We will be part of the Southern Highlands Arts Trail – Open Studios on the 2nd, 3rd and 4th weekends in November.
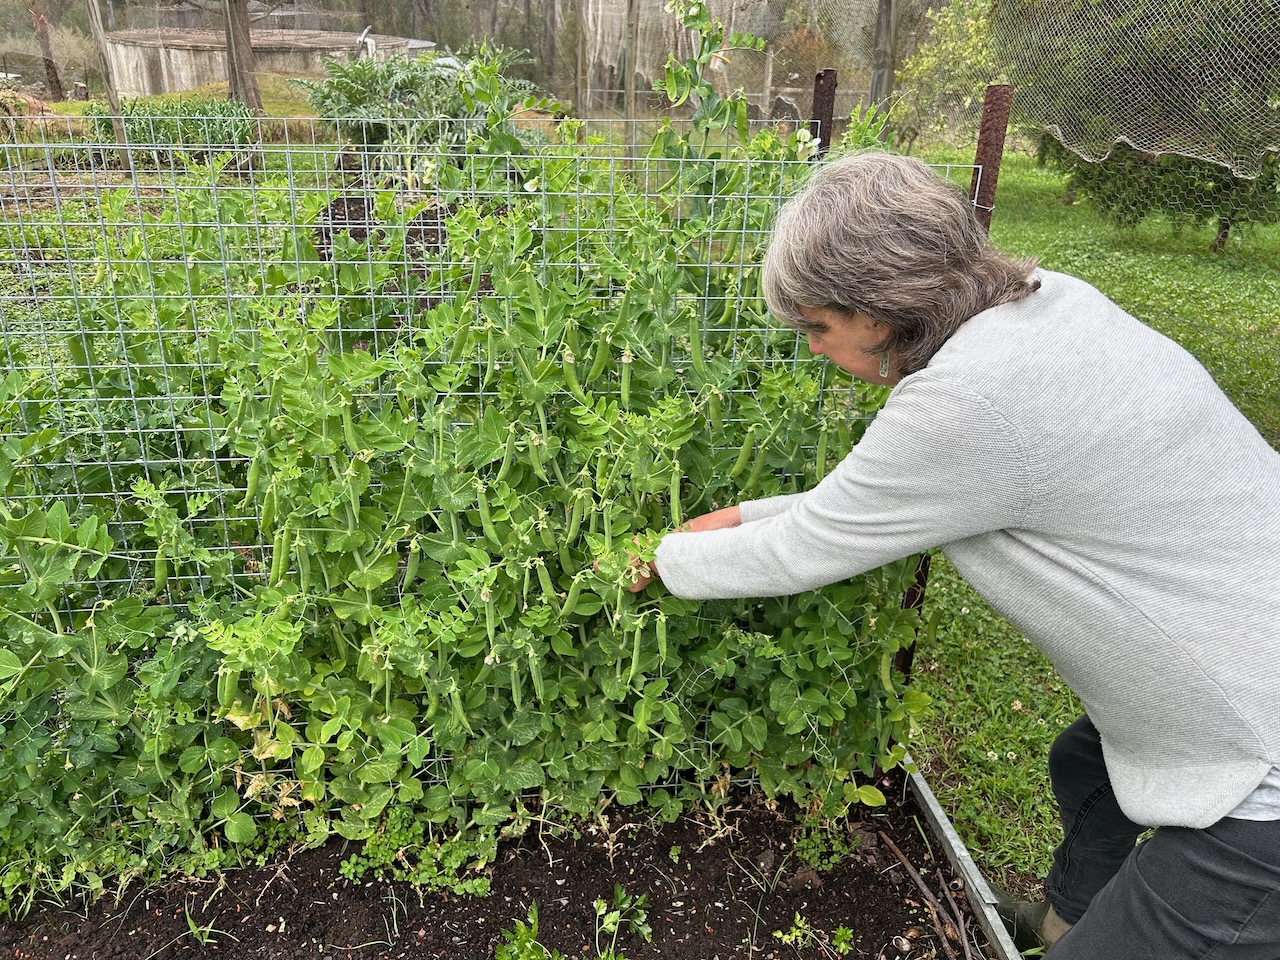
I’m back from my work in Korea and I hit the ground running. All the seeds and seedlings that I planted in late August, just before I left for Korea, were all burnt off in the severe frost event that swept through here in early September. However, all the over-wintering vegetables like peas, broad beans, asparagus and the brassicas are all thriving. So that is what we are eating at every meal these days.
Because we only eat what we grow, our diet tends to go in long stretches of similar meals, we vary the actual mix for variety but I’ll be glad when the first of the summer crops comes on. That is always zucchini, they are so fast out of the starting blocks, along with radishes.
However, I know that I’ll be glad to see the last of the ratatouille based summer meals and we can taste that first cauliflower again as the seasons come around. I think that it is a universal human failing to want what you don’t have. No matter how many cabbages I grow, I still hanker for a banana or a pine apple every now and then.
At the moment, I am just loving the smell of the tomato foliage as I brush past it when weeding. The smell of tomato leaves offers such promise of fresh salads and the long hot days of summer to come.
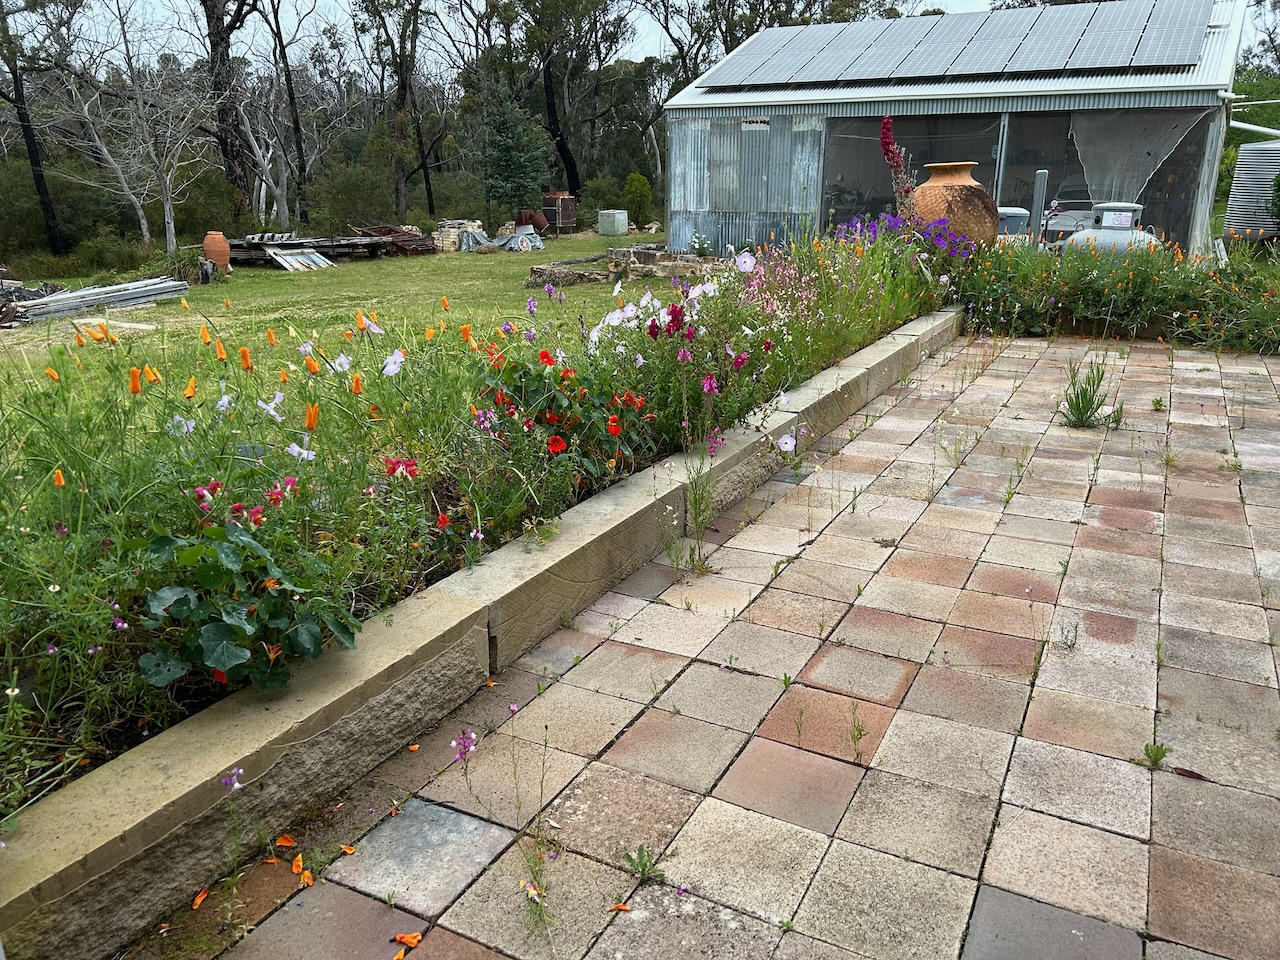
The more established spring flowers in the flower beds around the pottery were not affected by the frost, and have gone on to bloom there little buds off. Its very cheerful and uplifting to look out the studio window and see a vista of spring blooms.
After the frost. Janine went out and bought some more early seedlings to get a bit of a head start for the summer garden, and now that I’m back, I spent all of my first few days planting seeds, weeding, mulching and mowing to get the place ready for the Open Studios Arts Trail, that is being held on ther last 3 weekwnds of November. But also to guarantee our summer food supply security.
Janine transplanted some wild self-sown spinach seedlings, but they didn’t all take. I filled in the gaps inbetween with some extra seeds. The vegetable garden is looking good again with all the red poppies in flower now. The bees are going full speed ahead. Their little yellow saddle bags are full and bulgeing with pollen.
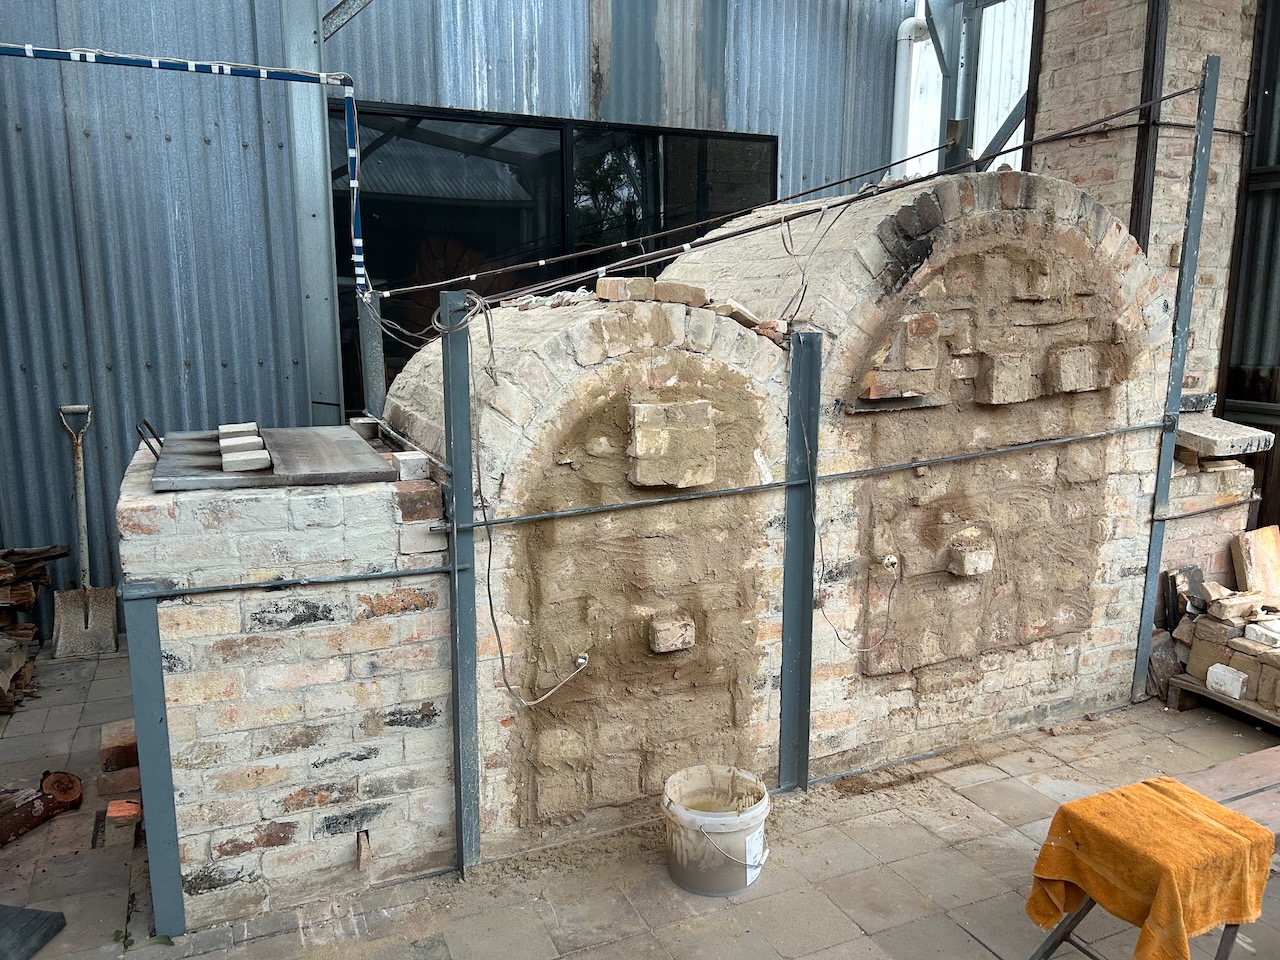
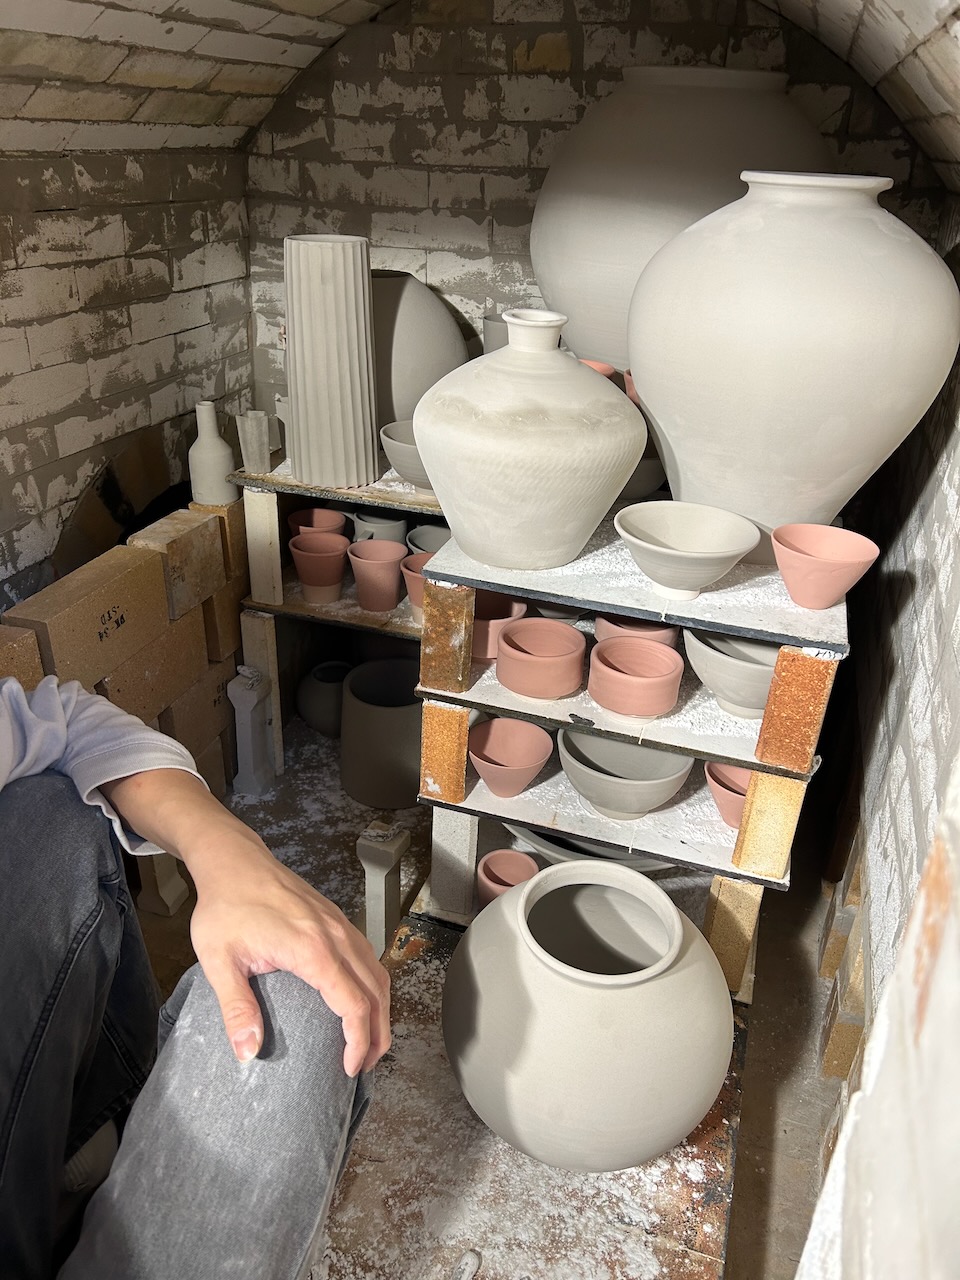
We already had a lot of pots made for the open studio sale before I left for Korea, but there was also a lot of bisque ware that I had prepared for a wood kiln firing, but I just couldn’t fit it in before I had to leave. So now that I’m back I have glazed all that work and packed the wood kiln.
13 hours to 1300. I think that I have finally found to best way to burn my pre-burnt and charred dead forest of kiln fuel timber.
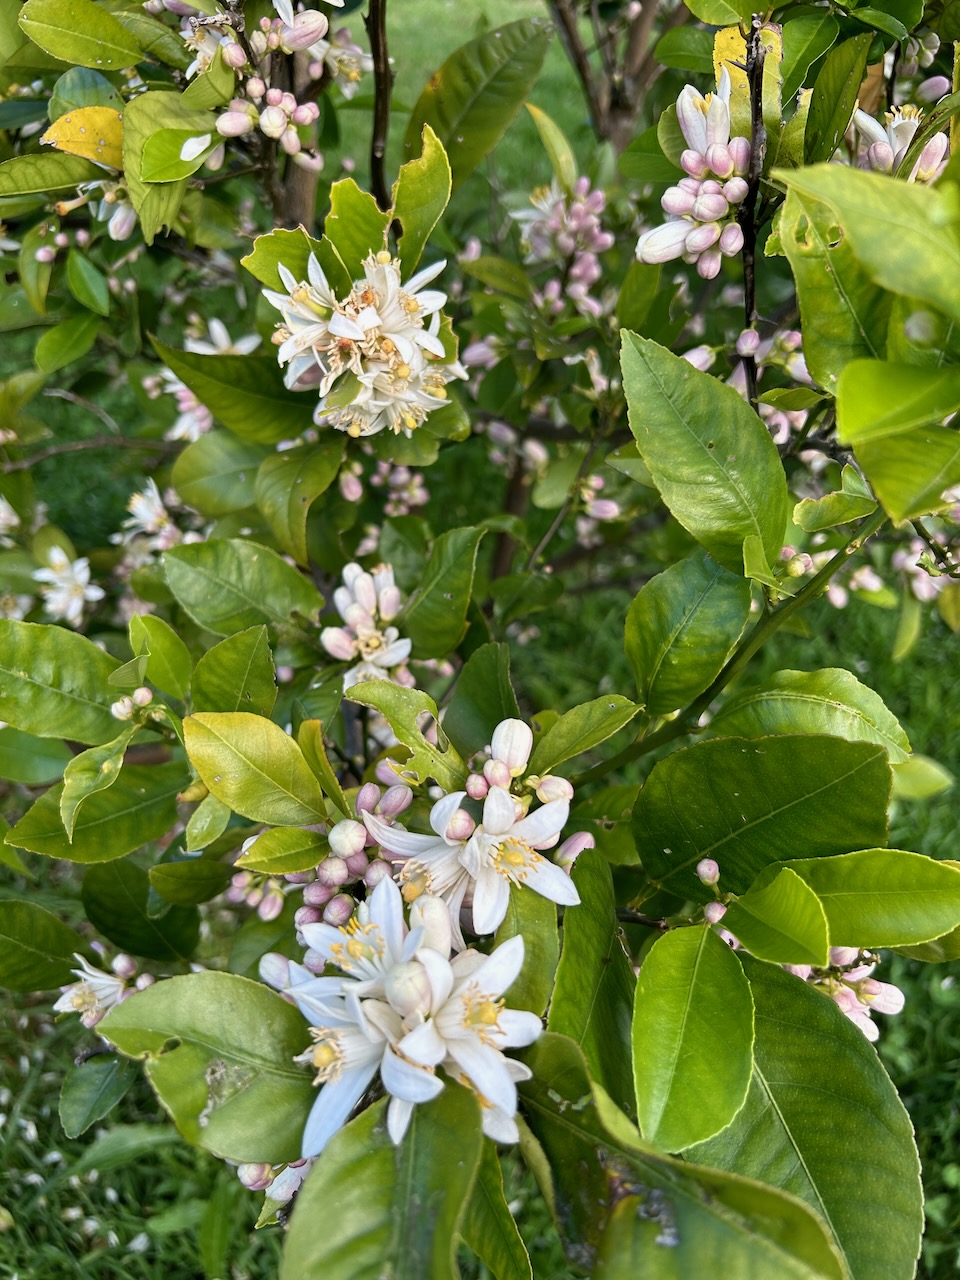
The citrus grove is in full bloom and you can smell the fragrance of the citrus flowers from the pottery, if the wind is in the right direction.
We will be open for three weekends in November, 9th/10th and 16th/17th. for the Southern Highlands Arts Trail then the ACA Open Studios, Ceramics Arts Trail that is happening Nationally on the 4th weekend of the 23rd and 24th of Nov.
Keep us in mind and call in if you can. We have some lovely work to show you.
In the evenings after the days kiln work and dinner, we are all allowed into the Porcelain Museum pottery room, so that we can all make some pots to put in the first firing of my kiln. I don’t know whose idea this was, but it’s a very good one. Everyone has contributed to its construction, and as it’s such an unusual kiln for these parts. It’s a very good idea for everyone to get to see a pot of theirs fired in it. NO Pressure!
It turns out that there are two ‘National Treasure’ potters in our crew here. But everyone is a famous potter from their own regional district. They all come together to do these big kiln building events at special places around the country. A loose conglomerate of like minded and highly skilled artists all contributing their own particular skill set to these big projects.
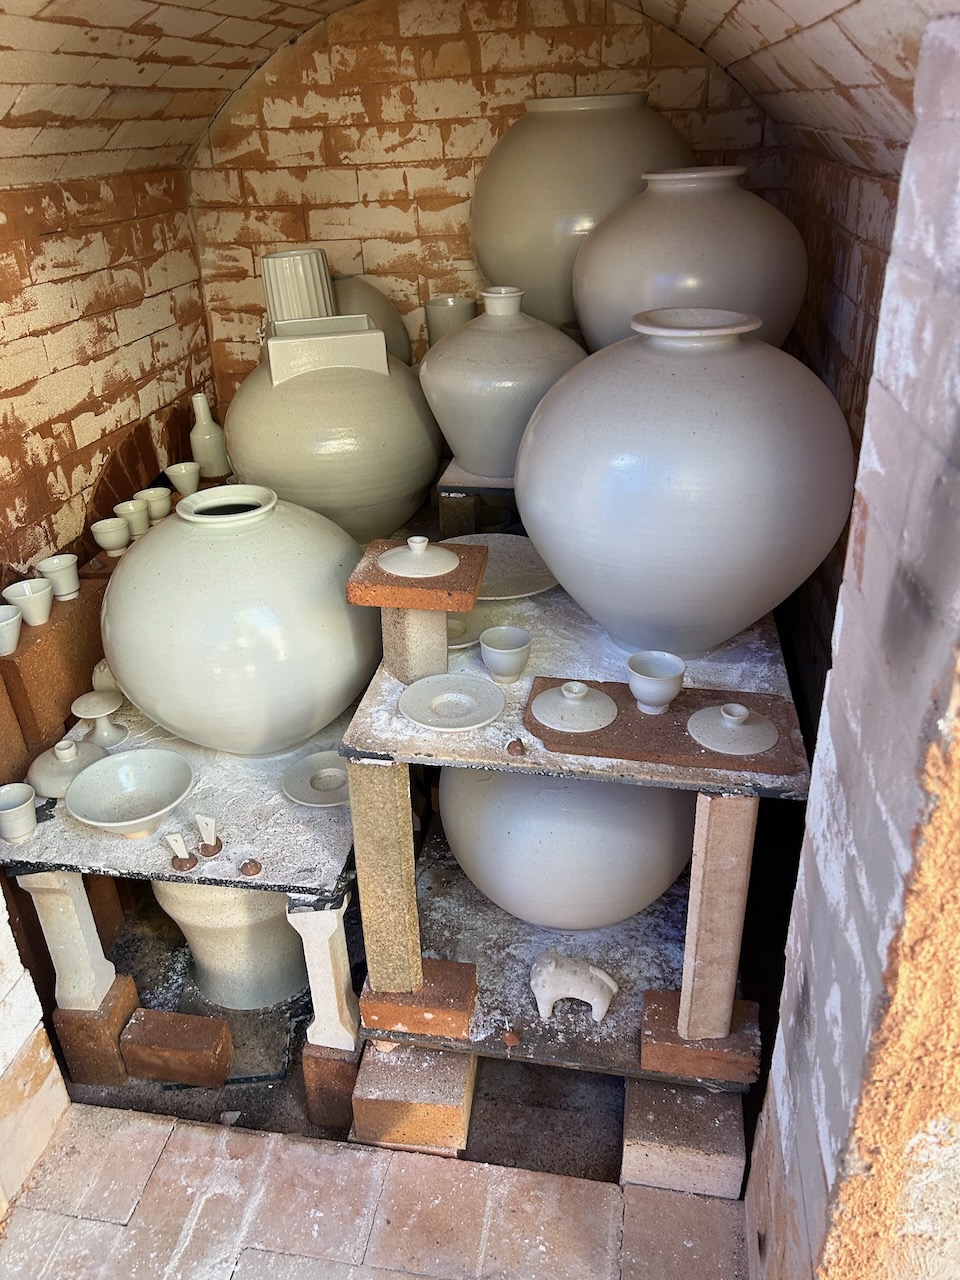
We pack the kiln with our bisque fired and glazed pots, with other contributions from the research students as well. There is only just enough pots to fill the kiln. I could have fitted more work in if there was any. But there is just enough.
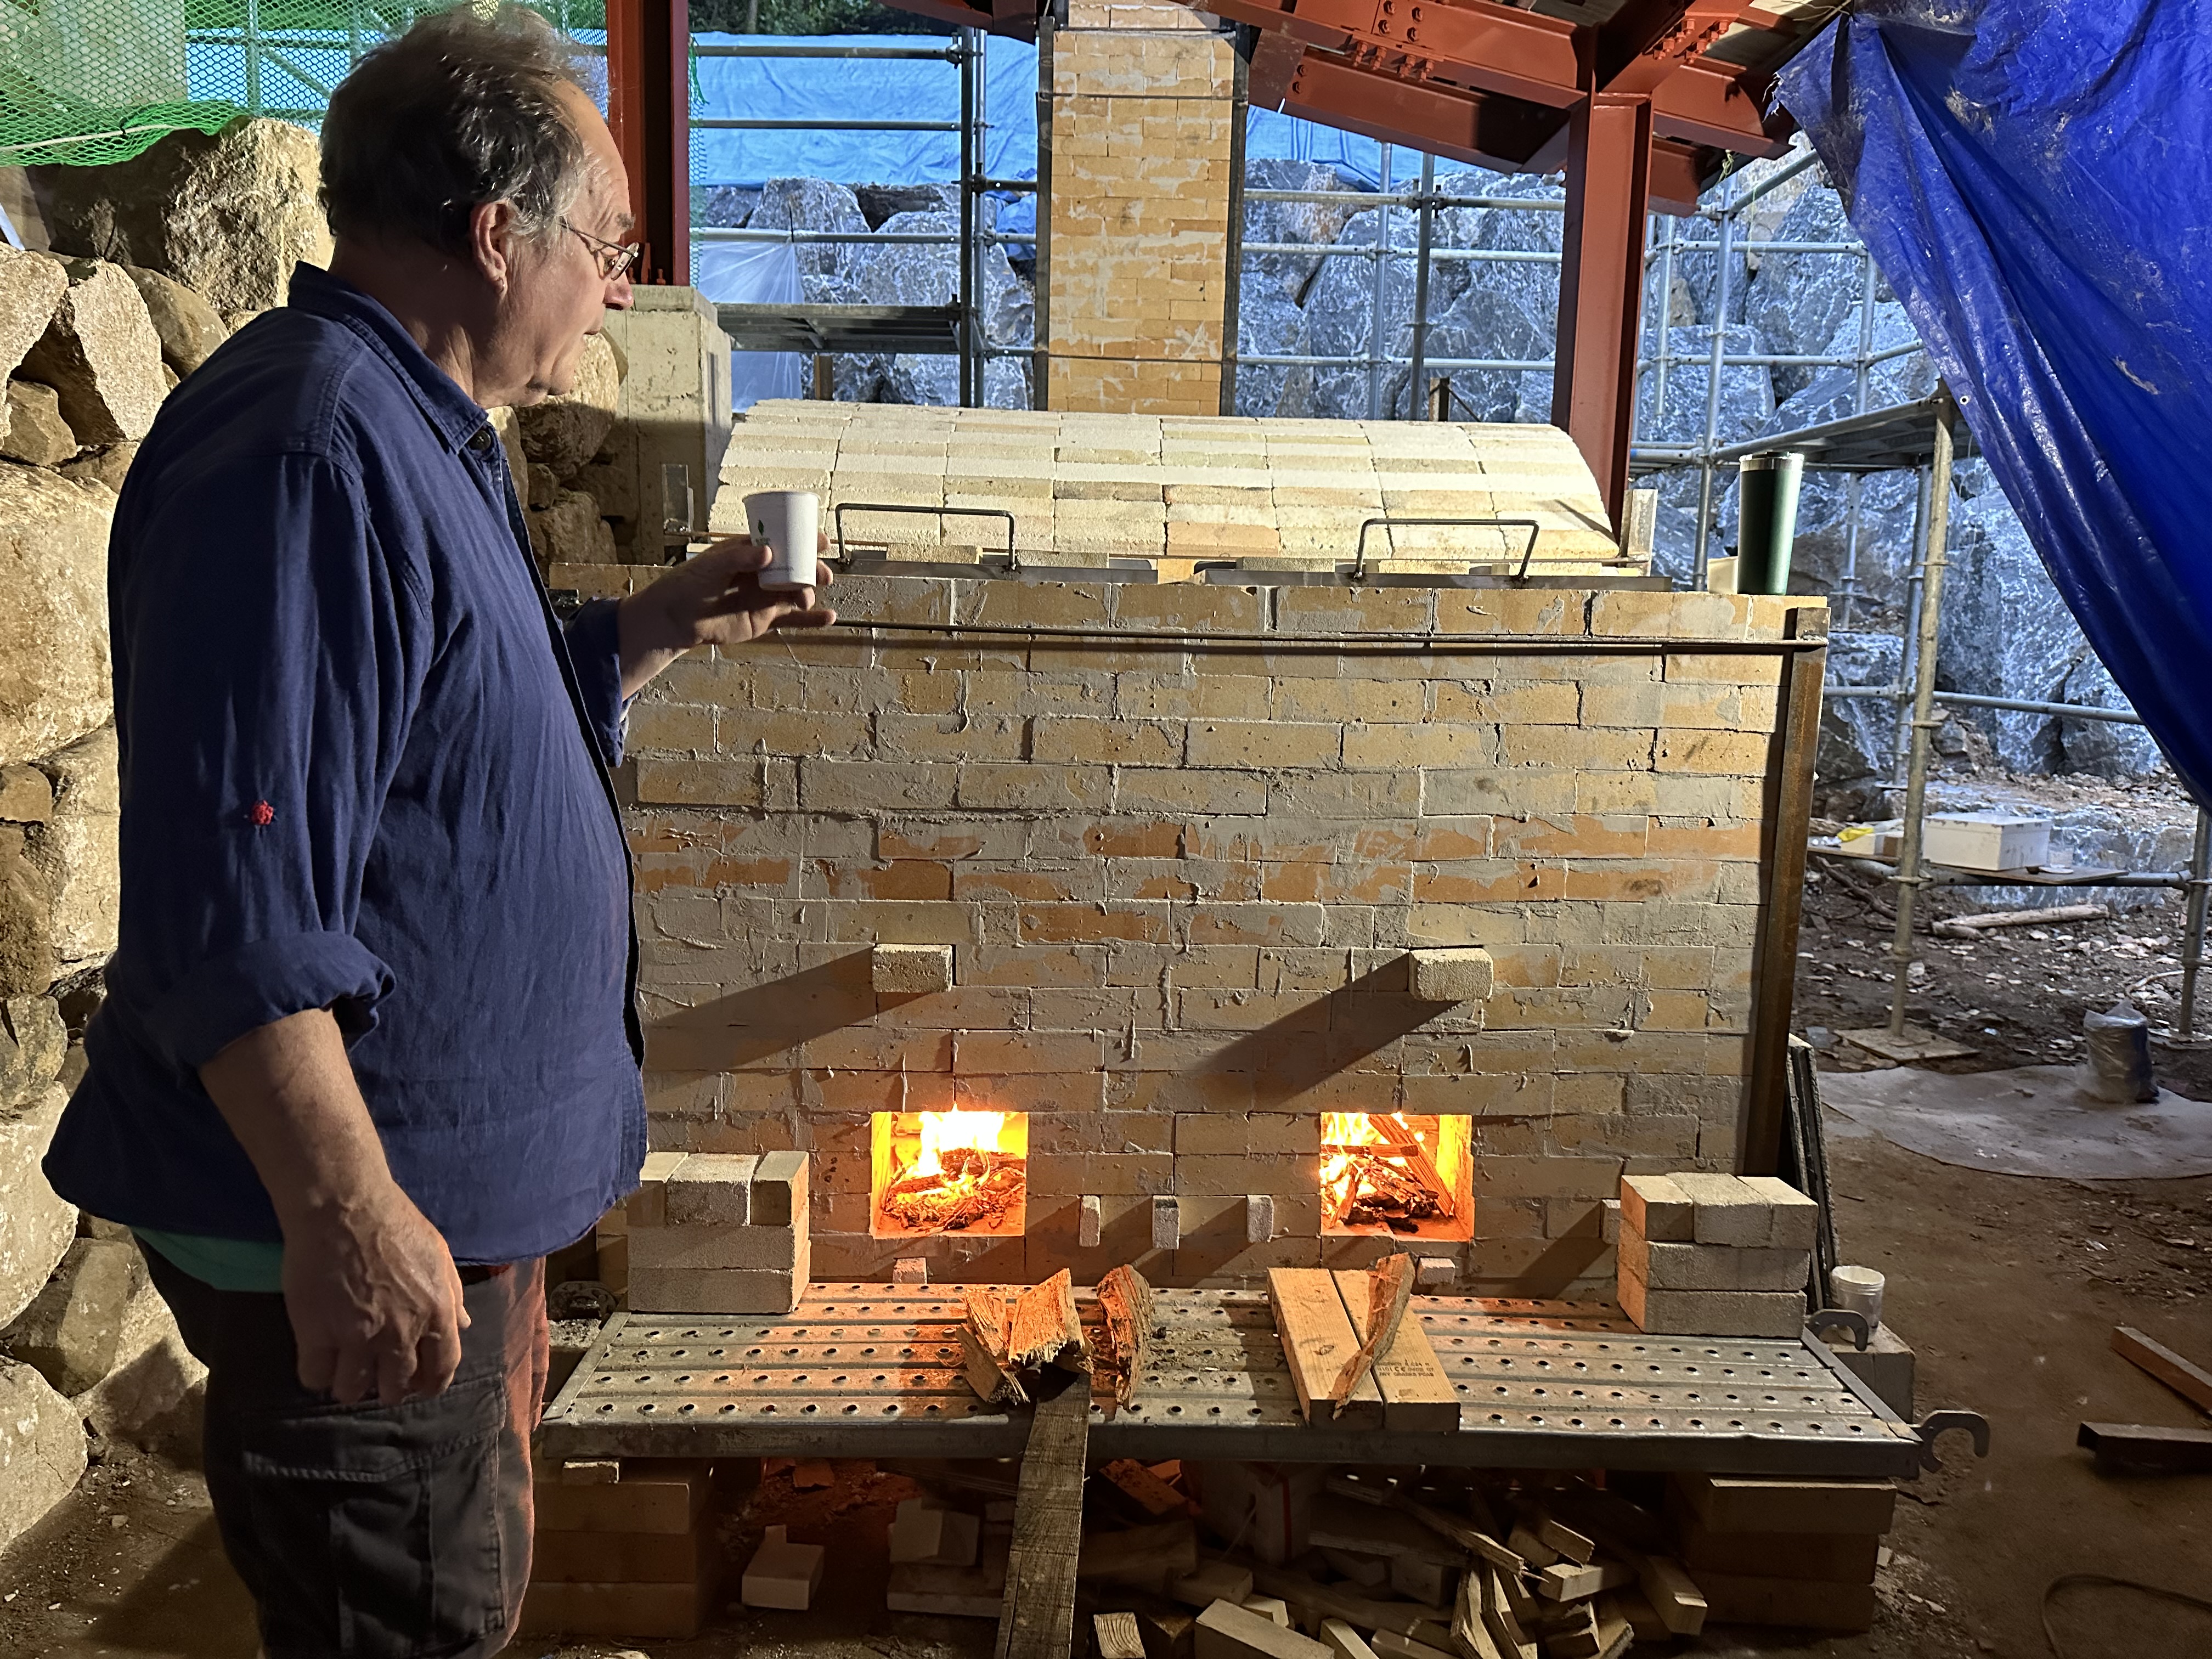
Interestingly, they don’t use digital pyrometers or pyrometric cones here. Traditional firing is judged by colour, sound, smell, smoke and flame. Using years of experience with a particular type of kiln, to judge the progress of the firing. They do however use small glazed tiles as draw trials to gauge the degree of glaze melt, and something that I haven’t come across before, and that is the use of a small amount of stiff glaze paste, that is rolled between the fingers into a small length of pasta sized rod and set in some wadding. This little 3mm dia. rod of glaze will melt at top temperature and fall over, in much the same way that we use pyrometric cones as pyroscopes.
I suddenly realise that I’m really out of my depth here. I usually rely on a digital pyrometer to tell me how I’m going. Now I have to go back to basics and look and listen very closely to the fire to make my decisions. Luckily I’ve also done this before too, so I’m OK, but would prefer the reassurance of a pyrometer to confirm my decisions. Until very recently, we used ‘handheld’, battery operated, digital meters. This meant that you had to go over to where it was and switch it on, to see the LCD display the temperature. They are cheap – very cheap – $10 to $15, pretty reliable and because they are intermittent, they teach you how to look and listen to the kiln, to watch the fire and see how the wood is burning. How the flame is developing, and not just stare at the screen. Since the big fire here. We lost everything, and I bought 240 volt LED permanent temperature displays, online from China for $30, so I have recently become addicted to screen watching in my dotage. Luckily, I still retain some of my mental capacities, well learnt and polished to a finely detailed finish. So just like my stick welding skills, my firing skills are soon retrieved from the dustbin of the recesses of my mind.
In the late 1960’s, when I built my first kiln. No one owned a pyrometer. They were just so expensive. They were totally out of reach. I made a lot of mistakes along the way, but I learnt a lot. I wouldn’t recommend this learning strategy. Using an intermittent pyrometer is the better way to learn so much faster and without the losses that I incurred. My first pyrometer was an analogue, needle indicator, galvanometer. They were quite inaccurate and it taught me not to trust them. A wise decision. They are nearly always wrong. I use them to tell me if i’m going in the right direction. Up or Down. That’s it! I leave the decision as to wether the kiln is finished or not to the use of draw trials, test rings and pyrometric cones.
It is very important to me to fire this kiln well, not just get it to temperature, but do it in a steady, constant, reduction, so that all the usual reduced stoneware glazes that they use here will come out as they expect. BUT, most importantly, to fire the kiln with as little smoke as possible. As that is the main reason for me to be here doing this. This kiln is a demonstration of low emission wood firing.
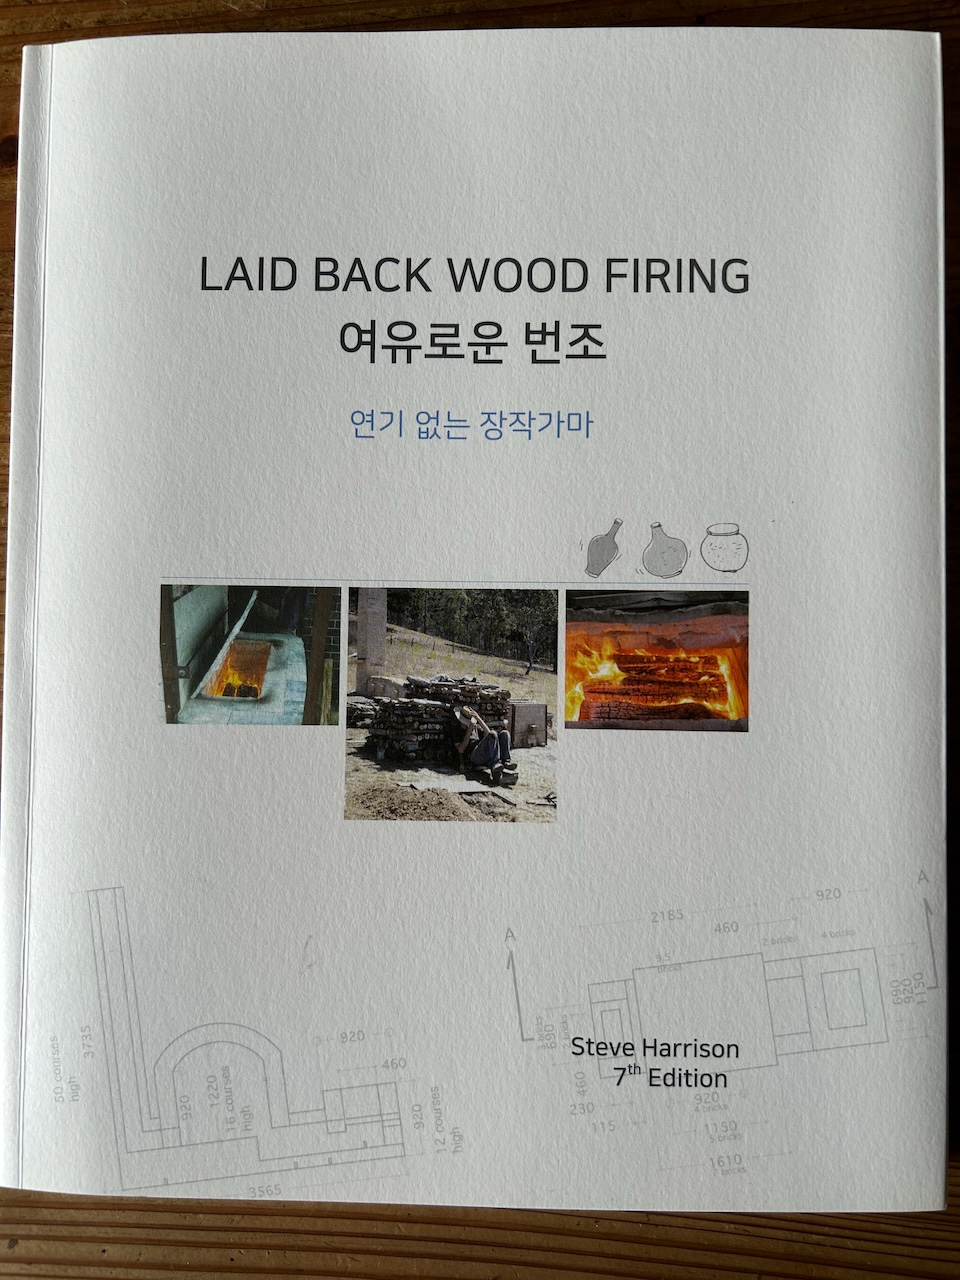
I must admit that as the only fuel here is 5 year old very dry and seasoned pine wood, that burns very fiercely and fast, I have my work cut out to keep the kiln in reduction, but to minimise the smoke at the same time. As it turns out, I can never get to the stage of filling the hobs with progressively combusting wood, as it is designed to do. I ask if there is any hard wood available and I’m told that it can be obtained, but not at short notice. In fact hard woods like oak and acacia are cheaper than pine, so they will get some in for the next firing. But for now, I have to carefully juggle the wood level in the fireboxes. This means constant attention to detail, so this is not really a Laid Back Wood Firing at all, but a rather busy one. AND, not a smokeless wood firing, as the cover of my book in Korean translation falsely claims!
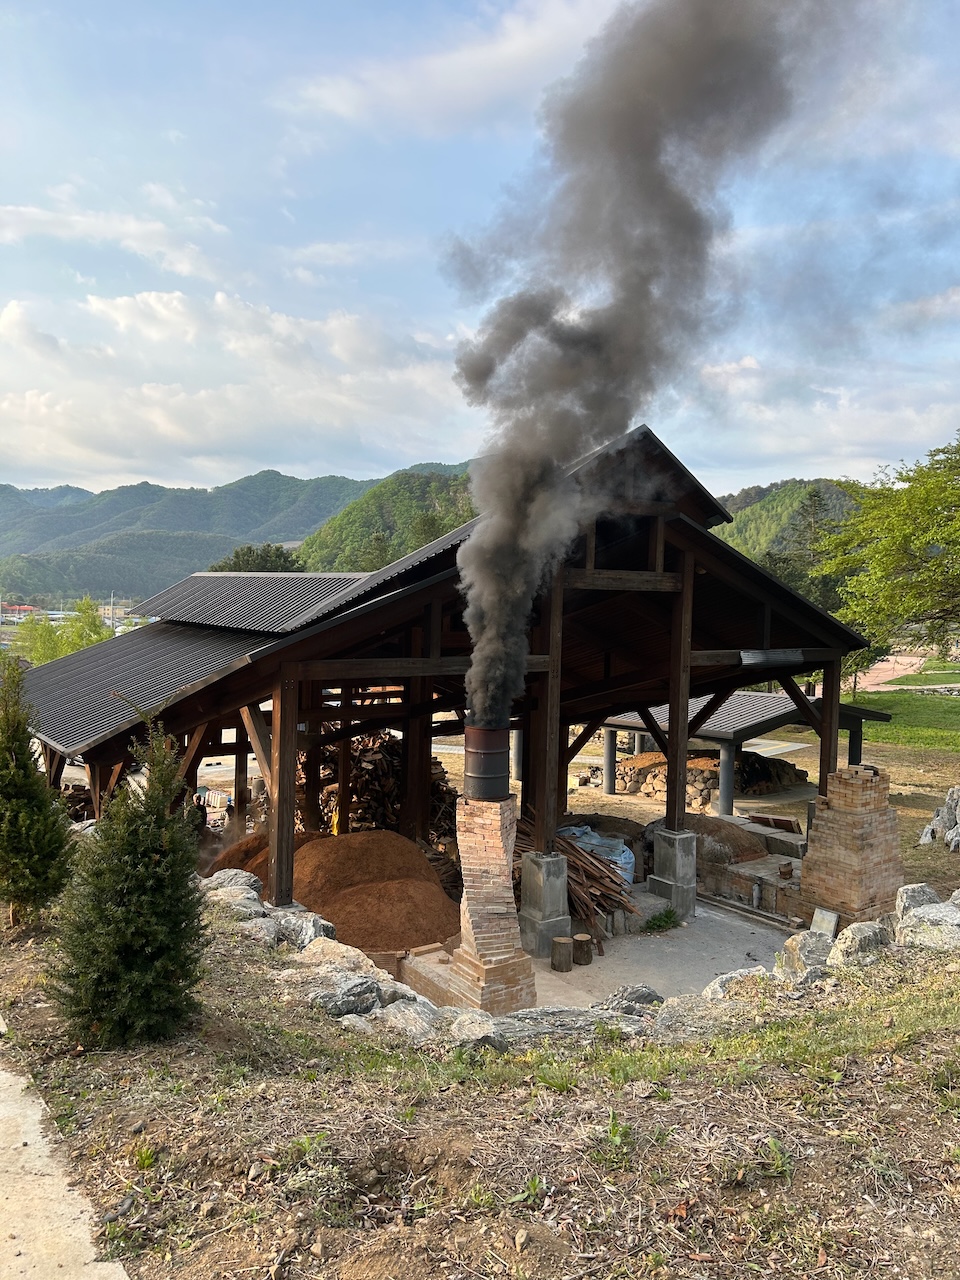
I manage it reasonably well, but each time I stoke and there is a little burst of pale grey/brown smoke from the chimney. There a howls of jeering from the kiln builders next door. However, although it is smoke, it is nowhere near the column of black smoke that issues from the traditional kilns here. Young Mi, one of the resident researches here translates for me during the firing. She tells me that the jeers are just in good humour, and that the chatter is all about how little smoke there actually is and how clean it is. I have surprised them.
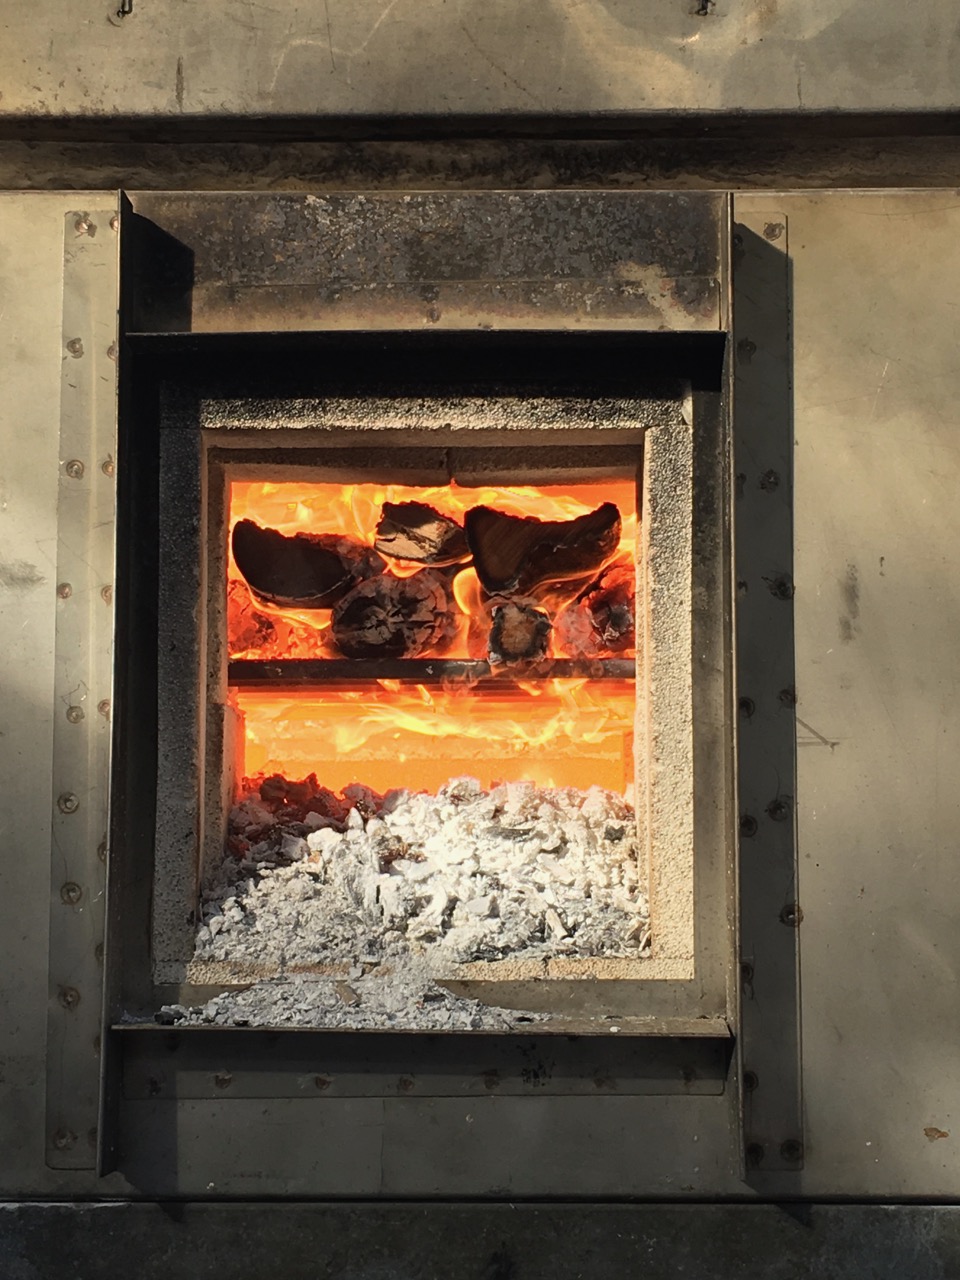
Another resident confides in me that he expected to see flames come leaping up out of the fire box as soon as I lifted the lid. He is also surprised how enclosed, slow and gentle the firing process is.
These 4 images by Kim Young Mi.
I prepared 8 stacks of timber for the firing, expecting to use it all, but as it turned out, I only got to use just over half of it. In the afternoon, when I go to look in the spy hole, all the little glaze rods have melted. The firing is over in just 9 hours. Too quick! I didn’t realise how fast the temperature was rising without a pyrometer. The colour in the chamber is still looking rather yellowish, and doesn’t have that bright pale glow that I’m used to. I wonder what temperature that glaze stick actually melts at?
Note to self! Next time I come here for a firing I’ll bring my own pyrometric cones and a hand held digital pyrometer.
The firing turns out OK. The glazes are pale, grey-blue celadons and off-white, grey/white guans. As I only burnt 4 stacks of wood, possibly 250 kgs of wood, there is no obvious ash deposit, just a little dusting of ash on the glazes facing the fire.
The bottom back shelf is under-fired, but I can remedy that by firing a bit slower and also adjusting the bag wall gaps and height. I hope to be invited back to fire it a couple of times in quick succession, at some later stage, to get to tune it and get an even temperature throughout.
Meanwhile, life goes on in the rest of the village, with the rice harvest in full swing, and autumn vegetables ripening in peoples gardens. I’d love to get in there and pick some of those beautiful vegetables.
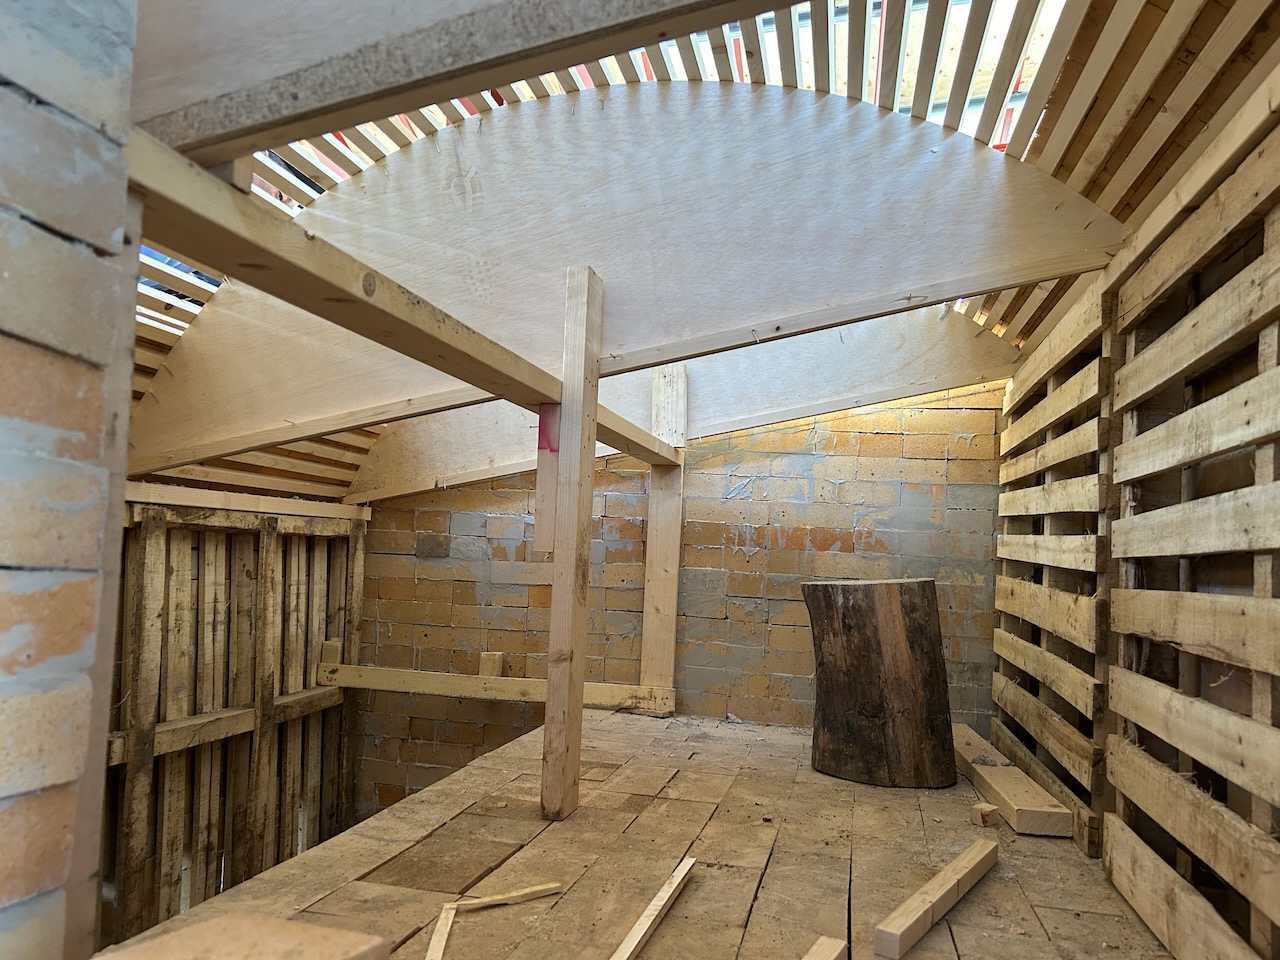
Work has been progressing on the big kiln next door. It is more or less finished, but may need some extra work on it. I’m not too sure there. It will certainly need to be pre-fired to remove all the arch shuttering that is built into each of the 5 chambers. It’s a massive kiln!
Who knows if, or when I’ll be back? What does the future hold. Watch this space
Before I leave this beautifully creative place, I make my usual pilgrimage up the mountain to the ancient site where all the sericite porcelain stone was stock-piled in ancient times. The site has been tragically decimated by a local former. I imagine to stop it being declared an historic ‘National Trust’ site of importance? The whole site was bulldozed some years ago, but remnants remain in the soil. Particularly after heavy rains, the white stones stand out from the brown soil and are easily collected. I make a point of hiking up there and seeing what is available for me to collect. I return with 10 to 15 kgs of stones in my back pack and start the process of meticulously scrubbing the stones to remove any particles of dirt. Then I rinse then several times, until the water runs clear. Finally I soak them overnight in bleach to kill anything that might be harmful to the environment in Australia when I return.
Back home, I put them through the jaw crusher and then into the ball mill and let the slurry sit and flocculate for a month or two, before stiffening and plastic ageing before use sometime next year.
Janine and I are recently returned from Korea where we were invited to take part in the Mungyeong Ceramics Festival, where I delivered a paper to the ceramics conference there about low impact wood firing.
My paper concentrated on my research into small down draught fire box design, intended to minimise smoke and pollution as much as possible. I also presented my current work on afterburners and scrubbers to try to minimise particulate pollution from our kiln chimneys.
I believe that these topics will become more important over time as Global Heating and carbon in the atmosphere starts to become obvious and difficult to ignore. Even to conservatives.
My paper was well received and I got some good interrogation during the question time afterwards. My book ‘Laid Back Wood Firing’ was translated into Korean about 5 years ago and has been available there for some time, so some people there had read it and were up to speed with the concept.
Janine and I will be returning to Korea later in the year to build one of my small Bourry Box kilns as a demonstration of how it can work. It will be built alongside several older traditional wood fired kilns. They are interested to compare the smoke from our firing and also the fired results afterward with that from the traditional kilns.
The most recently built, traditional, multi-chamber kiln was fired while we were there. It smoked all the way through the firing. I’m pretty sure that we can do better!
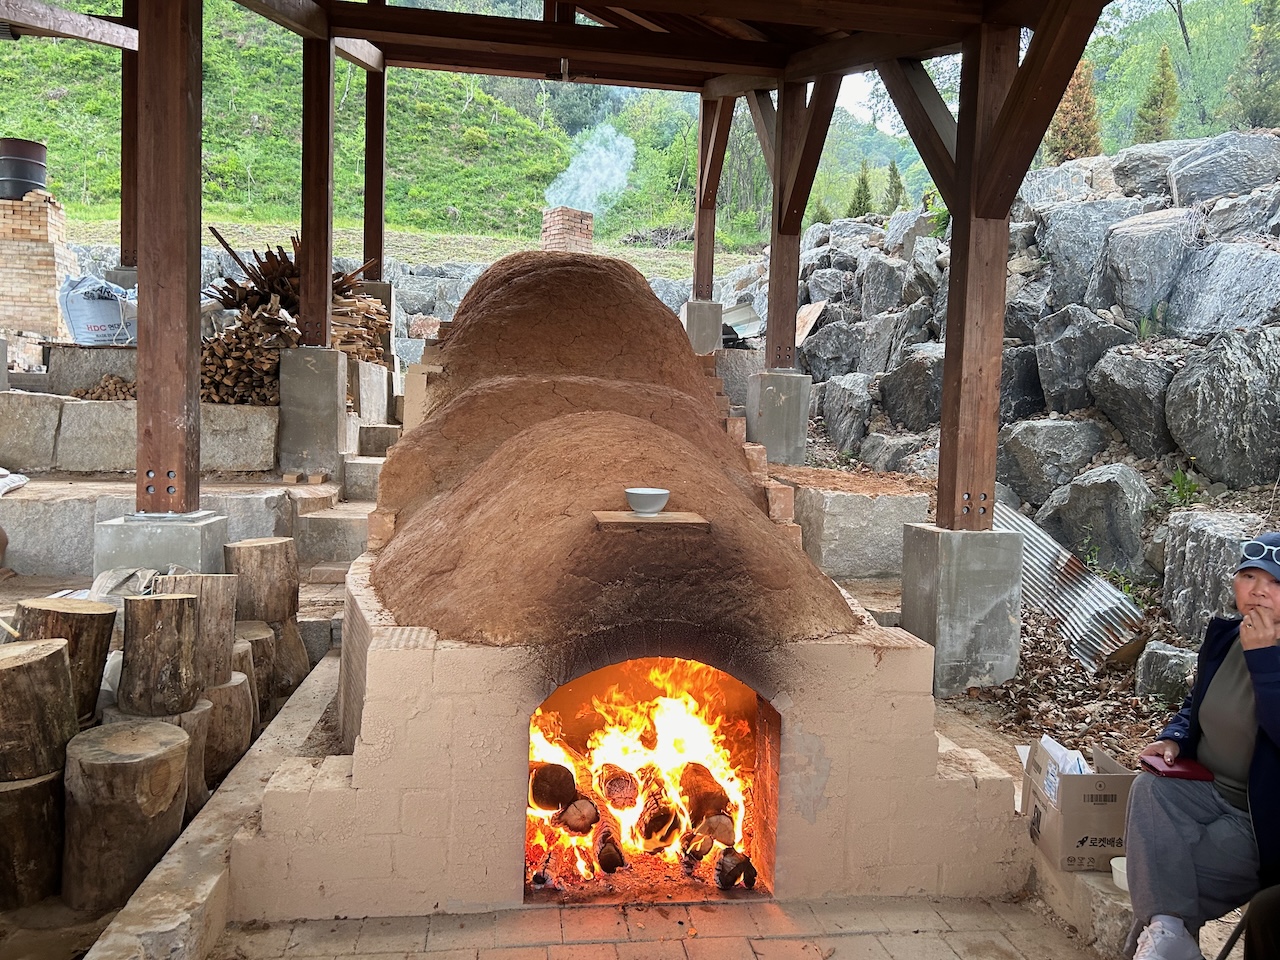
Its a really beautiful kiln to look at, and is constructed using the very old method of using cone shaped hand made ‘bricks’.
The cones were all made on site by the students/residents in the ceramic research centre at the Yanggu Porcelain Village.
The use of cone shapes allows for a rather nice dome shaped top or 3D arch over each of the fire box and 4 chambers.
The freshly built kiln took just 24 hours for it’s first firing – all 4 chambers to stoneware, absolutely no technology was use. No pyrometers or cones, just an experienced firing crew and home made draw trials of glazed tiles pulled at 30 minute intervals after orange heat.
This kiln was so new, it was still wet, and steam was coming out of all the cracks all the way to top temperature.
Side stoking is always a dirty business. Hard to get around that. It’s the nature of the beast.
That is why I have chosen to build a single chamber bourry box fired kiln as the demo model.
It will be a larger sized chamber, so I have designed it with 2 fireboxes side by side.
Only time will tell if it works the way I intend and if it impresses them.
When you are in Seoul and the air quality is rated as ‘fair’, but you can only see for 1 km through the smog. I makes you think about what a bad day might be like. Smoke from wood firing is not the big problem in the scheme of things.
We fired the big wood kiln last weekend, then during the week, Janine packed and fired the little portable wood fired kiln.
We have put the Sturt ’Terra Nova’ show up and it is going well, with a big turn up at the opening. We got to catch up with loads of people that we only usually see at conferences, and as I don’t go to a lot of conferences, nor do I go to ‘openings’ to do ‘networking’. Well, I don’t get to catch up like this very often. It was really good.
Our next big event on the horizon is the ‘Pop-Up’ Artists Open Studios Arts Trail, that will be on the long weekend of the 10th, 11th, and 12th of June. Hence the flurry of firing activity now in preparation. We have been making all year, and firing in the smaller kilns, the solar PV fired electric kilns. We don’t fire the wood kilns over the hotter part of the year, and certainly not during the fire-ban season. So it’s all go now.
Using a combination of elm garden prunings and some thinly split eucalypt (many thanks to our friends, Susan and Dev, who helped split a lot of side stoking wood with us a month or so ago.) Janine was able to fire up to Stoneware in reduction in 4 1/2 hours. A perfect firing for a little portable kiln.
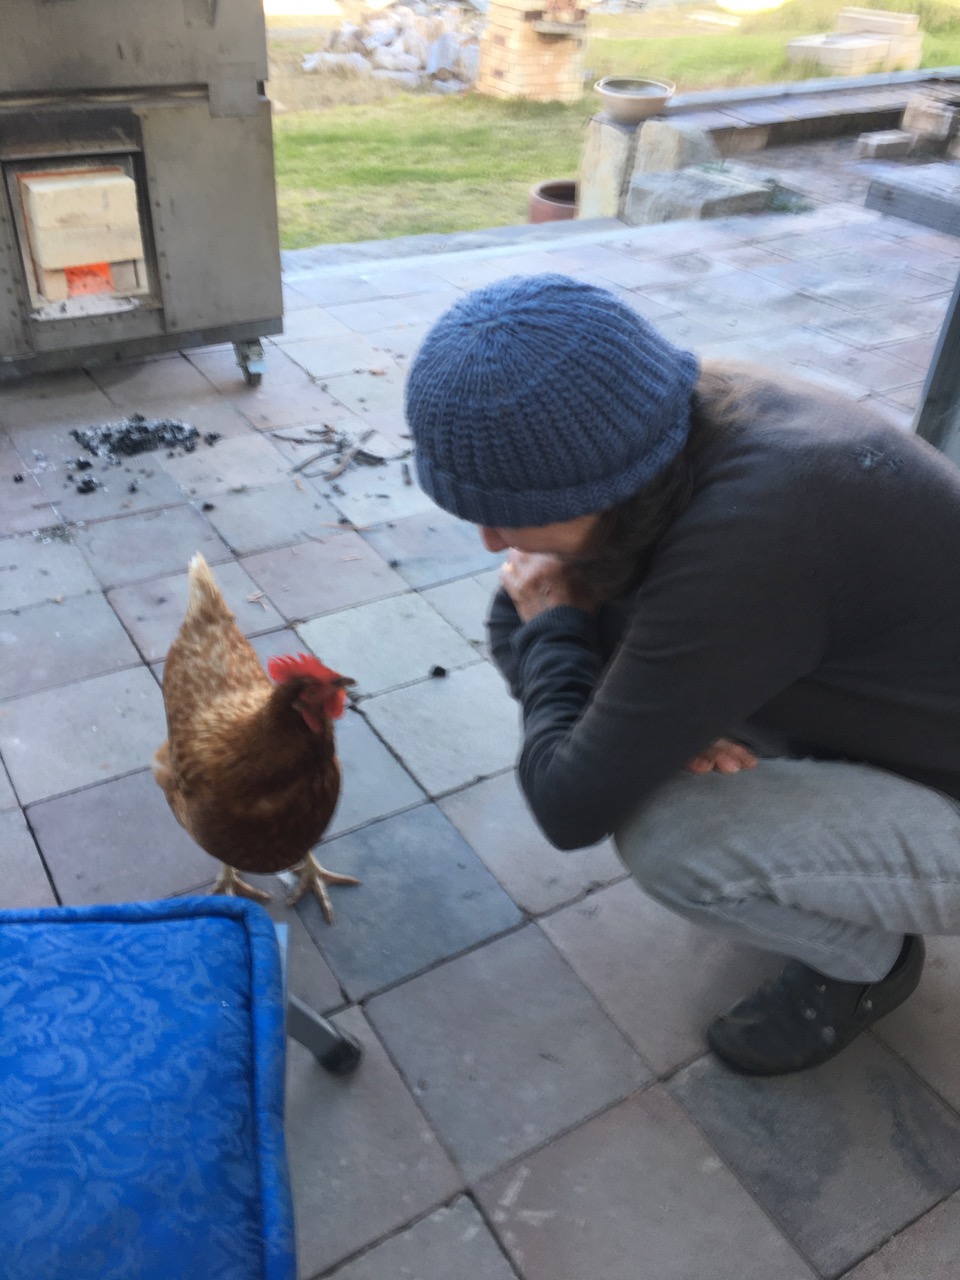
At the end of the firing, Edna the chicken came to check it out. Janine and Edna had a little chat, cooing and clucking together. The gist of it was probably around the matter of if there was anything for a chicken to eat?
I have been packing the big wood kiln again for another firing this coming weekend. The slowest part of packing the big wood kiln is rolling out all the thousand little clay balls of wadding. Each pot has to sit on a ring of little balls of refractory wadding to stop it sticking to the kiln shelf. Over time, and many, many, firings the kiln shelves get a coating of molten fly ash from the burning wood, and if the pots aren’t held up off the shelf, they will fuse together at high temperature becoming a monolithic whole.
First chamber finished and clammed up.
I think that I probably spend a quarter of my time rolling out these little balls, only to throw them away after the firing. Actually, Janine re-uses them as aggregate in the bottom of planter pots around the garden. However, when we first set out on this creative journey, back in the early ’70’s, because we had very little money and couldn’t afford to buy the very expensive kiln shelves that we needed to pack the big wood kiln. As a work-around solution, we decided to make our own. This was a very tricky bit of ceramic chemistry, and only one other husband and wife couple of potters, Harry and May Davis in New Zealand were doing it. We went to work with them to get some insights, and came back and made our own kiln shelves for next to nothing in terms of cash outlay, but a lot of time invested.
The cost of the high alumina grog used to make refractories was prohibitive, so we made our own. For every firing in the little test kiln that we had, I used very high quality, high alumina kaolin from Mudgee. Puggoon 157 kaolin, purchased directly from the mine not too far away, to make the wadding balls. After firing, instead of throwing them out. I put them through the rock crusher and turned them into high alumina crushed grog. All the failed experimental kiln shelves were also put back through the crusher, mixed with more kaolin 50/50 and used again. Eventually we had enough kiln furniture to fire the big 300 cu. Ft. wood kiln at next to no cost. They weren’t very good, but just good enough and this exercise in self reliance got us going. We still have them, but they are rarely used these days, because the new silicon carbide kiln shelves from China are both affordable and excellent quality.
Photos of me, as a much younger man, making kiln shelves, taken by Janine King
This week is the mid point of autumn, Half way between the equinox and the solstice.
The weather is certainly a lot cooler and we notice that the days are so much shorter. I really like this slightly cooler alternative the long days of summer. Our summer wasn’t so hot as it used to be during the decade of el-nino years. These last few summers have been so much nicer, cooler and wetter, everything has turned green and grown its head off. We have harvested more tomatoes then we have ever grown. It seems that all the planets aligned for the tomatoes. I haven’t counted the bottles, but there must be over 40 jars. Quite enough to last us well over 12 months, possibly even 2 years?
We went to Canberra over Easter for the National Folk Festival.
We caught up with people that we haven’t seen for over 4 years, as we were confined to home because of;
1. The fire,
2. The on-going clean-up,
3. The rebuilding,
4. Covid, followed by a year of lock down.
It’s only now that we feel that we have the time, space and safety to go out again. Womad was on again this year, but we chose to stay home, save time and money and get on with some of the long list of jobs. However, we decided to go to Canberra for ‘The National’, as we can drive to Canberra in just 2 hours in our electric car. Travelling to Adelaide for Womad is looking more and more extravagant and carbon intensive, regardless of whether we drove or flew, we were responsible for burning loads of carbon each way. I just can’t justify it anymore.
The long weekend of music was wonderful, so many great acts, too many to list, but a few stood out.
The ‘We Mavericks’, Lindsay Martin and Virginia vigenser, were excellent. We have had them here in our home to perform for us in one of our house concerts a few years back. I believe that we were their second only performance together. They get better and better.
Billy Bragg was also really good. He was the best that I have ever seen him. Powerful voice, smack on key and few very powerful, short spoken interludes between songs, on why we should care about the state of things and the world. He also explained what he is doing to make a difference. Very inspiring. However, it crossed my mind that he must owe a tremendous carbon debt?
We also enjoyed Gleny Rae Virus, Leroy Johnson, (above) the Park Ranger from Mutawintji National Park out near Broken Hill, and Farhan Shah & SufiOz. singing Sufi devotional chants. + many more.
Back at home we have been Splitting wood for the kiln firing, and working in the garden.
We met up with our friends Susan and Dev in Canberra, and they called in here on their way home to give us a hand with those jobs.
My friend Len Smith also called in and we had a little reunion. As Len, then Janine and finally myself, were Susans teachers at different times in her life, at different colleges.
Together, we ripped out 3 beds of waning tomatoes, that had reached the end of their productive life and added them to the compost heap.
Afterwards, I planted out lettuce and radish seeds as well as lettuce and spinach seedlings.
The garden suddenly looks a bit more loved again after a few weeks of minimal up-keep and absence.
My last job was to plant out 160 of our own self grown and stored garlic cloves. I should have been onto this a month ago, but better late than never.
I did two rows of 80, one of our purple garlic and the other of our white skinned variety. They have started to shoot from their skins. A very good sign that they are ready to be planted out now!
Everything takes time and time needs to be made or created by making decisions about what is most pressing and needs to be to be done NOW.
Tomorrow it is back into the pottery to unpack and repack the electric kiln for yet another bisque. Learning to Juggle my time and energy has been a life long exercise in developing this skill for me.
I want to do so much each day, Even summer days aren’t long enough. I need to triage my desires to fit my capacity to actually achieve outcomes. Added to this, I really don’t know what I’m doing most of the time. I’m reasonably well trained in making pottery, and I have taught myself to grow vegetables and orchard fruit trees, but I have such a low basic understanding of building techniques and mechanical engineering, I just muddle through as best that I can. I rely on asking more knowledgeable friends for advice on what they would do, or where is the best place to buy the correct parts.
I’m so grateful to all of my friends for the advice and help that they have given so generously over the years.
When we built the new ‘kit-form’ tin shed for the new pottery. I paid a bunch of so called ‘expert’ tin shed builders to come onsite and erect the kit. They had experience and all the fancy gear to do the job. A bobcat loader, a scissor lift gantry and a truck load of power tools. They put the frame up OK. It is at least level and vertical. But when I asked them to screw on all the 2nd hand, grey re-cycled old rusty gal iron sheeting that I had collected to give the shed some character, they did the worst job that you could imagine. They chose to use roofing screws without any rubber ring to seal out the weather, and as a consequence, all the walls leaked in heavy weather. The windows weren’t ‘flashed-in’ correctly or at all, and leaked. The cement slab was cast with a definite hollow in the centre. The verandah wasn’t ’stepped-down’ 50 mm to stop water blowing in under the doors, so that when it rained hard, the building leaked, all the water ran to the centre of the building and pooled there. I’ve spent over a year discovering all these faults, omissions and bad workmanship and then correcting them as best that I can. If only I’d known something more about the building trades, I might have spotted these faults occurring and got them seen to at the time. But I trusted them. BIG mistake.
Our previous three potteries that burnt down were all home made on a shoe string budget mostly out of wood and other materials that we could scrounge off the side of the road on council clean-up day, or from the tip. They too had character, but a very different character. This last shed is so much better in all sorts of ways, but mostly it will be easier to defend against fire. Metal clad, metal frame with metal lining and the cavity stuffed full of insulation. All the previous buildings were made of wood and therefore were very flammable.
It seems that I have discovered all the problems with the poor workmanship in this shed now. I’ve discovered all these faults bit by bit over time and fixed them myself. The builders have shot through. There is something to be said for self-reliance.
Do it yourself, do it right the first time. I do it to the best of my ability. If it isn’t the most professional job, at least it is mine and any mistakes are honest ones. The stuff that I do has my character printed all over it. I own my mistakes, my lack of skill and my incompetence, but in the end I figure it all out and I can live with the result. At least I’m not upset with myself for ripping myself off. AND everything is done on a minuscule budget. We have never earned much money, so have learnt to live very frugally.Everyone seems to be obsessed with money these days, as if it solves everything. I heard on the news that the 3 richest Australians have more money than the bottom 10% of the nation. Pretty shocking! It’s a shame that there isn’t a way of making life a little bit more even and equitable for the disadvantaged. The Lovely and I have done very well for ourselves, being able to have built a simple, largely non-acquisitive, low carbon, organic lifestyle here, without ever having had a ‘real’ job. We’ve managed to ‘get away with it’ for all this time, living an engaged, creative, self-employed, part-time amalgam of a life. Without credit card debt or interest payments, doing almost everything ourselves. Living within our self-determined means. We’ve never been on the dole and never asked for handouts. Money may be essential in the modern world, but we don’t let it ruin our lives.
As an example of this frugal self-reliance I recently fixed up an old Chinese wood splitter. It needed a new/old/2nd hand starter and air cleaner to get the engine going again. That wasn’t too difficult. I just stole the parts off another old ruined motor that was in the barn. Best not to throw things out if they might have useful parts on them to keep another machine going for a few more years, There is a lot of embodied energy stored in those old bits of machinery. So it’s better to try to repair something old and get extra life out of it, than to give in and buy a new one. It’s also much, much, cheaper
Once I got the engine working, I decided to make it into a bigger splitter with a longer stroke. All cheap Chinese hydraulic splitters have a 600 mm. (2 ft.) hydraulic ram. That is the upper limit of their log capacity. My new kiln has a fire box length of 690/700 mm. (2’ ft, 4” inches). To give the splitter a longer stroke I decided to cut 75 mm. (3” ) off the cutting wedge to make it shorter ,and therefore add extra length to the logs that can be split.
I wasn’t sure that it would work, but it seemed a lot easier than cutting the end off the frame and welding a new section of RSJ onto the frame to make it a longer machine.
By shortening the blade I achieved the same outcome with much less work. But an hour on the angle grinder was a bit of a chore, as 20mm thick steel plate doesn’t cut easily.
You can see in this image that the blade used to go all the way to the bottom of the backing plate.
Scrooge’s technique of making a bigger splitter out of an old small one.
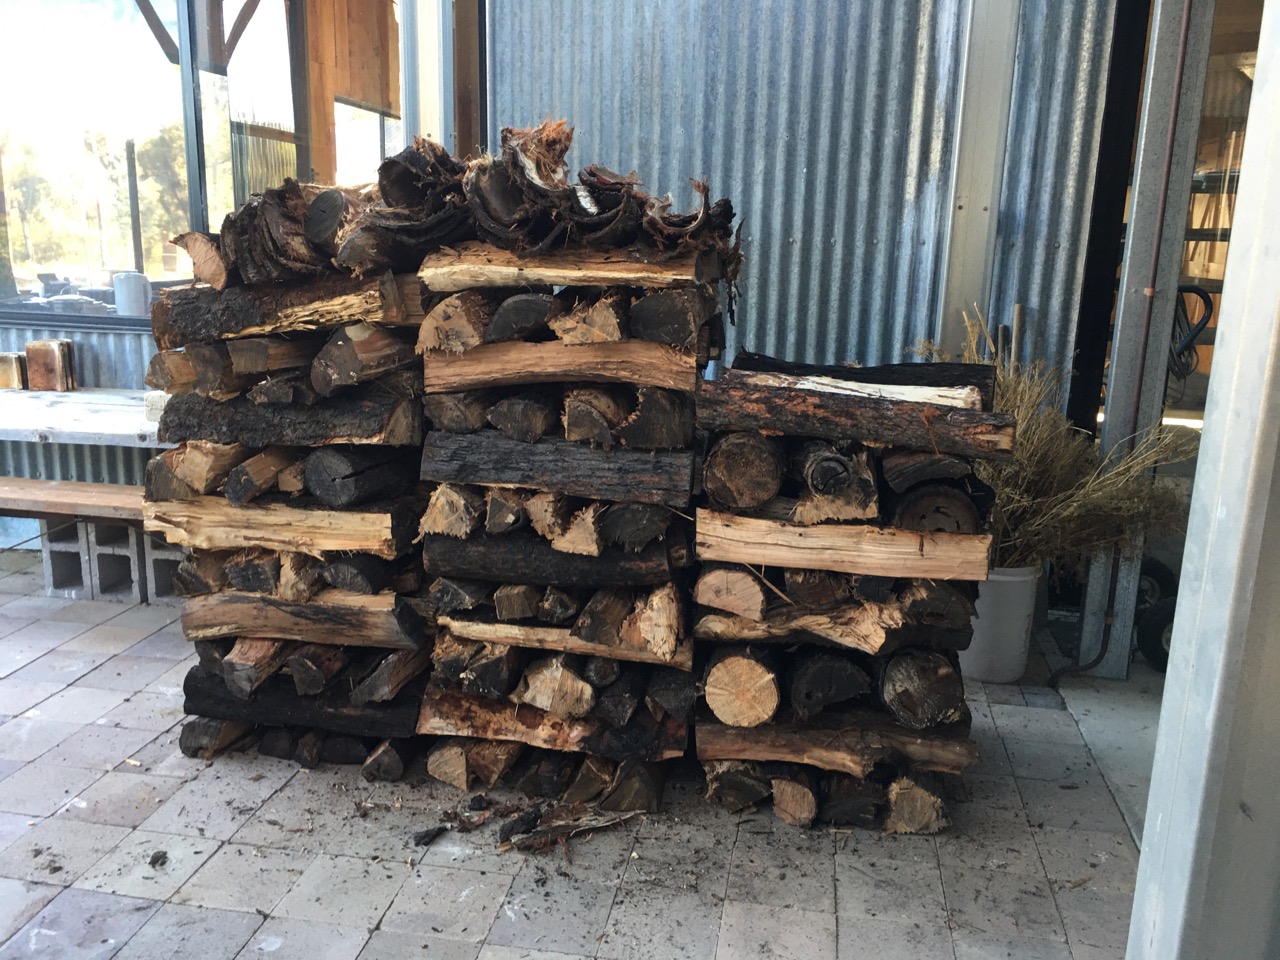
The old small engine managed the longer wood OK. I filled the truck with wood cut and split to 675mm long. That is about enough to fire the kiln to stoneware in 14 hours.
2 1/2 stacks of Hob wood,
A couple of piles of smaller kindling lumps for firing on the floor,
and then a couple of stacks of thinner side stoking wood for the 2nd chamber. Thanks to Dev and Susan.
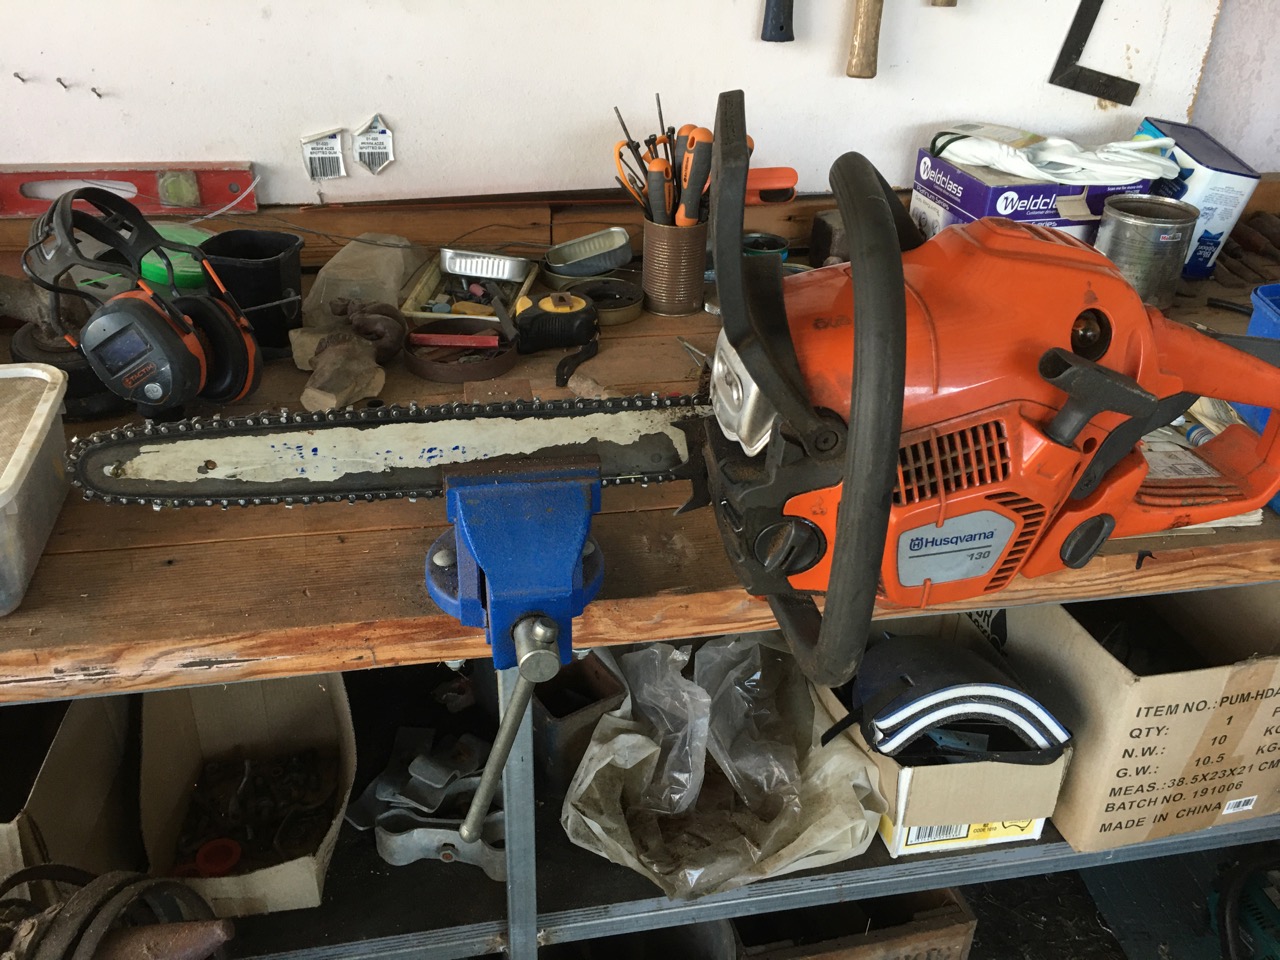
I finish the day by servicing the chain saw. Best to do it when it’s fresh on my mind, even though I’m tired from all the work, fixing the splitter, then testing it out and finally stacking all the wood.
I hate it when I go to use the saw and find that it is blunt and needs servicing, So I do it straight away. Sharpen the chain, blow out the air filter, rotate the bar, fill with 2stroke and bar oil.
It doesn’t take so long and everything is ready to go again, — except me! I need a rest.
For those people who attended the recent Zoom ‘Earth Friendly Kiln Firing’ webinar and want to learn a little bit more about what we do, here are a few links that you can follow up on this blog.
You can type in the following key words into the search box in the top right hand corner and there are posts and articles that you can read.
Small portable wood firing kiln
Slower, Smaller, Quieter. Towards A Local Terroir Based Life and Aesthetic
We have been hard at it in the pottery preparing for the Arts Trail – Open Studios and the TACA Open Studios weekends coming up very soon. It starts next weekend. We have just managed to squeeze in one last wood kiln firing. But this will be the last for some time. Mainly because I’ve just about run out of dry glazed pots, but also, because from now on the weather will be getting too hot for safe wood firing over the summer.
This firing seemed to go very well, just 11 1/2 hours to cone 10 down, not quite so hot on the top back shelf with cone 8 over, but cone 10 just starting to bend. Probably cone 9, close enough. I changed to pack again this firing just see if I can get a better understanding of how this kiln responds to subtle changes of setting. Life is endless learning.
I got a very good control of the ember level with this firing. I’m pleased about that. We have been getting rather too much ember build-up towards the end of the firing in the last few firings, so I opted to open all the mouse holes right from the start. I can’t remember ever doing this before, but it was just right and worked well, kept everything under control. I’m a slow learner, but I get there in the end. I recon that this wood firing lark is quite good fun. I’ll probably have another go at it 🙂 We’ll see how it has turned out in a couple of days.
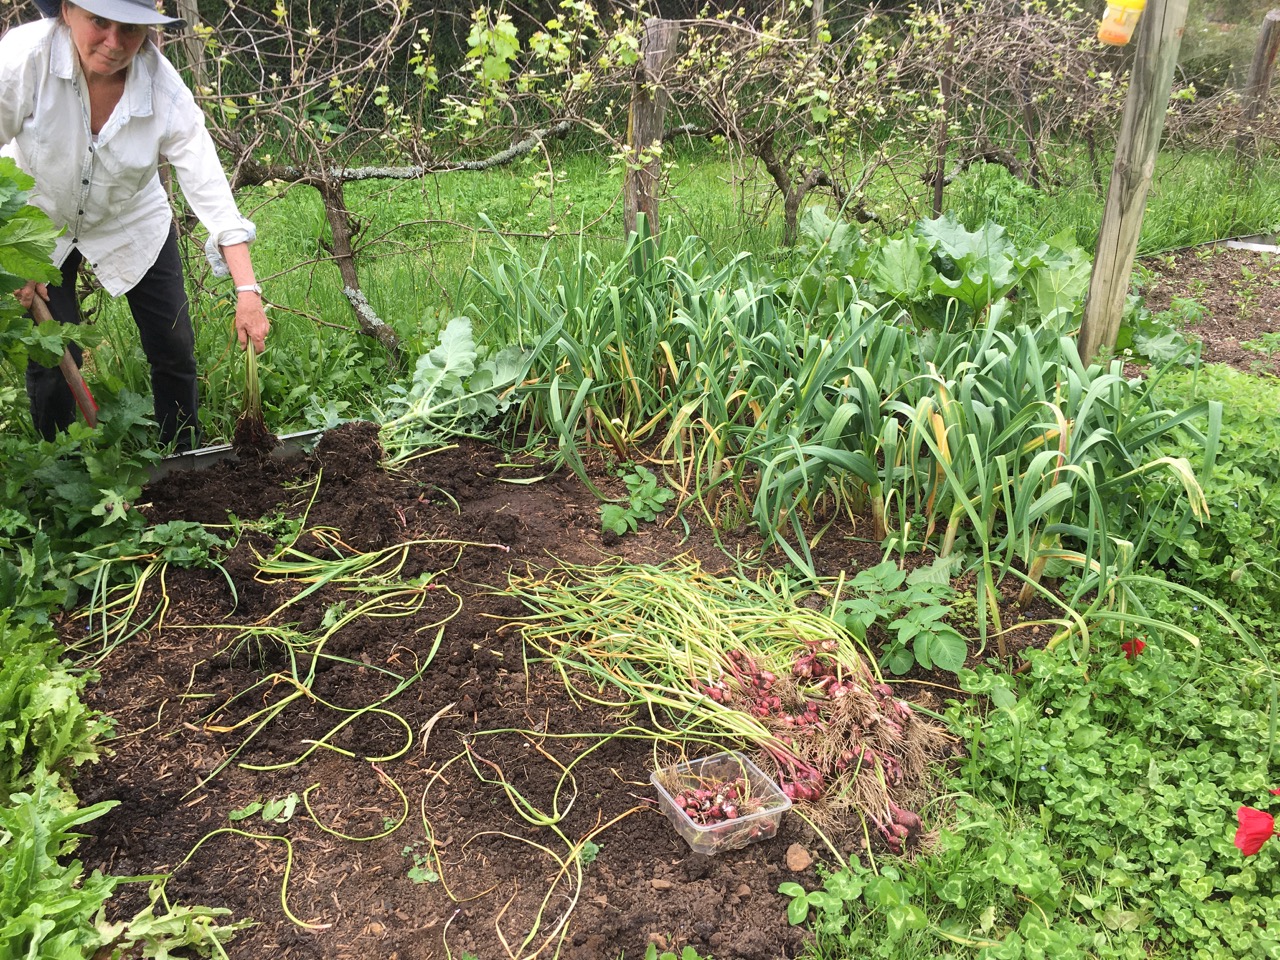
We have also lifted the 2nd planting of garlic. This bed of garlic was planted at the same time as the previous batch that had split into individual cloves. This variety has taken a few weeks longer to mature and has stayed as complete bulbs. This bed of garlic has delivered around 50 knobs. The last bed lifted out 45 split knobs. We still have one more double sized bed to go, maybe in a few more weeks? It may have up to 100 plants, but we’ll have to see what matures and lifts and dries successfully. Not all our garlic plants mature to a full supermarket size. We get quite a few small knobs that are a bit tedious to peel, but the flavour is still all there. We can get through up to 300 knobs of various sizes of garlic in a full year, and that isn’t always quite enough to see us through till next years harvest. This year we ran out of our own home grown organic garlic about a month ago and had to buy 4 or 5 knobs to get us through to a time when we could start to ‘snaffle’ or ‘steal’ a few very early plants from the edges of the first bed. I love fresh, wet, early, fragrant garlic. I have to have a couple of cloves sliced on my homemade rye bread, with a twist of fresh ground black pepper and a tiny sprinkle of salt. Tonight it’s just not my fingers that smell of garlic. Keep your distance!
The first lifted crop is now all dried, plaited and hung in the kitchen ready for use.
This weekend we fired the wood kiln again. The third firing in 3 weeks. One firing each Weekend. This firing went very well.
I’m starting to get the measure of this new kiln and my endless supply of pre-burnt wood fuel. For the first of these 3 firings, I altered the firebox and made it deeper, which helped. Before the 2nd firing, I changed the flues. For this firing I changed the setting and adjusted the flues slightly. more fine tuning than major change. All these adjustments have come together now and this last firing was even from top to bottom, with cone 10 over on each shelf, as well as the floor.
There is still an issue with the wood. The flame is quite short and although cone 10 was over on the front of the top shelf, we only got cone 9 over at the rear of that same shelf, just 400mm further back.
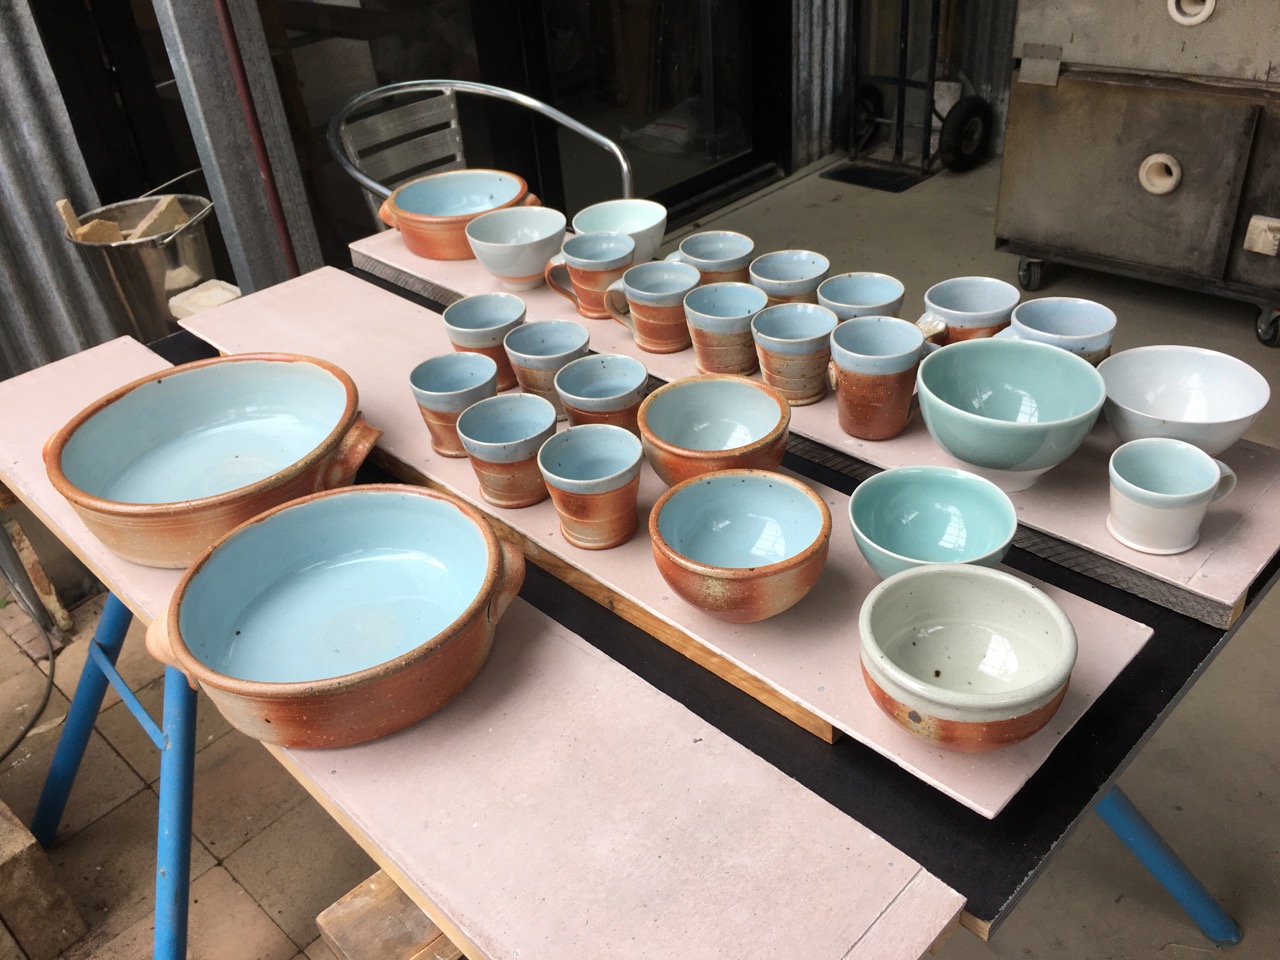
Still, everything is well melted and looks good. We have plenty of pots fired and ready for the two open Studio Weekends coming up.
It was a very foggy and misty dawn for the firing.
All of our specially developed home made wood firing clay bodies have taken the fire well and are flashing up with good toasty colour.
This is one of Janine’s bowls with her home made cobalt infused pigment brushwork and her ash glaze made from the ash out of our kitchen slow combustion cooker. This bowl has picked up a little bit of carbon inclusion around the rim. Janine doing her bit to remove carbon from the atmosphere permanently and counter global warming.
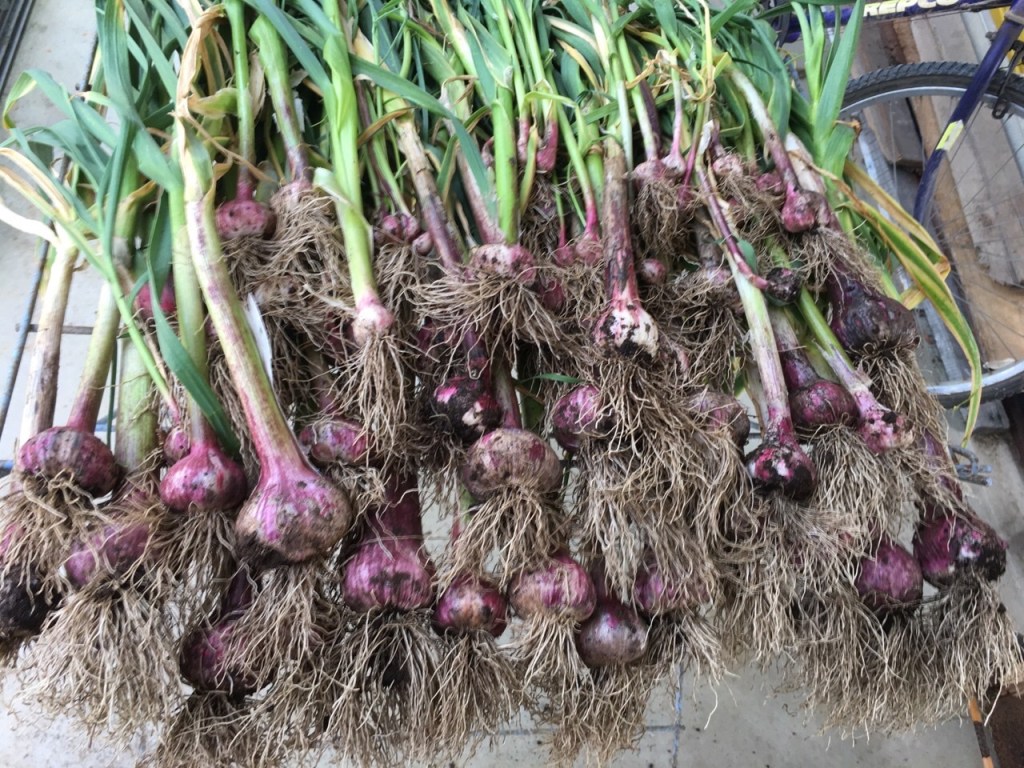
This is one of my bowls that I decorated by trailing Janine’s opalescent ‘jun’ style ash glaze over tenmoku.We have just harvested the first of our 3 garlic crops. This year I planted two different types of garlic, one breaks up just before it’s ripe and ready to harvest, sending up multiple new green shoots. The other variety continues to grow as normal. I planted these two varieties last year as well and they did the same for me then. Very odd. The cloves are perfect, just separated into individual cloves.
The multiple stem variety is on the left.
We lay it out to dry for a week, then Janine plaits it into bundles and we hang it to dry until we need to use it.
Our firing went as well as could be expected. I’m learning more all the time. The back of the kiln was under-fired, but 80% came out OK.
I ‘borrowed’ some of my friend and neighbour Sandy Lockwood’s wood. Sandy fires with wood too and lives only a few kilometres away in the same village.
Sandy buys all her fire wood in, so her stock of wood is totally different from ours. Our on-site burnt forest that has been left standing, but dead, after the catastrophic bush fires of 2019 doesn’t burn the way it used to.
We have been nurturing our few acres of eucalypt forest for the past 46 years that we have lived and worked here. Carefully and very selectively dragging out the dead branches and tree trunks from the bush for use in our kilns and home. Almost everything that we do runs on wood for fuel. We obviously fire the kiln with it, but we also have a slow combustion kitchen stove that cooks our meals, warms the kitchen and also heats the hot water for the house. Then there is the slow combustion heater in the lounge room that we use during the cooler months to keep us warm at night. We also have a slow combustion stove and room heater in the pottery shed.
I get a lot of sowing done repairing my worn-out clothes, sitting front of the lounge room heater during the winter. I wear the clothes out chainsawing, cutting, carting, splitting and stacking all the firewood. It’s a bit of a circular economy.
We have so much of this dead wood now, I have to find a way to use it creatively. I have another couple of firings scheduled in before the Australian Ceramics Assn, Open studio weekends of the 12th Nov. This overlaps with the Southern Highlands Arts Trail, Open Studio weekends on the first two weekends in Nov. We’ll be open for visitors on all 4 days of those weekends.
I will use these next firings to try out different approaches to solving my dilemma with this wood. If I can’t find a way of burning it successfully in its current form. I will have to change the fire box arrangement. But I’ll try all the easier options first. Side stoking the back chamber will probably work well, but I don’t want to do too much of that until I build an afterburner and flame tube with a spark arrestor on top. I don’t have time to build that until after the open studios in a few weeks.
So the next couple of firings will concentrate on fuel management, then packing and firing technique.
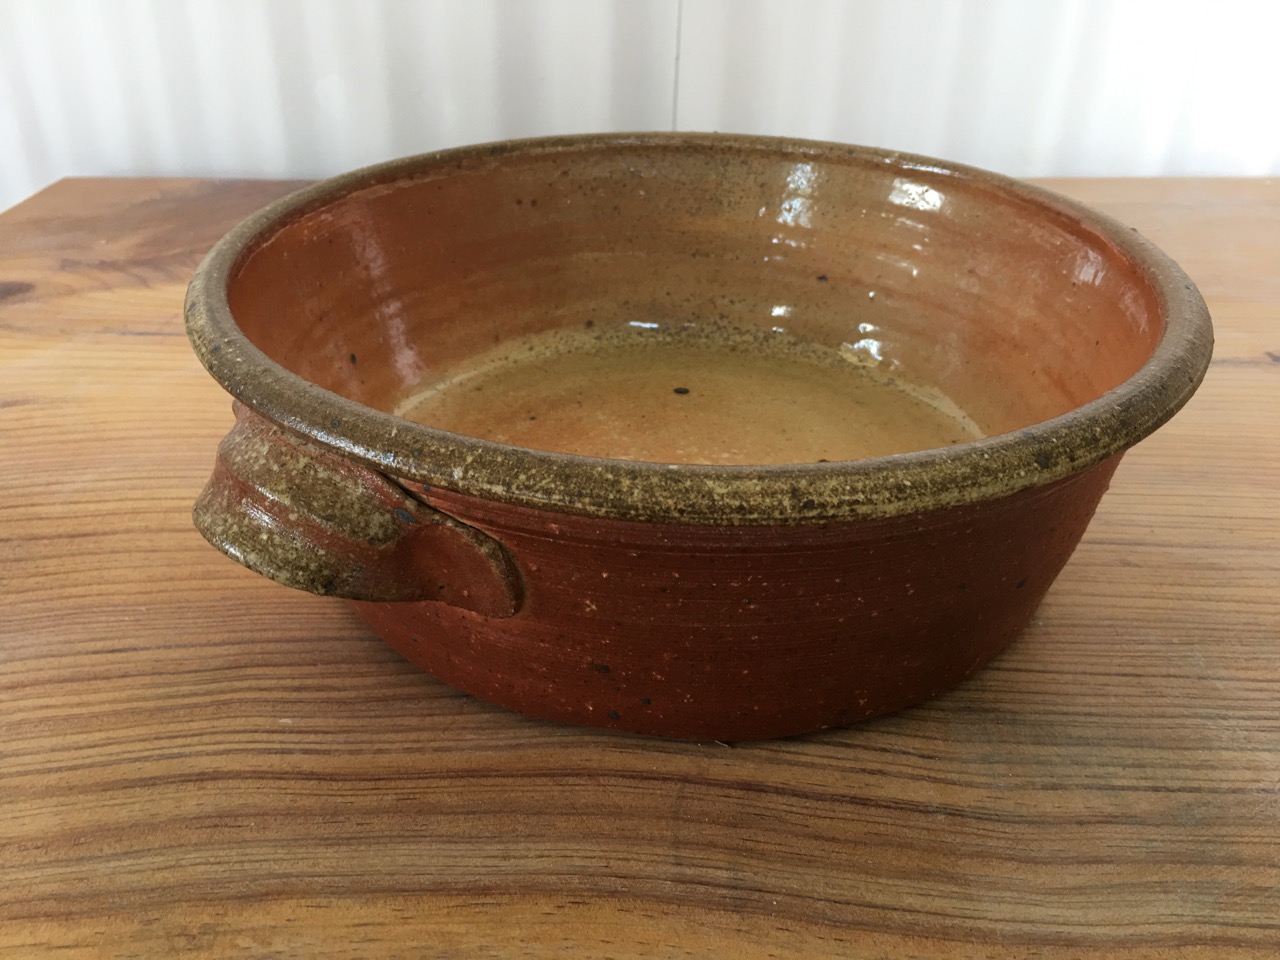
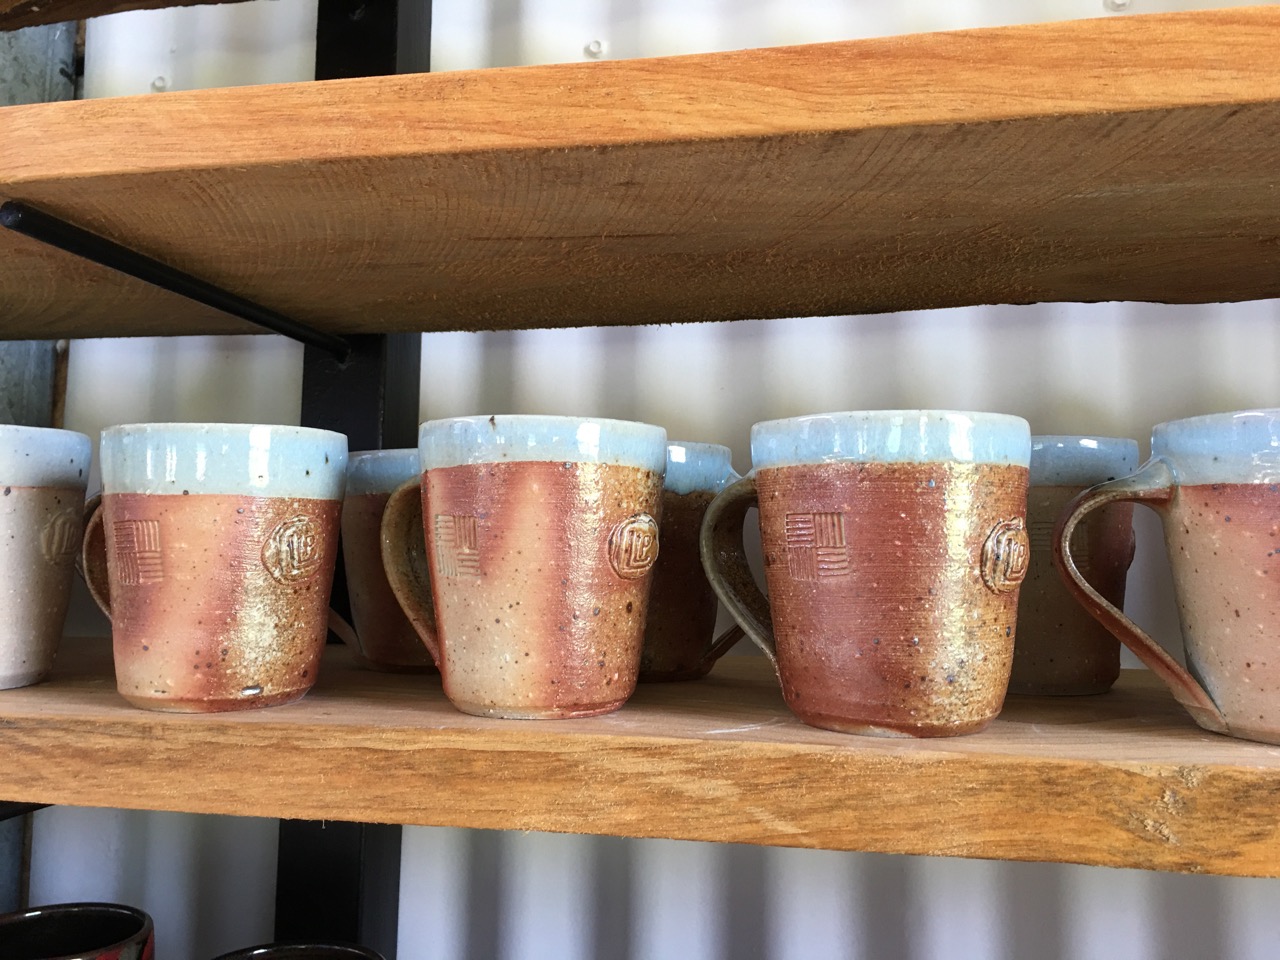
Here are a few of the roasty toasty pots that I left unglazed on the outside to pick up colour, fire flashing and a little wood ash from the one day firing. I used to fire the wood kiln for between 12 to 14 hours, but now with the change in the timber, I need to fire for 17 to 19 hours. Too long for an old guy and his hard working Missus. I was completely trashed the next day.
The colour is lovely and warm and the surfaces are very tactile.
Working with this rough, iron stained stoneware clay has been such a pleasure after the past few months of battling with the ground-up-sericite-stone bodies.
In preparation for the up-coming Open Studio Weekends on the first two weekends in November, we have been hard at work making and firing to get everything ready in time.
We are still working on the pottery shed, as it isn’t quite finished yet. So much to do, but it is almost there. We have to stop the building work to concentrate on making pots now.
There are so many little bit and pieces of the building that need to be cleaned up and properly finished. The team of shed builders who erected the frame for us were working very quick and rough and left a lot to be desired in terms of details. I’m still finding out the places where they didn’t finish off the flashing, or didn’t put enough silicon in the joints here and there. But their biggest crime was not using metal screws with rubber seals, so I had to go around the whole building and squeeze silicon rubber over all the external screws to waterproof them. It probably only saved them $10. Such is the state of modern building trades. Fortunately we didn’t buy a high rise home unit with cracks in it, so we couldn’t live in it, but still had to pay the mortgage. That is so unforgivable. With all this rain over the past year, I’m still discovering places that leak or just little annoying drips that need attention.
The framing crew did at least get the frame level, square and true. I’ll give them that much. The building inspector from the council who came and inspected our job, told us that this was one of the better frames that he had seen. Some were so bad, he had to call the builders back to straighten it up.
Janine and I have done nearly all of our building work over the years as owner builders here for the past 45 years, but this rebuilding job was just beyond us in our ’senior’ years. Especially the scale of it and particularly after working ourselves into the ground with all the clean-up work that we did after the fire. By the time it came to start re-building, we just didn’t have the energy. After the 6 months of cleaning up, we were ready to hand over to a team who supposedly knew what they were doing when it came to erecting a steel fame shed — sort of. They were certainly well practised at making short cuts.
This last weekend we fired the wood kiln. This was our 2nd firing in this new kiln and we are still learning how it works and getting to know its peculiarities and character.
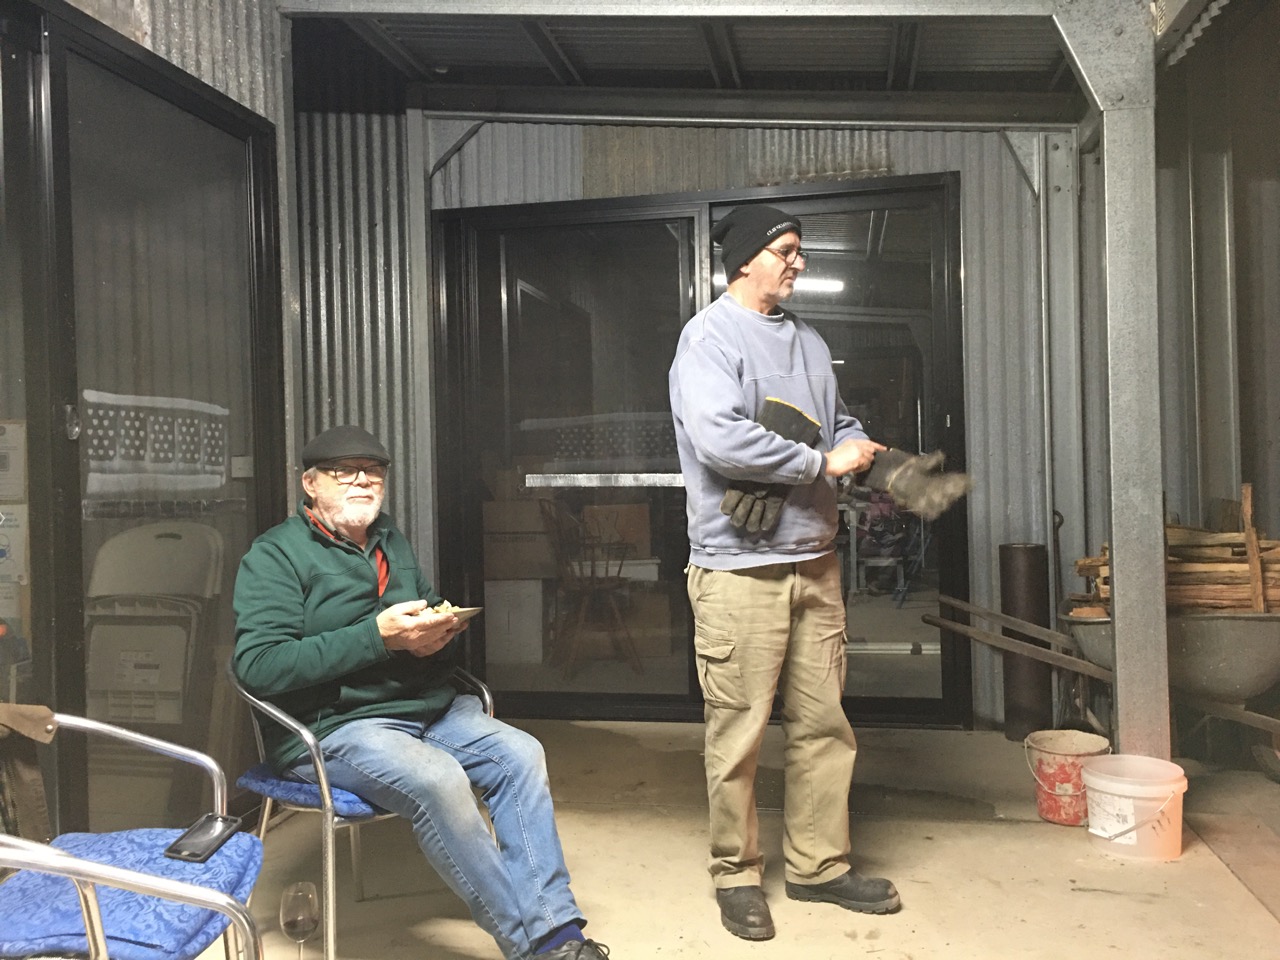
We had Len Smith, Rob Linegan to help and Jan Kesby called in after her workshop at Sturt Pottery to give us a hand, as she was in the neighbourhood.
Lighting the kindling fire with just bark and twigs.
The kiln at full fire, burning logs on the hobs.
Rob and Len doing their bit.
Jan Kesby showing us how it’s done.
We will unpack later in the week after it has cooled down.
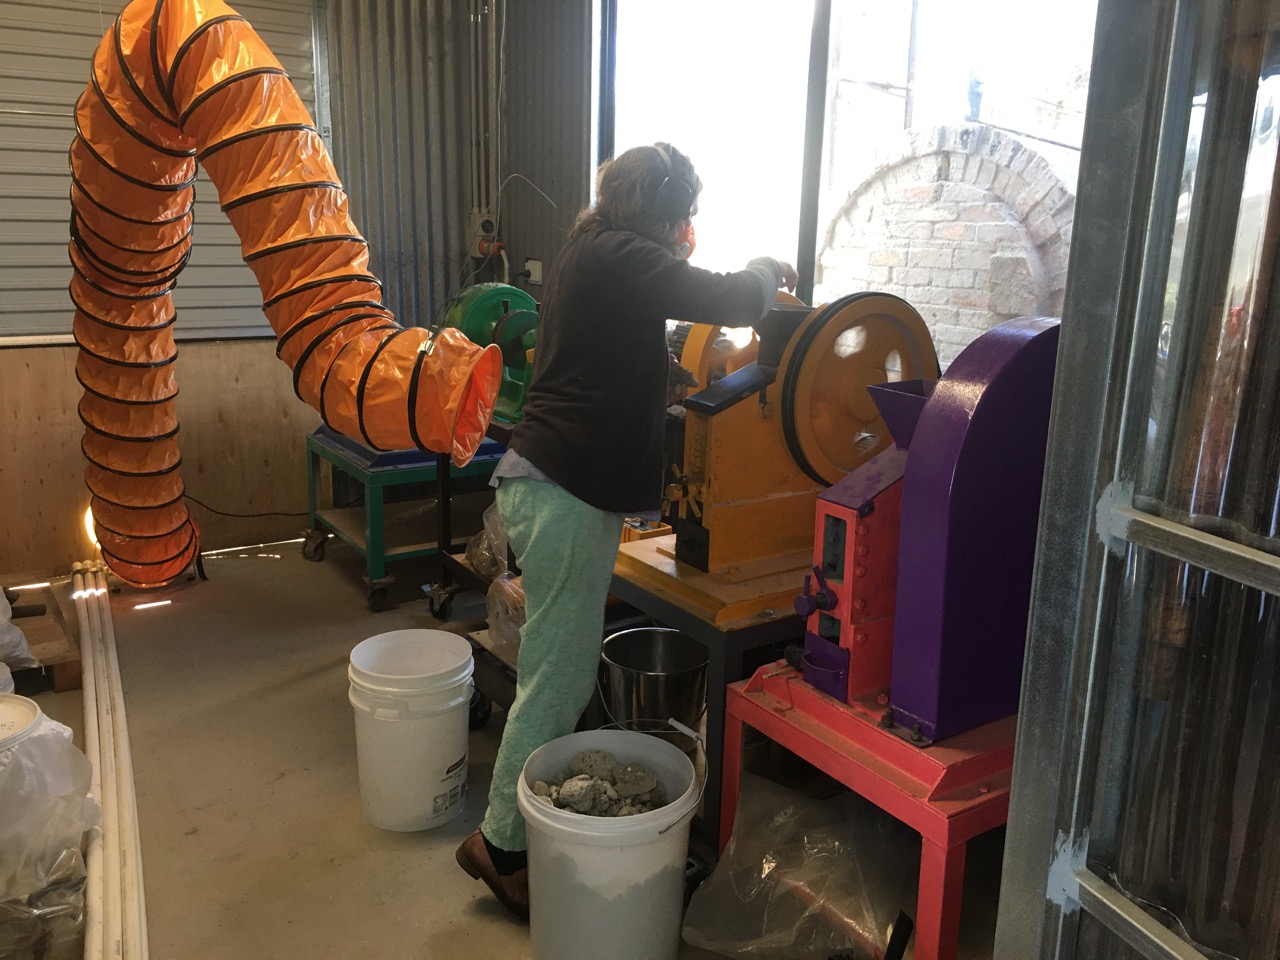
Janine putting stones into the rock crusher. Wearing her dust mask and with the exhaust fan pulling any dusty air from the room.
Janine has been crushing and grinding her beach pumice stones to make her sea-ladon green glaze. Made from just beach pumice and beach cuttle fish carapace ‘shells’.
She has also been making up her ‘Chun’ or ‘Jun’ blue opalescent glaze that she makes from the ash from the kitchen slow combustion stove.
They both require crushing and then grinding in the ball mills to get the best result. There are so many little steps that go into being a self-reliant artist that most people just couldn’t imagine.
Then there is the splitting and stacking all the wood for firing. Everything takes time. We only have pre-burnt logs to fire with now, as every tree on our block of land was burnt. So we have a few hundred tonnes of standing dead wood to use up for the rest of our lives, but regrettably, since it is already pre-burnt. It has lost a lot of its volatiles, saps, kinos and resins. This means that we have to invent new ways of using it up in the kilns, as it is a bit like firing with charcoal than fresh timber. It still burns, but with a short flame and doesn’t really crackle and roar like it used to pre-fire. One solution I’m trying is to split it finer, where that is possible, but the stringy back that grows around here has a very twisty, gnarly, well integrated grain, that doesn’t easily lend itself to fine free-splitting.
Another option is to re-build the fire box to adapt it better to this charcoal rich environment, larger and with more provision for burning charcoal and ember? That’s a much bigger job, so I’ll try all of the easier options first. Time will tell.





































You must be logged in to post a comment.