Seat and two veg

We have just finished our 5th weekend workshop in so many weeks, with only three more double-weekend high temperature woodfiring workshops to go before the fire restrictions cut in again for another year. For this workshop today, I have made ‘The King’ a new kiln out of spare parts and off-cuts. A bigger version of Stefan Jakob’s ‘Ikea’ garbage bin kiln concept. Stefan is a genius kiln maker and raku potter from Switzerland. He is one of the most impressive people that I have ever met. Check out Stefan’s site here; <http://www.raku.ch> Keramik & Animation.

If you are in Switzerland or Germany, get along to one of his amazing workshops. I’m sure that you won’t regret it.
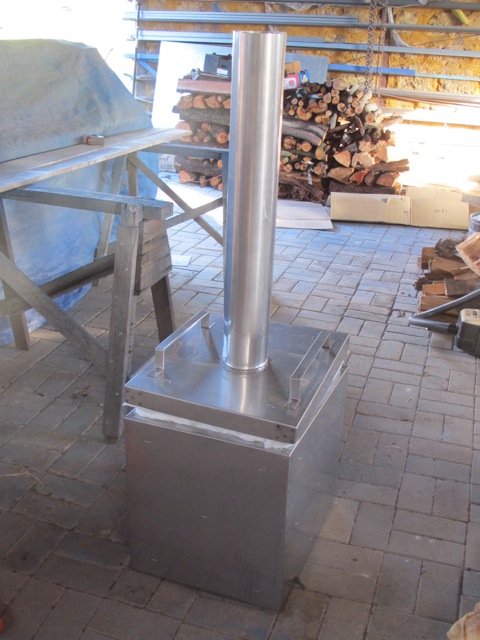
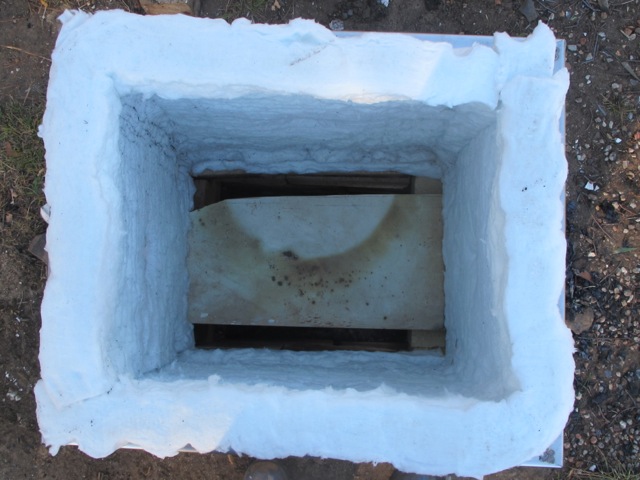
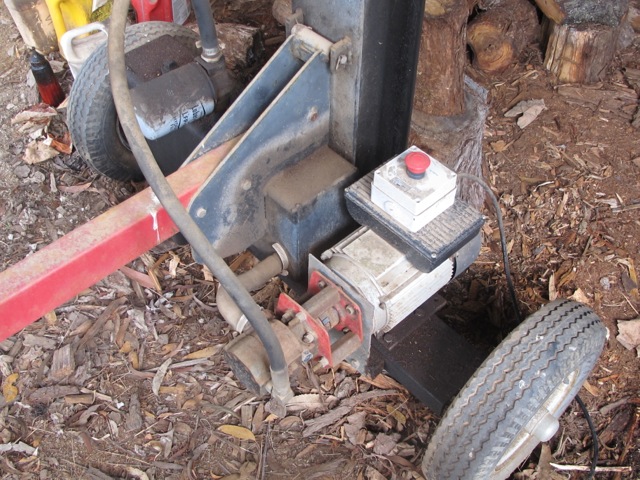
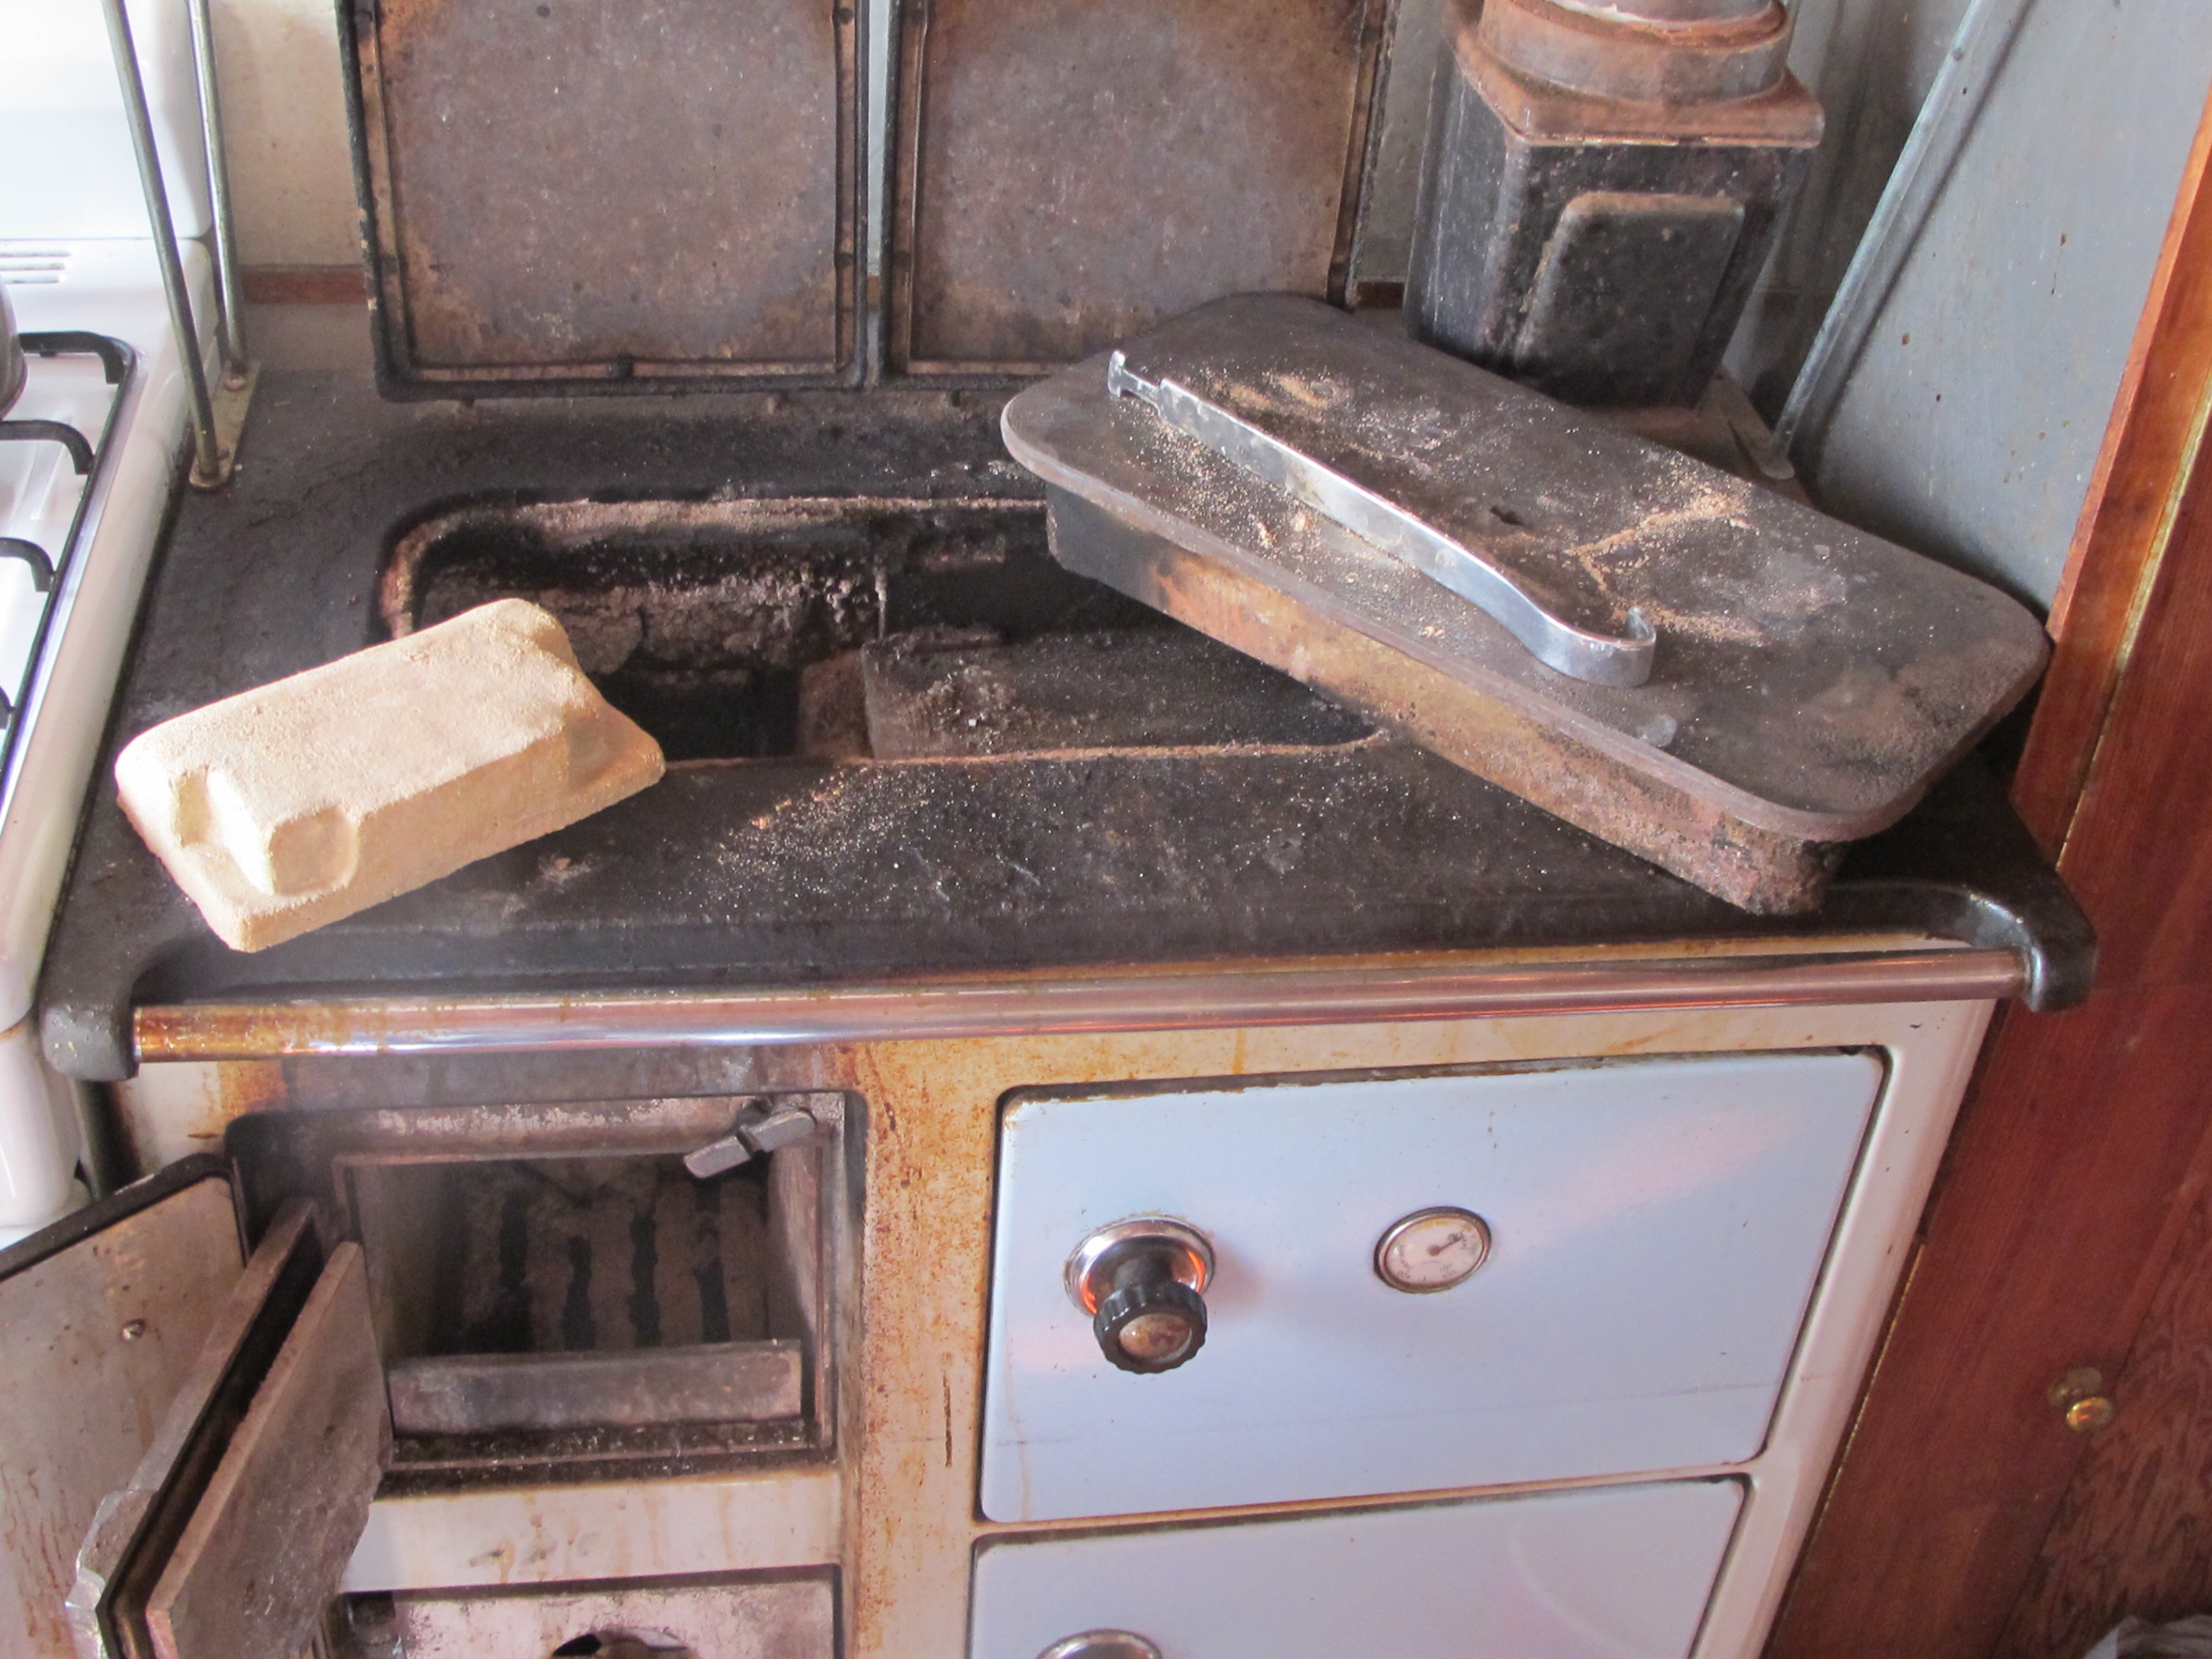
For this new ‘improved’ version of Stefan’s kiln. I’ve made a stainless steel box and lid from off-cuts of stainless steel — because I can. Then lined it with 50mm. of ‘soluble’ ceramic fibre. It sits on a fire brick base that is the fire box and fitted with an old cast iron grill as fire bars. It’s all rather Heath Robinson, but works a treat. It’s at least 4 times larger than the original and fires just as easily.
IMG_4192IMG_4194

IMG_4195IMG_4197

IMG_4199IMG_4203
 IMG_4206IMG_4211
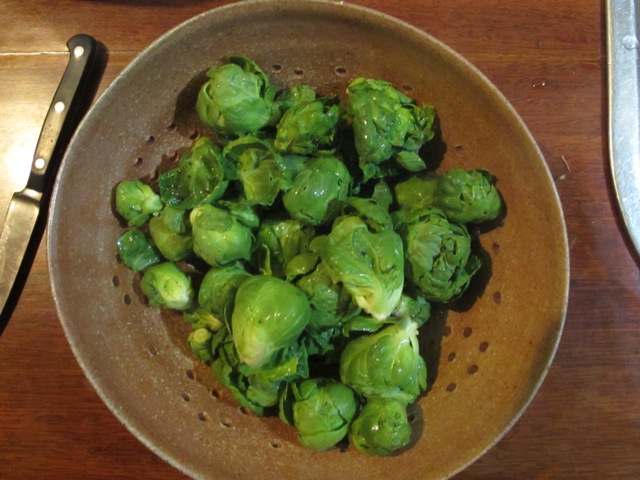
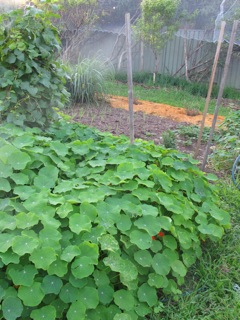
We are well into the winter season and well past the solstice, but still no frost as yet. Only down to zero, but not minus oC as yet. We are eating our way through the cauliflowers. The second planting of the broccoli, which is well on its way, and just this night, we have had our first pick of Brussels sprouts.
They are so slow compared to other brassica plants. We have cauliflower, cabbage, broccoli, kale and Brussels sprouts, all in their rows.
IMG_4183
IMG_4182
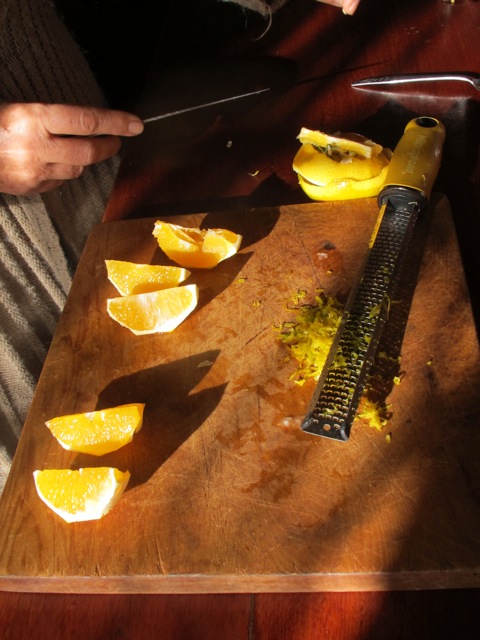
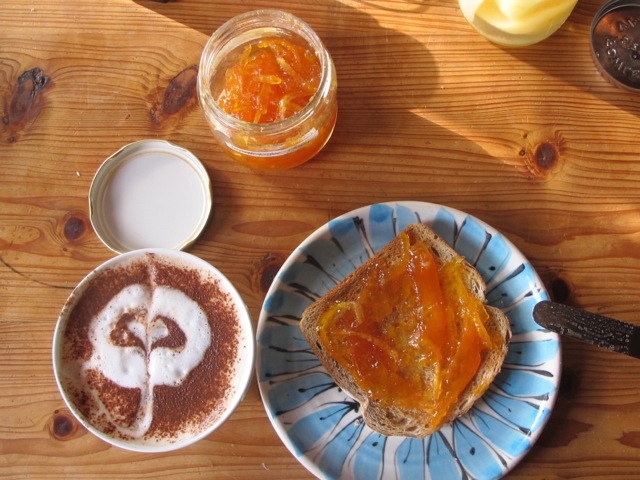
All the citrus are ripening now and The King has made the first batch of Royal marmalade. We are also having a mix of citrus fruits for breakfast as well.
We zest the skins before cutting them up for breakfast.
IMG_3979IMG_3980
Marmalade is so nice with coffee and toast on a winters morning.
IMG_3933IMG_3935
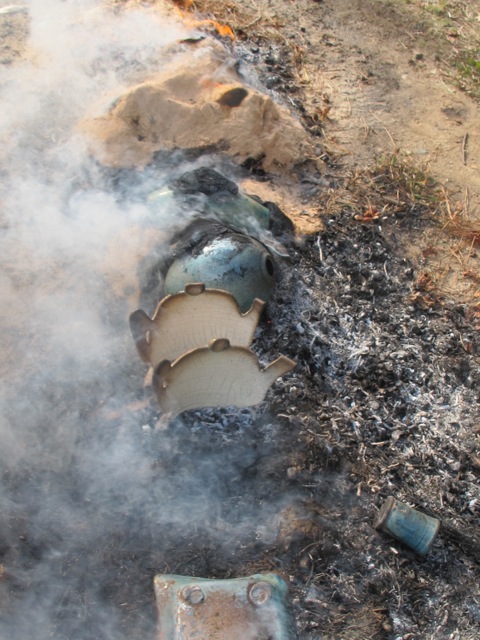
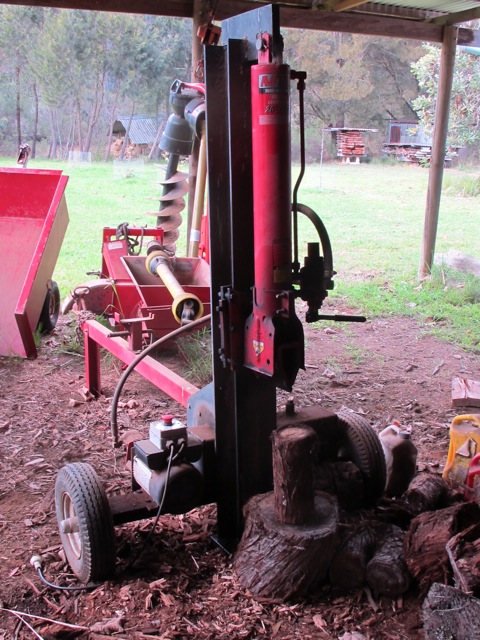
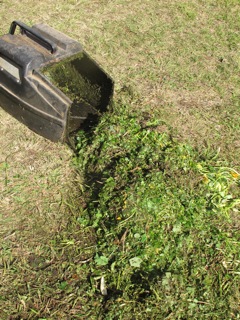
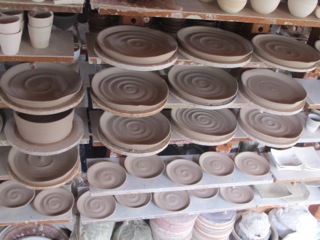
Working so hard in the pottery and garden, getting my own work ready to fire tomorrow, cutting and splitting the wood for the firings and the for the workshops to come. Teaching the weekend workshops and fitting everything else in as well, we find that we are quite ‘bushed’ tonight after we come in from the last of our weekend workshop raku firing. It’s been quite cold and windy. So that now we have cleaned up and come inside, we light the fires, shower off the raku smoke smell and get warm.
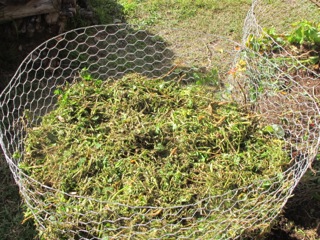
We get quite tired after days like this and it is all we can do to get ourselves along to the veggie garden in the darkening gloom to pick the nights dinner, but we do. There is no other option. We are being self-reliant. The shops are all closed by now and they are all 30 kms away anyway, and it’s Sunday night, so that isn’t going to happen in a hurry.
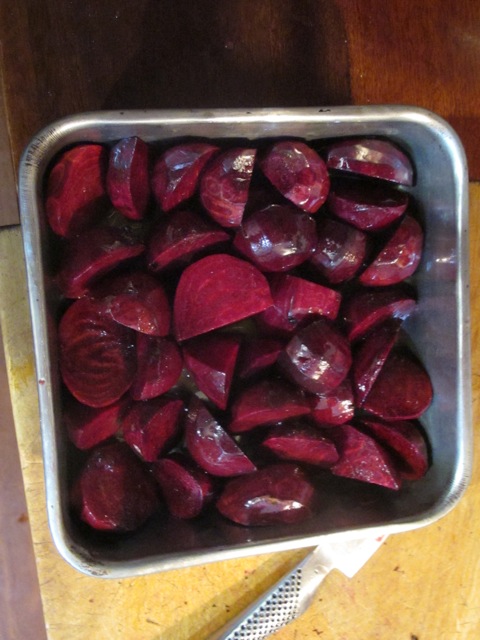
We have beetroots to roast, potatoes to boil, along with Brussels sprouts, and a fish to steam. It all works well and we are proud to be able to enjoy such bounty from our own back yard. It’s an honour and a privilege to be able to feed our selves like this.
IMG_4164
After dinner we both plonk ourselves down onto a seat in front of the idiot box to watch something or other on the TV or a DVD, I don’t know what and I’m past caring. We are going to veg out, we are too tired to do anything intellectual or meaningful.
This day is over and we’ve done enough, all we are good for is a seat and two veg.
Best wishes from the pale and waxy Mr ‘Dutch Cream-Kipfler’ and his regal (Janine)King Edward, the couch potatoes.


The tender ambiguity of failure.

While I spent some time converting the wood splitter from dirty petrol to clean solar, doing what shouldn’t be doable and succeeding against all odds,  and quite pleasantly surprised I was. I also spent time converting the garden shredder from dirty petrol to equally dirty, but more efficient diesel tractor power take off, PTO – and failed, or at least for the time being. As every failure is one step closer to eventual success.
Nothing is ever finished.
We bought a garden shredder, quite a good one from the US, not cheap Chinese. It wasn’t long before it needed parts for the engine though.
Nothing last forever.
It had a ‘Tecumseh’ 9 HP engine and I soon found out that it had gone out of production about the time that I bought it. So 2 years later when I needed parts. That wasn’t  going to happen, unless I could find old stock somewhere, or 2nd hand parts.
I had a quick look online but because I don’t know anything about engines I couldn’t make head-nor-tail of what I was finding.
I had a brilliant idea. Instead of continuing with the dirty small petrol engine, why didn’t I convert the whole machine to run off the power take off drive on the tractor?
I seemed like a good idea at the time. I stripped the old shredder down, removed the engine, which had the cutting disc attached to its own shaft. Problem 1. How to mount a new shaft on the old machine when there was nowhere to bolt it on. Just thin air, previously, everything had been mounted off the engine. Now that the engine was removed, there was nothing. I decided to weld up a sheet-metal base plate and stand, then use that as a base to bolt everything on to, to make the old machine work again. So far, so good.
Problem 2. the cutting disc of the shredder is mounted on a tapered shaft with left hand thread set screw to hold it on. I decided to turn down an old piece of steel bar to an approximate taper like the old one. A bit of careful guesswork, but it fitted OK. So that was good. This was quite tricky on my old hand-made, metal lathe and I had to buy a ‘tap’ to maker the new threaded hole for the retaining screw. I mounted the new shaft on some cheap bearings and added a splined shaft adaptor to suit the tractor PTO.
So further, so good. After re-assembly it turned by hand freely. I felt pleased with myself, even a little bit smug. A couple of weeks of spare-time tinkering, a few small items purchased and some re-cycled junk put to a better use and given a new life. I welded on a 3 point linkage mounting, primed it and painted it all bright red.
What could possible go wrong?
I back up the tractor and connected it all up. Three point linkages, PTO splined shaft drive, safety links on drive shaft cover, all good!  Start the tractor and engage the PTO drive. It all works, it rotates, it spins, it whirrs. It looks and acts like a bought one. Success!
But when I tried to put weeds into the shredder, they just wouldn’t go in, try as I might. Then it finally dawns on me that the old stationary petrol engine spun clockwise and the tractor PTO spins counter-clockwise. It’s all running backwards. No wonder that it doesn’t work!
Who ever decided that small engines should run one way and larger engines should run the other? I’m totally perplexed and completely crest fallen.
My new, bright red, grown-ups toy is never going to work like this. If it was an electric motor, I could reverse the polarity quite easily, but not a combustion engine.
There is some tender ambiguity in this failure. It’s a complete failure, no hiding the fact. But technically, it works beautifully, backwards!
Not to mention that it is a very impressive bright red colour, and very new looking and ever so shiny. So I can be proud of all that.
It just doesn’t work.
It looks great parked in the shed. It impresses everyone who sees it. I’m ever so proud of it.
It just doesn’t work – At least not yet!
Is it a failure — yes!
Am I proud of it – Yes!
Nothing is perfect.
I can’t afford to spend any more time on it now, as I have half a dozen group shows coming up and I need to fire all the pots that I’ve been making. I can’t change the shredder mechanism. It’s only built to work in the one direction. I can’t reverse the tractor engine. It’s a total loss. I’m a twat! But no-one told me!
Perhaps at a later date, when I can create some more spare time, I can fabricate a reversing gearbox out of some spare cogs on a 2nd shaft? A couple more bearings, weld up a hinged lifting mechanism to tension the system. It’s all do-able.
Time will tell.
This hasn’t been my finest hour, but I still have a few more fine hours left in me – at least I hope so!
And after all, it is so terribly red and ever so shiny.
It looks great. It just doesn’t work.
Failing is a strange kind of self-reliance
Watch this space.


The thrice-warming winter-solstice wood pile.

The thrice-warming winter-solstice wood pile.
It’s the winter solstice and we need to keep ourselves warm in front of the fire every night now. So a continuous supply of wood is needed to keep the home fires burning. “Cut your own wood and warm yourself twice”. We do a lot of wood cutting , splitting and stacking. Then wheel-barrowing and re-stacking. There is a sense of satisfaction and security in a generously stacked wood shed. As we change and get increasingly older, we have had to adapt and change from the initial brute strength and enthusiasm to a more considered longer-term approach of working smarter. Some might say that to be still living here like this in our sixties might be  proof that we aren’t so smart, and maybe we’re not, but this life of minimal consumption that we’ve chosen is still working for us, or should I say that we are still working for it!

IMG_4091

I’m so naive!  

I try to do all sorts of things that I can’t do and have little expectation of succeeding at, bit I have a go at it because that is what self-reliance is all about. Sometimes things actually work out well and I’m surprised and thrilled at the end of it. Other times not. Take the wood splitter for example. Just about everything here runs on wood or solar power – except the car. (If only! I’m still waiting for the cheap solar/electric car). We cut and split a lot of wood each year to run the house and most of it is grown here on this little 2.5 hectare (7 acre) bit of land. I do the chainsawing and manhandling to the truck. These days I use a cheap, hand-pumped hydraulic crane to lift the logs up onto the truck. Then they are driven to the wood shed and the biggest ’rounds’ are stacked inside the shed ready for splitting. These days The Lovely does the splitting, but it wasn’t always so.

It’s not as bad as it sounds, because we have a hydraulic wood splitter.

I used to do it all with a block buster and axe. Janine would collect all the sticks and kindling up to sizes that she couldn’t snap and then stack it all near the wood pile. All the larger, unsnapable branches were dragged to the wood pile for me to cut up with the chain saw.
Initially we couldn’t afford a chain saw, but we came across a 2m. long two-man cross-cut saw. Our friend, fellow potter and experienced bush man, Mike Pridmore, called in one day and showed me how to sharpen and set it. We fashioned two wooden peg handles for the metal sockets at each end and we were away! Janine and I, one on each end of the ‘two-man’ saw. Rather oddly and badly named. In our case it was a two person, husband and wife saw. We would do 1 hour of cutting together before breakfast. Later we found a smaller 1.2 metre single handled variation of that saw, which I could use alone. But after 20 years of this my back got too worn out to continue with the block busting and heavy lifting, so eventually we bought a chain saw and a hydraulic wood splitter at great expense and the two big cross-cut saws are hung up in the barn for good now. These purchases were our second concession to the modern world, after the ride-on mower. It revolutionised our wood preparation efforts. The splitter had a 5 HP Briggs and Stratton petrol engine on it, and the motor lasted about 15 years, with minor work to keep it going, but eventually it was worn out and packed it in. I spent a hundred dollars on it , new rings and ground the valves and it went for another few years, but that was it.
Nothing last for ever.
I decided that now we had solar power installed, it would be good if we could convert any petrol usage to solar electricity. The splitter was a great candidate because it was stationary and could run on an extension cord from the house. The wood shed is only 20 metres from the house. I asked a bloke who was very experienced with machinery matters about this and he said it would be a ‘piece of piss’, nothing to it. Just get a three phase, 5 horse power electric motor of the same size as the petrol engine and swap it over. Having no background in things mechanical I wasn’t sure what to think, but I was sure that it wouldn’t be that easy.
We didn’t have 3 phase electricity anyway, so that was out of the question. The best that I could do was to buy a 3.25 HP single phase 240 volt motor. This would draw all of the available 10 amps of current to run it and even more on start-up. But 3.25 isn’t 5, and was way too small. I asked another bloke with farm machinery background and he told me not to worry, Petrol motors have very small horses powering them! Something to do with only one of the 4 strokes in a 4 stroke motor being powered, leaving a gap in the power curve being un-powered for 3/4 of the time. Or words to that effect. Whereas, electric motors have very strong horses powering them continuously and evenly. The word ‘torque’ comes to mind? He told me that a 3 HP electric motor would do what a 5 HP petrol engine would do!
I was sceptical, so I asked my friend Dave Hunt, who is a real engineer, if that was true and he told me that he’d never heard of that. Fair enough, it sounded a bit bodgy to me too. Nothing could be that easy!

IMG_4096

However, as I had no other real alternative, except buying another petrol engine, and this was quite unpalatable to me, knowing that small petrol powered engines are the most inefficient, polluting and wasteful of all motors. I though that I’d give a small solar powered electric motor a go. I bought the small single phase motor and managed to weld up a home made adaptor that suspended the old hydraulic pump in front of the new electric motor. The old system had the oil pump directly bolted onto the petrol engine. This was not possible with the small electric motor. My amateurish piece of bodged home-made engineering linked the old hydraulic pump from the old petrol motor to the new electric motor, even though they are completely different in configuration.
Amazingly it worked!
I didn’t know that it couldn’t be done, so there was a slim possibility that it could work. I may be naive, but I’m prepared to ask questions and give things a try. “Don’t believe anything you read, nothing you’re told and only half of what you see!” – Mark Twain. This one worked for us. It’s not quite as elegant as it was, or as powerful as the old 5 HP petrol engine, but almost. It can split almost everything that we put under it, and it has been working perfectly now for almost 10 years. Janine can start the motor just by switching it on at the power point. So I’m now redundant in the splitting process. She doesn’t even need me anymore to start the motor — which, at the end, had become quite troublesome and difficult with the petrol engine.
Nothing is perfect.

IMG_4094

 So now we use sunshine to split the wood to heat the house and cook the dinner. It’s nice.
Just the thought of it is warming.
Install solar panels to power the wood splitter and warm yourself thrice.
Luckily, although now mostly redundant, I can still be useful to herself for killing spiders and loosening tight jam jar lids, so she still feeds me. Otherwise I might expect to be pushed outside for the winter, like one of the drone bees! Actually I am still more competent than The Lovely when it comes to the big chain saw and using the hand pumped imitation ‘Hi-ab crane’ and fibre slings for lifting the biggest logs onto the back of the truck for delivery to the splitter.
I might just be safe for the time-being.
Nothing is ever finished.
Fond regards from the thrice-warmed, Mr Redundant and his competent Mrs. – Who haven’t split up.

Give Peas a Chance

Give peas a chance

The Lovely and I have been doing a bit of community service down at the Moss Vale Community garden. It was a joint meeting of the seedsavers, Permaculture and community gardeners groups. We went along to hear David Murray talk to us about preserving older ‘heritage’ varieties of peas and beans. He’s an ex-academic from Wollongong who’s specialty is peas and beans. I don’t want to pea in his pocket, but he was good! He really knows his stuff and now we know more than we probably need to about peas, beans, their propagation and the safe storage of the seeds. He has quite a complicated rigmarole of drying and desiccation using repeated applications of silica gel. Followed by a few days in the freezer to kill weevils and then double storage in glass jars with more silica gel in the intermediate space. Very thorough!  After the talk we spent a couple of hours fettling, sorting, winnowing and sieving various seeds for the community seed bank. We took along a big bag of our own vegetable seeds that we had saved and packeted for our own use in recycled envelopes, but as always, we live with abundance, so we have far too many seeds left over, more than we need, and as we collect more seeds every year, we end up with such a lot that we have to throw the older ones out eventually to make room for this seasons fresh seeds.

We’re not very thorough about it. We just let one of the biggest and healthiest plants grow on to seed after all the other plants in that bed have been harvested. I prefer a plant that is close to the end of the row so that it is more or less out of the way. In this way, I can reuse the bed without disturbing the roots of the seeding plant. These selected plants often grow into small trees and need to be staked to keep them upright. One plant like this can carry enough seed for the whole village. We only collect a small selection for our own use. There is always a lot that blows away and spreads all over the garden, the paths and the lawn.
We put the seeds into big paper bags along with some of the stems that they are attached to and place them in the linen cupboard in the laundry that has the hot water tank in it. The gentle warmth in there dries them out nicely over a few weeks or a month or so. This seems to have eliminated the need for the silica gel for us.
On this occasion, we donated coriander seeds to the seed bank and came home with some extra tall growing ‘skyscraper’ climbing peas. We haven’t grown these before, they are new to me. Apparently they can grow up to 3 metres tall! We’ll see what happens. I hope that they don’t as my trellis isn’t high enough. Growing this tall doesn’t sound like an advantage to me. The plant must put a lot of energy into making such a tall frame and then it might be  vulnerable to strong winds? However, we are promised that they are very tasty to eat. The seeds that we get are a couple of years old now and need to be ‘refreshed’ for the bank. So this will be our contribution back to the seed bank later in the year. We have tended to be pretty slack about our labelling up to this point. We have so much to get done each day that somethings don’t get done very well. As it turns out labelling the exact variety of seeds tends to be one of the things that we don’t always record. We just write something like “climbing peas 2014,” or ‘bush peas 2014’. This is enough information for us, but doesn’t make them very useful to a seed bank. The plants seem to grow well enough for us, we just don’t always know which variety that it is exactly and we haven’t needed to care about it either.
From now on we will try and be a little bit more attentive to detail, so that our efforts won’t be wasted and our seeds can be useful to others through the seed bank.

IMG_4084IMG_3603

I can’t help eating a few peas every time I go to the garden at this time of year. I can’t walk past them. They have to be one of the most delicious vegetables that can be eaten raw directly in the garden. They are such a sweet treat.
In the Oxford Book of Food Plants, I read that there is a variety called ‘Harrison’s Glory,’ now that is the variety that I ought to be growing! But alas, I haven’t seen it anywhere as yet. It could be one of those older varieties that has slipped from general usage over time and probably only exists in a seed bank now? On the other hand, there is a variety called ‘Balmoral,’ listed in the CSIRO book, ‘The small food Garden,’ I certainly should be growing that variety here. But again, I haven’t seen it anywhere around as yet.

IMG_4082

The follow-on crop of peas is just emerging. I’m determined to give peas a chance.
We also grow coriander on and off all through the year, just like everyone else does I suppose? I don’t know how many varieties of coriander there might be, but I can only surmise that there might be quite a few, especially in Asia. I don’t know which one we grow. We just grow our own ‘generic’ coriander and always have recycled our seed in this way. It’s a very prolific seeder.  Some years ago I bought some ‘cilantro’ coriander, that was supposed to be slow to bolt to seed and be more leafy, but it grew just the same as our ordinary variety, so I didn’t save any seed from it. We added our multi-generational ‘generic’ coriander to the seed bank as well.
We have pulled out a lot of late summer/autumn stragglers from the garden and composted them. Firm dry material like corn stalks go through the shredder really well and make good compost, but anything that is at all damp just clogs it up, so I’ve found that piling it all up on the lawn and run the mower over it
gets it all shredded pretty fast.
IMG_3829
 IMG_3832

IMG_3833

 IMG_3834
Once it has all been mown over a few times, it’s reduced to damp mush in the catcher, it then mixes really well with the dry material and a bit of chook poo to make very fast rotting compost. We fill the bin to the top in layers and it gets hot in hours, in a few weeks it’s rotted down to half way. We have 3 sites around the garden and orchards where we have these wire rings located. They are constantly being filled, rotted and emptied, every few weeks, as we need the compost for planting out. Shredding and mulching like this breaks down the plant fibre structures and they compost so much faster than if they are just all piled up without shredding.
 IMG_3835IMG_3838
This Honda Buffalo mower has given us terrific service for the past 25 years. It’s always easy to start and works hard all day, when it is used. I change the air cleaner and oil once each year, a spark plug each decade and new blades as required. It was a good quality brand and quite expensive in 1989 when we bought it. But it was a good investment and has paid off. This is one of the few things that we own that hasn’t needed to be re-built at some stage during its life. It just keeps on working.
The last few cobs that were left on the corn plants were 2nd cobs. These are usually a lot smaller than the first cob. We left them on and allowed them to dry off, then collected them before we shredded the stalks. I finished drying the cobs in the sun in front of the kitchen window. After a few weeks they appear to be quite dry and shrivelled. I decide to put the kernels through the blender and make some corn meal for polenta. I end up with two very nice meals of ragu and polenta, plus a bit more than a large jar full of corn meal for more warming meals over the coming winter. Two cups of water to one cup of polenta, seems to work quite well and makes enough polenta for the two of us. It’s a bit dull and dry by itself. It needs some sort of sauce to lubricate it. I’ve tried it a few different ways and I like it better with a little cheese added in.

IMG_3955

 IMG_4070

IMG_4072

 IMG_4075

IMG_4076

 IMG_4077

IMG_4078

 IMG_4079
One more thing that we have done recently with the stripped out garden plants before mulching them all into compost, was to pick all the seeds from the nasturtium plants to make fake capers. After washing them well, I soaked them in salt water for a day, and after rinsing them well. I poured lightly salted pickling vinegar over them. They taste different from capers, but they are a very good substitute and it’s good to be able to use every part of the plant. Nothing wasted.

IMG_3605

 IMG_3604

IMG_3983

 Back in the pottery we’ve both been making plates. The lovely is making slab dishes and I am throwing plates on the kick wheel. I have a few very nice glaze tests coming along using wood ashes and ball-milled granite. They look good but need a flat surface because they are very fluid. When I stiffen them up to eliminate the running,  they aren’t the same glaze any more. The best looking glaze tests need to be very fluid to get the most attractive result. So that is why I’ve decided to make plates just now.Plates with a slight turn up at the edge, to allow for the very fluid glaze to pool without running off. Janine has wood fired raku workshops booked for the next 3 weekends so she is busy making pieces for demonstrating during those workshops.

IMG_4056

 IMG_4059

IMG_4016

Wood ash and rock glaze tests, showing some interesting results with nice crystals

IMG_0535

IMG_0540

IMG_0542

IMG_0543
from the seed savers and wannabe self-reliant post modern peasants.
With love from Steve and Janine who are getting along together like two peas in a pod.


Nothing lasts forever

Nothing lasts forever.
We wake up on the first day of winter to a foggy, wet, drizzly morning. I’m glad that it’s rained finally, the garden needs it. It’s been a month without rain now. We have been enjoying the prolonged Indian Summer of warm balmy days, but nothing lasts for ever. How true that is, is suddenly made very apparent when the front firebrick in the kitchen stove spalls into several pieces that fall into the fire box. It’s not a catastrophe as It’s happened before, nothing lasts forever. I know that. 
 
IMG_3994
 
I recently wrote a piece telling how this old stove has lasted us for close to 40 years and we bought it second hand even then. I shouldn’t have shot my mouth off!  Suddenly I’m up for a repair job again. I say again, because the original fire brick only lasted a few years and I had to quickly make a new one from our own refractory clay mix that I used for making fire bricks, kiln shelves and props to repair the kiln. I had to piece the old stove liner brick back together from the shards to approximate the shape and size needed. I hand formed the first brick into what I thought was the shape of the original one, with all its curves and cut-outs, such that it locks into place and is held there by gravity. Luckily, I made a plaster cast of that first hand made fire brick, so I could easily make some more. It was also lucky that Janine and I had made all of our own kiln shelves and props to support the pottery in our kiln during firing and so we had some special refractory fire brick mix already in stock. 
When we started out here we had no money and the kiln shelves used to load all the pots into the kiln were very, very, expensive. We were able to buy 2nd hand fire bricks to build our first big kiln for next to nothing, but the kiln furniture to fill it was prohibitively expensive. Our kiln was also quite large at 120 cu. ft. or 3.5 cu. m. This meant that we would need a lot of kiln shelves to be able to fill it with a load of small functional pots. Some potters got around this by making big planter garden pots that stacked on top of each other to fill the kiln, others made special shapes that sat inside each other, sitting on little wads,  still others cut special foot ring shaped grooves into the glaze surface so that  they could be stacked inside each other and didn’t stick during firing, and a few others tried making saggars, like ceramic cake tins, that held the pots and stacked on top of each other, but their life was short as they cracked easily and it was a lot of work to re-make them. We tried all of these singly and in combination.
IMG_3993
A failed, cracked, old-fashioned sagger. These cracks are typical of what happens to this kind of one-piece sagger.
IMG_3988
A dish with cut-out glaze ring in the centre, for the next pot’s foot ring to fit on top. Making for a vertical stack of bowls. In this way many bowls can be set on top of each other in the kiln without kiln shelves.
round kiln pack 6
Adding small fine wads to the foot ring of a dish. These are needed to allow for the slightly uneven surface of our ‘rough’ home made shelves.
Luckily, we got to work with Harry and May Davis in New Zealand in 1980, where we saw how they made their own kiln furniture quite successfully, so I just applied here, what I learned there, from the Davis’s. See; The Potters Alternative, Harry Davis, Methuen Australia, 1987. Harry had already been there and done that. He had already figured it all out and come to a very clever solution. As was his way. He used separate square kiln shelves and square corner props to make his saggars. Because they were already made in 5 pieces, they couldn’t crack apart like the old style one-piece saggars did. The Davis’s were a very impressive and admirable couple. Very ethical and socially minded.
To get the best outcome for hand made refractories we needed good kaolin. So we bought a train goods-car load of bulk, unprocessed, refractory kaolin, No157. from Phil Crossley, at ‘Puggoon’, near Gulgong. Approximately 10 tonnes. It was excellent quality, high alumina,  refractory kaolin, normally sold to firebrick companies to make high alumina fire bricks. The hardest part was having to climb into the rail car and shovel all the clay out into a hired tipper truck. Paying demurrage on the train car and paying the truck to wait for a few hours while I shovelled it all out was the most expensive part. It turned out that it would have been cheaper to have it trucked directly down to us and tipped out on site.
Nothing is what it seems.
round kiln pack 1round kiln pack 2 round kiln pack 3 round kiln pack 4
Packing our first kiln here with home made kiln furniture.
We were able to make all our own ‘inferior’ quality, hand formed, kiln refractories for many years. I say ‘inferior’ because we were not able to fire them high enough to make them really strong, but they were OK. Not brilliant, but just OK. I still have a little bit of this clay left. I stopped using it when I discovered my own local white bauxite clay substance, that although not as good as the ‘Puggoon’ kaolin, was local and within my 50 km radius, from where I have prospected nearly all of my materials. This is my equivalent of the 100 Mile Diet, applied to ceramics, the 50 km palette. It has become all part of our attempt to live as sustainably as we can manage.
In the past year I have extended this area a little to include a few more materials, as I find them on little trips into the countryside. I have also again bought some Gulgong kaolin to help to plasticise my local ground stone and washed gravel clay bodies. I must say it is such a relief to be able to throw almost normally again after ten years of struggling with the virtually non-plastic ground stone powder pastes. I’m changing and becoming a little more pragmatic in my old age. A step back from total self-reliance.
Nothing is perfect.

So I take one of the pre-fired stove fire bricks out of stock from under the hot water tank cupboard in the kitchen and replace the crumbled one with a brand new one. I make a mental note that the next time I see the stove firebrick mould down in the pottery. I must make two more stove bricks for stock.
Next it will be the cast iron grate that needs replacing. I can see that it is almost done in, but still has a few more months of life left in it yet. It is rusting away and is badly buckled up. I have two more of these home made replacements in the cupboard waiting in stock. so all is well there. The current one will stay in place until this one finally fails.
I found out very early on that cast iron driveway grating sections, when cut into 3 pieces with an angle grinder, work very well as replacement parts for the grate. They only cost $3 each and last longer than the original cast iron ‘raddle’ grate ever did.
I never like to throw out anything that isn’t completely worn out. So the old buckled grate stays for the time being. It’s not such a big job to replace this part when it’s had it. Self reliant maintenance is an on-going job that never ends.
Nothing is ever finished.
IMG_3853
So now the stove is back in working order again. In time for this cool, damp, first day of winter.
With respect, from the wannabe-self-reliant post modern peasant potters
Steve and Janine