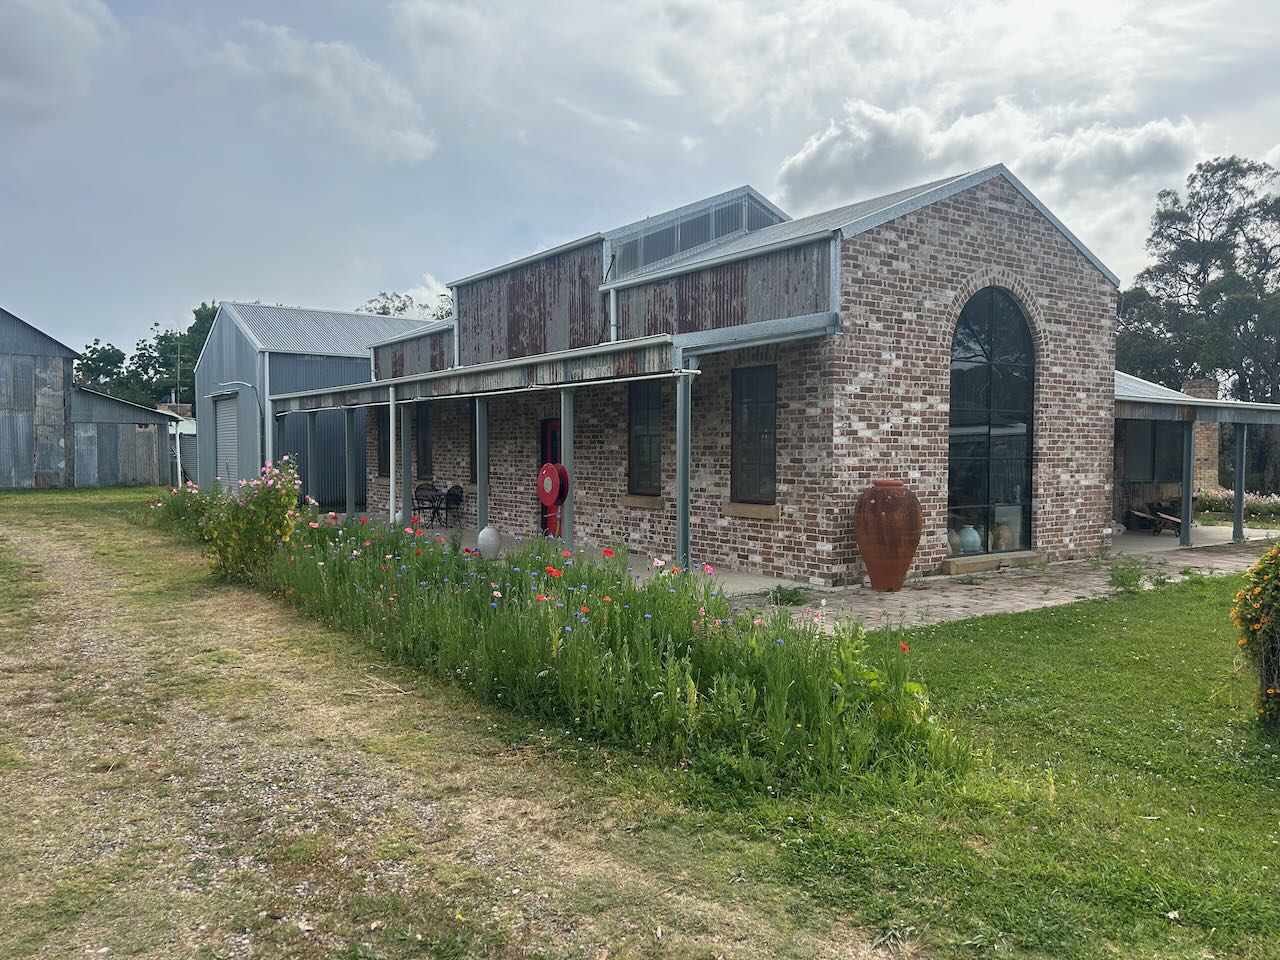
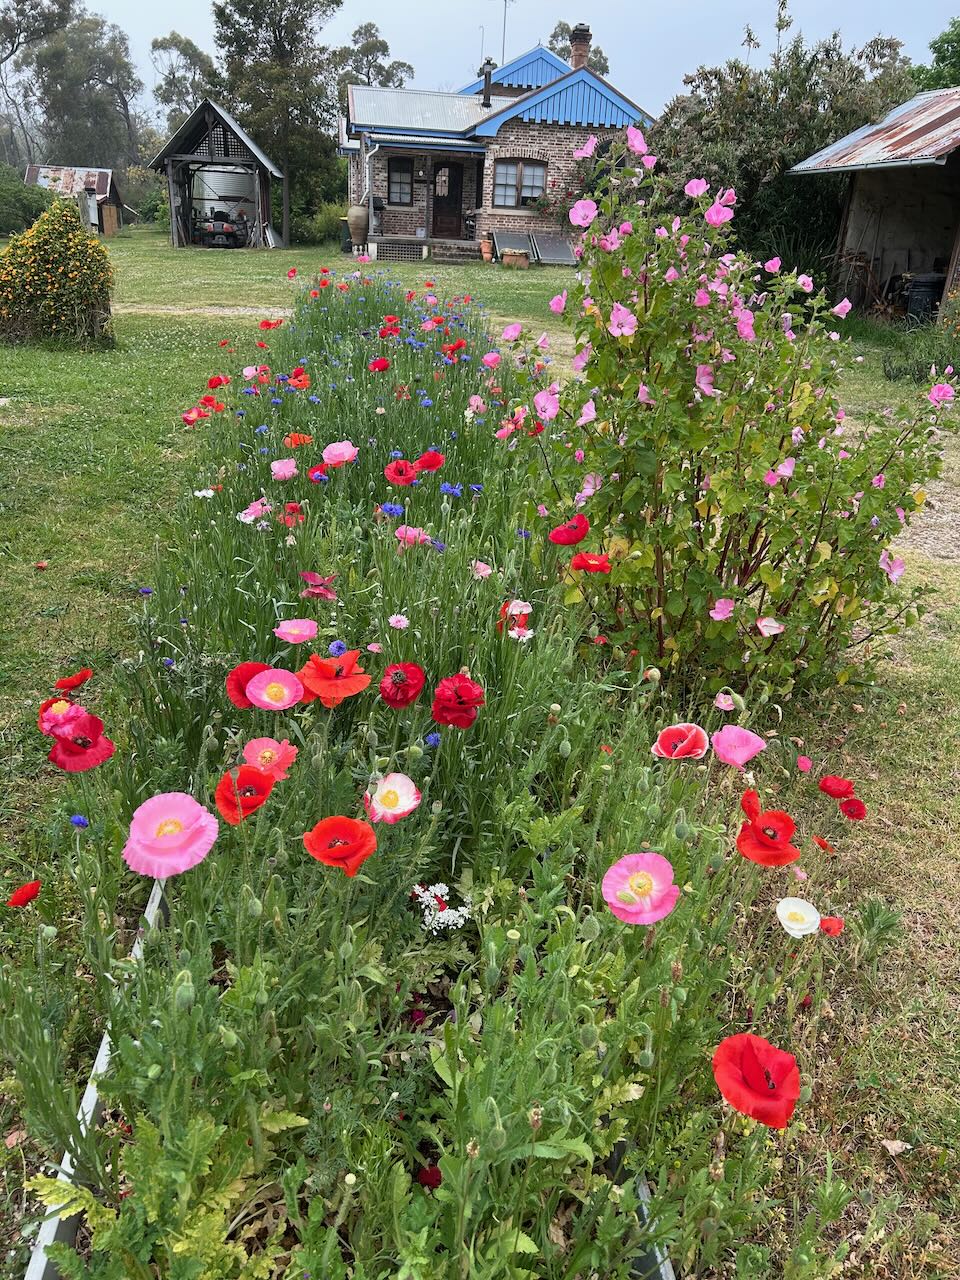
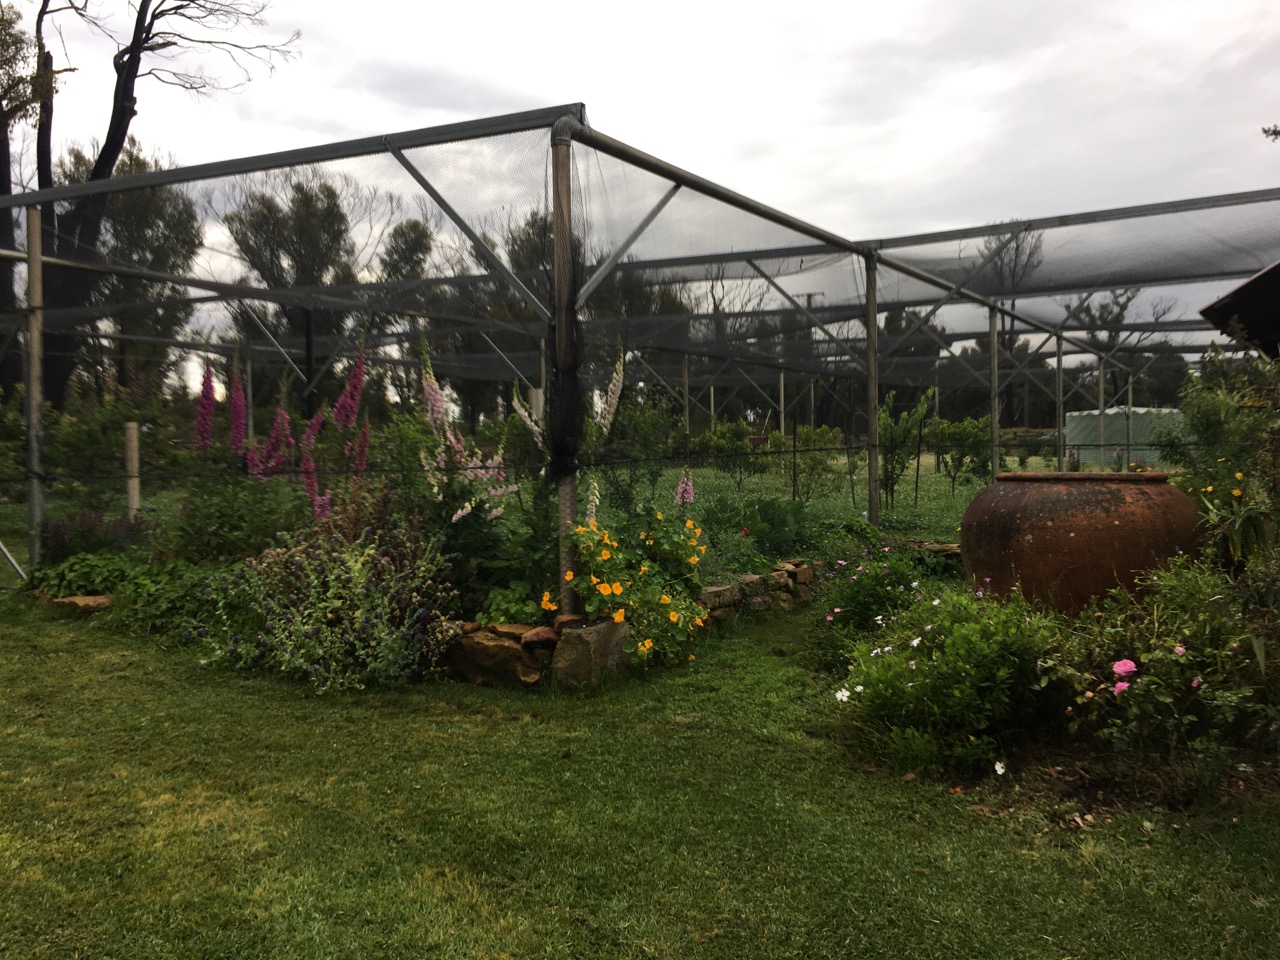
The pottery and its garden are looking great just now and for the next few weeks. All the spring flowers are coming out, just in time for the Open Studio weekends.
We are firing both electric kilns every day for the past week. We are getting all of the final glaze firings done. Working like a well oiled machine. We have been so lucky, that the sun has been shining bright every day – until today. It’s overcast with just a few spots of drizzly rain now and then. Just enough to stop me wanting to go out and do some gardening. I have two more firings on. One stoneware and one gold lustre firing. It’s all coming together.
We have managed to do all our firings on sunshine up until this afternoon, when it had turned quite overcast. Not only have we managed to glaze everything with our own electricity, but I have been careful to manage it so that I have kept both electric cars fully charged, at the same time and still been able to sell just a little of our occasional excess back to the grid to cover our daily access charges. It’s important to me to live a green, low carbon, passive, low energy, non polluting, life of minimal consumption, and we are doing it. We are managing it pretty well. But this afternoon, I will be withdrawing some expensive ‘green’ sustainable energy from the grid, for the last 3 hours of these current firings.
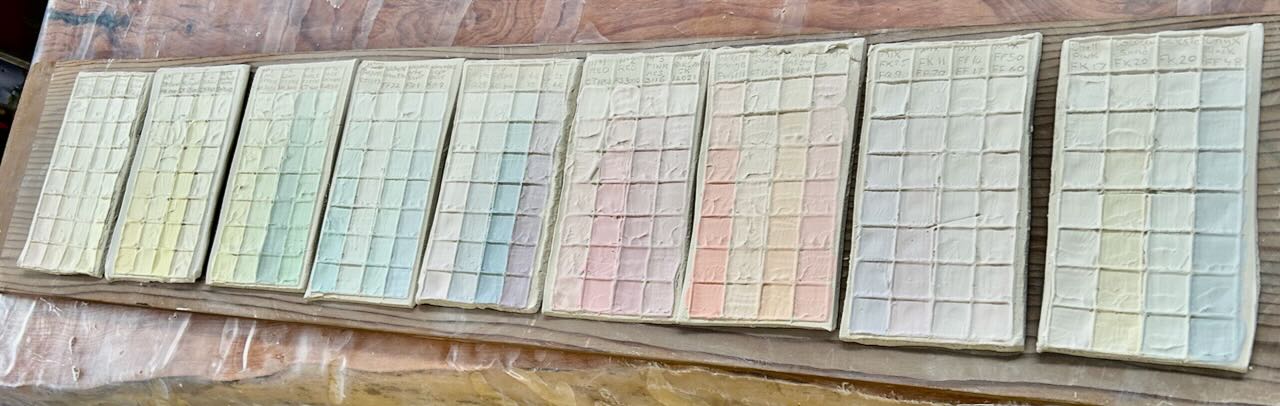
I have been experimenting with some new coloured pastel slips that I developed before we went to WA for the conference. See my previous post; More rain and tasting cider, Posted on
I weighed out almost 300 different pastel tones of stoneware slips.
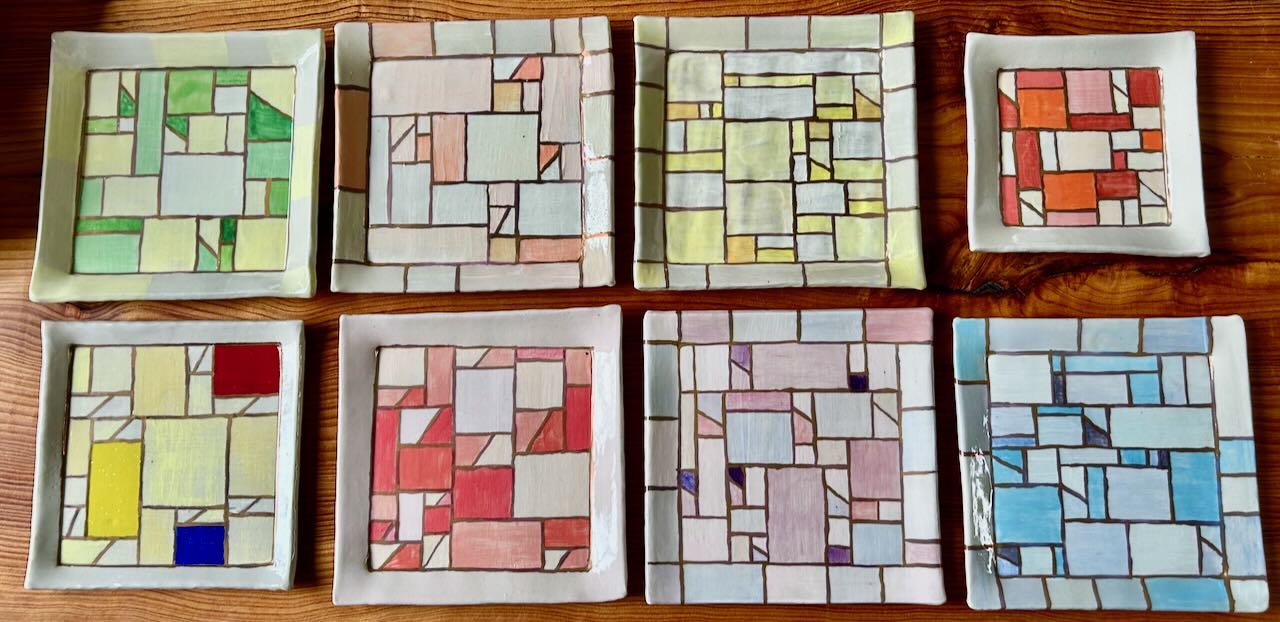
Using these colours, I tried making some new square plates, with a Korean inspired ‘Bojagi’ traditional fabric design. I’m very pleased with them, for a first attempt. I quite like the one were I ‘channel’ Piet Mondrian. Mondrianic bojagi!
I have also been making some more Korean inspired ‘Moon Jars’, but with an Australian twist. No photos yet, that are still in the kilns.
Please call in to see us on the next two weekends 1st/2nd and the 8th/9th of November. We will have tea or coffee and even cake for the first in and best fed.
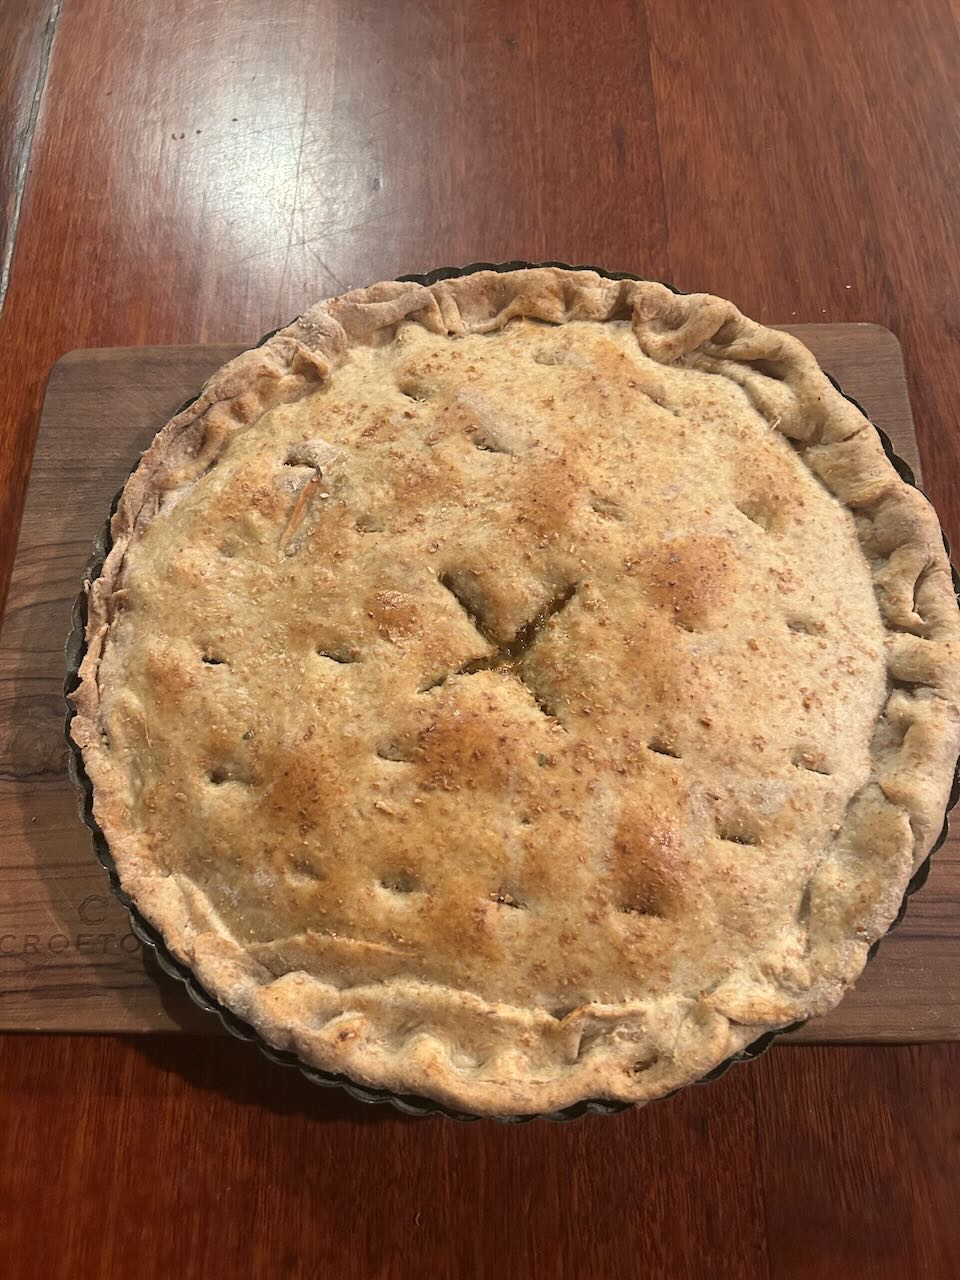
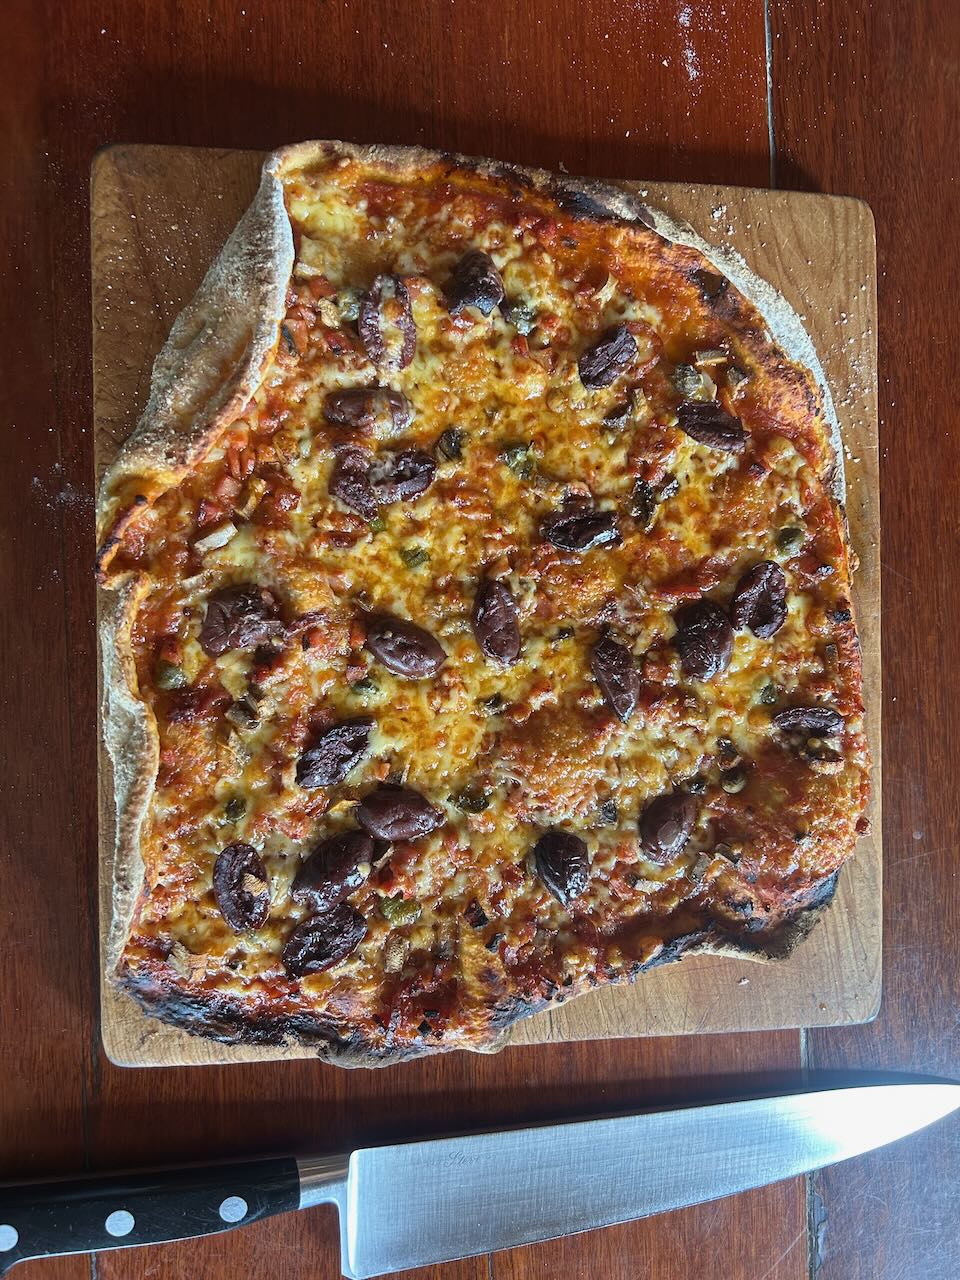
In the kitchen, I’ve been harvesting lots of leaks, and making chicken and leak pie. I’ve got quite quick at knocking up small batches of wholemeal pastry for pie crusts and pizza bases.
We may be very busy in the pottery, but there is always time to raid the garden for food for dinner and to cook up something wholesome and delicious for dinner.
Last week I was busy making clay for the fast approaching, up-coming weekend workshops. I made half a tonne of special clay body with a bit of extra grit, adding some more ‘tooth’ to the usual reliable body that I make up for us.
It took me two days. I can make up a quarter of a tonne of clay each day from scratch, pug it twice to ensure even mixing, then re-pugged through the Venco Vacuum pug mill and finally bagged and stacked. Along with sorting materials, weighing out, mixing, pugging and finally cleaning up, I have to have a day off in-between to catch up and to avoid over-doing it. Suddenly a week has gone by, but now it’s all done and ready for the next couple of workshops. We are pretty self reliant in the pottery here. Using our own electricity, our own rain water, using all the machinery and equipment that I have either made, re-purposed or re-built after the fire. I’m fairly proud of this minor achievement of self-sufficiency.
This week we have been very busy with all sorts of little jobs. We ate the last of our late season tomatoes. Surely this must be the last of the late crop. I’m not expecting the last 3 green toms to ripen very well, so these half dozen little self sown gems will probably be it. And very nice too. We cant expect to see another ripe tomato here until just before Xmas if all goes well with the spring planting for next summer’s crop. This must be some sort of record for us, eating home grown red ripe tomatoes for the garden in the last week of July.
What we are getting a lot of from the garden are cauliflowers, broccoli and Brussels sprouts, all the usual winter fare. last night I harvested the first pick of parsnips for our baked veggie dinner. Cauliflowers, broccoli, Brussels sprouts, parsnips, potato, pumpkin and onion, baked in the oven and then dressed in a cheesy béchamel source. A lovely, warming, winters dinner.
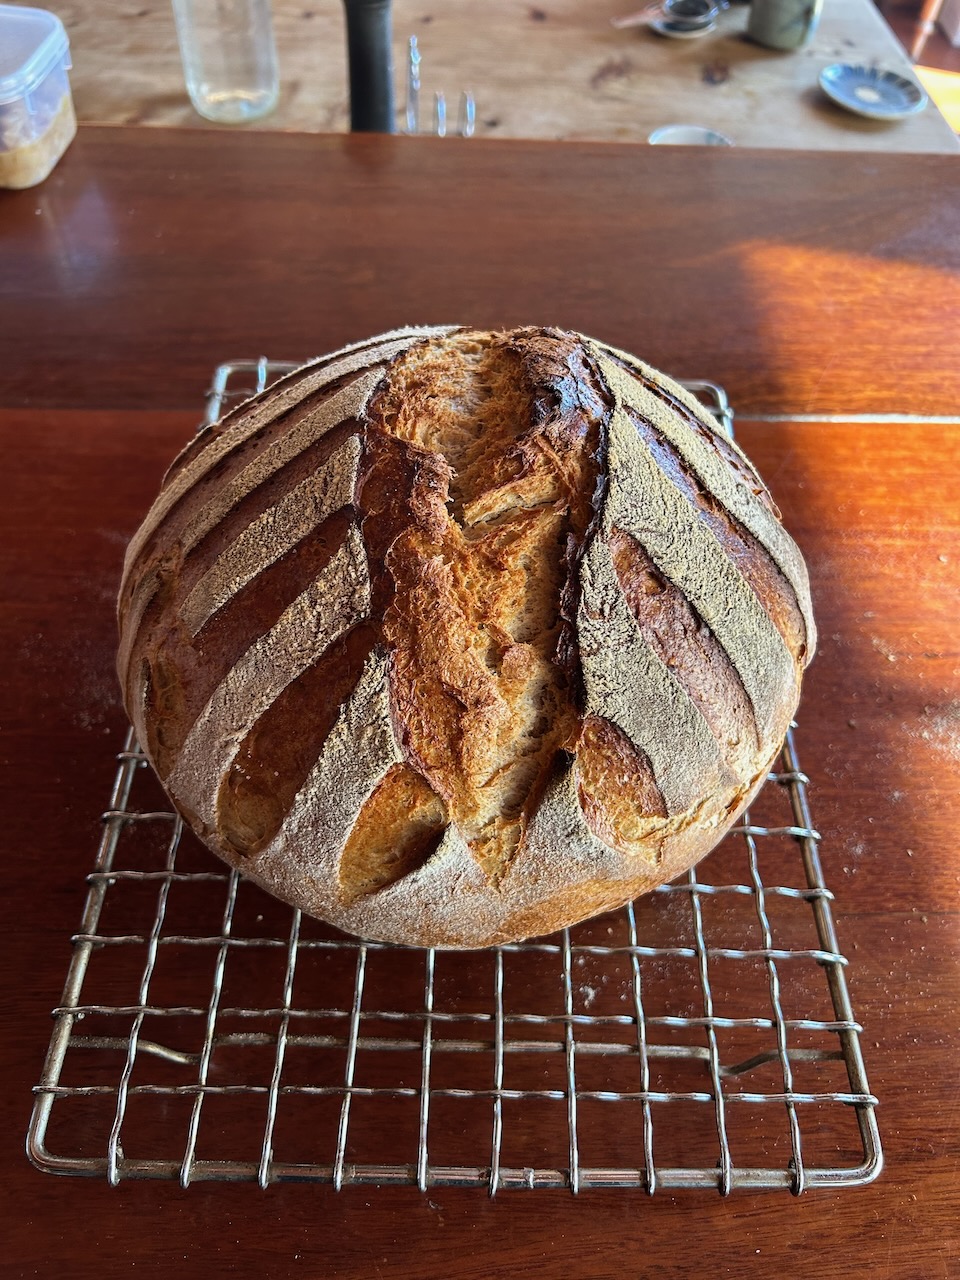
This weeks loaf of rye bread was the usual beauty. All crusty and solid dense rye inside. I use 50% of wheat flour as well so as the get it to rise, as there is very little gluten in rye flour, but it has fantastic flavour. I’m using locally grown and milled organic stone ground flours from the wheat belt of NSW. All grown, harvested and milled on site on the family farm.
This week we also hosted a weekend workshop, but held mid-week, Tuesday to Thursday for a student from FNQ. I had offered a glaze workshop last year, but only got 3 replies, and only one who paid. so it was cancelled. Not enough to make it worthwhile to run it. One potter enquired as to when the next one would be offered. I told her that it wouldn’t. Then she asked how much it would cost for me to do a private one-on-one workshop. She applied for a grant, was successful and so she was here this week. A year later than originally offered.
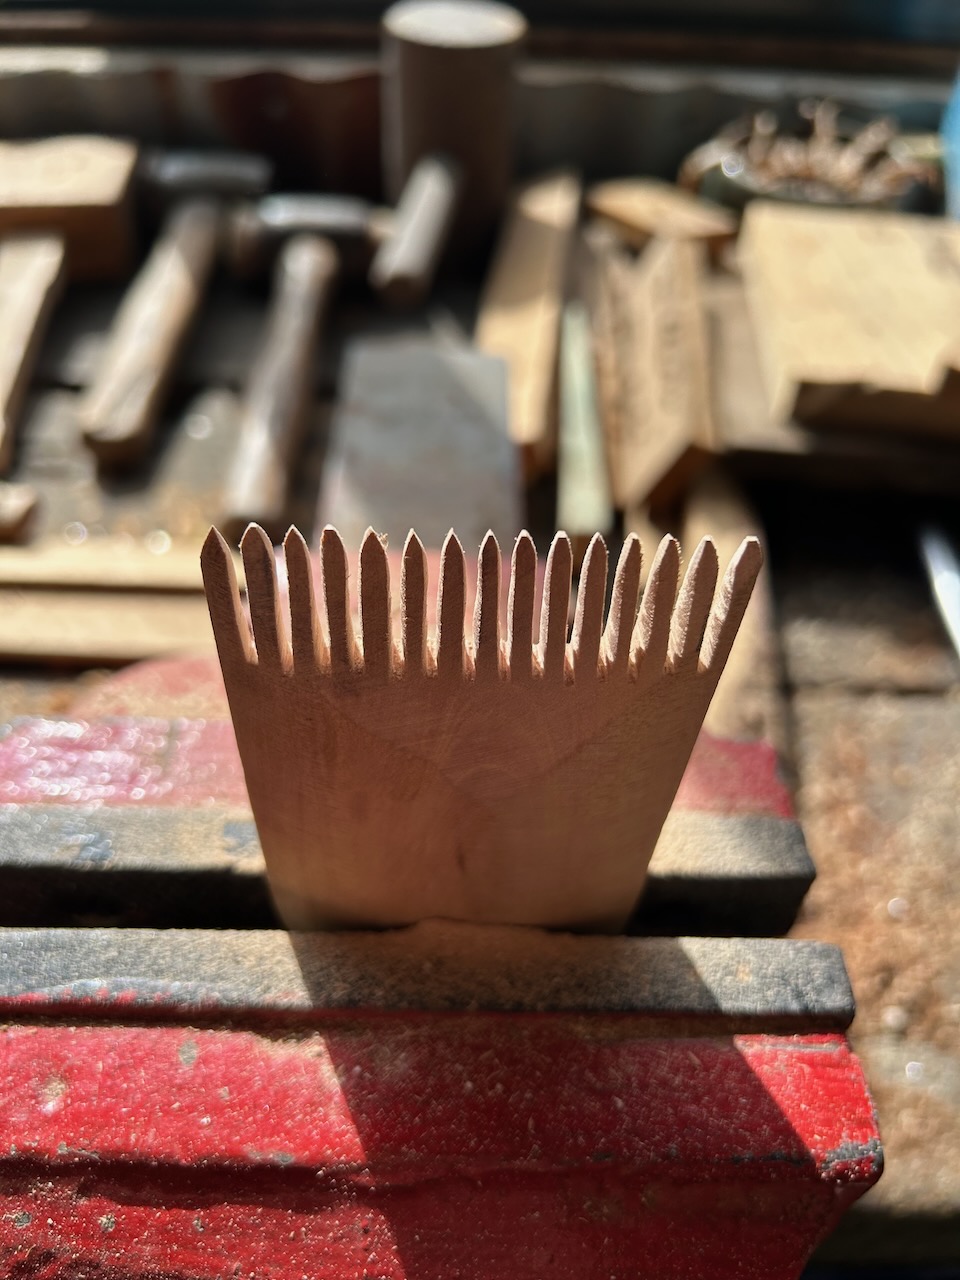
I spent Tuesday morning waiting for her to arrive from Queensland sieving wood ashes from the various fires, stoves, burn piles and kiln fireboxes, ready for use in our testing. I still had a little time, before she arrived, so decided to make a wooden pottery tool. At the last throwing workshop, my good friend Len Smith left behind a wooden comb that turned up in the throwing water. I really liked it and had got used to using it. It’s very comfortable in the hand and very useful. I really like it and was sad to have to give it back when Len next visited for the recent wood firing a week or so back. I decided to make one for myself, so I set to it and in half an hour I had one made. Not as good as Len’s, but I think that it is workable. and most importantly, it’s home made onsite from scrap wood. Not as good as the bought one perhaps, but individual, personal and much more meaningful. It still needs a little bit more sanding and finishing, then some vegetable oil, and it’s ready to go.
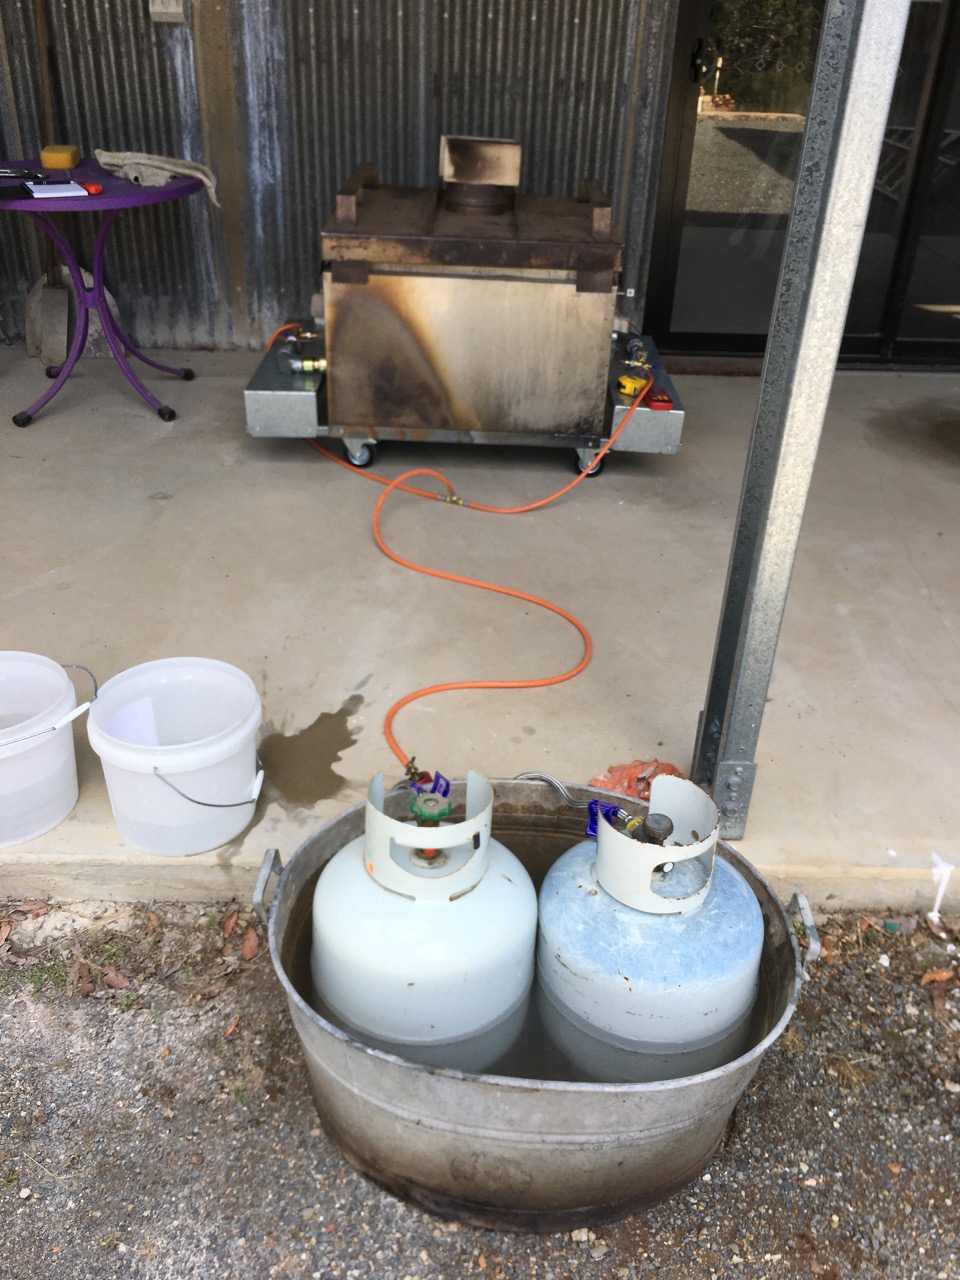
When my student arrived from the airport, we had lunch and spent the afternoon doing a geology tour of the Southern Highlands, collecting samples and talking geology, analysis and geological maps on the short drives in-between sites. Day two was spent crushing and milling our samples in the morning and then making glaze tests in the afternoon. We finished the weighing out in the late afternoon, having completed 13 test tiles, half for oxidation and half destined for reduction firing. We packed both the electric kiln and small gas kiln with our test tiles before dinner. The solar electric kiln was fired over night used the days stored sunlight energy from our battery, while we fired the small portable gas kiln during the evening into the night, a 3 hour reduction firing from 6 till 9.00PM.
Day three morning was spent unpacking the kilns, debriefing on the results, and then a theory class on glaze technology, choice of materials, Segar Formula and loads of other relevant related glaze topics. We finished on que at lunch time, in time for her return to the airport for her flight home. A fully packed, midweek-weekend, intensive crash course in geology, rock glazes and using collected ‘wild’ local materials. Ashes, gravels, arkose, clays and rocks, all alchemically metamorphosed from road side dirt into shiny glazes.
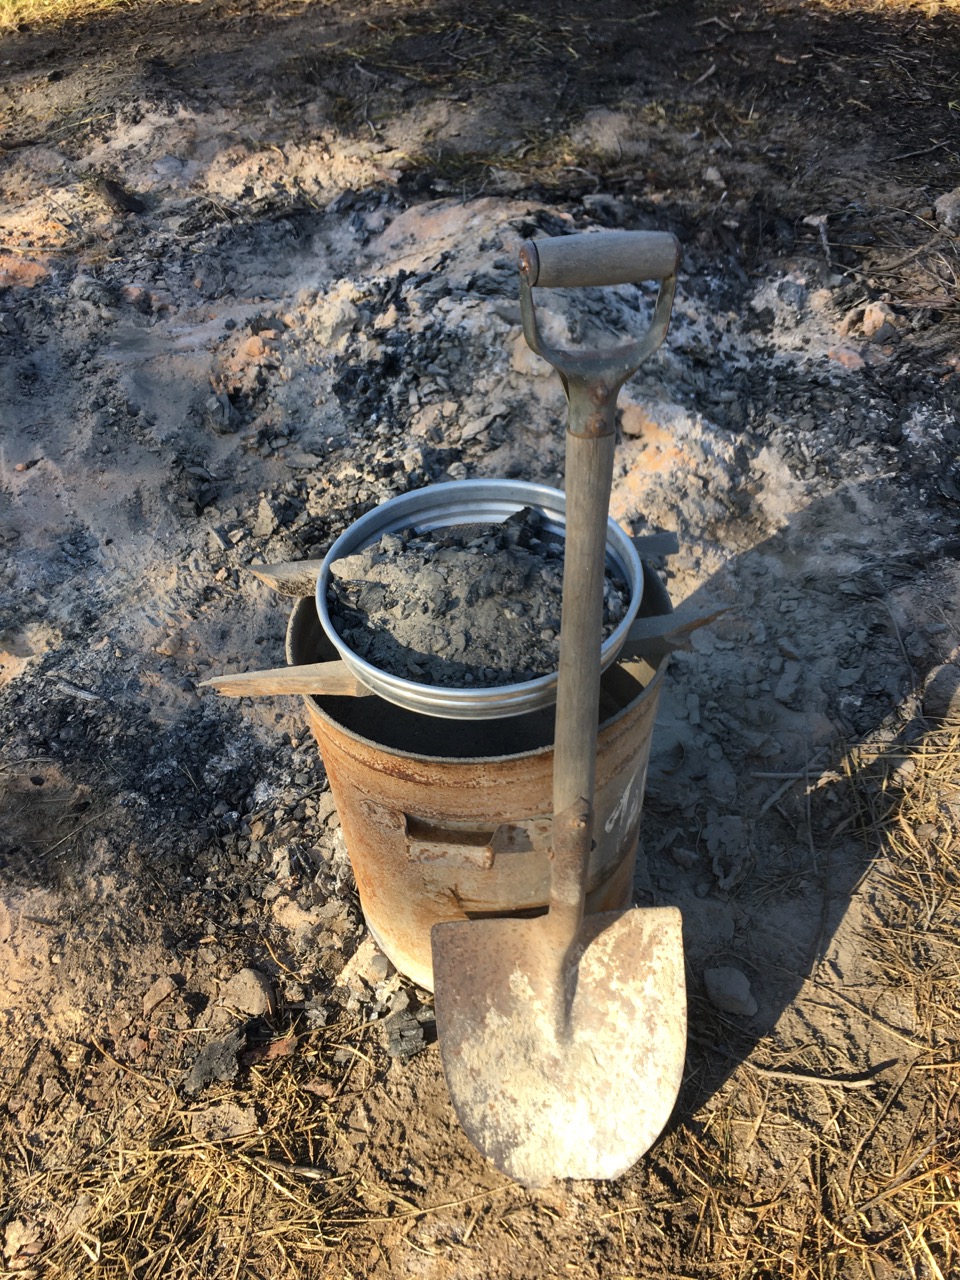
It’s a few days since the fire died down, I’ve been out there in the paddock collecting the ash for use in glazes. If I try to get there and dig up the ash before it is mostly cooled. I can get burnt, so I must be careful. I wear my oldest thick soled boots, as the ash and charcoal from the burn pile holds its heat in the ground for ages. I have melted the soles of my boots in the past, going in too soon.
If I wait for too long for it to cool, then there may be a strong wind, and that will simply blow away the finest particles of ash, scattering them all around the grassed area. Worse still, is rain, as that will dissolve and rinse away the solubles in the ash. Its the solubles that are the fluxes, and these are so important in ash. They are what makes ash melt and be so useful in glazes. It’s also important to me to be as self-reliant as possible, so I don’t want to waste this important potential resource. Doubly so in this case, as there are no more pine trees left on our land. The bush fire here was so hot and intense, that it killed every single one of them, and I haven’t seen any seedlings germinating out of the ashes in any of the paddocks. It’s the end of an era here.
In fact we did have a little shower of rain on the 2nd night after the fire was finished, so some of the usefulness of the exercise will have been lost. I won’t know how much was lost, until I get it all sieved, processed and tested to find out. I suspect that it will be too far gone to be useful to me as a glaze ingredient, but that wont stop me processing it to find out. We only have a burn pile like this once in a decade where we burn off stumps and big logs. It was the big pine logs that made this burn pile ash so attractive, as pine ash is very different to the hard wood eucalypt ash that we collect from the slow combustion kitchen wood fired stove every week. The slow combustion stove works best on hard wood fuel, and that is what we have plenty of here. Now especially since the fire leaving so many dead gum trees to deal with.
The ash from our Caribbean pine trees here is clearer, paler and more fluid than the ash from our local stringyback and bloodwood eucalypts. Their ash melts to a matt yellow/mustard colour, and is rather more firm, being lower in the alkalis than the pine. They are both good, just different.
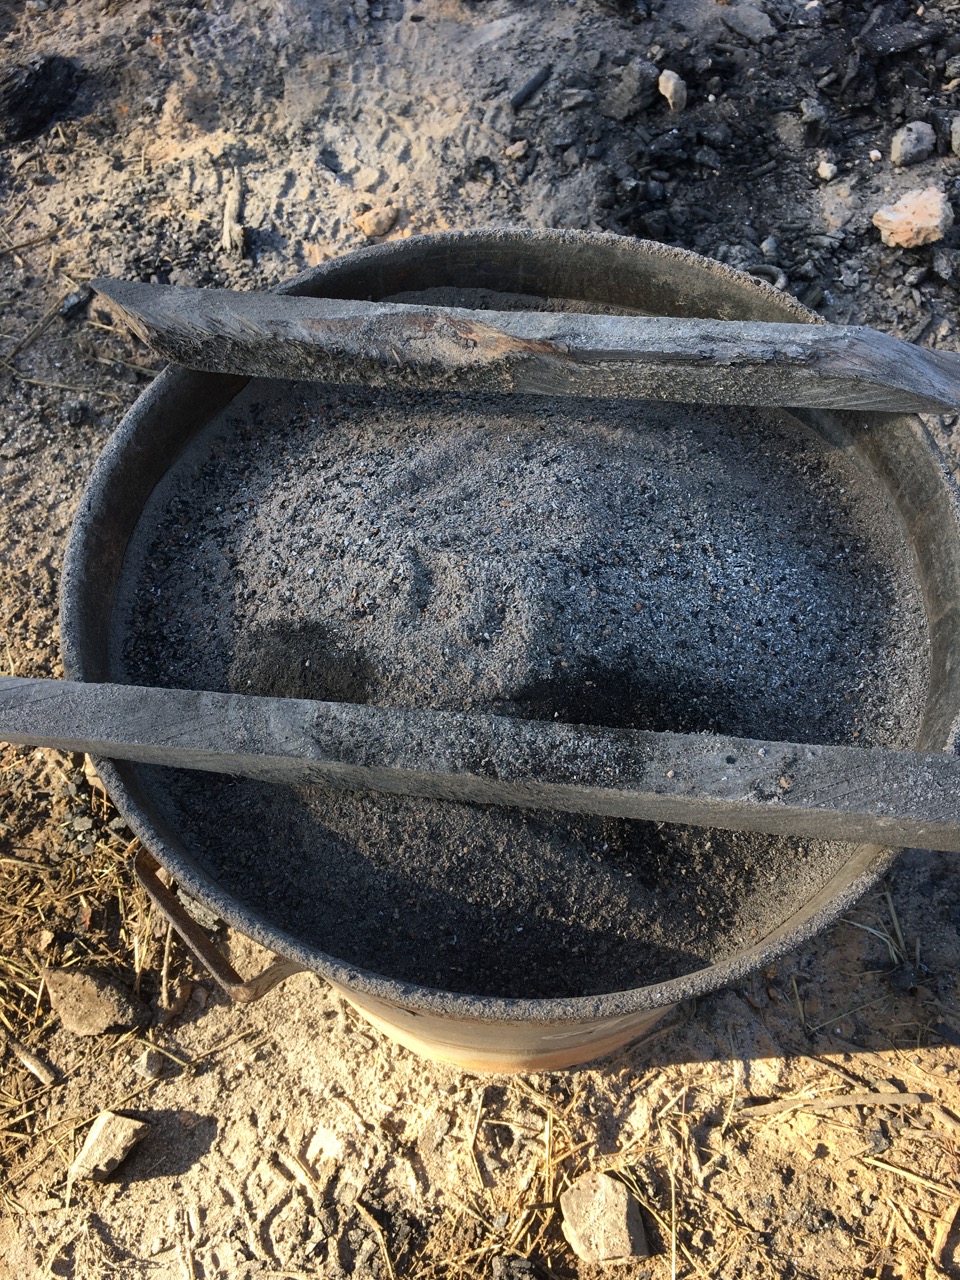
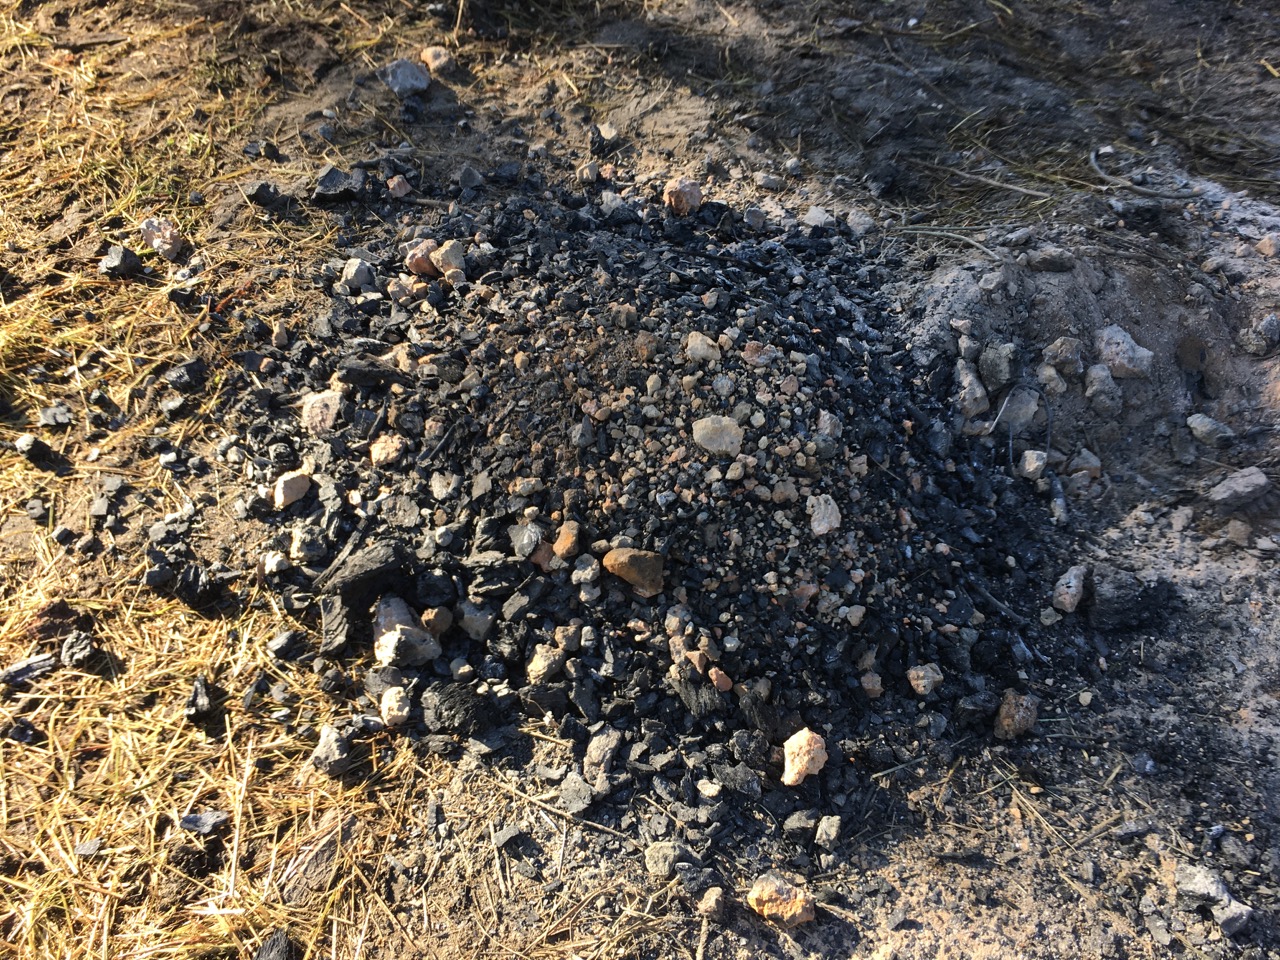
I set about digging into the pile of still warm ash and charcoal and found it littered with calcined lumps of subsoil from the tree roots and stumps. Not a good sign. I was hoping for a deeper cover of fine white ash before hitting the heavier stuff. Pity!
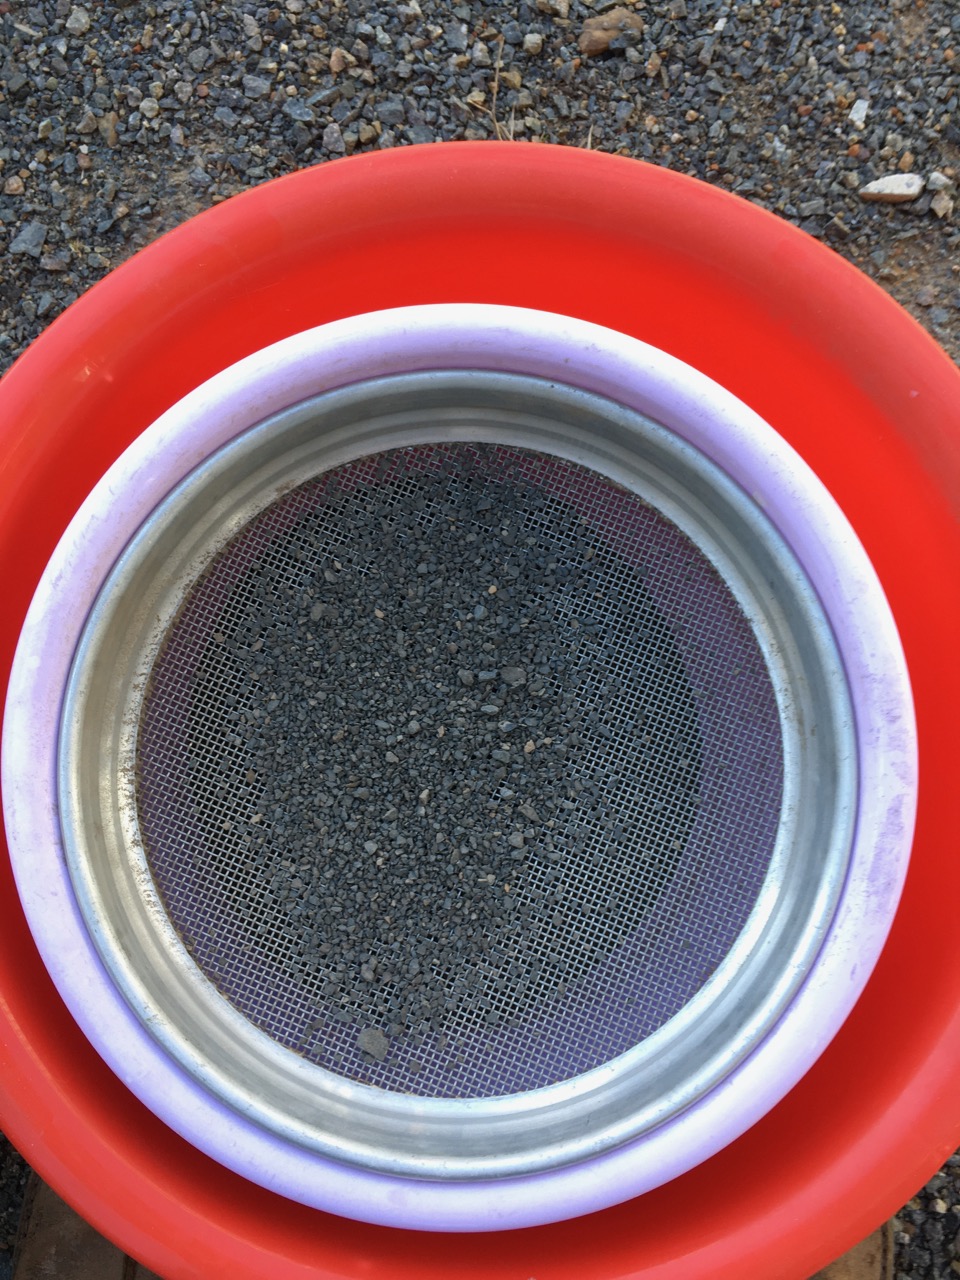
I started by sieving the ash through the first 6mm screen to get rid of the big chunks of soil and charcoal, then down through the next 2.5mm screen.
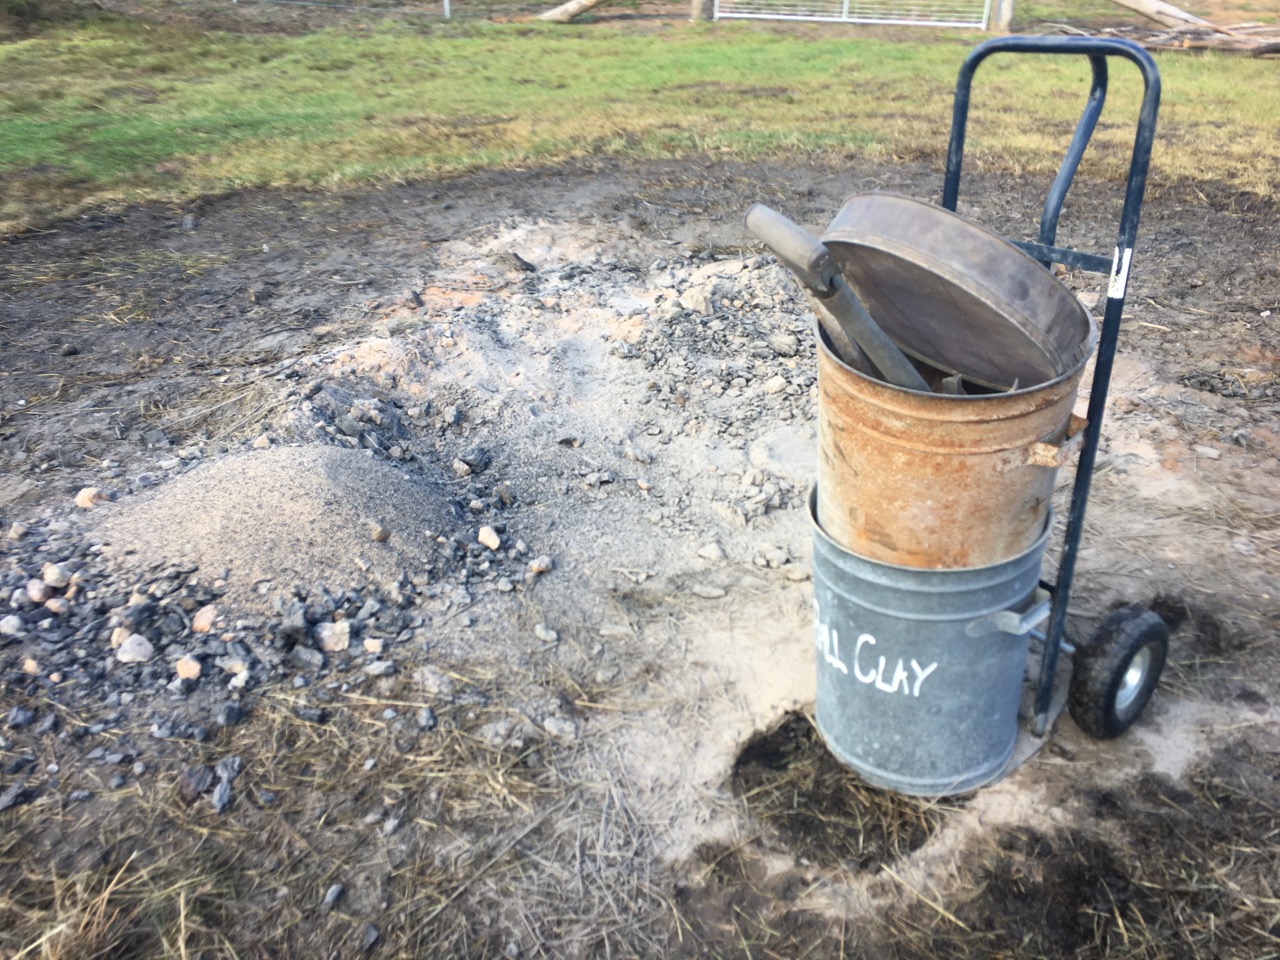
I filled a large metal garbage bin with this first pass. I use a very old and slightly ruined bin for this, as if the ash turns out to be still a bit too hot, it will melt a plastic bin, or burn the zinc off a good bin.
As the burnt pile of ash decreases, the pile of discarded sievings increases.
The second pass is through a finer sieve. It can’t be too fine at this stage as ash is very sticky, and will clog up a very fine sieve. I use a 40# lawn or about half a millimetre, as the ash will pass through this fairly easily. It’s a stainless steel sieve that went through the fire in one of the sheds that burnt down, but not too hot, as the fine mesh didn’t crumble. All my other sieves that were burnt, were completely ruined.
I shovel the coarse ash out of the first bin and back through the fine mesh into the second bin. 1 1/4 bins of coarse ash becomes 3/4 of a bin of fine ash. The discard pile grows as the fine detritus mounts up on top.
Mission accomplished for the time being. The next step is to wash the ash with water to get it to pass through a 100# sieve. But that is for another day. At least this garbage can full of dry ash will keep indefinitely in the storage room, safe from the vagaries of the weather.
All packed up and ready to go. This much ash will last a few years of glaze making.
Nothing is perfect, nothing is ever finished and nothing lasts.
In preparation for the up-coming Open Studio Weekends on the first two weekends in November, we have been hard at work making and firing to get everything ready in time.
We are still working on the pottery shed, as it isn’t quite finished yet. So much to do, but it is almost there. We have to stop the building work to concentrate on making pots now.
There are so many little bit and pieces of the building that need to be cleaned up and properly finished. The team of shed builders who erected the frame for us were working very quick and rough and left a lot to be desired in terms of details. I’m still finding out the places where they didn’t finish off the flashing, or didn’t put enough silicon in the joints here and there. But their biggest crime was not using metal screws with rubber seals, so I had to go around the whole building and squeeze silicon rubber over all the external screws to waterproof them. It probably only saved them $10. Such is the state of modern building trades. Fortunately we didn’t buy a high rise home unit with cracks in it, so we couldn’t live in it, but still had to pay the mortgage. That is so unforgivable. With all this rain over the past year, I’m still discovering places that leak or just little annoying drips that need attention.
The framing crew did at least get the frame level, square and true. I’ll give them that much. The building inspector from the council who came and inspected our job, told us that this was one of the better frames that he had seen. Some were so bad, he had to call the builders back to straighten it up.
Janine and I have done nearly all of our building work over the years as owner builders here for the past 45 years, but this rebuilding job was just beyond us in our ’senior’ years. Especially the scale of it and particularly after working ourselves into the ground with all the clean-up work that we did after the fire. By the time it came to start re-building, we just didn’t have the energy. After the 6 months of cleaning up, we were ready to hand over to a team who supposedly knew what they were doing when it came to erecting a steel fame shed — sort of. They were certainly well practised at making short cuts.
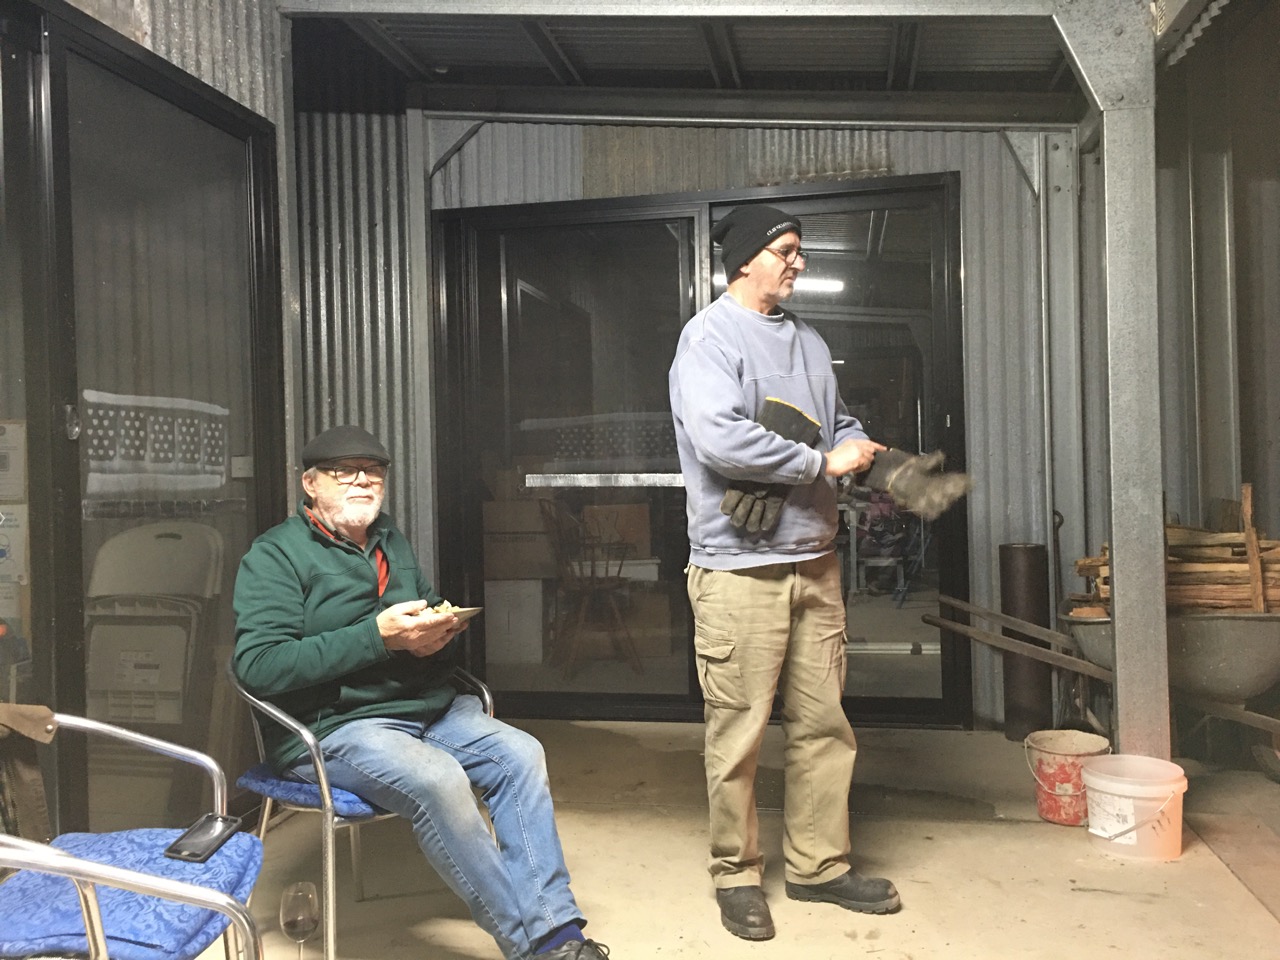
This last weekend we fired the wood kiln. This was our 2nd firing in this new kiln and we are still learning how it works and getting to know its peculiarities and character.
We had Len Smith, Rob Linegan to help and Jan Kesby called in after her workshop at Sturt Pottery to give us a hand, as she was in the neighbourhood.
Lighting the kindling fire with just bark and twigs.
The kiln at full fire, burning logs on the hobs.
Rob and Len doing their bit.
Jan Kesby showing us how it’s done.
We will unpack later in the week after it has cooled down.
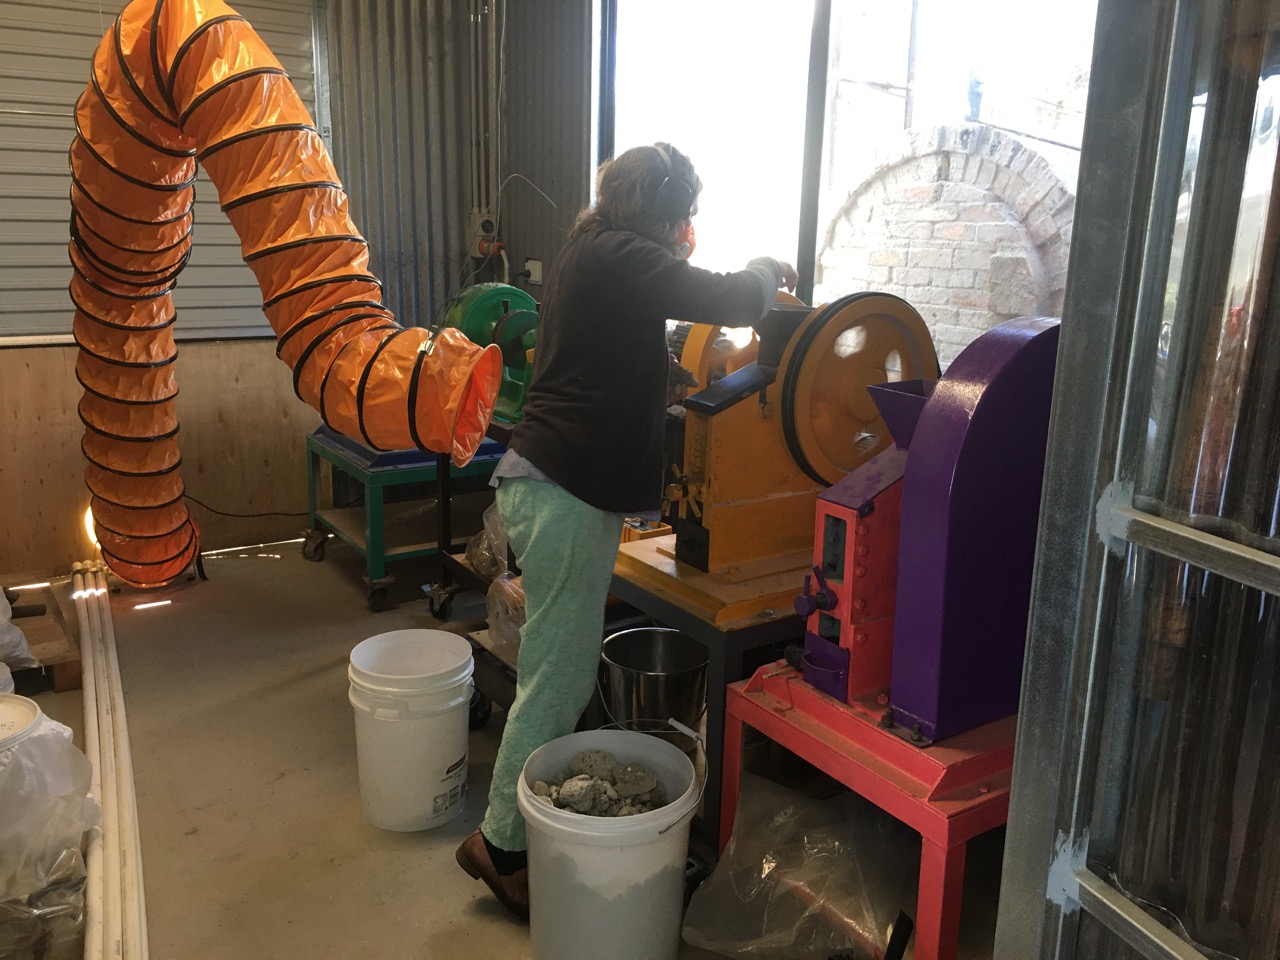
Janine putting stones into the rock crusher. Wearing her dust mask and with the exhaust fan pulling any dusty air from the room.
Janine has been crushing and grinding her beach pumice stones to make her sea-ladon green glaze. Made from just beach pumice and beach cuttle fish carapace ‘shells’.
She has also been making up her ‘Chun’ or ‘Jun’ blue opalescent glaze that she makes from the ash from the kitchen slow combustion stove.
They both require crushing and then grinding in the ball mills to get the best result. There are so many little steps that go into being a self-reliant artist that most people just couldn’t imagine.
Then there is the splitting and stacking all the wood for firing. Everything takes time. We only have pre-burnt logs to fire with now, as every tree on our block of land was burnt. So we have a few hundred tonnes of standing dead wood to use up for the rest of our lives, but regrettably, since it is already pre-burnt. It has lost a lot of its volatiles, saps, kinos and resins. This means that we have to invent new ways of using it up in the kilns, as it is a bit like firing with charcoal than fresh timber. It still burns, but with a short flame and doesn’t really crackle and roar like it used to pre-fire. One solution I’m trying is to split it finer, where that is possible, but the stringy back that grows around here has a very twisty, gnarly, well integrated grain, that doesn’t easily lend itself to fine free-splitting.
Another option is to re-build the fire box to adapt it better to this charcoal rich environment, larger and with more provision for burning charcoal and ember? That’s a much bigger job, so I’ll try all of the easier options first. Time will tell.
The Winter Solstice has come and gone and the days are going to start getting longer and the nights shorter, but the coldest part of the winter is probably yet to come.
We had a crackerjack frost a few days ago, Everything so shimmering silver/white. This mornings frost was much more mild, with just a light dusting of white in the open spaces, less so under the bare branches of the cherry trees in the Chekov orchard. The winter is really just starting, so there will probably be a few more frosts yet where that came from.
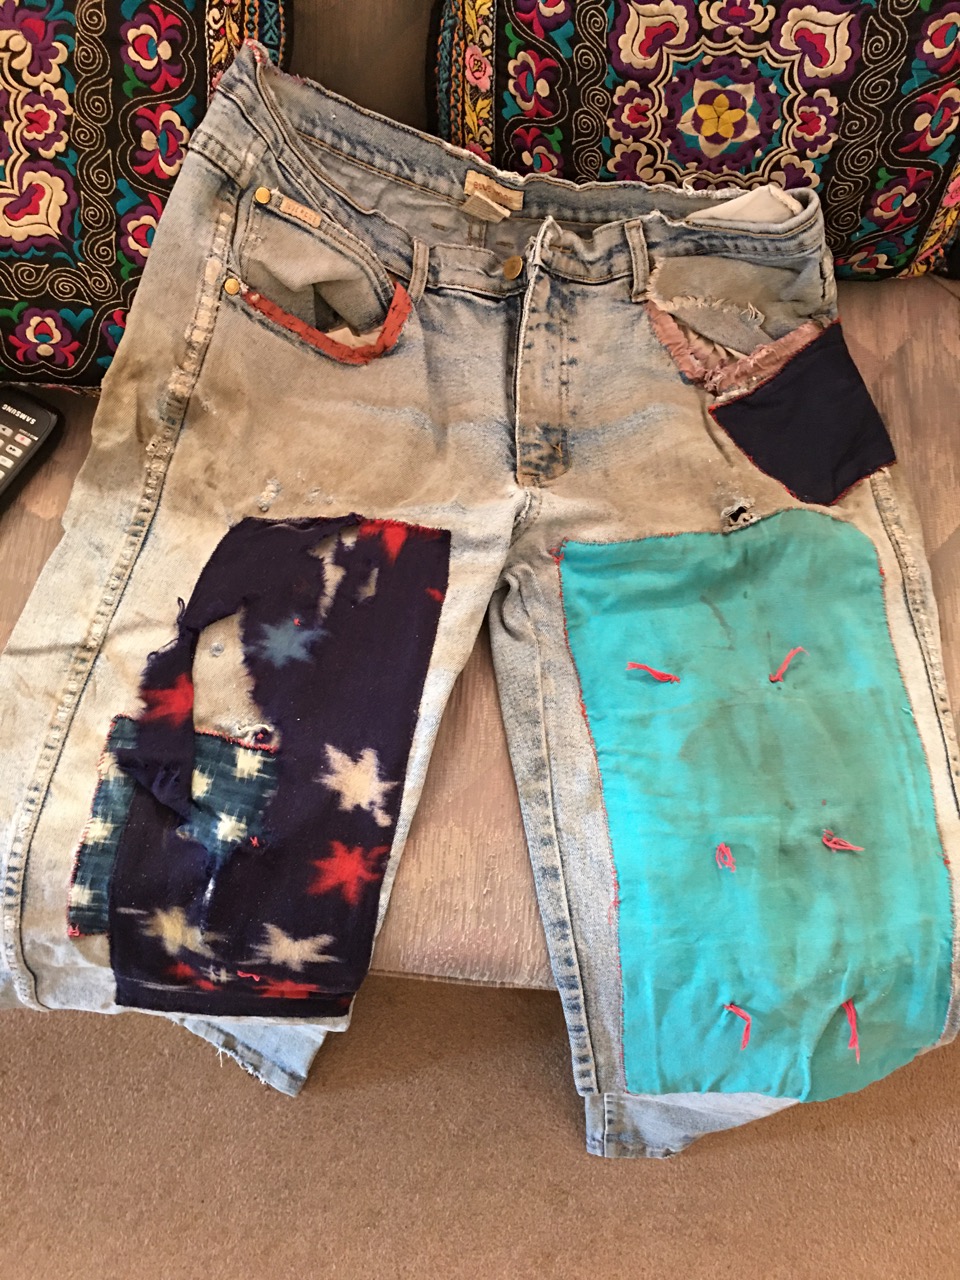
In the evenings, as there is nothing worth any attention on the idiot box. I have started to repair another pair of jeans.
These jeans are about 4 or 5 years old and the front of the thigh part has worn through. That is the most usual place for wear for me. They were the cheapest brand of jeans.
I had already replaced the pockets with some excellent, robust, pale yellow, linen cloth that should outlast the original flimsy thin cotton that wore through in just two years. Initially in the pocket where I carry my car keys, but then the other pocket as well, just after that. Then it was the edge of the pocket where the new linen lining meets the blue denim.
I reinforced that edge with some red Japanese silk, It look great when it was fist done, but it isn’t really up to it, and is already starting to wear through, so will also need to be redone in the future.
This time I added a front panel of indigo dyed cotton that I bought in the markets in Kyoto a few years back.
Every time I go to Japan, I keep my eye out for street or temple markets where I can find lengths of indigo dyed, or other interesting old fabrics. These are usually some old piece of clothing that someone has unpicked. The hems and loose threads along the edges where they were stitched together are often still visible. Much of this old cloth was woven on small looms in bolts that were only 13” or 330 mm wide. The clothes were assembled by stitching these long thin strips together, to get a wider fabric.
It is an interesting phenomena that cloth dyed in indigo does not rot easily, nor is it eaten by bugs. It seems to last for ages. It certainly makes good patches for work wear like shirts and jeans.
This pair will be good for another 5 years if I keep up the maintenance. The pair that I’m currently wearing to work in the pottery are over ten years old now and still going OK. They have patches on the thighs and knees, as well as new pockets.
My woollen jumper was new in 2004, or 2006. I can’t quite remember. It has quite a few patches of repair, where I have darned the holes where moths have eaten through it, or sparks from welding spatter, or possibly damage incurred during stoking the wood kiln have made holes in it. They all get mended in what I think is a complimentary colour to make a colour spill pattern. It’s a work in progress, It’s 16 or more years old and still very warm and wearable. I like to make things last. i never want to throw anything out until it is really worn out. Repair and reuse, before finally recycling.
I just took a selfie of my Sunday morning jeans. I never take selfies. This must be the first time I’ve put one up on this blog. I’m dressed up to receive some very good friends for Sunday lunch, so I’ve got my best pair on. I’ve been working on these jeans for many years now. I still work in them, but this morning they are straight from the wash and are lovely and clean and suitable to welcome our close friends in. I wouldn’t wear them to try and pass through customs in. But my friends know and understand me. They won’t be affronted.
Actually, I think that work like this is verging on Art. If not a work of art, then its certainly involves some aspect of creativity. I don’t just slap on ‘iron-on’ patches from a sewing shop. I mix and match the patterns and colours to suit my mood and proclivity. Well, that’s my story and I’m sticking to it.
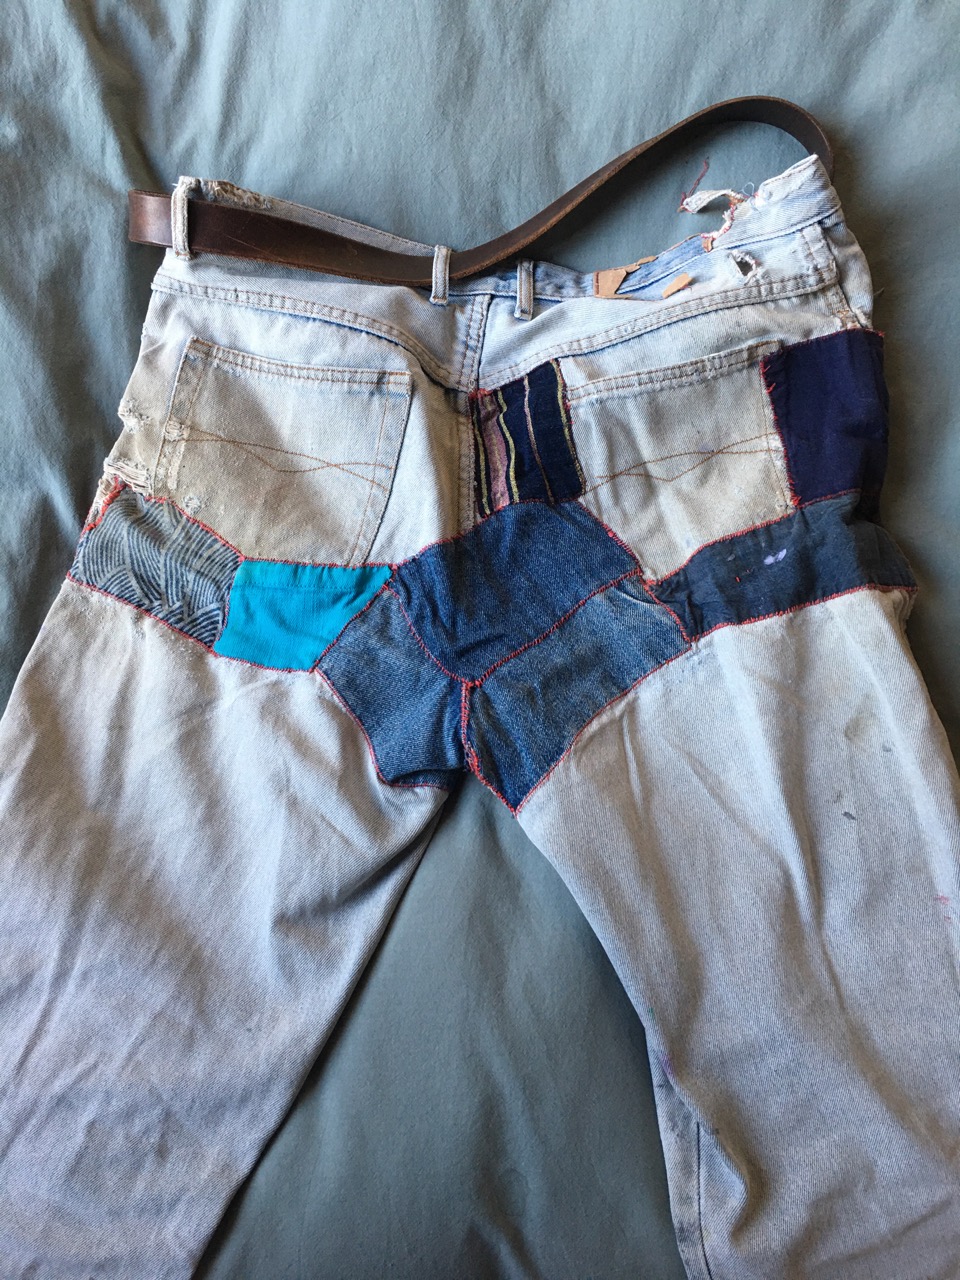
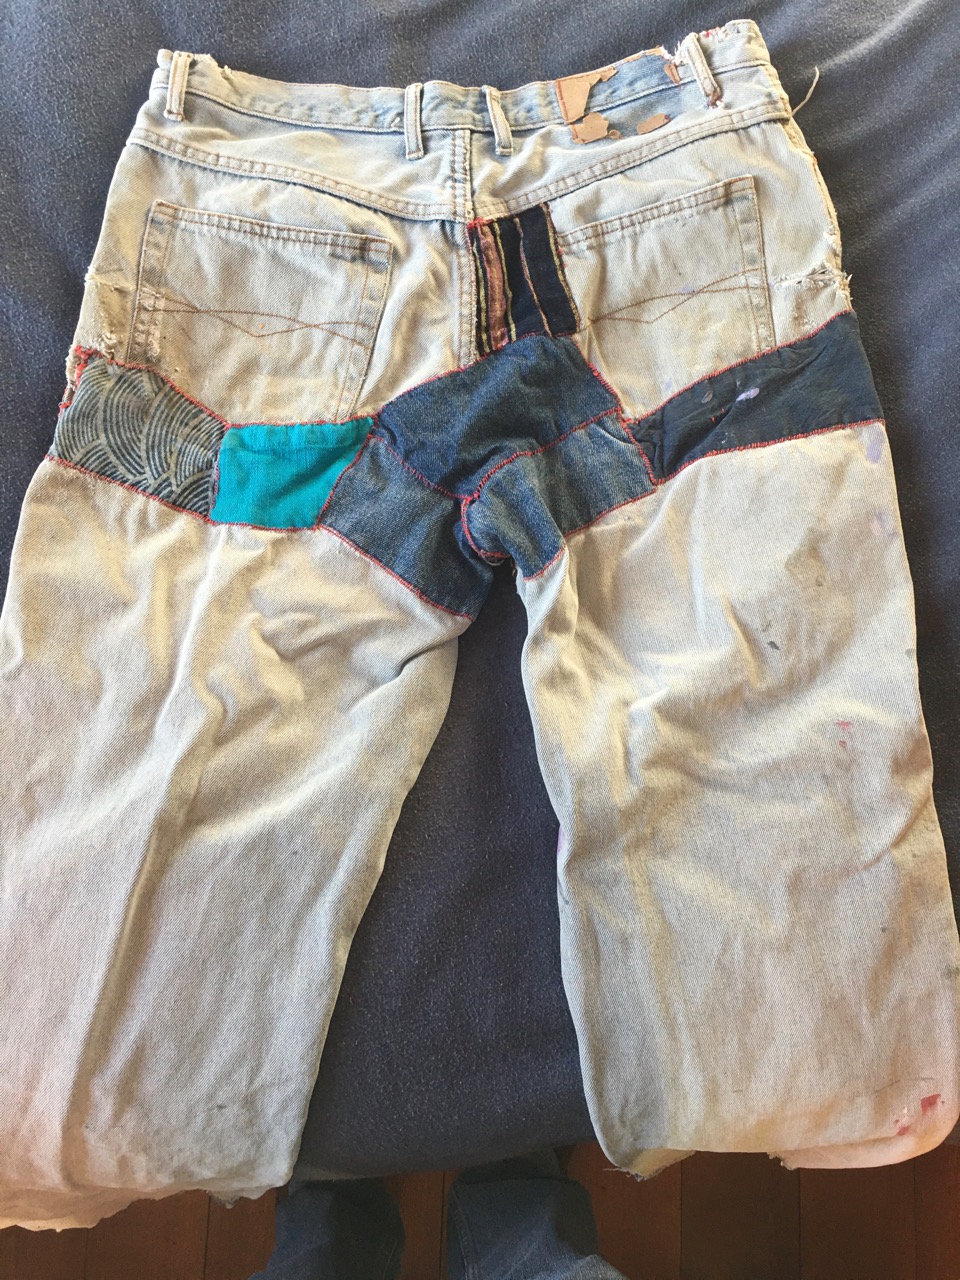
Even the arse end has some good work on it. This wear can be attributed to sitting on the wooden saddle-like seat of the ‘Leach’ treadle potters wheel. The slight swivelling/rocking motion of kicking the treadle with one lag seems to cause the butt end to wear out?
This last week we have made new batches of clay bodies to re-stock the clay boxes. I made a batch of the Mittagong halloysite porcelain from the mafia site.
This weathered stone is pretty well kaolinised, or in this case ‘Halloyositised’. This makes the stone somewhat crumbly and easily crushed, because the mica and felspars are broken down and weathered from igneous stone to clay-like substance, this causes the loss of some of the alkali fluxes. The stone can then becomes slightly clay-like and less stone-like. However, this creates a minor problem, because as the stone becomes more friable and easily crushed. It can’t be put through the jaw crusher, as the increased clay content causes the crusher to clag up and jam.
There are two options. The first is to calcine the stone in the bisque kiln and then it will become dry and brittle and easily passed through the crushers and ball mill, but this will completely eliminate the plasticity. So I only do this if I intend to make it into a glaze. If I want to make a porcelain body, I need to retain the plasticity, so the way to extract the clay fragment is to soak the sample in water and then stir it up into a liquid slip. This is called ‘blunging’. However, to make it smooth I need to pass it through a fine screen to eliminate all the unweathered stone fragments that are mostly mica, felspar and silica. In this case, I want all these minerals in the finished porcelain body to create the flux to make it melt and become translucent. This problem is solved by then ball milling the grit residue on the screen and then remixing to two together. This is a rather long and tedious job and I used to do this before I got a roller mill.
The best machine for this kind of material is a roller crusher. I actually have one of these, but it was burnt in the fire and I haven’t managed to find the time to rebuild it. It is still sitting on the crusher room floor in pieces waiting for a quiet period when I get bored 🙂 so that I can find the time to repair/rebuild it. Watch this space. Everything gets done eventually.
In the meantime, in the absence of any mechanical assistance. I decided to crush all the material by hand in the large mortar and pestle, before ball milling it all into a fine porcelain clay body. I used to do this when I was at Art School, as a mortar and pestle was the only piece of crushing equipment that I owned at that time. I still hand-crush small samples up to a few hundred grams for initial testing of field samples. It is quicker than cleaning out one of the bigger machines after use. It’s just like all those kitchen gadgets that are supposed to save so much time, but end up taking longer when you factor in the cleaning and drying, and then reassembly time before returning the gadget to the ‘stuff-that-is rarely-used’ cupboard.
Once reduced to a suitable size, it goes into one of the the mills.
After ball milling, I pass the slip through a 100# screen to remove any coarse particles that may have escaped milling. This halloysite porcelain sample has some iron contamination, so appears a little yellowish in the slip form. This slight iron staining helps create a lovely mahogany ‘flashing’ on the surface during wood firing. The Mafia halloysite is quite variable and is prone to severe warping during the early stages of firing when the halloysite tube-like clay crystals break down and re-form as fractured platelet shards. In this unstable state, the pots can warp and/or crack, so I have found it wise to blend it with some of my other porcelain clay or plastic kaolin to help stabilise the body.
In this most recently collected Mittagong halloysite sample, the site had been eroded badly in the recent rains and all the best and whitest, material had been washed away. Simply because it was the most friable and easier to dissolve in water. Because the remaining material was less weathered and darker than I wanted, I blended it with some more reliable local kaolin based porcelain.
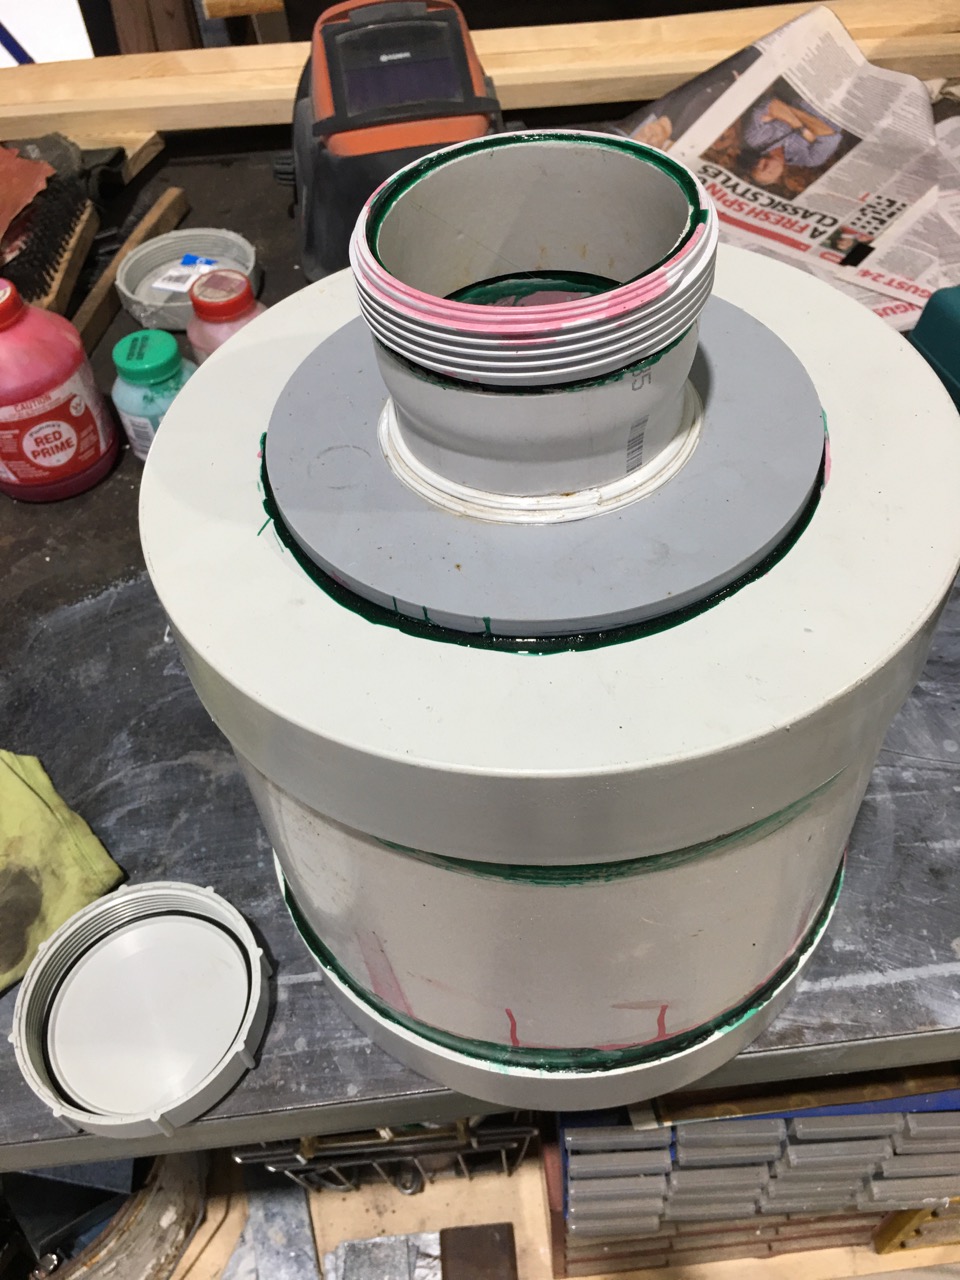
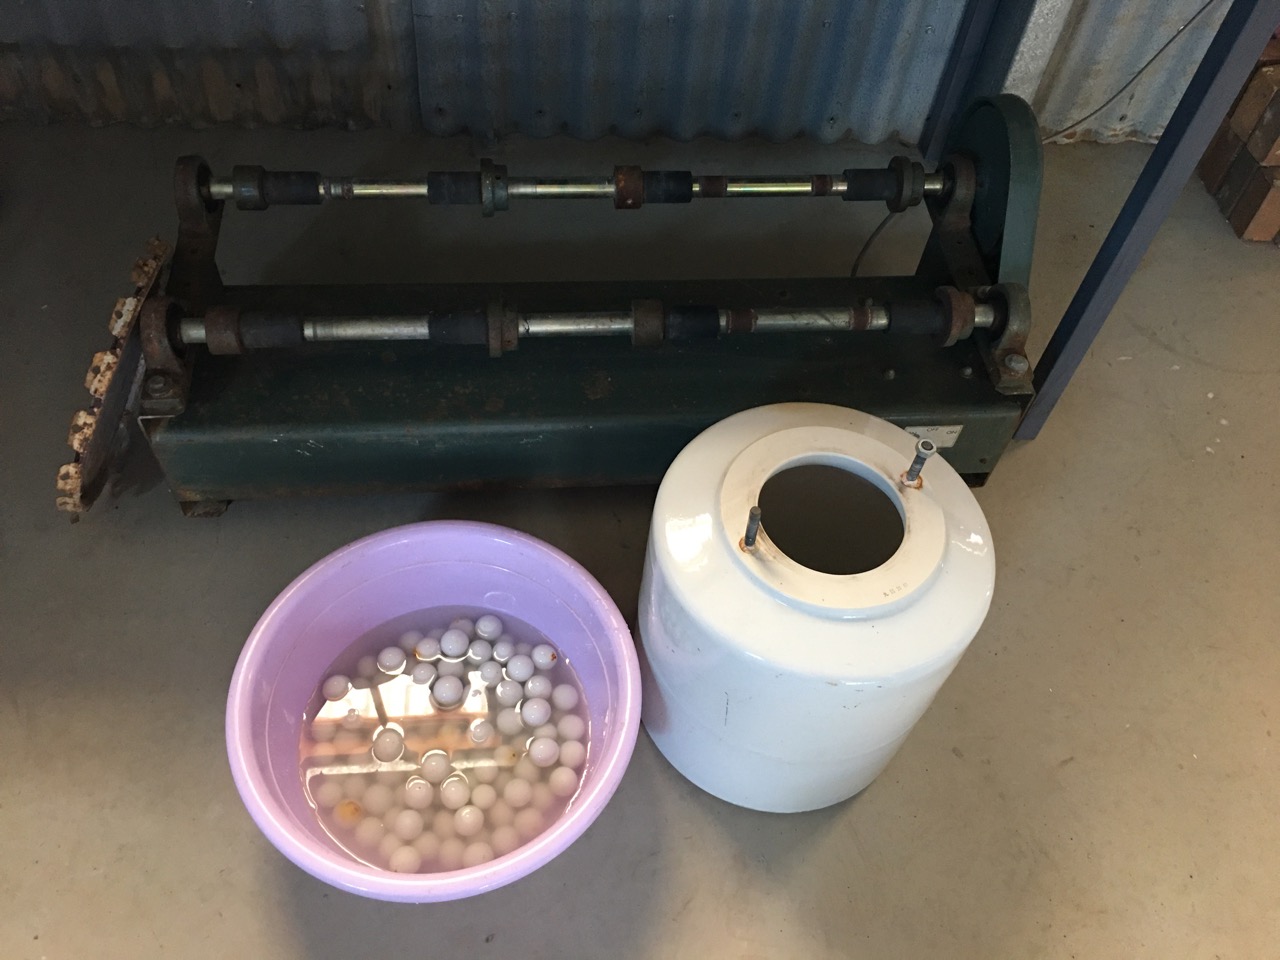
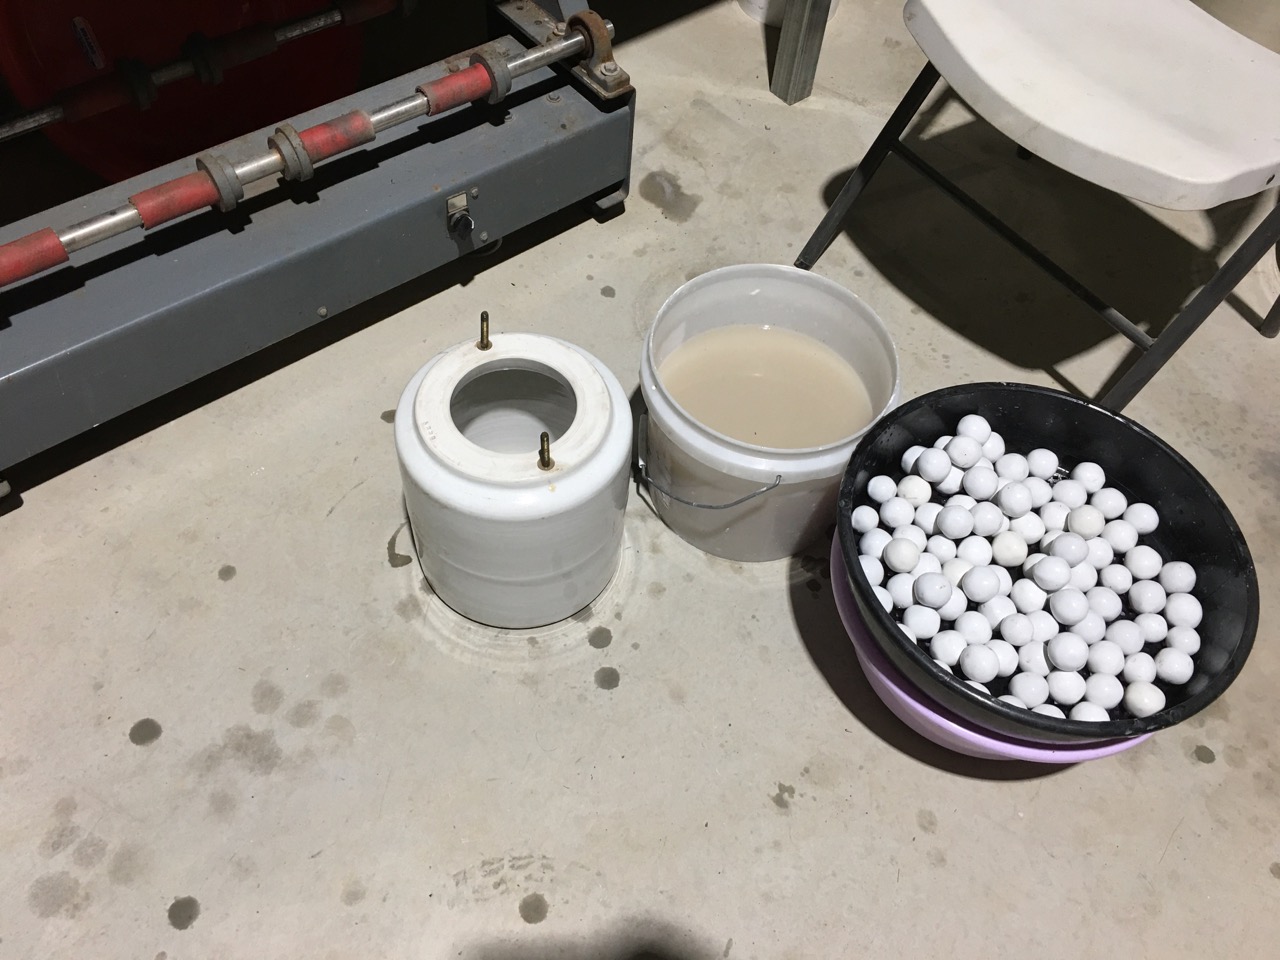
I have been finding the loading and unloading of the porcelain balls into the larger porcelain ball mill jar quite hard on my back as I age. I have had to load the balls in and out in small handfuls. It takes time and requires and lot of bending and effort. So recently, I built myself a couple of new PVC ball mill jars. These a significantly lighter, although the porcelain balls still weigh quite a bit. For these lighter PVC jars, I made a stainless steel mesh inset for the spare lid. I can easily change the lids and simply up-end the jar over a bucket and let the charge all drain out. I partially refill them with fresh water, roll them along the floor to rinse the balls clean then re drain into the bucket.
The jars are then ready for a refill and to be used again. The balls never leave the jar. So much quicker and easier.
These new PVC jars are made from cheap, standard, over-the-counter, plumbing parts. They are larger, but lighter, than the old one, and I made them so that I can fit two of them on the roller at once. So now I’m able to get more done in the same amount of time..
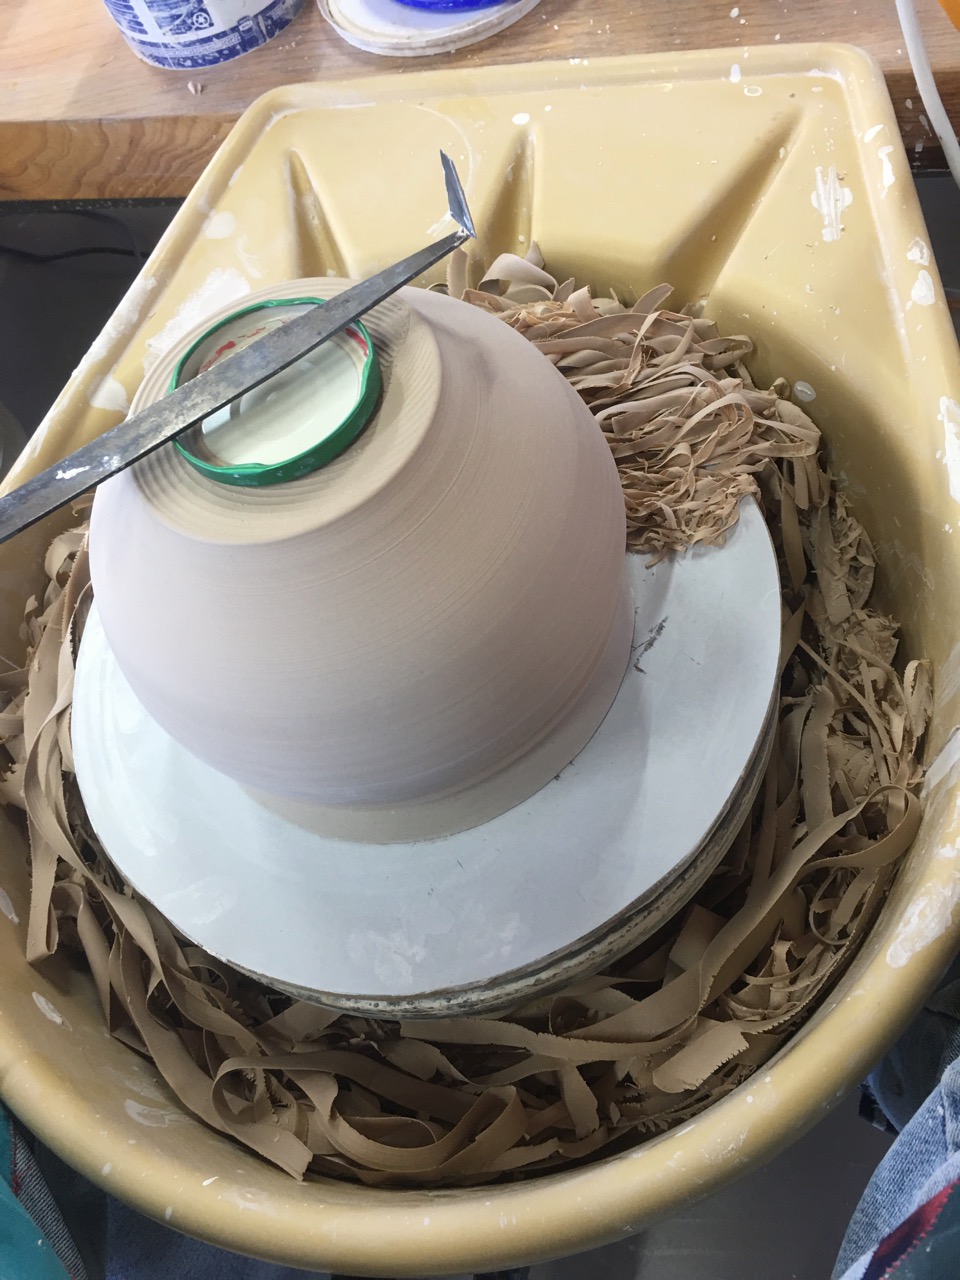
As I have been throwing and turning the porcelain. I have been collecting the turnings, they pile up like so much fettuccini pasta strands in the hopelessly small Shimpo wheel tray that need to be emptied every few minutes. In the old pottery, I took the plastic trays off and had the wheels in enclosures, so that all the turnings just spilt out onto the floor, but it was a big job to clean it all out and wasn’t suited to the sort of work that I now do, that involves using a large number of different, experimental, small batch, sericite and halloysite porcelain bodies.
So I persist with the tiny tray so that I can recycle each different sericite porcelain body separately to maintain its integrity.
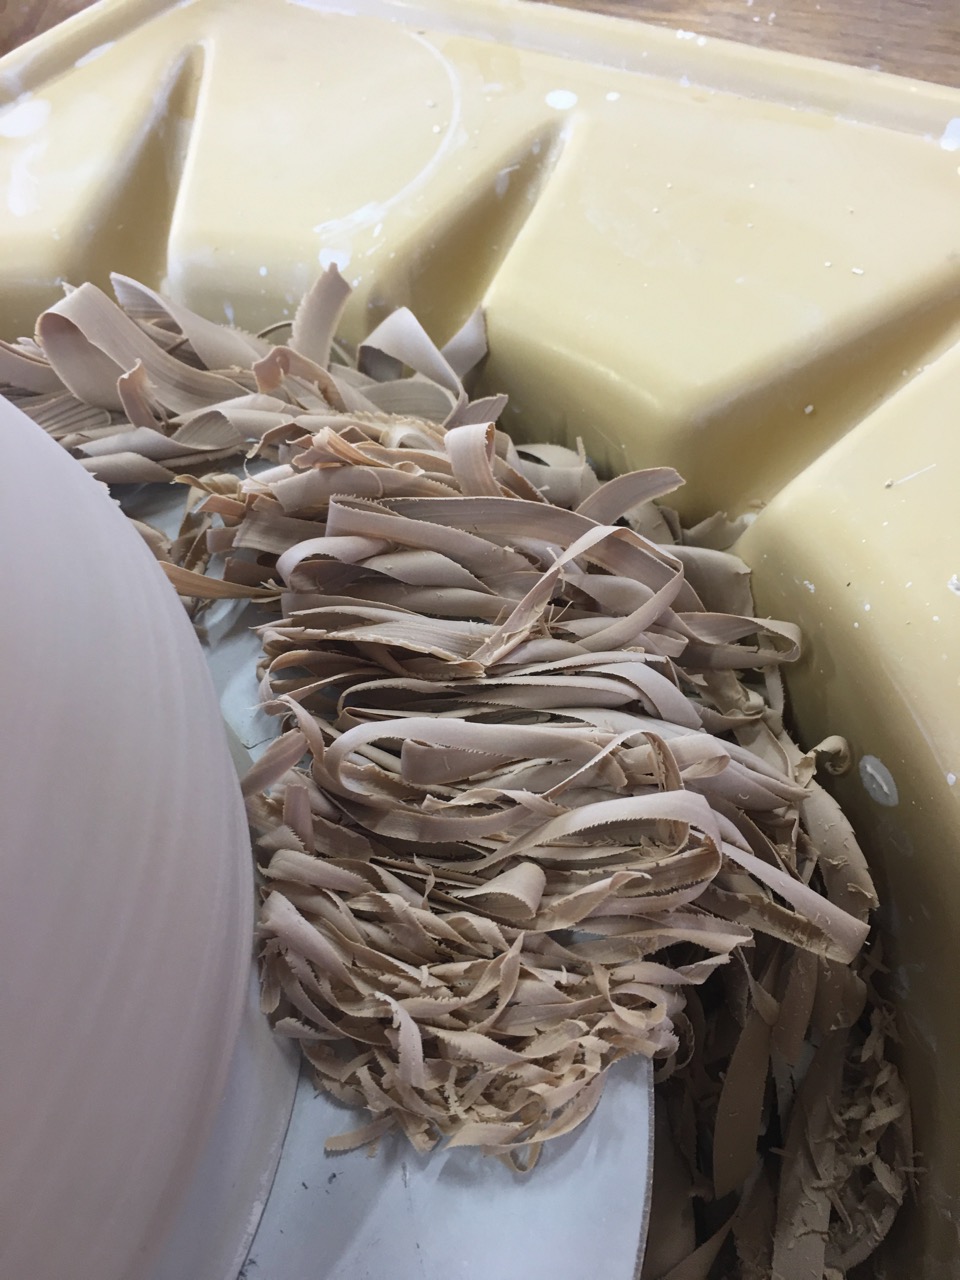
I have been collecting and drying the turnings, then calcining them in the bisque kiln and finally ball milling them to a fine powder to make a porcelain glaze from the porcelain body.
The raw, dried turnings
The same turnings after being fired in the bisque kiln. The low temperature oxidised firing turns the calcined porcelain slightly pink.
The powdered glaze material in the ball mill after milling, ready to make porcelain glaze. 80% porcelain body and 20% lime.
A simple glaze recipe, Self reliance all the way along the line. DIY.
Nothing is perfect, nothing is ever finished and nothing lasts.
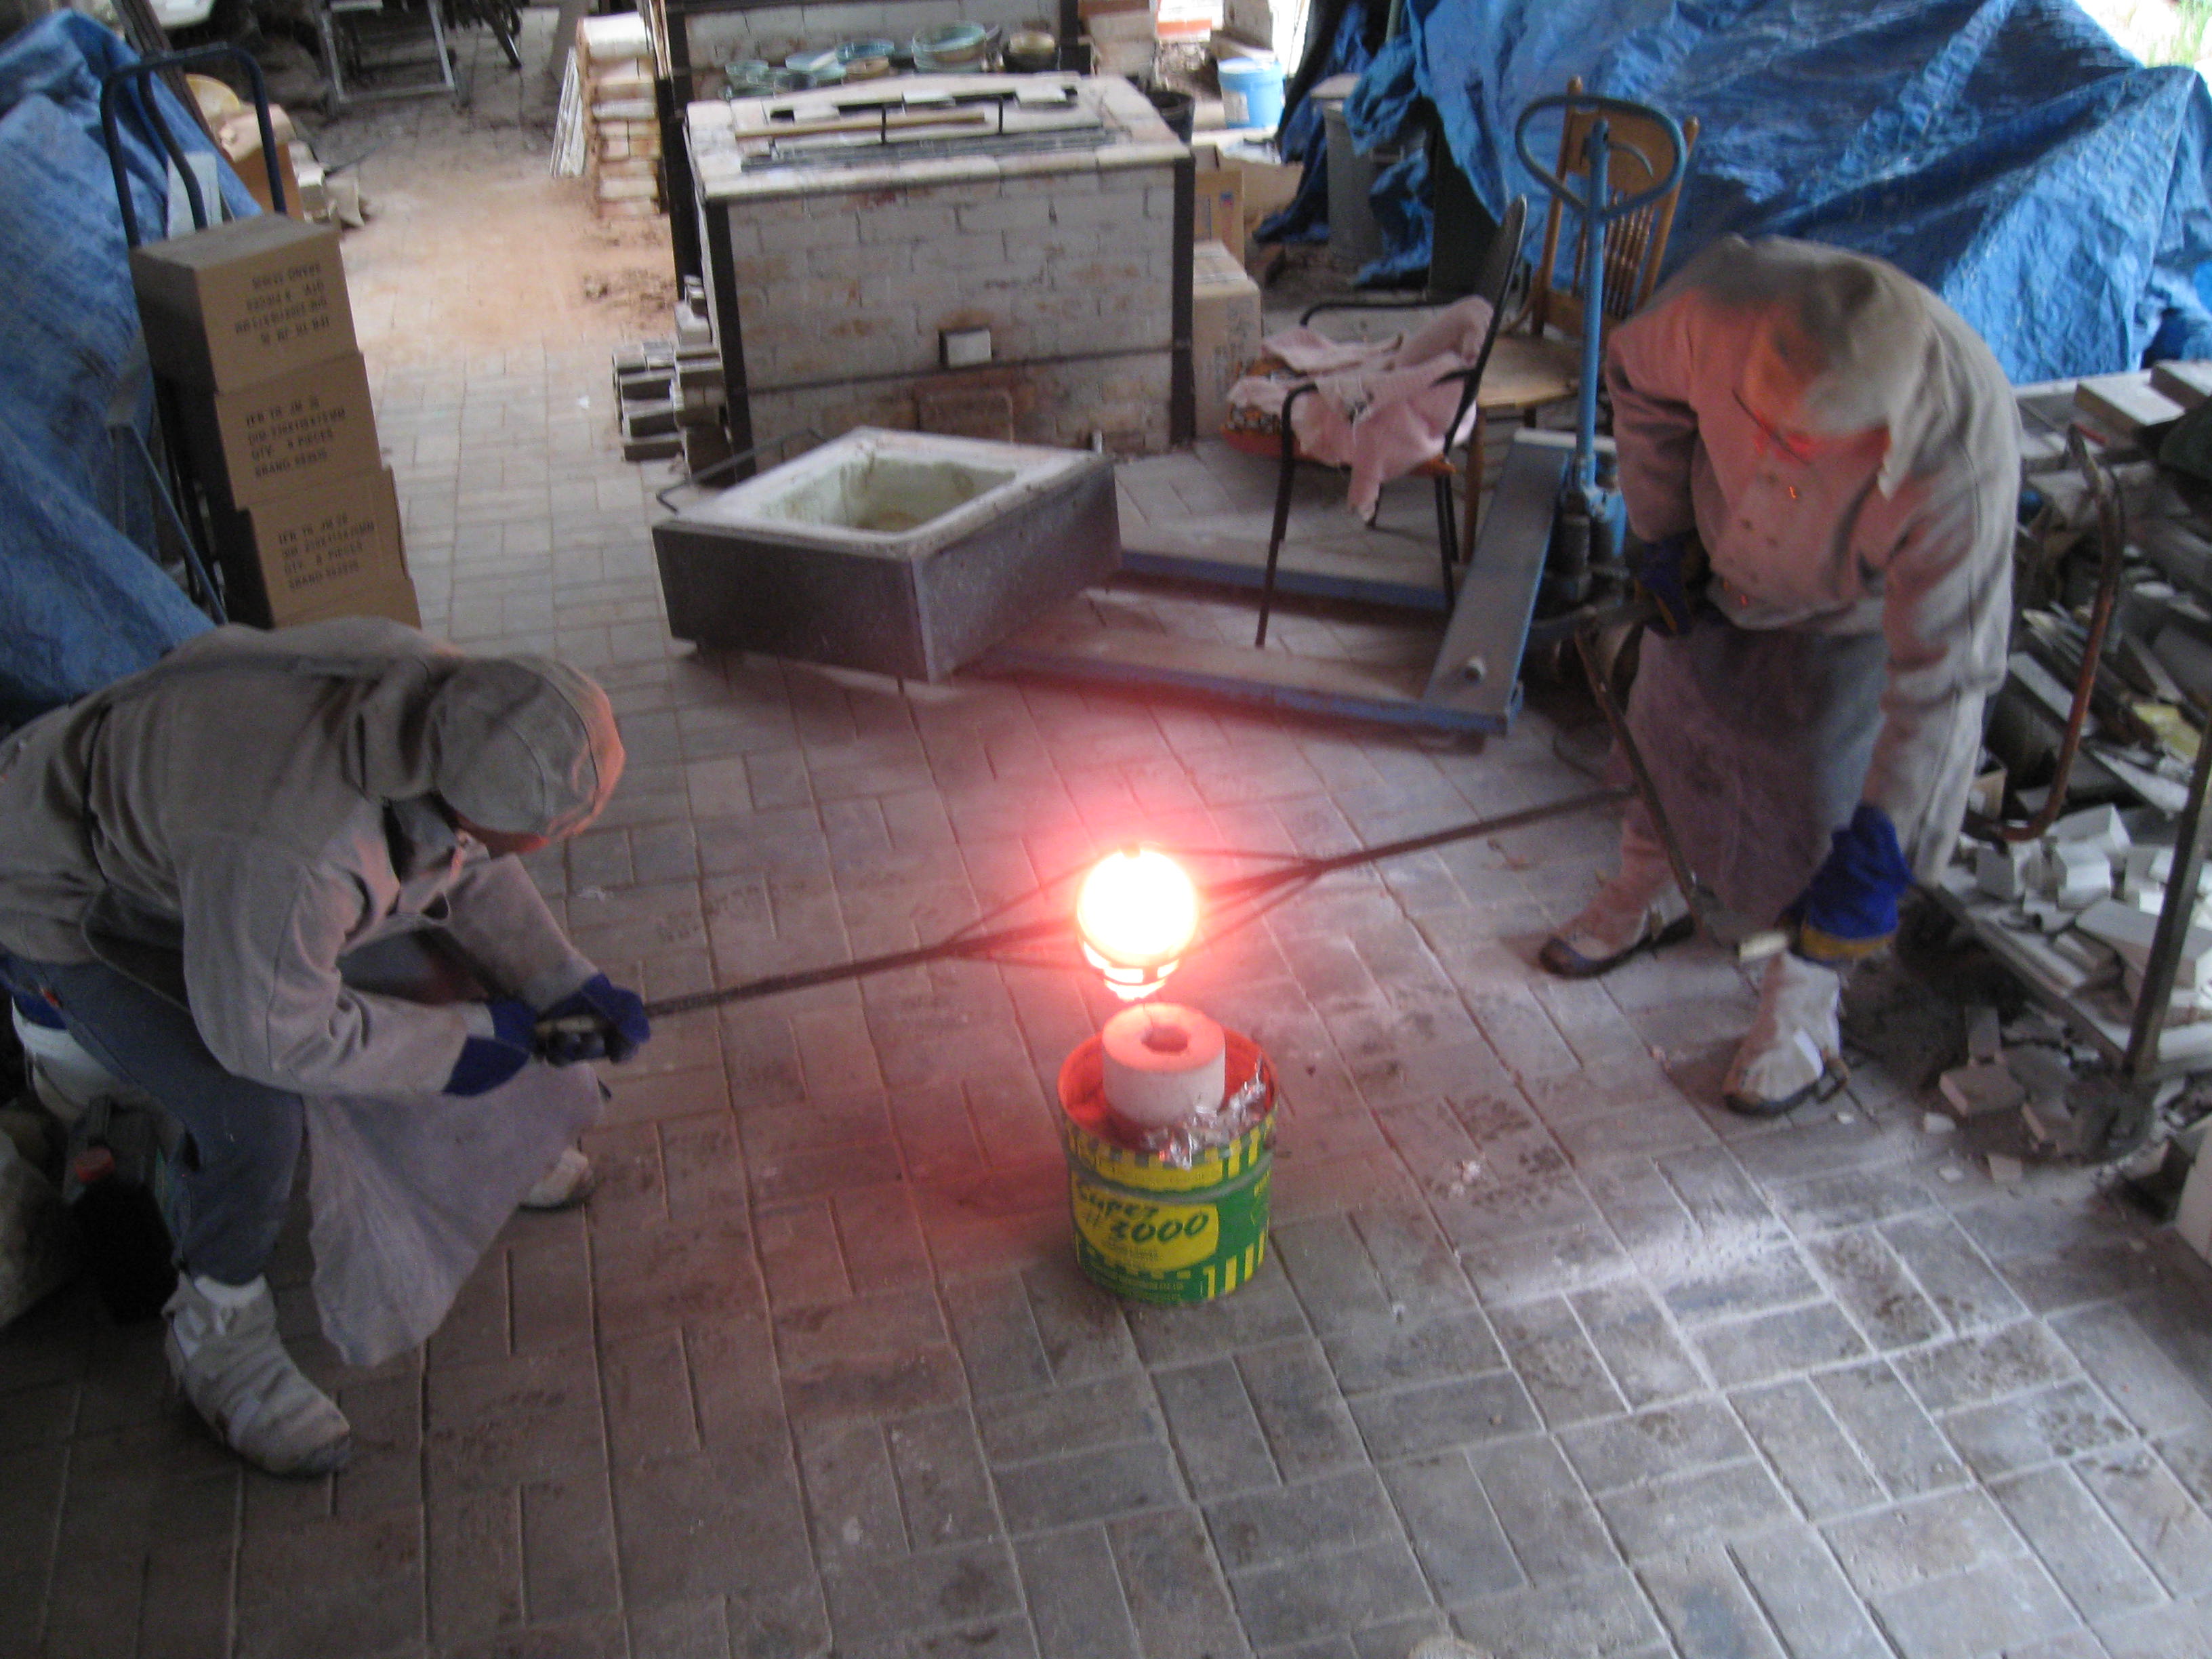
Yesterday we had all three kilns firing at once. A bisque in the little electric kiln, a stoneware reduction glaze in the big gas kiln and another stoneware reduction firing going on in the old relocatable mini wood fired kiln. I recovered it from the ashes of the fire. As it was built from a stainless steel monocoque frame with insulation brick lining, it mostly survived the fire, because it was stored out on the verandah and didn’t get too badly burnt. It just needed some cosmetic TLC on the frame and a new set of castor wheels. Lucky!
It was designed and built as a possible dual fuel kiln to be fired with either wood or LP gas from BBQ bottles. However I had never fitted it with burners and only fired it with wood previously. Now is the time to finish fitting it out with burners. I spent a day making shiny new burners and gal steel mountings. I chose to only pack and fire the bottom half of the kiln , as it is designed to be in two sections. A bottom half with the fire box opening and burner holes – which ever is chosen to be used. Then a top half composed of a removable ceramic fibre ring and lid. The ring can be removed and the lid placed on the base section to make a smaller half sized kiln. Which is what I did yesterday. As it was the first test firing of the kiln, I thought it best to go small for a first firing.
After an initial tweaking and tuning, It worked perfectly and fired to stoneware in reduction easily in 2 1/2 hrs. using less than one 9kg bottle of BBQ gas. I had 2 set up ready with a change over switch just in case, but the 2nd bottle wasn’t needed. I also set them up in a tub of water that can be warmed. In this way I can fire them to dead empty without them freezing. But none of this was necessary yesterday.
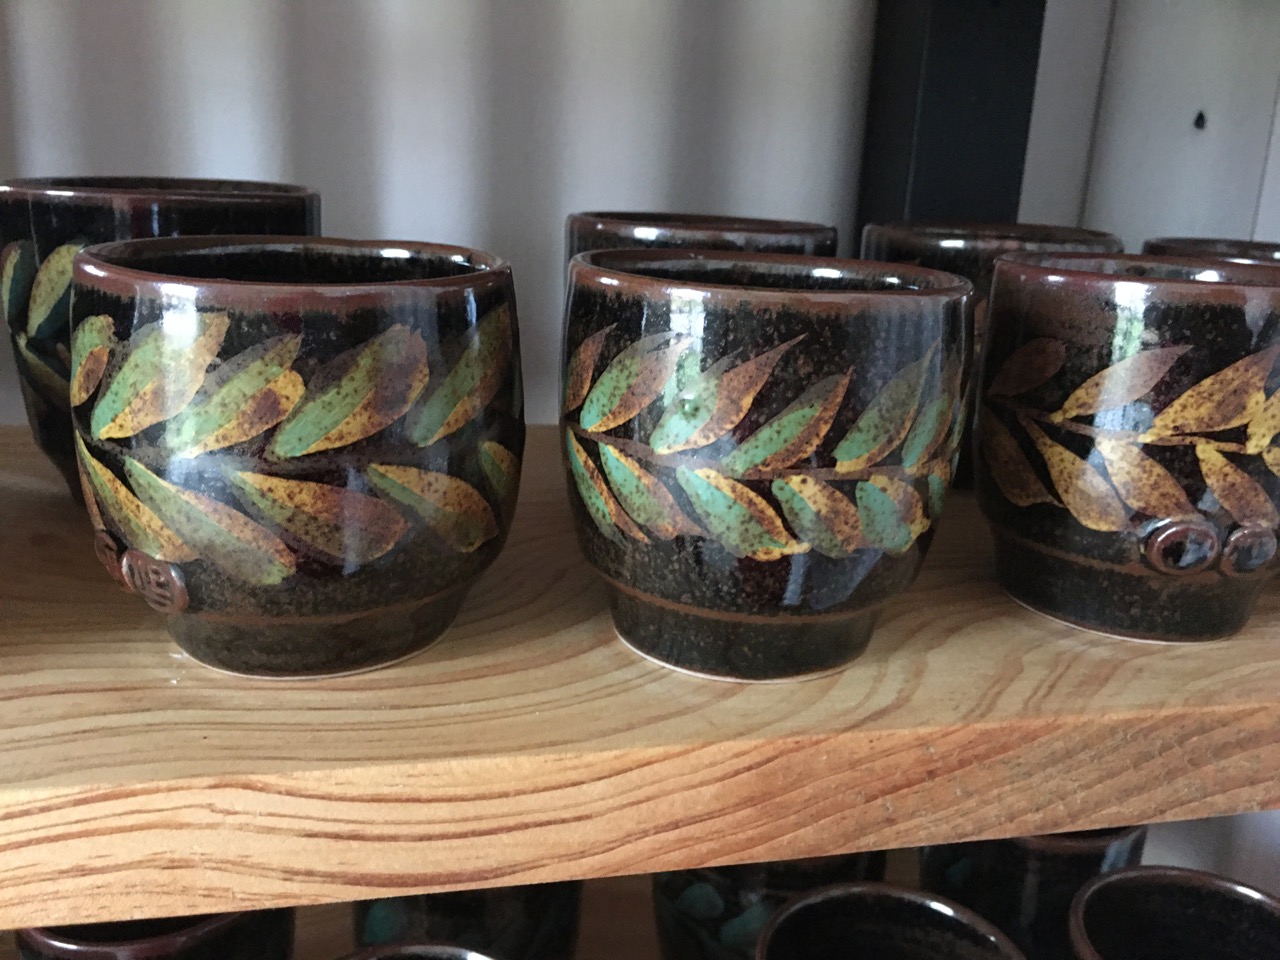
I’m a bit more confident about our local rock glazes now after 3 rounds of test firings. The hares fur/teadust tenmoku is a little more stable.
Both Janine and I have been investigating the use of colours over tenmoku.
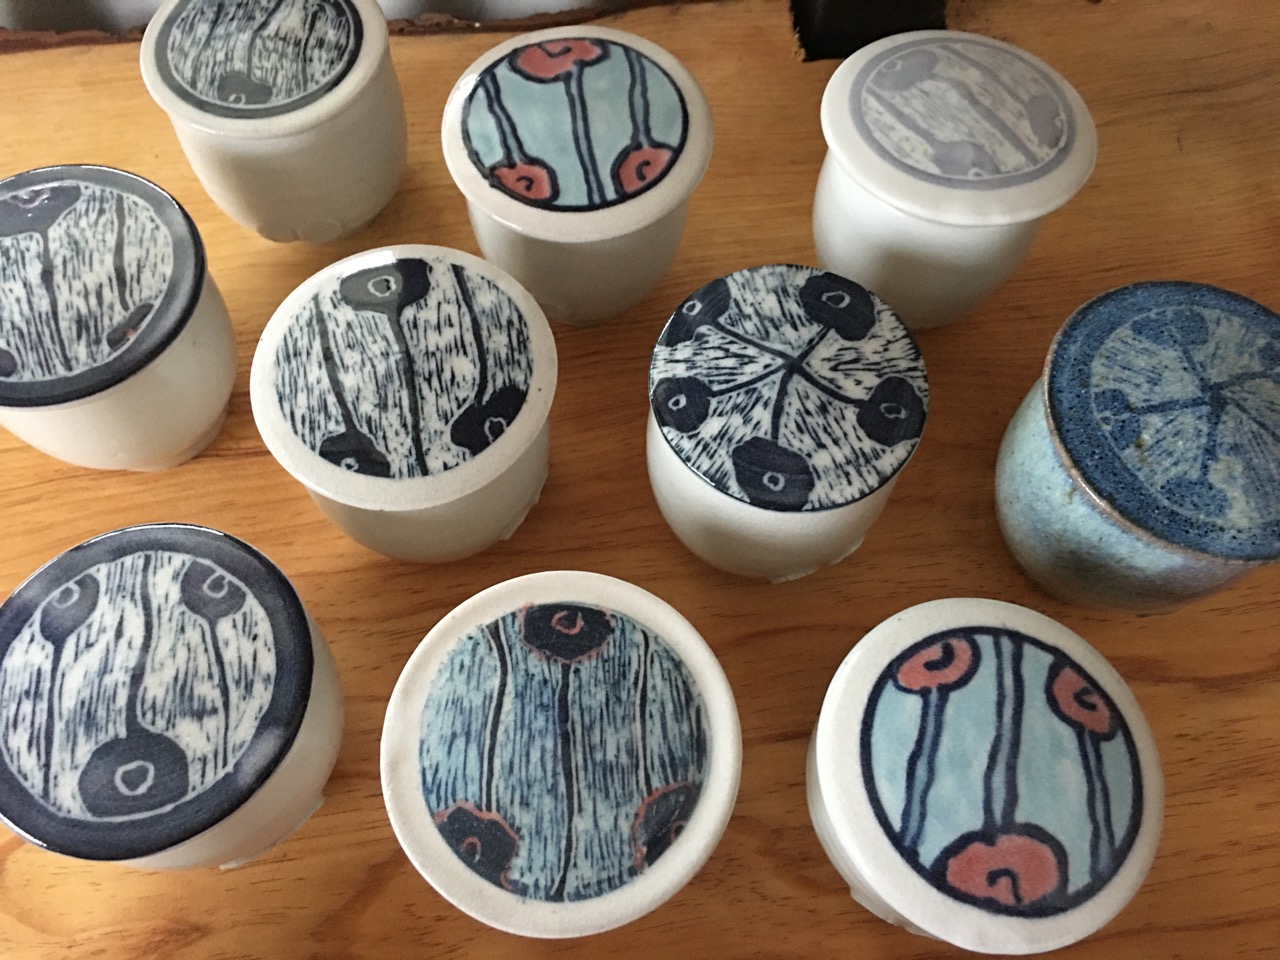
and I have managed to stabilise the local Balmoral dirty feldspathic stone and wood ash opalescent Jun glaze.
Janine has made some slip decorated lidded boxes.
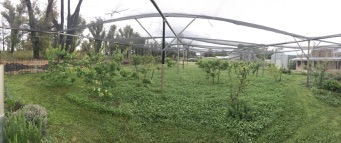
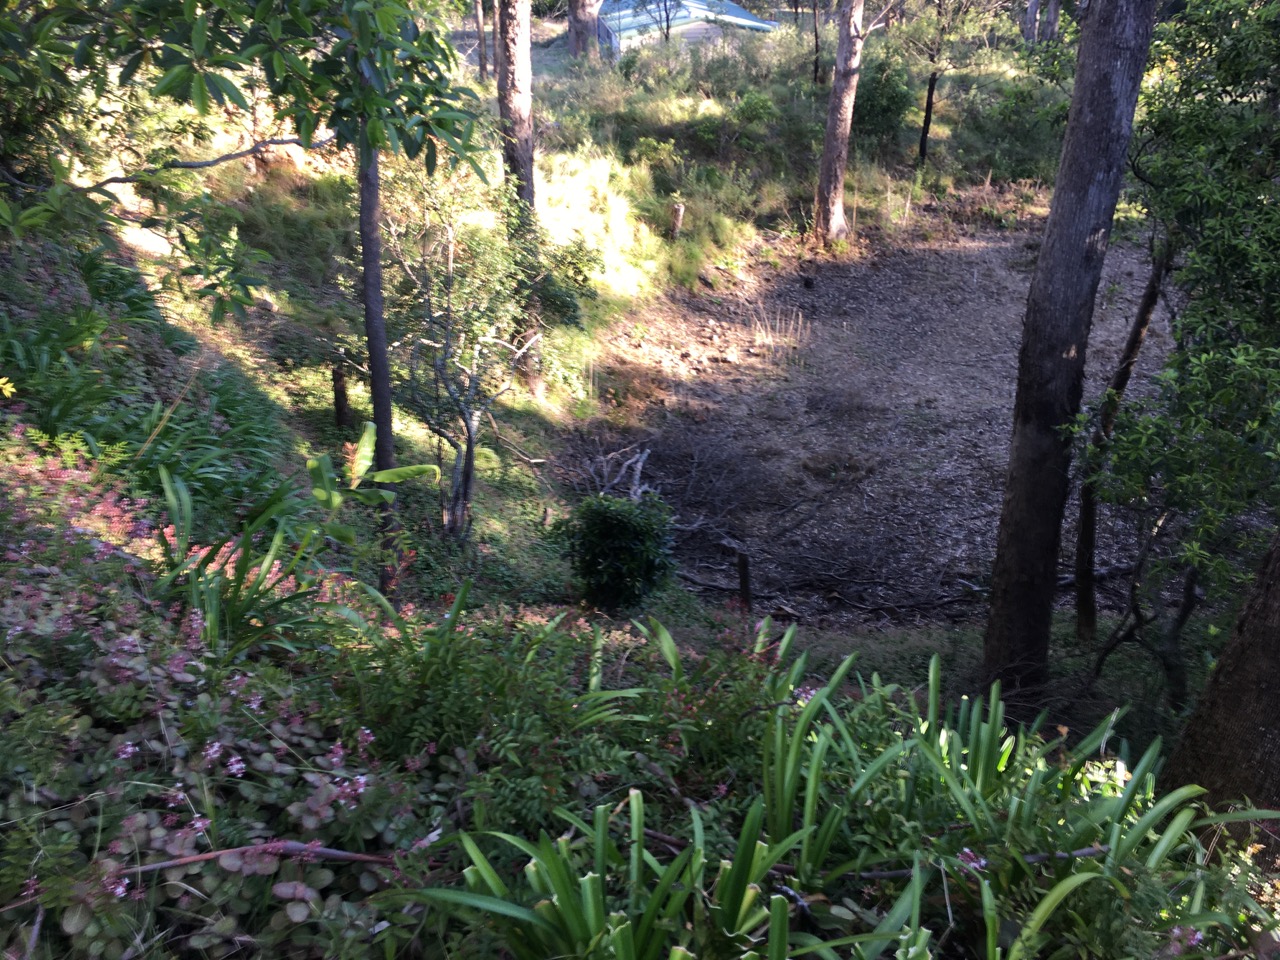
The stone fruit orchard is looking great after a wet start to the spring season and everything is green and luscious.
The almond grove is also very lush and green. All these mature almond trees were burnt and transplanted into this area that was formally a native garden. We have decided to keep the more flammable native bush at a much safer distance from the house now.
The pottery will be open this coming weekend, the 13th and 14th of November as part of the Australian Ceramics Assn. Open Studios weekend that will operate nationally. We will be open in conjunction with Megan Patey in Colo Vale. Megan makes beautiful Majolica and Smoked Arab lustre.
click on the QR code to find your local potter.
Janine and I will be also open on the first two weekends in December and the Southern Highlands Artists Pop-Up Open Studios group.
We will be open on the 4th/5th and in conjunction with Sandy Lockwood, on the 11th/12th of December.
We look forward to being able to show you around the new pottery on one of these 6 days.
We will be following the government recommended COVID19 safety protocols. So please come if you are double vaccinated and have your vaccination certificate. There is our Service NSW, QR code poster on the door for login
We have a covid-safe plan that includes keeping the space very well ventilated and limiting numbers to 4 sq.m. per person.
Please don’t bring dogs, as we have recently had both wood ducks and brown ducks hatching clutches of little ducklings that waddle all around the property with their parents feeding on the lush grass. These are timid wild animals and we have no control over where they wander. So please keep a respectful distance if you are walking around the garden.
Dear Friends, We will be opening our pottery on the weekend of 13th and 14th of November. We are informed that on the 1st of November, the state will be opening up to allow people from the Greater Sydney Region to travel to the regions like ours in the Southern Highlands. We have joined the Open Studio Weekend organised by the Australian Ceramics Assn. and accordingly, we will be open from 10 am to 4.00 pm on both Saturday 13th Nov. and Sunday 14th Nov. We are looking forward to seeing our friends again after such a long time in lock down.
We must remind you all that we will be observing strict Government COVID safe protocols.
Please don’t come unless you are double immunised, and have a vaccine certificate to show us.
We will need to see your vaccination certificate before you can come in and there will be a strict 4 Sq. M. rule applied. That’s 7 people max. in the gallery. Although I can’t imagine that we will get more than 7 people all day, never mind all at one time 🙂 We will have all the doors and windows open for good ventilation and to keep the CO2 levels down to around 450 ppm. As this is considered good practice to minimise the chances of infection. We won’t have a lot of work fired and for sale by that time, as we have only now just had our first stoneware reduction glaze firing full of glaze tests. I have been very busy working on the 3 local igneous rocks that I could collect within 5 km of our home here, or near the supermarket and Post Office on our once a week shopping excursion. That has limited my choices, but it’s a challenge to make the best I can out of what I have available in my immediate vicinity.
Its shaping up to look like we can make a tenmoku and tea dust glazes from the Hill Top basalt found in the next village. A green celadon from some washed felspathic gutter sand, A pale blue celadon, a yellow matt glaze, Blue/yellow mottled glaze, also made from the local ‘Living Waters’ Basalt intrusion, and a pink matt glaze made from the sericite porcelain body. As well as something resembling a pink/orange shino style of glaze made from the Balmoral dirty felspathic igneous stone. Nothing special, but a workable mix to get us started. As long as you are double vaxed, We’d love to see you here at some stage, once we are all allowed to travel inter-regionally. Even if there is only a small selection of our our work on the shelves, we welcome you to call in and see the new shed. I’ll be pleased to give you a tour of the Workshop, Pottery studio and Gallery, as well as the raw material processing facilities that we are in the midst of developing – for those so inclined.
We will probably also be open from then on, each weekend, through until Xmas, but please ring beforehand, just to make sure that we are in and open, and not out doing shopping.
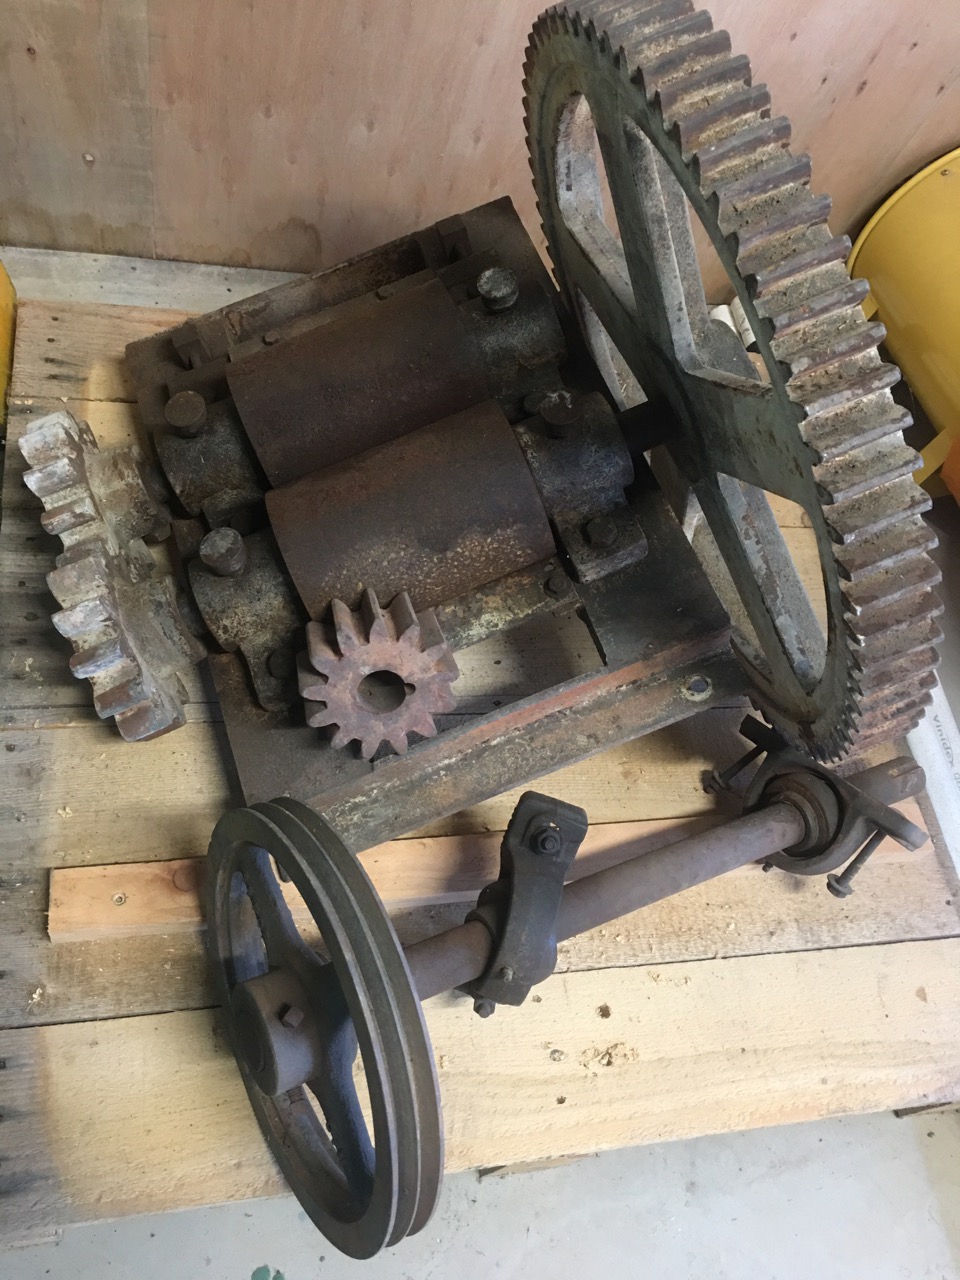
Each week I attempt to crush and mill another local igneous rock for use as a glaze ingredient.This week I stopped off on the way to Mittagong Post Office to collect another stone, on the hill behind the post office.I passed it through the rock crushers that I have pains-takingly restored after the fire. Luckily, all these machines are made of very solid steel plate or cast iron, but more importantly, they were situated in the breezeway between the two buildings. Being largely out in the open with very little flammable material around them, just a polycarbonate roof over them. So they didn’t get too hot.They weren’t warped or melted. This meant that I was able to restore them, not just scrap them.New motors, bearings, seals, pullies and belts were required. The metal work was largely saved because I poured used engine oil all over them, straight after the fire and before it rained on them. With the assistance of my friends Warren Hogden and Len Smith, Along with my friend Dave and his crane truck, we were able to lift them out of the rubble and up to a safe place, out of the way of the demolition crew and then tarp them in their oily state. This was just enough protection to stop them from rusting and flaking really badly. One very important aspect of my philosophy of self-reliance is never throwing anything out simply because it is no longer fashionable or is showing signs of wear. I keep working on my possessions, maintaining and repairing them, until they are really worn out, or past repair. In this regard, I have spent a lot of time patching and stitching my worn out work clothes and repairing some of my treasured pottery machines. Particularly the rock crushers. These things are as scarce as hen’s teeth and really worth working on. The Japanese have a word, ‘mortainai’ that means ‘making do’, I have written about it on this blog previously. It really sums up this repair and reuse philosophy.A year of part-time evenings has seen both my work jeans and the rock crushers back at work. These jeans are many years old and have patches over their patches, over their patches, especially on the knees.
My jeans mostly wear out at the knees and thighs, I have also had to reline the pockets, as the pockets are made from the lightest grade of cotton cloth that wears out in no time flat if you keep your car keys in there.
It’s just one more example of built in obsolescence. A product designed to fail. The retailers hope that i will just ditch the whole pair and buy another – in the latest fashion style! Well I won’t and don’t. I repair, re-use and re-cycle. I like to make them last me a decade. They start out as being for ‘best’ , going out etc. Then after a couple of years, they start to get a bit past their shiny best, they are worm in the pottery and for gardening. Finally after another 3 or 4 years, they are reduced to the welding workshop, rock crushing and angle grinding. This really takes it’s toll and they require more patches more often. In the past I have finally given up on them when I grew out of them and had to go up to another size. Then they became rags for painting and cleaning. These days I don’t get any bigger, so size isn’t the death knock that it used to be. Hence I a back log of three pairs of these patched jeans that just keep on being repaired and worn again and again.
But its not just the pockets, knees and thighs. They also wear out in the butt.
I think that ongoing hand stitched repairs like this are an important aspect of my creative expression. I exhibit my pots , but no one ever sees these creative endeavours. They are strictly utilitarian and for home use only, but this doesn’t meant that they are any less important. I kintsugi my pots and I patch my clothes. It’s the same thing.
After I had got the rock crushers going. I left it at that, as I wasn’t ready to crush any stones at that time. But the machines were ready. At least I thought so. I didn’t have the time to test them all out with rocks. I didn’t even have any rocks at hand to try out. I was satisfied when the new motors were installed and the new drive belts were fitted in place, just to see the machines rotate successfully. That was all I got to do. Now is the testing time.
Straight off, there was one casualty. The smallest laboratory jaw crusher just doesn’t seem to work at all. I got it 2nd hand from a junk yard. I tested it, the motor ran, the shaft turned, it whirred and clanked, but now that I go to use it, nothing happens when I put rocks in. They just sit there bouncing around. Luckily, I only paid $250 for it. I’ll need to pull it to bits and find out why. But that will have to wait till later, much Later… I have other machines that do actually work and they are enough to get me started. What’s most important is that I can get some local stones powdered so that I can get a glaze firing full of test pieces done.
There were a few hiccups with the other machines before I got them all working. The big jaw crusher was found to be running back wards. I hadn’t noticed this when I first wired it up, as the degree of oscillation movement is very slight, but the first time I put stones in it, I noticed that it was very slow to engage with the rocks, it still crushed the chunks down to blue metal sized pieces, but very slowly. It was really only because I know this machine very well as I have rebuilt it previously over years and am familiar with it, such that I noticed its lack of performance. Luckily, it is a simple exercise to reverse polarity of a 3 phase motor. It works properly now.
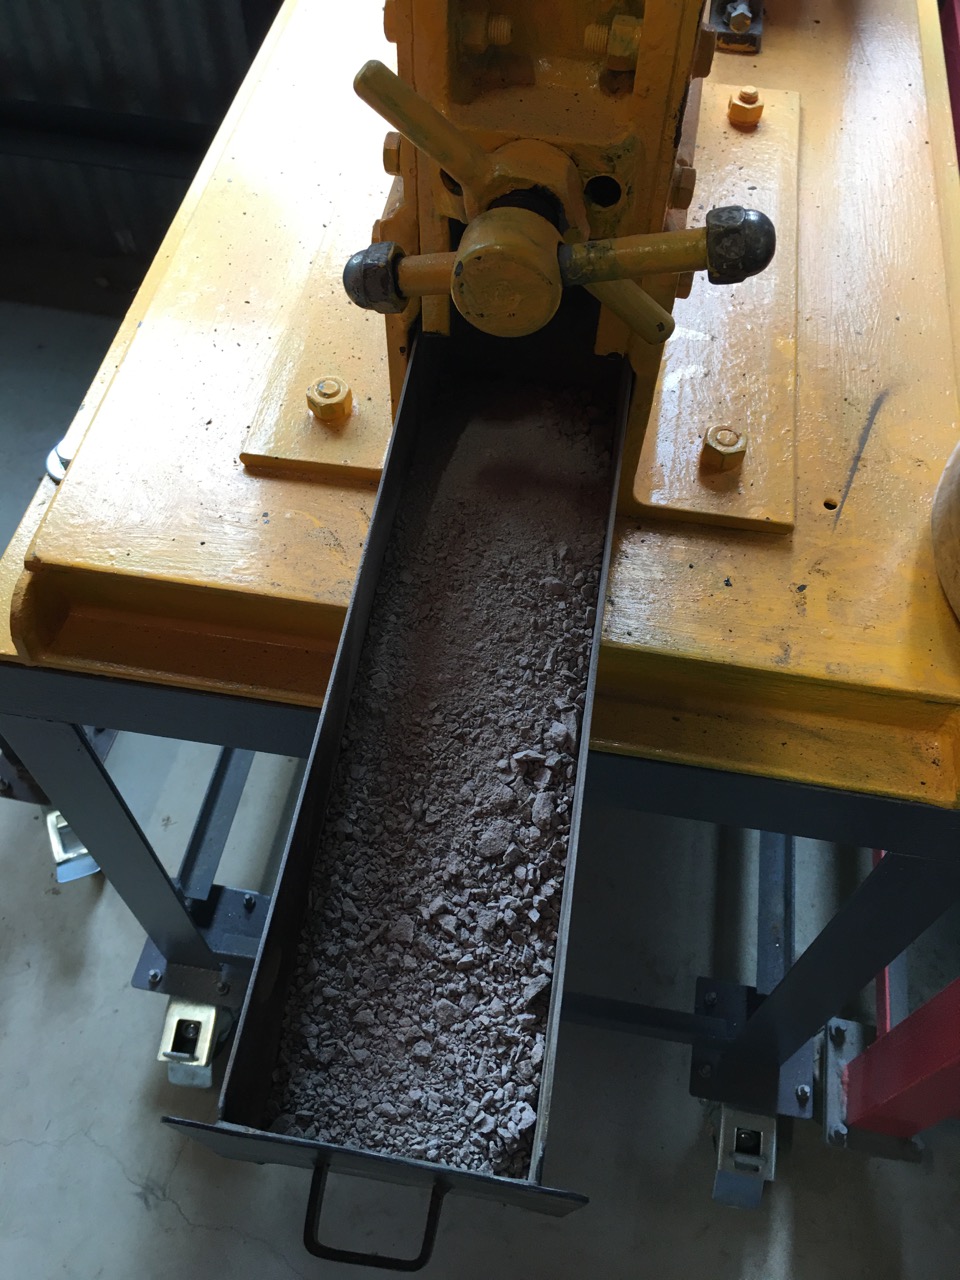
The small jaw crusher, which I use as a 2nd stage crusher, takes the blue metal sized lumps and reduces them to grit.
This little machine is now painted industrial yellow, but was formerly dark blue and orange in the old pottery. Me painting my machines a different colour is a bit like a lady dyeing her hair. A change is as good as a holiday. It cheers me up to see all the brightly coloured machines. Like big kid’s toys!
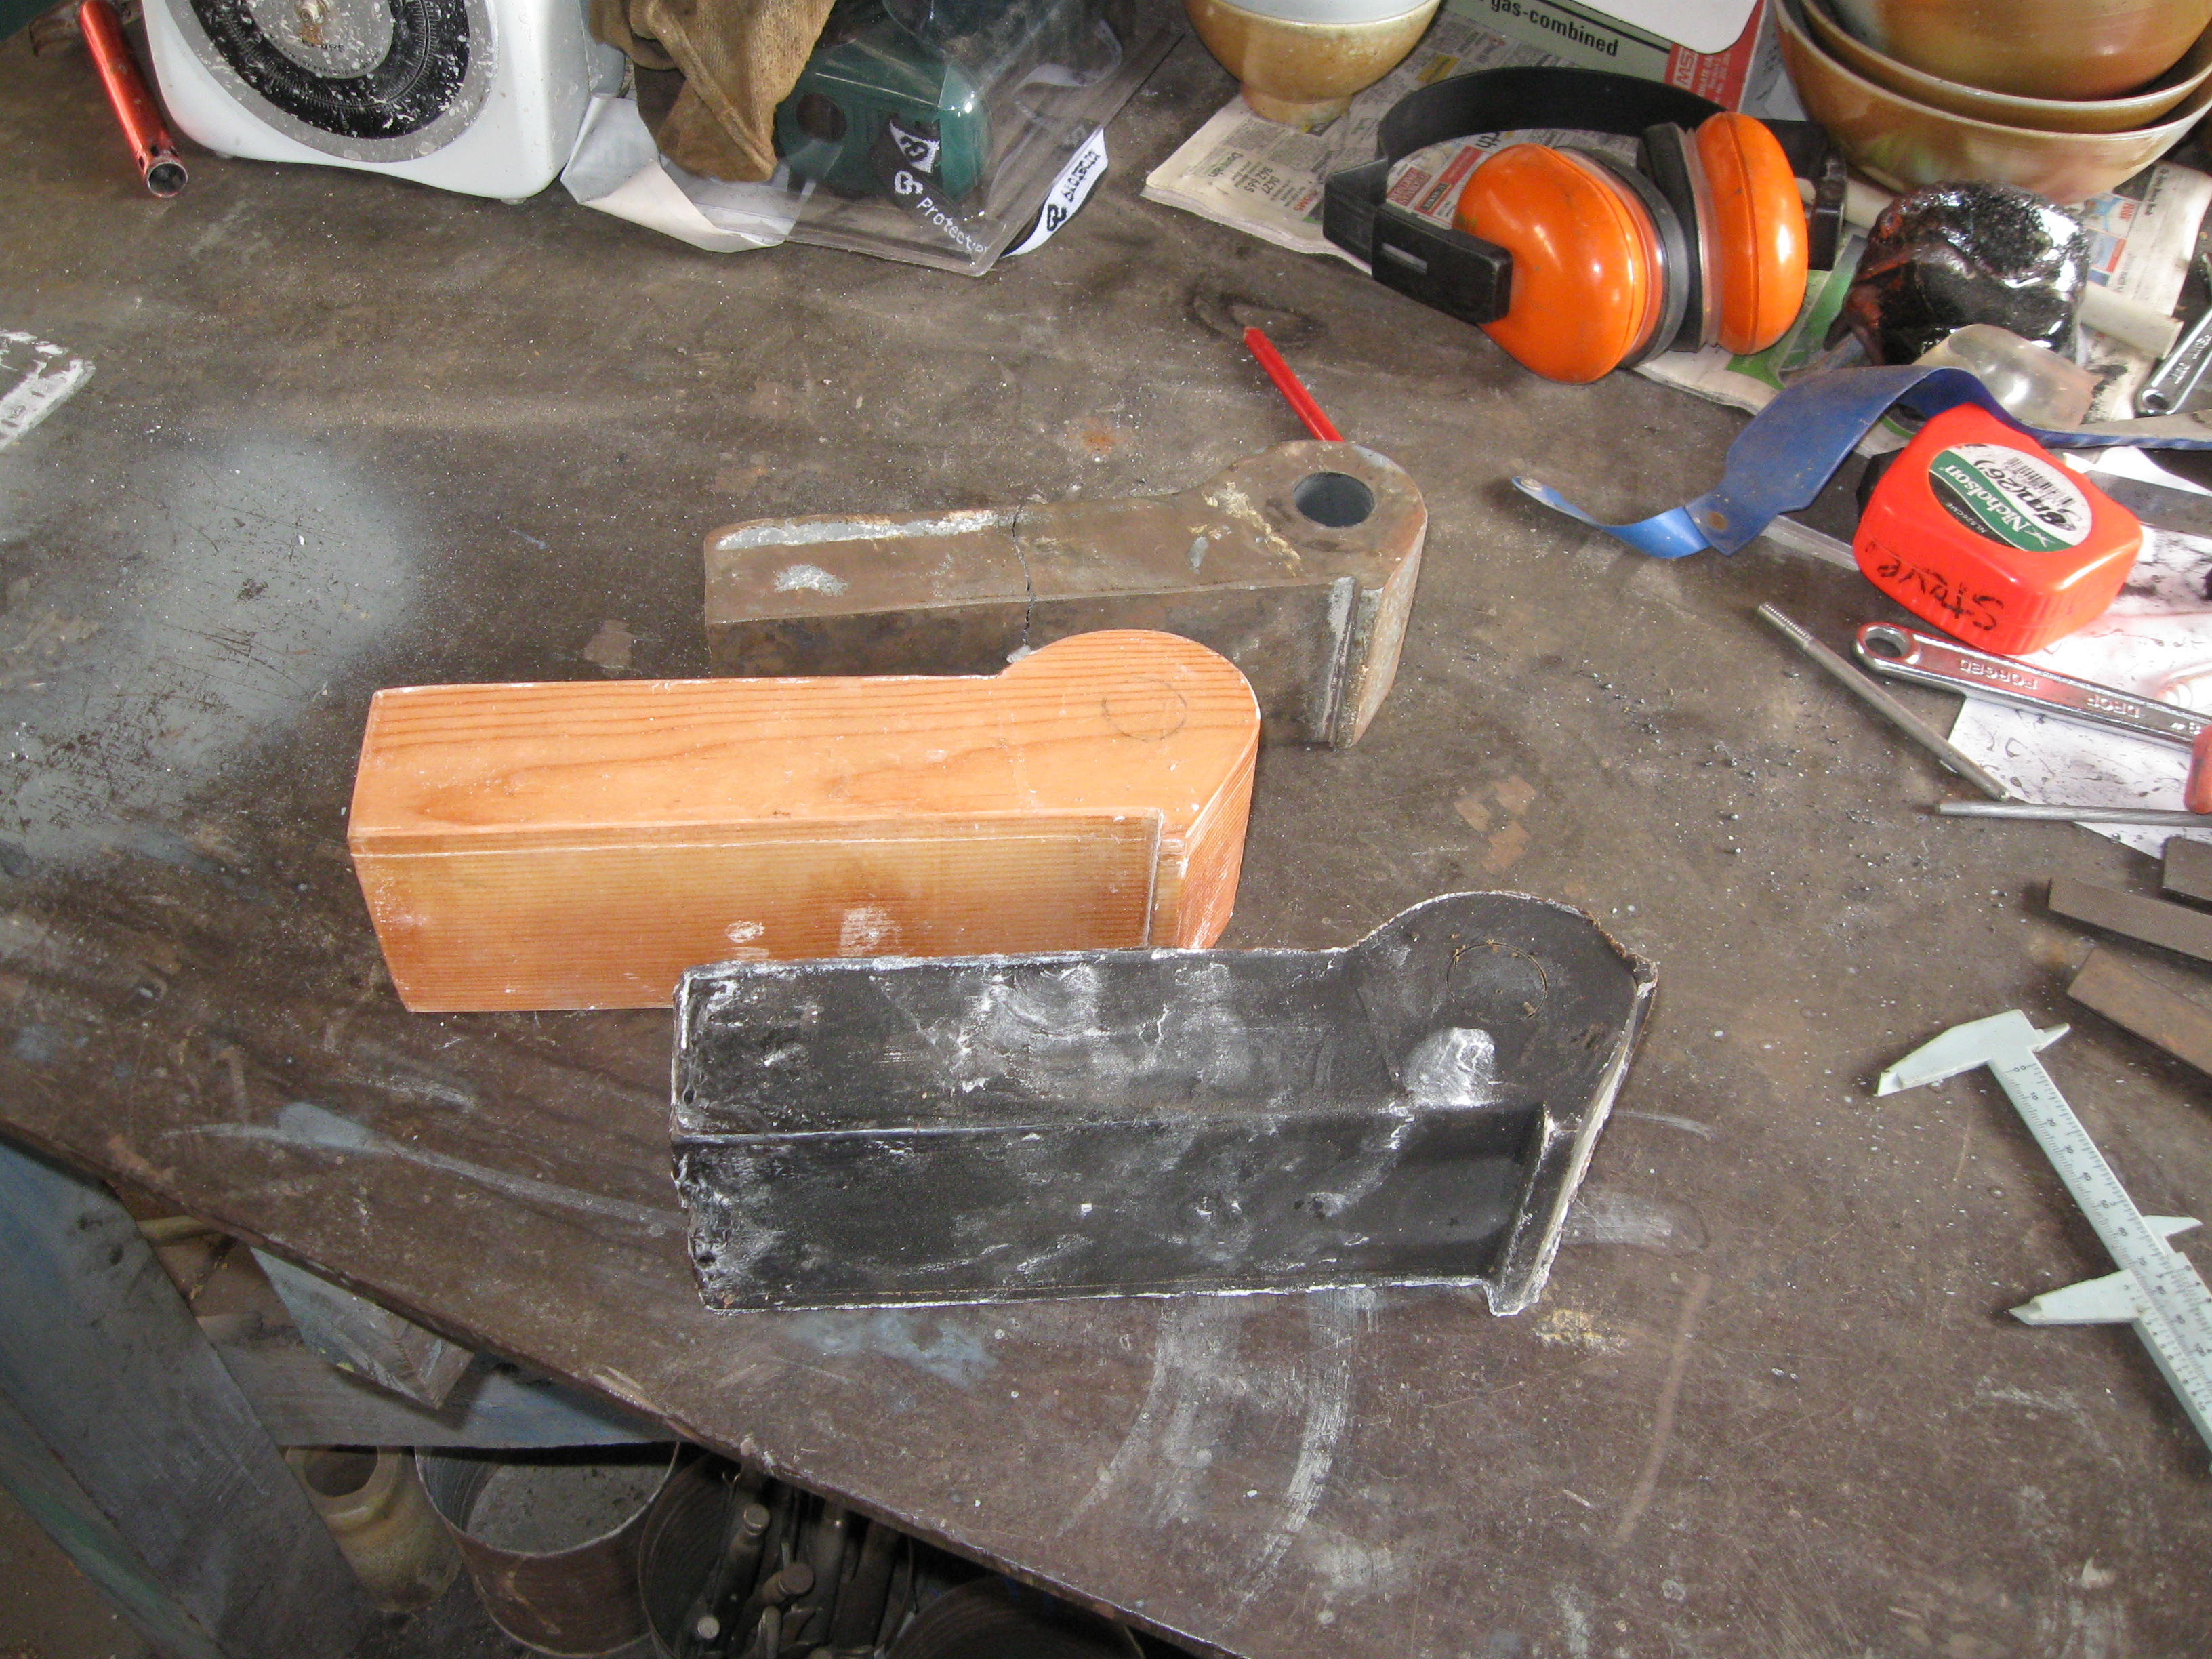
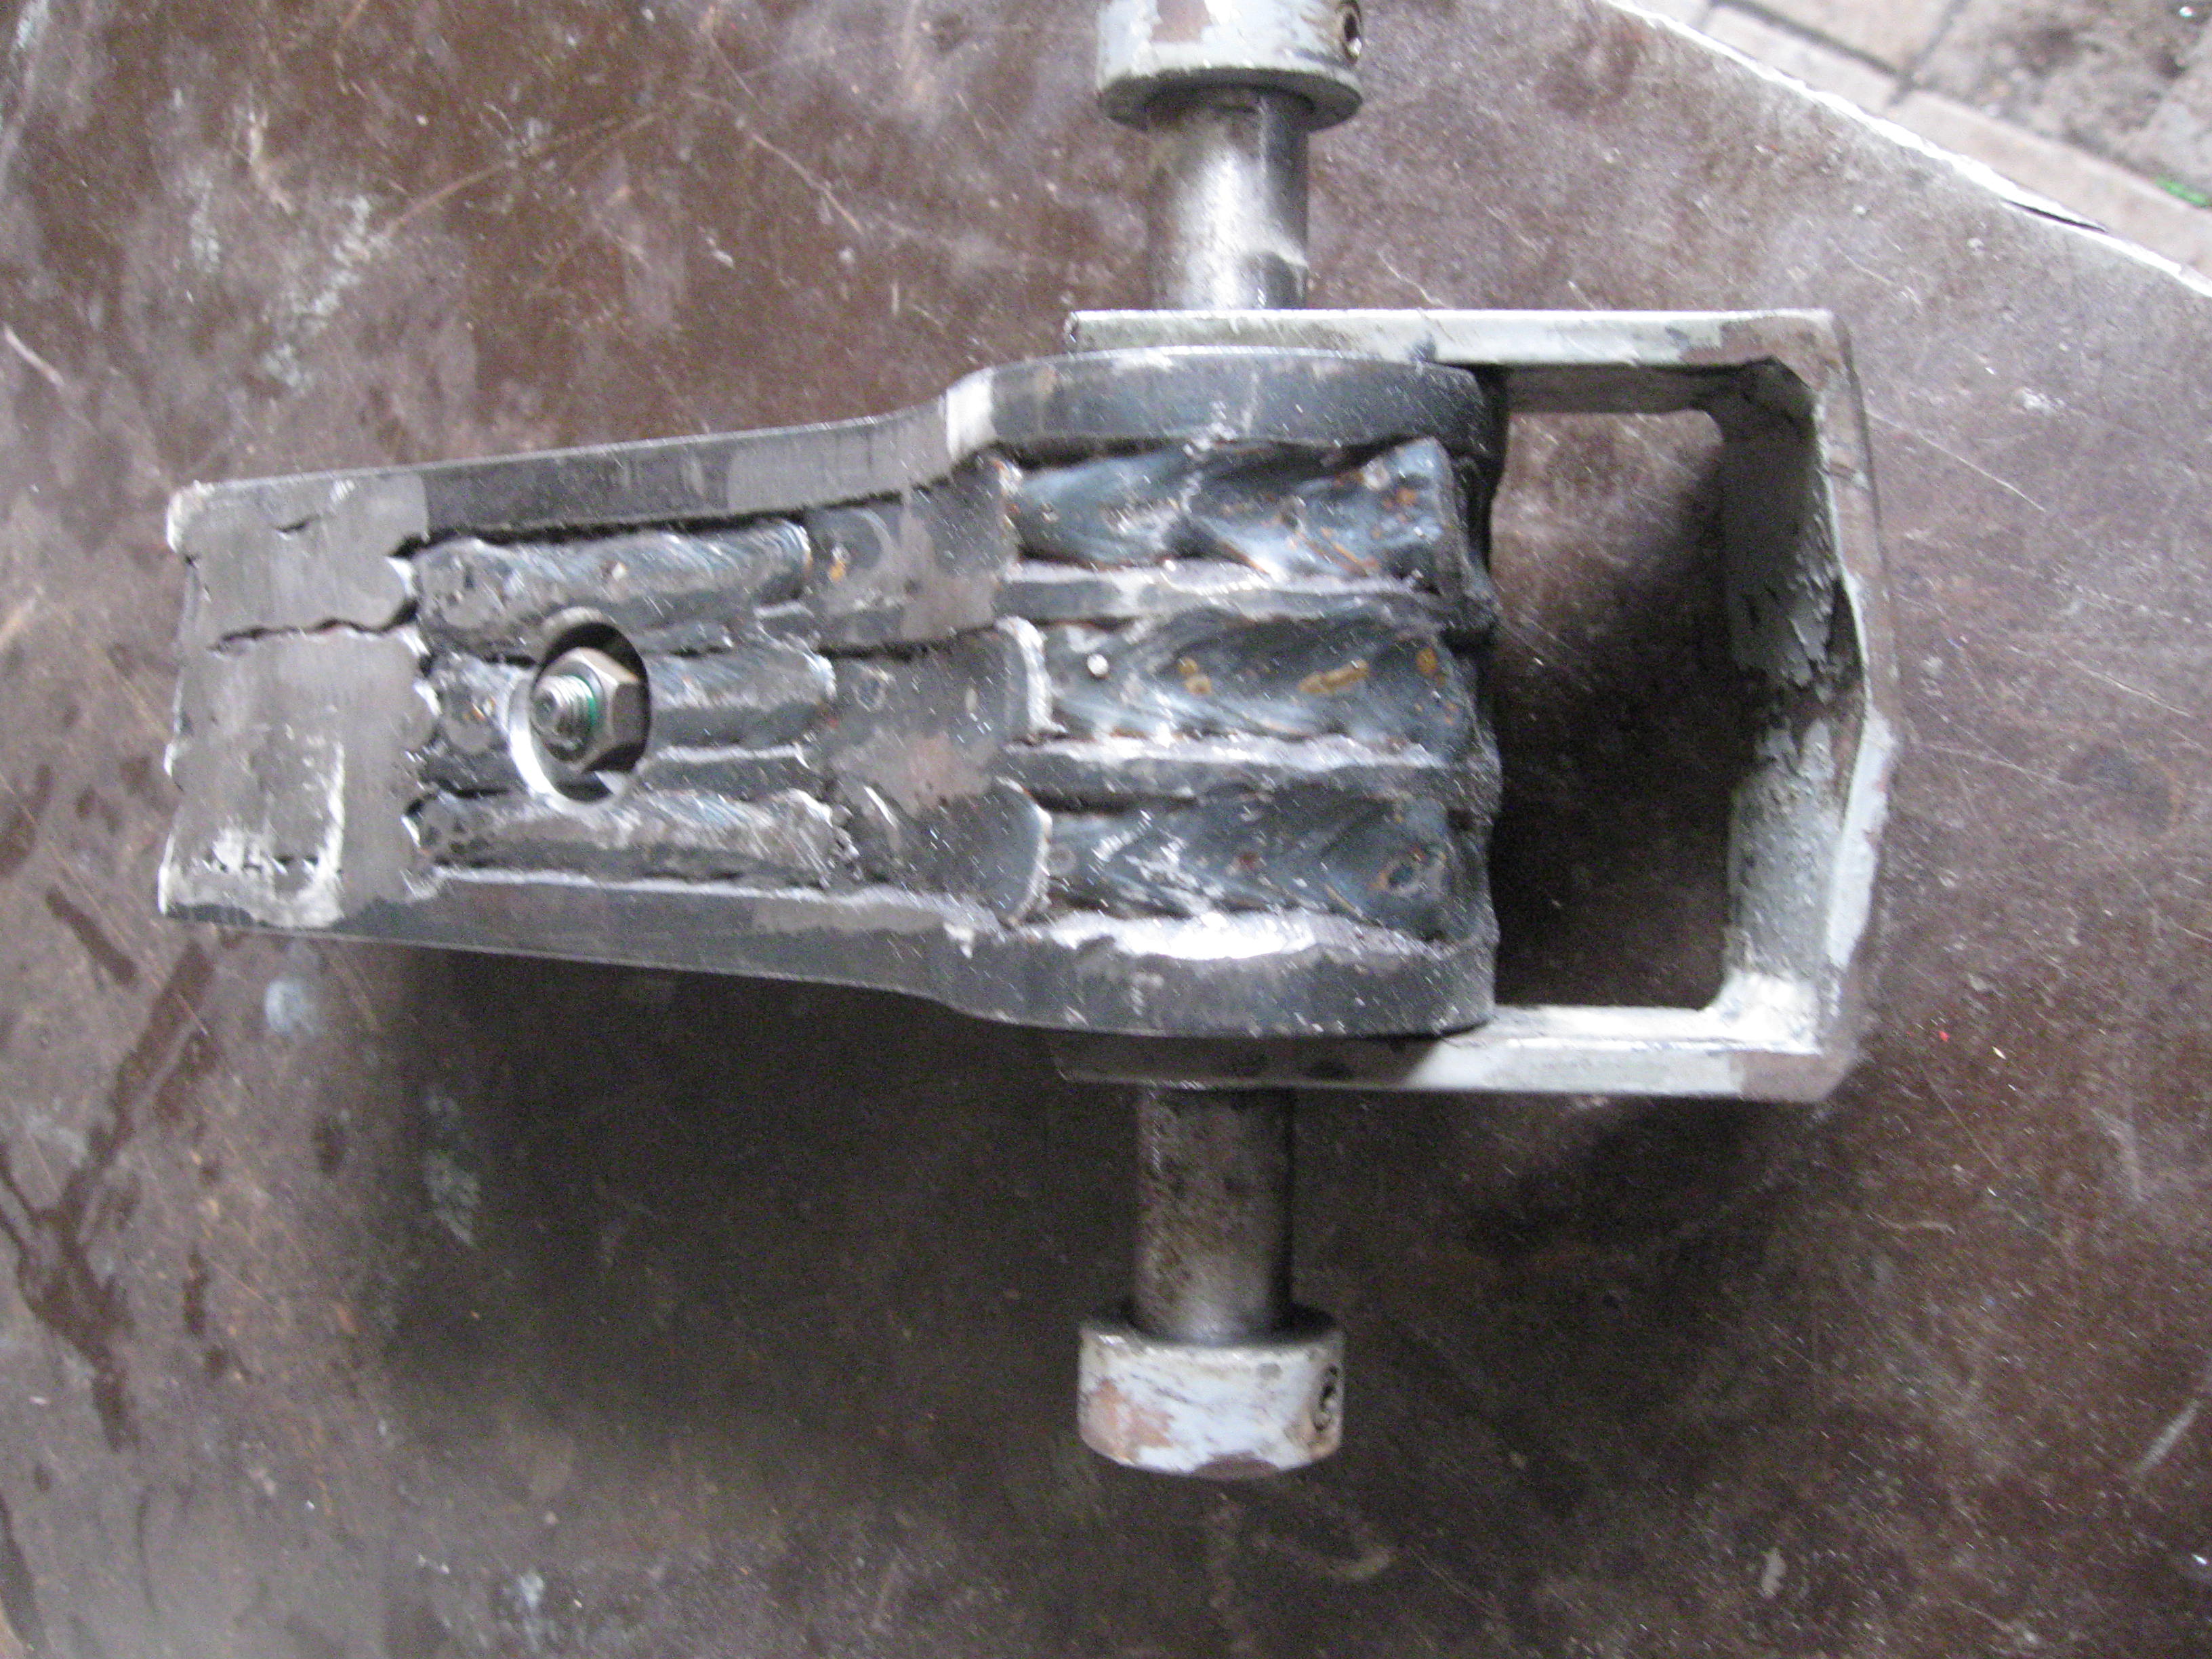
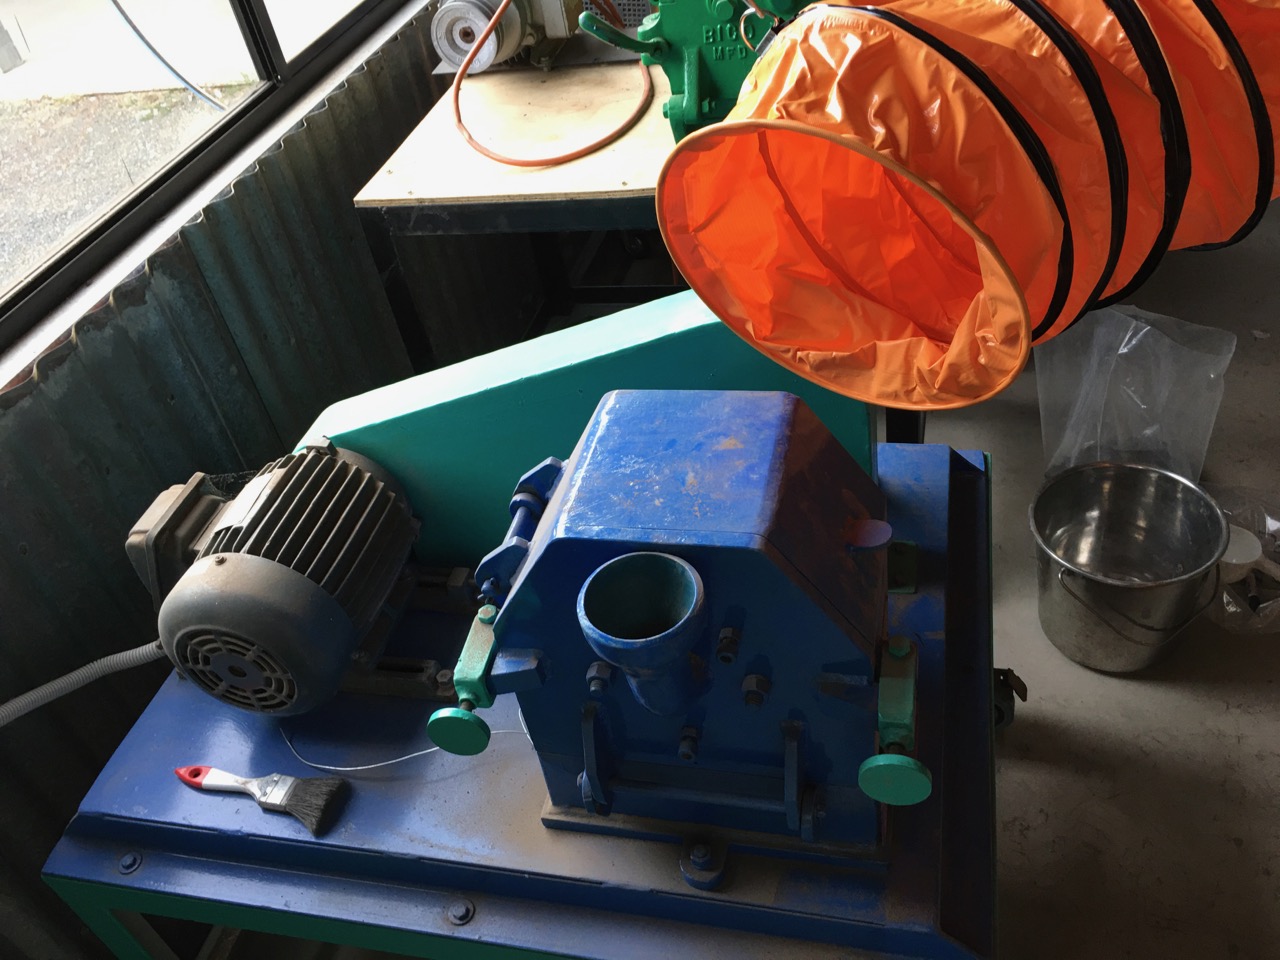
I move the negative-pressure ventilation, dust extraction hose from machine to machine. I have found that the end of the tube is quite friendly and affectionate. If I get too close to the end of the bright orange ducting, it attaches itself to me with the pressure of the suction. It’s not too strong and easy to remove from my shirt, but it is very friendly and persists in wanting to get attached to me. It’s quite amusing. It keeps on seeking out my shirt every time I get close while I’m working. I keep brushing it off, it keeps wanting to nuzzle-up and attach itself to me. Maybe it’s my pottery-workshop-cabin-fevor, after all these months of lock-down. Janine says that I need to get out more! But it’s nice to be wanted! 🙂 The output of this machine is from 6mm down to dust. I bought the little, now-yellow, crusher direct from the manufacturer, ‘Van Gelder’ back in 1983. When we used to make things here in Australia back in those days. This company has now gone to the wall. It’s a shame, as it was established back in the 1800’s to support the late gold rush and the follow-on mining activities here. They were located in Silverwater in what used to be Sydney’s industrial manufacturing heartland. The owner at the time said that they were just hanging on, all the workers were getting old and heading for retirement. He wasn’t sure how he was going to pay out all the retirement funds. He told me that he would probably sell the site and move out of the city to some where much cheaper. Before I left with my brand new crusher – which is still the most expensive piece of pottery equipment that I ever bought. He added my name and the serial number of my machine into his manufacturing log book. It was a quarto sized, beautiful old leather bound journal, that was showing a lot of wear around the edges. It contained a list of every machine that had ever been built by that company. I felt honoured to be on that historical list. It has occurred to me since then, whatever happened to that company’s records and in particular, to that journal? In 2009, the cast iron static jaw broke in half, presumably from metal fatigue? I googled ‘Van Gelder’ and found them up in Gosford. We had an email exchange, but the new owner was completely disinterested in helping me out by selling a new jaw. In fact almost rude. Such a different experience from the old owner! So I decided that I’d make my own – only better than the original. Cast iron is brittle and not the best choice for a machine part that is under constant impact. I decided to make a new one myself. I tried casting one in bronze. I started out by making a wooden replica that was 17% larger. Making a plaster cast of that wooden piece, then casting a copy of that wooden one in wax, so that I could do a lost wax bronze casting.
The original is at the top. the larger wooden model is in the centre. The cast wax model is at the bottom. I built a small foundry, and with the assistance of my good friend Warren, we cast a blank, which needed a lot of machining.
I decided to also make another jaw out of steel. I made the steel jaw out of a series of 3/4” or 19mm. steel plates welded together to make up the 3” or 76mm thickness of the jaw. I was able to drill out the hole for the shaft in each plate before I welded the plates together and then ground them down to a smooth finish where it was necessary to fit the housing. This was quicker and easier for me to complete. This new jaw is still going strong. I had never attempted to weld 3/4” steel plate before. I was really chuffed that it worked. I decided to go with the steel jaw instead of the bronze jaw.
So it’s working again now beautifully. Producing a grit that is suitable to go into the disc mill.
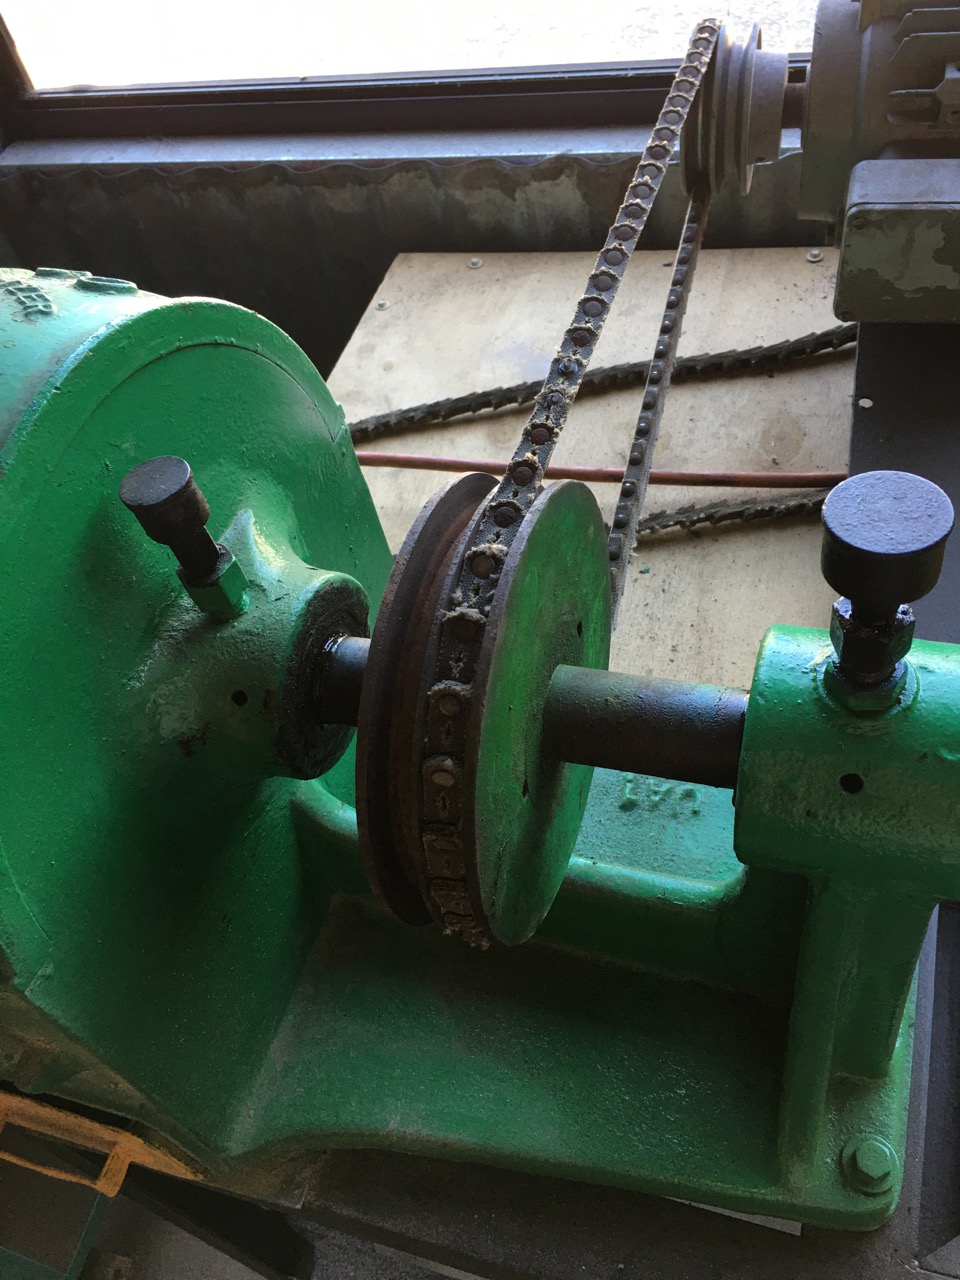
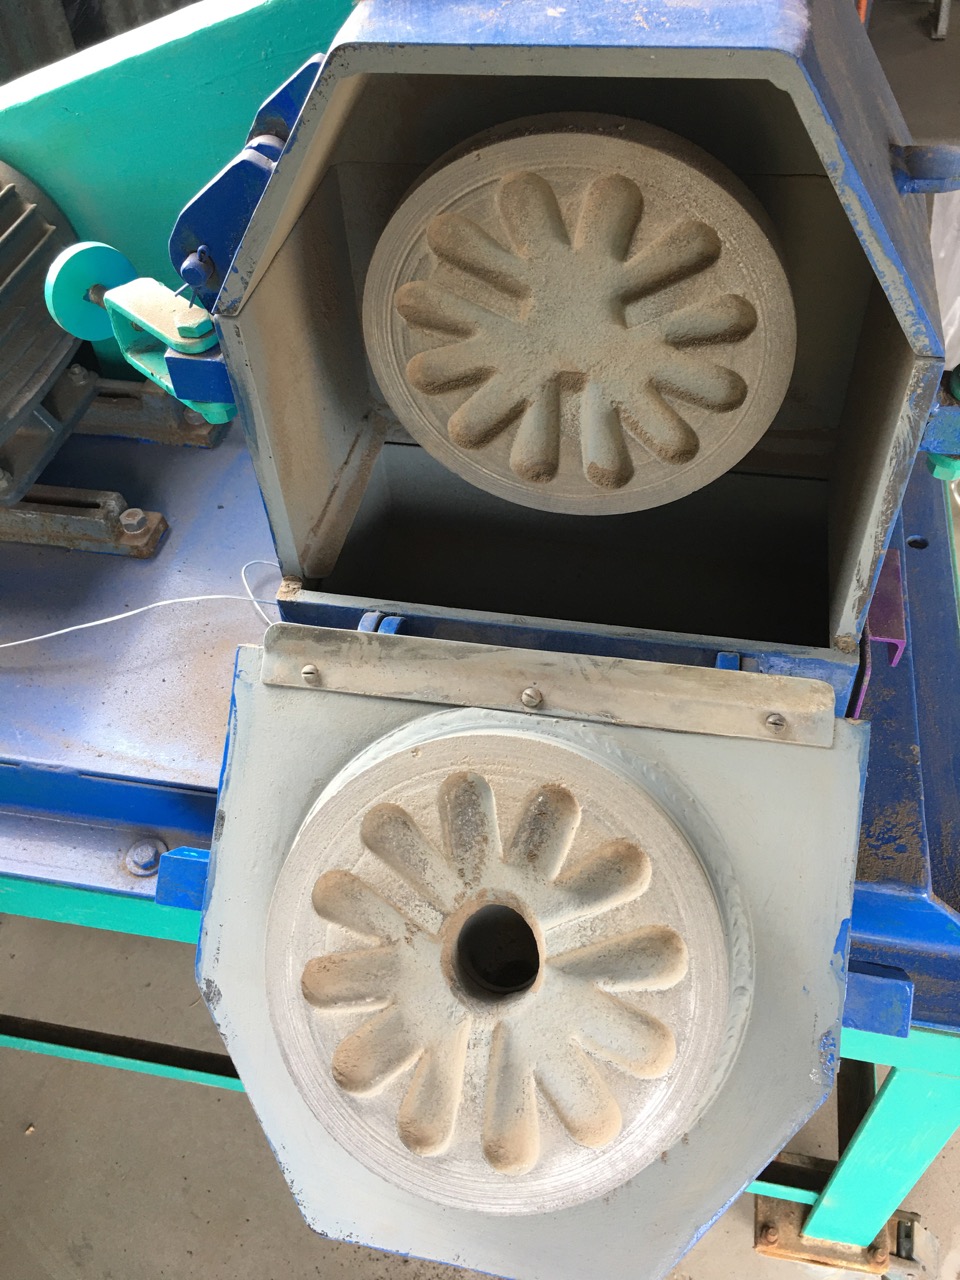
The grit from this small Van Gelder crusher is then reduced further in the ‘Bico’ disc disintegrator mill, down to something close to a sand-like size. Interestingly, ‘Bico’ crushers are still available in the USA. I googled them, they are still in business and the identical machine is still for sale on their web site in a slightly newer version. I bought mine many years ago 3rd or 4th hand, no history and unmounted. It obviously hadn’t been used for a long time and was seized up, but I managed to get it moving again after a bit of work.
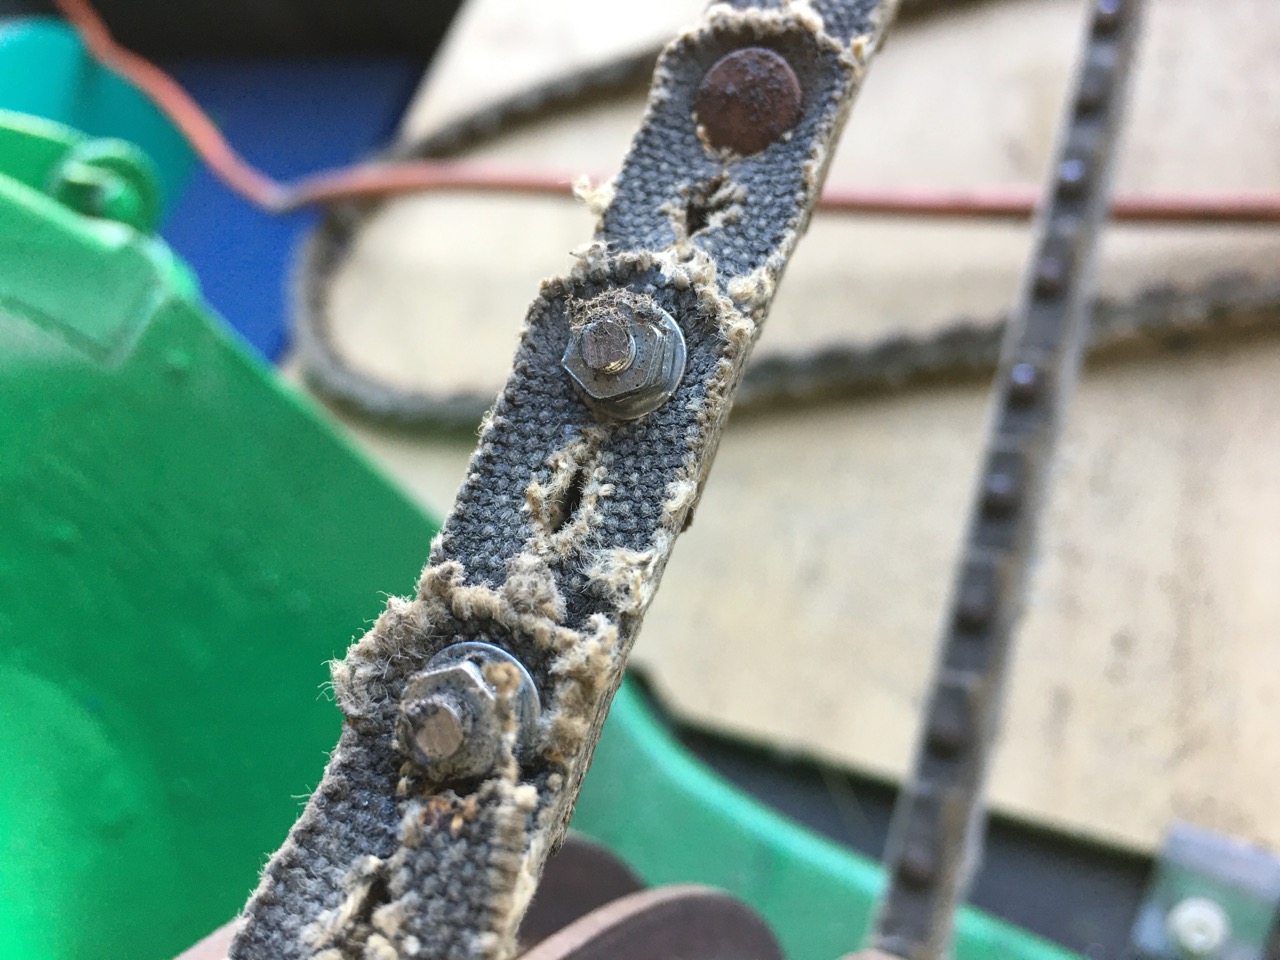
To get this disc mill working again, I also had to learn how to make, break and fit segmented leather drive belts, as the drive pulley is completely enclosed within the cast iron frame of the machine. I had to thread one open end of the broken belt through the frame and then rejoin the belt. I couldn’t find any way to extract the rivets easily from the segmented belt, so I just cut the head off two of the rivets and then replaced them with small bolts and washers. It seems to have been successful. It works! But I’m not too sure for how long?
I put ‘locktite’ on the threads, so I’m hoping that they won’t come loose during work.
This sandy stone grit then goes into the ball mill for 4 hours to be ground down to fine dust, ready to be made into glaze.
It’s quite a process and takes all day. And just like a time-saving kitchen appliance, it needs to be cleaned up after use. This cleaning and relocating of the ‘friendly’ dust extractor proboscis from machine to machine takes more time than the actual crushing.Such is modern convenience.
I have started to get out and collect some rocks, but because of the COVID19 lock-down, I can’t go driving all around my shire doing a full geology excursion.I’m suppose to stay within 5 kms of home. I can go to the shops or Post Office for essentials, but we don’t have a shop or a post office here in our little hamlet. So we have to go the 5km to the next village where there is a small shop and Post Office. Luckily for me, I have walked all this country around here over the past 45 years. So I know where to go within 5 kms to get some glaze stones. There is a small volcanic plug just a couple of kms away, but it is completely kaolinised and has lost most of its alkali, so doesn’t melt very well – in fact not at all. Also, the high levels of iron and magnesia that are left limit what can be made from it. It’s really just a brown soil and is only good as an iron pigment.It would be nice if there were some acid rocks nearby, but there aren’t. So I’m stuck with what is here. There are just 3 volcanic plugs within the 5 k limit around here. All basalts.
I called in at Werner’s house, just a couple of kms further along, on the way to the shops. Keeping my distance of several metres, I reminded him that I had called in there 20 years ago and he let me collect some of the basalt rocks that out crop from a small volcanic plug in his back yard. Werner is a very nice guy. He has retired since I was there last. We went for a well distanced walk around to his back yard. We are both double vaxed, so felt safe to do so.
Mid last century, this was a working quarry, it’s abandoned and quite over grown now, but there are lots of little, hand-sized, small stones that I can pick up from the garden bed near the top of the quarry wall. I can fit about 15 kgs in my back pack and thank Werner and prepare to walk back out. I tell him that I’ll be back for some more stones in another 20 years! He laughs, he will be 100 by then.
I put the stones through my rock crushers. First, I put the fist sized pieces through the jaw crusher to reduce the stones down to blue metal sized pieces.
Then they go through the disc disintegrator mill to reduce the gravel to grit.
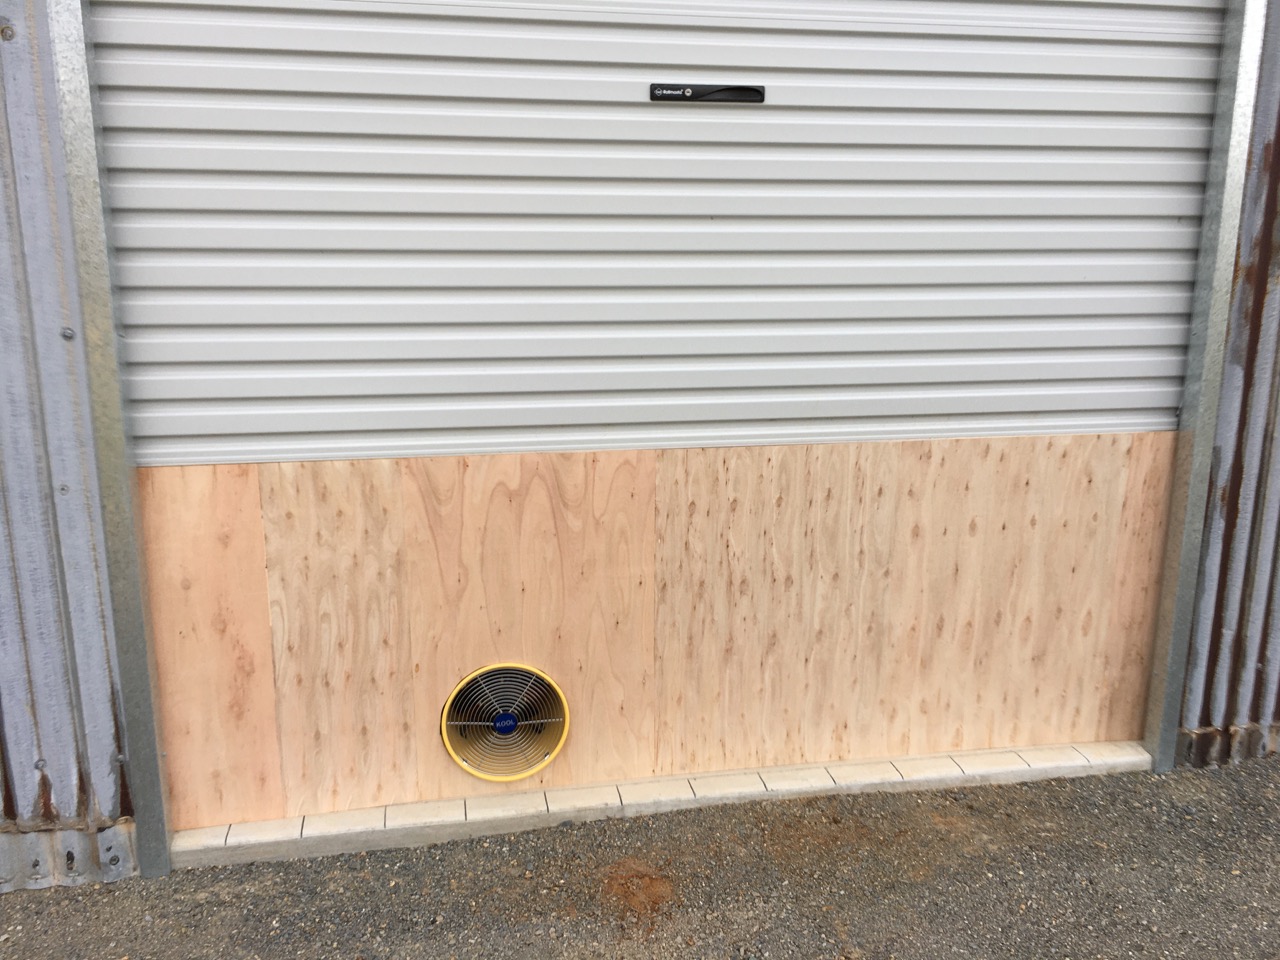
I have installed a flexible dust extractor system that sucks the dust from the machine out through a fan installed in a sheet of plywood that fits in the roller door space. It is quick to install and remove afterwards. This was the quickest and cheapest DIY solution to the OH&S dust problem involved in crushing rocks, as i had the sheet of plywood left over from the ceiling of the throwing room.
I sieve out all the over-sized bits, and put the rest into the ball mill. This reduces the grit down to dust that I can use to make a glaze.I know from my previous research that I can make a tea-dust and a tenmoku glaze from this dark rock. Basalt isn’t very easy to work with, as it doesn’t contain sufficient silica or flux to melt properly. It also has far too much Magnesia and iron to make anything other than dark glazes like tea-dust and tenmoku. Even then, it needs extra limestone and silica to get any usable, stable, glossy result at all. But the thing is, it can be done with a little bit of chemical jiggery-pokery using just what is available around here. In fact. It can be done with what is in my back yard! My initial test tile showed me that I can make a honey brown glaze, a black tenmoku, a green magnesia matt, a tea-dust green/black glaze and an opalescent dark blue/green glaze.
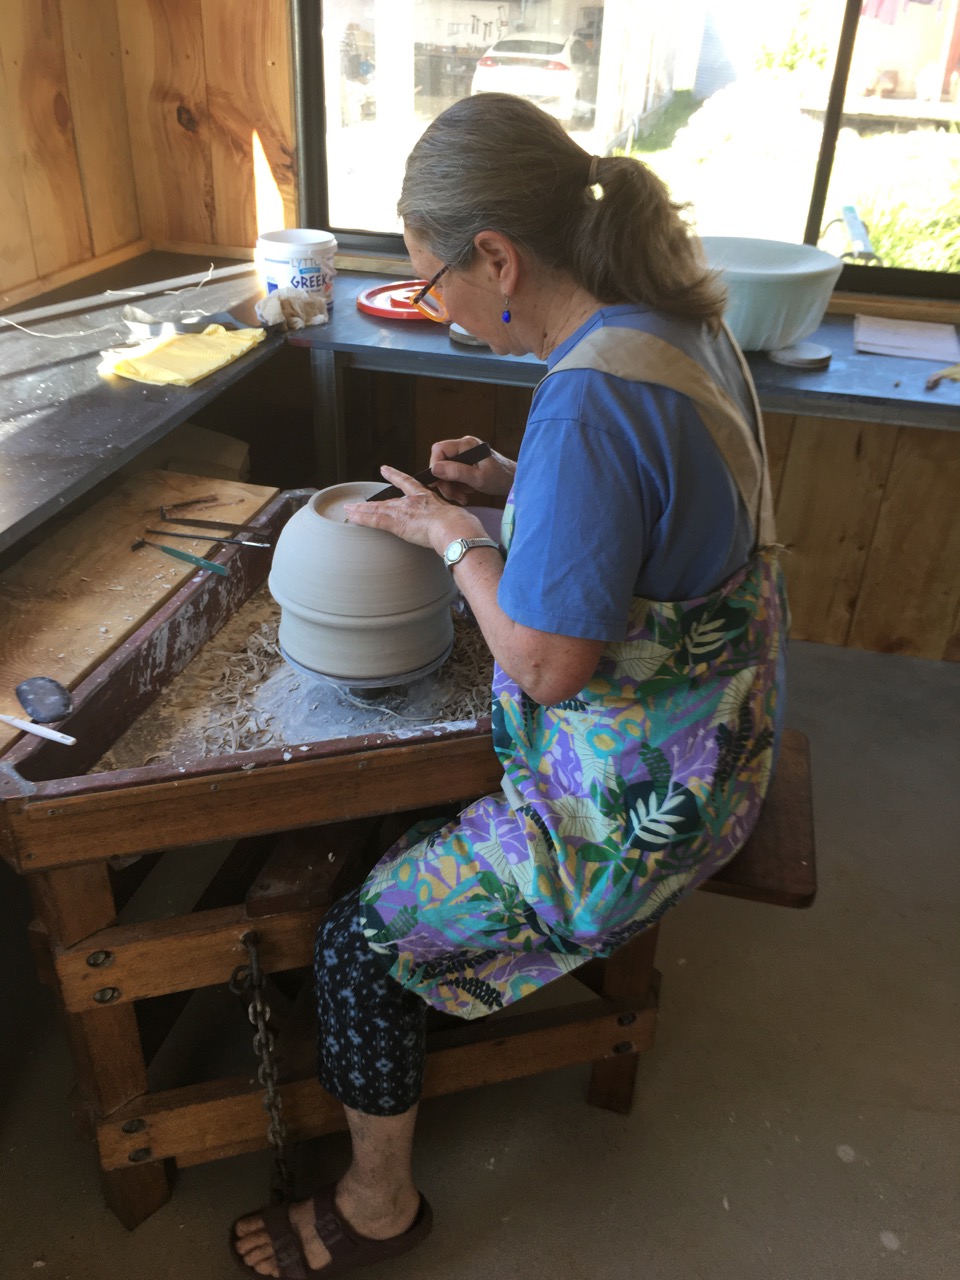
Meanwhile, Janine is at work making larger bowls on the ’Slatyer’ kick wheel.
While the ball mill runs, I spend a bit of time making some new fibre cement pot boards. I use our own sawn and milled pine slats to reinforce and support the fibre cement sheet boards. Some of the advantages of the FC pot boards is that they are cheap, very flat, quite absorbent and light weight.
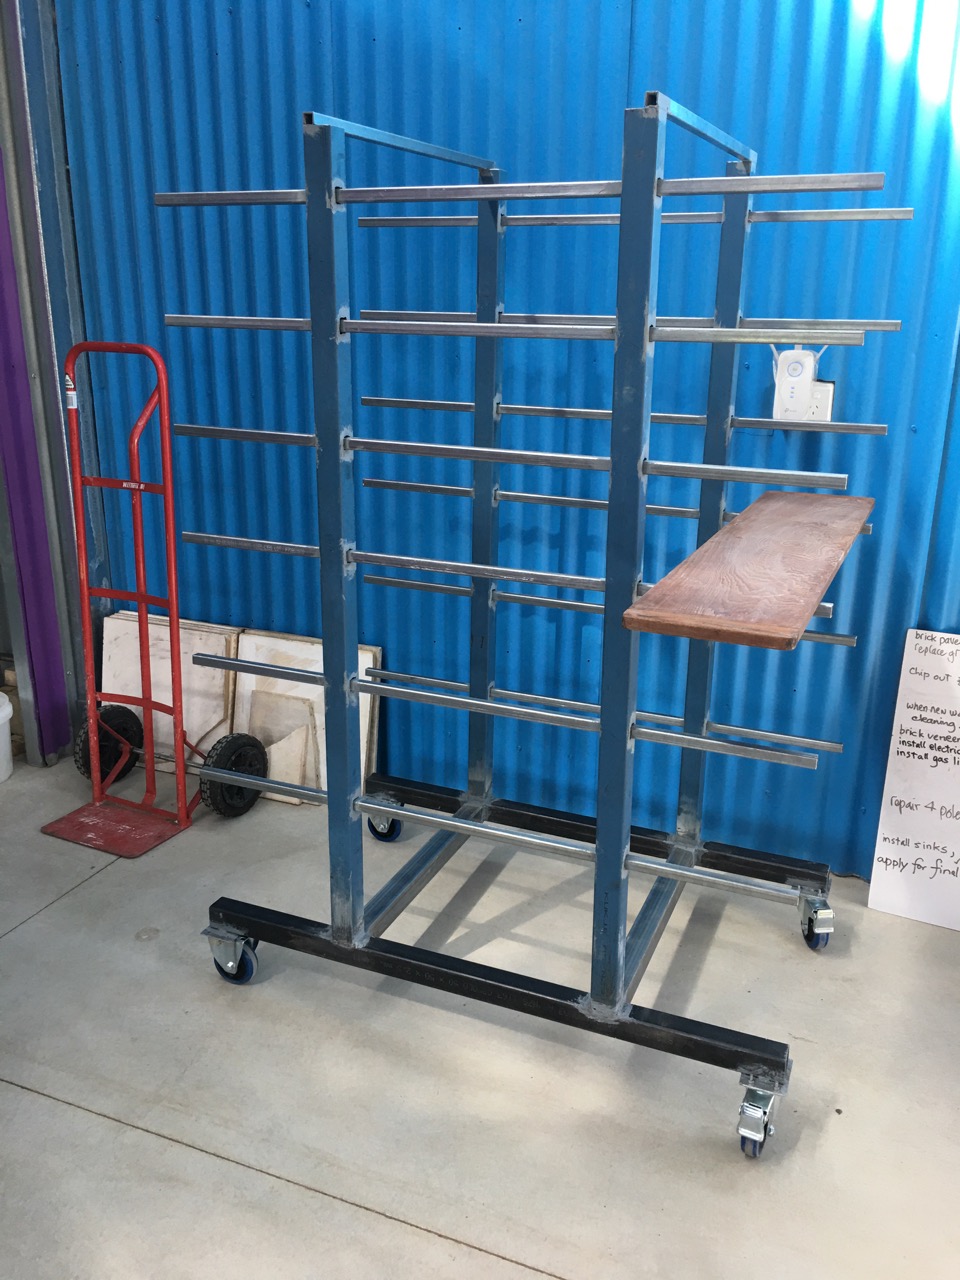
I made a couple of stillages on castors to hold the pot boards in a compact and movable form. The first set I made from leftover parts of the brickies’ scaffolding. I don’t like to see waste, so i kept the parts after i dismantled the scaffolding. The other set I made from steel, half of which was left over from the shelves and benches that I made for the Gallery and lab rooms. These shelving racks can hold 28 pot boards if they ever get filled. More than enough for us.
Now that we finally have a continuous, flat, level floor, we can wheel our work between the throwing room, kiln room and glazing rooms as needed. So easy and convenient now. What a luxury!
Janine made up our first bucket of glaze. She mixed up a 5 kg bucket of Leach’s Cone 8 glaze. We have used this glaze all our life. It is the reliable go-to glaze for testing all our clay bodies. A basic and reliable, no frills glaze that fits right in the middle of the spectrum. A great way to compare the various different clay bodies glaze fit characteristics in our first few firings, which will be nearly all tests.
It can also be an extremely beautiful glaze, a pearly, creamy white, surface. But this is only really true if it is fired just to cone 8 only and not higher. We also ball mill the glaze batch for a little while to get all the particles well mixed. Not too long, otherwise the already finely milled felspar granules will start to break down, releasing its alkalis into solution. Felspar does not have a chemically robust structure, so care is advised when ball milling rocks for glazing. To avoid this damage, I usually ball mill my stones dry after putting them through the rock crushers. I can then store the powder for use in making clay body or glazes, weighing them out accurately dry before wetting them down. The alkali is less likely to be released during dry milling.
I’m not trained or qualified in any way to do with mineral processing, but I have worked with locally found stones for my glazes for the past 47 years. Everything that I have learnt is self taught. I built my first ball mill in 1974. The first year after I graduated and I have built a few more since then. I will probably make another one in the coming years, when time permits. I have always kept a ball mill log to track my ball mill usage. I kept a record of what was milled, for how long and how much was in the mill, wet or dry milling and the date that I milled it, as well as any recipe involved. I lost that log book and all my other glaze recipe books etc. in the fire. Just as I did in the first and 2nd fires. I had two copies of my glaze recipe books, one in each building, but they both burnt down! I can remember that my most recent milling log, kept since 1984, I had clicked up over more than 1,000 hours of milling since then. but the exact number escapes me now. Somewhere around 1050 hours? With an average milling time of 2 to 3 hours, This is about 500 uses of that last mill. Thats a lot of hours of loading, unloading and washing out.
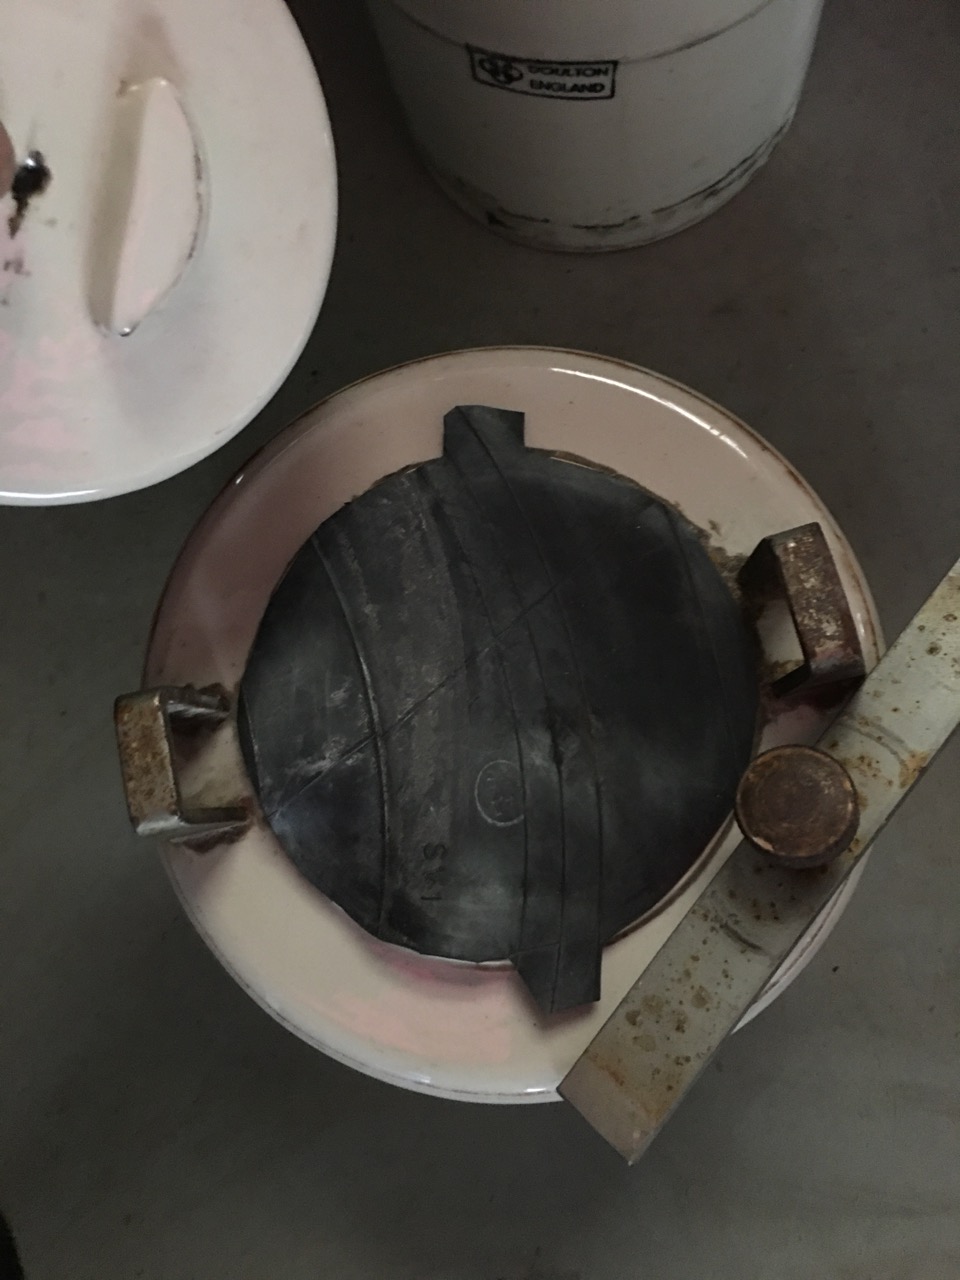
My friends have sourced some 2nd hand ball milling machines for me. Len Smith is always on the digital lookout for me for bits of equipment. He is so fantastically resourceful! He told me about a deceased estate of a potter. I turned up (before lock-down) and was lucky to buy what appears to be a locally made copy of a Shimpo ball mill roller and two 1 gallon, Chinese made porcelain jars. One was broken on the shoulder near the locking stud and the other has a brittle, seized rubber ring seal. Was able to prize the stuck lid off with a chisel. They both need some work. But I was lucky to get them. I made a new silicon rubber seal for the seized and a flat rubber washer type of seal for the other.
I vaselined the ground porcelain jar rim, then extruded a thick silicone rubber ring around the lid and placed it on the jar overnight to set.
This has created a new, soft and springy rubber seal that will keep it going for another 30 years.
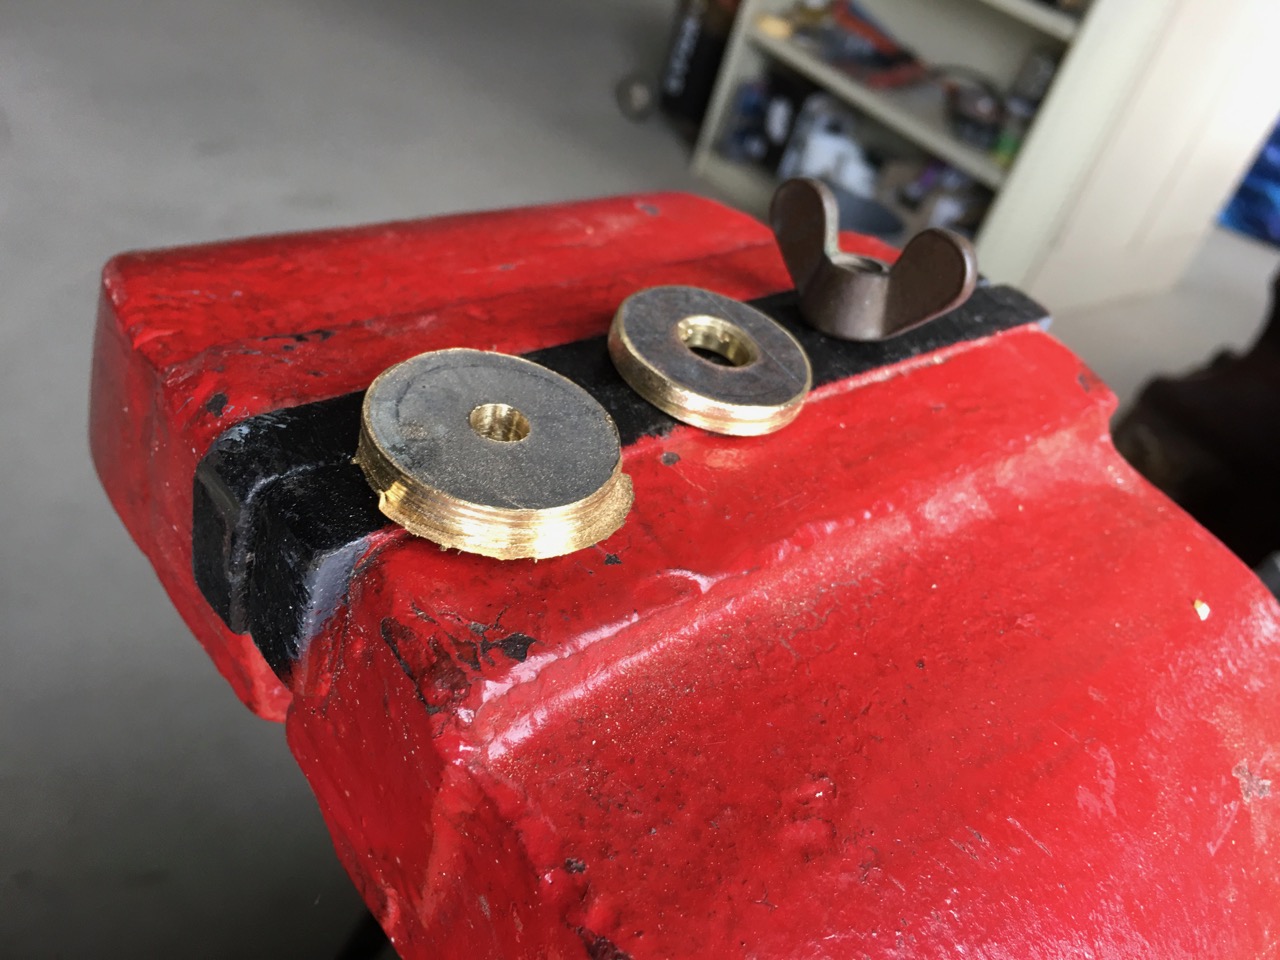
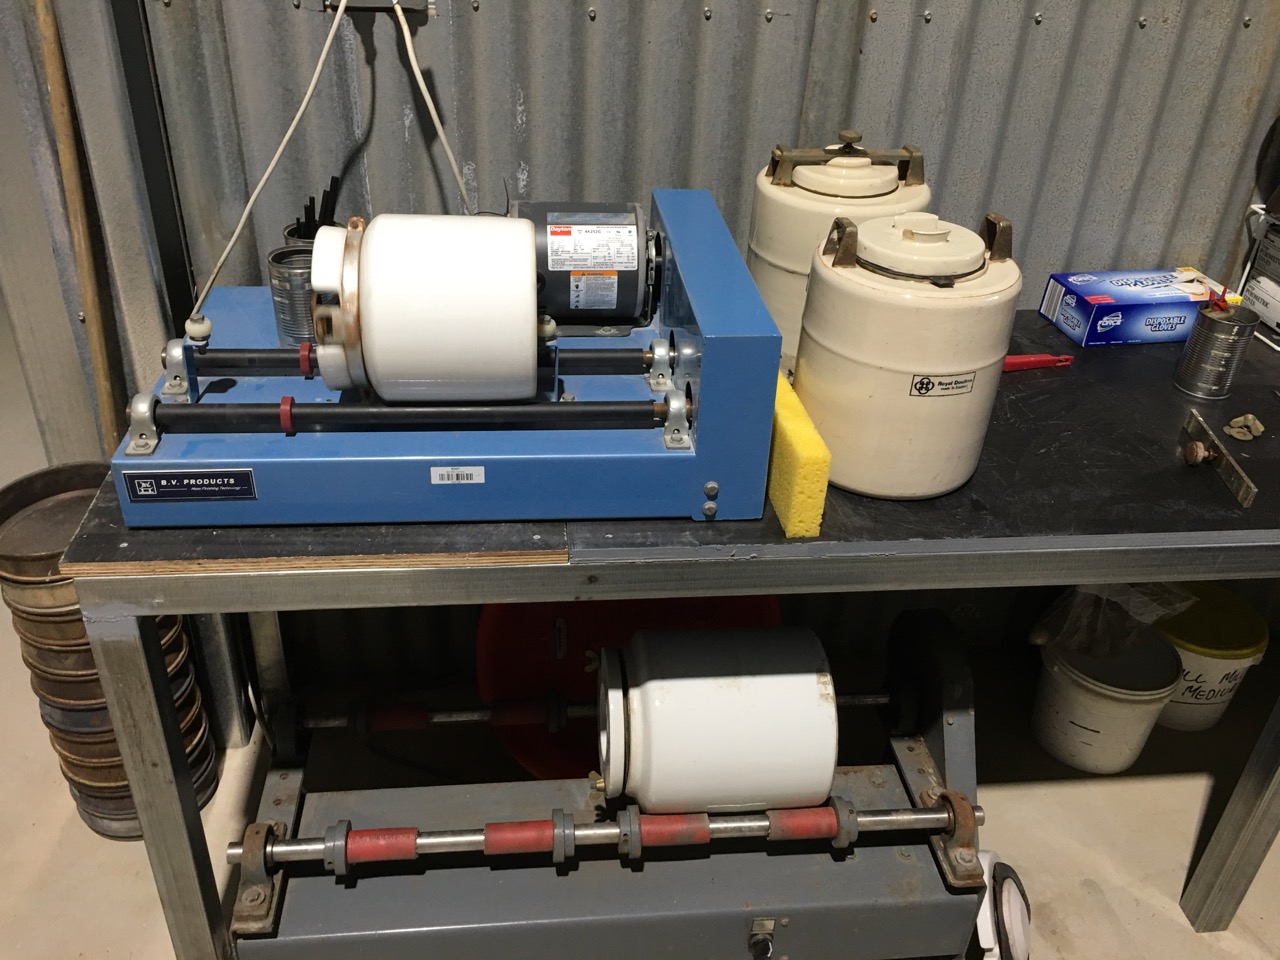
My friend Simon Bowley, just gave me his 3rd hand Shimpo mill roller and a beautiful 15 litre Chinese jar. It has the brass wing nut and brass washers missing to secure the lid. This gadget was stored in an old shed for some years, and I’m not too sure if it has ever been used very much. As it still had the paper label from the supplier (Walkers) glued to the outside of the jar. This started to wear off as soon as I used it.
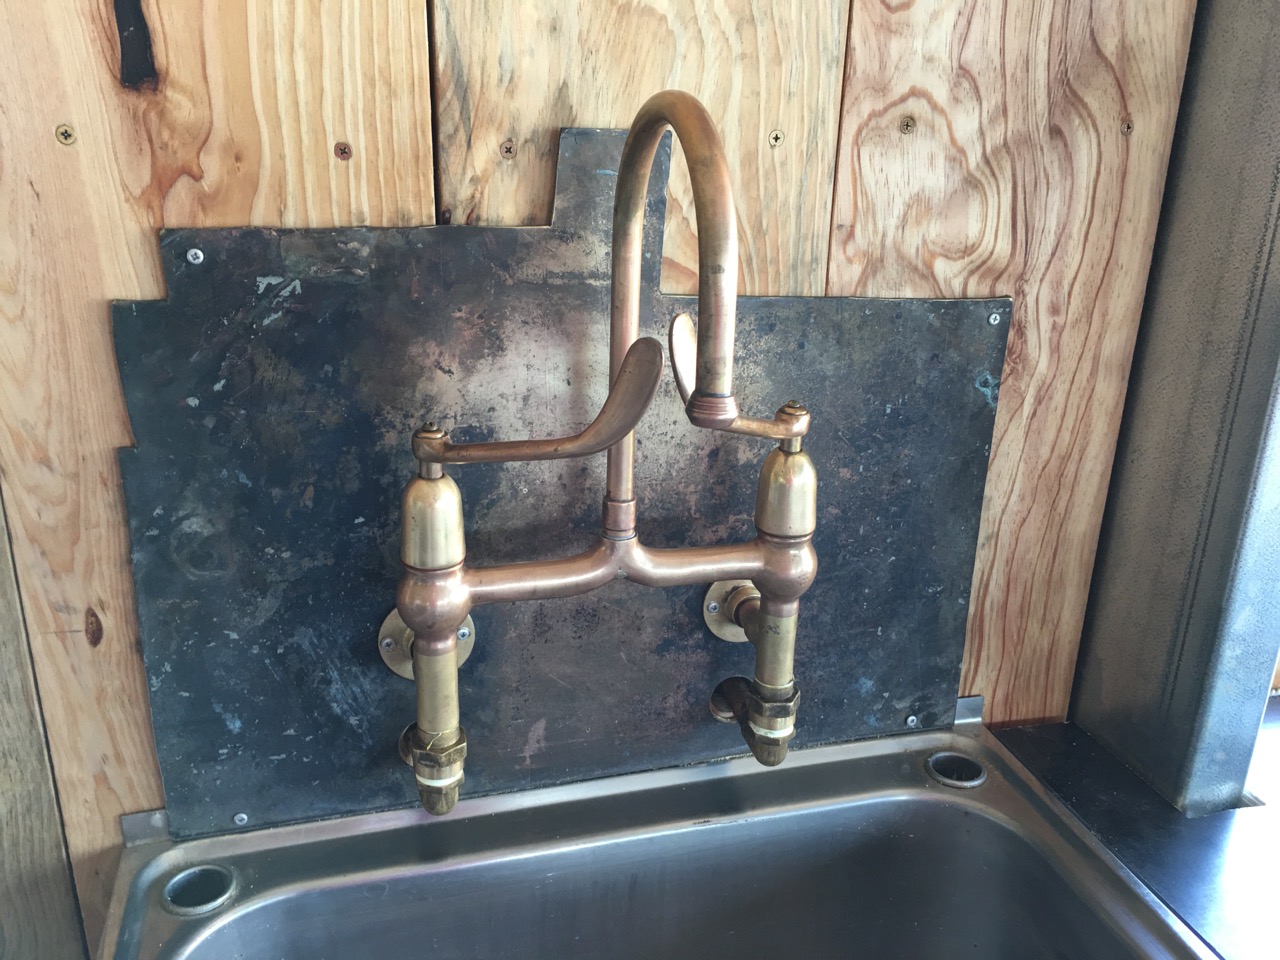
I made a couple of brass washers from the ‘hole’ pieces that I cut from the pottery sink splash-back to get the water pipes into the shed.
I hadn’t thrown them out, as I thought that they might just turn out to be useful some day. A good piece of thick brass like that, 6mm thick is too good to throw away! They came out of the hole saw pretty rough, but I was able to file them down to a smoother finish and drill out the centre hole to a clearance on 3/8″ BSW thread and they work a treat. Not many potters have the luxury of solid 6mm brass washers on their mill jar.
Len also located a very small ball mill unit in Melbourne that wasn’t being used and was able to be donated to me as a bush fire victim. It looked as though it had hardly ever seen the light of day. It came with 2 beautiful Daulton porcelain jars of about I gallon, or 4 litres, and a plastic bucket of small milling media to suit. The jars had some remnant brown dust in them, but looked as though they hadn’t been used very much.
When I tested the small mill roller with one of its Daulton jars loaded with balls and water to clean the mill. I found that the motor overheated and stopped after 25 mins. I can see why this machine wasn’t used very much. It doesn’t work! 30 mins is only long enough to do a bit of blunging, but a couple litres isn’t enough to achieve much. I will need to change the motor for a larger/stronger one. These Daulton jars will fit on the smaller end of Simons mill roller, so I can use them in this way.
My friend Tony Flynn gave me his shimpo potters wheel a few months ago, He also gave me a tiny 1 litre porcelain jar. This could be useful for milling pigments. I tried it on the RMIT roller the next day and it was small enough and light enough not to over heat the motor. It got too hot to touch, but didn’t trip the overload switch. so this will be a useful combination for small batches of pigment.
So now I have a 3 different jar roller mechanisms and by mixing and matching the different jars, I can use the Daulton jars on Simons roller, Tony’s jar on the small roller, Simons big jar on his roller and one of the smaller Chinese jars on the deceased estate roller.
Most of the jars needed new rubber seals. I had already been to the tyre business in Bowral and asked for a punctured inner tube from their rubbish bin, so I was prepared.
All the jars needed to be washed out and cleaned, then filling with balls and water and run for an hour or so the get the surface of the balls and mill all clean and fresh to start work. After milling like this the water turns cloudy, so the balls are rinsed in 2 buckets of fresh water, then placed in a plastic garden sieve to drain and dry out.
The volume of all these small jars added together just about equals the one bigger 25 litre jar that i used to own. The big difference is that to load all 5 seperate jars, run them on 3 different machines and then clean them is a lot of extra time and labour. But at least I can get some stones milled and local rock glazes made to get us going.
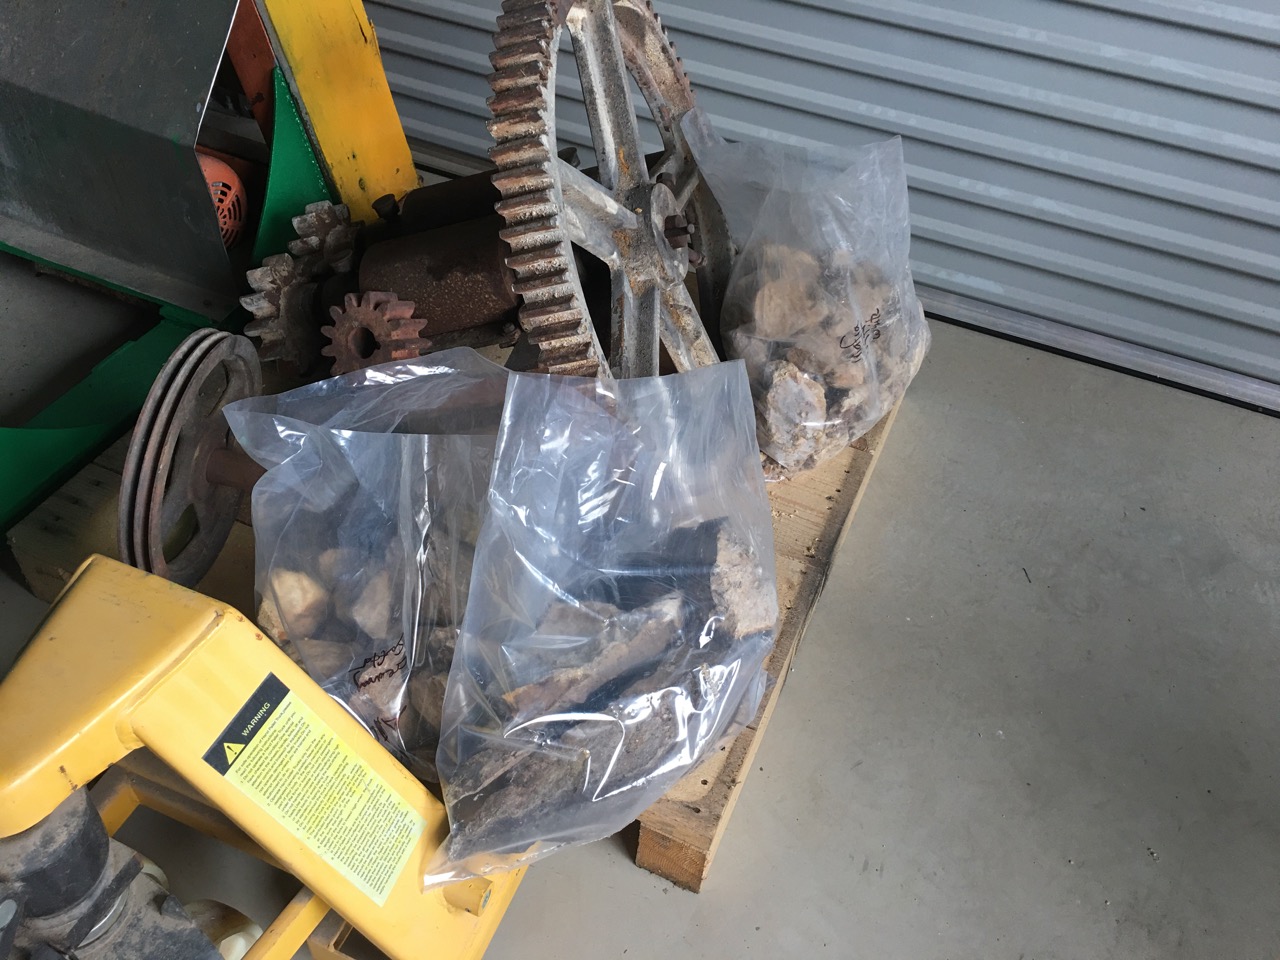
I stopped off at a few local sites on the way to the supermarket a few days ago. So I have a few bags of stones to work on. The next step will be to get the rock crushers going. The roller mill is still in pieces and needs some TLC


You must be logged in to post a comment.