A BIG Day

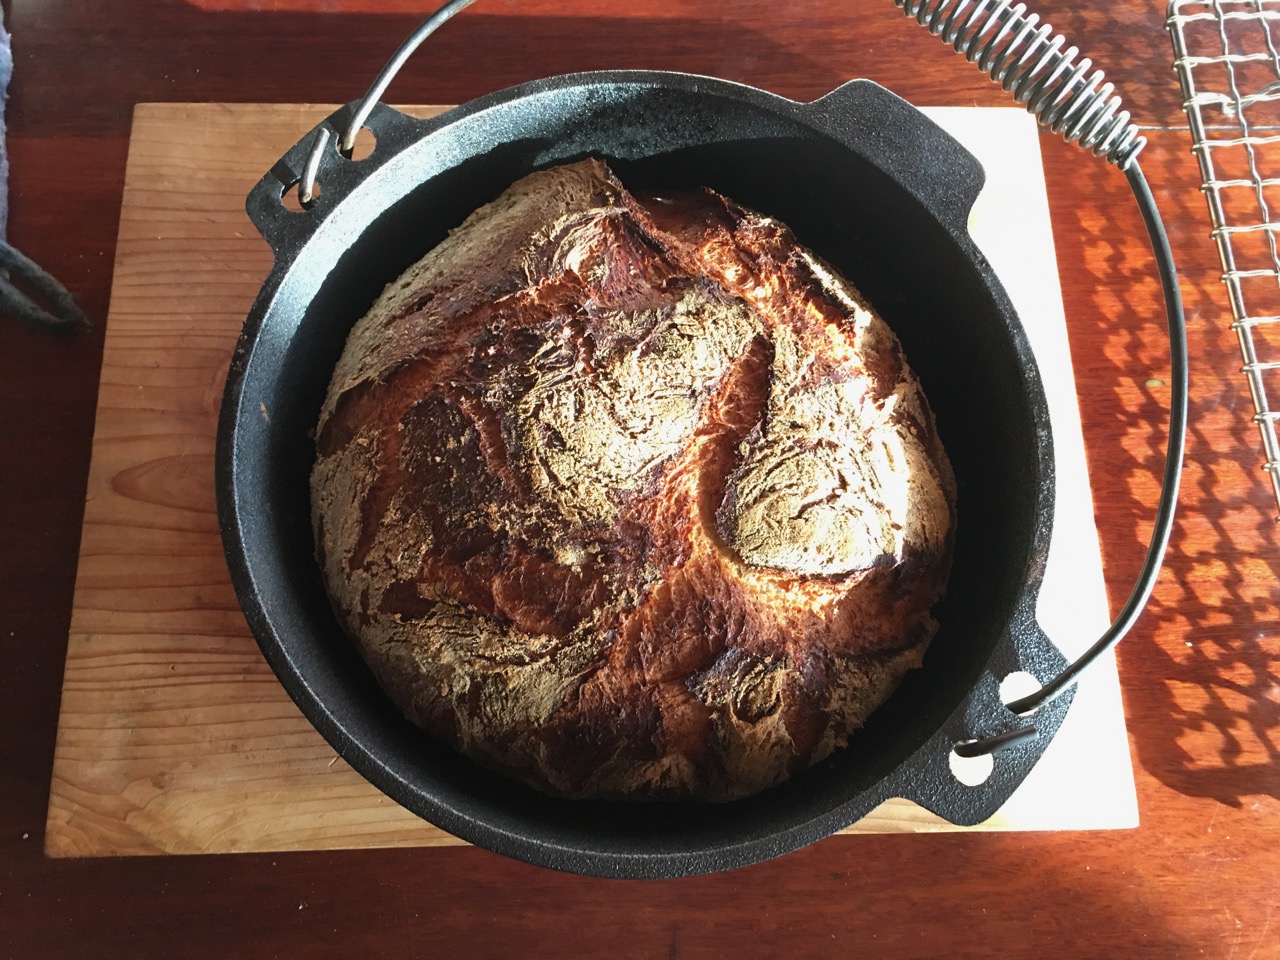
We are potters again!

We have our hands in clay again – finally. It’s been 19 months and 3 days since the fire.
Today we made our first batch of clay in the new pottery clay making room in the new shed.
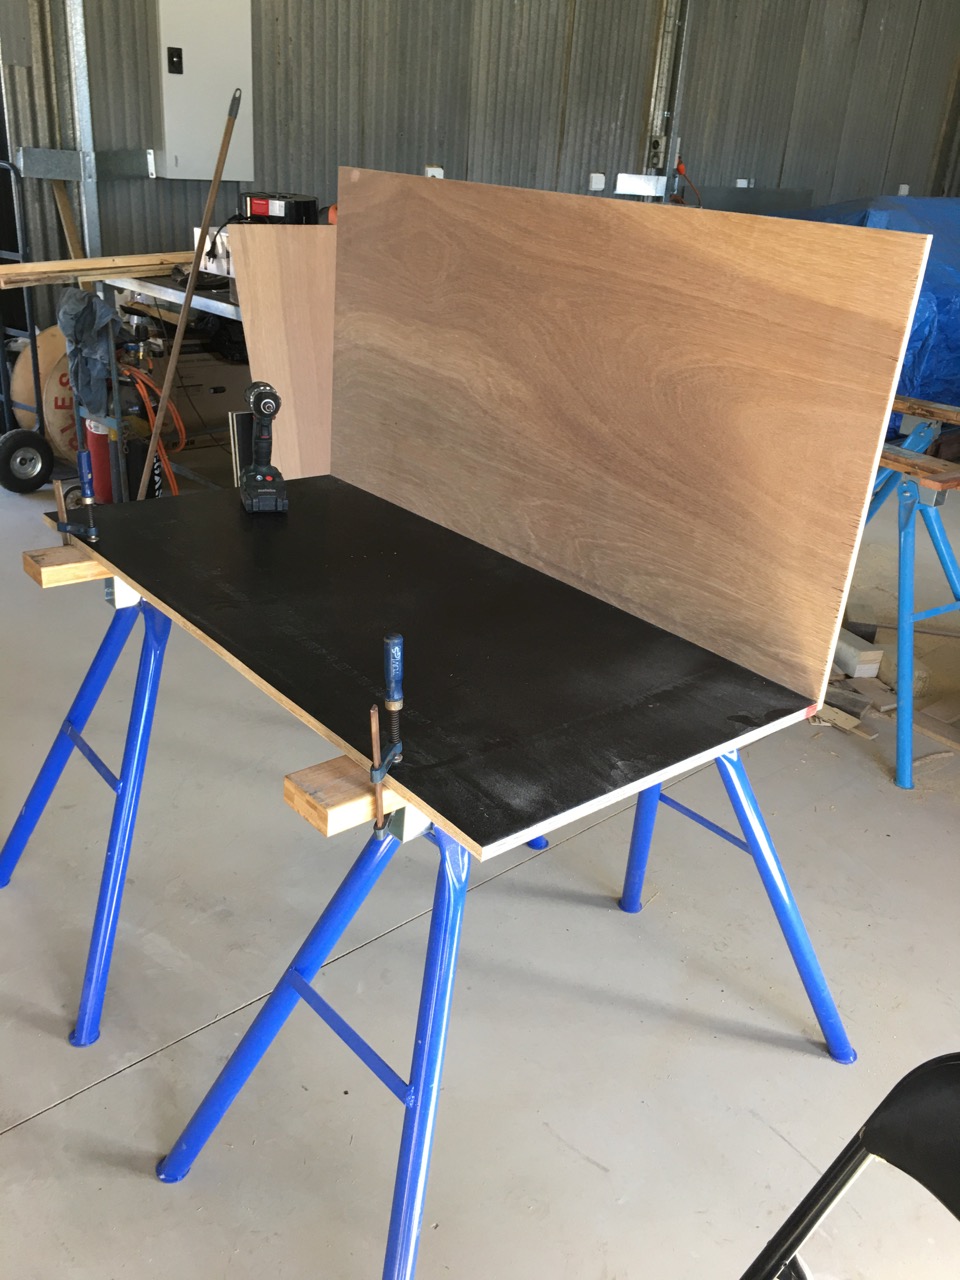
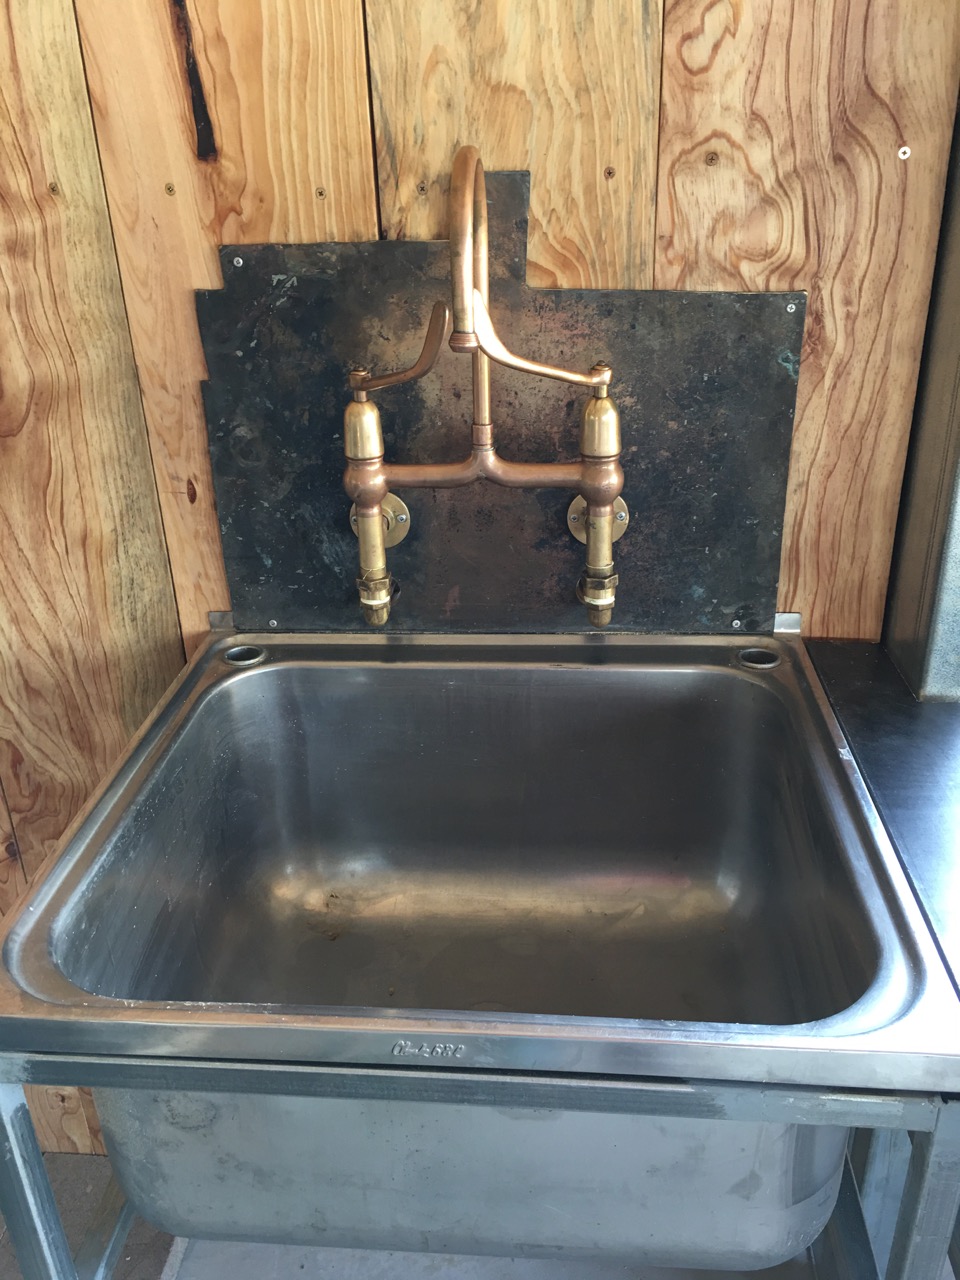
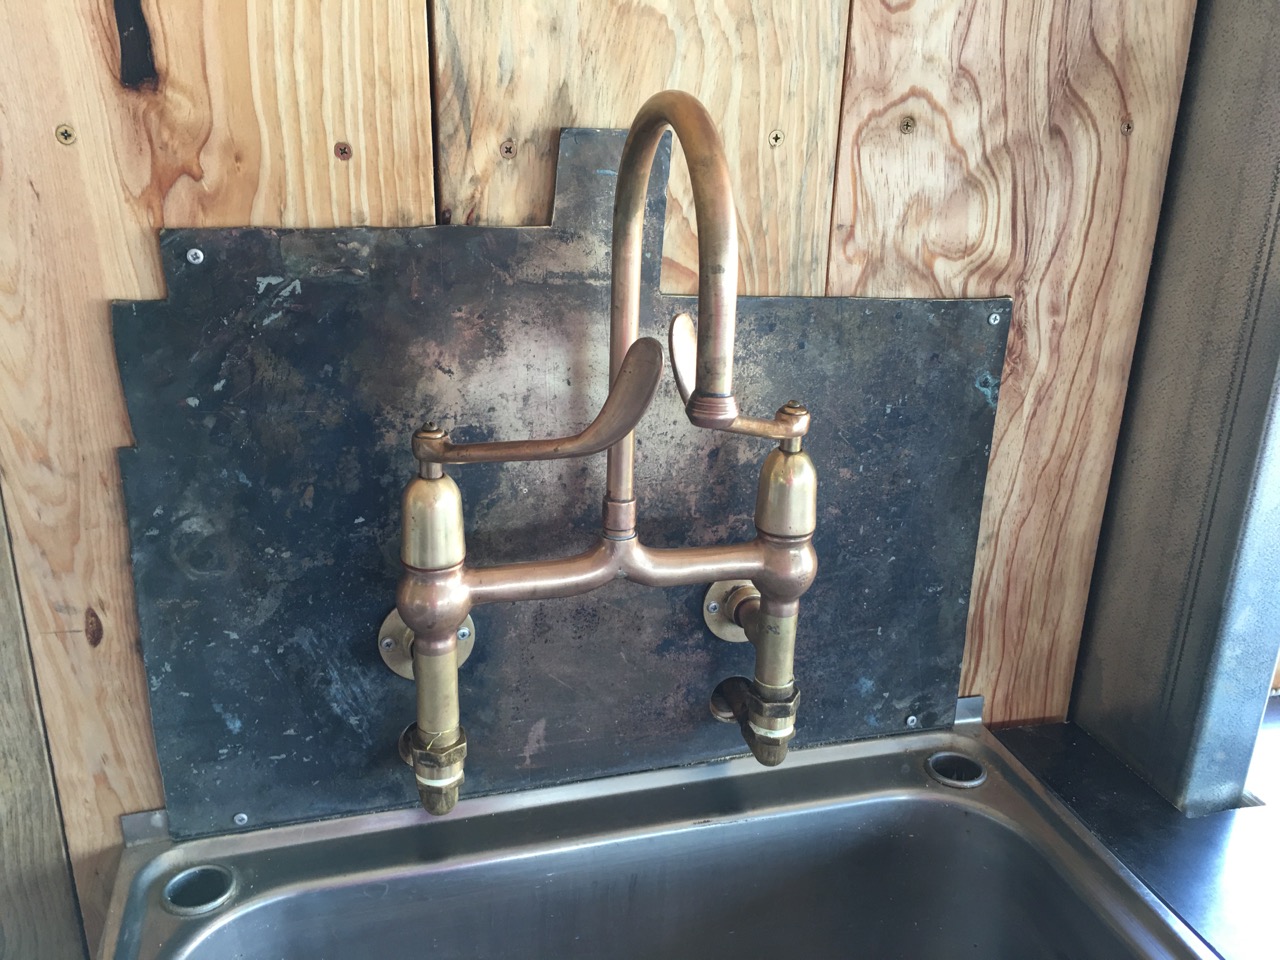
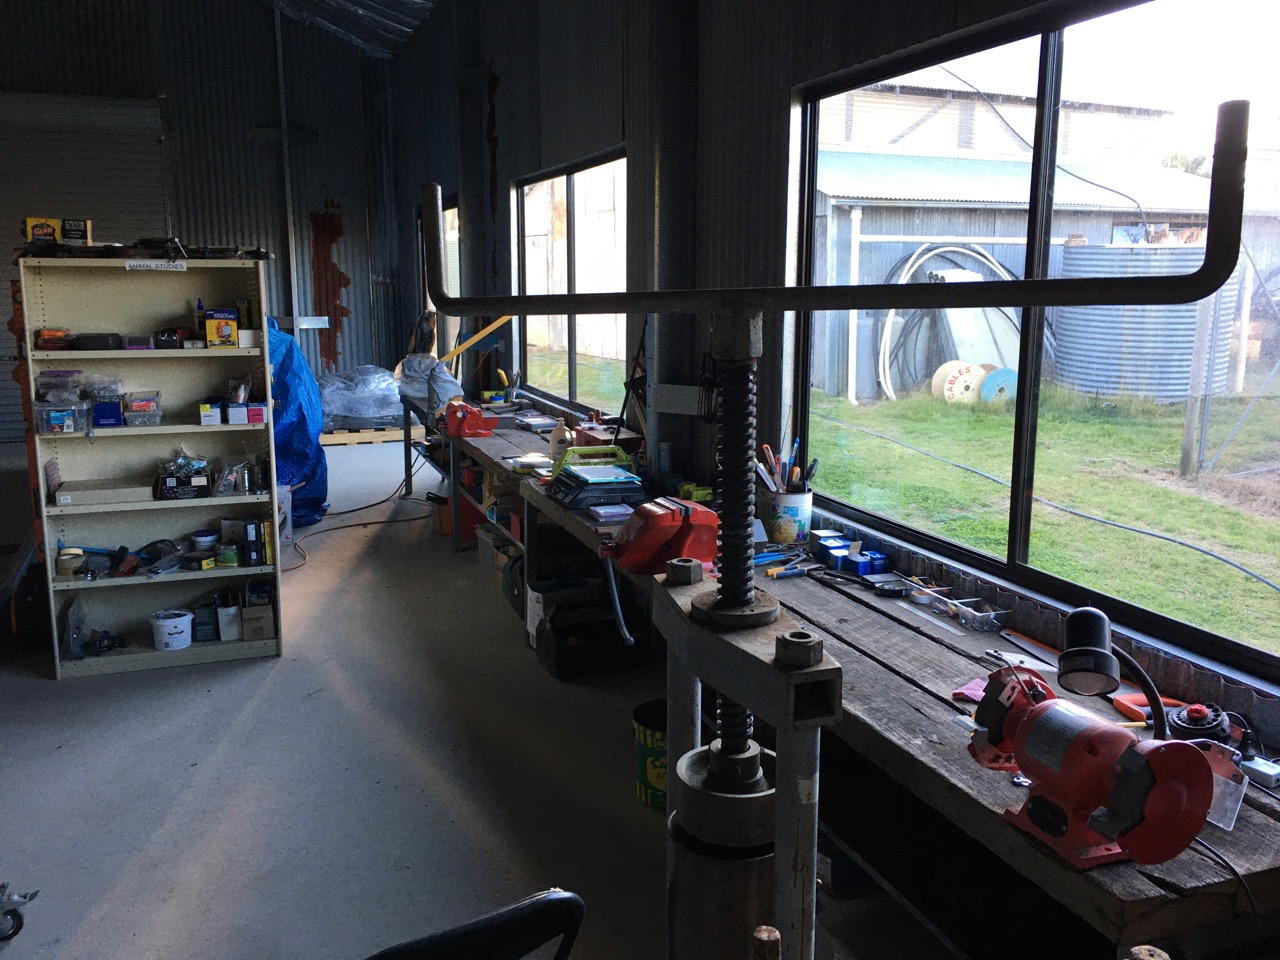
I spent part of Friday fabricating a wedging bench, because there would be nowhere to work the new batch of clay coming out of the dough mixer into balls and then blocks, before bagging them up, and moving them to the new clay boxes. So I needed a strong bench.
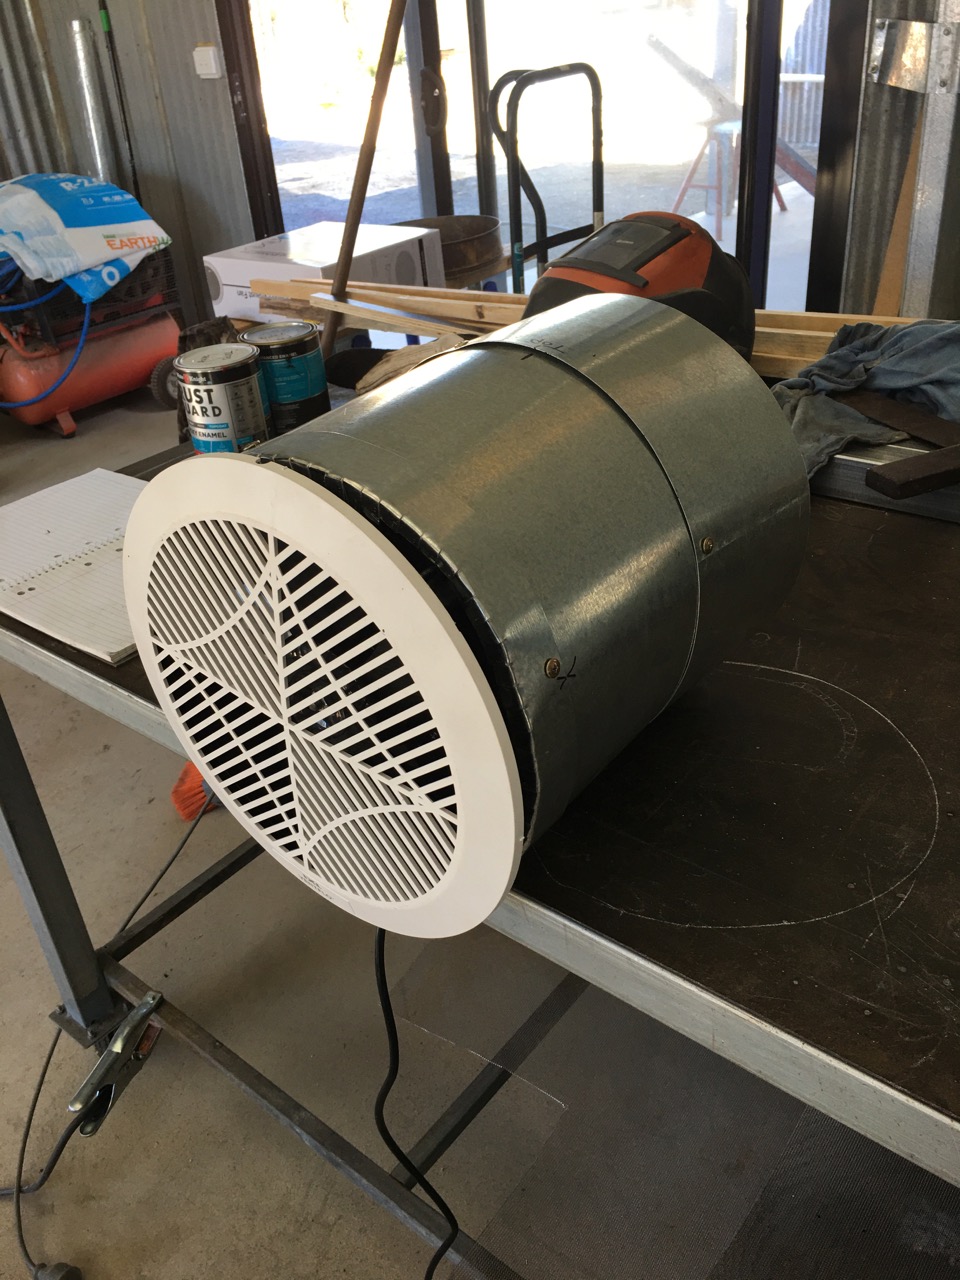
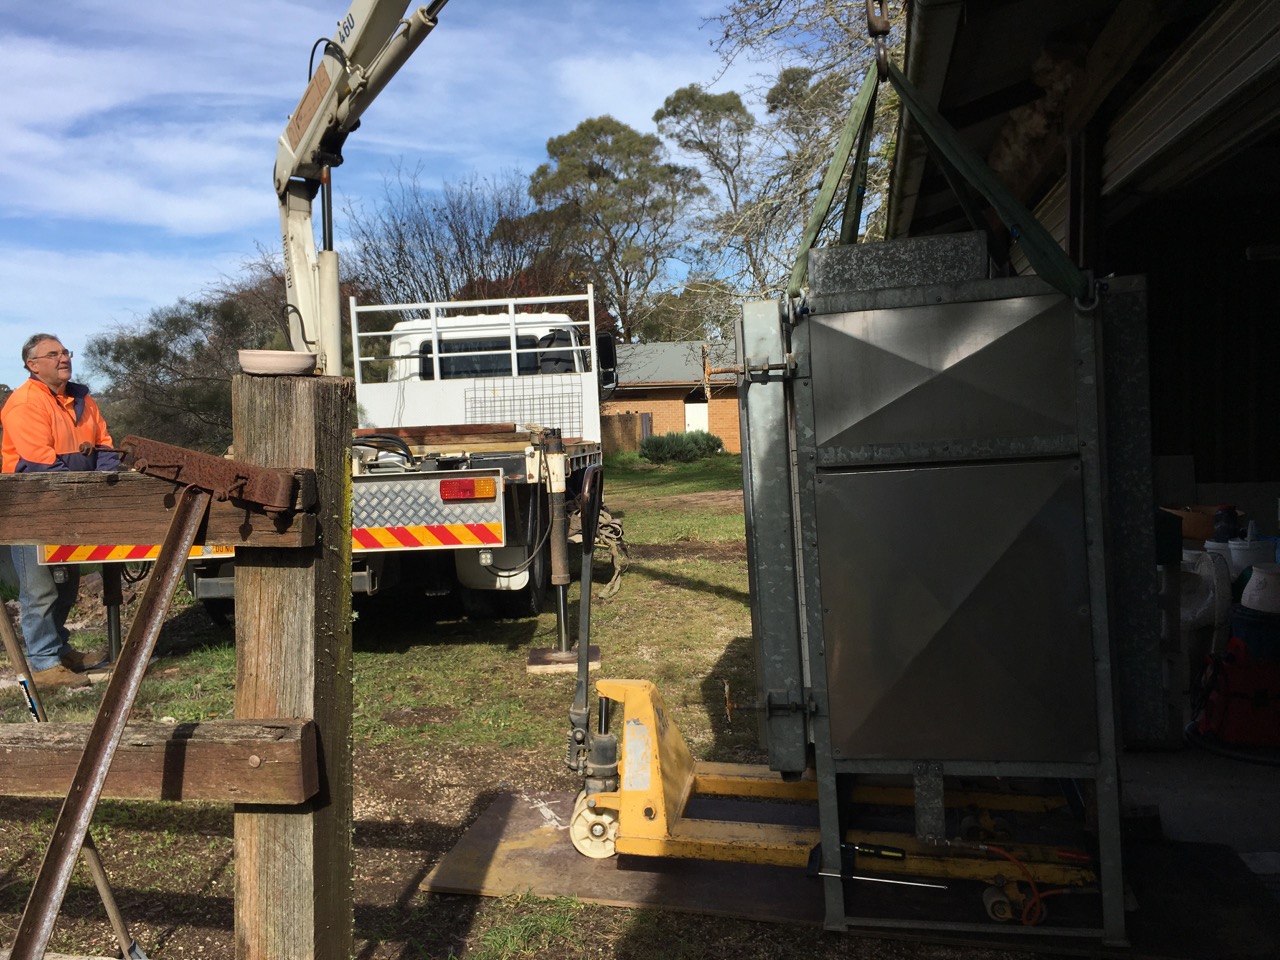
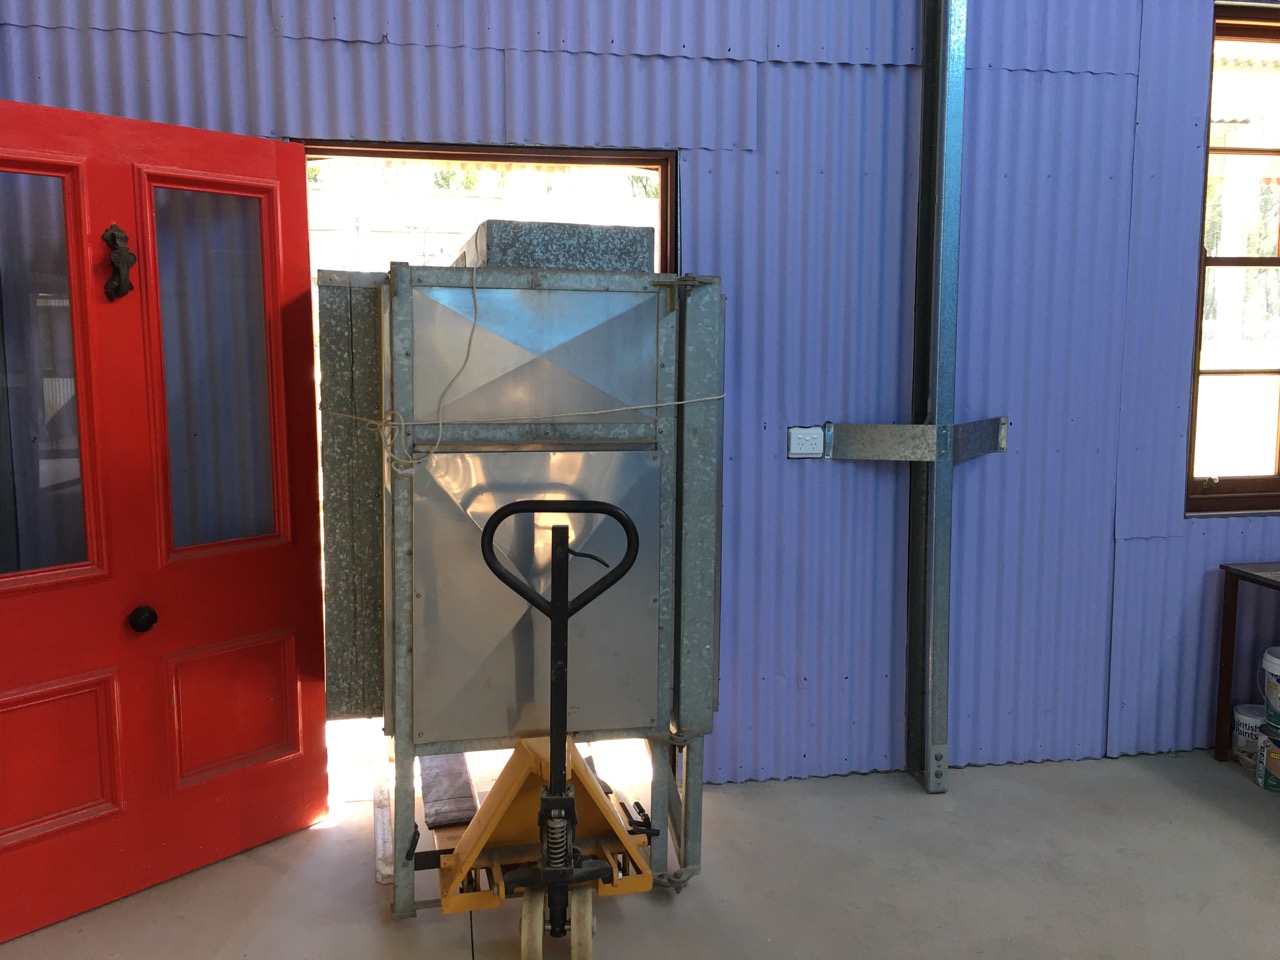
Every step has been considered and planned, so I have already built the plastic lined clay boxes. Installed the dust extractor. Rebuilt the dough mixer – for the 2nd time after it was burnt in the pottery fire in 1983 and then again in 2019. Making the wedging/clay prep bench was the last step.


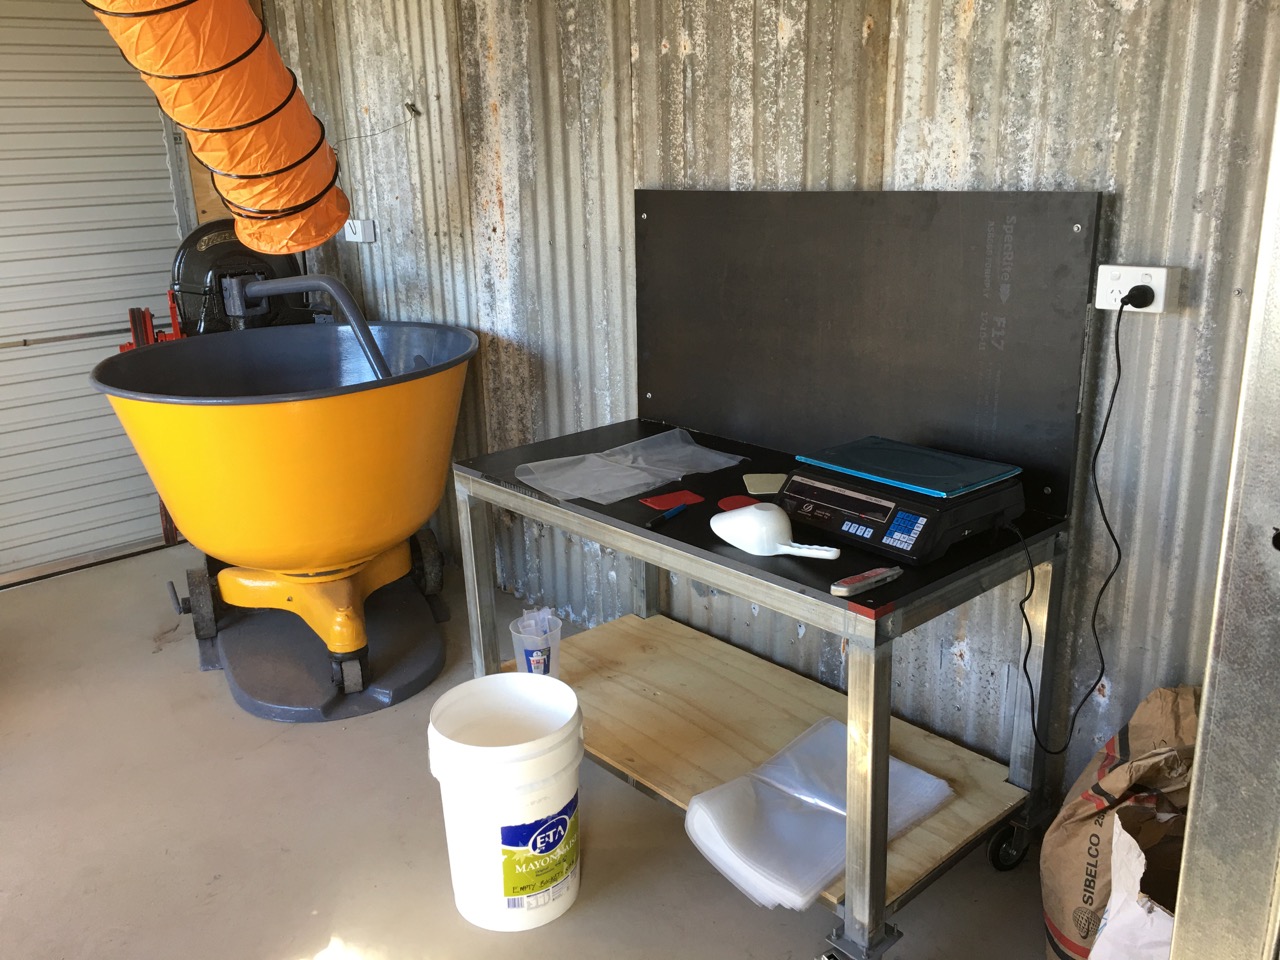
I incorporated a marine ply splash back on my bench, so that in the future, I can stack clay on to the bench quite high prior to pugging, without it falling – that is, once we manage to get a pug mill. We have had one gifted to us, but as we are all in lock down. I can’t get it.We are making clay anyway and bagging it up to age in the new clay box, so that when we get a pug mill, we will vacuum pug it and can use it straight away.


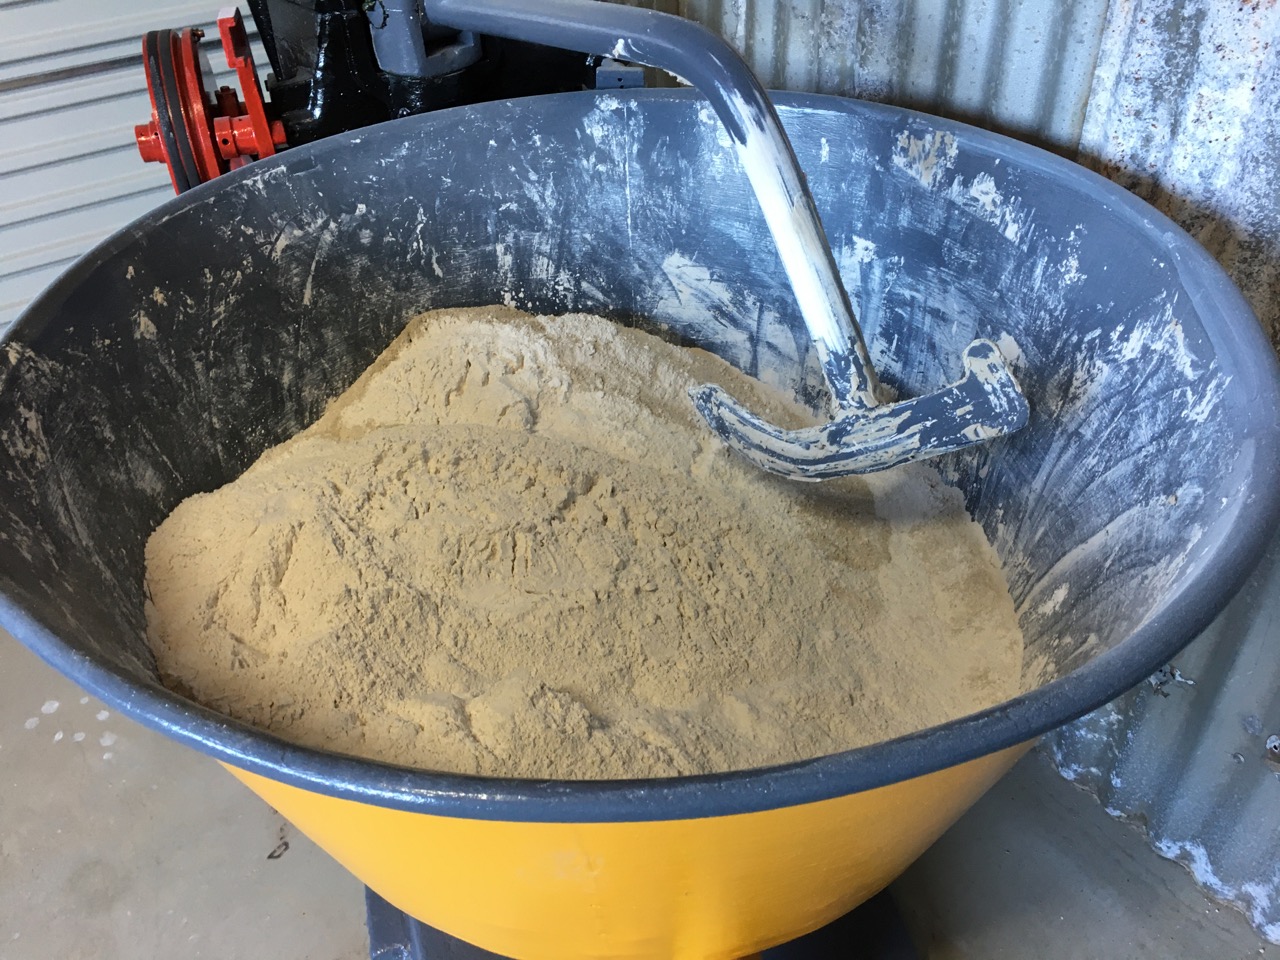
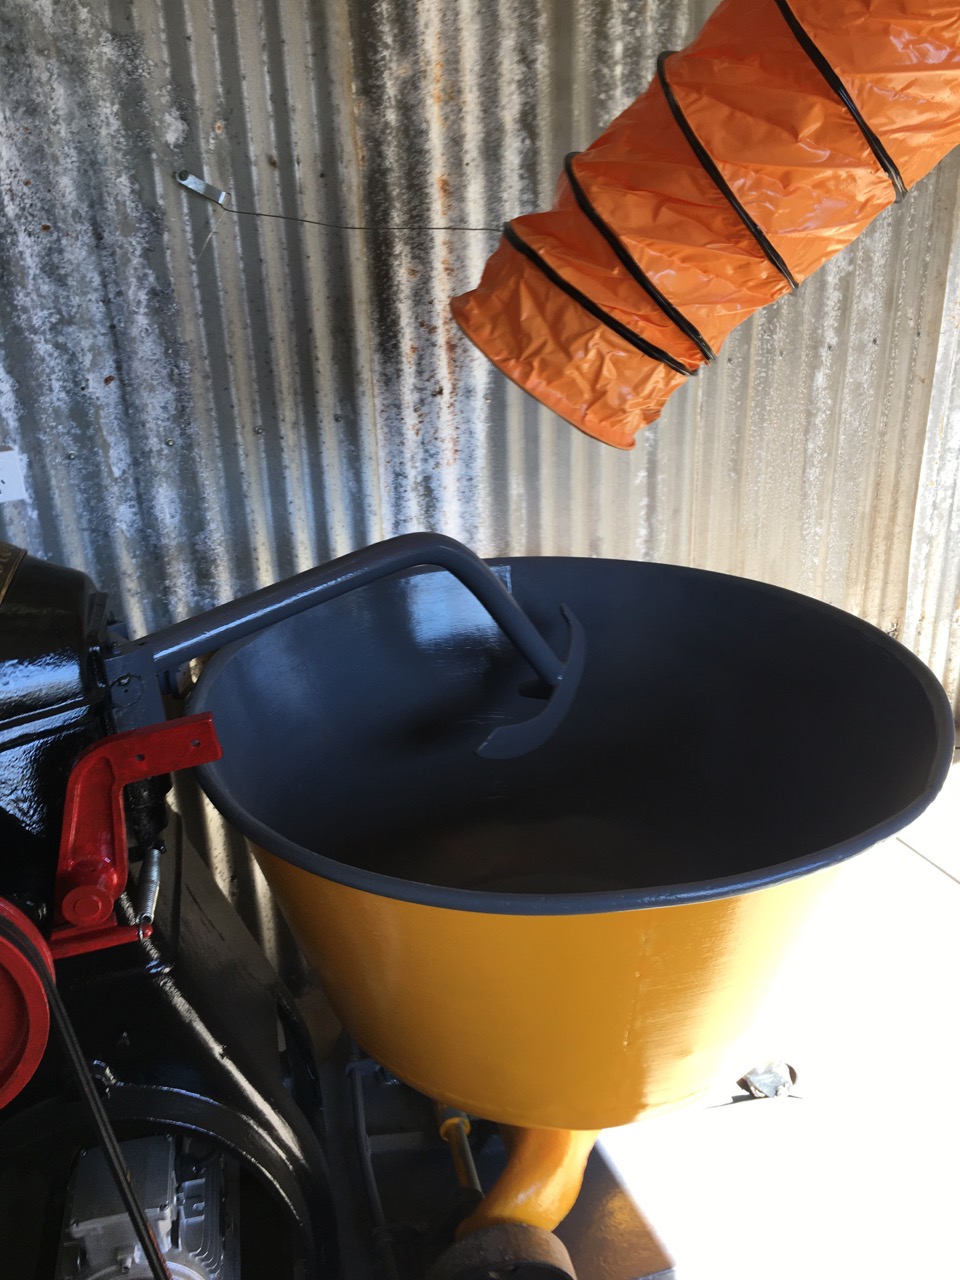
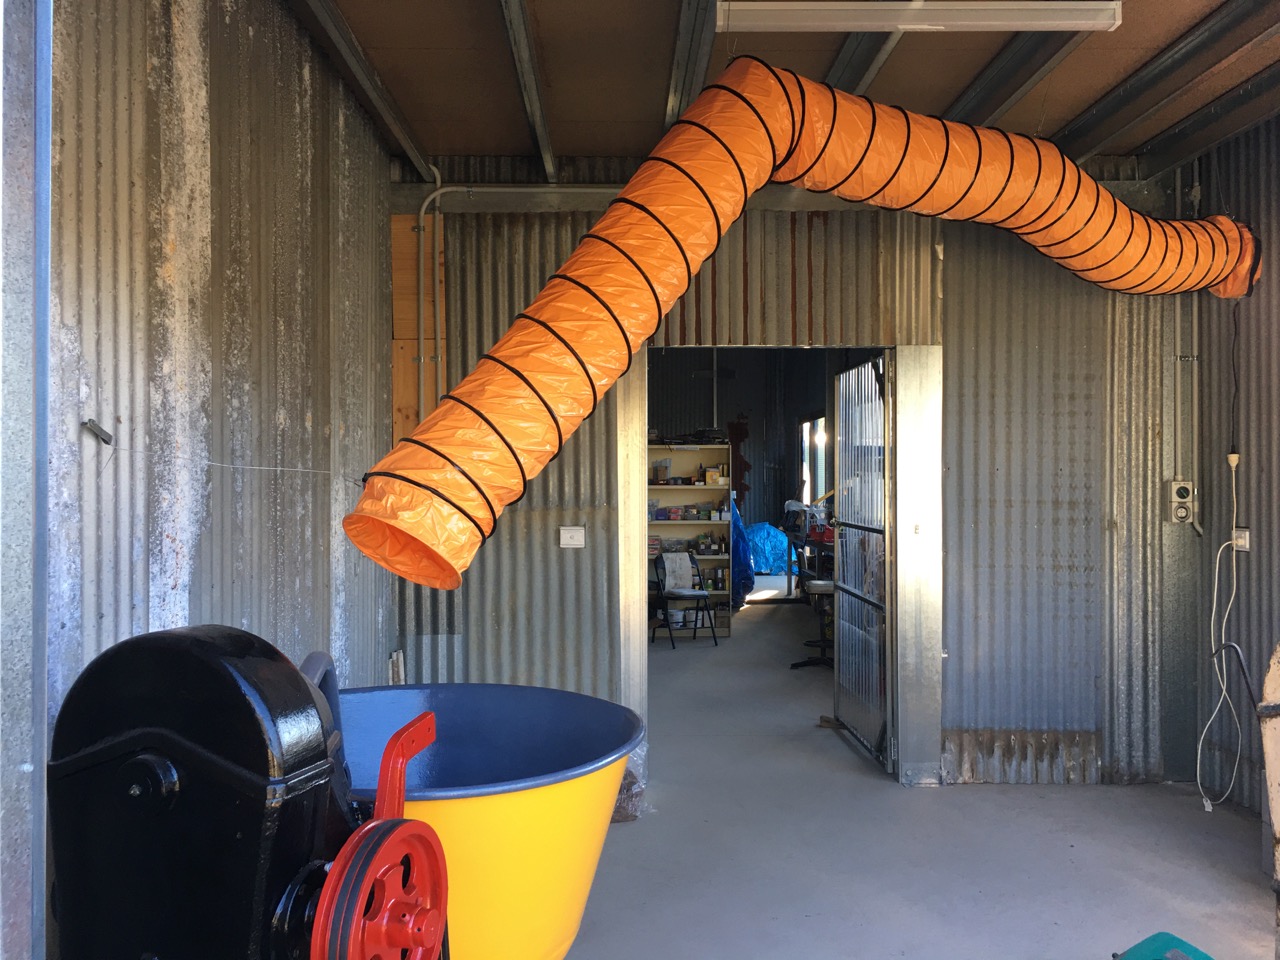
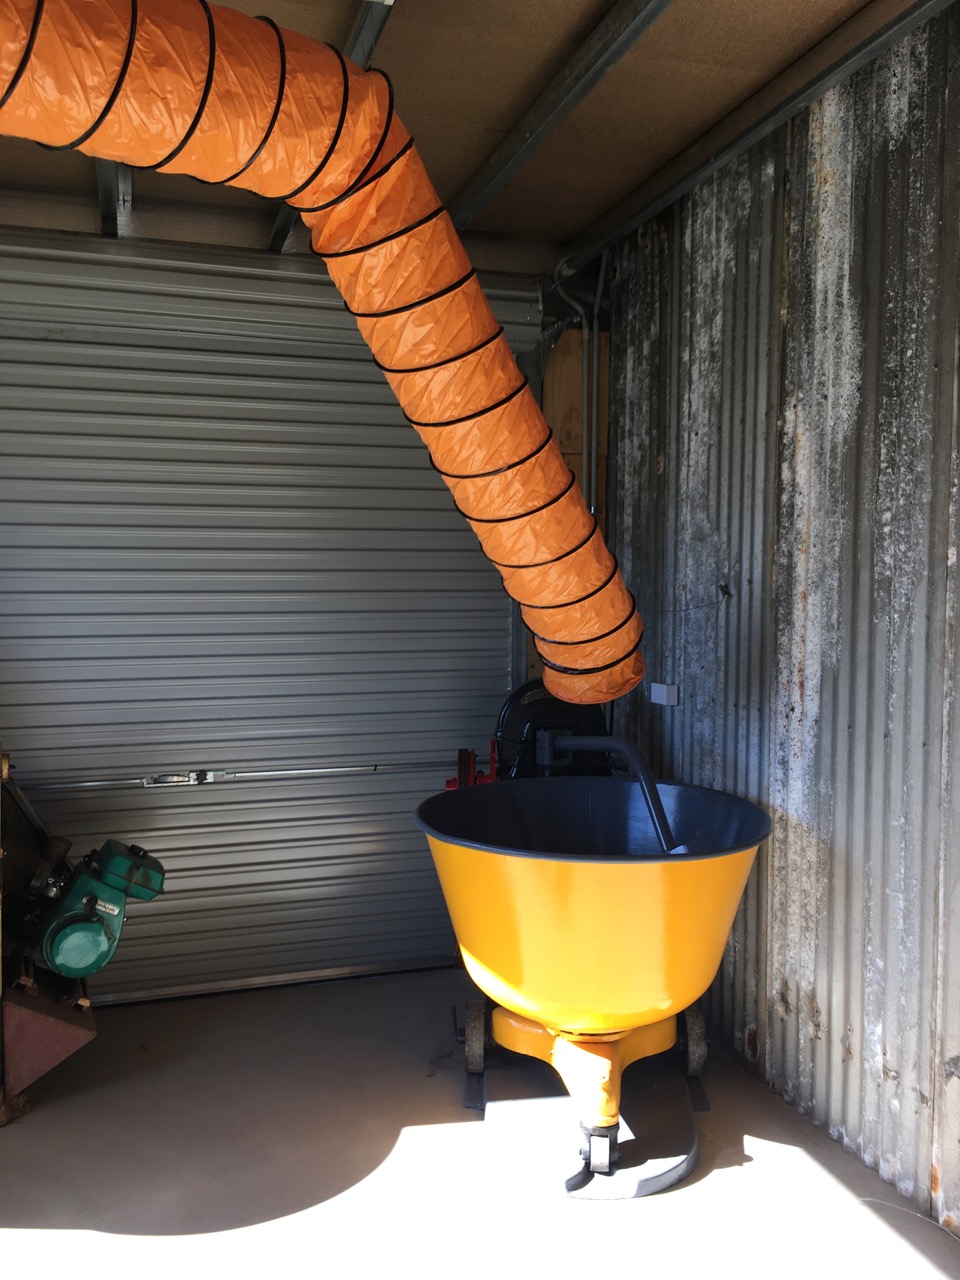
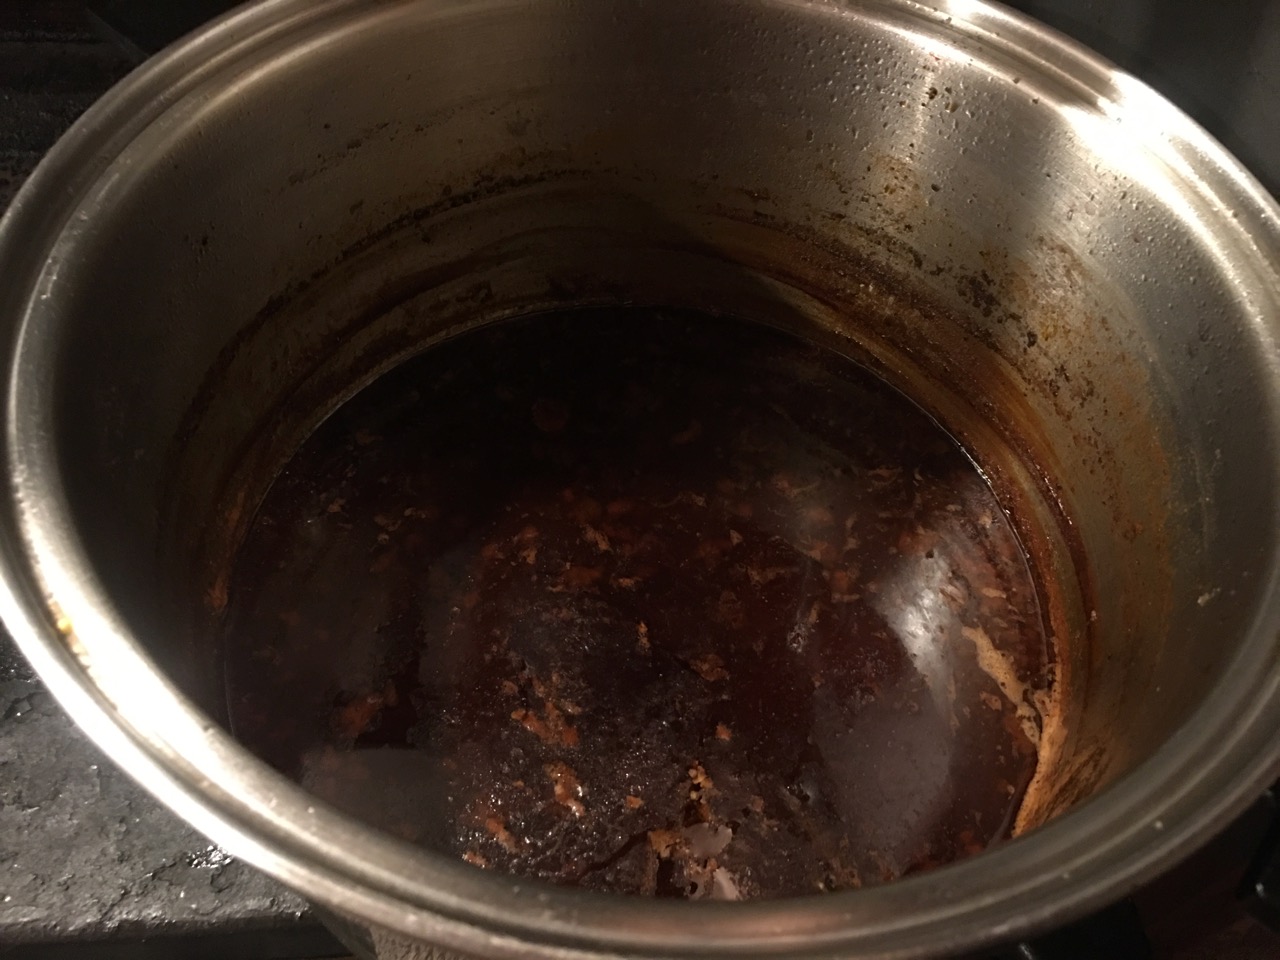
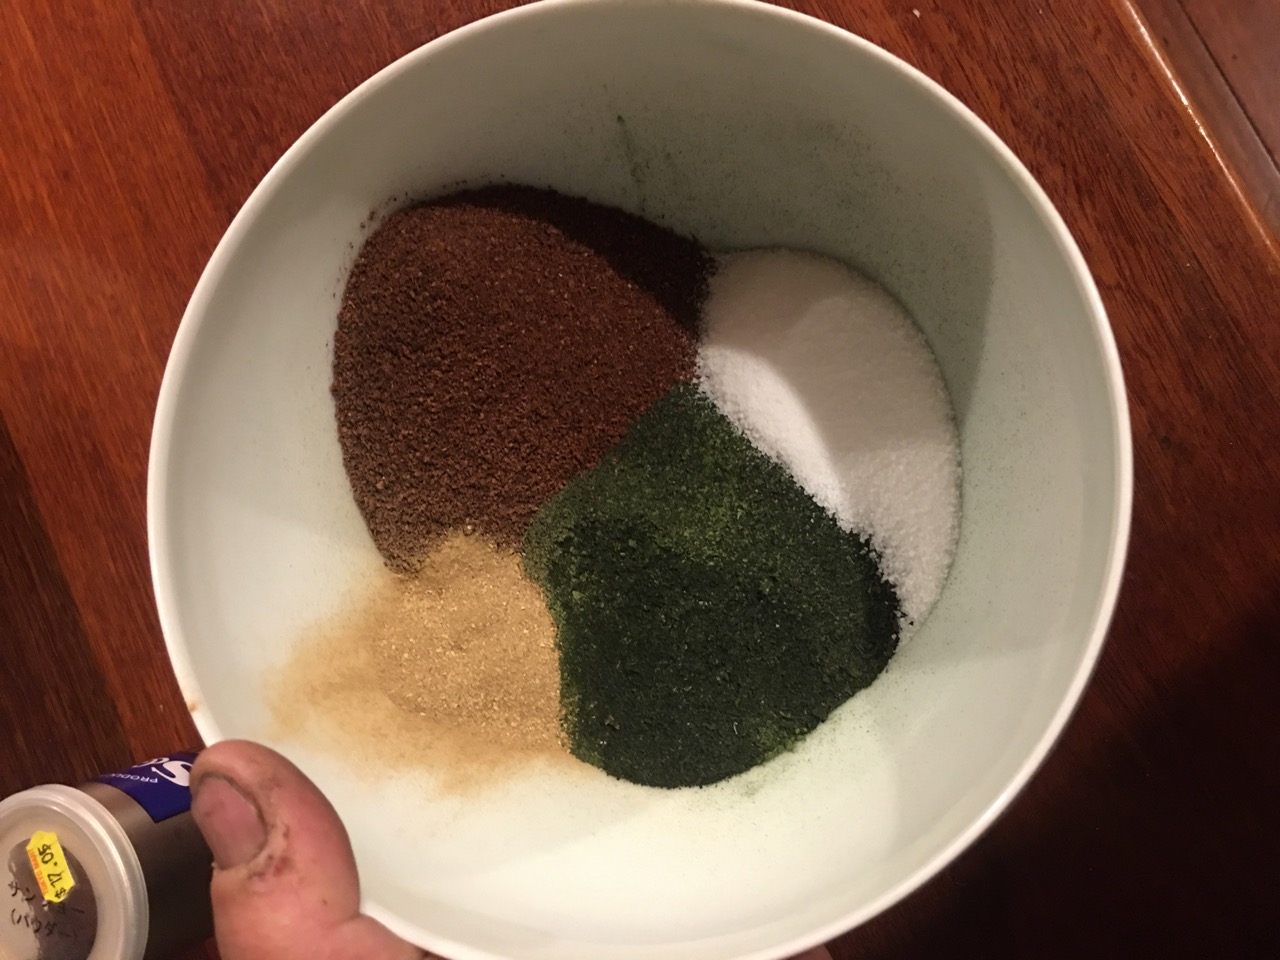
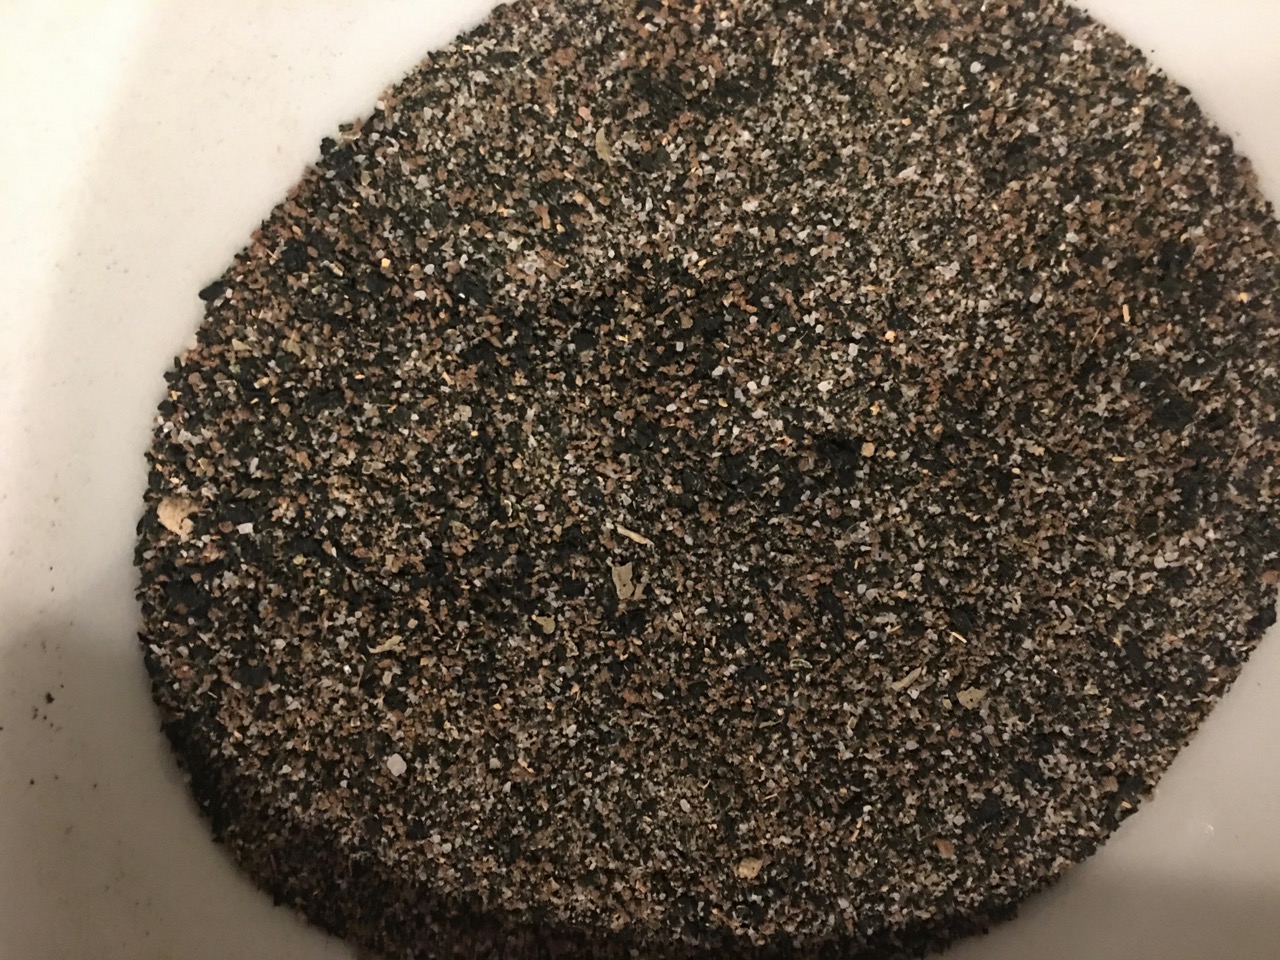
All the dry powdered ingredients are accurately weighed out on the scales and placed slowly and carefully into the dough mixer bowl to minimise any flurry of dust rising up out of the bowl. Any dust that does rise disappears up into the bright orange tube of the exhaust fan mechanism and is issued outside.We mixed the powders dry for a few minutes, until all the ingredients were the same colour and all sense of difference was mixed and mingled in together. Then I added the exact, measured amount of water and let it continue to mix for several more minutes, until the batch becomes stiff and starts to ‘ball-up’. 
I’ve learnt that this is the time to add the remaining small amount of water that was withheld from the first pour. This last issue of extra water wets the stiffer ‘balled-up’ ingredients and softens them, I then Iet the mixer run for several more minutes until everything is smooth and plastic.
Amazingly, when I rebuilt the mixer this time around I had to reshape the mixing bowl that had gone out of shape during the fire and had 4 large splits in the metal rim.The bowl had been a little bit pear shaped since the first fire in ’83. So much so that the mixing arm used to bang into the side of the mis-shapen bowl and had scraped all the paint off in one place. Now after this last fire and re-working, I had to clamp it into some sort of semblance of a round shape as I panel beat it back into a useful shape. I had no real idea of how to approach a job like this. I’m not trained in metal work, just entirely self taught. I muddle through most difficult jobs, lurching from crisis to crisis. I manage to succeed by shear graft and persistence, rather than knowledge and skill. So, I was totally amazed that when I came to use the dough mixer this time round,  I discovered that I had indeed managed to make it almost perfectly round again. Well, not perfectly round, it still has a distinct wobble in it, but there is no impact on the wobbly side anymore. There is no wobbly side! Just a general overall wobble. Sort of evenly wobbly! I managed against all the odds to repair it really well. I fully expected it to be worse, not better. I’m no panel beater. So I am really amazed! it’s such a fluke! I am very pleased.


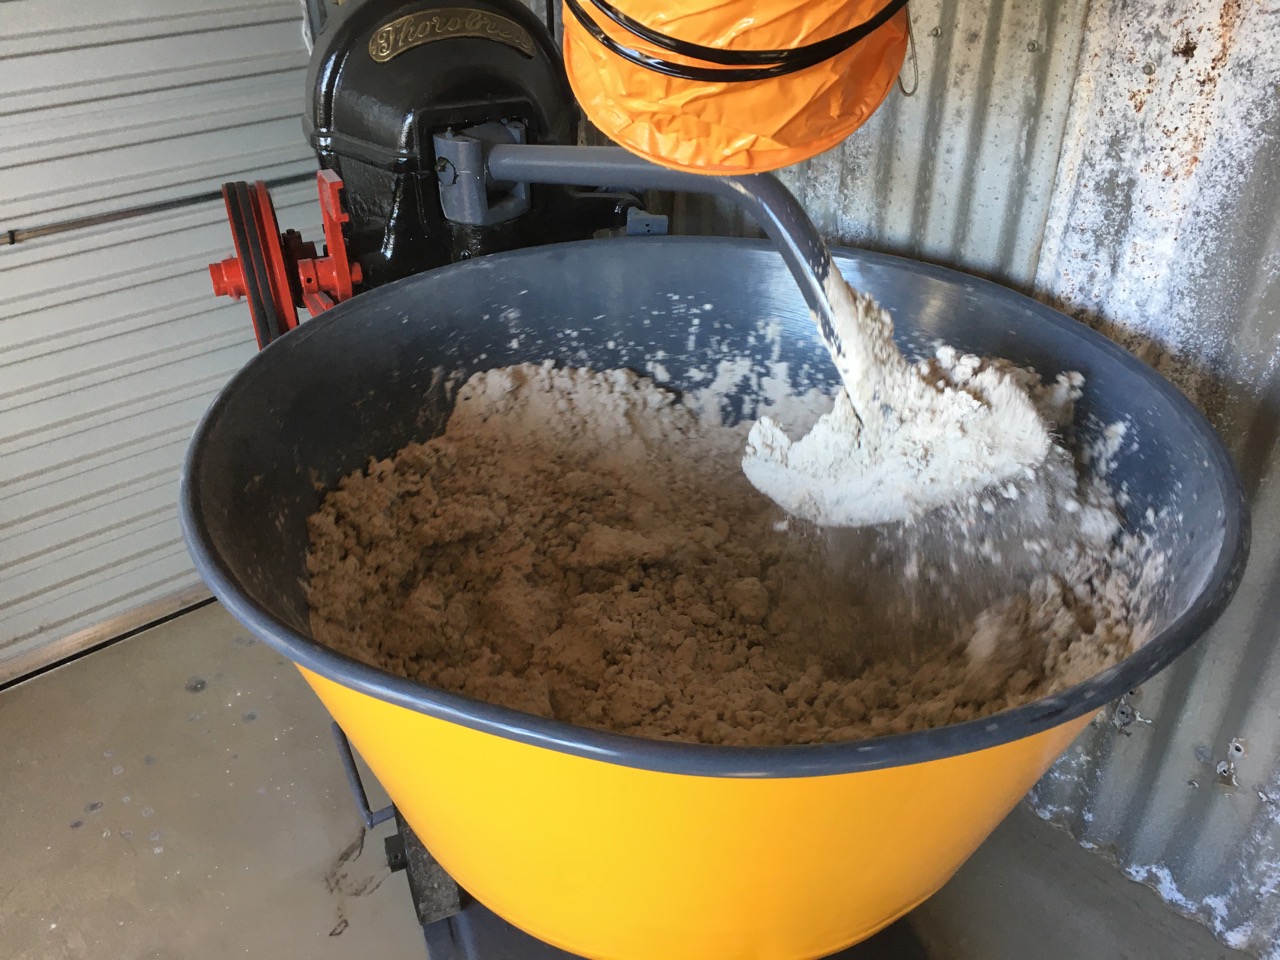
As the clay absorbs the water, it stiffens and balls up.


The hardest part of this ‘dry-mix’ clay making, is having to dig the stiff and sticky plastic clay out of the mixer bowl by hand. In the past, I would unload the clay from each batch into a bathtub next to the mixer. I used to make 8 batches in a row, one after the other, and that would make up a tonne of clay. Enough to fill one clay box. Then I would pug it all through the pug mill with no vacuum to speed up the process (the vacuum process slows down the speed of through put). I stacked all the first pugs of clay in a large pyramid stack and then re-pugged it all again with the vacuum on. This time slicing off all the ends of the previous pug sausages and mixing them all together in one handful into the pug mill hopper. This ensured that any mistakes or slight variations in the 8 different mixes were all averaged out in the final pug sausages.
It used to take me all day to make up, twice pug, then bag and box a tonne of clay. It was a long day and quite hard work overall. I stopped making dry mix clay over a decade ago. For the past ten years or so, I was crushing, grinding, and ball milling all my porcelain stones, to make my porcelain stone ‘clay’. The only time that I used the dough mixer in the past few years, was to make a big batch of wadding for the wood fired kiln.
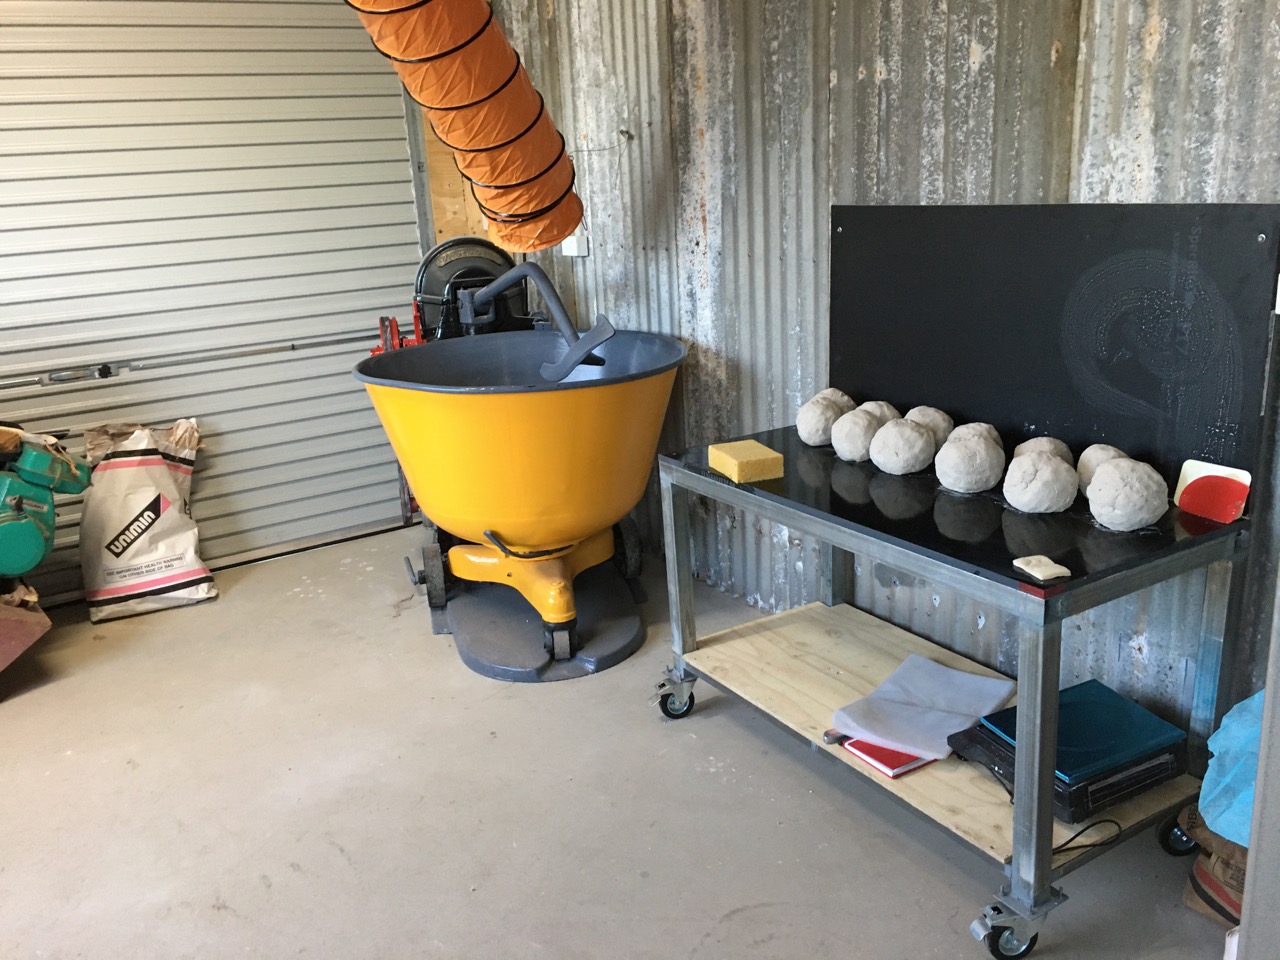
However, now, on this occasion, we have no pug mill, so it’s all to be done by hand, we work it up by hand into round balls of a couple of kilos, pounding 3 of these together into a block and stacking 3 blocks one on top of the other, before bagging the lot.Each batch we make is 130 kilos and we make 2 batches. It has taken us about an hour and a half for the first batch, but we get better at it, and the second batch only takes one hour to weight out all the ingredients, mix them and unload the batch and bag it all up and place it into the clay box.
I scrape down the mixing bowl between each batch, because I don’t want the thin remnants of clay drying out and going hard between batches and causing lumps later, that will need to be hand wedged to be sorted out.


After we have finished the 2nd batch, I sponge down the mixer and clean the bowl, ready for the next use.


As I made the mix a little wet, to allow the water to fully integrate into the clay as it ages. We left the last 25 kgs out over night to stiffen up a little, so that we can wedge it up tomorrow, wire cutting it and kneading it to remove the air bubbles and get this small amount ready for the wheel. I will need to make a series of clay test to get to know this clay, but also to provide tiles for glaze testing. We aren’t ready for any throwing yet.


We haven’t moved the potters wheels that we have been given and loaned by our friends out of the storage barn yet. There is no room to install them in the studio just now, as it is full of stuff that I am still working on, but the time is getting closer. I still need to finish welding up the benches and table for the centre work station of the studio and a table for the gallery. That will be my next job. Meanwhile, the clay is resting in the clay box and hopefully ageing and improving a little

Ventilation

There are now lots of small jobs to convert our cheap and nasty metal framed farm shed into a functional pottery studio. I had to fill the little gap above the wooden windows, between the metal lintel bar that supports the arch brickwork. This is to stop sparks and vermin getting into the cavity. It also looks better and more ‘finished’, but really, I just had to get it done to complete the building so as to get our final approval and occupancy certificate. 

The next most pressing job was to install OH&S ventilation. A fan in the materials processing rooms to take the dust away from the rock crushers and clay mixers. I never had to worry about forced air ventilation in the past, as the machines were more or less outside in the breezeway between the two pottery buildings. Now that I have them all in the one sealed room. It is essential that I fabricate and install good ventilation.


This metal tube has some 2nd hand/re-cycled 1.5mm stainless steel mesh inserted to stop sparks and insects getting into the building.


And a cheap batroom fan in the other end that will be inside the room.

Connected to a long flexible air hose.


With the exhaust fan embedded in the wall, I can direct the cheap flexible suction vent hose to any machine in the room.

I have no idea how other people might achieve this sort of dust extraction, but this is one cheap alternative solution, and mostly home made.

Clay? What OH&S risk?

Final Inspection and Prepping for Clay Making

We have been working a bit frantically to get all the things on the list completed so that we can get our final inspection, which, if our building passes, will entitle us to get our occupancy certificate. Once we have this, we can legally move in and fill the place up with pottery equipment and start to use the space as it was intended.
The Council Building Inspector called in today in the late afternoon. He gave our work a good scrute and declared that we had completed everything on the list to his satisfaction. He issued us with a carbon copy of his Final Inspection Report and was very complementary about the way that we had transformed a cheap, kit form, tin shed(s) into an interesting building. He commented on our sandstock brickwork and the arch window that visually links the new pottery shed to the Old School building and our use of recycled, old gal iron to enhance the visual amenity of this historic site. I was chuffed.
We celebrate with a dozen oysters off the fresh fish truck that come up from the coast on Wednesday, Thursday and Friday, paired with a couple of cheap sushi trays.


Now we can legally move in. Actually, he didn’t comment on the fact that we already had moved in our kilns, clay mixers, rock crushers and ball mills, the benches, pan break and guillotine, they are all in there and ready for work. I have been using the maintenance shed for a couple of months now to restore my machines and actually make the components to fit out the rest of the building.

One of the first things on my list now, is to make some clay, so that it can ‘age’ for a while, to improve its plasticity, so that when we start to make pots again, the clay will be more workable and respond better on the potters wheel. Having a bit of time to age is very important for freshly made clay, when it is made from powdered materials.

Ageing isn’t so important when clay is made by the wet method involving a slow stiffening back from a liquid mix where the raw material is in the crude natural form straight from the ground.


It might be worth explaining here a little bit about clay. When clay is in its natural crude form, it has a multitude of fine, flat, hexagonal particles, sort of laminated like pages of a book. When the clay is soaked in water and stirred into a watery ‘slip’ or slurry, these flat sheet like crystals are slowly liberated one by one and flake off from the ‘book’. This process takes time. The finer the particles, the more ‘plastic’ and workable the clay can be, realising the best of its potential, but it also takes a long time to get the water in between the various surfaces. 


Stirring the clay and water mix or ’slip’ up into a fine slurry, sieving it to remove any unwanted particles and then letting the slip sit and settle takes time. Sometimes, the clay particles in the slip don’t settle out due to gravity allowing the water to come to the top where it can be decanted off. If the slip doesn’t settle out, then the mixture has to be tested, measured and treated. This involves measuring the pH of the slip. Usually, the clay will need a small addition of an acid to change the pH to very slightly acid.

 
Clay particles have an electrostatic charge on their surface. Clay chemistry is very complex, but suffice to say briefly here that clay particles are a little bit like small magnets. What is needed is to get the positive and negative charges to balance so that they attract each other and not to repel. If they are repelling each other the clay will never settle, but stay suspended and cloudy forever. Once acid treated they can be made to become attractive and will form larger clumps that are affected by gravity, and so settle to the bottom, allowing the water to be forced up where it can be decanted off. This process is called ‘flocculating’ . Think of a mob of sheep forming a flock.


I’ve tried many different ways of flocculating my clay particles. Old red wine that was undrinkable due to cork taint, there isn’t much red wine that I wont drink, but cork taint is one that isn’t drinkable, then I’ve tried cheap commercial vinegar, even cheaper imitation vinegar, dilute brick cleaning acid from the hardware, or epsom salts, but my ‘go-to’ dilute acid is the water in our old pottery water tank full of rain water ( carbonic acid) that has been affected by the constant fall of gum tree leaves onto the old pottery iron roof. This caused the roof to rust and created a moderately acidic solution of carbonic and tannic acid. It came out of the tank pale brown, like cold black tea. When I used this water to make slip I didn’t need to add extra acid. I much prefer this natural method of flocculation. It suits my life philosophy of living naturally as possible and treading gently combined with minimal consumption. Once the clay has settled to the bottom and the excess water removed, the thick slurry can be placed out side in the sun and wind to stiffen. 


This wet method using crude clay is a very slow process. So to speed thing up potters use can use dried powdered kaolin and powdered non-plastics like felspar and silica blended together in a set recipe in the dry state and then just enough water is added to bring the mix to the required plastic consistency. This is akin to making a cake. Although fast, this method doesn’t wet all the available fine particles and the clay doesn’t develop its full potential plasticity. Its a compromise like everything else in life. This dry mix method is fast and efficient and with a tiny addition of some extra plasticiser like bentonite, the preemptive addition of some acid to the water and a period of ageing, then a reasonable result can be obtained. That is what I intend to attempt this coming week. 


When life settles down a little and we have more time, I will make the next batch of clay body by the wet method, using my larger ball mill to mix the liquid slip and allow the slip to sit as a liquid in a large plastic drum for some time and then slowly dry the slip out. This is designed to realise the maximum potential plasticity of the clay body, and is what I have been doing for the past decade to get the most out of my porcelain stones. As they are not inherently plastic, they need all the help that they can get. Tragically, In the fire I lost several tonnes of milled porcelain stone body that I had been ageing for up to 10 years for use in my dotage. 


Before I can make this first batch of quick and dirty clay, I want to make a clay storage box to keep it in. Clay ages best somewhere cool, dark and where it will keep damp with a minimal amount of condensation, that means no direct sunlight, so a plastic lined, heavy duty wooden box has worked well for us for the past 35 years. 


Luckily, back in 1983 when we were building our last pottery shed, after our 2nd fire, I saw two packing cases on the side of the road placed there outside a factory for the taking. 1200mm x 1200mm x 900mm. Big enough to hold a tonne each. We would fill them and when we had used up the first tonne of clay, we would make another tonne to replace it, and then use the other box full while the freshly made tonne was left to age and improve. We kept up this swap and go method of ageing our clays for many years.
Unless I can find two more suitably sized packing cases on my way to the timber-yard today, I’ll be buying a couple of sheets of ply wood and a big sheet of heavy duty plastic, to make some new clay storage boxes.


I still need to line them with plastic – maybe tomorrow?

Finishing Touches – This week it’s plumbing

There are still a lot of small jobs remaining that we have to complete before we can call the Council Building Inspectors and apply for a final inspection. We need the final inspection to get our Occupancy Certificate, then we can be potters again instead of being stuck in this perpetual builders labourer mode. One of the main jobs on the list was to bring water down form the big new water tanks up near the street in front of the barn down to the pottery.
This sounds simple if you say it quickly, but like all jobs it develops a life of its own. Firstly I needed to dig just over 100 metres of trench to bury the plastic water pipe. The trench has to go down the side of the new shed and around the back, across the back retaining wall, across the courtyard and finally up to the North wall of the pottery studio and into the sink inside. 
I wasn’t going to have a sink in this new pottery. We had lived without one in the old pottery for the past 36 years, just using buckets to bring in water from the water tank outside. This avoided any problems with silting up, or clogging up of the drains. However, it was the building inspector who came to do the site visit who talked me into it. He told me that it was a simple matter of getting an S64 certificate, nothing!
Well it’s something! But once committed, I’m following through. First we needed a seepage trench 600mm x 600mm by 10 metres long, then a grease trap, ’S’ bends etc. It all takes time and money and a lot of effort, but we are almost there with the pottery sink and all that it entails.


We are lucky that have very good friends who have a half share in a trench digging machine, so I asked to borrow it for a day last Saturday. It’s a fantastic gadget. I was able to dig the 100 metres of trench in a little over 2 hours. I hit a lot of flat iron stones that are very common in this soil. They sit horizontally in layers not unlike shingles, so digging through them is quite an effort with a mattock and crow bar. The last time I did it manually to do a short 11 metre trench for some storm water pipe on the barn, it took me most of the day, and I ended up digging a trench 300 mm deep x 300 mm. wide flaring open towards the top as I prised out the multiple pieces of flat stone. I only need to bury 9cm. pipe, but the hole was more like the Suez canal!
So on this occasion the powerful machine makes short work of such matters as flat iron stone. But there is always a down side, and that is such that as the machine loosens and evicts each large flat stone, it jambs the drive mechanism. So I had to put it in reverse to spit the stone out. It does this easily, but in so doing, it spits the stone and all the dirt along with it back into the trench just dug. I proceed onwards and will deal with that later.
I was finished with the machine by lunch time. I spent the rest of the afternoon digging the flat stones and soil out of the trench and cleaning it of rubble and roots.
Sunday was spent laying the pipe work. I decided that if I was going to dig such a big trench, to save time and effort later, I would put 4 different pipes into the trench at this time, so that I can use those other pipes to supply high pressure water from the fire pump to the fire fighting sprinklers on the walls and roof of the new shed. Fitting the sprinklers doesn’t need to be done now in the midst of winter, but laying the pipes now is a good idea.


I put in a 2nd trench to the front of the pottery shed to take the fire fighting sprinkler line to the front of the shed while I was at it. This is all taking more time now and is a bit off putting and seems a bit like a waste of time seeing that I’m in such a rush to get this shed finished and passed, but it will be so much easier later when I get up to that job.
With the trenches filled with the 4 different pipes, it was time to refill the trench and cover the pipes. The chickens love to be busy where ever there is fresh dirt exposed.


While I was involved in the plumbing side of things, taking the sprinkler lines up the walls, attaching them and caping them off. Janine and the chickens back filled the trenches.


The last part of this job is to run the pipe into the studio and install the goose neck mixer and taps. We found this set of old hospital taps in a junk shop 40 years ago and bought them for $40 to use in our house when we were building the kitchen way back then. It turned out that they didn’t fit in the place that we envisioned them to go when the time came, so I put them in storage in the barn wrapped in an old tea towel, and there they sat until now when we remembered them. Luckily for us, they were stored in the part of the barn that didn’t burn down. The barn caught fire, but I was there on hand and was able to fight the fire and stop it from spreading too much, so I managed to save most of the barn. These taps included. 


I gave them an overhaul, I pulled them to bits and replaced all the seals and washers, then lubricated all the working parts, reassembled them and gave them a good clean and polish. They never looked so good. I had an old piece of 6mm thick solid brass plate given to me many years ago. It was an off cut from a big job at an engineering place that closed down. I couldn’t ever really find a use for it that justified cutting it. So it just remained stored in my kiln factory. After the fire, I saw it sticking out from the ashes, all bent and twisted and a little bit melted in one corner. Luckily it was on the floor in a part of the shed that didn’t get too hot, in amongst metal machinery and up against the mud brick wall. 


I spent the best part of a day straightening it out and hammering it flat. Well, as flat as I could get it. I gave the centre part a bit of a polish to show that it really is brass, and left the rest with its fire-scarred patina. It makes a suitably steam punk splash-back for the ancient taps.


Making Progress, but it’s oh so slow.

For the past couple of weeks we have been fully occupied with building benches and tables in the pottery studio and the kiln room/mill room.I decided to build all the benches with steel frames to minimise the amount of wood in the building. In the old pottery, we had the benches and tables made of wood, but with a material called ‘plasply’, for the bench tops, which was a kind of concrete formwork plywood. It had a water proof coating that was very hard wearing. We could pile up thick wet slurry and let it stiffen and dry, and also place big platters upside down to stiffen on their rims. The moisture didn’t cause the ‘plasply‘ to warp or rot. It proved to be a really great utility surface.As far as I know, ‘Plasply’ isn’t available any more. It was an expensive Australian made quality product. We had that board on our benches and they lasted 36 years of constant work and scraping and sponging of clay off them. These days, I can buy a similar product, but it is made in China now. It is a fraction of the cost these days, which is easier on the budget, but I’m concerned that they may not be as water proof, flat, stable and long lasting as the old stuff. Time will tell.
I used the 17mm thick ply version for the bench tops. They are all screwed down onto the metal frame and the whole unit is very solid.


The benches wrap around the walls of the studio, and incorporate a shelf underneath. The shelf space can accomodate both 20 litre and 10 litre buckets.


This bench with the 250mm x 80mm thick re-cycled hardwood planks will be my heavy work bench for maintenance, hammering, drilling and sawing. I was given these slabs just in time  to be able to incorporate them into this bench top. They look and feel just right. This work bench has filled up with tools and ‘stuff’ in the process of building the other benches.


I thought that I would have been finished by now, but the jobs just keep on coming. As soon as I finish one lot of jobs and clear the list. It occurs to me that there are still a host more to be completed. Not just that, but every job takes twice as long as I estimate. As I haven’t built a pottery for over 36 years. I’m completely out of touch with building. I have to accept that I’m incompetent at estimating. I have completed the benches in the studio and the kiln room, but still have the gallery room to do. 
A few weeks ago, an ex-student and friend called me to tell me that she had to vacate her rented studio and wanted advice about what to do with her kiln. I had built her kiln 26 years ago and my ex-student had looked after it very well. I told her that I was interested to buy it back off her, as I will be in need of a good kiln very soon. Of course, I have the skill and experience to build myself another one easily enough, but buying back one of my own kilns, that is still in excellent condition would save me 6 to 8 weeks of extra work, possibly more at this time, as I don’t have a fully functioning kiln factory any more.
Janine and I made a trip to see the kiln to check it out, and then hired my friend Dave and his small truck to go and collect it. I measured the kiln precisely, to make sure that it would fit through the door of the pottery. It worked out that we had 20 mm. to spare if we took the door lock handles off. It was do-able if we worked carefully and slowly.

The kiln in its former home of the past 17 years. It has had two owners, before being here, it lived in Ryde for almost 10 years. A genuine 2 owner that was only used on Sundays and never fired in the rain!

It just fits.

Settled into its new home here.


She was so sad to see it go. She would have preferred to keep it if she could. I promised her that she has visiting rights any time. I also told her that I will sell it back to her in a few years, once she is more settled in a better and more permanent place and as soon as I can get established again and can build myself a new one to replace it.
So I am saved 6 to 8 weeks of work, but straight away I realise that I now have to finish the gas line, fabricate and install ventilation ducts and manufacture a tall flue for the chimney, to clear all the combustion products from the building.

Swings and roundabouts. The jobs just keep coming.

I need two of me just to keep up with the multiplying job list.

A Week in the Kitchen

We have been very busy working in the new pottery shed building benches and starting to fit it out as a functioning pottery. But we have also been needing to get into the garden and do a bit of maintenance as well. Everything needs to be done NOW, but we have a limit on our time and energy levels. We muddle through, lurching from crisis to crisis. Everything gets done eventually. I console myself about my ineptitude and clumsiness, by keeping my eyes on the very long view.
We have also been continually busy in the kitchen. In this cold weather we are eating less salads and eating more comfort food. This week I made roasted bone marrow stock with loads of garden Mirepoix veggie stock and a bottle of red wine. This can’t be done in one go. I do it one step at a time, evening by evening. Each night when we light the wood fired kitchen stove, this cooks dinner, warms the house and allows plenty of free extra heat for cooking things like stock that need long cooking time and reduction. 


The browning the marrow bones on the stove top, sharing the hot plate with Janine’s Minestrone.


Janine’s minestrone made with our summer harvest of dried beans and our vegetable stock base. The only purchased item was the alphabet pasta, left over from a kids meal.


You can see the various tide line levels on the side of the pot, as I simmer it down from three large boilers of 5 litres each, all reduced down to fit in this one pot and then reduced again to just 600 mls of jellylike concentrate. A spoon full of this flavour bomb, is a home made stock cube substitute, only better, being low salt. 
I saw some nice bratwurst and also some pork mushroom and garlic sausages at the local butcher. I bought one of each and we shared half each, cooked with parsnip and spud mash, red cabbage and julienne carrots with garlic. Sausages are not very healthy food, they are stuffed full of salt, fat and preservatives, so I rarely buy them. The only time I eat a sausage is over at the Village Hall at the occasional fund raising get together event. So buying a sausage was a quite unusual event. I can’t remember the last time I bought a sausage from the butcher. It must be two or three years.

Our hybrid take on the old favourites, banger (singular) and mash and bubble and squeak.


I also took time out one evening to dry, mill and grind some sea vegetable kelp and added to it some ‘lite’ potassium chloride salt, with Sumac and a small amount of Japanese sansho pepper. This is all mixed together to make a low sodium, salt substitute seasoning. Being mostly vegetable based, it has loads of flavour but little ‘bite’ from the low salt level.


I also bake bread twice a week. We can eat a loaf between us over 3 to 4 days. I vary the flour as I run out of one, I buy something different for the next batch. I alternate between 100% rye, rye and Wheat blend and straight wheat. I think that I prefer the rye/wheat blend the best.


At lunch time, I made a croque Monsieur. Not just a ham and cheese sandwich, but pan fried and served hot and so warming on a cold day.