
There are still a lot of small jobs remaining that we have to complete before we can call the Council Building Inspectors and apply for a final inspection. We need the final inspection to get our Occupancy Certificate, then we can be potters again instead of being stuck in this perpetual builders labourer mode. One of the main jobs on the list was to bring water down form the big new water tanks up near the street in front of the barn down to the pottery.
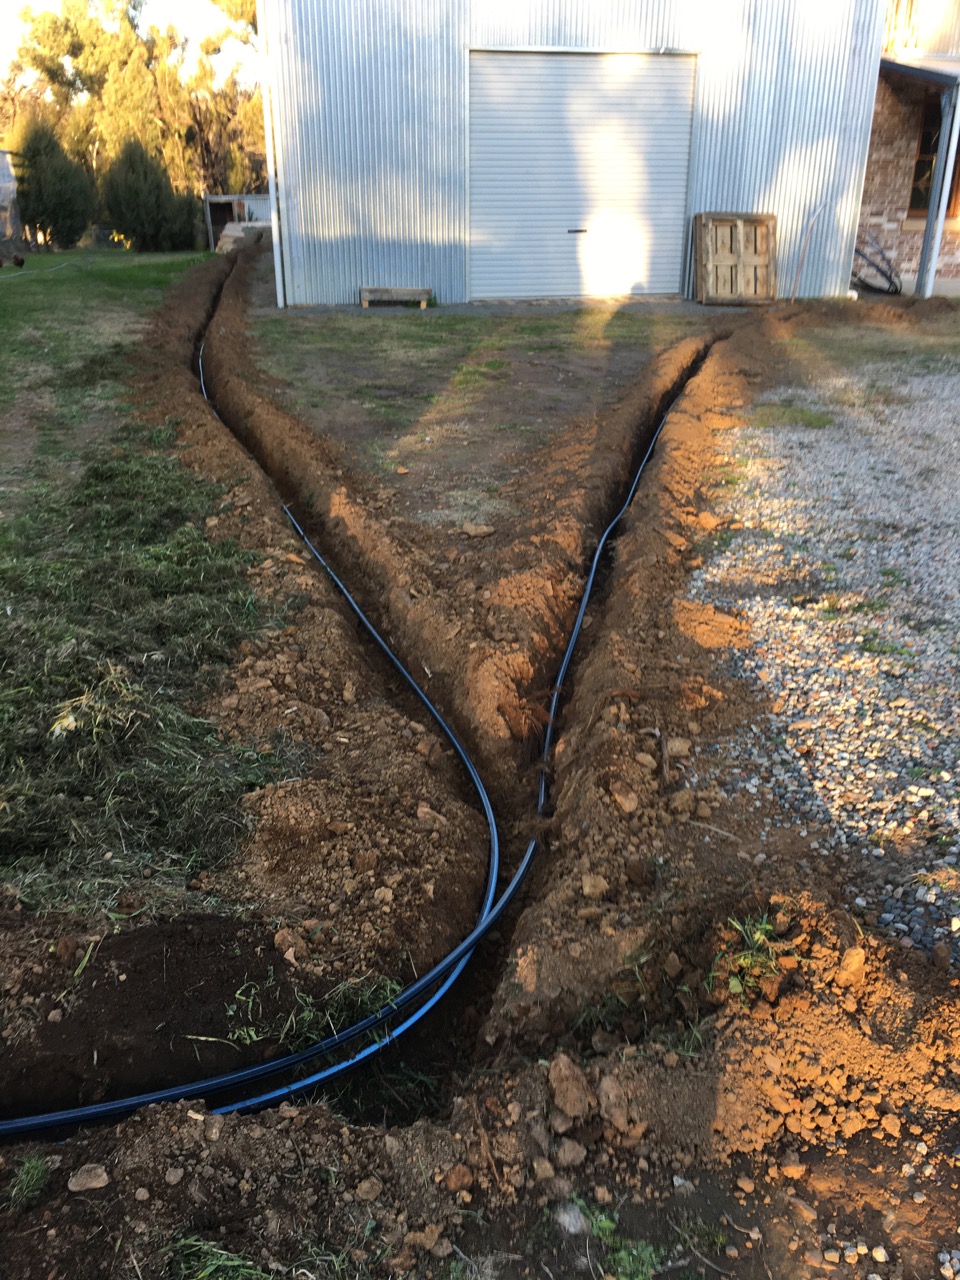
This sounds simple if you say it quickly, but like all jobs it develops a life of its own. Firstly I needed to dig just over 100 metres of trench to bury the plastic water pipe. The trench has to go down the side of the new shed and around the back, across the back retaining wall, across the courtyard and finally up to the North wall of the pottery studio and into the sink inside.
I wasn’t going to have a sink in this new pottery. We had lived without one in the old pottery for the past 36 years, just using buckets to bring in water from the water tank outside. This avoided any problems with silting up, or clogging up of the drains. However, it was the building inspector who came to do the site visit who talked me into it. He told me that it was a simple matter of getting an S64 certificate, nothing!
Well it’s something! But once committed, I’m following through. First we needed a seepage trench 600mm x 600mm by 10 metres long, then a grease trap, ’S’ bends etc. It all takes time and money and a lot of effort, but we are almost there with the pottery sink and all that it entails.
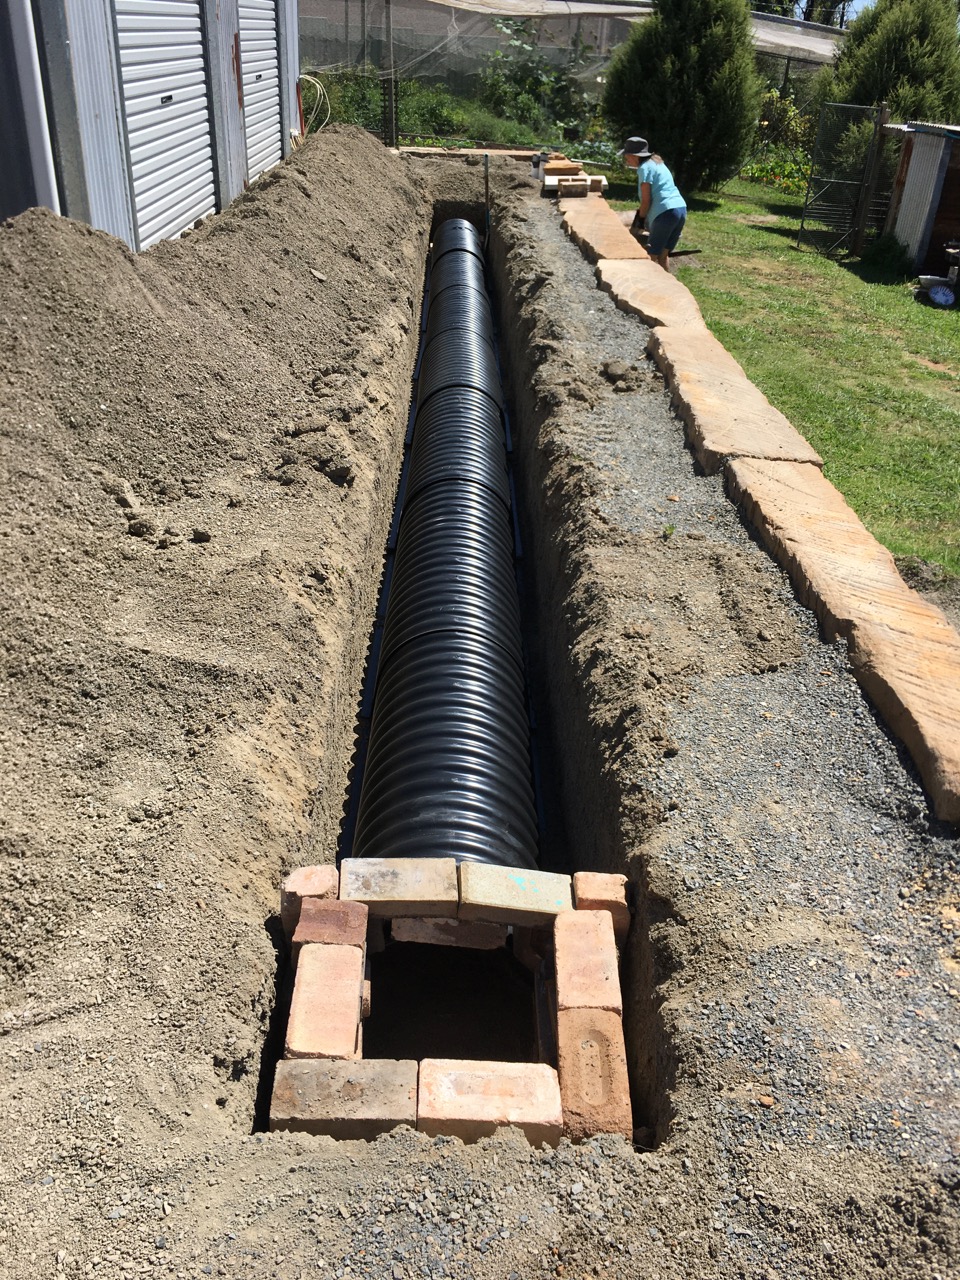
We are lucky that have very good friends who have a half share in a trench digging machine, so I asked to borrow it for a day last Saturday. It’s a fantastic gadget. I was able to dig the 100 metres of trench in a little over 2 hours. I hit a lot of flat iron stones that are very common in this soil. They sit horizontally in layers not unlike shingles, so digging through them is quite an effort with a mattock and crow bar. The last time I did it manually to do a short 11 metre trench for some storm water pipe on the barn, it took me most of the day, and I ended up digging a trench 300 mm deep x 300 mm. wide flaring open towards the top as I prised out the multiple pieces of flat stone. I only need to bury 9cm. pipe, but the hole was more like the Suez canal!
So on this occasion the powerful machine makes short work of such matters as flat iron stone. But there is always a down side, and that is such that as the machine loosens and evicts each large flat stone, it jambs the drive mechanism. So I had to put it in reverse to spit the stone out. It does this easily, but in so doing, it spits the stone and all the dirt along with it back into the trench just dug. I proceed onwards and will deal with that later.
I was finished with the machine by lunch time. I spent the rest of the afternoon digging the flat stones and soil out of the trench and cleaning it of rubble and roots.
Sunday was spent laying the pipe work. I decided that if I was going to dig such a big trench, to save time and effort later, I would put 4 different pipes into the trench at this time, so that I can use those other pipes to supply high pressure water from the fire pump to the fire fighting sprinklers on the walls and roof of the new shed. Fitting the sprinklers doesn’t need to be done now in the midst of winter, but laying the pipes now is a good idea.

I put in a 2nd trench to the front of the pottery shed to take the fire fighting sprinkler line to the front of the shed while I was at it. This is all taking more time now and is a bit off putting and seems a bit like a waste of time seeing that I’m in such a rush to get this shed finished and passed, but it will be so much easier later when I get up to that job.
With the trenches filled with the 4 different pipes, it was time to refill the trench and cover the pipes. The chickens love to be busy where ever there is fresh dirt exposed.
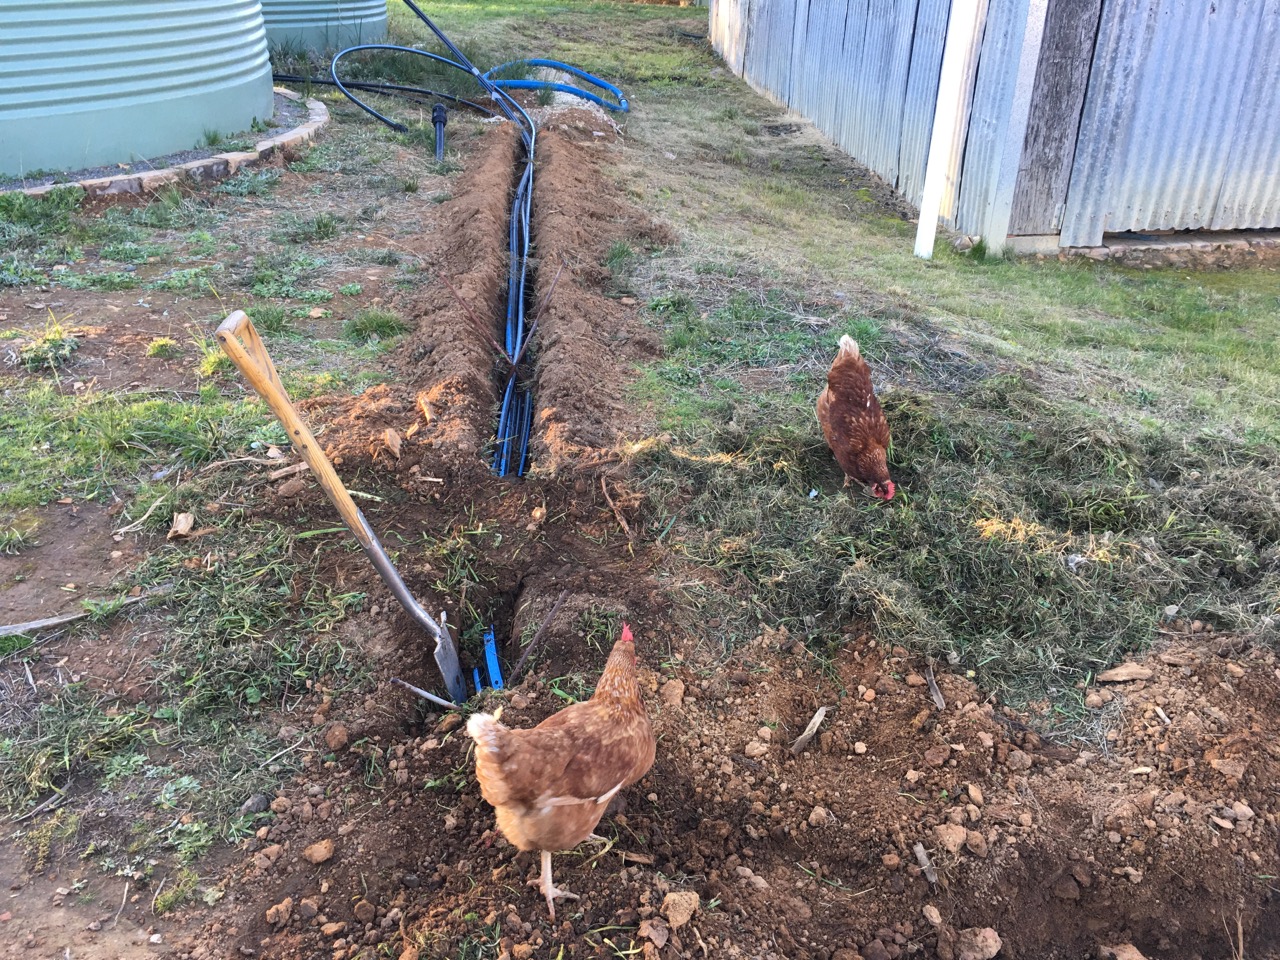

While I was involved in the plumbing side of things, taking the sprinkler lines up the walls, attaching them and caping them off. Janine and the chickens back filled the trenches.


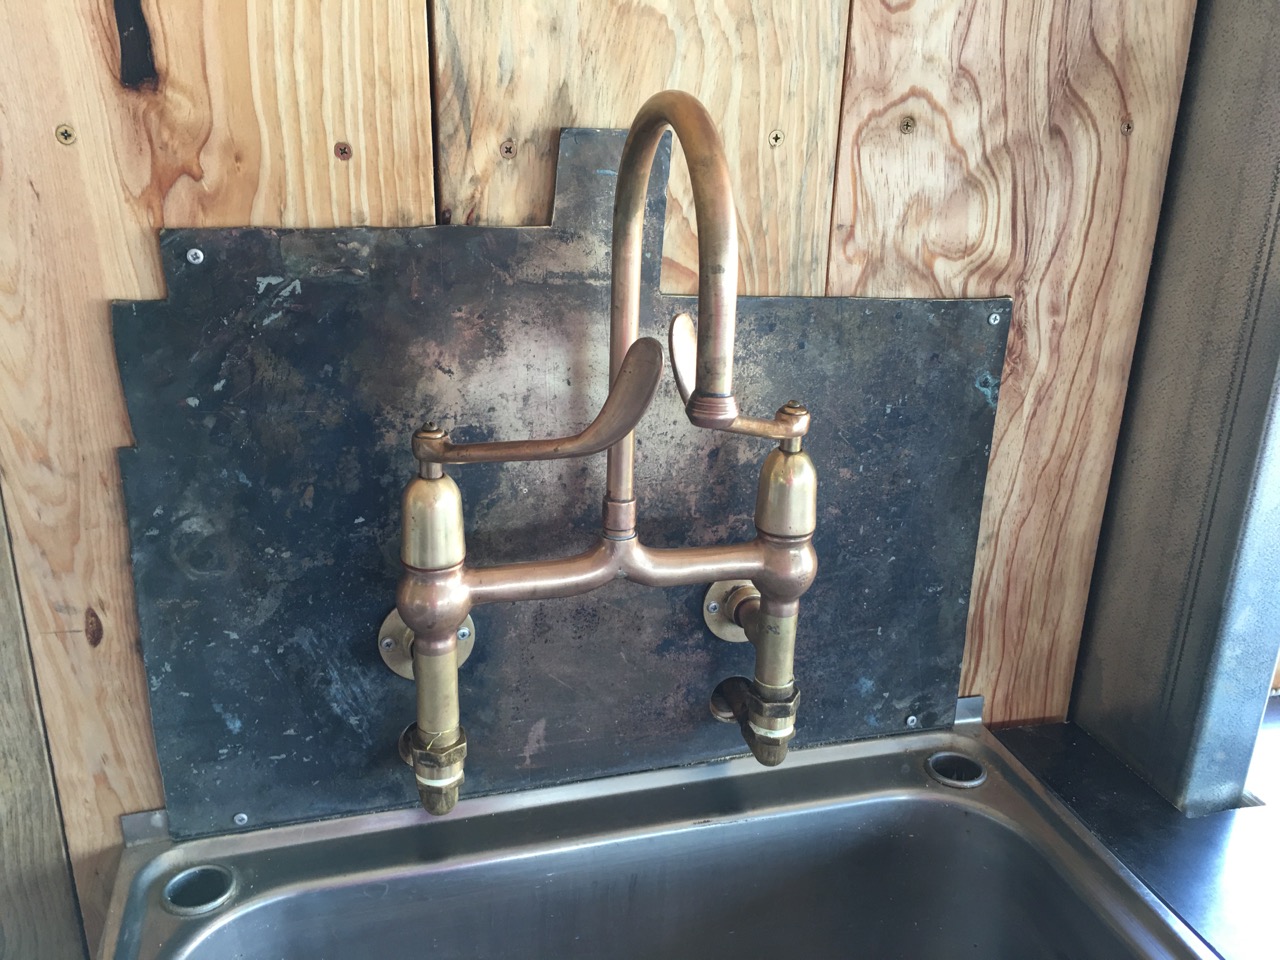
The last part of this job is to run the pipe into the studio and install the goose neck mixer and taps. We found this set of old hospital taps in a junk shop 40 years ago and bought them for $40 to use in our house when we were building the kitchen way back then. It turned out that they didn’t fit in the place that we envisioned them to go when the time came, so I put them in storage in the barn wrapped in an old tea towel, and there they sat until now when we remembered them. Luckily for us, they were stored in the part of the barn that didn’t burn down. The barn caught fire, but I was there on hand and was able to fight the fire and stop it from spreading too much, so I managed to save most of the barn. These taps included.
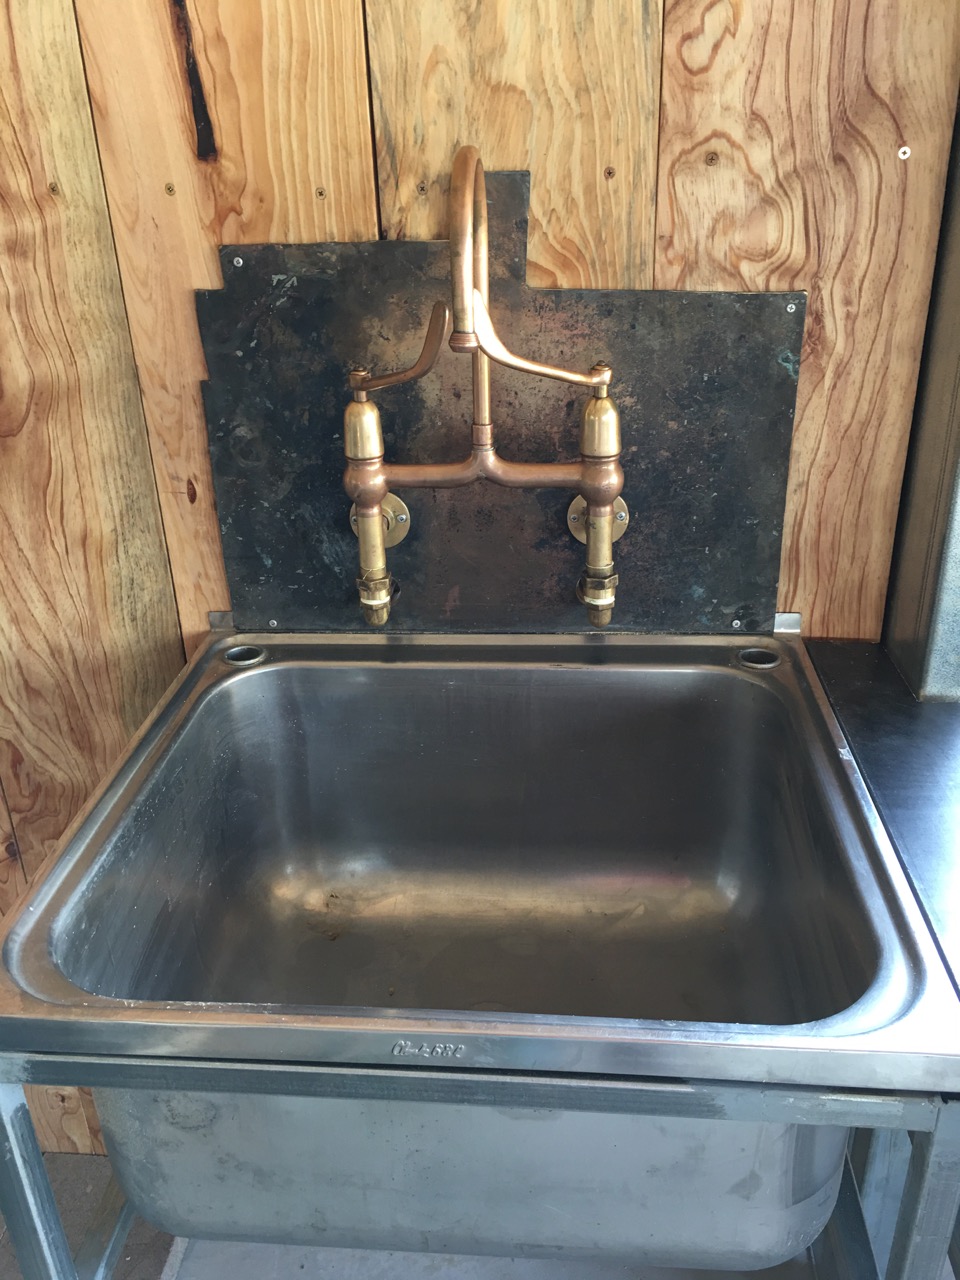
I gave them an overhaul, I pulled them to bits and replaced all the seals and washers, then lubricated all the working parts, reassembled them and gave them a good clean and polish. They never looked so good. I had an old piece of 6mm thick solid brass plate given to me many years ago. It was an off cut from a big job at an engineering place that closed down. I couldn’t ever really find a use for it that justified cutting it. So it just remained stored in my kiln factory. After the fire, I saw it sticking out from the ashes, all bent and twisted and a little bit melted in one corner. Luckily it was on the floor in a part of the shed that didn’t get too hot, in amongst metal machinery and up against the mud brick wall.

I spent the best part of a day straightening it out and hammering it flat. Well, as flat as I could get it. I gave the centre part a bit of a polish to show that it really is brass, and left the rest with its fire-scarred patina. It makes a suitably steam punk splash-back for the ancient taps.

You must be logged in to post a comment.