
We have been working a bit frantically to get all the things on the list completed so that we can get our final inspection, which, if our building passes, will entitle us to get our occupancy certificate. Once we have this, we can legally move in and fill the place up with pottery equipment and start to use the space as it was intended.
The Council Building Inspector called in today in the late afternoon. He gave our work a good scrute and declared that we had completed everything on the list to his satisfaction. He issued us with a carbon copy of his Final Inspection Report and was very complementary about the way that we had transformed a cheap, kit form, tin shed(s) into an interesting building. He commented on our sandstock brickwork and the arch window that visually links the new pottery shed to the Old School building and our use of recycled, old gal iron to enhance the visual amenity of this historic site. I was chuffed.
We celebrate with a dozen oysters off the fresh fish truck that come up from the coast on Wednesday, Thursday and Friday, paired with a couple of cheap sushi trays.

Now we can legally move in. Actually, he didn’t comment on the fact that we already had moved in our kilns, clay mixers, rock crushers and ball mills, the benches, pan break and guillotine, they are all in there and ready for work. I have been using the maintenance shed for a couple of months now to restore my machines and actually make the components to fit out the rest of the building.
One of the first things on my list now, is to make some clay, so that it can ‘age’ for a while, to improve its plasticity, so that when we start to make pots again, the clay will be more workable and respond better on the potters wheel. Having a bit of time to age is very important for freshly made clay, when it is made from powdered materials.
Ageing isn’t so important when clay is made by the wet method involving a slow stiffening back from a liquid mix where the raw material is in the crude natural form straight from the ground.
It might be worth explaining here a little bit about clay. When clay is in its natural crude form, it has a multitude of fine, flat, hexagonal particles, sort of laminated like pages of a book. When the clay is soaked in water and stirred into a watery ‘slip’ or slurry, these flat sheet like crystals are slowly liberated one by one and flake off from the ‘book’. This process takes time. The finer the particles, the more ‘plastic’ and workable the clay can be, realising the best of its potential, but it also takes a long time to get the water in between the various surfaces.
Stirring the clay and water mix or ’slip’ up into a fine slurry, sieving it to remove any unwanted particles and then letting the slip sit and settle takes time. Sometimes, the clay particles in the slip don’t settle out due to gravity allowing the water to come to the top where it can be decanted off. If the slip doesn’t settle out, then the mixture has to be tested, measured and treated. This involves measuring the pH of the slip. Usually, the clay will need a small addition of an acid to change the pH to very slightly acid.
Clay particles have an electrostatic charge on their surface. Clay chemistry is very complex, but suffice to say briefly here that clay particles are a little bit like small magnets. What is needed is to get the positive and negative charges to balance so that they attract each other and not to repel. If they are repelling each other the clay will never settle, but stay suspended and cloudy forever. Once acid treated they can be made to become attractive and will form larger clumps that are affected by gravity, and so settle to the bottom, allowing the water to be forced up where it can be decanted off. This process is called ‘flocculating’ . Think of a mob of sheep forming a flock.
I’ve tried many different ways of flocculating my clay particles. Old red wine that was undrinkable due to cork taint, there isn’t much red wine that I wont drink, but cork taint is one that isn’t drinkable, then I’ve tried cheap commercial vinegar, even cheaper imitation vinegar, dilute brick cleaning acid from the hardware, or epsom salts, but my ‘go-to’ dilute acid is the water in our old pottery water tank full of rain water ( carbonic acid) that has been affected by the constant fall of gum tree leaves onto the old pottery iron roof. This caused the roof to rust and created a moderately acidic solution of carbonic and tannic acid. It came out of the tank pale brown, like cold black tea. When I used this water to make slip I didn’t need to add extra acid. I much prefer this natural method of flocculation. It suits my life philosophy of living naturally as possible and treading gently combined with minimal consumption. Once the clay has settled to the bottom and the excess water removed, the thick slurry can be placed out side in the sun and wind to stiffen.
This wet method using crude clay is a very slow process. So to speed thing up potters use can use dried powdered kaolin and powdered non-plastics like felspar and silica blended together in a set recipe in the dry state and then just enough water is added to bring the mix to the required plastic consistency. This is akin to making a cake. Although fast, this method doesn’t wet all the available fine particles and the clay doesn’t develop its full potential plasticity. Its a compromise like everything else in life. This dry mix method is fast and efficient and with a tiny addition of some extra plasticiser like bentonite, the preemptive addition of some acid to the water and a period of ageing, then a reasonable result can be obtained. That is what I intend to attempt this coming week.
When life settles down a little and we have more time, I will make the next batch of clay body by the wet method, using my larger ball mill to mix the liquid slip and allow the slip to sit as a liquid in a large plastic drum for some time and then slowly dry the slip out. This is designed to realise the maximum potential plasticity of the clay body, and is what I have been doing for the past decade to get the most out of my porcelain stones. As they are not inherently plastic, they need all the help that they can get. Tragically, In the fire I lost several tonnes of milled porcelain stone body that I had been ageing for up to 10 years for use in my dotage.
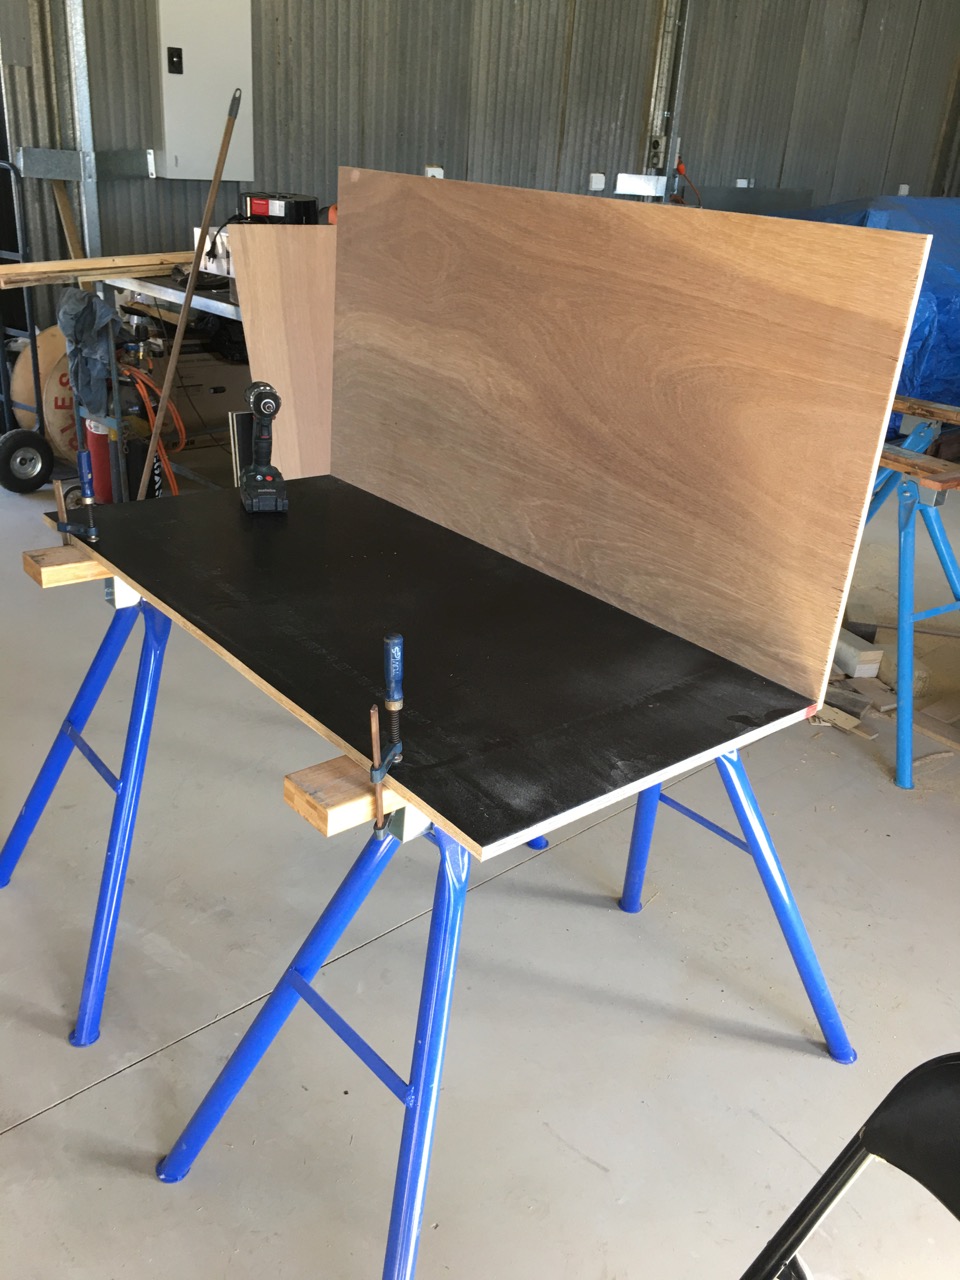
Before I can make this first batch of quick and dirty clay, I want to make a clay storage box to keep it in. Clay ages best somewhere cool, dark and where it will keep damp with a minimal amount of condensation, that means no direct sunlight, so a plastic lined, heavy duty wooden box has worked well for us for the past 35 years.
Luckily, back in 1983 when we were building our last pottery shed, after our 2nd fire, I saw two packing cases on the side of the road placed there outside a factory for the taking. 1200mm x 1200mm x 900mm. Big enough to hold a tonne each. We would fill them and when we had used up the first tonne of clay, we would make another tonne to replace it, and then use the other box full while the freshly made tonne was left to age and improve. We kept up this swap and go method of ageing our clays for many years.
Unless I can find two more suitably sized packing cases on my way to the timber-yard today, I’ll be buying a couple of sheets of ply wood and a big sheet of heavy duty plastic, to make some new clay storage boxes.


I still need to line them with plastic – maybe tomorrow?

You must be logged in to post a comment.