This week we have been working on several projects simultaneously, a few hours of each job alternately over the course of the day.
I start at 6:00 am each morning straight after I wake up, I walk over to the pottery and switch on the electric kiln. I need to start early as the days are short at this time of year. The kiln starts it’s firing program running on the battery supply of yesterdays sunshine. The kiln only draws a small amount of energy at the start of the firing, but ramps up over the day, such that it draws the maximum power at the end of the firing. I want the firing to finish when there is still some good sunshine available. 2 to 3 pm is a good time to finish.
I have programmed the glaze firing schedule to take 8 1/2 hours, more or less. Each of the electric kilns has a different and individual capacity to achieve any particular temperature rise at high temps. Depending on the age of the electrical elements. As the elements get older, they loose power, so the firing takes longer at high temperatures. One of the kilns, the big fibre kiln, has brand new elements that I have only just wound and installed, so is capable of 200+ degrees C per hour. However, one of the smaller kilns is quite old and the elements are pretty much worn out, so can only just manage 30 degree per hour at the top temps.
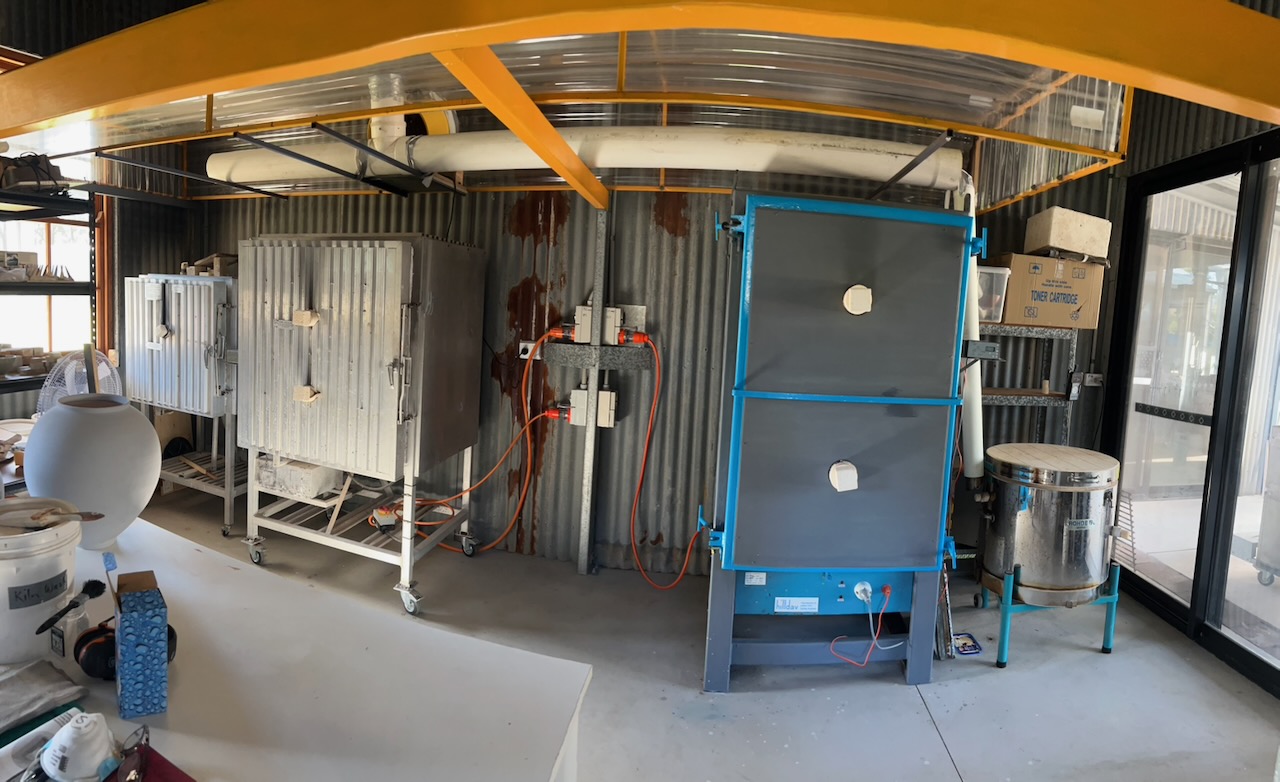
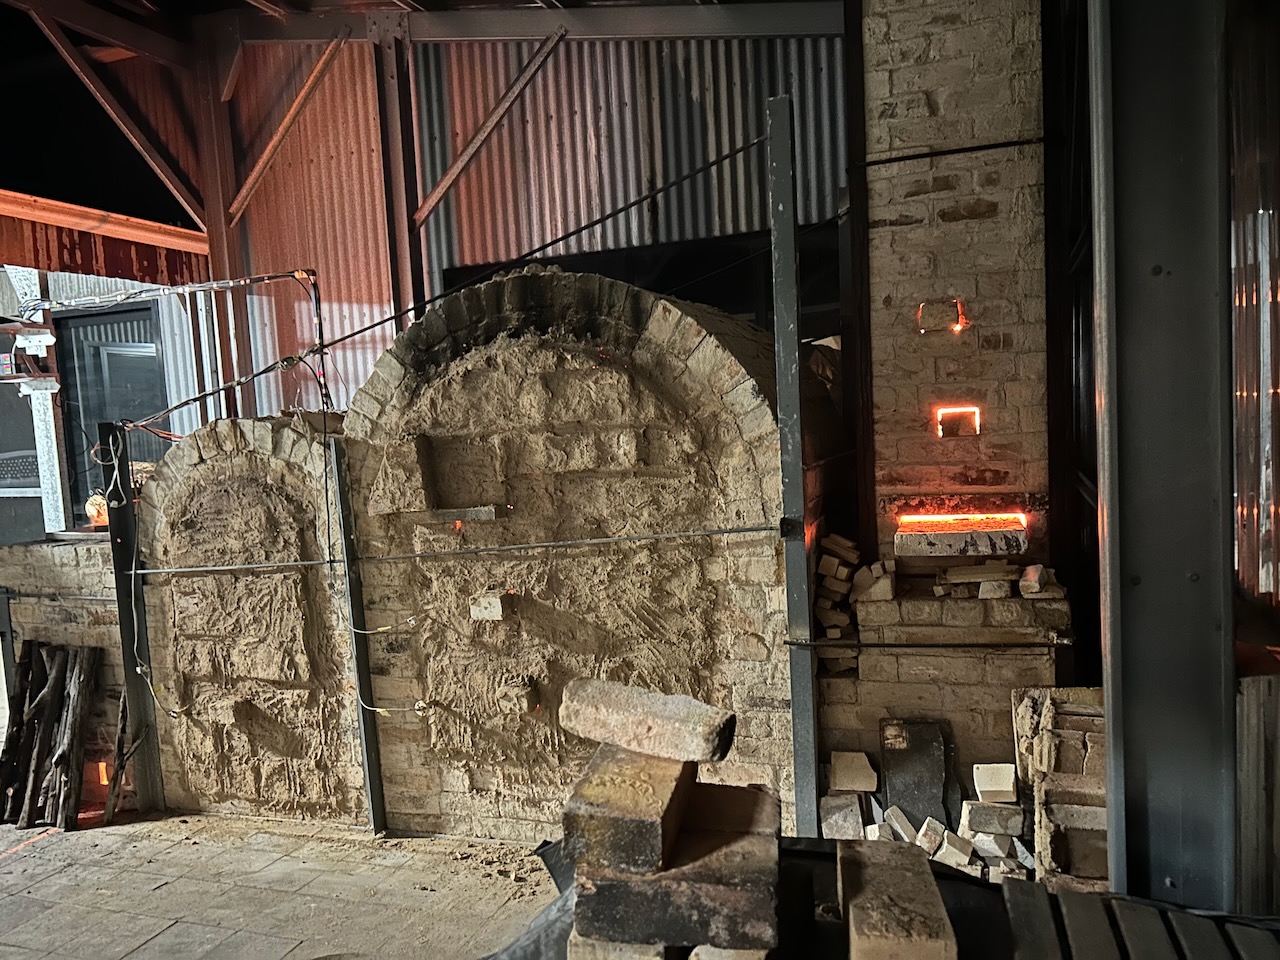
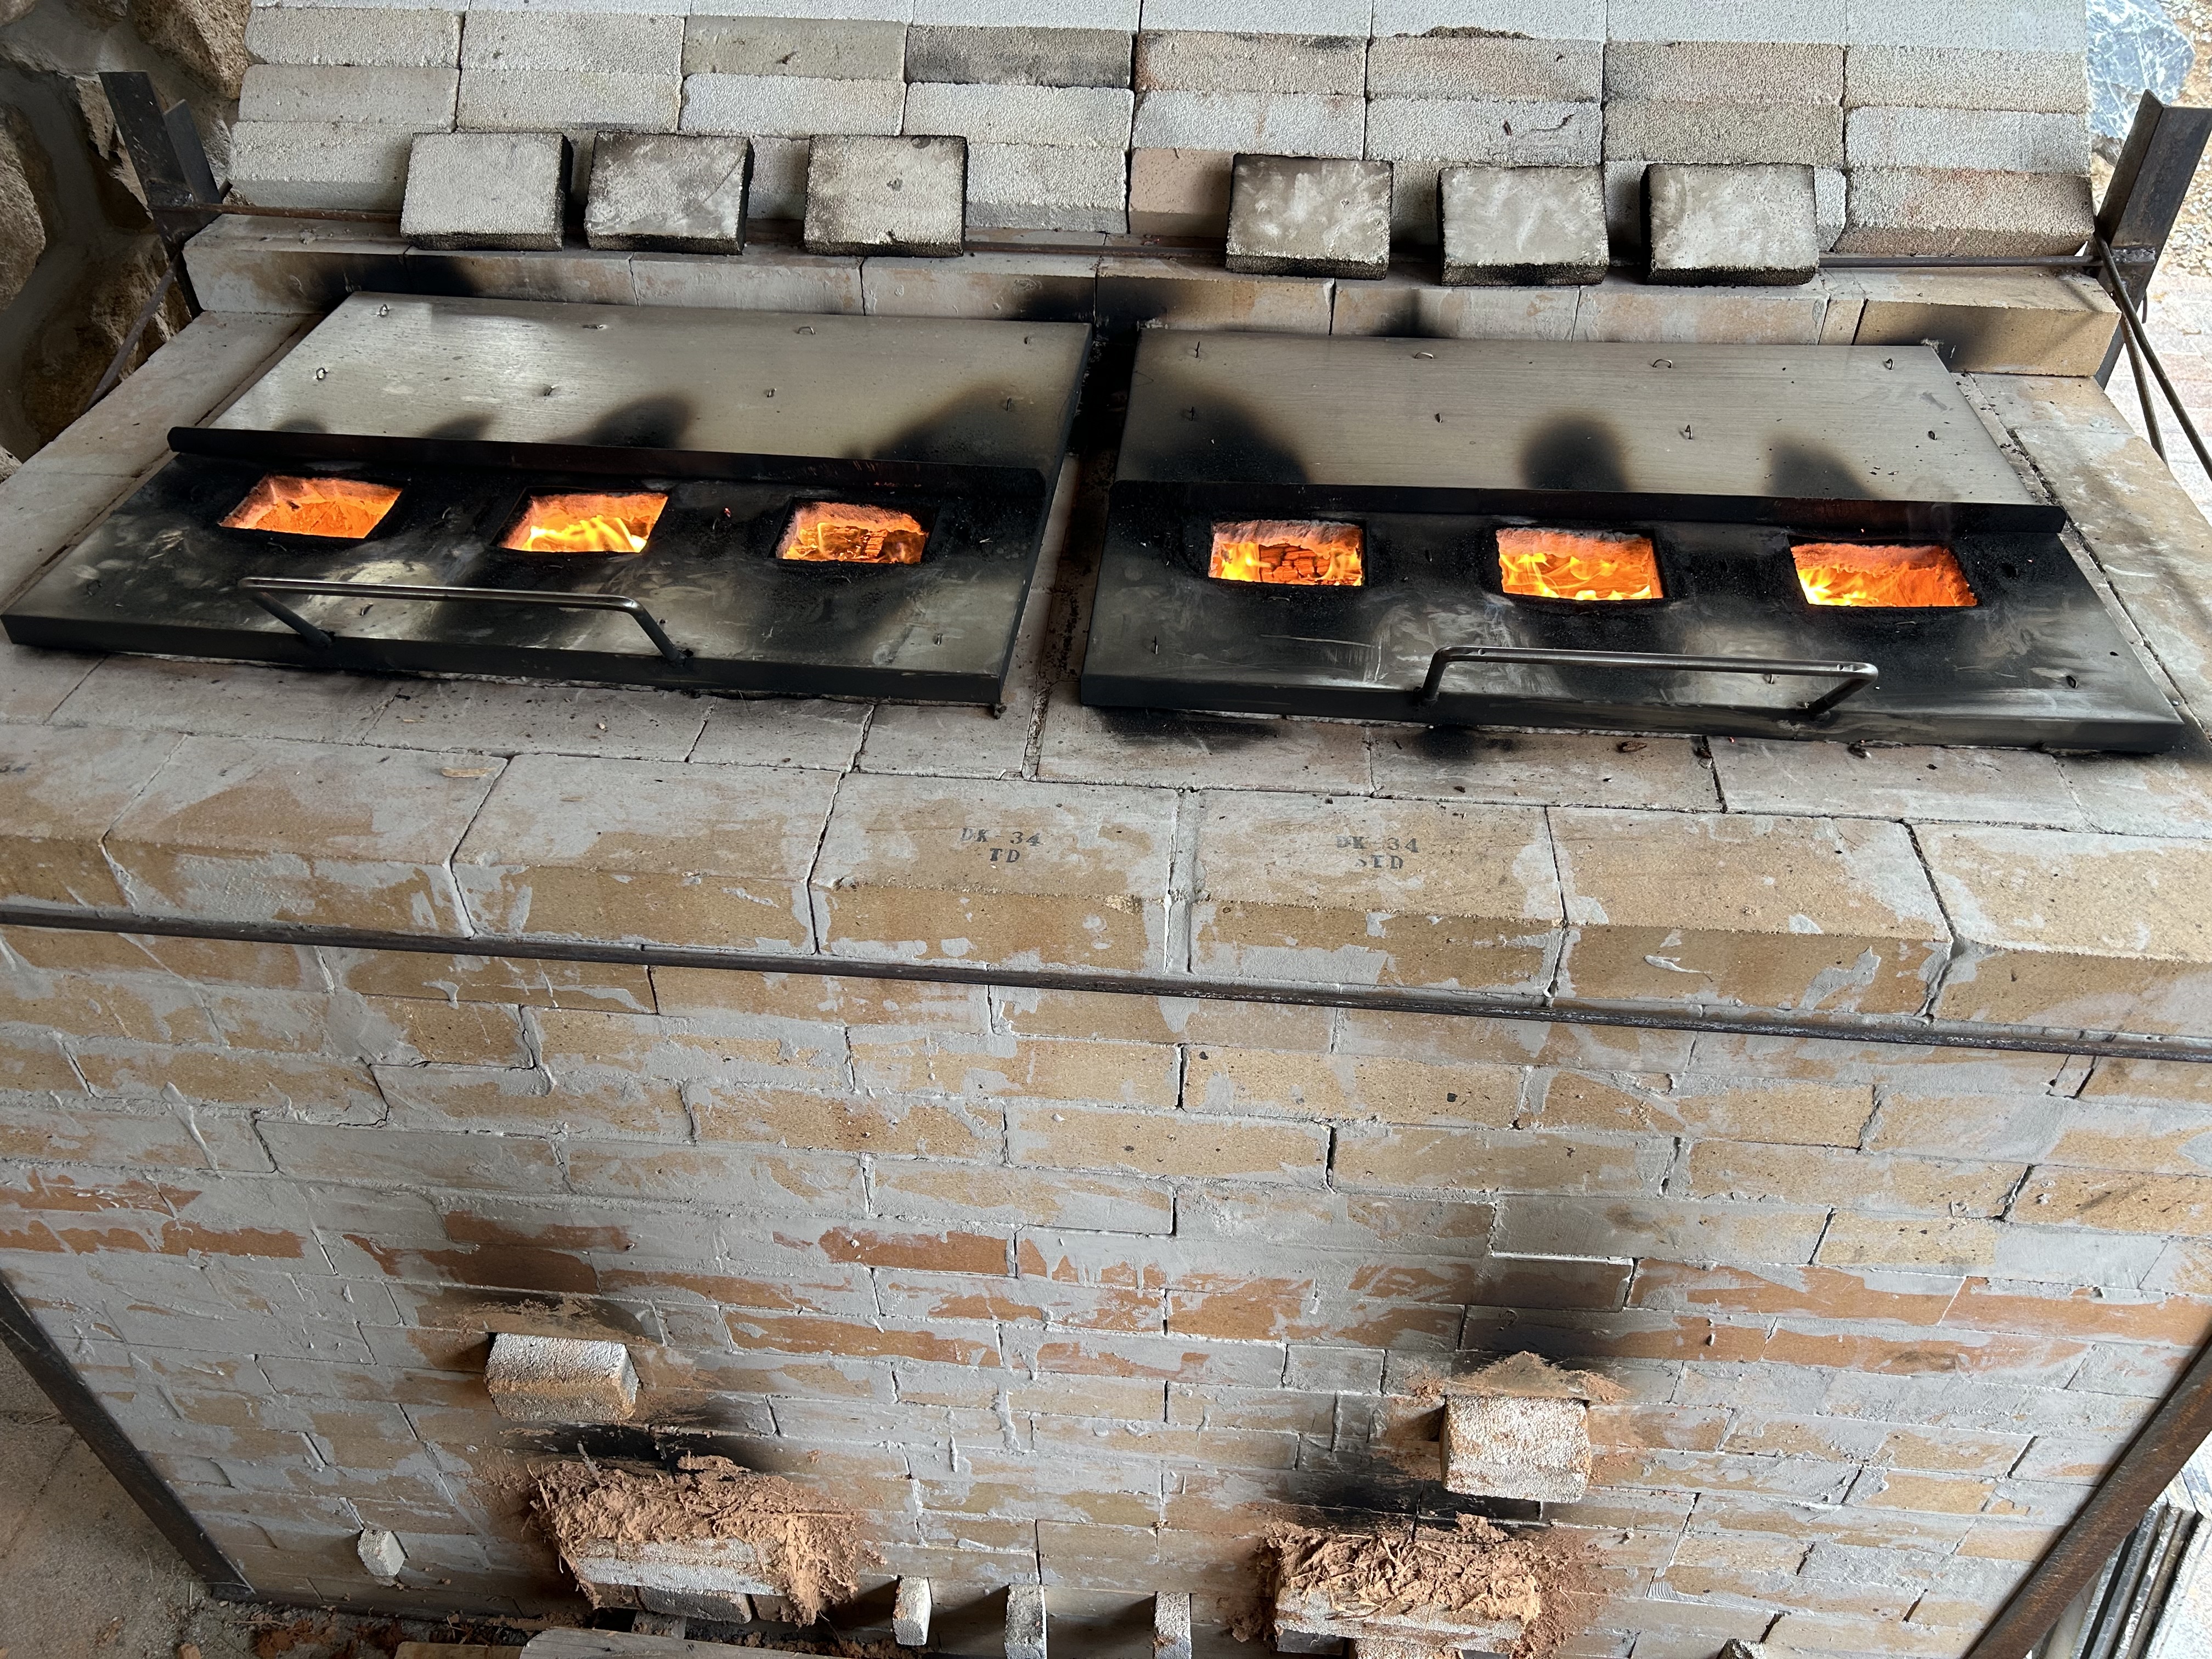
I like the firings to finish in the afternoon while there is still sufficient sun shine to recharge the battery before sunset. I’ve been doing a lot of firings this last couple of months. Firing my 20 or so moon jars, first to bisque, then stoneware glaze, and finally to 750oC for lustre, gold or enamel firings. To make sure that I stay within my energy creation budget limits, I only fire one glaze kiln each day. However, I can fire two small bisque kilns or two gold firings, and still have plenty of solar power for everything else. I was recently given a very old, and very large ‘Hilldav’ brick lined electric kiln from my lovely friend Robin. Thank you Robin! It certainly drains everything out of the system when it is fired. It needs 33 amps on 3 phases to run. That’s a lot of juice! Not many potters have that much power available in their studios. I save firing this kiln for times when I need such a big capacity to fit in larger work. When I got it, it has a broken door lock, that needed welding back on, it also needed a decent bit of work to control the rampant rust, repairs to the top, new insulation over the arch and work on the left front lifting lug and a new door seal. But it’s all good now.
On the left, the small and large fibre kilns. On the right the Big Hilldav and small Rhode brick kilns
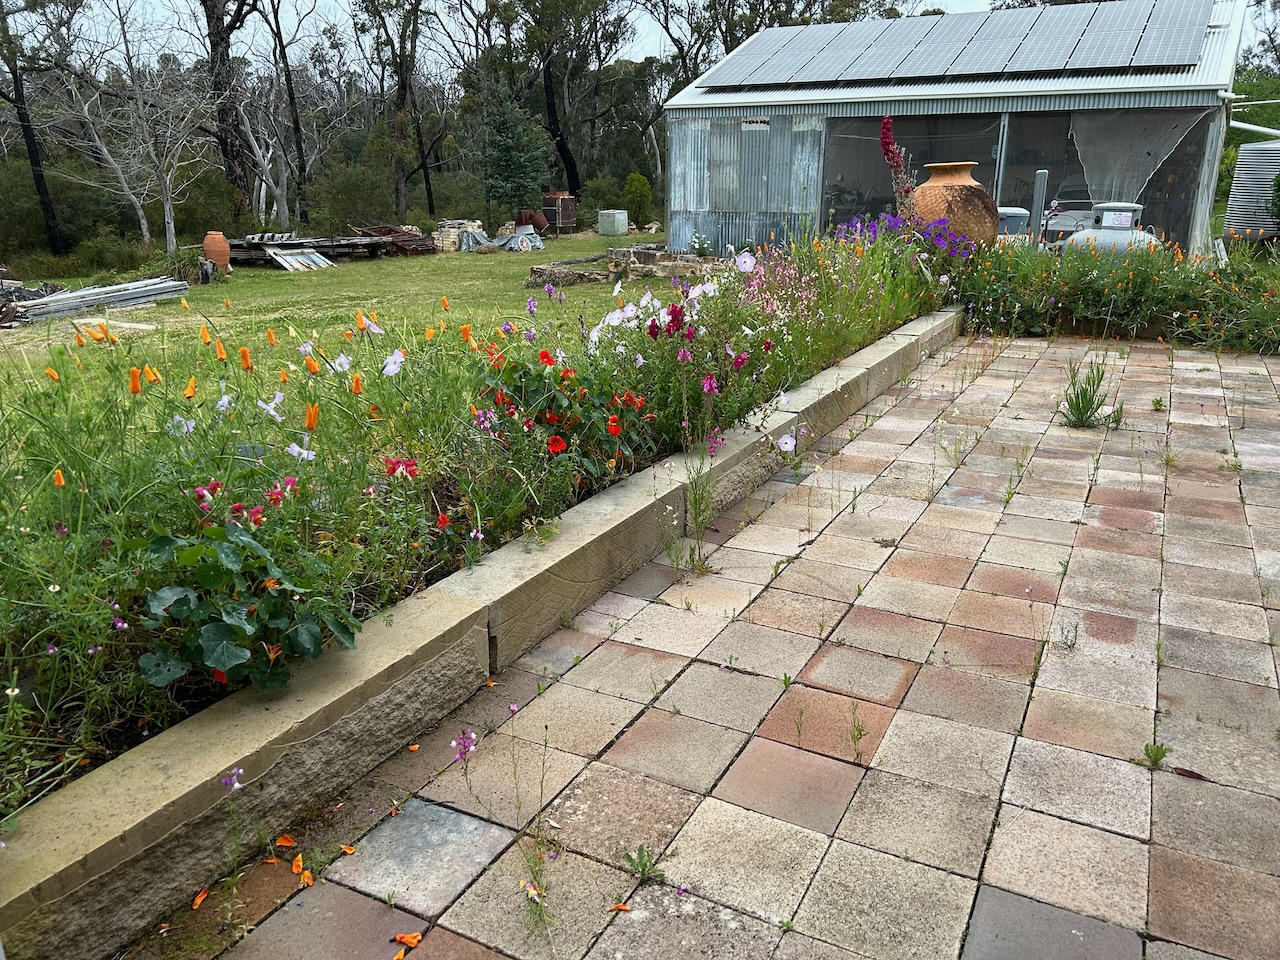
While the kiln fires automatically, We get out in the garden early, straight after breakfast to beat the heat. There is so much that needs to be done at this time of the year. Autumn is the time for a big ‘end-of-summer’ clean out and replanting. The compost heap is now full to the brim again, but it will soon rot down to make more space for ongoing additions.
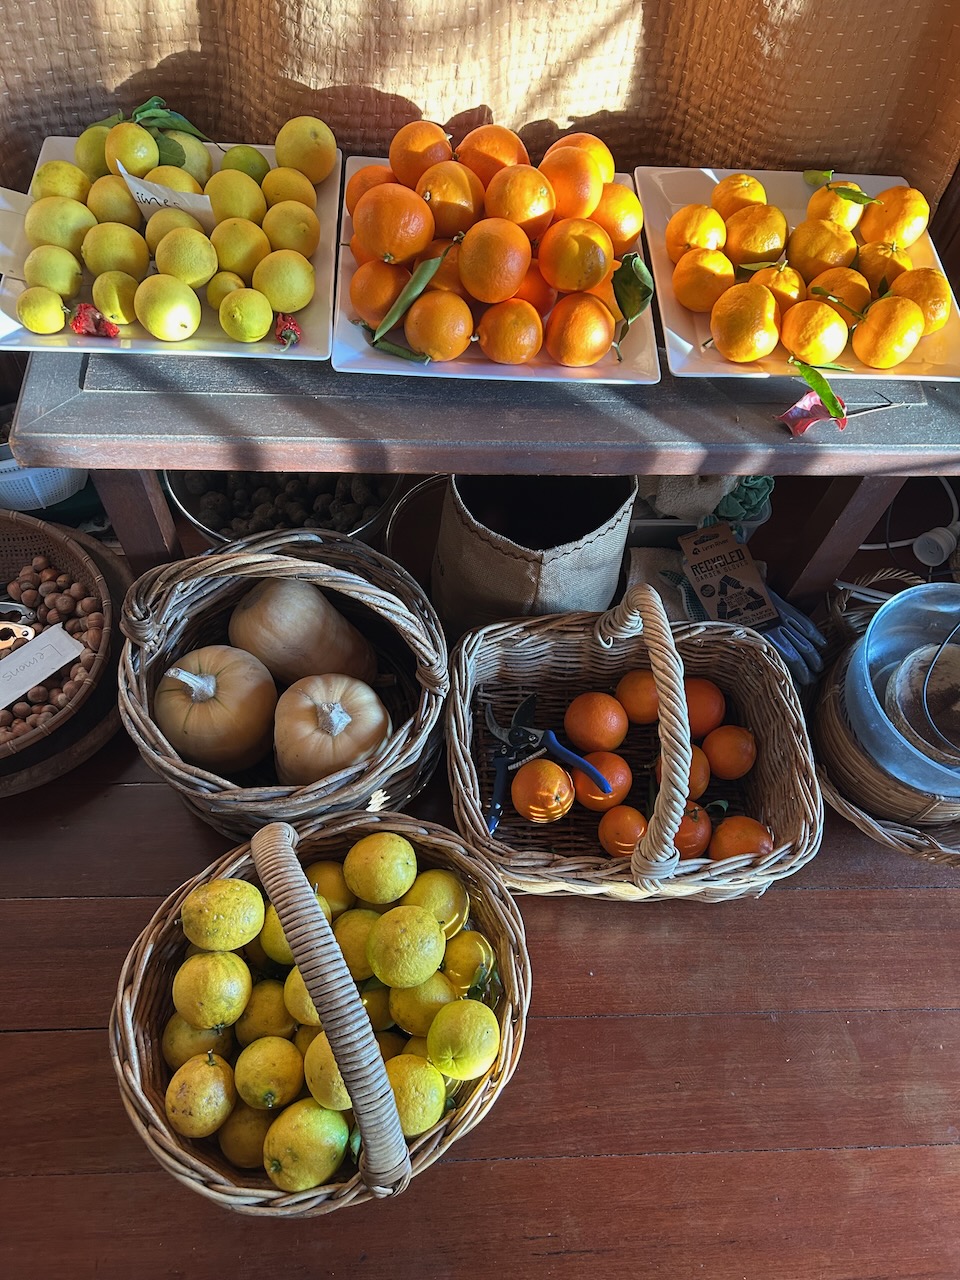
After lunch it is often too hot for us to be working out side, if it is a sunny day, so we retreat inside. Sometimes to help our son with his fruit cordial business, by peeling fruit, or processing herbs. Yesterday, Janine and I spent the afternoon outside on the verandah, Janine stripping lemon myrtle leaves from their branches, and me milling them down to a fine powder, before freezing them to preserve the lively, zesty, lemon fragrance.
Lemon Myrtle and Lemon Verbena are both deciduous, so the leaves need to be collected now and the plants cut back, ready to over-winter, before they re-shoot in the spring. They are hung under the verandah to dry. There is always plenty of citrus fruit ripening over the winter, for citrus fruit cordials. We grow 16 different varieties of citrus trees in the citrus grove. However, we need to collect, dry, mill and freeze the Myrtle and Verbena leaves into powder, now, while we have them, to fill out the flavour profile, as needed, when that time comes, later in winter.
Milling dried Lemon Myrtle leaves into a fine powder, before freezing it to preserve the Zing!
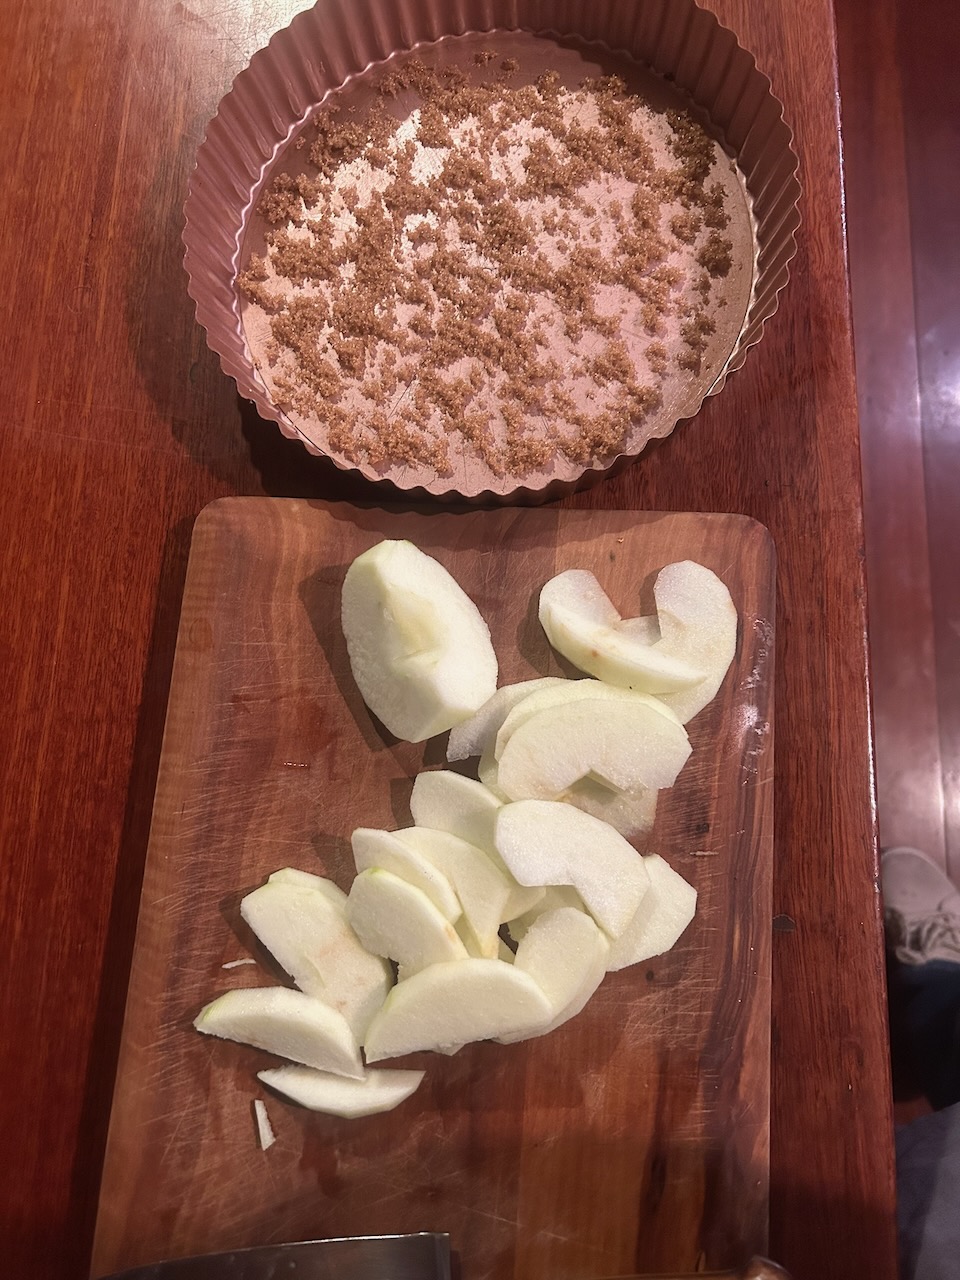
After dinner I made an apple tart tartin, as we have plenty of apples at the moment.
I fired my wood fired kiln a week or so ago. It was a very good firing. I’m quite pleased with the results. Of course there were a few 2nds, as there always are, however, on balance. I got a lot of very nice pieces out of the kiln. The clay bodies worked very well and I achieved a lovely red/orange flashing colour on the clay.
So that was very nice to see , and I look forward to developing those clay bodies into the future, as they are exactly what I like about wood fired pots, unglazed outside and fire-flashed. All the domestic pots in this firing were raw glazed. ie. glazed when they were still wet or damp from the potters wheel, and then dried out and fired without a bisque firing. A raw glazed firing starts off very slow and gentle, just like a bisque firing, because it is. Then it ends like a stoneware glaze firing. It saves a lot of energy and work in packing, and unpacking, the kiln twice.
However, only certain glazes can be adapted to work as raw glazes. The recipe needs to contain about 20% of clay or thereabouts. This is required to allow the glaze to shrink onto the pot as it itself shrinks as it dries out. Otherwise the glaze will flake off. There is a particular quality of high clay glazes. They contain a lot of alumina. This means that some glaze chemistries, that require high silica content cannot be made very easily. The are a few work-arounds like adding bentonite instead of kaolin, but there are limits to far you can take this successfully. I’m working on it.
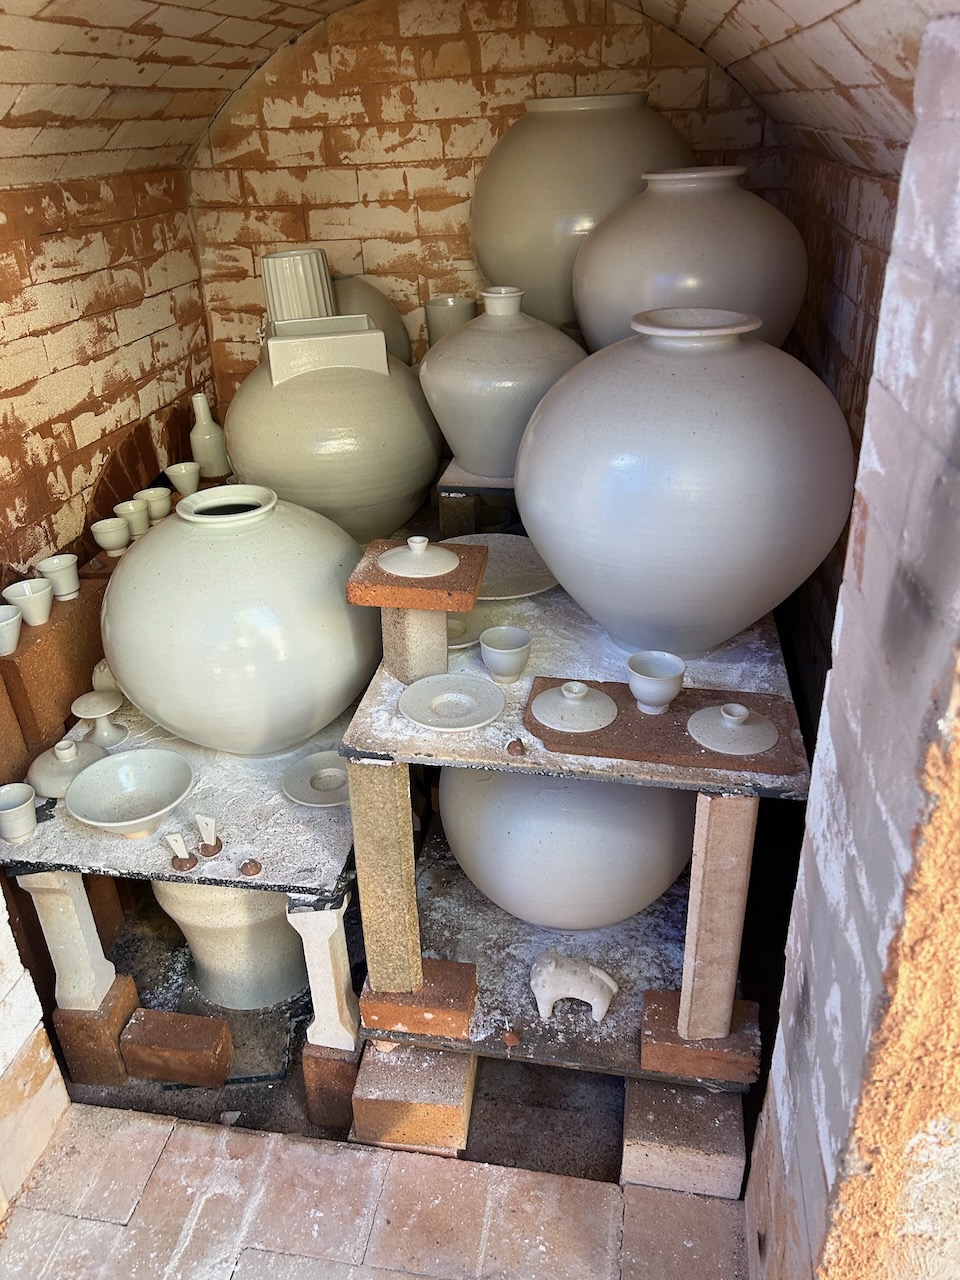
Some of the most interesting pots in the firing were my Australian versions of Korean influenced ‘Moon Jars’. The moon jar is a significant cultural object in Korea. They have been made for centuries for the Royal Family, and more recently are quite sought after in contemporary Korean middle class homes.
Interestingly, the porcelain clay for these ancient cultural masterpieces was mined in a very small village in the central north of what is now South Korea. This is the very same village where I have been going to study and carry out some of my research for the past decade in Korea. I’m honored to have a few of my porcelain pieces on show in the Porcelain Museum on site there. It’s such an inspiring place and the single stone, weathered sericite, porcelain clay is amazing.
Having worked there on a number of occasions now. I can’t help but be inspired by these magnificent objects. I can’t bring myself to make copies of them, it wouldn’t fitting for me, sitting here in Australia, as an Australian, appropriating their finest cultural heritage. And what’s more, probably doing it badly.
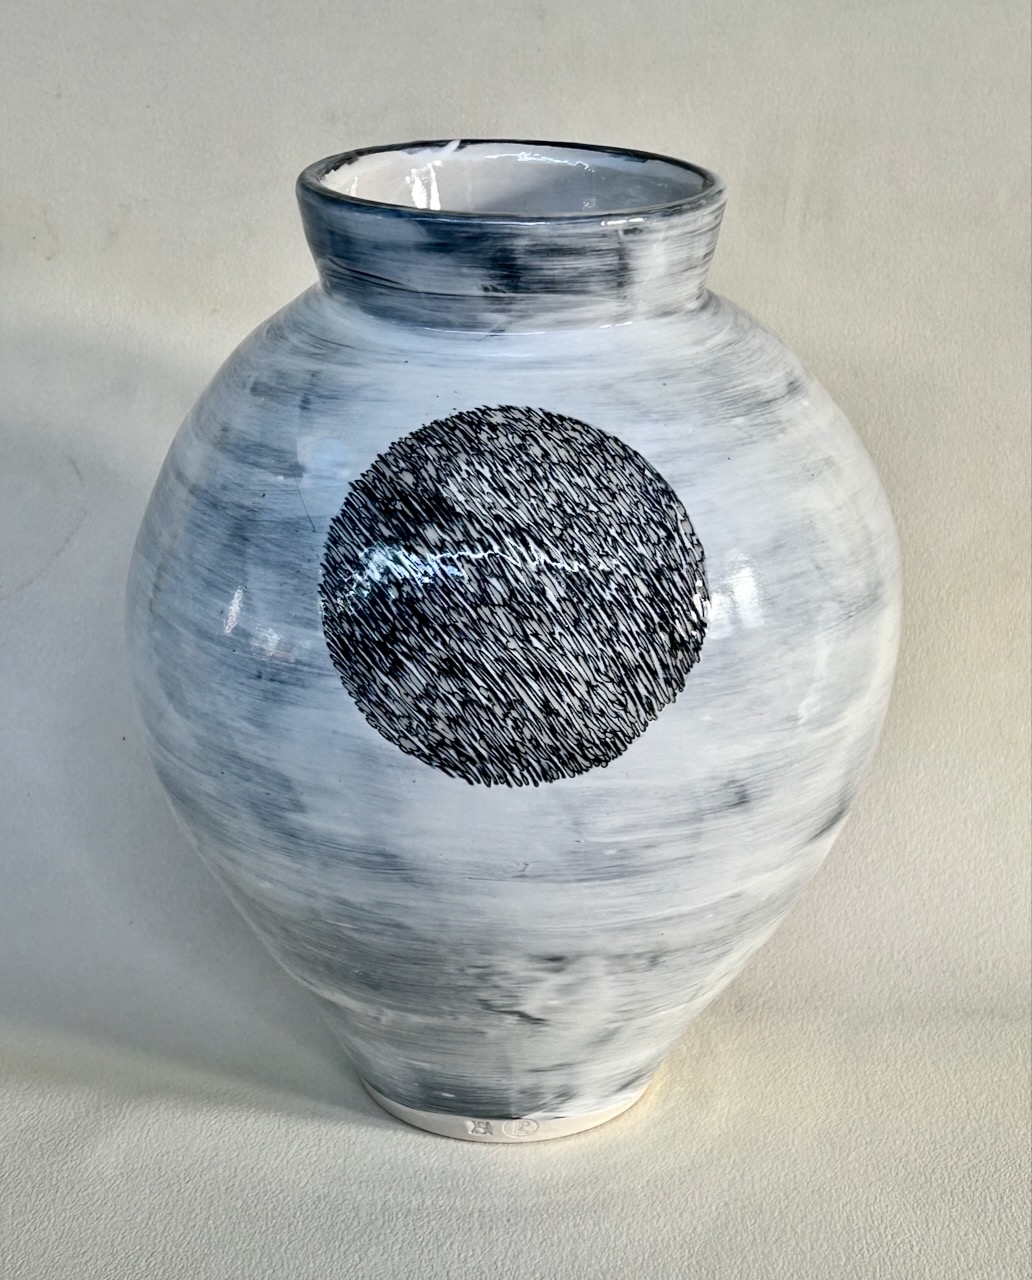
But I can’t resist the temptation to have a go at a big round jar influenced by the Korean moon jars. so I made my own Australian version. This series of homages are not made from porcelain, nor are they spherical and white – glowing like the full moon. I have made mine as a different kind of ‘moon’ jar. I threw them in white stoneware, coated them in black slip, and then again in white slip, so that I could do some sgraffito carving through the surface. A technique that I have become fond of in recent years.
During the long, high temperature, wood kiln firing, the combination of ash and the slip coatings combined to turn the surface a lovely green/grey/black/white/brown/orange, depending on where they were placed in the two different chambers for each of the firings. They bear no resemblance to the big, fat, round, glowing, white Korean porcelain full moon jars. These are definitely my own interpretation. They couldn’t possibly be confused as culturally appropriated local copies!
Full Moon jar
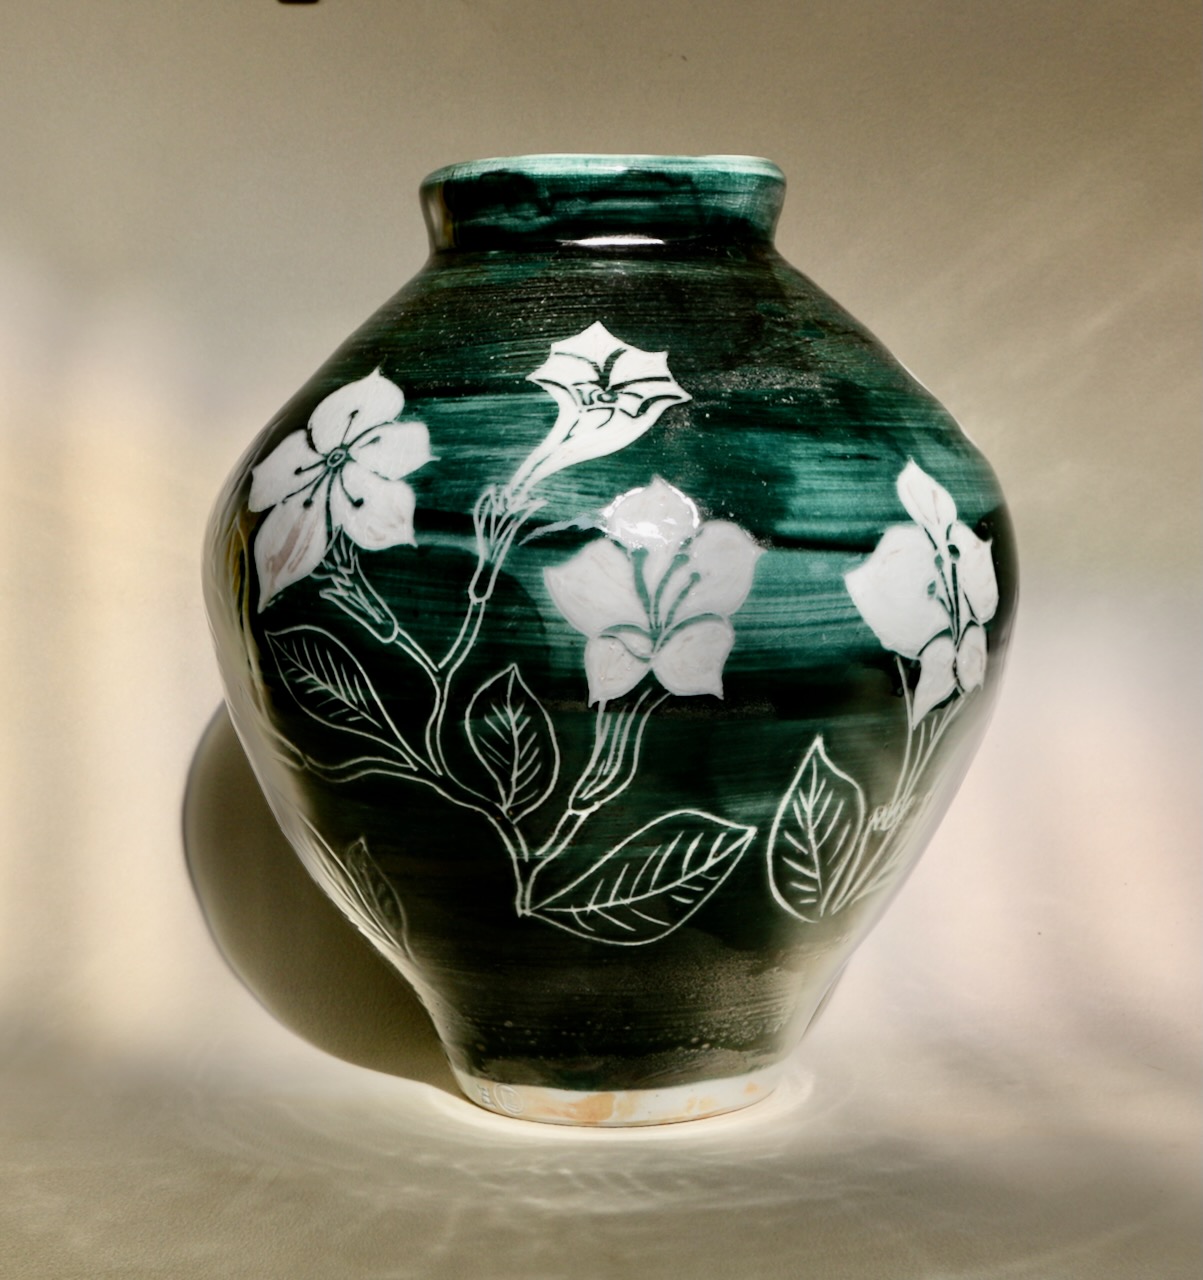
Moon shine vine. Decoration by Janine King.
Phases of the moon Jar
Phases of the Moon Jar II
Clouds over the moon
Phases of the moon III
Moon Flower jar
Man on the moon jar.
A very different ‘riff’ on the subject of the Moon Jar
The only noise that I can hear is the sound of the ice under my feet crunching as I walk down to the pottery. It is 5.00 am and pitch black this wintery morning. No stars, so there must be a lot of cloud? It’s too early even for the birds to be stirring and beginning to make their first tentative calls.
I love these early starts. The air is very cold and crisp. My noise hurts in the minus degrees air. fortunately there is no wind, so I’m lucky. It could be colder.
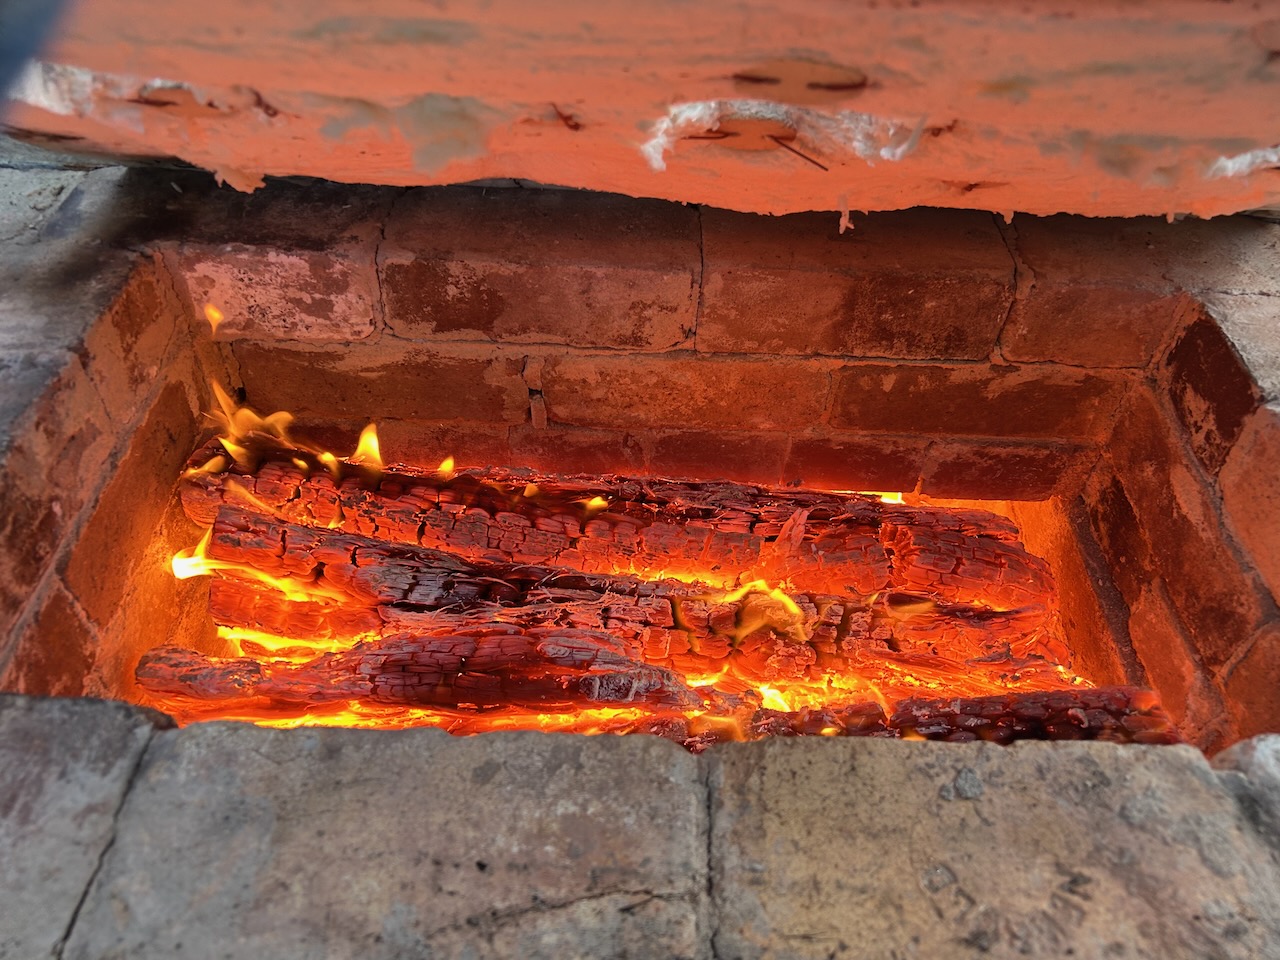
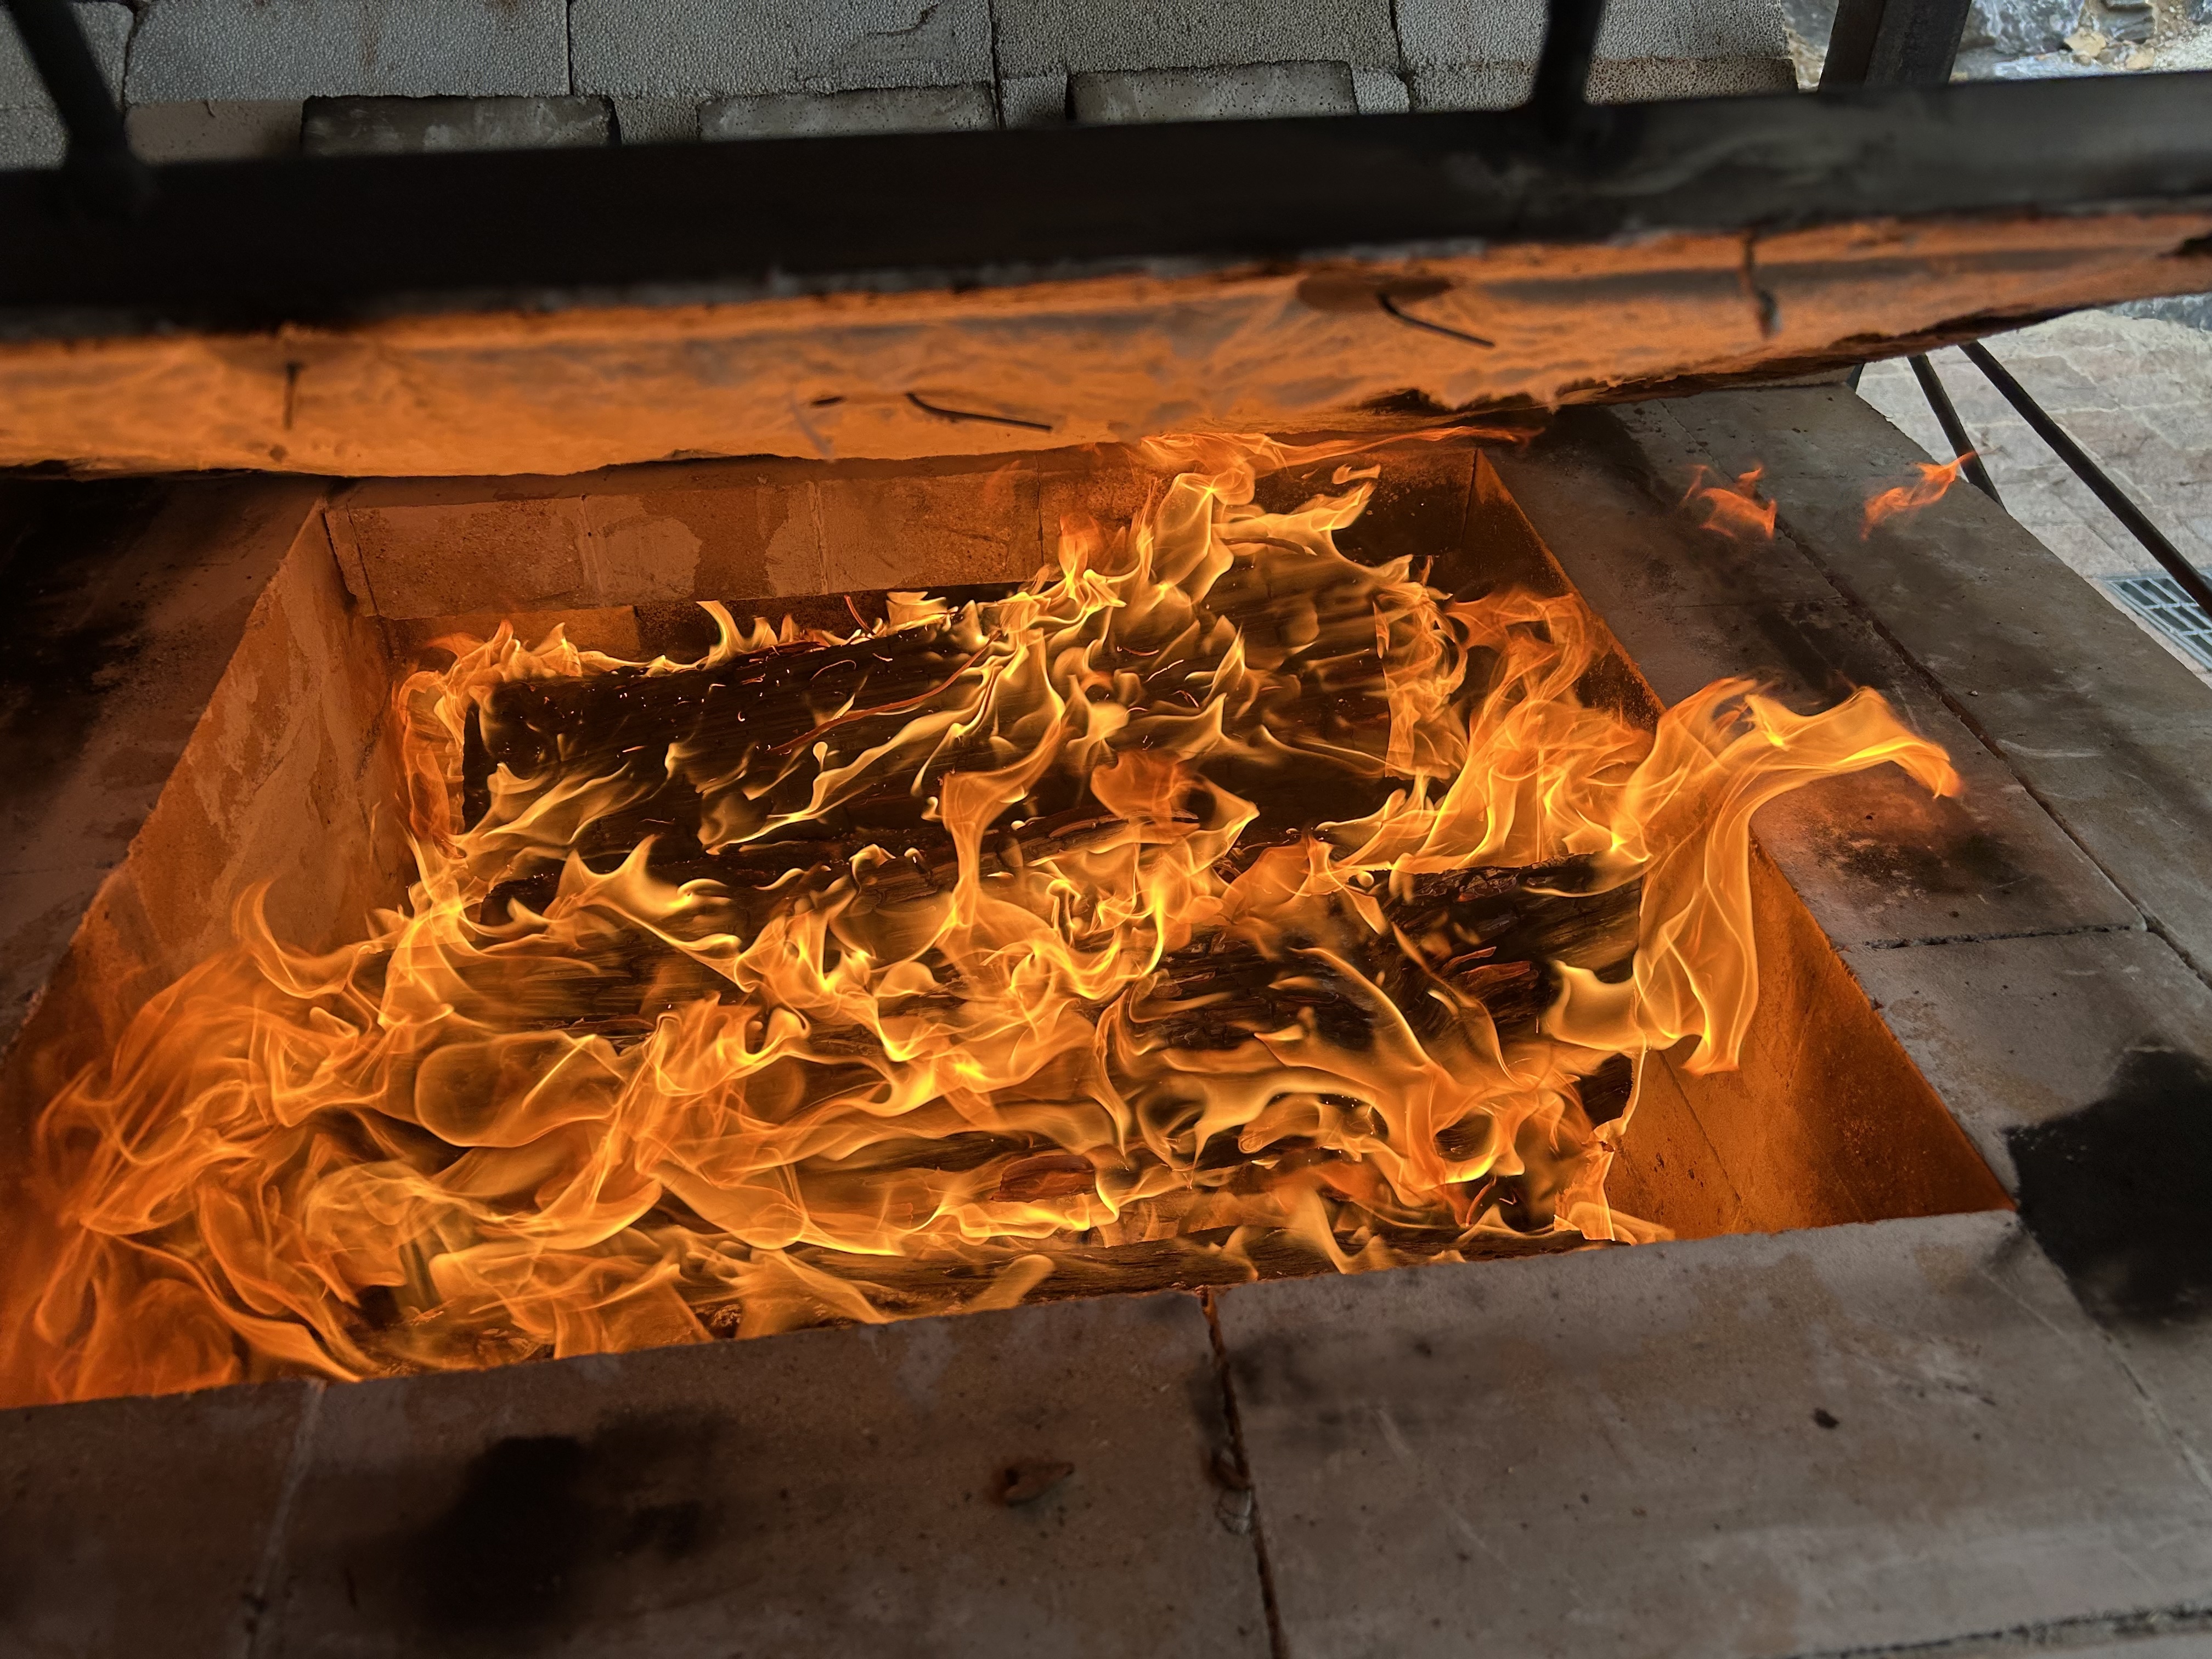
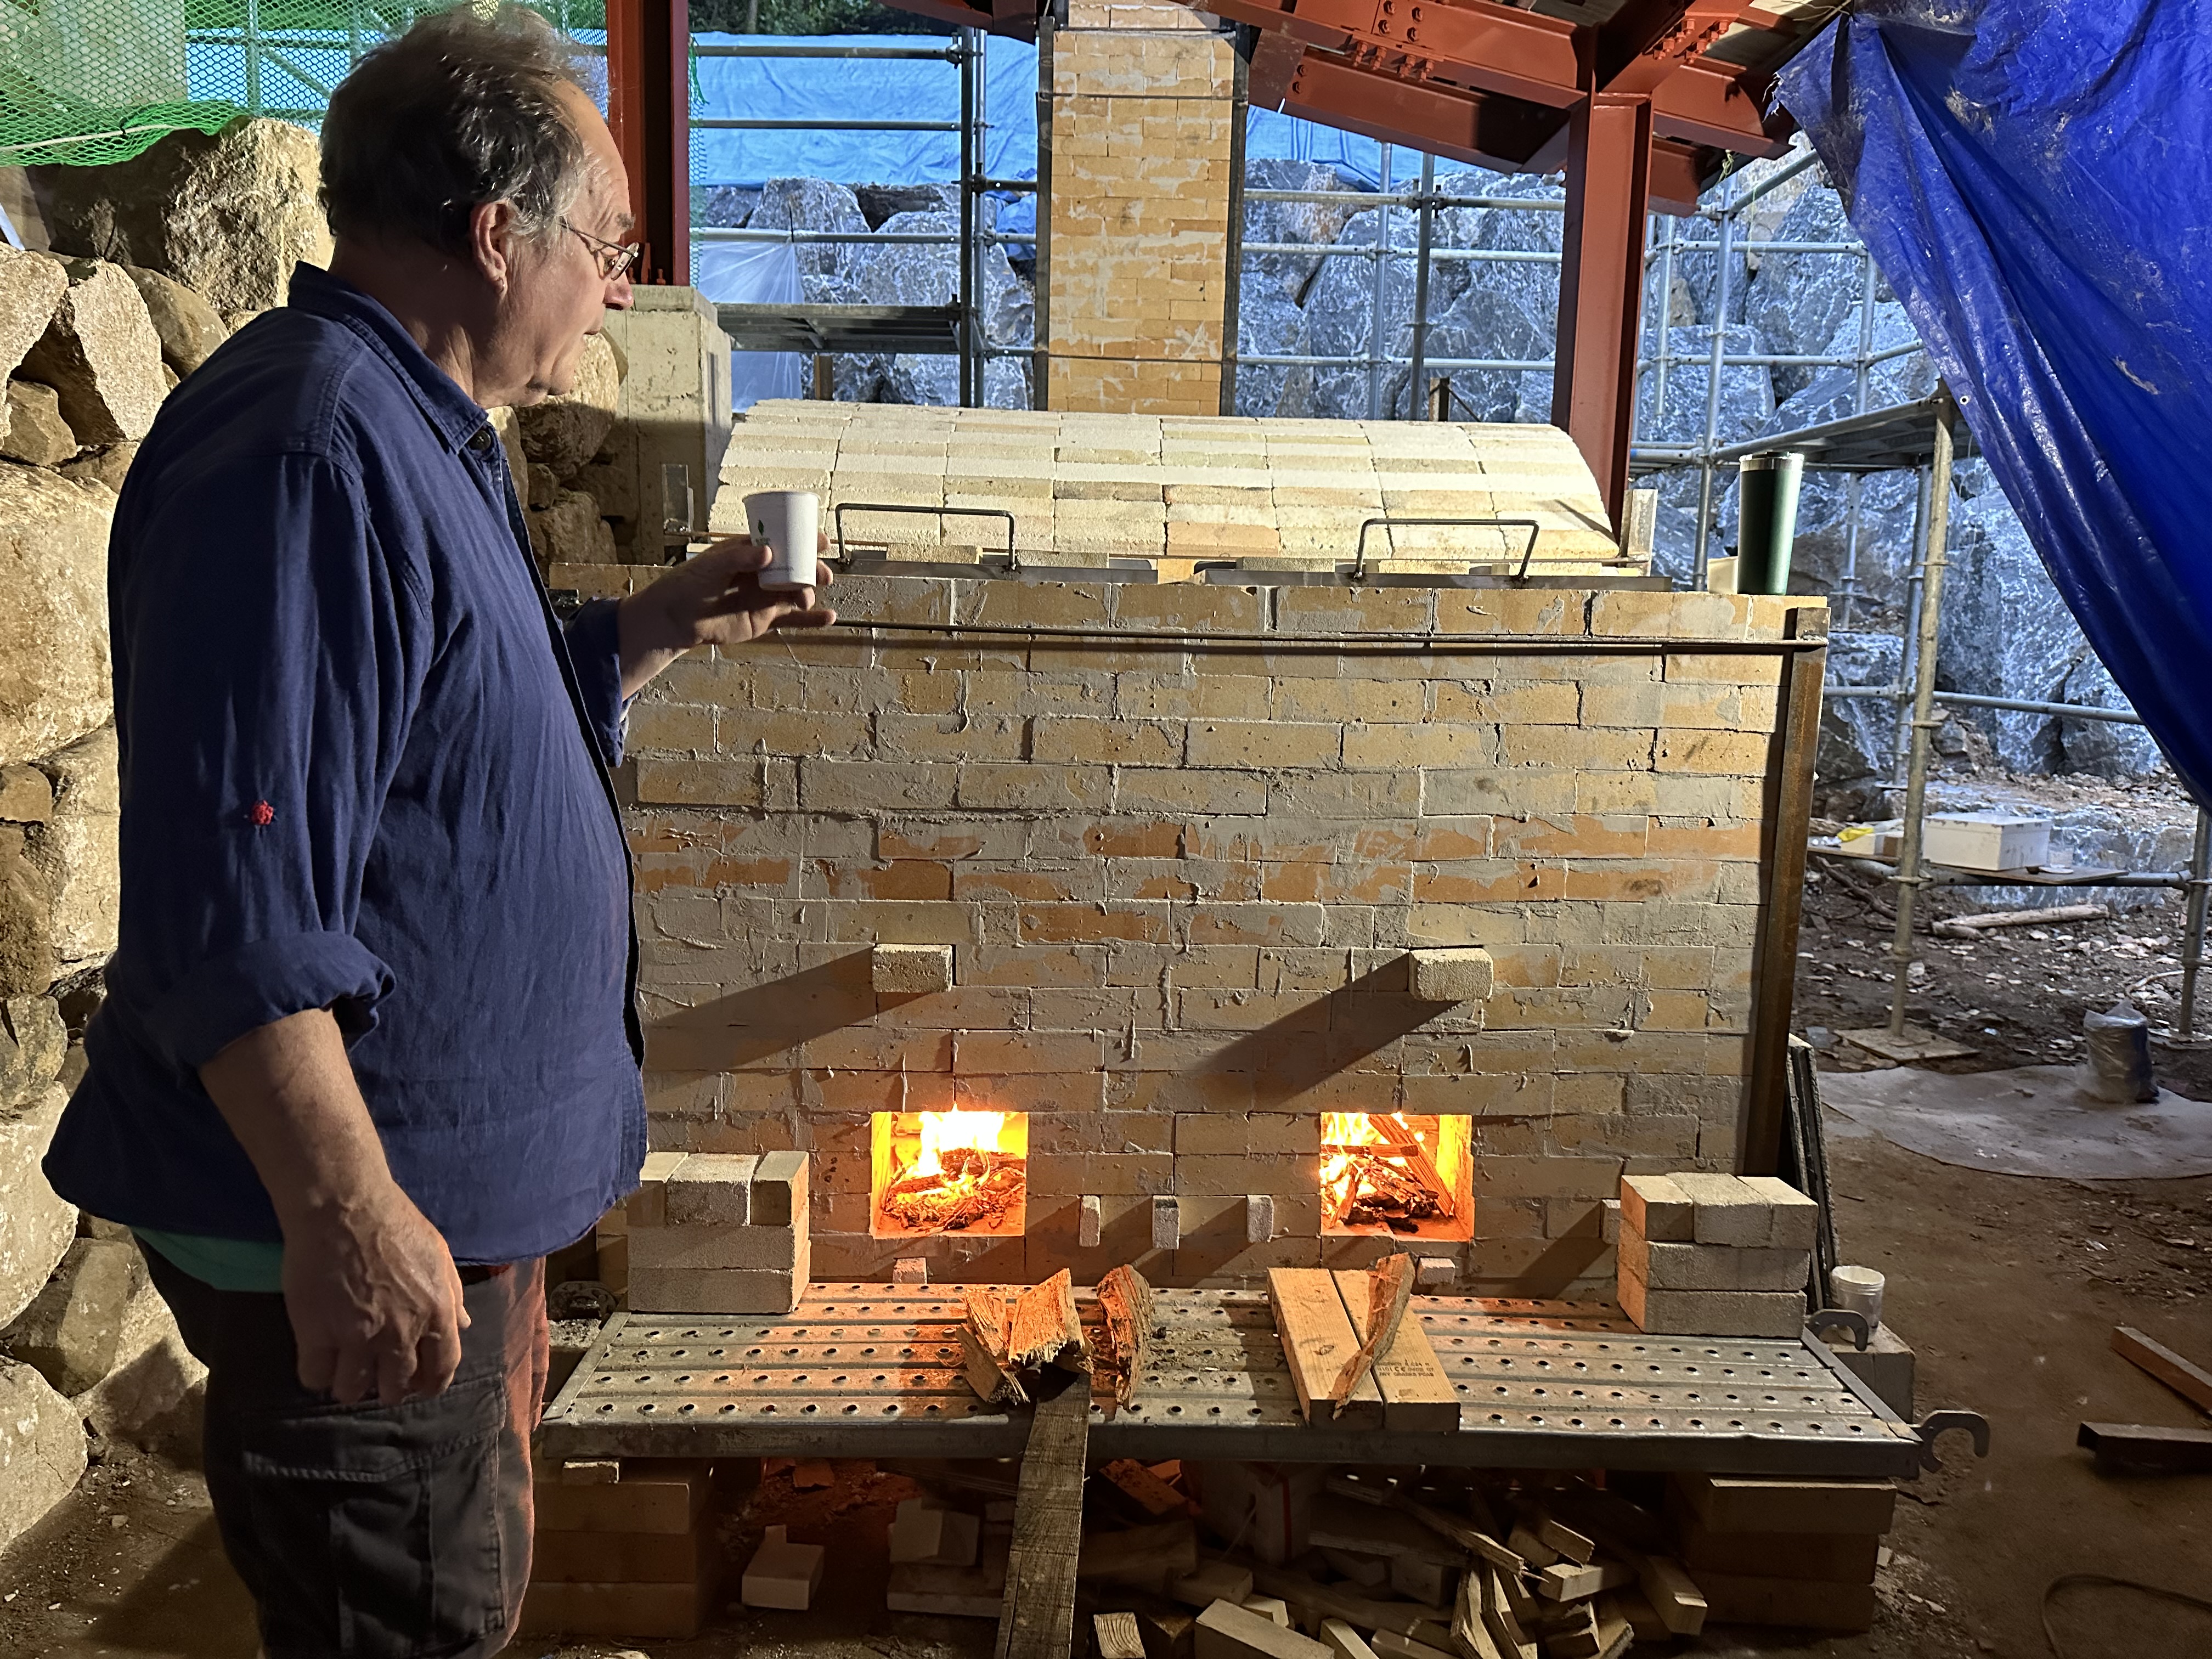
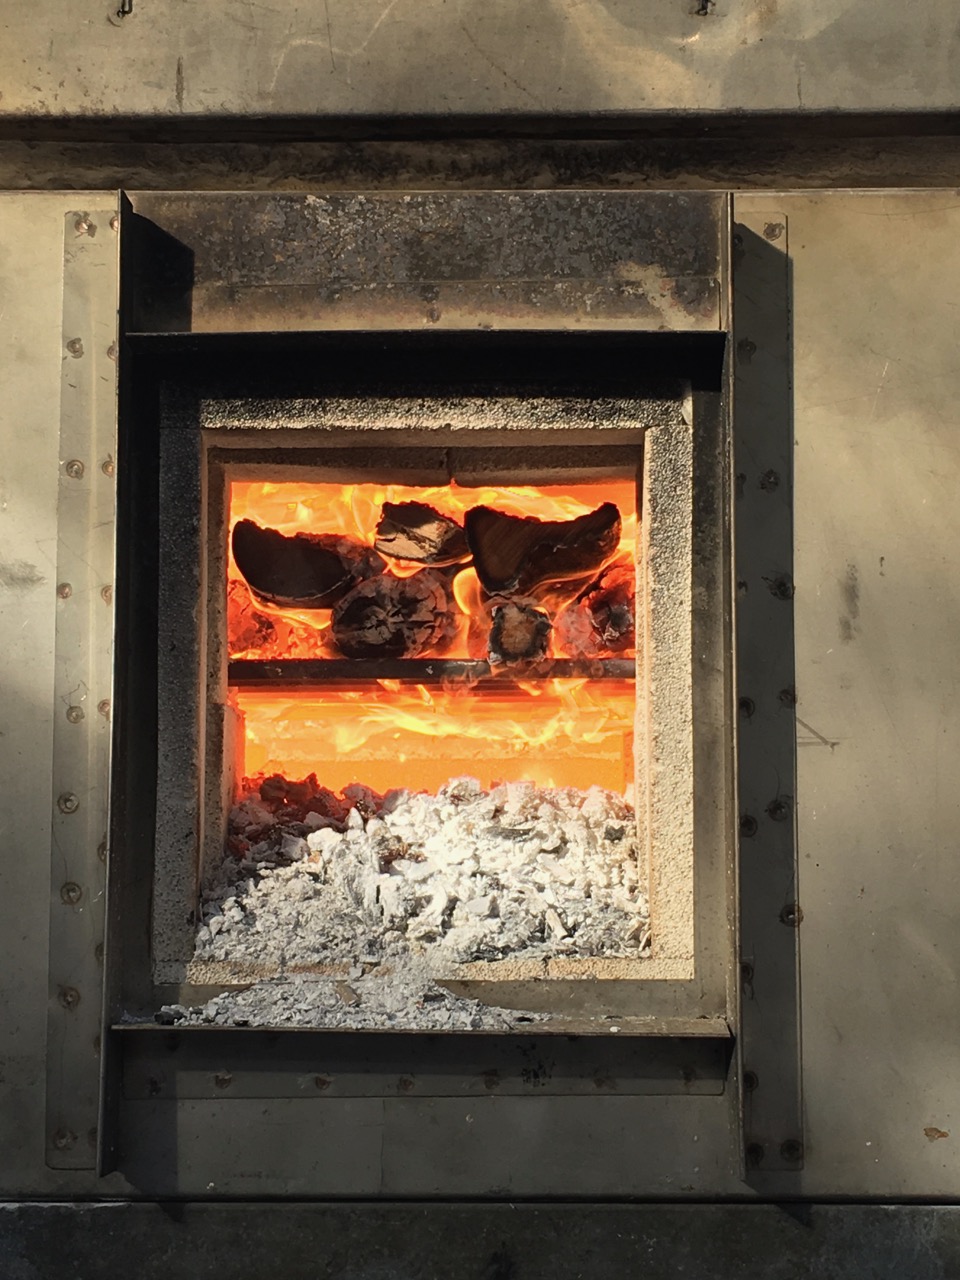
I’m fumbling trying to light a match wearing gloves, but I do it, and the little kindling fire slowly spreads and comes to life. There is a strong draught in the firebox because I had the kiln lit and firing yesterday evening through into the night, preheating all the raw glazed pots, I have to be careful not to heat the kiln too fast, as the raw pots may still have a small amount of water in them that can easily turn to steam, expand and blow the pot up. This would be a disaster, not because I might loose a single pot, but because the explosion would spread shrapnel like fragments and even larger chunks of rubble through out the kiln chamber and bits would land in almost every open bowl-like form. I’d need to stop and unpack the whole kiln and start again.
By staying up last night keeping a small kindling fire going, I had the kiln up to just above 100 degrees centigrade, sufficient to dry all the pots out thoroughly. I preheat into the dark, leave it to sit and sweat while I have dinner and then I’m back down here to keep the fire alive for a few more hours. This gentle start to the firing is very important and can’t be rushed. I’m used to sitting in the dark, all my wood kiln firings start and end in the dark.
The firing goes well, everything is prepared in advance, all the different sizes of wood, from kindling through floor wood onto hob logs, it’s all cut and stacked next to the kiln. I have my tea making gear ready. Thick, warm, long, leather gauntlet gloves, initially to keep my hands warm, but later to stop them getting too warm or even burnt while stoking. A few hours later, Janine and Len arrive, I’m just about ready to go to hobs with the stoking and shortly afterwards to start reduction. Janine cooks breakfast for us, we have bacon and eggs, then toast and marmalade with coffee. A great start to a good firing. I love my home made marmalade!
I stoke the fire box, keeping it full to the top, and this generates a consistent level of reduction. I initially use some thinner sticks of 75mm up to 100 mm. diameter, stoking every 15 mins, but as the kiln get hotter, I soon move on to the heavier thicker logs of 100 to 150 mm diameter, and eventually up to 200mm diameter. these burn consistently over a longer period, so I only have to stoke every 30 to 45 mins. The biggest and thickest logs can burn for up to 1 hour, keeping a steady reduction atmosphere and a gentle temperature rise. This is kept steady and even for the following 10 hours, while maintaining a pretty clean chimney. Something that I’m proud of. Minimising any smoke and using my afterburner and scrubber on top of the chimney to minimise any PM 2.5 particulates escaping to the environment.
I have spent the past few years experimenting in new ways to pack and fire this kiln. There are so many variables, but a steady reduction atmosphere is a necessary constant for good clay and glaze colour. I fire for about 14 or so hours. I finish up around 8 pm, but need to hang around for another hour for the burning down process, before closing the damper in the chimney. I will leave the scrubber running for another hour while I go up to the house for a glass of wine to celebrate and a bit of chat. Later, I return to the pottery to check on everything, switch off the scrubber pump and all the lights and lock up. I have to leave the scrubber water pump running for an extra hour or so, to make sure that it doesn’t over heat from the hot air coming up the chimney during cooling. I don’t want to melt the delicate brass spray nozzle.
A while ago, I made enquiries about getting a stainless steel version of the same fitting, but the guy wanted $250 for it. Extortion! It’s better to replace the brass one every few years at just $10.
Wood firing is such an old fashioned occupation. I love it, not because of its long history, or its hands on haptic rewards, or because it is a way of avoiding the use of fossil fuels, nor its DIY economical kiln structure investment of 2nd hand fire bricks, making it economical, but in essence, it’s simply because of the quality of the pots that I can make by doing it. It is all of the above of course, all rolled into one experience, but it’s the beautiful ash enhanced surface on the pots that keeps me doing all the extra work involved in their creation.
However, having said that, I’m also really engaged with minimising my carbon foot print, so burning wood that I have grown myself, from my own forest is an achievement. I’m so privileged, not many people can claim that. Wood is a form of stored carbon extracted from the air, which when burnt, returns to the air. A beautiful, virtuous circle. It almost entirely eliminates fossil fuels. However, although I use a solar-electric chain saw to cut up the smaller logs and I split the timber using a solar-electric splitter that I re-built myself from a burnt out petrol model, (re-use, re-cycle, re-purpose.) which runs off our solar PV electricity. I still have a big petrol powered chain saw and I cart the logs on my old 21 year old petrol powered ute, but this is extremely minimal fossil fuel use for a kiln firing. Maybe one day there will be an electric ute? Nothing is perfect, so I’m happy with where I am at the moment. I have attempted to do all this so far on a low budget working in the arts.
Winter is the season for wood firing and also for spending the long evenings cooking in the kitchen. We light the wood fired kitchen stove each evening in the winter, which heats the room, but also heats our hot water from the ‘wet-back’ boiler in behind the firebox, while I am cooking our dinner. Winter is also citrus season. So marmalade making is on the agenda.
Making marmalade is such an old fashioned thing to do. It’s sort of a grandma’s thing really, young people don’t seem to know much about it. but I love the stuff, so I have taught myself to make it reasonably well. Every batch is slightly different as I experiment, trying to learn whatever there is to be learnt. My methods are also different from Janine’s, so we have various jars of different marmalades. I like testing out all the various marmalade making techniques. It’s a real learning curve. Exactly the same as when I’m wood firing. Everything is a bit of an experiment.
I can’t really bring myself to want to do exactly the same thing every time. I love to experiment, trying different ways of packing the kiln, different shelf layouts, experiment with different clay bodies, decorating techniques, choice of timbers and wadding. Everything makes a difference. Before the 2019 fires, the last kiln that I had, was there for 15 years, altered a coupe of times, but in continuous use. I got to know it well, I was able to get some really nice pots out of it. This new kiln is a learning experience. I haven’t had a kiln exactly like this before, so I’m only just getting to know it now after 5 or 6 years.
Packing and firing is a little bit stressful. There is a months work at stake, as the wood kiln is so much bigger than the electric kilns, and all the little changes that I decide to make will have unknown consequences. Hopefully they will lead to something better, but not always. I just have to decide to take the plunge. Wood firing to me is akin to pruning the orchard. That might sound strange, but it has similarities. I’ve been doing both for 50 years and still don’t know exactly what I’m doing with either. There are so many variables that I don’t understand fully, but there is no point in procrastinating. I just make the decision and go for it.
With pruning, each tree is different. I’ve done it before, but was it right?. I have to get over 60 trees pruned. I don’t have unlimited time, so I have to make decisions, and fast. I decide and then do it. I open the centre to let light in, take off any dead wood, remove all the water shoots and crossed branches, reduce top growth by 2/3 to keep the tree manageable and prune to an outward facing bud. That’s it! It’s simple! But which bud, and at what height, how much to take from the centre, which of the two crossed branches to remove and which to keep? I’m never sure. But I choose and do it.
The same with packing the kiln. I can think about it for a long time, but still not know if it is the best option or not. So I’ve learnt to just do it and accept the consequences. Occasionally I unpack a bit and re-do it, but not often. I do take photographs as I pack though, so that I will be able to remember what it was that I did, 3 days later, after I unpack and study the results. If it doesn’t turn out how I imagined or hoped, no worries, it was a learning experience. Hopefully there are enough good ones to make it feel like it was all worth it.
Sometimes the pots turn out not at all like I was expecting, so I’m not too thrilled. However, it is a case of not seeing what I was expecting to see. After cleaning, fettling and grinding their bases, I get a better look at them and start to see their good points. They are often quite good, just not what I was anticipating. I end up well pleased with the fresh surface quality and I learn something new. So it’s all good.
The winter is well and truely here now. We have passed the solstice. We are getting cracking frosts that turn the paddocks silver/white. Janine harvested the last of the almost red, struggling, self sown, tomatoes just in time before the first of the really heavy frosts reduced the plants to crisp brown stalks. The shrivelled plants and their remaining unripened green tomatoes will be composted – eventually, when the weather warms up a little. The mid-winter garden looks a little bit forlorn, but it is still feeding us really well.
We are continuing to pick the citrus fruits. The later crop of Seville oranges are just starting now, so some serious marmalade making will be taking place in the evenings from now on.
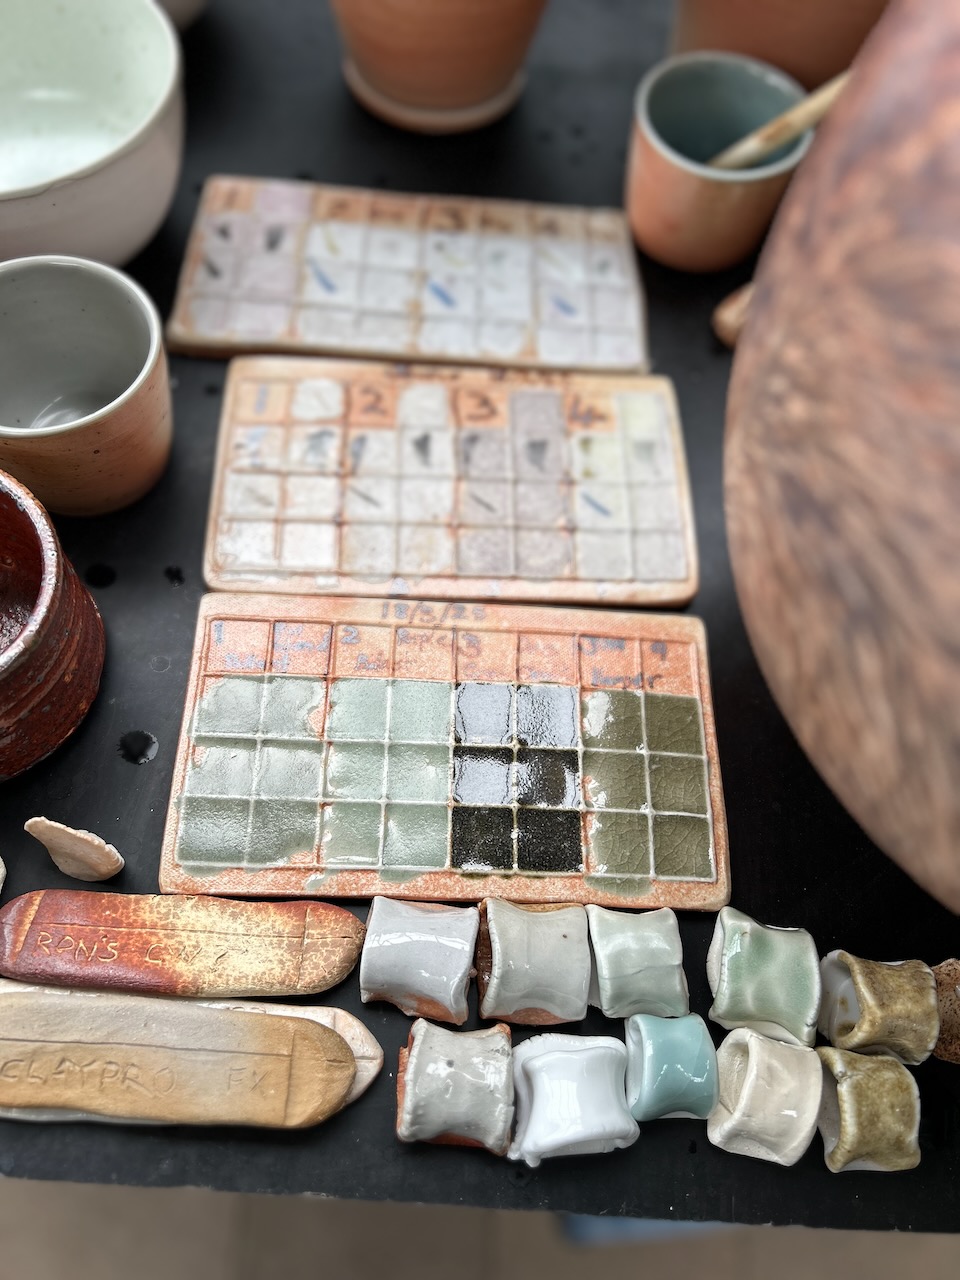
I’ve done the first wood kiln firing since returning from my work in Korea. It worked perfectly, and the results were good, although I’m always hoping for something a little bit better, however, I’m happy with the best pots and there is always a string of new test bodies and glazes developing from my local rocks. The samples are encouraging.
I start the firing in the very early morning, so early that there is no noise at all. At 3.30am it is pitch black and really quiet. No traffic noises from the main road. Every body is in bed. It’s a great time to start that tiny little kindling fire, nurture it and watch it slowly grow and develop into something with a life of its own. The little kindling fire is quite an intense time, you can’t walk away for any reason. You have to turn up prepared to sit and pay attention. I don’t leave to make some breakfast and a cup of tea until I start to stoke the bigger blocks of hard wood. Then there is some time to boil the kettle and make some toast.
By morning, I’ve progressed to the hobs and my firing friends have turned up, so Janine makes us all a proper hot breakfast, cooked on the pottery wood stove. A special treat of our own chickens eggs and some nitrate-free bacon, followed by coffee, our own marmalade on my home made rye bread toast.
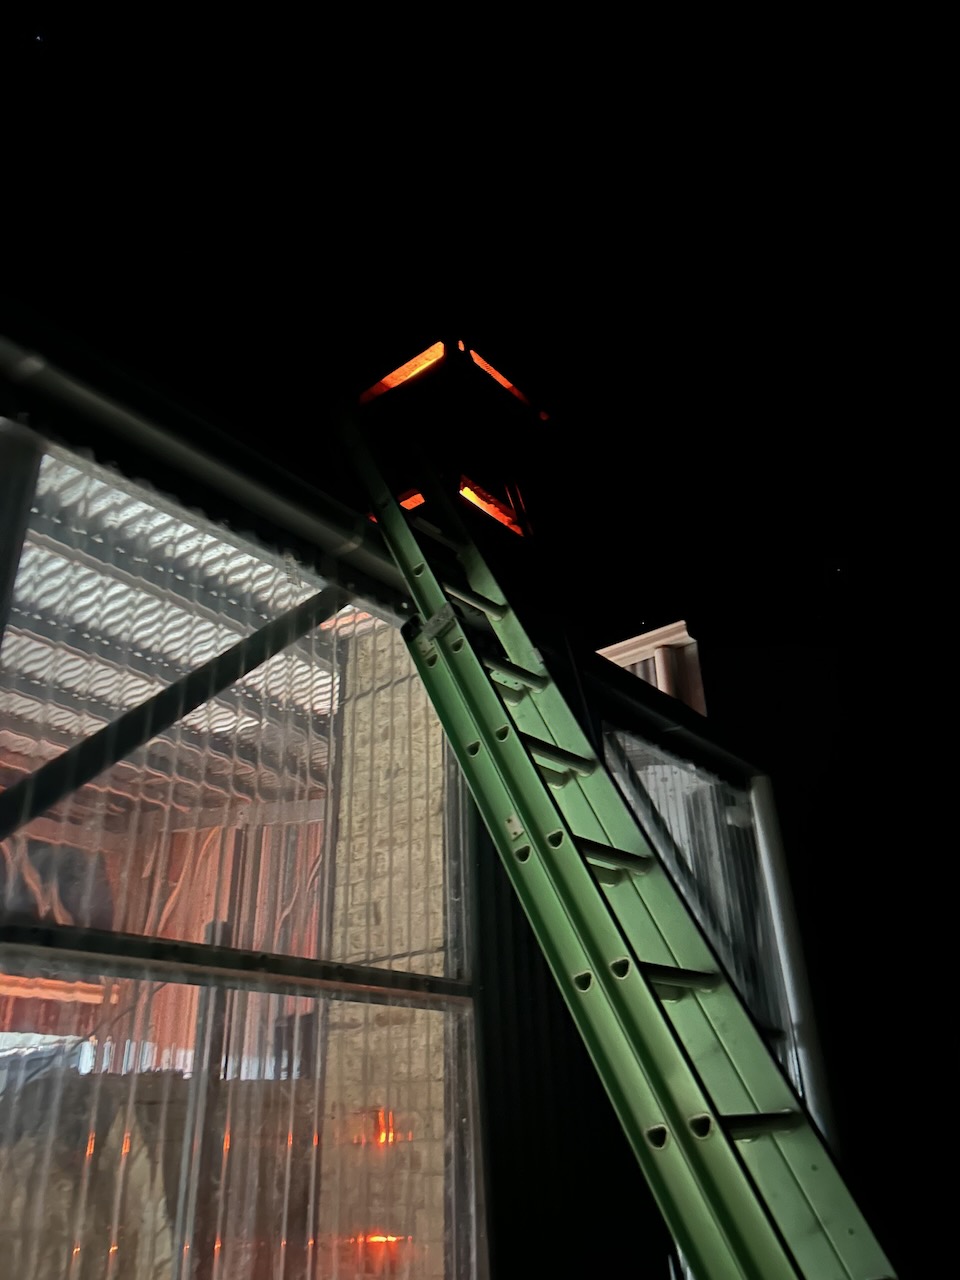
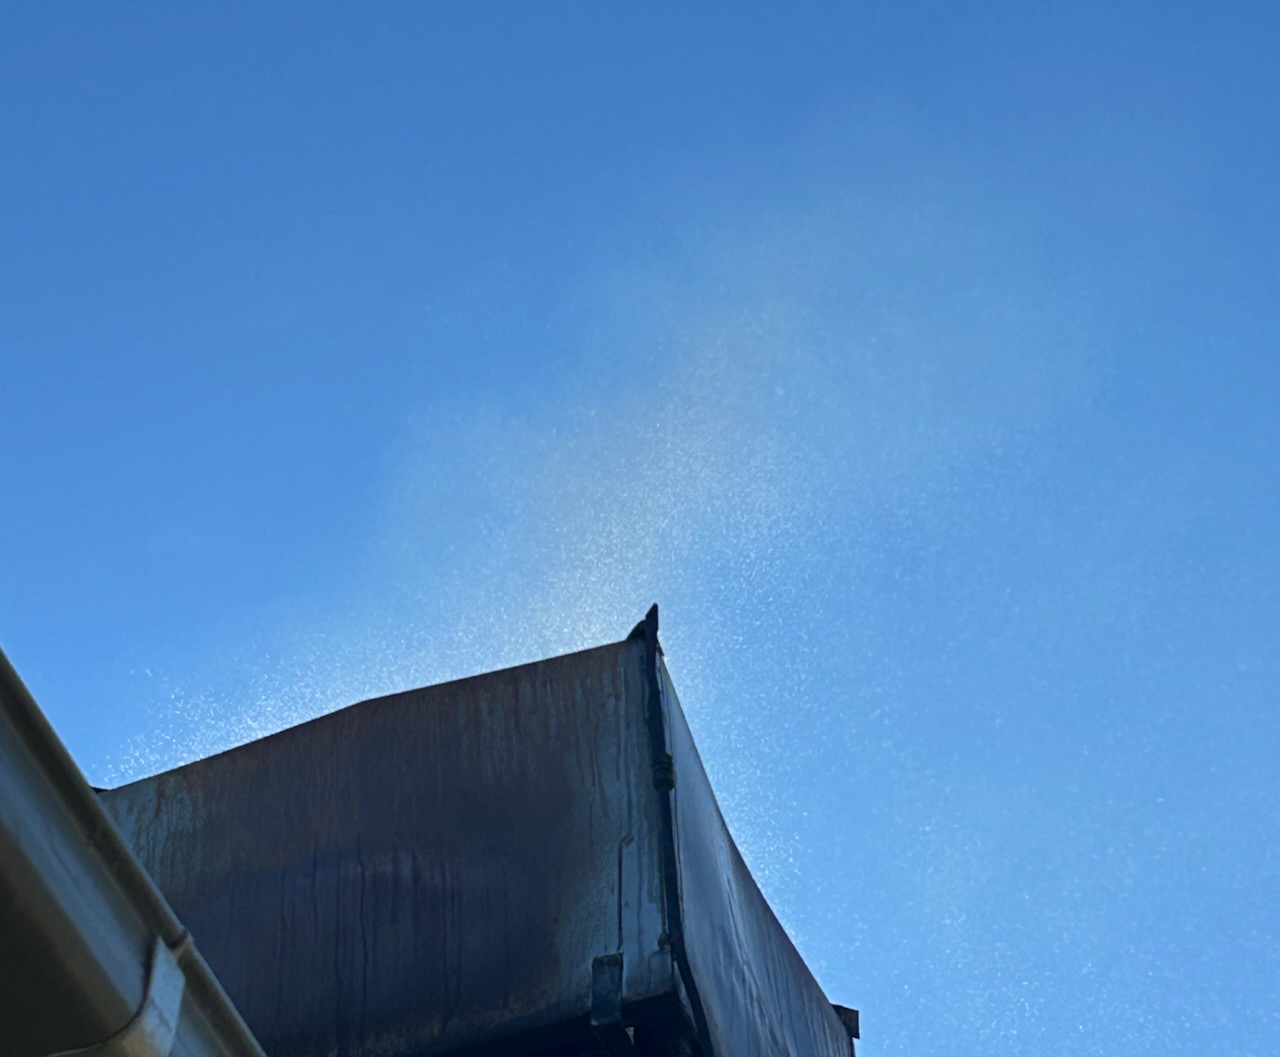
I have put a second water spray in my chimney top scrubber and the coarser droplets can be seen wafting out from the top of the scrubber, illuminated in the morning light. They fall like light rain bringing down PM2.5 carbon particles with them. The rest are collected inside the scrubber gutter and drained down into the soil in the back garden.
After unpacking the kiln, the first thing is the house-keeping, cleaning out the firebox and chamber floor, washing the bricks and kiln shelves with alumina, then finally fettling the work. I can see that the sgraffito work is quite different in the wood kiln. The ash and higher temperatures completely change the look of the work compared to the similar pieces fired with solar electricity in the electric kiln.
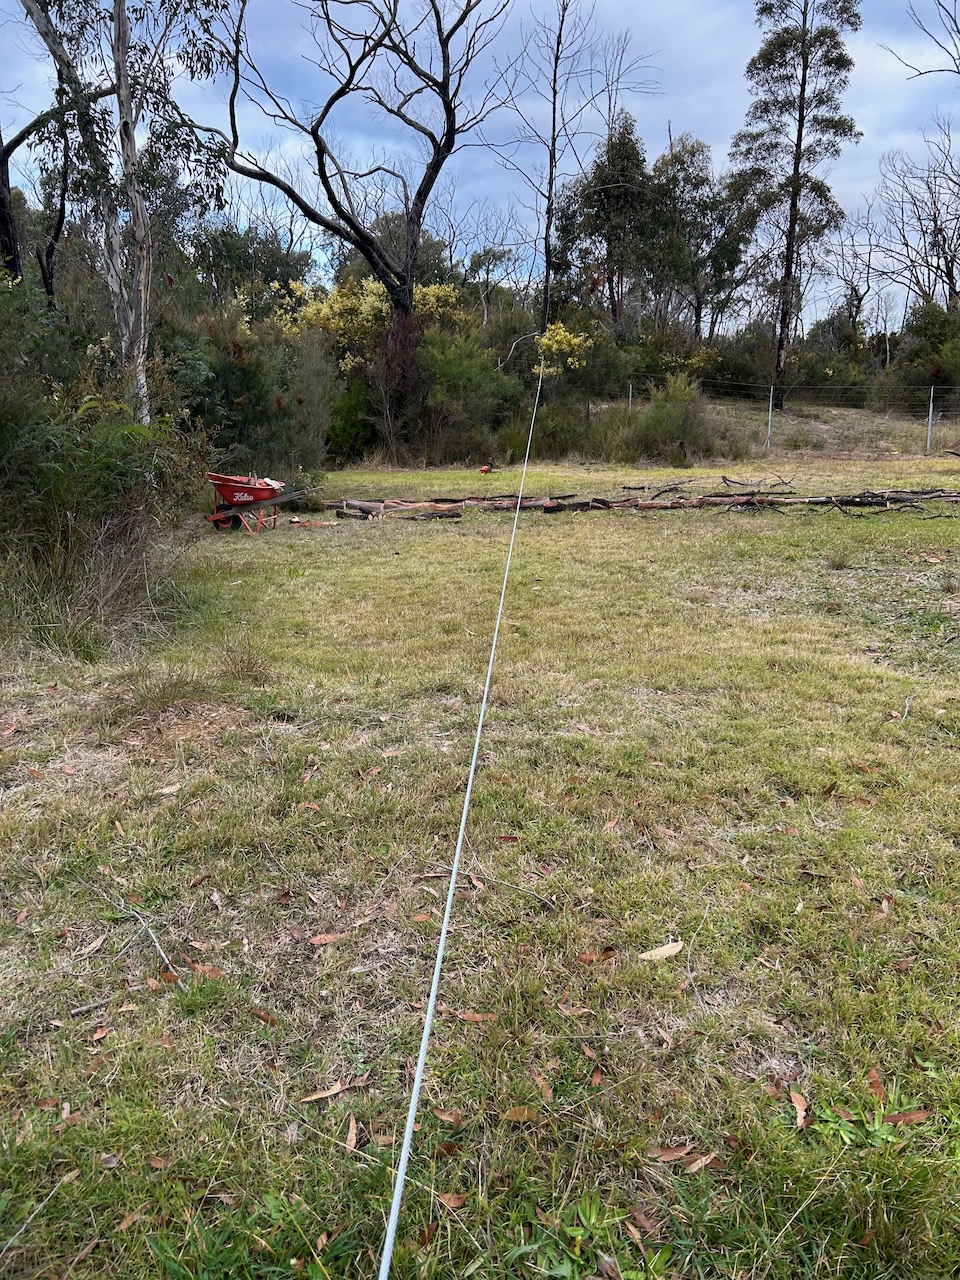
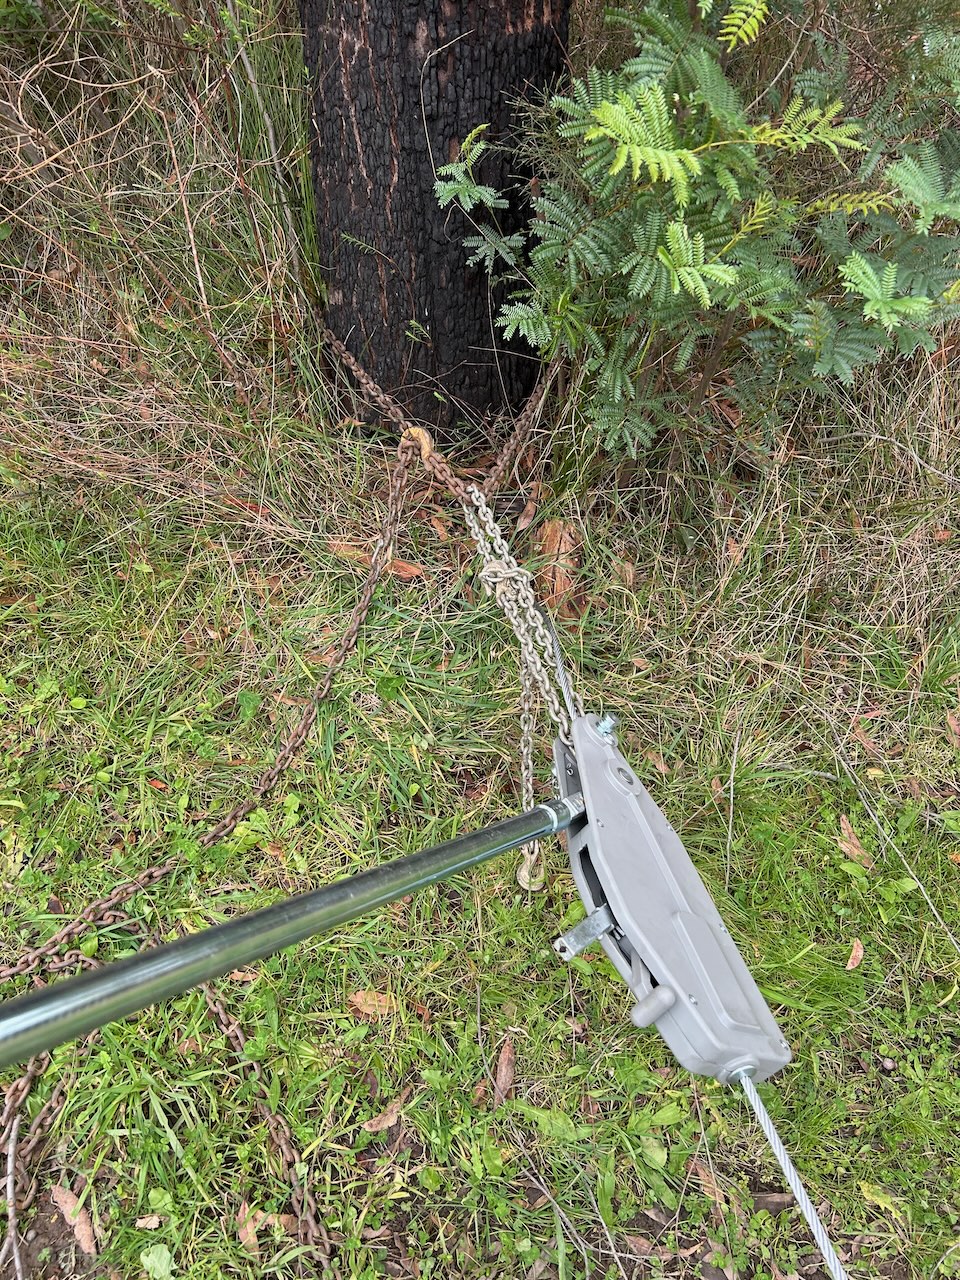
As heavy rain is forecast for the next week, I wanted to get a load of kiln fuel, in and under cover, ready for the next firing. I spent a few days winching over and cutting down some of our standing dead trees in the far paddock. They were killed in the 2019 catastrophic bush fires that cleaned us out. There is a lot of re-growth now and the understory is coming back up. I’m not sure about these long-dead, burnt trees. Just how stable they are, or if they are partially rotten inside. Dead wood like this can be unpredictable – therefore dangerous. So I’m taking no chances. I wrap a load-chain around the trunk up as far as I can reach, or if they are very tall, I use a ladder to get the connection point up as high as I can. Felling trees is dangerous, so to make it safer, I climb ladders – which is equally dangerous after you turn 50? or 60? or 70? Climbing ladders to make it safer seems a bit of a contradiction, but who said life was straightforward and easy.
Once the chain is (un)safely connected. I remove the ladder and pay out the chain over to where I have a steel wire winch connected to a substantial tree trunk. I cut out a wedge from the chosen tree in the direction that I expect it to fall, then go to the winch and apply a bit of tension, quite a bit, until I see the tree bend over slightly in the desired direction. Lastly, I put a cut in the back of the trunk, stand aside and watch as it falls over to where it is being pulled by the directional cutting and the pull of the winch.
I has worked perfectly every time so far, except once. When the tree was so rotten inside that the weight of a large side branch took it across in an unexpected direction to one side. As I’m standing well back and a little to one side as it goes. I feel that I’m relatively safe. I have been so far, even when the tree goes off sideways in it’s own way.
With smaller saplings, I just attach the wire rope/load chain to the tractor and pull them over.
The wood is all cut, split and stacked ready for the next firing. My hardwood seems to be getting harder as I get softer? It’s a big effort these days to restock the kiln hob wood pile.
After it’s all done. I’m blessed with a perfect red sunset. Some shepherd somewhere will be delighted.
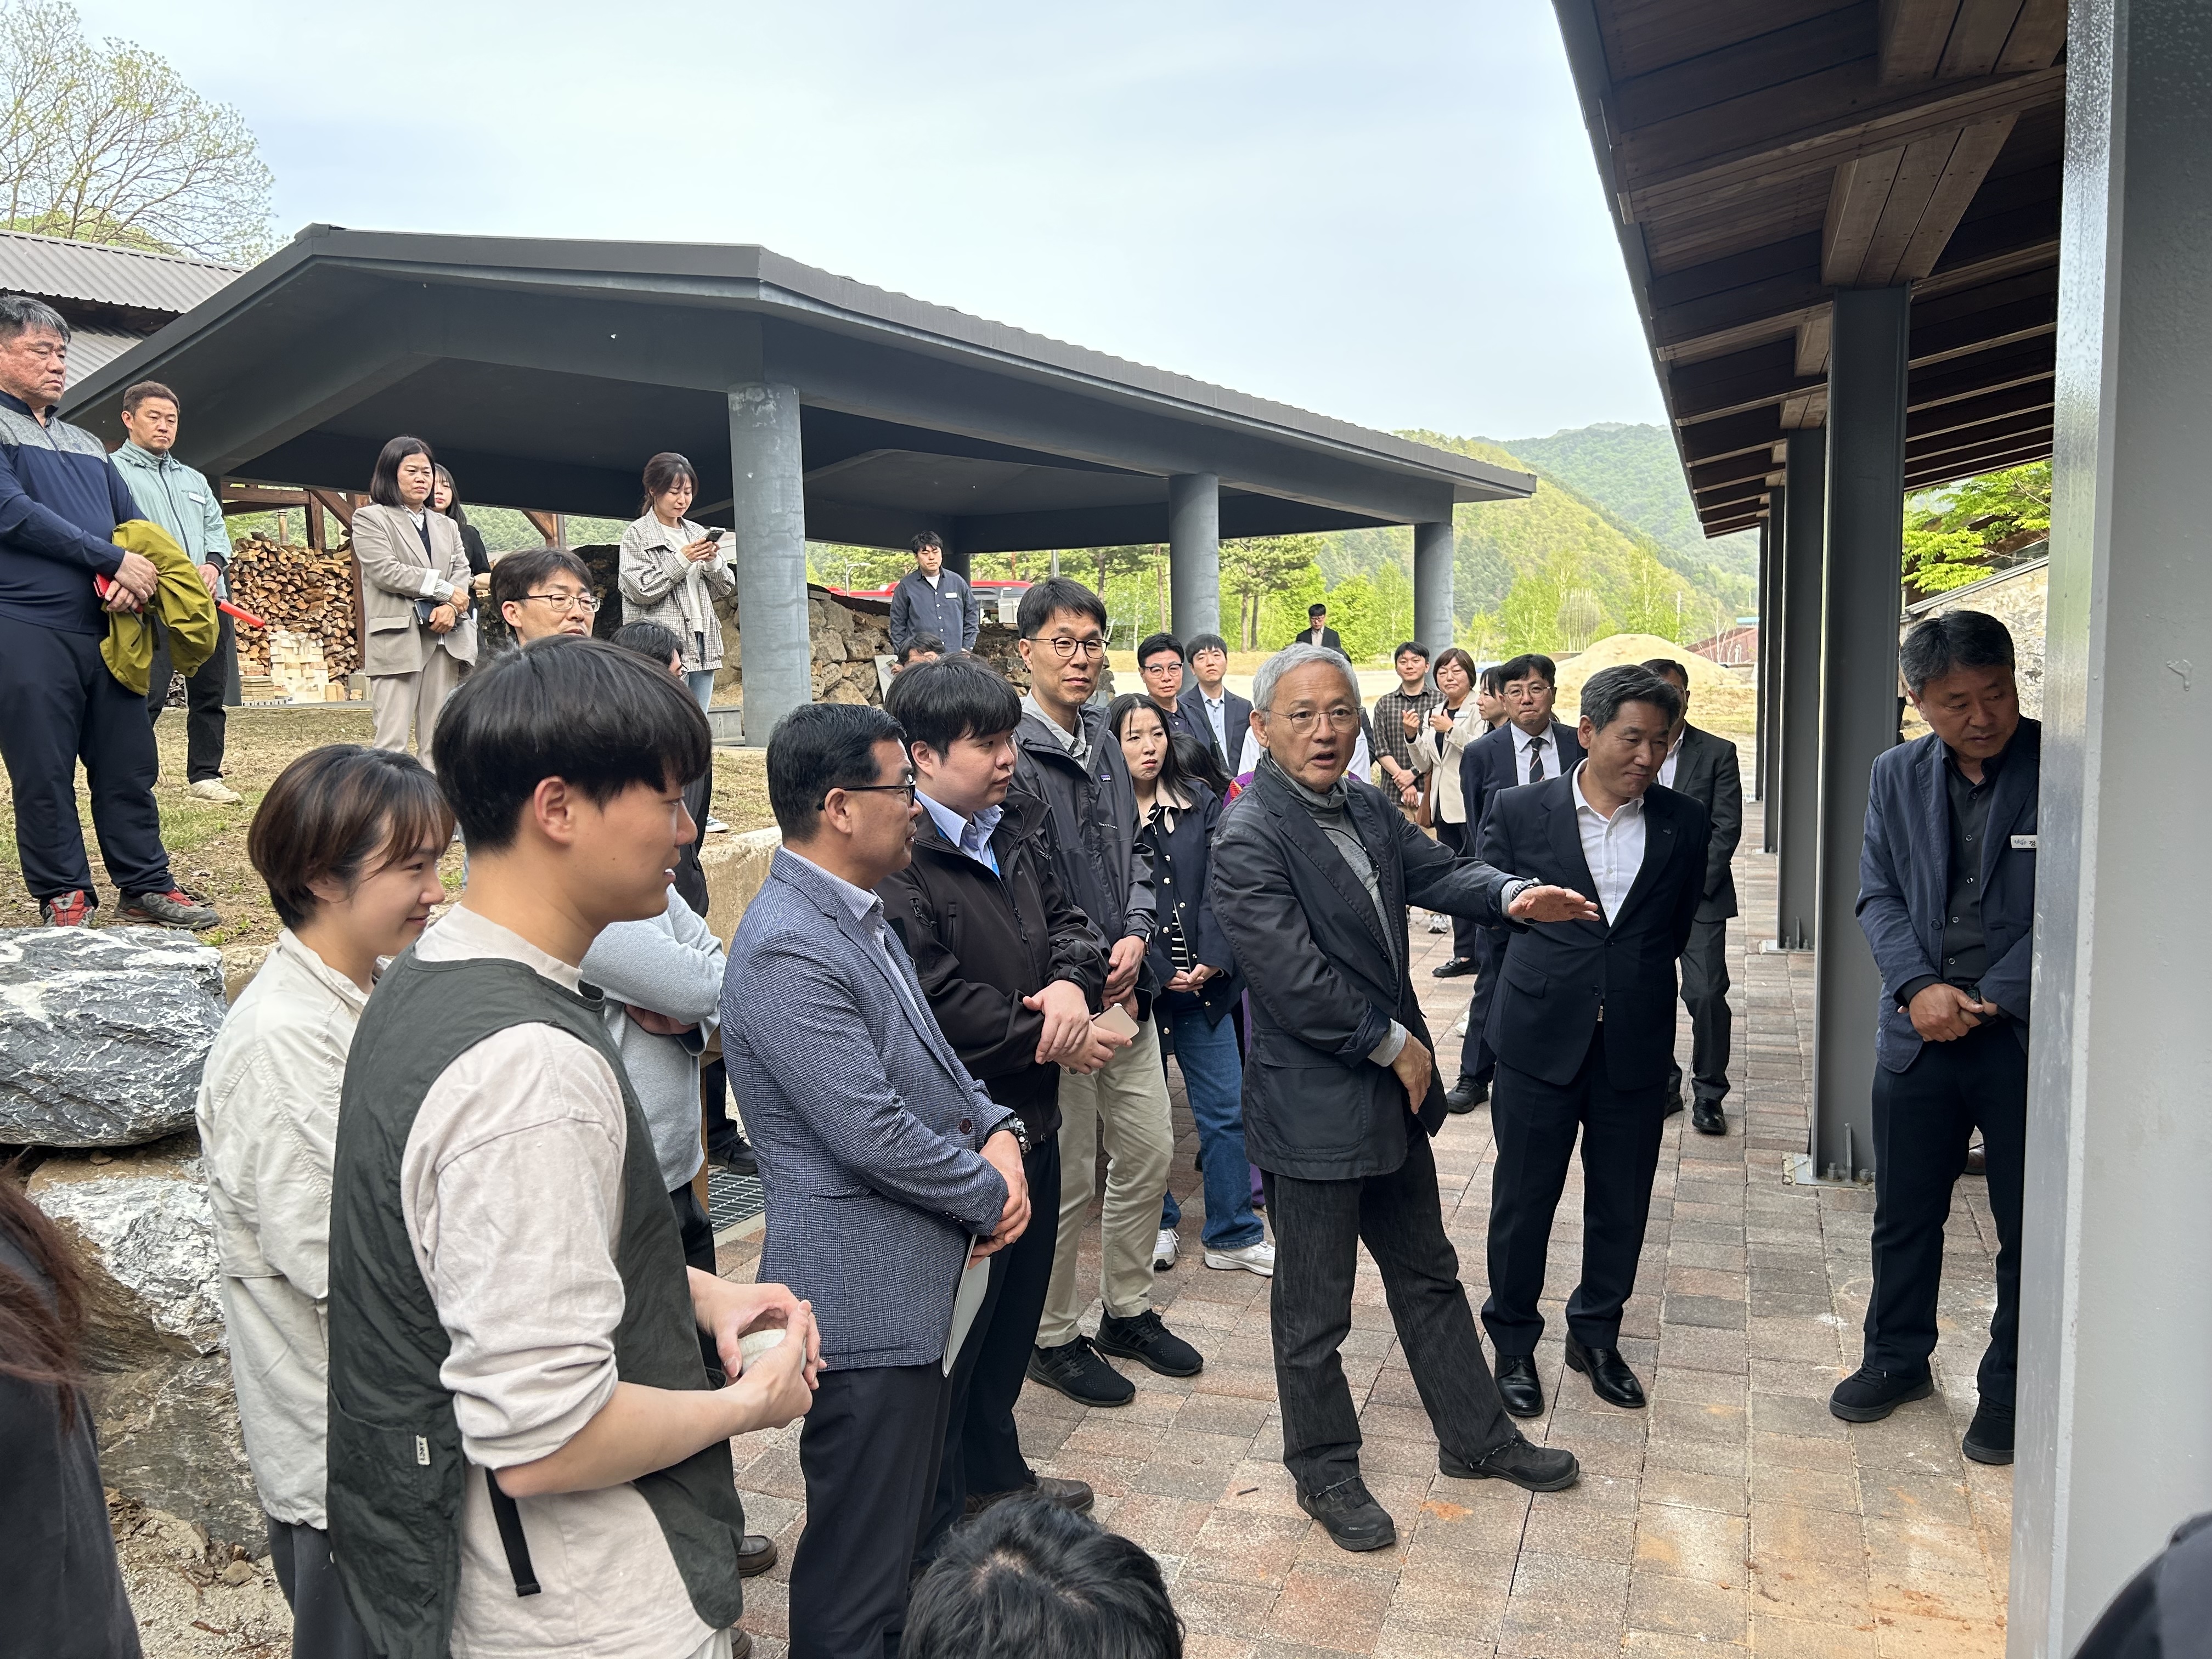
I’m working in Korea in this little artists village community on the edge of a country town. There have been potters here making and mining porcelain stone for 800 years. The village is located away from the township, such that the smoke from the traditional wood fired kilns is not a concern for the township residents. It was great forethought in its time to start to locate all the wood kilns up into this side valley.
But it doesn’t stop there, this has been a long-term plan and as with all long-term plans, it is evolving and adapting with current thinking and social mores. Hence my involvement here with the constriction of my low-emissions wood kiln firing designs and techniques. I was commissioned to start this work here, back in 2019, I was all set to come, but before I could start, we had the fire, then covid intervened. So I was unavailable for some years. But I’m back here again now the the plan is back on track.
My demonstration firing was very successful. In previous firings here the only fuel available to fire the kilns with was very dry 5 year aged local pine. The standard fuel here that everybody uses. It is a statement of fact here that dry pine is the only fuel that works in a kiln!
Last year when I was travelling around, I visited a famous potter’s studio, where they fired with wood. He had built a special pine fuel drying kiln, to desiccate his very thinly split fuel. He told me that it was his special secret, and that only desiccated pine could raise the temperature of the kiln easily. Other potters struggle with ordinary wood, but he had discovered the answer. I decided not to mention that I sometime throw water over the dry pine to get a better result! He had no concerns about making smoke. That was taken as a norm. All kilns make smoke, don’t they!
In the kilns that I have built here, the 5 year seasoned pine burnt furiously and it was very difficult for me to minimise the smoke. I managed it, but wasn’t at all happy with such dry volatile fuel. I enquired about alternatives. There is hard wood available in the form of oak and acacia. But no one uses it for kiln firing as it doesn’t work!!! That was the local opinion anyway! Meaning that it doesn’t work in the traditional kiln designs, used here, using traditional techniques. I thought that it might just be ideal for my purposes, for use in the down draught firebox.
For this most recent firing I had requested that both pine and oak be available, to give me options. There is also the possibility of using local acacia wood, But I was told that this is not considered be be a useful fuel for kilns. That made me more interested in trying it out. I said that it is one of the better fuels back in Australia, but that hasn’t cut any ice here as yet – apparently.
When I arrived, the oak and pine were stacked neatly in front of the kiln. A lovely sight. I started by using just 100% oak. Initially, I found that the oak burnt black and then smouldered. Just as everyone else had found. But I was perfectly sanguine about this, because my local stringy bark timber back in Australia does the same. In fact the locals wouldn’t cut it for use in their open fire places because of this. I quickly found that a blend of 80% oak with 20% pine was a good combination to get started with, using the flashy pine to keep the oak burning. This combo worked well from 700 up to about 1000 oC, when I cut the use of the pine back to just 10%, and finally at 1100oC, I was using straight oak.
This series of combinations got the kiln firing well, while still burning quite cleanly with almost non-existent traces of smoke from the chimney. Just the occasional waft of pale grey smoke.
Problem solved. I was able to fire up to cone 9 in reduction with virtually NO smoke, while firing in reduction. This is a notable achievement here. A lot of chatter and comment, firing in a wood fired kiln with no smoke, by using the oft’ maligned local oak. Applause all round. Who’d have thought?
Maybe the local acacia might even have been better? But that is a project for another visit.
There are two ceramic university campuses that are keen to follow up on this, as they are located in cities, and there is no possibility of being able to make smoke in their location. Downdraught oak firing might just do the trick.
Word gets about it seems. During the cooling period I got news that the opening of the kiln would have to be delayed from one day to the next, then from the morning of the appointed day, to the afternoon, as the Federal Minister of Culture wanted to be there to see the results unpacked, and he could only be available in the afternoon of the 8th. So when in Rome… I delayed the opening at his masters pleasure.
I’m certain that this is no accident. Of course, I don’t know, but it smacks of ‘realpolitik’ strategising. I’d bet that the Director of the Museum has organised this as a media event to promote the Museum. Politicians fund the things that they see, are involved in, understand, AND if it looks like a successful vehicle to advantage their own career. They want to be seen associated with it.
Just a thought! Call me cynical! But…
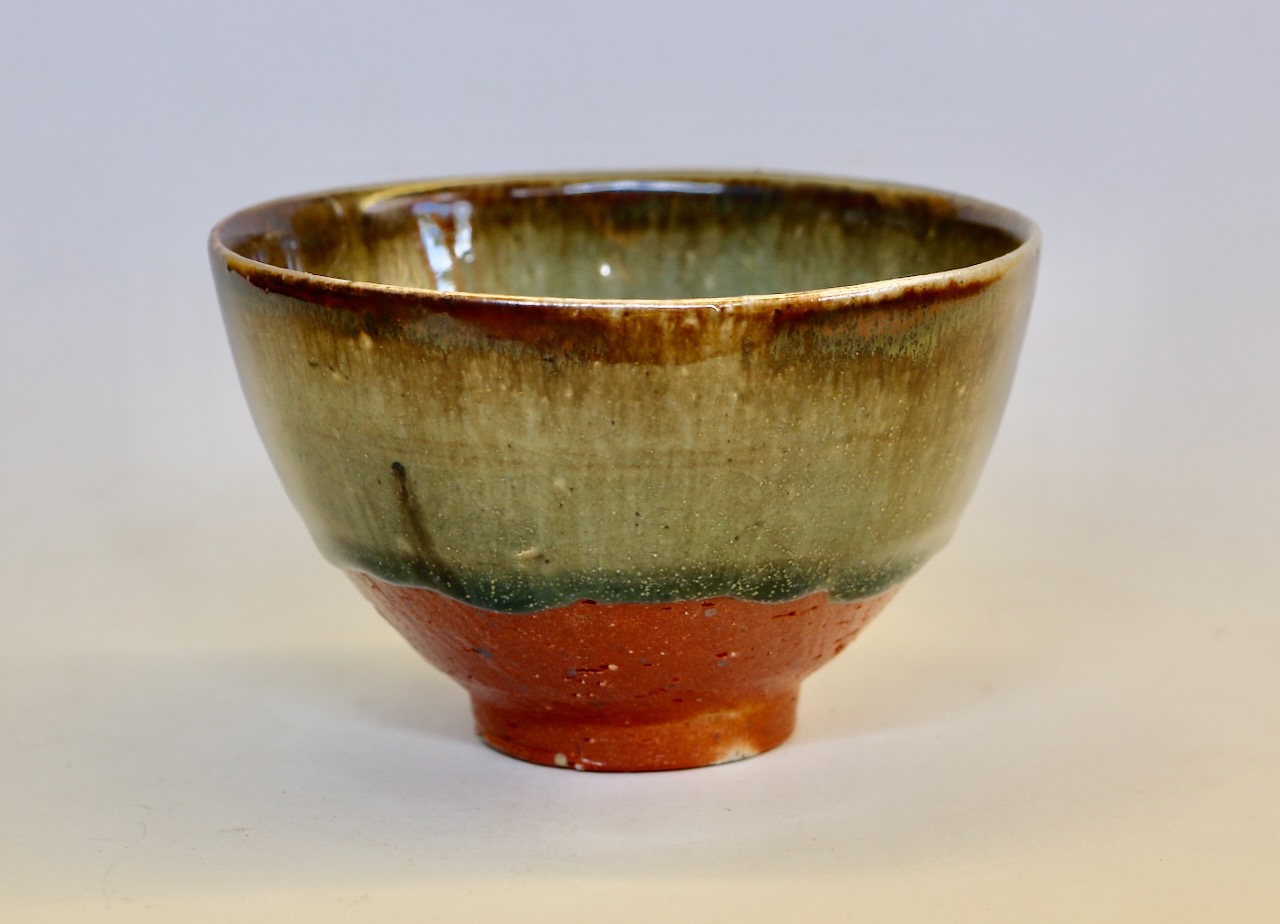
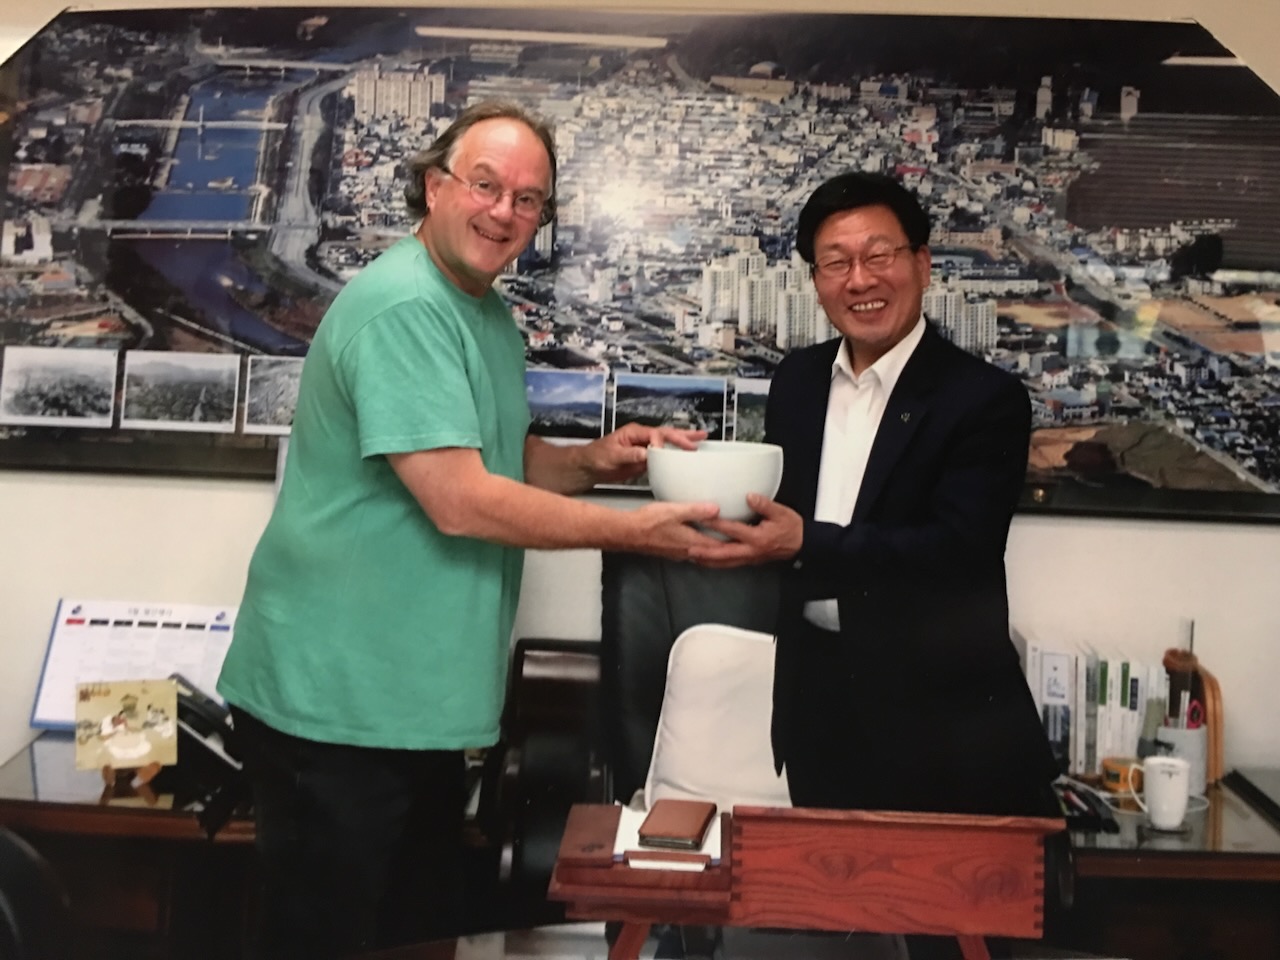
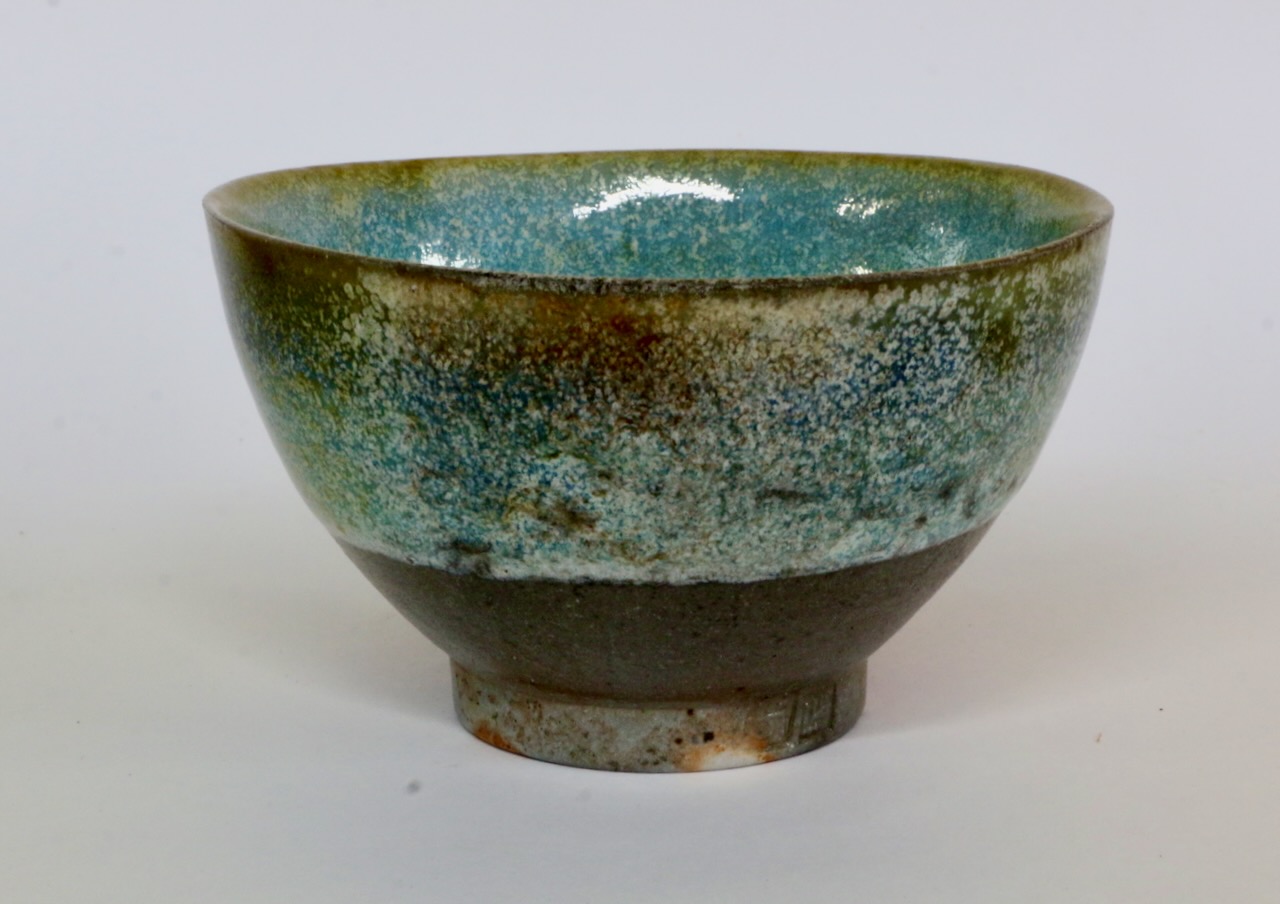
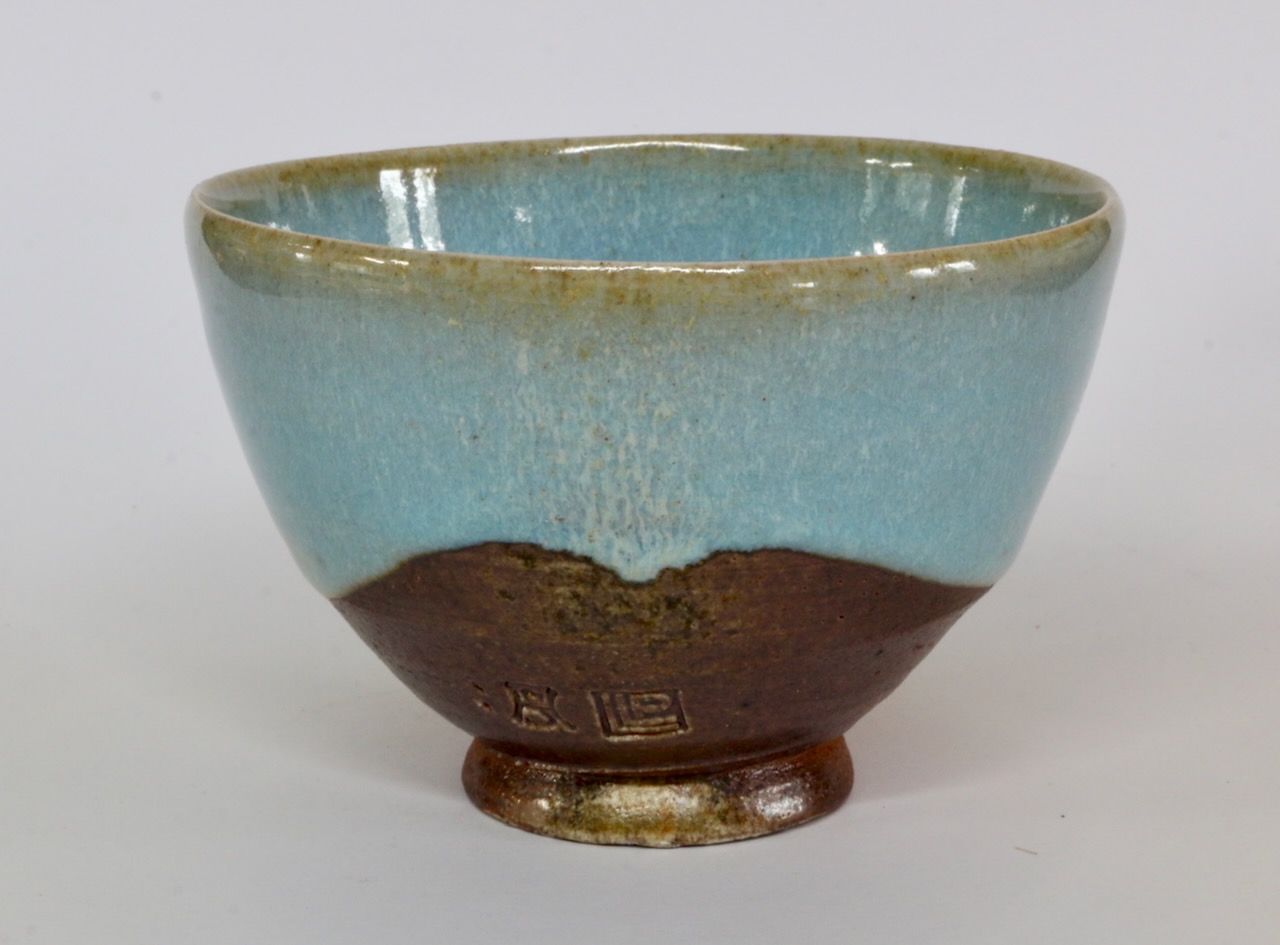
I remember some years ago. I collected some porcelain stone from here and took them back to Australia and made a large bowl out of them. I glazed the bowl with a subtle blue celadon glaze that I made incorporating kangaroo ash. A kangaroo had died on my property, so I calcined it and retrieved the local source of phosphorous from the bones. Phosphorous is known to enhance the optical blue in certain pale iron glazes like celadon.
I gave it as a gift to the Museum Director along with the story. This was my own private Cultural Exchange project. His Korean stones collected from this historic site, made into a pure sericite clay body glazed with my Australian kangaroo blue glaze. He loved it. He was so taken by it that he called the Premier and made an appointment for us to meet him and make the bowl a gift to him. Thus bringing the Museum into his field of vision.
We turned up just before the appointed time for our 15 mins of fame, and were eventually ushered into the Official Office along with newspaper reporters, translators, aids and other staff. I was duly introduced to the Premier, a little bit of small talk. He had been very well briefed and made appropriate comments. Then it was down to brass tacks. I handed over the bowl and he graciously accepted it on behalf of the Korean People. He said straight away that he knew next to nothing of Ceramics, but understood the significance of the effort that had gone into such an art work and its cultural exchange significance. He thanked me again and shook my hand. There was a flurry of flash bulbs going off to record this staged event.
He asked me how I came to be researching Korean Porcelain from this remote place. I replied that Korean porcelain is unique in the history of world ceramics. I came here because of the history of the place and the pots that were made here. You can only learn so much from books. I had to come to experience it. He smiled, so you knew about Korean porcelain from back in Australia? I said yes, once I learnt about it, I had to come. The Porcelain Museum here is one of the very few places in the world where this kind of study can take place. Mr Jung, The Director, is very supportive, open and inclusive. He runs a great institution.
The Premier was reflective for a second, then said. I believe that you can build pottery kilns that fire with wood and make no smoke. This is important for the environment. Mr Jung has asked me for more funding for this kind of project. If the Museum is so famous internationally, attracting research like yours,
I will fund it!
The next day, the newspapers had the Premier on the front page announcing the success of his funding initiative for his international artistic ceramic exchange program, for the very successful, now internationally recognised, Yanggu Porcelain Museum. Every one wins. The Premier gets all the credit and is in the paper looking like a hero. The Museum Director got his funding. I enjoyed the research and achievement of making the lovely bowl. The premier mentioned before we all left, that the best place to keep such a unique bowl, would be in the porcelain museum.
Back to the present time and hence the sudden flush of offers of work to build similar such kilns from established potters and university campuses. Once it is shown to work, it gets it’s own legs. Word travels fast. These days it travels electronically with likes and re-postings. It’s very fast.
The Minister of Culture is coming for a visit to the Museum and will be at the opening of the kiln. The kiln has cooled more than enough waiting for him to arrive. I’m introduced to the minister, he asks me in Korean – if I can speak Korean. I recognise the phrase, so I’m onto it, but my recall of Korean standard reply phrases is so slow, that before I can make my clumsy reply, he already knows my answer, so swiftly continues in English. “So we will have to speak in English then!”. I nod my thanks.
We make some small talk. He’s been briefed on hisc way here about the nature of the project and asks me if it is going well and I reply yes. That’s the depth of our interaction. That was my 15 seconds of fame! The photographers elbow in and I’m shifted sideways. The minister looks quizzically at the kiln and my Jung explains something in Korean. The Museum team are then given the go-ahead to unpack the kiln.
The firing is unpacked and everyone ‘oohs’ and ‘arrhs’, the other potters here each look in and turn to me with BIG smiles and thumbs-up. Huge sigh of relief. Everyone is all smiles. The pots are mostly well fired, but I’m interested in the minutiae of the detail. I’m looking not just for colour, but for the depth of colour in the celadons. Not just a shiny surface, but a certain quality of soft melt and satiny quality there. I want to get in and see the flame path and the flashing on the exposed surfaces and kiln shelves. Where is the ash deposit and how has it melted. None of this is possible with 50 people crowding around and flash guns going off.
Its a bit like a crime scene or perhaps an archaeological dig. You don’t want a rabble of untrained people trampling all the evidence and the details. Just like an aboriginal tracker, I want to read the ephemera, the subtle traces and shadows, but that isn’t going to happen. The pots are whipped out and shown to the Minister, with total disregard of their place in the kiln and their fire face and lee side qualities.
It’s just a little bit of a shame, as I’d like to learn more than I am able to in this situation. Looks like I’m the only one who isn’t ecstatic! I am really pleased that everyone else is so happy with the result, but I know that I can do better. But I need to read the surfaces to be able to learn what I need to be better at it the next time round.
In a perfect world, I’d like to go slowly and examine each pot in detail. These pots aren’t just trophies and trinkets, they are also part of my research, or at least they were when they went in! But this has become a media event now, and that is also very important, possibly more important, because it may well result in continued or even better funding into the future. A topic far more important than one firing and a few glazed pots.
The firing is a success, no doubts. Everyone is happy. They all leave feeling uplifted and maybe just a little bit happy and warm inside to know that they have been somewhere where there is some sort of mysterious, but positive, environmental action taking place. Even though they don’t understand what it is.
Back at the Museum tomorrow, I’ll have to have a quiet look at all the work as we are setting up the show. But the exact context will be lost, however, I can fill in some of the missing info using my experience. I’m so pleased that everyone is happy, but I could have learnt more to help them with the next firing, as the kiln still needs some fine tuning.
What I could see quite clearly, was that the oak ash was very refractory. I’m guessing that it is very high in SiO2. We may need to burn a bit more pine in the mix to introduce some CaO (calcium flux) into the eutectic to get a softer surface from the ash deposit. I was burning 20% pine in the early stages without smoke. I might have to keep that up for the whole firing? As pine ash has a lot of calcium in it.
All grist for the mill in the future. I could also see that the floor at the back was still a little bit under-fired, so I was up at 5,30 this morning and went down to the kiln and took out the bag wall and rebuilt it one layer lower and with one full brick removed, to make larger gaps. I will see how this works after the next firing. I also placed one brick in the middle flue hole to force the flame out to the corners more. All little fine adjustments that I hope will make it fire more evenly.
Another option for the refractory silicious ash problem might be to place a few tiny pre-fired stoneware cups containing a spoon full of Na2CO3 (washing soda) in the front of the kiln. This will mimic a few years of charcoal built-up and decomposition at high temperatures, where sodium vapours are released from the burning embers. The soda will sublimate and slowly volatilise throughout the firing, reacting with the silicious ash as it is being laid down and help it to melt. or I hope so anyway. Everything is an experiment!
I could also use common salt to get a similar effect, but sodium chloride creates a slightly different look. I don’t want to change the look of the ceramic surface from wood fired into salt glaze pots. But anything and everything is worth a try. At least once. I first came across this light salting technique being used in La Bourne in France, back in 1974, where they had been doing it for centuries. As a naive student, I thought that it was a very clever idea that I hadn’t come across before. Many potters have used it since. In fact, it has become part of the standard repertoire.
With the influence of the Minister of Culture on the front pages and the release of the TV doco soon, there will almost certainly be more enquiries about this firing method. It is my intension to try and leave the kilns here in good condition and with useful, technically accurate kiln firing logs that the students here can use to do their own firings in the future. Hopefully we can work together ‘virtually’ via ‘Kakao’ talk or Zoom to achieve the best result possible. It could be a whole lot easier if they would just read the book, or at least the first chapter on how to fire!
All that is required now is for some young enterprising Korean potter to pick it up and run with it, develop a small business building these kilns for whoever wants one.
Maybe firing a downdraught fire box kiln with local oak will become a thing? I have shown that it is possible. It is now one other possible strategy for potters and academics in the field, to follow to be able to keep on wood firing here into a cleaner, carbon constrained, and environmentally friendlier future.
All I need to do now is to introduce them to the concept of the after-burner/scrubber to minimise PM 2.5 particulates, not just smoke. But that is a bridge too far at this time and for this visit.
We will be part of the Southern Highlands Arts Trail – Open Studios on the 2nd, 3rd and 4th weekends in November.
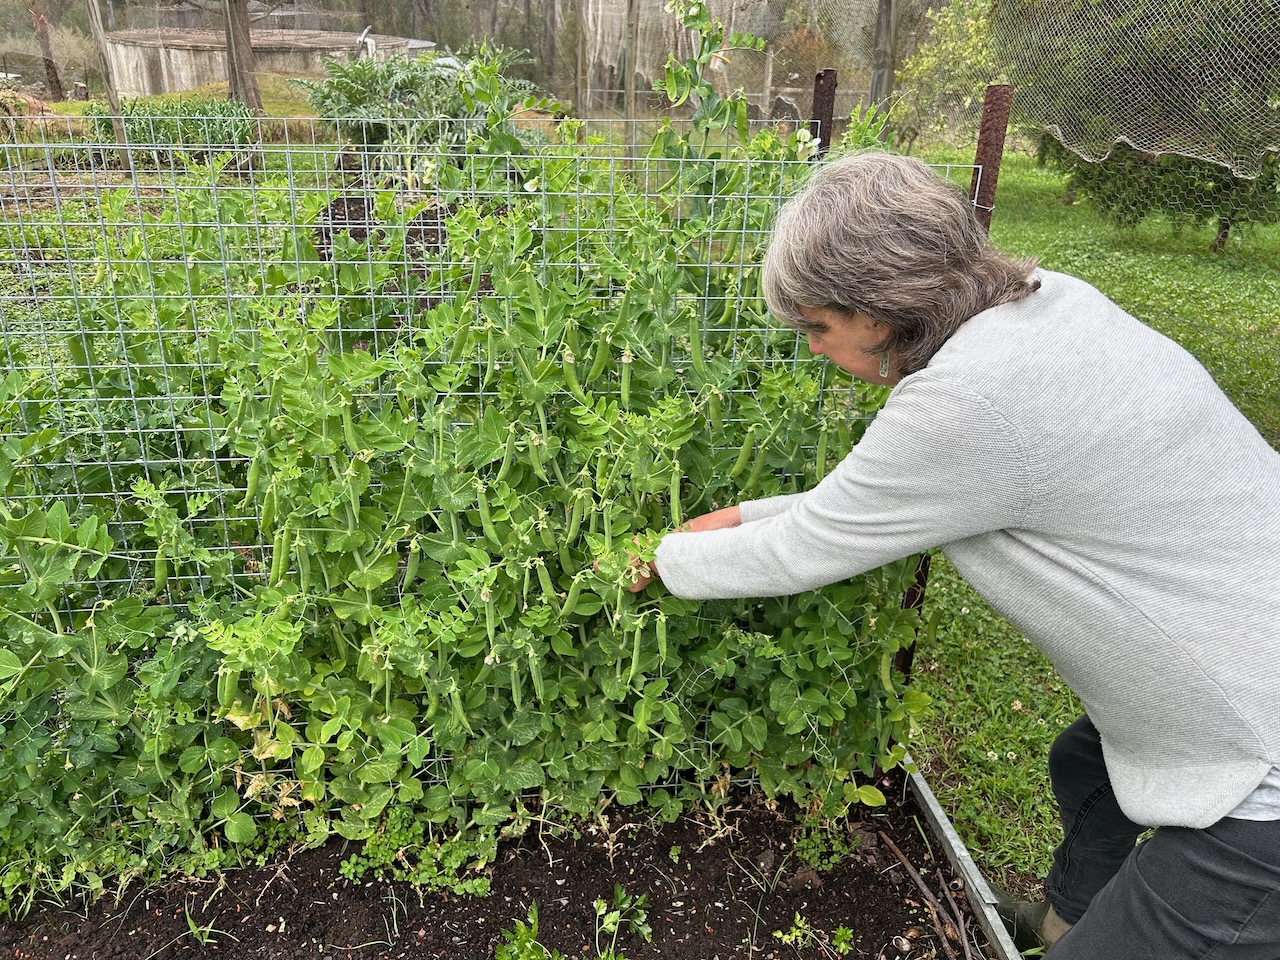
I’m back from my work in Korea and I hit the ground running. All the seeds and seedlings that I planted in late August, just before I left for Korea, were all burnt off in the severe frost event that swept through here in early September. However, all the over-wintering vegetables like peas, broad beans, asparagus and the brassicas are all thriving. So that is what we are eating at every meal these days.
Because we only eat what we grow, our diet tends to go in long stretches of similar meals, we vary the actual mix for variety but I’ll be glad when the first of the summer crops comes on. That is always zucchini, they are so fast out of the starting blocks, along with radishes.
However, I know that I’ll be glad to see the last of the ratatouille based summer meals and we can taste that first cauliflower again as the seasons come around. I think that it is a universal human failing to want what you don’t have. No matter how many cabbages I grow, I still hanker for a banana or a pine apple every now and then.
At the moment, I am just loving the smell of the tomato foliage as I brush past it when weeding. The smell of tomato leaves offers such promise of fresh salads and the long hot days of summer to come.
The more established spring flowers in the flower beds around the pottery were not affected by the frost, and have gone on to bloom there little buds off. Its very cheerful and uplifting to look out the studio window and see a vista of spring blooms.
After the frost. Janine went out and bought some more early seedlings to get a bit of a head start for the summer garden, and now that I’m back, I spent all of my first few days planting seeds, weeding, mulching and mowing to get the place ready for the Open Studios Arts Trail, that is being held on ther last 3 weekwnds of November. But also to guarantee our summer food supply security.
Janine transplanted some wild self-sown spinach seedlings, but they didn’t all take. I filled in the gaps inbetween with some extra seeds. The vegetable garden is looking good again with all the red poppies in flower now. The bees are going full speed ahead. Their little yellow saddle bags are full and bulgeing with pollen.
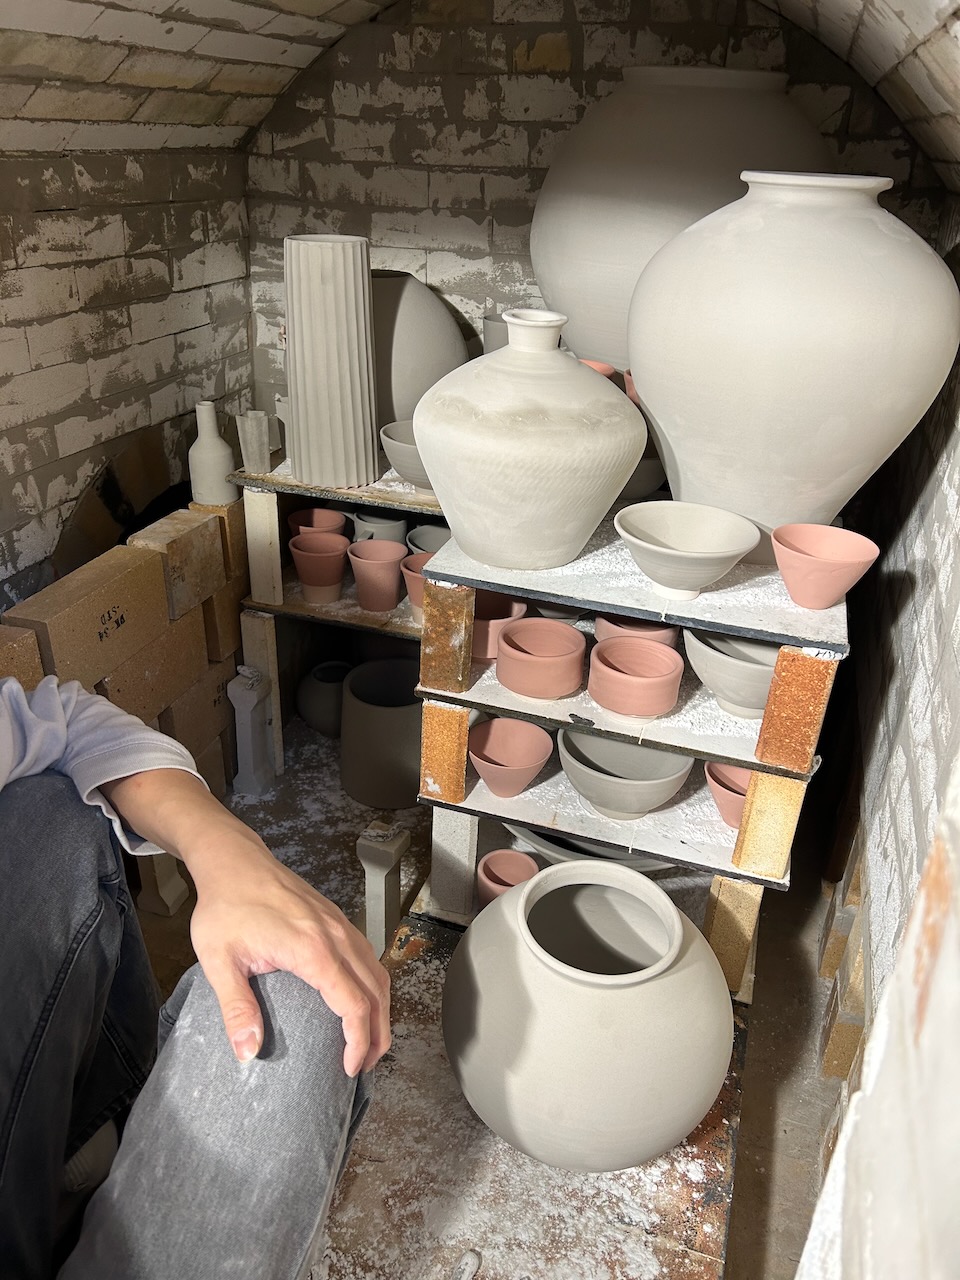
We already had a lot of pots made for the open studio sale before I left for Korea, but there was also a lot of bisque ware that I had prepared for a wood kiln firing, but I just couldn’t fit it in before I had to leave. So now that I’m back I have glazed all that work and packed the wood kiln.
13 hours to 1300. I think that I have finally found to best way to burn my pre-burnt and charred dead forest of kiln fuel timber.
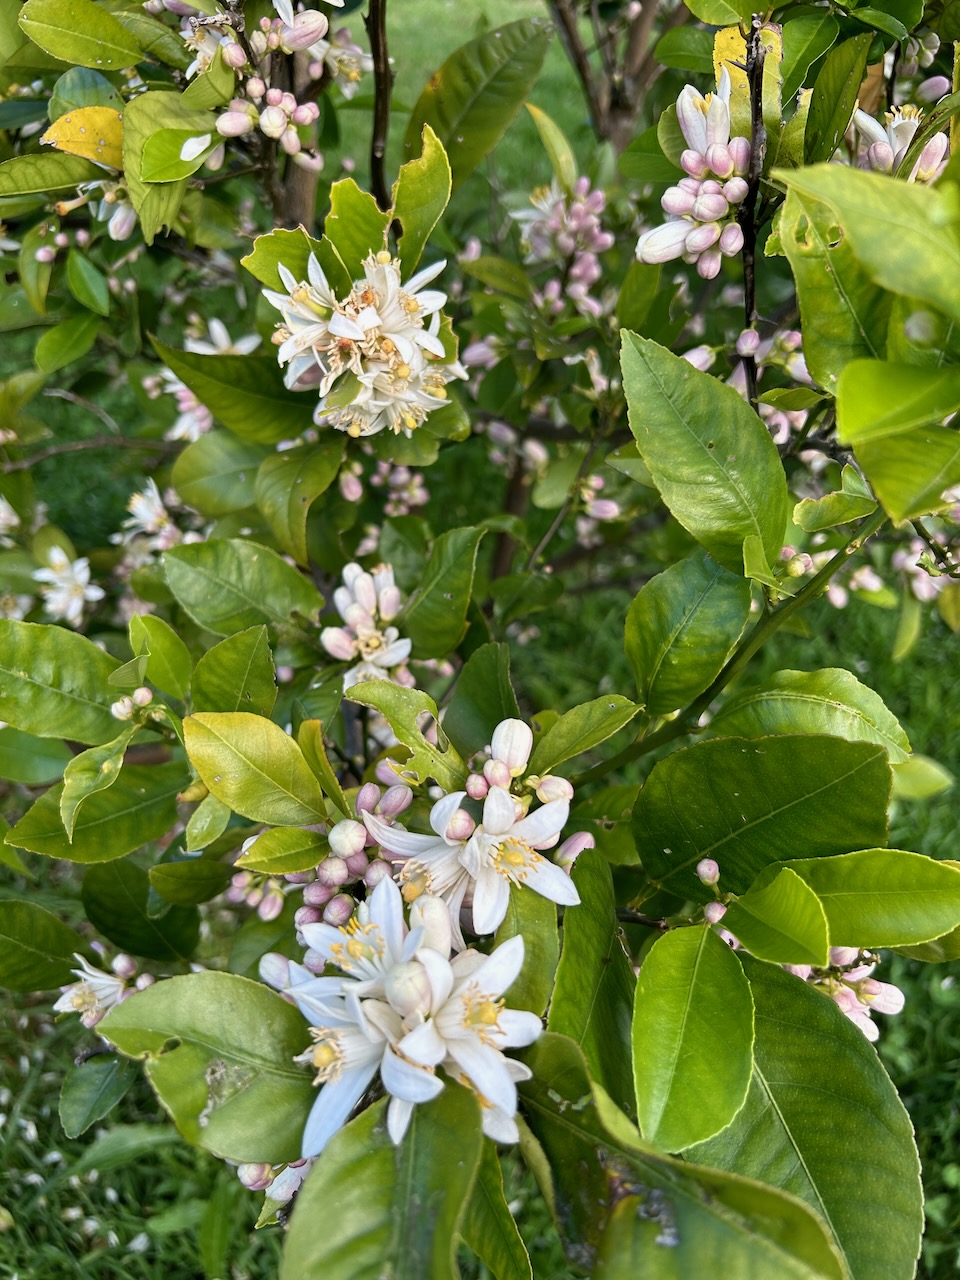
The citrus grove is in full bloom and you can smell the fragrance of the citrus flowers from the pottery, if the wind is in the right direction.
We will be open for three weekends in November, 9th/10th and 16th/17th. for the Southern Highlands Arts Trail then the ACA Open Studios, Ceramics Arts Trail that is happening Nationally on the 4th weekend of the 23rd and 24th of Nov.
Keep us in mind and call in if you can. We have some lovely work to show you.
In the evenings after the days kiln work and dinner, we are all allowed into the Porcelain Museum pottery room, so that we can all make some pots to put in the first firing of my kiln. I don’t know whose idea this was, but it’s a very good one. Everyone has contributed to its construction, and as it’s such an unusual kiln for these parts. It’s a very good idea for everyone to get to see a pot of theirs fired in it. NO Pressure!
It turns out that there are two ‘National Treasure’ potters in our crew here. But everyone is a famous potter from their own regional district. They all come together to do these big kiln building events at special places around the country. A loose conglomerate of like minded and highly skilled artists all contributing their own particular skill set to these big projects.
We pack the kiln with our bisque fired and glazed pots, with other contributions from the research students as well. There is only just enough pots to fill the kiln. I could have fitted more work in if there was any. But there is just enough.
Interestingly, they don’t use digital pyrometers or pyrometric cones here. Traditional firing is judged by colour, sound, smell, smoke and flame. Using years of experience with a particular type of kiln, to judge the progress of the firing. They do however use small glazed tiles as draw trials to gauge the degree of glaze melt, and something that I haven’t come across before, and that is the use of a small amount of stiff glaze paste, that is rolled between the fingers into a small length of pasta sized rod and set in some wadding. This little 3mm dia. rod of glaze will melt at top temperature and fall over, in much the same way that we use pyrometric cones as pyroscopes.
I suddenly realise that I’m really out of my depth here. I usually rely on a digital pyrometer to tell me how I’m going. Now I have to go back to basics and look and listen very closely to the fire to make my decisions. Luckily I’ve also done this before too, so I’m OK, but would prefer the reassurance of a pyrometer to confirm my decisions. Until very recently, we used ‘handheld’, battery operated, digital meters. This meant that you had to go over to where it was and switch it on, to see the LCD display the temperature. They are cheap – very cheap – $10 to $15, pretty reliable and because they are intermittent, they teach you how to look and listen to the kiln, to watch the fire and see how the wood is burning. How the flame is developing, and not just stare at the screen. Since the big fire here. We lost everything, and I bought 240 volt LED permanent temperature displays, online from China for $30, so I have recently become addicted to screen watching in my dotage. Luckily, I still retain some of my mental capacities, well learnt and polished to a finely detailed finish. So just like my stick welding skills, my firing skills are soon retrieved from the dustbin of the recesses of my mind.
In the late 1960’s, when I built my first kiln. No one owned a pyrometer. They were just so expensive. They were totally out of reach. I made a lot of mistakes along the way, but I learnt a lot. I wouldn’t recommend this learning strategy. Using an intermittent pyrometer is the better way to learn so much faster and without the losses that I incurred. My first pyrometer was an analogue, needle indicator, galvanometer. They were quite inaccurate and it taught me not to trust them. A wise decision. They are nearly always wrong. I use them to tell me if i’m going in the right direction. Up or Down. That’s it! I leave the decision as to wether the kiln is finished or not to the use of draw trials, test rings and pyrometric cones.
It is very important to me to fire this kiln well, not just get it to temperature, but do it in a steady, constant, reduction, so that all the usual reduced stoneware glazes that they use here will come out as they expect. BUT, most importantly, to fire the kiln with as little smoke as possible. As that is the main reason for me to be here doing this. This kiln is a demonstration of low emission wood firing.
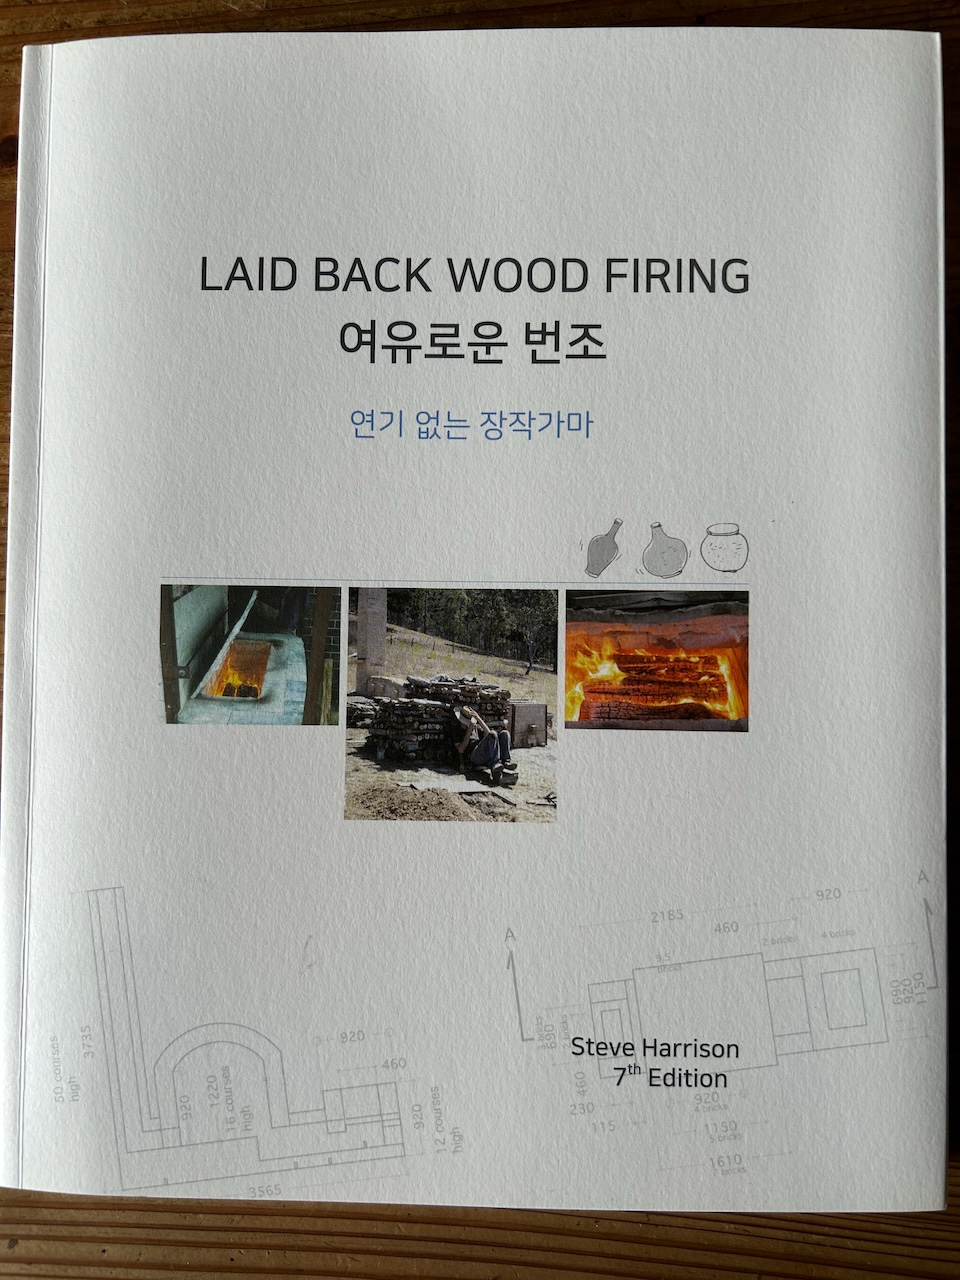
I must admit that as the only fuel here is 5 year old very dry and seasoned pine wood, that burns very fiercely and fast, I have my work cut out to keep the kiln in reduction, but to minimise the smoke at the same time. As it turns out, I can never get to the stage of filling the hobs with progressively combusting wood, as it is designed to do. I ask if there is any hard wood available and I’m told that it can be obtained, but not at short notice. In fact hard woods like oak and acacia are cheaper than pine, so they will get some in for the next firing. But for now, I have to carefully juggle the wood level in the fireboxes. This means constant attention to detail, so this is not really a Laid Back Wood Firing at all, but a rather busy one. AND, not a smokeless wood firing, as the cover of my book in Korean translation falsely claims!
I manage it reasonably well, but each time I stoke and there is a little burst of pale grey/brown smoke from the chimney. There a howls of jeering from the kiln builders next door. However, although it is smoke, it is nowhere near the column of black smoke that issues from the traditional kilns here. Young Mi, one of the resident researches here translates for me during the firing. She tells me that the jeers are just in good humour, and that the chatter is all about how little smoke there actually is and how clean it is. I have surprised them.
Another resident confides in me that he expected to see flames come leaping up out of the fire box as soon as I lifted the lid. He is also surprised how enclosed, slow and gentle the firing process is.
These 4 images by Kim Young Mi.
I prepared 8 stacks of timber for the firing, expecting to use it all, but as it turned out, I only got to use just over half of it. In the afternoon, when I go to look in the spy hole, all the little glaze rods have melted. The firing is over in just 9 hours. Too quick! I didn’t realise how fast the temperature was rising without a pyrometer. The colour in the chamber is still looking rather yellowish, and doesn’t have that bright pale glow that I’m used to. I wonder what temperature that glaze stick actually melts at?
Note to self! Next time I come here for a firing I’ll bring my own pyrometric cones and a hand held digital pyrometer.
The firing turns out OK. The glazes are pale, grey-blue celadons and off-white, grey/white guans. As I only burnt 4 stacks of wood, possibly 250 kgs of wood, there is no obvious ash deposit, just a little dusting of ash on the glazes facing the fire.
The bottom back shelf is under-fired, but I can remedy that by firing a bit slower and also adjusting the bag wall gaps and height. I hope to be invited back to fire it a couple of times in quick succession, at some later stage, to get to tune it and get an even temperature throughout.
Meanwhile, life goes on in the rest of the village, with the rice harvest in full swing, and autumn vegetables ripening in peoples gardens. I’d love to get in there and pick some of those beautiful vegetables.
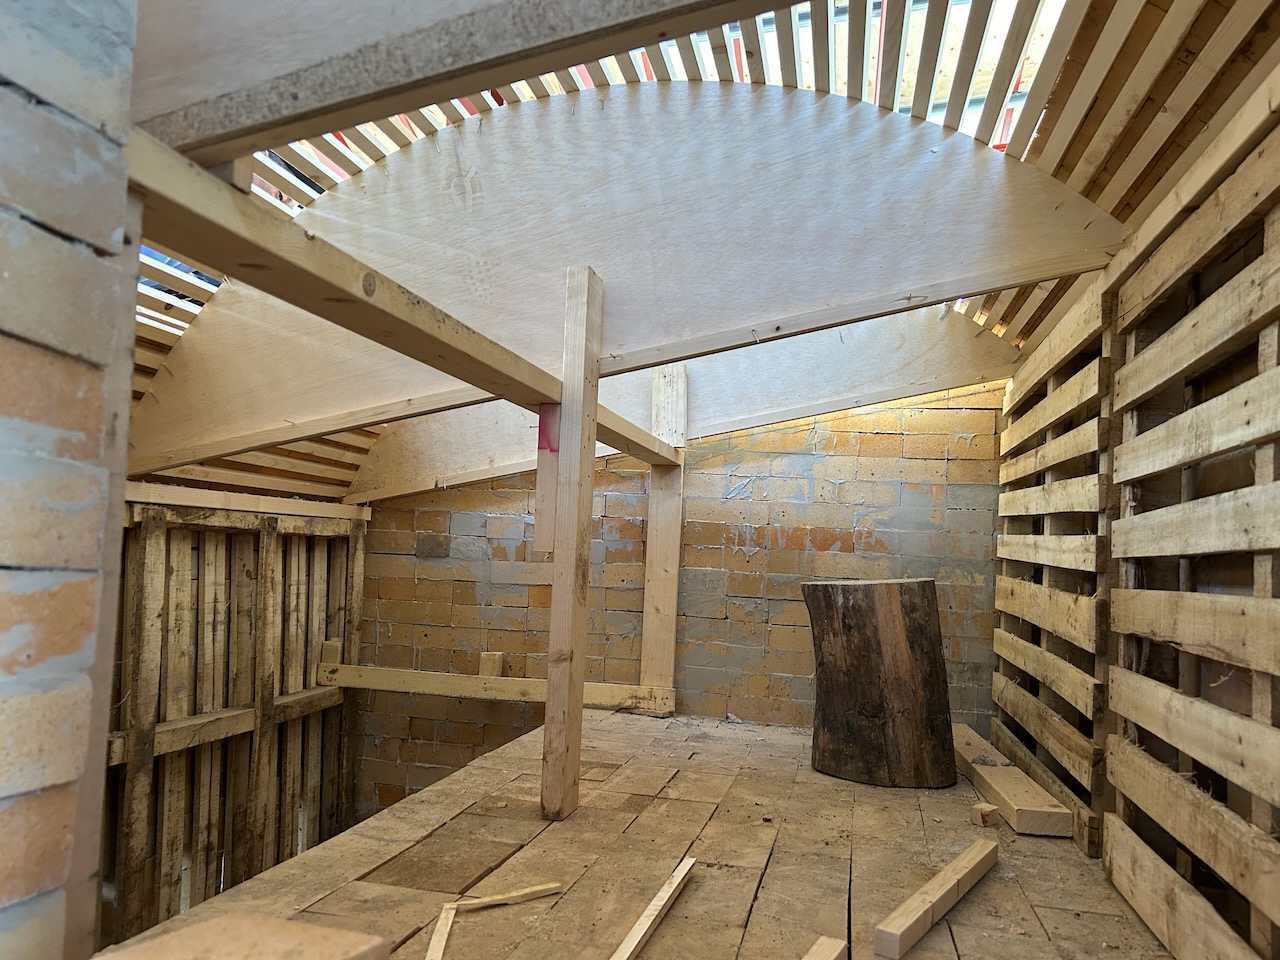
Work has been progressing on the big kiln next door. It is more or less finished, but may need some extra work on it. I’m not too sure there. It will certainly need to be pre-fired to remove all the arch shuttering that is built into each of the 5 chambers. It’s a massive kiln!
Who knows if, or when I’ll be back? What does the future hold. Watch this space
Before I leave this beautifully creative place, I make my usual pilgrimage up the mountain to the ancient site where all the sericite porcelain stone was stock-piled in ancient times. The site has been tragically decimated by a local former. I imagine to stop it being declared an historic ‘National Trust’ site of importance? The whole site was bulldozed some years ago, but remnants remain in the soil. Particularly after heavy rains, the white stones stand out from the brown soil and are easily collected. I make a point of hiking up there and seeing what is available for me to collect. I return with 10 to 15 kgs of stones in my back pack and start the process of meticulously scrubbing the stones to remove any particles of dirt. Then I rinse then several times, until the water runs clear. Finally I soak them overnight in bleach to kill anything that might be harmful to the environment in Australia when I return.
Back home, I put them through the jaw crusher and then into the ball mill and let the slurry sit and flocculate for a month or two, before stiffening and plastic ageing before use sometime next year.
Janine and I are recently returned from Korea where we were invited to take part in the Mungyeong Ceramics Festival, where I delivered a paper to the ceramics conference there about low impact wood firing.
My paper concentrated on my research into small down draught fire box design, intended to minimise smoke and pollution as much as possible. I also presented my current work on afterburners and scrubbers to try to minimise particulate pollution from our kiln chimneys.
I believe that these topics will become more important over time as Global Heating and carbon in the atmosphere starts to become obvious and difficult to ignore. Even to conservatives.
My paper was well received and I got some good interrogation during the question time afterwards. My book ‘Laid Back Wood Firing’ was translated into Korean about 5 years ago and has been available there for some time, so some people there had read it and were up to speed with the concept.
Janine and I will be returning to Korea later in the year to build one of my small Bourry Box kilns as a demonstration of how it can work. It will be built alongside several older traditional wood fired kilns. They are interested to compare the smoke from our firing and also the fired results afterward with that from the traditional kilns.
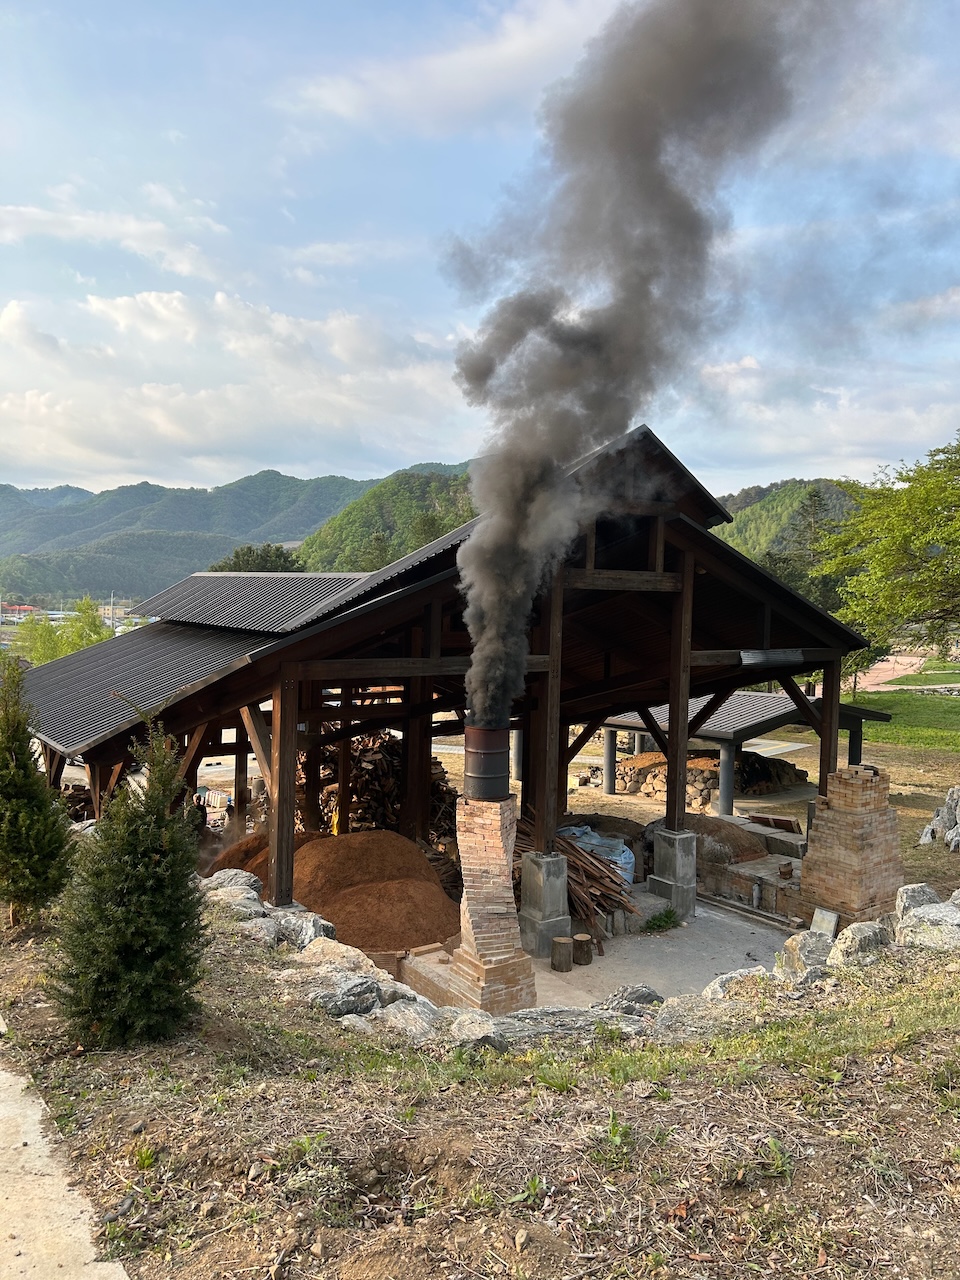
The most recently built, traditional, multi-chamber kiln was fired while we were there. It smoked all the way through the firing. I’m pretty sure that we can do better!
Its a really beautiful kiln to look at, and is constructed using the very old method of using cone shaped hand made ‘bricks’.
The cones were all made on site by the students/residents in the ceramic research centre at the Yanggu Porcelain Village.
The use of cone shapes allows for a rather nice dome shaped top or 3D arch over each of the fire box and 4 chambers.
The freshly built kiln took just 24 hours for it’s first firing – all 4 chambers to stoneware, absolutely no technology was use. No pyrometers or cones, just an experienced firing crew and home made draw trials of glazed tiles pulled at 30 minute intervals after orange heat.
This kiln was so new, it was still wet, and steam was coming out of all the cracks all the way to top temperature.
Side stoking is always a dirty business. Hard to get around that. It’s the nature of the beast.
That is why I have chosen to build a single chamber bourry box fired kiln as the demo model.
It will be a larger sized chamber, so I have designed it with 2 fireboxes side by side.
Only time will tell if it works the way I intend and if it impresses them.
When you are in Seoul and the air quality is rated as ‘fair’, but you can only see for 1 km through the smog. I makes you think about what a bad day might be like. Smoke from wood firing is not the big problem in the scheme of things.
We fired the big wood kiln last weekend, then during the week, Janine packed and fired the little portable wood fired kiln.
We have put the Sturt ’Terra Nova’ show up and it is going well, with a big turn up at the opening. We got to catch up with loads of people that we only usually see at conferences, and as I don’t go to a lot of conferences, nor do I go to ‘openings’ to do ‘networking’. Well, I don’t get to catch up like this very often. It was really good.
Our next big event on the horizon is the ‘Pop-Up’ Artists Open Studios Arts Trail, that will be on the long weekend of the 10th, 11th, and 12th of June. Hence the flurry of firing activity now in preparation. We have been making all year, and firing in the smaller kilns, the solar PV fired electric kilns. We don’t fire the wood kilns over the hotter part of the year, and certainly not during the fire-ban season. So it’s all go now.
Using a combination of elm garden prunings and some thinly split eucalypt (many thanks to our friends, Susan and Dev, who helped split a lot of side stoking wood with us a month or so ago.) Janine was able to fire up to Stoneware in reduction in 4 1/2 hours. A perfect firing for a little portable kiln.
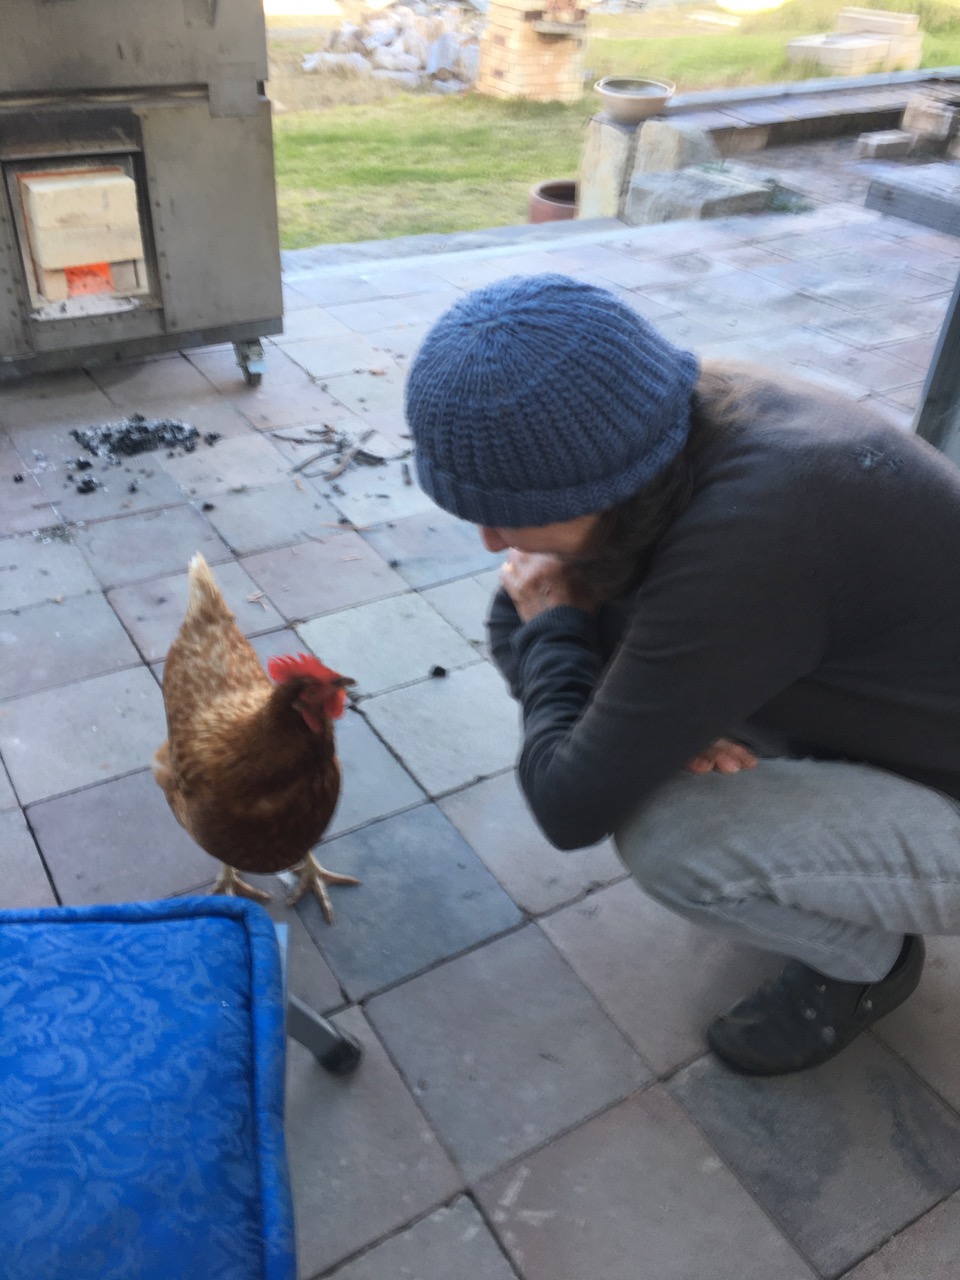
At the end of the firing, Edna the chicken came to check it out. Janine and Edna had a little chat, cooing and clucking together. The gist of it was probably around the matter of if there was anything for a chicken to eat?
I have been packing the big wood kiln again for another firing this coming weekend. The slowest part of packing the big wood kiln is rolling out all the thousand little clay balls of wadding. Each pot has to sit on a ring of little balls of refractory wadding to stop it sticking to the kiln shelf. Over time, and many, many, firings the kiln shelves get a coating of molten fly ash from the burning wood, and if the pots aren’t held up off the shelf, they will fuse together at high temperature becoming a monolithic whole.
First chamber finished and clammed up.
I think that I probably spend a quarter of my time rolling out these little balls, only to throw them away after the firing. Actually, Janine re-uses them as aggregate in the bottom of planter pots around the garden. However, when we first set out on this creative journey, back in the early ’70’s, because we had very little money and couldn’t afford to buy the very expensive kiln shelves that we needed to pack the big wood kiln. As a work-around solution, we decided to make our own. This was a very tricky bit of ceramic chemistry, and only one other husband and wife couple of potters, Harry and May Davis in New Zealand were doing it. We went to work with them to get some insights, and came back and made our own kiln shelves for next to nothing in terms of cash outlay, but a lot of time invested.
The cost of the high alumina grog used to make refractories was prohibitive, so we made our own. For every firing in the little test kiln that we had, I used very high quality, high alumina kaolin from Mudgee. Puggoon 157 kaolin, purchased directly from the mine not too far away, to make the wadding balls. After firing, instead of throwing them out. I put them through the rock crusher and turned them into high alumina crushed grog. All the failed experimental kiln shelves were also put back through the crusher, mixed with more kaolin 50/50 and used again. Eventually we had enough kiln furniture to fire the big 300 cu. Ft. wood kiln at next to no cost. They weren’t very good, but just good enough and this exercise in self reliance got us going. We still have them, but they are rarely used these days, because the new silicon carbide kiln shelves from China are both affordable and excellent quality.
Photos of me, as a much younger man, making kiln shelves, taken by Janine King


You must be logged in to post a comment.