Izumiyama and the Shira Jiki

I’m working in a workshop in Arita, in Kyushu. I’m trying to learn something about working with single stone porcelain. The potters of Arita in Japan have been making porcelain ‘jiki’ pots out of this single crushed stone from the izumiyama mountain quarry for four hundred years and they have developed a technique or two in that time. I’m keen to learn just a fraction of that knowledge in the very brief 5 weeks that I have here.

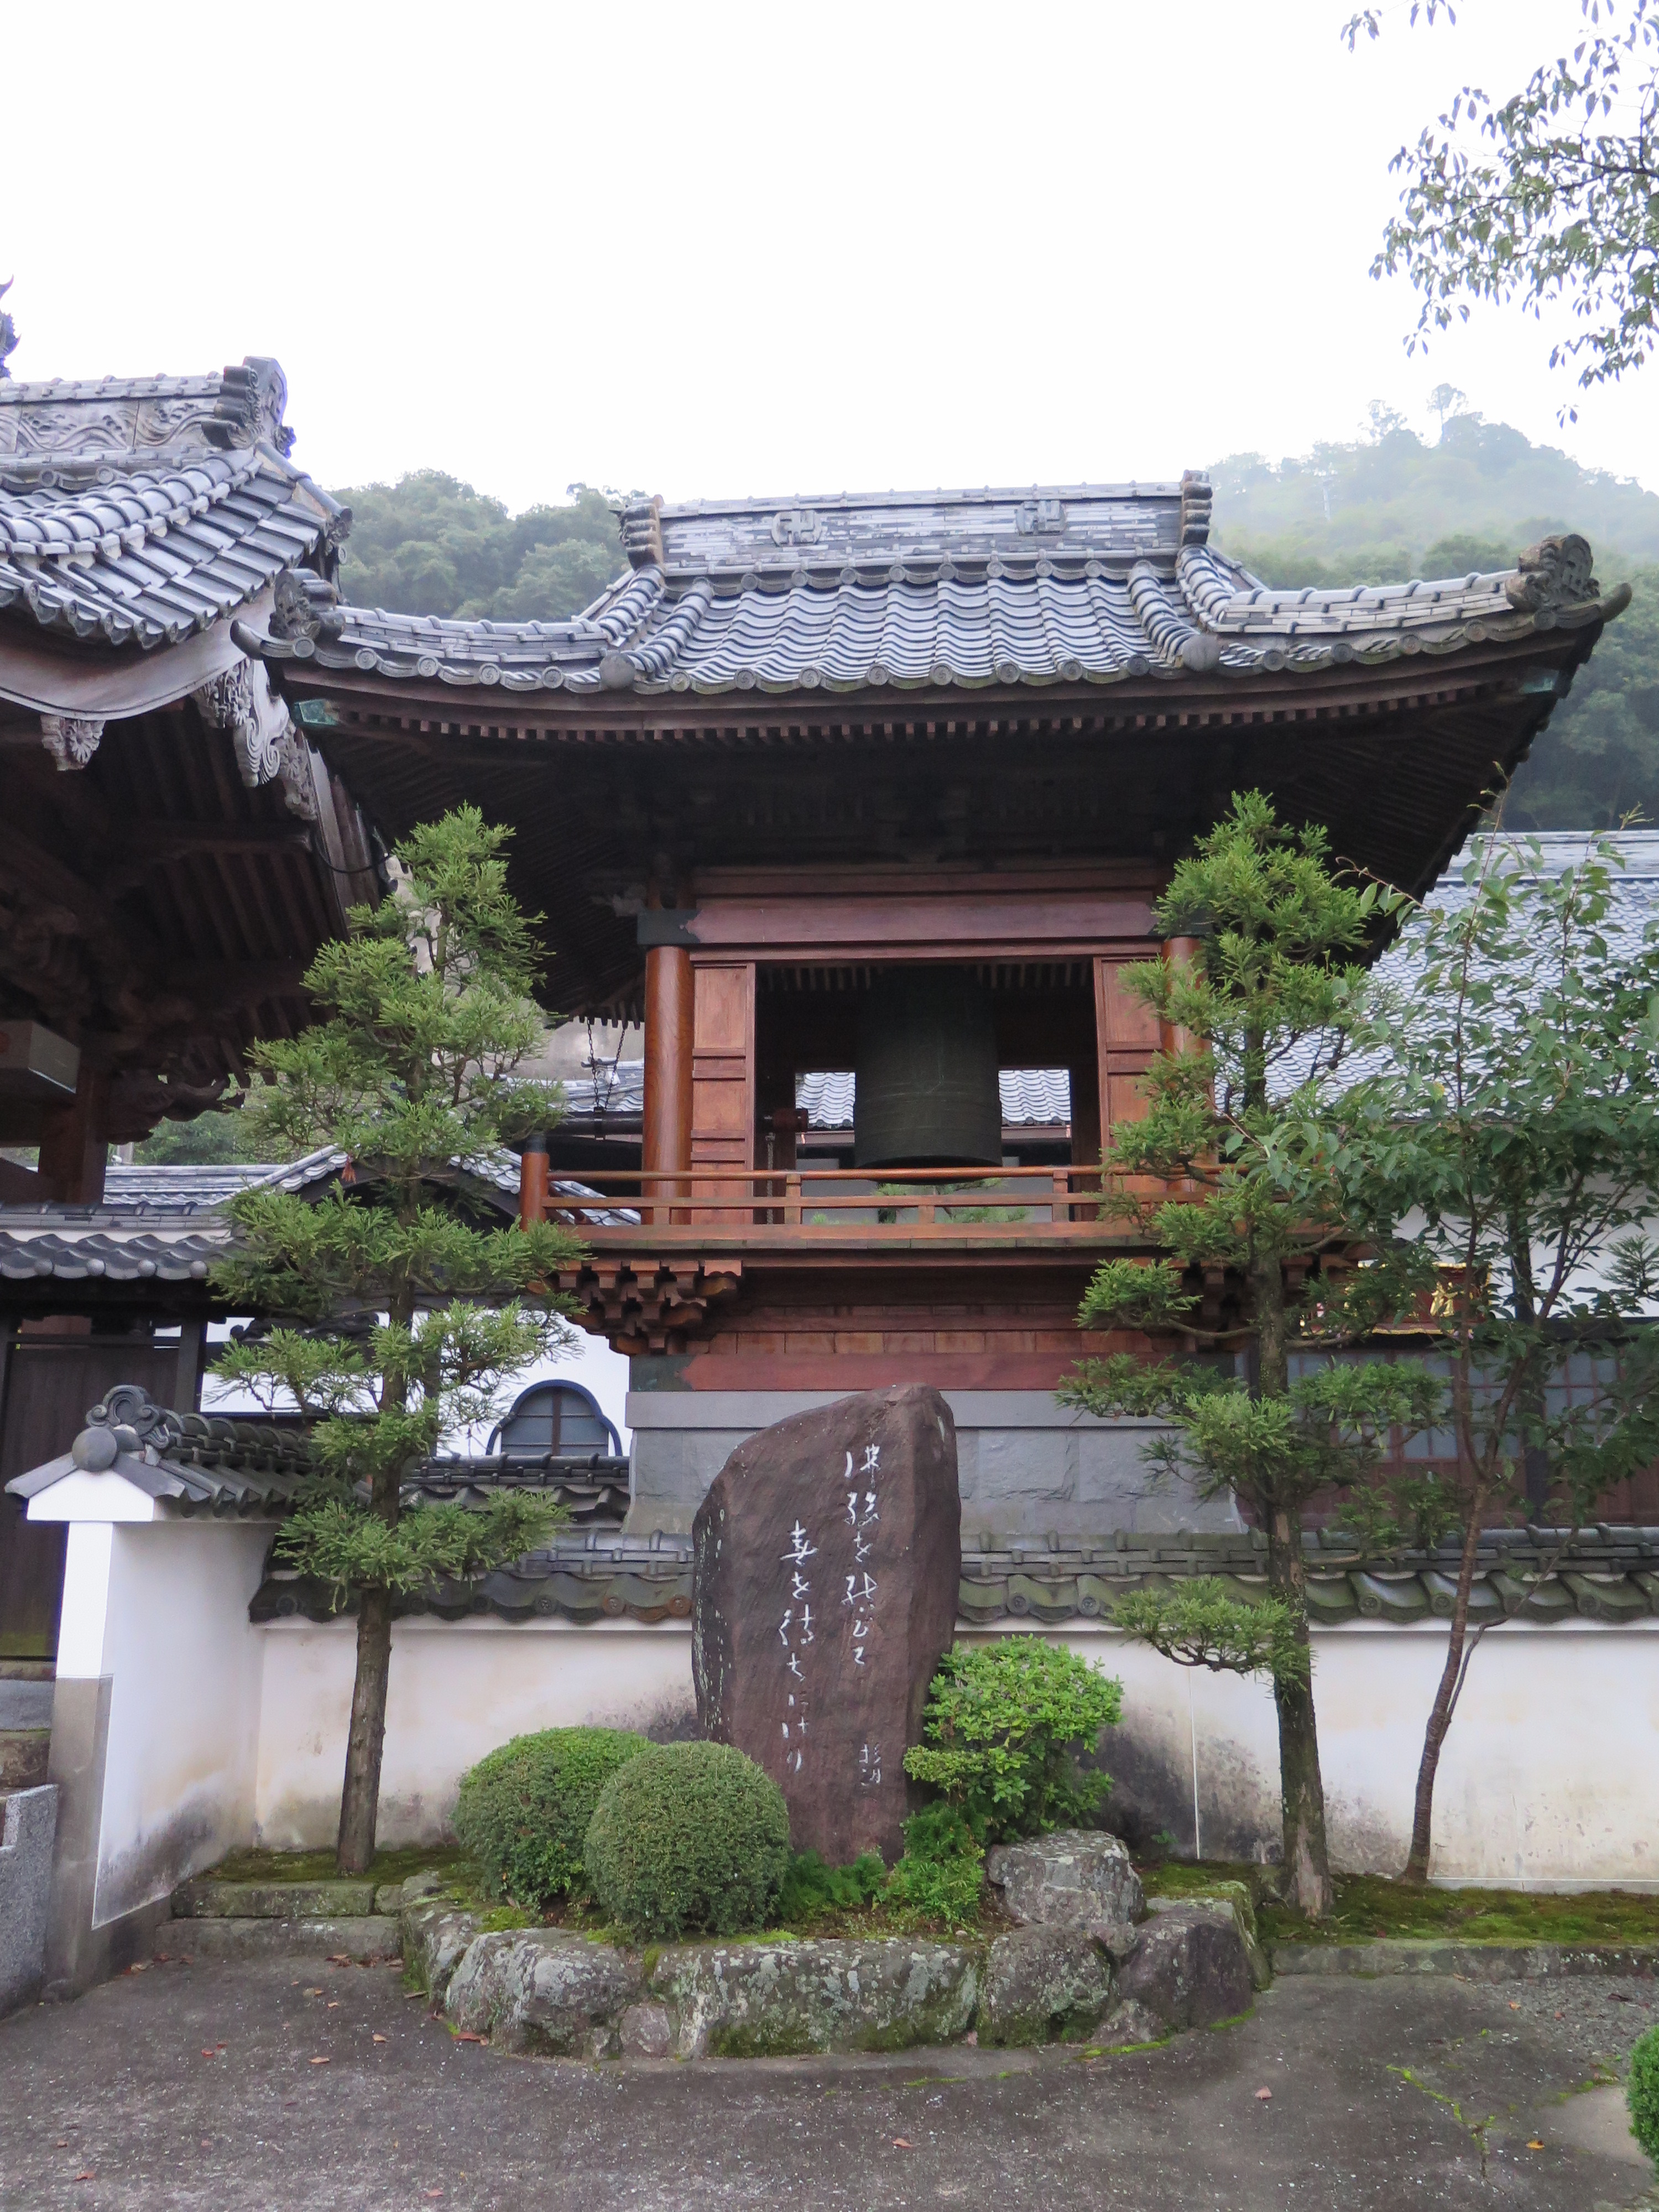
Arita is famous for being the first place in Japan where porcelain stone was discovered and white porcelain was subsequently made here. This place has a very long history. The first porcelain being made here in 1616. Since then the industry has had it’s highs and lows. We are currently in a low. Just like everywhere else in the world, the industry here is facing steep competition from China. Only a couple of decades ago, there were 300 studios here in this little town. Now there are only 100 and falling steadily. No country or industry can compete with the low cost-base of China. The best hope that they have is to engage with people like me, cultural tourists. I’m prepared to pay for the experience of working here in this amazing place, with this unique material that they have here. Merging traditional porcelain manufacture with paid workshop access for artists could be the difference between financial survival in the future. This town needs more accommodation and restaurants, if it is to encourage more longer-stay cultural tourism. Something more than the usual casual day-visit for shopping.

I don’t think that they really understand how rare and amazing this stuff really is on a global scale. So don’t fully understand its true value and what they have to offer. It’s just so normal for them here, after so many centuries. They don’t realise the special nature of what they have. It’s bred by familiarity! As all the workshops seem to be struggling financially, People like me could be the cash cows of the future, or at least part of the fiscal solution.

In the early 1600’s, the great Japanese Warlord Hideoshi invaded Korean. He captured potters and repatriated them to Japan. Rendition! It sounds familiar? A potter, named Ri Sampei, he was actually a part time potter and part time vegetable grower (farmer). Sounds familiar. He was captured and brought to this place. He soon discovered the special porcelain stone in the mountain of Izumiyama just outside of the village of Arita. He recognised it for what it was and began to make the first white porcelain in Japan, called Shira Jiki. The rest is history.

First day, I start with a clean wheel and pot boards, + a few lumps of porcelain clay.

IMG_0426

So I’ve come to this place to experience the special southern Japanese porcelain techniques that have been developed here. This stuff is amazing, sufficiently plastic to throw well enough, so that you don’t really think that you are throwing with a ground up piece of stone. It is quite strong and stands up well on the wheel. Not vigorous, but sufficiently robust to make reasonable forms easily. For me anyway.

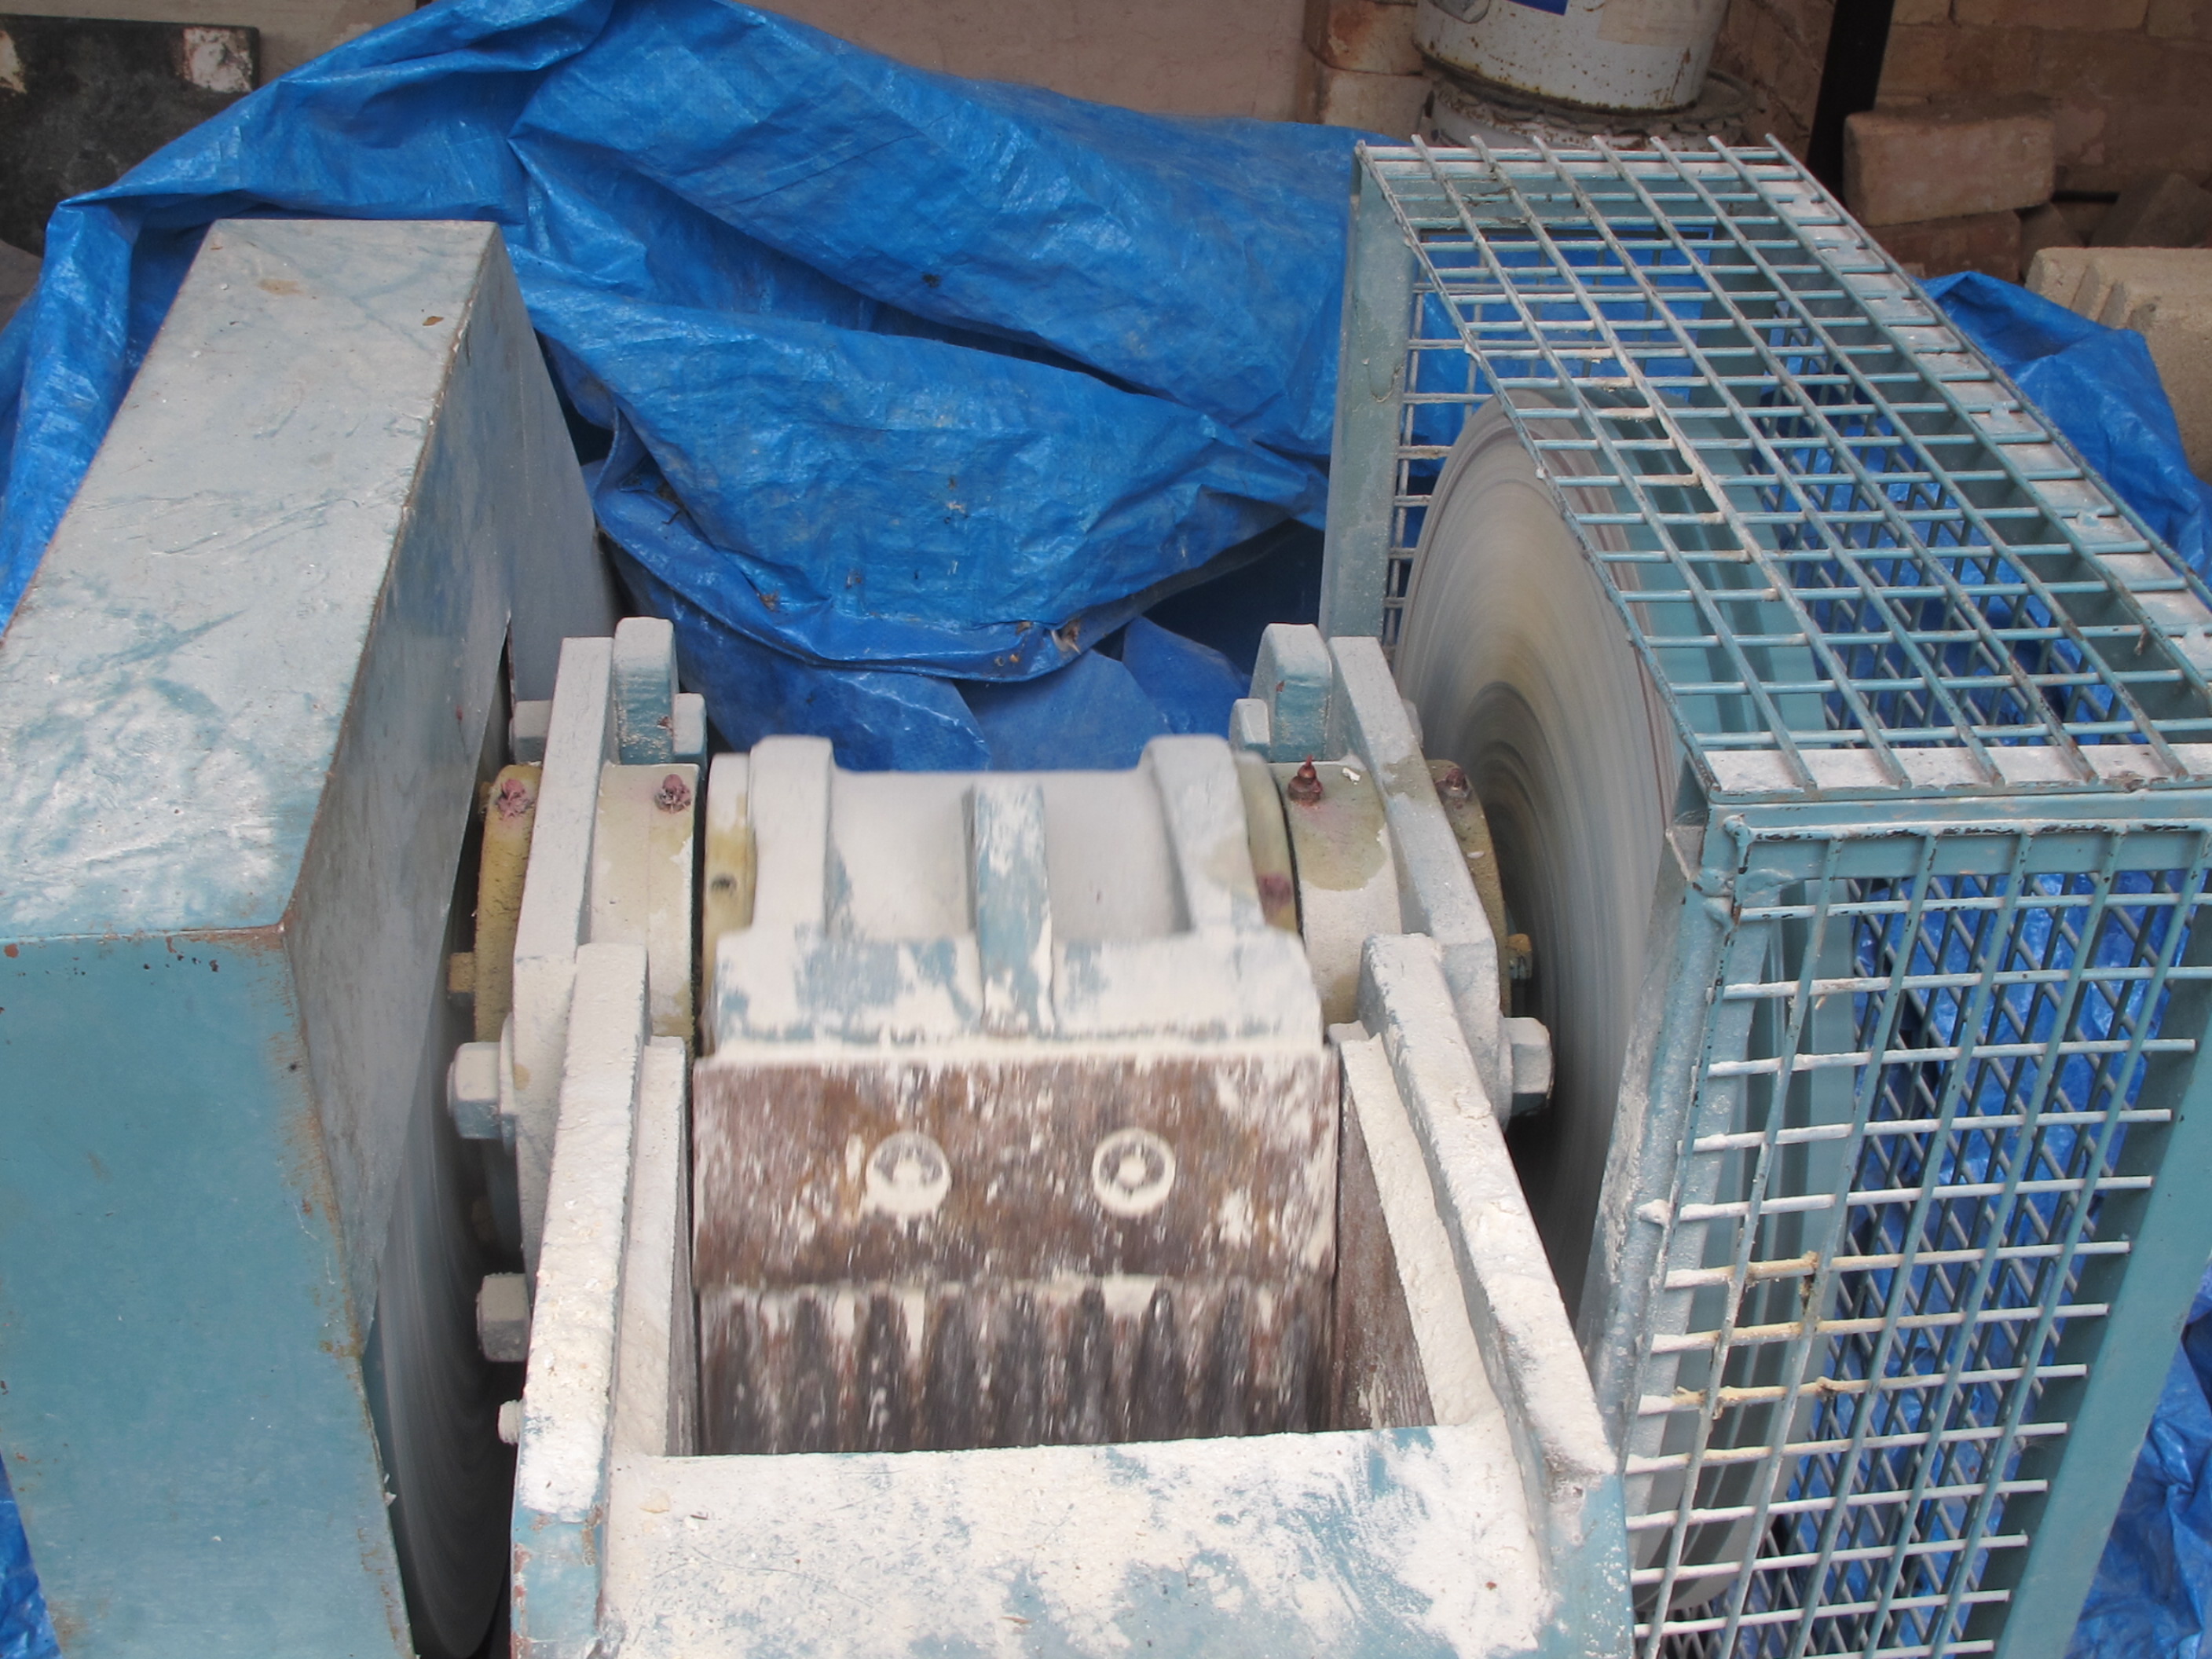
It is miles away from what I’m used to. The hard rock that I grind up at Home is a solid, non-plastic affair. I know from my reading that this stone here, is highly weathered. In a form known to geologists as ‘hydrothermal weathering’, where hot steam has passed through fissures in the parent rock, reducing what was formerly hard granite, to a soft crumbly type of soft white mica called Sericite. Sericite is both slightly plastic, throwable and highly fluxed at the same time. Plus, it is very low in iron oxide. A very unusual combination of characteristics. Only a few places in the world have materials like this at hand.

I find that the clay is used so soft here in this workshop, that I can’t separate my pots from the wheel-head using a conventional cutting string and lifting technique that I’m used to. I find that I have to use so much force to allow air in under the pot to lift it, that it distorts the bowl. I take a moment to make myself an extra thick, double twisted, multi-stranded, cutting string. The texture that it creates as it passes through the ultra-fine porcelain clay allows air to penetrate, so breaking the vacuum seal and allowing the pot to be easily removed from the wheel head.

IMG_0456IMG_0457

I settle in for a few of weeks of intensive work. We work together, side by side.

IMG_0429

I’m, in the workshop of Tsutsui Tatsuya. He is very experienced, having spent 40 years in this workshop. Purpose built, up on the hill overlooking Arita’s U-Tan district. I spend half a day throwing my pots and then spend a week turning them, and so it goes for the rest of my time here. I soon fill my shelves and then I’m looking for more storage space in the overhead racks, above the wheels.

IMG_0437IMG_0468

The turning here is a different story to what I’m used to. It takes me back to my student days working for the Japanese Potter Shiga Shigeo. He was trained in the porcelain techniques of Kyoto and worked for the ‘Nation Treasure’ potter Tomimoto in Kyoto, another porcelain centre of excellence in Japan. Here they turn not just outside, but inside as well. I’m not used to that. I have tried in the past to get my form just about right on the wheel, so that there would be as little turning as possible. Here they all seem to use the ‘nobebere’ profile stick to throw the forms. Another thing that I’m not used to. But I’m here to learn and to experiment.

IMG_0464IMG_0477

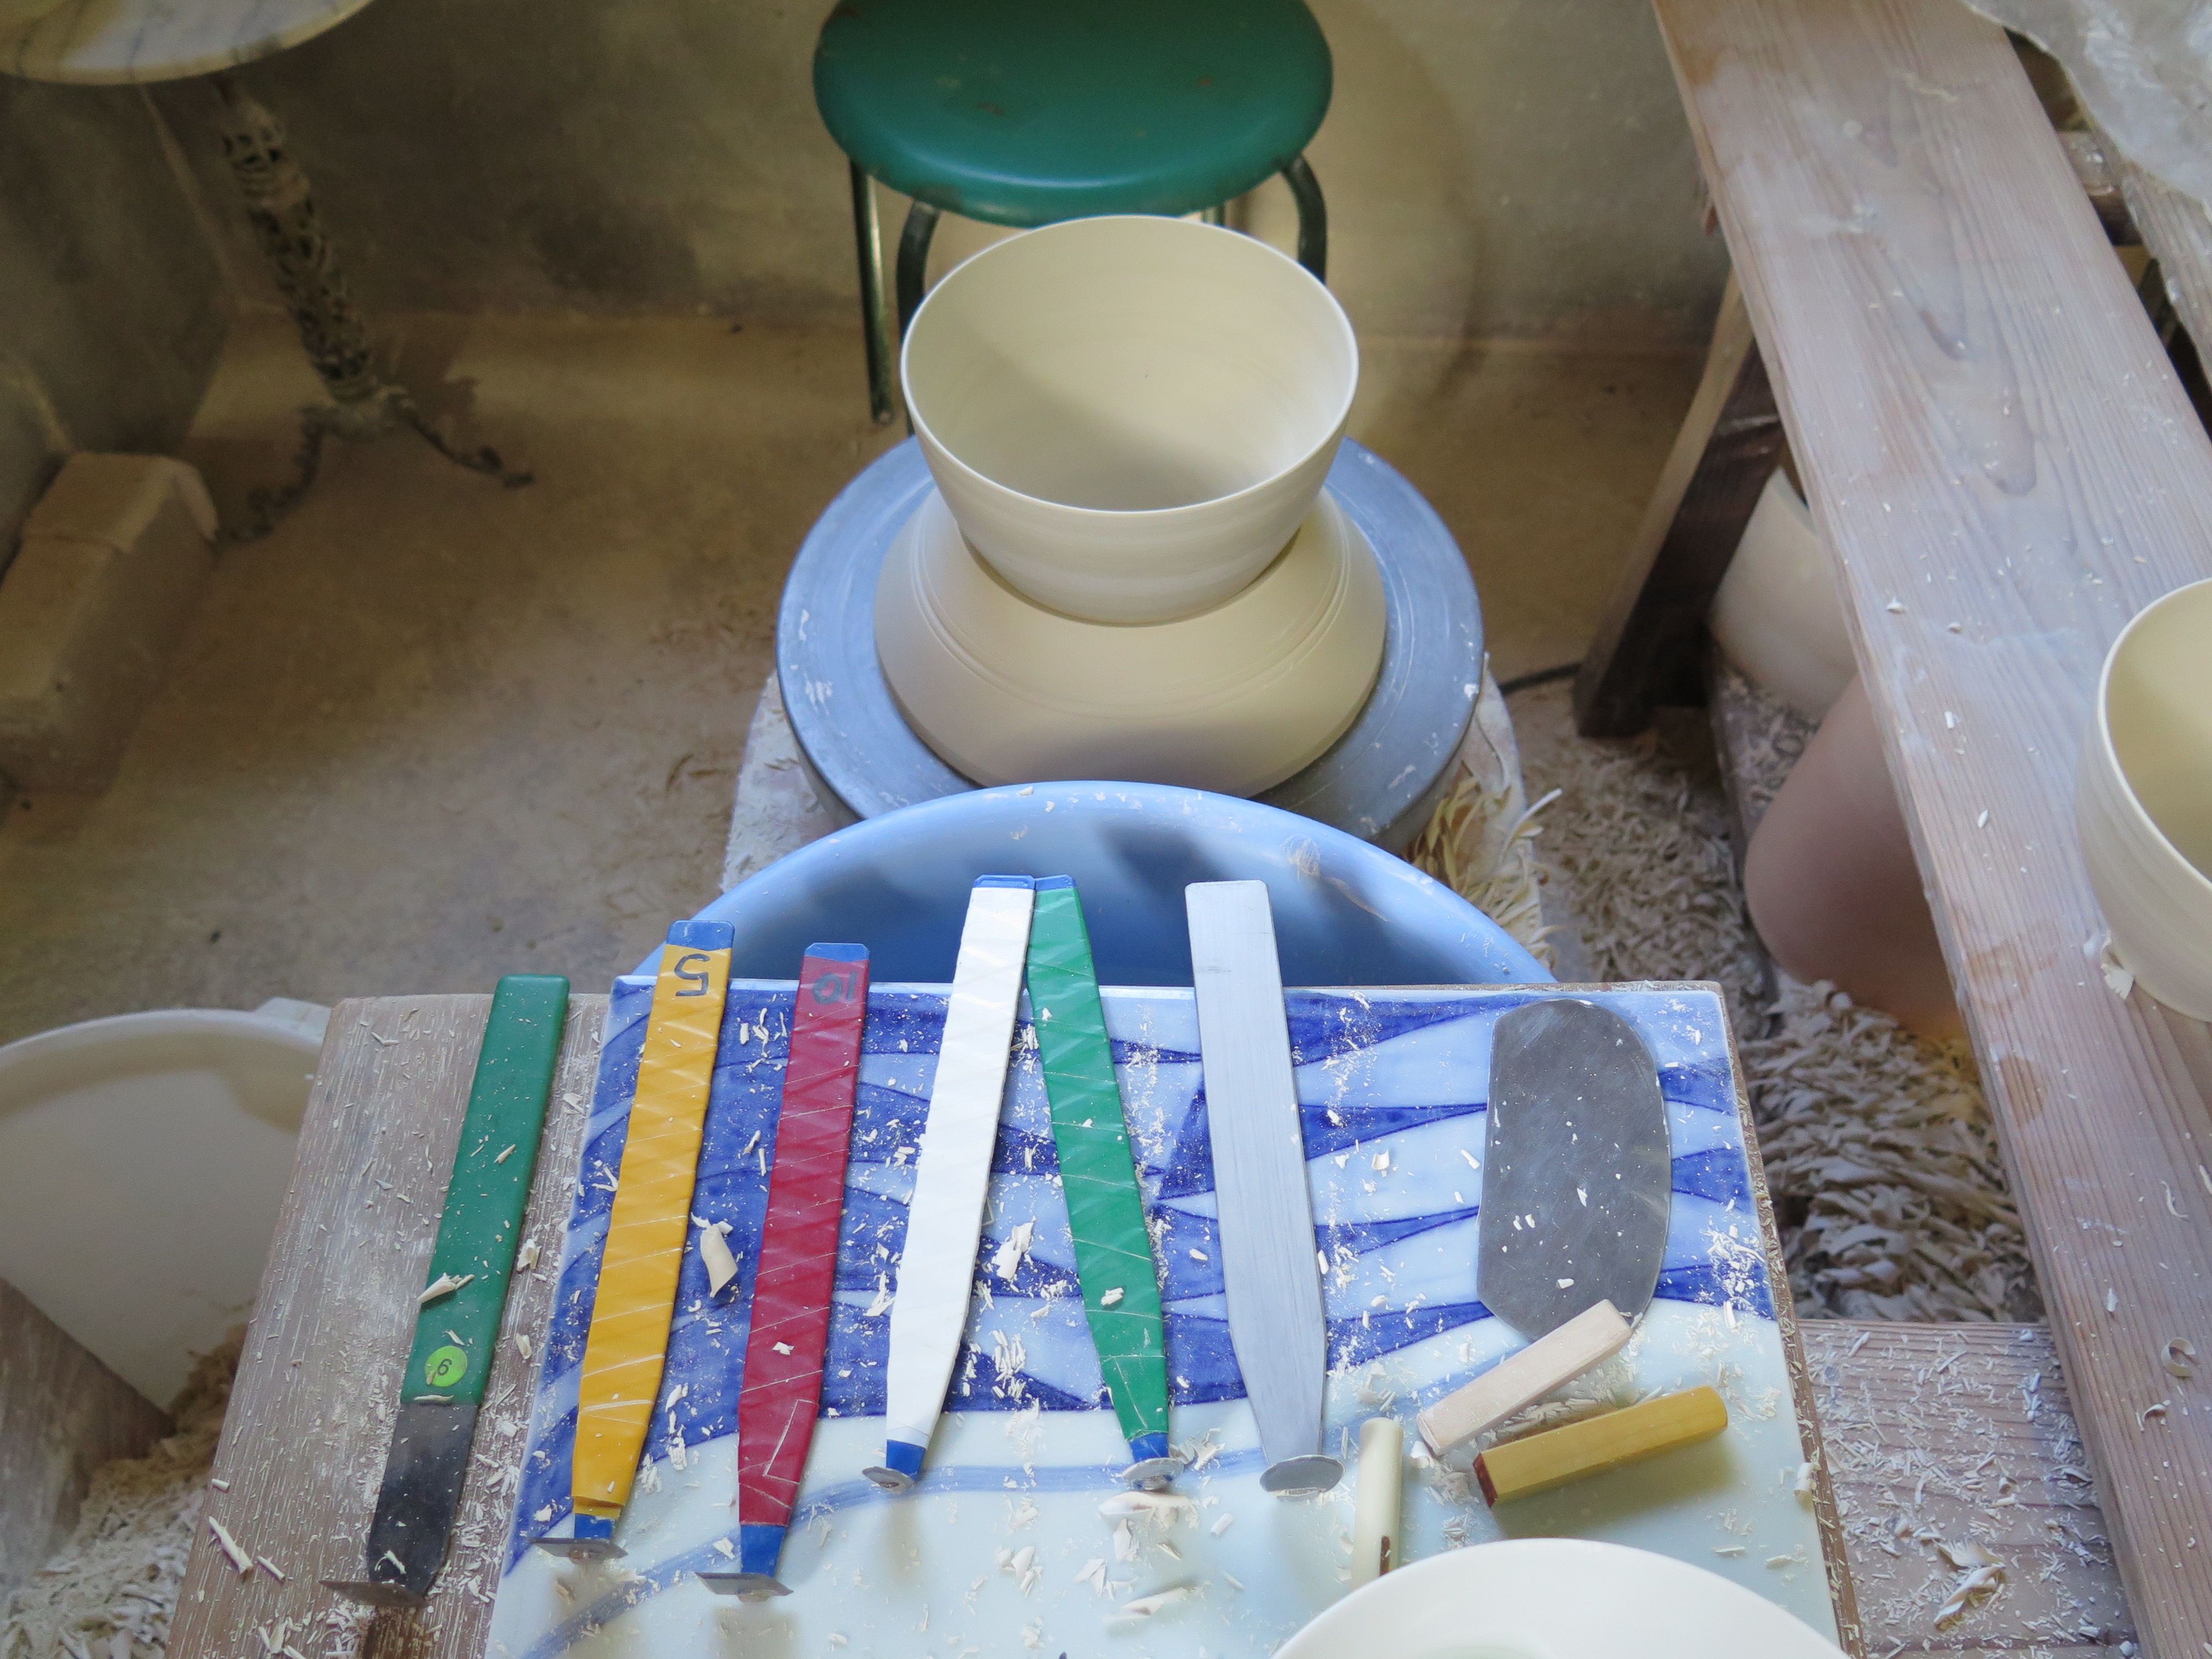
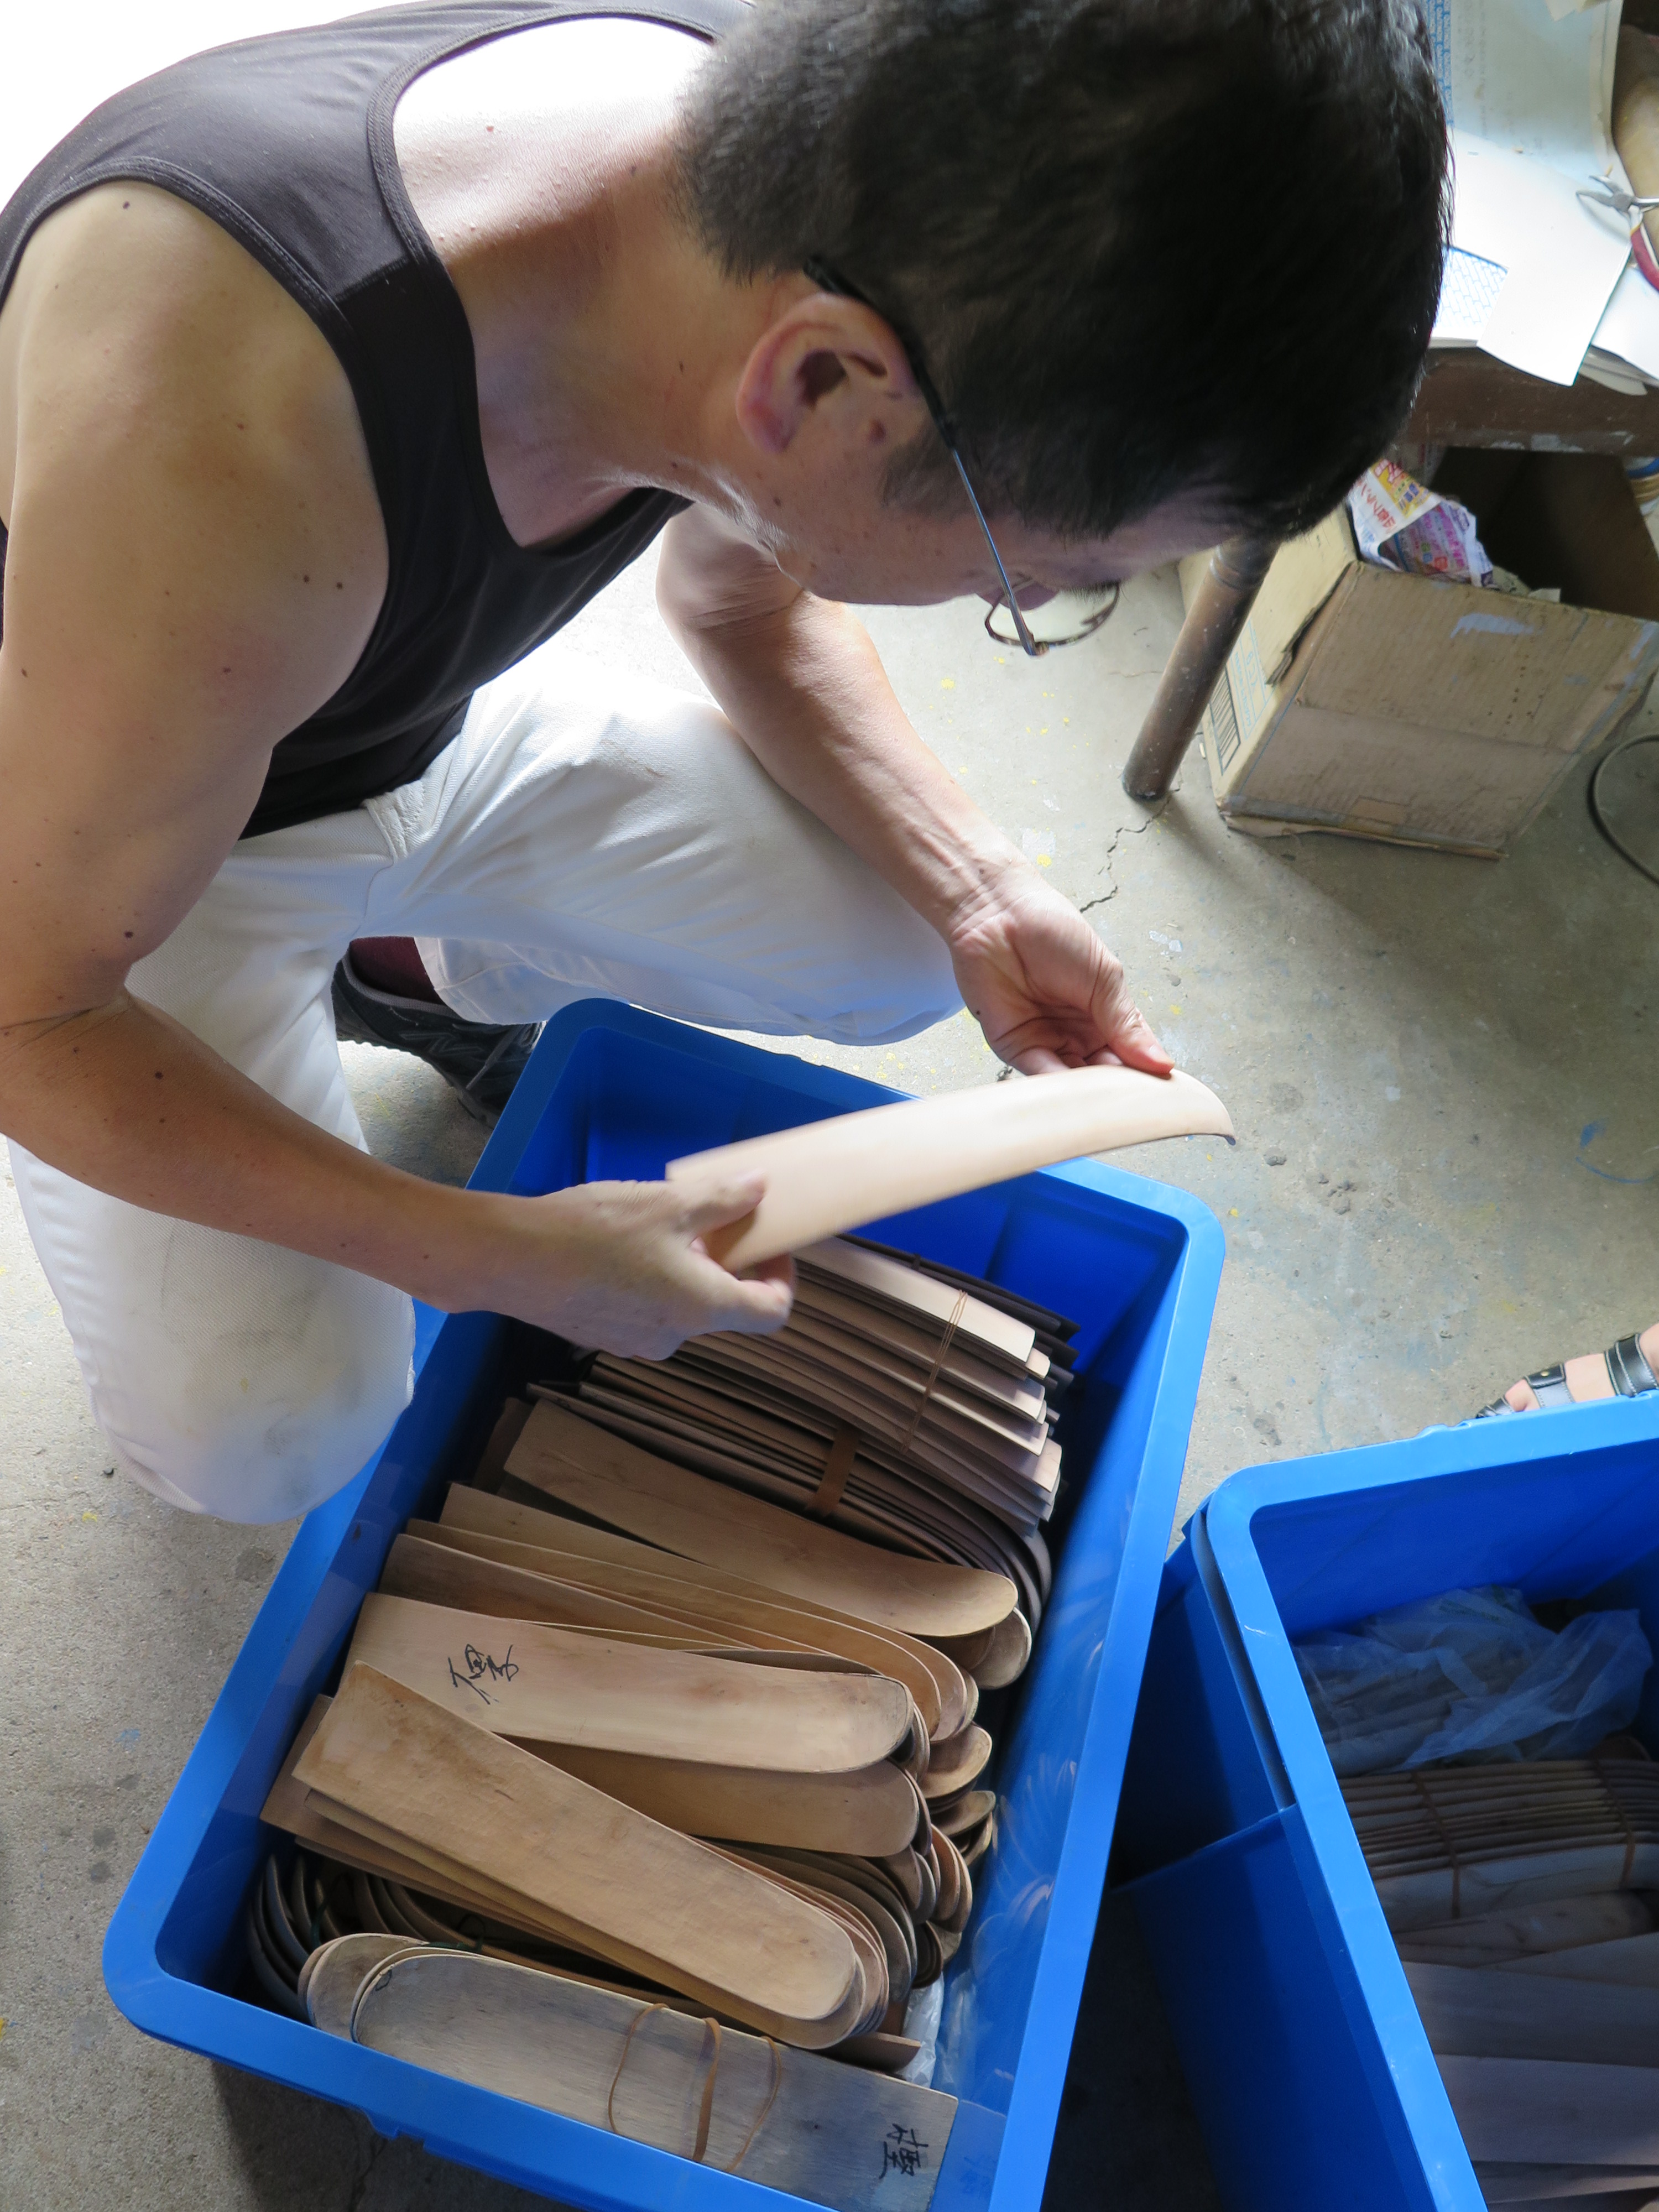
This work requires you to be both meticulous in detail and therefore precise in your hand-eye co-ordination, I’m not too sure if I’m up to it, but I give it my best, roughing out on the next day and turning down to form on the third, then the precise thinning and finishing when it is bone dry on the next, or any time after really. It doesn’t matter once it is fully dried out. I get to use my new tungsten-carbide-tipped turning tools for the job. I’ve colour-coded them. I need to get out more!

IMG_0471made by Steve in Arita

IMG_0449First pot finished, 89 to go.

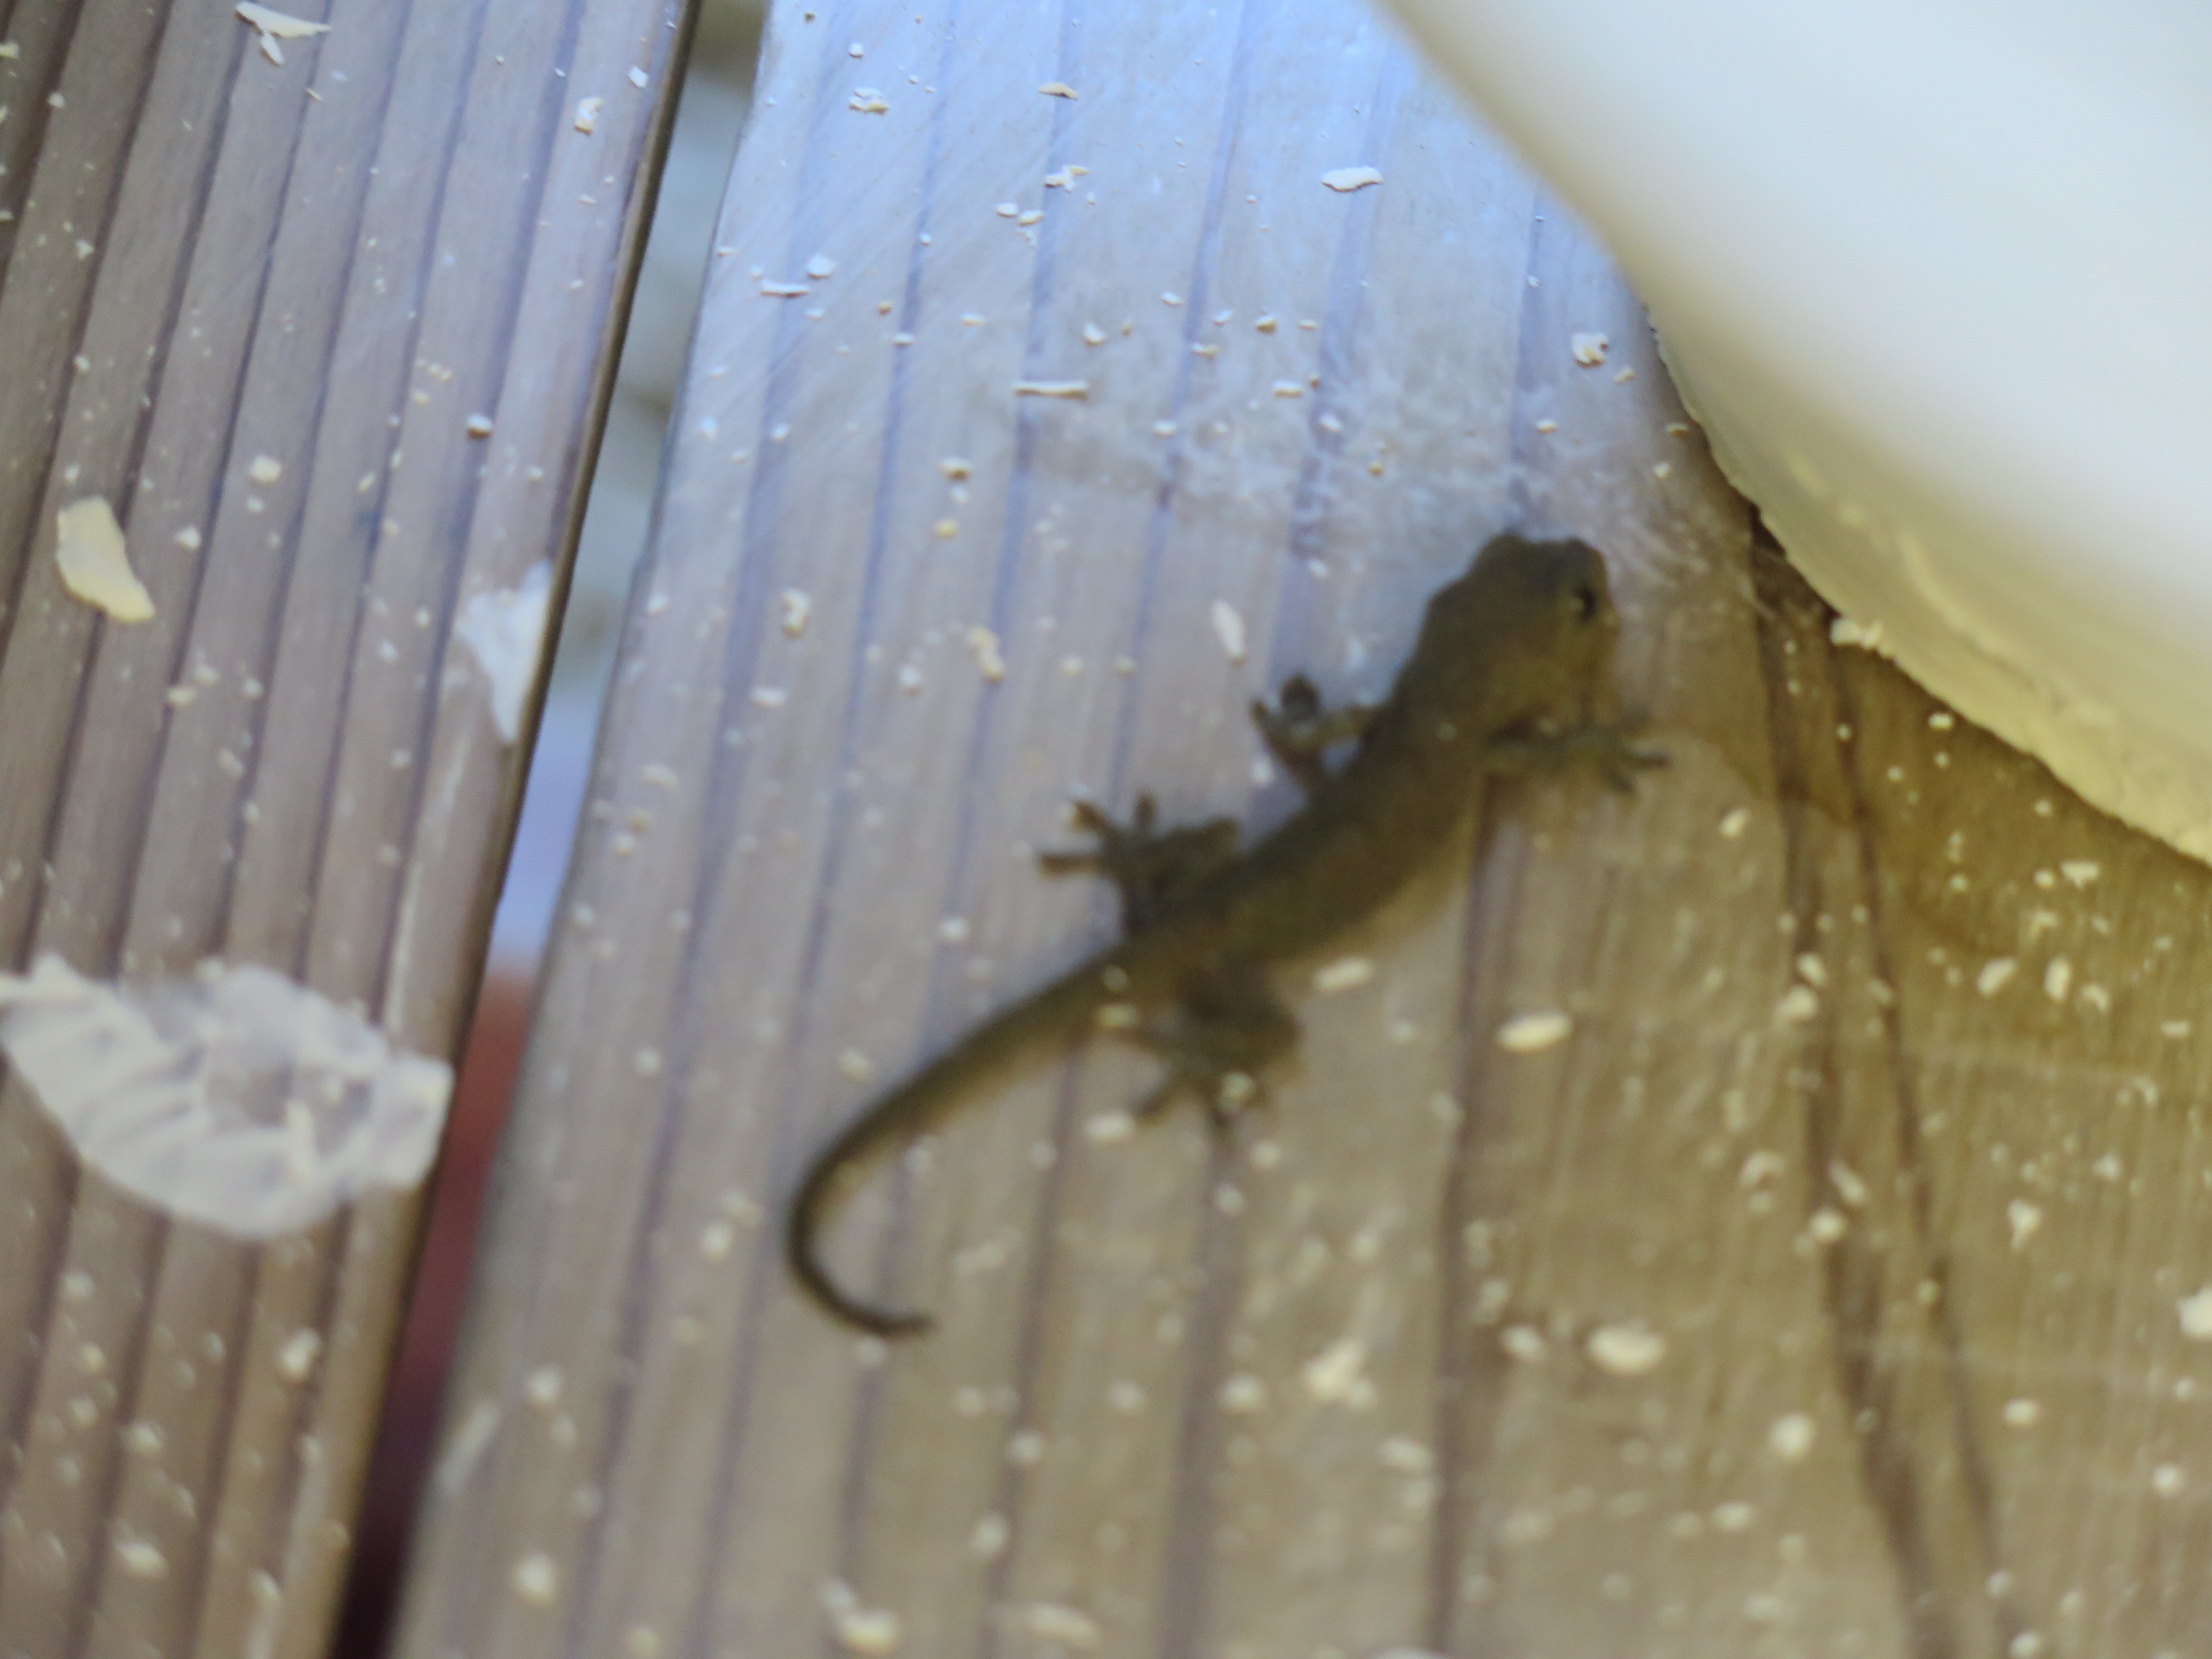
A gecko comes to visit me while I’m turning.

IMG_0466

Today Tatsuya made us a cup of matcha for afternoon tea break. It was amazing. He offered me his father’s Karatsu tea bowl and chose to use the bowl that I had recently given him as a gift, for himself. The tea looked really good in them. We both reached for our cameras at the same time. We laughed! So funny!. We were both thinking that we ought to record the special image of this very particular event on our cameras.

IMG_0473IMG_0475

IMG_0476

It’s a modern world, in this ancient place. So full of history, you can taste it!

The perfect juxtaposition of then and now.

fond regards from Old Steve in the New Arita, Japan

The Temple Bell

Every morning at dawn, the temple bell rings. It makes its first gong at 6.00am and then about every 35 seconds until ten past. The next strike comes just as the last one has died away. It is a very gentle way to be reminded that the day is about to begin.

Luckily for me, I live some distance from the temple. if I lived right next to the giant bell, I might have a very different opinion. I lay in bed and ponder just where this temple is. There a so many temples and shrines around here. Everywhere in fact. The streets and lanes are crowded with them. I have some idea of the direction of the sound. But sounds are funny things, so influenced by the surrounding buildings and the hill, that I’m not too sure if i’m hearing the sound directly or as it bounces off another building.

Today, I wake just as the dawn in breaking and the new pale light illuminates the shoji screens of my room. It’s 5.30 am. A while before the bell is due to ring this morning. I decide to go out into the street and listen more closely to determine where the sound is coming from.

IMG_0158

I’m up, washed and dressed. If I move fast, I will be able to find to source of the bell. It’s not that important, but I’m inquisitive. My instinct is that it will be coming from the higher temple, above the train line, up on the hill. but my ears have been telling me each morning that it is emanating from the opposite direction. I’m never really sure when I hear the first gong, but once I’m awake they enter my consciousness and become real.

I start by heading to where I feel that it has been coming from in the past. I have 15 minutes to find it before the monk starts his morning task. I walk down the street, I pass a gap between two buildings, there is a little lane way. I can see straight away that it leads up to some temple buildings. I walk up the lane as quietly as possible. I don’t want to disturb the Monk in his daily rituals, he might be meditating?

IMG_0267IMG_0257IMG_0264

When I get up there, there is no-one to be seen. The temple is beautifully kept. It has a raked gravel garden with some large stones. I still have several minutes before the first sound is due to ring. I take a moment to look around the garden and courtyard where the bell house is situated. We are quite well elevated here, above the buildings in the street. The sound would carry well from here. It’s not as hight as the other temple up on the hill, but high enough.

IMG_0261

Only a minute to go and there is no sign of anyone around. Suddenly the sound of a bell sounds out. It isn’t this bell at all. I was completely fooled. I could have sworn that the sounds were coming from the direction of this temple. I head off down the lane and out into the street. It must be the hight temple then.

I head off in that direction, up the street, then up the side street towards the temple. Just then it strikes again. I’m completely wrong! What’s happening?  The sound is coming

from the other end of the street now, back where I just came from. I turn and hurry back with as much dignity as I can muster, as I rush down the street, back past my place and further down the hill towards the sound. I want to get there before the monk or priest finishes his work. I only have 10 minutes max. to find it. Of course, I could always try again tomorrow morning, but I’m up now and on the job.

IMG_0267

The sound is definitely coming from here. I walk up the lane and there it is, right in front of me. As I approach, the bell strikes again. Actually, that is wrong. The bell sounds as the log that is suspended on 4 chains swings back and strikes the bell, producing that marvellous resounding gong sound. I can’t see the monk in  underneath the supporting structure, so I walk around the garden wall to

IMG_0260

where I can see the bell house most clearly. There is no-one there!  As I watch, the log swings back and strikes the bell again. It is an automated system, run mechanically. I have to say that I’m just a bit shocked and disappointed, for some reason, I was sure that there would be a person here doing some sort of ritual daily devotion.

So now I know, or at least I think that I do, but what do we ever really know? There are two temples and two bells. The first strike seems to come from up on high, then all the subsequent rings are from the lower one.

I’m sufficiently satisfied with this explanation to go home and prepare my breakfast of unsweetened natural yoghurt and fruit. The day has begun. No time to dally. There are porcelain bowls to be turned using my new hi-tech, tungsten carbide tipped kanna turning tools. If I have no problem adopting this brand-new technology for my work to make my life easier, then why shouldn’t a monk do the same?

Stalking the wild Kanna

I came to Japan with a few projects in mind and as my stay here develops some of my plans have fallen into place, while it has become apparent that others will not be achievable on this trip. But there will always be the possibility of another time?

One of the little side projects that I had in mind was to buy some ‘kanna’. Kanna is the Japanese word for sharp edged tool, so it can be applied to razors, knives, wood working planes as well as potters turning tools. In particular, I’m here to find the source of the very special and quite rare, tungsten carbide tipped turning tools that the porcelain potters here use.

I have tracked down and visited 4 potters supply shops now, I find something of interest in each one. Today I followed a lead up into the hills to find a small workshop where I’m told that there is a man who actually makes the tools from scratch. I’ve been lucky enough to meet someone, who knows someone who can take me there

My guides took me to visit this special tool maker in his workshop right up in the hills, into the next provence. In a small shed in the bush, down a little lane, in a gully, under the huge concrete pylons of the freeway, that passes straight over the valley. Finally I have found the unremarkable workshop of the humble tungsten carbide turning tool maker. It’s a small unprepossessing shed. You wouldn’t look at it twice, and it’s ever so small to boot. No signage, no identification. You just have to know!
IMG_0103
We go in and straight away I can see that this is a real metal workers workshop. It has the taste and flavour of metal all about it. The types of machines, the black metal dust on the floor. The smell of burnt resin binder on the carbide cutting disks. It all seems, looks and smells  so familiar. Parts of it could be my metal working shed. So I finally get to track the shy and elusive, wild Kanna to its source. So this is it’s natural and unspoilt habitat. Don’t know what I was expecting, but it wasn’t this. Something corporate, larger and more commercial/industrial. It all seems so humble and small scale and it is!
IMG_0100IMG_0099
This is Japanese artisanal work. The sort of thing that is slowly dying out here. At least it has lasted this long. I am a very lucky man to get here now. In this place and this time. I am grateful. This lovely man is quietly spoken and very humble, as far as I can tell with no language to communicate with at a deep level. But you can sense a person’s character from their demeanour, even without words. I only have greetings and platitudes. I’m so glad that I have my friends and guides here to translate for me. Because I want to know more about the process and how he works.
IMG_0101IMG_0102
Apparently this workshop is only open in the mornings. After that he has other things to do?? Maybe a second job? or out on the road selling his wares, because not too many people will find him here in the this unmarked shed on an unsign-posted lane, out of the way from a small town. Although people in the know do find him here. While we are there a young girl drove up with two tools she bought a while ago. She wants them re-sharpened.
I looked through his boxes of stock and find two tools that will be of use to me. it’s a bit difficult for me, because firstly, I’m left handed and secondly I work in the reverse rotation to the Japanese style. So not all tools will be suitable for me. I can commission some to be custom-made, but this won’t be necessary. I can find everything that I need in symmetrically shaped Kanna. I buy two of his tools from him. That just about completes my set.
Then to my surprise, I’m told that he also makes wooden tools as well. A real renaissance man! So I can’t resist buying a hand carved ‘nobebera’, or ‘nijiki’ throwing profile from him as well. He has boxes of these in stock too. Different shapes for different pots. Funnily enough I want one for throwing small bowls! I don’t know which one to choose from his stock, as I am so inexperienced and naive the these matters, so I buy the one recommended by my friend. I get a quick lesson along the way about what to look for in an ideal nobebera.
I had no idea that this guy we were going visit was a complete all-rounder.  He also makes these special wooden throwing tools himself. It’s a very long process, 12 months in the making. Sometimes longer, it all depends on the cross-section of the wood, that has to be seasoned properly. Some of the thicker sections need  to be seasoned for up to three years in water, before starting the process. He uses ancient, thick cross-section, Azalea wood, called ‘nijiki’ here. 125mm in dia. that is up to 50 years old. He roughs out the shape and then soaks the wooden proto-form in water for several months, then slowly dries it for another few more, before shaping it to almost-right. It has to be cut from the branch in such a way that the eye of the grain is centrally located in the tip of the curve. He then lets it warp as it dries completely. As it finishes its drying and settles into shape it needs a bit more re-shaping. Finally, a few months later, when it has stabilised, comes his final shaping and it’s now ready to sell. 12 to 24 months to the day after it was cut.
IMG_0096IMG_0097
IMG_0098
My friend is at pains to point out that this is only the beginning of my mutual contract with the maker and this tool. It will warp to suit my methods and the humidity in Australia, when I get it home, so don’t expect that this is it. You have to use it and then re-shape it a little yourself, to get it just right for your purpose. It will probably need a little thinning out as well when you get tit home, to get it just thin enough to be flexible, but not so thin that it breaks under pressure. It is starting to sound like the making of a good cello, all the intricacies of the living wood and how it is never really stable, constantly responding to its circumstances and environment.
I buy the one that my friend has selected for me out of a box of about 50. He knows what to look for, He has some of these tools that are 40 years old in use in his studio.
Its a beautiful thing. I am proud to own it, and consider myself especially fortunate, to have met the maker in his native environment and seen where it is made. In-situ as it were.  It is such a privilege!

Best wishes from Steve at home in the natural habitat of the hand made Kanna and nobebera.

Make Clay While the Sun Shines

Warning! This post could be very boring if you are not a potter – and maybe even if you are?
Contains technical terms and traces of nuts.
.
Making clay while the sun shines is a very good idea and ought to be possible in summer, but not this summer.
This has been the most amazing summer that we have had for many, many years. It’s hot, just like every year, but this year it has rained more than we can remember for a long time. We are having a great time. The rain combined with the warmth has made everything grow its head off. We have plenty of water in the dams and drinking water tanks, plus lots of food coming from the garden. We only have to water the garden every few days, as it usually rains in between at some point. Sometimes it rains hard enough to wet the soil sufficiently that we don’t need to water for a few days.
IMG_8261
Earlier in the summer it was raining very hard and very often, but now that pattern has changed to occasional showers. So it is now dry enough under cover to get my milled porcelain stone slip to dry on the drying beds and in plaster basins. I’m aware that it is not wet like this everywhere. There are bush fires raging down south, while I’m clearing ditches to guide the excess water away from the pottery. When it is this wet, the humidity is so high that it is very hard to dry liquid clay slip. It just tends to sit there and go mouldy while rotting the fabric membrane underneath that separates the clay from the brick bed.
IMG_8270
After 40 years of pursuing my project of self-reliance, I have decided to modify slightly my fundamentalist, hard-line approach of ‘total commitment to maximum achievable’ self reliance, to a more relaxed and flexible approach of ‘substantially committed to’ self-reliance.
In this regard I have recently decided to allow myself some slack and buy in more processed product to allow for an easier life as I age. For example, When I returned from my studies in Japan, late last spring, it was getting a bit late to put in seeds and start a summer garden from scratch, so I decided to compromise and buy some punnets of vegetable seedlings to get the garden up and growing, while I planted my seeds and waited for this second planting to come along as a second, follow-up crop. This worked well and I’m very pleased with the serried plantings and how they are growing and providing a steady flow of tomatoes, sweet corn and zucchini etc.
It’s a small compromise, but once compromised, why not go with it?
IMG_8172IMG_8183
IMG_8240IMG_8241

IMG_8242IMG_8244

Blanched French beans served with fresh, home-made basil pesto.

Blanched French beans served with fresh, home-made basil pesto.

I have decided now to addapt this freer approach to my ceramic materials and my creative work. I have previously only used the rocks, shales and clays of my own local shire and I am still completely committed to this ‘local’ concept. I had found during this long extended period of research that although I tried very hard to locate everything that I needed to make my ceramics from only the materials that I discovered around me. I could not find any pale plastic throwable clay in a quantity that was useable. However, what I did find, was plenty of hard igneous rocks to make glazes and in the end I managed to make two really special, unique and very interesting stoneware clay bodies from self-processed, local rock dusts. To achieve this, I realised that I would need to add some bentonite (a very sticky clay) to bind and slightly plasticise these powdered rock bodies to make them useable. These rocks are so hard, that they need to be crushed first in a large jaw crusher, then a small laboratory jaw crusher and following that I put the grit through a disc mill and finally in the ball mill for 16 hours to get it really fine. Using this rather slow, convoluted and old-fashioned technology, that I obtained as industrial cast-off, from auctions and junk yards, I can process my finds from large rocks down to 200# powder in about 24 hours. It’s the drying out of the liquid clay slip from the ball mill that is taking the longest time and slowing the process down. Not helped by the continuing wet weather.
I never thought that I’d find myself complaining about rain!
IMG_8137IMG_8263
Warning, there are traces of nuts showing in this image!
IMG_8265IMG_8221
I pass the thin liquid slip through 100# sieve before settling out the solids.
IMG_8211
So, bentonite was my first compromise. It may not be local, but it is Australian. I have bought 3 x 25 kg bags of bentonite during my career. I also found that I needed to buy in alumina powder to use as shelf wash. This wasn’t absolutely essential, it was just very much better than all the alternatives, so another compromise. I’m still using this original 25 kg. bag of Al203. I use it sparingly, so It will last a very long time.
Recently, I decided to get some kaolin to add some slight increase in plasticity to my ground up local native porcelain stone bodies. This is not a local material either, as it comes from 300 kms away, but it’s closer than the bentonite. There must be something closer, I just haven’t found it yet. Proceeding on from my initial tests. I have decided to add 15% of this plastic kaolin to my ground porcelain stone body, it makes an enormous difference to it’s workability very quickly. I completed the first small batch tests of 5 kg each last year, before I went to Japan. So now I am making the larger 100 kg batches to see how they work on a larger scale. The tests were very promising, so I am eager to see them perform and feel them on the wheel. I was encouraged to follow on with this blending idea when I saw them making their porcelain body in Arita in Japan recently, using imported New Zealand kaolin. But I’m not prepared to go that far for some kaolin.
I have been told that the most famous porcelain body in Australia, which is exported all over the world, is made from Chinese kaolin, Indian felspar and American bentonite. At least the water is Australian!
IMG_8247
To aid the drying process of my ball milled (bai tunze) porcelain stone slip, to a stiff plastic, usable porcelain body, I make two batches. One of 30 kg in the big ball mill as a liquid slip. This slip has to be thin enough to allow the grinding down of the very hard rock granules from the crushers. After milling I allow the thin liquid to sit and settle for a day or so, to allow the very fine ceramic fragments to flocculate. I drain off the free water from the top of the settled clay material. At the same time I make a second 5 kg. batch in the smaller ball mill which is dry milled. I then add this dry material to the wet batch and mix them together. This significantly stiffens up the slip. I can then put it out on the drying bed or plaster tubs to firm up.
I drag my finger through the stiff slip to make it dry into usable square plastic blocks that are easier to pick up and store for pugging.
IMG_8272IMG_8214
IMG_8290
However, because of the very wet summer continuing on like it has, I’m finding that the clay just won’t dry as usual. The humidity is just too high. I’m having to lift the very soft plastic mass off the sodden brick drying beds and place it in the open air to get a little air movement over it to finish it off to a stiff plastic condition. Perhaps the extra 15% of kaolin content is slowing the drying a little as well?
I have been using my new ‘VENCO’ stainless steel mini pug mill to pug the small batches of clay. It’s fantastic, quiet, fast for it’s size and ideal for small batches of porcelain body like the stuff that I’m making. And so much easier on my wrists than hand wedging.
IMG_8295IMG_8299
As part of this sudden loss of intellectual rigour and convenient relaxation of my philosophical standards, I hope to make my life a little easier in my latter years. However, I can’t help somehow feeling a bit like the philosopher Bertie Russell reneging on his death-bed. I am fully aware that this is where the similarity ends. I am no philosopher, and hopefully I am not on my death-bed either – just yet. I just feel like I need to extend my range and have the ability to work with an extended palette of interesting materials for my creative work. 15% of non-local kaolin isn’t going to change the fabric of my work in any noticeable way, but it will make the act of throwing a lot more pleasurable for me and extend what I can make.
So I have decided to start using materials that I have discovered that are outside of my shire and my previous 50 km radius of interest. Over the last 20 years I have experimented with my immediately available local materials, non of which are mentioned in McMeekin’ s book. I have worked on them to the point that I couldn’t think of any more variations that I could make to gain any further insight into these materials. Only extreme ageing could improve their plasticity, I’m too old to wait for that solution to work for me. I’d taken these materials as far as I could imagine. Another potter would certainly find new things to do with these materials, but I feel that I have lived and worked on this restricted palette for long enough. I want to experiment with some ‘new’, and therefore interesting materials that I don’t know anything about.
IMG_8266IMG_8280
To this end, I just went to collect some felspar from a site that I came across a few years ago, near my friend’s house, it’s 150 kms away. I only sampled it at that time, because it wasn’t within my target area, but it looked very interesting all the same and I can’t pass an interesting bit of soil by without at least looking at it and taking a preliminary sample. The initial testing proved that it was felspar and although quite weathered, it still has quite a bit of alkali, so it might turn out be very useful. I’m extending my range, making more flexible choices and hopefully making my life a little more interesting and a little easier.
I have a few different projects in mind for the future.
Best wishes
from the potter making many a slip twixt the mill and the lip