We have just completed the first weekend workshop in the new pottery.
We invited the potters and ex-students who had helped us clean up the mess from the catastrophic fire that cleaned us out in November 2019. We only have 8 potters wheels in the new throwing room, so our numbers were limited to the first 8 potters to get in touch with us.
Regrettably, we had to turn a few lovely people away. However, there will be other workshops coming along in the pipeline. I’ll be announcing them here on the blog as they become reality and when we have set firm dates. This first workshop was a ‘freebie’ as our thank you to those volunteers.
To help us out on this first workshop we invited or friend and collaborator Warren Hogden to join us. We started off with throwing mugs, cups and beakers.
The pottery was buzzing, with every one being busy. Janine, Warren and I all gave a demo of our throwing techniques, so everyone got 3 different approaches demonstrated, so that they could choose something to concentrate on for the day.
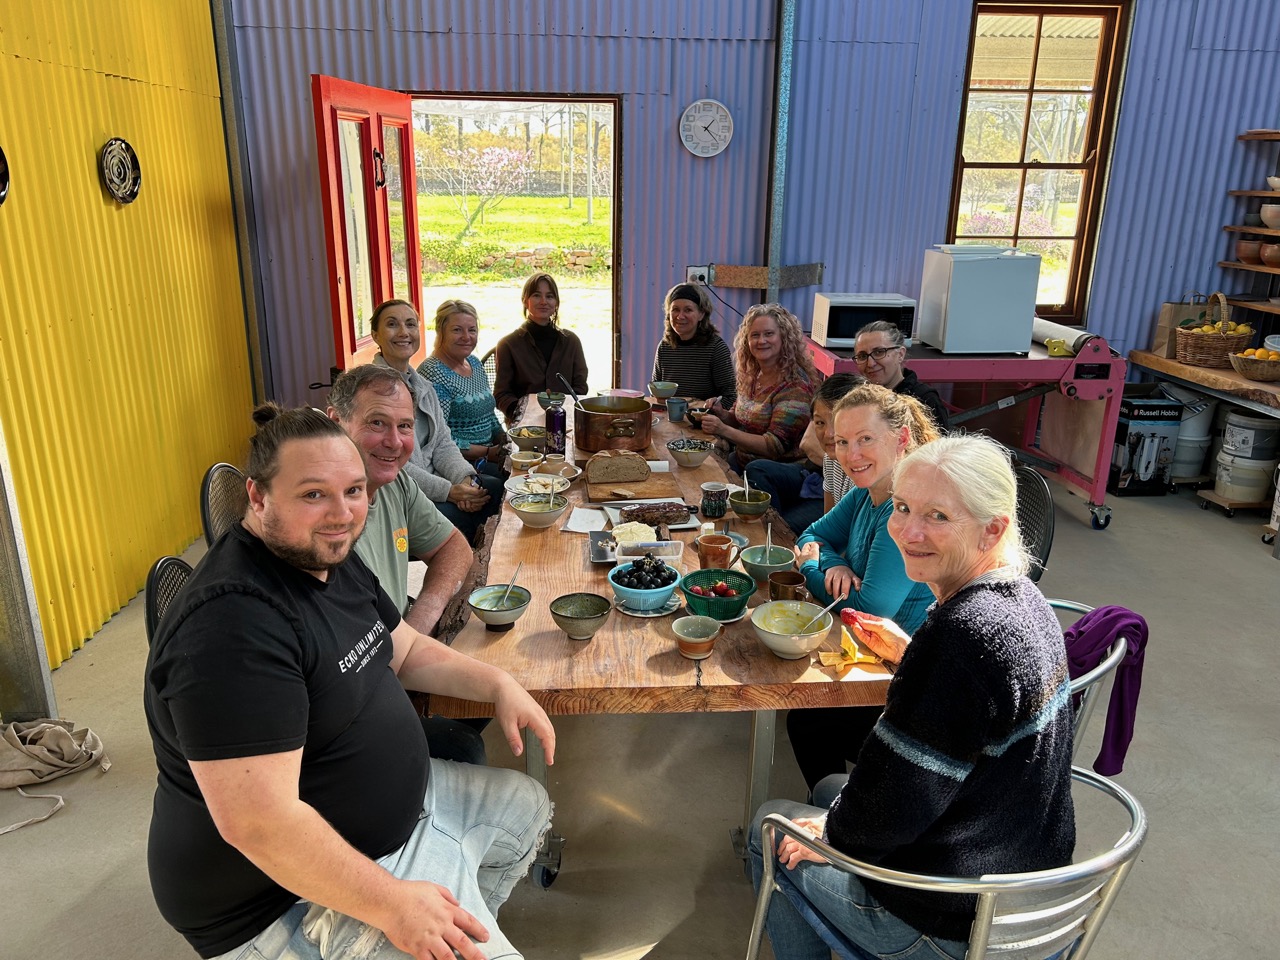
Each lunch time, we asked our son Geordie, who is a ‘hatted’ chef, to come in and cook lunch for us – a very special treat.
We set up the hand-building room as our lunch room, I made a table out of a very large slab of wood from one of our trees that was killed by the fire. And rather than waste it. I couldn’t bear to see it bull-dozed, chopped up and burnt, so I hired a portable sawmill for 3 days and we milled the trees into all the planks and slabs that we needed to build the new pottery.
This solid table is one big slab of timber that can seat 12. We use this room for functions, dinner parties and openings. Our house is small, so if we need to sit more than 6 guests, we move out into the pottery where we can seat 12 to 14 at a pinch. It’s a large bright, well lit room with loads of practical, flexible space, so it has become an extension to our house in some ways.
On the 2nd day we all demonstrated turning our pots, then making and applying handles. We kept everyone busy all day for both days.
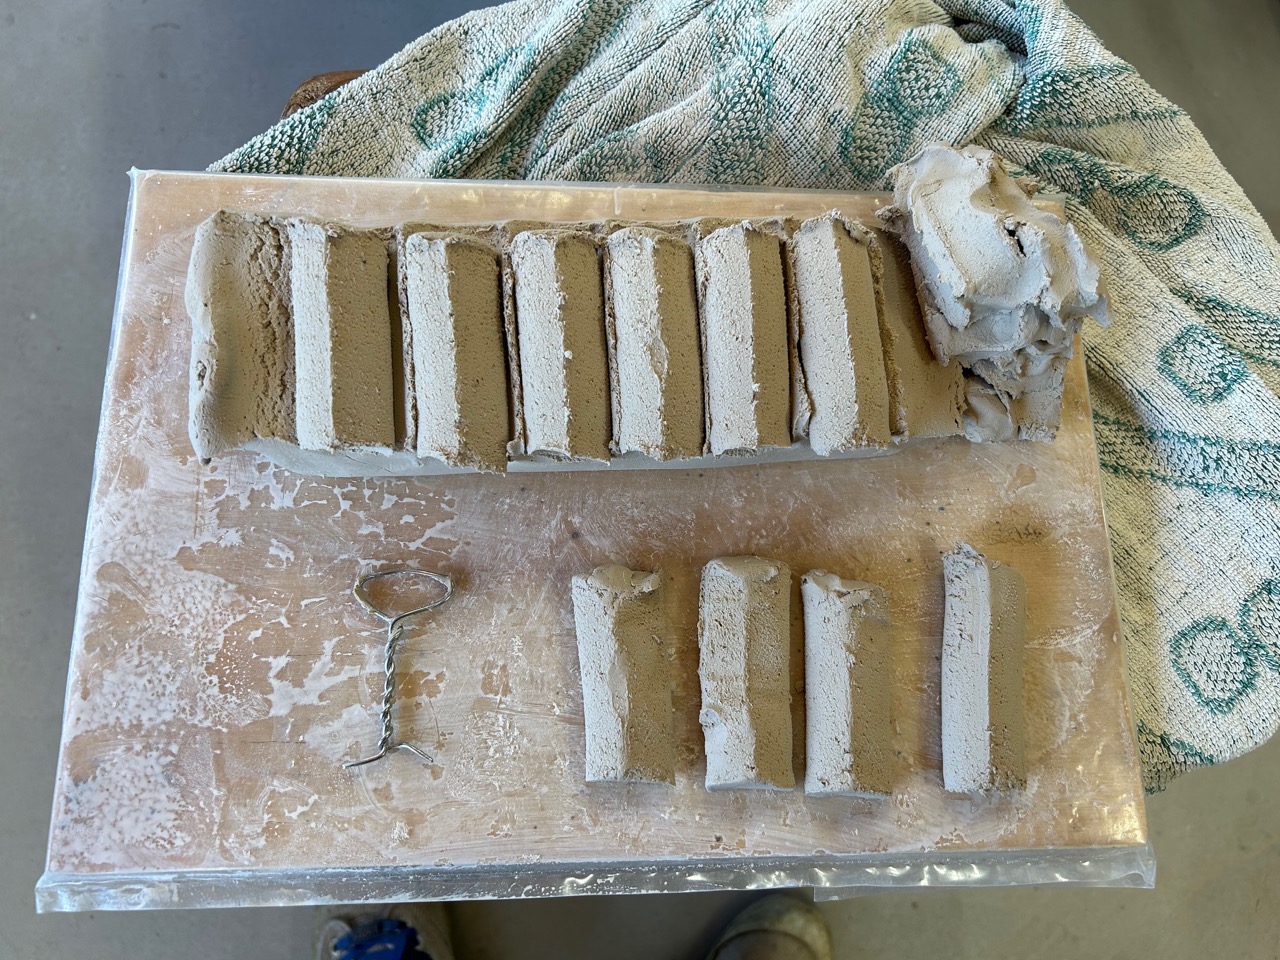
I demonstrated pulling handles from simple hand rolled coils, as well as my somewhat crude, but easily made, twisted-wire handle ‘blank’ extruder.
These ‘blank’ billets of proto-handles are applied to the pot and then ‘pulled’ in the traditional way to make an elegant, smooth, curved handle.
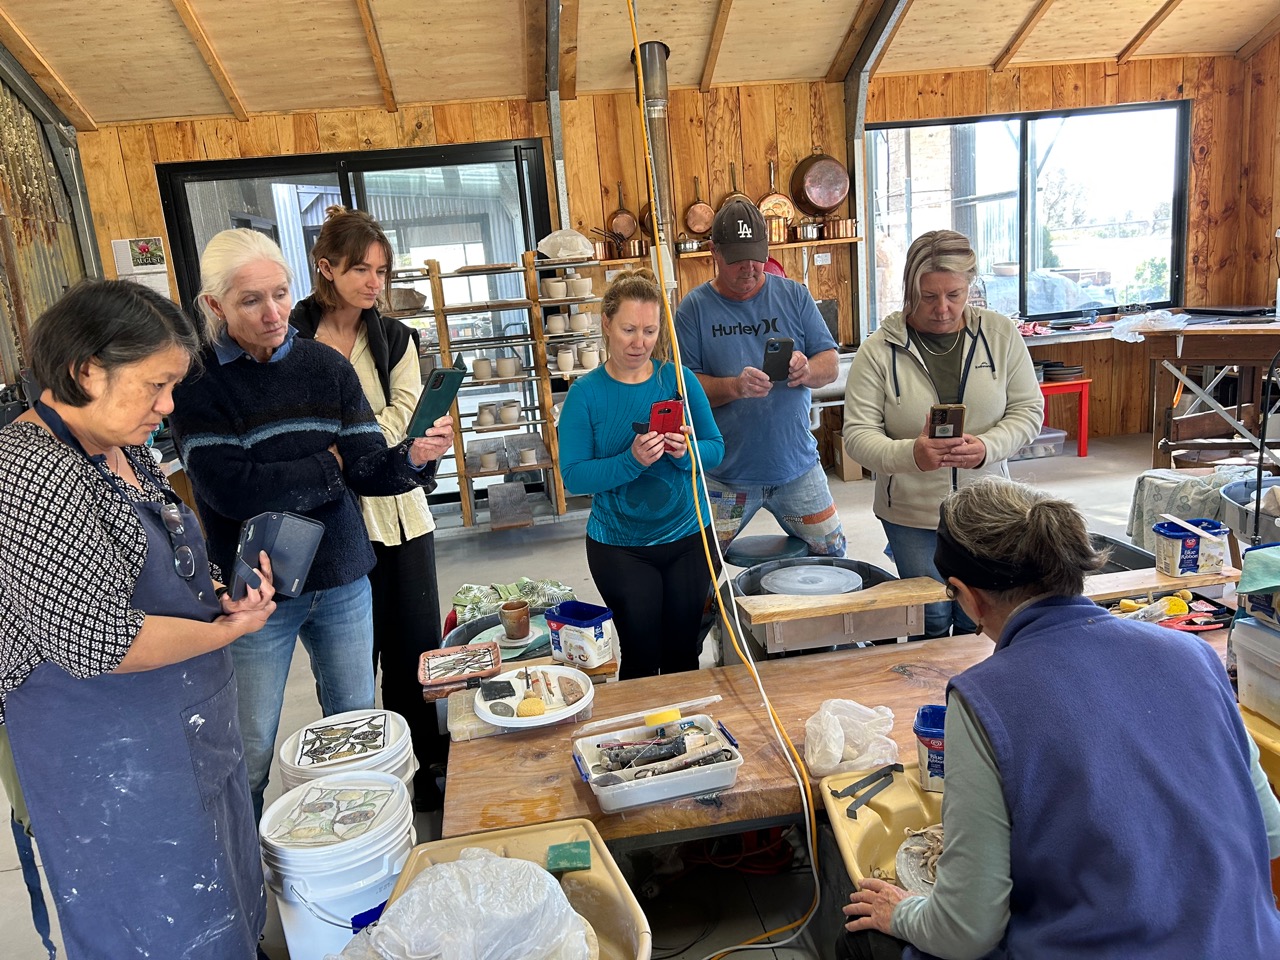
Janine demonstrated turning the base of her pots on a leather-hard clay ‘chuck’.
I couldn’t help by notice how things have changed over the years. These days everything is videoed on mobile phone for later reference.
Warren demonstrated the use of a ‘caulking’ gun to extrude the basic handle shape. He also demo’d the use of a plaster mould to press mound handles.
Everyone appeared to enjoy them selves. It was certainly an intensively productive 2 days.
We farewelled everyone with a very tiny taste of Geordie’s latest venture as the head distiller at ‘Renegade gin’ in Mittagong.
We had a bottle of his Australian Native Plum Gin. I served it in very petite antique Japanese porcelain sake cups. I didn’t want any one to get booked on the way home, so just 1 or 2 mls. It’s really delicious stuff. So intense, fruity and concentrated, just superb!
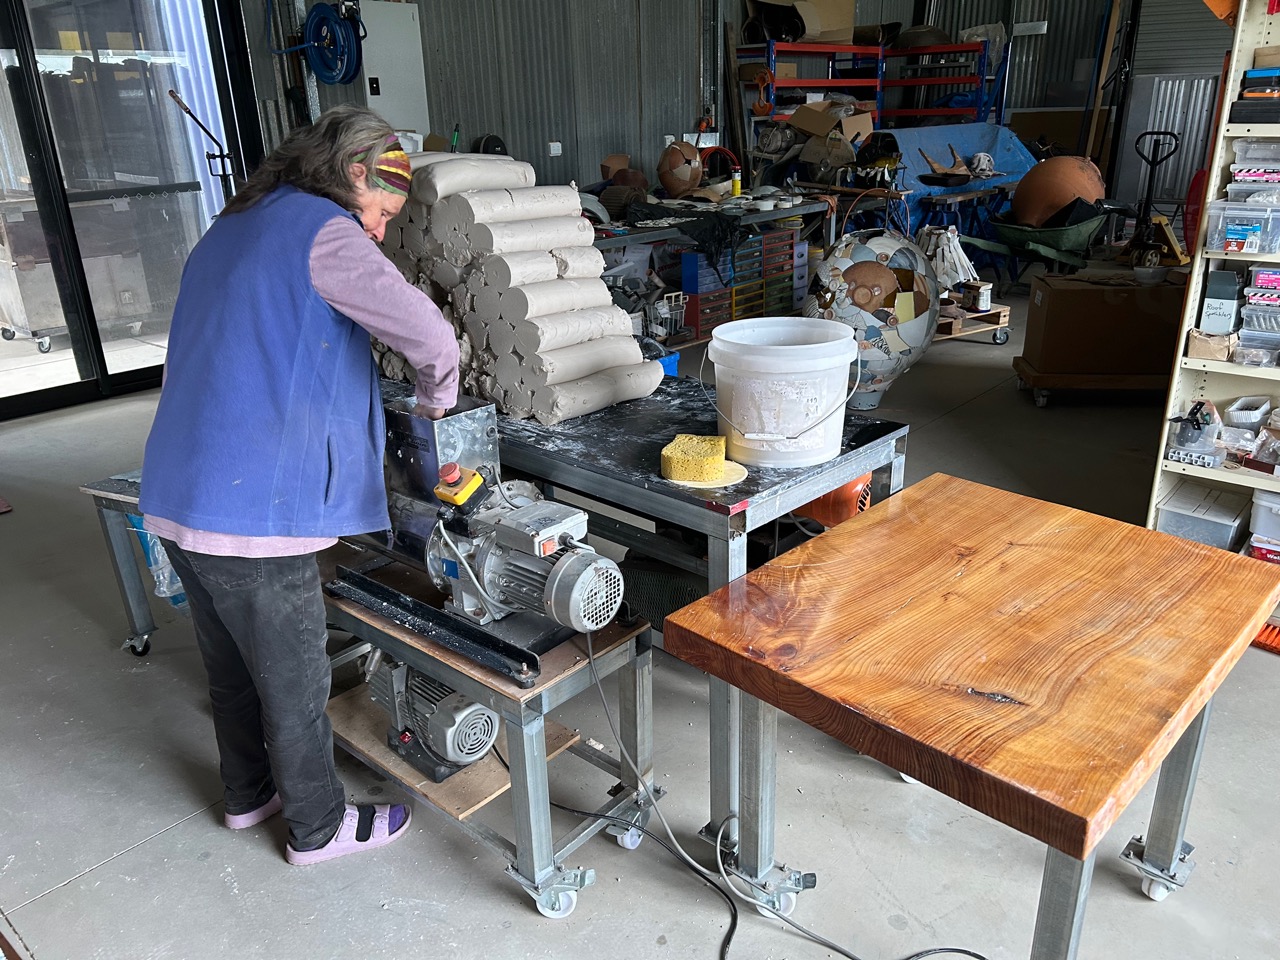
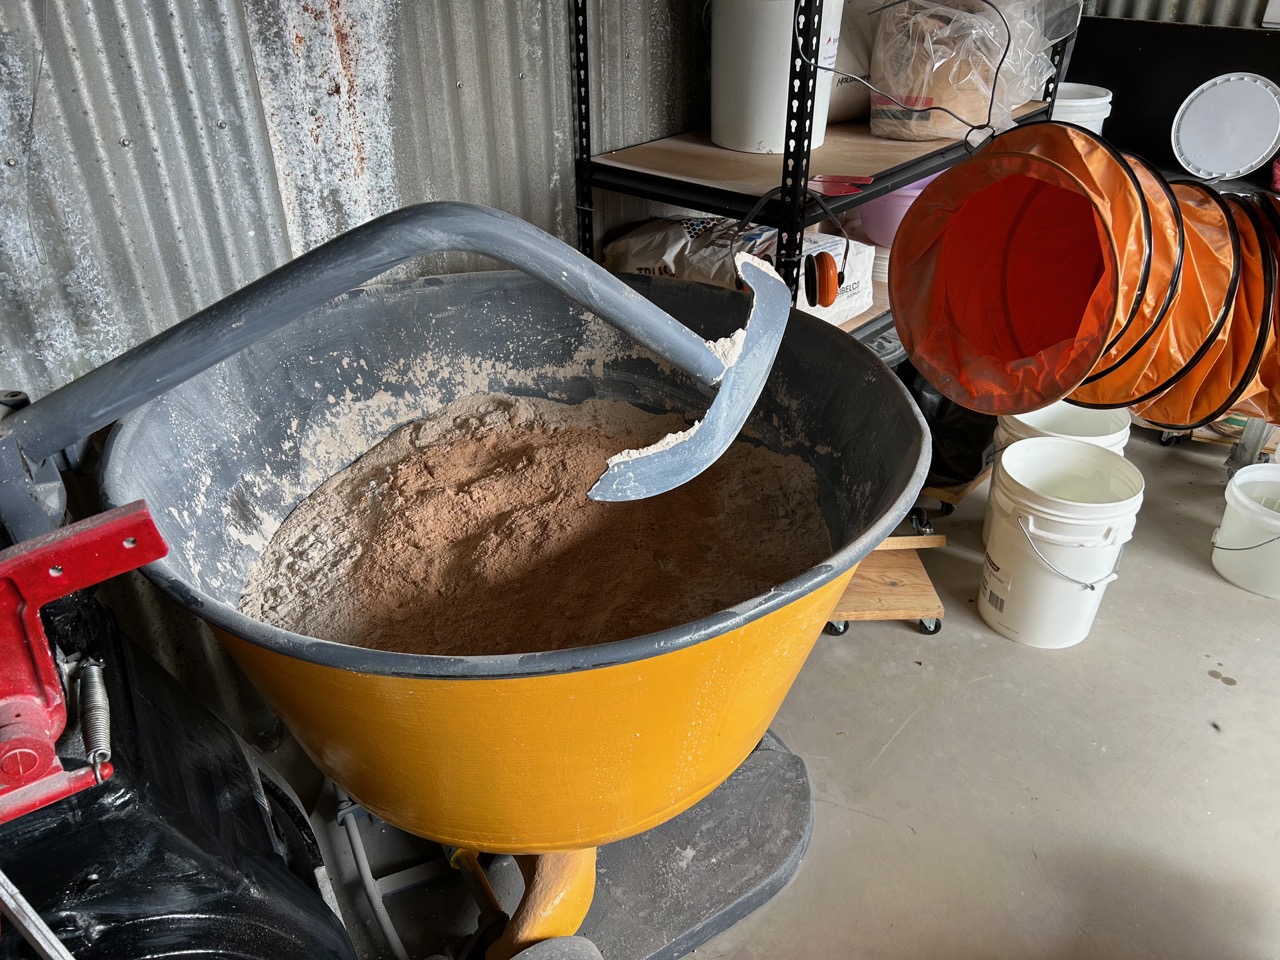
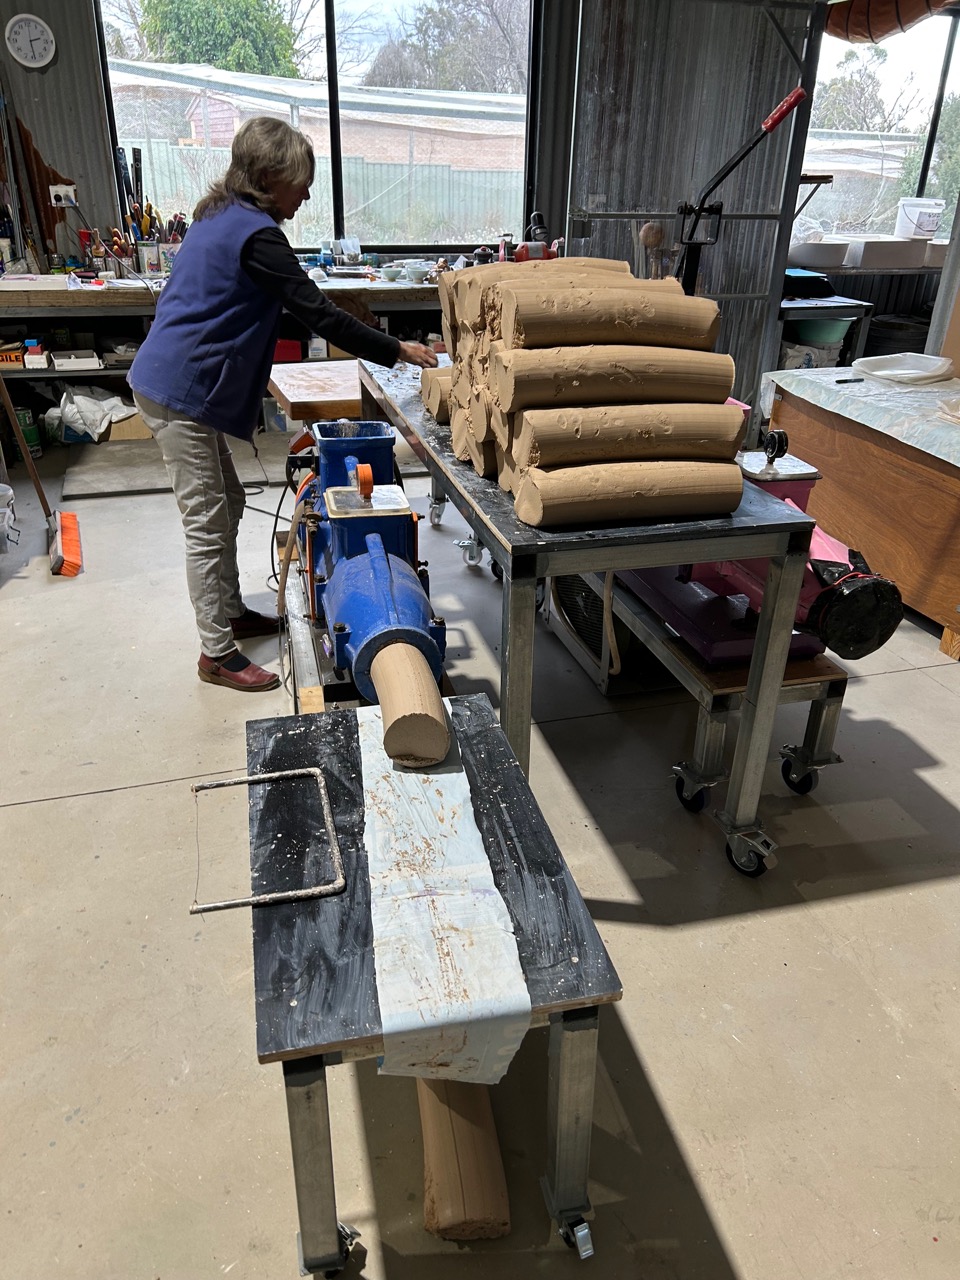
We’ve been busy in the clay making shed loading up the dough mixer with more clay mixtures for the coming throwing weekend workshops booked for the 26th and 27th of this month. This time I made up a single batch each of vitreous white stoneware/porcelaneous body and a batch of coarse, wood firing, stoneware body using local rough crushed shale with both pale and brown kaolin powders.
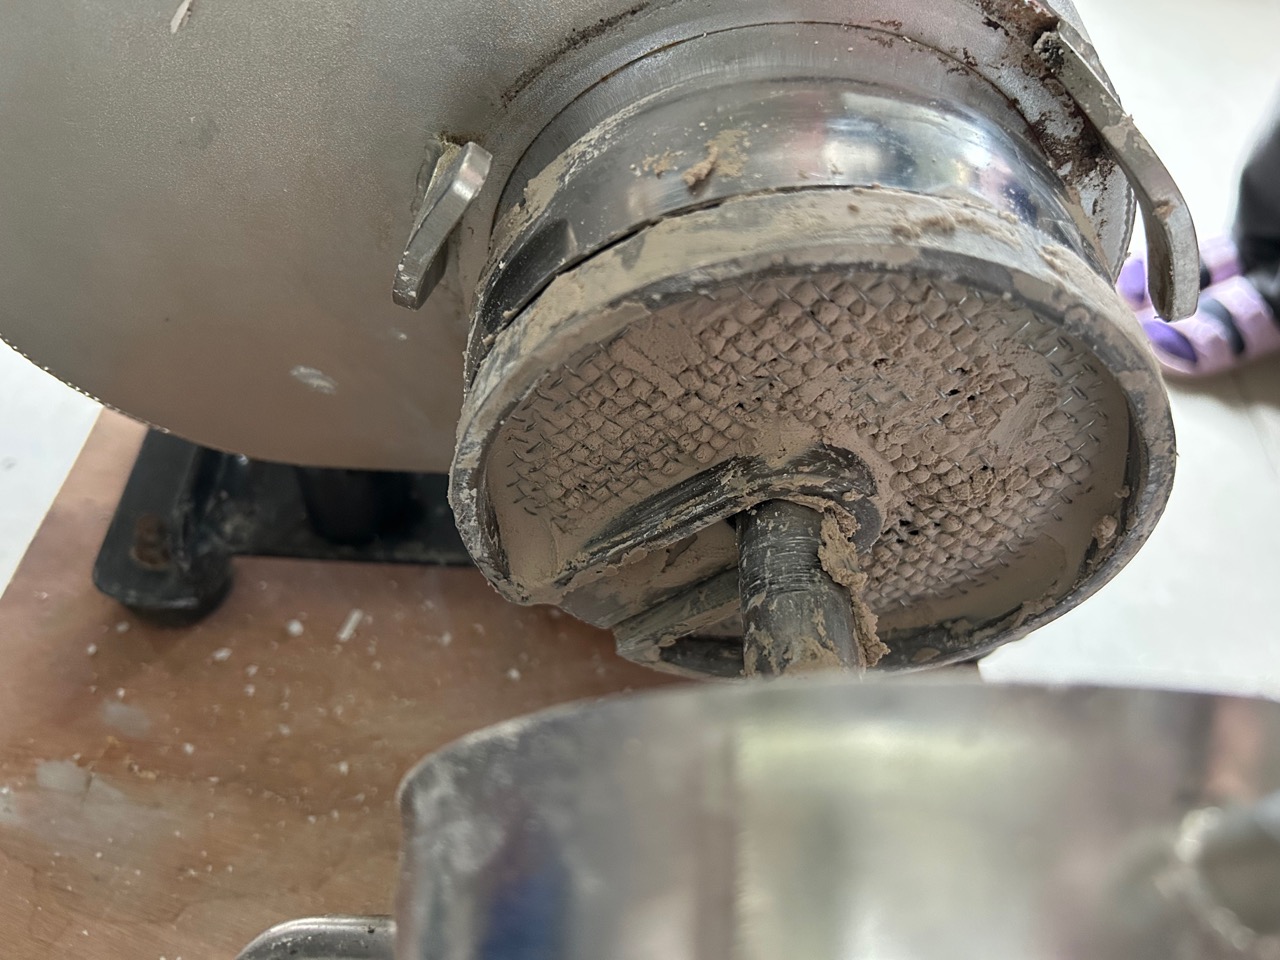
We use the stainless steel twin auger Venco pug mill that I bought 2nd hand. It’s only small with a 3”, or 75mm dia, extrusion, but it is so quick, very quiet and self feeding.
We started by recycling all the slaked and stiffened turnings from the last batch that had been sitting in the clay box ageing and waiting for the next pugging session.
Over the few months since I used it last, the clay had dried out a little in places in the barrel. Which was a little bit strange, as I had the pug mill pretty well sealed at both ends, but some of the clay dried out enough to be too firm to pass through the vacuum screen. It jammed in the screen mesh and slowed down the pugging significantly, so I had to pull the pug to bits and clean the screen. No problem! The beautiful feature of this pug mill, is that it only takes 60 seconds to rotate and un-clip the barrel, then lift it off to get to the screen. It’s so quick and easy with no bolts or spanners required. I scraped the screen clean and replaced it in 2 mins and back in business. Amazing!
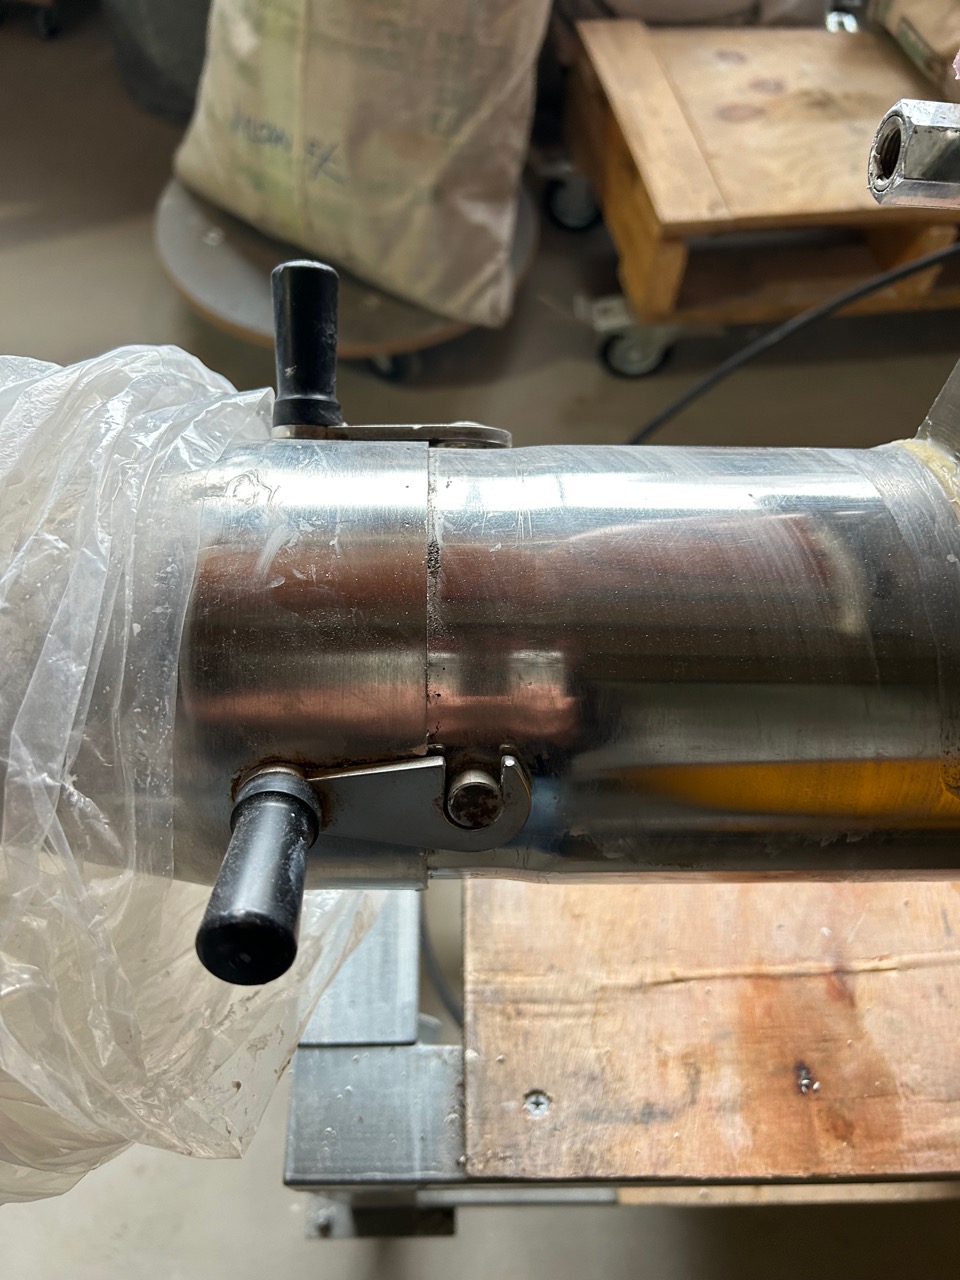
The next batch of coarse textured wood firing clay was put through the dough mixer and the Venco 4” or 100 mm. dia. vacuum pug mill. This pug mill is fitted with coarse mesh vacuum screens, specifically for making clay bodies like this.
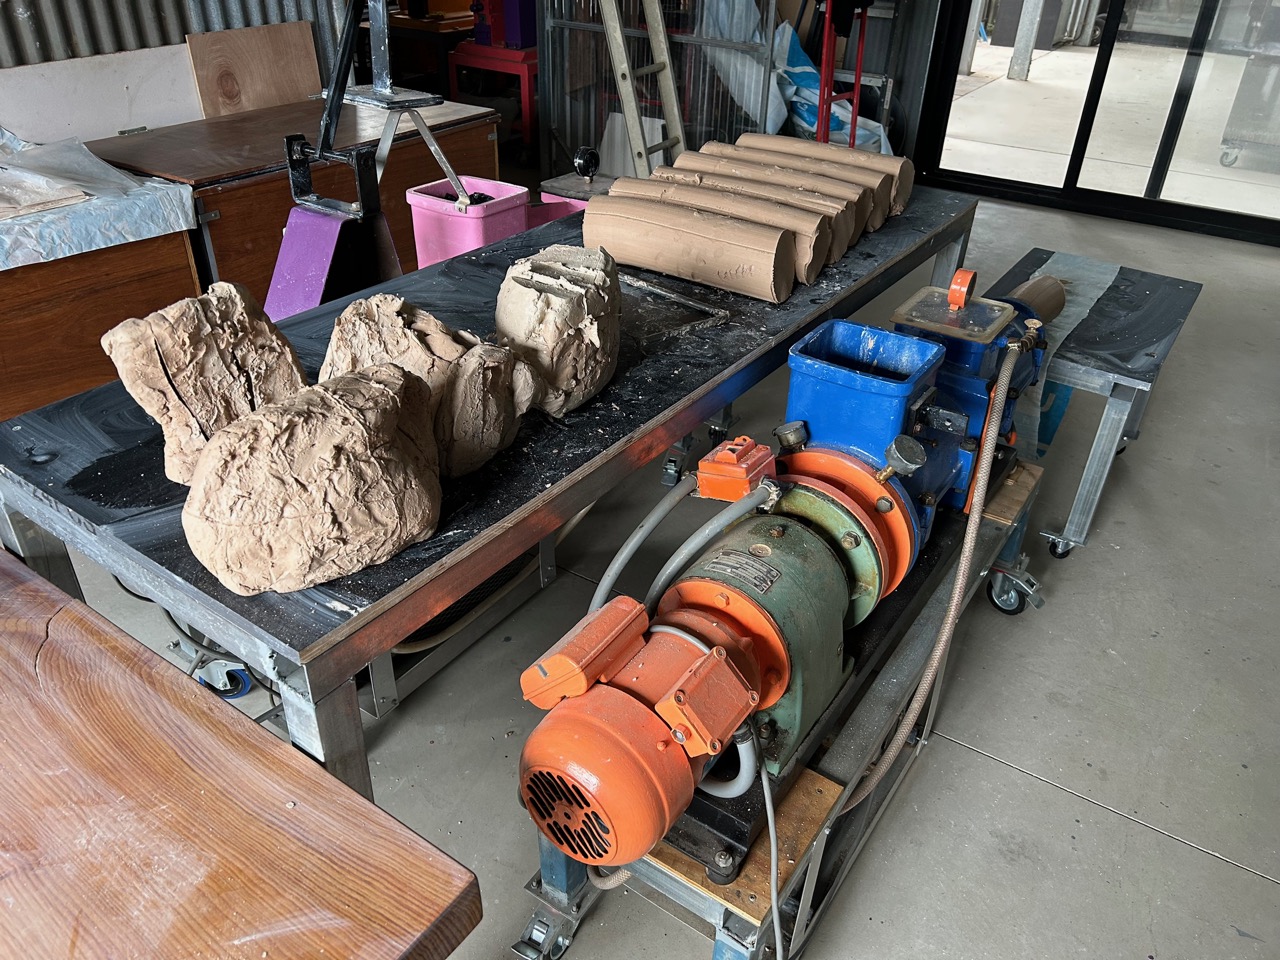
We start off by pugging all the recycled turnings from the last throwing session. These have been wet processed, bagged and then stored in the clay boxes waiting for the next pugging session with this mill. By having different pug mills for each different clay body. It saves so much time in not having to clean out the pug mill before changing clays. The recycled turnings also benefit by the time spent ageing in the clay box, increasing in plasticity over time. The new batch of clay is loaded onto the mobile clay table and wheeled out of the isolated and dust extracted mixer room, then wheeled out to the pug mill area. Janine can then start to pug the clay in a clean, dust free environment, while I return to the clay mixer room and start another batch.
The recycled clay and the new batch are then pugged together to get a good mix. But most importantly, all the pugged clay is stacked in a long stack on the pug mill bench and when full, all the ends of every pug of clay are all cut off and mixed together, and fed back through the pug mill, so that there is a little bit of every part of the new batch and all the turnings all aggregated in the new sausage of clay as it comes from the pug. This thrice pugged and well blended clay is then bagged and back into the clay store ready for use. This double processing and blending eliminates any variation between the first and last pugs of clay from that mix.
It doesn’t eliminate any mistakes in the weighing out or the dough mixing, but it minimizes the possibilities. Life is what it is.
Nothing is perfect, nothing is ever finished and nothing lasts for ever.
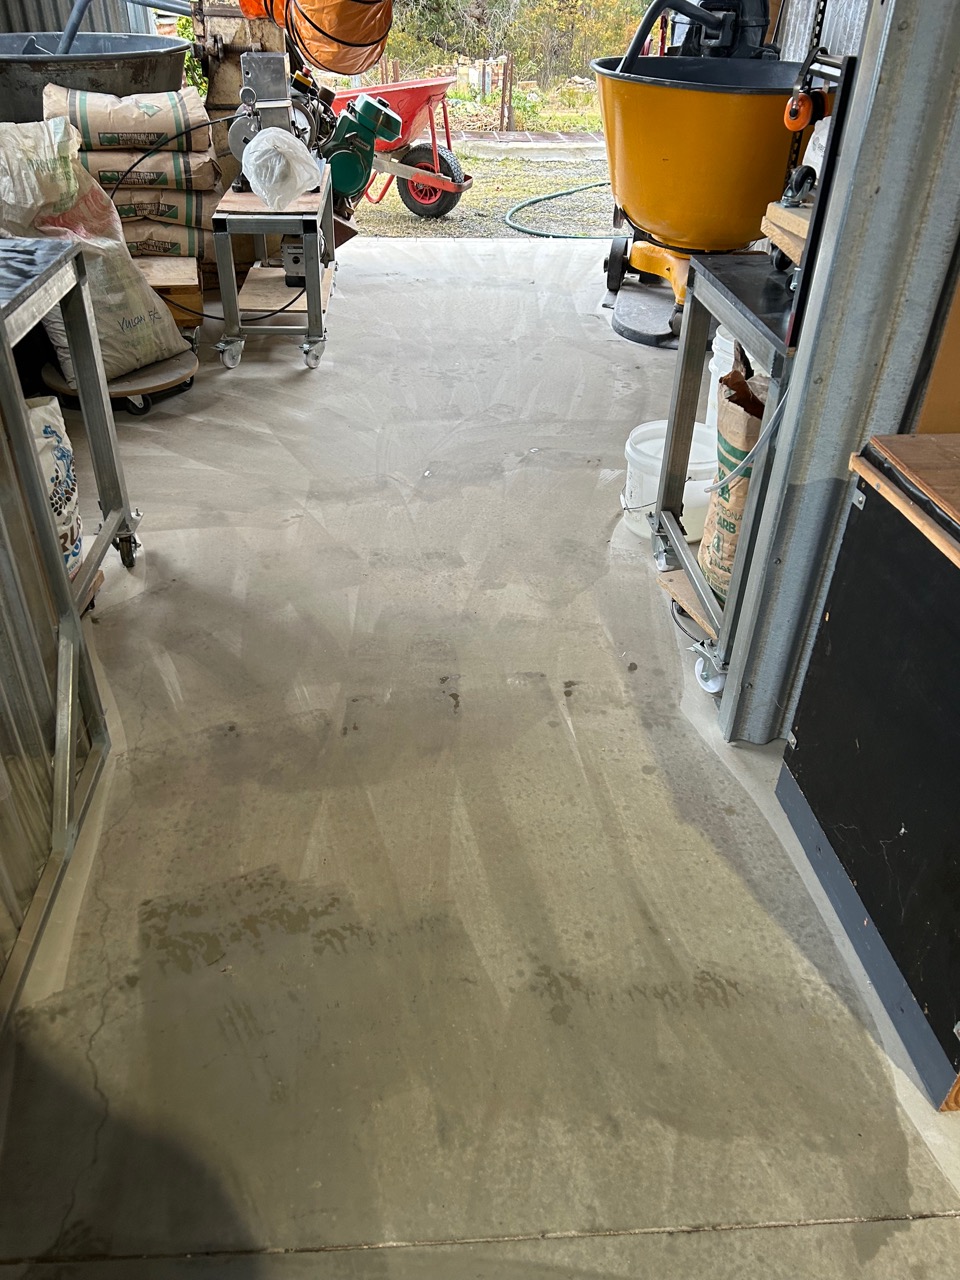
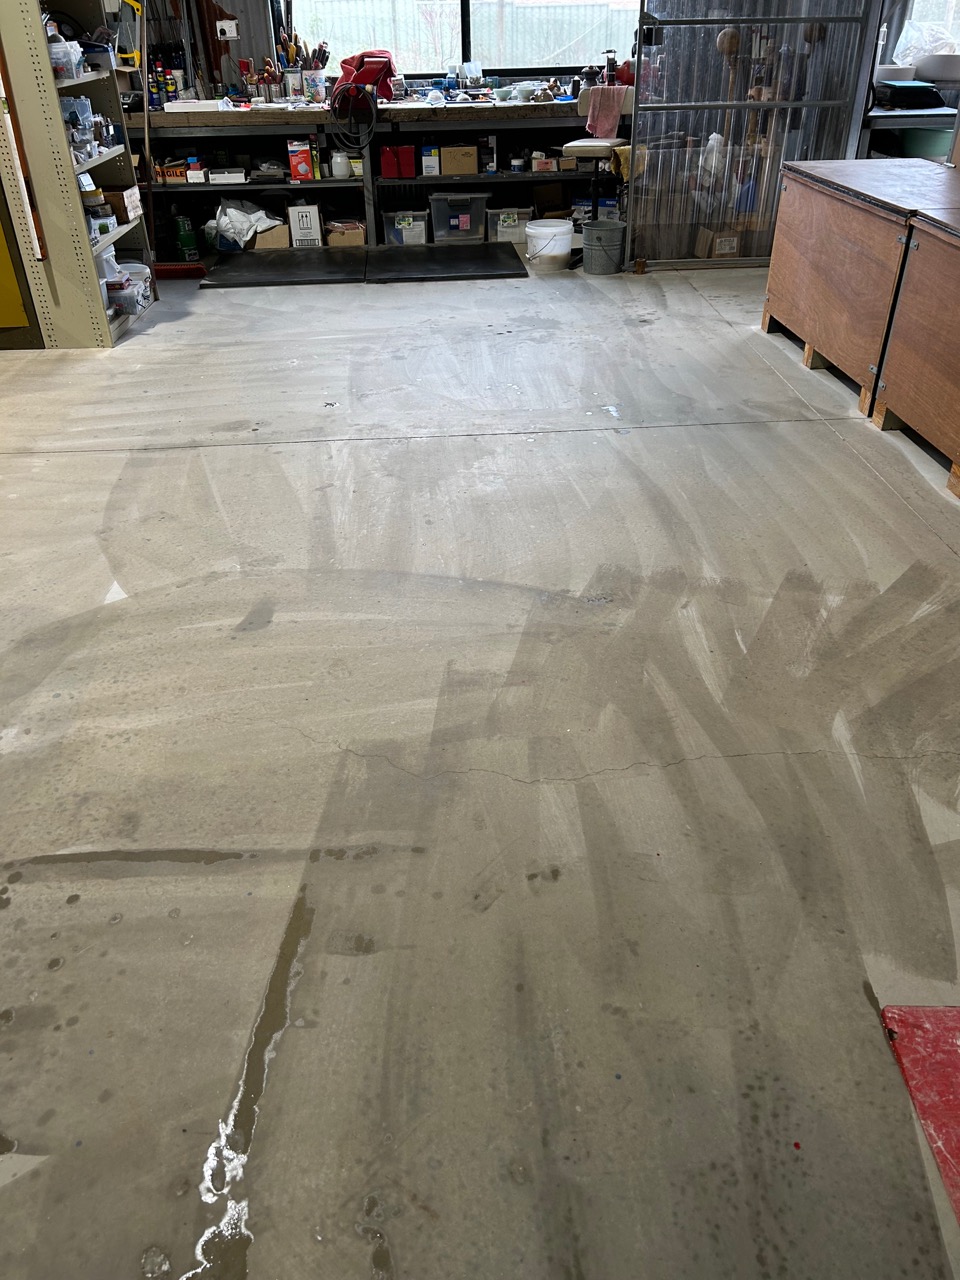
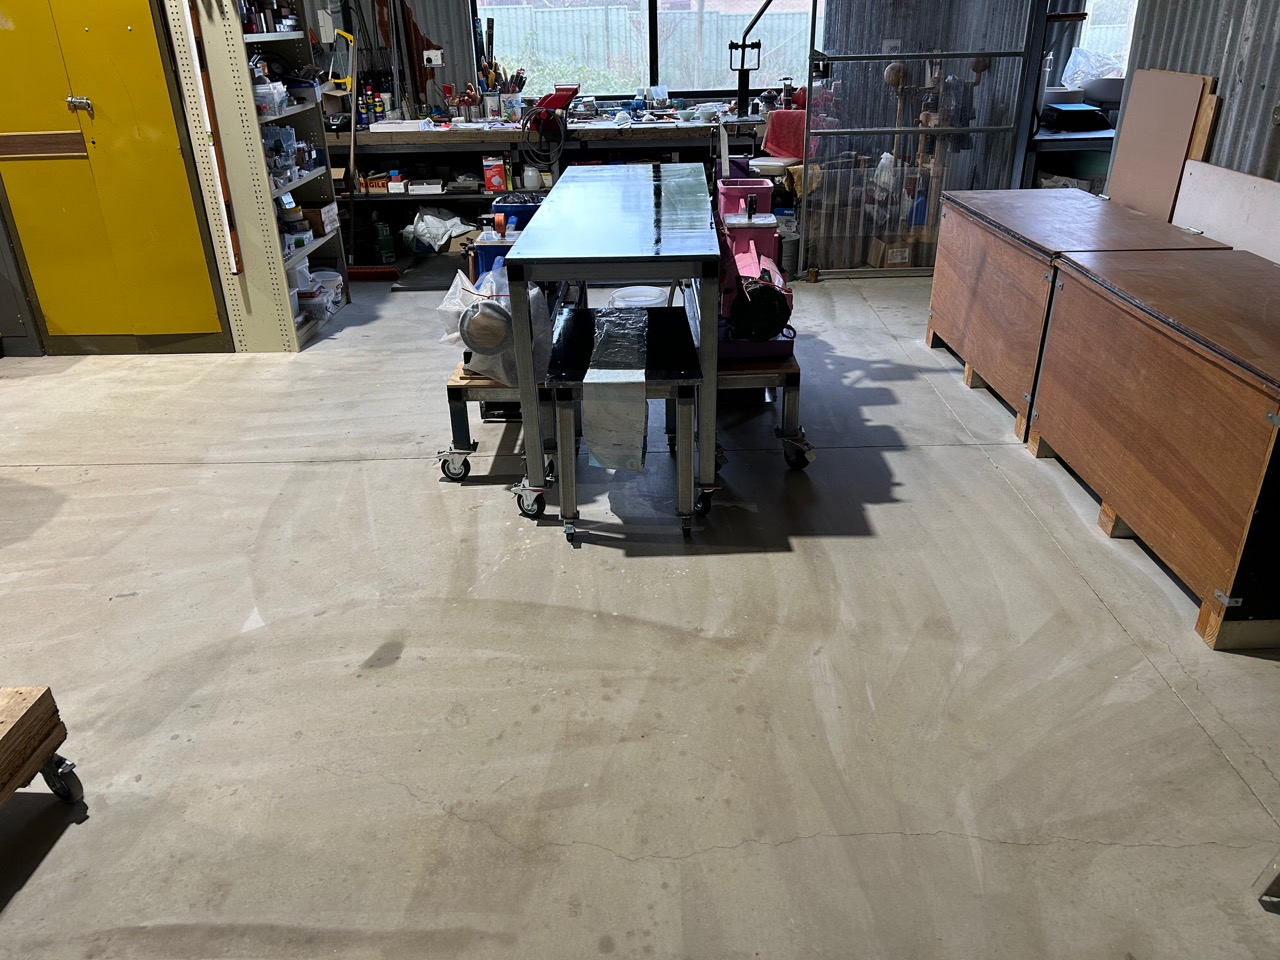
All the machines are built on trollies or castors, so that once all the clay is bagged and stored away, I can then wheel all the machinery out of the way and mop the floor clean of any spilt fragments of clay, dropped while pugging. The whole area is opened up to a through breeze, and thoroughly wet cleaned and mopped, then allowed to dry, before the machinery is wheeled back into place.
It’s not perfect, nothing is, but it is very good and the best that I can do at the moment using the machines that I could get my hands on 2nd hand at the time, and others donated from friends. You know who you are! I thank you from the bottom of my heart for your support and thoughtful kindness!
Janine and I have work in the ‘Fire and Ash’ exhibition at the ‘Lowe and Lee Gallery’ in Sydney. The show opened last Friday.
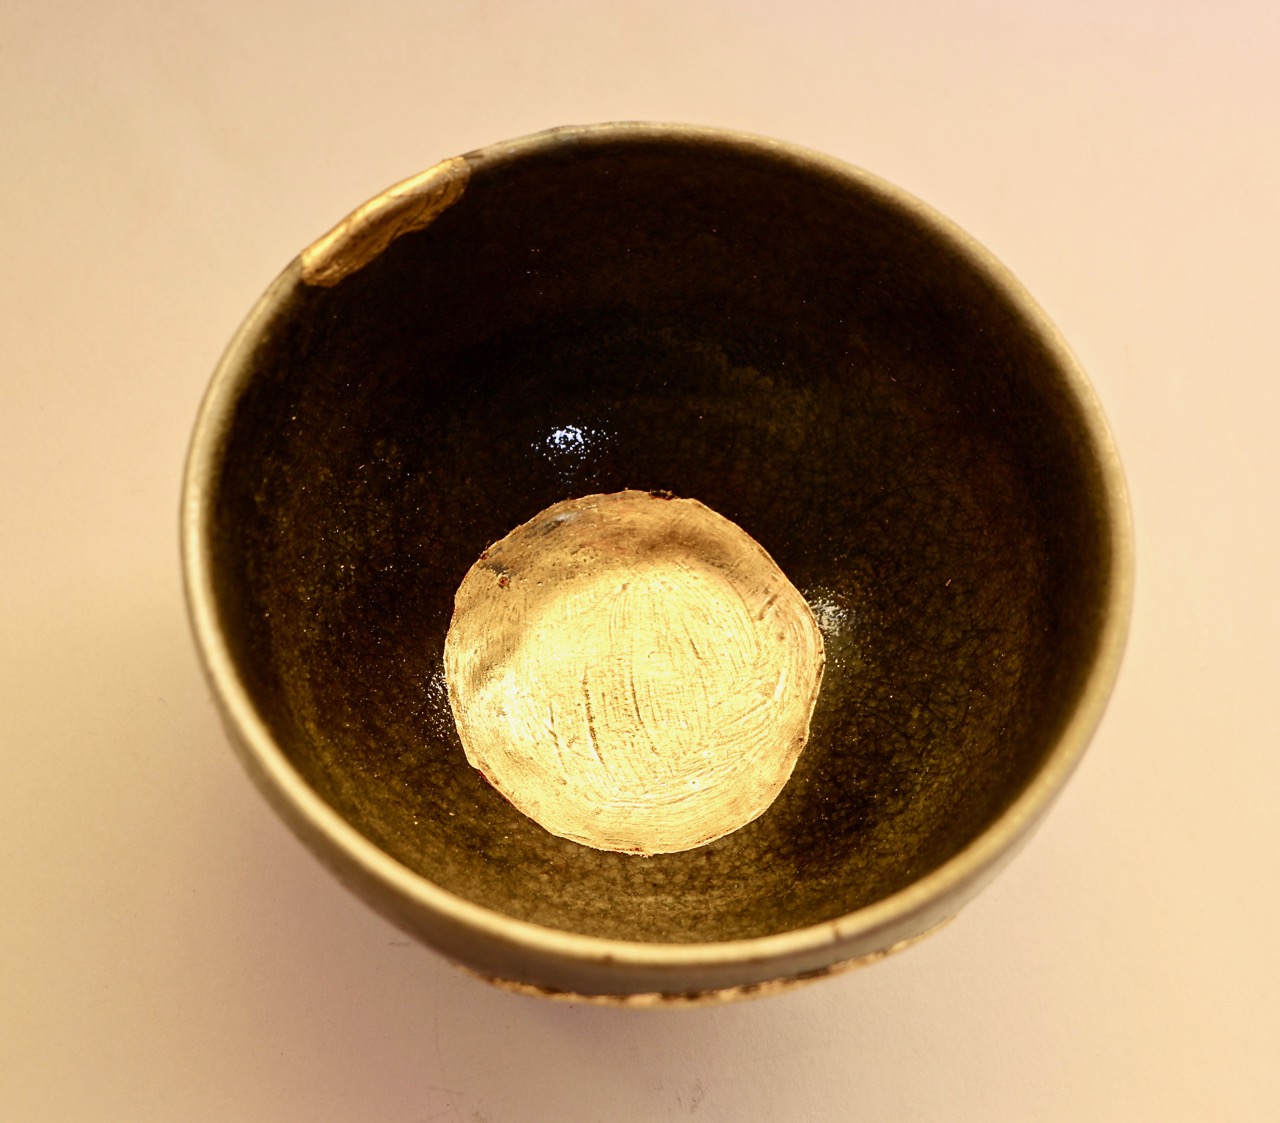
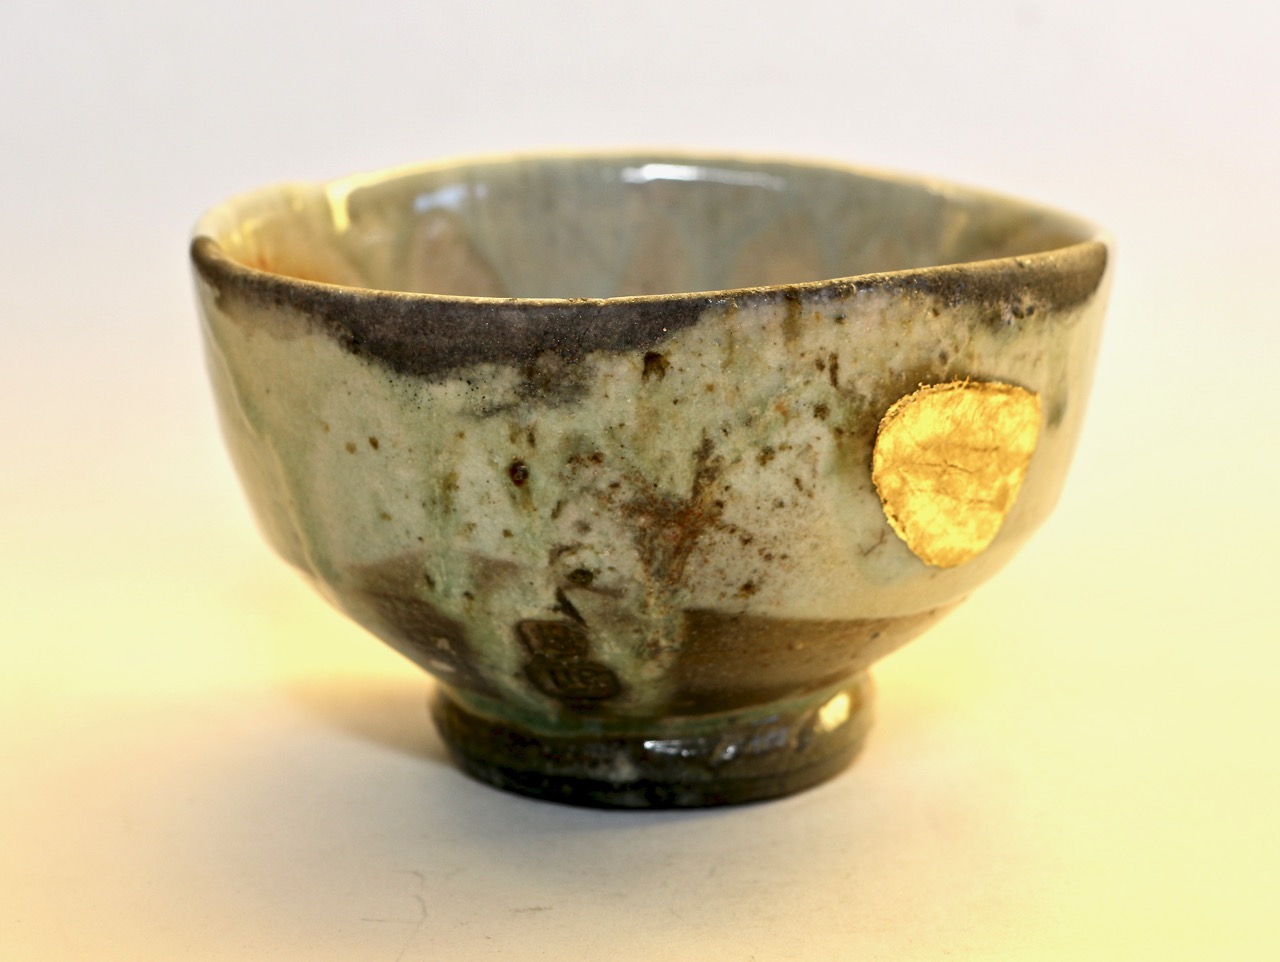
I have a few wood fired bowls that had minor damage during the firing, and I repaired them with gold. If I was Japanese, or working in Japan using traditional materials. This work would be called ‘kintsugi’.
However, as I’m in Australia and using very westernized hybrid techniques, methods and materials. I choose to call these bowls ‘gold repair’ pieces. The only common material is the 23 karat gold.
I did a course on kintsugi repair when I was in Japan, but the uniquely Japanese materials like the sap of the Rhus tree are not readily available here in Australia, or not that I know of.
Also, it is worth noting that the sap of the Rhus tree is highly toxic and not to be used without extreme caution PPE. It causes Toxicodendron dermatitis.
So I have invented my own hybrid methods that incorporates locally available materials, like 5 minute epoxy glue instead. I make up my own blend of high strength filler putty, and I also make my own grinding and polishing discs to buff the surfaces up to a fine finish.
After a bit of work, they are greatly improved and given a new life. By selecting them as special and showing them some respect by repairing them. They are made even more beautiful, even with their scars, chips and cracks.
Some of my work is now on show in the Art Gallery of NSW.
There is a new show of Ceramics called “Brick, Vase, Clay, Cup, Jug“ That has recently opened in the Art Gallery.
This show of ceramic related items from the Gallery’s collections, is curated by the highly esteemed ceramic artist/curator/writer, Glenn Barkley.
I’m very pleased and proud to be in the New South Wales Art Gallery collection in the first place and now ‘on show’ as part of this extensive exhibition.
My few pieces are a very small part of this extensive show. They were purchased with funds very generously donated by Vicki Grima AO, past CEO of the Australian Ceramics Association for the collection.
These 13 porcelain bowls on display were originally shown in my exhibition titled ‘5 Stones’, at Watters Gallery as part of a major show of over 100 pieces that took me15 years of research and travel to assemble. They are all made from various deposits of single stone porcelain (sericite). I researched and then traveled to every site that I could find around the globe. I studied, searched and collected samples in Japan, China, Korea, UK and of course Australia. I located 13 separate sites and collected samples of the various stones, then carried them back to Australia after each trip in my hand luggage, where I crushed, ground and finely milled them into porcelain bodies, before ageing them and finally firing them in my wood fired kiln.
Because the research and travel involved in creating these pieces was entirely self funded, it ended up taking about a quarter of my life to complete. So I’m pleased to see that it has just a little more exposure than the original 3 weeks on show at Watters Gallery.
I need to give thanks to Janine for putting up with me while I toiled away at this endeavor over the years, also Frank Watters for showing the work, plus Vicki Grima for funding the purchase for the collection, and finally Glenn Barkley for curating the show and selecting my pots to be part of the story.
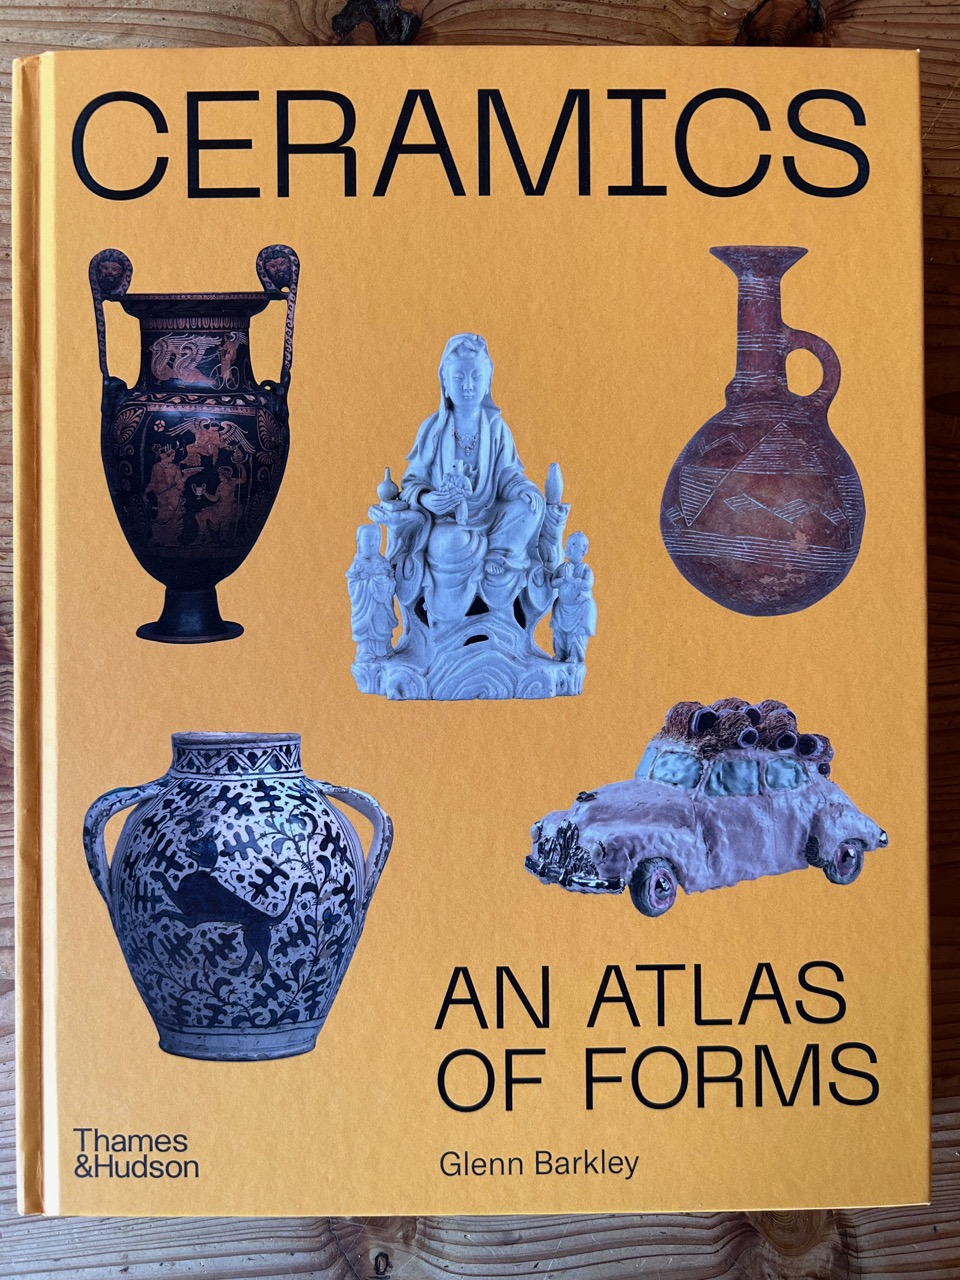
Glenn Barkley has just released a major new book on Ceramics, titled ‘Ceramics – An Atlas of Forms’
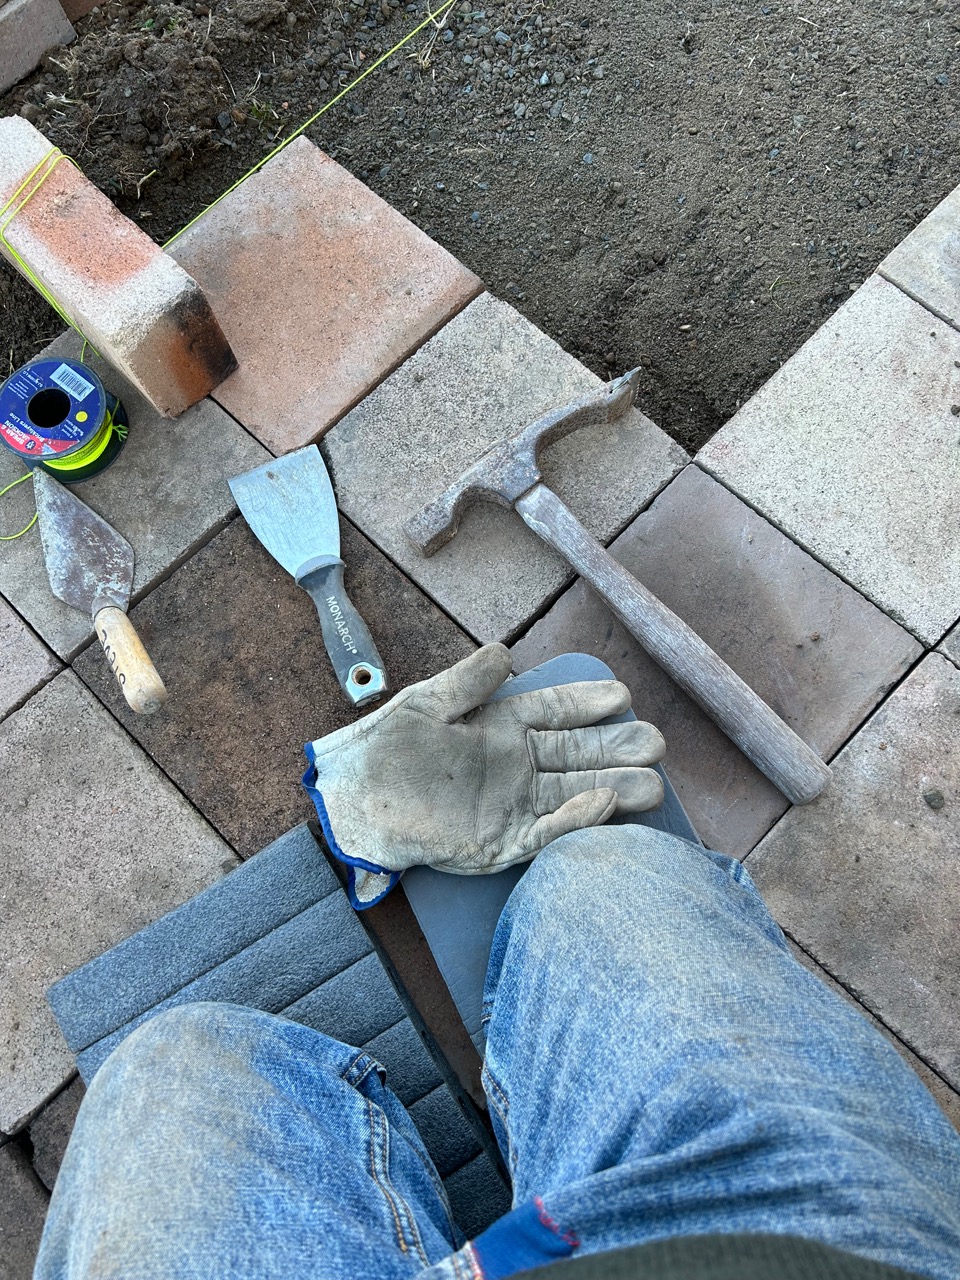
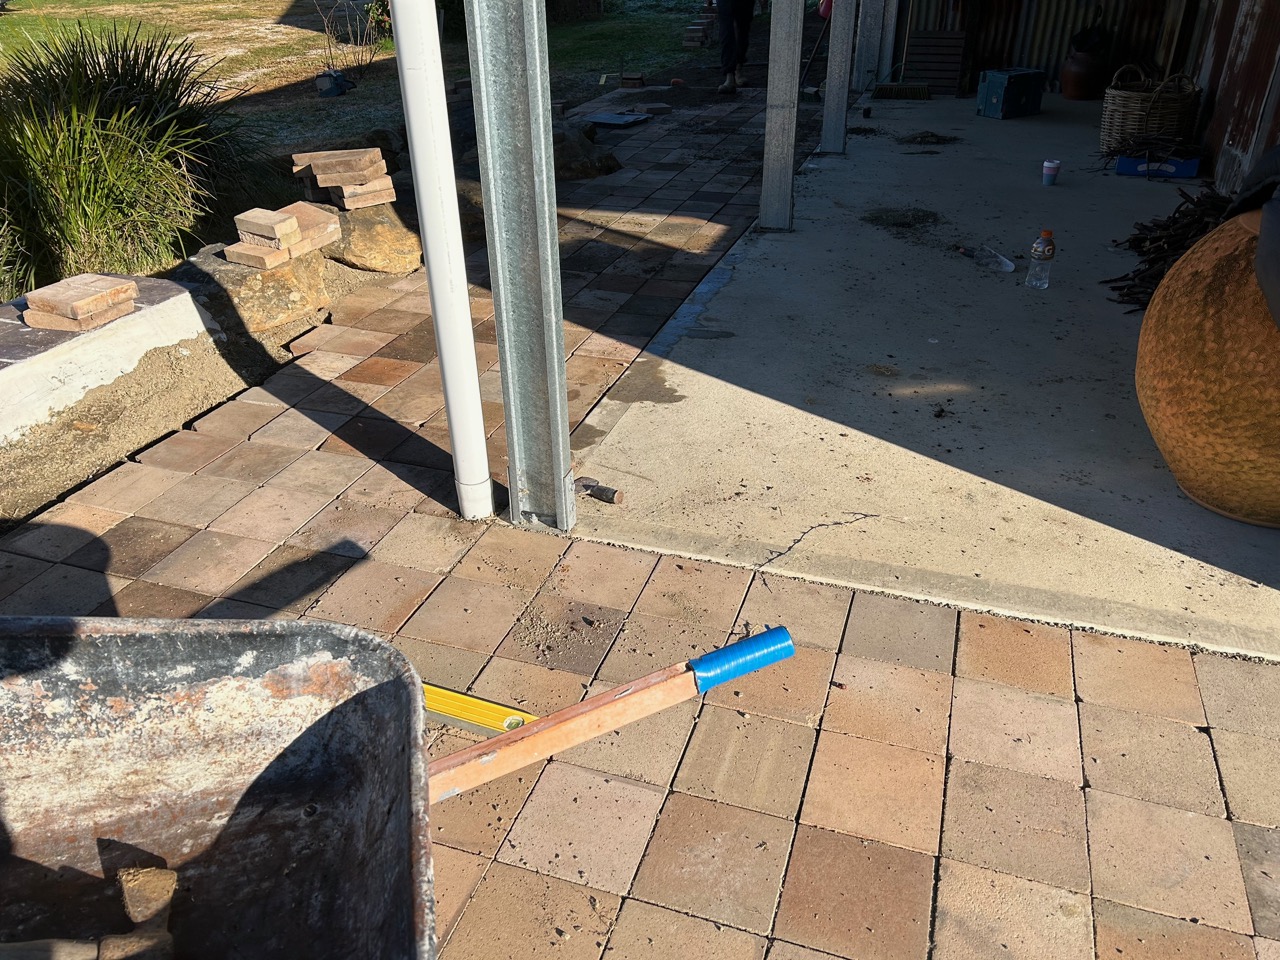
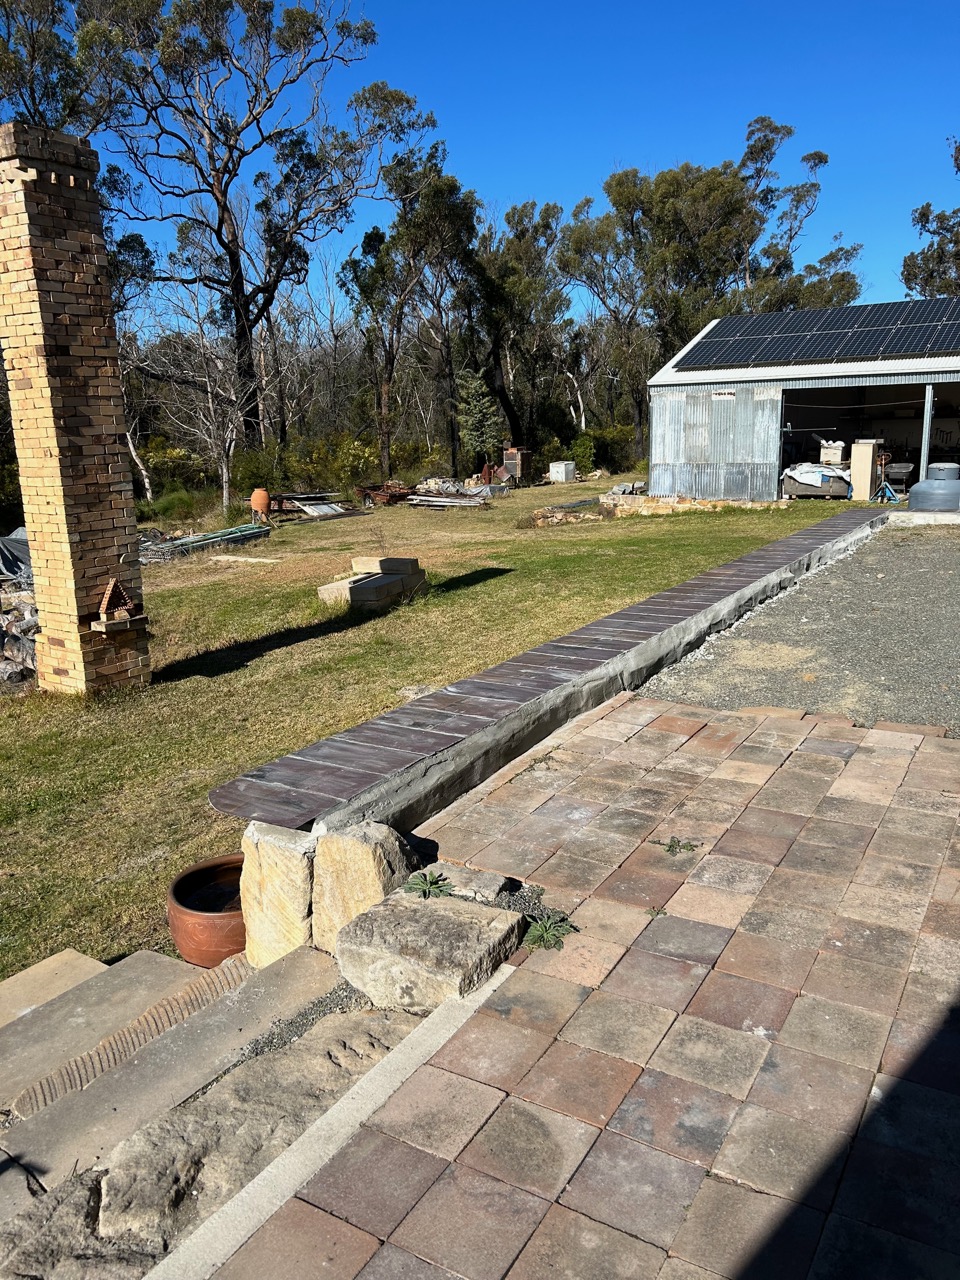
This last week, Janine and I almost finished off a lot of the paving around the pottery. It’s good to cover over most of the coarse gravel that is the left over remnants of the building site. Slowly slowly, we get the jobs done. We felt that we could face doing all the digging and shovelling on our own, so we hired a young local guy to help us with the digging and screeding.
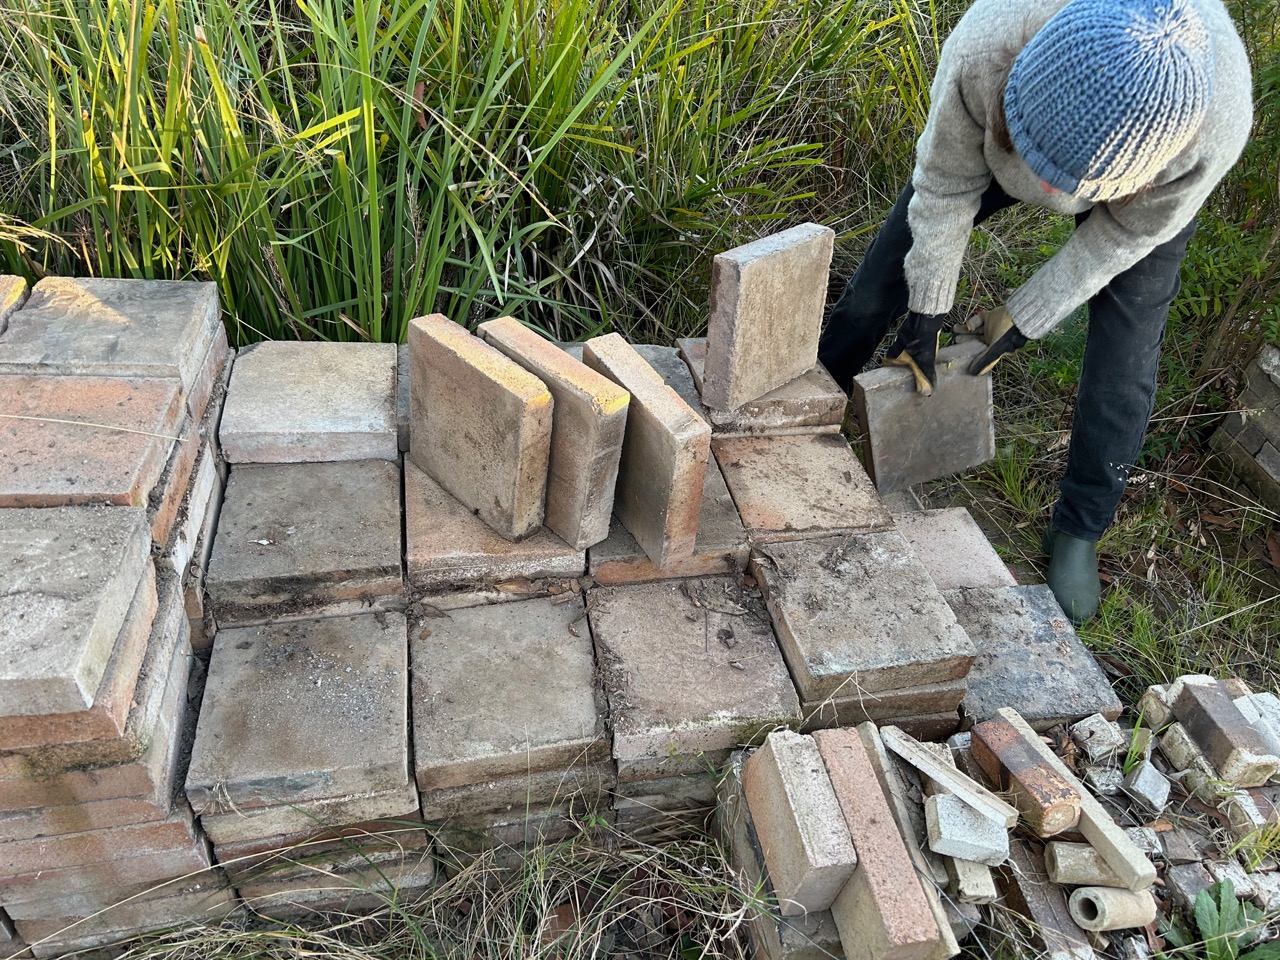
The week after the fire, we had a working bee here, when a few of our past students and other volunteers turned up and helped us clear away all the paving tiles that had been the floor of the old pottery. We avoided using much concrete in any of our buildings, because of the carbon debt that it involves, so all of our previous pottery buildings were earth floored and paved over a plastic membrane.
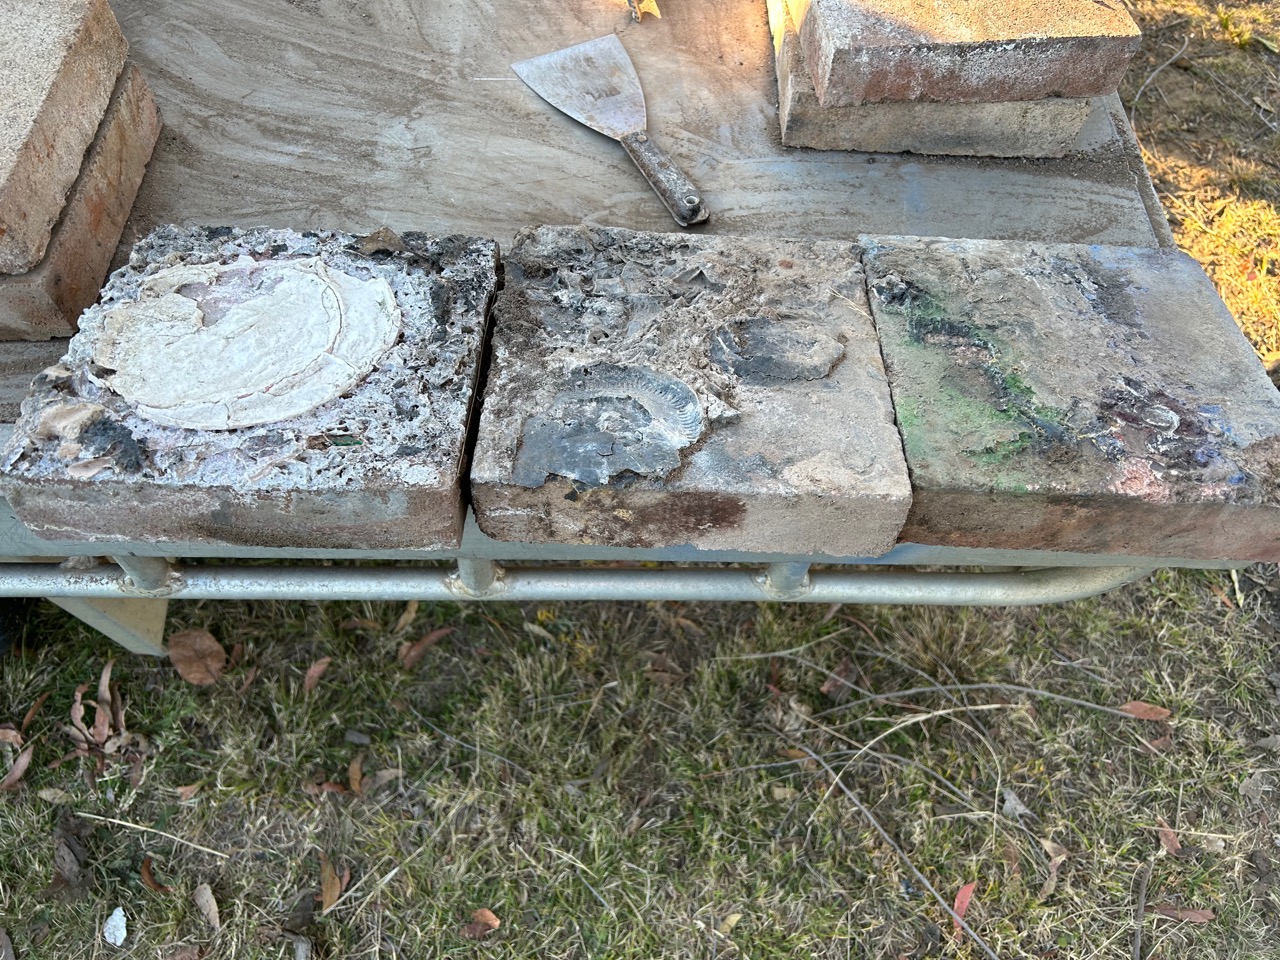
As each of the potteries that we built burnt down over the years, we dug up the pavers and stacked them to one side, then re-used them in the next building. We had to flip them over each time to get a clean fresh face upwards. Some of the pavers have melted plastic buckets fused into them, others have metal attached or even molten glass. It takes us a few days to get them all chipped, skutched, scraped and smooth.
This time there isn’t much choice, as both sides of the tiles have previously been through a fire. This is their third use. However, with persistence and a lot of chipping, scraping and washing we have an interesting new floor with a particular character. Fortunately, the crushed gravel substrate that we laid to build on is most suitable to lay pavers onto. AND it is easy to screed and level out to a smooth surface. So we don’t need to buy in anything to complete this job. Re-use, re-cycle, re-purpose!
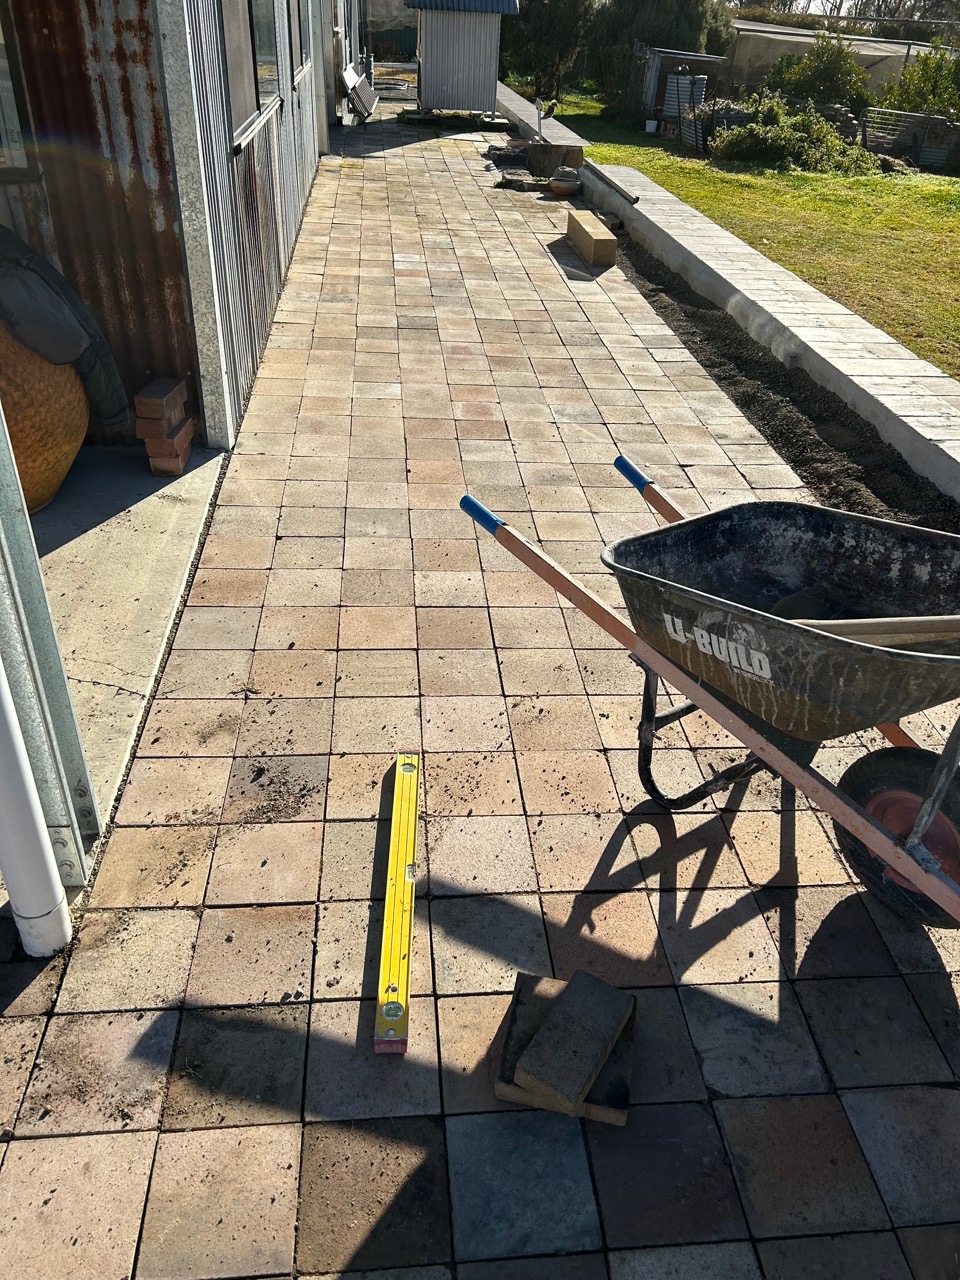
This new paved area isn’t perfect, but just like me, it has its own peculiar character. Worn, trashed, recovered, reinvented and back in service again. A battered and aged look. Possibly a bit WabiSabi even? It isn’t stylish or pretty, but it functions on several levels.
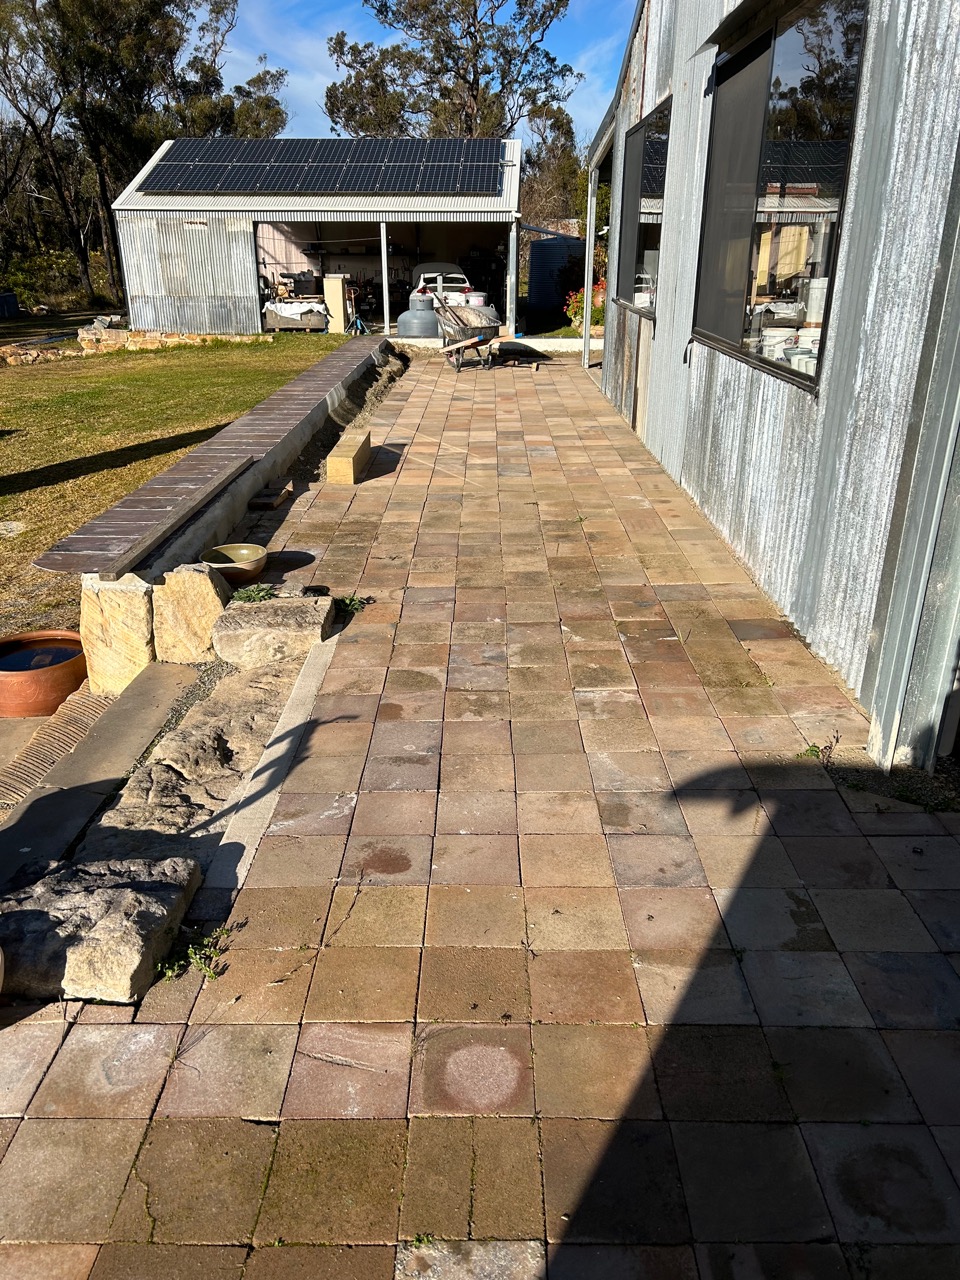
These tiles used to be terra cotta orange and brown, but after two fires, they have been reduced to 50 shades of grey, charcoal black and creamy-grey-pink. It’s a very good match to the old re-cycled grey and rusty corrugated iron sheeting that we scrounged off old buildings to give the new pottery shed a weathered and worn-in, shibui look. Many of the tiles are broken or chipped, but we re-use them anyway, just as they are. This is real life, not Hollywood!
It has it’s own story embedded in its surface. It actually looks really appropriate as wrap-around paving, acting as an introduction to the next part of the story.
Our old singular surviving chicken, Edna, has been quite lonely recently, since the death of her sister chook, Gladis. She is getting quite old now for an Isa Brown chicken, she is about 4 years old and has been laying less eggs month by month this year. About one or two per week, which is normal for this breed at 4. If we had a rooster, she’d be a great grand chicken!
Recently she has gone off the lay entirely as she goes through the moult. She is putting so much energy into growing new feathers, that it takes all the protein that she can muster. Hence, no spare protein, no eggs. We have been feeding her extra tit-bits of meat in her diet to help her along, increasing the protein in her diet. She just sits in the corner of the courtyard all day. She has lost her inquisitiveness and desire to get out and scratch and forage. She looks a bit lonely and sad. But I could be overlaying that reading onto her. She’s probably perfectly happy? Who would know?
This shortage of eggs coming from the hen house has led me to enquire about another source of eggs. We have got a couple of dozen now and then from our neighbour Paul, who has more than he can eat just now. I have also investigated buying eggs from the various stores and supermarkets around town. But buying commercial eggs is fraught with difficulties. The big commercial producers who control the market have recently bribed the government in some way or other to change the law regarding the food labeling laws on eggs.
It seems that now with this change, the definition of ‘Free Range’ chickens is meaningless, with so many birds to the hectare (when allowed out). It looks like a concentration camp for chickens and not much better than being caged. Caged birds can be stocked at a rate up to 20 chicken to the sq. m. According to ‘Choice’ magazine.
I could never buy any caged eggs, in my mind it’s akin to torture. Even ‘Barn raised’ chickens at 4 chickens per square metre. That’s 50cm x 50cm of space per chicken. No free space at all. No way to be able to move around freely. They have debased terms like ‘Free-Range’ and ‘barn raised’, it sounds like it might be a nice environment. It’s not.
Having grown up with chicken in the back yard when I was a kid, they were always locked up at night to keep out dogs and foxes, but then let out every day to free range around the back yard all day. They would put themselves to bed at dusk. The big wire-netted yard allowed them to move around freely, but safely, until they were let out. We seemed to always have about a dozen or so. We shared the common back yard with my grand parents, who lived behind us in another street.
My grandfather managed the chickens for my Mom. He obtained fertilised eggs when we had a broody chook, as we didn’t have a rooster. It was his job to sort out the young roosters and dispatch them as needed, as half of the eggs would hatch out as males. I learnt from him the basics of chicken management, although I never saw him kill them. He kept that away from us.
So when Janine and I came to live here, it just seemed the most natural thing to build a chicken coop and get a few chooks. We’ve had them in our yard for most of our life. We got our first chickens from our neighbour John Meredith. He kept Old English Game Fowl. We learnt a lot from him, It was the first time that I had lived with a rooster. We were far enough from any neighbours, that it was legal to keep a rooster. The rooster was always so protective of his girls.
One evening we were ready to go out at dusk and tried to close the chicken coop door, but the rooster was stubbornly refusing to go inside, standing just a little bit away from the door and making a bit of a racket. We couldn’t coax him in. When suddenly one lone chook came running across the yard from some distance away, where she had lost track of time and didn’t realise that it was dusk. Once she was safely inside, he went in and we could close the door. He knew all his girls weren’t in yet, there was still one missing, so would not let us lock her out. I don’t think that chickens can count. I know that some birds can, but not up to 12. so he must have recognised her absence by look or personality?
In the mid ’80’s, we had the amazing Sally Seymour come and stay with us for some time. She taught us so much country ‘Lore’. A better, cleaner way to dispatch a chook, and she also taught us dry plucking, so much neater and cleaner. So many little tips and tricks, we owe her so much. You can check out Sally and John Seymours books at Sally’s web site in Wales. <https://www.pantryfields.com/sally-seymour>
So, with Edna off the lay, I went looking for an ethical egg, or dozen. The best bet was from our neighbour paul. But after that it was to the shops. I started looking closely at egg boxes, reading the fine print. People can buy a dozen caged eggs for $4.50 per dozen, although I couldn’t. I love my chickens. I’d hate to think of them locked into a tiny wire cage box for 2 years then slaughtered, having never been able to run around in the grass or take a dust bath. it’s cruel.
Next comes the ‘Barn laid’ eggs from chickens crammed into industrial sheds. Read this as locked in a big tin shed, under artificial lights, 20 hours of light per day, with 30,000 other hens with hardly enough room to turn around. This is just as unacceptable to me.
Then there comes the BIG lie. The huge commercial/political con job called ‘free range’. These days it seems any crammed unpleasant space filled with chickens seems to be legally marketed as free range. I looked at a lot of egg boxes in the supermarket to see how many chickens they had per hectare.
Are ‘free range’ chickens really allowed to range around freely. Some ‘free range’ egg producers claim 25,000 hens to the hectare is free range. Some boxes also add the caveat of “when allowed out”, (see the Choice article above) so again, they spend their lives in crammed spaces. These aren’t really free range at all. This is just marketing double-speak and advertising mumbo-jumbo to try and trick you into thinking that the chickens are living a natural life. They are not. This is just linguistic promiscuity.
Real free range is where chickens are allowed to roam free on pasture all day. To scratch for bugs and worms, to dig holes and take dust baths. They should have enough space to form little clusters or flocks and move independently around the paddock at their will.
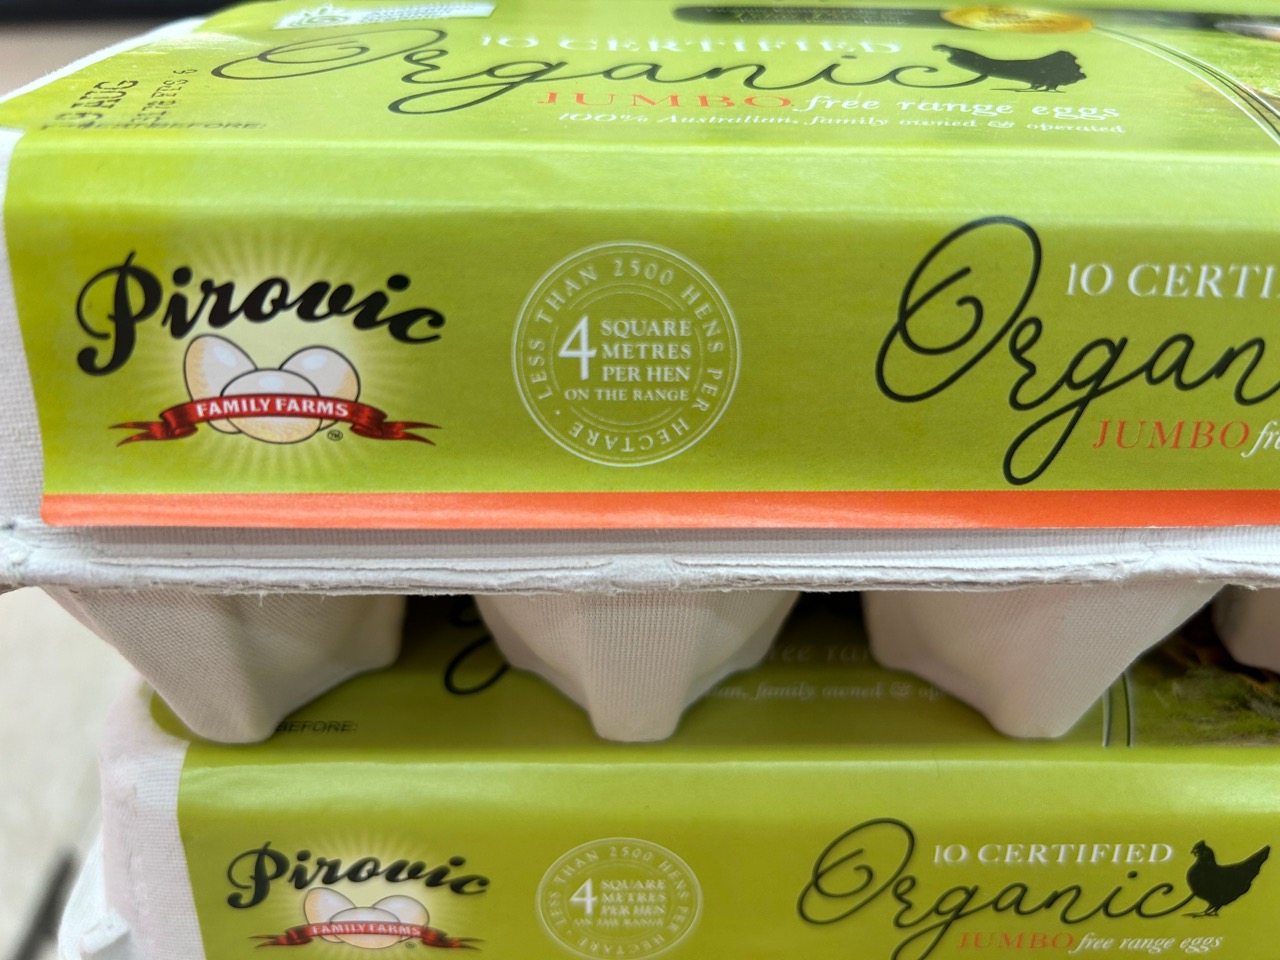
I started to look closely at the boxes of eggs available in the supermarket, grocery store and green grocers. I read all the blurb on the labels. I found various cartons of eggs in different shops around town, that seemed to fit my version of free range requirements.
This box claims to hold less than 2500 birds per hectare, which seems quite OK. But could be better.
Farmer Rod’s brand claimed 1250 hens per hectare and are labelled ‘pasture raised’. Great, that sounds good. I’d like to check it out a bit more and make sure that it is all it claims to be.,
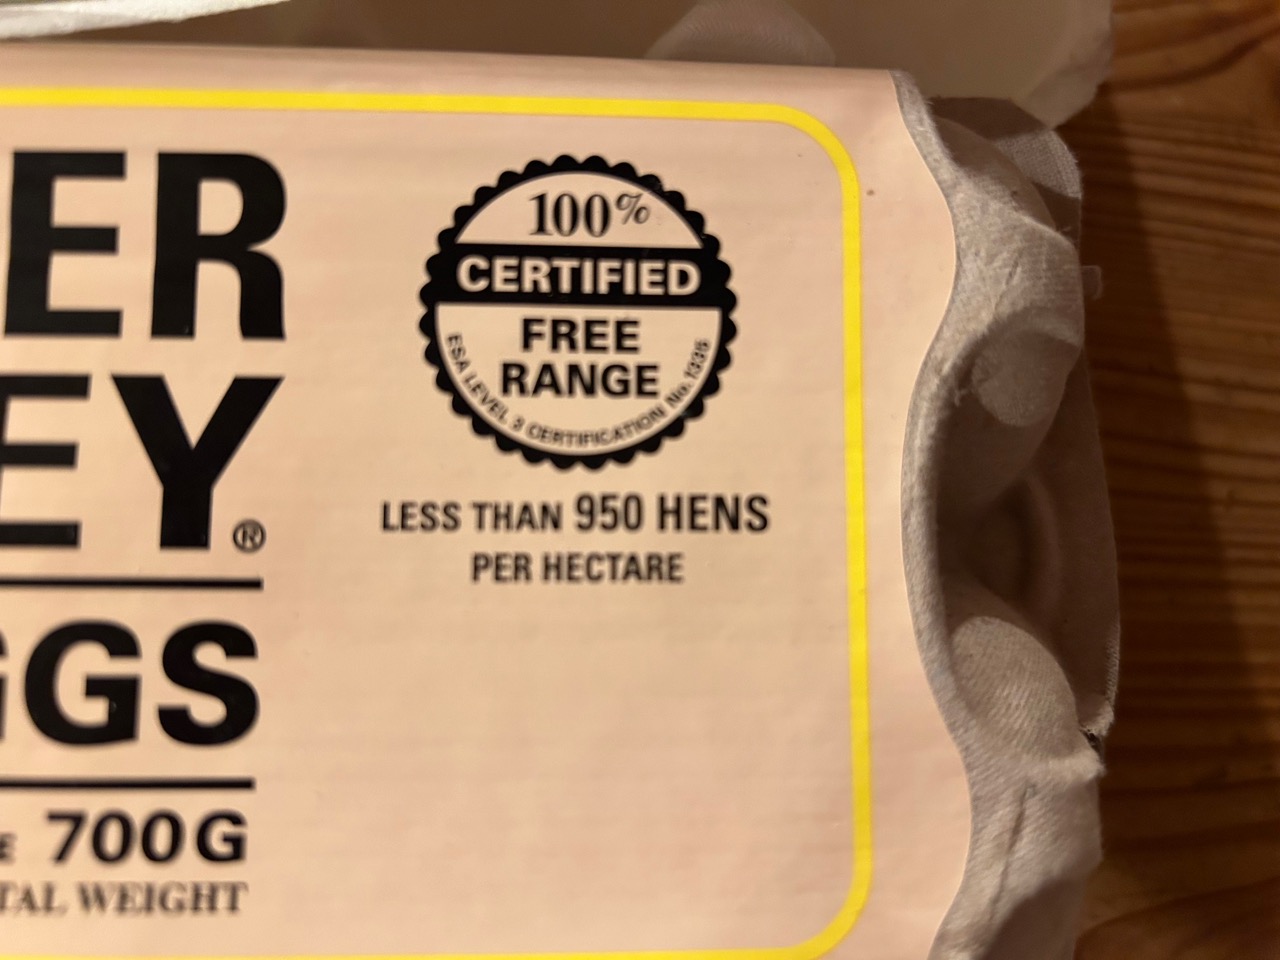
but then I saw, Hunter Valley eggs.
Free Range hens stocked at 950 chooks per hectare. That’s even better. but is it true? I have no idea. I really hope so. The web site says a lot about being certified and hens raised to industry standards. Oops! that’s a bad sign! ‘Industry standards’ are very low and they are always lobbying for higher numbers and lower standards. Call me callous and cynical, but I don’t trust big business, their ‘Industry Standards’, along with industry ‘self-regulation’. It has proved over and over again to be worthless posturing.
I moved along to the next best box. Its packaging claims 750 chickens per hectare.
I googled the company and found out that it is an olive growing company. They run their chickens in amongst the rows of olive trees in big mobile trailers. Or so they say. It all looks credible, but I notice that on the label, it also states “when outdoors”! Oops, why would they not be out doors if they are free range? The images on their web site didn’t show any big sheds, just mobile trailer laying boxes! I refer you to the ‘Choice’ magazine article again. It could well mean that they never get to go outside at all according to Choice. Moving along.
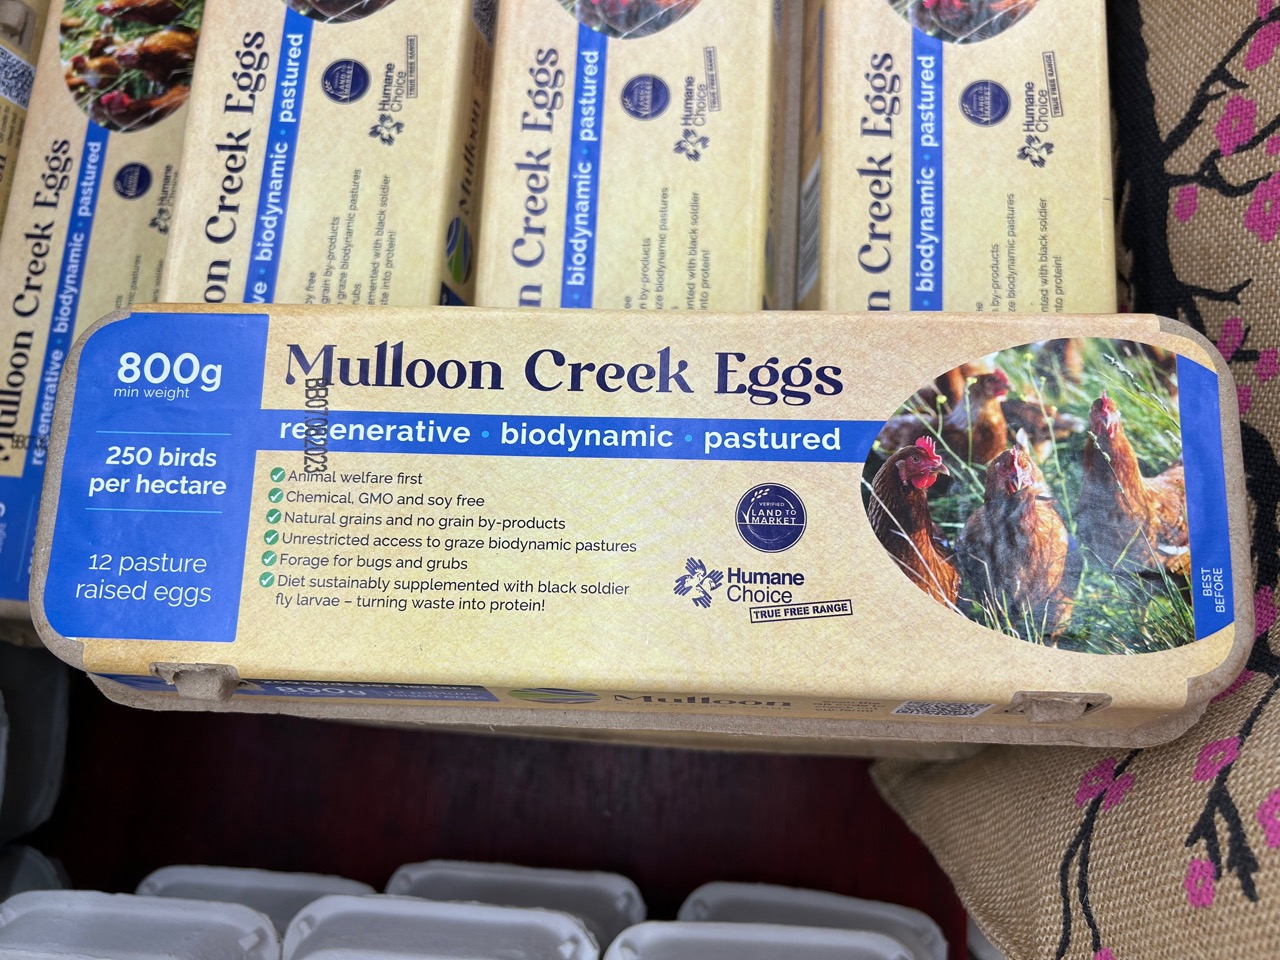
Mulloon Creek eggs look to be very good. Their labeling ticked all my boxes. I was going to buy these eggs. But then I saw Kangaroo Valley eggs. Check out their web site, it is very impressive. It looks to be completely ethical. Or have I just been conned by sophisticated marketing and advertising goobaldygook!
The best that I could find was a local farm run by a husband and wife couple who appear to be both teachers. So it appears that they leave the chickens out to roam throughout the day while they are at work teaching, but they have 3 ‘maremma’ guard dogs in with the flock. They also employ casual staff to help guard the hens. it all sounds pretty reasonable and they are local to me.
They claim just 40 chooks per hectare, and from the images on the web site, it looks like that. No big sheds in sight in the aerial photographs.
So this was my choice. I didn’t worry about value for money comparisons. I am prepared to pay a proper price for a properly raised happy chicken. The most expensive eggs were the olive farm organic eggs at over $1 each. However, the local Kangaroo Valley eggs were higher mid range price. A good find. and will be our fall back position when we don’t have sufficient eggs from our own girls, but they are in limited supply, so the Mulloon Creek will be my next best choice.
We usually keep between 2 and 4 chickens here on our 2 hectares. That’s a stocking rate of 1 to 2 chooks per hectare! I think that because chickens are birds, they prefer to flock together, so a few more wouldn’t be a bad thing, even a good thing, but we just don’t need more than 2 eggs a day each, so we need to keep our flock small.
At the moment we only have our singular, lonely chicken, named Edna, but I have just bought 3 more ‘point-of-lay’ pullets. That should keep us in eggs for another 3 years or so. There will be a difficult week here while Edna turns nasty and beats up all the young pullets to establish the pecking order. We keep them all in the house all day to sort it out and to get the new girls used to where they now live, sleep, feed and drink. Once habitualised to this new norm, we will let them out all day confident that they will return to the chook house at night to be locked in and kept safe from the foxes.
I don’t like to see chickens fight and peck each other. I really feel for the littlest one who cops it from all the others, but it’s not up to me. It’s chickens own way of sorting things out and best to let them get on with it and don’t try and interfere. But i can’t hang around down there with them too much, it distresses me. So I keep away, just turning up to give them feed and clean water morning and evening.
Once we start to let them out, we will have to start training them to come when they are called and recognise their name. This is done with careful, slow and persistent food bribery. Giving them little tit-bits when they come. Once one of them get the idea in her head that it is worth her while coming. All the others start to realise that she is getting fed, so competition cuts in. They can’t stand to miss out, so they all start to come when called- just in case there is a food reward at the end. it works!
We are well and truly in the months of winter now. We had a week of crackling frosts, then they were driven away by a week of freezing winds. That didn’t help me to get out and about in the garden at all, so I stayed inside working in the studio, out of the wind.
We celebrated the winter solstice with a dinner here in the big decorating room in the pottery, at the big work bench, converted for the day into a refrectory table. We can seat a dozen pretty comfortably in there. It is such a big, almost empty space, that it doubles up very well as our entertaining area. It is huge and uncluttered, as opposed to out house, which is small and compact, and none of the rooms in the house were designed to seat 12 people for a meal. We have however, had over 30 souls in there for a house concert, crammed in cheek and jowl. But that was only for listening to music, not a sit down meal.
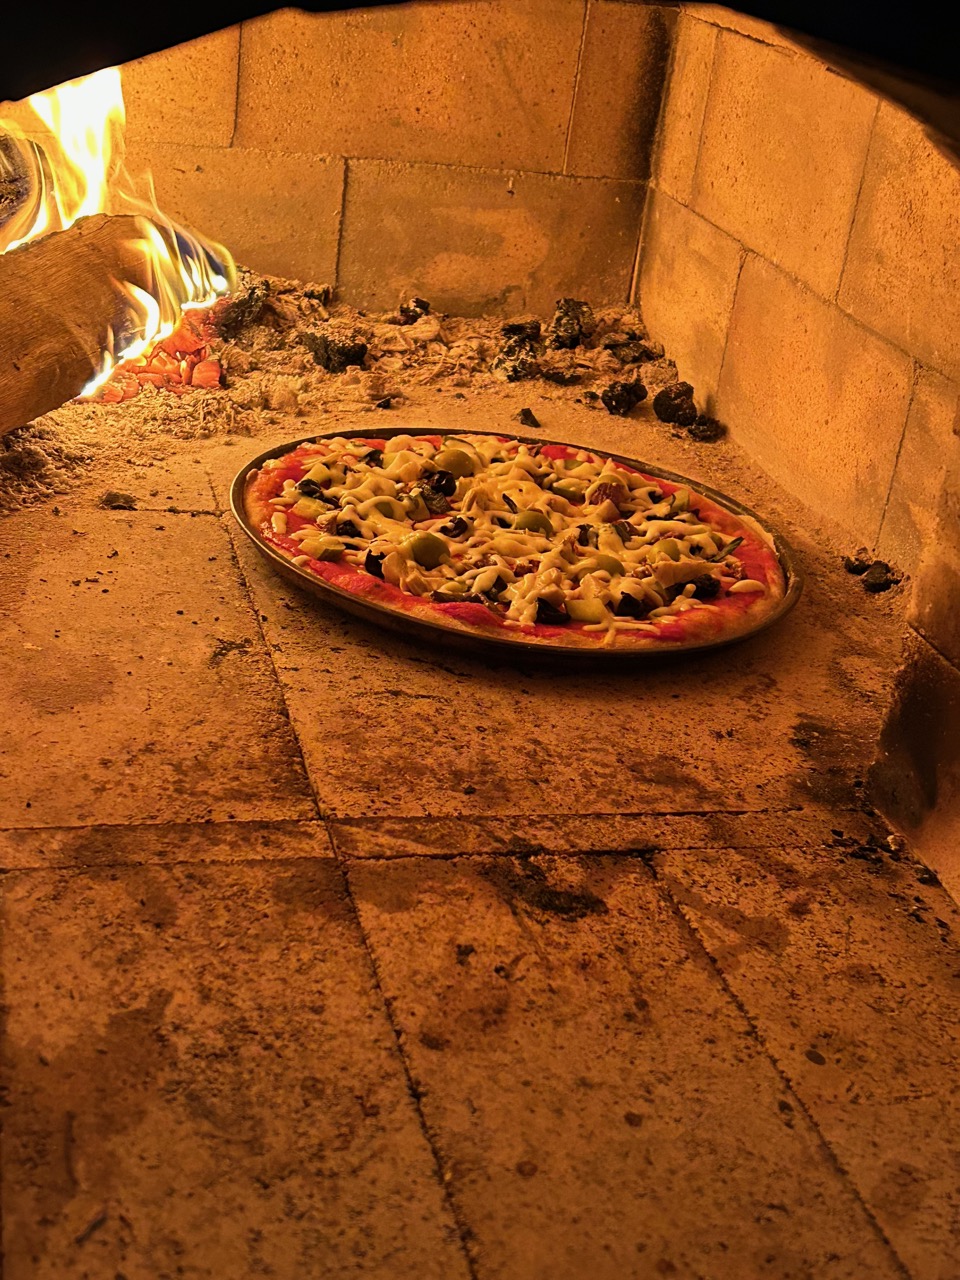
On this occasion, I cooked pizzas for everyone, as it is cold outside, it was a good time to light up the old wood fired pizza oven and crank out a few pizzas.
I try and stay clear of the usual suspects. My favorite this time was wilted spinach and oven roasted pumpkin from the garden, with a few olives. I prepared everything before hand, picking, washing and wilting the spinach before everyone arrived. I spent the morning in the kitchen prepping. The pumpkin was finely sliced, diced and roasted in the new solar electric oven, with olive oil salt and pepper and some finely diced garlic, also from the garden. These crunchy little gems melt in your mouth and smell and taste delicious.
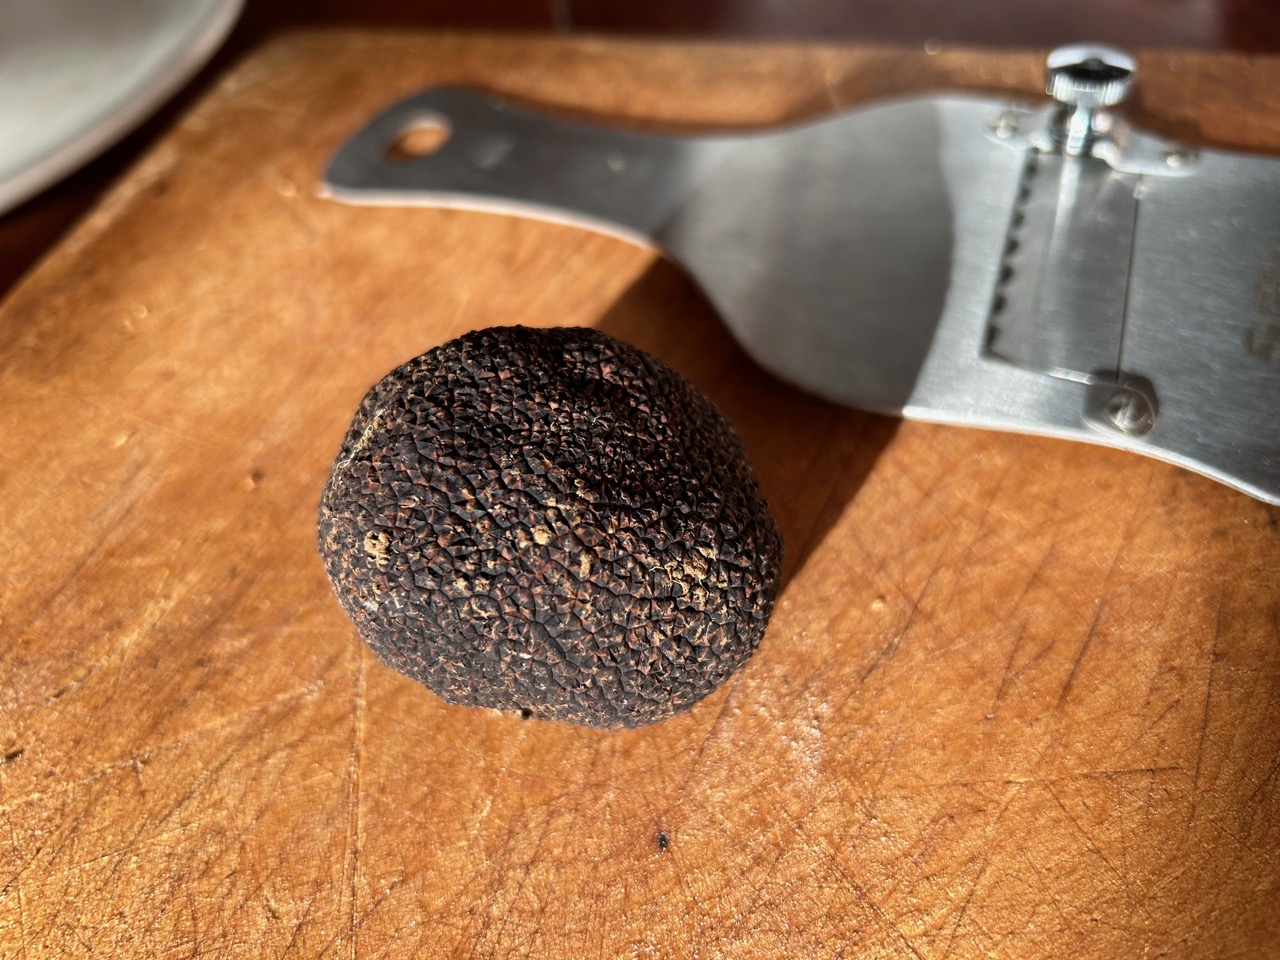
We have been enjoying the first truffle of the season for our breakfasts this last week. We buy only one truffle each winter. It’s a special indulgence. They are hard to buy around here directly from the growers, who prefer to sell in larger amounts directly to restaurants. Luckily we have a son who is a chef and has access to the trade, so we order one each season through him. We take what ever comes. I only ask for something less than $100. At $1 a gram, it can quickly add up, but usually we get something around $30 to $50 worth. However, this year, the price has gone up to $1.50 per gram, and what turned up in our order is a beauty! 50 grams. That is about 50mm dia. and the biggest that we have had the privilege to enjoy so far.
This is a 4 or 5 meal truffle!
We store the truffle in a container with the eggs for tomorrows breakfast and a cup of rice that will be the next nights risotto dinner.
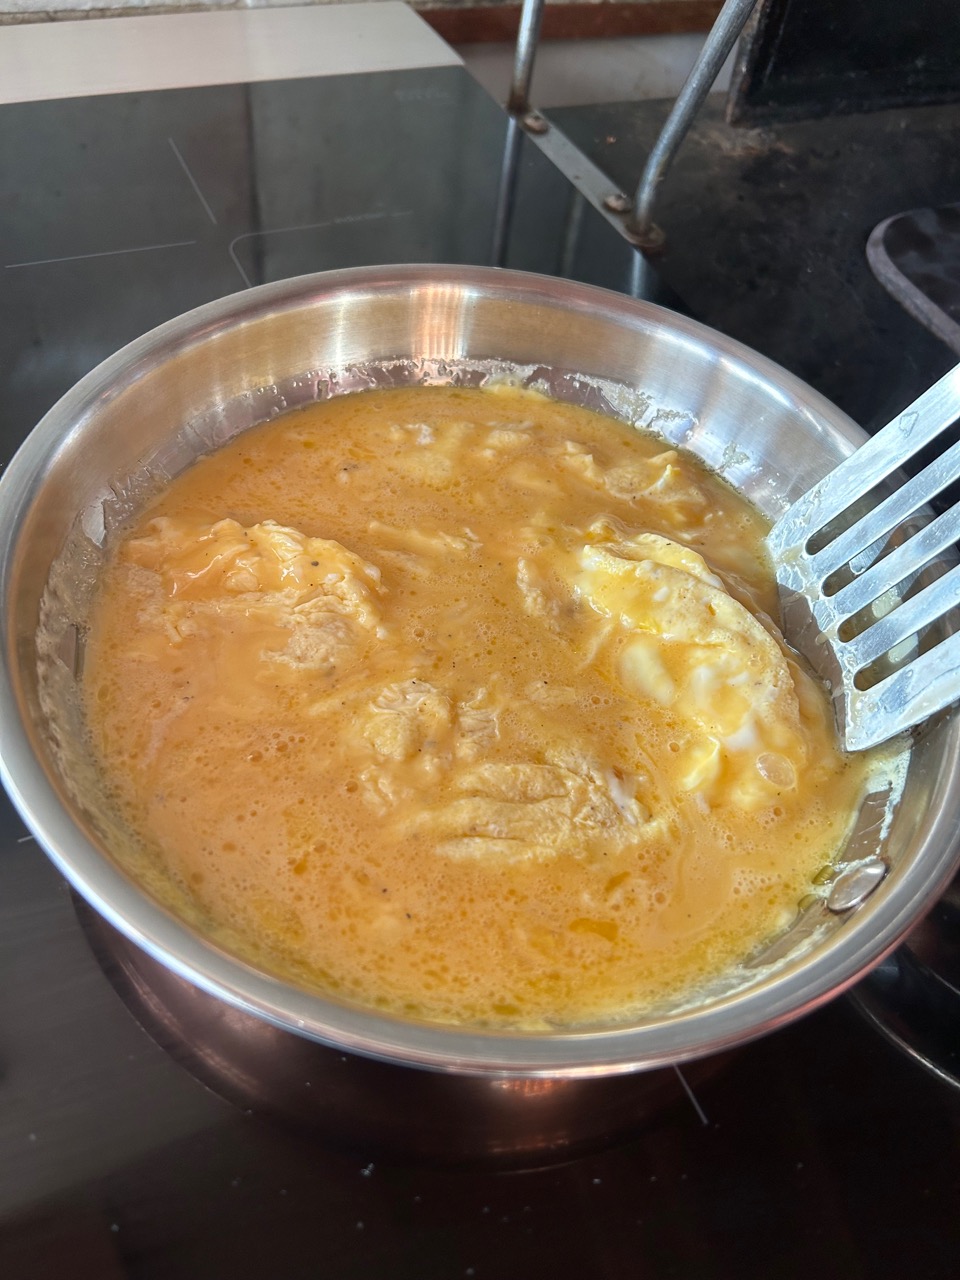
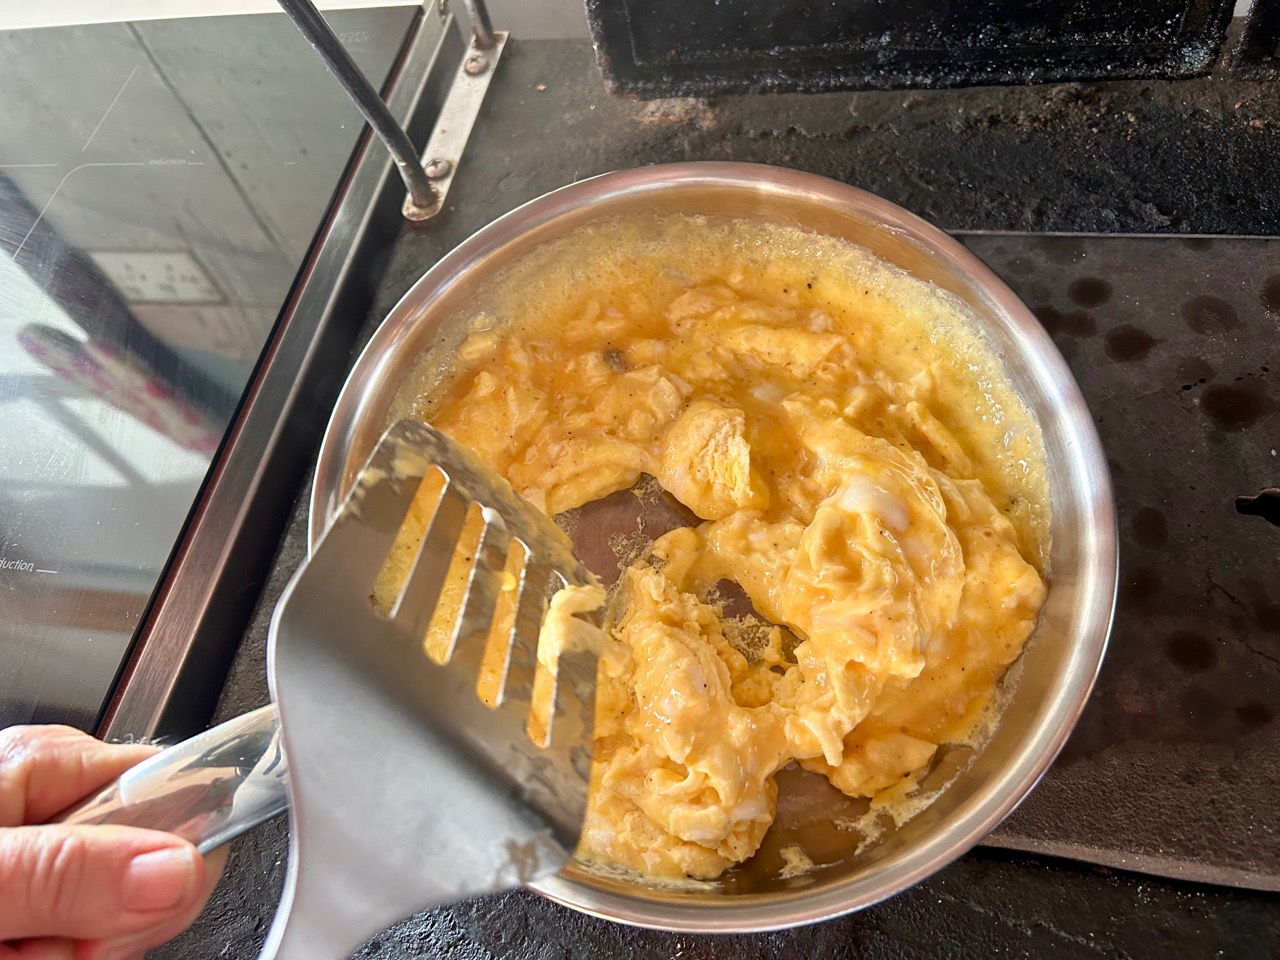
The best way to enjoy truffle in my opinion is just simply grated over very soft scrambled eggs.
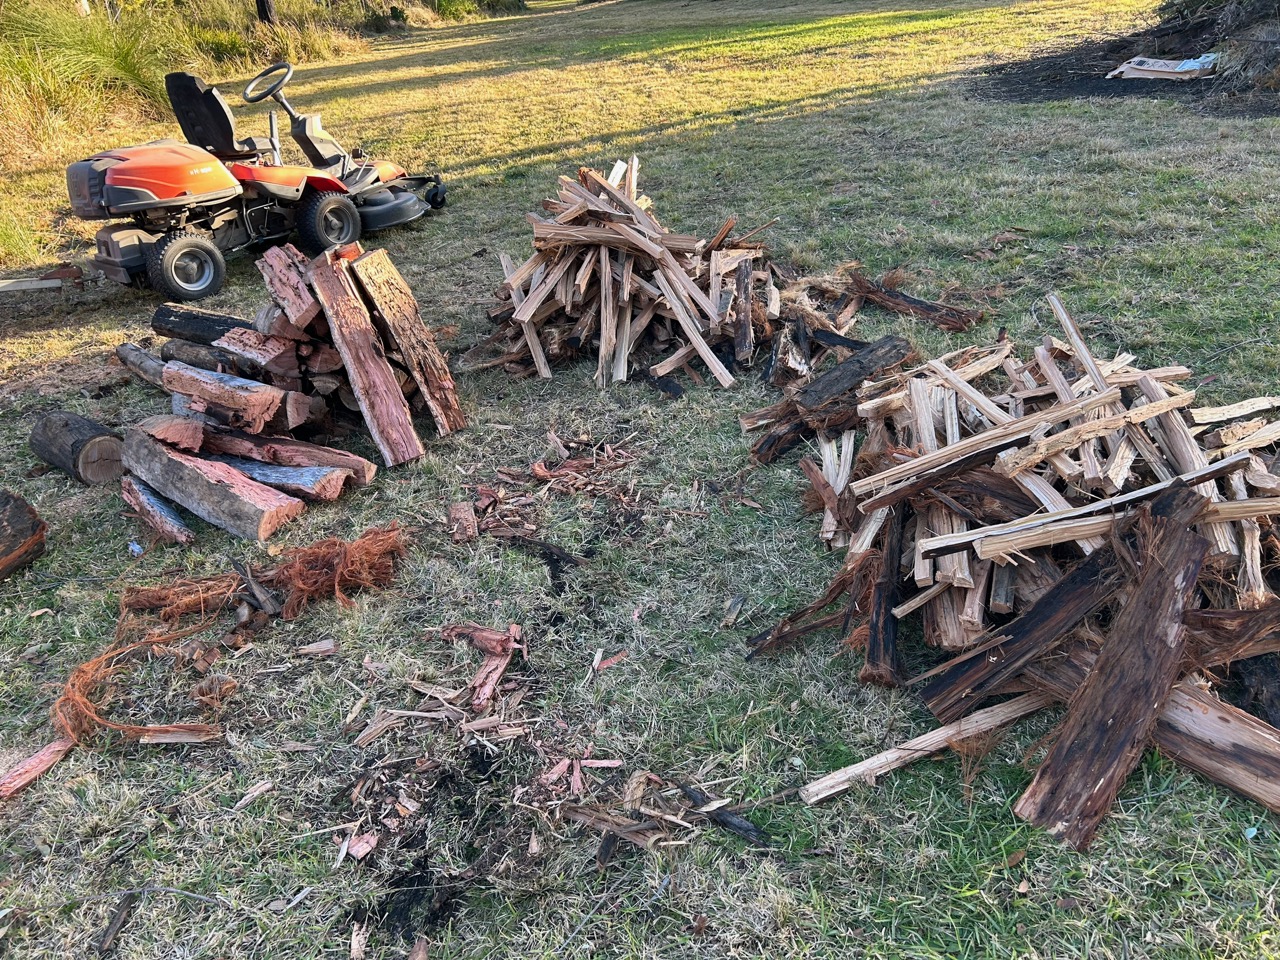
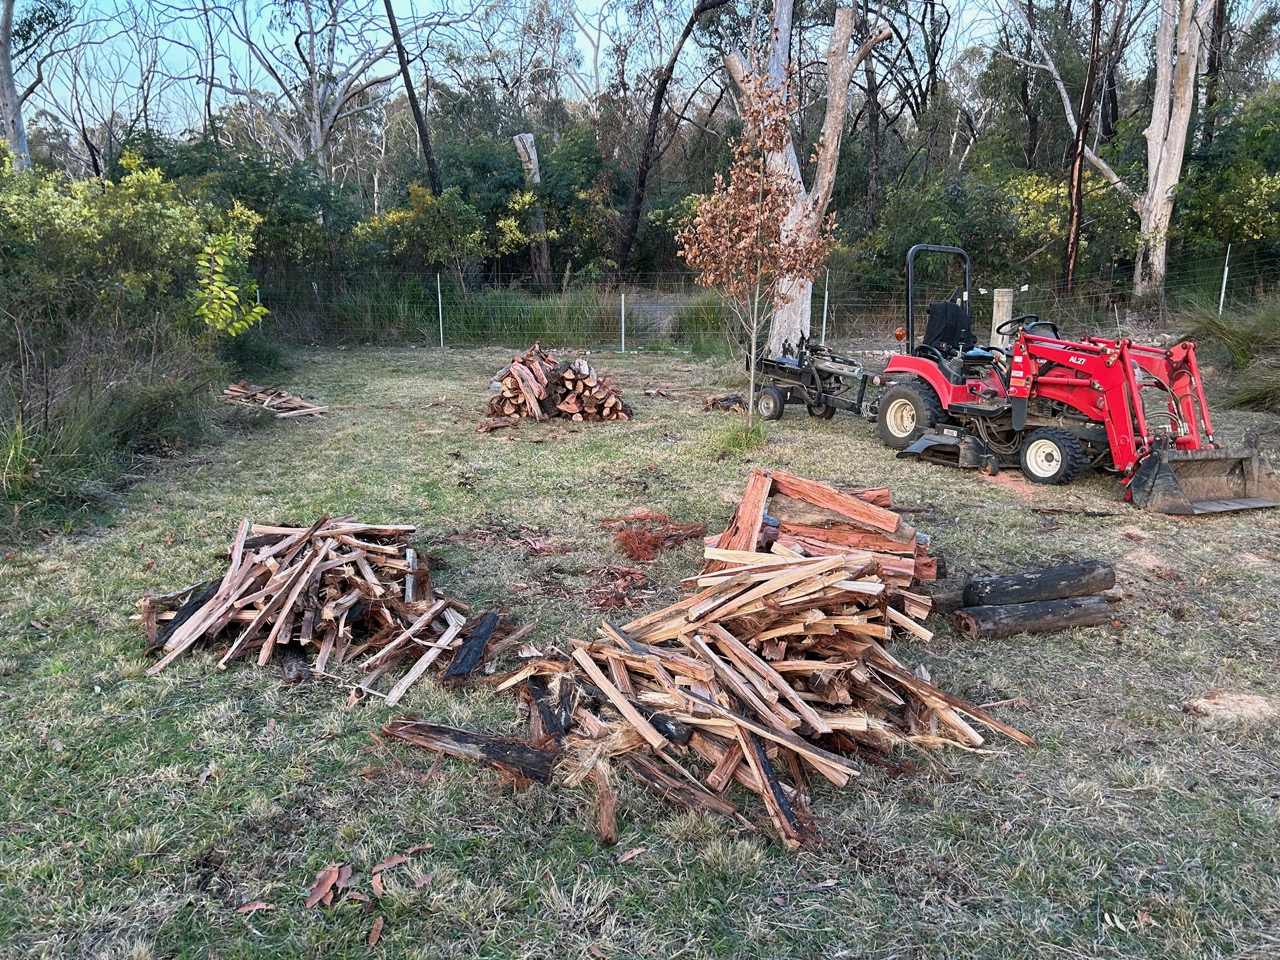
We spent the weekend cutting and splitting wood for the kiln and house. These are logs still sitting in the yard, left over from the bushfire clean-up.
Yes, We are still dealing with the aftermath of that horrible event. It’s still all around us, in the dead trees still standing, but on this occasion, we are cleaning up logs still sitting on the ground from burnt tress that were felled for safety reasons by the State Government clean Up squad that came through after the fire to ‘make-safe’ the area where people might be living and working around their houses.
Some of the logs were particularly straight grained, so were ideal for splitting very fine for the side stoking of the 2nd chamber of the new wood kiln.
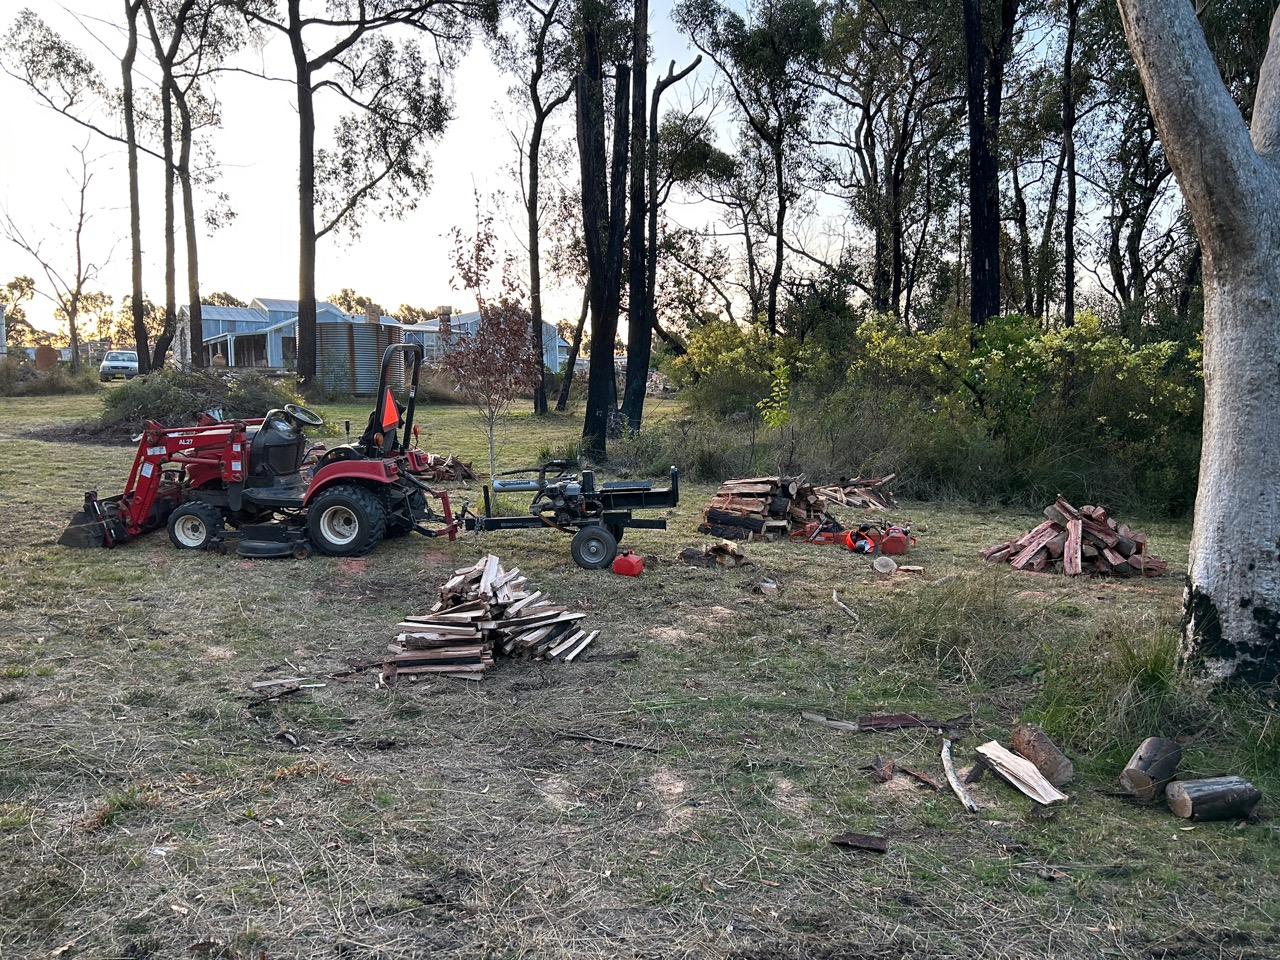
Others were gnarled and knotty with many forked branches, so I cut these short for use in the house stove. You can see the new pottery up in the distance. We are clearing up further from the core area around the house now, So we are making some progress.
It was a full day and by the end of it I was conscious that I was very tired and needed to stop before I ended up hurting my self. I have damaged my hand in the splitter years ago, by working on into the gloom in the evening, just trying to get the job finished in one day.
As the shadows lengthened. I called it quits. I will finish the job another day.
What started the day as a 3 big piles of twisted logs and butt ends, ended with several small er piles of split timber kiln fuel.
49 years ago, when we started out together on this creative journey. All we had was a two metre long, ancient, two man cross-cut saw and a block buster hammer. My, how things have changed! I still have the big cross cut saw, it hangs up on the wall in the barn. I still have the block buster head too, however it has had countless wooden shafts, broken and replaced since then. My days of swinging the block buster are numbered, but it still gets some sporadic use for small jobs that are too small to be bothered getting out the tractor and hydraulic splitter. It’s a bit like kitchen gadgets that take more time to clean up than the time saved using them. I still admire and appreciate many old things and ways of being, but splitting wood with a hammer is not one of them.
In our attempt to reduce our carbon footprint to as low as possible without having to reduce ourselves to living in a cave. We want to engage with the modern world, but only to the extent that we can cope with. For instance, we have virtually no presence on social media.
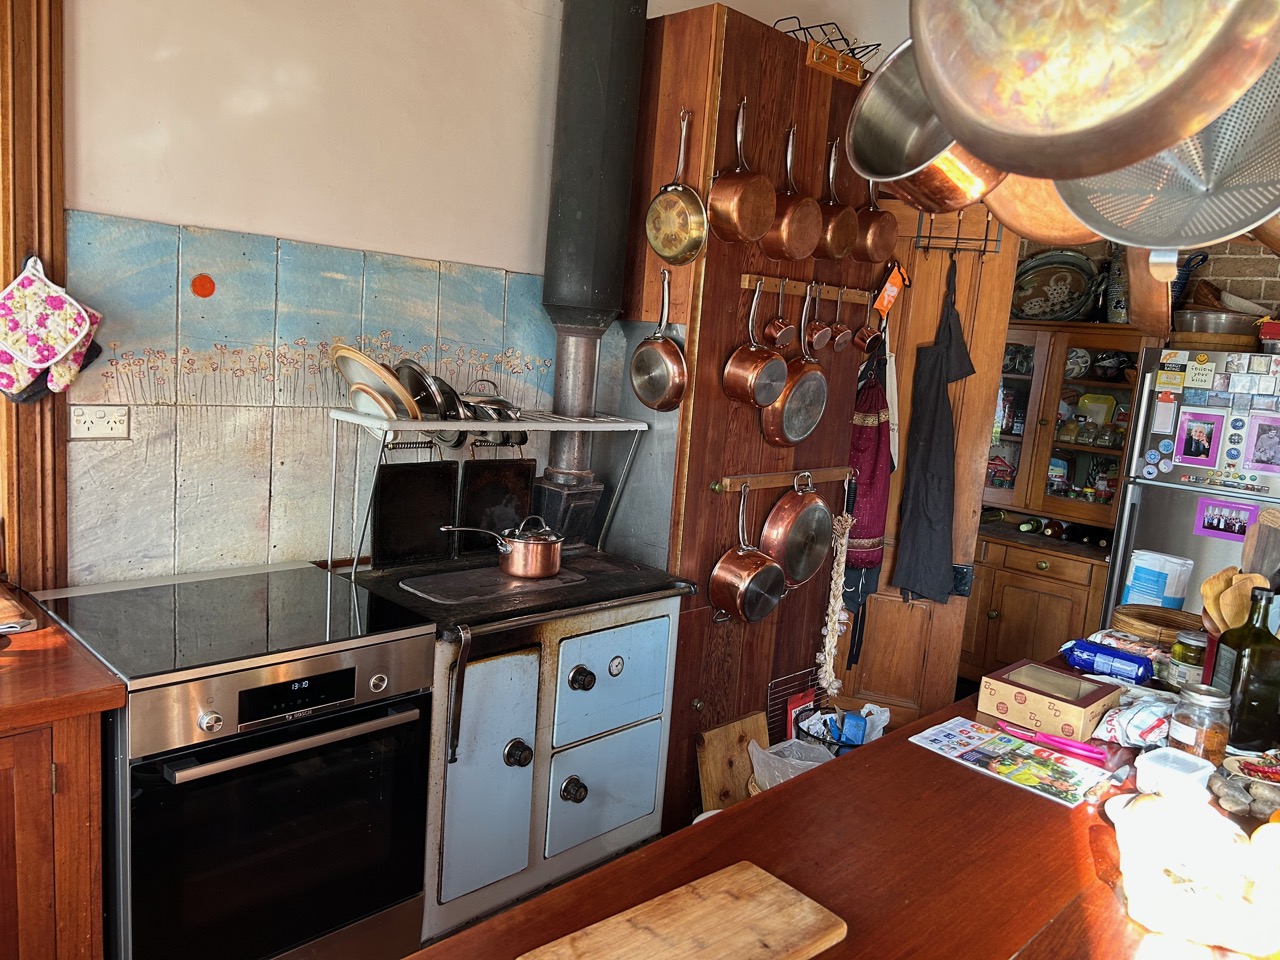
As our latest attempt to get out of the fossil fuel industry web of complex energy solutions. We have recently purchased an electric stove, so the old LP gas stove has been retired to the pottery for the odd occasion when I have to cook for a lot of people over there.
The new stove now completes our conversion to a fully PV powered solar electric home. It’s a good feeling to cook on sunshine, either fresh off the roof during the day, or stored in our battery for use at night. The pottery kilns are either solar electric or wood fired using trees from our own forest. Our car is run almost exclusively on PV sunshine, and now the house is fully electric. However, we have retained the wood fired slow combustion kitchen range, as it heats the hot water for the house in winter when there is not so much less sunshine for the solar hot water panels. It cooks all the winter meals, and warms the house to boot. In summer when the temperature is too hot to want to light the fuel stove, that’s when the electric range comes into play.
The stove has a conventional electric oven, but it has a modern induction cook top, coupled with the right induction compatible metal based copper pans it is lightning quick to heat up and cooks beautifully. There will be a bit of a learning curve for us to digest the 50 pages of instructions.
Digital cooking is a new concept for us. We end up pressing a lot of buttons with our digits to make it work.
The new stove sits very comfortably alongside the very old steampunk wood stove that we bought 2nd hand 45 years ago.
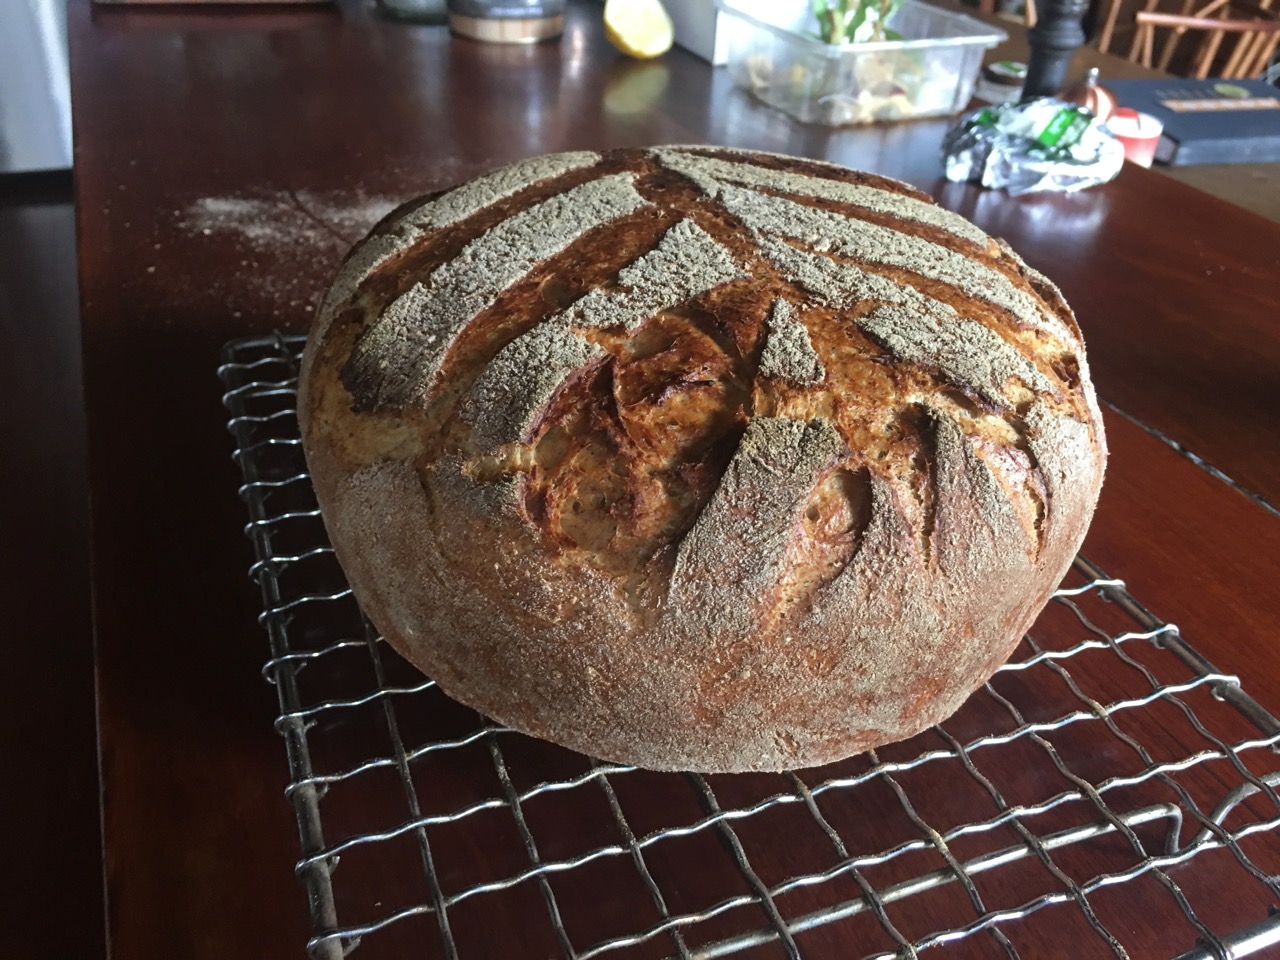
So far I’ve experimented with baking a loaf of rye bread, couldn’t tell the difference.
A pan forte cake, witch was just as delicious as it always was in the old stove, no change there, just cleaner air in the house and no fossil carbon released.
I also tried winter vegetable quiche. All good with no problems. I’m happy.
As soon as the Pop-Up long weekend Open Studio sale was over, we got busy tackling the next big urgent job.
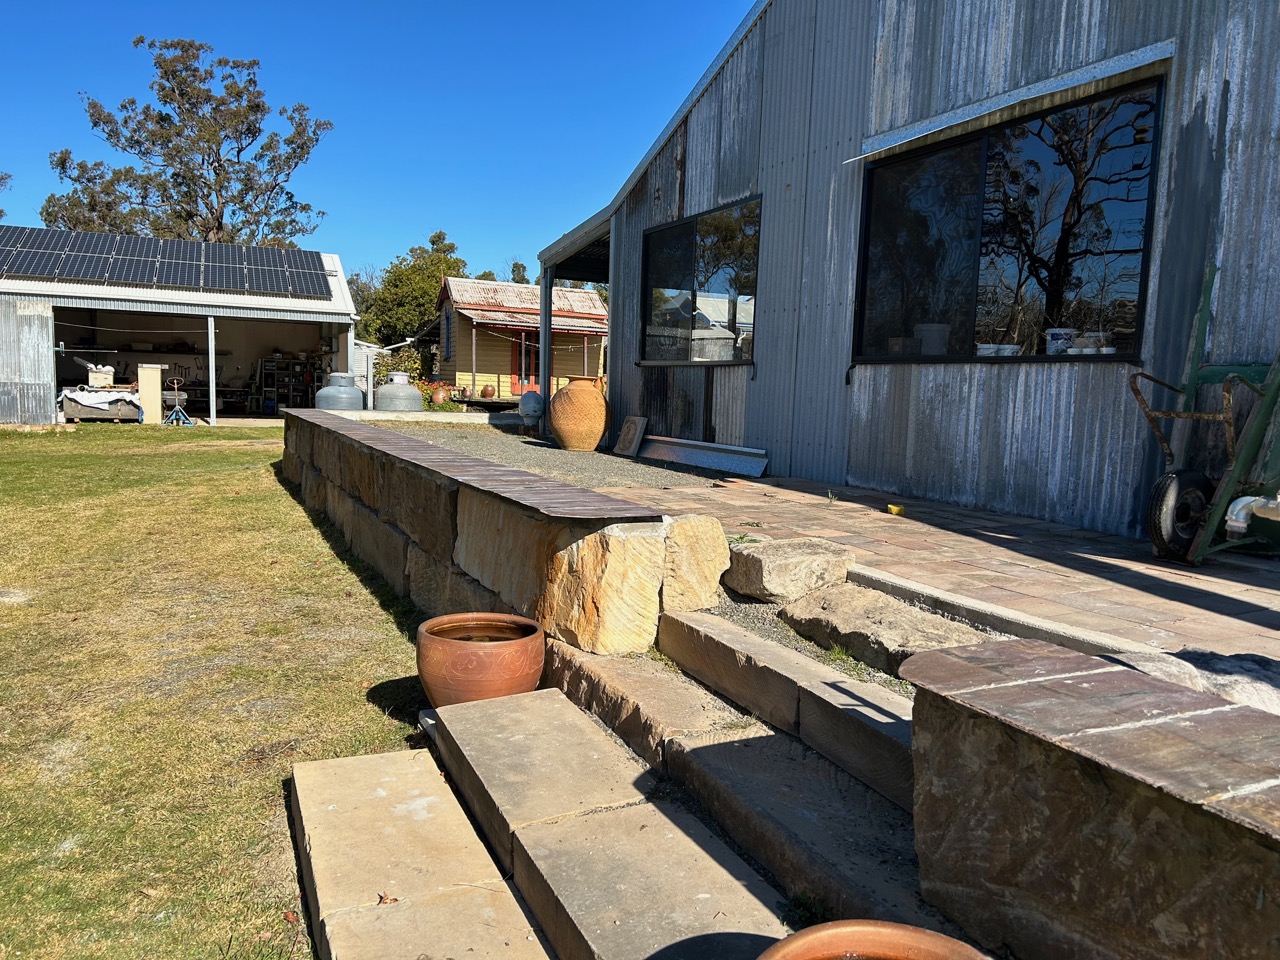
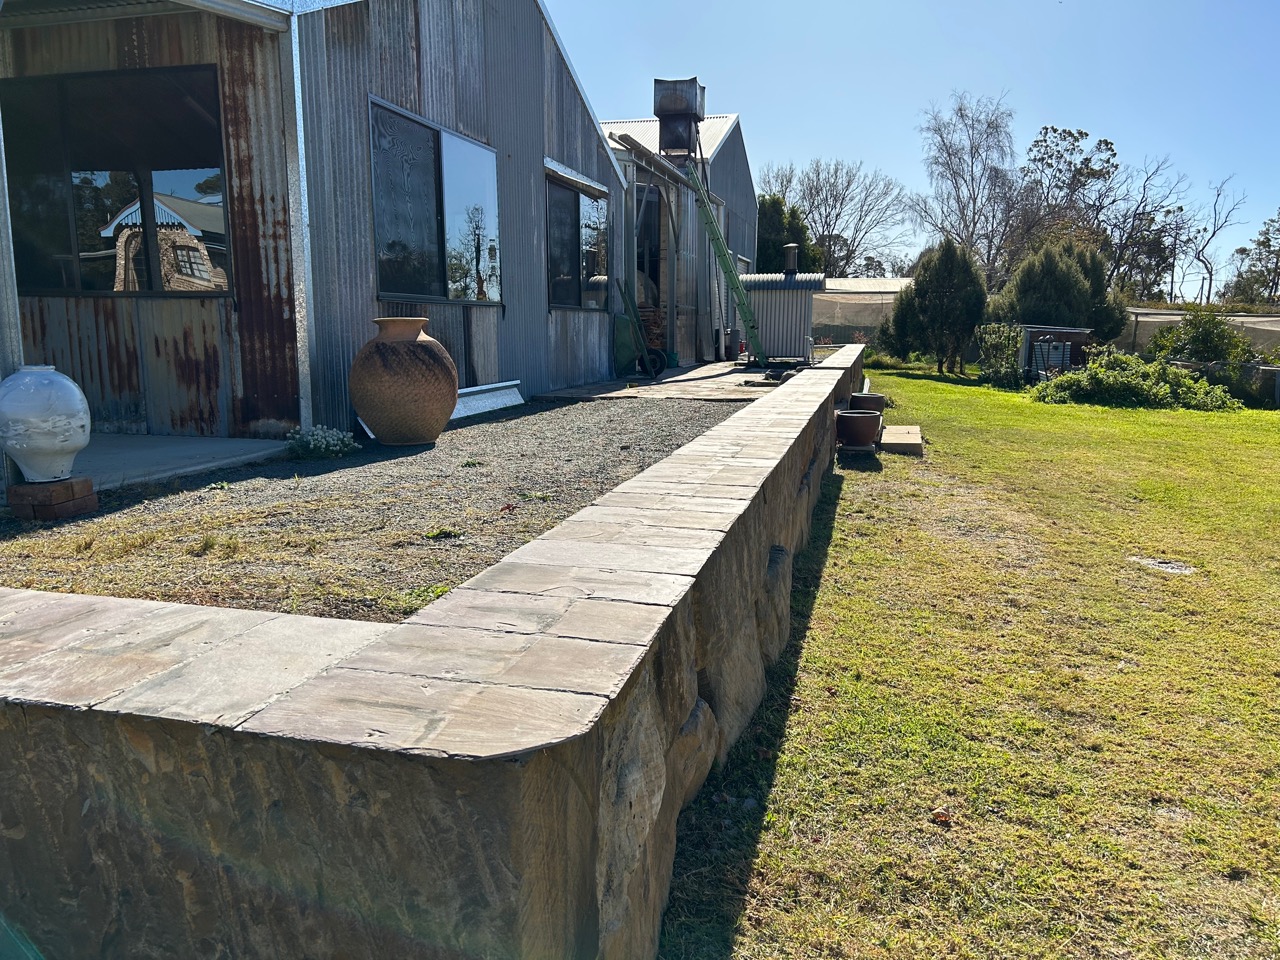
That job is dealing with the cracking and spalling of the big sandstone blocks that we used to make the retaining wall behind the pottery.
I knew when I bought them that they were rejects. I naively thought that they were cheap because they were split in an irregular way and not square, but tapered. That didn’t worry me, as I could arrange them so that they had a reasonably flat and square face outwards. I could hide the unevenness in behind the grave back-fill.
However, as it has transpired, the real problem with them, and the reason for them being very cheap, is that they are not hard sandstone, but rather soft and sugary.
Bummer!
Over the past 3 years that they have been sitting there year in, year out, through the rain storms and winter frosts, they have begun to spall. Water soaks in to the porous stone and when the frosts come and the ice expands, bits of the face split off. Recently we noticed that the blocks were beginning to split down the centre, not just the face and edges. This is serious stuff. If not dealt with immediately, the stones will start to loose their stability.
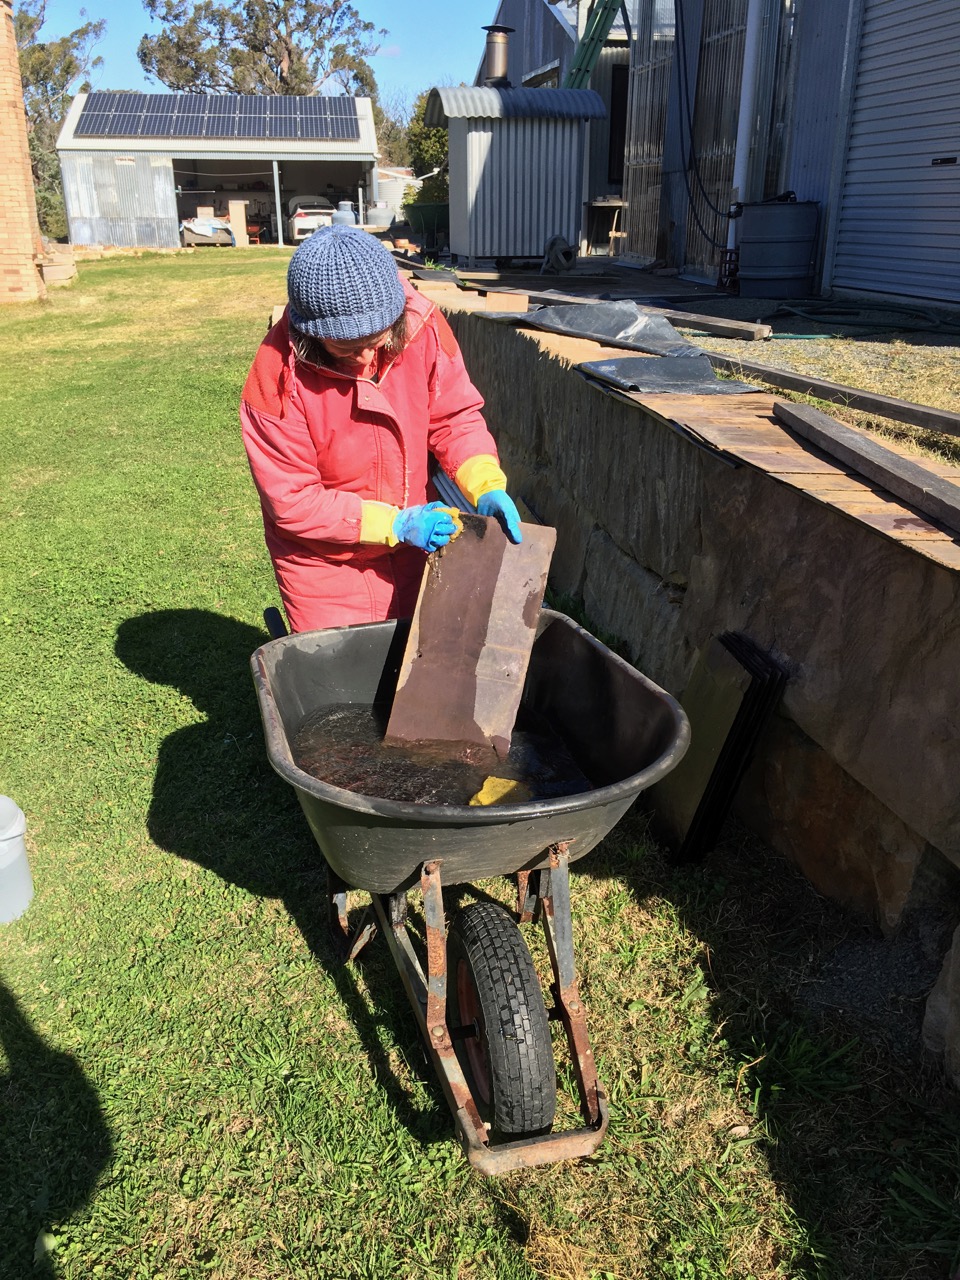
I decided that the best approach would be to cap the stones with some sort of waterproofing system. We had a load of old roofing slates stacked away under the railway station. They came off the roof of my brothers house before it was demolished many years ago. We always intended to use them as floor tiles, but never did. So we have plenty of these old weathered slates. We needed to get them out from under the floor and give them a good scrape and clean, then a good scrub and a wash to get all the grunge of history off them, so that we could get the cement to stick securely.
We spent 2 half days fettling and washing the slates. A cold, wet job for the first of winter after a cracking good frost.
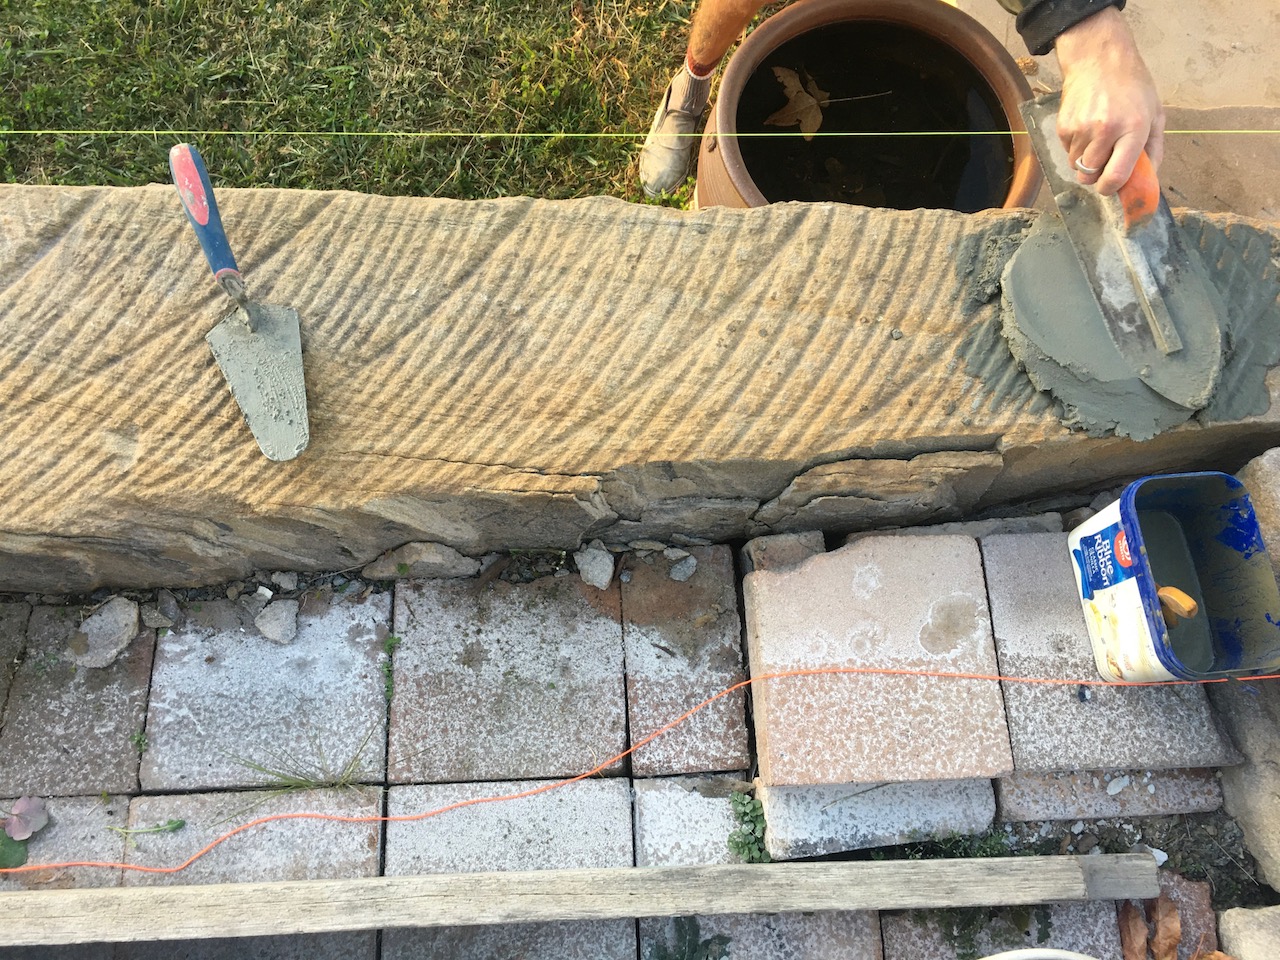
I took the truck down to the sand and gravel yard each day to pick up half a tonne of sand and 7 bags of cement each day for the 3 days that it took us to get the job done. We employed a young, local guy to give us a hand, as we are getting too old for this kind of heavy work on our own these days.
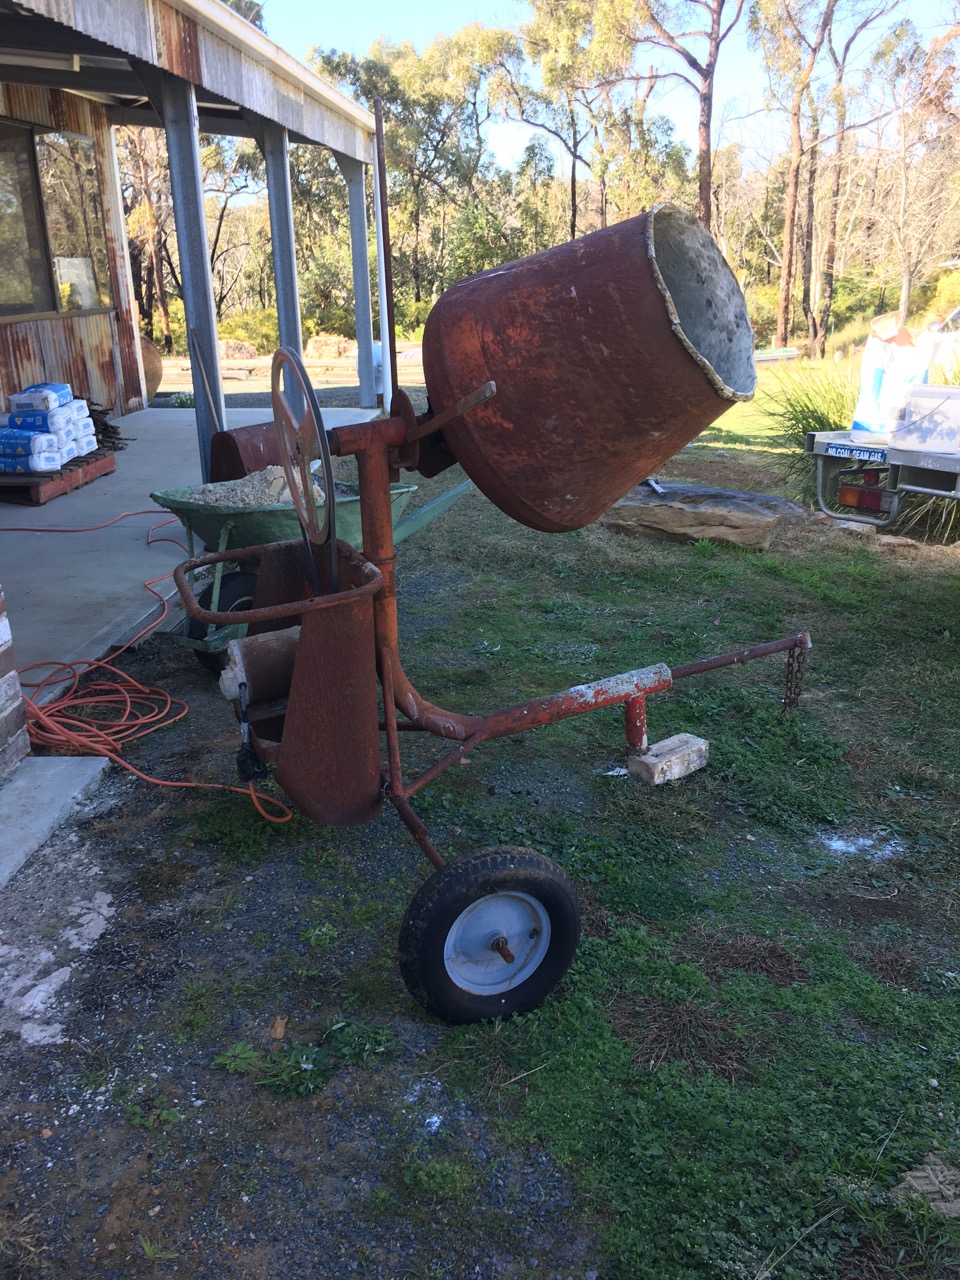
Using our very old ‘wabi-sabi’ Steam-Punk cement mixer that we bought 2nd hand for $50, 35 years ago. We mixed 14 loads a day and got through 1 1/2 tonnes of sand and 20 bags of cement to render a 70mm thick bed of mortar over the stones to get a continuous straight level, thick enough to be water proof and strong enough to cap the stones and support the slate capping.
Time will tell if this has worked well enough to deter any further spalling. I did notice that there was enough embedded heat energy in the stones, such that after the frost melted in the morning, the slates were very soon dry, except where the edge extends over the stonewall to create a clear drip line. The extended slate stayed wet, frozen and cold.
We still have a lot of paving to do, but everything in its own time. This job was an absolute priority now that winter is here and the frosts are back.
The first thing that I learnt was actually last night.
I tried roasting Brussel Sprouts in with the roast instead of steaming them first and then sautéing them in olive oil with a little garlic, salt and pepper.
They were sensational roasted. Soft and creamy inside, but a little bit crispy and crunchy-charred outside. So fantastic! It made my day! Maybe I need to get out more?
As winter is a time for roast dinners, I’ll be doing this again.. This months experience of roast beef was a very petite 250 gram roast. After cooking and cut in half we had just over 100 g each. Just the right amount to insure that we have some red meat, just in case it is good for us. But not too much just in case it isn’t!
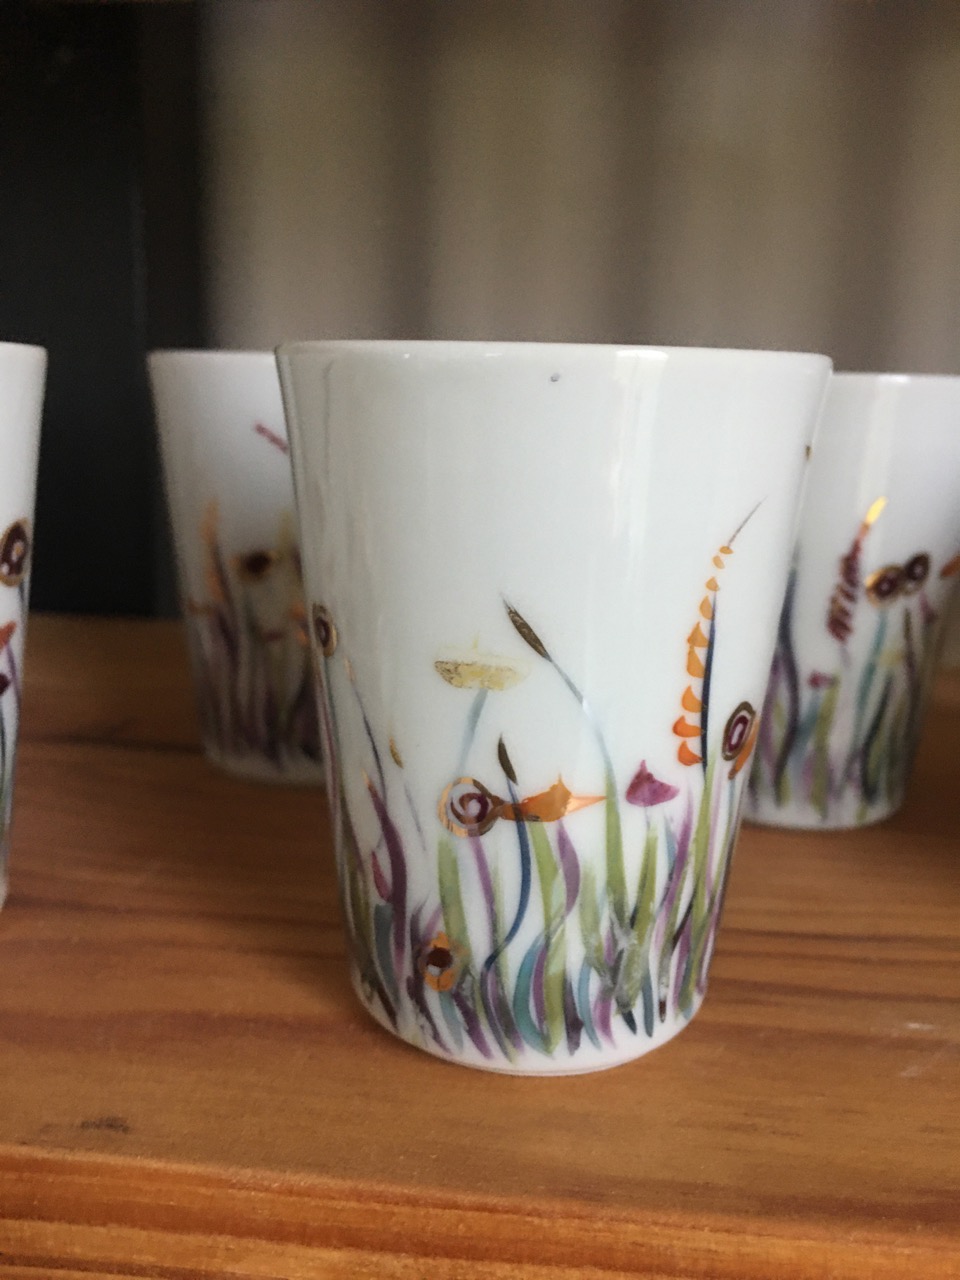
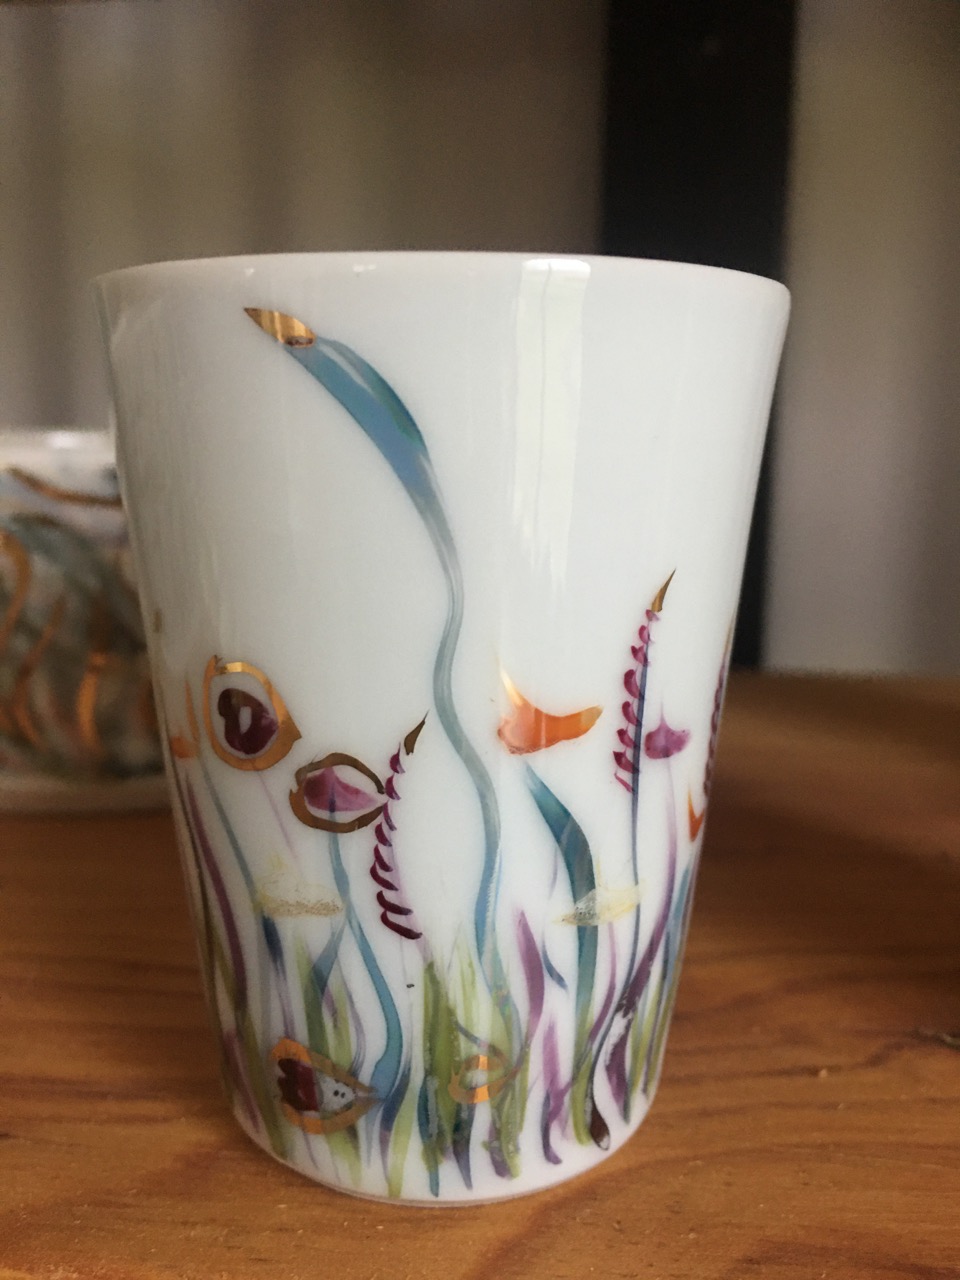
The other thing is that I am really enjoying learning to decorate with colours and lustres.
I feel Like I’m a first year pottery student channeling Janna Ferris. Only without her talent, insight, skills and years of experience.
But I have to start somewhere. This is very ‘somewhere’ for me at this stage in my life.
I’m very happy with these tiny ‘shot’ glasses. 50mm dia x 75mm high.
The last thing is that native worrigal greens (native spinach) makes a wonderful spinach and 3 cheeses pie.
I already knew that but just thought that I’d throw it in.
They are so good I made 2.
We will need some handy, ready-made lunches for the weekend Open Studio Arts Trail sale days.
So really, there was just one new thing that I learnt today. But it was so good, that it felt like three!


You must be logged in to post a comment.