The shelves have been re-stocked. The Pan Forte cake is mixed and is ready to bake. The coffee is freshly ground.
We are ready for the 2nd Open Studio Sale Weekend starting tomorrow. What could possibly go wrong? Hopefully nothing, as we had 22mm of rain yesterday which has freshened up the garden and topped up the water tanks.
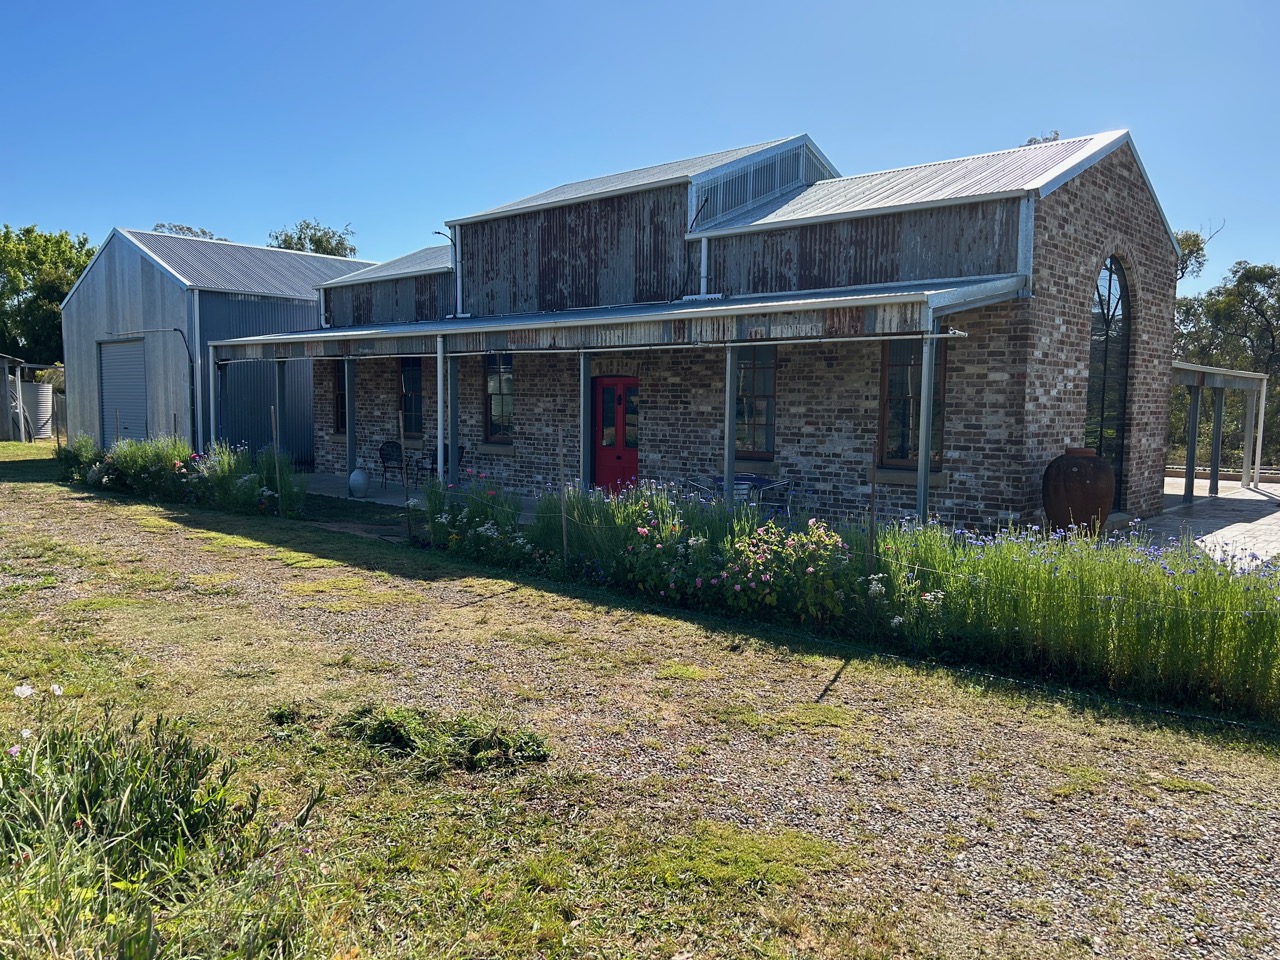
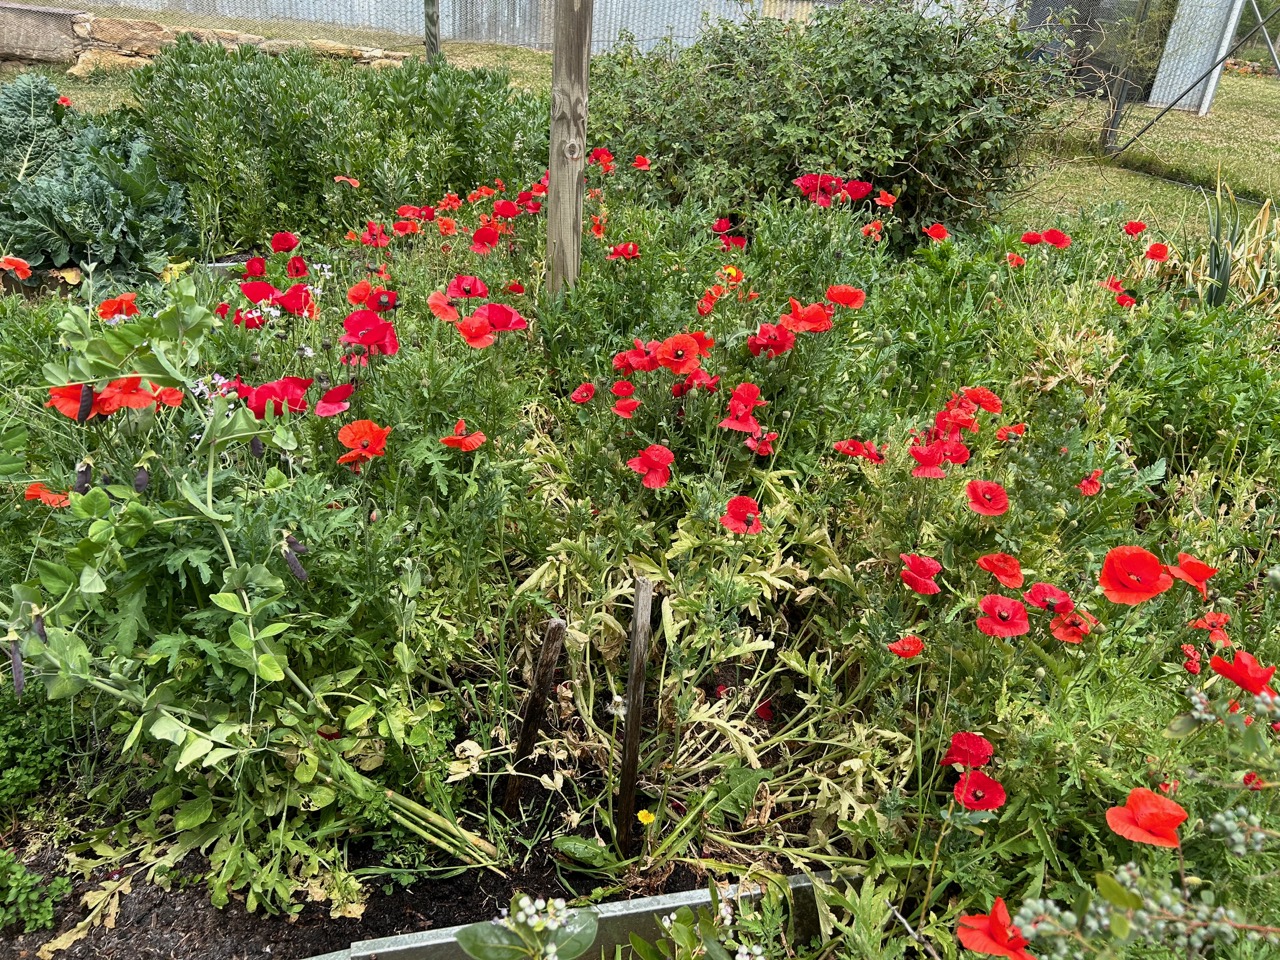
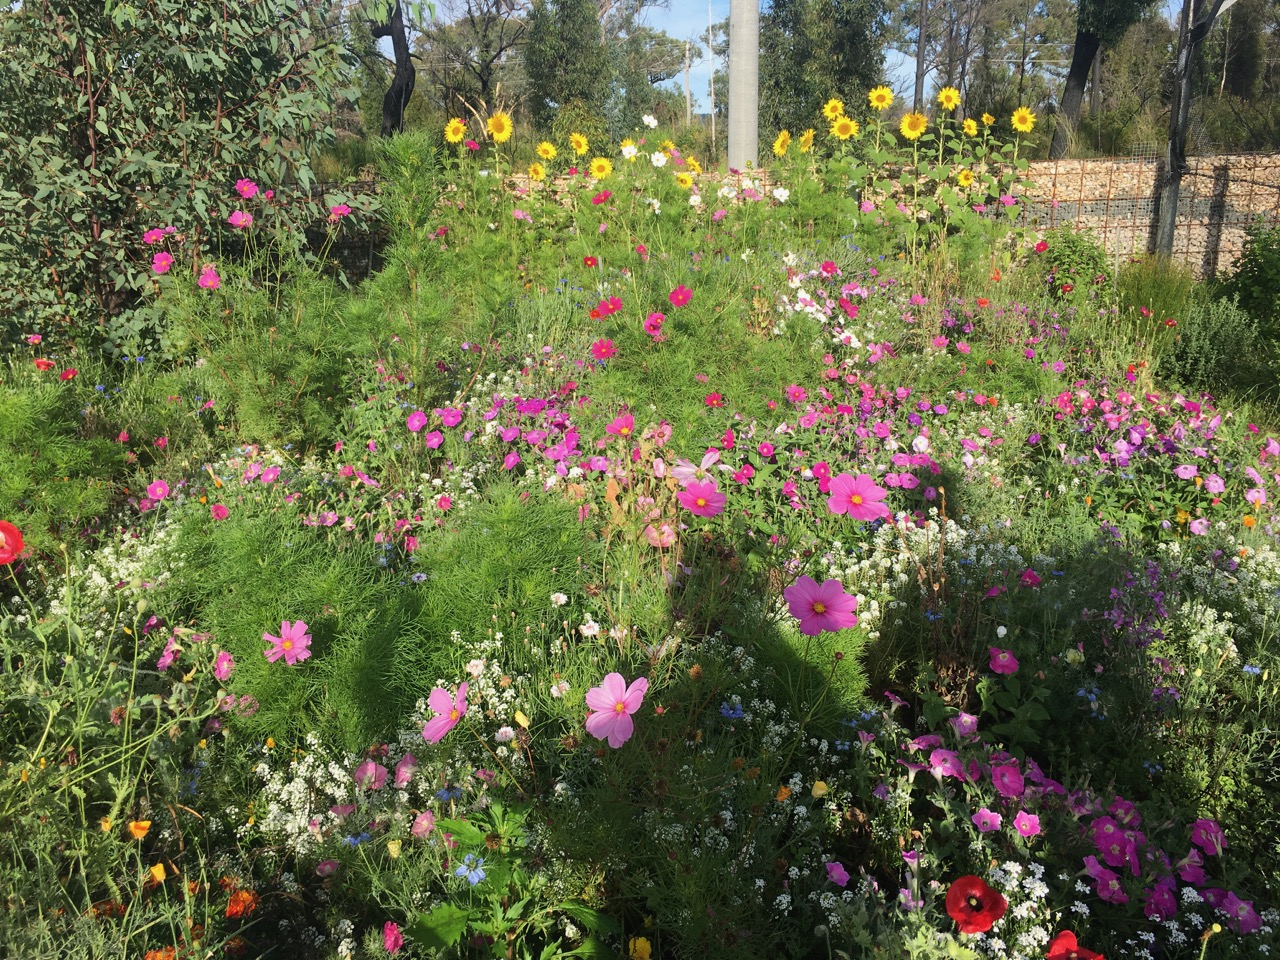
Today started with a heavy mist from yesterdays rain. Regrettably, the rain wasn’t strong enough to flood the gutters and pour down the dirt road and flow into our dam. Most of it soaked in, but that is also very good for the garden and all our fruit trees, some of which had started to drop fruit in the prolonged dry spell. The lawn had turned brown and started to ’crunch’ underfoot it was so dry. However, it is amazing what a little rain will do. What was left of the burnt off grass has turned to a flush of green again over night. One blessing is that as it is only millimetres high, it doesn’t need mowing. There is always a bright side. The welcome rain has watered the english cottage garden flowers along the front of the pottery, so everything is looking bright and perky.
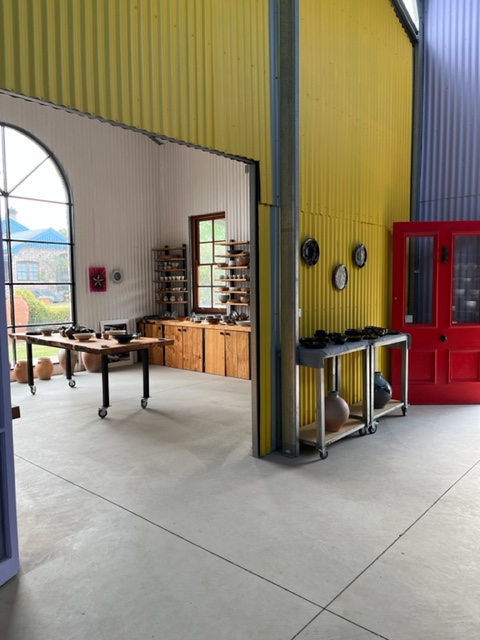
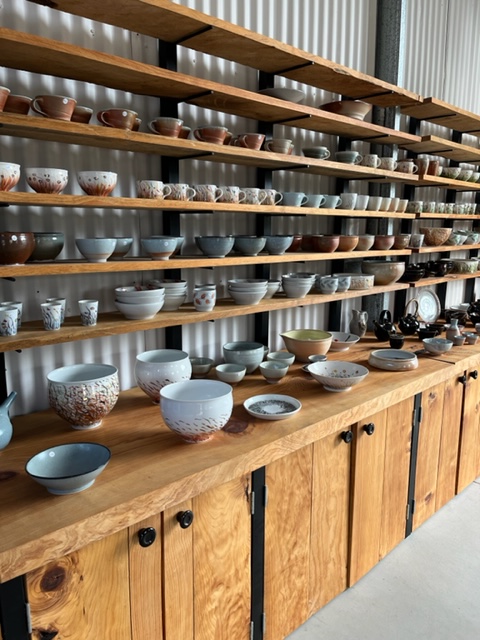
All the shelves are full and the gallery is looking good.
Call in and see us over the weekend if you are in the area. Stop for some cake and coffee if you have time, we’d love to catch up.
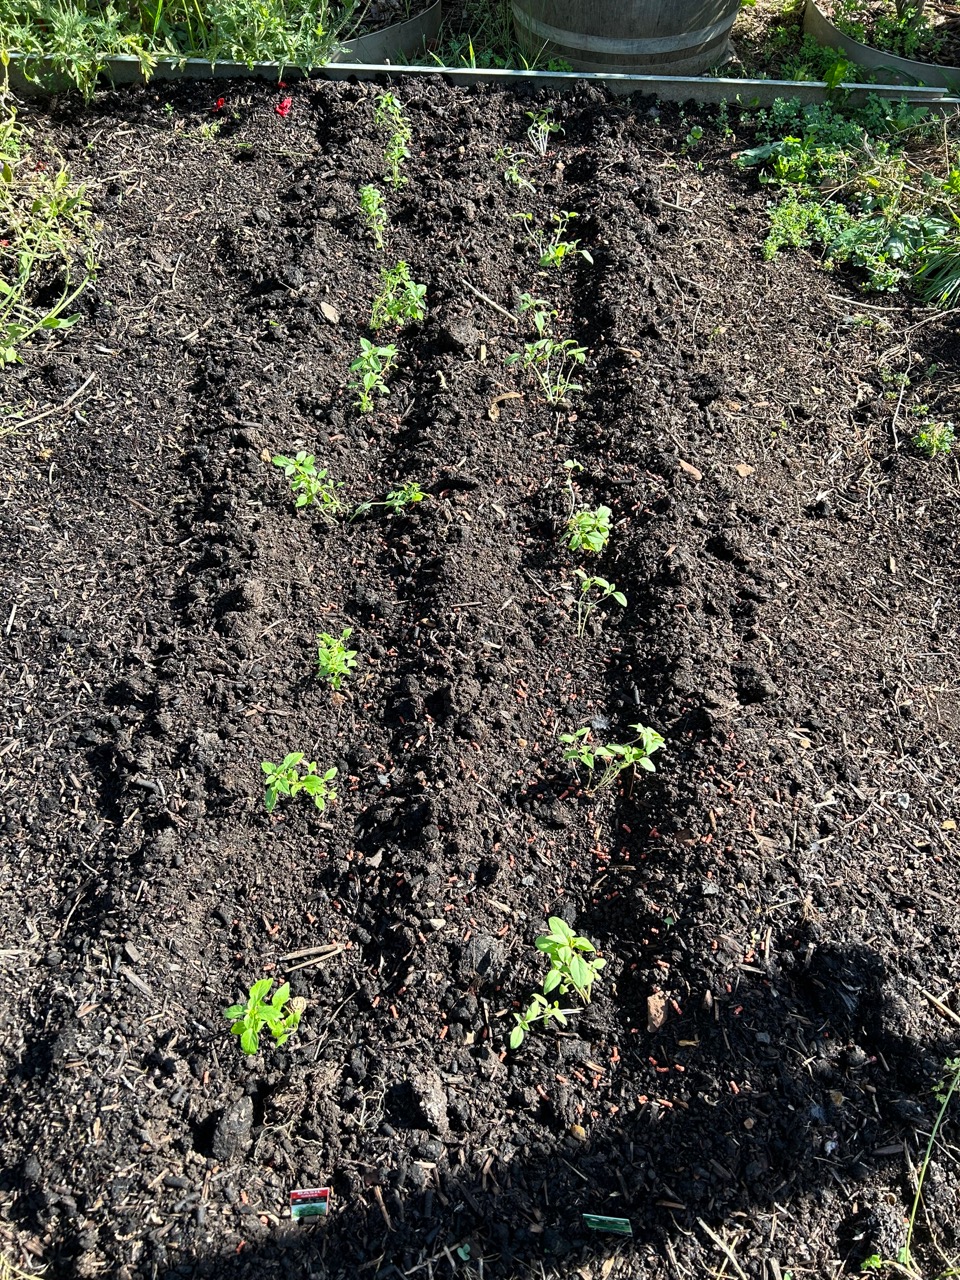
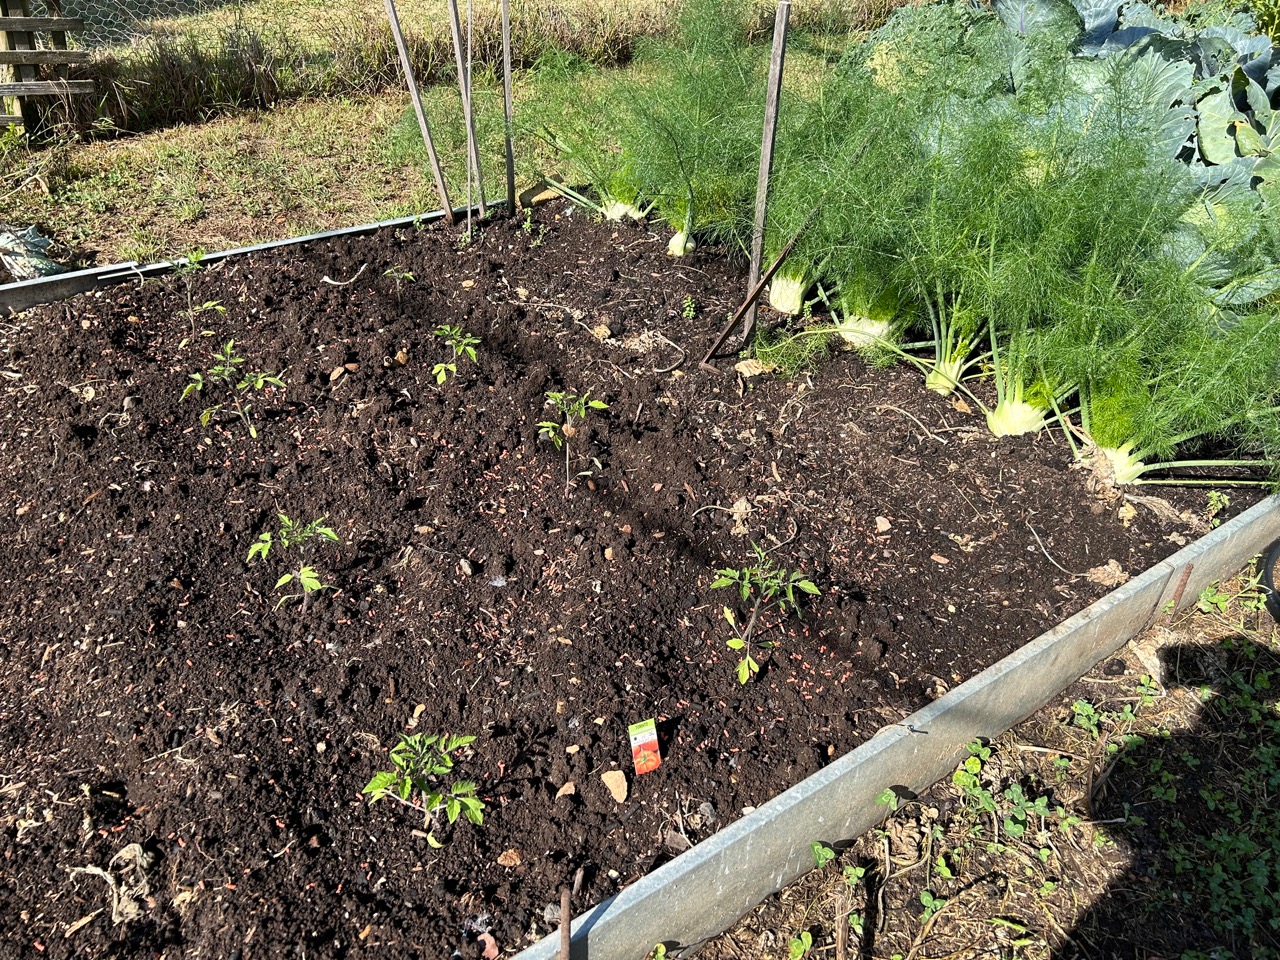
The veggie garden has been woefully neglected recently. It still feeds us well from our previous plantings, but because we were away for a lot of August and September. It was pointless planting any seeds in such dry weather, and then not being here to water and nurture them. So we missed out on our spring planting this year. I would normally have started seeds off in mid to late August, and then planted out in late September while keeping an eye on the frosts and possibly using our portable home made closh system of wire and shrink-wrap frames. However, as we have been so busy since our return, I have only just found time to work in the garden again. i found time in-between pumping water uphill to weed out and replant a few beds.
I have had to resort to buying seedlings in punnets this year, so as to get some advanced tomatoes in the ground, along with zucchini, egg plants and lettuce. I also planted out seeds of the same for a follow up planting in December. It will be a smaller vegetable garden this summer. But you can’t do everything.
Buying punnets is a bit of a come-down, but I’m only human and needs as needs must. My own home grown seedlings are on their way.
Nothing is ever finished, nothing is perfect, and nothing lasts. Enjoy the moment.
The first Open Studio Weekend is over. One more to go!
We had a very slow day on the Saturday, as it was raining hard on both sides of us in Picton and Bowral. So visitors were reluctant to leave home, and few and far between. We had just a few brave people venture out. One visitor from Picton had gone to an Open Garden event, but it was so miserable in the pouring rain, that she gave up and decided to come and visit us for some indoor, dry and warm, entertainment.
The Sunday Open Studio was much better, quiet in the morning, but it picked up after lunch and we were almost busy dealing with a steady flow of visitors in the afternoon. We hope for better weather and more visitors next weekend. However, if it is going to rain, I’d prefer it to pour down, flood the gutters and stream down into the dam.
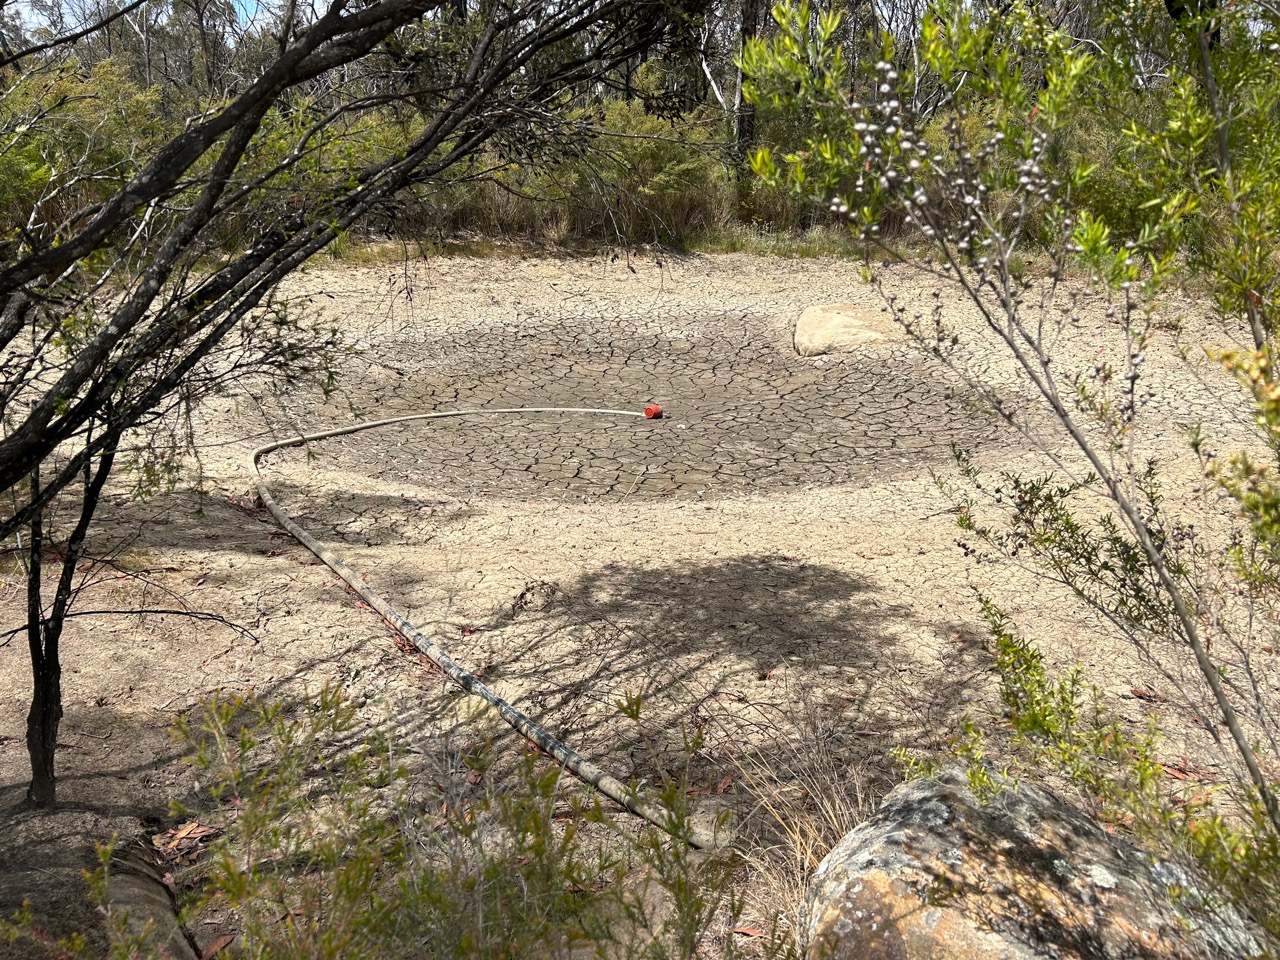
Of course, as usual, it didn’t rain here at all, just a few light passing showers throughout the day. Our top dam, the one closest to the house, that rely on for irrigation and fire fighting water is bone dry. The foot valve for the pump is sitting high and dry on top of the caked and cracked mud. This dam still had a very small amount of water in it when we left for our time away in New Caledonia and then Brisbane. However, we got a call from our lovely neighbour one day to tell us that she had tried to water the garden for us, but no water was coming out of the hose. I knew knew why. I expected it to run out and dry up at any moment. but there was nothing that I could do at a distance.
Starting on the Monday morning, with the news of so many houses burnt down in the north of the state in the terrible bush fire there. I wasted no time in preparing ourselves for the next bushfire – whenever it happens. Maybe sooner than later? With the bushfire season now upon us in earnest. I was straight into action working on all those jobs that I had put off during the recent three wet years.
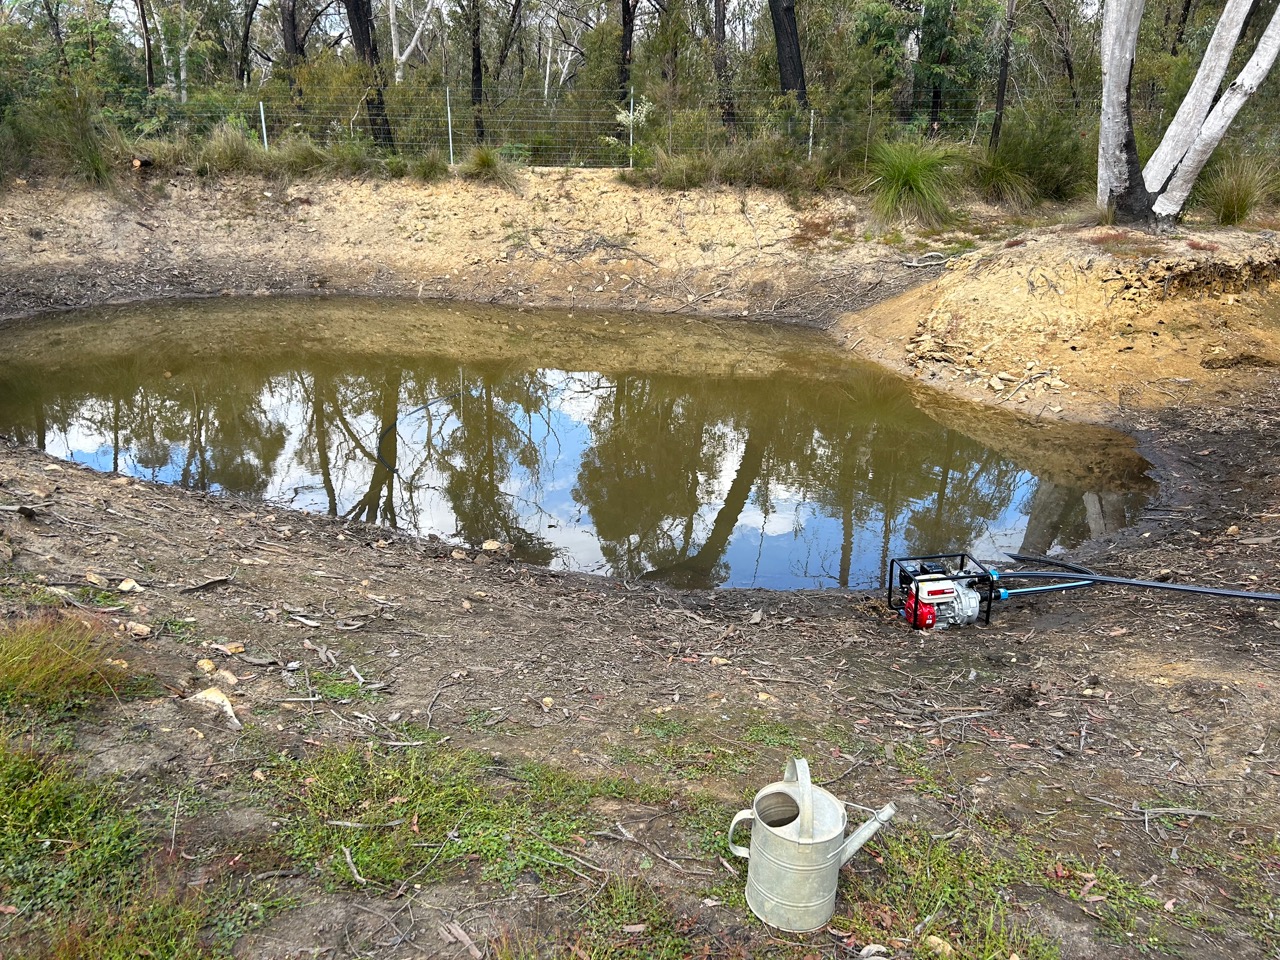
We have 4 dams, built in a key-line system. I moved the high pressure, petrol driven, fire fighting pump, down into the bottom dam, which is nearly empty, but still has some water in it, right at the bottom. I built a jerry-rig, improvised system of poly pipe lines to convey the water from this little bottom dam, up to the larger, middle dam. A day of running the pump moved most of the water up the hill to the next dam. I left just 300 mm of water in the bottom of that dam for the yabbies, to keep them safe over summer. If it does dry out completely, they will bury them selves in the mud.
From the bottom dam, up to the middle dam. This larger middle dam also has next to nothing in it, just 300mm deep in the middle, but every drop counts in summer. Especially when a bush fire is in the offing.
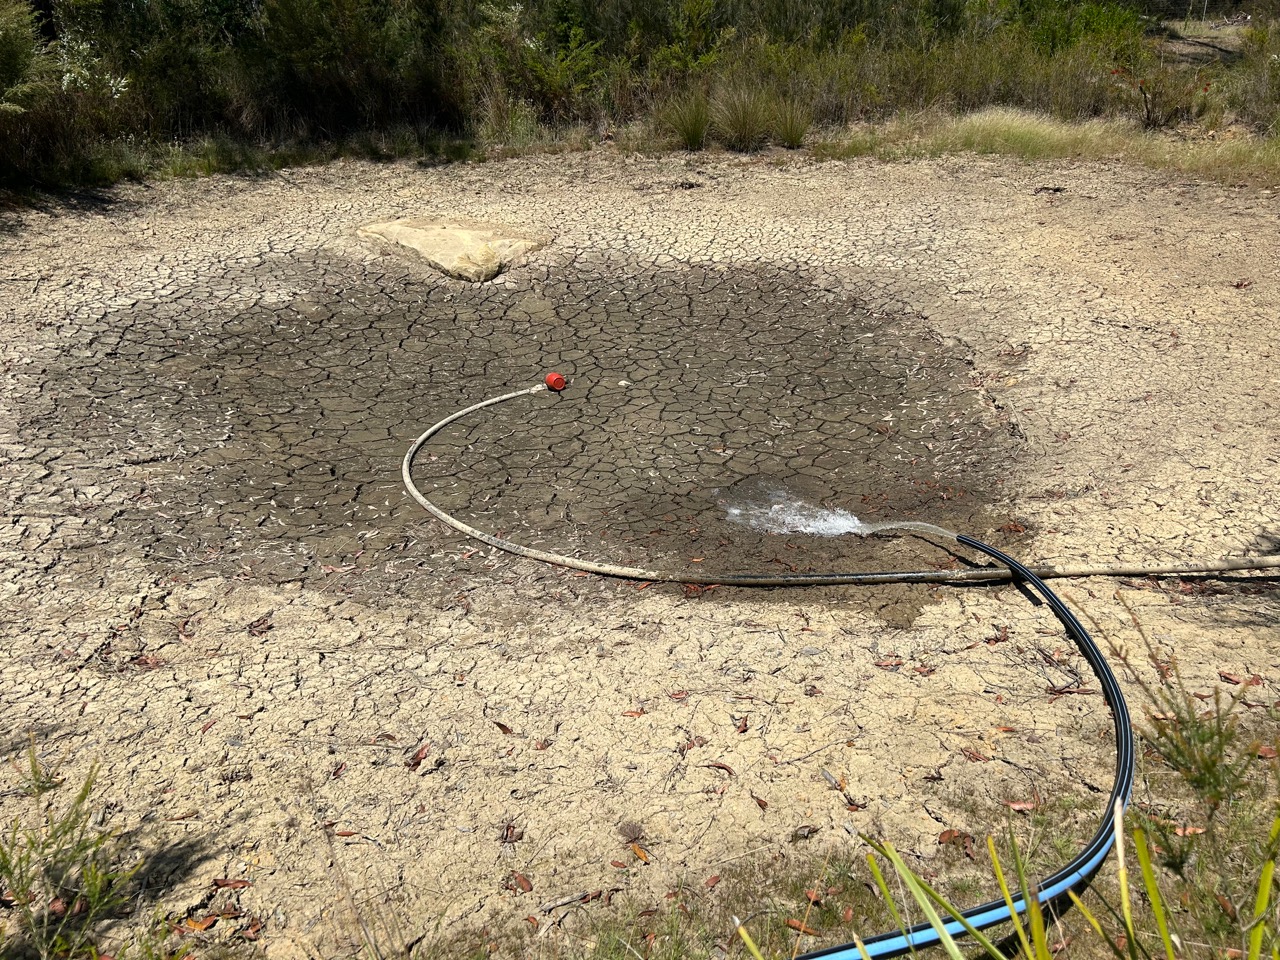
Neither the bottom dam or the middle dam, has a functioning pump on them at the moment, so moving all the available water up to the top dam, where I have both petrol and electric pumps installed gives me access to whatever water is left to us over the hot dry summer for fire fighting. Also, concentrating all our water in one place minimises the losses from evaporation.
Once the bottom dam was more or less empty. I carried the petrol pump up and into the middle dam, re-arranged all my Heath Robinson, improvised piping and began pumping from the middle up to the top dam. I’ve been on my very own personal, localised, ‘Snowy Hydo 2′ project here for two days now and all the water hasn’t been relocated yet. It’s a slow job, moving thousands of litres of water, up hill through a 40mm dia pipe. I hope to finish it off tomorrow.
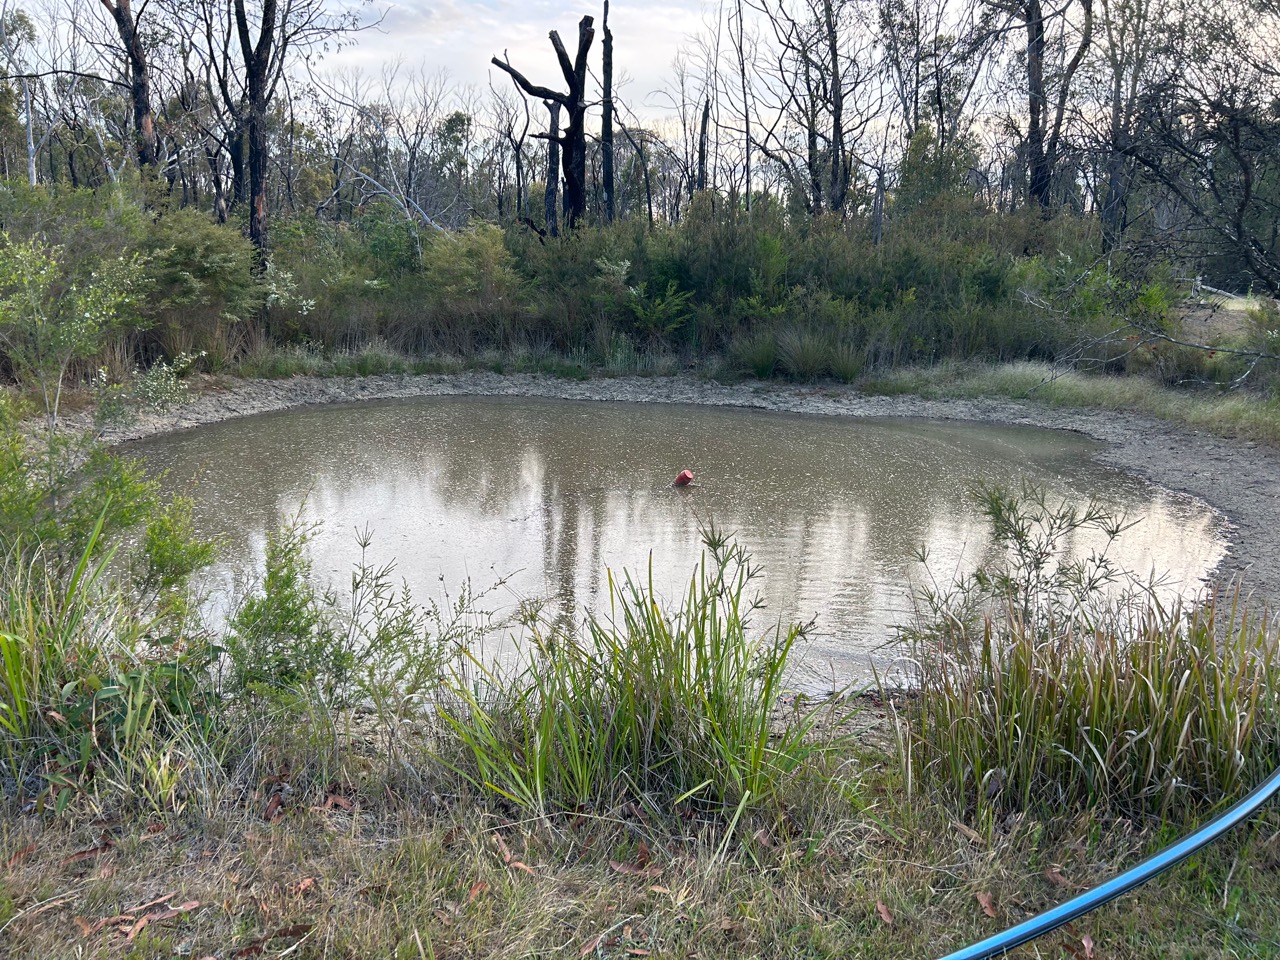
From the middle dam up to the top dam.
The little top dam is now half full with all the accumulated water from the other dams, it will keep us safe into January. Then?
While all this was going on. I was also working on the new fire fighting sprinkler system along the verandah and roof of the new pottery building, and also rebuilding the burnt out sprinkler system on the barn. It worked perfectly during the fire, and saved the barn for burning, but when the power failed and the electric pump stopped, the plastic pipe system melted. I will be installing a petrol driven, high pressure, fire fighting pump in this system when I’ve finished pumping all the dam water uphill.
The roof and wall sprinklers all rebuilt and up and running again now.
Nothing is perfect. Nothing is ever finished, and nothing lasts.
However, I feel safer knowing that I have water in the system available to use to fight the next fire,
and a reasonably functional system in place that I hope will be able to cope with whatever nature throws at us
I make sure that I use the fire pumps often over the summer months to irrigate the garden and orchards.
In this way, I always know that the pumps are in reliable working order, then if one of them gives some trouble with the irrigation, I can step in and fix it well before there is any emergency, when there is no time for fixing things. Everything must work perfectly and immediately.
Since the last fire 4 years ago, I have installed 45,000 litres of tanks in front of the Barn, dedicated to the fire pump for the pottery and barn system. I have also installed 30,000 litres of new water storage tanks on the old Railway Station and car port with its own fire pump.
We are much better prepared now than we were 4 years ago. This is self reliance!
The Southern Highlands Arts Trail and Open Studios Pottery sale is on again this weekend and the next. This also coincides with the Australian Ceramics Assn Open Studios on the 2nd weekend in November. So we will be open for both weekends, the 4th/5th and the 11th/12th of November.
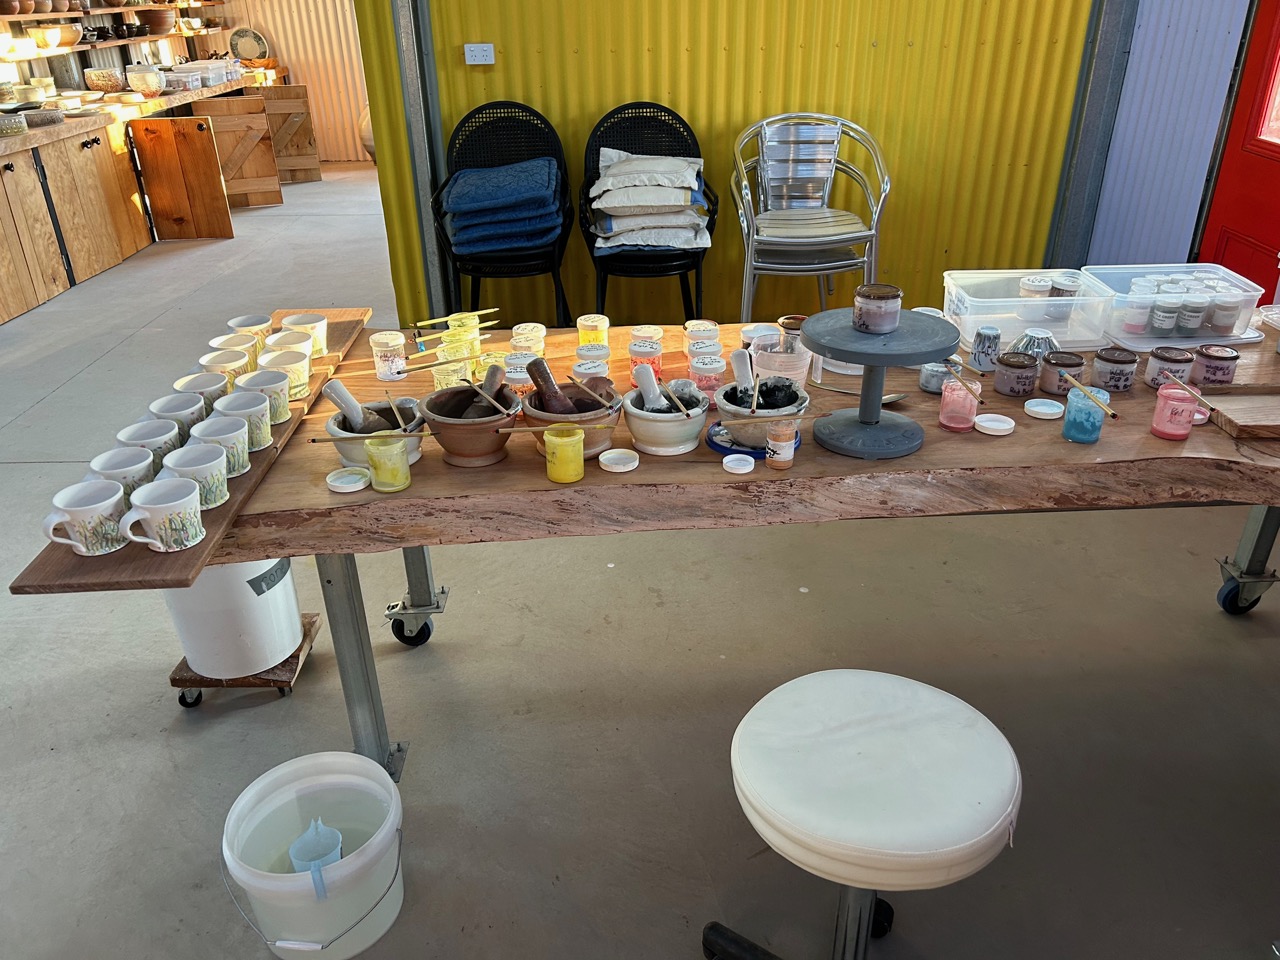
We have done our last few firings and are cleaning out the pottery, scrubbing, mopping and polishing. For this Open Studio sale I have been concentrating on being as sustainable as possible in our process. Almost everything is fired using our electric kilns and our solar electricity. This is quite a change for me. I usually work in reduction atmosphere, and will again. However, to keep everything as sustainable and light footed as possible. I have decided to only fire in the electric kiln using our extensive solar power and Tesla batteries during these hotter and more fire prone months. I am slowly slipping into a cycle of making and firing reduction wood kiln firings in the cooler months for the July sale using our own bush fire scorched and dead trees as fuel, and then solar electric firing for the November sale when wood firing is too dangerous.
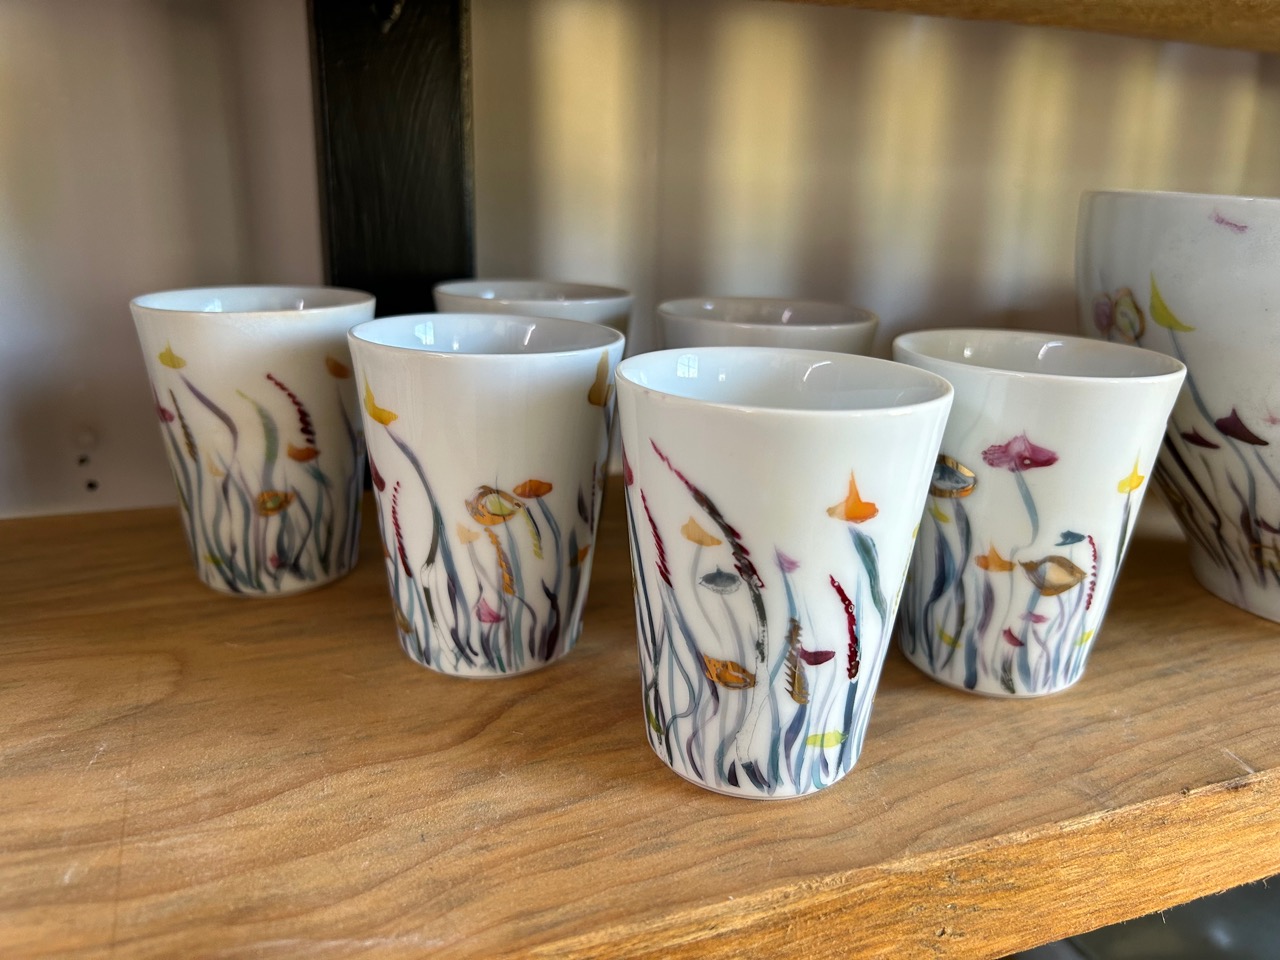
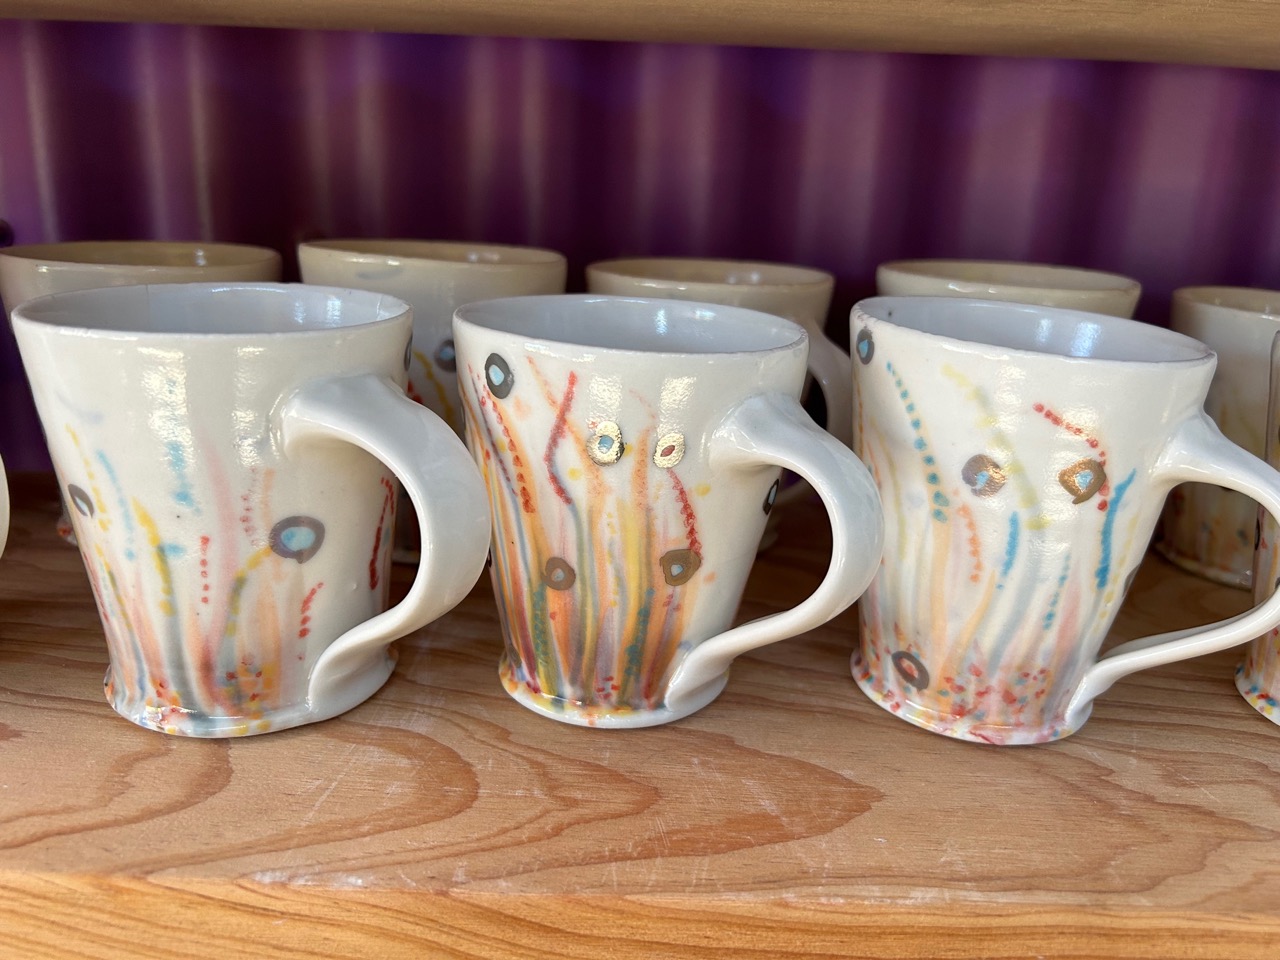
This means that there will be a big difference in the work for each sale. The chunky, rough, fire flashed bodies and unglazed surfaces of the wood kiln, vs the softer, glazed all over and brightly painted glazed work from the sunshine fired work. Both are sustainable and very low carbon the way that we have organised it. I aim to be carbon neutral where ever possible.
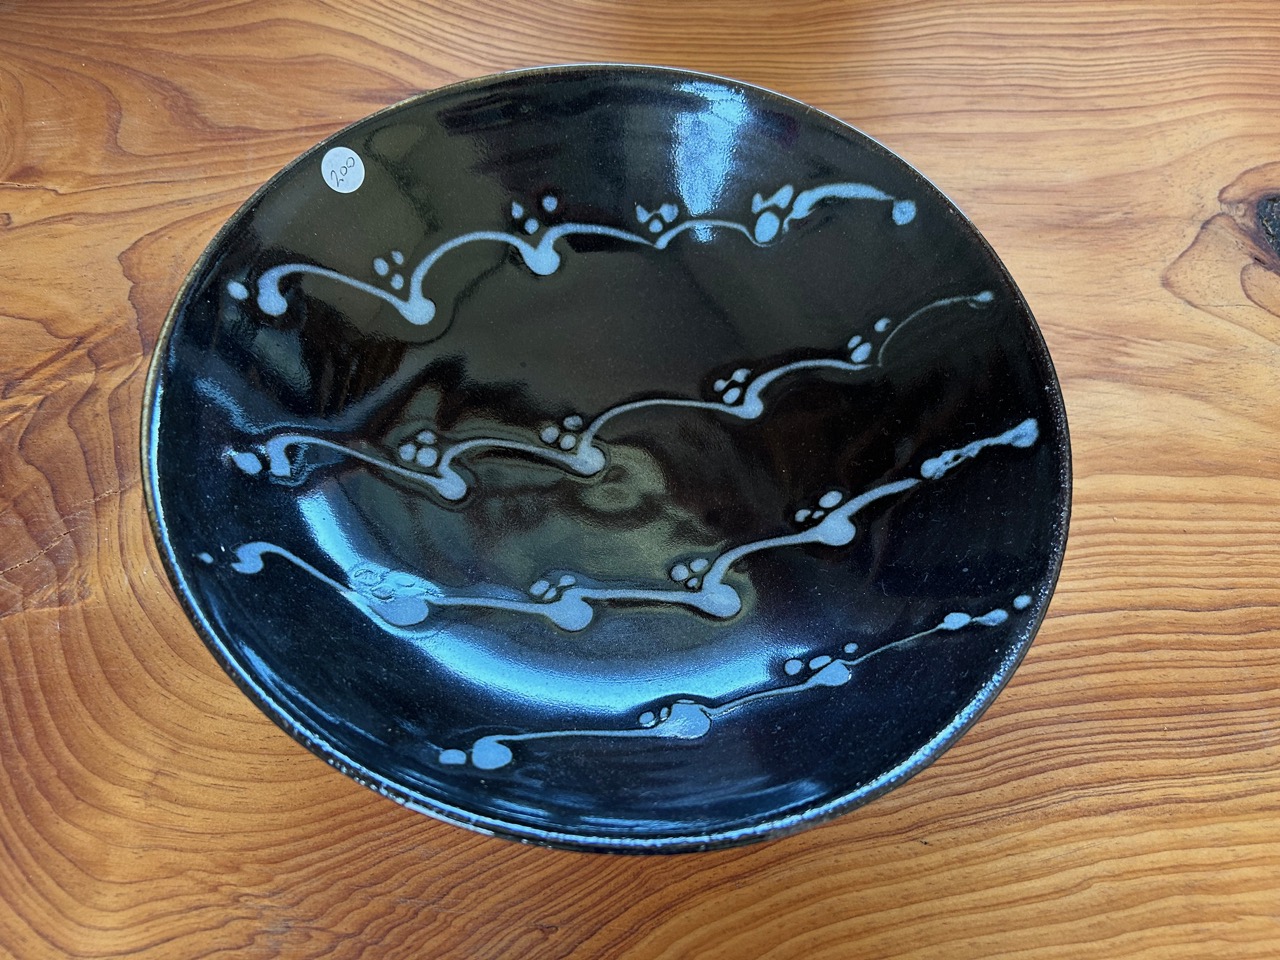
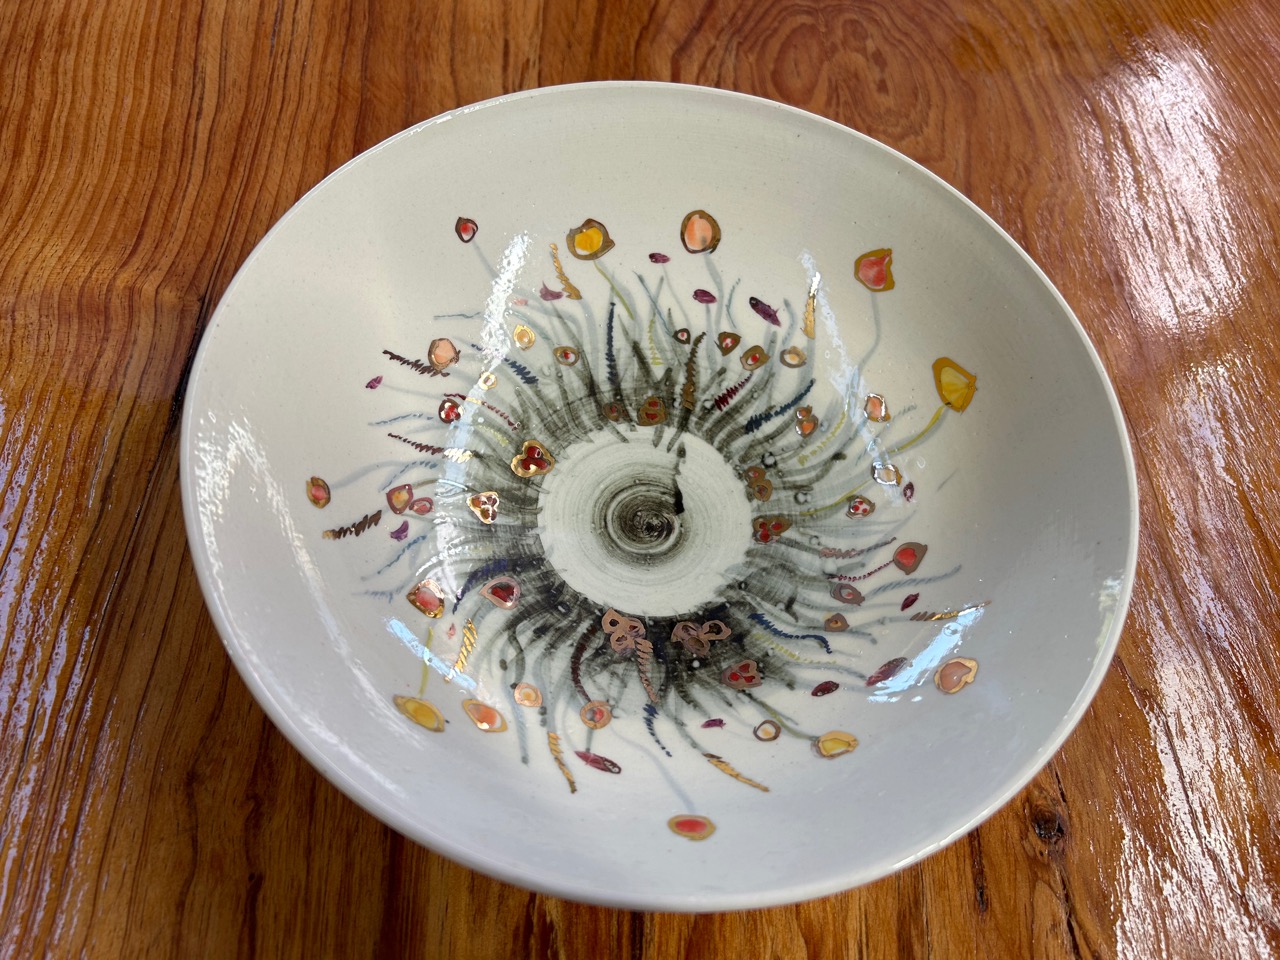
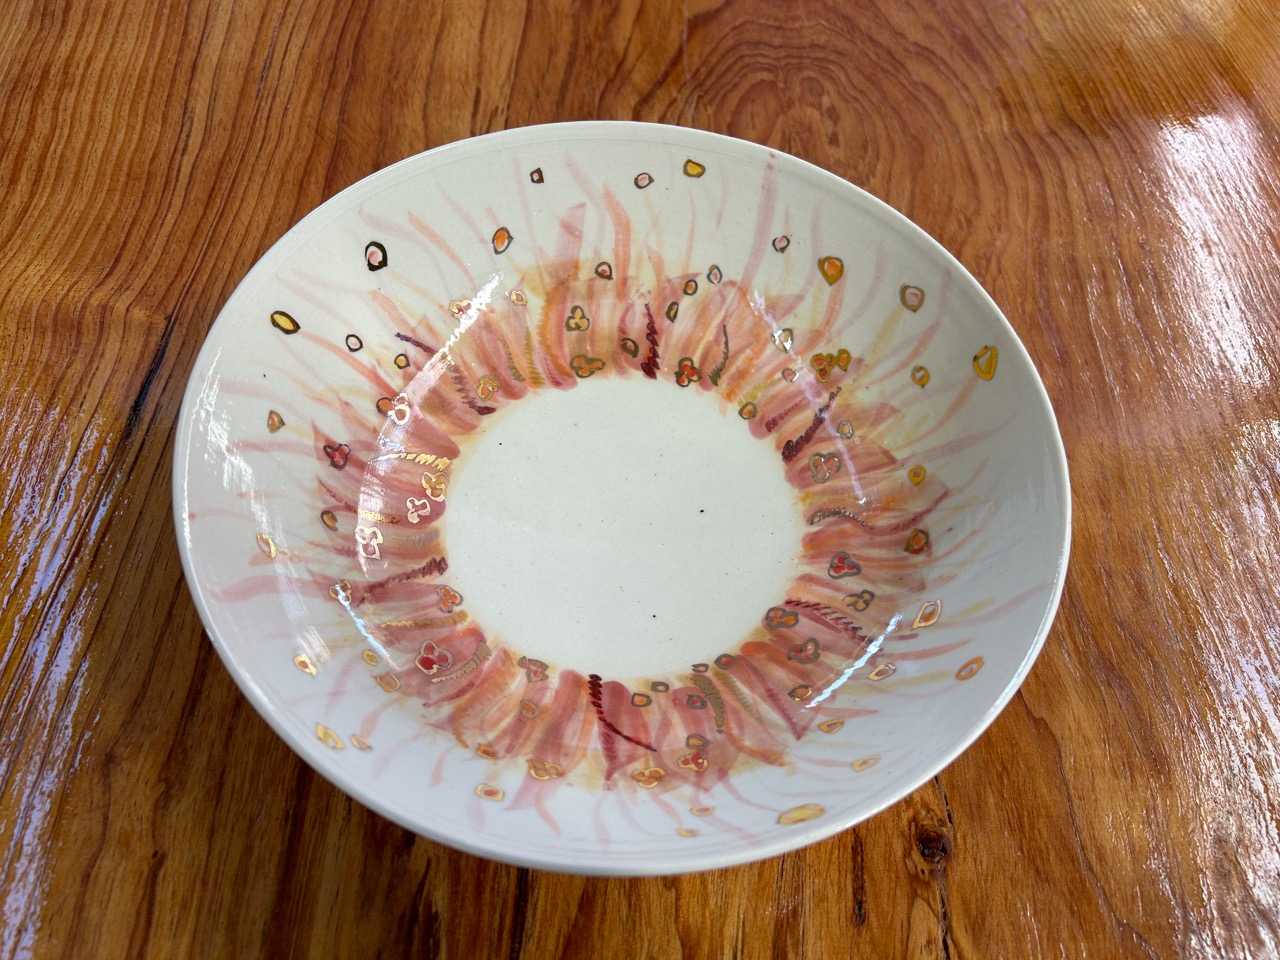
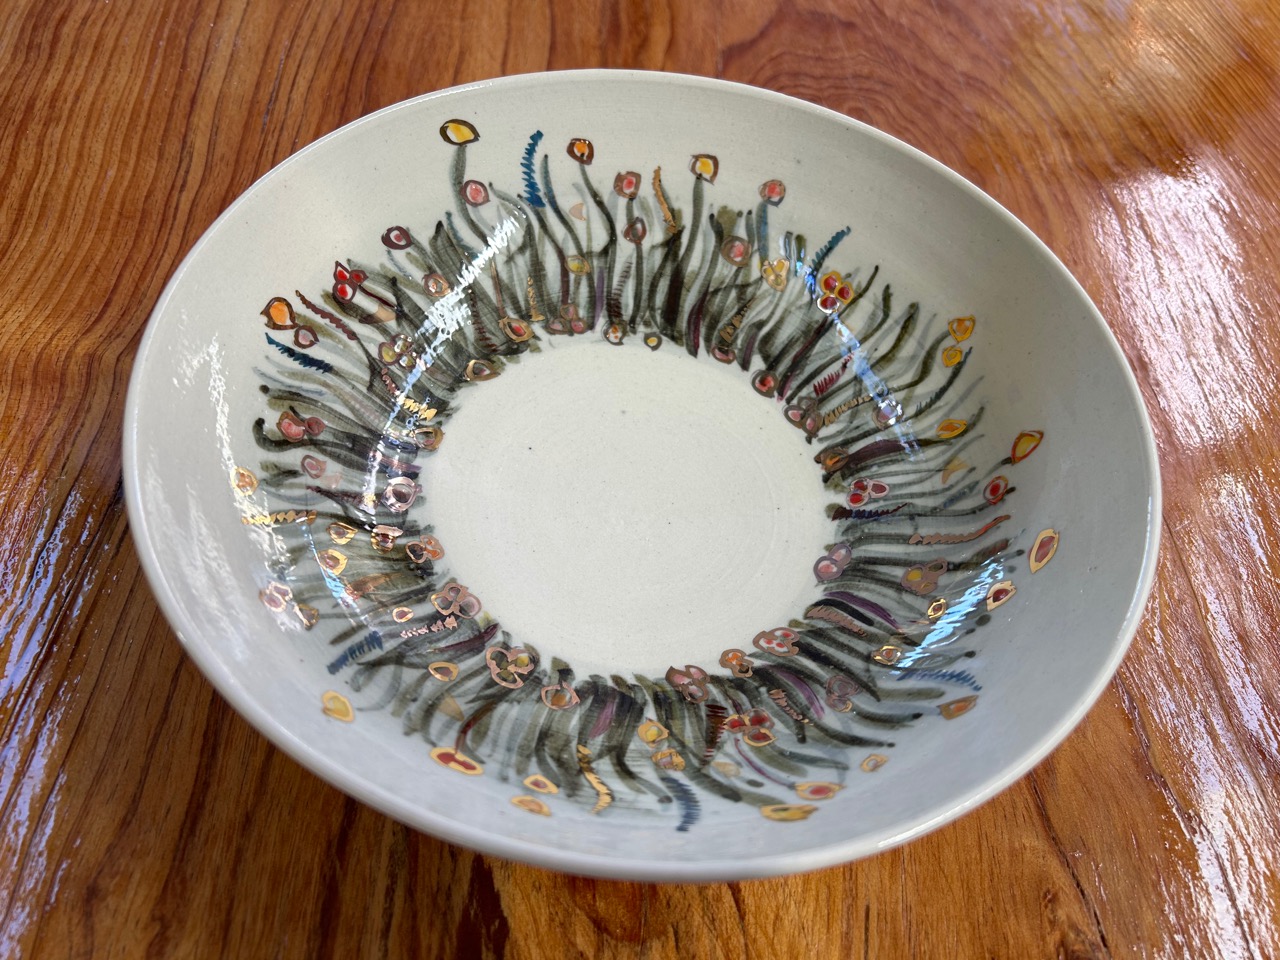
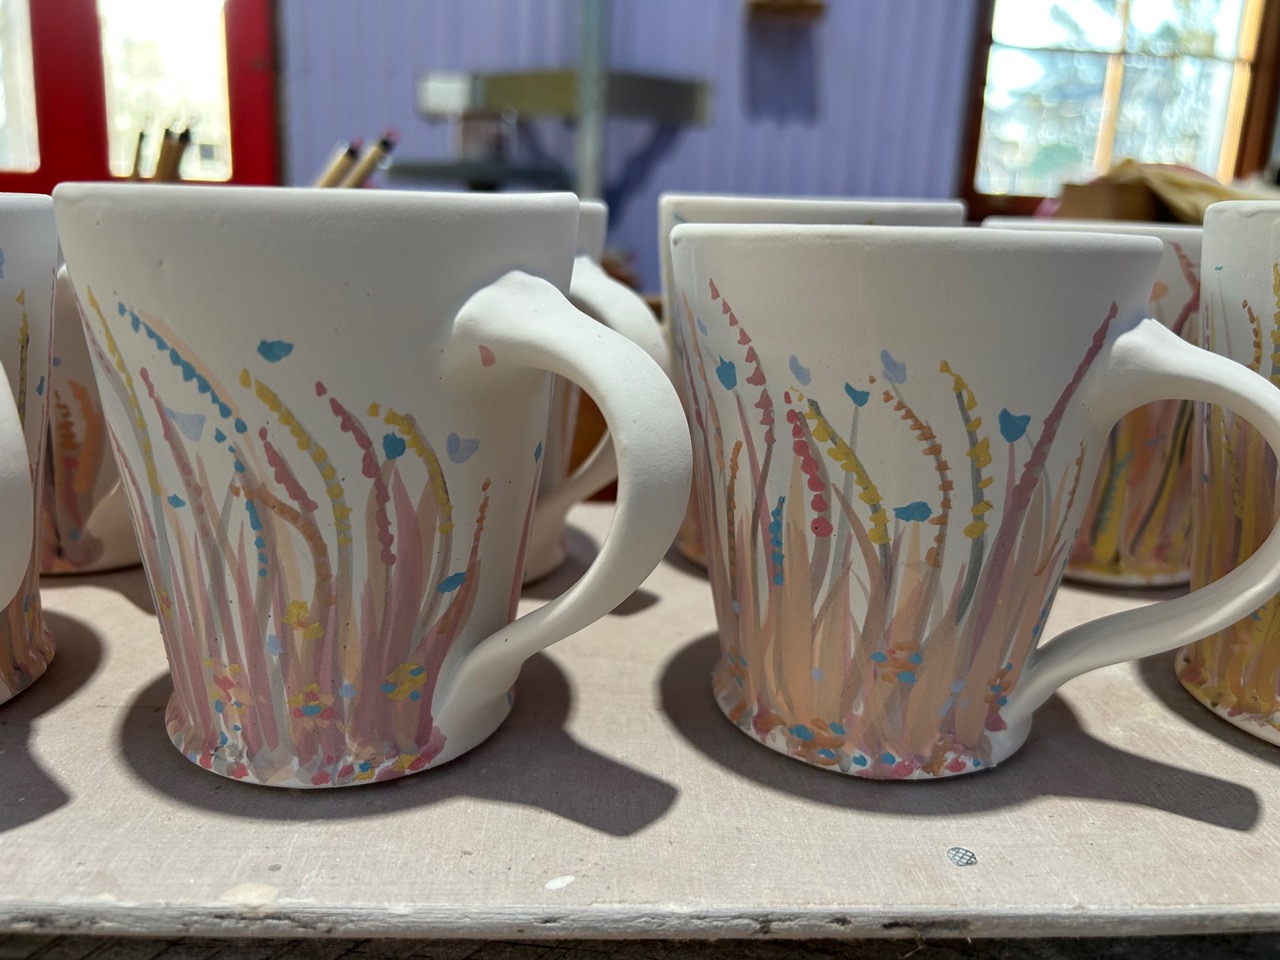
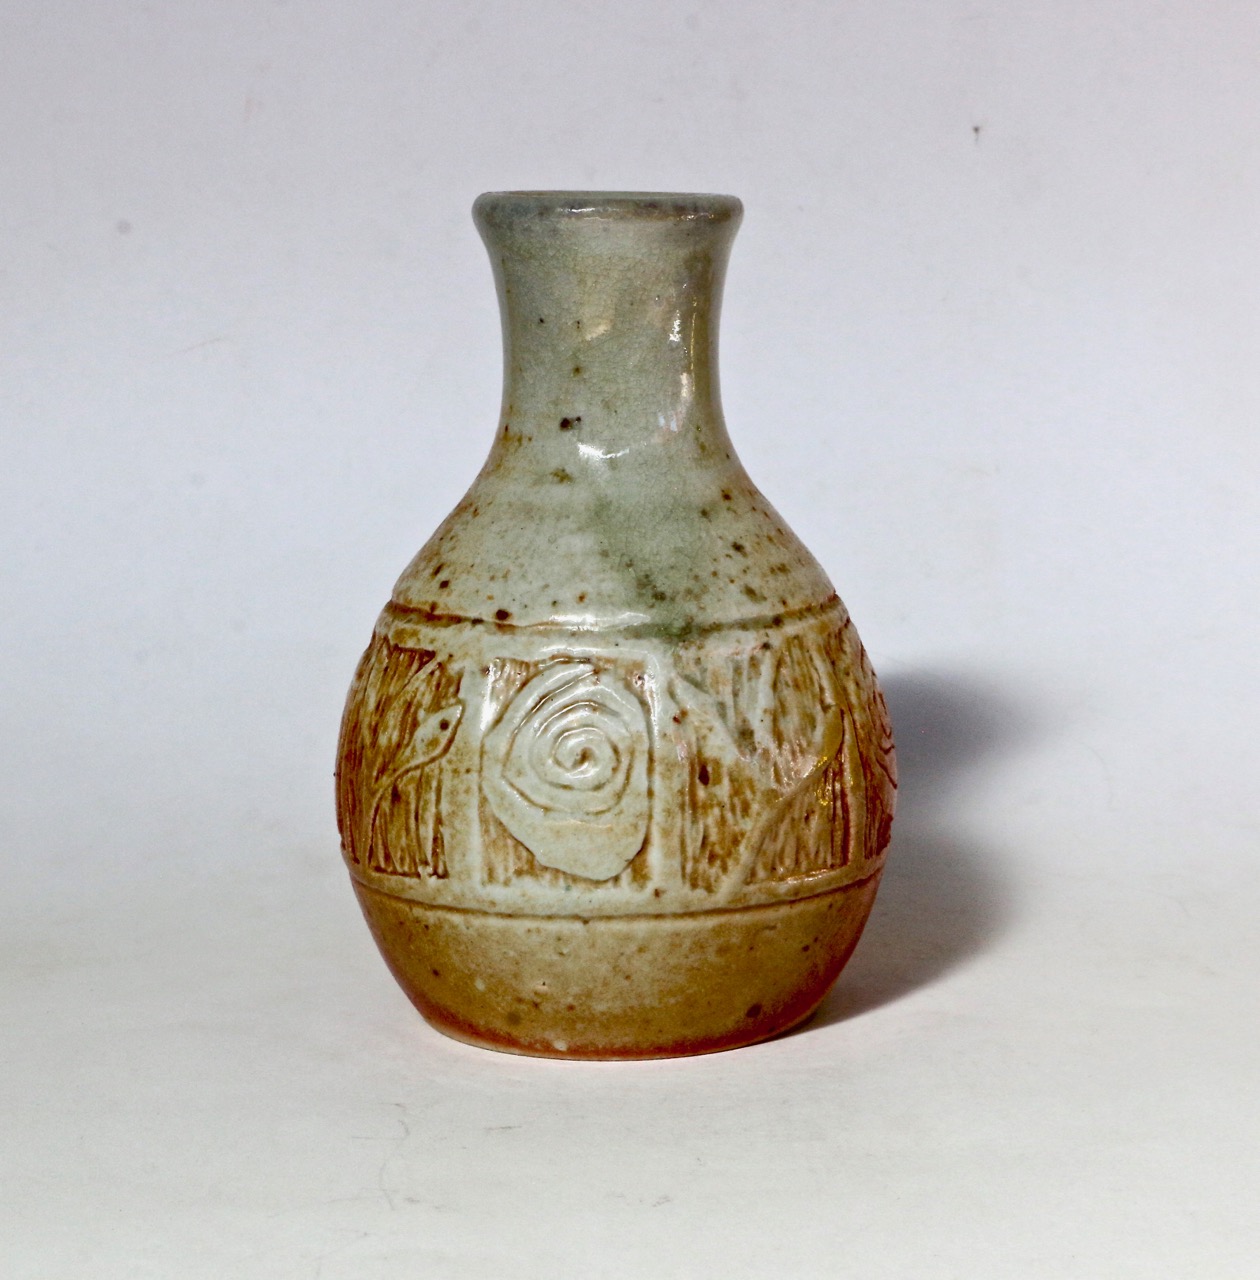
The last few firings that I have done for this show were lustre firings to add a bit of extra colour and shine, plus a little bit of pure gold here and there for some added ‘bling’. I never used to decorate very much, relying almost totally on my locally collected rock glazed celadons and guan glazes, combined with wood firing for the soft and subtle understated effects. However, since the fire and the almost total change in my life and circumstances, I’ve taken an interest in painting and colour.
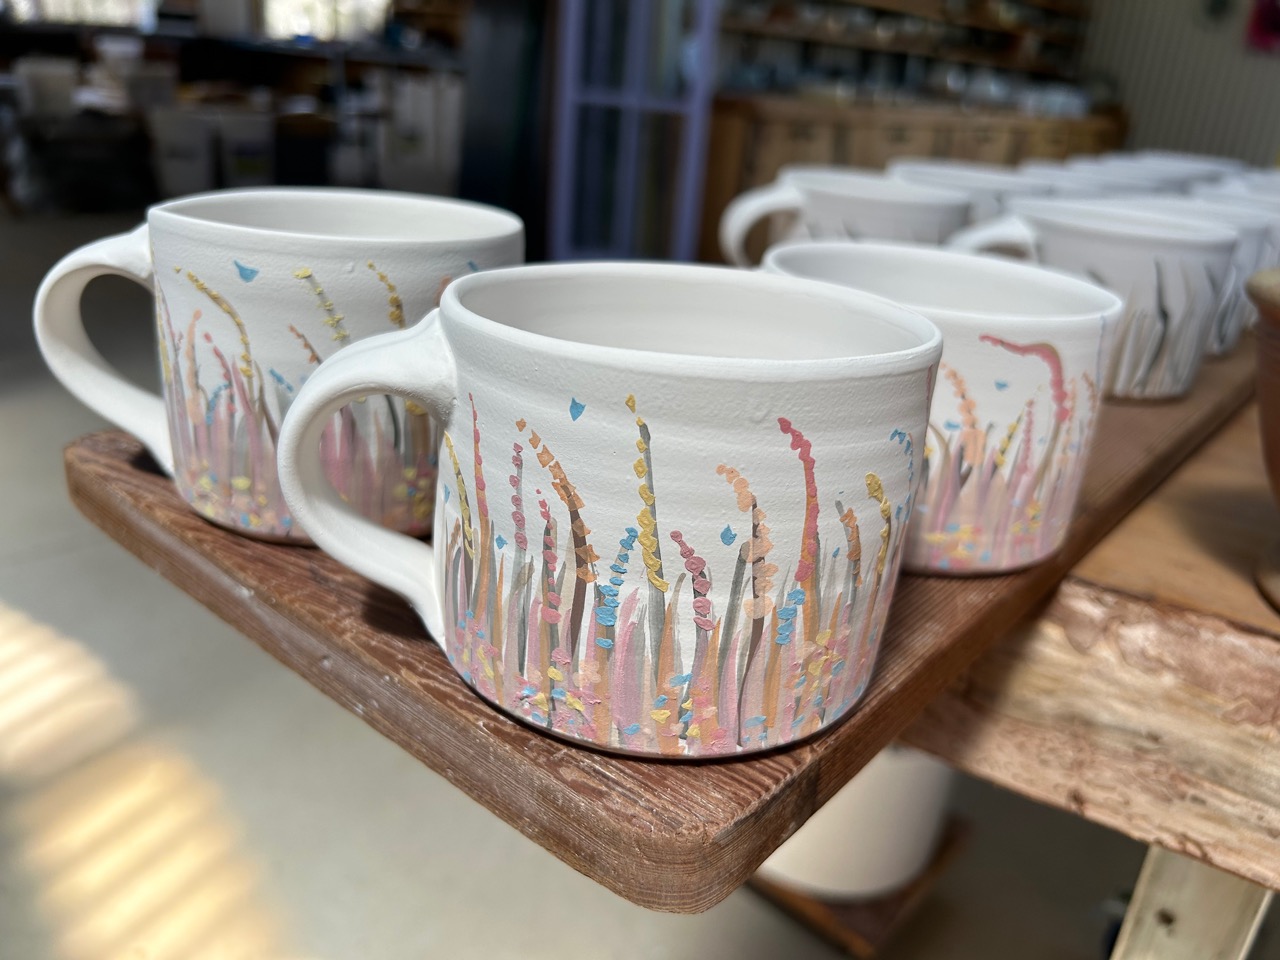
This change was slow and complex, but aided along by some very good trauma therapy and the fact that I was gifted and box full of china paints and lustres from a local potter who passed away recently. I’m continuing with my theme of ‘from flames to flowers’ leitmotif.
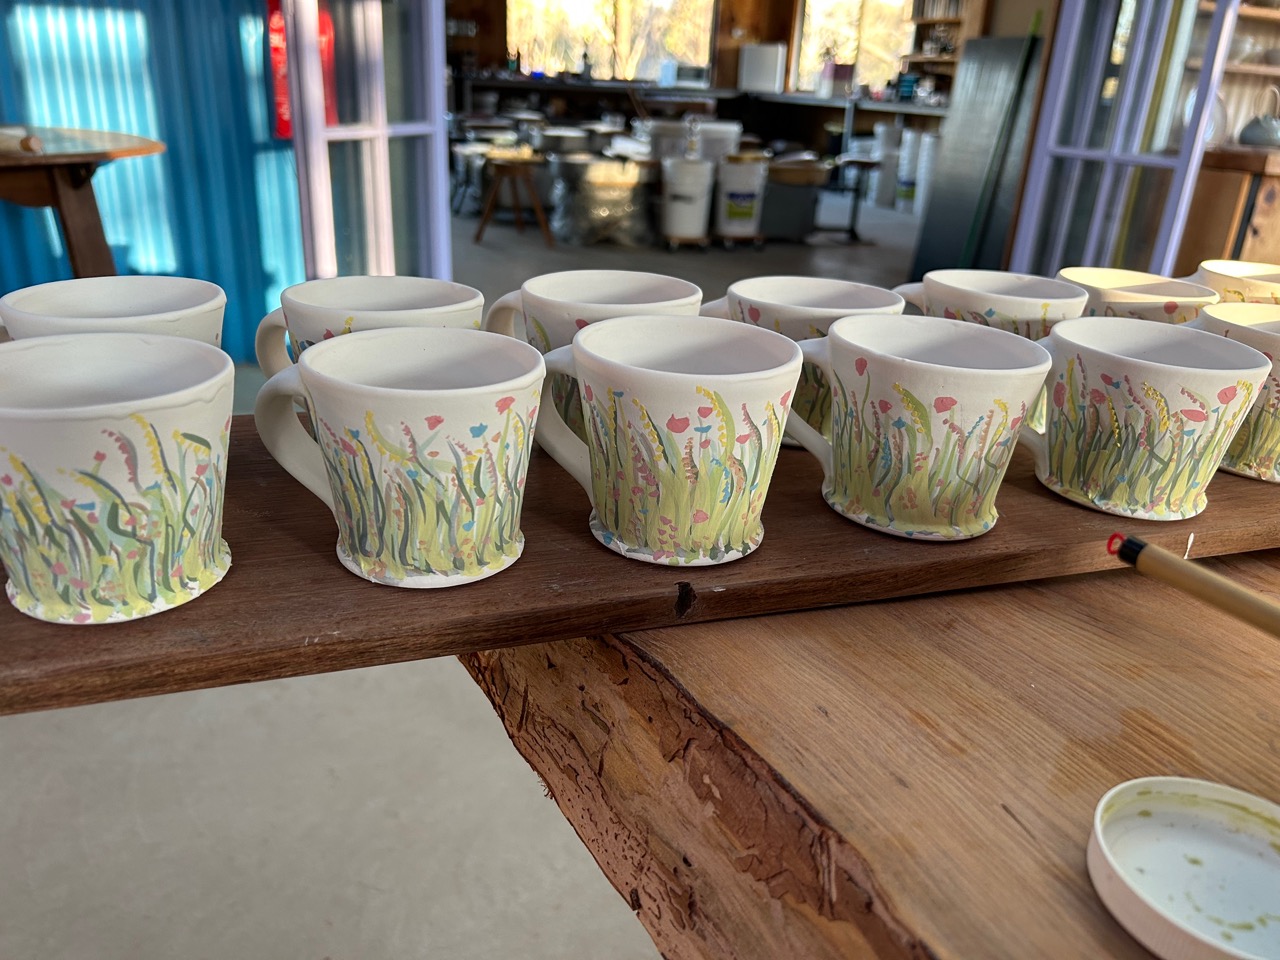
I worked through 3 slightly different colour palettes from yellow/green hues, to two tone blues, through to purple mauves.
I like them all but perhaps I will keep one of the yellow green cups for the kitchen for our own use.
I’ve also made some breakfast bowls and coffee mugs in different shapes, tall narrow and short and wide.
I think that I might have reached peak flower now!
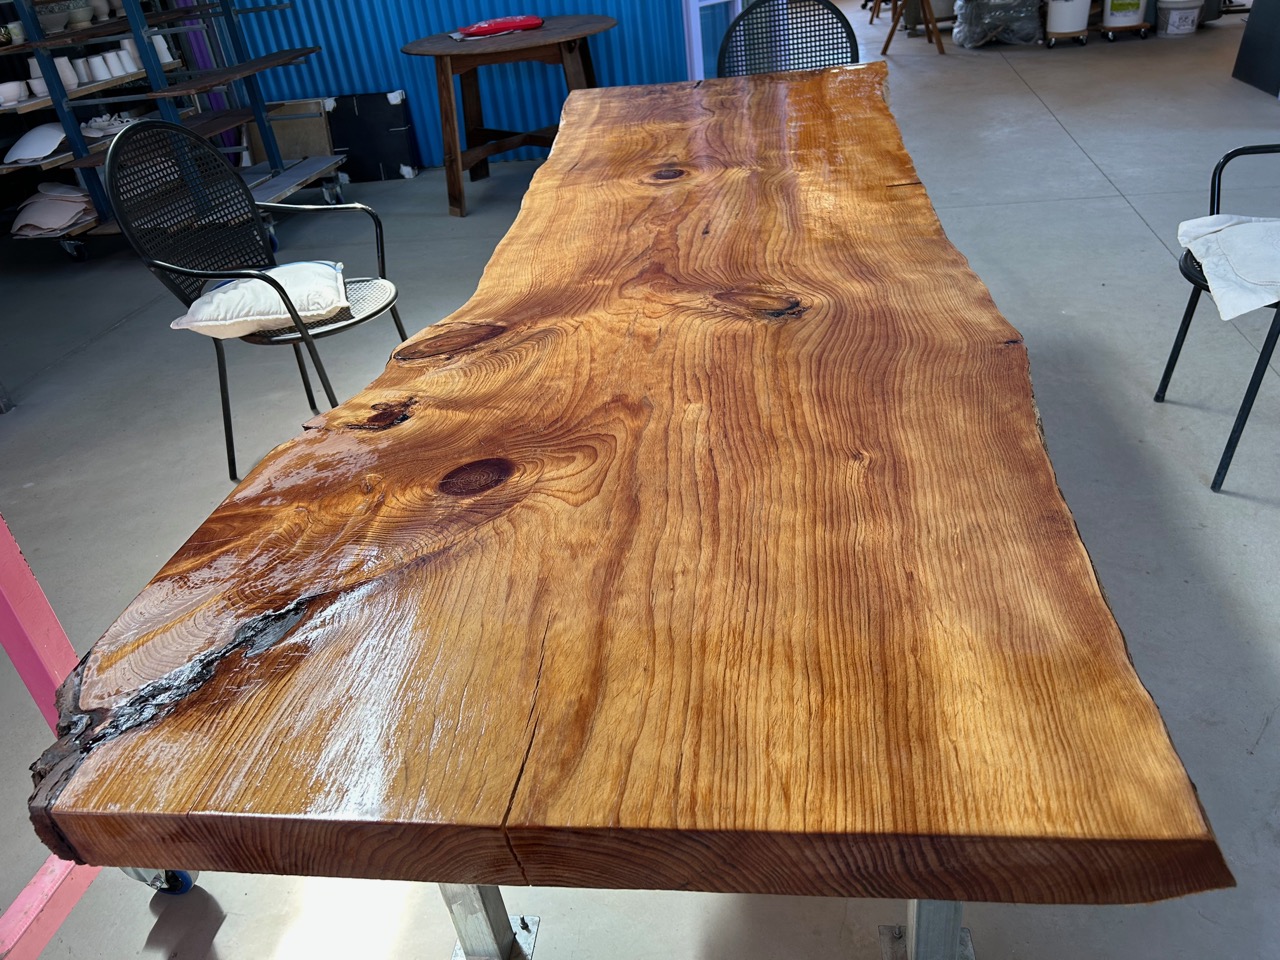
As part of the sale weekend prepping and general spring clean I cleaned and re-oiled the big hand made wood slab table. I milled it from our own pine tree that was burnt in the fire It looks brand new again now.
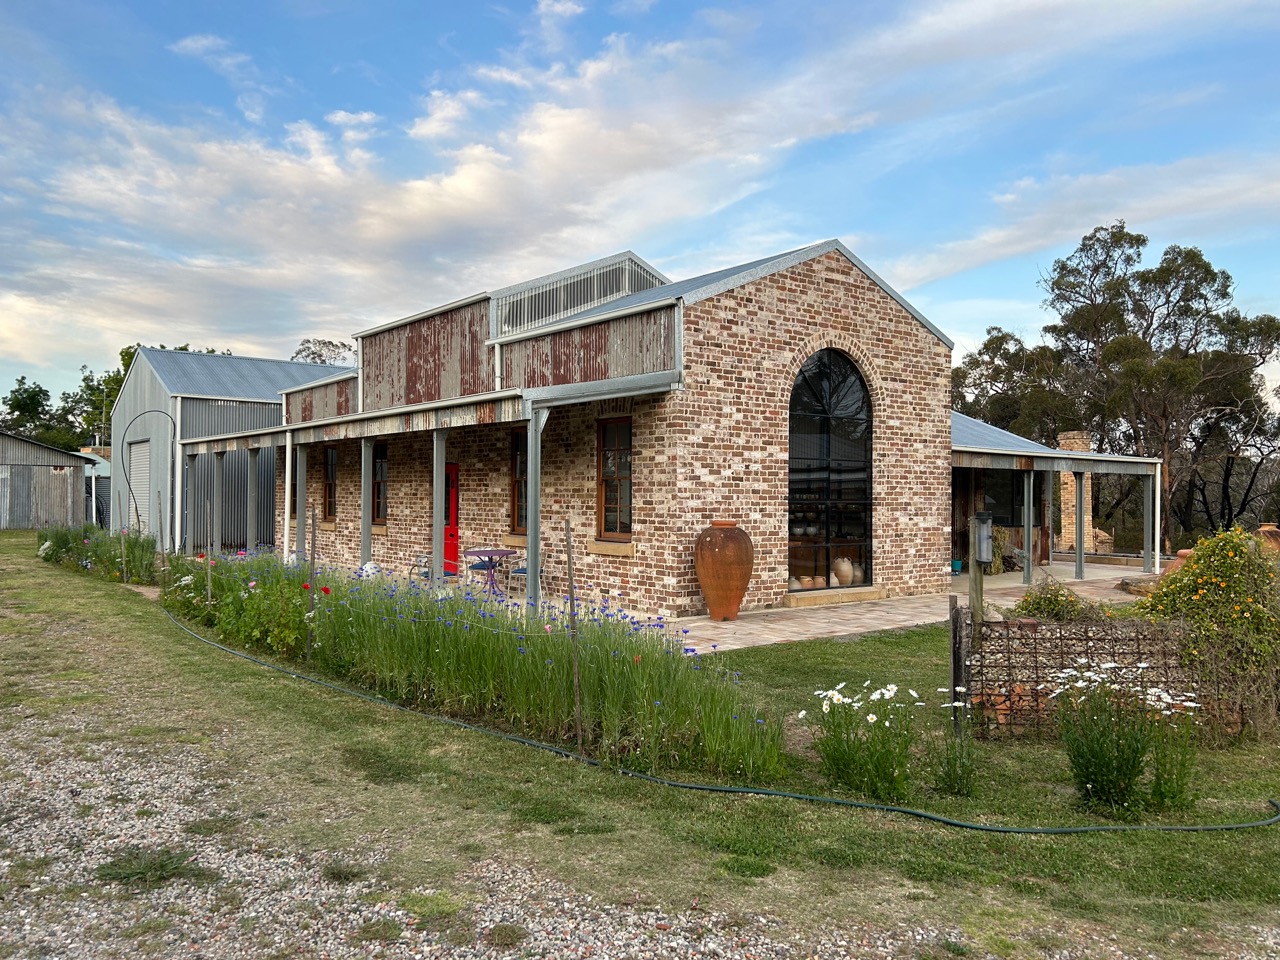
We have almost completed all the paving around the pottery now, and the flowers are blooming along the garden in front of the pottery along the driveway.
November is fast approaching. We will be opening our workshop for the first two weekends in November for the Arts Trail – Open Studios event here in the Southern Highlands. We have been getting ready for this open Studio sale since the end of the last Open Studio sale in July.
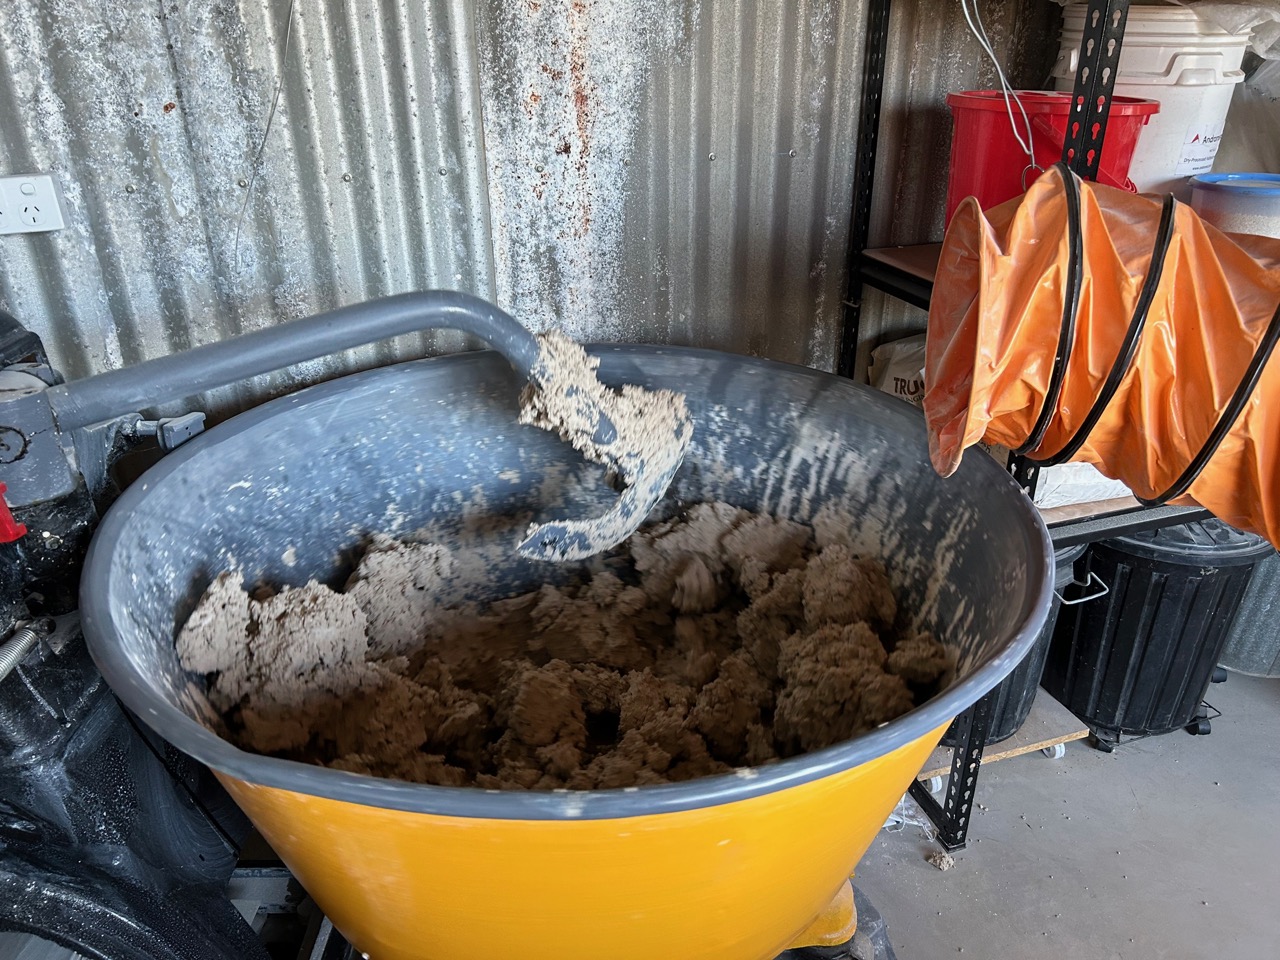
Straight after the last sale, we had our 1st throwing workshop weekend in the pottery and then got stuck in straight away making new batches of clay, so as to make the new work for this show. I wrote about it here on the blog in August. < Pugging ClayPosted on >
We spent September throwing, turning that new clay into pots. We had to be strict with our selves, as there is always so much to do here throughout the year dealing with seasonal events like pruning and making marmalade, before we left, but we got the pots made. We knew that we would be away for a lot of October doing a geological survey of potters materials in New Caledonia, so all the work needed to be made and bisqued before we left.
As soon as we returned we were solidly back at work in the pottery glazing and decorating those pots. Again on a tight schedule, as I was asked to give the 10th. Ian Currie Memorial Lecture to the Ceramic Arts Queensland ceramic group. I gave the first lecture in the series a decade ago, and they asked me back to give another lecture, this time with a theme of sustainability, but also to give a weekend workshop on making glazes from local raw materials. We had decided to drive up and back, so as to call in and visit all our relatives along the way. Folks that we hadn’t seen since before the fire, COVID and the lockdown, so we had to allow a couple of weeks for the trip.
We have planned the 2nd half of this year pretty well. So now we are back home again and doing the last few glaze and gold lustre firings ready for next weekends sale.
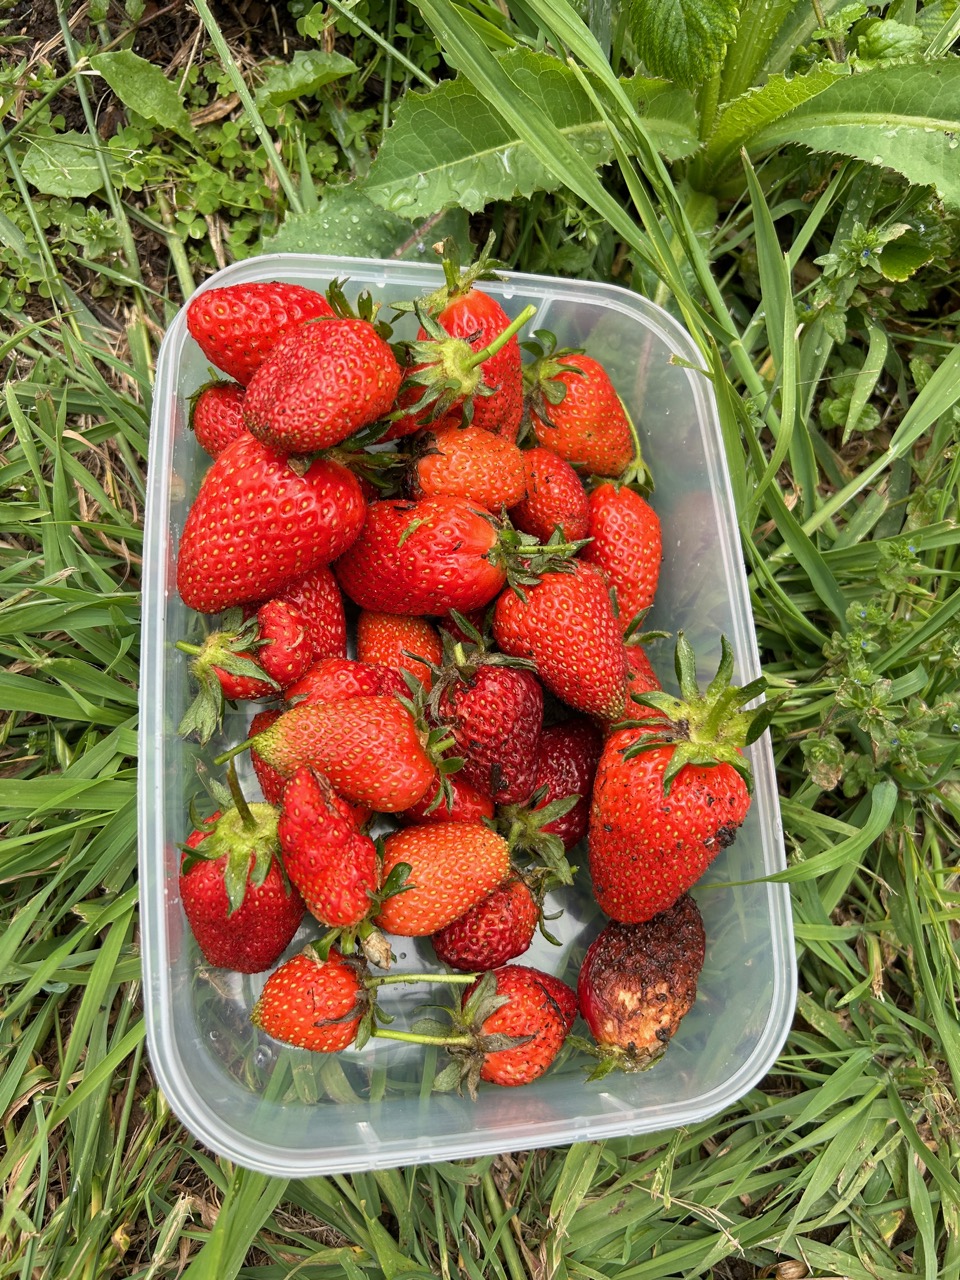
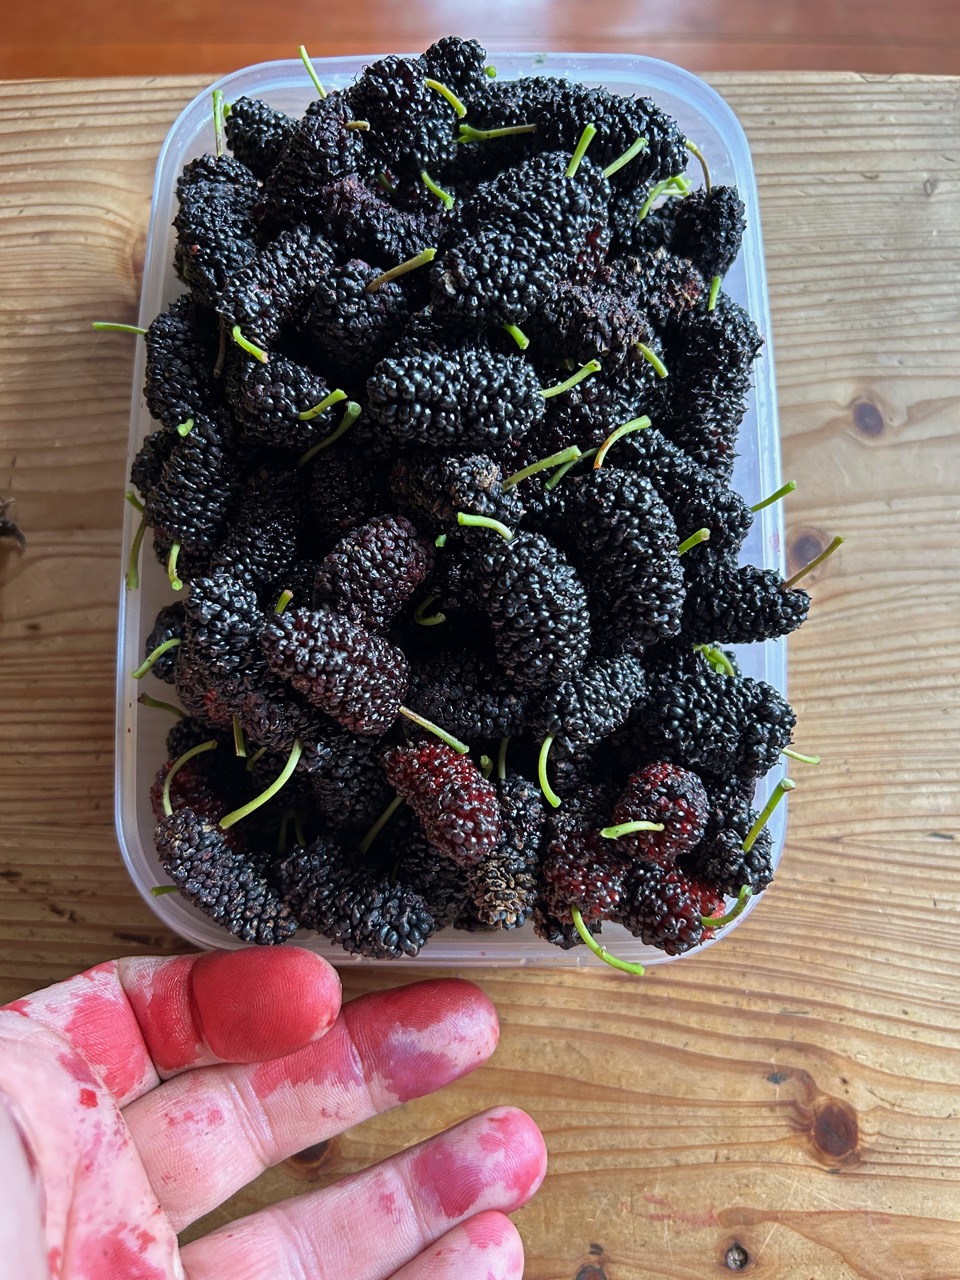
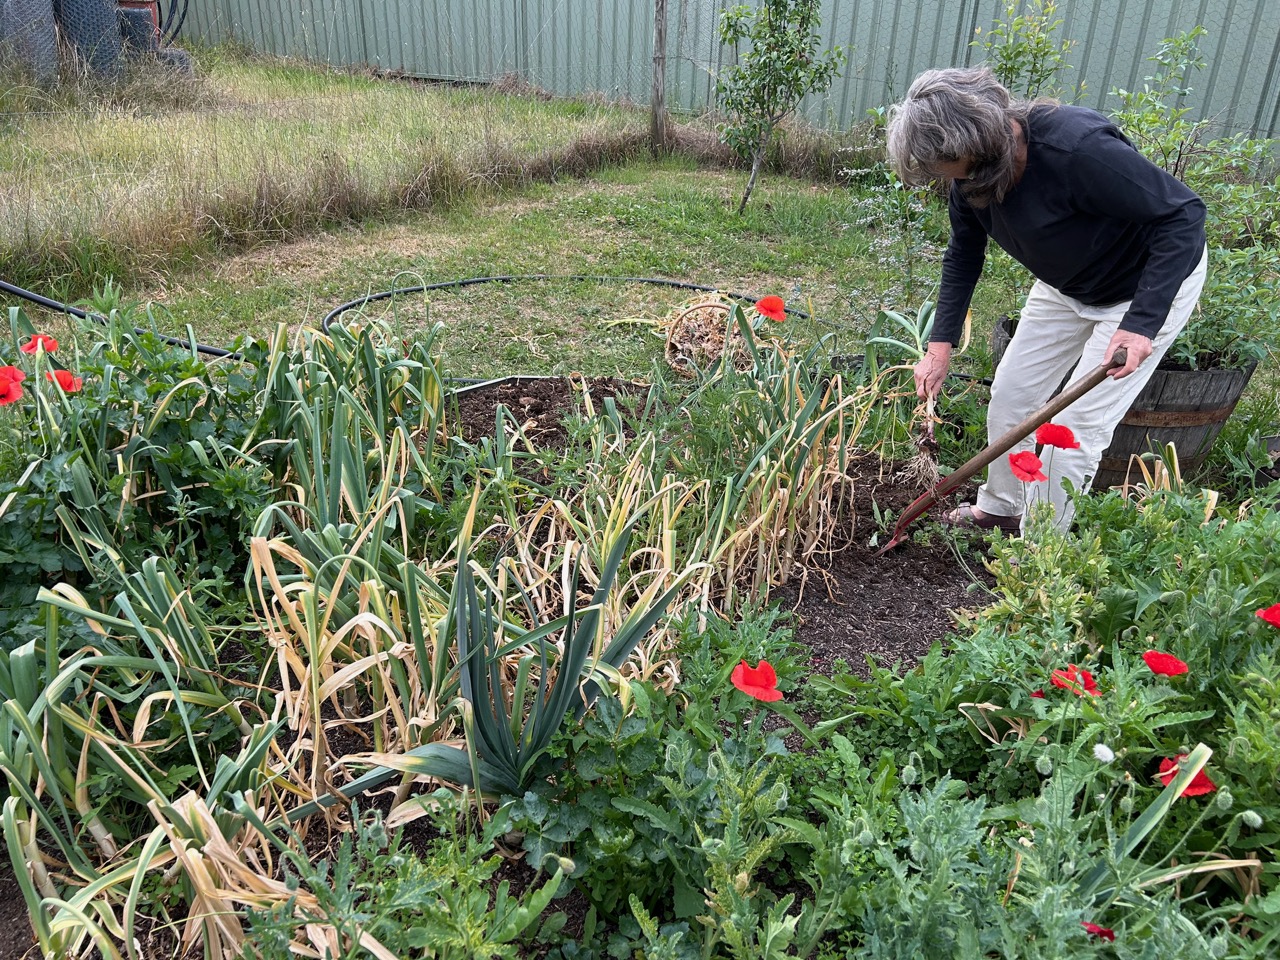
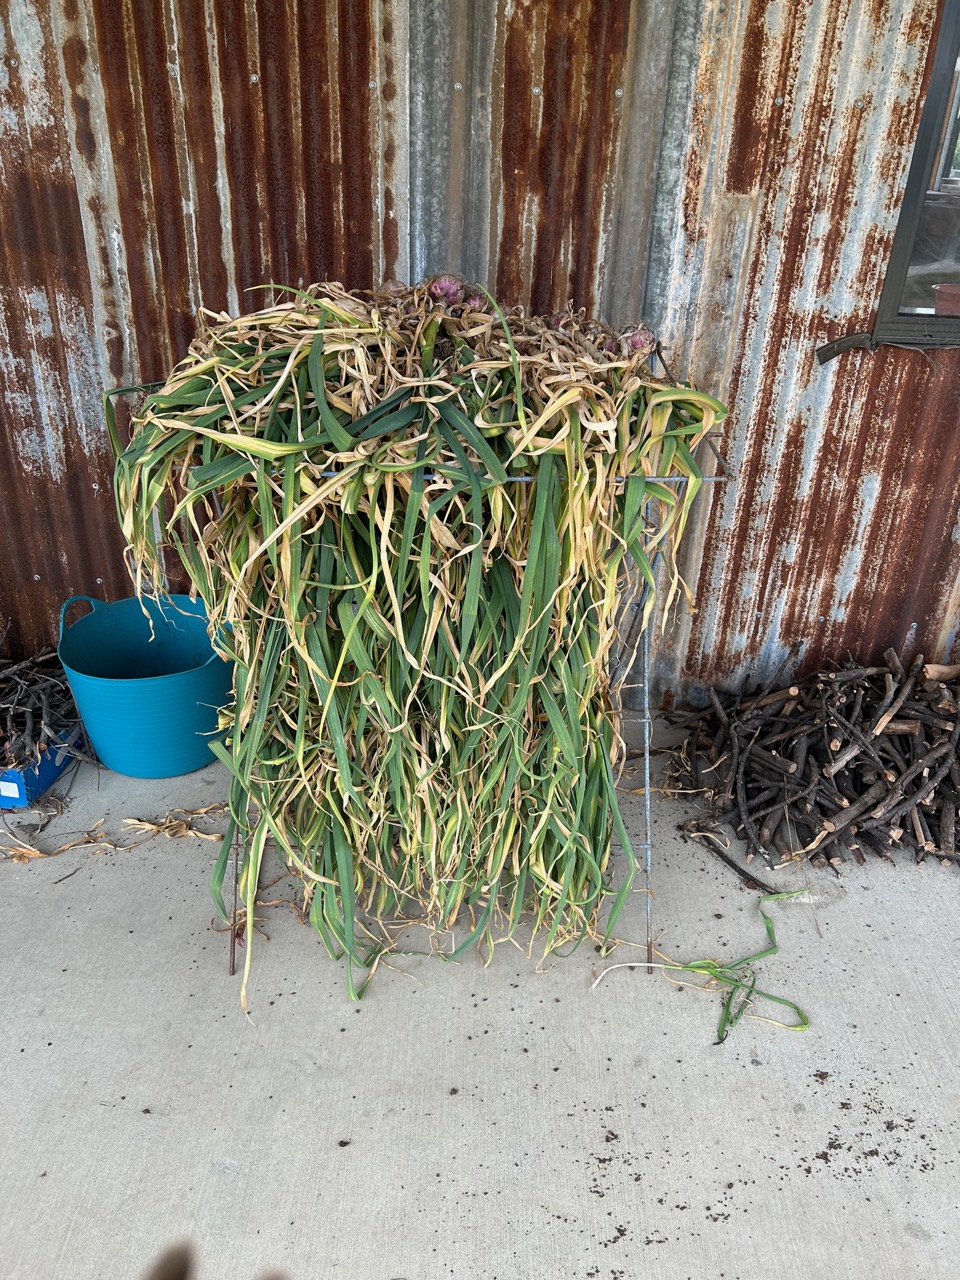
We came home to find a wealth of lovely things that had matured while we were away. The flower garden is still in bloom, the strawberries, cherries, mulberries are ripe and ready to pick. We got out of the car, unloaded the boot, put the washing on, then started watering the garden, picking fruit and lifting the garlic. No time to waste. Everything needs to be done now, so we have to schedule our time and energy appropriately.
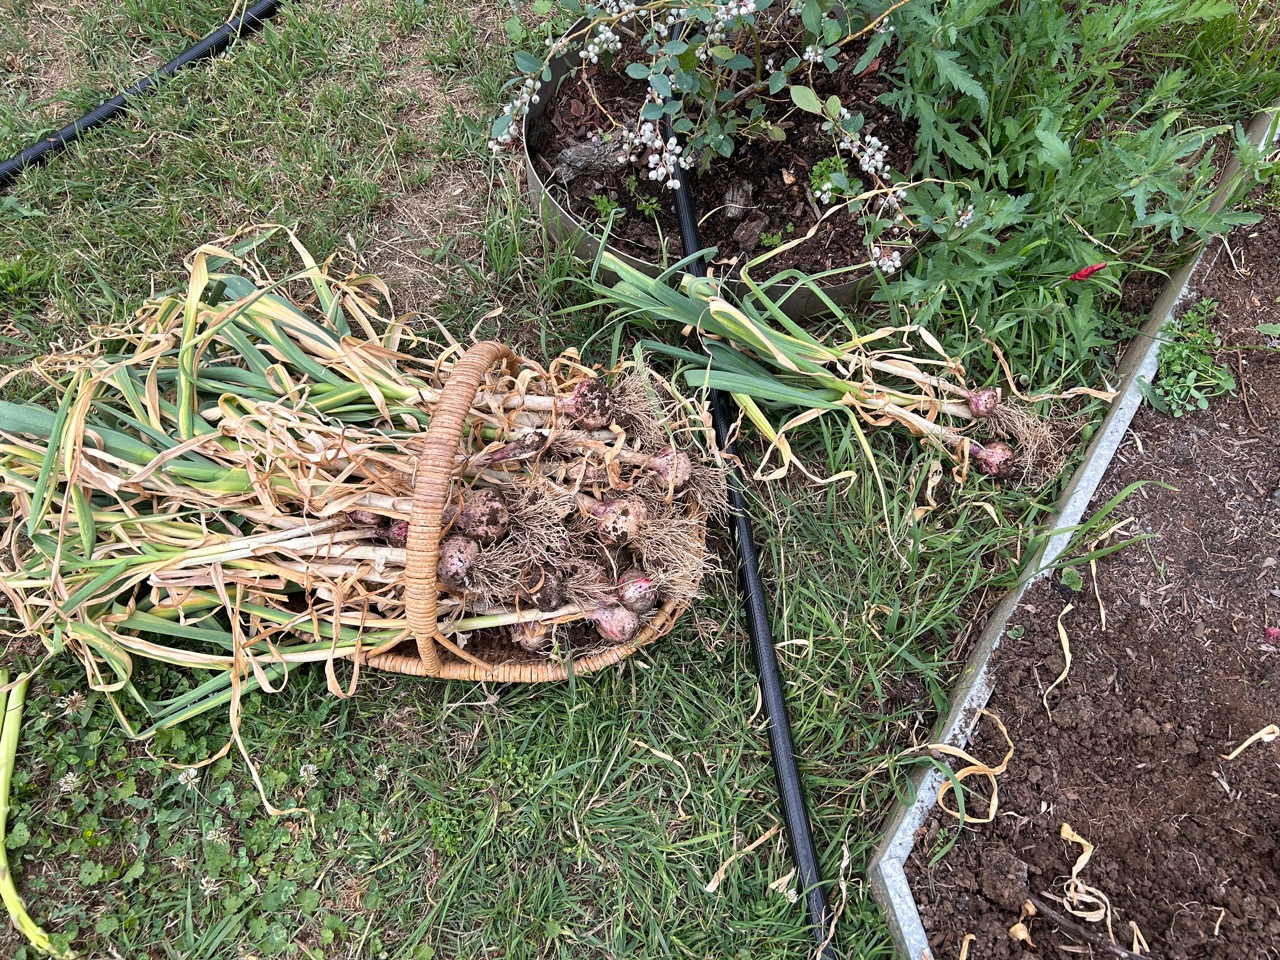
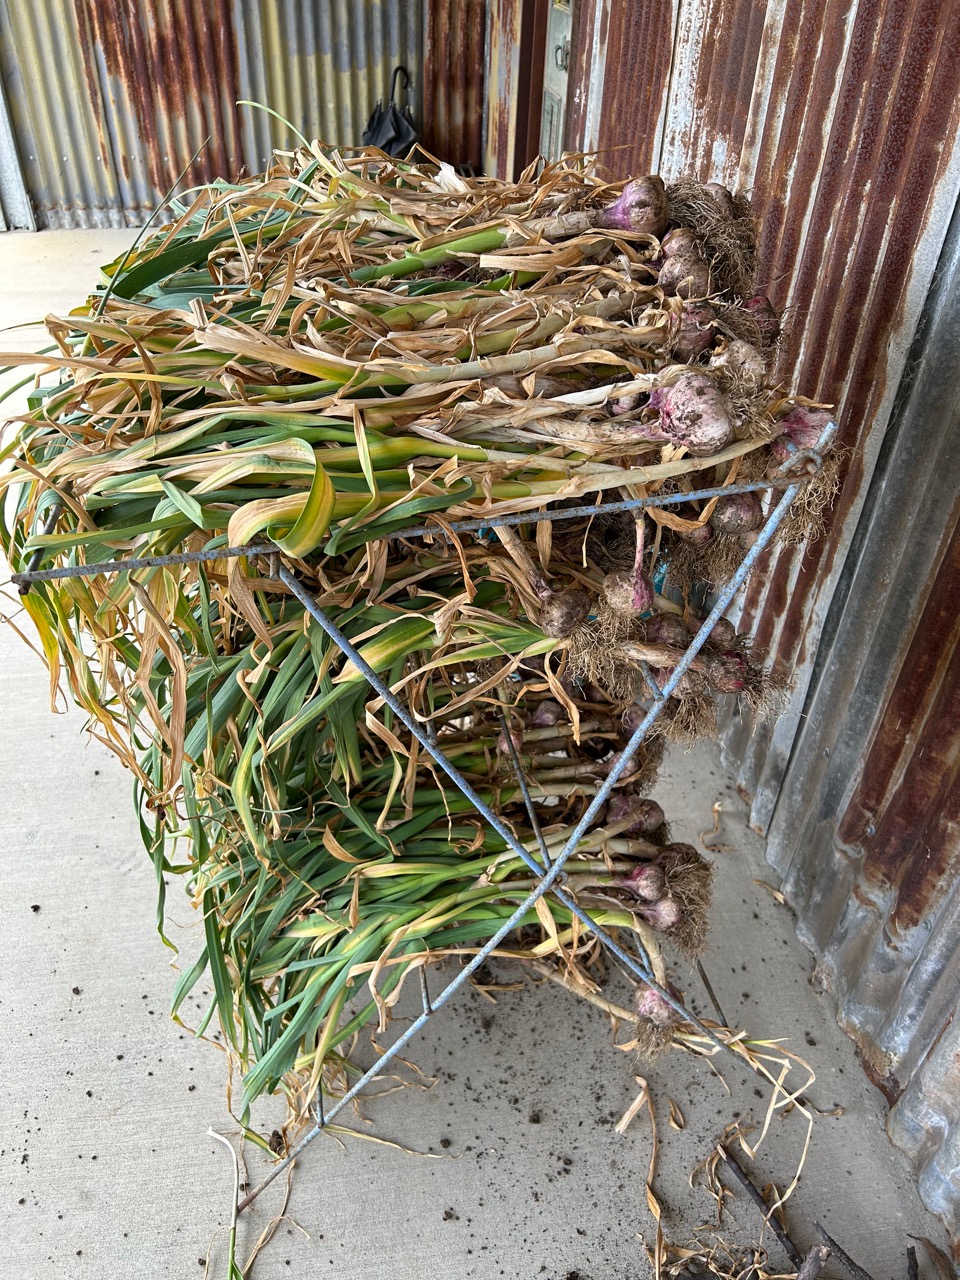
The garlic is ready to lift.
We lay it out on a metal rack to dry for a week or two before platting and hanging ready for use.
We have about 150 mature knobs this year. A small harvest compared to previous years. We have lifted up to 300 knobs in a good year, but I’m not complaining, any garlic is good garlic when it’s home grown.
By the time we take out the best 20 knobs for replanting, there will only be enough to last half a year.
We have had a cancellation in the first ‘Make and Scratch’ sgraffito workshop on the 25th/26th of November. If you are inrterested in filing this place, please email me at <hotnsticky@ozemail.com.au>
The workshop is titled Make and Scratch, and will be a hands-on Making, throwing and decorating workshop concentrating on Sgraffito.
Janine and Warren will be leading the workshop and demonstrating their techniques of sgraffito decoration. I will be assisting with the throwing part of the process.
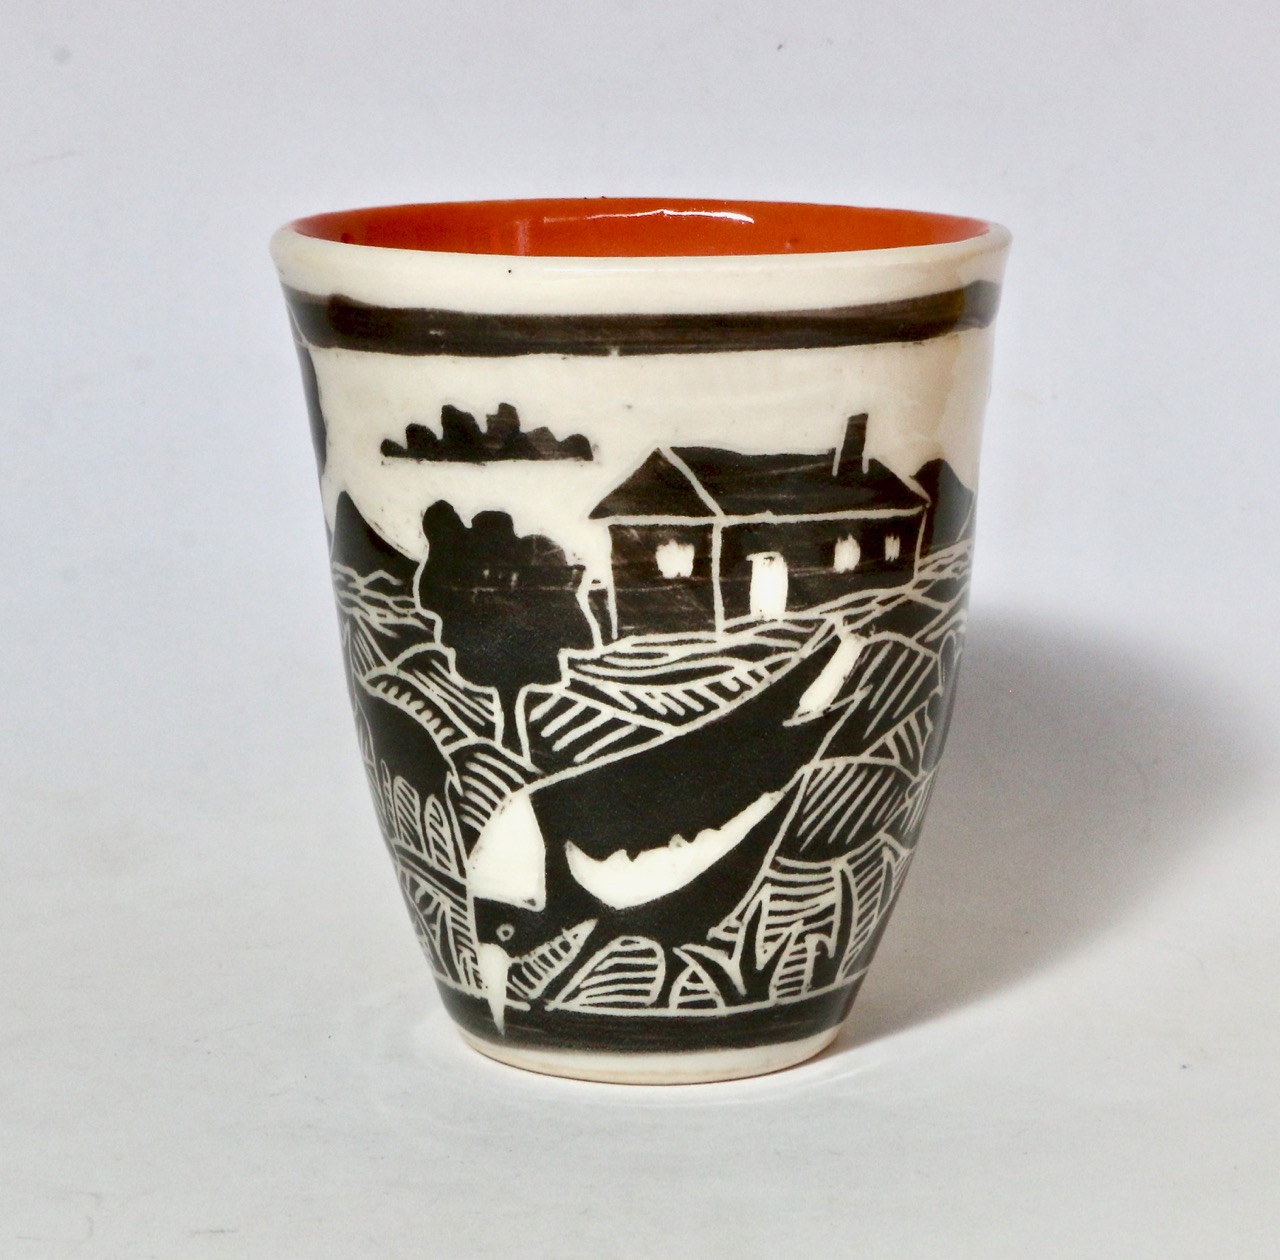
Over the weekend we will be demonstrating throwing and slab plate making techniques to be painted with coloured slip(s) then decorated using the ancient sgraffito technique of scratching back through the slip to reveal a contrasting clay body colour underneath.
Day 1. This workshop is aimed at potters of beginner/intermediate level of experience. We will be beginning with a design exercise on paper to develop a graphic motif for you to carve into your pots. Please bring your design ideas portfolio with you. We will be throwing cylinder forms, then flatware forms that are suitable for sgraffito decoration. We will also be rolling out a few slab dishes so that everyone has a chance of getting a few suitable forms stiff enough for slip decoration and sgraffito on the second day.
Day 2. We will be spending most of the 2nd day in decorating mode practicing our sgraffito decoration.
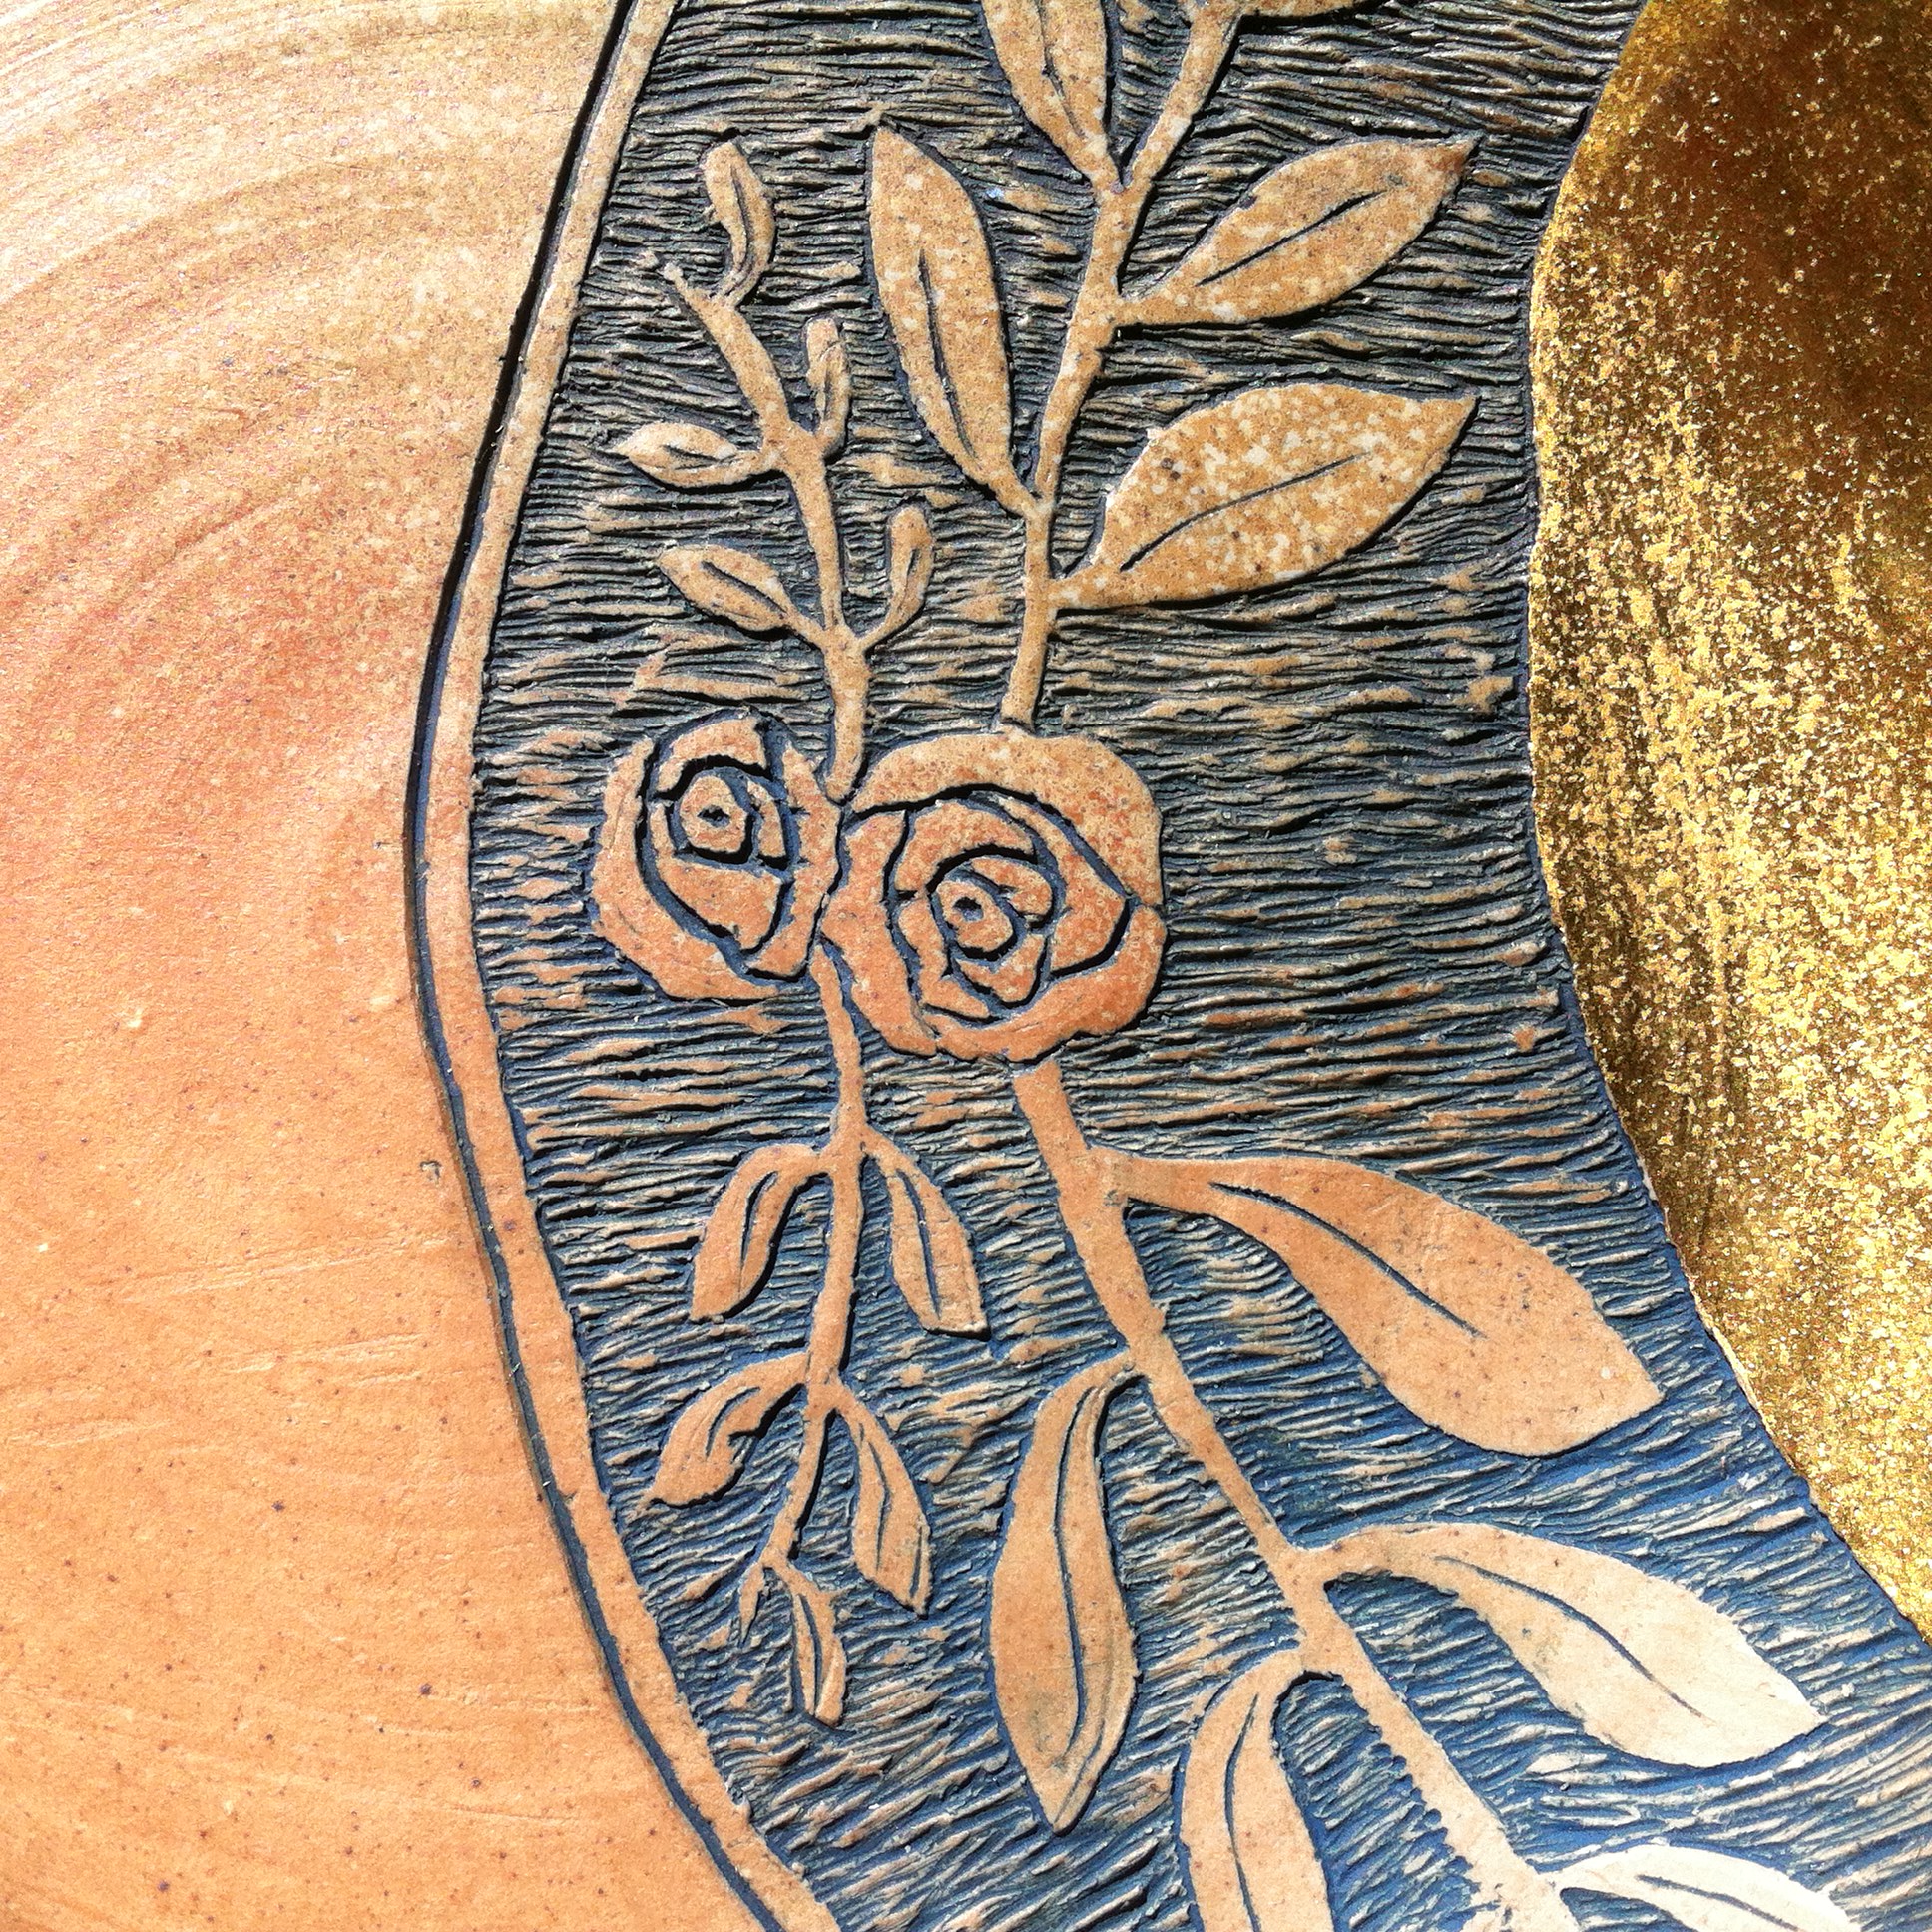
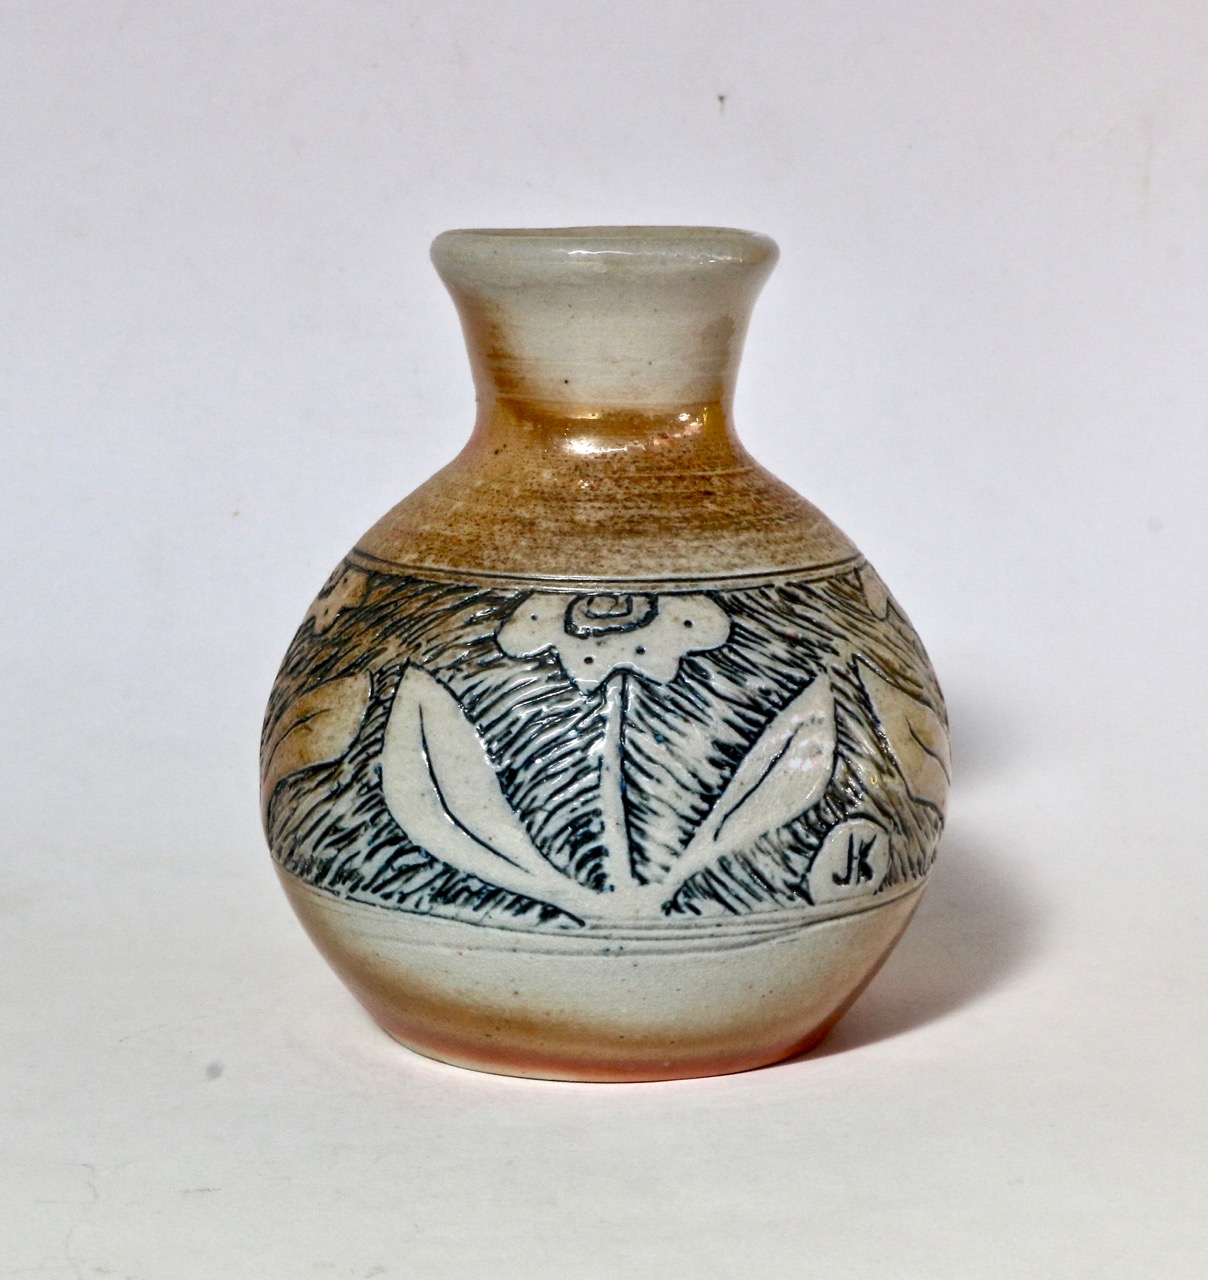
Wood fired and sgraffito’d work by Janine King
Slip and sgraffito piece by Janine King
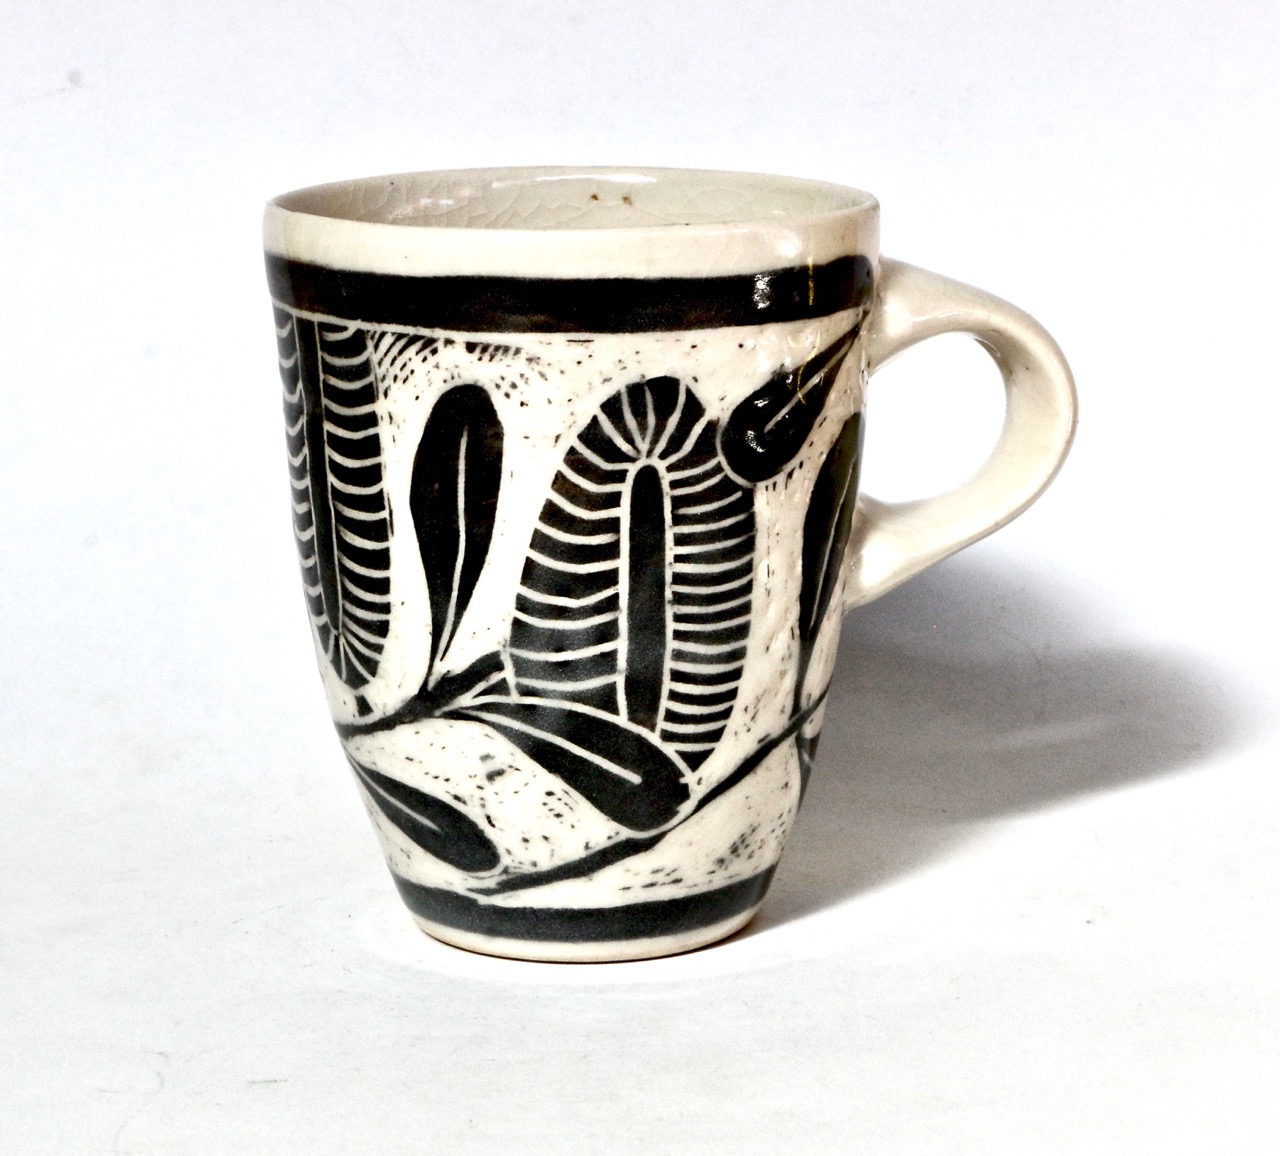
Graphic sgraffito mugs by Warren Hogden
Overview.
Sgraffito can be elementally simple, just carving straight into the clay surface. This is a very effective technique for pots that are destined to be wood fired, where the carving enhances and enriches the natural wood fired surface. Other glazing options are to carve into the surface and then glaze the pot with a celadon, or other transparent glaze. Celadon and other similar glazes pool in the crevices and get darker and richer with the carving.
Alternatively, a contrasting slip can be painted on the clay body and then carved through to reveal a contrasting decoration. We will be using our homemade Balmoral white stoneware clay body and homemade black slip. If you have a special interest in using a particular underglaze colour scheme, you are welcome to bring your own underglaze colours.
You will need to bring some design ideas, a sketch book, a 5B or 6B soft drawing pencil, your throwing tools and something simple to share for a communal lunch. Tea and coffee will be provided.
At the conclusion of the workshop. I will be offering to bisque fire 2 of your best pieces for you.
We have been very busy since our return from our research trip to New Caledonia.
We had made a lot of new work for the end of year Arts Trail – Open Studios sale, before we left for the trip.
The Open Studios, Arts Trail is on the first 2 weekends in November, so save the date.
Now on our return form Noumea, we have been flat out busy glazing and decorating that bisque ware and have two kilns packed ready to fire this weekend.
I have spent the past week painting. The motif is quite complicated and involves building up a surface of 20 different colours to create depth in the image
We have to be busy, because we are driving up to Brisbane shortly to deliver the 10th Annual Ian Currie Memorial Lecture to the Qld Ceramics Society.
I gave the 1st one a decade ago, and it must have been OK, as they have invited me back. Either that, or its taken 10 years to get over the first one 🙂
After the fire, All my dreams were very stressful and all about the shock and terror of the event. I found that I had somehow edited my experiences in my brain to make them more palatable and less stressful, by recalling all of them in black and white and all silent. A bit like old movies.
So The first work that I made after the fire was all in black and white. It took me a while to incorporate some colour into my pieces about the fire.
Over time, and quite a bit of therapy, I healed to the extent that I could start to talk about the fire. but I still had issues that I couldn’t discuss.
I tried to improve my lot by planting an English style Cottage Garden of bright flowers. It helped a bit, I felt good looking at them.
After a few months of a new therapy called EMDR trauma therapy. I felt so much better and started sleeping better, plus several nasty ailments like psoriasis and irritable bowel syndrome started to clear up. This was a very good sign that things were improving.
One day I was painting flames on my pots, and the next I found that the flames had started to turn into flowers!
I didn’t choose this, It just happened! I’m very pleased with the result.
I’ve turned my flames to flowers.
I have no idea where they came from. It just came out of my subconscious. In a very peaceful and quiet way.
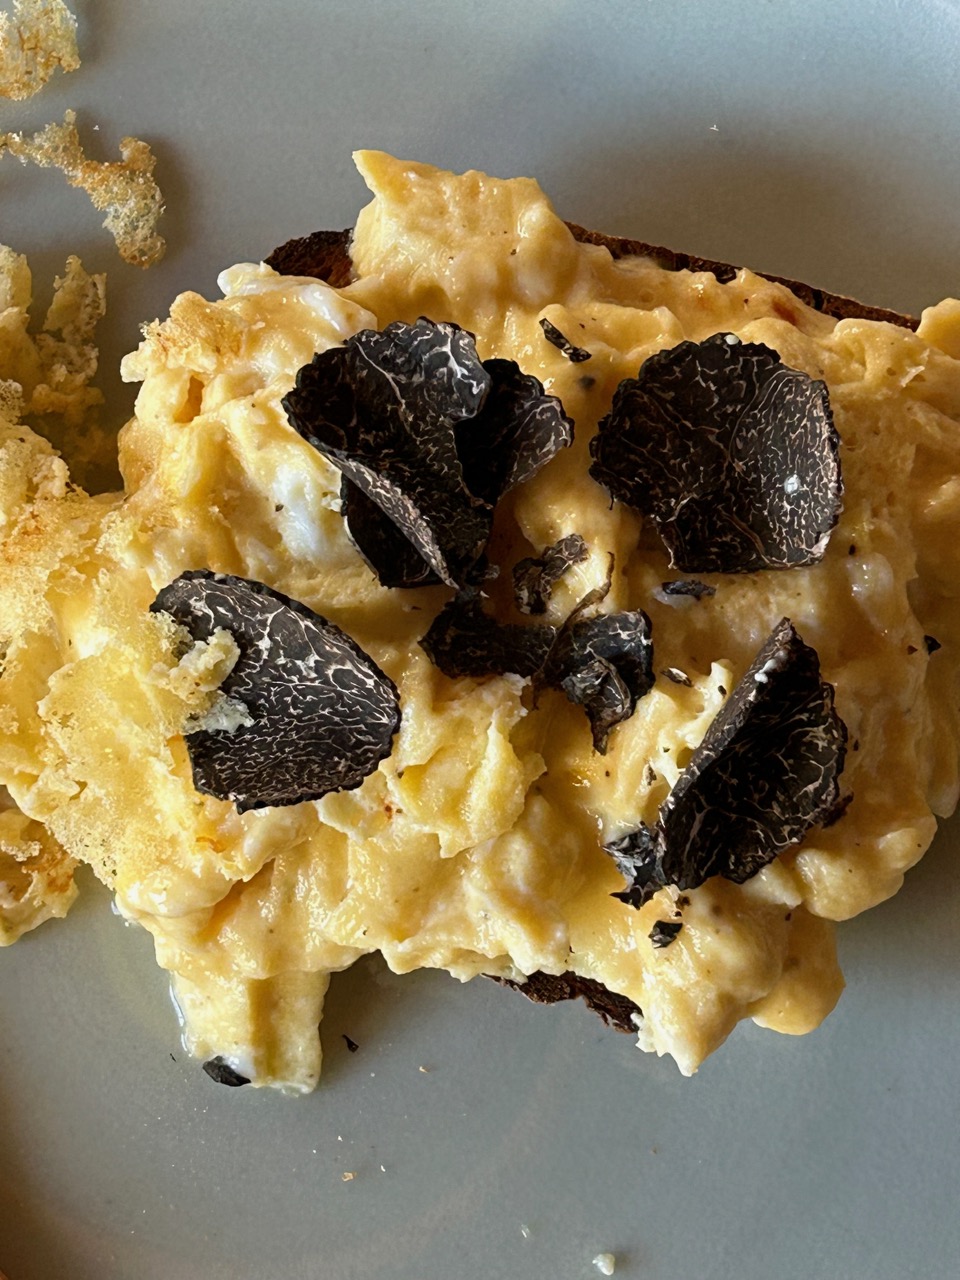
Today we finished off the last truffle of the season. It was romantic, mysterious, fragrant, exotic and delectable. It really elevates the humble scrambled egg into something special without taking anything away, just adding loads of romance and aroma. The warmth of the freshly cooked eggs releases so many aromatic oils and esters from the tiny black fungus. It fills my nostrils as I bend over doing the shaving. It’s a good thing that we only get to eat these delicious little morsels in the winter months, otherwise we may become somewhat blasé about it all. As it is, they are still a very special seasonal treat, If somewhat expensive. We can only afford to live this decadent gourmet lifestyle on our frugal budget because we have a son in the industry.
We are also probably making our last batch of marmalade too, as we have picked most of the Seville oranges now and eaten nearly all of the other citrus fruit. Although this is the beginning of spring, it is also the end of winter in another way, so it’s the end of the winter crops like citrus. We try and live with the seasons, so that’s it for the big citrus splurge in our diet.
It is one of the blessings of living in the Southern Highlands, that we have 4 distinct seasons. For instance, this morning we had another frost. This might possibly be our last really cold morning, but you never know with the climate emergency developing as it is, anything could happen.
I peel off the thin yellow layer of the skin without taking too much of the pith. I want the pith off! With my pile of curly peels, I end up with what can only be called ‘bitter and twisted’ .
Janine removes the pith and cuts up the juicy centre to add to the pan. The first pan is on for 30 mins. before we get the 2nd pan on the stove and the difference in colour is dramatic, it gets richer and deeper as it cooks. We try to use as little sugar as possible, while not making it too bitter and acidic, we also need enough sugar to make it ’set’. It takes about an hour of steady simmer to get it to thicken sufficiently. It’s worth all the effort, it tastes delicious, with just the right consistency. Seville oranges aren’t all that nice on their own. They are OK, but they really come into their own when it comes to making marmalade.
The stone fruit orchard is growing up well. This is its 3rd year and the trees are starting to look a lot more settled and established, with thicker trunks. I have been pruning them into open vase shapes where possible, but some of them have a very narrow vertical habit. They are all grafted onto ‘dwarf’ rootstocks, so they are keeping to a compact size. Most of them are now about 1.5 to 1.8 metres high, with an expected total height of 2.5 metres eventually. But I am well aware that plants can’t read their own labels! So there are bound to be variations.
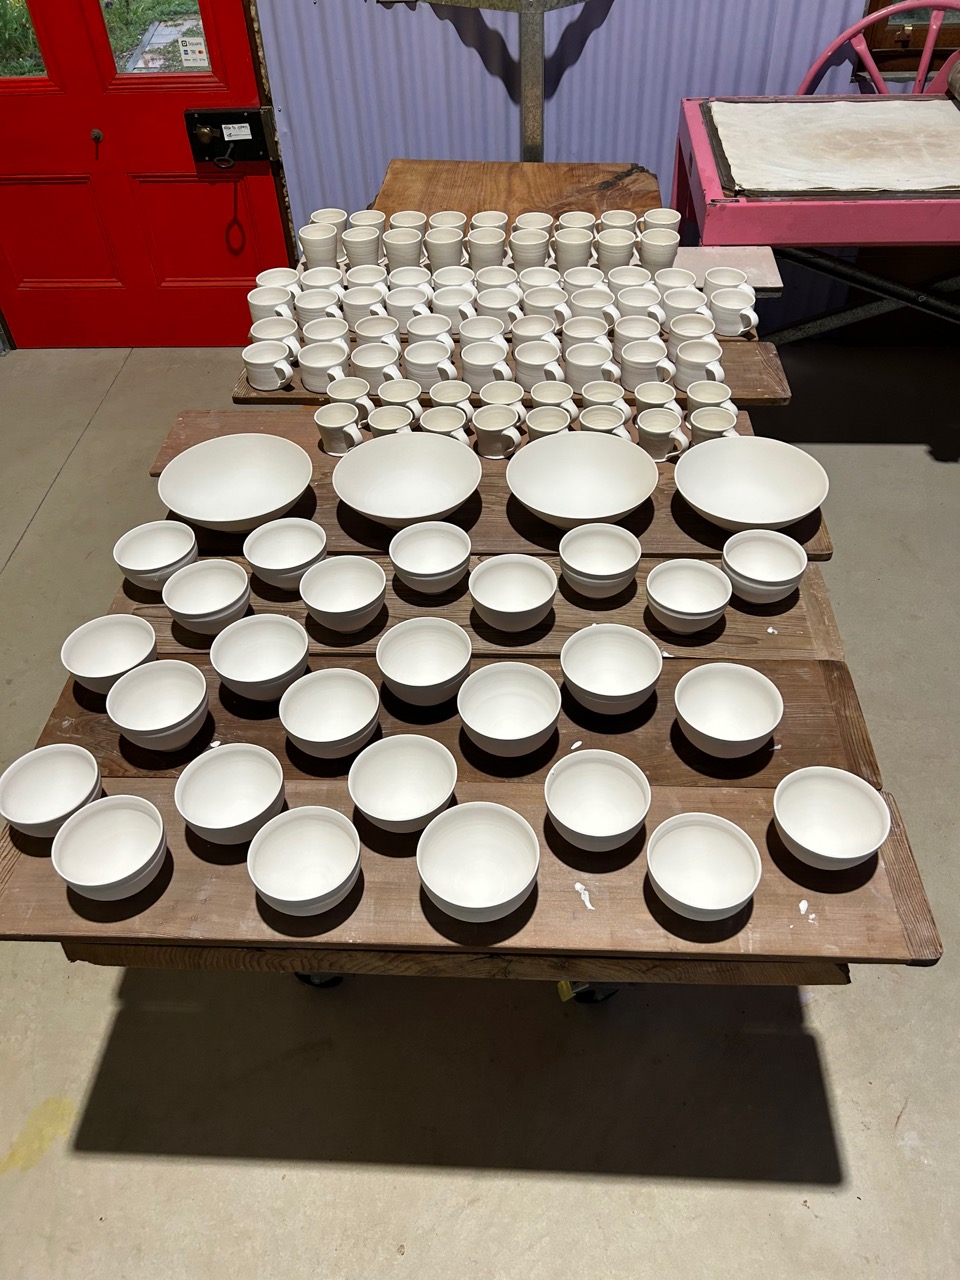
We had a really great 1st Weekend workshop in the new pottery. It worked very well. The new studio is a great space to teach in. The light is good and the layout works ergonomically for 10 people, 8 students and 2 teachers. After everyone left I got stuck in and started making more pots for myself. The Open Studios, Arts Trail is coming up at the end of the year, so I need to get back to work making pots for that. I started back at it by making 30 straight sided mugs.
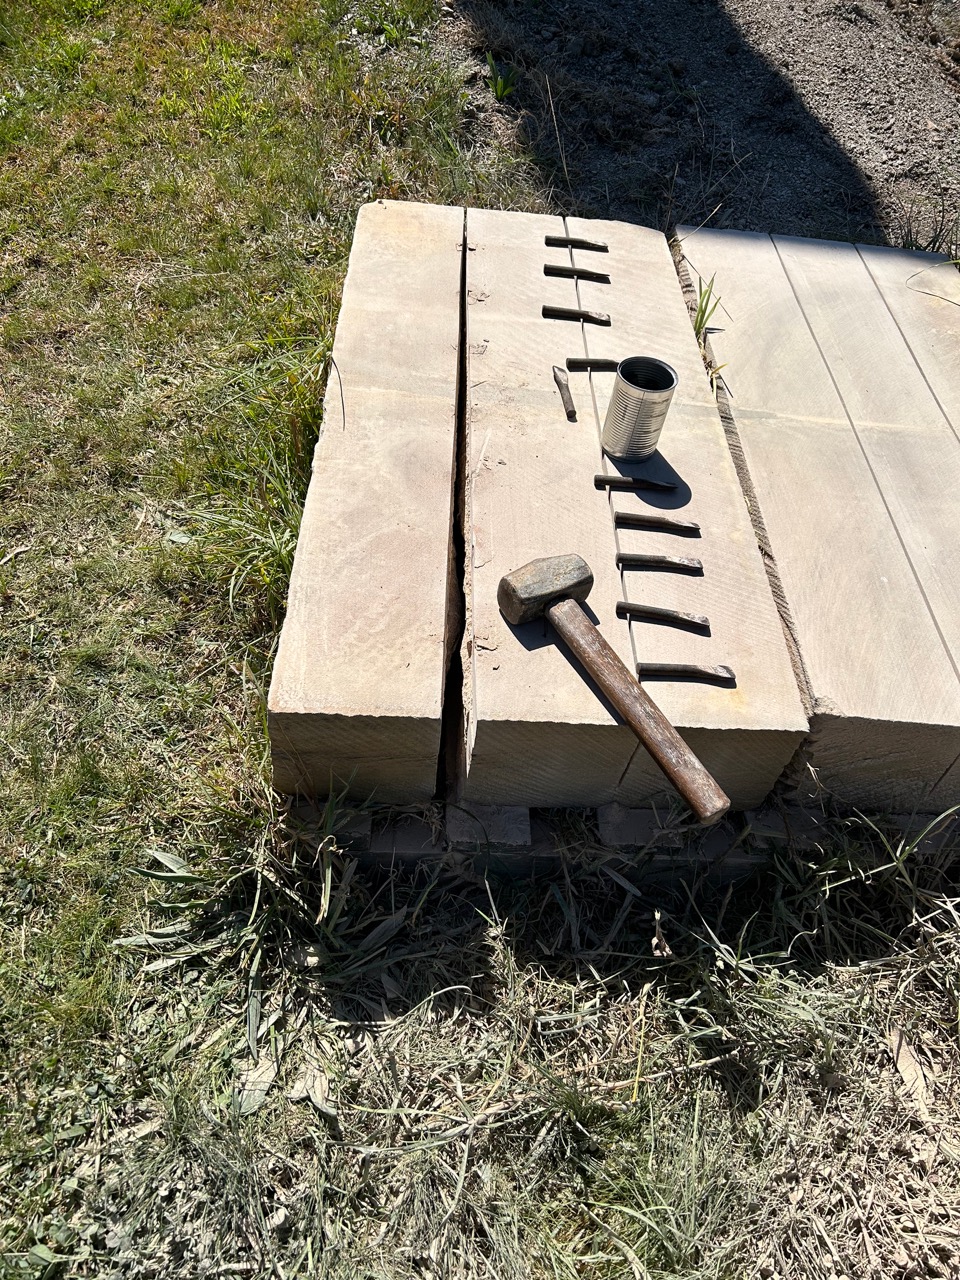
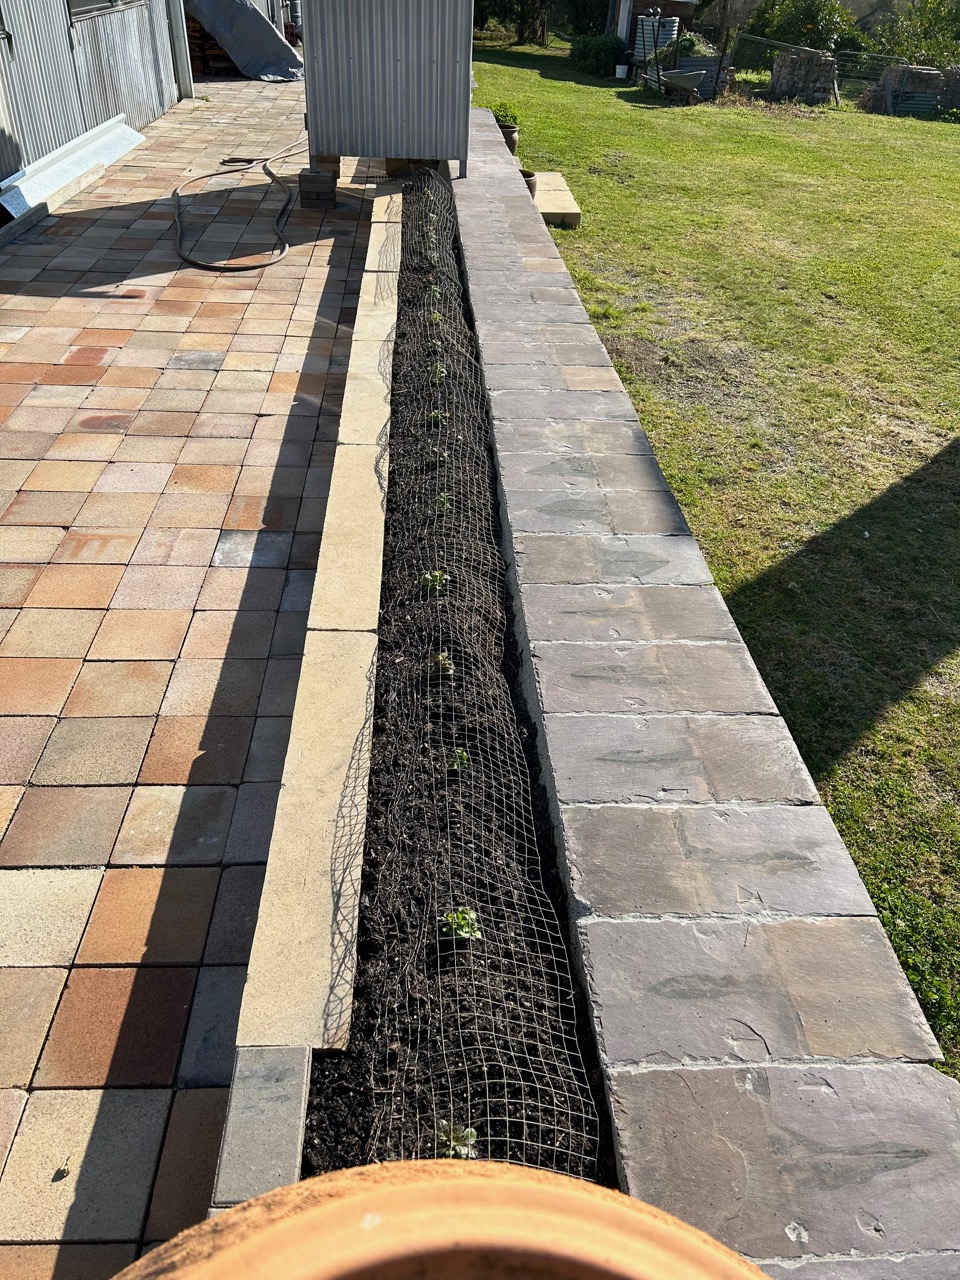
I spent a few days since the recent weekend workshop, in the afternoons, in my spare time, splitting and dressing sandstone blocks, to make some garden bed edging along the recently finished slate capping on the big sandstone retaining wall around the new pottery. It’s just another one of those jobs that has been in the offing and waiting for the ‘right’ time. I chose this ‘right’ time from what is left of my other time! Once the little wall was in place I shoveled in a load of top soil and planted seeds and a few seedlings to make the edging look a bit more settled and finished. I sprinkled in a packet of English Cottage Garden seed mix for good measure and 30 caper seeds, one every 600mm. Capers need an elevated, well drained, sun baked, dry, harsh environment to thrive. They take 2 years to establish, then persist for many more as long as they are cut back and pruned hard in the winter to stimulate good growth in the spring and summer, as flowers and fruit are produced on the new years growth. The elevated and exposed wall seemed like a pretty good place to try them out. I have read in a few books that they thrive on top of stone walls in the Med’s dry summers. I have no expectations, but if something comes of it, I’ll be pleased. If not, then I’ll chalk it down to another one of life’s enriching experiences. The stones look nice anyway, regardless of whether the plants grow or not!
After the soil was shoveled into the new beds, Edna the chicken, who had been helping me all day, came along and decided to help me some more by scratching a lot of it out again. I had to make some impromptu wire covers to protect the small seedlings from being excavated!
I’m happy with the result. 3 days work and $50 bucks goes a long way. I’m hoping that it will look greener in time for the November Arts Trail, Open Studios event.
For those of you who have expressed interest in doing a weekend workshop with us here in the new workshop, now is the time!
We will be hosting the 2nd weekend workshop here at the Loopline Pottery, on the 25th/26th of Nov.
The workshop is titled Throw and Scratch, and will be a hands-on throwing and decorating workshop concentrating on Sgraffito.
Janine, Warren and I will be offering the weekend workshop here over two days on the last weekend in November, 25th and 26th of Nov.
Over the weekend we will be demonstrating throwing and slab plate making techniques to be painted with coloured slip(s) then decorated using the ancient sgraffito technique of scratching back through the slip to reveal a contrasting clay body colour underneath.
Day 1. This workshop is aimed at potters of beginner/intermediate level of experience. We will be beginning with a design exercise on paper to develop a graphic motif for you to carve into your pots. Please bring your design ideas portfolio with you. We will be throwing cylinder forms, then flatware forms that are suitable for sgraffito decoration. We will also be rolling out a few slab dishes so that everyone has a chance of getting a few suitable forms stiff enough for slip decoration and sgraffito on the second day.
Day 2. We will be spending most of the 2nd day in decorating mode practicing our sgraffito decoration.
Wood fired and sgraffito’d work by Janine King
Slip and sgraffito piece by Janine King
Graphic sgraffito mugs by Warren Hogden
Overview.
Sgraffito can be elementally simple, just carving straight into the clay surface. This is a very effective technique for pots that are destined to be wood fired, where the carving enhances and enriches the natural wood fired surface. Other glazing options are to carve into the surface and then glaze the pot with a celadon, or other transparent glaze. Celadon and other similar glazes pool in the crevices and get darker and richer with the carving.
Alternatively, a contrasting slip can be painted on the clay body and then carved through to reveal a contrasting decoration. We will be using our homemade Balmoral white stoneware clay body and homemade black slip. If you have a special interest in using a particular underglaze colour scheme, you are welcome to bring your own underglaze colours.
You will need to bring some design ideas, a sketch book, a 5B or 6B soft drawing pencil, your throwing tools and something simple to share for a communal lunch. Tea and coffee will be provided.
At the conclusion of the workshop. I will be offering to bisque fire 2 of your best pieces for you.
Cost $ 250 for the two day workshop. ($125 per person per day.) We have 8 potters wheels, so the class will be limited to 8 people. First in, first served.
Please feel free to contact us for further information.
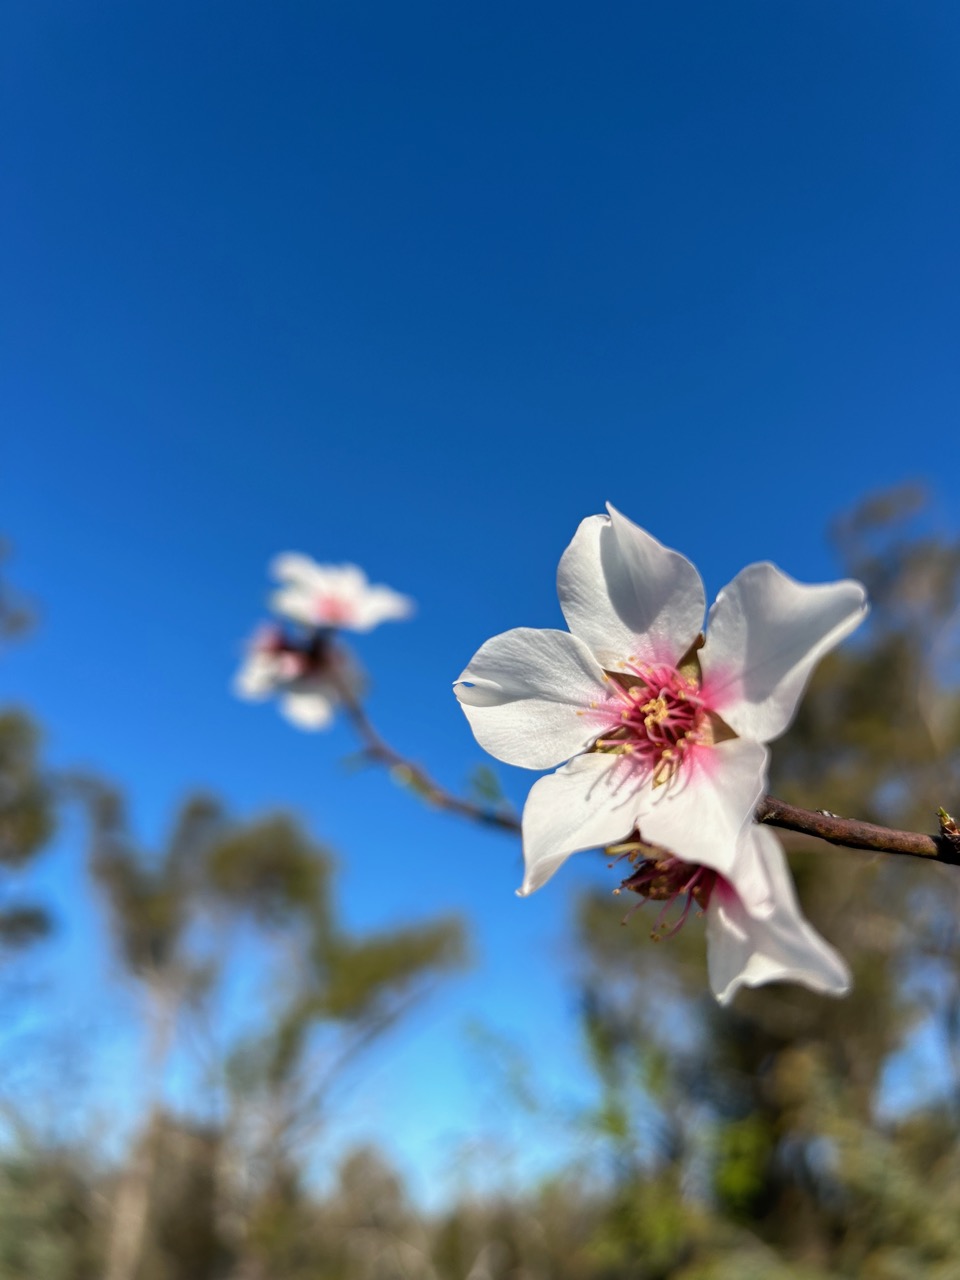
Right on schedule, it’s the beginning of September and therefore Spring, and sure enough the orchard trees are breaking into blossom.
Someone recently said, “spring has come, I’m so excited that I wet my plants”. I liked it, it made me smile, so I’ve stolen it.
Right on cue, everything has burst into bloom.
Blueberries
Nectarines
Peaches
Apricots
Almonds
Cherries
Even the hazelnuts are flowering. However, they are almost invisible, unless you get right up close, very close indeed.
Their tiny red flowers are only a couple of millimetres across. Obviously, being so small, they are not relying on bee pollination, like the showy stone fruits. Those floozies are big, brash, colourful and full of rewards for bees. Hazelnuts on the other hand are fully wind pollinated, so don’t need to expend any energy of showing off.
Hazelnuts
The weather is predicted to be hotter and dryer in the coming years as we slip back into El Nino again. We have had 3 wet years of La Nina, that ended the drought and the bush fires, but now we are heading back into the old hot and dry years again.
It hasn’t rained properly for months. The dams are already down to below half and we haven’t even started the summer. I can see that we will be relying on our tank water storage for the garden and everything else as well.
Fortunately, Janine and I invested heavily in large water tank storage over the past decade of our working life. It was that water that I used to save the house and whatever else I could during the fires.
Every roof that can catch water has a water tank attached. We have about 1/3 of a million litres of storage capacity in hand now. Since we have rebuilt the pottery and other sheds after the fire, they are all now connected back into the water storage system with independent, petrol powered, high pressure, fire fighting pumps. They haven’t been used in anger since the fire, so will need to be serviced and tested before the real heat sets in. I feel that we are in the best place possible to deal with the coming dry.
Now the garden needs some TLC and water. I’m so excited, I wet my plants.


You must be logged in to post a comment.