
This weekend we did a wood firing, now that the weather is cooled and safer.
I could have fired anytime after March, but I was a bit too overwhelmed with everything, to be able manage to get it together straight away. However, since my effective experience of EMDR experience, I have regained my Executive Functioning capacity. So now I can make decisions, make plans and carry them out and get things done again.
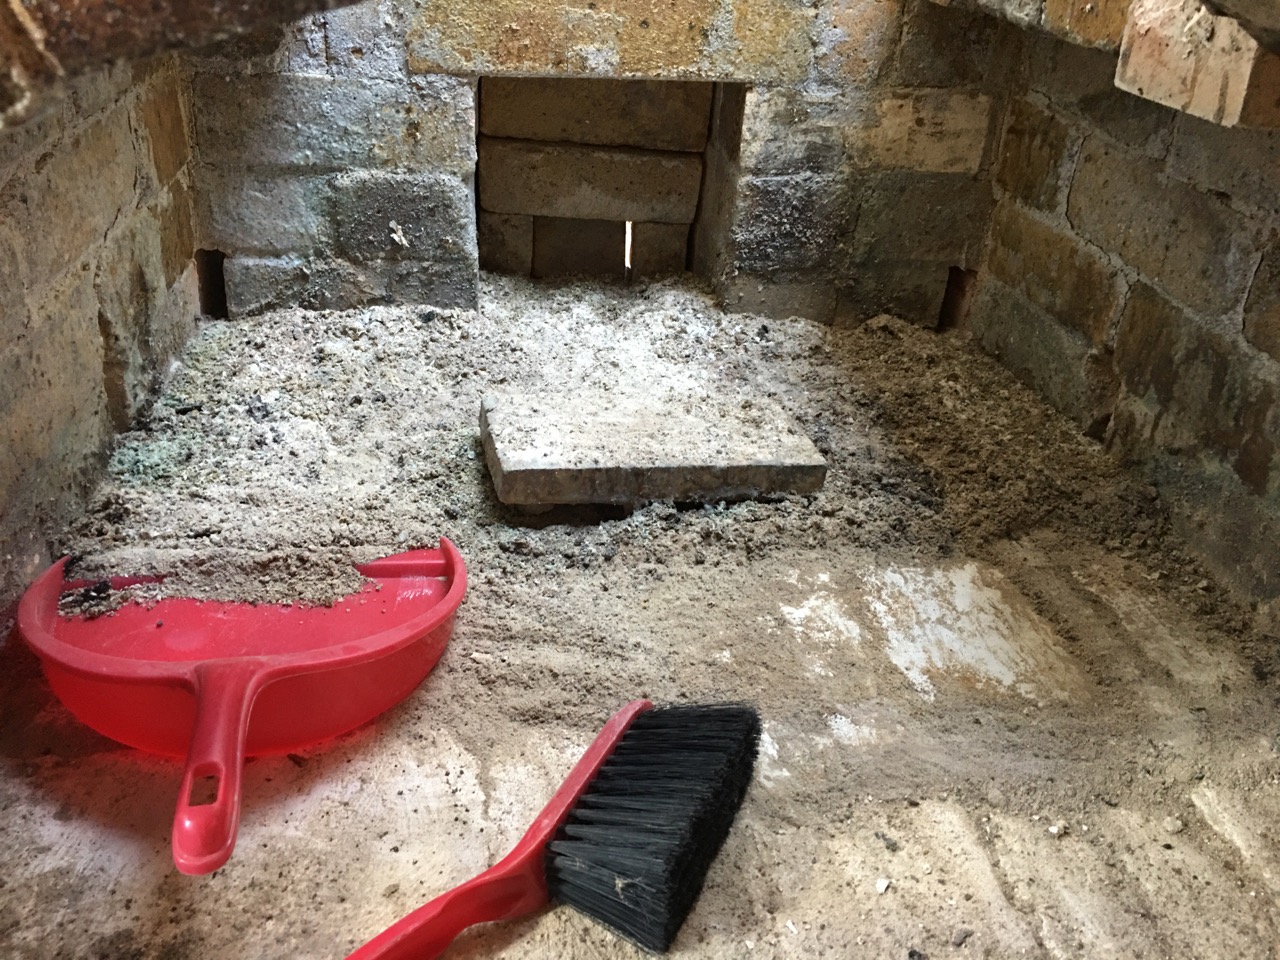
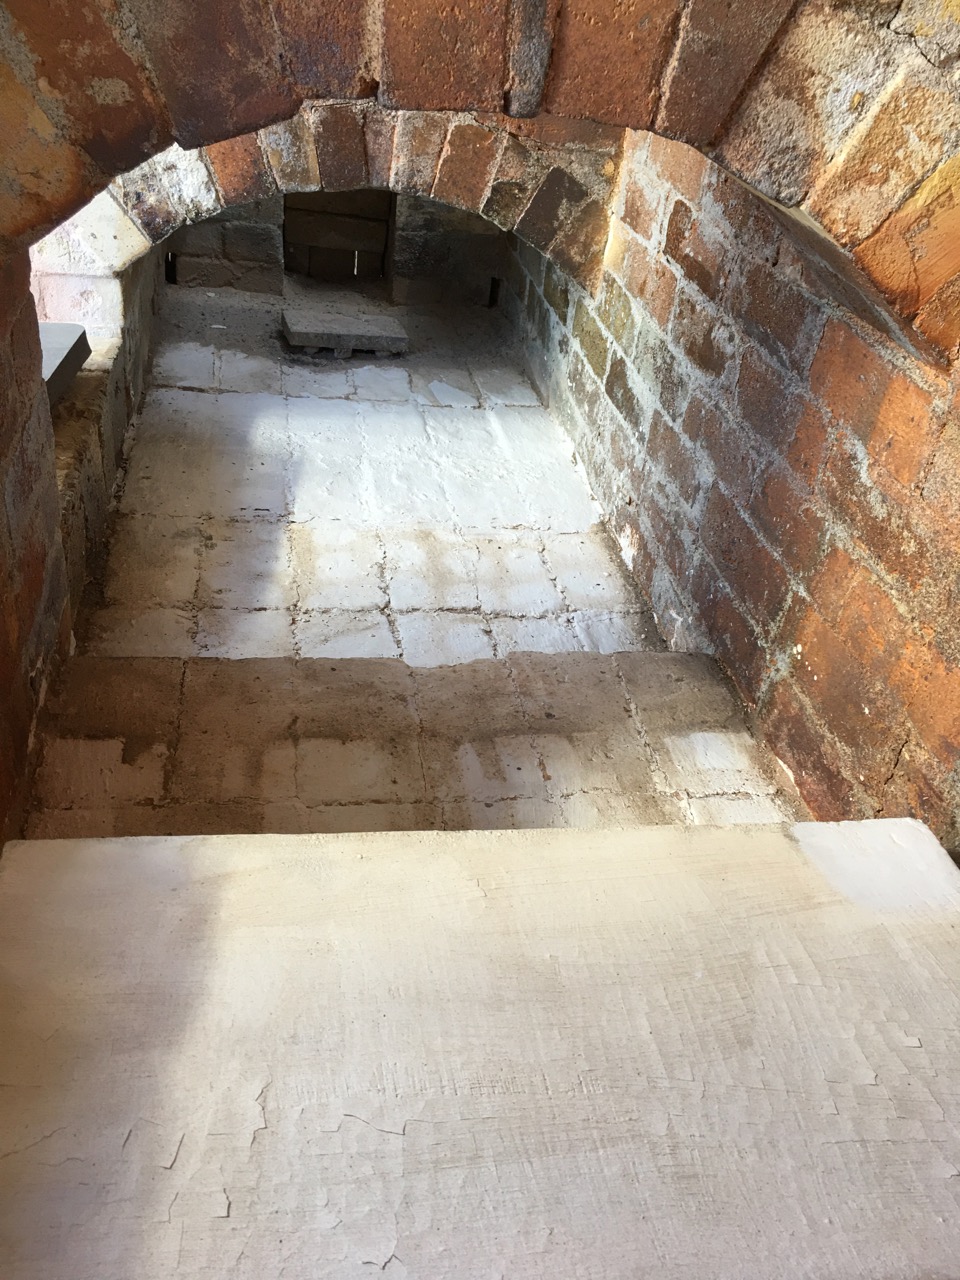
I had to clean out the ash from the last firing. I had been a bit slack in not doing it earlier, but the last firing was just before the last Open Studio weekends. I was a bit rushed at the time. I cleaned the out, cleaned the mouse hole cover and washed the floor with alumina.
At the end of the summer, I had collected all the seeding heads off a row of celery plants. I collected the stalks and dried them in a sunny spot in front of the big glass doors in the pottery, then stripped them to use the celery seeds. I used the dried stalks as kindling. It works very well as a fire starter/kindling.

I did a Friday night pre-heat to dry everything out, then started proper, very early on Saturday morning, assisted by my firing friends Len Smith and Warren Hogden. It was a very easy firing. I learnt to use my pre-burnt logs a bit better this firing. I tried splitting the logs much finer this time and it worked so much better. This might be the solution to my bushfire fire wood issue. We fired in 12 hours, including one hour of side stoking the 2nd chamber.
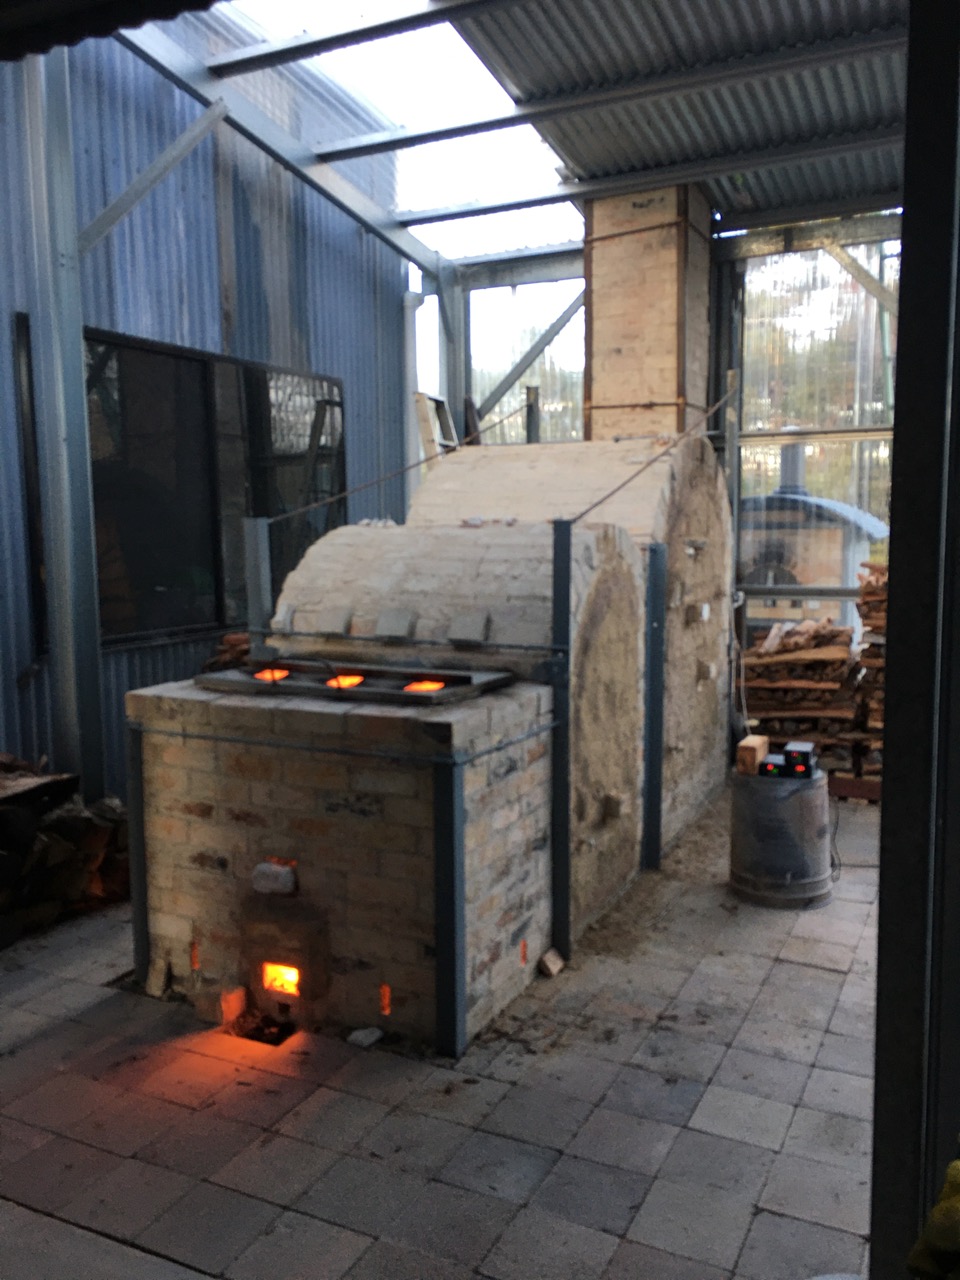


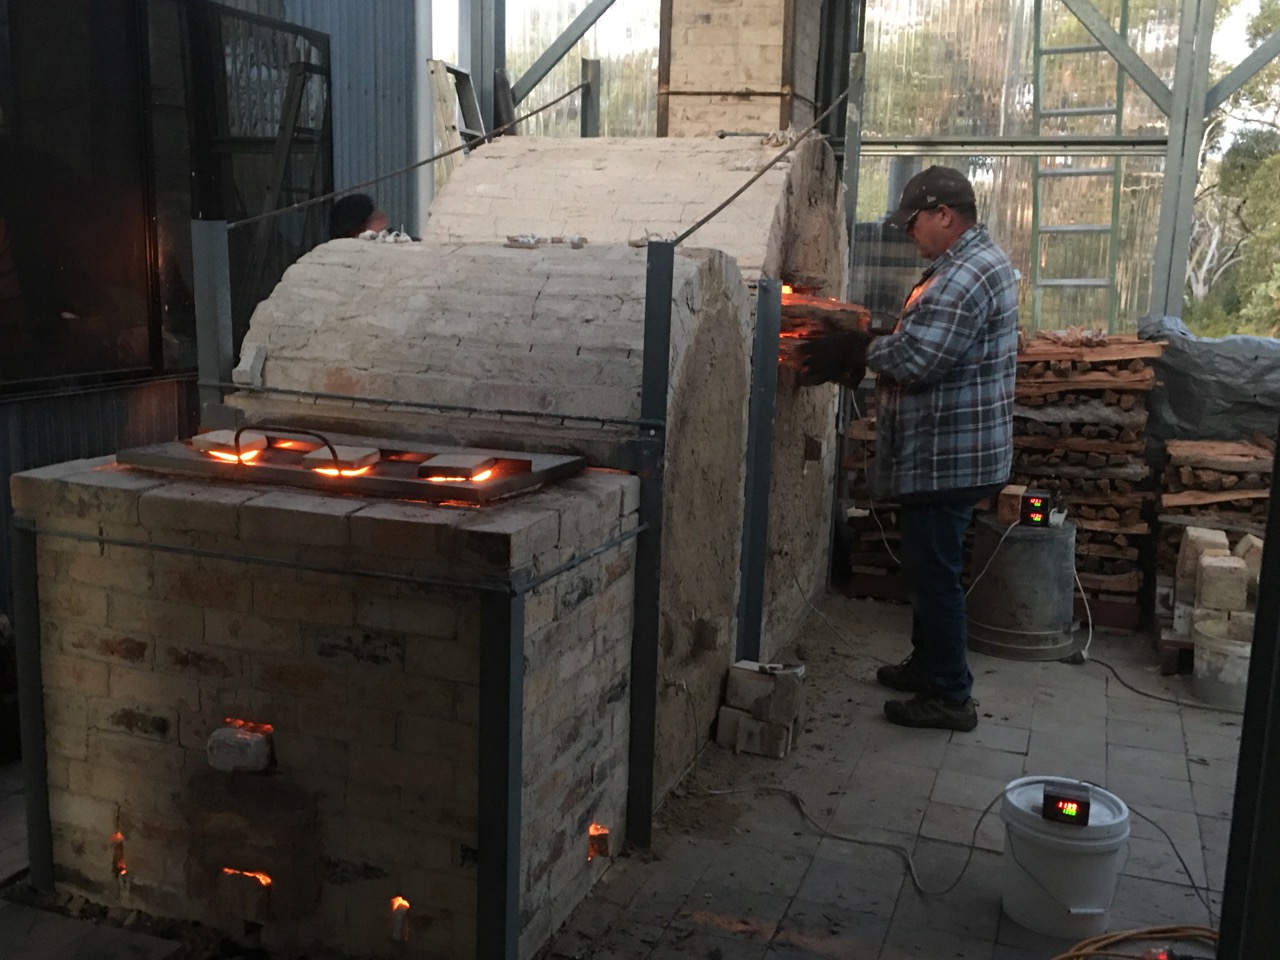
For this firing, I have built and ‘After-burner/Spark-arrestor/Scrubber’, all in one chimney adaptation.
I didn’t work as well as I had hoped, but it did work. I had not attempted anything along these lines previously. I have built spark arrestors before for clients. I have built after-burners for people. I have built flame tubes previously and I have built scrubbers for potters who do salt firing, to strip out the chlorine fumes from the exhaust gasses in the chimney.
But I had not attempted to combine them all together in one unit previously. Unifying them seemed like the logical next step. I gave it a go with my best bet, but it needs extra work to become more effective. I was very pleased with how it performed as an experimental prototype. I used all stainless steel sheeting for heat resistance.
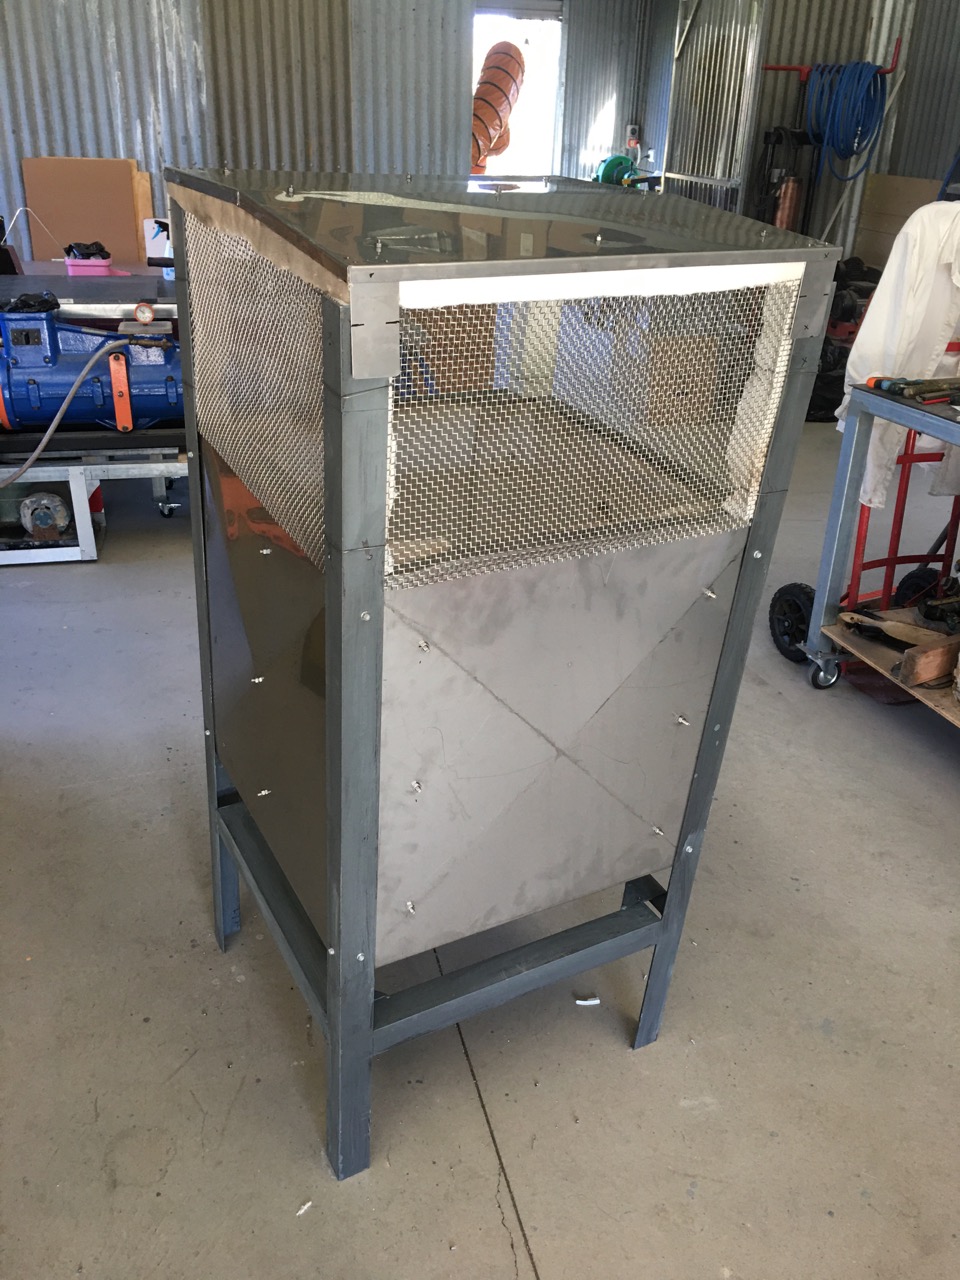
I decided to use plastic ‘polypipe’ hoses and fittings to save cost. I knew from my bush fire experiences that polypipe filled with fast flowing pumped water will not melt. They didn’t here either! I had used plastic polypipe and fittings on the fire protection sprinklers that I fitted to my out buildings, they didn’t melt, even as the building burnt. The sprinklers kept on working!
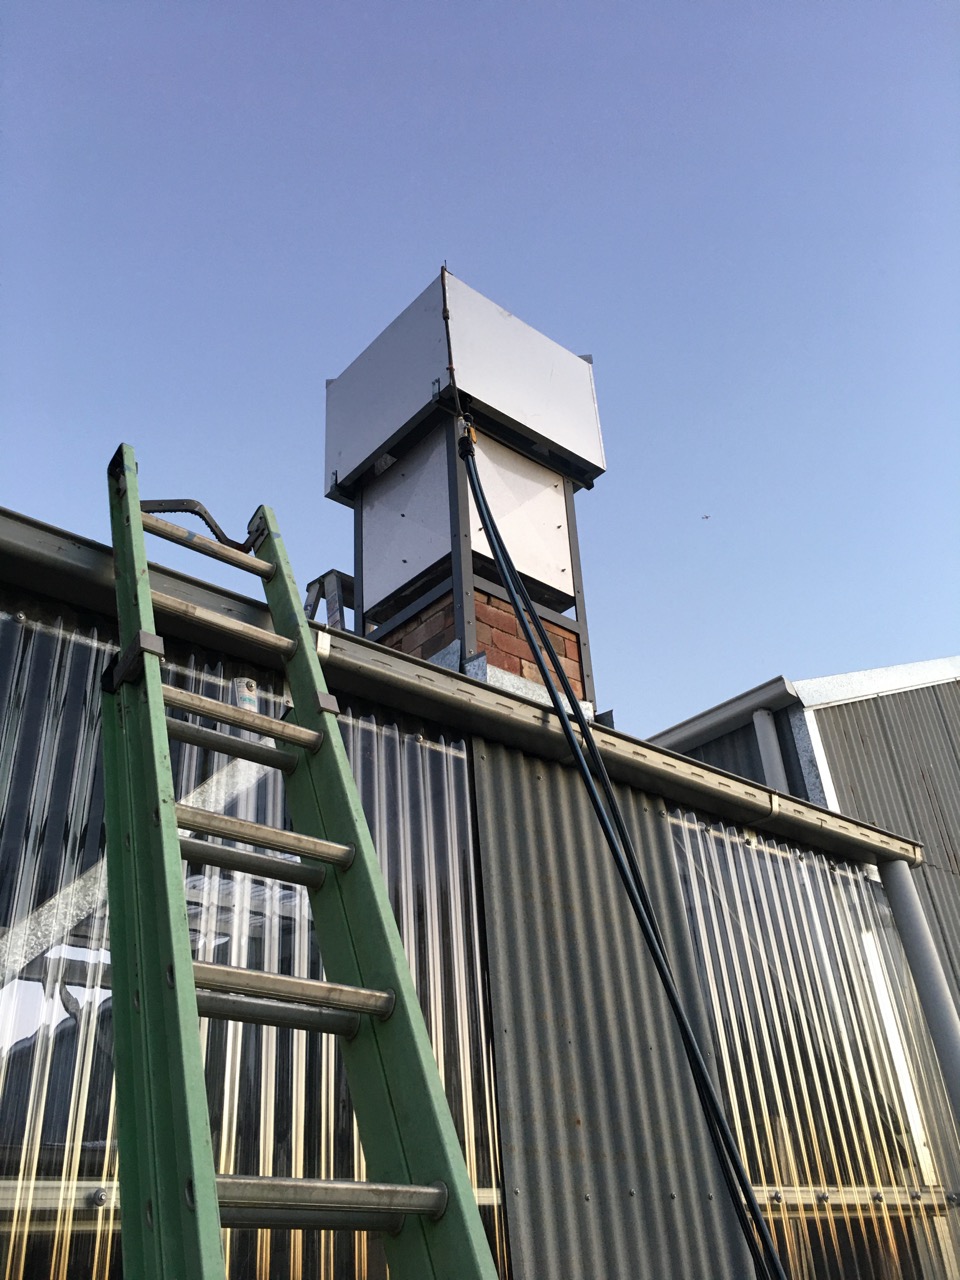
At a guess, I’d say that I managed to remove perhaps 1/2 the smoke from the chimney top during the side stoking, which can be a very dirty firing technique. Very effective, but very smoky.

The clear rain water in the 200 litre plastic drum reservoir, before the firing. You can clearly see the submersible pump sitting on the bottom of the tank.
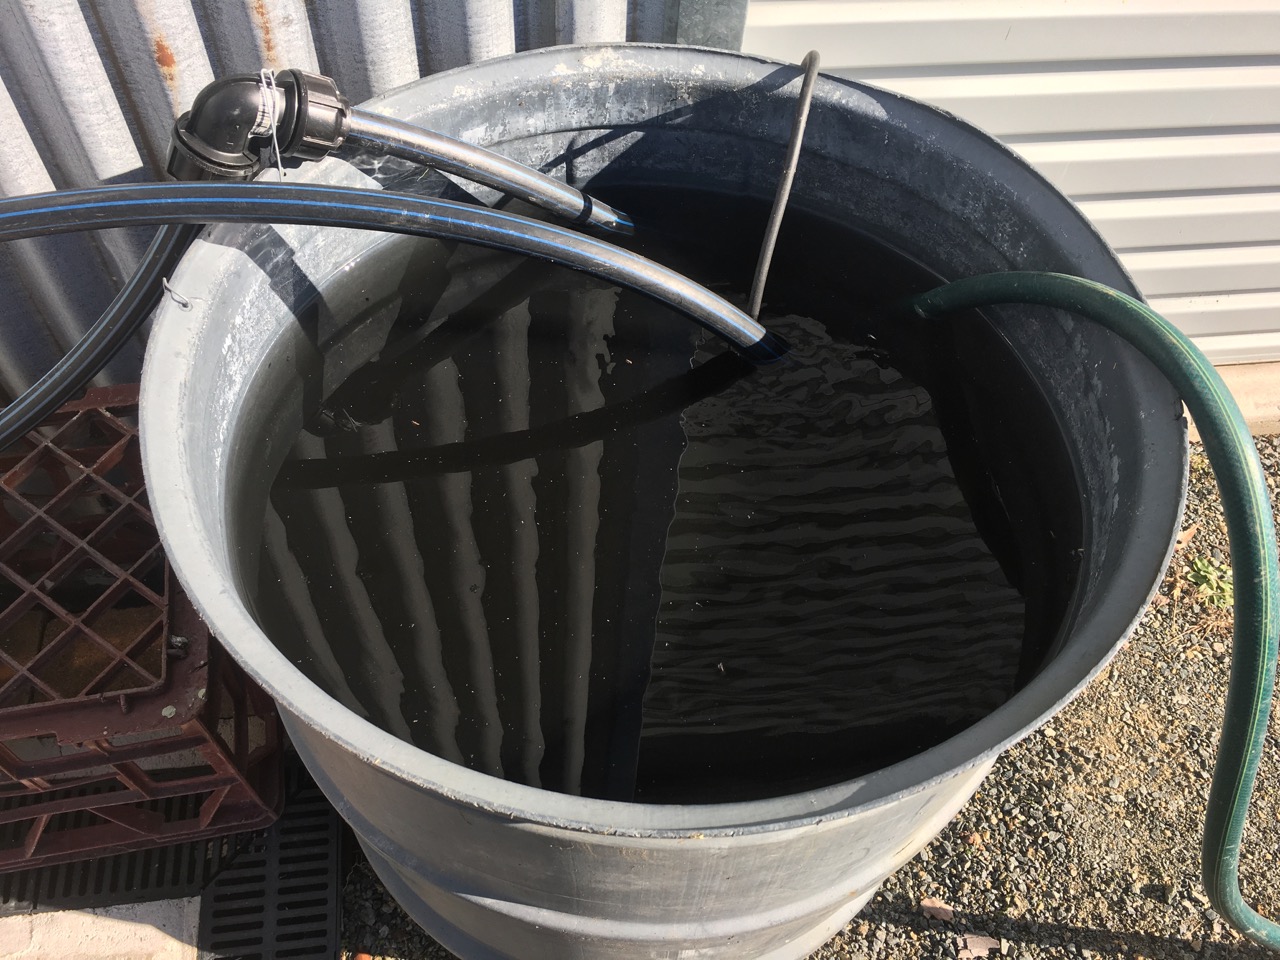
The tank is filled with black sooty water after the firing. This is all the soot removed from the smoke at the chimney top. The submersible pump is completely obscured.
During the main part of the firing the scrubber removes most of the smoke. It’s less effective when the degree of smoke increases. Particularly when a load of butt ends drop from the hobs, there is a flurry of intense smoke and some flame.
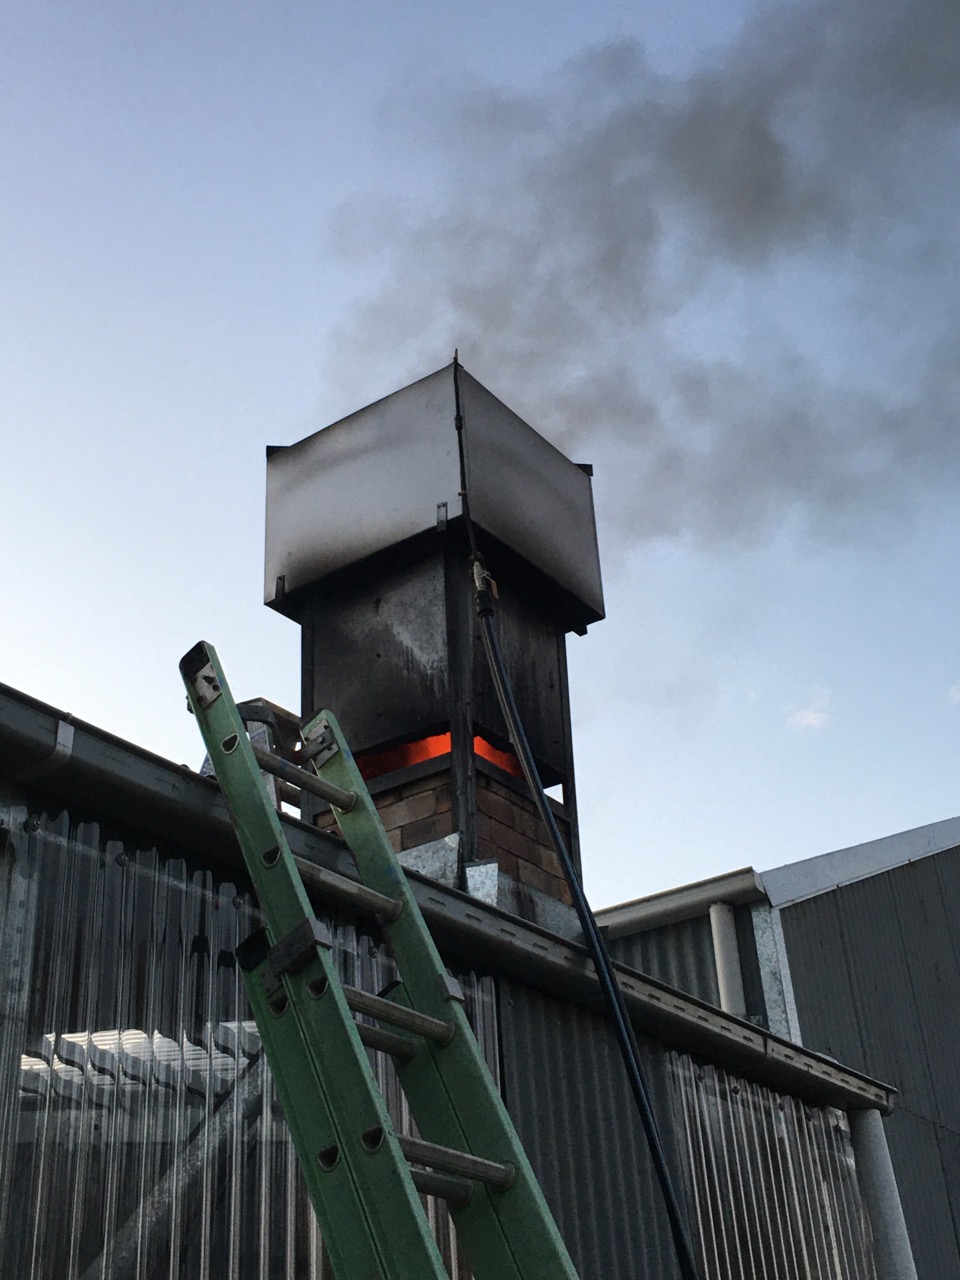
At the peak of the side stoking part of the firing, the scrubber removes some, but not all of the pollution. You can see the intensity of the flame entering the afterburner at the base, but only 1/2 of the smoke is removed. If the afterburner/scrubber wasn’t there, there would be a tall pillar of black smoke going up above the kiln.
Still, it’s a great start. nowhere near perfect, but I have several ideas about what I can do to improve this first unit. Watch this space.

You must be logged in to post a comment.