Delivering a Kiln, What Could Possibly go Wrong?

I have just finished refurbishing an old 2nd hand kiln for a friend. It’s one that I built 20 years ago and although has suffered some neglect. It is in remarkably good condition. We  delivered it to our friend in some very inclement weather. Fortunately the sleet cleared just before we arrived and the frost and ice was melted by the steady drizzle that set in, so the drive was uneventful. The driveway into the property was a bit wet and mushy after all the rain, so it was a slippery slidey reverse up the wet  grassy driveway and up onto the concrete slab.

IMG_3919 IMG_3920

As we are way out into the country side here, there are no facilities to call on. Any sort of assistance would have to come a long way and at great expense. So we are on our own. Two ladies and me.

So, if all goes well, it should only be a matter of lifting the kiln up off the truck and then driving away. What could possibly go wrong?  The kiln should then be able to be gently lowered down into the exact position on the slab. A builder has been commissioned to come along later and build a garden shed over to the top of the kiln in-situ.

I think that I have thought of everything. I have lifting gear, slings, chains, shackles, gloves, pallet truck and crow bar. All the parts to built a tripod and a chain block to do the lifting.

Amazingly, it all goes exactly to plan. The rain stops. I take the wooden poles off the truck and build the tripod, walking each leg inwards towards the centre, raising the chin block to a height, high enough to clear the kiln when it is on the back of the ute.

I manage to position the truck with the kiln on the back, more or less in the correct position on the site. Directly under the centre of the tripod and we are ready to lift.

IMG_3927 IMG_3929

This technique only works on soil or gravel. I have learnt from bitter experience that the legs of the tripod tend to slide outwards from the centre as soon as the load is applied, when they are sitting on concrete, or other flat , smooth surface. On soil, then settle in and dig down, locking them firmly in place. My only concern here is that the soil is so saturated, that they may just keep on sinking in. The soil is absolutely saturated here.

I try a slight test of the gear. The chain block takes the weight and the tripod settles in. I lift a little bit more and the ute raises up on its springs. A little bit more and the kiln starts to move a little and swing to one side a fraction as the weight comes off the legs. Finally its hanging free in mid-air. Just as it’s supposed to, success! While I steady the kiln and keep a hand on the lifting chain. The Lovely releases the hand brake and the ute suddenly zooms off….!

IMG_3932

We are all a bit surprised at the speed. The slope was sufficient to allow the truck to freewheel away quite fast. Without the engine running, the power assisted braking doesn’t work and Janine had to press very hard on the truck’s brake pedal to bring the ute to a stop. Nothing went wrong, but no matter how much planning you do, there is always something else that you haven’t considered.

We wrap the kiln and I load all the gear back onto the truck just as the rain returns.

Perfect!

The simple pleasure of a dull job

It’s that time of year again. I need to make some more wadding for packing the kilns. Making wadding isn’t fun. It isn’t even interesting really. If truth be told, it’s a rather dull job. It just has to be done. So, to make it as bearable as possible, I make it up in a monster size batch, so that the pain is all in one go and then there is the relief of knowing that it won’t need to be done again for another year.

Wadding is used to seperate the pots from the kiln shelves and the kiln props from the kiln shelves. It has to be refractory and remain crumbly and friable after being fired to stoneware temperatures, so that it can be removed easily, even allowing for the deposition of the fluxing effect of wood ash during the firing.

I make it up in big batches of 120 to 150 kilos. Every wood-firer has their own ‘secret’ recipe. I don’t have any secrets. They’re all up here on this blog. Some potters use various mixtures of silica and clay, but I don’t want to use fine silica dust anywhere if  I can help it, because of the risks of silicosis. Others use alumina powder and clay, which is very refractory, but expensive and in my opinion it is overkill. There is too much of an embedded energy debt tied up in aluminium and alumina processing. It takes massive quantities of electricity to extract aluminium from bauxite, most of which comes from burning coal, so it is rather unethical to use alumina powder, unless it is absolutely necessary. We use a small amount in shelf wash, but it amounts to just a kilo a year. I can live with that.  The other thing that I really dislike about alumina in wadding is that unless you are particularly careful, you end up putting stark white finger prints on the pots that are being packed after handling the wadding. You really have to wash your hands after every time you touch the stuff.

IMG_3862

I have decided to make this batch of wadding out of ‘fat’ sand. Fat sand is also called ‘bush sand’,  ‘brickies sand’ or ‘bush loam’. It’s a coarse quartz sand with a fair amount of clay in it. It also contains some limonite or hydrated iron oxide, so it looks a bit yellowish. I mix this with some powdered kaolin. This is a great use for powdered kaolin. I don’t use a lot of it, but is is very useful for this purpose. I mix it in the ratio of one 25kg bag of kaolin to 4.5 buckets of damp washed sand and one bucket of water. When I can get clean saw dust I also add two buckets of saw dust, but this is getting harder to find these days. The last time I visited the local timber yard, they had been cutting some synthetic wood products that were a rich canary yellow. This stuff looked like it was loaded with resin glue. I thought that it might be particularly toxic if it were burnt in the kiln as wadding. So I didn’t collect any.  So, this batch of wadding is just going to be sand and clay.

IMG_3867

Adding saw dust is great for wadding that use on new pots that are once fired, as it can leave an interesting charcoal grey to black shadow mark. It doesn’t work on bisque, only once fired work.

When it is freshly made wadding like this is rather short or non-plastic, being so sandy, but after ageing for a few months it develops quite good plasticity and after a year or so, the last few bags are plastic enough to throw with. Not that you would want to, but I think that it might be possible. I’m down to my last bag of the old batch now and it is very easily worked into coils and small balls. This new batch will have a month or two before I need to use it.

IMG_3870

I make it up in a couple of batches in the dough mixer and then bag it up into 15 kg packs and store it away.

Security is a years supply of wadding.  Now, when I look down on my stash of wadding I get the simple pleasure of knowing that I won’t have to do this job again for another 12 months. It’s a nice feeling!

fond regards from the well wadded potter.


Back From The Mountain

We spend a bit of time looking closely at the Nabeshima pots on display, and it is true that there is very little texture in the pale blue gosu, natural cobalt ore, background pigment.

IMG_3471

We make our way back down the mountain past the noborigama kilns and other pottery workshops and display rooms. As it has been raining for a day or two, the stream is running quite noisily. Our guide, Tsuru san is very knowledgeable about the ceramic history of this area. Born and bred here, she knows more than we can take in.

IMG_3475 IMG_3458

The water driven clay crushing hammers are working hard, unattended, pounding the soft porcelain stone to powder all through the day and night without a power bill.

IMG_3452 IMG_3463

The fish seem unperturbed.

From Okawachi, we drive to another interesting site of early Arita porcelain development. We go to visit the re-constructed Korean climbing that is said to be the one used by the originator of the porcelain industry here, Li Sampei or Ri Sam Pei.

Its a magnificent kiln stretching all the way to the top of the hill, with a slight bend in it  to suit the lay of the land form, just as the original one did, as excavated by the archeologists.

IMG_3493 IMG_3495

IMG_3497 IMG_3504

IMG_3506

On our way home, we call in to visit the Rice Field Potters Kiln. Unsurprisingly, it is set in the middle of some rice fields on a gentle side slope. It has also been reconstructed recently from the information gleaned from an archeological dig on the site. This kiln dates from the time when potters didn’t work full time, but fitted their firings into the rhythm  of the season along with rice and vegetable farming. They were the original self-reliant potters.

IMG_3522

I really love the way that this old kiln wriggles and snakes its way up the slope. If I were a self-reliant, wood-firing gardener/potter, I’d love to own a kiln like this one. Come to think of it. I am, and I do!

IMG_3526

Both of these kilns were built with dog-legs in them to follow the natural surface contours of the local terrain. They are both used intermittently by the local potters groups to keep them working and alive.

It’s been a long day and we have just enough energy left to visit the local sake brewery for a tasting. I can’t decide which one is best, so I am forced to taste them all before I can decide. A total lack of knowledge about sake can be an advantage sometimes?

A Trip to the Mountain

We are taken on an excursion to the mountains. It’s a foggy moist kind of day with intermittent rain showers. On the way we pass a really obvious white pegmatite dyke in the side of one of the hills near the road. I’m keen to stop and look, but it appears to be on private land and there is no easy access to it. We drive into a trucking company’s yard to get a closer look, but it is still a bit too far away and it is raining. I don’t fancy bush bashing in my good ‘going out’ clothes. So we let it pass for today. I may try to come back here if there is time on a fine day.

IMG_3436 IMG_3440

IMG_3430 IMG_3431

We press on over the mountain top, past a very pretty water fall. Yesterdays rain has brought it to life today. It wasn’t flowing like this the last time that I was here.

IMG_3444

We go to Okawachiyama for a 2nd visit. I don’t mind, I’ve been here before, but Janine hasn’t. It’s a pretty place and there is always more to see. You can’t see everything on one visit. There are still lots of lanes and little walkways to explore. This remote valley once housed the Nabeshima Clans’ potters. They were held here in captivity to create the finest, whitest, polychrome enamelled porcelain. They managed to find the whitest of materials and restrict their use for the shogunate only. The creamy white clay glaze combination that they created is still a wonder to this day. It’s purity and translucency is just remarkable. I went on a geology tour of the local porcelain stone sites last week with Kanaiwa san. We visited many places around this district, but we couldn’t find the lost kaolin mine of the Nabeshimas. Kanaiwa san has made a life long study of the ‘nigoshide’ white effect. He has managed to make a modern synthesised version using 3 of the local varieties of porcelain stones. I don’t know his technique, but his knowledge of froth flotation technique that be came obvious to me during one of our early conversations, leads me to believe that there might be some fertile ground there for experimentation. I have certainly found it an essential way to remove iron from otherwise ‘dirty’ rock samples back home in Australia.

IMG_3457

On our walk up the steep Okawachiyama Valley road, we call in to see one of the last ladies that  can do the seamless cobalt background brushwork. It is a very difficult technique and is now almost lost. These days this kind of background is either sprayed on, or transfer printed. Of those who still hand paint the ‘gosu’ cobalt blue background. and there are only a few of  these left as well, the technique used these days is to gently squeeze the ‘fude’, pronounced ‘foo-day’, brush to control the flow of the gosu pigment and loop the brush tip back and forth, producing a layered, slightly overlapping, background pattern. The Nabeshima technique used here is to hold the brush by the handle, not the hair, so no squeezing is used, They tilt the brush, up and down, to control the flow of the pigment. It is a truly astonishing technique.

IMG_3473

IMG_3488

IMG_3490

Traveling South to Kyushu

We say a temporary good-bye to Kyoto with its cherry blossoms all finishing up. Mostly on the ground. Its raked gravel gardens and Maiko make-over girls. We’ll be back, we always seem t find an excuse to return here.

IMG_5751 IMG_5752 IMG_5798 IMG_5810

We take the long train ride south to Kyushu. We leave Kyoto, and after a while the concrete high-rise scenery starts to diminish slightly and is replaced with low-rise. After a very long while we realise that the buildings are far less common and there is farm land starting to appear. It’s not that there isn’t any farmland near the bigger cities. There is a small, very small, plot of rice being farmed only 1 kilometre from Kyoto’s main central station. Amazing!

As we rumble on, we pass through farming districts and extensive fields of golden crops already for harvest with their heads golden of bearded barley ripening in the sun. I can’t imagine that harvest time for these crops is very far off.

IMG_3254 IMG_3256

We also see farmers out in the flooded fields with their mini tractors and rotary hoes, working up the inundated mud, presumably preparing the silt for the coming planting of the rice crop. Ploughing now, if you can call this ploughing, is to kill off the weeds and any competition for the young rice seedlings that will be planted soon.

When I was last here 6 months ago, they were smack in the middle of rice harvest in the autumn. We arrive in the far south in Kyushu, not too far from Kumamoto, about an hour away. Everything here is OK, different strata or geological sequence? We only had a level 2 shake up here. So the kilns are still standing and all the pots are still on their shelves.

It’s all foggy, rainy and damp when we arrive and the hills are coated in a beautiful mist.

Our first visit here is to a place near Karatsu on the North West coast. We visit an old pottery studio that has existed in this little secluded valley for a couple of hundred years. The old lady tells us that her family have always been potters here since the arrival of the Korean potters 400 years ago. The war Lord Toyotomi Hideyoshi launched 2 failed invasions of Korea in 1592 and 98. Each time he captured and brought back prisoners of war. Some of whom were potters. One in particular found and developed the first porcelain pottery in Japan in 1616. Exactly four hundred years ago this week.

She is a sweet old thing and at 83, has seen a bit of life. Her son is now the resident potter here. She tells us that there were once 300 houses in this valley, most of them making pottery and farming rice and vegetables. Now there are only 5 houses here and only one potter.

They are in the middle of packing the kiln when we arrive. It’s a well-loved old nobori-gama wood fired, 3 chambered climbing kiln.

IMG_3271 IMG_3272

They pack the pots on rice husks to stop them sticking to the kiln shelf during firing, as rice husk is composed mostly of silica, which is refractory. It also creates a shiny ‘flash’ of colour on the exposed clay at the foot of the pots.

IMG_3273 IMG_3270

Later, we travel home to Arita via the ‘Hitakata’ ancient kiln site. This little valley once had a number of korean potter families working and farming here. But they are all gone now and only the archaeology remains. This site has been fenced off now to stop looters from stripping the site of old artefacts.

IMG_3267

IMG_3268 IMG_3265

It was one of the first Korean kilns built here way back in the late 1500’s. It is set in a beautiful forested glade with a small but fast flowing stream nearby. Quite idyllic! This kiln was built without the use of fire bricks. It was constructed out of rammed earth. The local soil here doesn’t look particularly refractory, so it probably had a short life and needed to be rebuilt often.

I can’t read the Japanese on the information board, but the illustration shows 9 steps or doorways into the tunnel-like chamber. My teacher back in 1973, the Japanese potter Shiga shigeo, to whom I was apprenticed,  trained near Kyoto after the war and his teacher,  Saburo Saito had a 3 chambered climbing kiln, all made from rammed local refractory clay and home-made bricks. I was told that the fire-box needed rebuilding after every firing and the first chamber arch was likewise re-built after every 2nd or 3rd firing. This was the traditional way back them and is still used by some potters even today, if they are keen on reproducing the old effects.

Janine and I made all of our own fire bricks to build our wood fired kiln. The current kiln has had twenty firings and is still going strong. However the time will come when it needs to be pulled down and rebuilt.

Such is the way of the world.

Nothing is ever finished, nothing is perfect, and nothing lasts!

Fond regards from Steve and Janine in the shaky isle of Kyushu.

Free Fuel

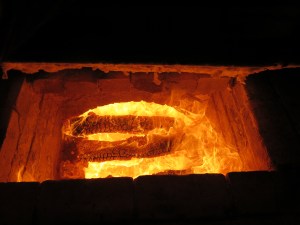
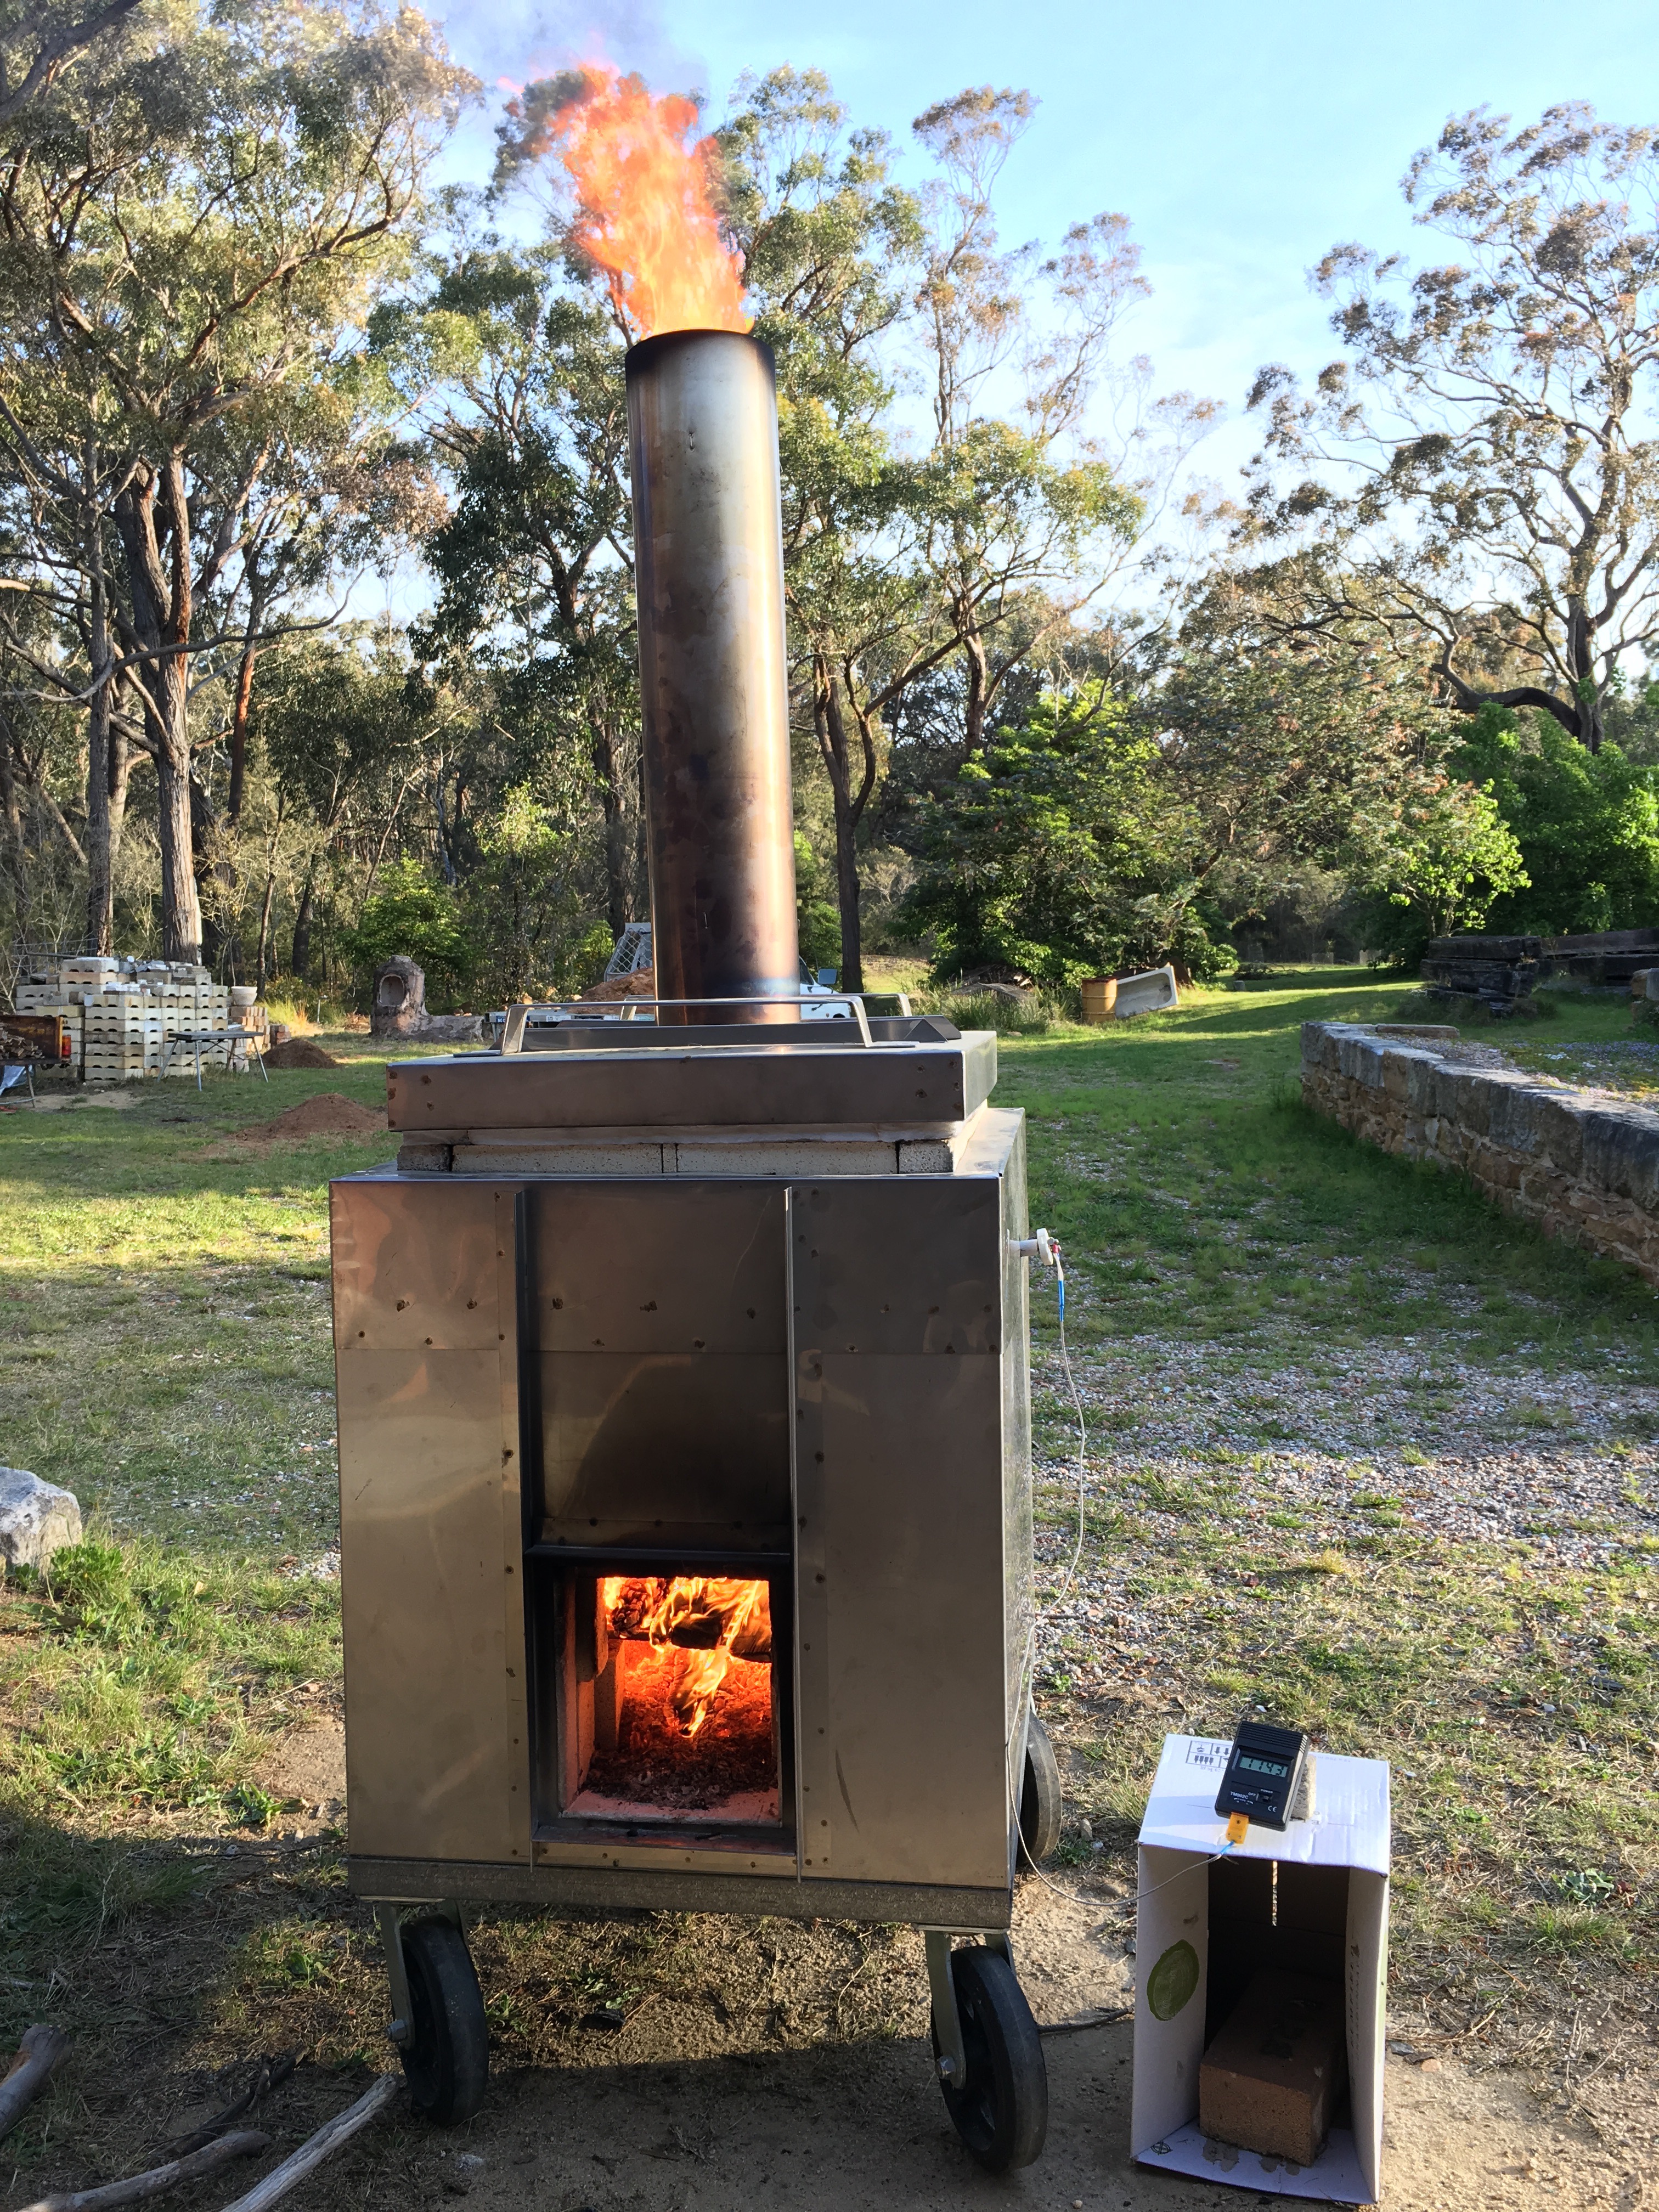
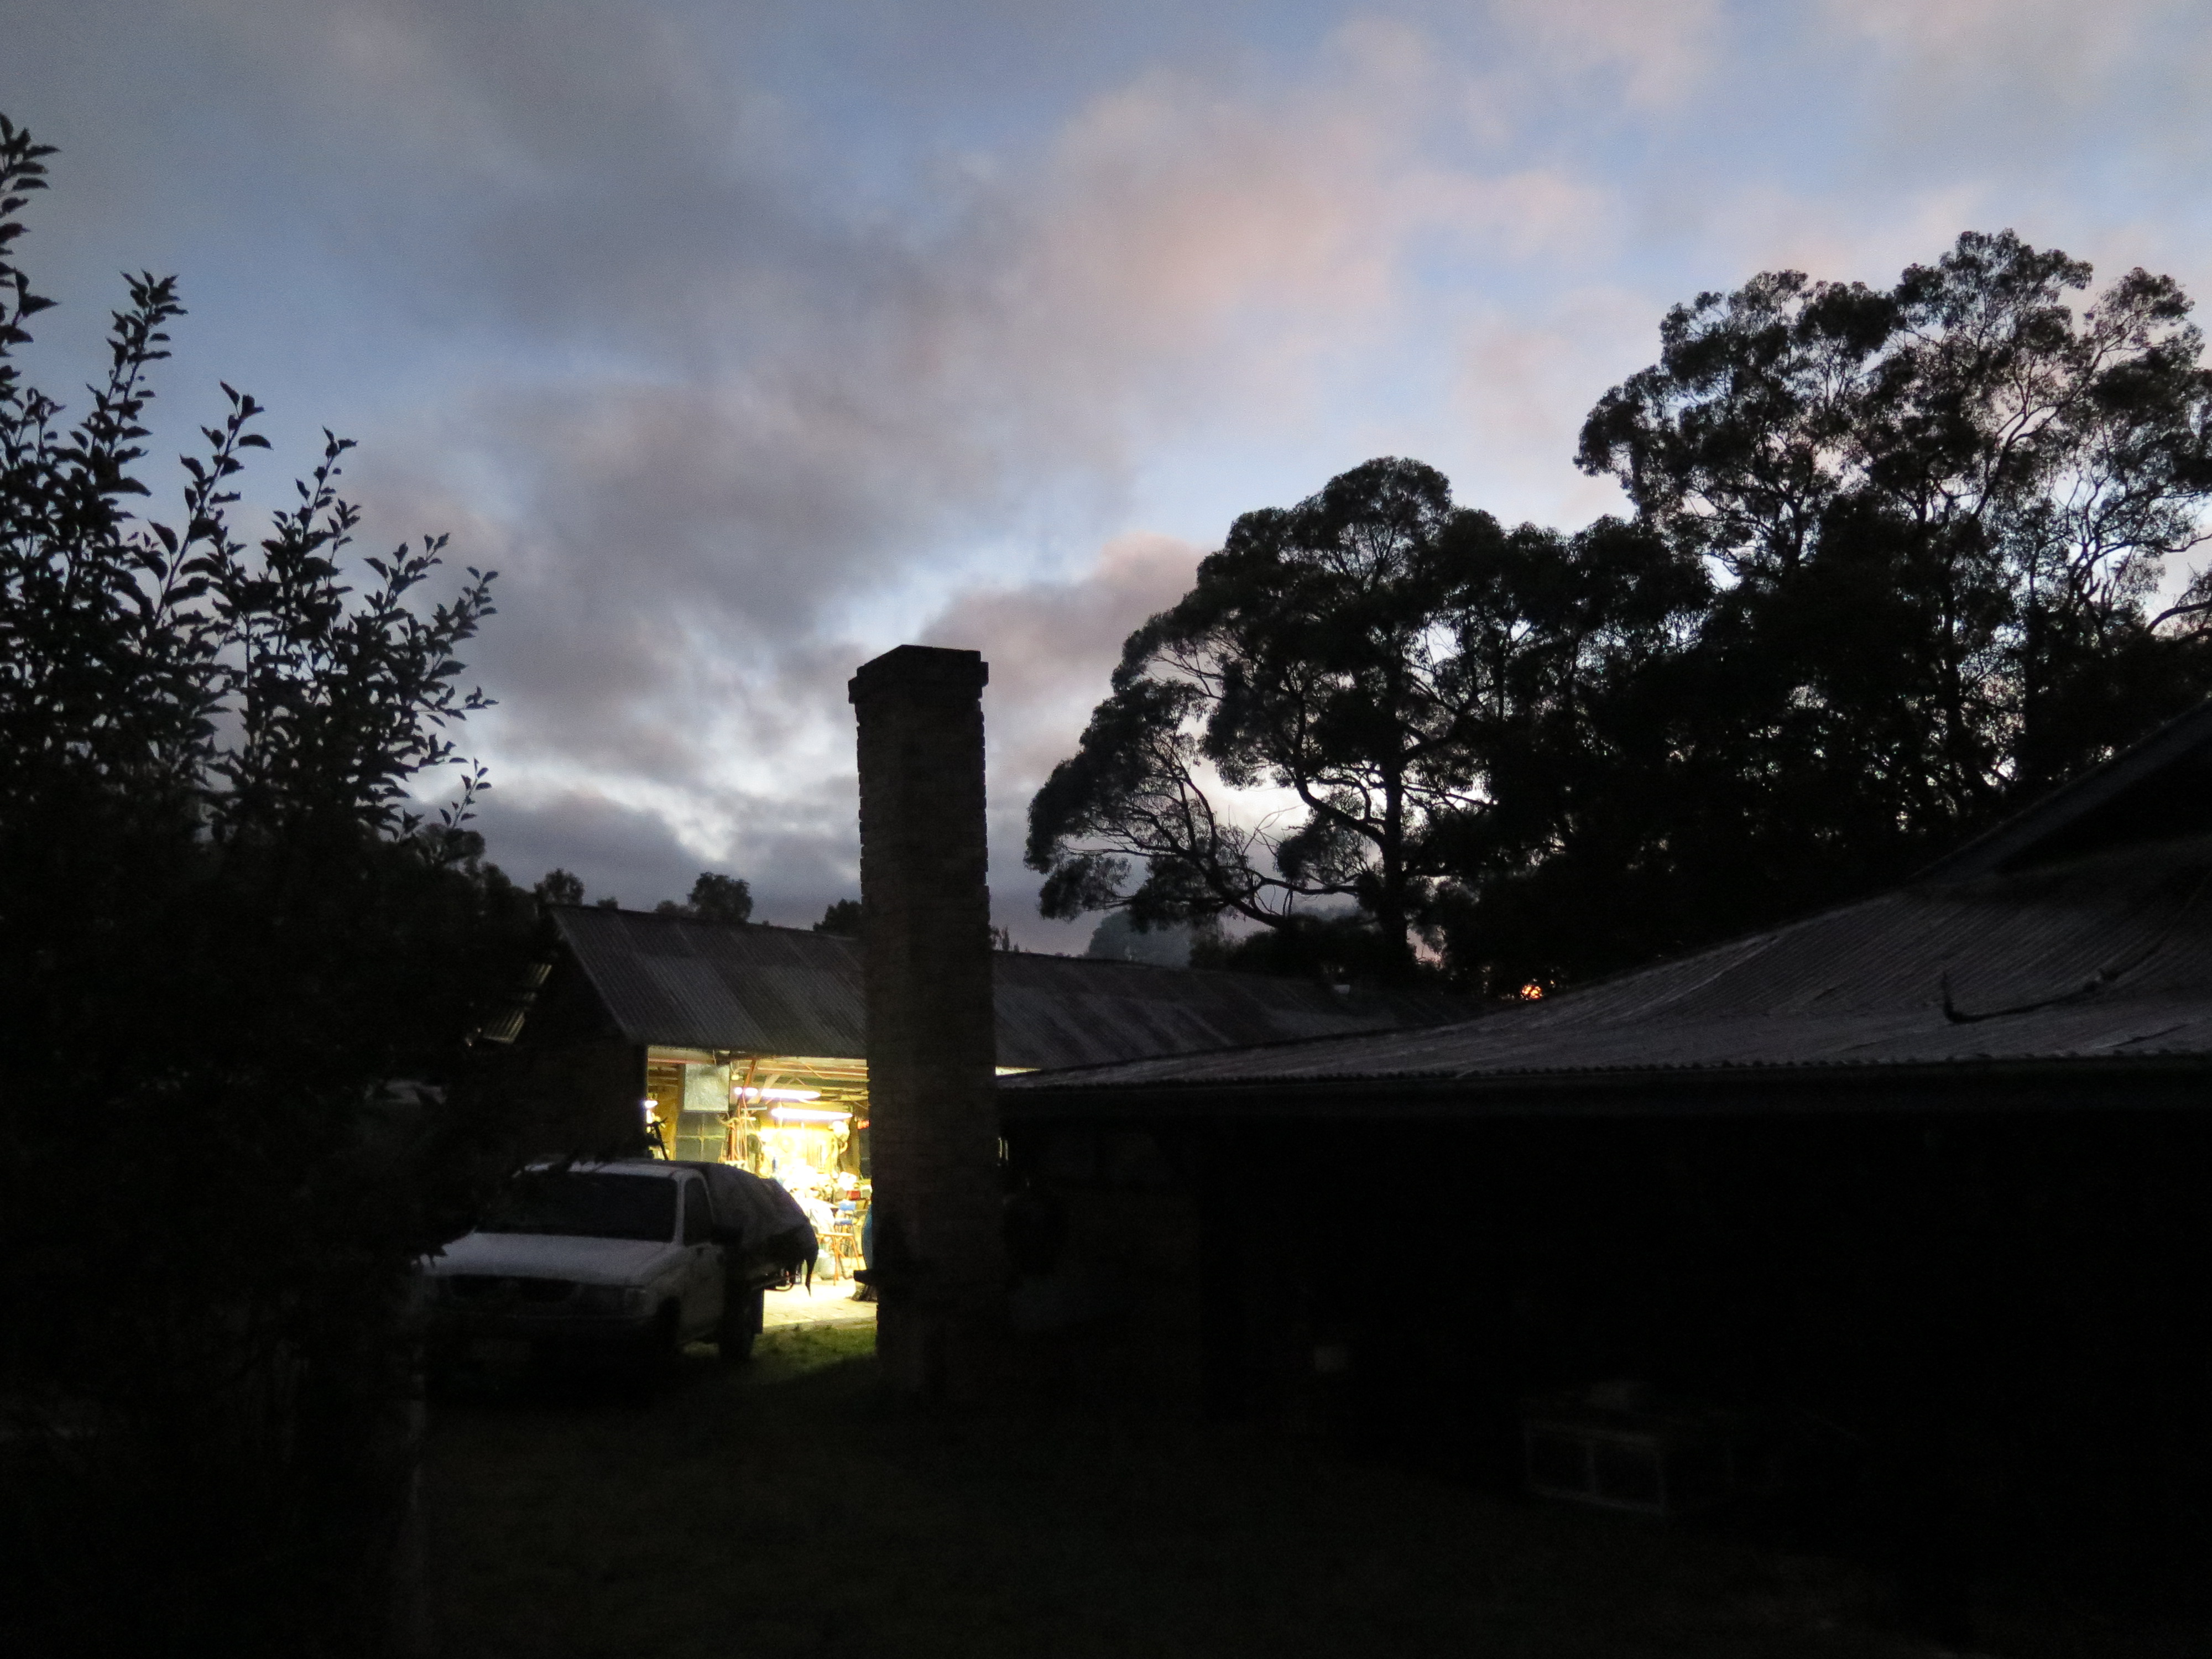
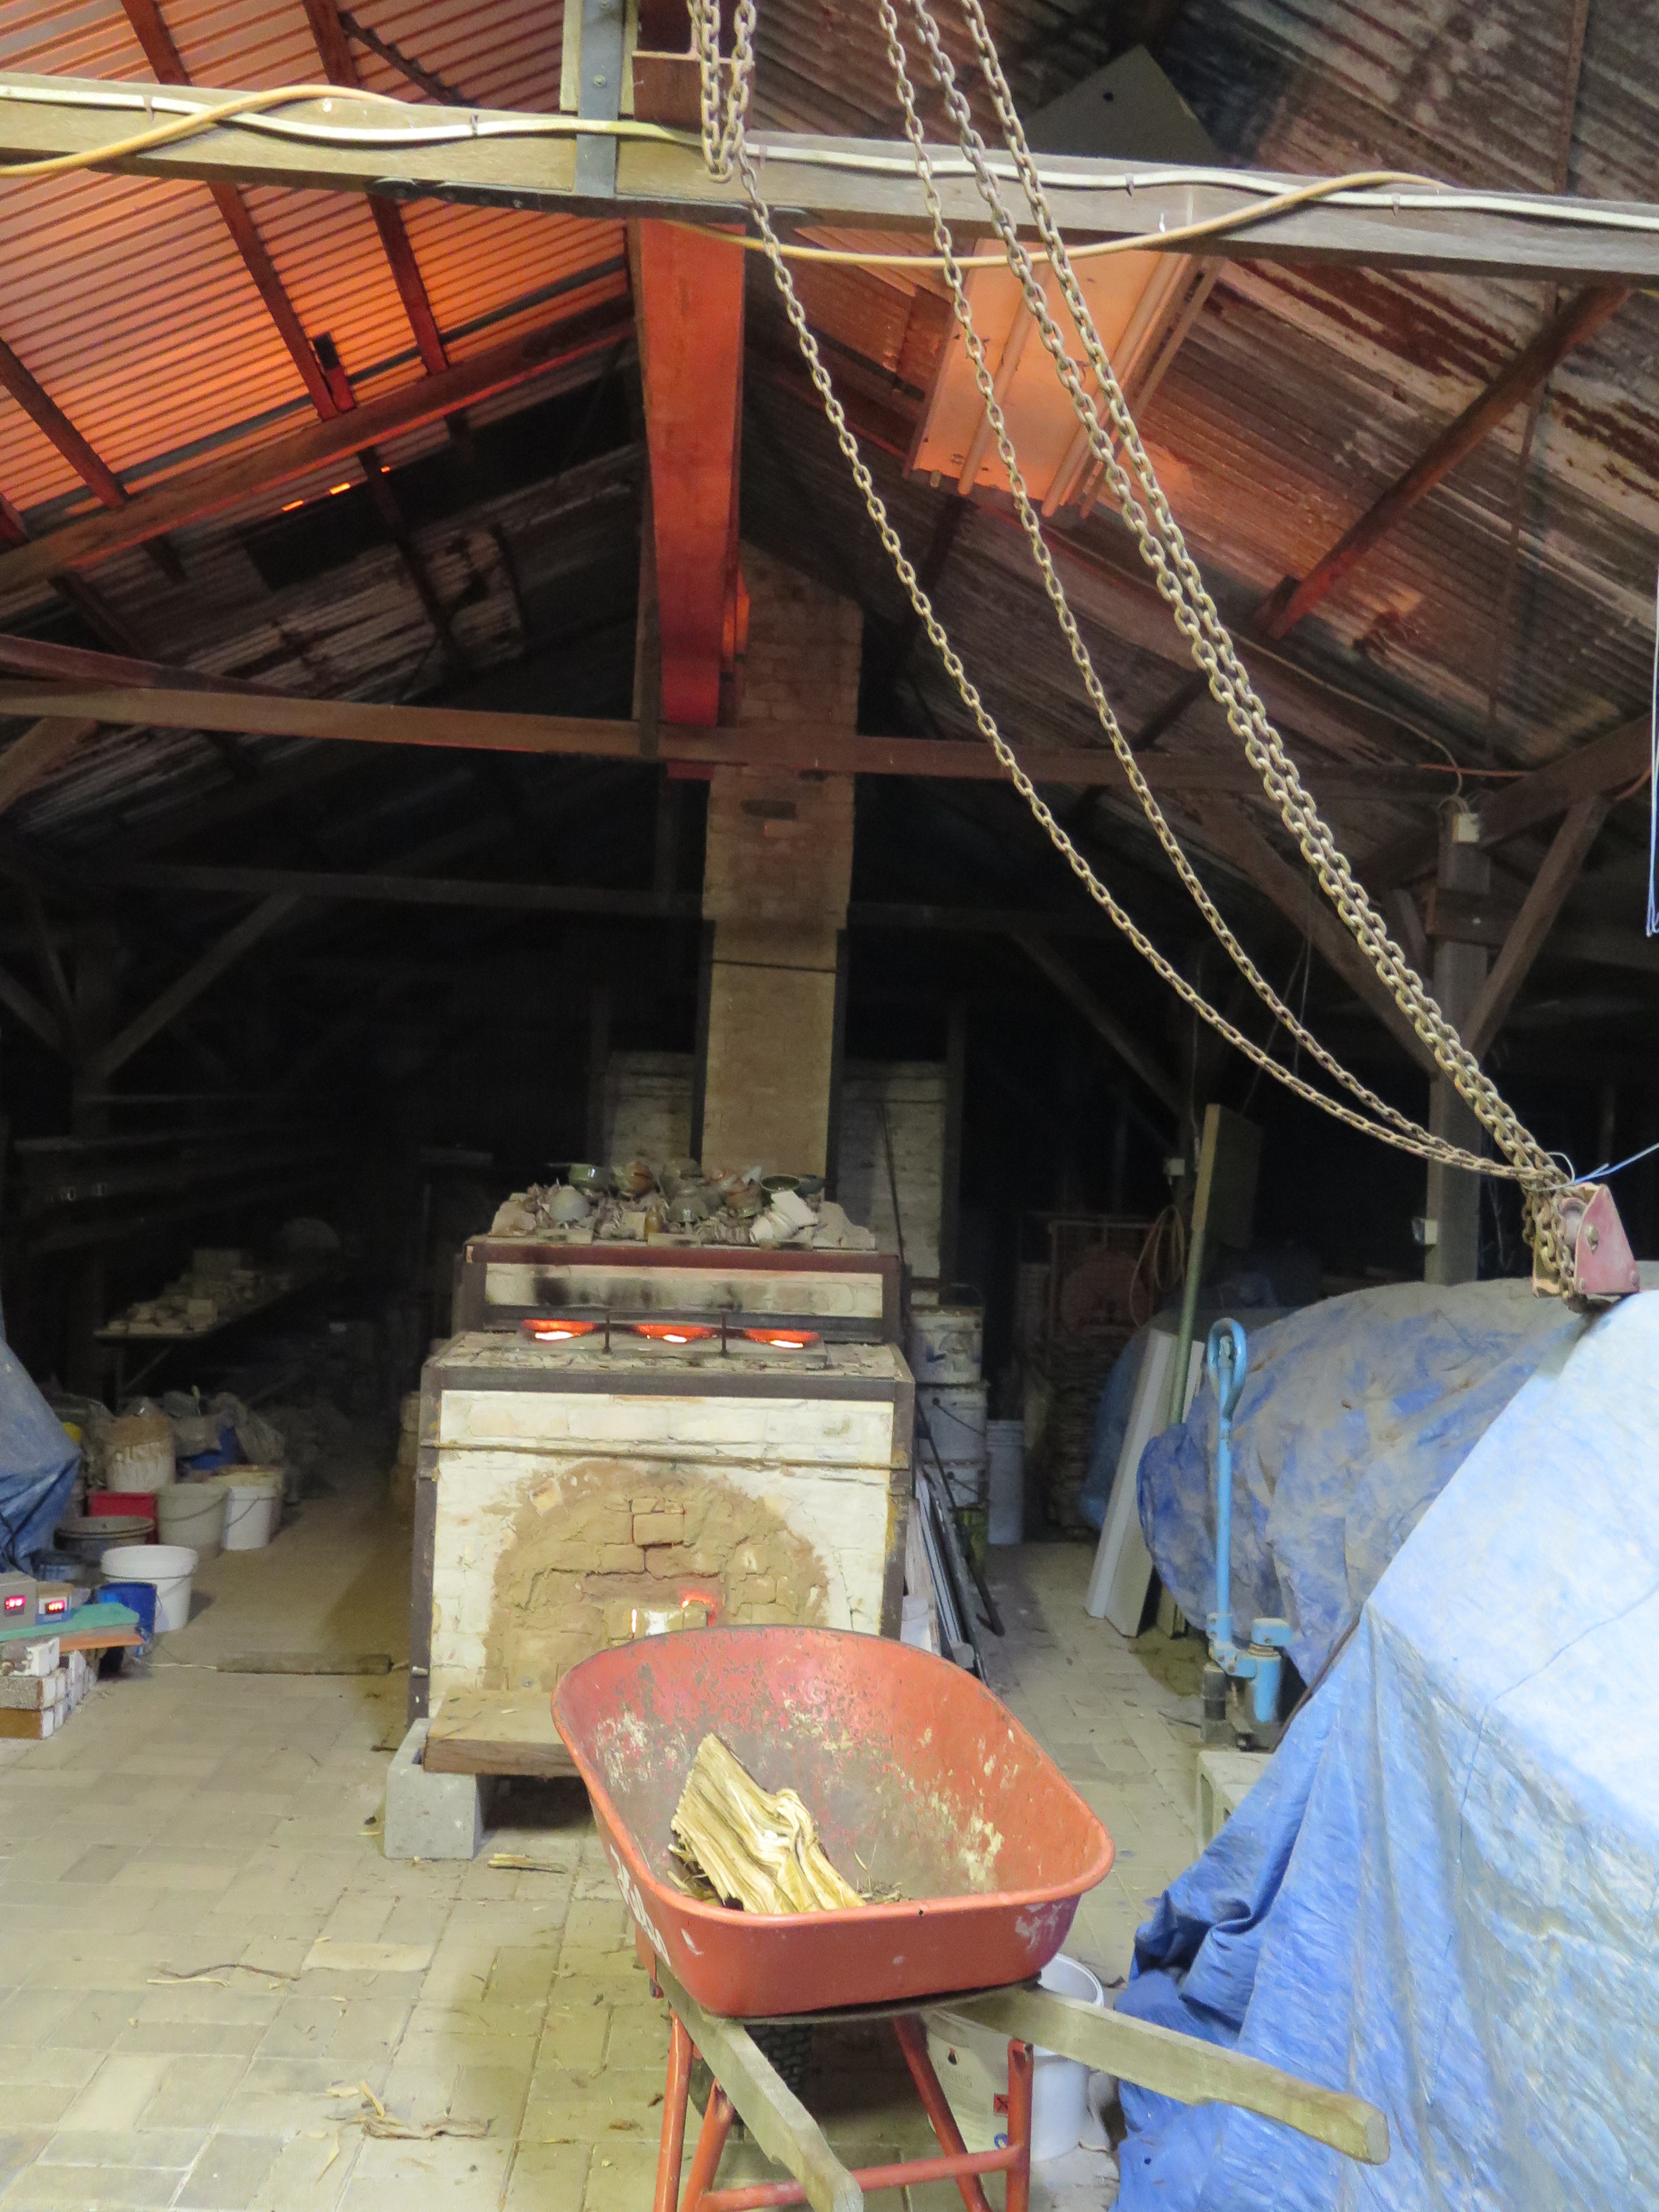
It’s dark and quiet. I’m here alone in the very late night, or very early morning. I’m in the kiln shed firing our wood fired kiln. It’s not 5 am yet and I’ve started our 8th wood firing for this year. We can’t start our firings too soon in the year, as there is a fire ban in place until the end of March or sometimes April, depending on the year and the state of the forest and the immediate past rainfall. I have fired our kilns during the summer in years gone by. But only after a good fall of rain, when the fire danger is reduced to low/medium risk. When the bushland all around is wet, there is no chance of my kiln starting a fire. If I want to fire over the summer period. I pack the kiln and seal it up, then wait for rain. It can take a month or more, but I can’t take any risks when there is a fire danger.
IMG_2741 IMG_2743 IMG_2747
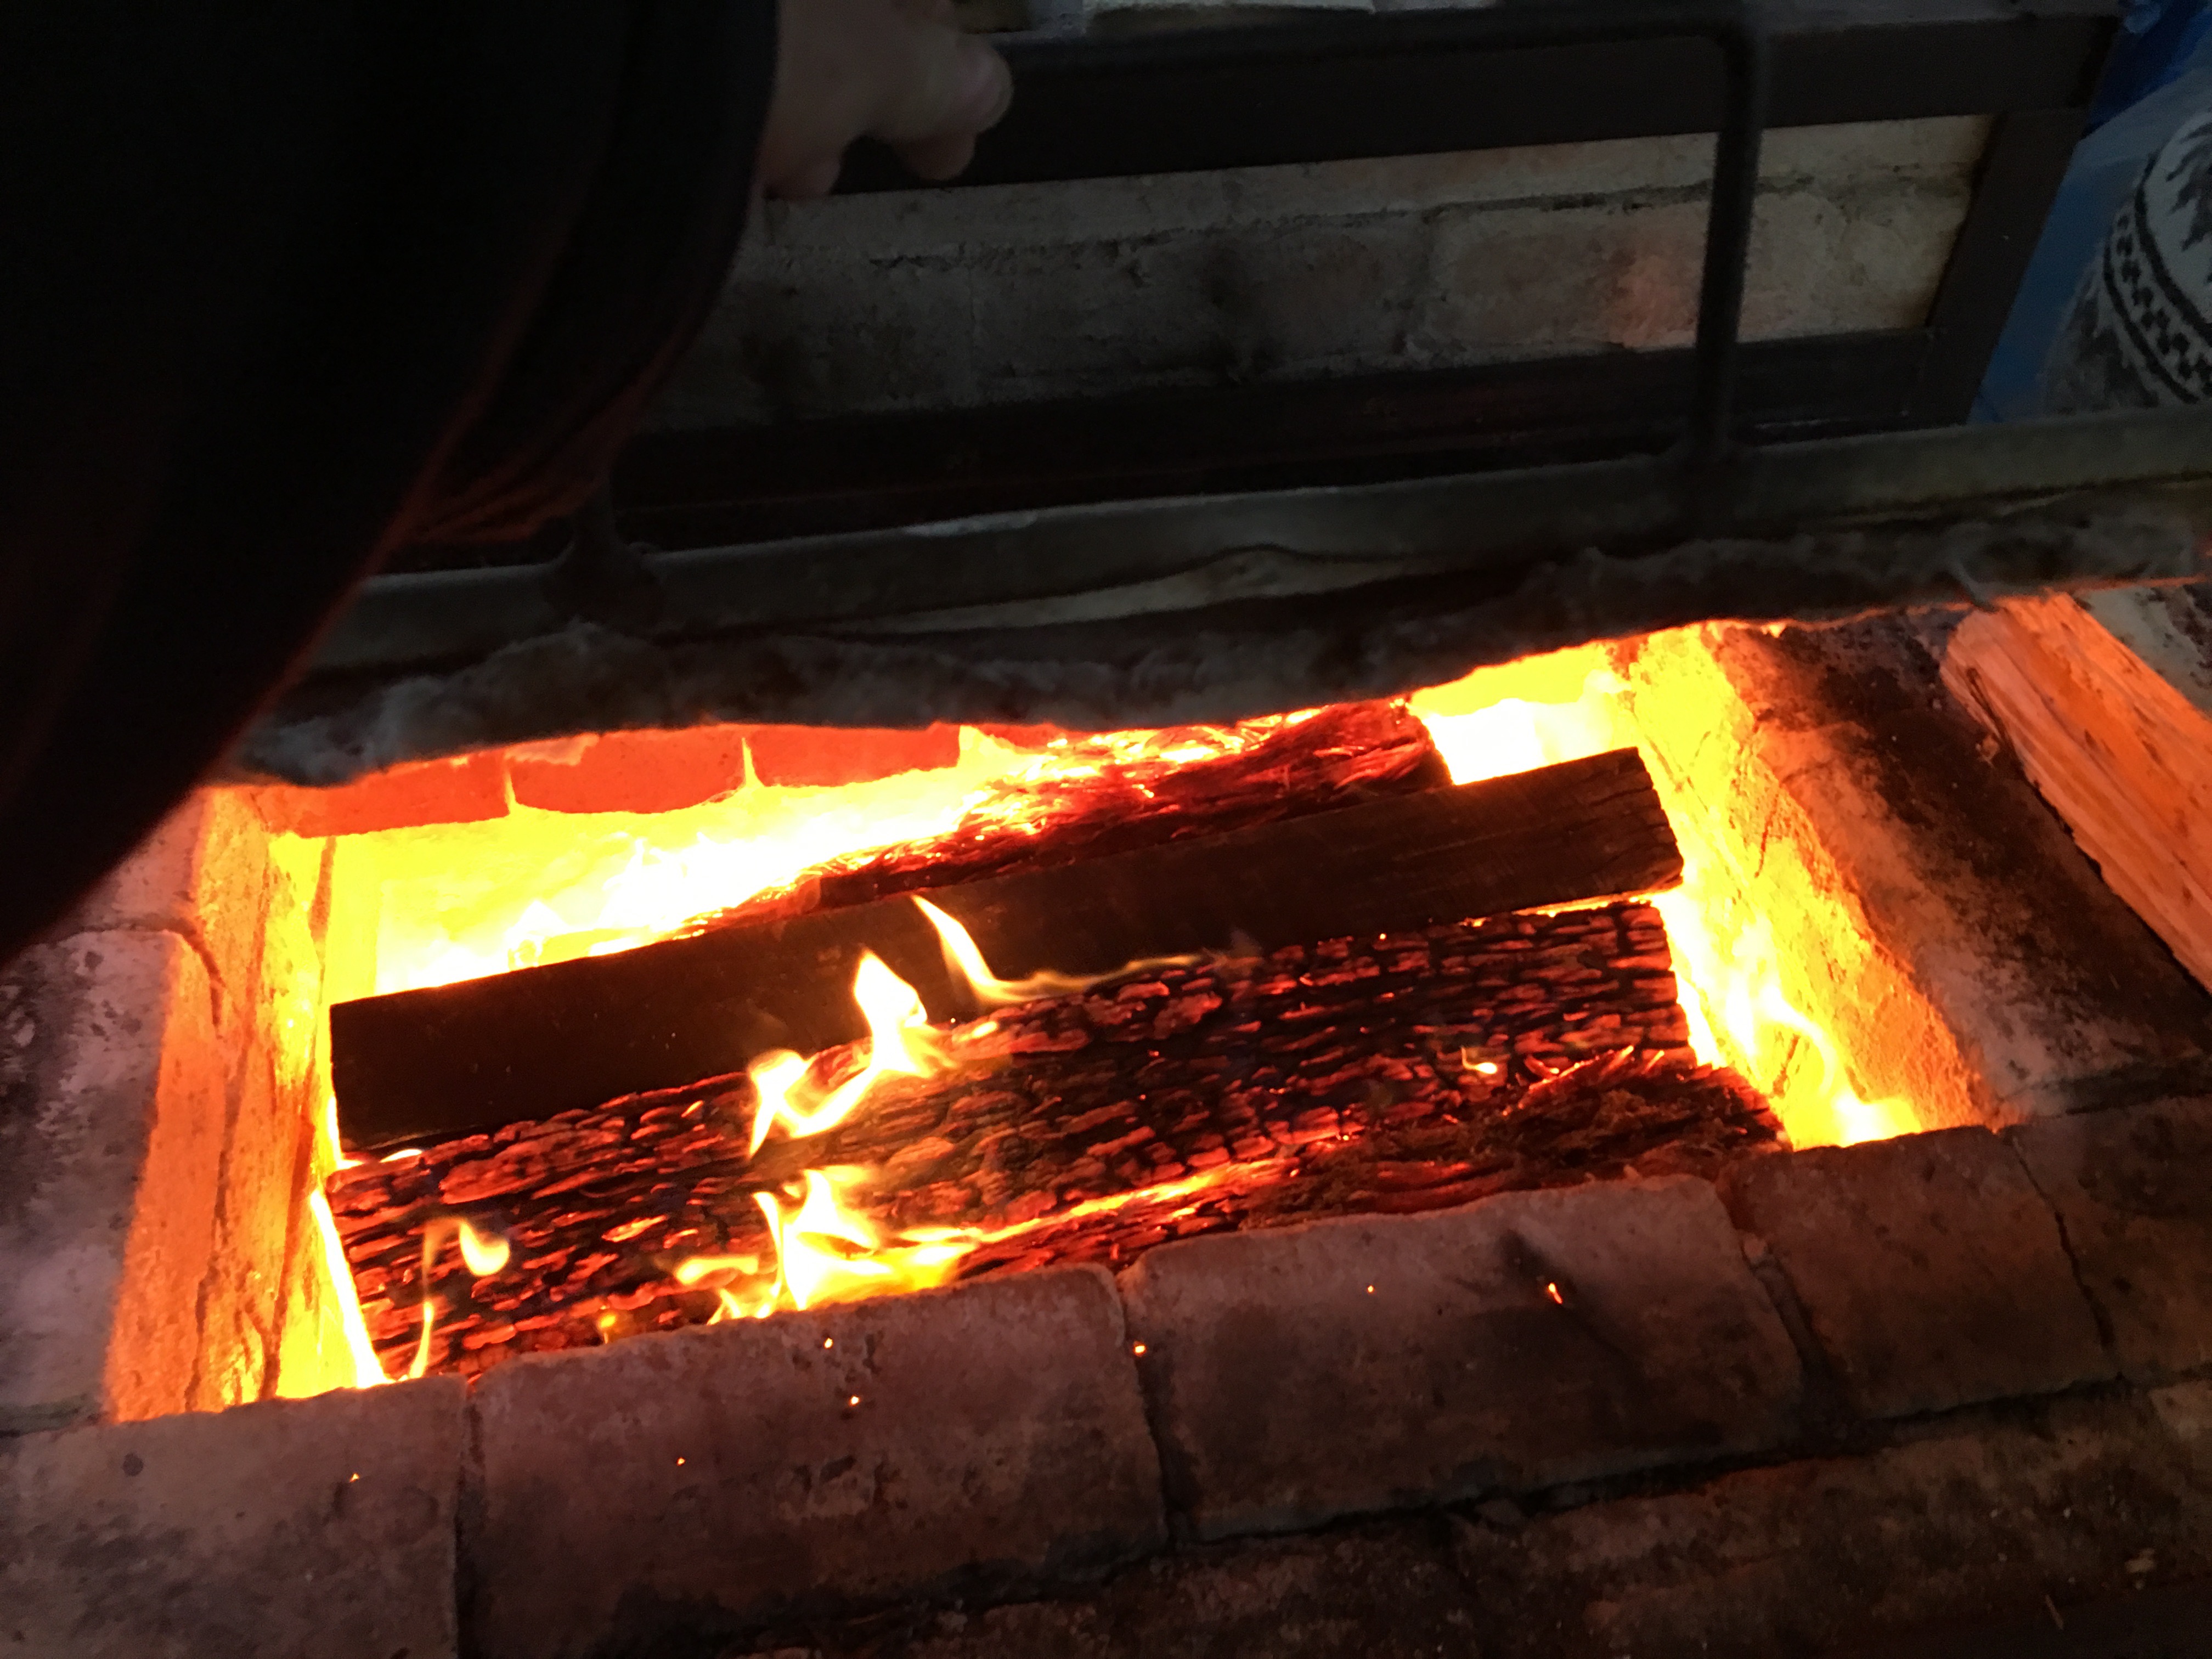
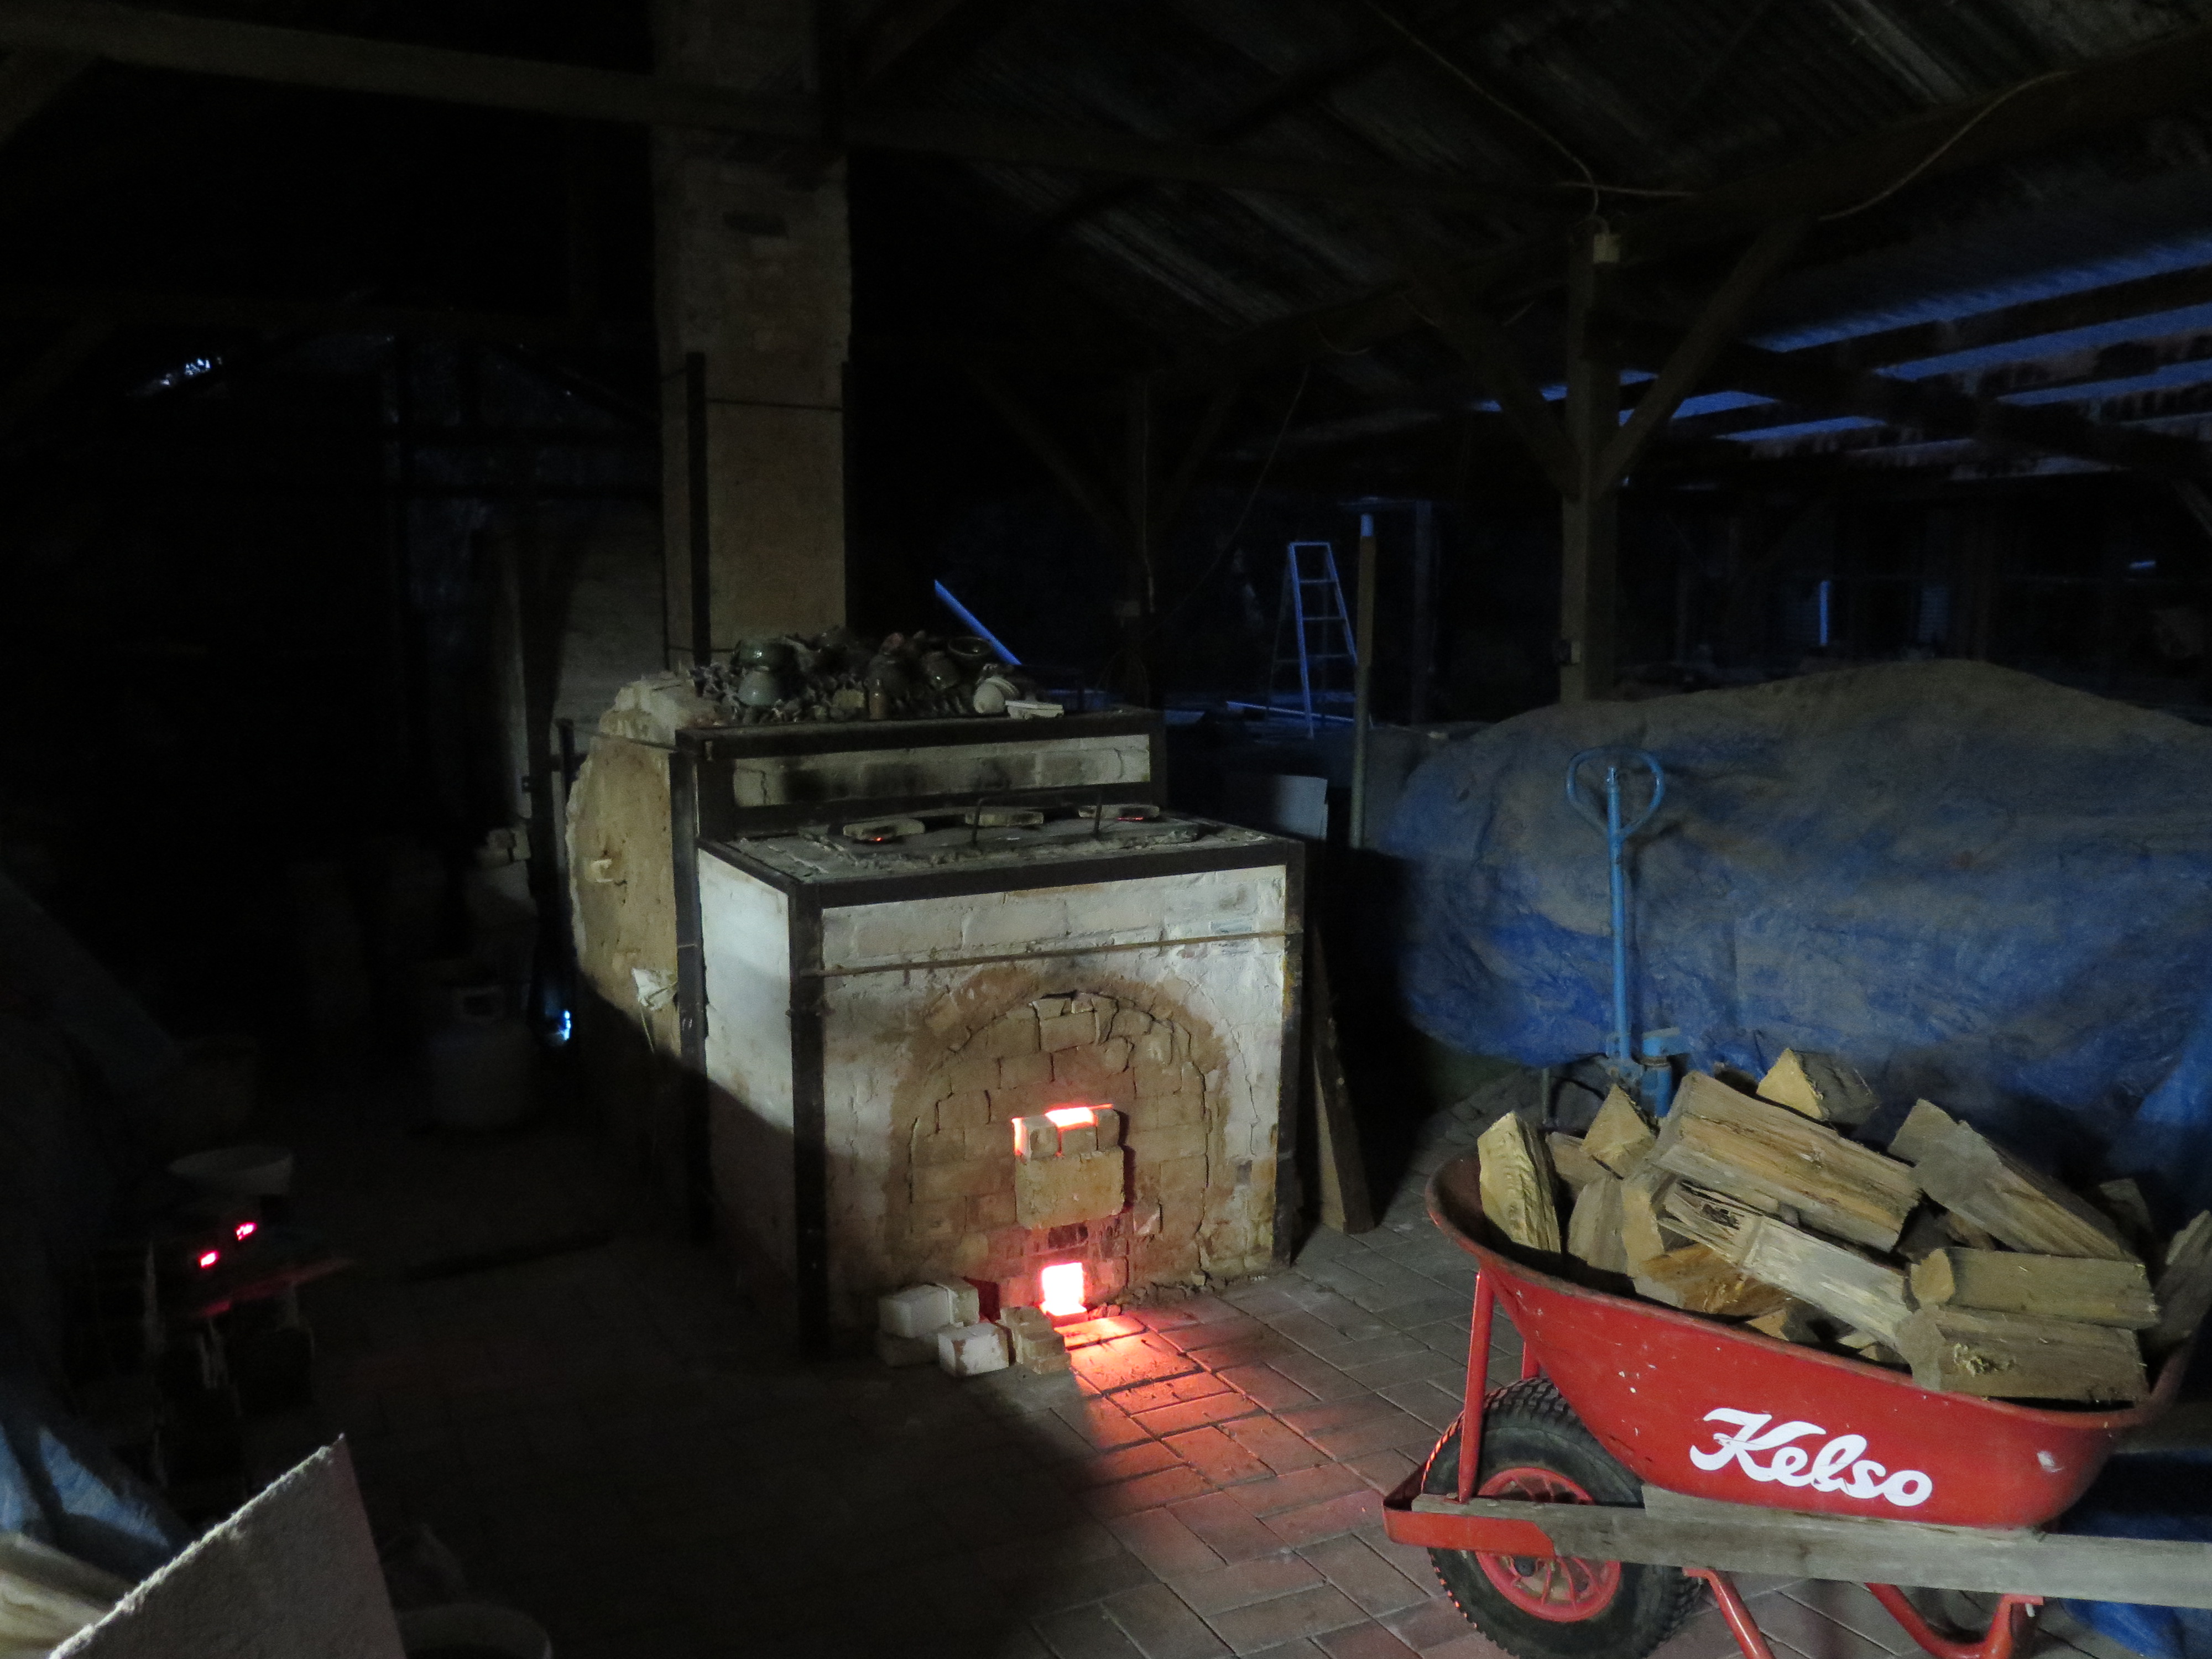
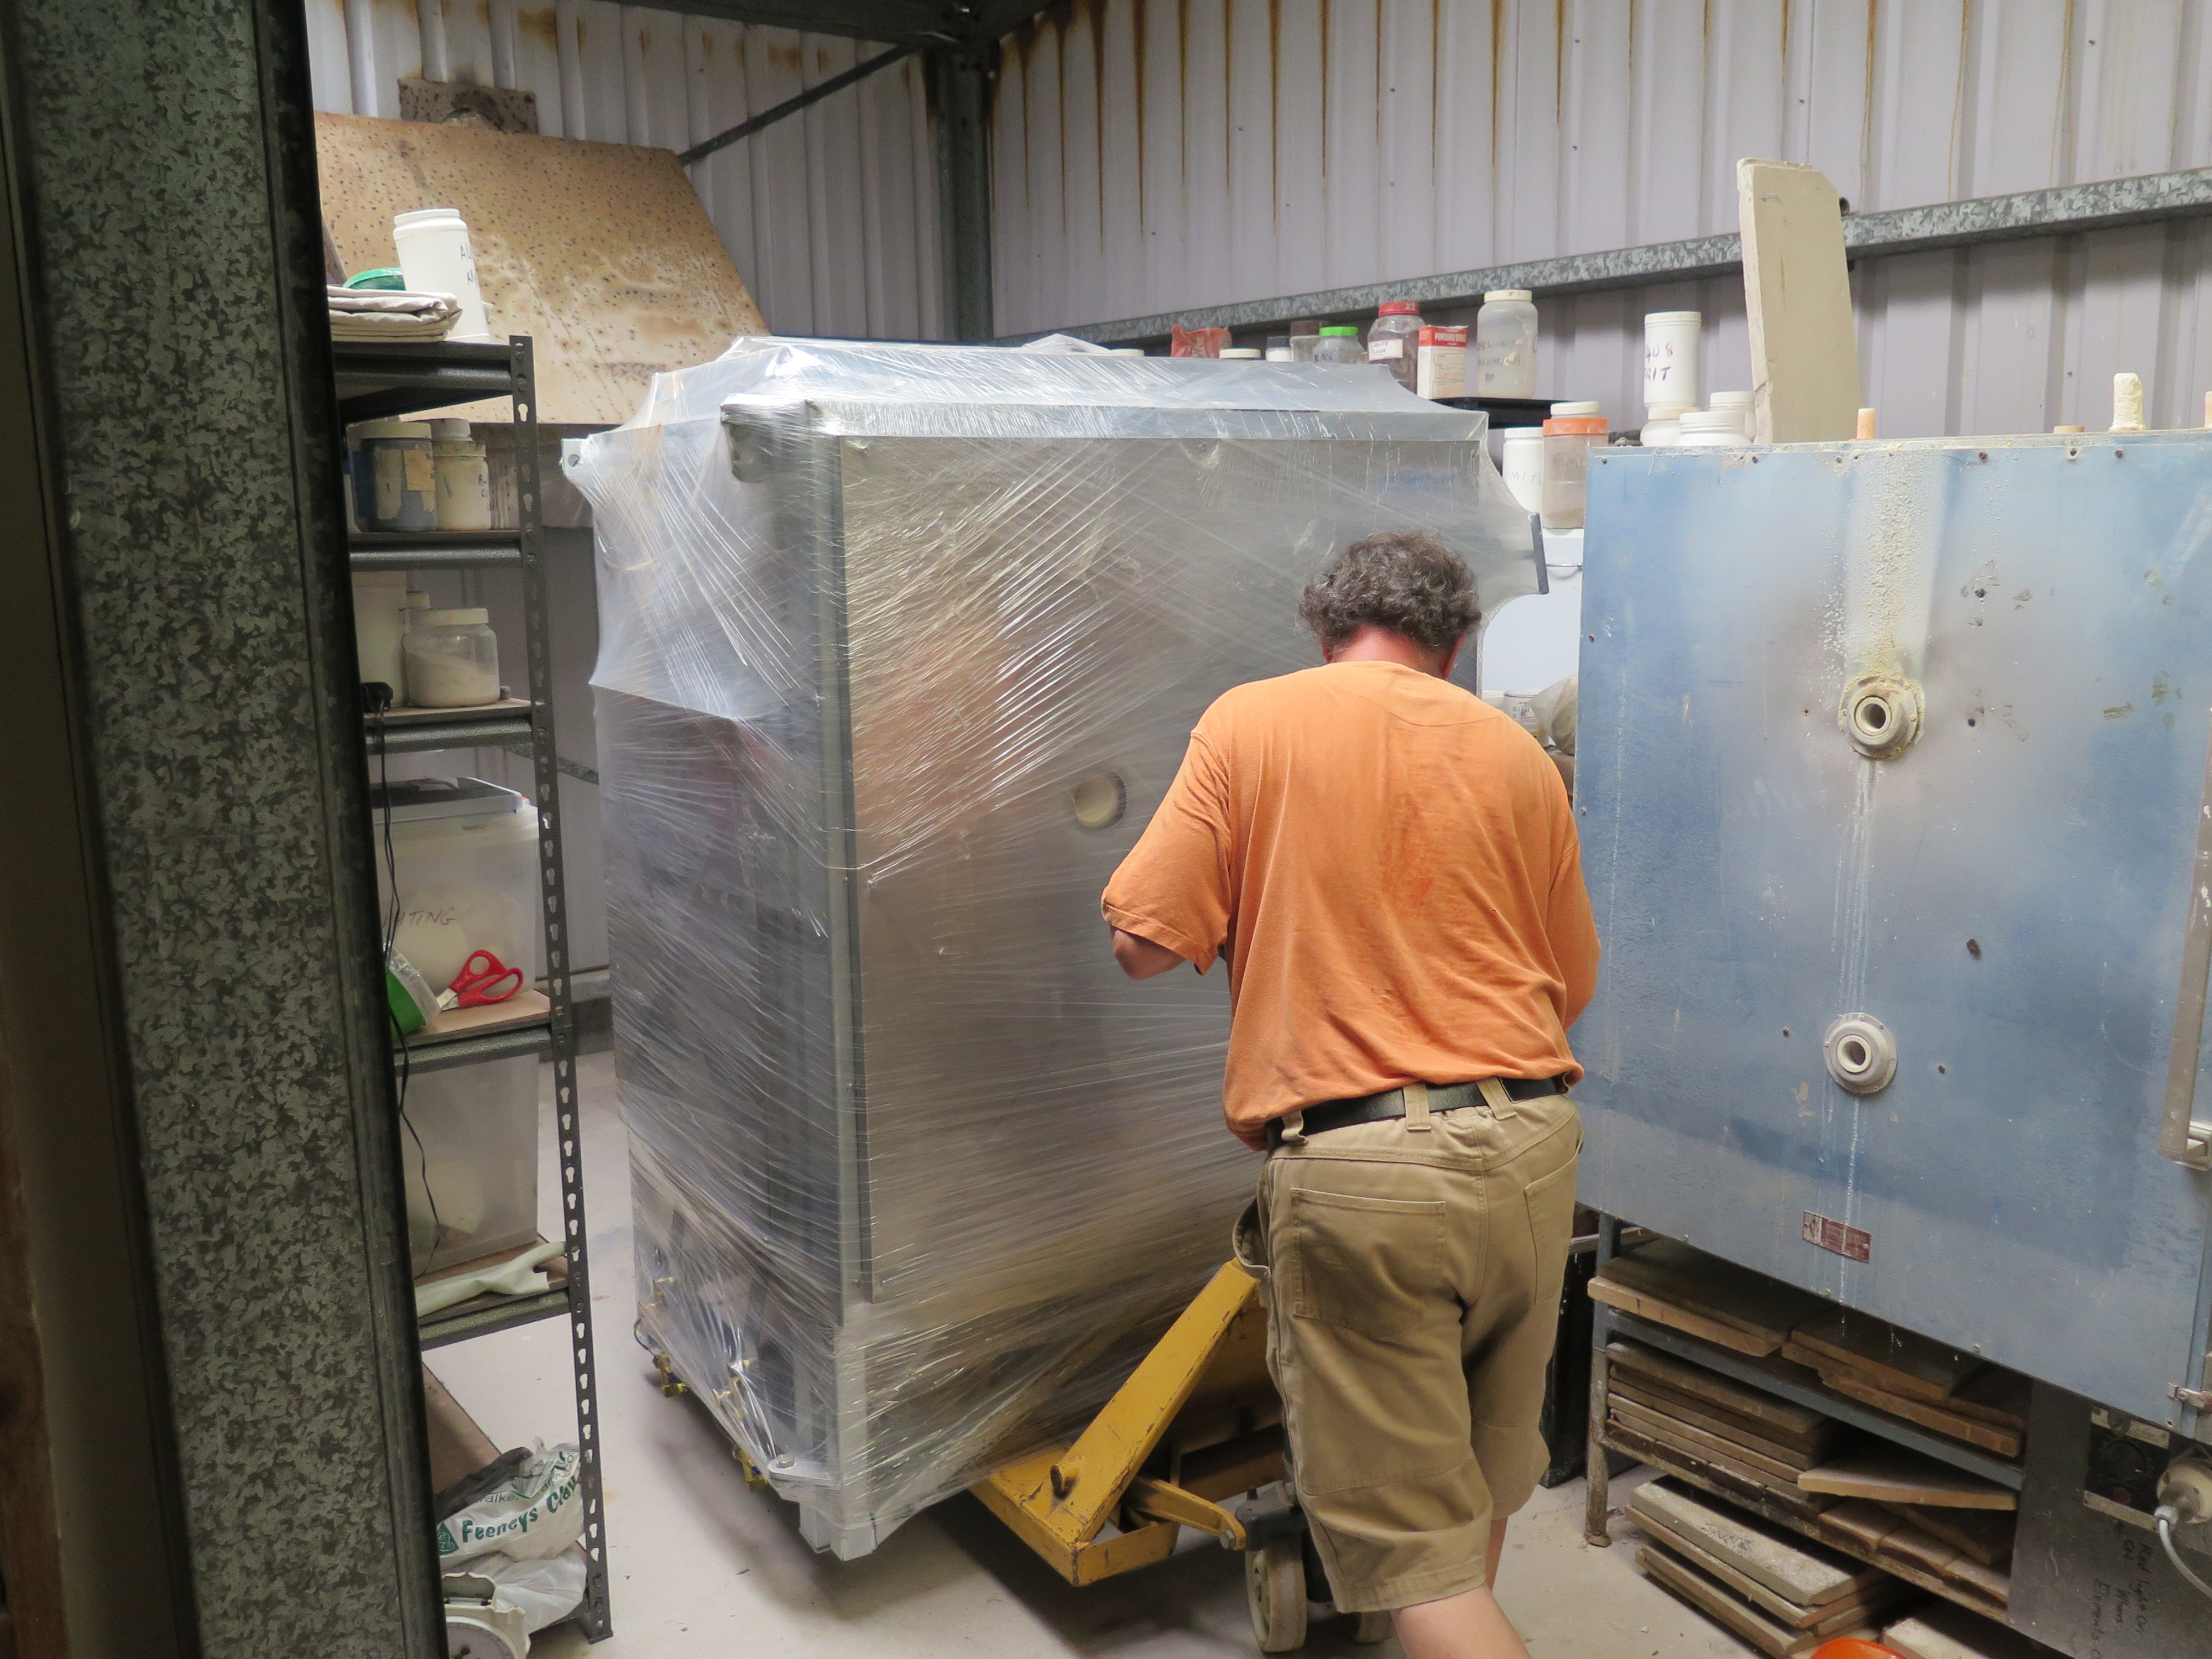
We are firing the mid-sized kiln of 1.25 cu. m. We don’t fire the big kiln anymore. At 4.6 cu. m. it is just too big for us now and the amount of pottery sales that we can make these days. We have found that it is better for us to fire the this kiln more often and get all our tests through in reasonable time so that I can continue my research into my local raw materials, especially the development of my single stone porcelain bodies and glazes. Now that we have a reliable small wood kiln that can fire our tests in at any time, it just takes 3 hours, this will make our testing and research regime a lot easier.  As the night marches on relentlessly into the early dawn, the birds start carolling, mostly magpies by the sound of it. They just love the dawn and make a big fuss about it. Dawn seems to be some time after 5 am when it is still quite dark, and before 6 am, when I can switch off the light and make entries into the kiln log without needing the light on. The birds are carolling madly now as it gets lighter in the eastern sky. It’s a tremendously beautiful sound, so gentle and lulling. It’s like some pure form of happiness made audible. It’s infectious. I feel happy! Why are they so infectiously happy? Are they celebrating the fact that they are still alive and not eaten during the night by some predator?
IMG_2756 IMG_2757
IMG_2759
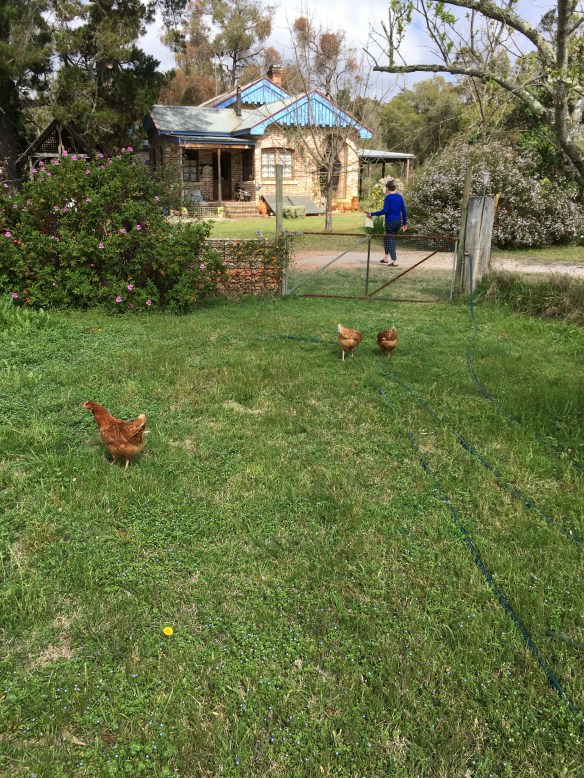
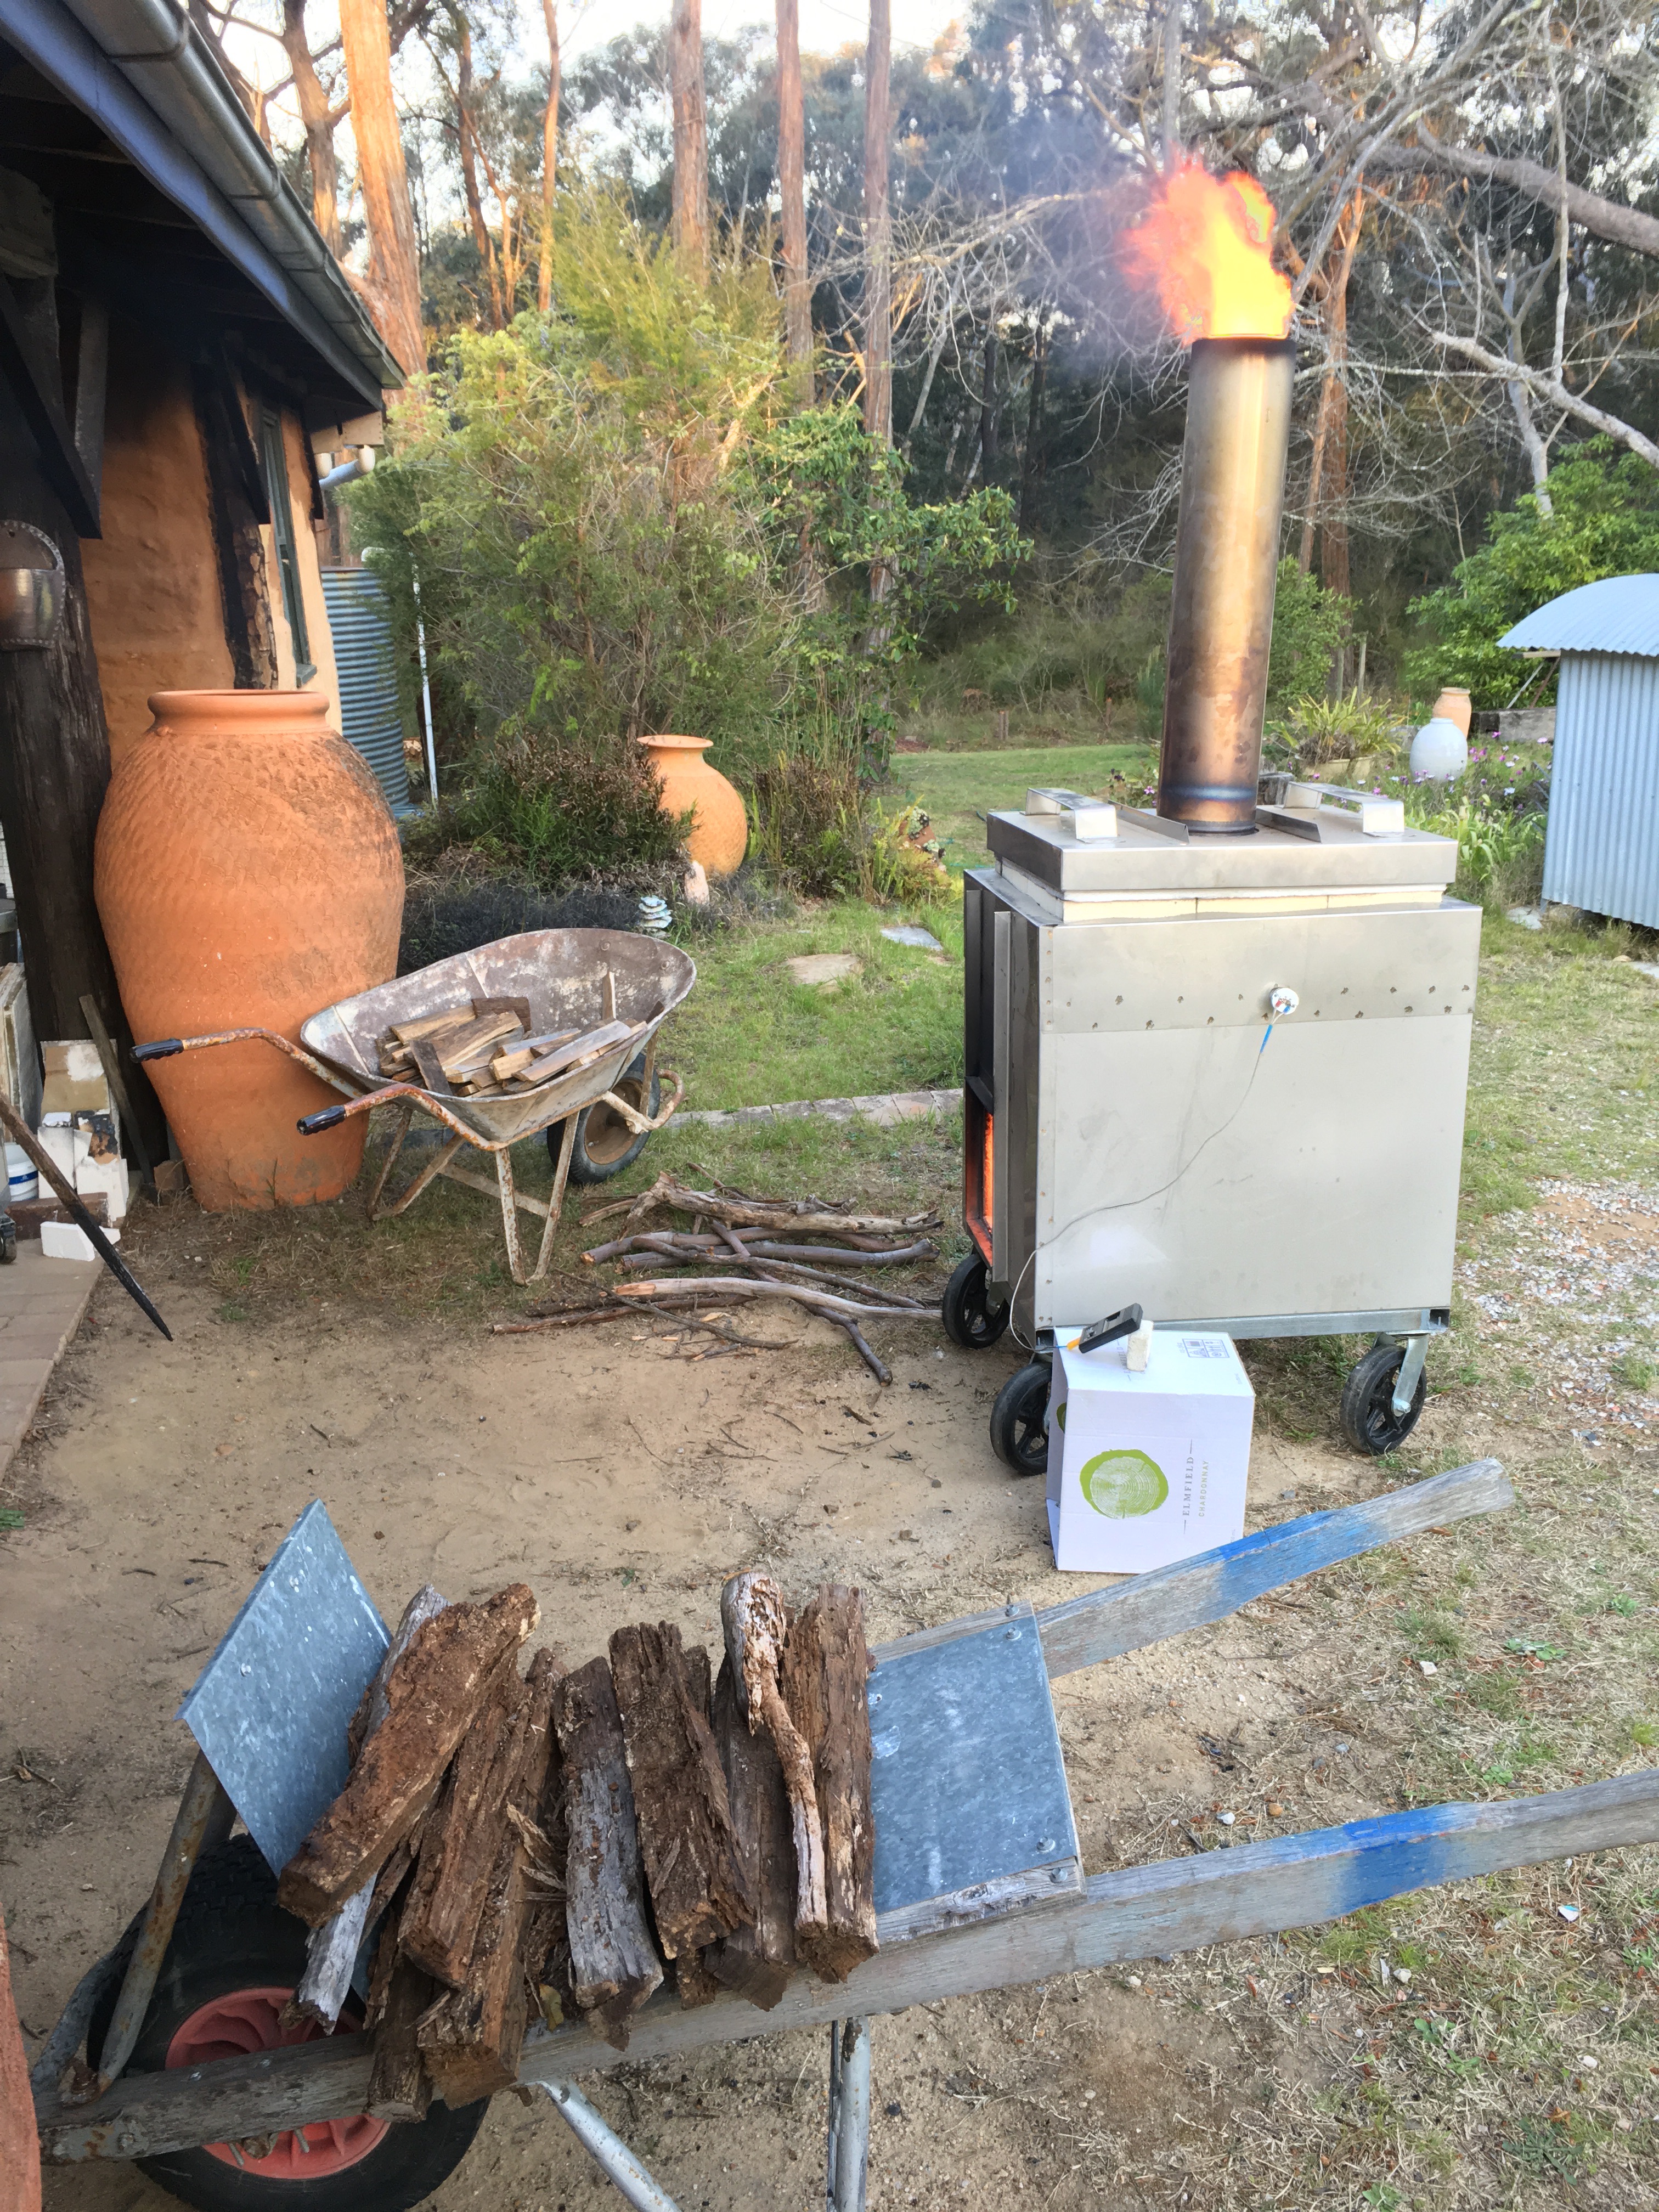
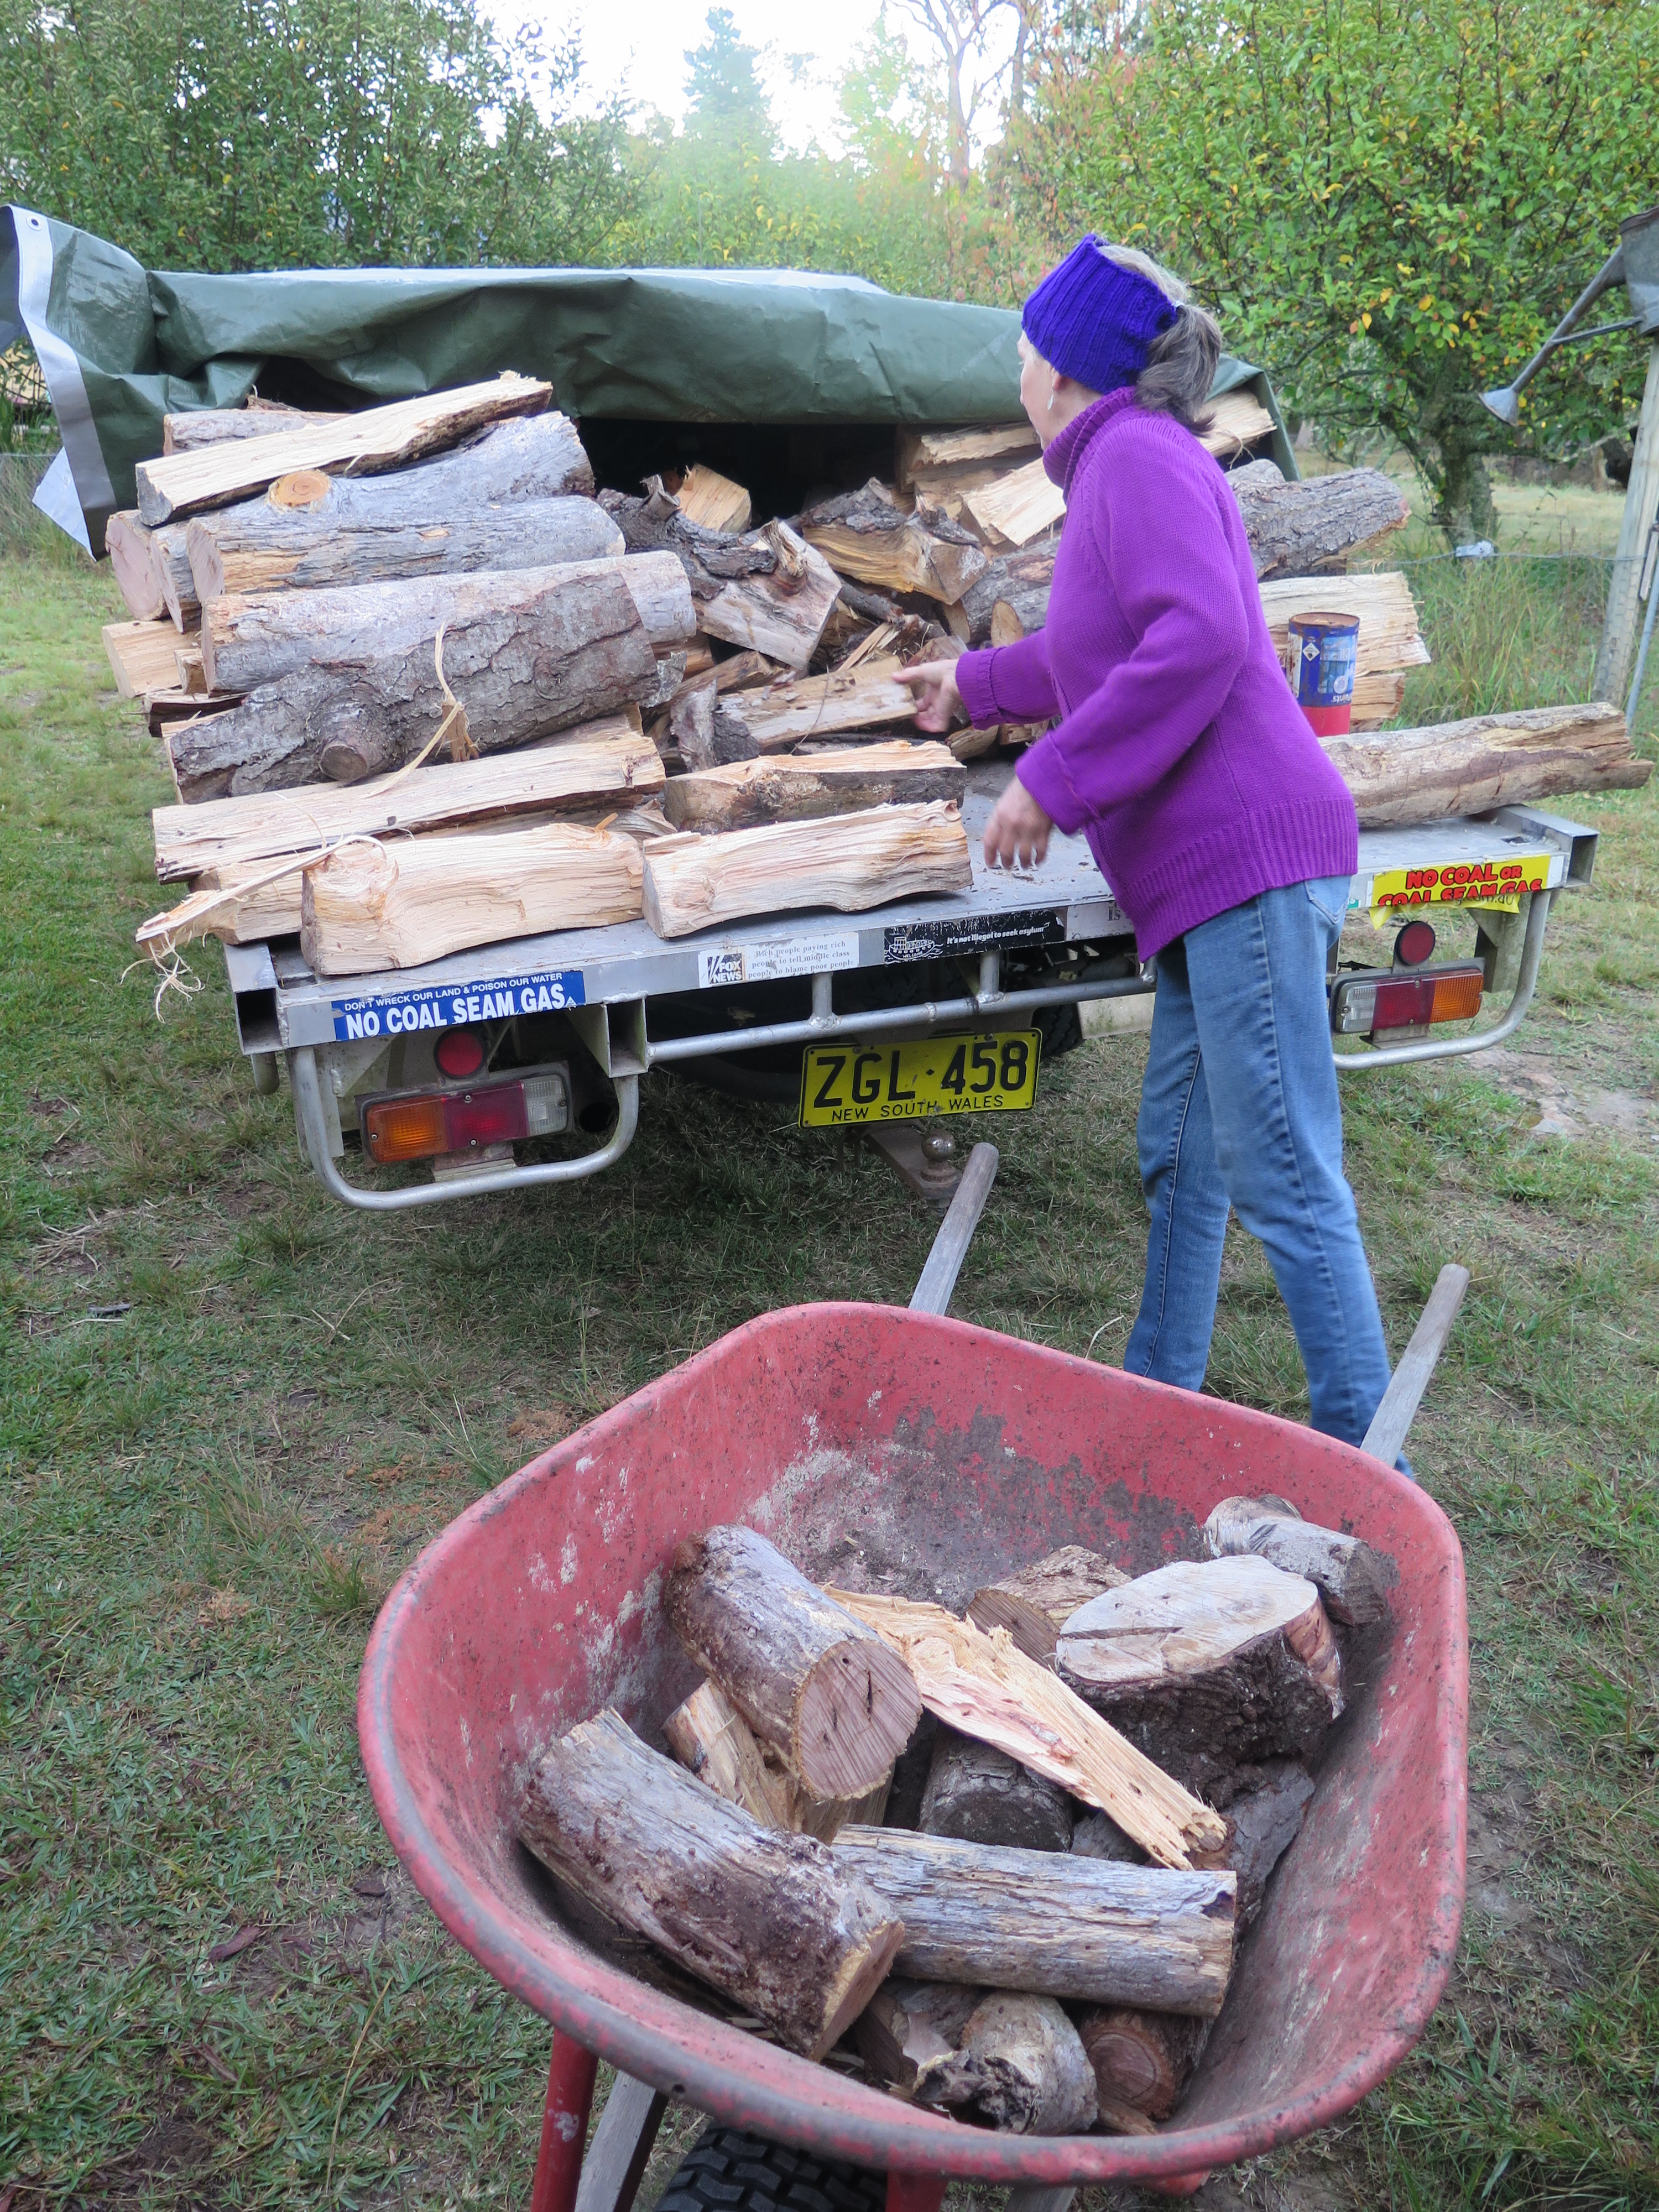
In this unique firing, I’m burning a type of timber that I don’t know anything about. I’ve been given a dead tree by the local tree-lopper guy. I don’t know what sort of tree it is, as it has no leaves or bark, but I know that it is not something that I have come across before. This is nothing unusual, because there are thousands of different tree species and as a rule, I only burn the local trees from around here. Mostly trees that Janine and I have grown here on our 7 acres of highland sclerophyll forest over the years. However, because I’ve lived in this little hamlet here for over 40 years. I have met a lot of people and they know that I have a wood fired kiln, so every now and then someone turns up with an offer of free wood for the kiln, just to get rid of it and not have to pay the dumping fee at the local council recycling centre, which is also located at the other end of the shire and 45 minutes drive away and is quite a drive. We are located at the opposite end of the shire from the recycling centre.
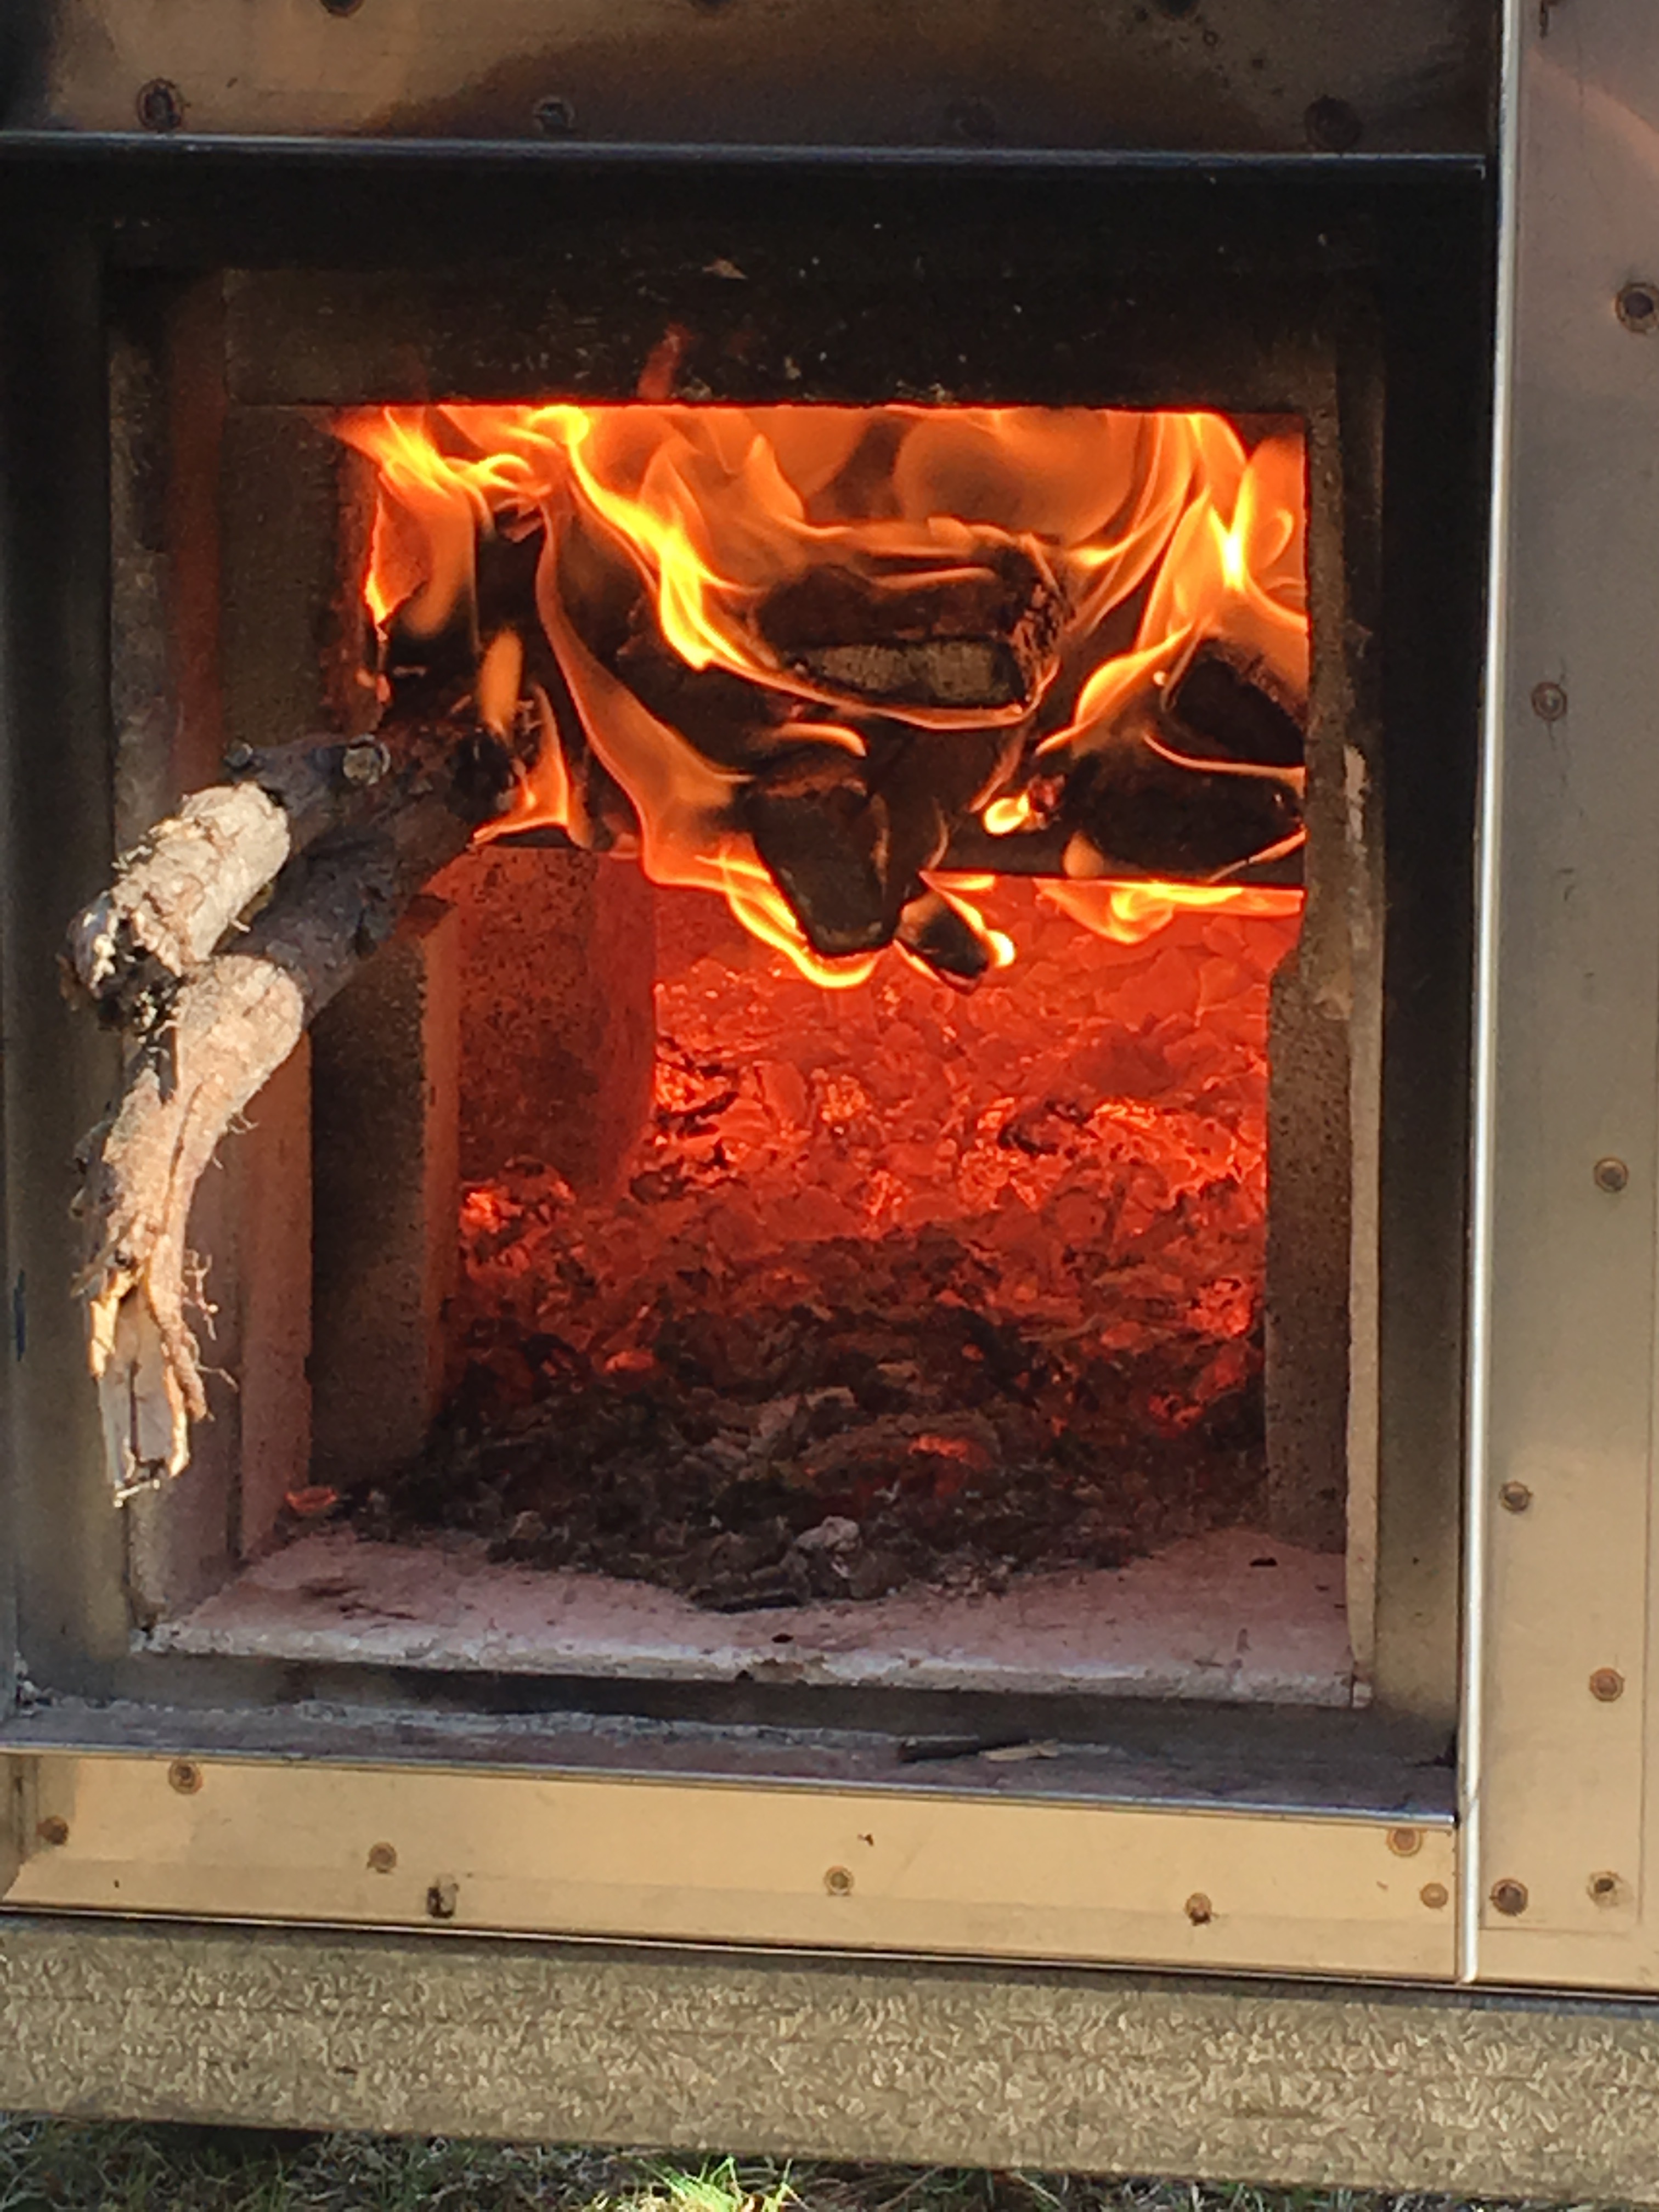
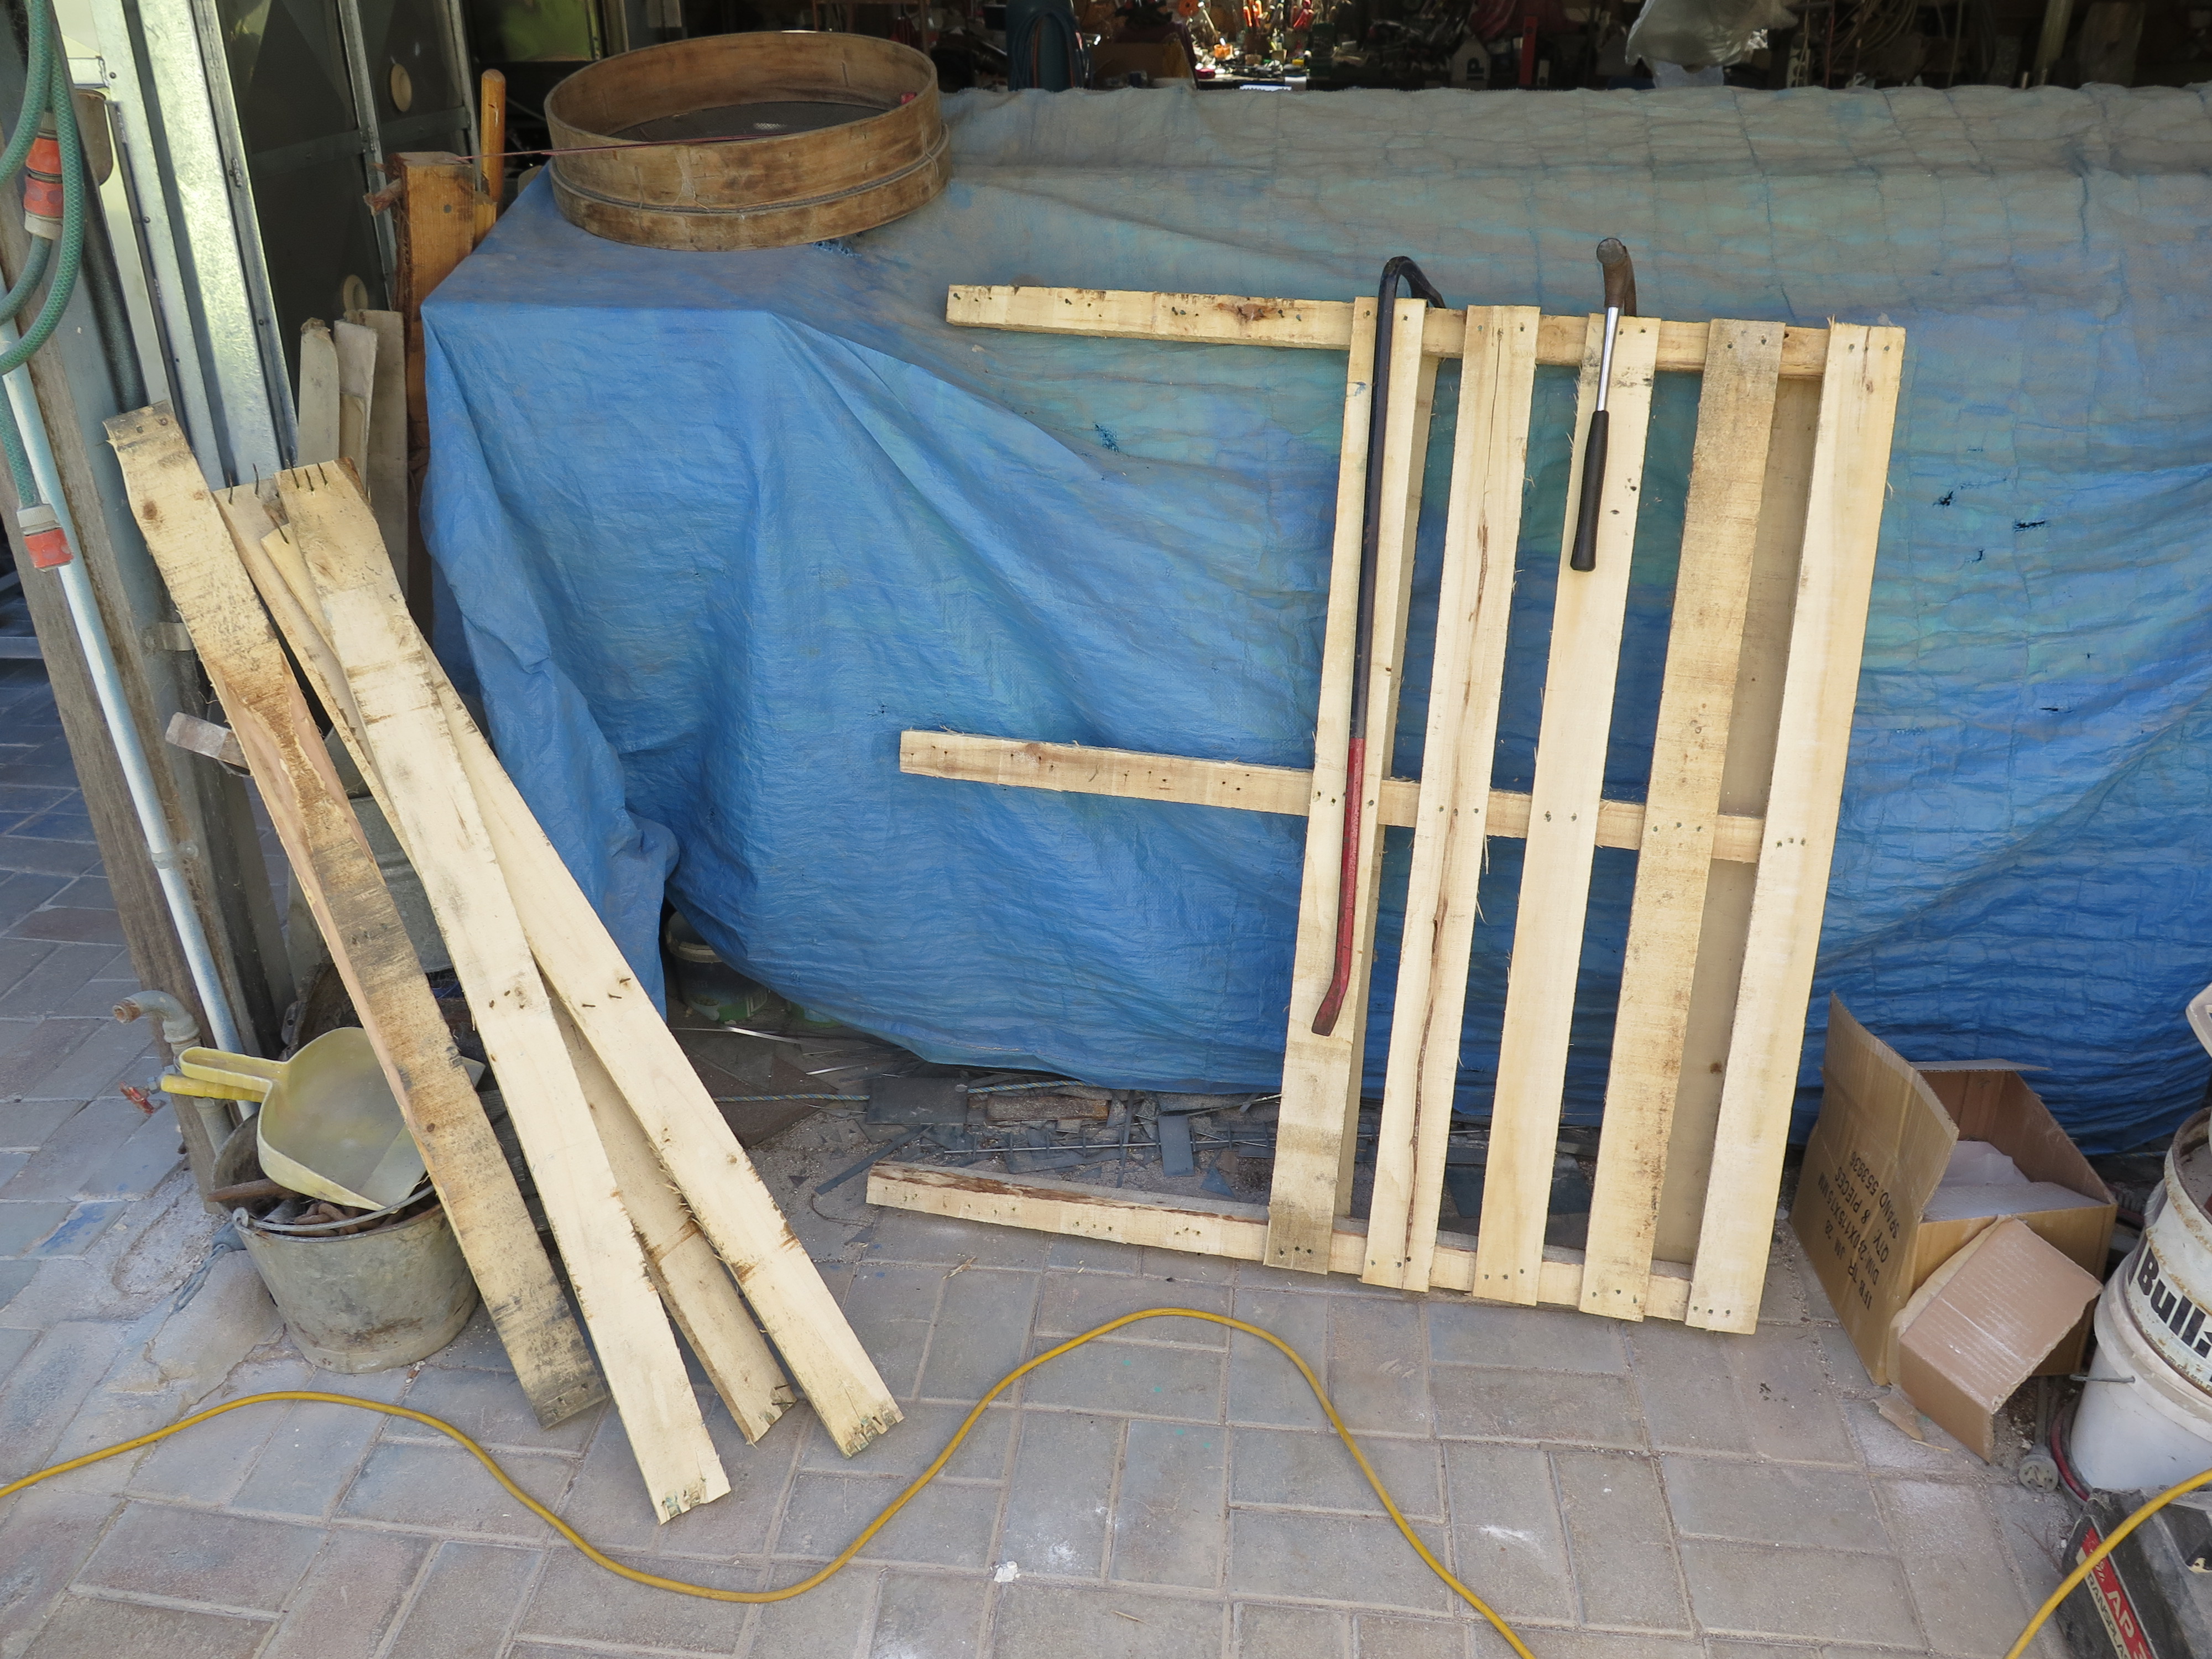
What I do know about this dead tree is that it is interesting. It is quite light in weight like a soft wood such as pine, but it has a strange twisted, interlocking grain like a hard wood such as a eucalypt. It turns out to be quite hard to split, even using the hydraulic splitter. It’s quite a tough wood. I’m hoping that it will burn well. But this is not knowable in advance until I actually get it into the fire box and see what happens over time. I have a lot of wood already cut, split and stacked ready for firing. I have several stacks, each about enough for a firing. I have stringybark, paperbark, ironbark and she oak all ready and prepared as well as a firings worth of radiata pine, from a load of trees brought here by a local contractor who was asked to clear a building block to make a house site. I naively said “yes. Bring the trees here, sure, I’ll take them”!
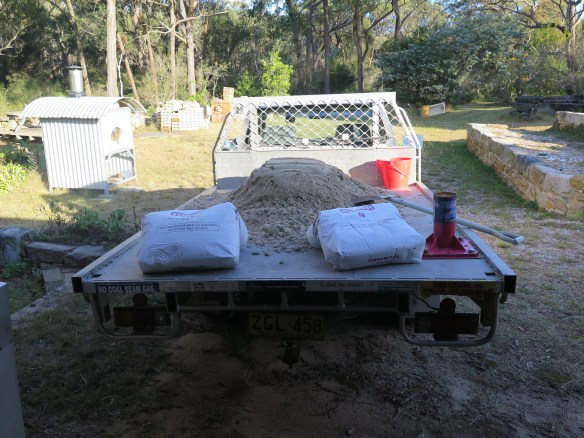
It turned out to be 8 truck loads in his 8 tonne truck. He had more, but I just ran out of space to dump it safely. He kindly sawed off the root ball, de-limbed them all and cut them to the 6 metre length of his tipper tray so that they would stack and carry efficiently. I have no way to know if each load was the full 8 tonnes or not, but it surely was a very large pile of logs by the time the last load was dumped here. It took up all of my wood storage space and then some. I could hardly move the ute and wood splitter around. I simply had to start at the far end and whittle away at the pile until I could make a space large enough to turn around in. Then I worked my way cutting and splitting all the way up one side to clear the driveway, back up to the road. I have been working my way through this huge 1/4 acre pile of trees for a while now and there is still a big pile of logs left to work through.
DSC01083 DSC01079
These logs are free fuel. Something not to be sneezed at in these days of increasing energy prices, but only free as long as you already have a spare 1/4 acre of forest clearing, a couple of chain saws, a tractor to drag the piles apart safely, a hydraulic wood splitter and a ute to transport the cut wood around, and then a wood shed to keep it all dry once it is cut and split to be stored and seasoned, then, ultimately I can burn it for “free”!
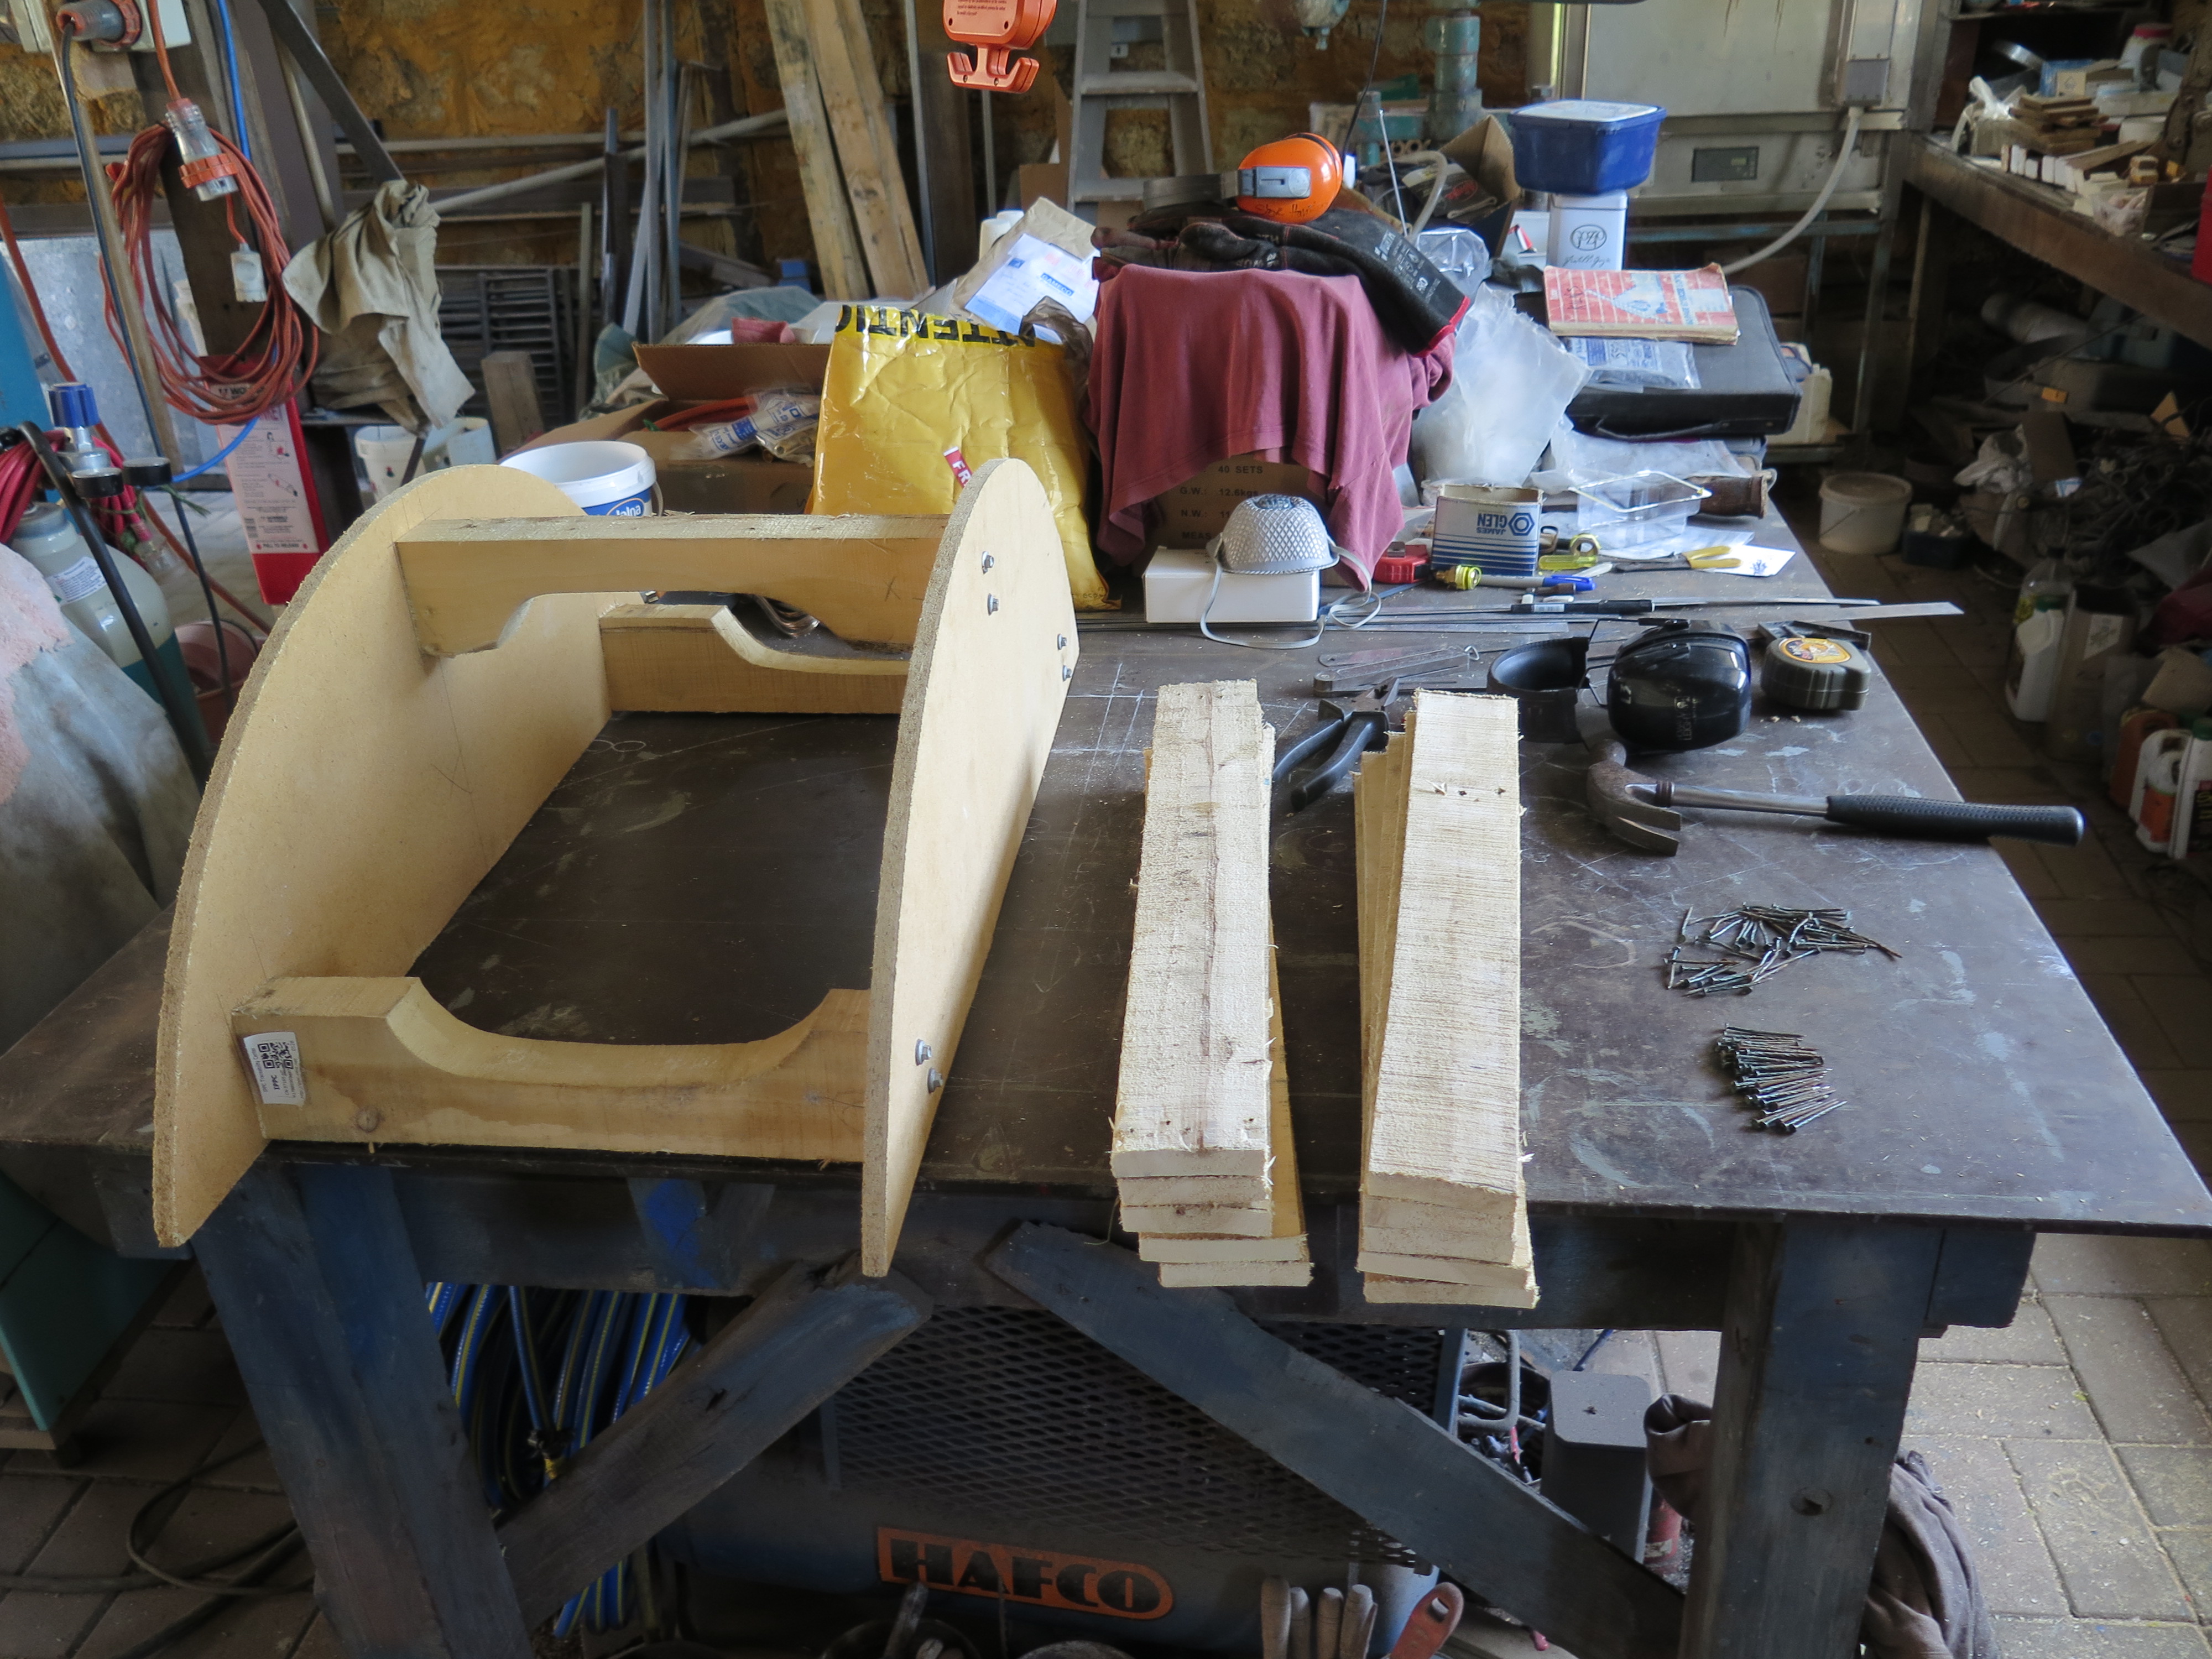
This firing has a lot of tests in it, as all my firings do. If I don’t have time to make some new tests and follow-up on new ideas. I feel like there is something wrong, something missing. After a lifetime of potting. It’s 48 years now since I got to throw my first pot on the potters wheel and was hooked. Any firing without tests in it is an empty firing. It’s the test pieces. The promise of something new revealed, that makes the unpacking extra special and not just plain mechanical work. It is the stimulus of expectation that makes the difference. I know that I should be aware of my all too human failing of expectation, just observe it and let it pass, but it just hangs around until I see those tests.  As it often turns out, they are not very special, but every once in a while there is something interesting that makes it all so much more rewarding and worth while. It’s probably something like a kind of addiction. Hanging out for that next hit of pleasure, that next intellectual/aesthetic indulgence. It can just be a test ring or a shard. The object itself isn’t all that important, it’s the internal machinations and the thought processes that it provokes.
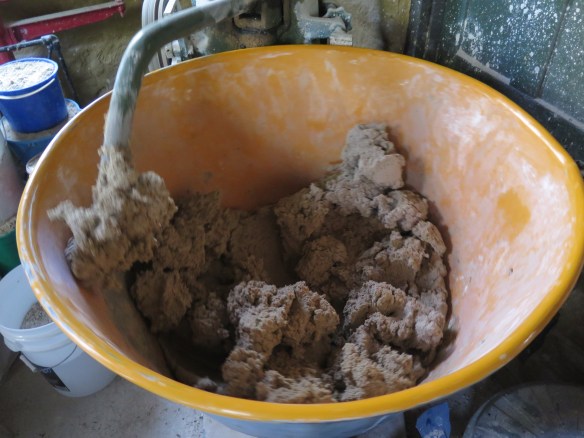
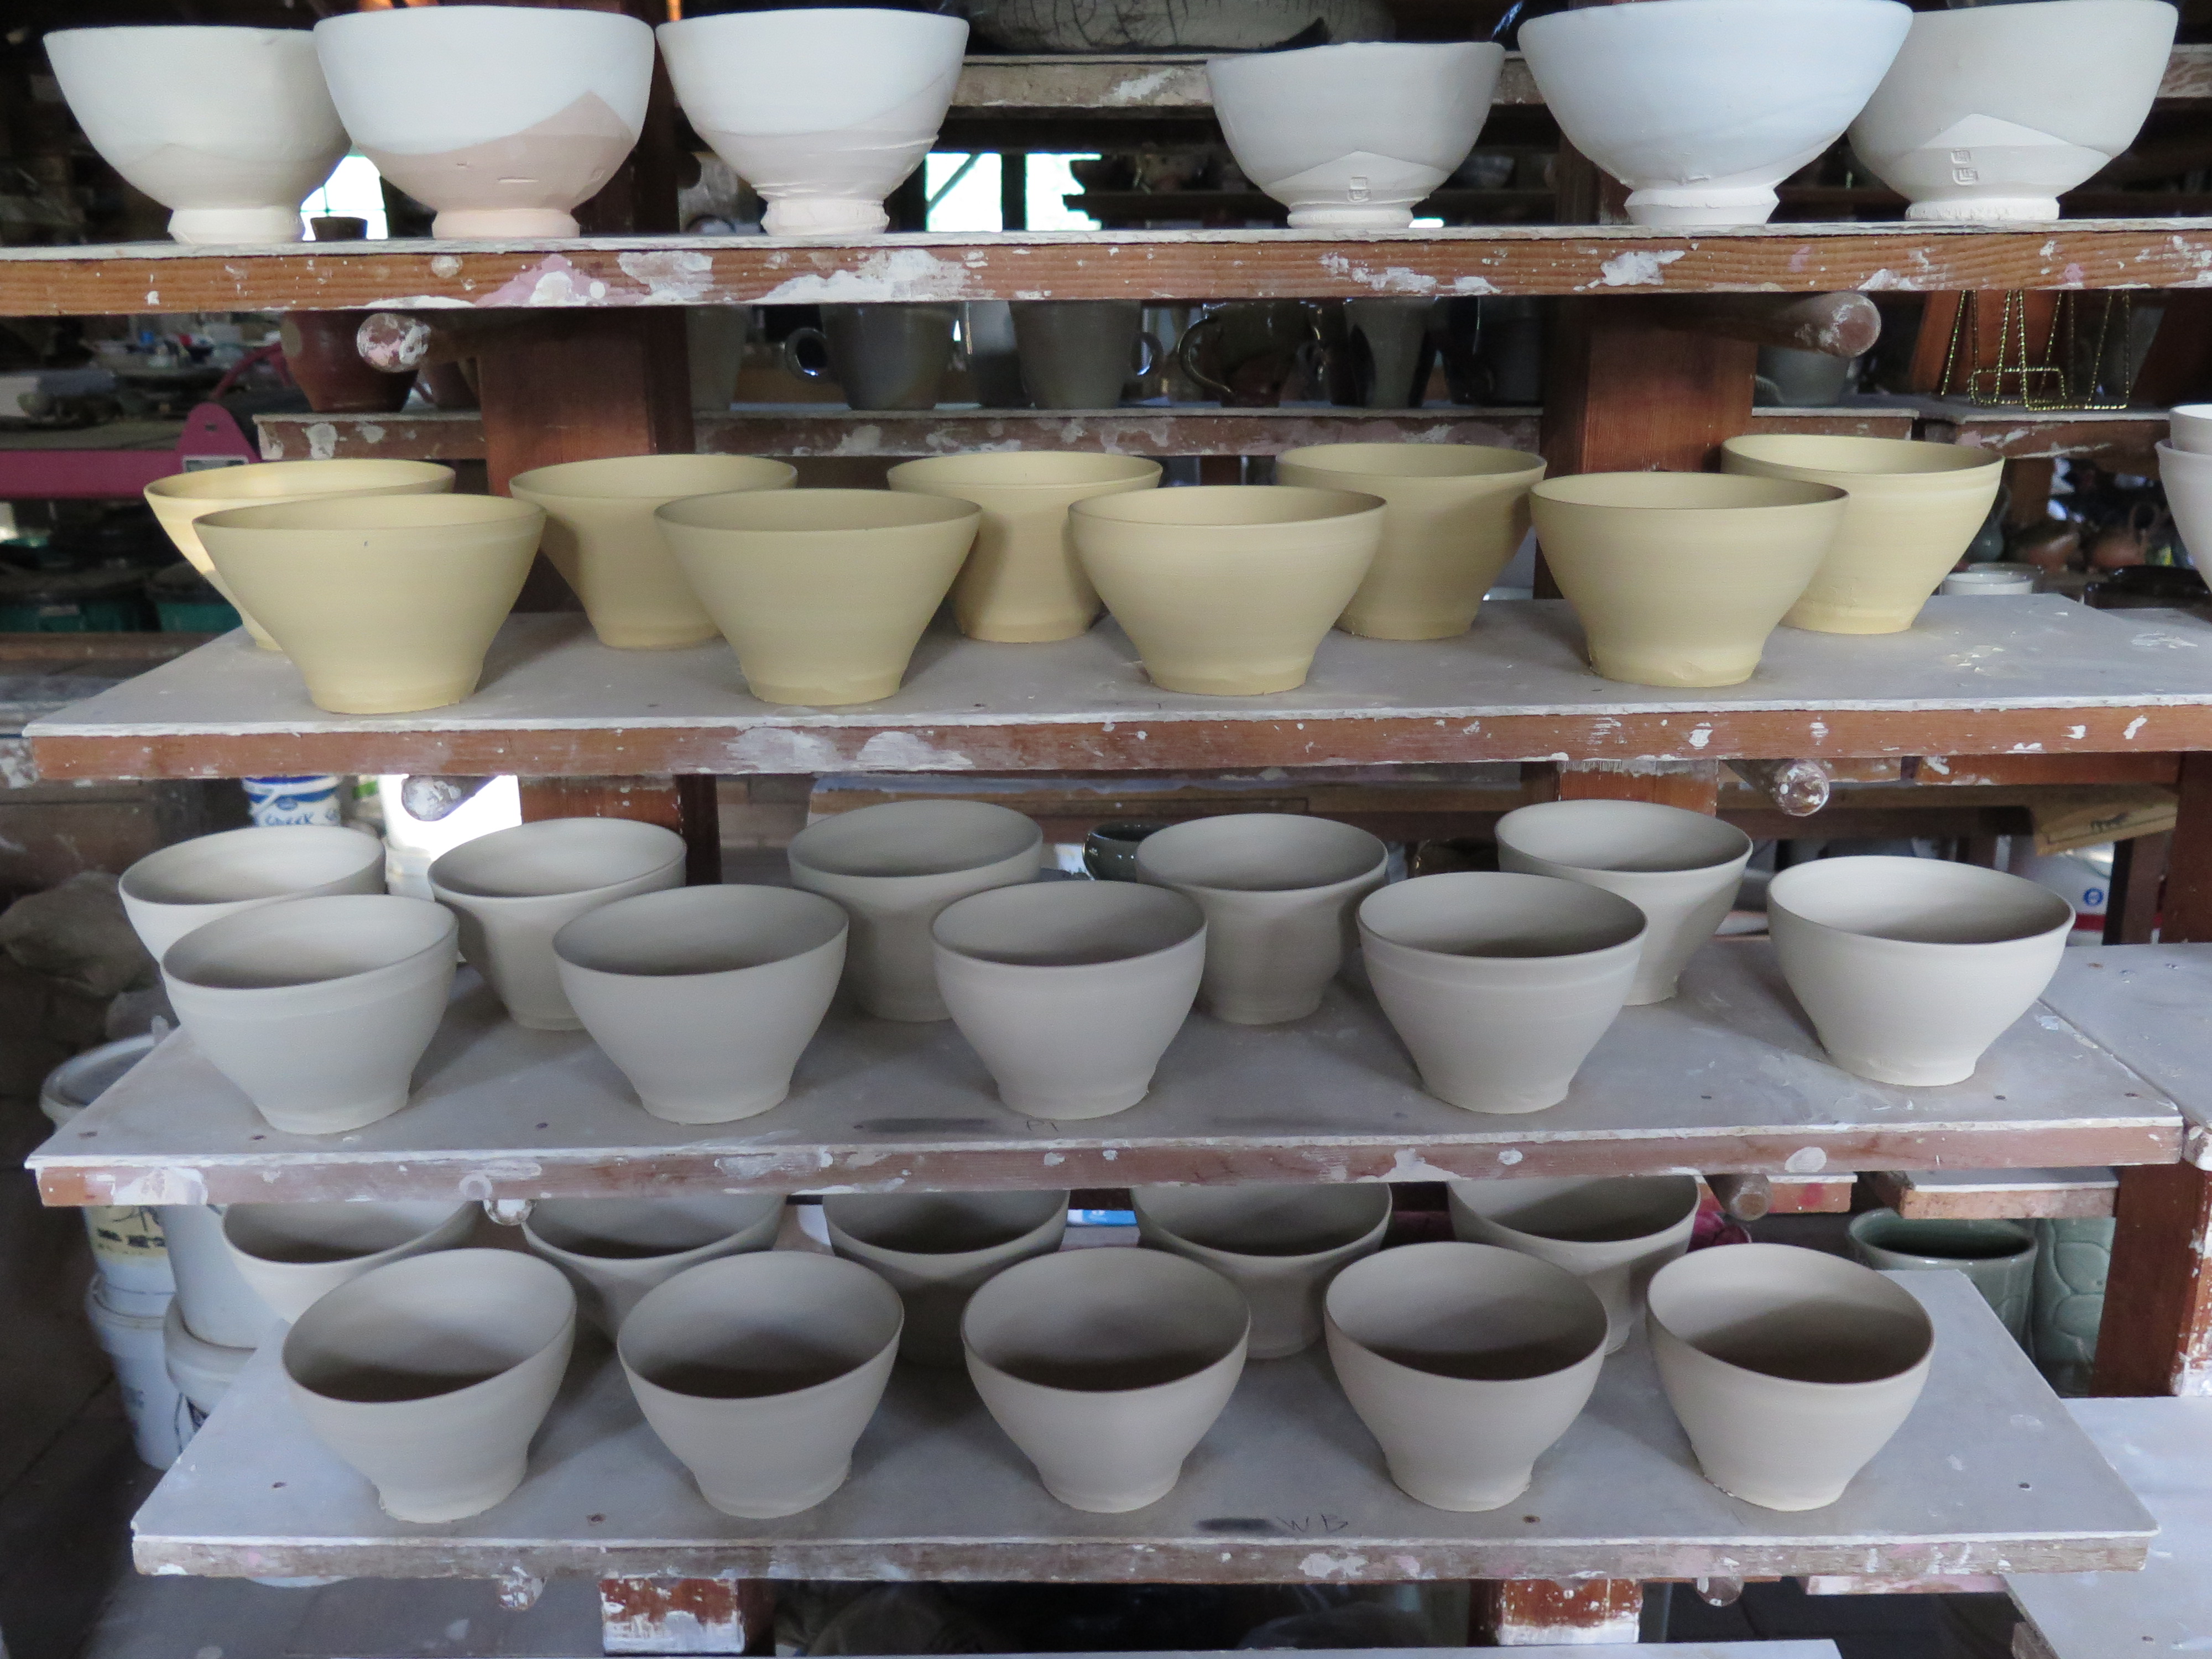
I have 10 new body pastes in this firing, but so as to keep it all under control. I am using all my reliable and well-tested rock glazes on them. Glazes that have proved to be suitably stable and beautiful. I can’t afford to use unknown bodies with unknown glazes on them. That would be asking for trouble. I have set up a system where I am testing each of the 10 new porcelain body recipes with each of my 10 rock glazes. Each new clay recipe/variation glazed with 10 well-known glazes. A hundred bowls in all. This should reveal something. I don’t know quite what yet, but I’m keen to find out. Even if there is nothing special or ’showable’ it’ll still be something to cross off as not worthwhile, so then I can work on something completely different. I suspect though, that there will be something in there. I just don’t know which one. This firing hopefully will reveal the best, or most likely contender for further refinement.
I’d like eventually, to be able to make something that is both meaningful and beautiful — on a shoestring
All will be revealed in a few days.
This is the life of a frugal self-reliant potter. Nothing is ever finished, nothing is perfect, nothing lasts.
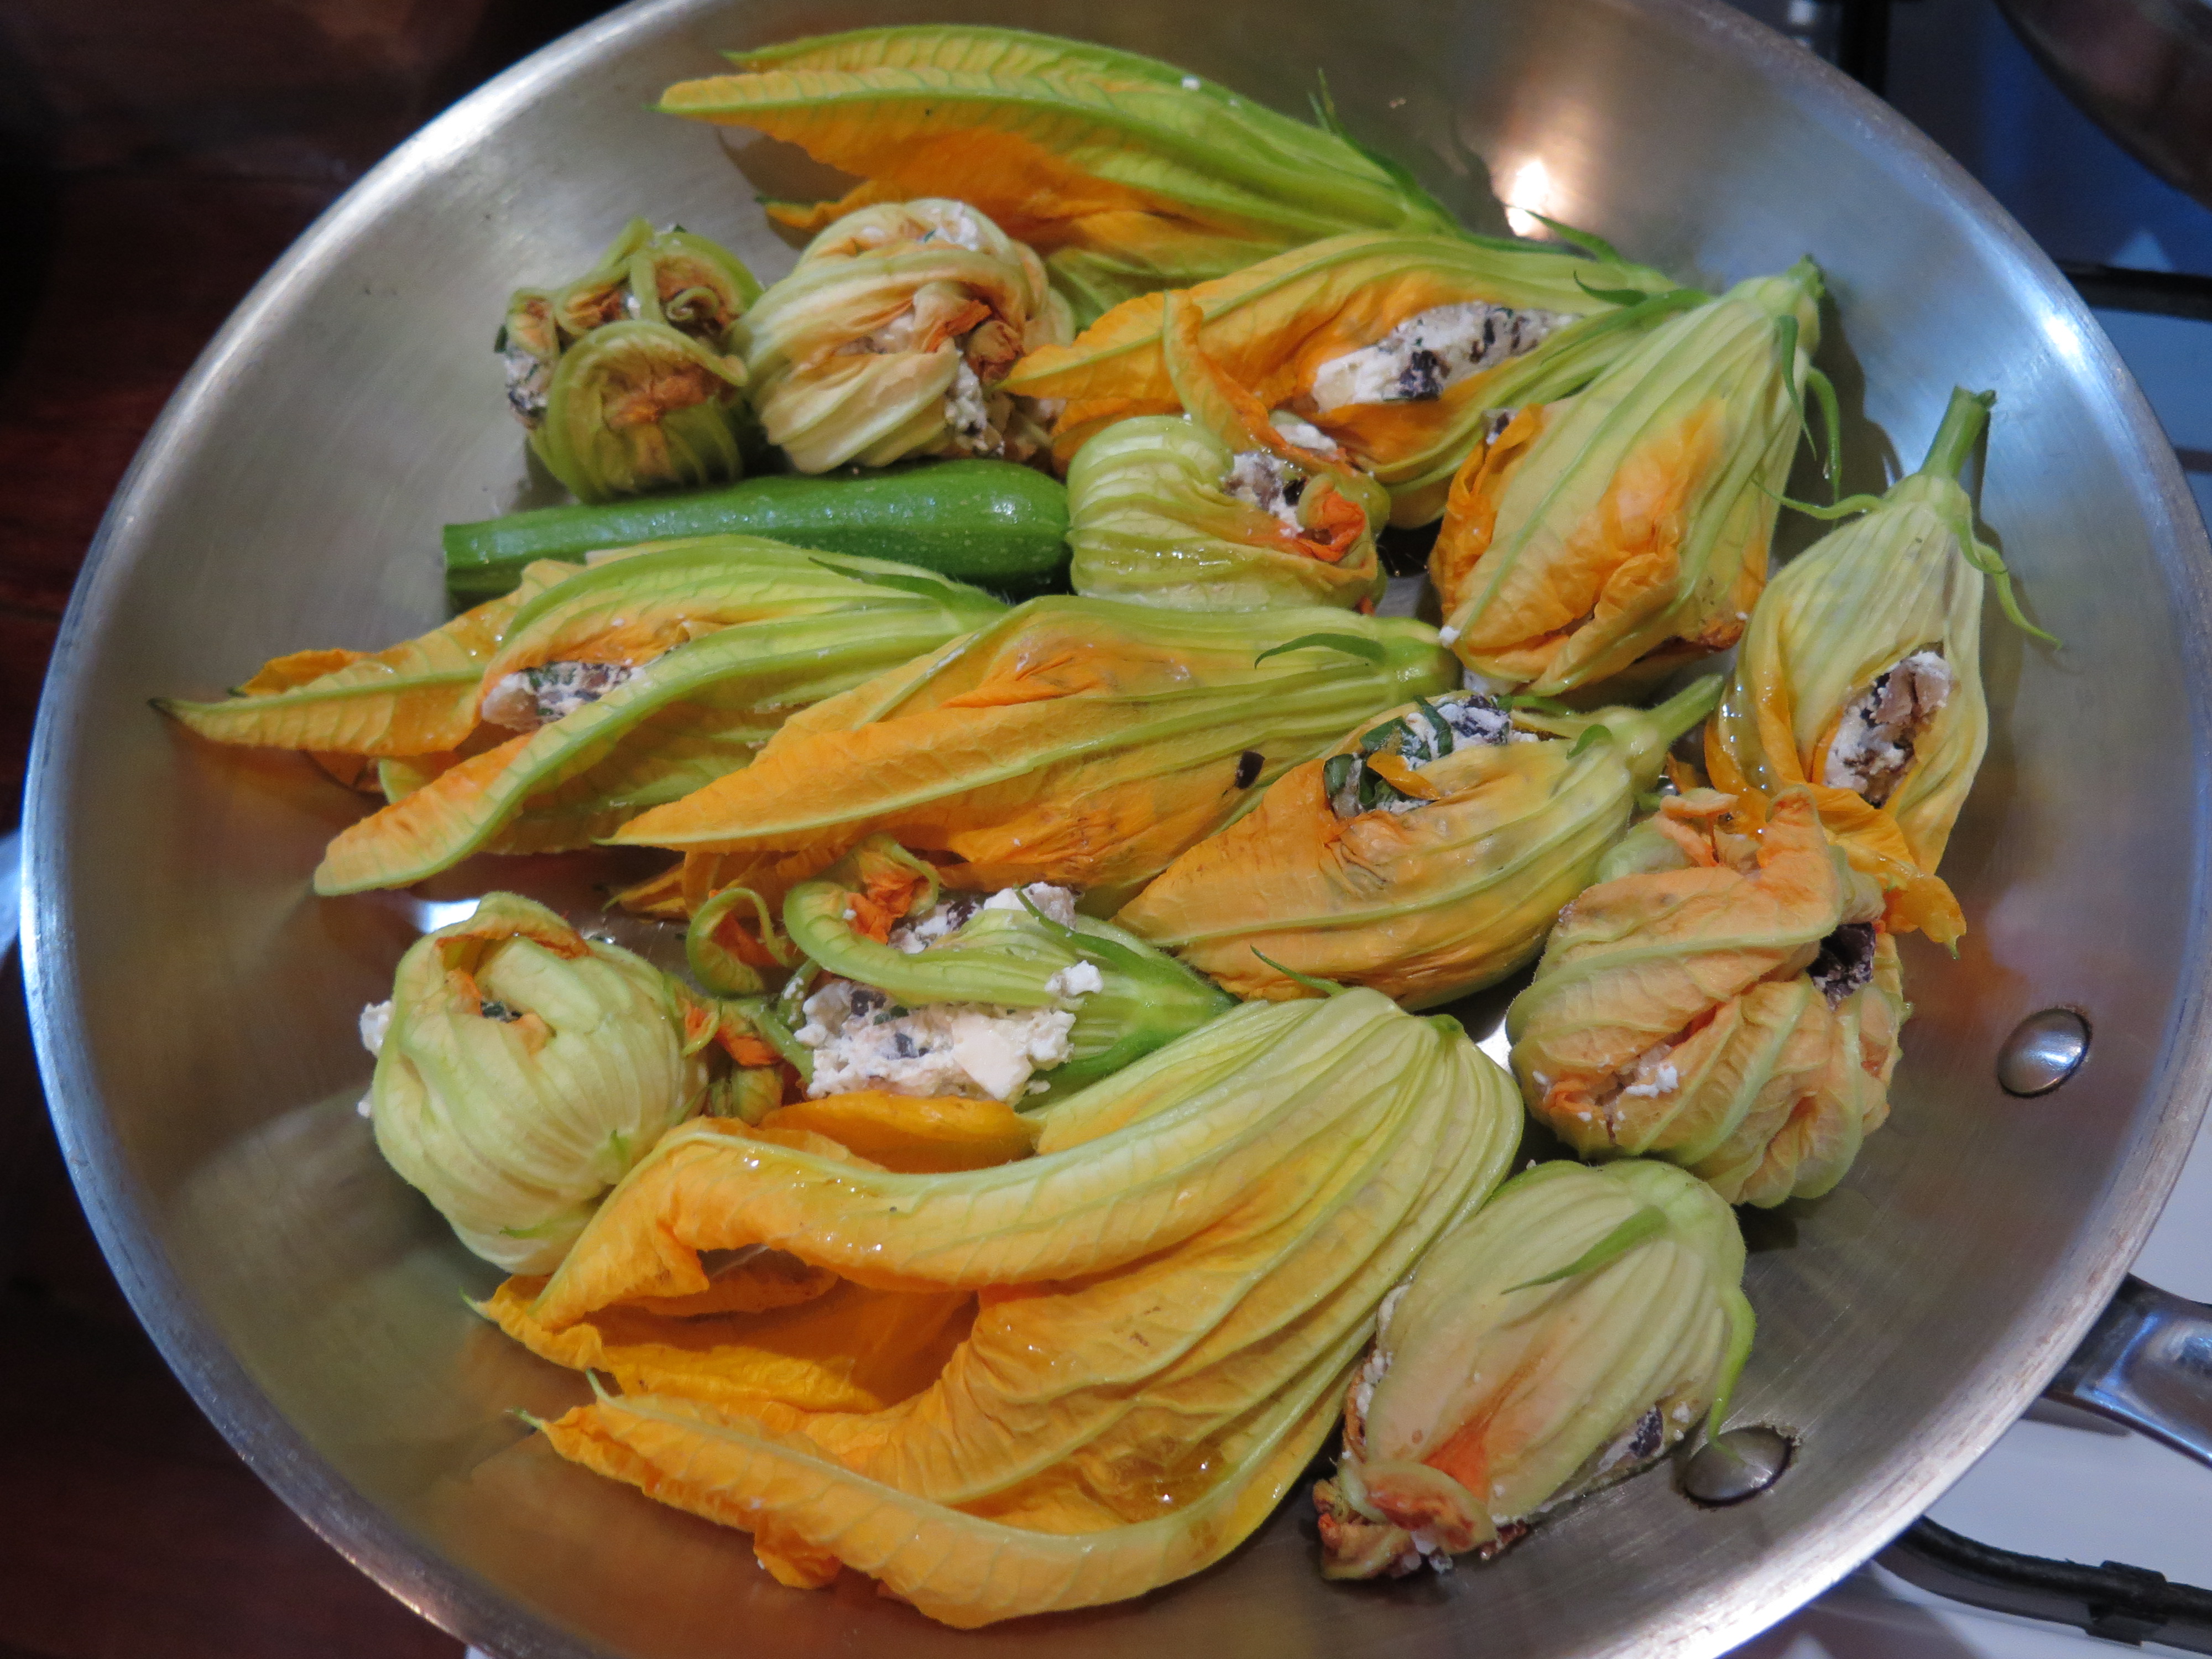
Its just like a good salad!
IMG_2416
Best wishes
Steve

Small portable stoneware wood fired kiln. cont.

We have just fired the 5th incarnation of our little, portable, stoneware capable, wood fired kiln. It fired very well, again easily in 3 hours. It just cruises along at its own pace. 1 hr to 1000 oC and then 2 hrs to 2 1/2 hrs in reduction to stoneware cone 10 over.

This variation was to test out the new chimney arrangement and that worked perfectly, some much better than the previous one. I am very happy with that. Another problem solved!

The hard-working firing team, going at it flat out. Half way through the wood stack in the barrow. Going for the big final effort, no holes barred! Go for it ladies!

IMG_2604

I have it adjusted now so that as the temperature reaches 1000 oC. The kiln automatically goes into reduction. I don’t have to use a damper to make this happen. The kiln continues to rise steadily over the next two hours without having to alter any settings in the firebox. It’s lovely.

However, I notice slight difference in the fired surfaces around the setting, so I conceive of another experiment to try and even out this anomaly. I have everything that I need in stock in the spare parts shelf in the pottery, so no need to go out and buy anything. I spend the morning cutting, grinding and painting all the new bits and the kiln is primed and ready to fire again. I need to glaze some more work for this firing, so there will be a days delay while they dry out. This will be variation/refinement firing number 6.

I’ve learnt from bitter experience that if I fire fast with freshly applied glazes. I can blow them off the pot on the underneath side. All my bodies and glazes are currently made here onsite from locally collected and processed rocks, shales and ashes. Everything is made onsite and it takes a month of Sundays to get it all organised, dried, crushed and milled and then bagged ready for inclusion in the glazes. These are weighed out and then sometimes re-milled. and at other times, just passed through a very fine sieve to extract any small detritus that was caught in a gap around the lid of the ball mill and didn’t get fully ground. Glazes with no clay in them are notoriously delicate and friable to handle once dry and very prone to just falling off from the underneath side of pots. Of course i use a little bentonite to help stabilise them and shrink them on as well as creating a little bit of dry strength, but I have found that I can only add 1 or 2 % before it starts to change some of the glazes.

Tragically, as always seems to happen. I found yet one more issue with this configuration that needs a little more thought. During this last firing, I notice that I could improve the kiln shelf and stainless steel grating arrangement. So it’s back to the drawing board, or in this case, the work bench and I make a new set of one-piece ceramic supports that I hope will work a lot better. I pull the kiln to pieces and start again from scratch, right back to floor level and create a new setting design.

Maybe this will be the last of the beta firings?

We will fire again today with a load of Janine’s work in it this time. As she has a load glazed and dried ready to go.

Always so much more to learn.

The Chalking Room Floor

I have just finished building a new kiln for the National Art School in Sydney. Used another pallet of lightweight refractory bricks and turned the empty pallet that they came on into another arch formwork. Every kiln I build is custom built for the customer to suit their specific requirements, so every kiln seems to turn out just a little bit different. Hence I need to make a new arch formwork for most of them. I have stacks of different sized formers in stock, just waiting for someone to order a kiln that is the same cross-section, rise and dimension. But it rarely happens. It’s a lot of work to make the shuttering for each kiln, but it is absolutely necessary if you want a beautiful arch that won’t drop spalls down onto your work during the firing. I really like to recycle the empty pallet and its nails, into something positive with a real purpose, instead of just burning it.
Arch formers are actually quite lovely things in their own right if they are made with care and attention to detail, and yet nobody sees them. They remain an invisible, but necessary part of the creation of a beautiful object.
IMG_2318 IMG_2320
IMG_2321 IMG_2323
IMG_2394
Warren tells me a story about the medieval tradition of the chalking floor or the tracing floor. A special room in a cathedral, where in ancient times the master masons would plan out the architectural details of a building and snap out chalk lines of the dimensions of the job at hand, directly onto the plastered stone floor in real time and one-to-one scale. These plans were then transposed to the workmen on the job in many seperate, small details, so that no one person, except the master mason knew the whole story and how the design, angles and dimensions were achieved.
I chalk out the details of the arch to be built onto the steel workbench top with boilermakers chalk and this is then transposed onto the pallet wood that I have just dissassembled and recovered for re-use. Warren watches me working out the details. Swinging the radius with a trammel line and dividing the inner arc by the taper of the brick unit size. It’s medieval in its simplicity and complexity. Nothing has changed in one thousand years. A plumb line, a straight edge, a measure and some chalk. The end result is beautiful and elegant. I now know the size, taper, and number of arch bricks that I need to cut to make a perfect arch, as well as the angle and dimension of the springer bricks that will support the arch.
However, unlike the ancient masons, I will use a diamond blade saw bench and a steel jig to do the precise cutting.
IMG_2316
The Lovely comes down to the workshop with freshly chilled, dark grape juice drinks for us on this very hot day and asks what I am doing, looking over at me chalking out my secret mens business. I explain that if I tell her, then she will have to die!
Only the master mason can know the secret of our techniques. Nothing personal, it’s just the medieval Master Masons traditional Lore.
She tells me that I can make my own dark grape juice in future.
But she can’t tell me the recipe otherwise I’ll have to die! Seems fair.
fond regards from Mr and Mrs Mason

Another Post From The Running Postman

The wild flowers have been lovely, but they are all gone now. It’s almost autumn and the cherry trees in the Chekov orchard are loosing their leaves. They are the first to fruit and the first to go dormant. We are experiencing a late summer scorching week of high temperatures in the mid 30’s and have had to be out early and late to water the garden. Overall, this summer has been exceptional, although it has been hot, it has also rained a lot and even at this late stage , with all this heat now, we still have green grass outside our window. We are usually looking out at dry, dusty gravel at this stage of the summer.

IMG_3689IMG_2350
I have delivered the latest kiln to my customer and all went so very smoothly. Just as it should, as we do a planning to get it all just right, but regular readers of this blog will know that the best laid plans can suddenly go terribly wrong at the drop of a hat when a third party lets you down after promising faithfully to turn up on time. This is never the case with Dave, my local crane truck driver. He is amazingly punctual and careful with my jobs. It’s a pleasure to work with someone so professional and creatively competent at moving heavy objects.
IMG_2313IMG_2335 IMG_2336IMG_2338 IMG_2340 IMG_2342
Warren and I have already started the next job and got it well under way. As I am ahead of schedule with my orders, I have been able to spend time in the pottery making some more of my porcelain. Iron stained yellow, pale ochre grey and creamy grey/white bodies.
IMG_2330 IMG_2331
We have also now completed 5 firings in our little new experimental, portable wood fired kiln. It gets better every time we fire it. That is to say we are getting better at understanding it and how it works. I’m also finding out all it’s weak points. All the things that I didn’t expect or imagine might happen have shown them selves and come to pass, so each time we fire, we find a new problem that needs a better solution. I solve each one as it appears and then onto the next. I think that I have it all solved, then something else appears. I’m constantly thinking this next firing will see it all solved and then I can start to produce them. Always the optimist:)
IMG_2292 IMG_2302
Cast iron doesn’t work in this kiln. OK for raku, but not here.
We have tried experiments with different types of fire bars over time and worked out that in this kiln, we can’t use ceramic fire-bars, or mild steel fire-bars, or cast iron bars, but custom welded stainless steel fire bars are the go for this little beauty when fired in reduction. The other fire bars that we have tried have worked well in other kilns at different times, but for this one, it’s going to have to be custom made stainless steel. They have proved to also have their issues, but I have worked thorough these and I now have a workable solution. I just need to try one more variation on the way we use the flue!
I am so confident about this little kiln now, that I am starting to draw up a plan for a larger version. Increasing the kiln shelf area from 300mm. x 455mm. (12’ x 18”) to a kiln shelf of 455mm x 455mm. Sq.  (18” x 18”)!
For the last few weeks, the hazelnuts have started to ripen and fall, we dry them in the sun in the kitchen window sill for a week and then they are ready to eat. Unlike our almonds, that always seem to need oven drying and slightly roasting to get the best out of them. The filberts are good to go, straight out of their shell after drying. This is our first good crop from them. We planted 2 year old grafted seedlings about 3 and 4 years ago, so the oldest ones are just starting to come to fruiting now. The first year, all the shells were empty. Last year we only got a few hands-full of nuts and half were hollow, but this year, they seem to have reached maturity, with most casings containing a nut — and they are lovely, crunchy and sweet. We have a few with a piece of nice cheese after dinner.
IMG_2193 IMG_2349
I’ve been in and out of the pottery pushing ahead with making pots for the next firing. We are technically still in fire ban season, so we can’t fire the big kiln easily at this time, as it takes 20 hours and is obvious to passers-by. But the little portable kiln is OK for a quick 3 1/2 hr. firing on the cooler days after some rain or a damp night of heavy dew. We can start early and finish before the day gets hot at mid day and after. It’s very convenient. We have settled into using just one wheel barrow of paddock falls, dry dead branches. I’ll have to try it with fresh split pine, old pallets and eucalypt heartwood in the future, but I can’t see any real problems there. Time will tell.

As the garden is thriving we have been eating fresh stuffed zucchini flowers. These are our 2nd planting of zucchinis. We are starting on our third planing of cucumbers, as the extremely hot days really frazzles them, and our 5th planting of raddishes etc.  We are also enjoying capsicums stuffed with ricotta and our own dried tomatoes and herbs. We have started to dig the first 3 rows of the 2nd planting of potatoes. It looks to be a very prolific crop. We fill a box quickly. There are twenty rows to keep us well fed through the winter.

IMG_2277IMG_2276IMG_2202IMG_2204IMG_2206
Regrettably, Janine and I went to the fish markets mid-week for a late sushi lunch on our way to an opening of a friends show at Watters Gallery later in the evening. I say regrettably, because I was struck down with food poisoning during the evening and had to leave early from the show, before my friend even turned up.
I’ve had to have 2 days off with the runs, and stomach cramps, unable to sleep through the first night without interruption. I am chastened and weakened, but starting to recover. An unwelcome surprise. I won’t be eating anything more from the sushi shop at the fish markets! Even now I’m still suffering a delicate stomach and slight head ache that makes it hard to concentrate. I have a load of work to do, but I’m not really up to achieving much just yet.
Best wishes from The Running Postman

Recycling

We have been active in the late summer garden, everything is growing it’s head off. The Lovely just picked two and a half kilos of beans. I took most of them straight down to Biota for Geordie to use in the restraunt. We have delivered baskets full of various veggies over the last few weeks, aubegines, zucchinis, mini orange pumpkins, sweet basil and bundles of shiso.

IMG_2188IMG_2127IMG_2102

At this time of year we are getting the full abundance of the late summer heat. We have had regular rain falls all through the summer, so we just can’t eat it all. We bottle, dry and preserve a lot of it, but it is always nice to be able to give away our excess to our neighbours and friends as well.

The chefs at Biota are high-end creative and flexible people, they simply invent a dish for that day that will use what we take in. It’s a one-day special on the menu till it’s all gone.
The summer garden has been feeding us with lots of lovely meals, like pan fried, stuffed zucchini flowers and baked capsicums stuffed with ricotta, our own dried tommatos herbs and spices.
IMG_1926 IMG_2174IMG_2176 IMG_2178
I’m back to work in the kiln factory again now. Warren and I put in a 5 day straight effort and almost finished the first one of the current pair of frames sitting in the shed.
IMG_2092IMG_2131
I make all my own firebricks for my own kilns, but when it comes to building kilns for other potters, then I buy in commercial light weight insulating refractory firebricks. They come all packaged on a wooden pallet. I end up with lots of these used pallets. Some from ‘loscam’ and ‘chep’ are deposited and can be returned or exchanged to retrieve the deposit, but these days a lot more coming in on one-off, single-use, non-returnable pallets. I’ve been thinking how I can get some value out of these pallets. The last resort is to break them up and fire the kiln with them. This is OK, as long as they are only heat treated and not copper chrome treated ‘green’ timber. The ‘green’ treated timber can only be taken to the tip for burrial, and at some expense. A total waste. Fortunately, we don’t see any of these green treated ones turning up anymore, they are all heat-treated these days, so OK for burning.
IMG_2116 IMG_2117IMG_2119 IMG_2118 IMG_2121IMG_2120

This last week I disembled one after we had used all the bricks off it to build the kiln and them re-cycled the timber into the arch formwork for the kiln. I even recycled all the nails from the pallet to re-assemble the arch form work.

We finish the day with a 3 rice rissoto and summer garden excess.
IMG_2141 IMG_2143
lightly browned home grown onion and garlic in olive oil, red ,brown and white rice, deglazed with a cup of white wine, enriched with a chunk of my frozen marrow bone stock and softened with a pan full of stock, simmered down from what was left from yesterdays baked fish lunch.
IMG_2145IMG_2068 IMG_2146IMG_2148
I serve it on Clive Bowen slipware plates with steamed sword fish and a dollop of Janine’s freshly made basil pesto.
IMG_2149
This latest kiln will be ready by the end of the week, so that I can start on the next one in the queue. I’d rather be making pots just now, but I know that I will need to pay out a lot of bills starting this week. Rego, insurance, council rates, land tax and the BAS statement, are all coming due. Just like so many creative types, I’m caught in the creative dilemma. Working for money to support my habit. My ceramic habit!
 .
Did you hear the one about the potter who won the big lottery?
He said that it wouldn’t change his life at all.
He would just keep on making pots till all the money was used up!
 .
At least we have a great life here working for ourselves, we don’t have to go to work for a boss! We live on a very low income, but have a millionaires quality of life. Last year we got a special tax concession of $500 from the tax dept. because we were living below the poverty line. We don’t think of ourselves as being in poverty. We’ve chosen this frugal austerity.
This Friday we’re having a day ‘off’, This will be our ‘weekend’. The Lovely and I will be firing the little portable wood fired kiln for its second outing. I’ve performed a bit of surgery on it to improve it a little more. At least I hope so. We’ll do a longer firing this time, we want to see if there can be some nice surface flashing if we fire for long enough? We’ll see what happens.
.
best wishes from doctor Steve and his very patient Janine