Sure to Rise

Janine spent some time in New Zealand when she was at school as an exchange student and it was in New Zealand that she learnt to spin wool and also got deeply interested in making pottery, something that has stayed with her for the rest of her life. Another thing that she learnt about in New Zealand was the Edmonds CookBook. She bought, or was given her first copy over there. She still uses it or refers to it often, mostly for cakes and puddings. It has been one of the constants in her life.

We recently got the latest version, when a relative visited New Zealand last year. I had tried to buy a copy by online direct from Edmonds, It was meant to be a surprise for Janine, but the online option didn’t seem to be available, so I sent an email requesting information on how to buy a copy and have it sent over here to Australia.

I filled out the contact info page and waited. Nothing happened for a day or two, then when I was out. A very nice lady from Edmonds rang directly from New Zealand to inform the bewildered Janine that she couldn’t buy one in New Zealand and  have it posted out to Australia, but rather, all she had to do was go down to the local ‘Dairy’ and buy a copy herself. The ‘Dairy’ in New Zealand is a bit like a small supermarket or local shop. They are everywhere in New Zealand, but not here in OZ.

Janine tried to explain that we don’t have a local ‘Dairy’ here. But the Edmonds Lady wouldn’t have it. She insisted that all Janine had to do was to ask. “They will have it!” “Everybody stocks it!” We don’t see Edmonds baking products for sale here in Australia. At least, not where we live anyway. Janine explained that we live in Australia and that the lady must have dialled ISDN to get through to us in Australia. She must know that we are located in Australia. She told her that we just can’t buy Edmonds Baking Products here. All to no avail. So the surprise was lost and we still didn’t have a new Edmonds cookery book. We laughed about it a lot though, and we do now have 4 editions of about 10 to 15 years apart.

IMG_4141

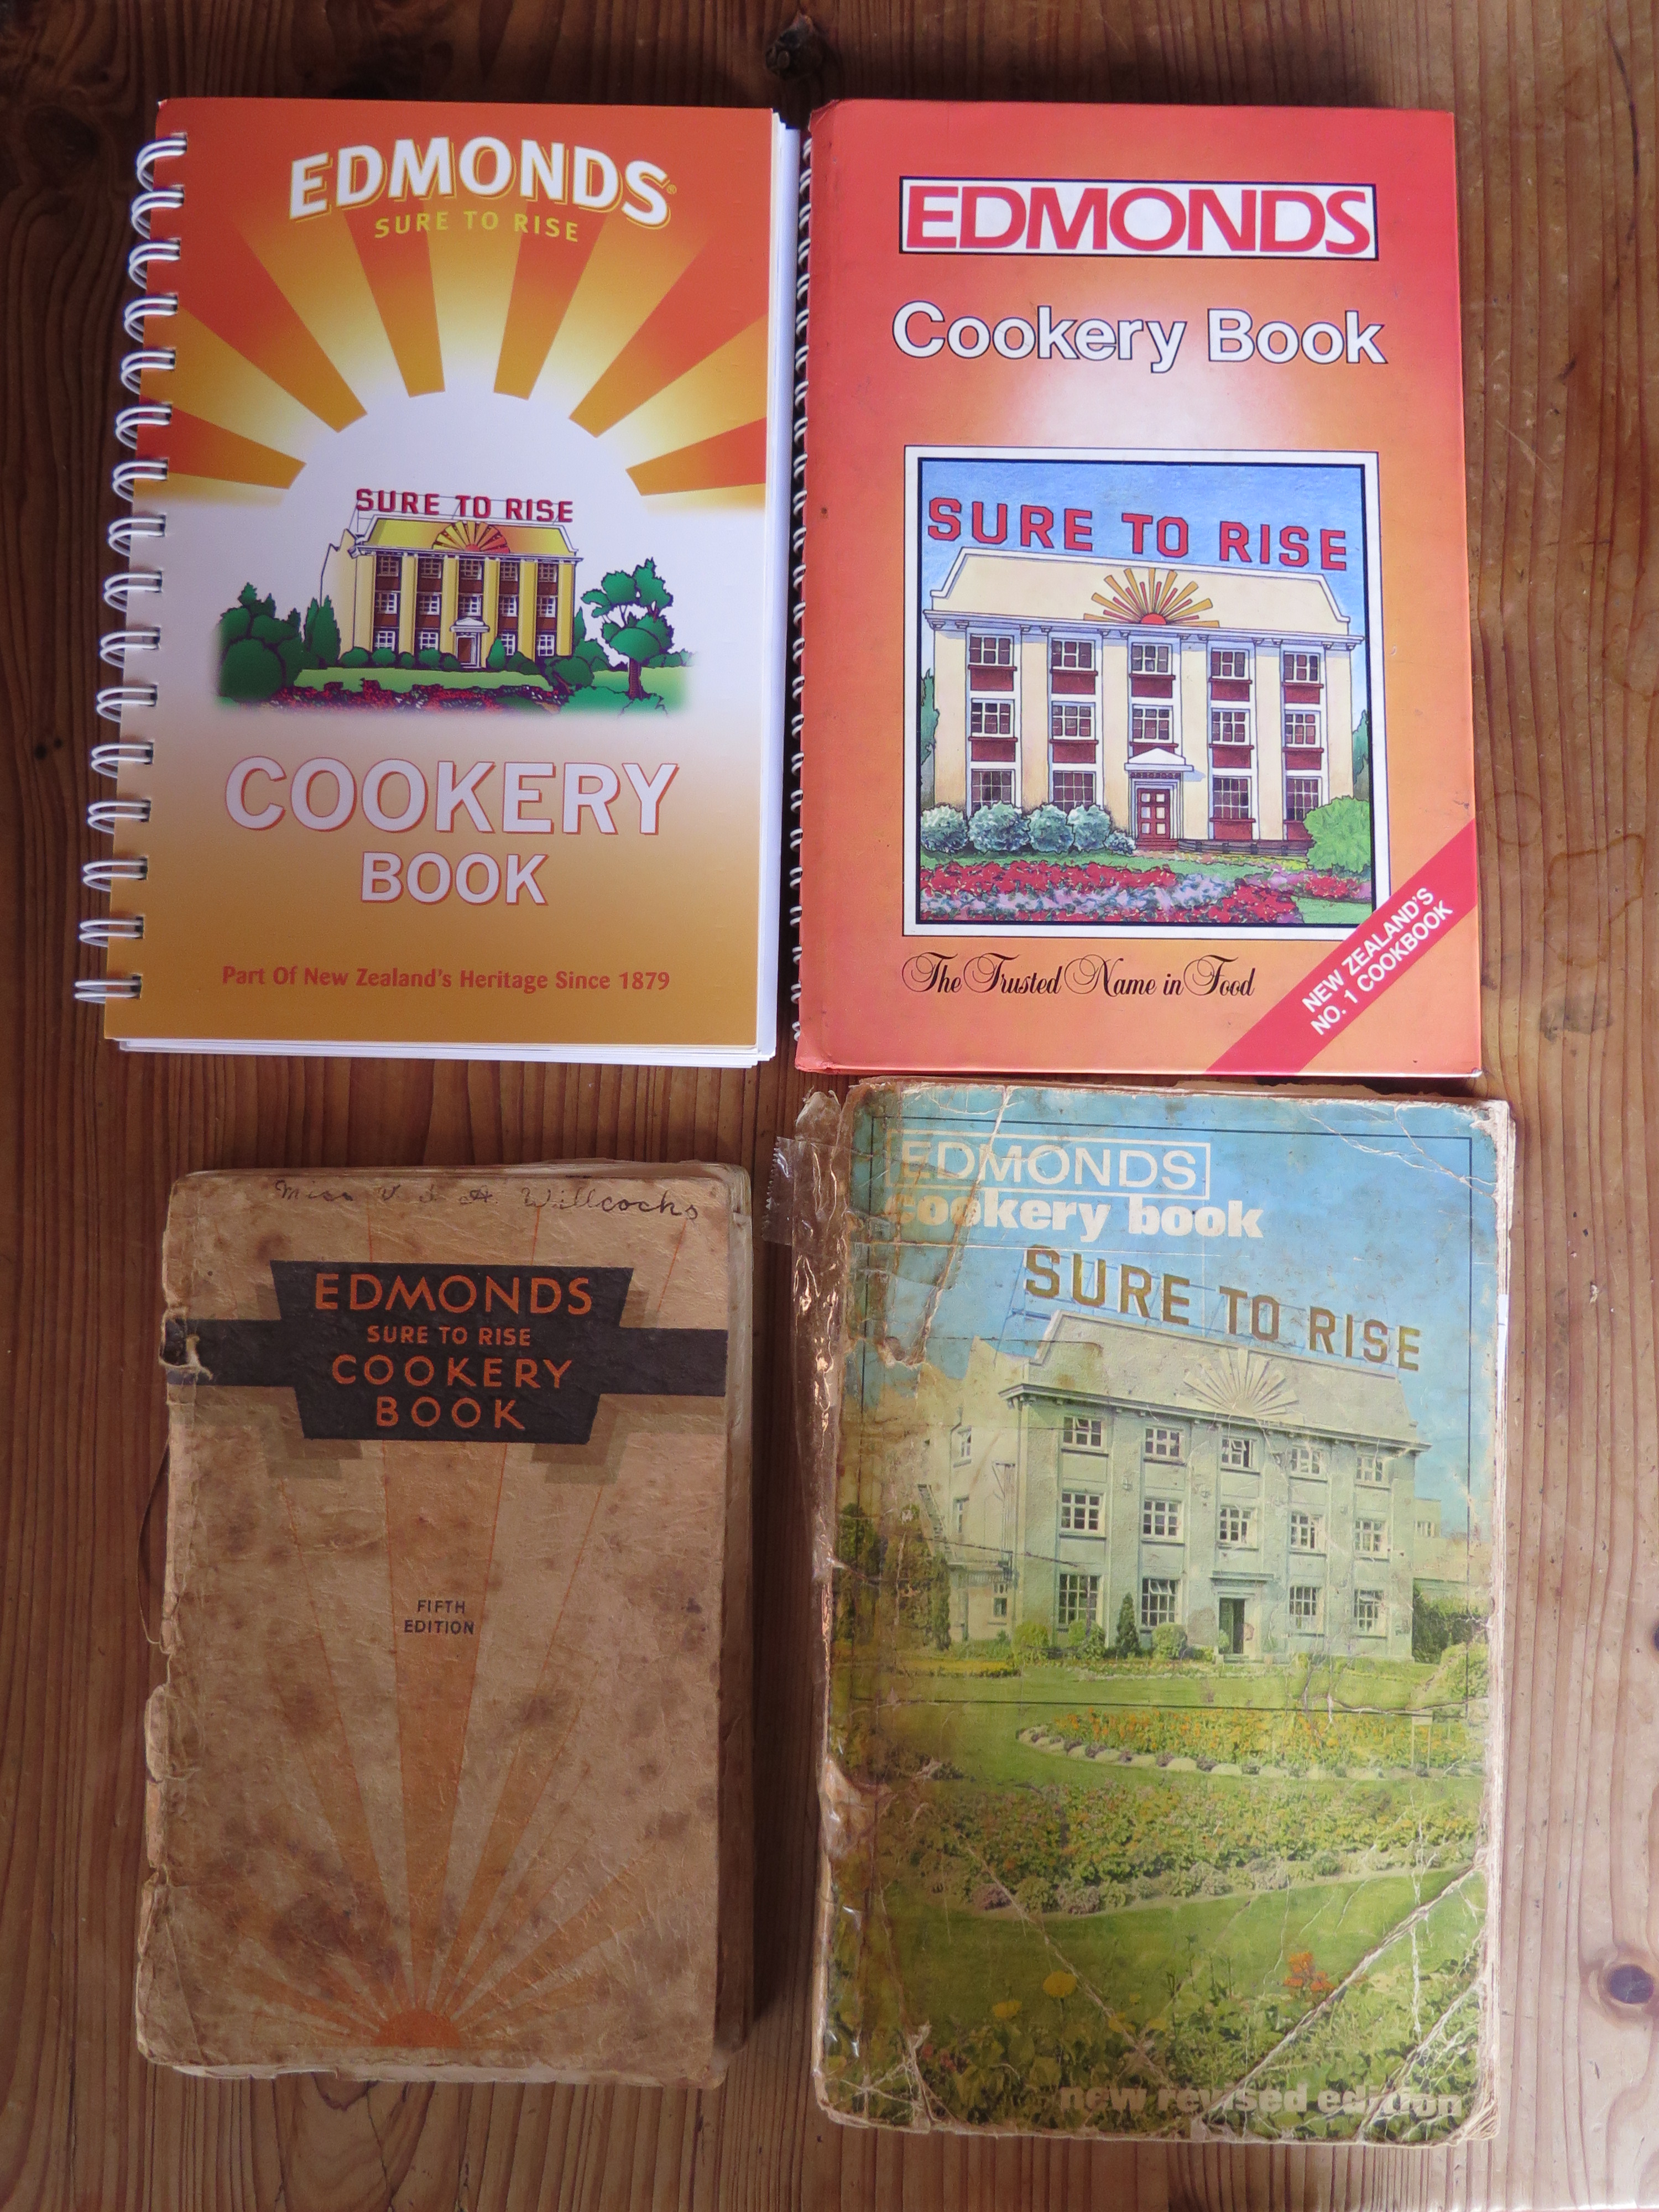
When Janine’s relatives turned up here with the intension of travelling on to New Zealand and back again, it was an opportunity not to be missed. We now have our new copy, along with the other 3 older editions. It’s quite interesting to look through them and see what has changed. In the 60’s edition, all the recipes are detailed on how to make the item from scratch. The biggest difference between the old copy and the new one is that now it is more likely to say something like, open a can or packet of this or that and add something to it. it’s an interesting record of changes in cooking habits over 50 years. Certainly the latest edition has very much more up-market descriptions of the recipes.

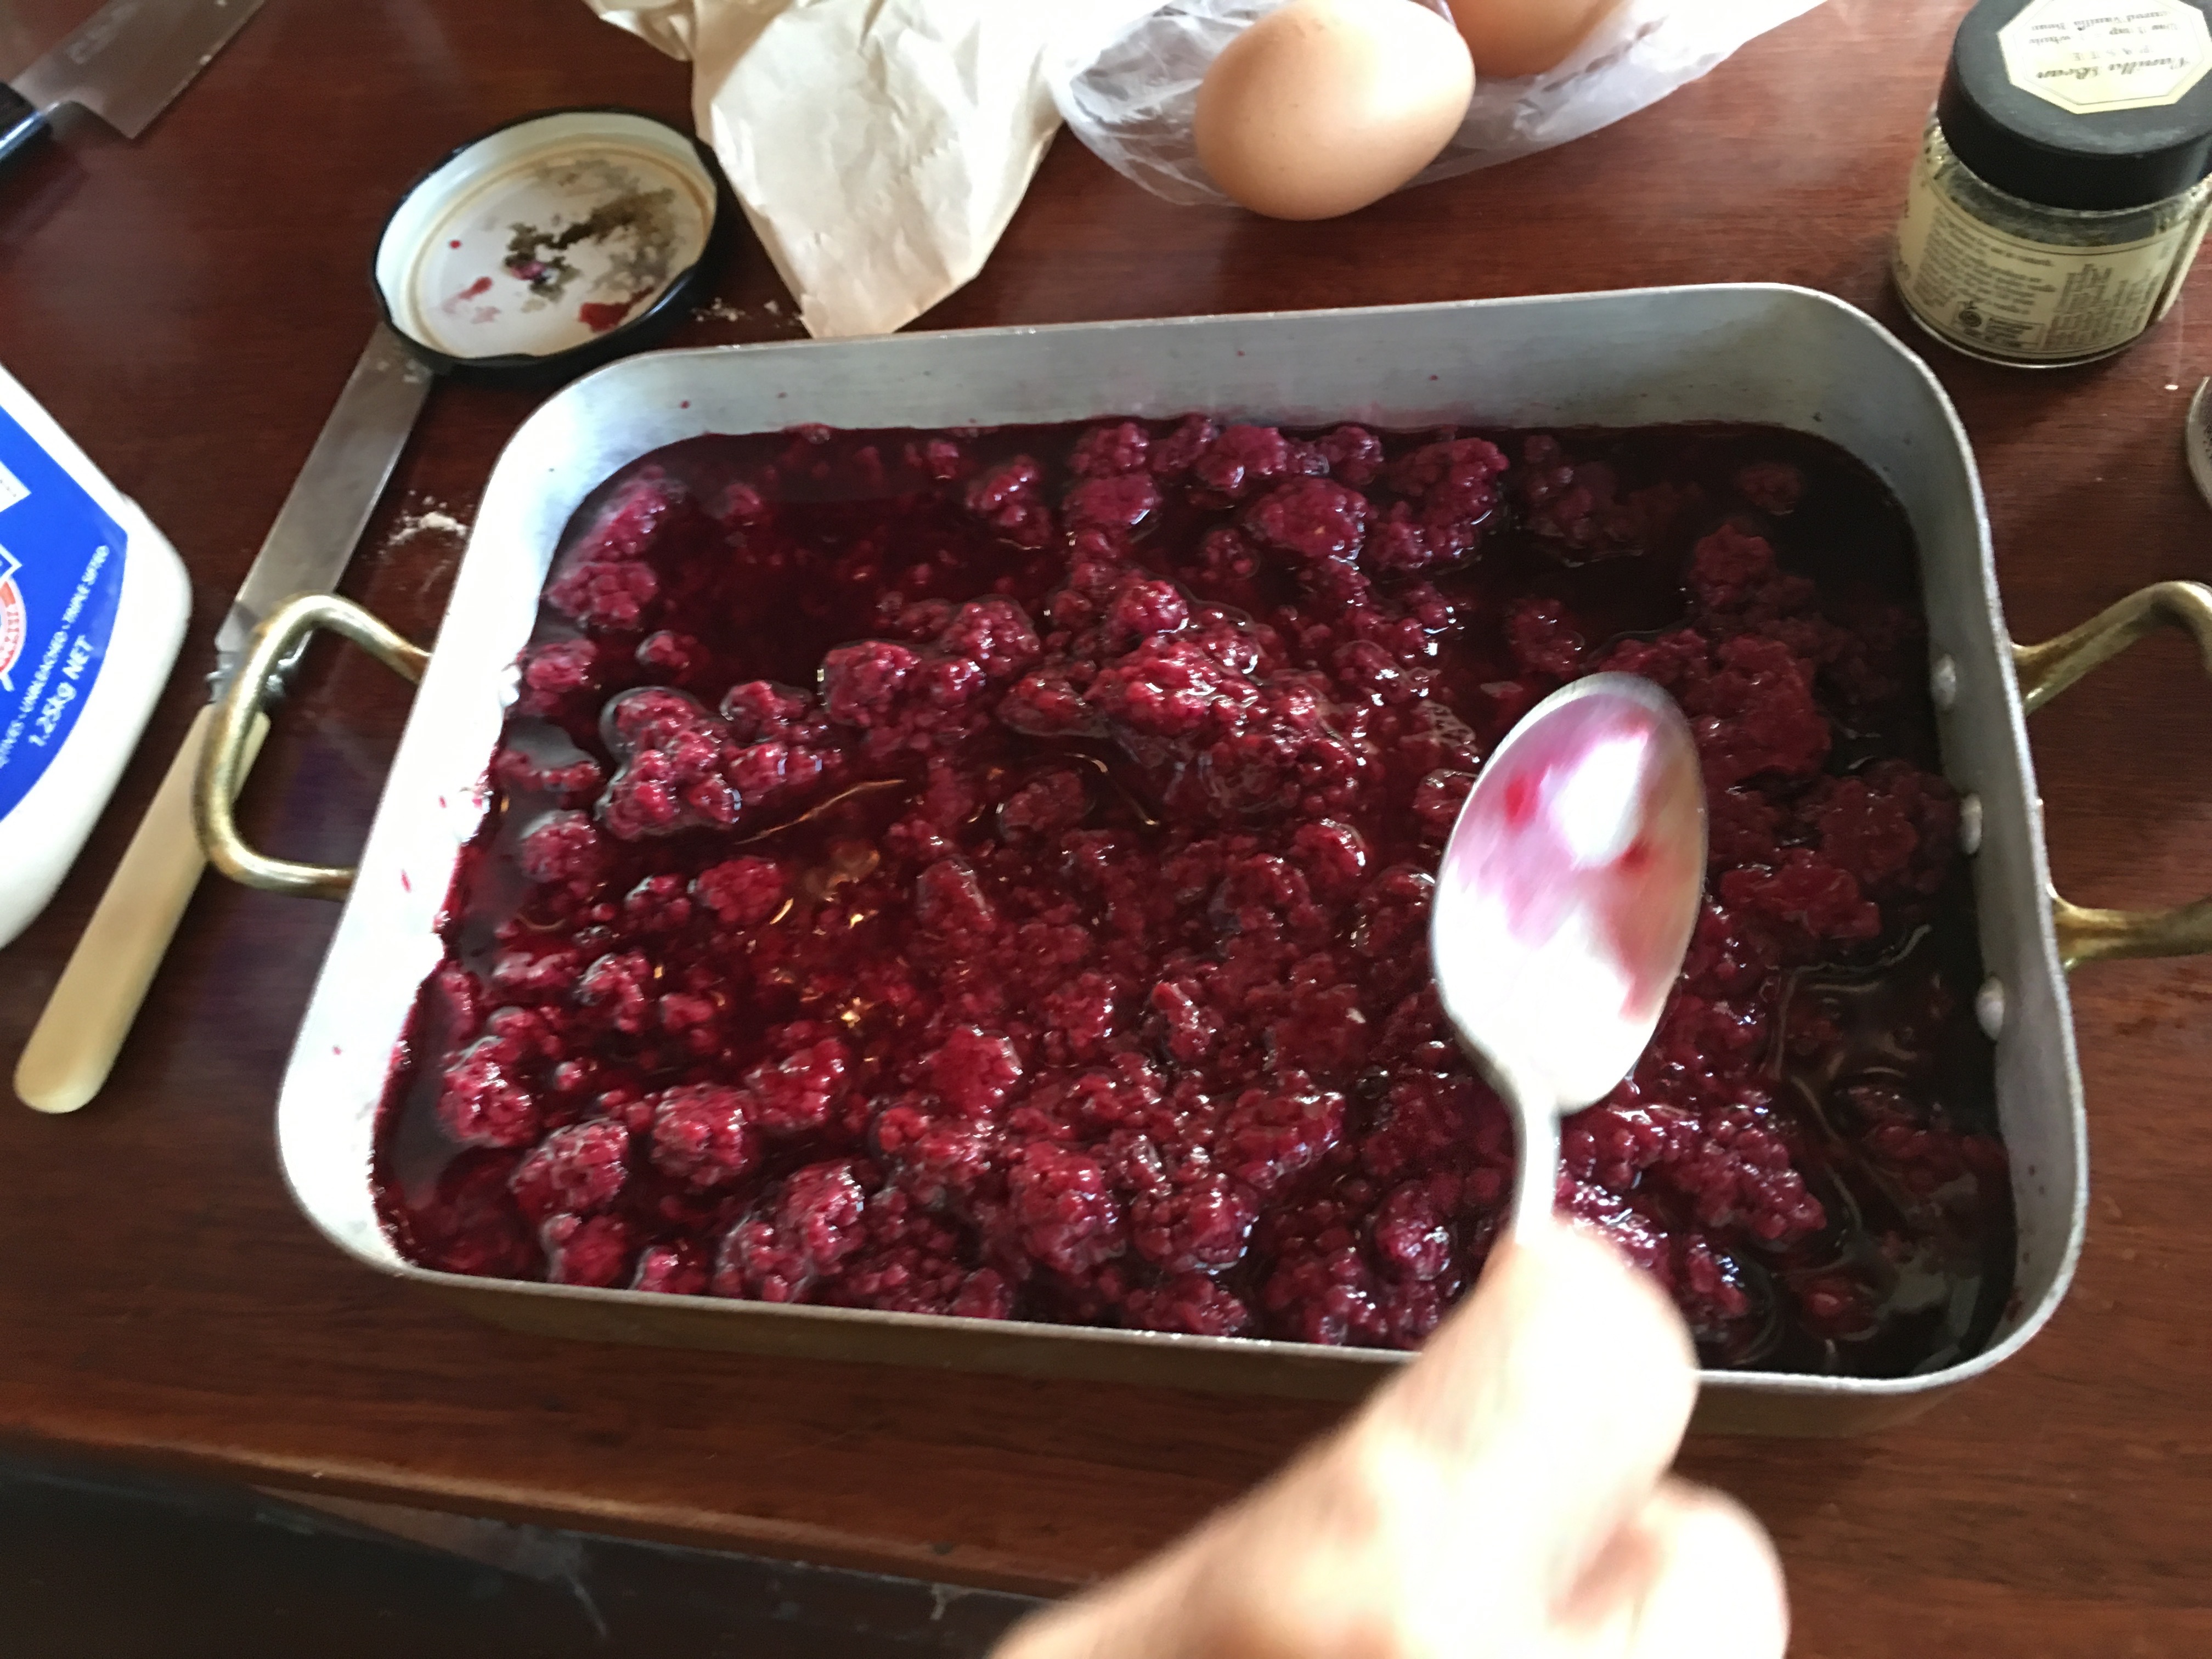
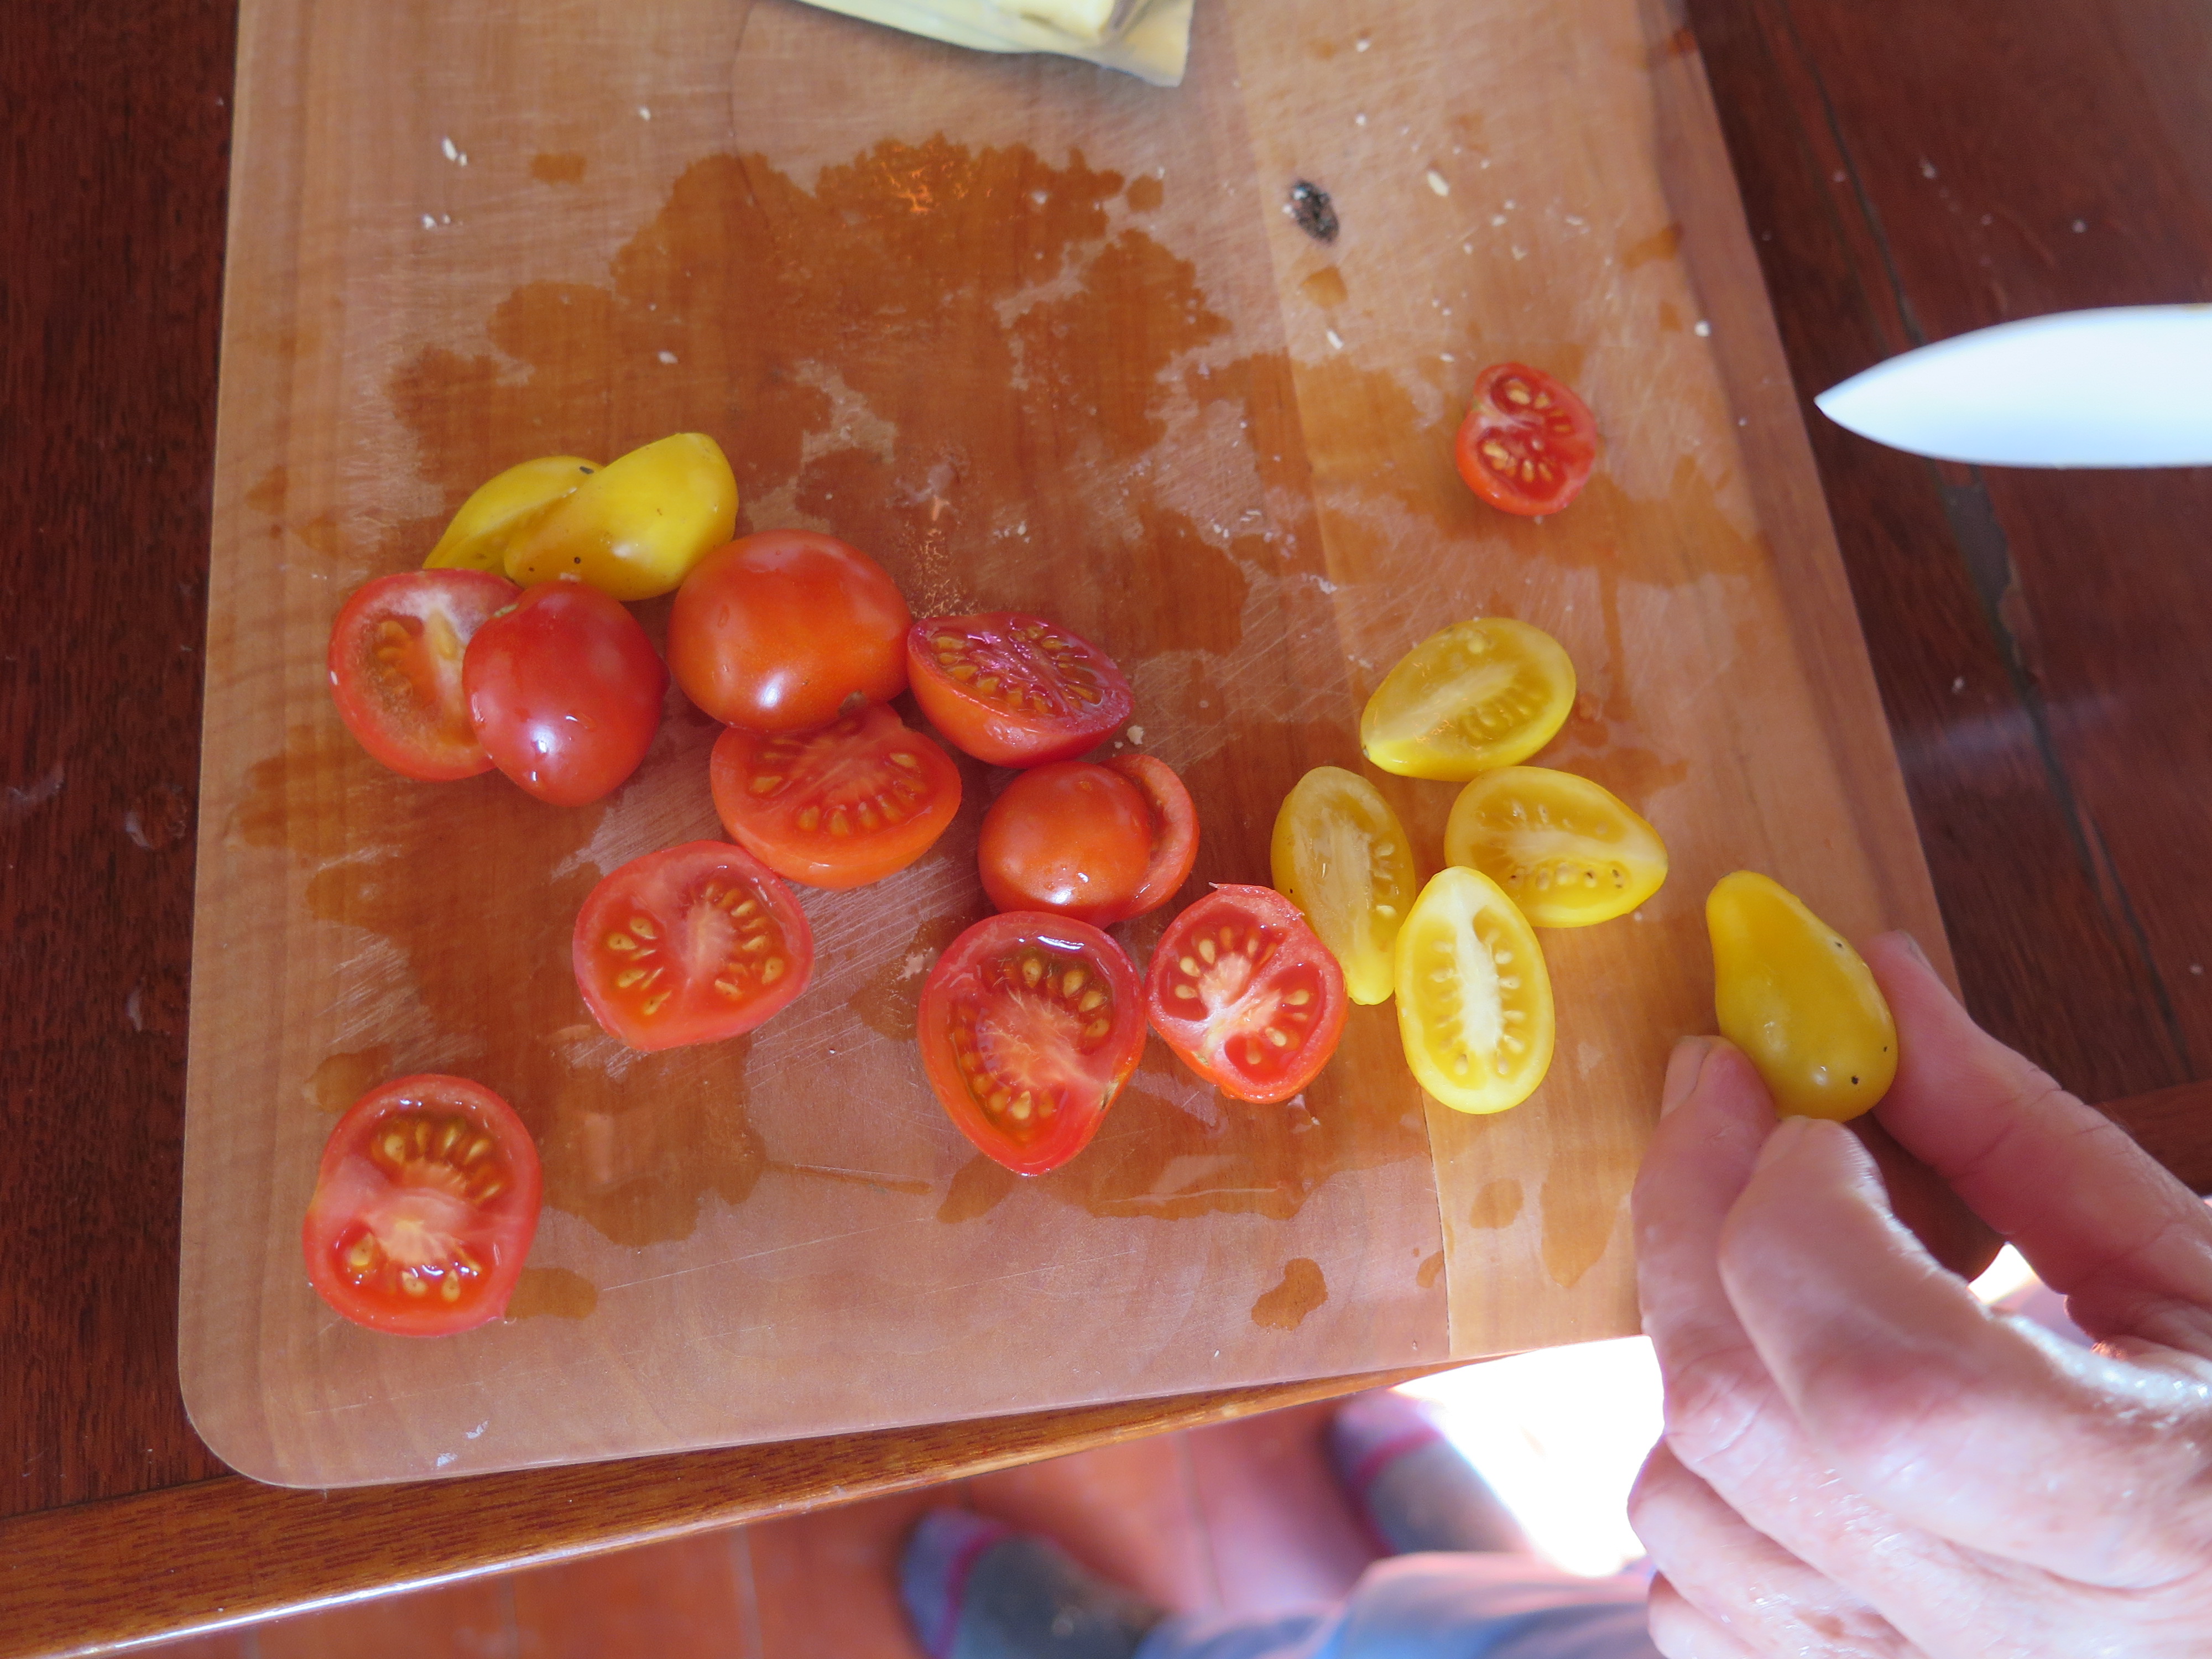
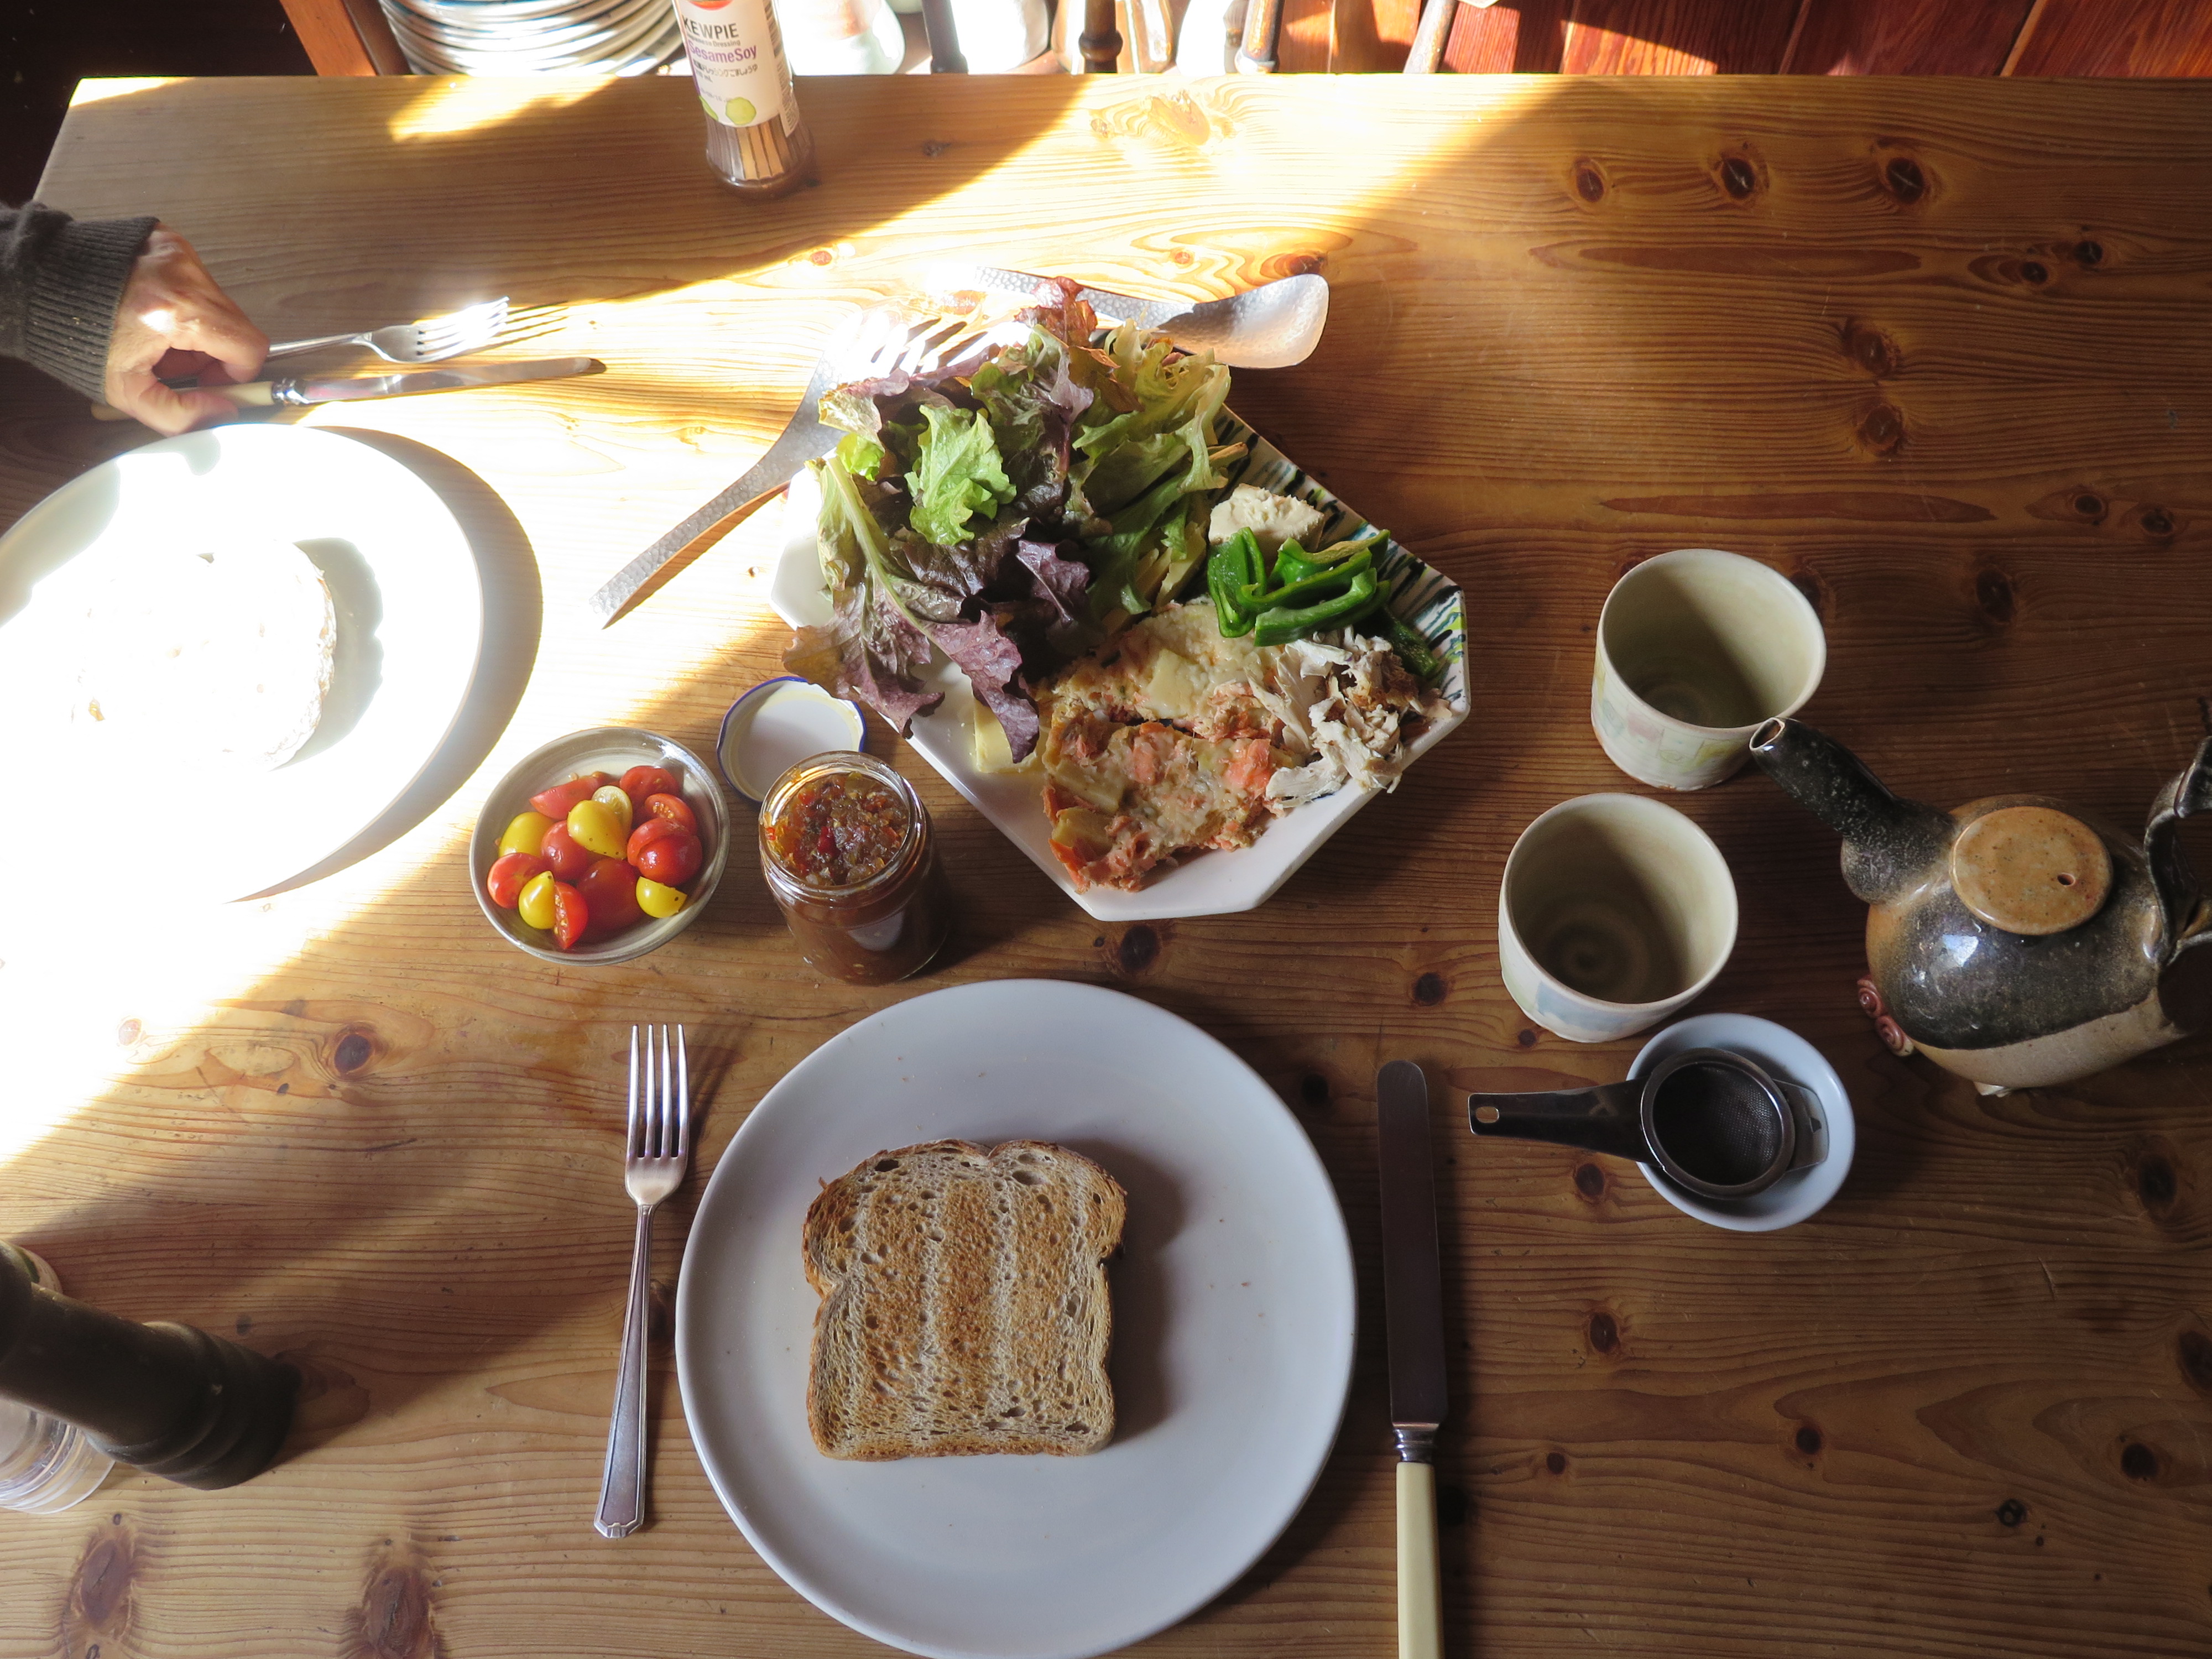
One particular recipe that is all the books is the sponge fruit pudding. The name changes a little, but the recipe remains pretty similar. It’s a lovely, warming, comfort food pudding for cold winter nights. Janine has developed her own particular variation, depending on what is in season or in the preserving cupboard. Tonight it’s preserved young berries that are going into the pud.

IMG_2555 IMG_2557

IMG_4247

This is Janine’s half-size recipe. Good for just two people. Double it if you want to feed more people

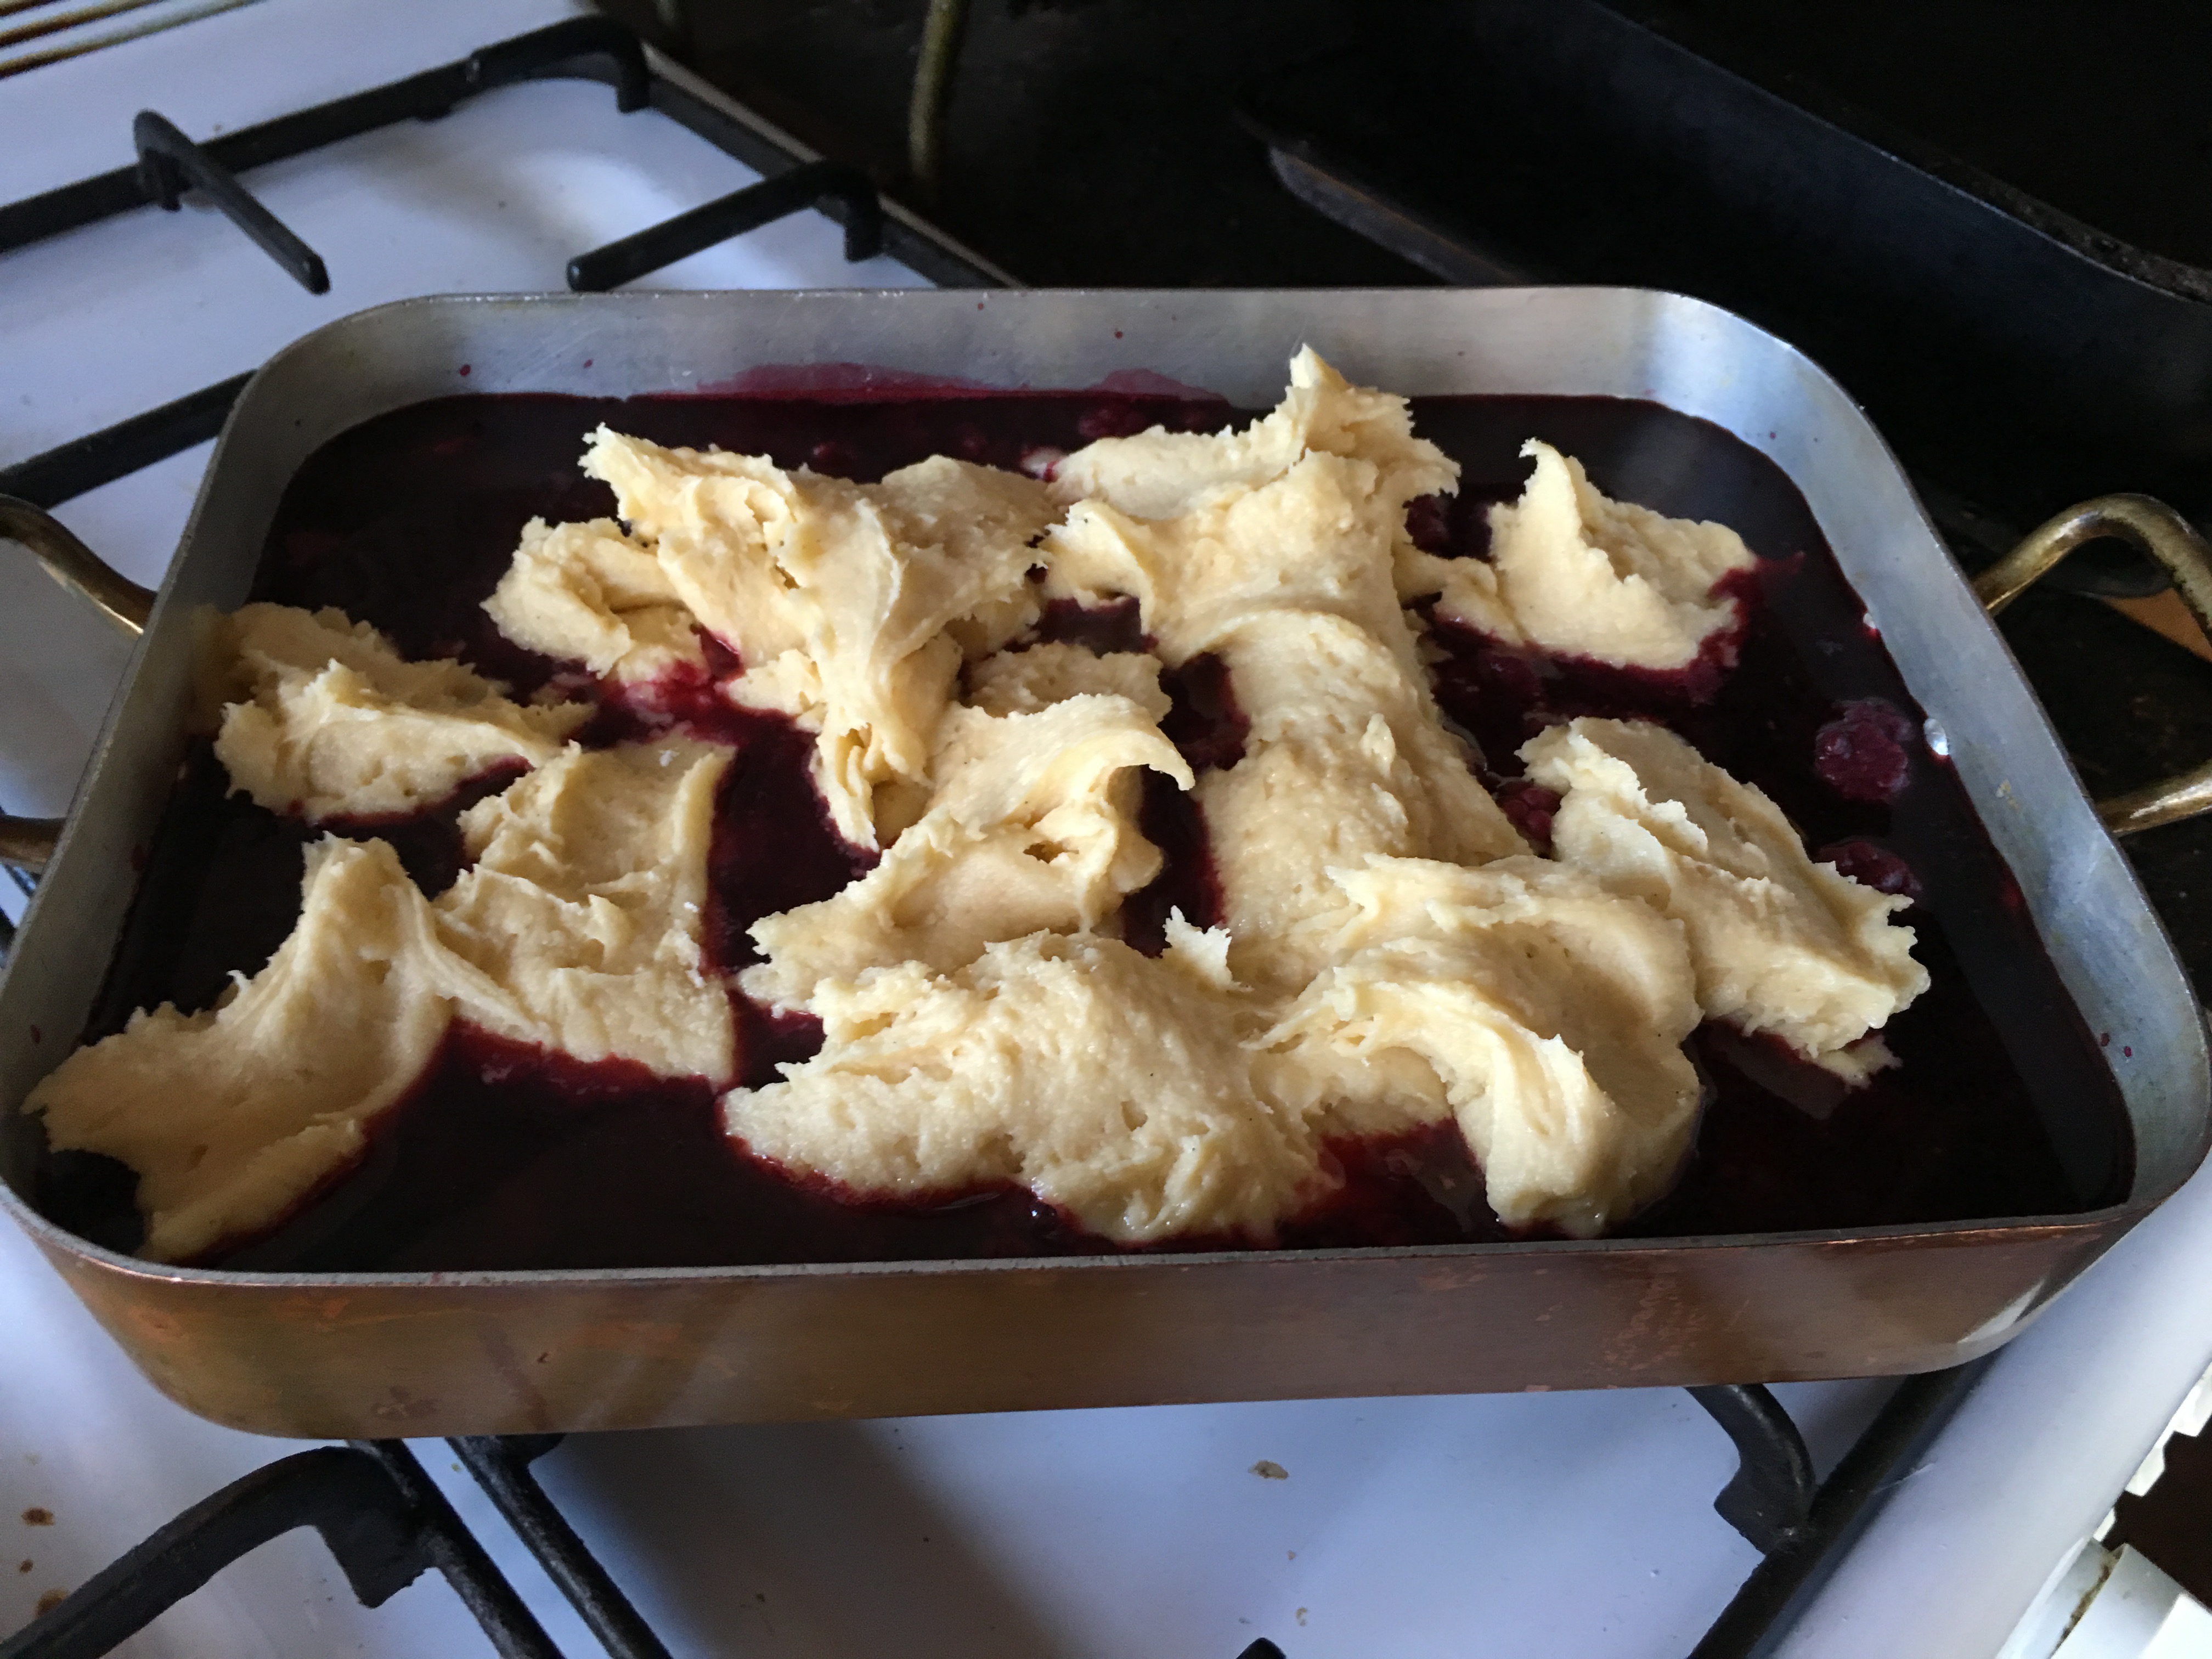
Take a 750 ml. jar of home made preserved youngberries. Pour into baking dish. Make a sponge topping as per your favourite Edmonds recipe, spoon it over the cooked fruit and bake until springy and golden. the recipe says from 35 to 45 mins at either 180 or 190oC, but My Sweet is cooking in the wood burning stove, so all the temps are a bit of a guess for us. She knows her stove now after 40 years and gets a wonderful result out of it. Cook until done!

IMG_2562 IMG_2567

Harri (son) Potter and The Three Headed Cabbage

We are in that time of the seasons at the end of winter and just before the beginning of spring. I heard someone call this period ‘Sprinter’. The early peaches are out in full bloom now and the almonds are just starting to burst bud and show their first flowers.

IMG_4163 IMG_4166

Janine knows a secret place just behind the stone wall of the citrus grove. A sun trap in the mornings where the last of the self-sown tomatoes were growing wild. The frost has burned off all the leaves, but the last of the fruit has hung on and turned from green to yellow and red over the past month and a half. It’s amazing, but Janine comes into the kitchen triumphant with a small bowl of tomatoes in mid winter. We have them for lunches over the next few days. On toasted rye bread with some blue cheese, or in a salad.

IMG_2547 IMG_4133

IMG_4134

We have learnt over time that when we cut a cabbage and then leave it in-situ. The cabbage will re-shoot new cabbage heads, usually three smaller cabbages will replace the original one large head. The total volume of the 3 new cabbages is almost the same volume as the original.. If you cut these three heads off, then the plant will keep on trying to head up to seed and reproduce. The 3rd generation of multiple, small, cabbage heads rarely amount to much. They put out new shoots, but these rarely manage to form firm heads. They are however still good shredded up for stir fry and salads.

IMG_4231 IMG_4234

We have also found that brocoli responds in this way, giving a larger number of progressively smaller Brocolinis with each picking. We have kept a few plants going like this for months. They don’t seem to mind growing through into the hotter weather. Cauliflower on the other hand doesn’t seem to react in the same way. I think that it might be because they take so long to grow, that by the time they are cut and harvested, the weather is getting too hot for them to continue growing?

The peas are looking good at the moment. In full flower and starting to set a nice crop.

IMG_4237

I love sprinter. It is loaded with promises of warmer weather to come. I think that I can just start to feel the days getting longer.

A Potters Floor

It just occurred to me as we swept some sand into the cracks in our new/old shed floor, that is made up of a mix of fire bricks and house bricks, that this is very much a potters floor and very appropriate. As I look down at the bricks and admire the patina of age and use, with all the varying hues and textures, I start to see the brand names of the various manufacturers.

Here in front of me under my feet is a brief history of refractory brick making in Sydney in the post war period. It doesn’t escape my attention that everyone of these companies that made these firebricks all around the Sydney region are all now gone and defunct. Everything is made in China now. In fact, I believe that I am probably the last refractory fire brick maker left in the greater Sydney area, if not all of New South Wales. I can’t think of any others, and we only make fire bricks for our selves, for use in our own kilns.

All of the old brick makers were bought out by the big multinationals and closed down. The sites were sold off for re-development and all the new stock of bricks were then imported. We don’t manufacture anything here anymore. We only operate warehouses for foreign multinationals to distribute imported product.

As the last Australian refractory brickmaker, perhaps I can look forward to being bought out by a big corporation? This might provide the superannuation that  I don’t otherwise have ?)

IMG_4184 IMG_4183 IMG_4202

IMG_4194 IMG_4195

 IMG_4187 IMG_4199 IMG_4189 IMG_4190

IMG_4191 IMG_4192

IMG_4195 IMG_4201 IMG_4186

Some of the above bricks are; Newbold General Refractories, Dive (Matraville), Illawarra fire brick Company, Waterloo Fire Brick Company, Woodall Duckhams, Vulcan, Bulli, Darley, Grit’A’, Ordish and Booths Medium Refractories.

This is in no way an extensive list, it is just the ones that came out of that small kiln that we dismantled, and the ones where the logo was laid upwards, so that I could photograph them.

We have lost so much in the past 4 decades.

The Accidental New/old Shed

e

I am preparing for a new research exploration project, but while I plan and organise, we decide to take a week off from the pottery to catch up on a few outstanding jobs. The weather has been beautiful all this week. The best winter days are like this with frosty nights followed by sunny days with no wind. Glorious days for working out side. We breakfast on marmalade and toast with coffee, and then the Lovely spends couple of days burning off all the orchard fruit-tree prunings to make ash for glazes, while I start working on the new shed.

IMG_4148 IMG_4209

We decided to build an addition to the kiln shed to create some extra storage space, while at the same time it allows me to create some space for a new chicken coop. We raised chickens and ducks here for 25 years, but we had a rather traumatic event with a pack of local village dogs that killed almost all of our birds in one savage attack. The old chook shed was somewhat degraded over time and the wire somewhat rusted and frail. It offered no real protection from the frenzied pack of dogs. I decided that I wouldn’t get anymore chickens until I built a stronger, steel-reinforced chook run.

IMG_4157 IMG_4218

The time has come now and it is done. 25mm. square, welded wire mesh with 6mm dia steel weld mesh dug down into the ground 300 mm. We now have 3 brown chooks at point of lay and are looking forward to our own fresh organic eggs again. The chicken run is quite small, but we only want 3 hens. One or two chickens would be enough for us, but I’m told that a trio is a better number for their own comfort and companionship. Once they are settled in we will let them free range all day, just as we did in the past. Only locking them up at night to protect them from foxes. Chickens are very resourceful at finding their own living out in the orchards and paddocks. Only the vegetable garden is locked up and out of bounds to them. They can be very destructive in a garden, digging up seedlings and excavating large dust bath holes in the soft, moist composted soil.

The other two thirds of the shed is a storage space for all the stainless steel sheets and other kiln building paraphernalia that I have to keep in stock, plus a small space for garden tools and the wheel barrow. We decide to pave the floor with bricks. This wasn’t in the original plan, but it seems the right thing to do to make the shed floor moisture proof and flat, so that I can wheel my brick cutting bench in and out easily.

IMG_4177 IMG_4179

IMG_4181 IMG_4205

We dismantle a couple of old, early wood fired kilns that have been in the garden for over thirty five years and are no longer used. The used bricks have a lovely patina of use and age about them. We lay them over a sand and black builders-plastic membrane substrate to keep the shed dry. 500 bricks later, it all comes together rather well. A good days work to dismantle, clean, stack, transport and lay all these bricks in one day.

This shed is built from nearly all recycled materials. I only had to buy a few sticks of hardwood for the rafters, nearly all the green poles were recycled from vineyard trellises and the iron sheeting for the walls and roof were all given to us when friends re-roofed their house. To complete the build, Janine suggests that we use some french doors and a solid timber single door that a friend found on the side of the road at council clean-up day and delivered here to us thinking that we might be the kind of people that could find a use for them, and we have. We get stuck into it and don’t seem to be able to stop until it is really formally finished. We hadn’t planned for such a proper shed. It started out as just a lean-to roof to keep the rain off the mud brick wall and an excuse to re-build the chook shed.

5 days later we have a beautiful dry, flat, level and secure, well-lit shed. It’s a thrill and a novelty to be able to let an idea go for a walk and have it end up so beautifully. Just using what recycled ‘rubbish’ we have collected here from what others have thrown out. It is almost too good for just storage. I didn’t intend to do this project, this week. I have a lot of other things that I have to do, but here it is and I’m really pleased with how it has turned out.

IMG_4210 IMG_4214 IMG_4212

We put a bit of effort into restoring the old doors. I need to replace a broken sheet of glass in one french door, which Janine organises and putties into place beautifully. There is one broken sheet of gold-red glass in the single door. We don’t even bother to get a quote on that. It will be too expensive to justify for a shed door, so I cut a small piece of perspex and we paint it with red poster colour – you can hardly tell. Once the doors are cleaned and painted, we end the week with a new/second-hand, recycled shed built for just a few hundred dollars and using a modern combination of old and new tools – because I can.

IMG_4216 IMG_4219 IMG_4172

We dine on steamed kale from the garden with our own home dried tomatoes and mushrooms, all softened with a little ricotta and some diced feta for texture.

IMG_4136 IMG_4139

IMG_4138

All suitably self-reliant for a hard-working couple of amateur builders.

The Short Days of Winter

We fill the short days of winter with lots of busy, necessary work. Pruning, preserving and cooking. We are both making marmalade at the moment, in our own respective ways, using the methods and recipes that we have each developed over the years. We have quite enough now to last us for the rest of the year.

IMG_4102

Even though the days are short and the weather is cold, the garden is still producing all our  meals. One or the other, sometimes both of us, go out to the garden at dusk and pick what is at its best and just bursting to be eaten. Food is plucked direct from the garden bed, into the basket and is cooked and on the table within the hour. It just couldn’t be fresher, or more rewarding. I have managed to scale and time the plantings through the summer and autumn, so that there is still enough green produce coming through now, even though everything has slowed down considerably.

IMG_4113 IMG_4114

I collect more mushrooms from the recent fungal blooms. I give them a good scrub with the bristle brush and clean them up and make them presentable. There is always bits of grass and other organic ‘natural’, but unwanted ‘stuff’ stuck to them. I slice them and lay them out to dry.

IMG_4104 IMG_4105

Once crisp, they are added into our stock of dried fungi in the glass jars on the kitchen dresser. We collect more of them as they appear and have fresh mushroom risottos, almost every night for a week. Each time with a different vegetable from the garden. Broccoli, cauliflower, brussel sprouts, capsicums and carrots.

IMG_4119 IMG_4120 IMG_4122

We have loads of golden berries coming on at the moment. Janine makes golden berry (gooseberry) and feijoa fruit mince and uses it to fill a fruit sponge, served with Edmonds custard. It makes a marvellous pudding. It is tangy, sweet and mouth-wateringly luscious and smooth. I have two helpings.

IMG_4106

We have spent the last three days pruning the stone fruit trees. Everything is dormant and deciduous at the moment. Except the earliest peaches, that have started to flower already. We work steadily and meticulously. Opening out the centre of the trees, restoring the ‘vase’ shape. Removing the water-shoots, thinning, shaping and pruning to an outward facing bud.

IMG_4111

IMG_4128

After 3 days of muscle challenging constant work, we are tired, but very pleased with our selves. We have finished pruning our 100 or so trees and spent an equal amount of time dragging all the spent and removed branches down the back to the burn pile and stacking it all up ready to be burnt in a months time, when it has dried out enough to sustain a fire that will purge the pruned wood of any disease and fungal spores that might otherwise infect the orchard trees.

We celebrate with a lovely dinner of wild mushroom risotto, collected directly off the lawn outside the back door, and then a great fortifying breakfast of truffled, creamed eggs. It looks like this will be the last truffle for this season, so we make the most of it.

IMG_4123 IMG_4125

IMG_4126

Marrowbone Stock

Winter days are full to the brim with hard work. We are cutting and splitting wood for the next firing in the wood fired kiln, or for the house. Otherwise, we are working in the garden, weeding or pruning, spreading compost or transplanting out seedlings. We like to keep busy to keep warm. When the weather is too bleak, we migrate inside to make pots or catch-up with bookwork and the never ending BAS statements and the other necessities of running a business. I have completed a kiln job and delivered pots to a gallery for an up-coming wood firing exhibition. So, all our days are full and so are the evenings.

These long winter evenings are a good time to make stock. The kitchen stove is lit almost every night to cook dinner. Best not to waste any of that heat in the stove. The wood fired stove heats the kitchen and makes it a cosy place to be on these chilly winter nights when the frost is settling outside. By working at the kitchen bench with my back to the fire, I get warmed too.

IMG_4028  IMG_4029

I have bought a couple of beef bones from our local butcher. He slices then lengthways and then in half to expose all the marrow. I roast the bones first in the oven for an hour to give them that slightly caramelised flavour. Then into the stock pot and covered with water to boil all through the evening and into the night. For as long as the stove is hot. I also put on a boiler of mixed vegetable and herb stock to simmer alongside the bones. I add all the usual things from the winter garden. An onion, a knob of garlic some thyme and oregano, bay leaves, a few whole pepper corns, a 5star anise, some chilli and a couple of capsicums that are still lingering in a warm spot. Even a small wild cabbage. This is not a gourmet stock, made from all the best, most perfect ingredients like pristine onions, carrots and celery, for some posh restaurant. This is peasant food. Post modern peasant food, We are practising self-reliance, so this is a case of using what we have in the garden at the time, in true peasant fashion. Ever time I make a stock it is different, depending on what there is in the garden that needs to be used up now or it will be wasted.

IMG_4039 IMG_4030

IMG_4038 IMG_4040

The next day I remove the bones from the boiler and scrape out all the marrow, if it hasn’t already dissolved out. I sieve the stock to remove any bone fragments and gristly bits along with the bits of onion, garlic and bay leaves etc. I also skim off as much fat as possible. I the evening, when we relight the stove for dinner, I sieve the vegetables out from the mirepoix, skim the stock again, and add the veggie liquid to the marrow stock. I also add a bottle of local red wine and let the whole lot simmer down from the initial 20 litres, down to a final 1 litre overnight.

I’ve learnt that I can trust the fire to linger on in the stove and keep the stock pot simmering for and extra hour or two, long after I’m asleep. The constantly reducing heat allows the stock to evaporate slowly and safely at no cost or effort.

IMG_4042

All the flavours are concentrated in this way and the resulting jelly-like stock is skimmed of any remaining fat and poured off into plastic containers and placed in the freezer for later use. A thin slice of this magic is just what is needed to add a little extra something to dinners in the coming months. Because the stock is so concentrated and jelly-like, it never really sets hard like water ice in the freezer. It always remains soft-ish and easy to slice even though it is frozen. A thin slice of this stuff is like a stock cube added to a sauce.

The big difference here between what I am making and what is in a stock cube is salt. This stock is made without salt. If salt is required in a dish, then it can be added at the time of final prep or after serving by each individual. Commercial stocks are all loaded to the hilt with far too much salt and in todays ‘convenience’ society, we all get way too much salt in our diet from pre-processed foods. Especially junk food.

We are attempting to live a wholesome life here without resorting to any pre-packs or processed items where ever possible. It takes some effort, but it’s a fun kind of effort.


Drying Mushrooms

We spend the day with our students, who have returned to unpack the firing that we fired together last weekend. We unpack the kiln slowly and methodically, recording everything as we go. Everyone gets a chance to handle the pots as they come from the kiln. Passed down the chain and then placed on the benches in the order that they were stacked in the kiln. Everyone can see what went where and which effects are gained in different places in the kiln.

IMG_4059 IMG_4063

IMG_4064 IMG_4067

After the kiln is unpacked and the pots all cleaned and safely stored in their cars for return travel. We have a quick lunch and then spend the afternoon cutting, splitting and stacking wood for the next firing. It’s great to be part of a team and a lot gets done in a short time with so many hands on deck.

IMG_4071

In the evening, I clear the table and start to sort and clean my haul of mushrooms. It takes a bit of time to clean them thoroughly.

Mushrooms are quite fragile and easily damaged and because I have collected so many in this latest haul. I decide that the best way to deal with them is to slice them and dry them in the oven using all the waste heat from the fire that has cooked our dinner and heated the hot water. It has also warmed the oven as well as the room all evening. I stoke it up again a couple of times during the evening to keep the warmth coming.

IMG_4073 IMG_4072

I only want to dry the mushrooms. I don’t want to cook them. So, I stack them on wire racks and place them in the oven with the door ajar to get a good circulation of heat and fresh air to carry the moisture away as well as keeping the oven temperature from rising to high.

I work through half of my haul before its time for bed. I leave them all in the oven over-night, as the fire has died down and I’m confident that the heat is not going to be strong enough to burn them.

IMG_4077 IMG_4083

In the morning they are all shrunk and don’t they shrink down a lot in volume as they dry. I had them closely stacked on the wire racks and now they are fairly sparsely laid out on the trays. They are pretty much dry, but not crisp yet. I don’t want them to go mouldy on me in the pantry cupboard, so I place them in the kitchen window to get a bit more heat during this sunny warm day, before storing them in glass jars for later use.

My hard-working girl and I spend the day, cutting and splitting more of our pine logs, to get the wood stacked indoors in the wood shed before the rain comes. It is slated to rain for the rest of the week, so there is some urgency in the matter. I have a kiln job to finish off as well, but I can work on that tomorrow in the kiln factory while it is raining. Today it is time to be flexible, change plans and store firewood while the sun shines.

IMG_4082

We are both fasting today, as we always do on Mondays, unless there is a good reason not too. Cutting wood really takes it out of us in this state. We have finished burning all our carbs and are now burning fat. Maybe it’s good for us? Only time will tell.

In the afternoon, all the mushrooms are toasty dry and snappy crisp sitting in the warmth of the north facing window. They snap when bent and so are ready to bottle. I will get stuck into the other half of the harvest tonight instead of watching the idiot box.

IMG_4087

I remember a few years ago, paying $14 for 10g of dried mushrooms from Italy. I suddenly realise that I have just made a few hundred dollars overnight.


A Basket full of Fungi

We have been very busy all week. The mornings are cold and a bit misty. We have been having frosts on most mornings. I have to go into town to get some parts for a kiln job, so I take the truck and make the trip pay, by returning with a ute-load of mushroom compost as a bonus. I get stuck into it in the afternoon and unload it into the wheel barrow to spread it around the vegetables. I pull out a lot of spent plants that have been killed off by the frost. Plants like basil are all dried out and dead sticks now. I pull the plants out and weed the patch, then cover it with compost to stop weeds taking advantage of the increased sunlight.

IMG_2516

Today has been the first time that I could get out and search for some more mushrooms. Since the tremendous rains of last month, then the few hot and dry days that followed, allowed the fungal spores to force their way up and into the light. This harvest is very late in the season. We usually get mushrooms from late summer/autumn through to early winter. It’s now mid winter and I wouldn’t be expecting too many more mushrooms here now. But here they are. Every year is different. The weather determine everything.

Last weekend the kiln firing crew all decamped en-mass, mid firing, to go and hunt for fungi and came home after 30 mins with half a basket-full of their hard-earned bounty. Three orange fungal heads appeared in our lawn during the week. This led me to think that there may be more around.

I decided to go for a walk this afternoon to try my luck along the fire trail. next to the train line. There are quite a few pines growing along there. We have pines in our garden and that is the source of our mushrooms. So find the pines and then look for mushrooms.

There are loads of mushrooms and toadstools that grow in this area, nearly all of them are not edible. There are two easily recognised species that are edible here. The most common edible wild mushrooms here are the saffron milkcap and the slippery jack. They are symbiotic with pines and seem to prefer it best on the north side of trees where there is open ground with some sunlight penetration and sparse grasses.

IMG_2524 IMG_2525

The mushies seem to grow under the dense dried grasses that felt the ground at this cool, frosty, end of the year. Mushrooms are some times hard to spot in the undergrowth, but after a while you get good at spotting them, even though they are often a similar colour.

I look hard in the most likely places and suddenly a few things snap into place. I bend down and scrape away the dried grass and there they are.

IMG_2533 IMG_2535

IMG_2537 IMG_2538

I manage to completely fill my basket without too much trouble. As I walk down the road, I come across a bloke on a big motorbike sitting by the edge. He is staring out into the distance. He isn’t near anywhere at all, just sitting there. I’m zig-zagging across the street from one side to the other, examining the ground under every pine tree as it comes along. He is aware of me and my erratic movements. I walk towards him and ask if he is OK? Does he need help? To use a phone? No! Apparently he is fine. He has a phone, no problems at all, nothing wrong, just waiting to meet someone!?

Weird! In the middle of nowhere? Still he seems happy enough. He asks me if I’m out collecting mushrooms. “Are you out to collect some mushrooms?” Which is not an entirely unreasonable suggestion, as I’m wearing my Basque beret and carrying a wicker basket full of them. Perhaps he thinks that I’m a french peasant that has got lost and walked all the way from Provence without noticing?

IMG_2539

“Yes I am!” I say, as I walk toward him to show him my basket. It’s chockers! He leans forward to see as I lift the basket for him to see in. He has a look and exclaims. “Wow” then he looks closer and focusses in and repeats. “WOW”, then does a double-take at the full to over-flowing basket and reiterates, “WOW!!!” He is visibly shocked. I realise that he wasn’t really expecting to see so many mushrooms.

He asks me if they are all edible. And I tell that they are. He responds, “are you sure?” I tell that I have eaten them many times. I’ve lived in the village for over 40 years and if they are a slow acting poison, then it must be very slow indeed! He responds with another  quieter “wow!”. As I walk on he calls out. “Thanks for your concern.” I nod and lift my hand in recognition.

I double back along the other side of the train line and find some more rich pickings. Mostly slippery Jacks on this side. A third of my haul are slippery Jacks, which are sometime called ‘sticky buns’ I guess because of their domed shape and brown sticky/slimey feel, depending on wether they are wet or dry when you find them. The other 2/3 of my basket are the red pine mushrooms that we have learnt to call ‘saffron milk caps’.

I stop looking as I pick up my pace and head for home. I can’t fit anymore mushrooms in the basket. They are starting to be flicked out of the basket by passing branches, sticky shrubs and twigs. I put my beret on top go them to hold them all in. I’m proud of my haul. I feel like a real Post-Modern Peasant.

IMG_2540

When I get home, Janine spreads out my bounty on a towel on the kitchen floor to stop them going mouldy. I need to peel and de-stem the slippery Jacks and slice them to aid the drying. The milk-caps will need some careful cleaning to remove all the grass and leaf-matter that is stuck to their tops. Luckily there has been no rain since they have emerged, so there is no splashed up dirt and sand stuck to their underside gills. That is always hard to spot and remove and results in  some rather gritty and crunchy meals.

I cook a 3 mushroom risotto for dinner with some of our truffle infused rice.

Bon appetito!

IMG_4055

Winter brings on the citrus

We are in the middle of the coldest time of the year. This cold weather ripens the citrus. Up until we got the frosts, the citrus were all green, but now the chill has sweetened them and made them turn yellow, or orange, or tangerine!IMG_2492 (1)

We planted the citrus grove only 4 years ago and it has grown well. Nearly all the trees are thriving. It’s just he native finger-lime that is finding the going hard. We are quite a bit out of it’s natural growing zone, so it’s to be expected.

IMG_3876

With loads of fruit ripening all at once, eating three pieces of fruit each day each isn’t going to make a dint on the harvest. I decide that it’s time to make marmalade. I make a few batches of pure Seville orange marmalade, but I must say that I’ve made better. It’s all a bit dull. Good enough OK, but could be better. The purists say that only Seville oranges can be made into true marmalade, but I disagree.

I’ve learnt over the years that I prefer the taste of a mixed fruit marmalade. Something that has Seville orange as a base, but also has a good quantity of  other citrus fruits like,  blood grapefruit, tangelo, lemon, lime and Italian Chinotto.

IMG_4024

IMG_4003

Our variety of Seville orange has loads of pips, and this is very good! Not so good if it were an navel orange for eating, it would be a pain. But as a Seville orange that we specifically grow for the purpose of making marmalade, then pips are a bonus.

Citrus pips, especially those of the  Seville orange, contain massive amounts of pectin, and they are large and there are loads of them. Pectin is what sets the marmalade into a gel, along with the large amount of sugar that is recommended.

IMG_3983 IMG_3982

I prefer to use very little sugar, as too much sugar is not at all good for you. One of the ways that Janine and I control our sugar levels, is to limit our carbs intake. I love marmalade, so I decided long ago to make my marmalade not too sweet and more fruity and bitter, with a lot of peel. In fact a lot of varied peels from all sorts of different citrus.

I have developed a recipe that limits the sugar down to very low levels and yet still ‘gels’ OK as a condiment. I do this by using the pectin from the pips, following this recipe;

1.2 kg of mixed whole citrus fruit

Juice the fruit to get 465g of juice

Clean the white pith off the peel to get 550g of sliced peel

add 300g of sugar and the pectin gel water off the boiled and simmered pips

Cut the citrus in half and squeeze all the juice out of the fruit. Save all the seeds. Seville fruit has loads of seeds. Ours does anyway, but I’m told that citrus fruit varies in the quantity of seeds. It all depends on which other citrus tree flower pollinates the fruit.

I put the pips in a small sauce pan with a minimum of water to just cover them and simmered to extract the pectin. This can be going on while you are slicing the peel. Push the resulting gel through a small sieve into the jam making pan. Add more water and boil again for a few minutes. Again, press all the gel through a sieve and then discard the seeds.

Save the juice and weigh it. It should bet about 455 to 465g. If there is too much, then pour some off into your mouth, or if there is too little, squeeze another piece of fruit to make up the total amount of juice, but don’t use the peel. Both options have happened to me. it all depends on the quality of the fruit. Fruit that has been picked for some time get juicier. Fresh picked fruit is a little dryer.

Cut the empty squeezed half citrus skins into 1/4s and scrape all the pith out of them then discard the pith. Save the clean peel and cut it into very fine, thin, slices. The peel should add up to about 550 to 560g of peel, add it into the bread maker machine and set to ‘jam’ setting. Add 300g of sugar and the 460 g of juice.

Turn on the machine and go about your other very important business for over an hour and come back to perfect marmalade. This week I unpacked a bisque firing and repacked another with this useful time saved.

IMG_3795 IMG_3988

Heat a few glass jars and lids to sterilise them and bottle the marmalade while hot. It can keep for years, but never gets a chance to.

While the citrus rush is on and there are plenty of fruit being eaten and juiced. I take the  opportunity to use the discarded skins to clean all the copper pans thoroughly and get them all shiny once more. A discarded, squeezed 1/2 citrus peel with a dash of salt sprinkled on cuts the developing verdigris oxide layer and gets copper pans looking new again.

IMG_3976

Mushrooming

The weather has been quite wet for the past month, but with a few warm, still days. The warmth seems to have brought on a last, end of season, flush of mushrooms. Usually the mushroom season here is from late summer through autumn into the beginning of winter, but this is a very late-blooming of fungal trove.

We have 10 potters here with us to pack and fire the wood fired kiln. Rochelle, one of our guests, decides to take a walk among the pines and comes back to ask for a knife to cut some mushrooms that she has found. Half the team suddenly take off. Janine tells them that she not only has a dedicated mushroom knife, but also a mushroom collecting basket. They’re all off and gone, returning half an hour later with the basket half full of fungi.

IMG_2499

Around here we get edible mushrooms growing on the pine tree roots. We have saffron milk caps and slippery jacks. There are lots of other fungi growing here, but these are the only ones that we know are edible and safe.

The fun-guys set to work cleaning and peeling the fungi. We cook up a couple of dishes for lunch. The saffron milk caps with olive oil and garlic. Then the peeled slippery Jacks tossed in butter with white wine and blue cheese. They are both pretty amazing dishes and couldn’t be fresher or more delicious.

Mushrooms are best cut from the stipe or stem, so as not to damage the rest of the ectomycorrhizal underground structure of the fungus. The less damage done, the better chance of a good crop next season – or so I’m told. Better safe than sorry. So much better to tread softly on the earth where ever possible, it costs us nothing and can reap great rewards.

This is self-reliance.

IMG_2501