We have had a cancellation in the first ‘Make and Scratch’ sgraffito workshop on the 25th/26th of November. If you are inrterested in filing this place, please email me at <hotnsticky@ozemail.com.au>
The workshop is titled Make and Scratch, and will be a hands-on Making, throwing and decorating workshop concentrating on Sgraffito.
Janine and Warren will be leading the workshop and demonstrating their techniques of sgraffito decoration. I will be assisting with the throwing part of the process.
Over the weekend we will be demonstrating throwing and slab plate making techniques to be painted with coloured slip(s) then decorated using the ancient sgraffito technique of scratching back through the slip to reveal a contrasting clay body colour underneath.
Day 1. This workshop is aimed at potters of beginner/intermediate level of experience. We will be beginning with a design exercise on paper to develop a graphic motif for you to carve into your pots. Please bring your design ideas portfolio with you. We will be throwing cylinder forms, then flatware forms that are suitable for sgraffito decoration. We will also be rolling out a few slab dishes so that everyone has a chance of getting a few suitable forms stiff enough for slip decoration and sgraffito on the second day.
Day 2. We will be spending most of the 2nd day in decorating mode practicing our sgraffito decoration.
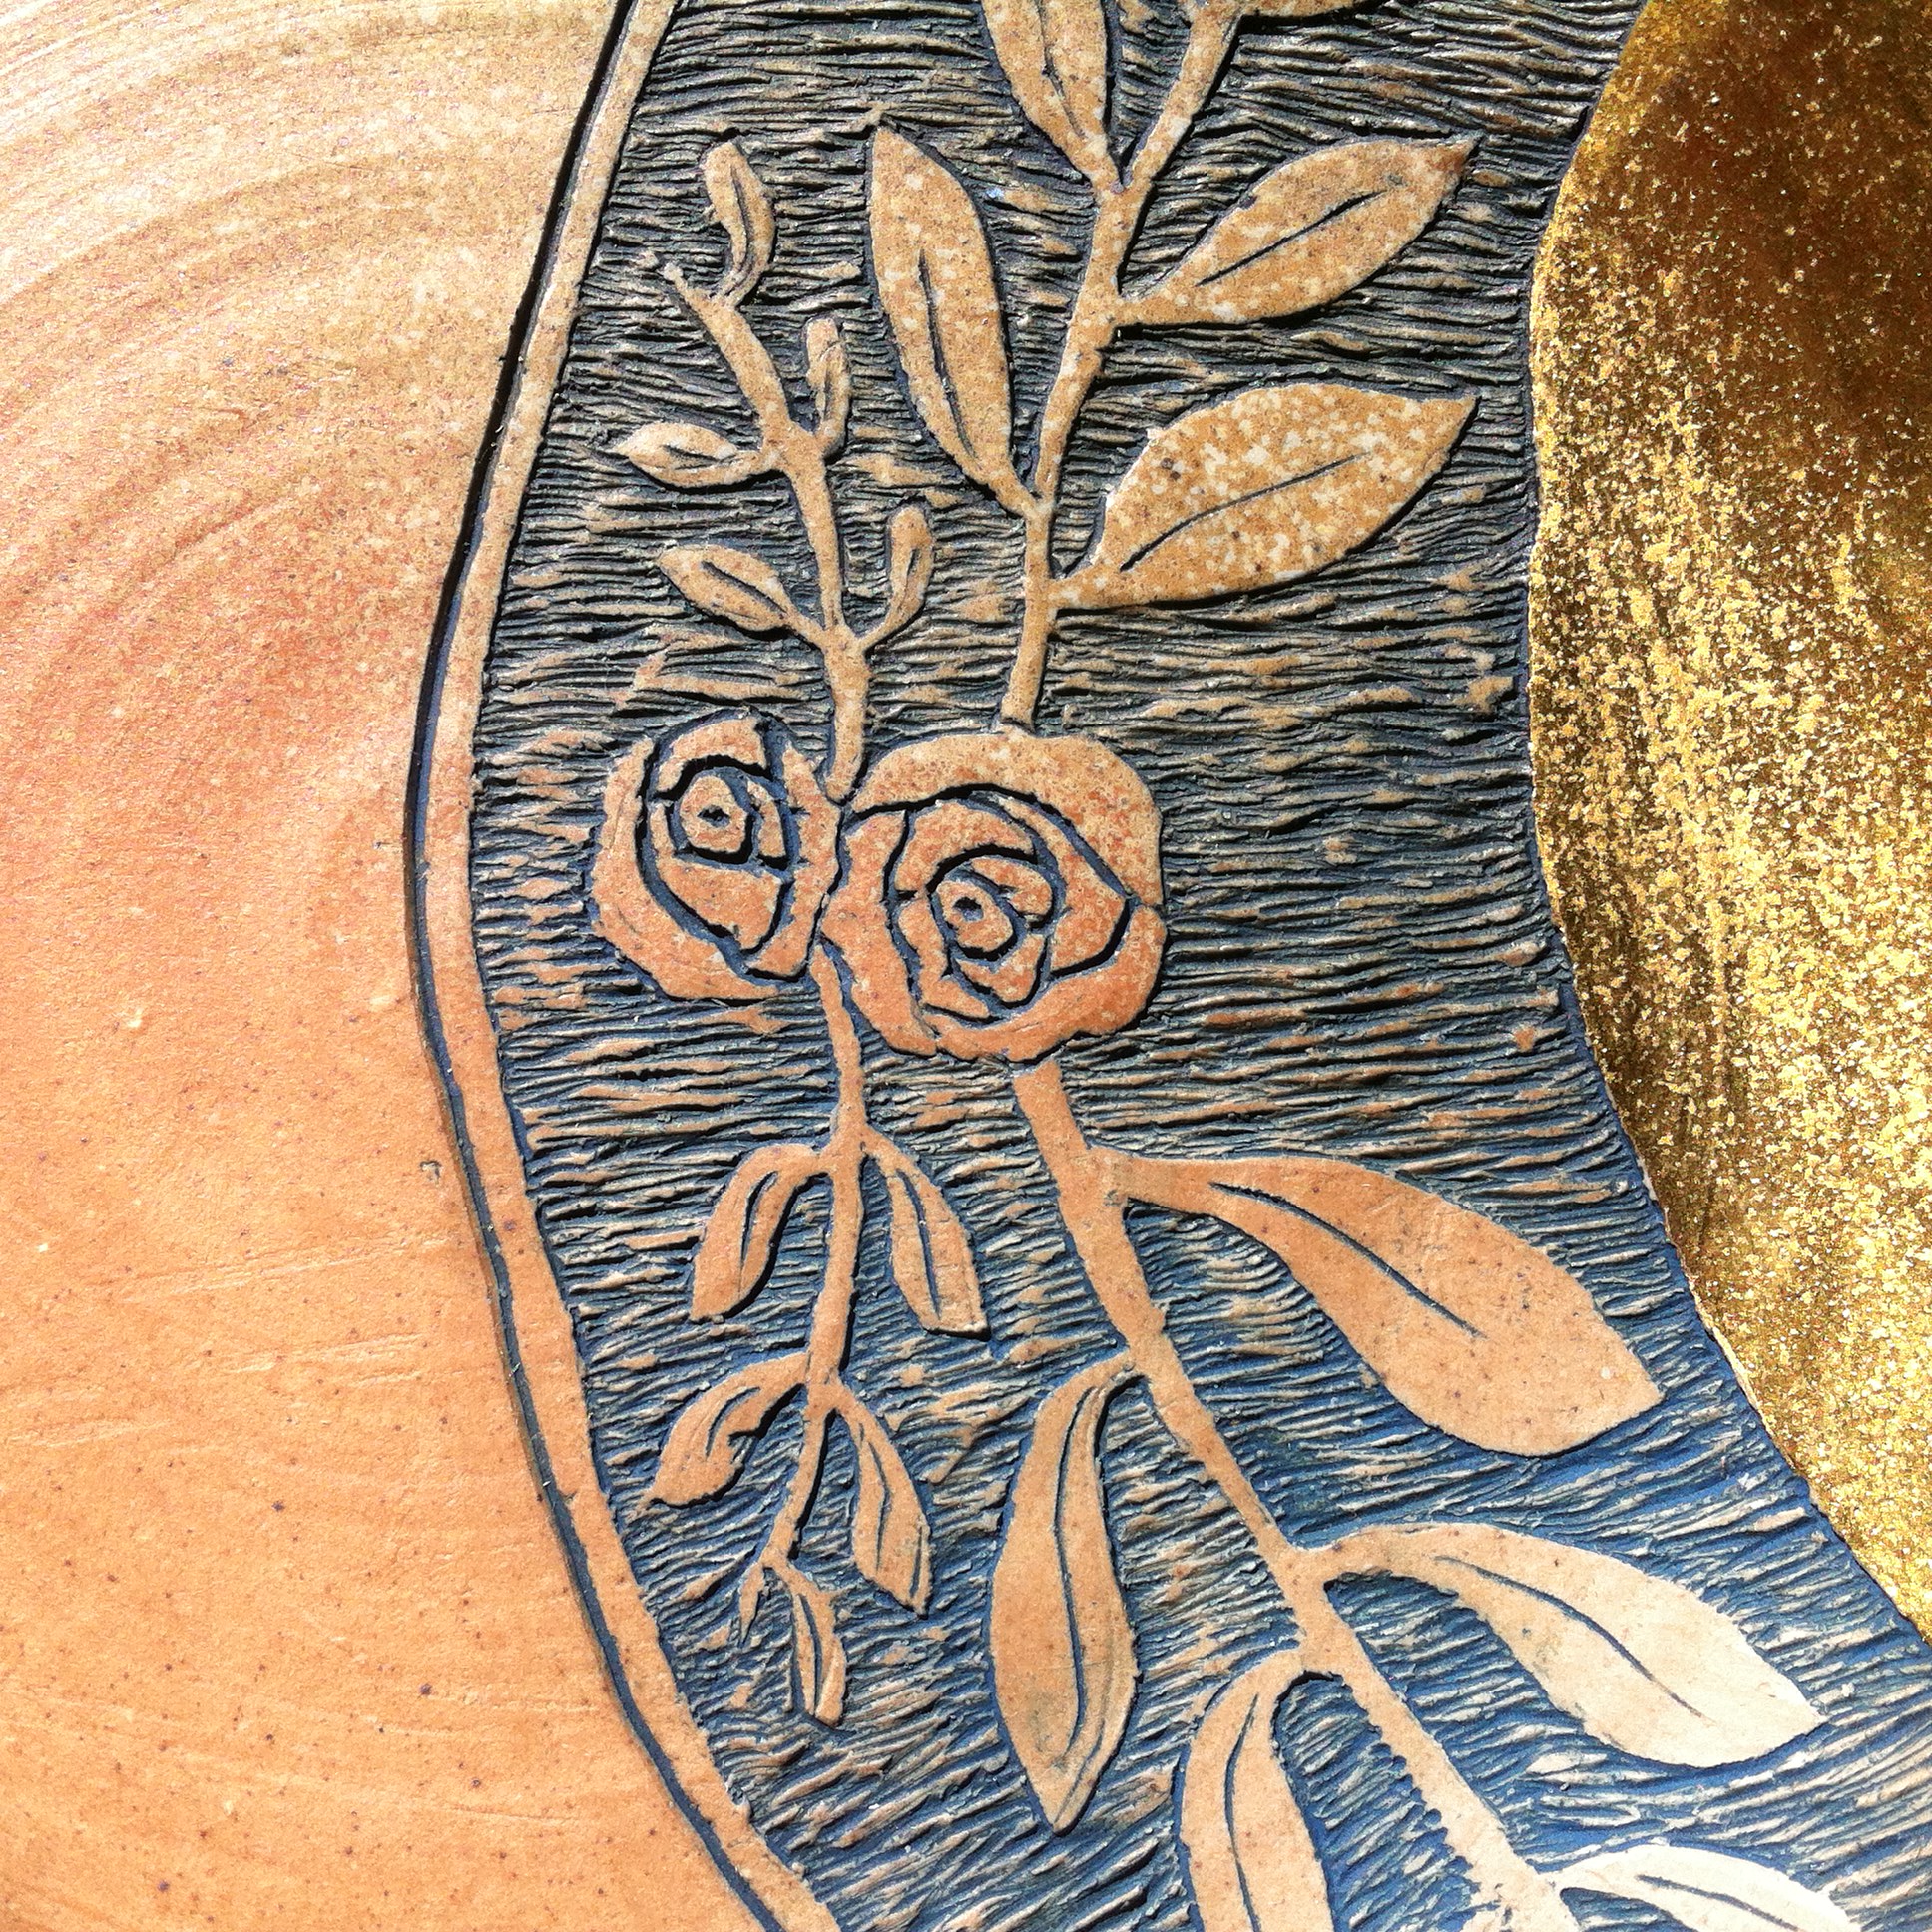
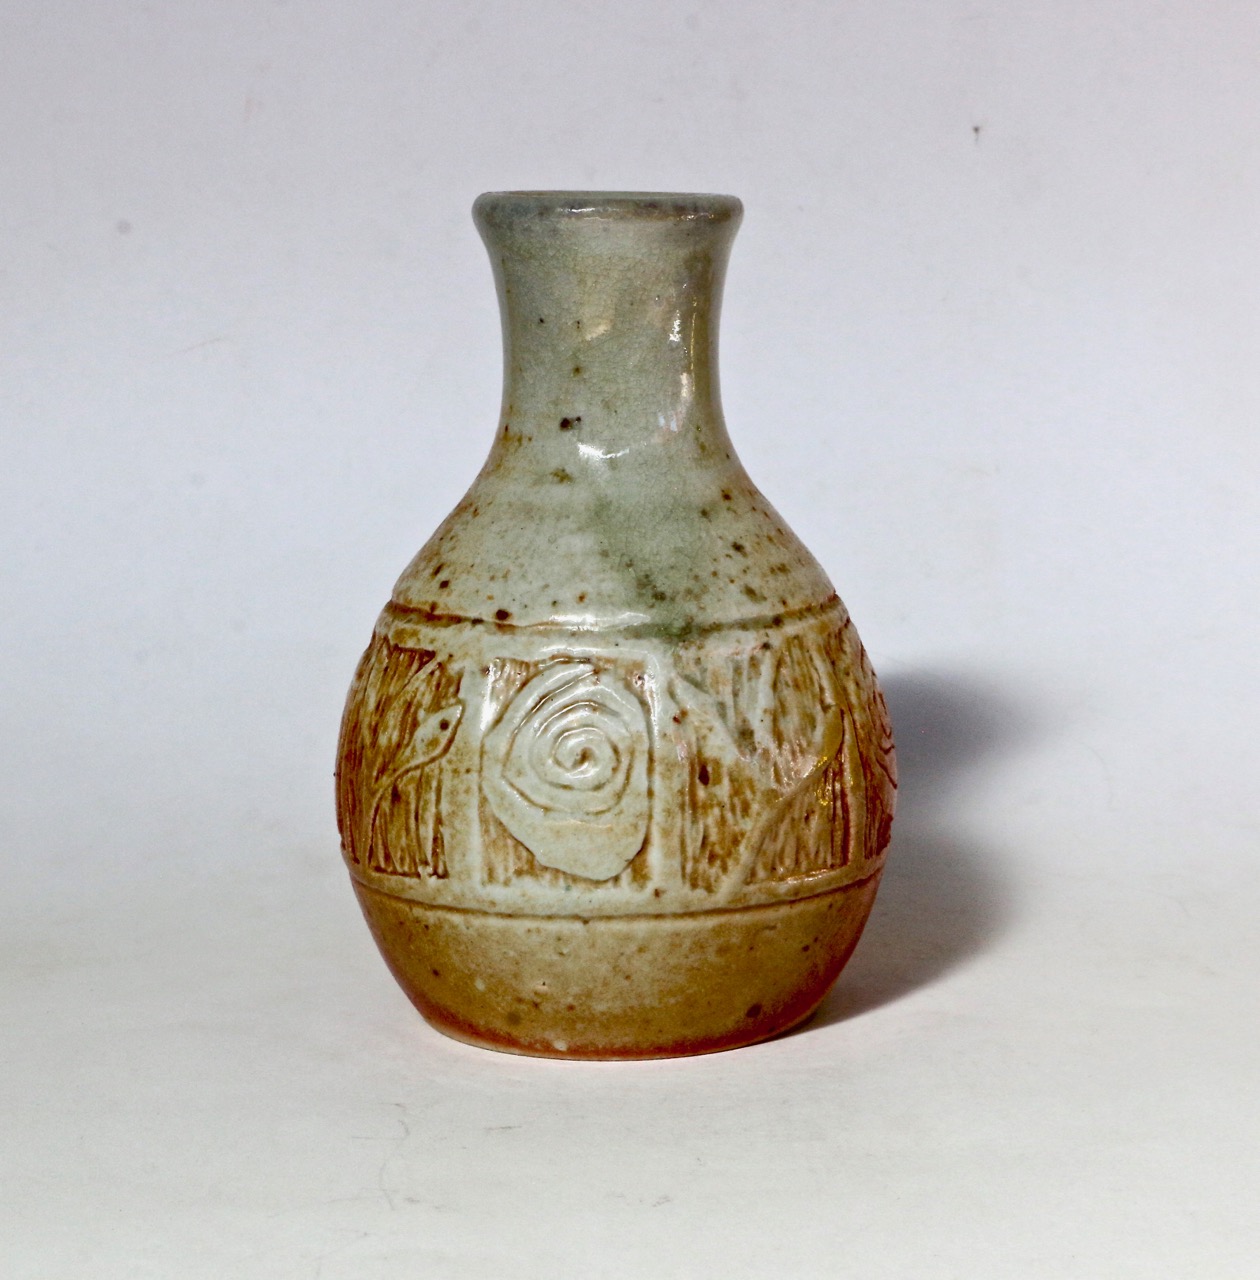
Wood fired and sgraffito’d work by Janine King
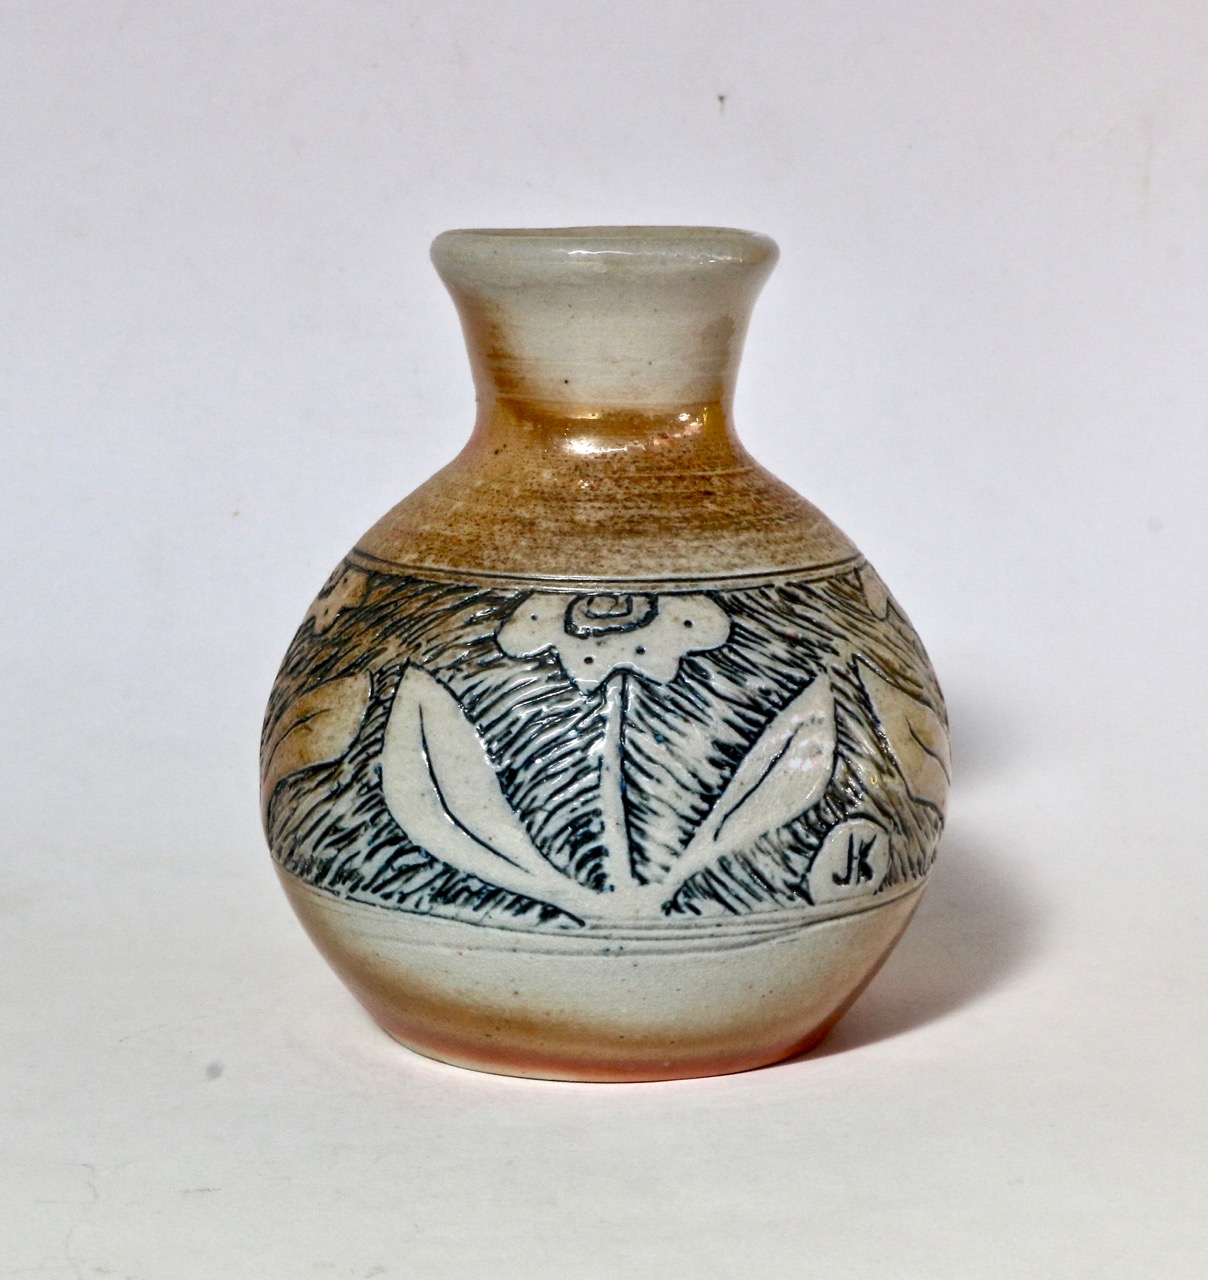
Slip and sgraffito piece by Janine King
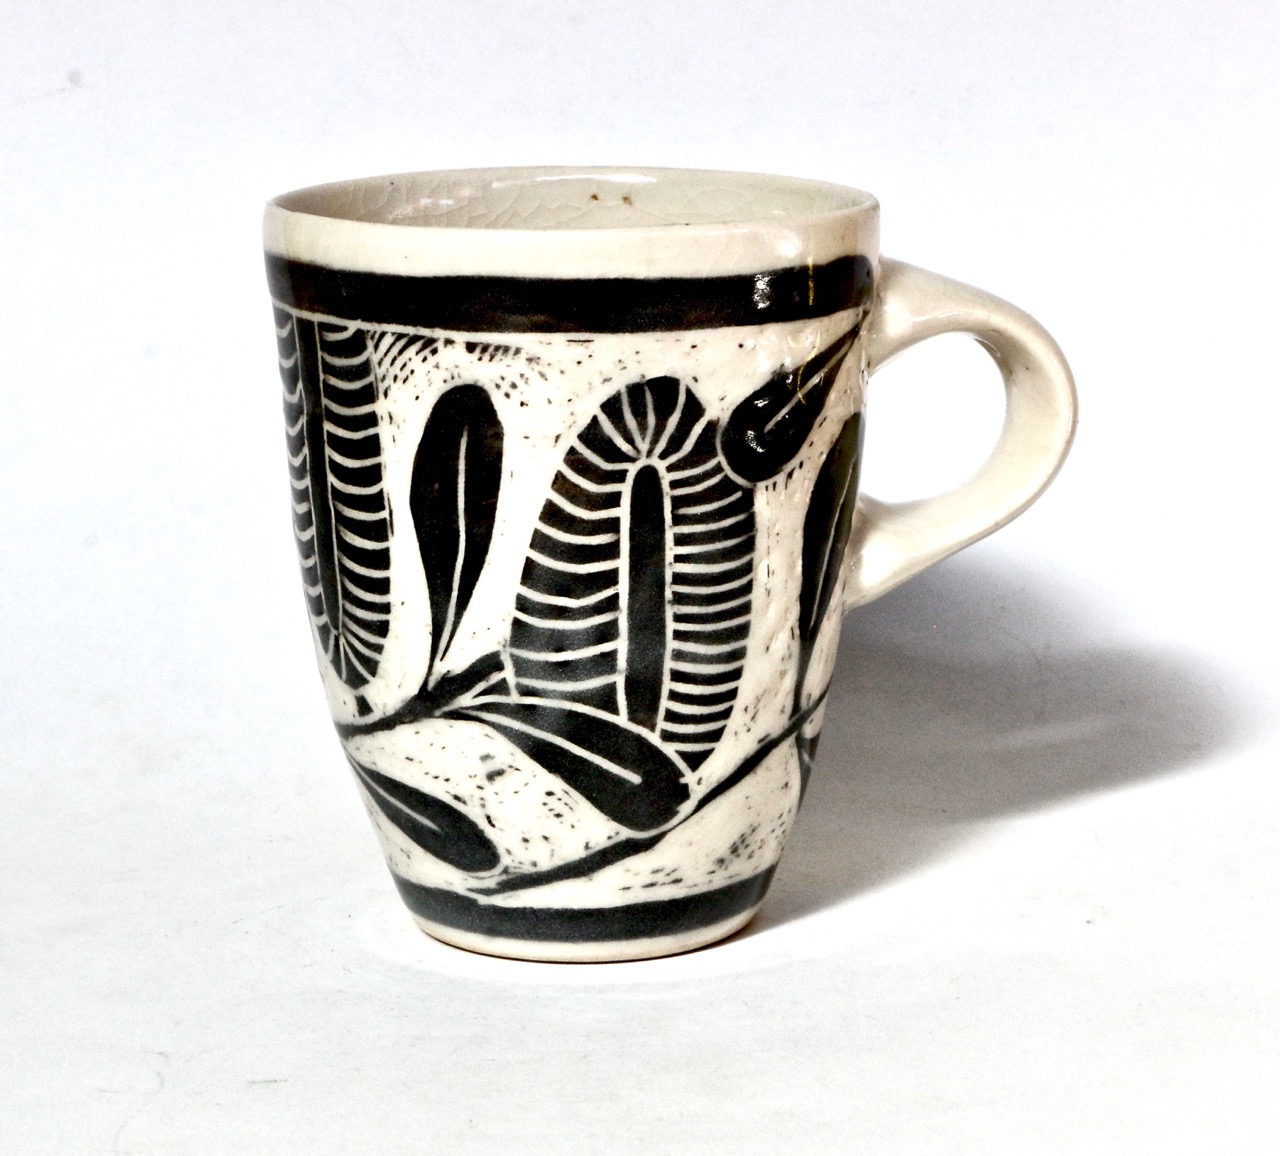
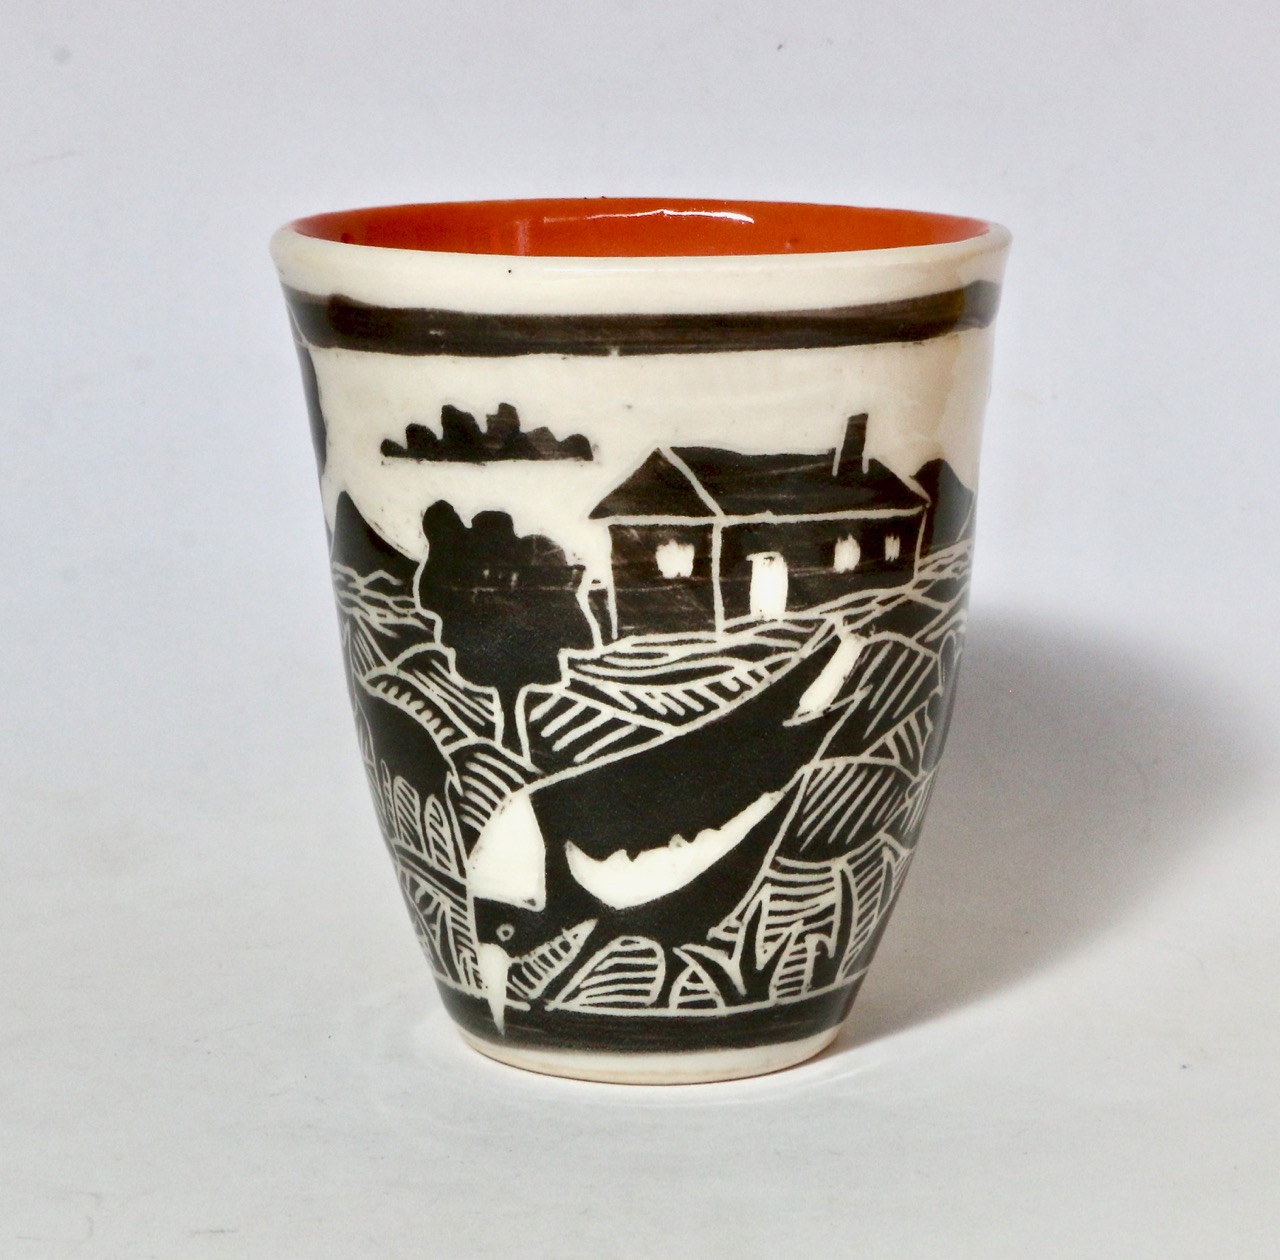
Graphic sgraffito mugs by Warren Hogden
Overview.
Sgraffito can be elementally simple, just carving straight into the clay surface. This is a very effective technique for pots that are destined to be wood fired, where the carving enhances and enriches the natural wood fired surface. Other glazing options are to carve into the surface and then glaze the pot with a celadon, or other transparent glaze. Celadon and other similar glazes pool in the crevices and get darker and richer with the carving.
Alternatively, a contrasting slip can be painted on the clay body and then carved through to reveal a contrasting decoration. We will be using our homemade Balmoral white stoneware clay body and homemade black slip. If you have a special interest in using a particular underglaze colour scheme, you are welcome to bring your own underglaze colours.
You will need to bring some design ideas, a sketch book, a 5B or 6B soft drawing pencil, your throwing tools and something simple to share for a communal lunch. Tea and coffee will be provided.
At the conclusion of the workshop. I will be offering to bisque fire 2 of your best pieces for you.
We have been very busy since our return from our research trip to New Caledonia.
We had made a lot of new work for the end of year Arts Trail – Open Studios sale, before we left for the trip.
The Open Studios, Arts Trail is on the first 2 weekends in November, so save the date.
Now on our return form Noumea, we have been flat out busy glazing and decorating that bisque ware and have two kilns packed ready to fire this weekend.
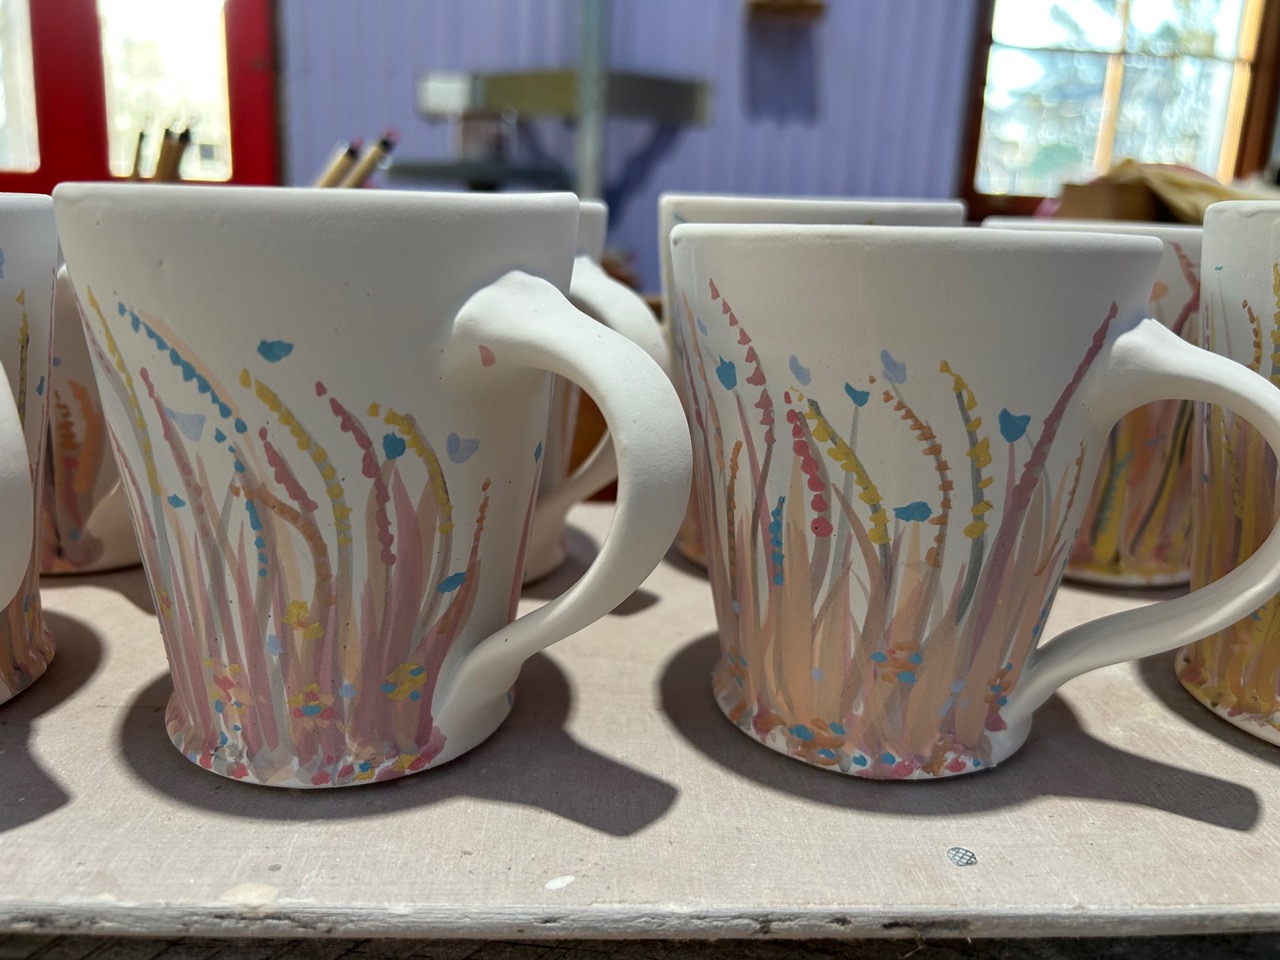
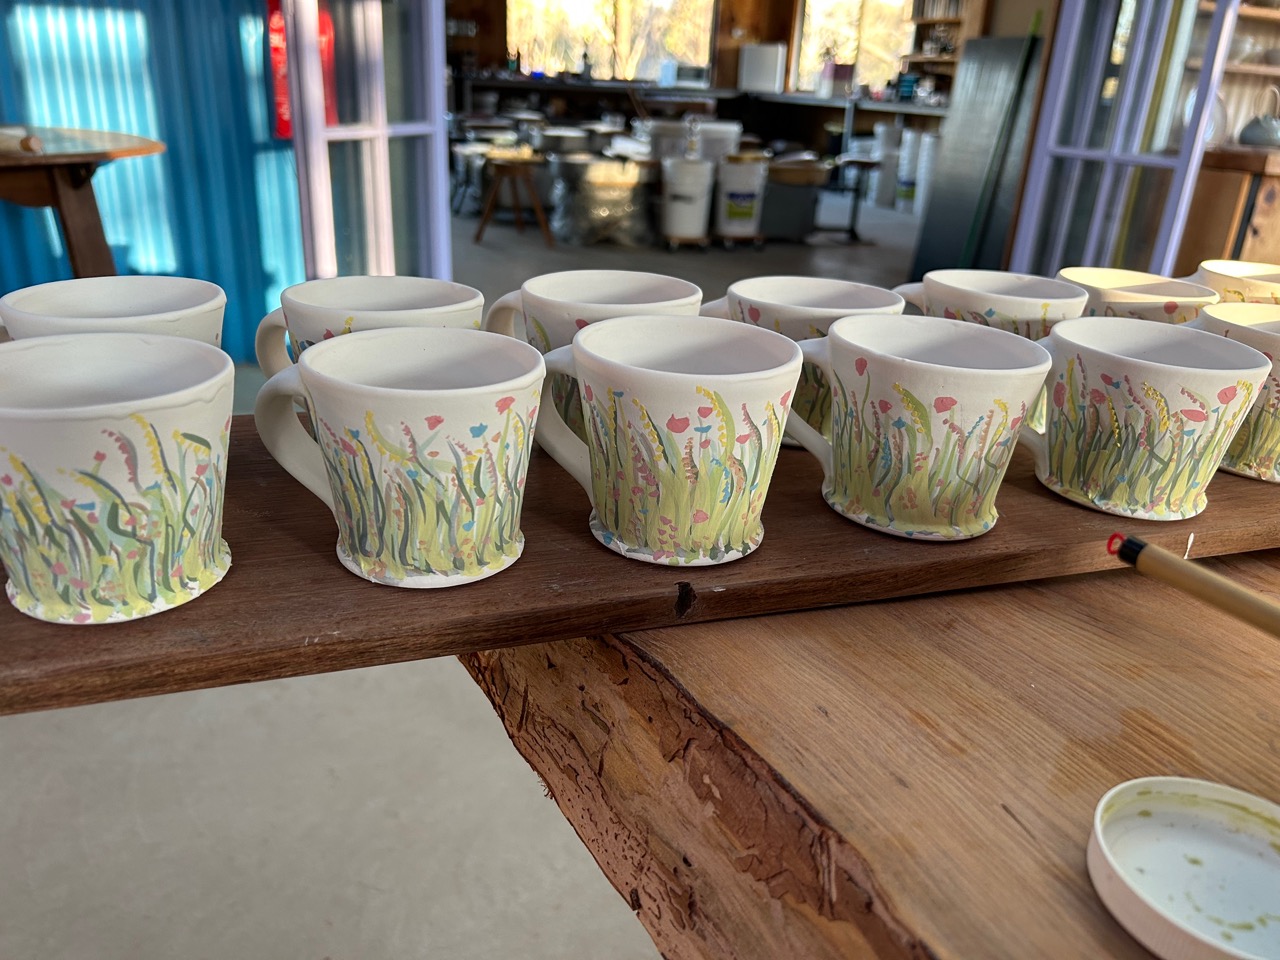
I have spent the past week painting. The motif is quite complicated and involves building up a surface of 20 different colours to create depth in the image
We have to be busy, because we are driving up to Brisbane shortly to deliver the 10th Annual Ian Currie Memorial Lecture to the Qld Ceramics Society.
I gave the 1st one a decade ago, and it must have been OK, as they have invited me back. Either that, or its taken 10 years to get over the first one 🙂
After the fire, All my dreams were very stressful and all about the shock and terror of the event. I found that I had somehow edited my experiences in my brain to make them more palatable and less stressful, by recalling all of them in black and white and all silent. A bit like old movies.
So The first work that I made after the fire was all in black and white. It took me a while to incorporate some colour into my pieces about the fire.
Over time, and quite a bit of therapy, I healed to the extent that I could start to talk about the fire. but I still had issues that I couldn’t discuss.
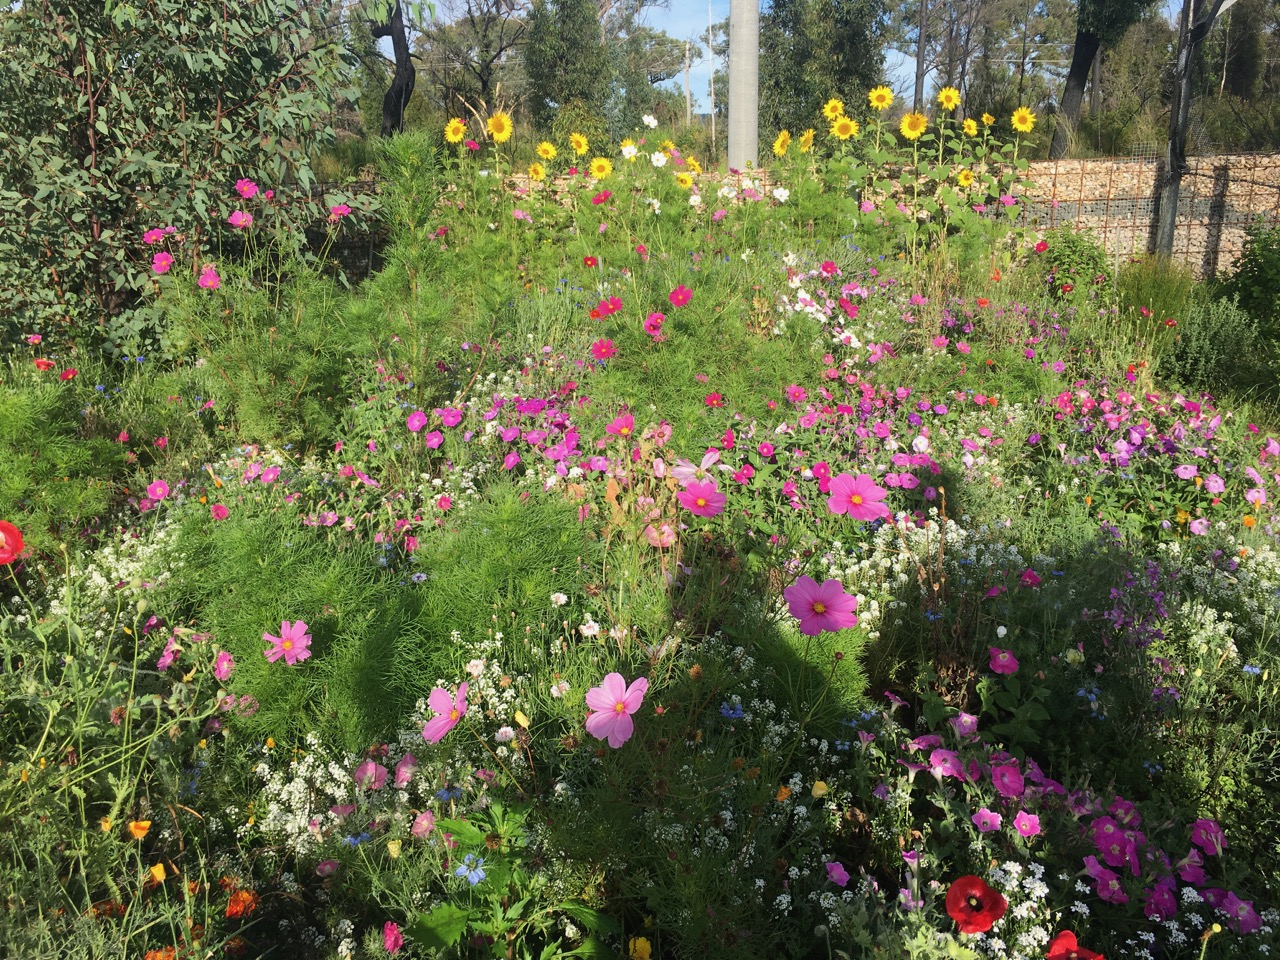
I tried to improve my lot by planting an English style Cottage Garden of bright flowers. It helped a bit, I felt good looking at them.
After a few months of a new therapy called EMDR trauma therapy. I felt so much better and started sleeping better, plus several nasty ailments like psoriasis and irritable bowel syndrome started to clear up. This was a very good sign that things were improving.
One day I was painting flames on my pots, and the next I found that the flames had started to turn into flowers!
I didn’t choose this, It just happened! I’m very pleased with the result.
I’ve turned my flames to flowers.
I have no idea where they came from. It just came out of my subconscious. In a very peaceful and quiet way.
Janine and I recently received a surprise job offer to do a geological survey of potential potters materials around Noumea in New Caledonia.
We only had to think about it for 2 seconds, before we said yes!
We are now back home again, hence our radio silence for the past few weeks. We were well looked after and found a lot of useful materials, as far as I am aware, no one has documented anything similar that we could reference. So we were starting from scratch. I approached it as I do here. Consult geological maps for insights as to the best places to look. As these were not forthcoming, we decided to just do a series of drives around the local area and see what turned up in the road cuttings and culverts. These give a great insight into what is under the grass in the countryside.
The research that I did online before leaving indicated that the principal feature of the main island is a nickel-rich laterite material. New Caledonia holds about a quarter of the worlds nickel reserves. Fortunately for them the new era of lithium battery powered electrical devices relies on nickel as one of the primary mineral components.
Our lovely local contact, who we met online, contacted us after we were recommended to her by her friend, who it just so happens bought my book on Geology for potters online from us! After an exchange of emails, we decided to take the job. Everything in New Caledonia is imported with the possible exception of green vegetables, which can be grown locally. Our host has a plan to run a project to teach the local Kanak people to make pots again. Tribal pots were made there in the past, but are no longer made since colonisation. The same is true of the nearby island nation of Vanuatu. I had volunteered on an aid project in Vanuatu in the past, helping the late Alistair Whyte with his private aid project there. Janine and I have also volunteered on privately organised NGO ceramic aid projects in Egypt and The Philippines, as well as New Guinea and Cambodia over the years. So we had some idea of what to expect.
All pottery materials are imported into New Caledonia at great expense, so are not really viable for the local population on lower incomes. We hoped to pass on what we could learn about what it is possible to do with just using the local resources.
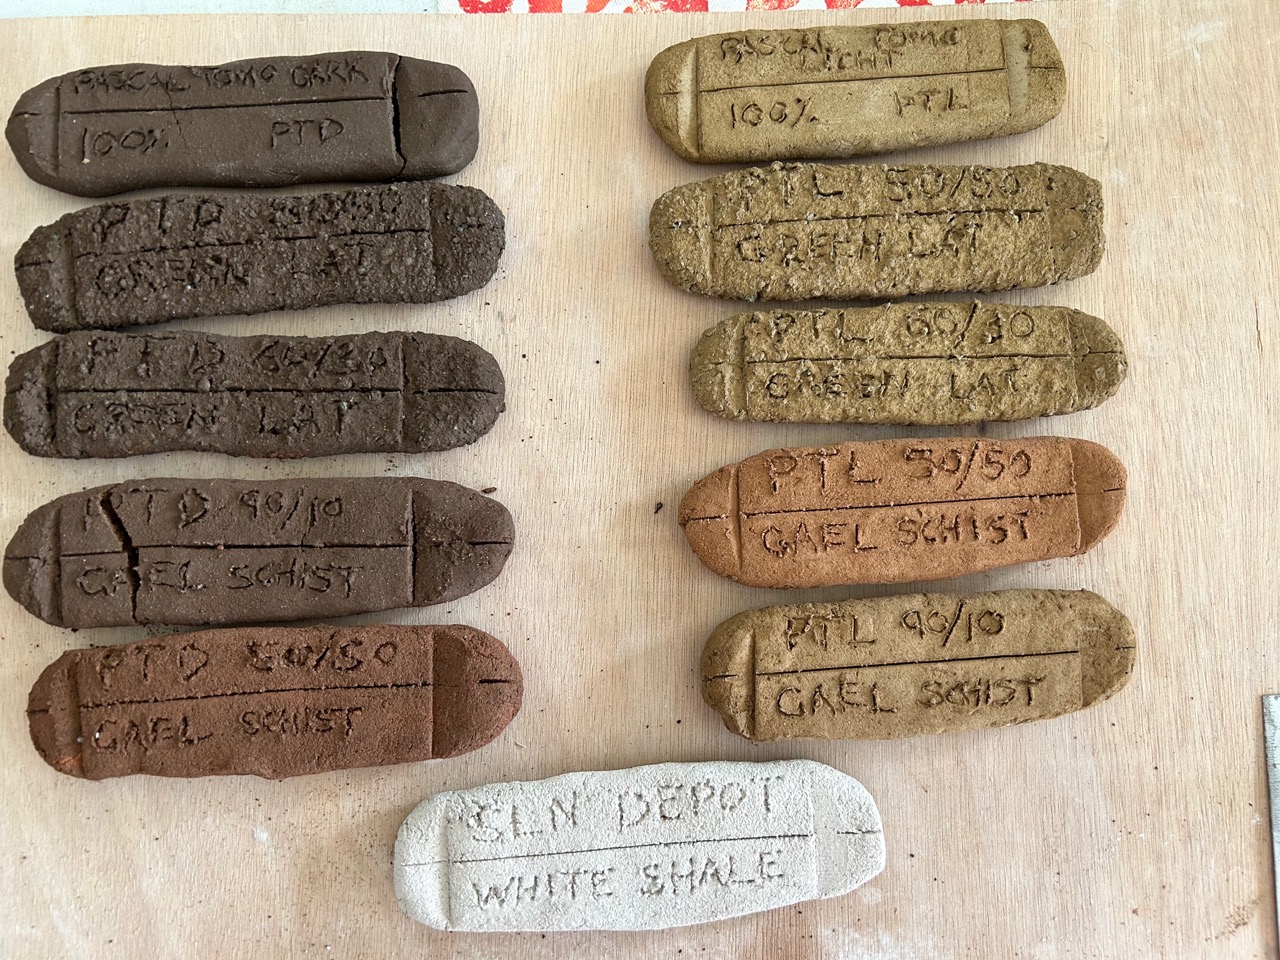
We were driven around and given a running commentary on the local issues and landscape usage. I spotted several dykes that had forced their way through the extensive and almost monotonous red/brown local soil profiles. These pale weathered siliceous intrusions hold a much more promising potential for glazes and bodies. We collected several samples that we took back to the studio for testing and analysis.
We also found several clay deposits that showed some promise, but they were so high in iron and very sticky clay minerals like montmorillonite, that they will probably only be useful as earthenware or mid-fire bodies.
I did however find two clay-like minerals that had some promise of firing to stoneware, but these were largely non-plastic or very low in plasticity. A more extensive and detailed search would no doubt find a more promising range of clays, but we only had 10 days to search for and then test what we had found. There is plenty of scope to continue this work and take the first series of tests to a more complex and useful result, but it will take more time. However, after this brief encounter, I’m convinced that there is plenty of potential to develop a locally available body of ceramic materials.
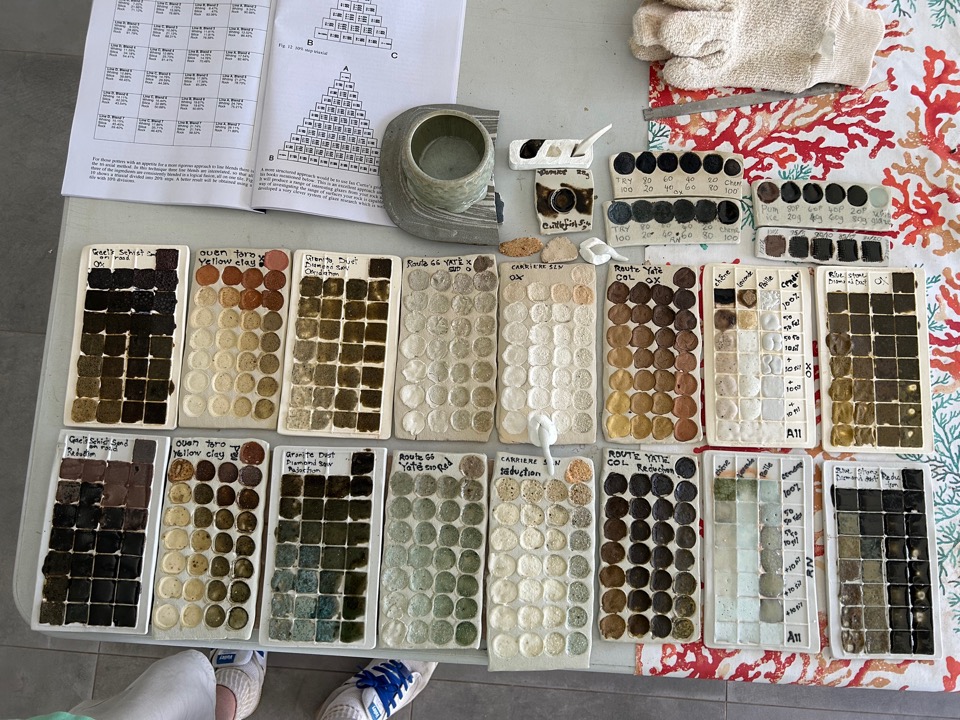
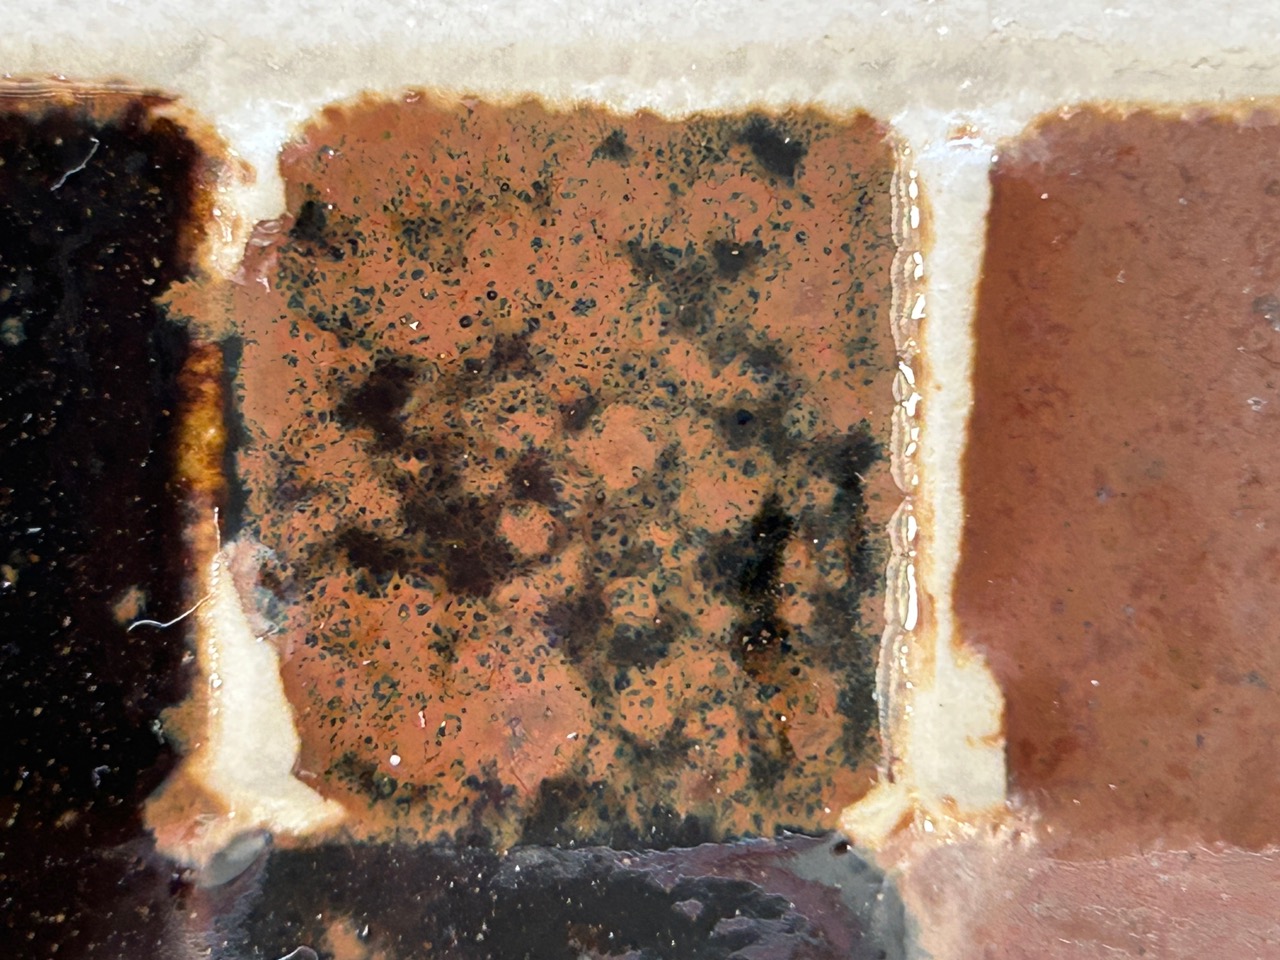
The grid tile tests that we made, looking at potential glaze possibilities were very promising. Again there is more work to be done there to refine and develop these early results, but they were very encouraging.
We found a good black/brown tenmoku, a possible oil spot tenmoku, a very good jun blue and cloudy opal blue, and a couple of celadons. Some of the materials from the hard dykes that weren’t weathered so well were difficult to crush fine enough to get a smooth glaze, but the slightly specky glaze tests show such excellent potential that it would be worth investing in some finer milling equipment? We did the best we could in the very short time available and the equipment that we had on hand. I spent a spare moment throwing two large mortars and pestles for use in the future, as there aren’t any to be had in Noumea.
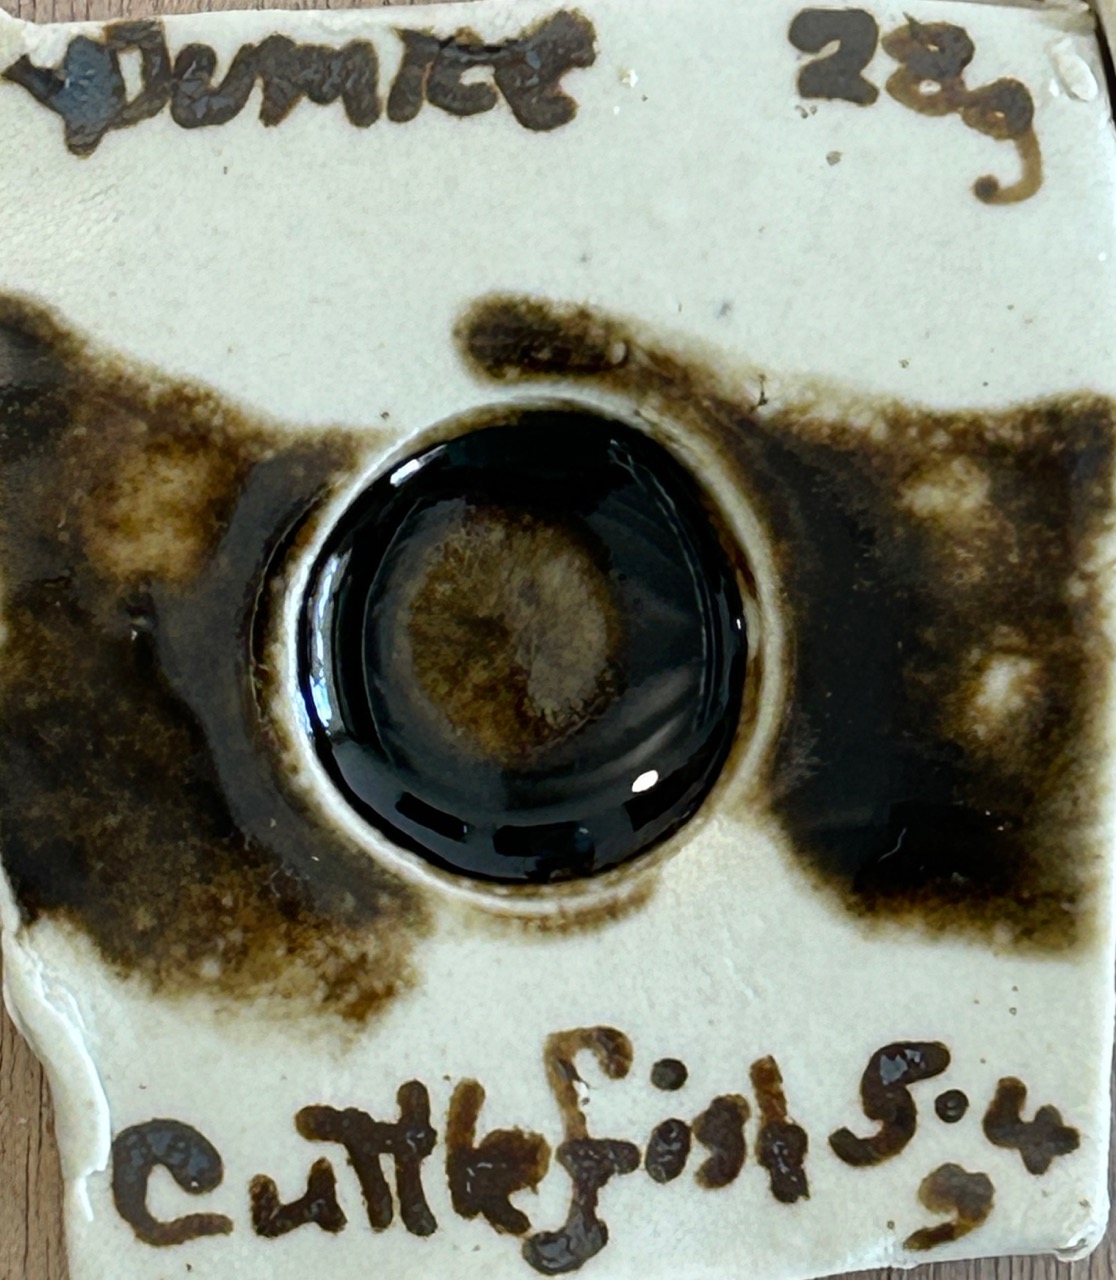
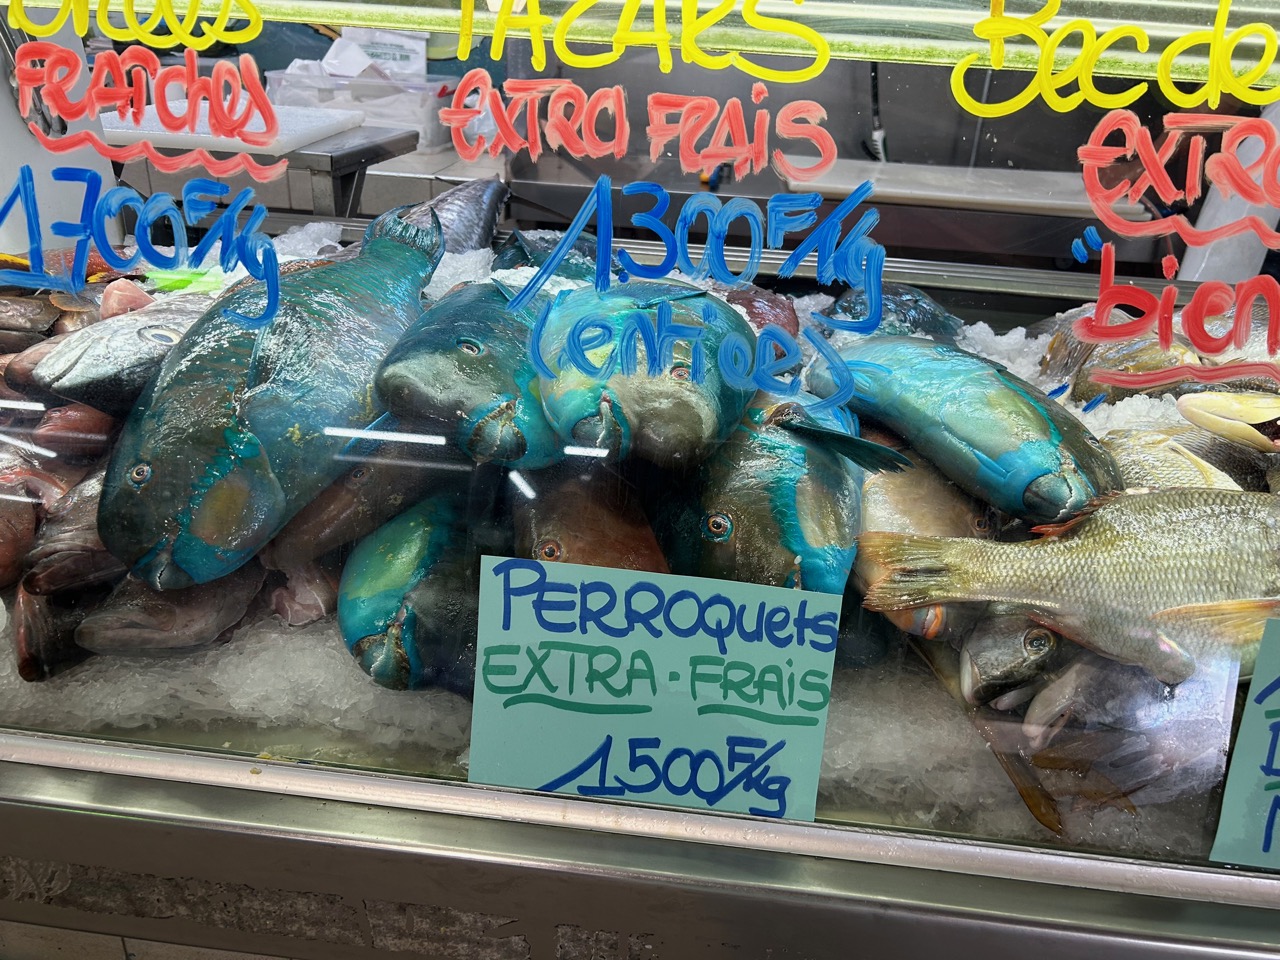
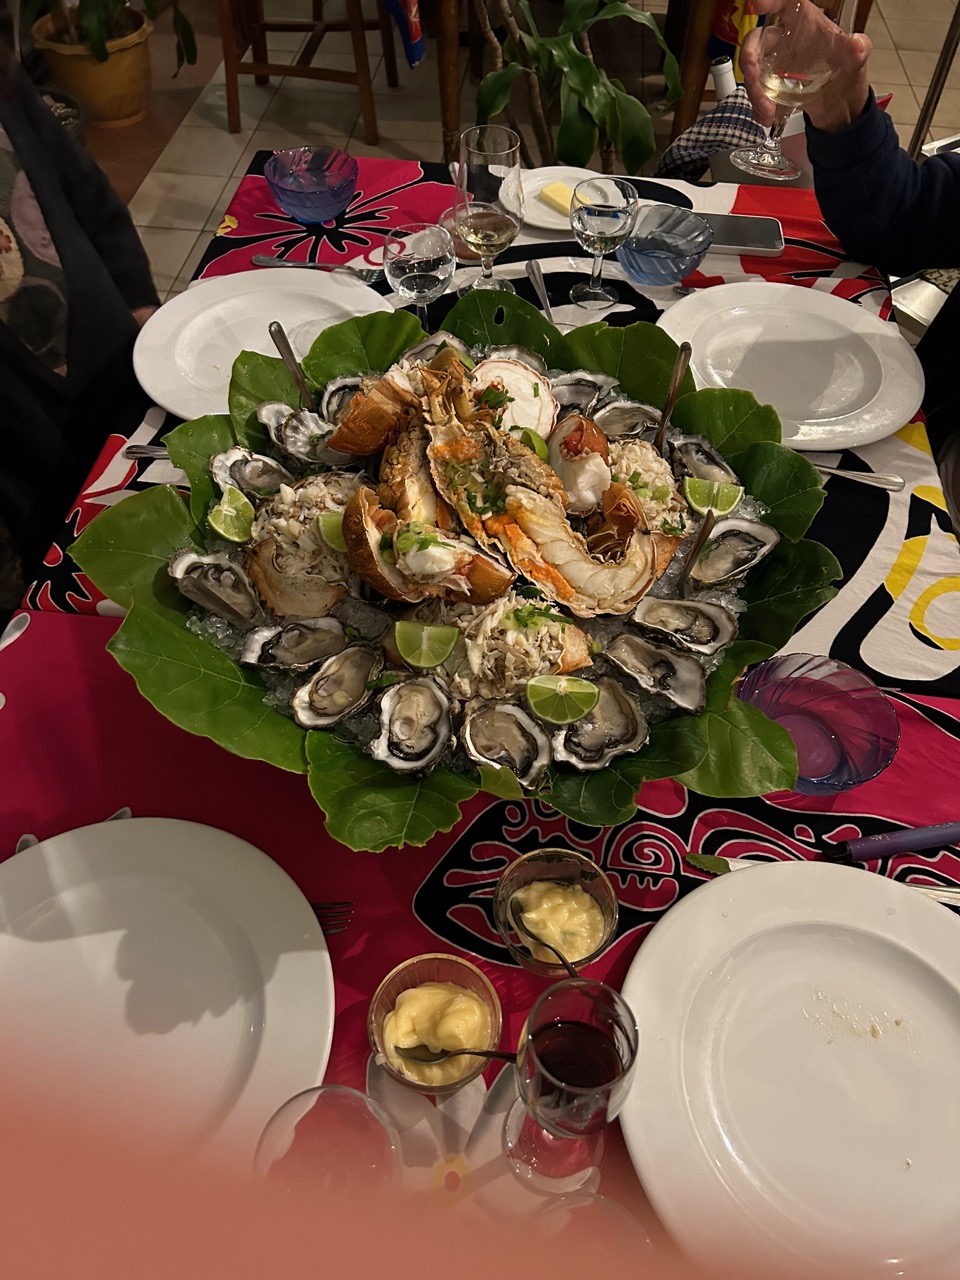
When we took a longer trip down the south coast to a place called Yaté, we found a lovely little beach with a gité, and had a very nice lunch of locally caught fresh fish, over-looking the beach. After lunch, we found both pumice and cuttle fish above the high-tide mark and collected enough to make a sealadon glaze test.
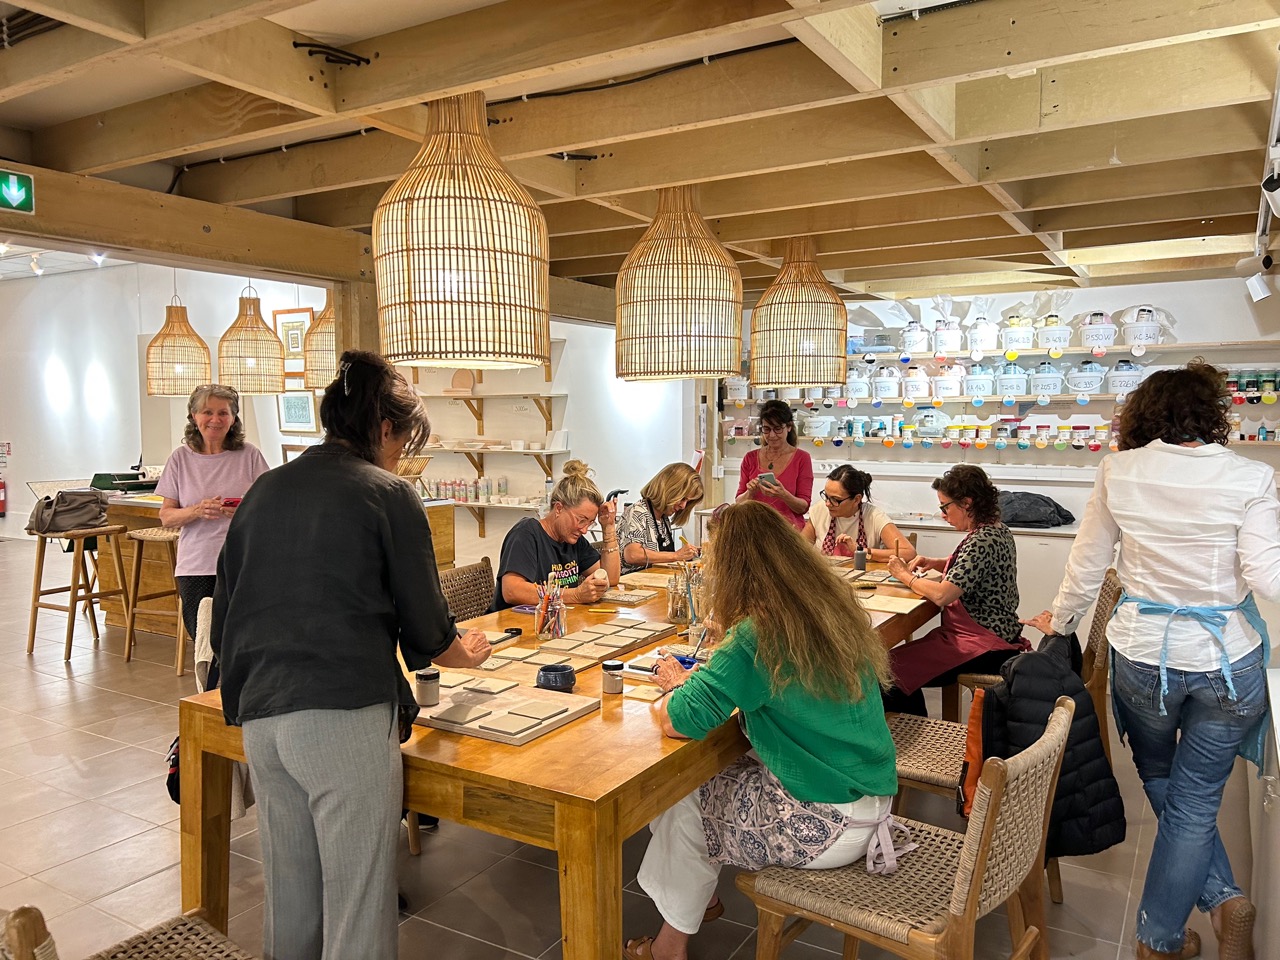
While we were there in Noumea, Janine taught a night class of surface decoration to some of the local potters at the local gallery and pottery studio.
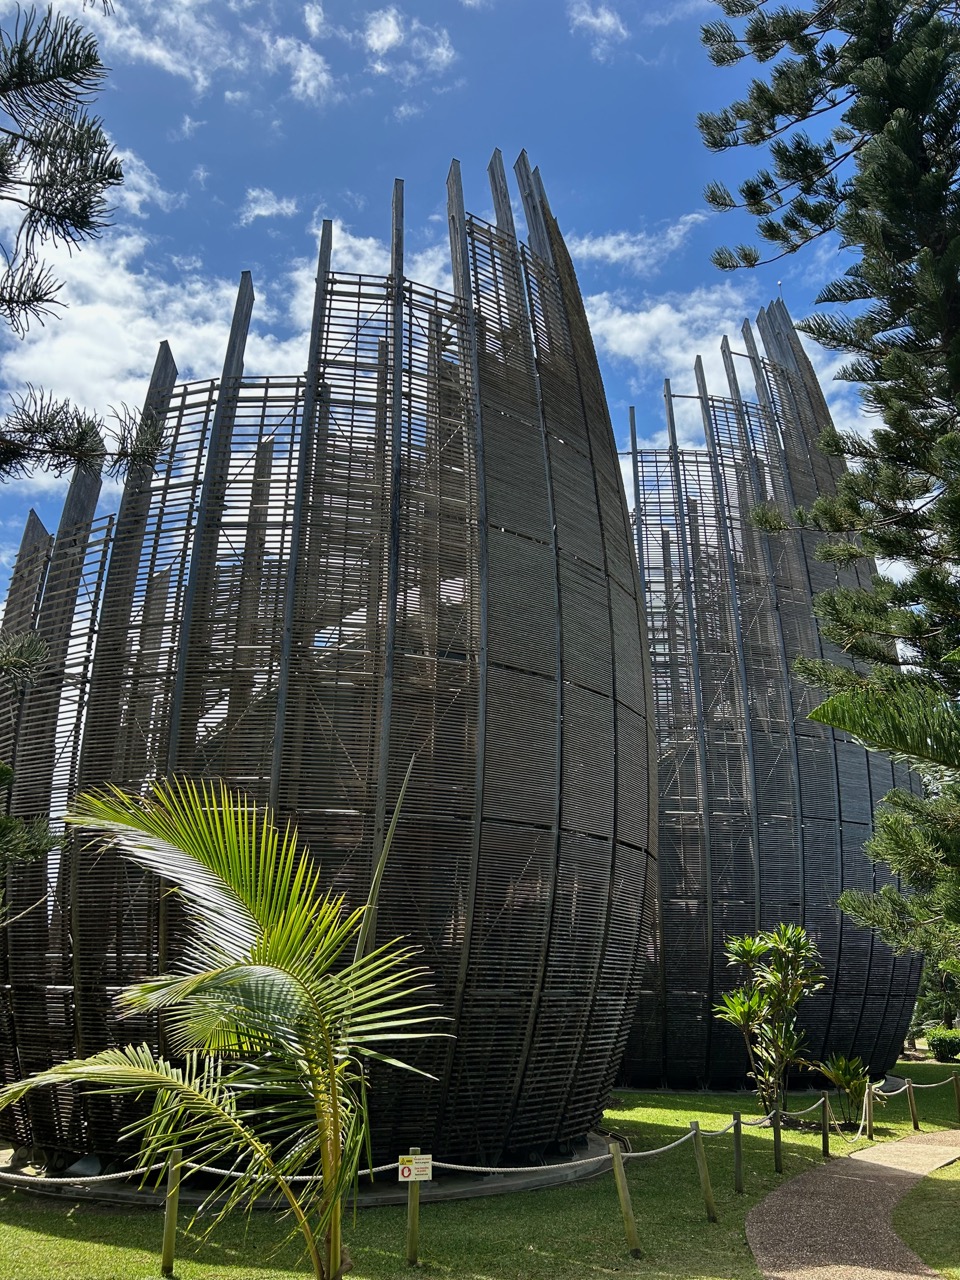
We had a great time and were really thrilled that we could achieve so many promising results in such a short time. It wasn’t all work, we got a little bit used to island time and managed to fit in a few cultural visits to the museums.
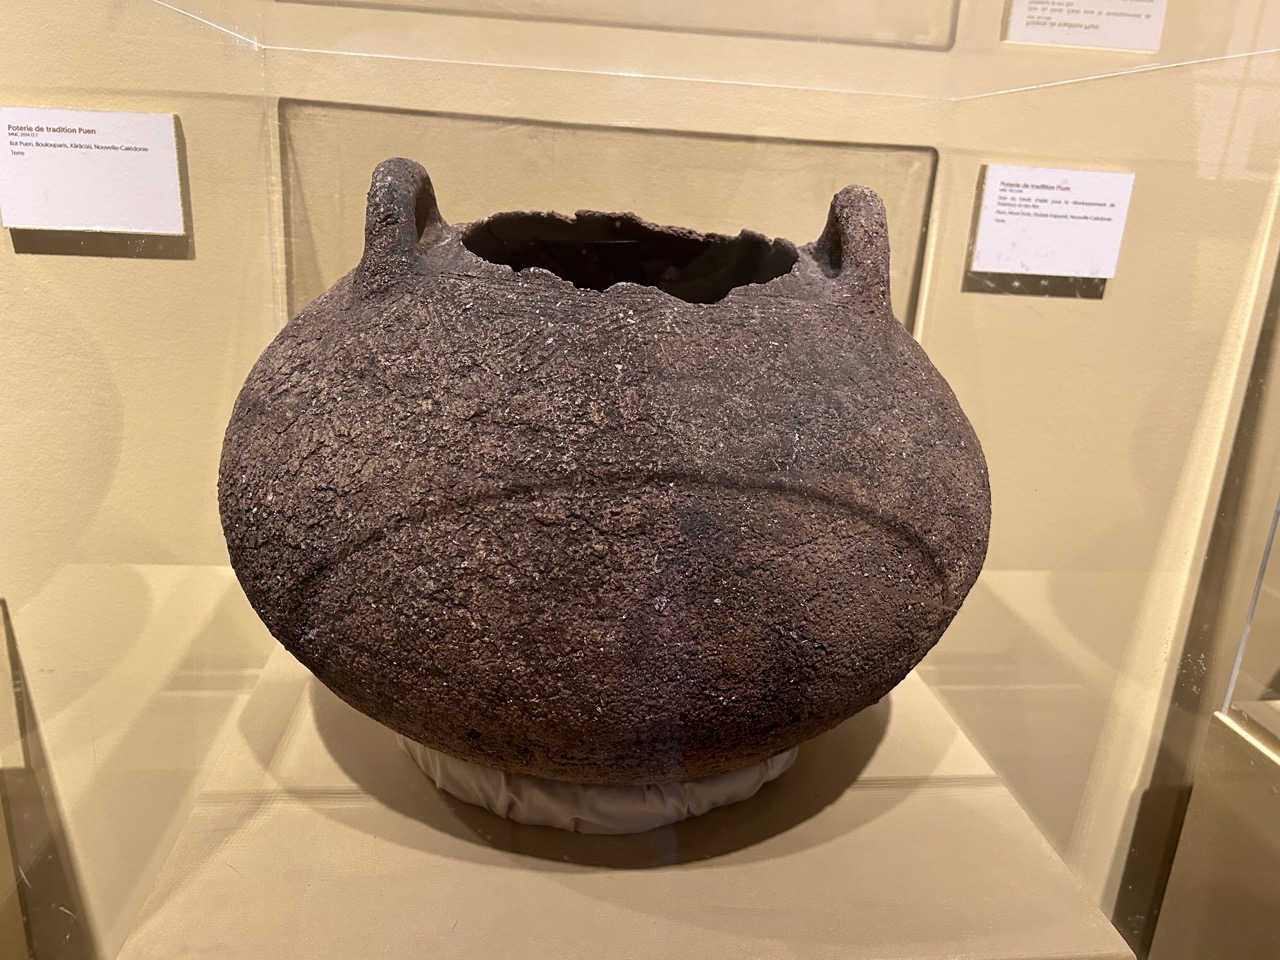
There were some lovely old pots that are no longer made by the local people.
Sea food was plentiful, but swimming in the ocean has recently been banned due to two shark fatalities in quick succession.
It was a great experience, but not everything went to plan.
What should have been a short 2 1/2 hr. flight back to Sydney, turned into an epic 2 day travesty of on-going delays, cancellations and more delays.
We were up a 5am to get to the international airport in Tontouta one hour north of Noumea in time to book in for the early morning return flight, but the aircraft was delayed, so we waited. We eventually got on board, but after half an hour in our seats there was an announcement that the plane would be delayed for technical reasons. After another hour the technical issue was fixed, and we were apparently ready for take-off. We taxied all the way to the end of the runway and turned around. I imagined that we would then thrust full bore down the runway and take off into the wind. But NO. We slowly taxied back to where we had started and parked there. We wait…. We are told that they would need to get a technician in to look at the plane. I suspect that they needed a new rubber band for the propeller, and the only one available would have to bought on the internet on ebay and posted out from China? Expect some longer delay.
We waited some more in our seats and there is an announcement but sitting directly behind us there are two rows of very noisey young French men who talk and jostle each other so vigorously, that we can’t hear what is being told to us, but we can tell that these young guys are not pleased with what has just been conveyed. They ark-up and cause even more of a stir. We are eventually told to disembark and wait in the departure lounge. More abuse from the Gauls, who are galled by the decision. I’m OK with it actually. I’d rather that the plane breaks down on the runway than half way to Australia.
We were apparently told to go back through emigration and customs again, our flight has been officially cancelled. We go back, get our exit stamp cancelled in our pass ports and wait in the departure area. We did that for another 12 hours, while the noisey French guys get drunk at the bar. Earlier on, the lady in charge of the airport comes out of her office and speaks to us, actually them, as she doesn’t repeat it in English. The young French hoons yell and scream at her, one even goes right up to her face and vents his rage right into her face, screaming at her. It’s so appalling. I would expect her to call security and have him detained, but she keeps her cool, although visibly distressed. She returns to her office and there is no more direct communication with us, thanks to the drunken dick-heads.
There are occasional announcements over the PA, that were sometimes contradictory. Always in French, however there was sometimes an English version that followed. But with the brain-dead Frenchmen on the flight who were now thoroughly drunk and always yelling and yar-hoo-ing very loudly every time there was any announcement. So much so, that we could never hear the detail of what was said.
Our sponsor and lovely friend, had seen on facebook that the flight was cancelled and called her friend who she knew was also on our flight. He searched us out, found us, and as a local French speaker, told us what he knew, but it wasn’t very much. We were stuck there in limbo. We just had to wait.
Eventually there came the news that another plane was due in from Brisbane later that night, and we would all be flown to Brisbane. The plane did eventually arrive, an hour late, and after cleaning we were all issued back through customs and emigration again and onboard. It was now 9 pm and we felt like zombies.
We were told that after arrival in Brisbane we should search out the AirCalin representative and she would find us a hotel and another flight onwards to Sydney the next day.
We eventually found her, along with the other 50 to 60 odd passengers who had wanted to go to Sydney. We get allocated a hotel room pretty quickly, but then there is a wait of another couple of hours in the queue of passengers to get our chance to speak to this singular person who is doing the onward bookings on her mobile. We are all sitting, or laying on the floor waiting for our turn. When it comes she tells us that we will have to pay for our own taxi fare into Brisbane to the hotel and back, but there is a mechanism to claim a refund. We get our flight number and taxi away. We finally get into the hotel bed at 2 am.
It’s been a very long and stressful 21 hours of frustration, not improved by our close proximity to drunken dick heads.
We sleep until 7am. Not long enough, but it’s bright daylight out there. We go down to breakfast and return to bed for a little lay down, and suddenly awake to find that we have slept for several hours and we have to rush to get back to the airport for our return flight at 2:30
We needn’t have rushed! The flight before us is cancelled by Qantas, a regular trick performed by them to block other airlines from using the gate. Our Qantas Flight is delayed for an hour. We finally get on board to some relief. But it doesn’t last long. There is a call out for a missing passenger. Will Mr SoandSo please make himself known to the staff. He doesn’t. Eventually the announcement is made that the flight is now delayed further, as the missing Mr. No-show, has a bag in the hold and it has to be found and unloaded.
Finally, another hour later, we take off. Now very late indeed. It will be getting dark soon after we arrive. We need to catch a train to Picton, but it is the weekend now and there is track work, so all the trains are cancelled on our line and we must take several busses to get to Campbelltown and onto the evening train to Moss vale. Then call a friend to come and pick us up at the station, as there are no busses on weekends to our part of the remote world.
Trivial First World problems I know. But they seem to be quite big when you are sleep deprived and stressed. Our beautiful friend Leonard has kept in touch by text and offers to come and collect us from Mascot. Such a lovely gesture, we are past our use-by dates and very grateful of the offer. Even with Leonard’s help, we still only get back home on dark. Len stays over and we thank him by opening a 2009 vintage bottle of superb quality red wine that we had hidden away at the back of the cellar. We share it over a quick pasta dinner. We are able to go to the pantry and get a bottle of our own home grown and bottled tomato passata sauce, an onion, garlic and olive oil, a great friend. We are home safe.
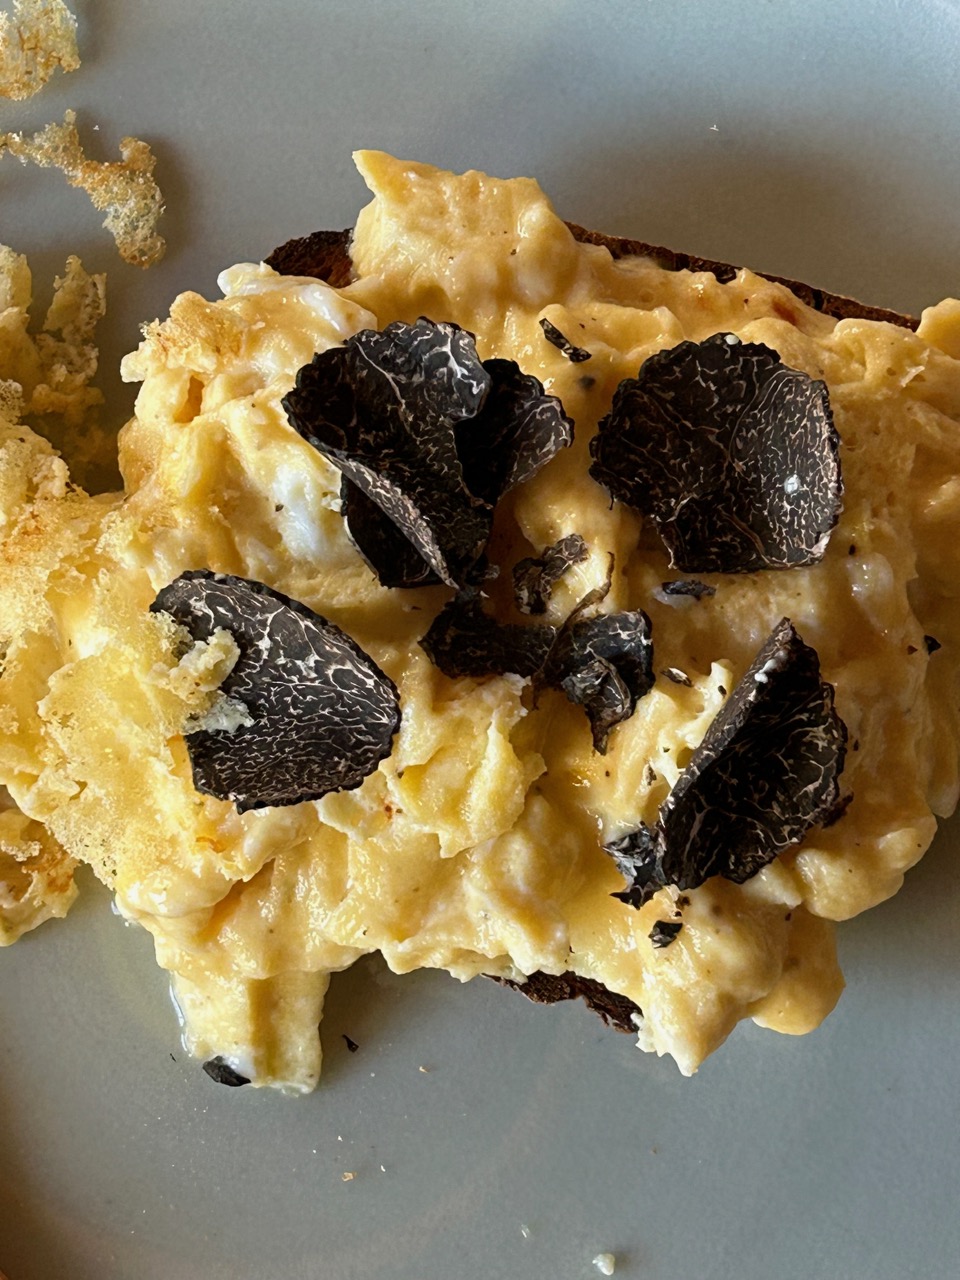
Today we finished off the last truffle of the season. It was romantic, mysterious, fragrant, exotic and delectable. It really elevates the humble scrambled egg into something special without taking anything away, just adding loads of romance and aroma. The warmth of the freshly cooked eggs releases so many aromatic oils and esters from the tiny black fungus. It fills my nostrils as I bend over doing the shaving. It’s a good thing that we only get to eat these delicious little morsels in the winter months, otherwise we may become somewhat blasé about it all. As it is, they are still a very special seasonal treat, If somewhat expensive. We can only afford to live this decadent gourmet lifestyle on our frugal budget because we have a son in the industry.
We are also probably making our last batch of marmalade too, as we have picked most of the Seville oranges now and eaten nearly all of the other citrus fruit. Although this is the beginning of spring, it is also the end of winter in another way, so it’s the end of the winter crops like citrus. We try and live with the seasons, so that’s it for the big citrus splurge in our diet.
It is one of the blessings of living in the Southern Highlands, that we have 4 distinct seasons. For instance, this morning we had another frost. This might possibly be our last really cold morning, but you never know with the climate emergency developing as it is, anything could happen.
I peel off the thin yellow layer of the skin without taking too much of the pith. I want the pith off! With my pile of curly peels, I end up with what can only be called ‘bitter and twisted’ .
Janine removes the pith and cuts up the juicy centre to add to the pan. The first pan is on for 30 mins. before we get the 2nd pan on the stove and the difference in colour is dramatic, it gets richer and deeper as it cooks. We try to use as little sugar as possible, while not making it too bitter and acidic, we also need enough sugar to make it ’set’. It takes about an hour of steady simmer to get it to thicken sufficiently. It’s worth all the effort, it tastes delicious, with just the right consistency. Seville oranges aren’t all that nice on their own. They are OK, but they really come into their own when it comes to making marmalade.
The stone fruit orchard is growing up well. This is its 3rd year and the trees are starting to look a lot more settled and established, with thicker trunks. I have been pruning them into open vase shapes where possible, but some of them have a very narrow vertical habit. They are all grafted onto ‘dwarf’ rootstocks, so they are keeping to a compact size. Most of them are now about 1.5 to 1.8 metres high, with an expected total height of 2.5 metres eventually. But I am well aware that plants can’t read their own labels! So there are bound to be variations.
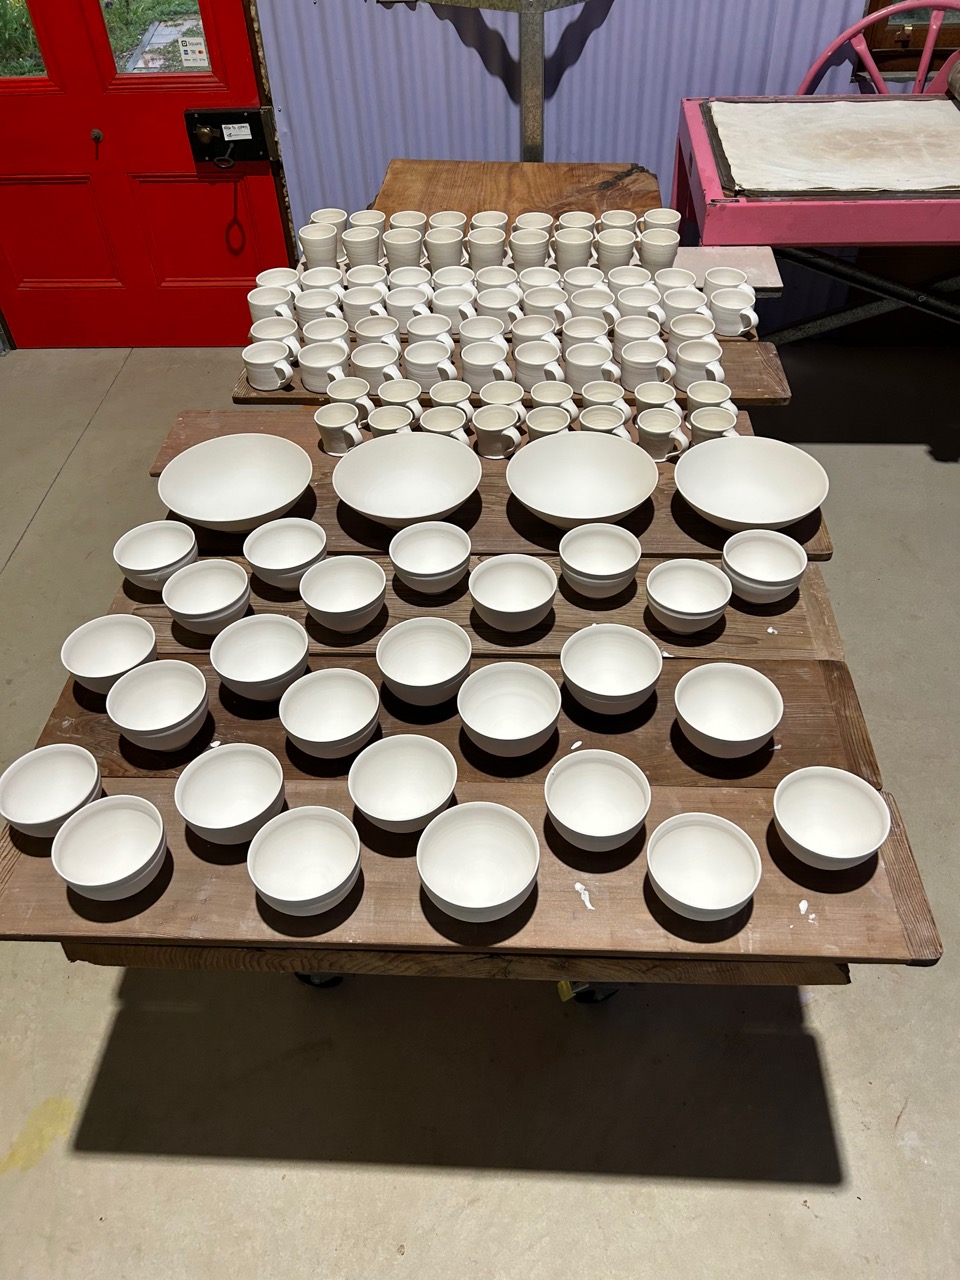
We had a really great 1st Weekend workshop in the new pottery. It worked very well. The new studio is a great space to teach in. The light is good and the layout works ergonomically for 10 people, 8 students and 2 teachers. After everyone left I got stuck in and started making more pots for myself. The Open Studios, Arts Trail is coming up at the end of the year, so I need to get back to work making pots for that. I started back at it by making 30 straight sided mugs.
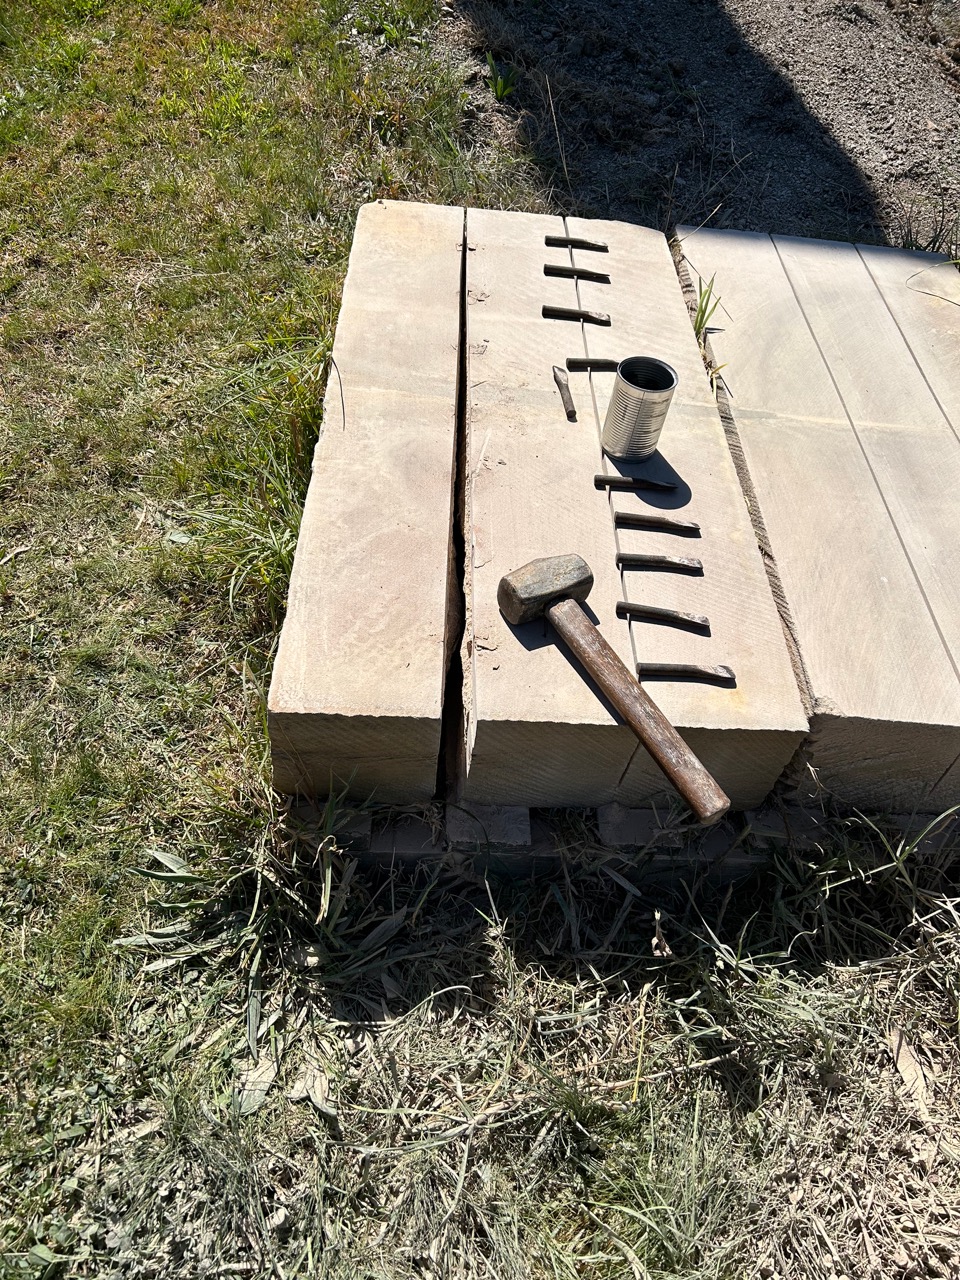
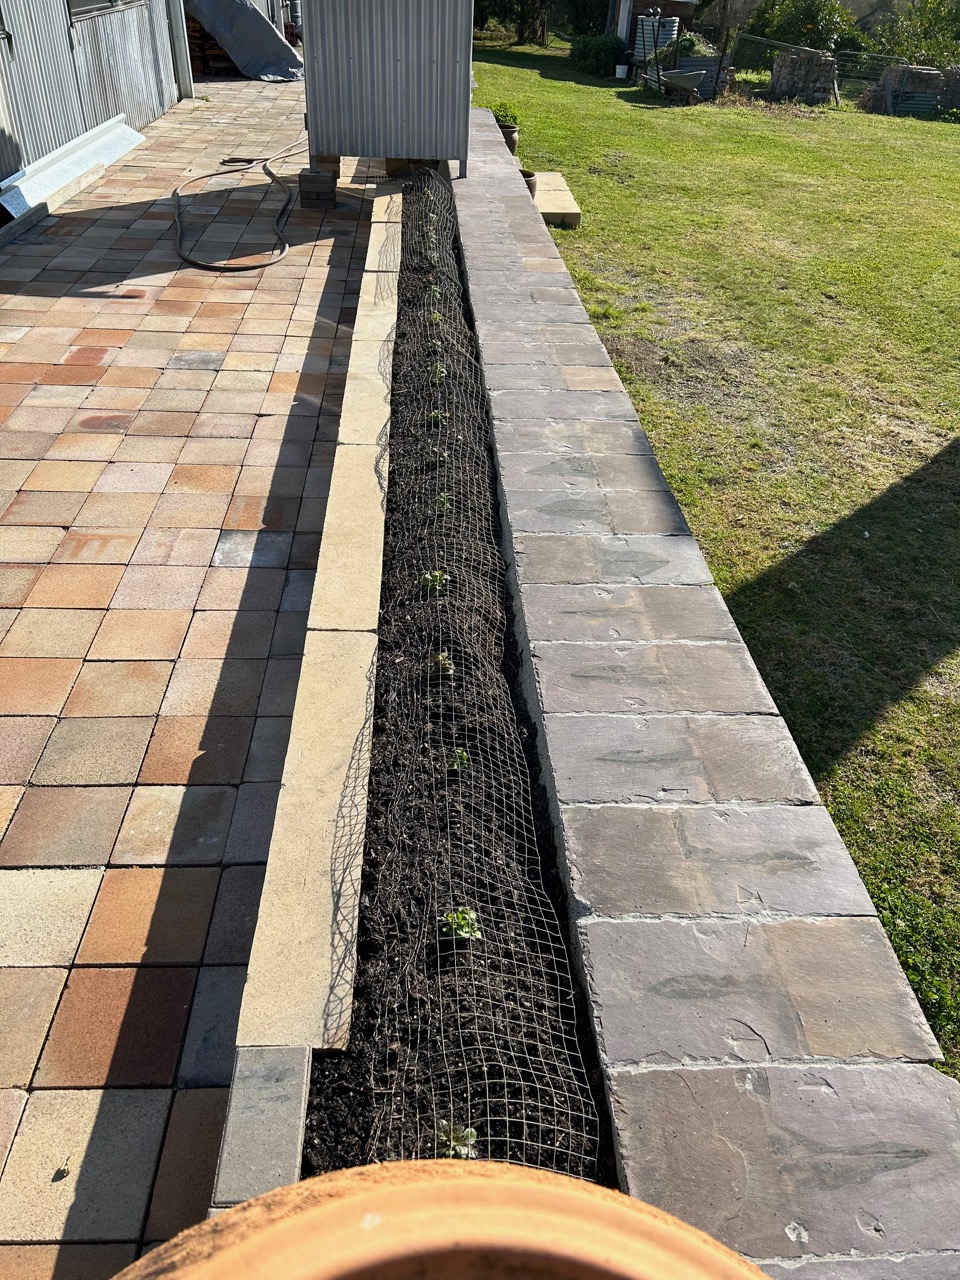
I spent a few days since the recent weekend workshop, in the afternoons, in my spare time, splitting and dressing sandstone blocks, to make some garden bed edging along the recently finished slate capping on the big sandstone retaining wall around the new pottery. It’s just another one of those jobs that has been in the offing and waiting for the ‘right’ time. I chose this ‘right’ time from what is left of my other time! Once the little wall was in place I shoveled in a load of top soil and planted seeds and a few seedlings to make the edging look a bit more settled and finished. I sprinkled in a packet of English Cottage Garden seed mix for good measure and 30 caper seeds, one every 600mm. Capers need an elevated, well drained, sun baked, dry, harsh environment to thrive. They take 2 years to establish, then persist for many more as long as they are cut back and pruned hard in the winter to stimulate good growth in the spring and summer, as flowers and fruit are produced on the new years growth. The elevated and exposed wall seemed like a pretty good place to try them out. I have read in a few books that they thrive on top of stone walls in the Med’s dry summers. I have no expectations, but if something comes of it, I’ll be pleased. If not, then I’ll chalk it down to another one of life’s enriching experiences. The stones look nice anyway, regardless of whether the plants grow or not!
After the soil was shoveled into the new beds, Edna the chicken, who had been helping me all day, came along and decided to help me some more by scratching a lot of it out again. I had to make some impromptu wire covers to protect the small seedlings from being excavated!
I’m happy with the result. 3 days work and $50 bucks goes a long way. I’m hoping that it will look greener in time for the November Arts Trail, Open Studios event.
For those of you who have expressed interest in doing a weekend workshop with us here in the new workshop, now is the time!
We will be hosting the 2nd weekend workshop here at the Loopline Pottery, on the 25th/26th of Nov.
The workshop is titled Throw and Scratch, and will be a hands-on throwing and decorating workshop concentrating on Sgraffito.
Janine, Warren and I will be offering the weekend workshop here over two days on the last weekend in November, 25th and 26th of Nov.
Over the weekend we will be demonstrating throwing and slab plate making techniques to be painted with coloured slip(s) then decorated using the ancient sgraffito technique of scratching back through the slip to reveal a contrasting clay body colour underneath.
Day 1. This workshop is aimed at potters of beginner/intermediate level of experience. We will be beginning with a design exercise on paper to develop a graphic motif for you to carve into your pots. Please bring your design ideas portfolio with you. We will be throwing cylinder forms, then flatware forms that are suitable for sgraffito decoration. We will also be rolling out a few slab dishes so that everyone has a chance of getting a few suitable forms stiff enough for slip decoration and sgraffito on the second day.
Day 2. We will be spending most of the 2nd day in decorating mode practicing our sgraffito decoration.
Wood fired and sgraffito’d work by Janine King
Slip and sgraffito piece by Janine King
Graphic sgraffito mugs by Warren Hogden
Overview.
Sgraffito can be elementally simple, just carving straight into the clay surface. This is a very effective technique for pots that are destined to be wood fired, where the carving enhances and enriches the natural wood fired surface. Other glazing options are to carve into the surface and then glaze the pot with a celadon, or other transparent glaze. Celadon and other similar glazes pool in the crevices and get darker and richer with the carving.
Alternatively, a contrasting slip can be painted on the clay body and then carved through to reveal a contrasting decoration. We will be using our homemade Balmoral white stoneware clay body and homemade black slip. If you have a special interest in using a particular underglaze colour scheme, you are welcome to bring your own underglaze colours.
You will need to bring some design ideas, a sketch book, a 5B or 6B soft drawing pencil, your throwing tools and something simple to share for a communal lunch. Tea and coffee will be provided.
At the conclusion of the workshop. I will be offering to bisque fire 2 of your best pieces for you.
Cost $ 250 for the two day workshop. ($125 per person per day.) We have 8 potters wheels, so the class will be limited to 8 people. First in, first served.
Please feel free to contact us for further information.
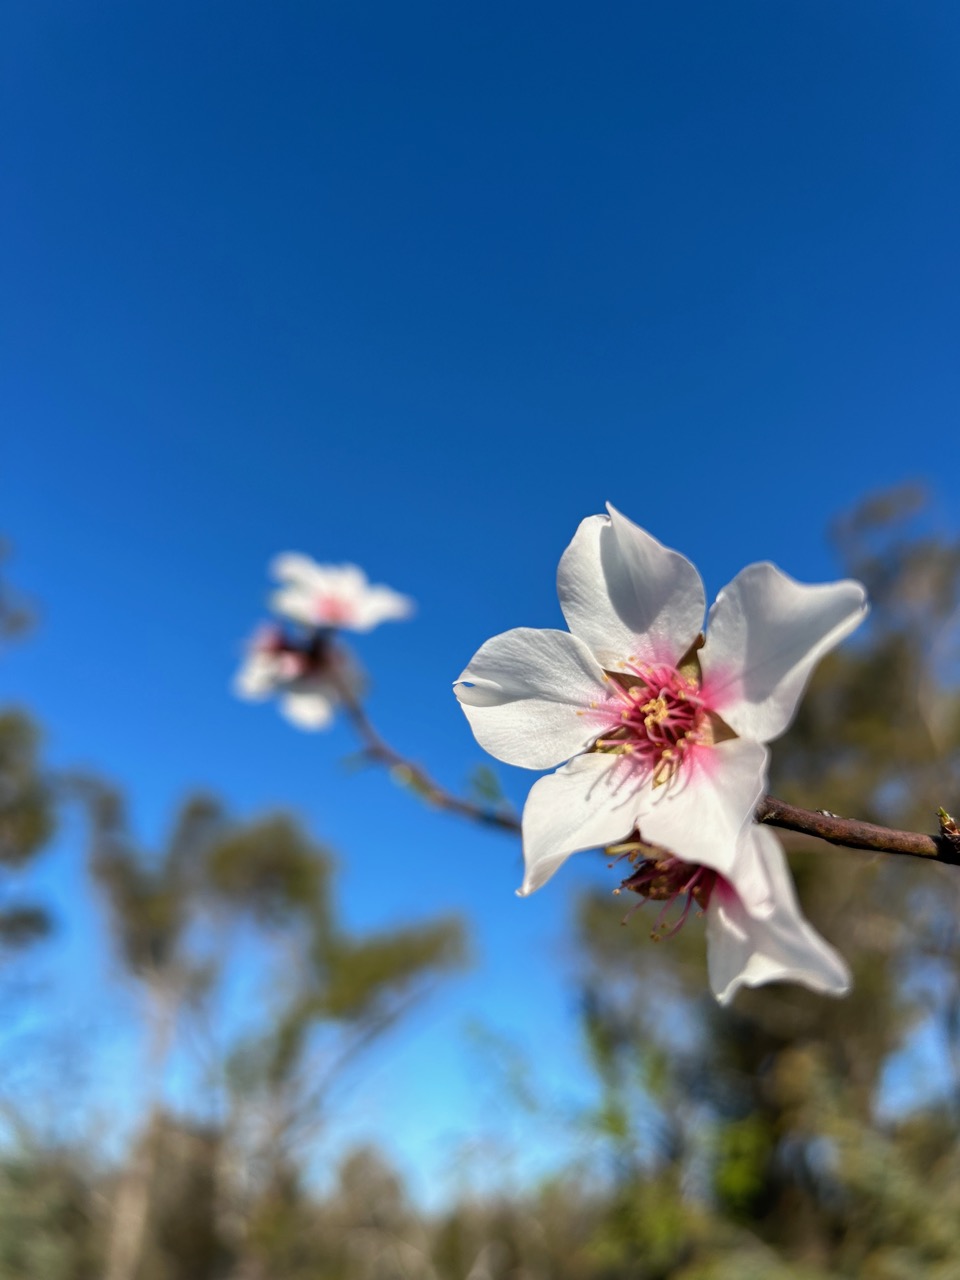
Right on schedule, it’s the beginning of September and therefore Spring, and sure enough the orchard trees are breaking into blossom.
Someone recently said, “spring has come, I’m so excited that I wet my plants”. I liked it, it made me smile, so I’ve stolen it.
Right on cue, everything has burst into bloom.
Blueberries
Nectarines
Peaches
Apricots
Almonds
Cherries
Even the hazelnuts are flowering. However, they are almost invisible, unless you get right up close, very close indeed.
Their tiny red flowers are only a couple of millimetres across. Obviously, being so small, they are not relying on bee pollination, like the showy stone fruits. Those floozies are big, brash, colourful and full of rewards for bees. Hazelnuts on the other hand are fully wind pollinated, so don’t need to expend any energy of showing off.
Hazelnuts
The weather is predicted to be hotter and dryer in the coming years as we slip back into El Nino again. We have had 3 wet years of La Nina, that ended the drought and the bush fires, but now we are heading back into the old hot and dry years again.
It hasn’t rained properly for months. The dams are already down to below half and we haven’t even started the summer. I can see that we will be relying on our tank water storage for the garden and everything else as well.
Fortunately, Janine and I invested heavily in large water tank storage over the past decade of our working life. It was that water that I used to save the house and whatever else I could during the fires.
Every roof that can catch water has a water tank attached. We have about 1/3 of a million litres of storage capacity in hand now. Since we have rebuilt the pottery and other sheds after the fire, they are all now connected back into the water storage system with independent, petrol powered, high pressure, fire fighting pumps. They haven’t been used in anger since the fire, so will need to be serviced and tested before the real heat sets in. I feel that we are in the best place possible to deal with the coming dry.
Now the garden needs some TLC and water. I’m so excited, I wet my plants.
We have just completed the first weekend workshop in the new pottery.
We invited the potters and ex-students who had helped us clean up the mess from the catastrophic fire that cleaned us out in November 2019. We only have 8 potters wheels in the new throwing room, so our numbers were limited to the first 8 potters to get in touch with us.
Regrettably, we had to turn a few lovely people away. However, there will be other workshops coming along in the pipeline. I’ll be announcing them here on the blog as they become reality and when we have set firm dates. This first workshop was a ‘freebie’ as our thank you to those volunteers.
To help us out on this first workshop we invited or friend and collaborator Warren Hogden to join us. We started off with throwing mugs, cups and beakers.
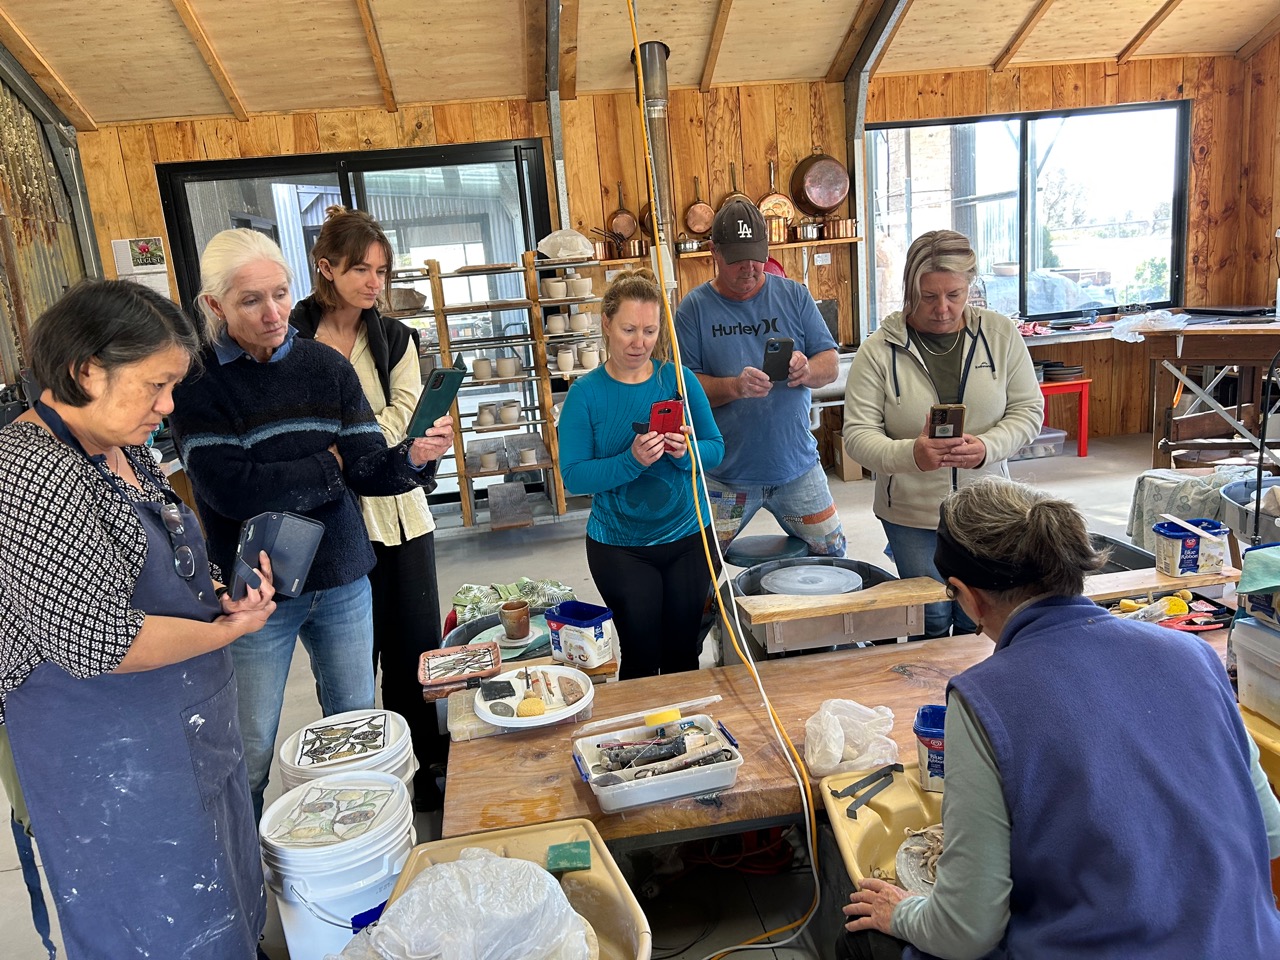
The pottery was buzzing, with every one being busy. Janine, Warren and I all gave a demo of our throwing techniques, so everyone got 3 different approaches demonstrated, so that they could choose something to concentrate on for the day.
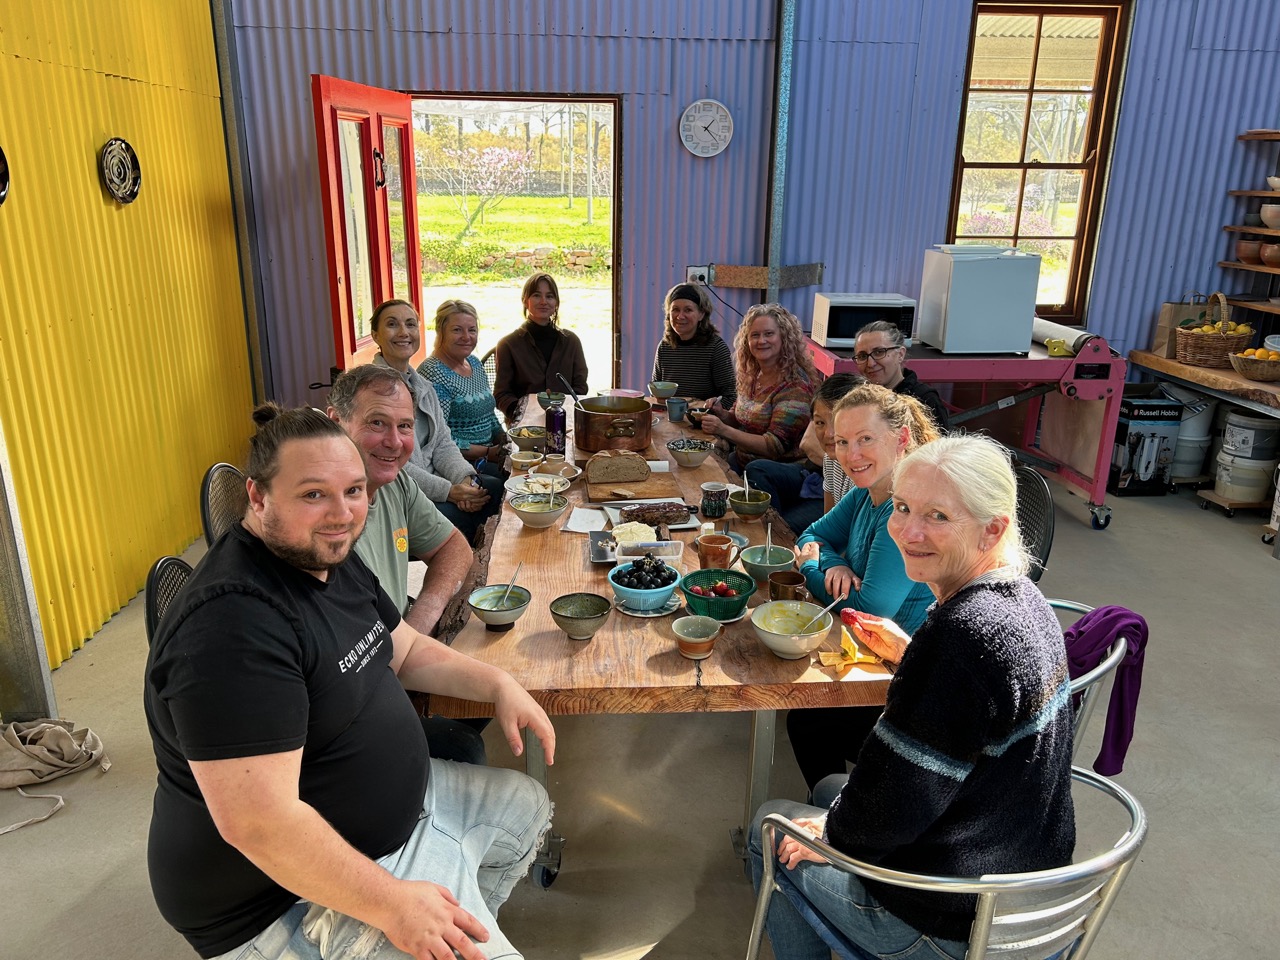
Each lunch time, we asked our son Geordie, who is a ‘hatted’ chef, to come in and cook lunch for us – a very special treat.
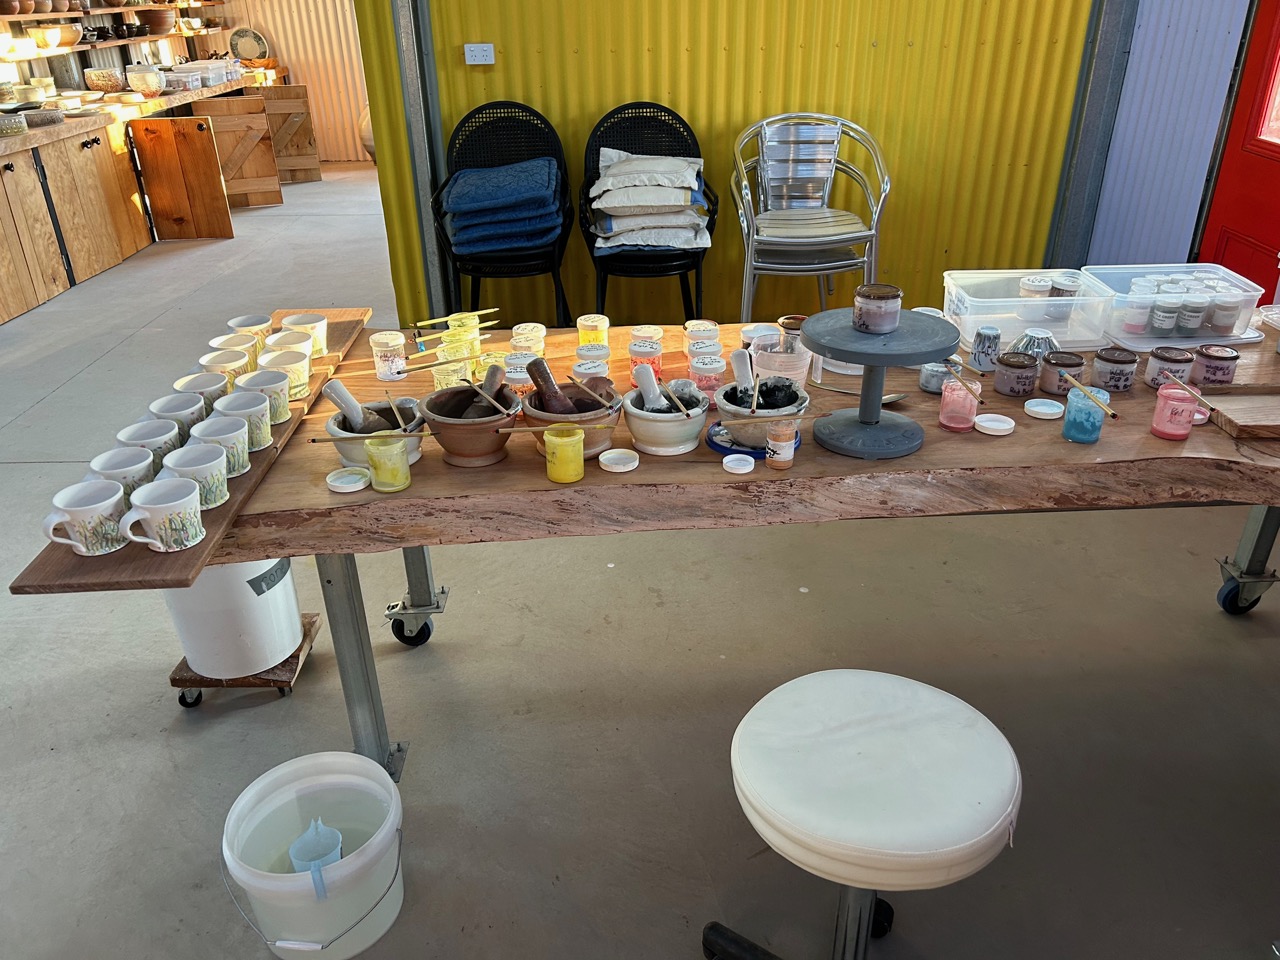
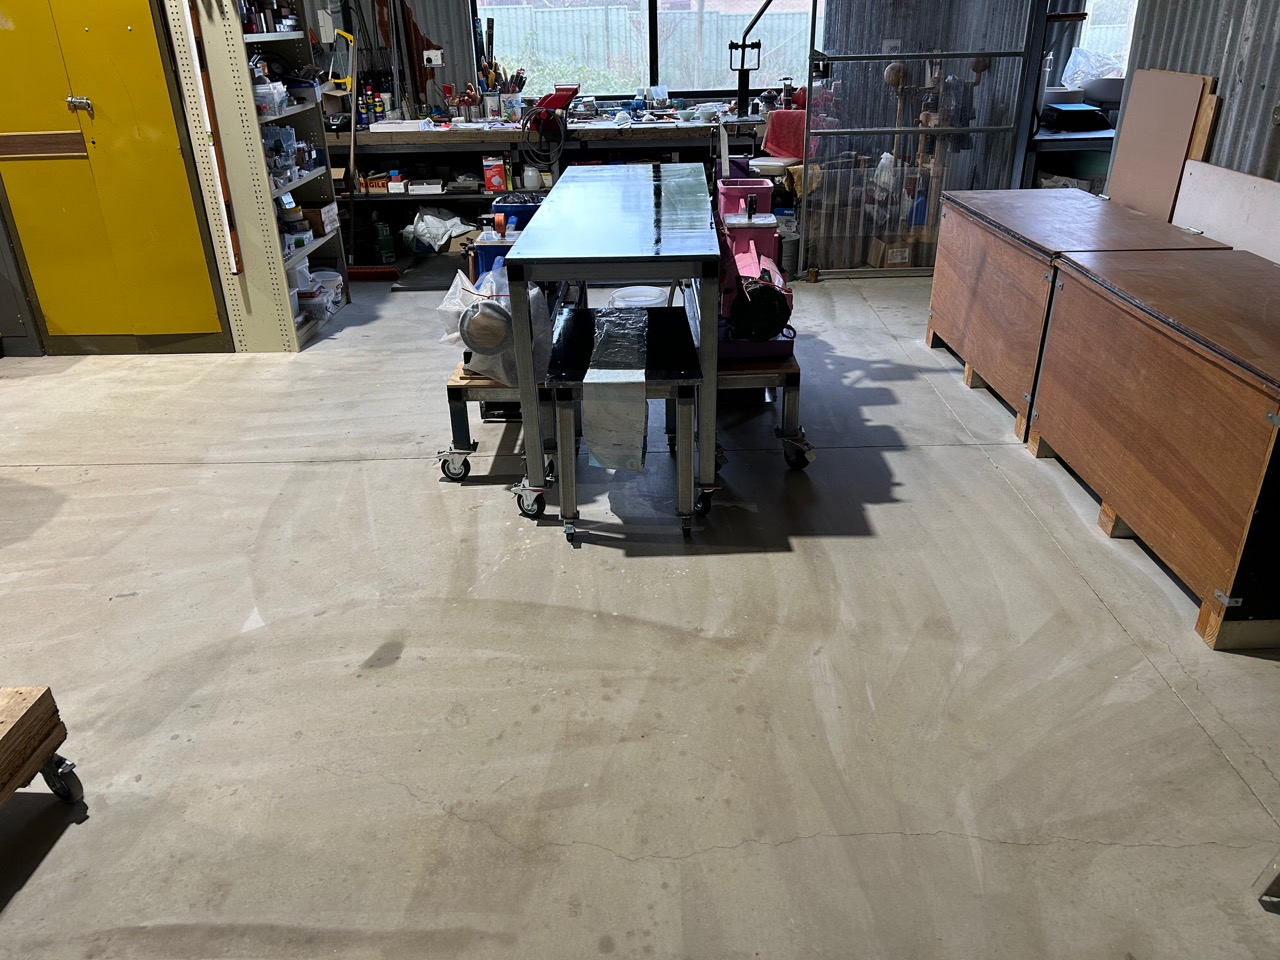
We set up the hand-building room as our lunch room, I made a table out of a very large slab of wood from one of our trees that was killed by the fire. And rather than waste it. I couldn’t bear to see it bull-dozed, chopped up and burnt, so I hired a portable sawmill for 3 days and we milled the trees into all the planks and slabs that we needed to build the new pottery.
This solid table is one big slab of timber that can seat 12. We use this room for functions, dinner parties and openings. Our house is small, so if we need to sit more than 6 guests, we move out into the pottery where we can seat 12 to 14 at a pinch. It’s a large bright, well lit room with loads of practical, flexible space, so it has become an extension to our house in some ways.
On the 2nd day we all demonstrated turning our pots, then making and applying handles. We kept everyone busy all day for both days.
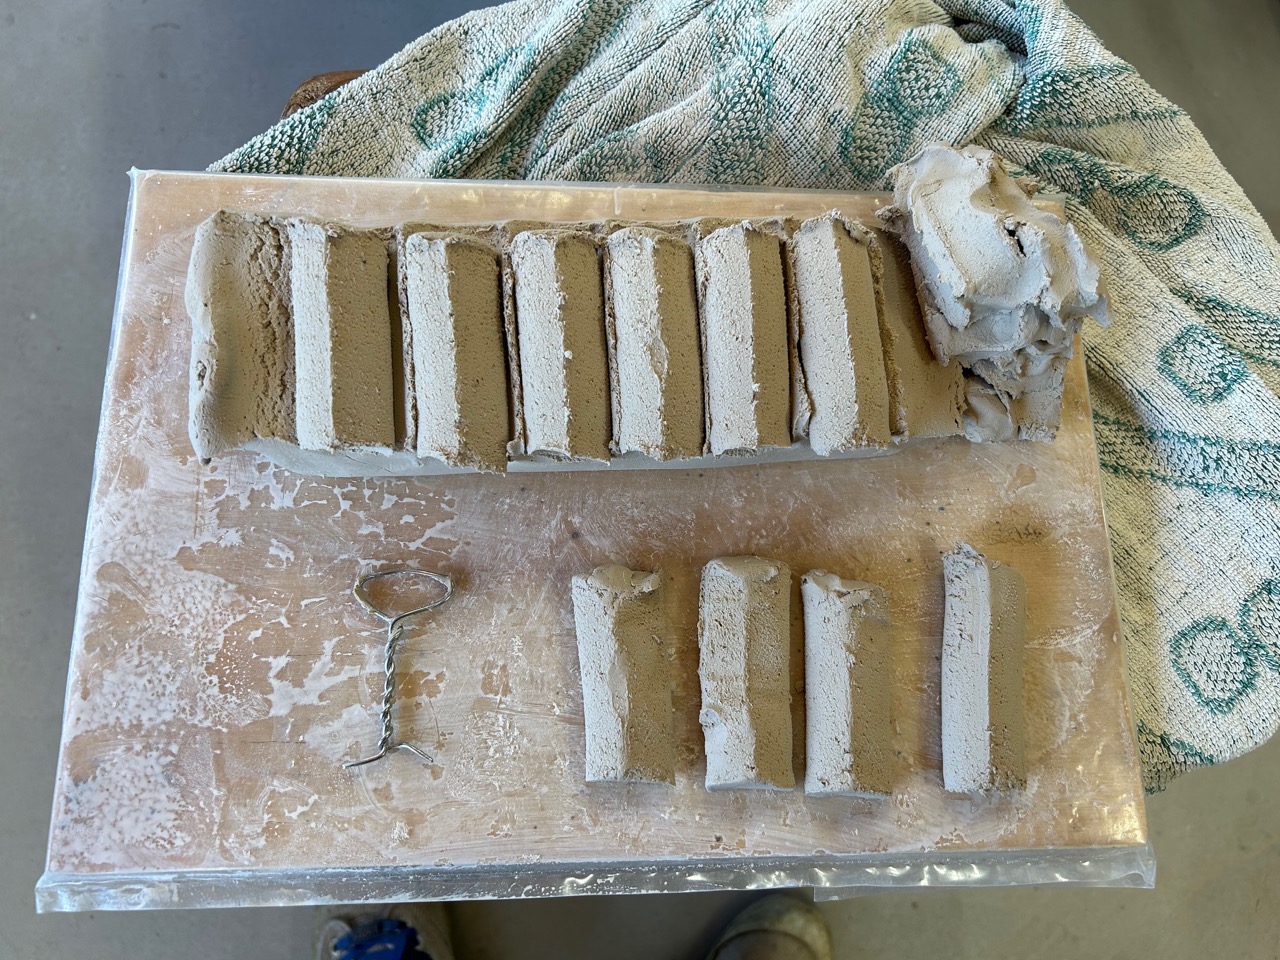
I demonstrated pulling handles from simple hand rolled coils, as well as my somewhat crude, but easily made, twisted-wire handle ‘blank’ extruder.
These ‘blank’ billets of proto-handles are applied to the pot and then ‘pulled’ in the traditional way to make an elegant, smooth, curved handle.
Janine demonstrated turning the base of her pots on a leather-hard clay ‘chuck’.
I couldn’t help by notice how things have changed over the years. These days everything is videoed on mobile phone for later reference.
Warren demonstrated the use of a ‘caulking’ gun to extrude the basic handle shape. He also demo’d the use of a plaster mould to press mound handles.
Everyone appeared to enjoy them selves. It was certainly an intensively productive 2 days.
We farewelled everyone with a very tiny taste of Geordie’s latest venture as the head distiller at ‘Renegade gin’ in Mittagong.
We had a bottle of his Australian Native Plum Gin. I served it in very petite antique Japanese porcelain sake cups. I didn’t want any one to get booked on the way home, so just 1 or 2 mls. It’s really delicious stuff. So intense, fruity and concentrated, just superb!
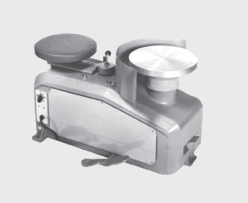
I recently bought an old Shimpo RK1 potters wheel from a friend.
It probably dates to the 70’s. These wheels were manufactured from 1958, probably up to the late 70’s or very early 80’s?
The smaller RK2 wheel was released in 1967 and became the standard wheel from that time on. The RK2 was smaller, lighter, more portable and cheaper than the RK1.
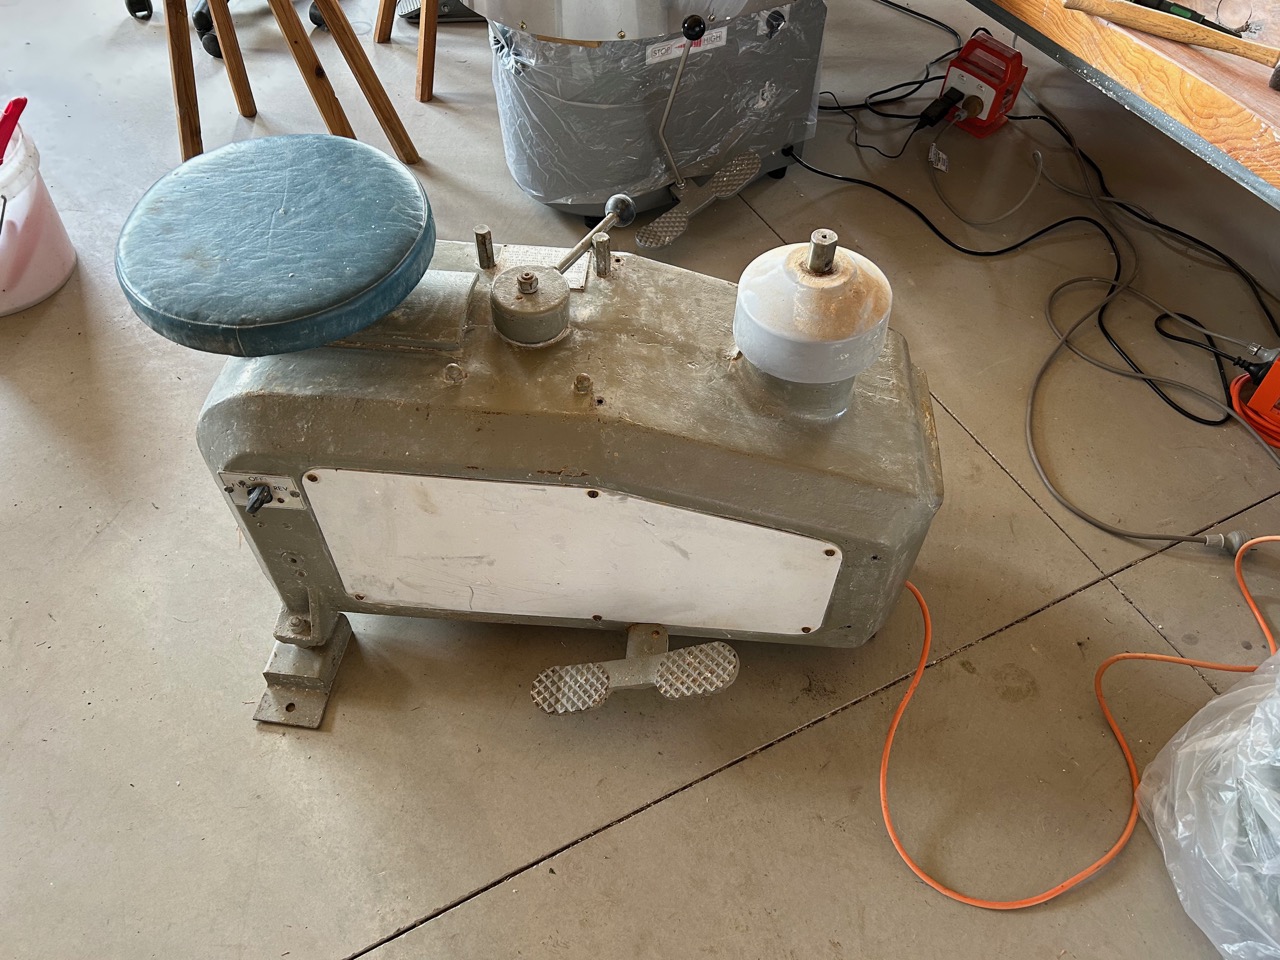
These larger and very much heavier RK1 wheels were built on a cast iron shell, making it quite stable, but very, very heavy. The RK1 has a kind of gearbox to increase torque when making very large pots, and the torque is finely adjustable using a handle on top of the casing to make the subtle changes needed, without stopping the wheel.
It’s a bit of a dinosaur. In fact I have only ever seen 3 of them in Australia. Les Blakeborough had one in the Sturt pottery workshop in Mittagong when I worked there in 1972. He had a special extra-large copper tray custom made for it. I’ve never seen anything else like it. My teacher Shigao Shiga had one in his studio when I was his apprentice in 1973, and Peter Rushforth had one in his later studio in Shipley. This one could possibly have been Shiga’s old one passed on to him, as they were close friends.
I missed out on getting my hands on all of these wheels when they changed hands, so I was pleased to see this one come up for sale recently.
I don’t think that it has had too much use, as it’s in good mechanical condition for such an old wheel. They were originally supplied with only a small splash guard in front of the wheel head, as were the original RK2 wheels in the 60’s. It was another 10 years before they started producing wheels with plastic trays – probably for the hobby market? All Japanese pottery studios in the early years had the wheel set down under the floor, and the potter sat cross-legged on the floor and bent forward to lean over the wheel head at floor level. Hence the arm bolted onto the foot pedal to reach up to floor level to control the speed. I had to learn to sit cross-legged just like this when I was an apprentice. As a 21 year old, it was a bit of a shock, and my legs went numb quite quickly. It took me months to get used to it. As I wasn’t accustomed to sitting cross legged on any floor, at any time. If I dangled my legs down into the wheel enclosure, they would get saturated with throwing water/slip. So I quickly learnt to throw with a minimal amount of water/slip. To this day, I still throw with almost no water.
The splash guard and it’s mountings were missing from this wheel when I bought it. This type of potters wheel is meant to be mounted in an enclosure to catch all the slip spray and turnings. I had two such enclosures in the old pottery, one for each of the smaller, more compact RK2 shimpo models that I owned back then. RK2 and RK2 super.
The good side was that you could work all week and the turnings would just pile up around the machine. Friday afternoon was the time to clean out the enclosure. The bad side was that you couldn’t change clays very easily. I use a lot of different clays/porcelain stone pastes these days and need to keep all the turnings and slip separate. So a full tray suits me better. Unfortunately, the plastic ones usually supplied with modern shimpo wheels a tediously small and so cramped that I can’t fit my fingers down into the gap to clean out the turnings. So I am forced to have to dismantle the tray to remove the turnings every few minutes, it’s so tedious.
The marketing picture of the original RK1 from their website shows the wheel with its wheel head splash guard.
I have built new custom built trays for half of my Shimpos so far. It’s just one of those jobs that is on-going and a work in progress. I’ll get them all done in due course.
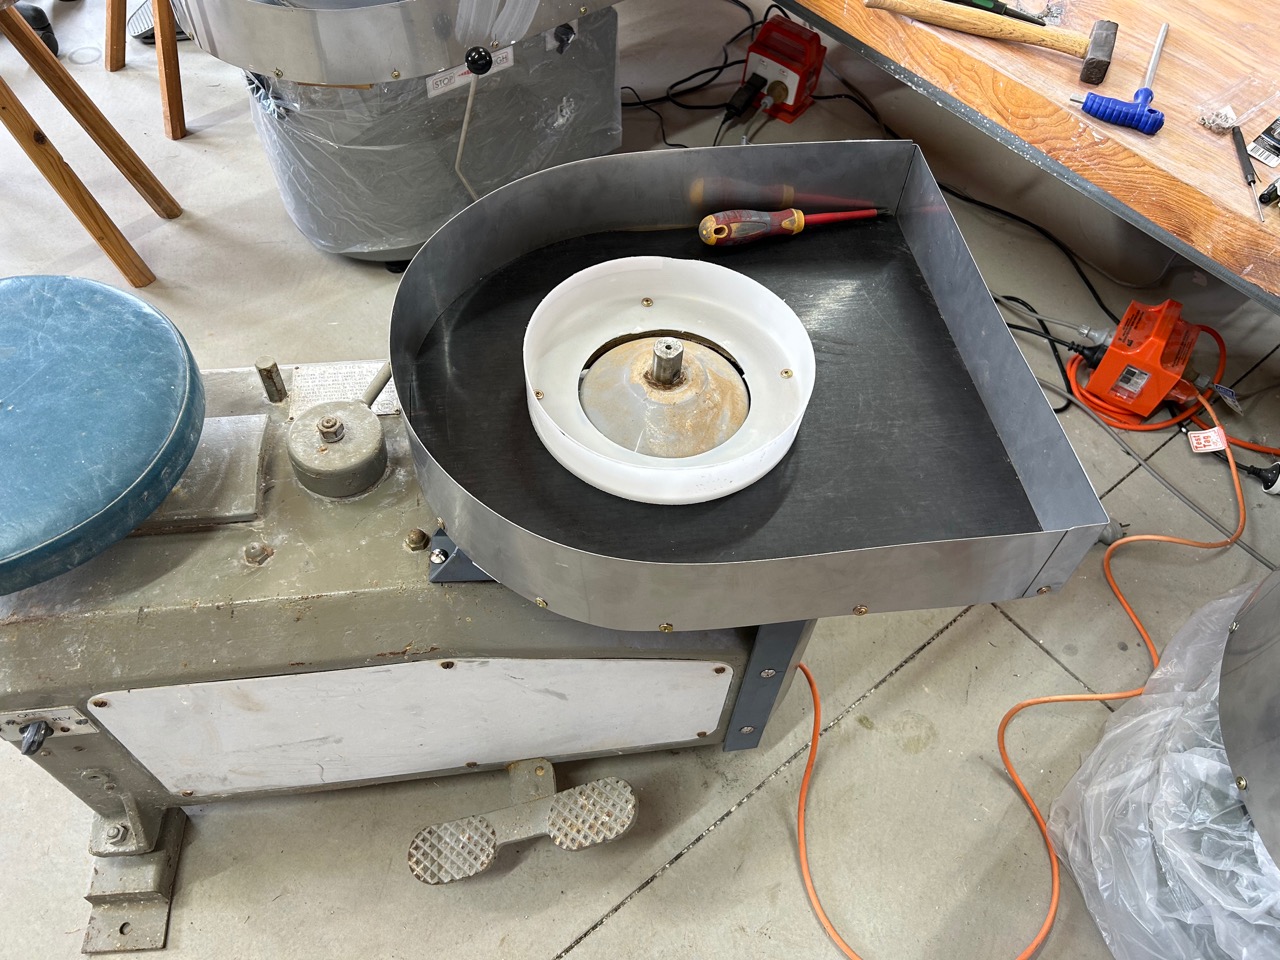
There was no easy way to fit a tray onto this old RK1 wheel with its sloping frame casting. So I had to weld up a support frame and drill and tap threaded holes into the cast iron casting to fix the new tray securely in place.
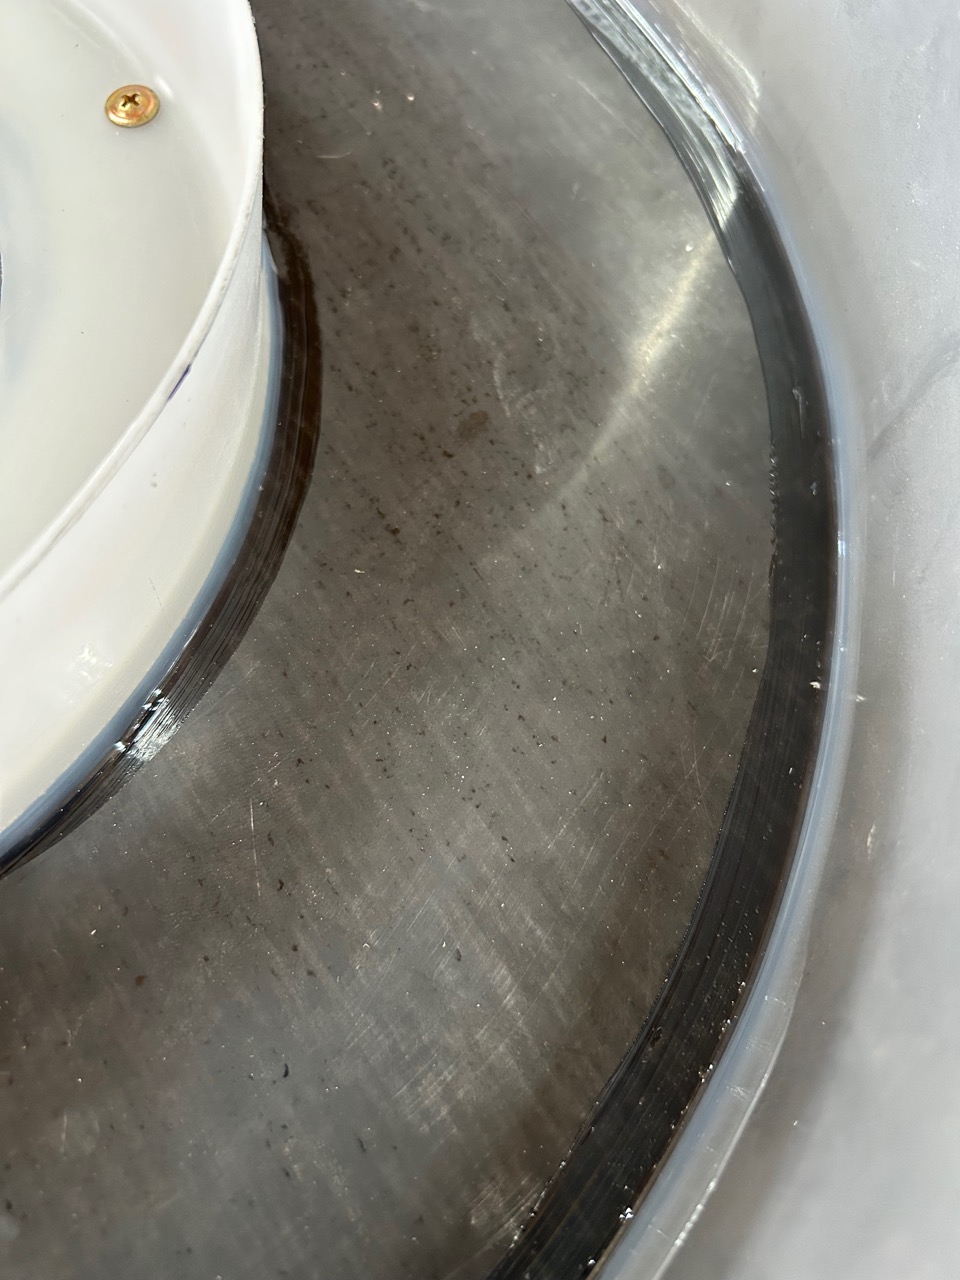
I siliconed all around the edges of the tray where the waterproof ply meets the stainless steel wall, and then glued on a strip of clear poly tubing all around the top of the steel edge to make it more comfortable for the user. I also used the base of a plastic bucket to make a protective guard around the shaft to keep water and turnings away from the bearings I screwed this down and siliconed it to the base as well. All good.
I made a wooden tool shelf for the end of the tray with an arc cut out to match the wheel head to allow for big batts when throwing platters.
The finished product in place and working. We now have 8 wheels up and running in time, ready for the first weekend throwing workshop, this coming weekend. This workshop was organised by invitation only, for those potters who came and helped us clean up after the fire. This one is free, as my thank you gift to those helpers. The next workshops will be advertised here to allow anyone who wants to, to apply. I’ve asked around and made a few enquiries. I’ve decided to charge a fee that is at the lower end of the current market price. I’ll be charging $125 per person per day.
I see these proposed intermittent workshops, spread out throughout the year, as being my part-time job in retirement.
I’ll be teaching other workshops as well as throwing in the coming year;
There will be throwing for wood firing, using my specially developed clay bodies.
Weekend wood kiln firings. Spread over two weekends, first weekend for packing and firing, then the following Sunday to unpack and debrief on the work.
One day geological field trip to collect samples followed by rock glaze testing and firing
Glaze theory and testing. + plus other topics as they appear appropriate or are requested.
Janine and I have acquired a lot of experience and skills over the years. We were trained in the 70’s when everything was done the old fashioned way and skills and theory were taught in greater detail than is done today. We are keen to pass on some of these skills before we expire.
The modern pottery workshop access classes, or potters wheel experience classes, don’t tend to teach much, if any, theory these days. We hope to fill part of that need.
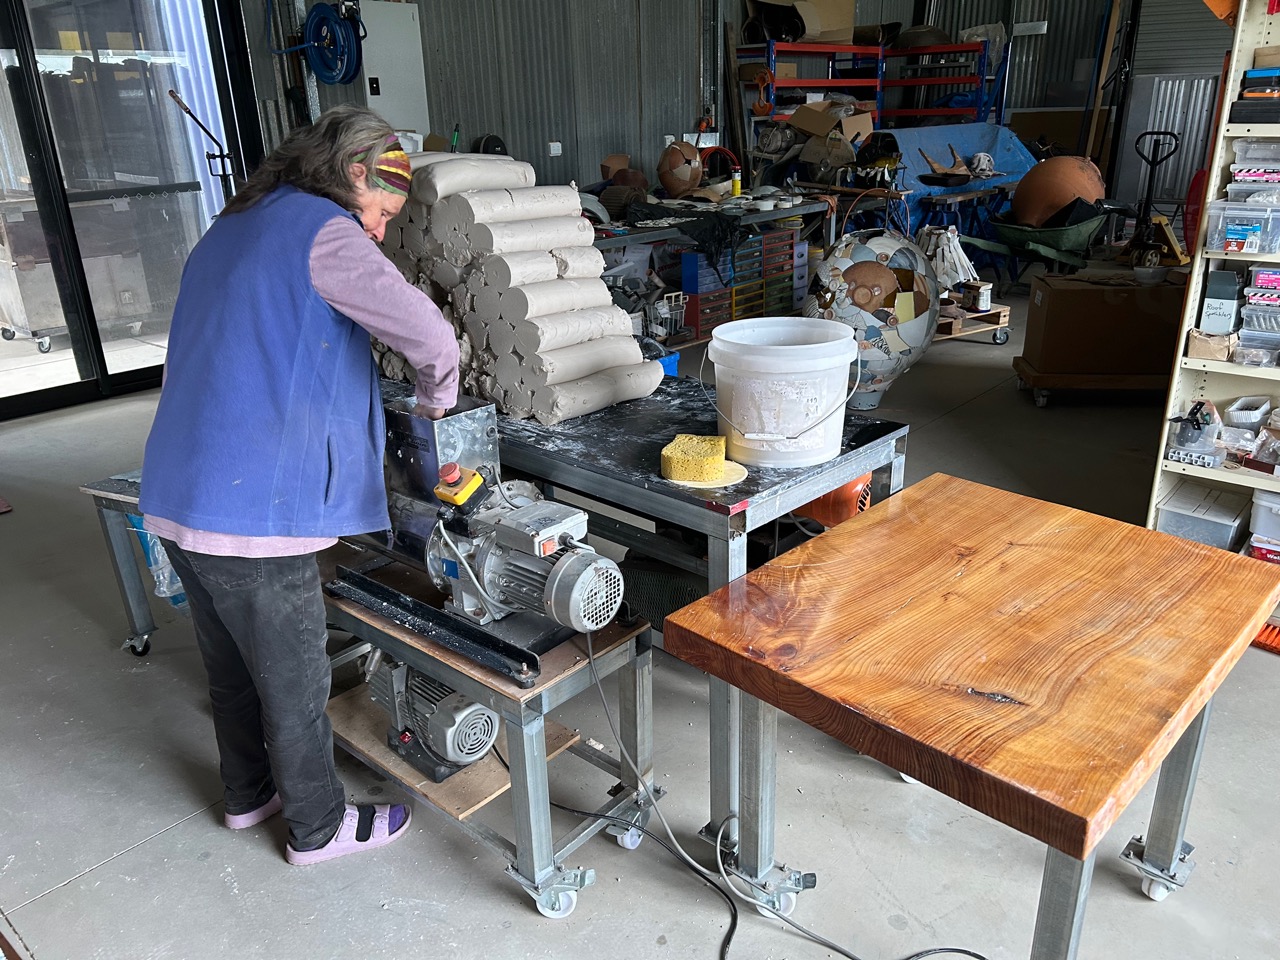
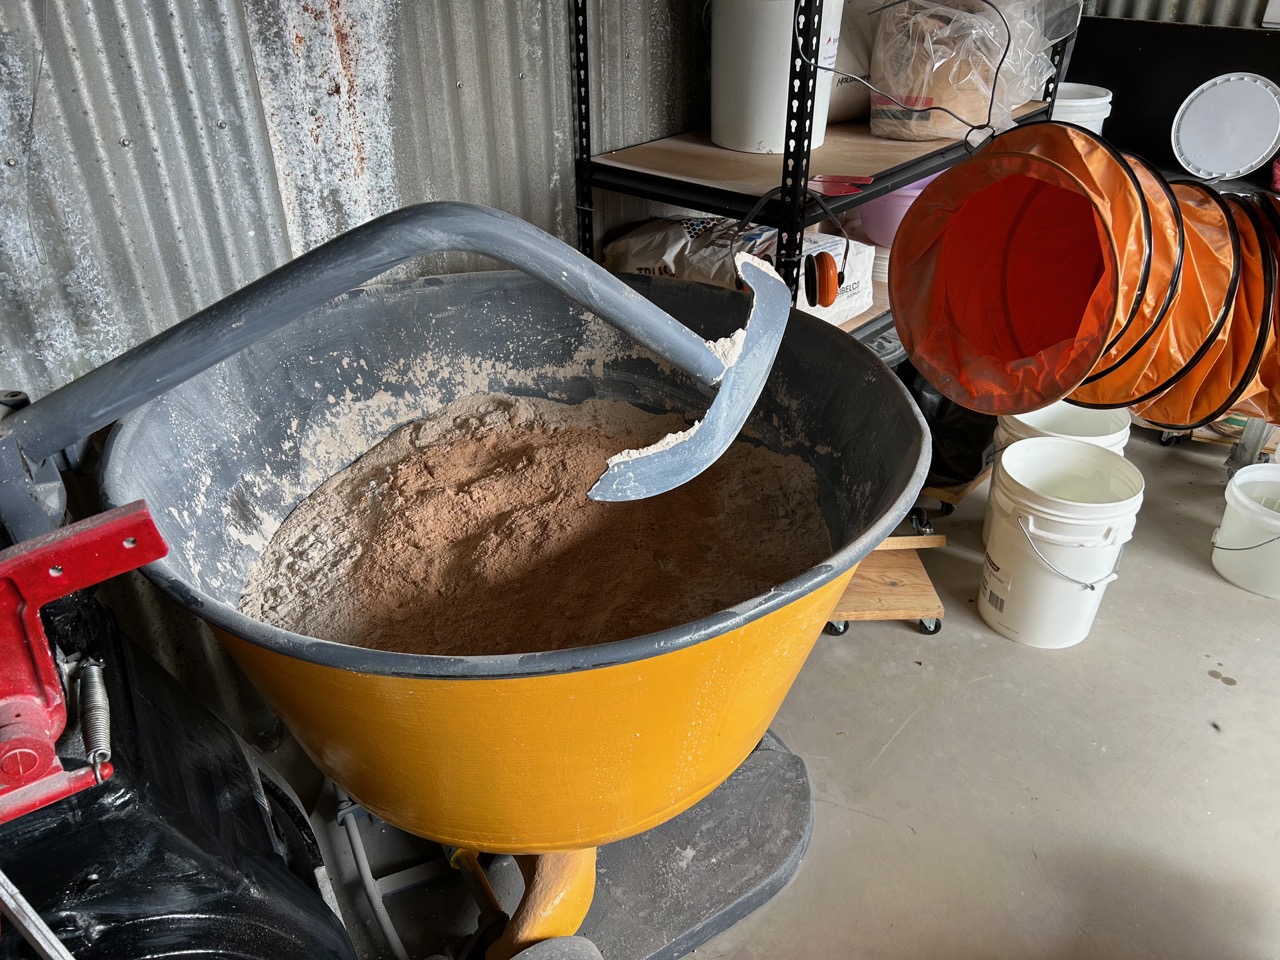
We’ve been busy in the clay making shed loading up the dough mixer with more clay mixtures for the coming throwing weekend workshops booked for the 26th and 27th of this month. This time I made up a single batch each of vitreous white stoneware/porcelaneous body and a batch of coarse, wood firing, stoneware body using local rough crushed shale with both pale and brown kaolin powders.
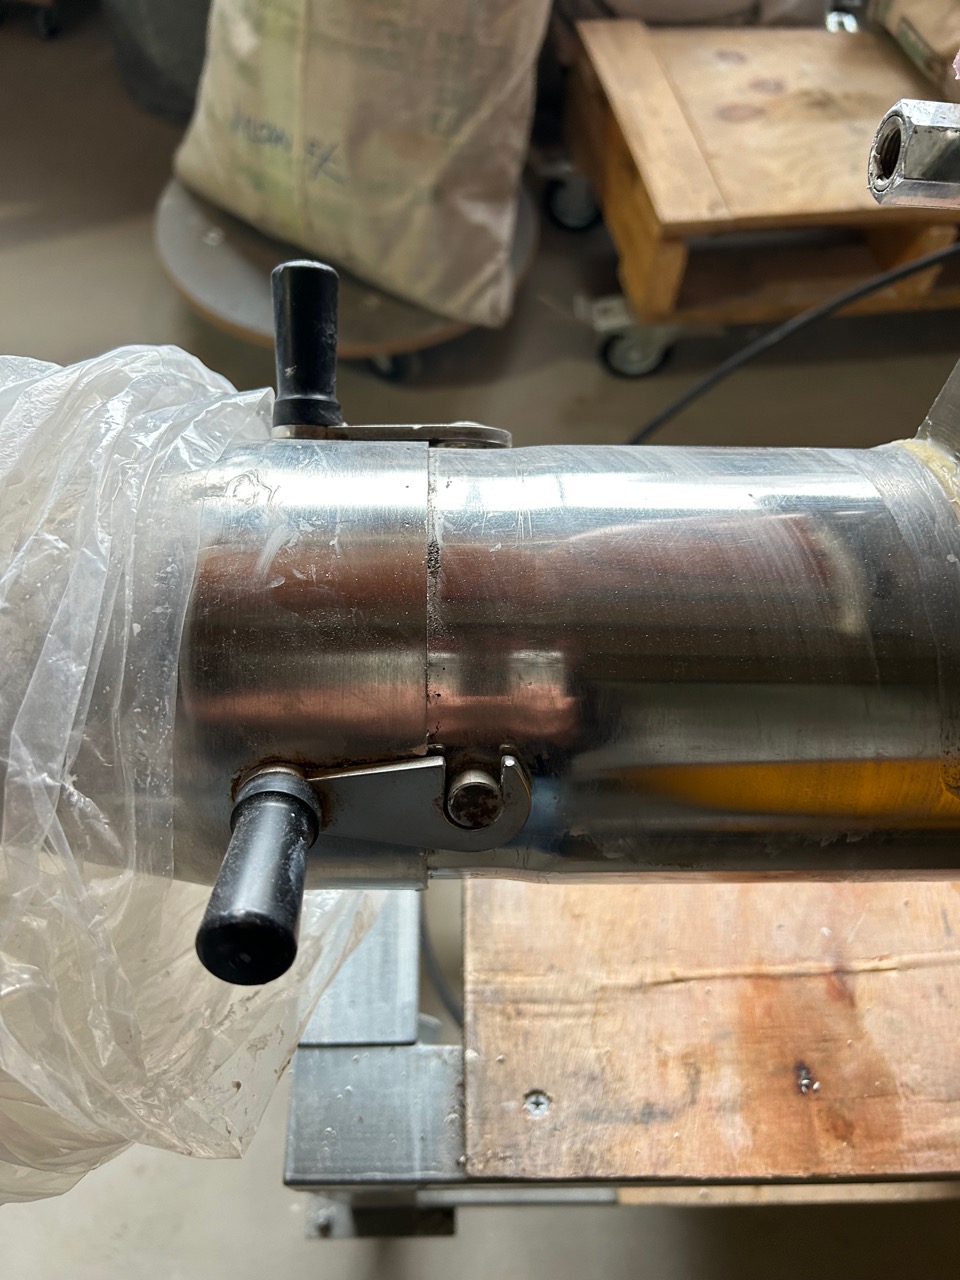
We use the stainless steel twin auger Venco pug mill that I bought 2nd hand. It’s only small with a 3”, or 75mm dia, extrusion, but it is so quick, very quiet and self feeding.
We started by recycling all the slaked and stiffened turnings from the last batch that had been sitting in the clay box ageing and waiting for the next pugging session.
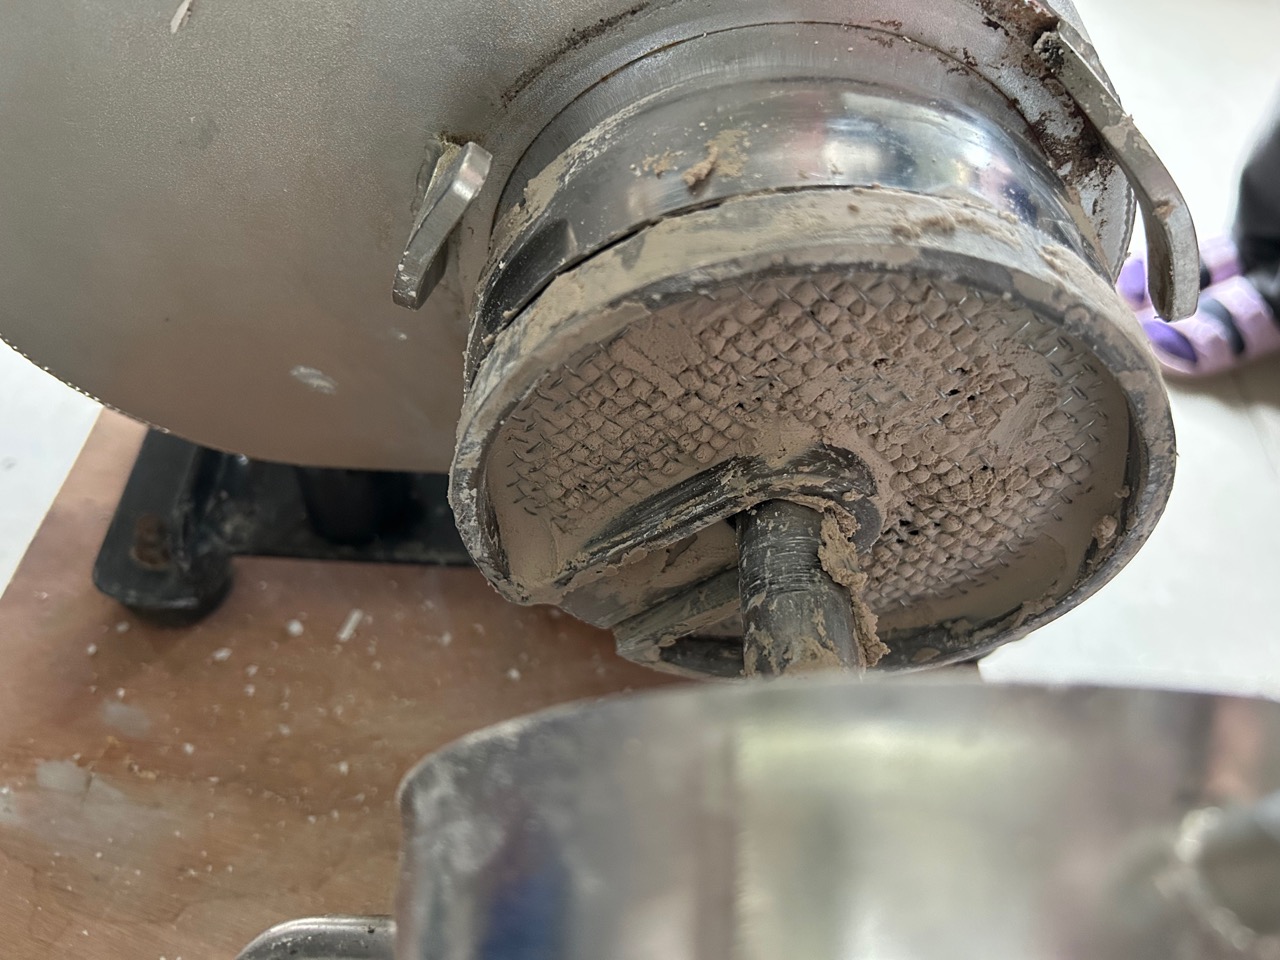
Over the few months since I used it last, the clay had dried out a little in places in the barrel. Which was a little bit strange, as I had the pug mill pretty well sealed at both ends, but some of the clay dried out enough to be too firm to pass through the vacuum screen. It jammed in the screen mesh and slowed down the pugging significantly, so I had to pull the pug to bits and clean the screen. No problem! The beautiful feature of this pug mill, is that it only takes 60 seconds to rotate and un-clip the barrel, then lift it off to get to the screen. It’s so quick and easy with no bolts or spanners required. I scraped the screen clean and replaced it in 2 mins and back in business. Amazing!
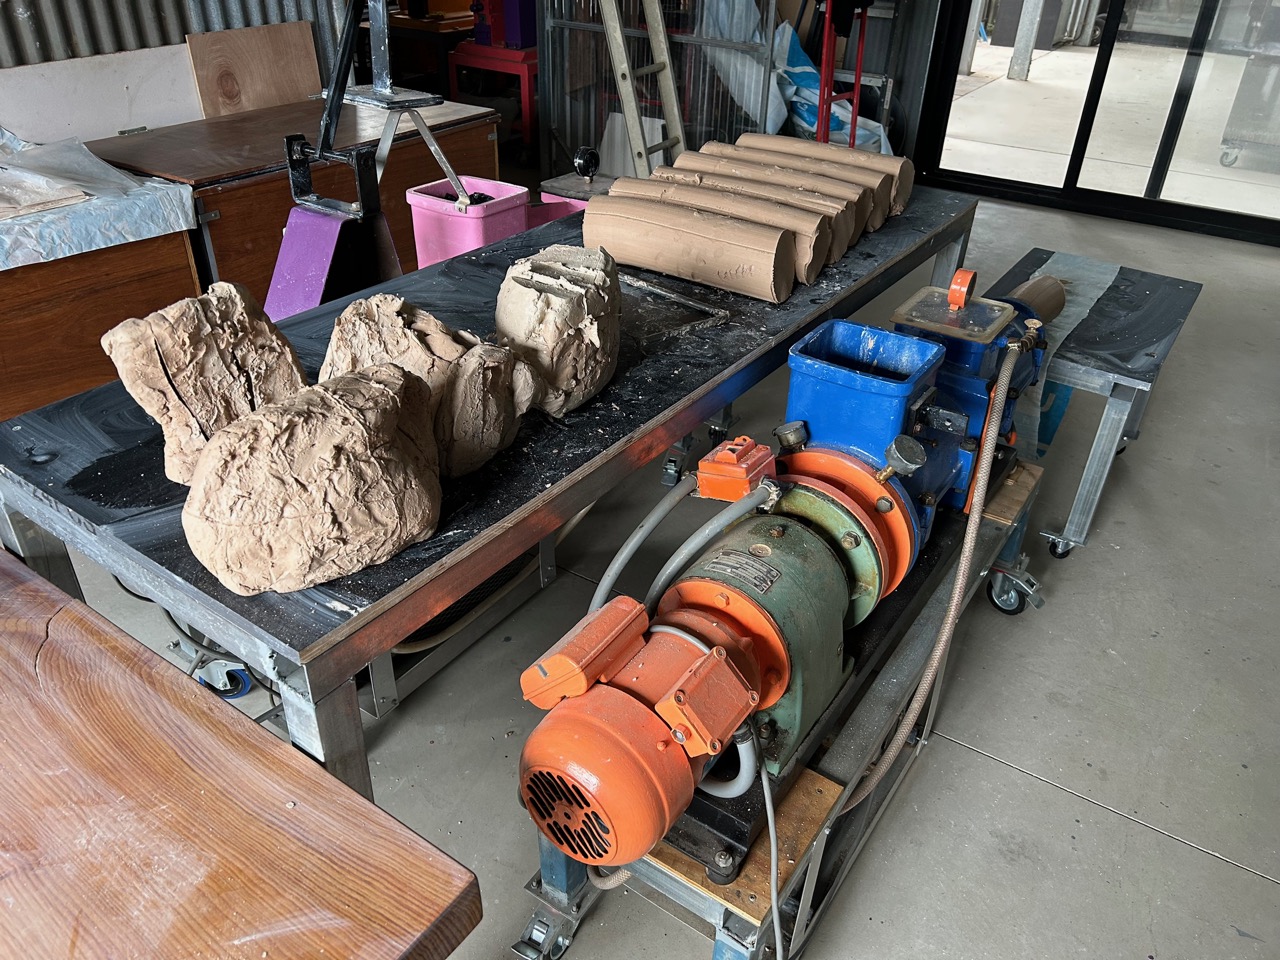
The next batch of coarse textured wood firing clay was put through the dough mixer and the Venco 4” or 100 mm. dia. vacuum pug mill. This pug mill is fitted with coarse mesh vacuum screens, specifically for making clay bodies like this.
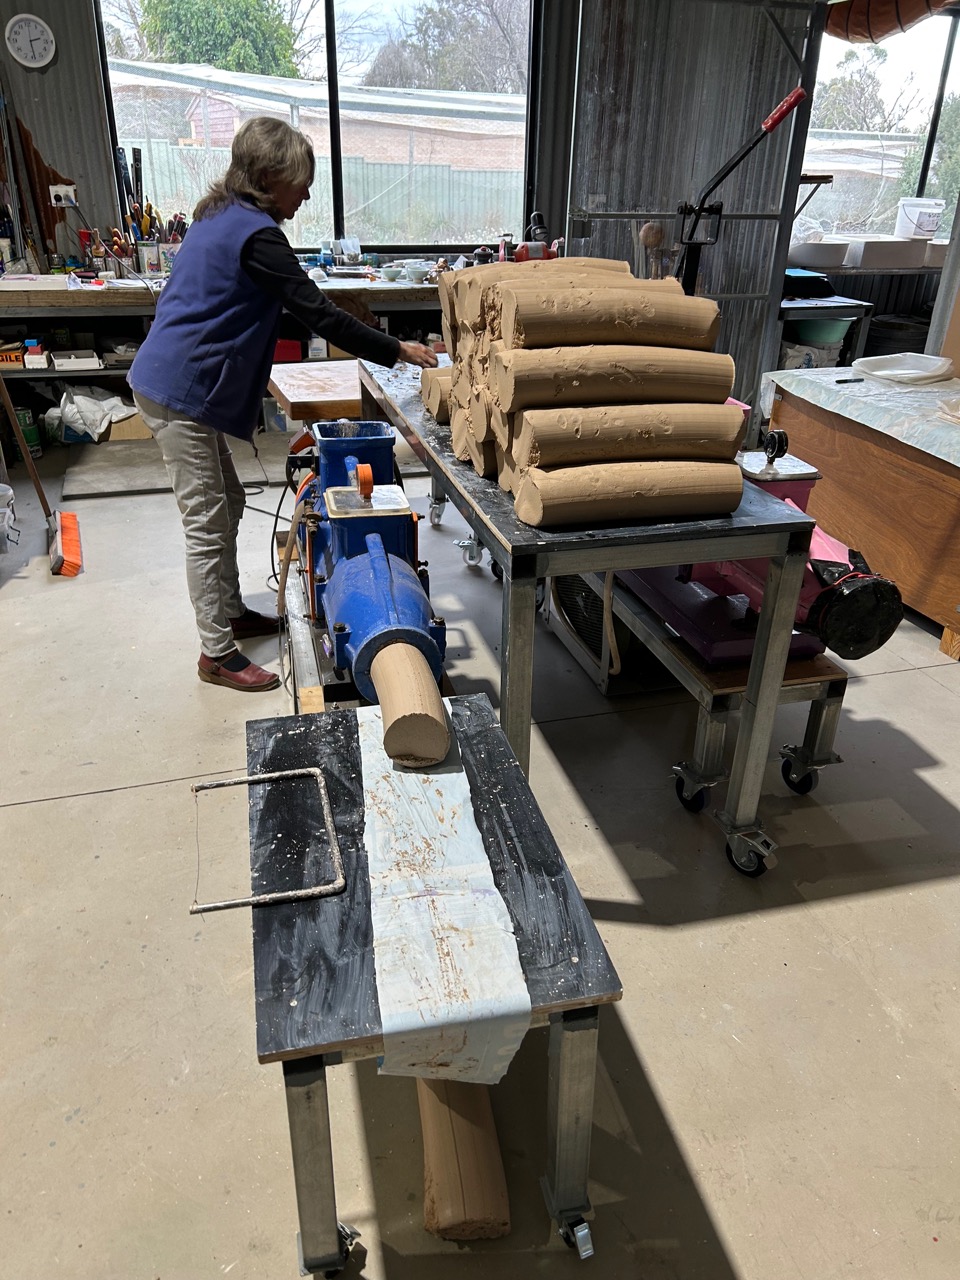
We start off by pugging all the recycled turnings from the last throwing session. These have been wet processed, bagged and then stored in the clay boxes waiting for the next pugging session with this mill. By having different pug mills for each different clay body. It saves so much time in not having to clean out the pug mill before changing clays. The recycled turnings also benefit by the time spent ageing in the clay box, increasing in plasticity over time. The new batch of clay is loaded onto the mobile clay table and wheeled out of the isolated and dust extracted mixer room, then wheeled out to the pug mill area. Janine can then start to pug the clay in a clean, dust free environment, while I return to the clay mixer room and start another batch.
The recycled clay and the new batch are then pugged together to get a good mix. But most importantly, all the pugged clay is stacked in a long stack on the pug mill bench and when full, all the ends of every pug of clay are all cut off and mixed together, and fed back through the pug mill, so that there is a little bit of every part of the new batch and all the turnings all aggregated in the new sausage of clay as it comes from the pug. This thrice pugged and well blended clay is then bagged and back into the clay store ready for use. This double processing and blending eliminates any variation between the first and last pugs of clay from that mix.
It doesn’t eliminate any mistakes in the weighing out or the dough mixing, but it minimizes the possibilities. Life is what it is.
Nothing is perfect, nothing is ever finished and nothing lasts for ever.
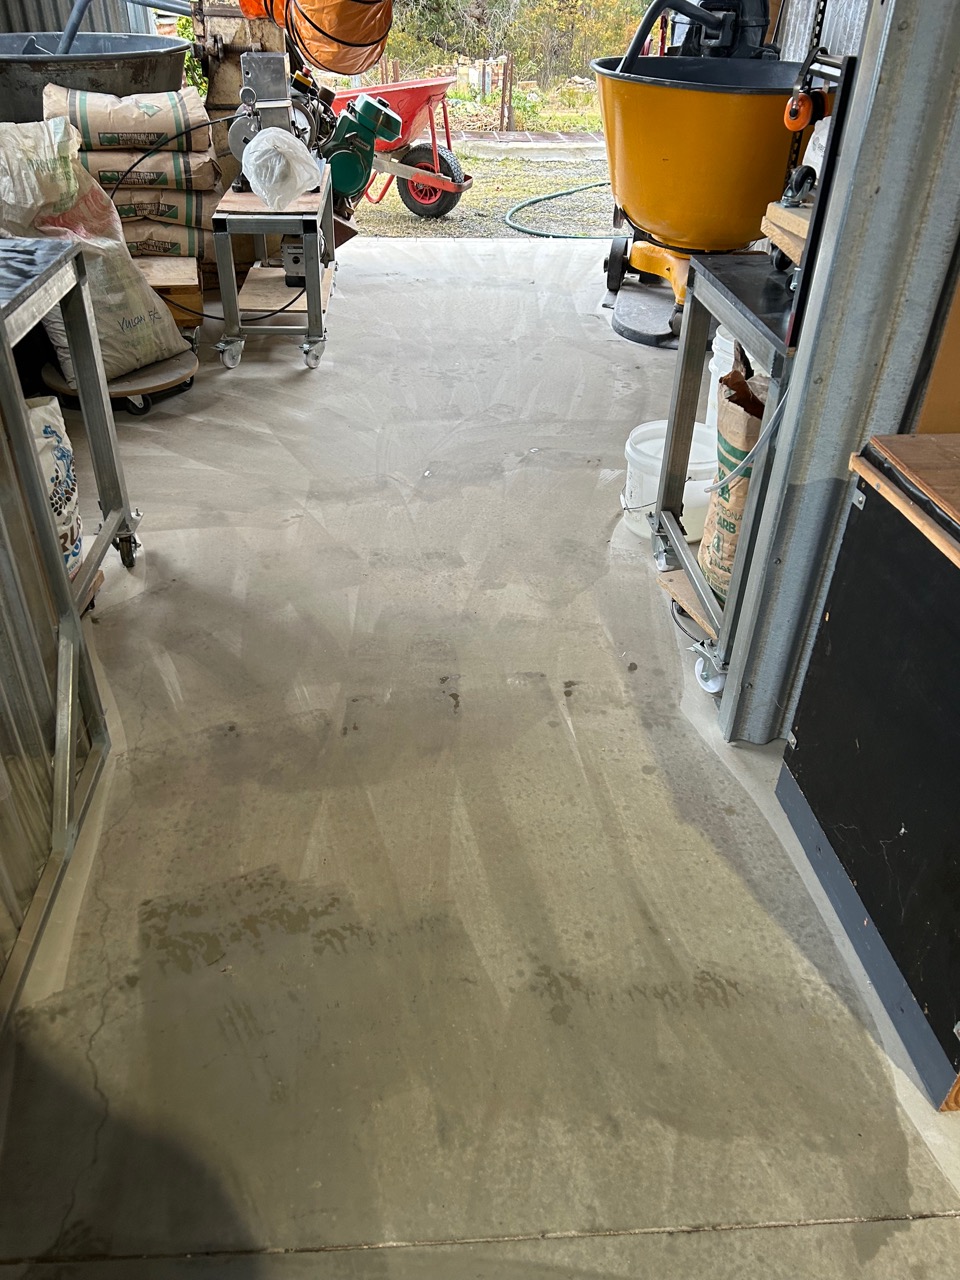
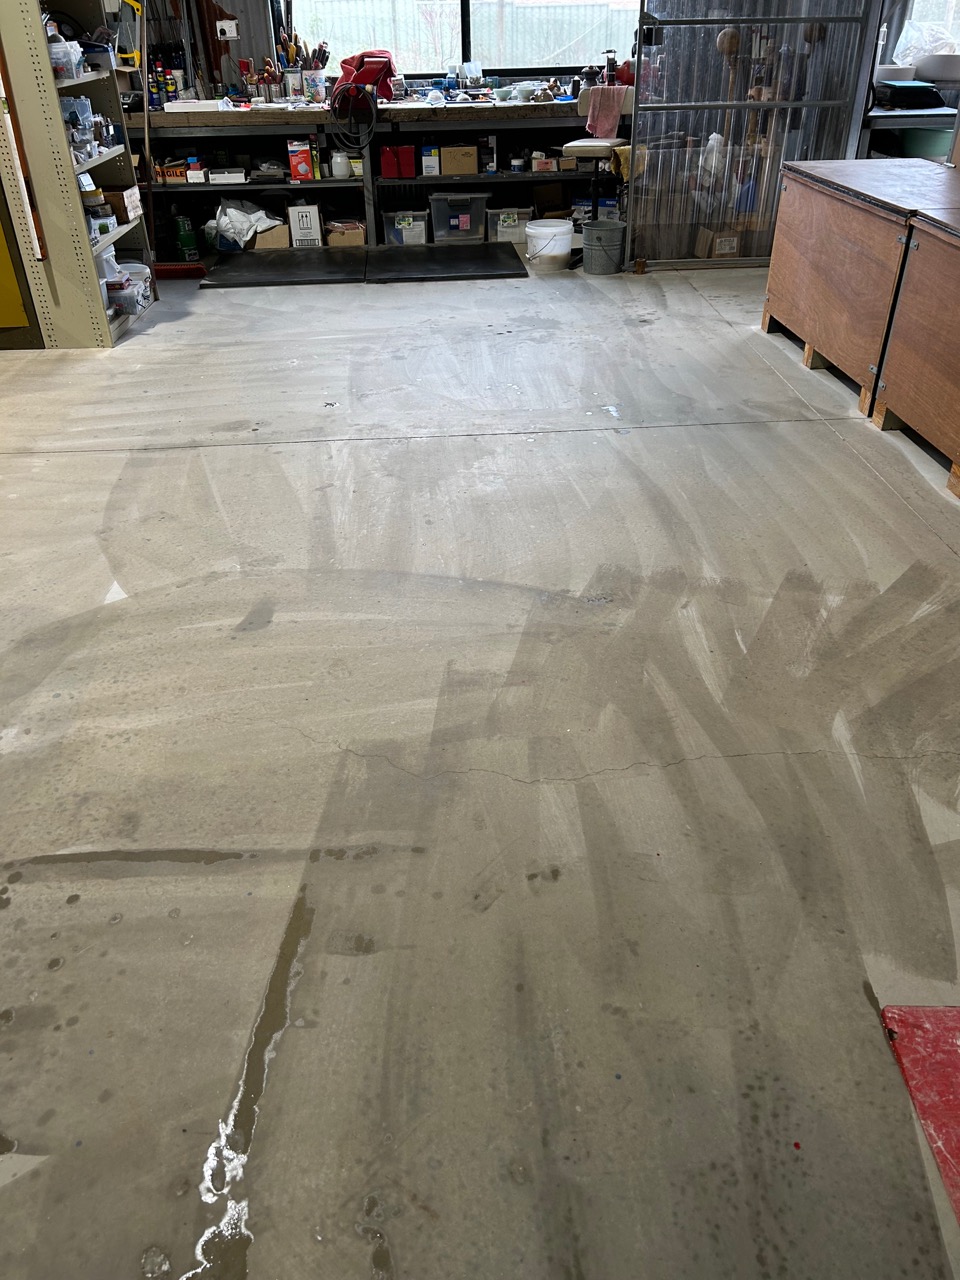
All the machines are built on trollies or castors, so that once all the clay is bagged and stored away, I can then wheel all the machinery out of the way and mop the floor clean of any spilt fragments of clay, dropped while pugging. The whole area is opened up to a through breeze, and thoroughly wet cleaned and mopped, then allowed to dry, before the machinery is wheeled back into place.
It’s not perfect, nothing is, but it is very good and the best that I can do at the moment using the machines that I could get my hands on 2nd hand at the time, and others donated from friends. You know who you are! I thank you from the bottom of my heart for your support and thoughtful kindness!
As the weather has been cold. We decided to have a baked dinner. This months meat meal is a very small piece of fillet steak.
Baked with a load of vegetables from the winter garden, and of course, a Yorkshire pudding in the old fashioned tradition of using all the meat juices from the baking pan. The proper way! After baking, the meat is placed in the warming oven to rest, while the baking dish is then reused to bake the ‘pudding’.
Non of those shop bought, frozen, pissy little cup cake things, masquerading as Yorkshire pudding, to be microwaved to a perfection of stogy, doughy sog.
The batter for proper Yorkshire pudding has to be made up and hour or so at least before hand. It’s the first thing that you have to do before starting to get a baked dinner ready. Even before washing and prepping the veggies, or spiking the meat with cloves of garlic. It has to be mixed and left to rest, then stirred occasionally throughout the baking time, so as to get a light and fluffy pudding with a thin crispy top.
recipe;
2 table spoons full of plain flour
1/2 a cup of milk
2 eggs
(See previous blog post 17/08/2014. ‘Don’t get to know the farm animals too well’)
Janine learnt this method from my Yorkshire mother, who learnt it from her mother etc.
She was a good student and makes a very nice Yorkshire pudding. My mother would approve.
It ends up being a huge meal, but we have been working hard, cutting and splitting fire wood all day, so it’s very tasty and easy to eat.
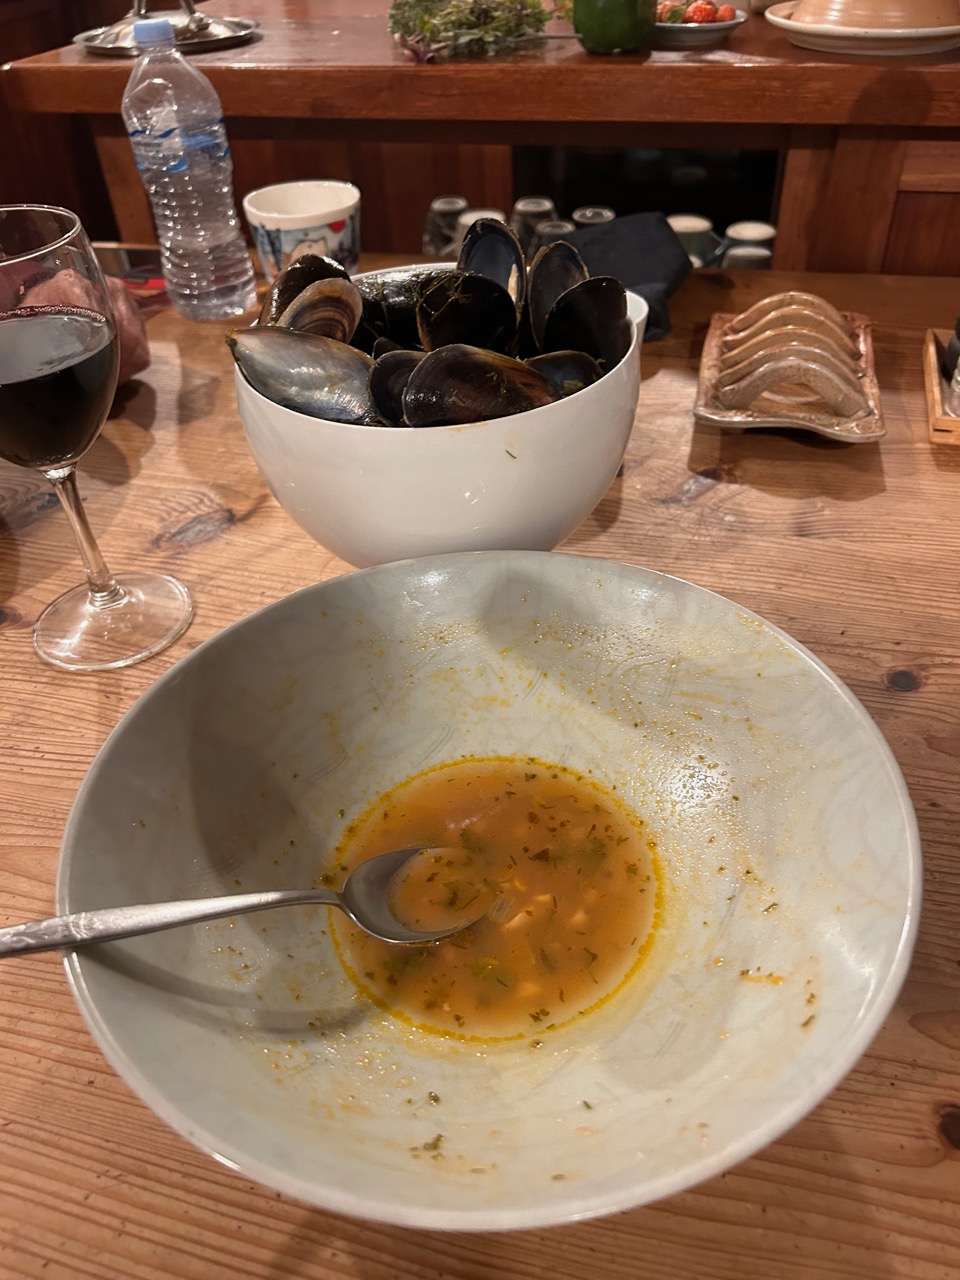
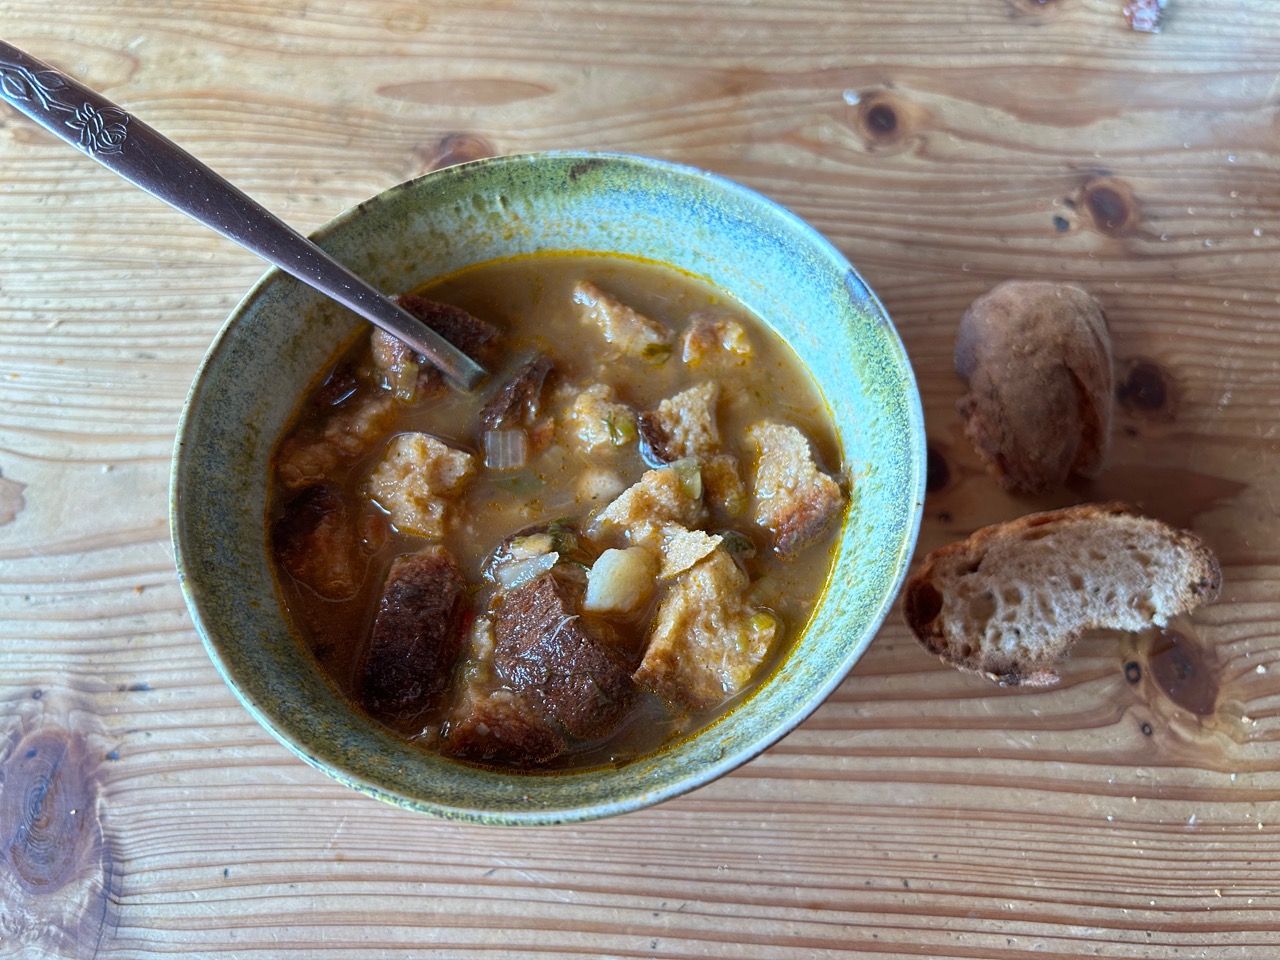
I also made a lovely mussel soup this week. I used a lot of fresh herbs from the garden, some white wine and a bottle of our preserved tomato passata from last summer.
It was very good with the mussels, and with a lot left over in the pan, made a warming lunch time soup the next day.
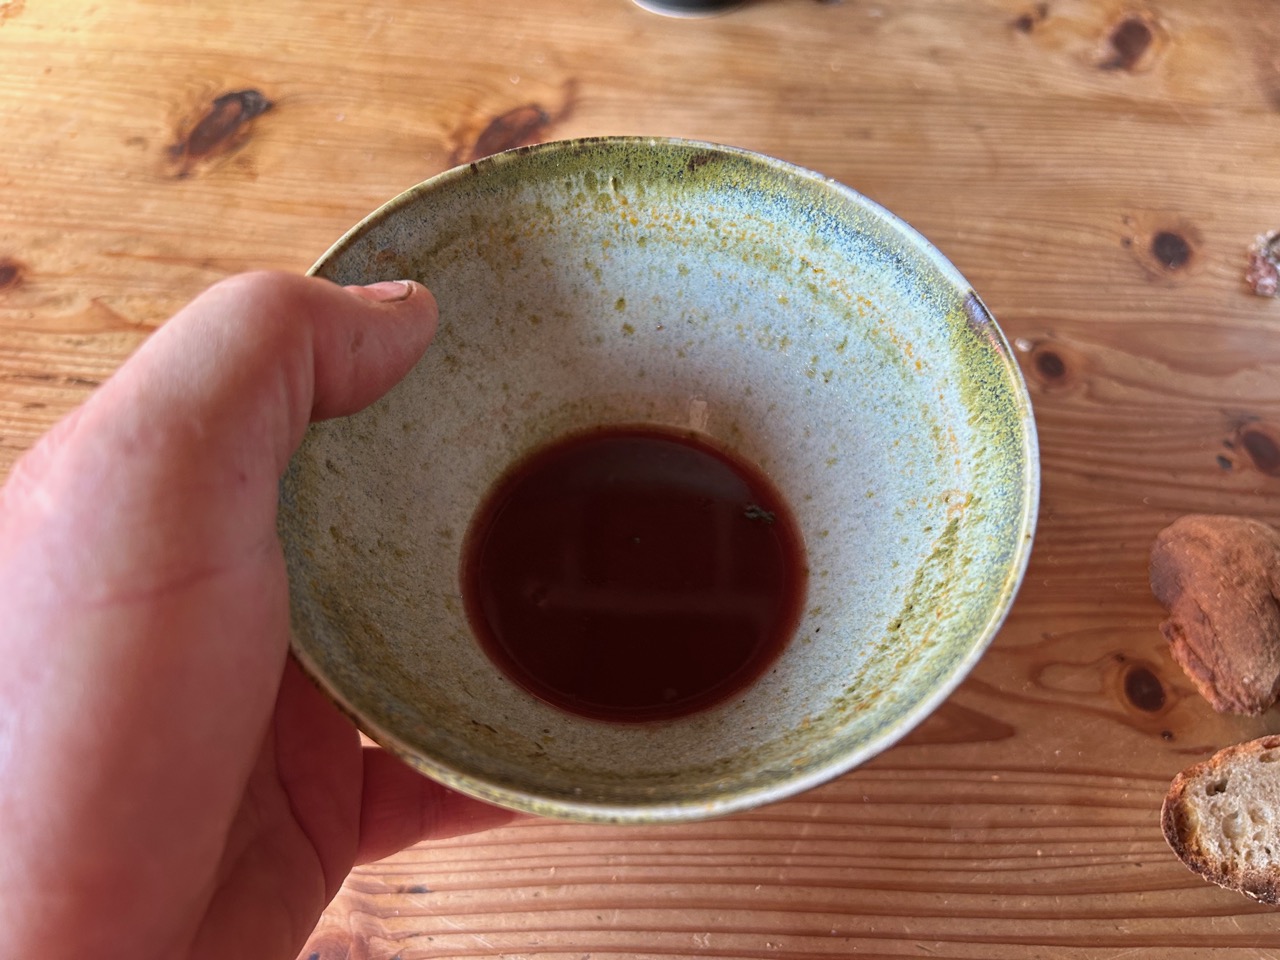
After eating all of the mussels, there was a little soup left in the bowl, so I was inclined to engage in the ancient French tradition of ‘faire Chabrol’.
By pouring a little of my red wine into the bowl and drinking the mixture straight from the bowl.
I’m warned that this is not a practice to engage in, in polite society. It’s strictly for peasants. Welcome to the home of the Post Modern Peasant.
It’s catching!
The next day at lunch, we had the same broth, sans mussels. But in another very old tradition, I added broken pieces of old bread into the soup to fill out the meal. And, in keeping with the tradition, I finished with a little red wine. Faire chabrot!


You must be logged in to post a comment.