Like everyone else on the East coast of Australia at the moment we are experiencing a lot of rain.
We are very lucky here to be situated up on top of a line of hills, on a ridge where the water table falls away on both sides. We at very unlikely to get flooded here. So our thoughts go out to all those who have been flooded and lost there homes and property. We’ve been there ourselves, but in a totally different way.
My partner Janine, who is from the North Coast area were the flooding is worst just now, has experienced this kind of flooding in her youth. She points out that at least after a fire everything is left sterilised. After a flood, everything is left putrid and stinking. Although the clean up takes just as long in both cases.
The rain came in horizontally and blew straight into our new kiln shed area through the open Eastern wall. i had to dig a drain to help ease the flow of water back out again.
If this is an insight into the future, then I will probably have to enclose some of this wall with polycarbonate sheeting. To let the light in, but keep the rain out.
Before
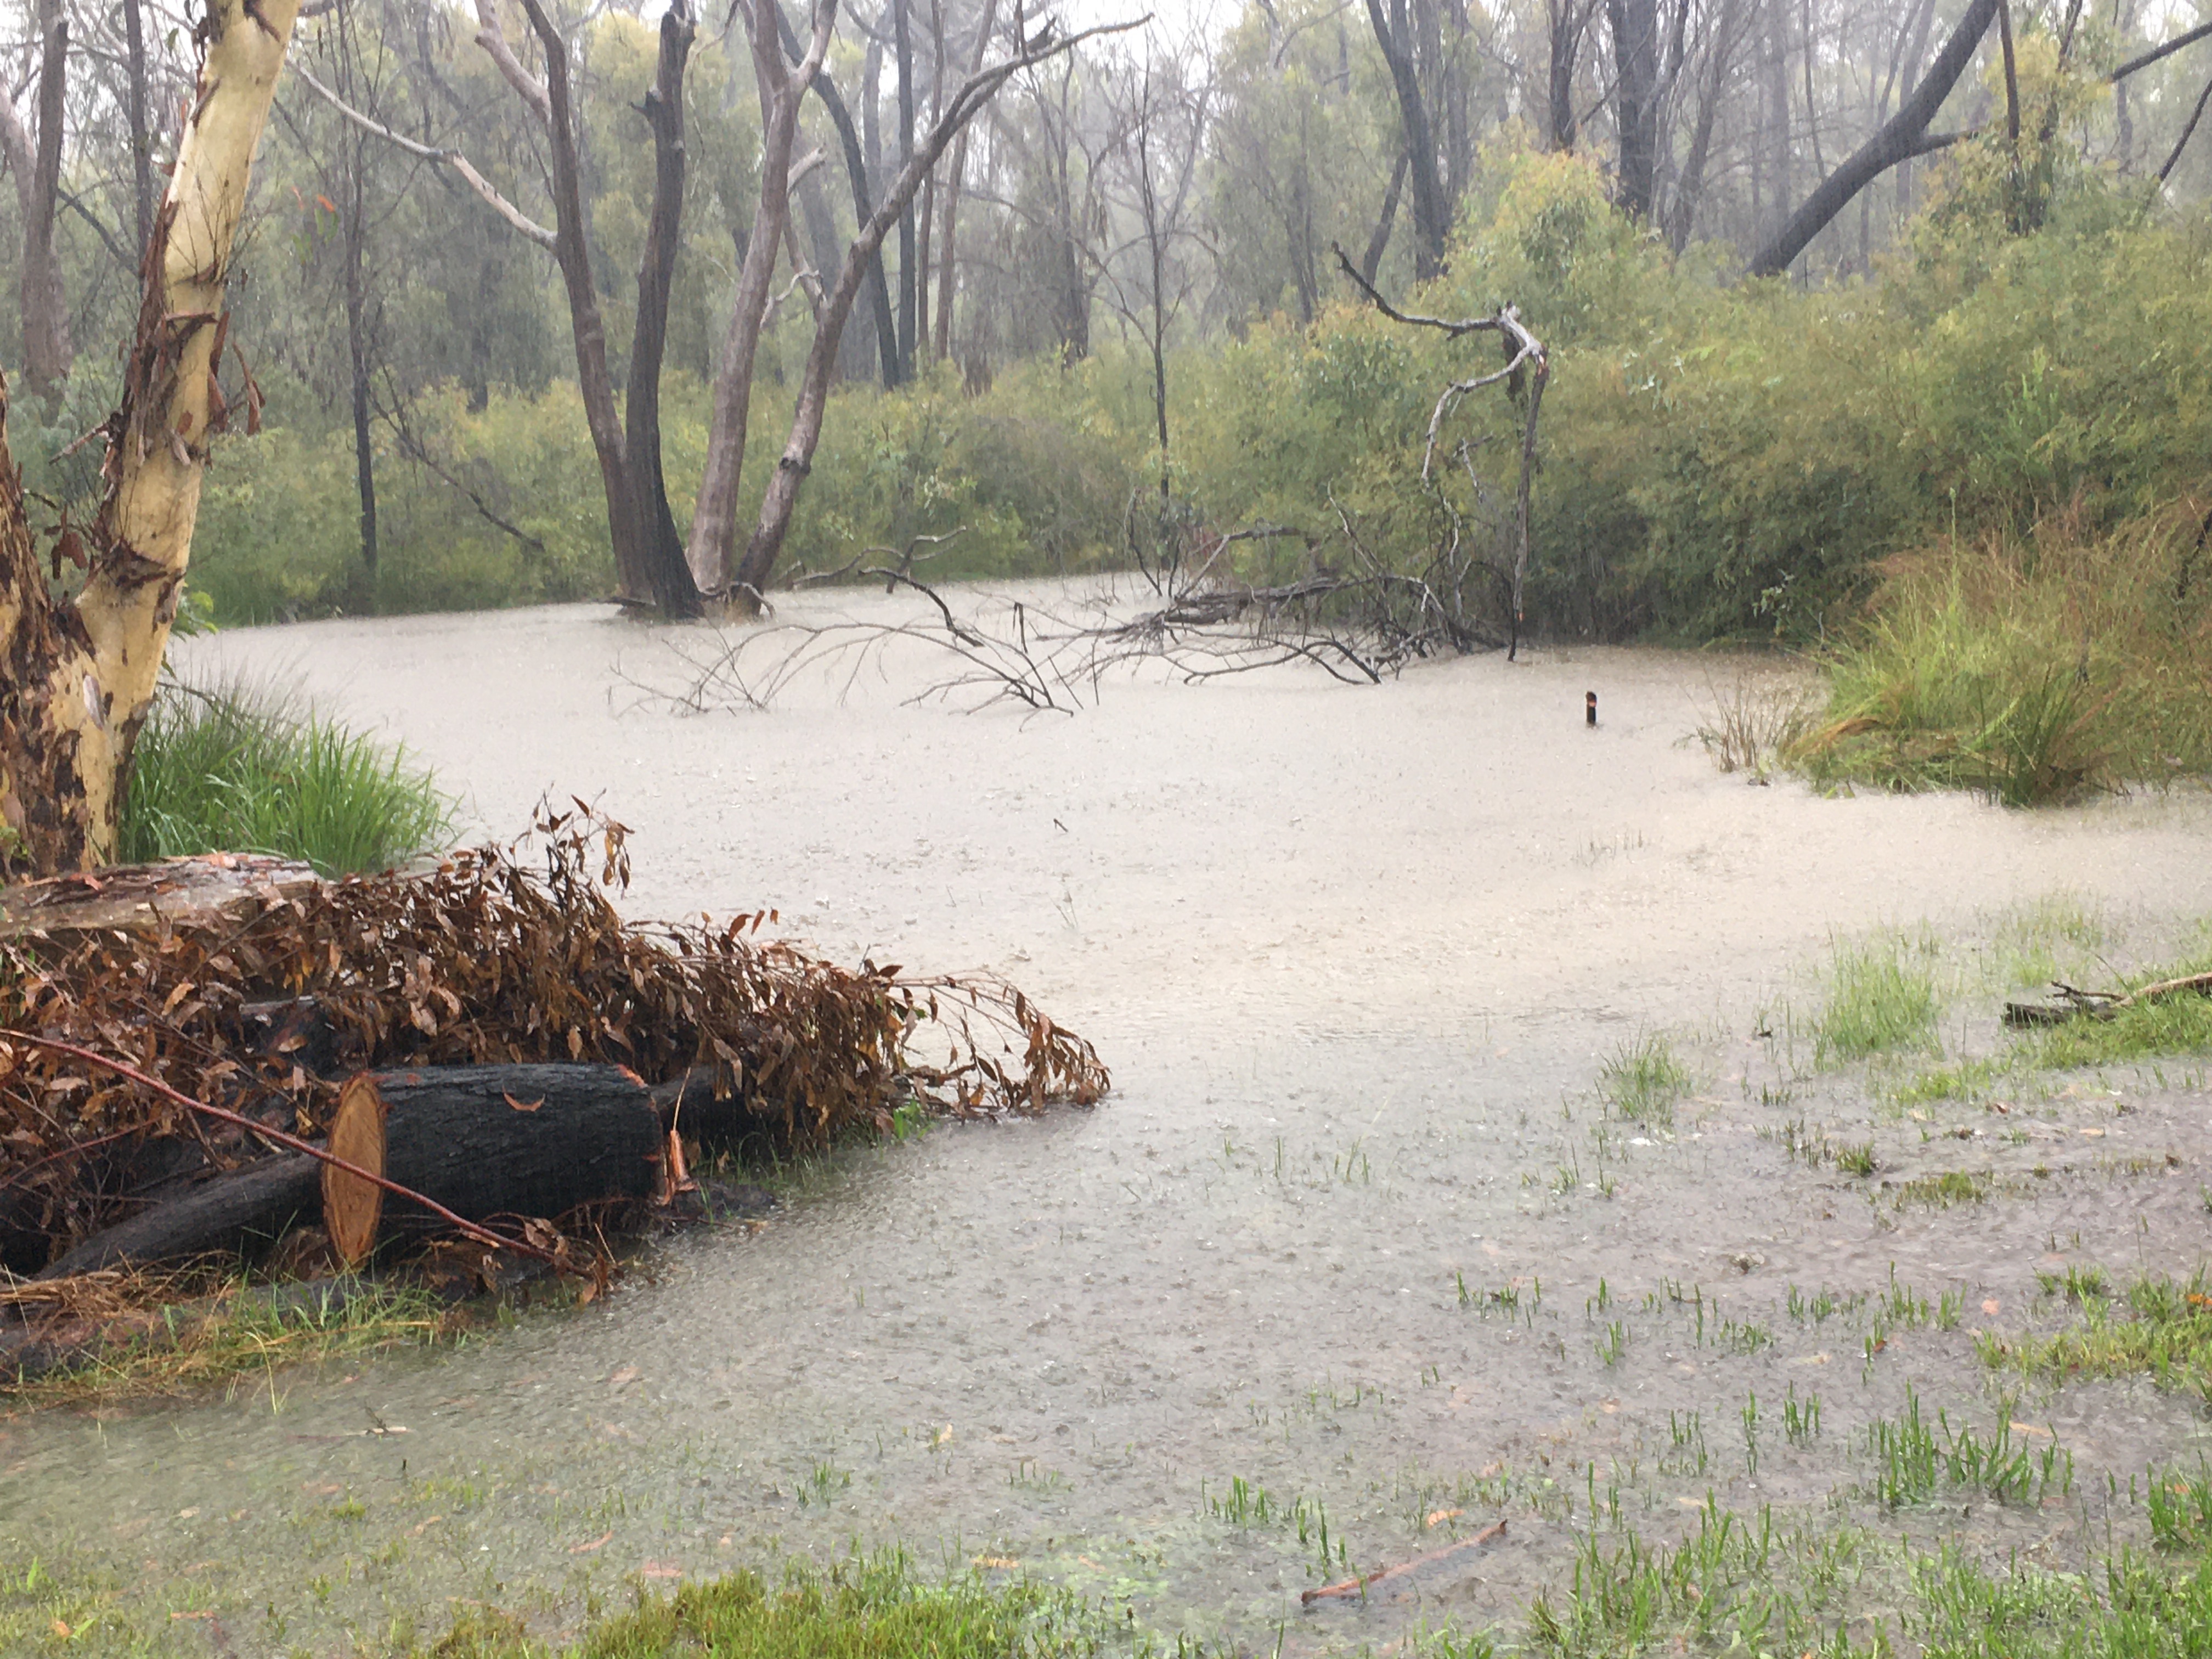
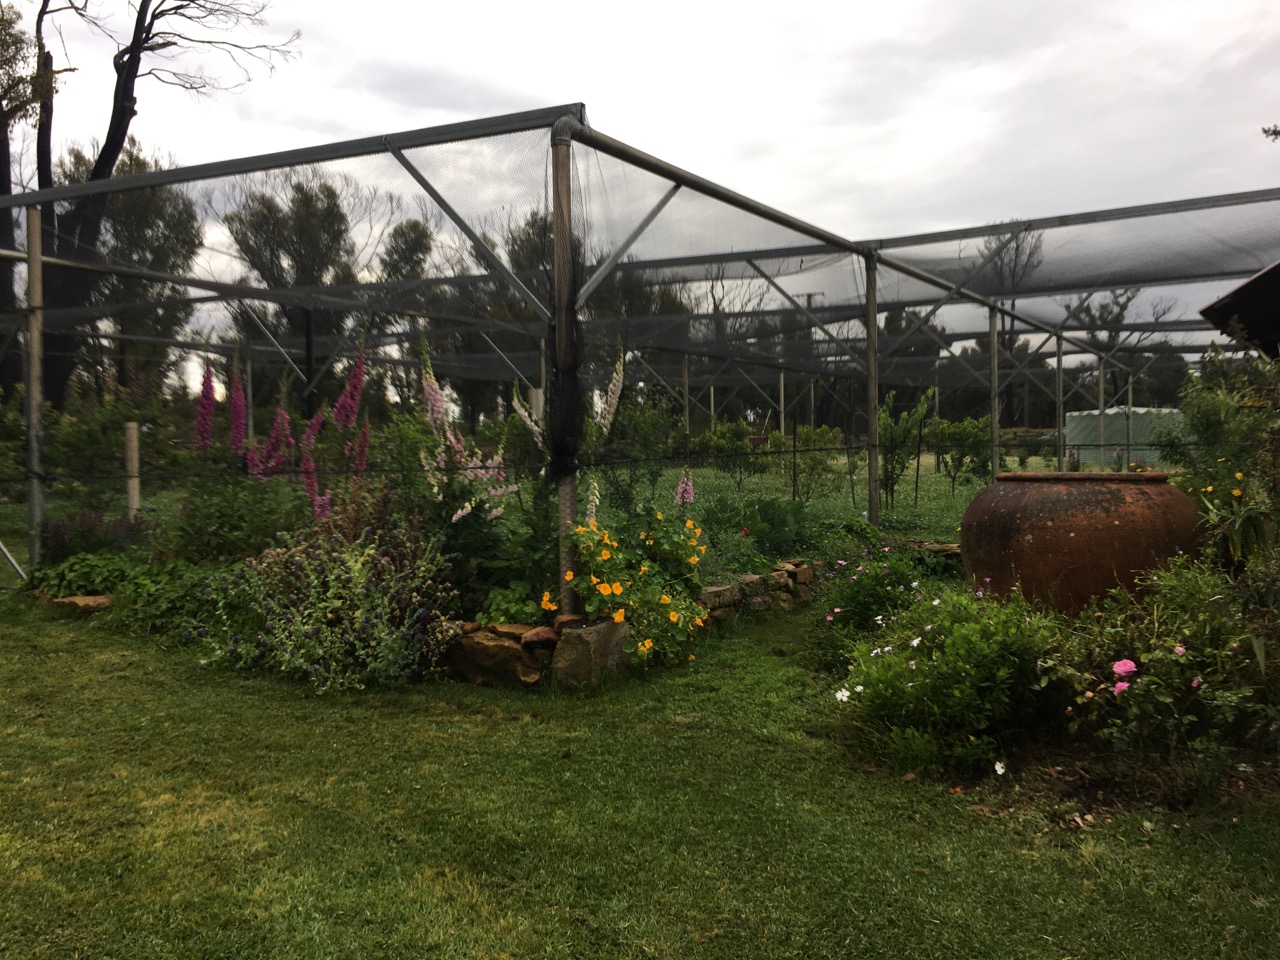
I’m somewhat amazed that water managed to build up like this here in the kiln courtyard, as it is elevated up on 1200mm. of crushed blue metal gravel behind the big stone retaining wall. At least it does drain well over night once it actually stops raining.
Our normally dry and sometimes barren back yard is now a small stream, with a creek running through it.
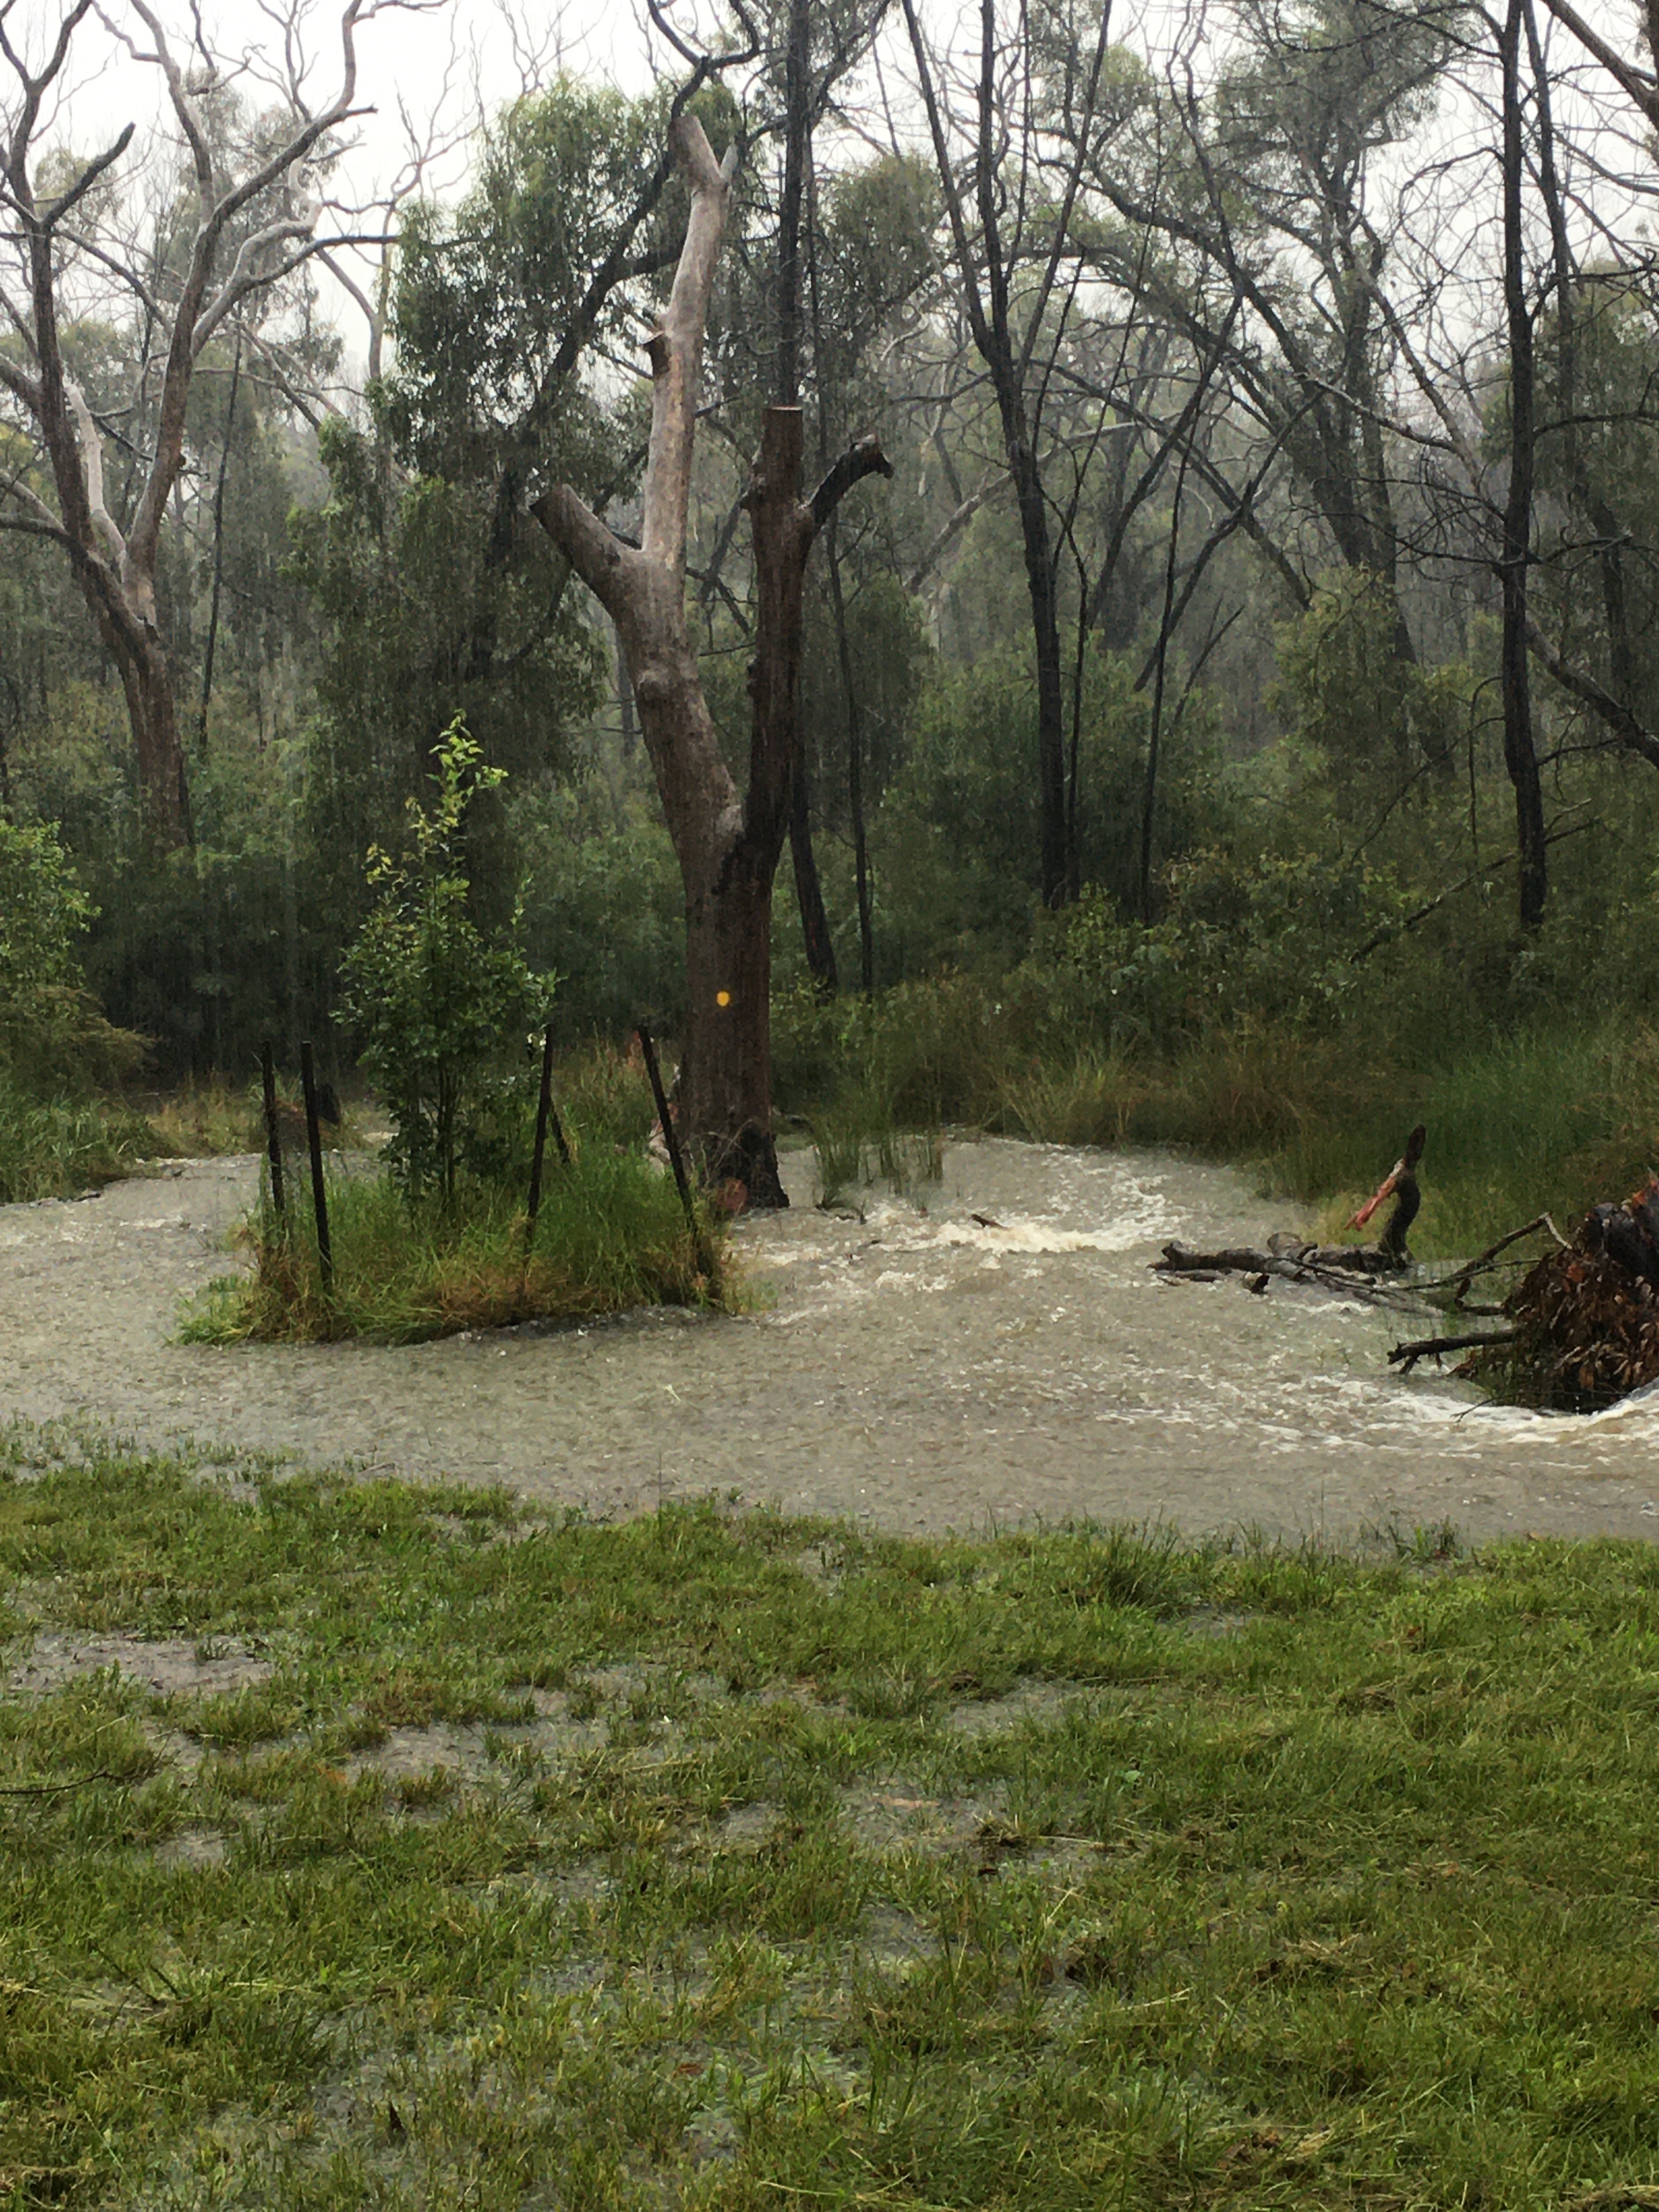
Here the small top dam overflow channel is not able to cope with the deluge and the dam is over flowing across the whole dam wall.
We have only ever seen this happen a couple of times before in our 46 years here.
We had over 185 mm of rain. We’ve had this much rain before. In fact the recent bush fires were put out finally when we had this same amount of rain 2 years ago.
But last time the rain fell onto, and soaked into, a dry parched landscape. This time it has fallen onto a saturated and sodden catchment and so instantly started flowing off.
We are fine and have plenty of home grown and preserved food in the pantry, and because we have solar power and a battery, we don’t know whether the power went off or not.
These extreme events are exactly what we have been warned will eventuate with the increase global temperatures due to carbon in the atmosphere. But our politicians refuse to do anything about it and those on the right are still denying that it is even happening. A pox on both their houses!
With 1 in 50, and 1 in 100 year weather events happening every other year now, I fear for the future of our kids and grandchildren.
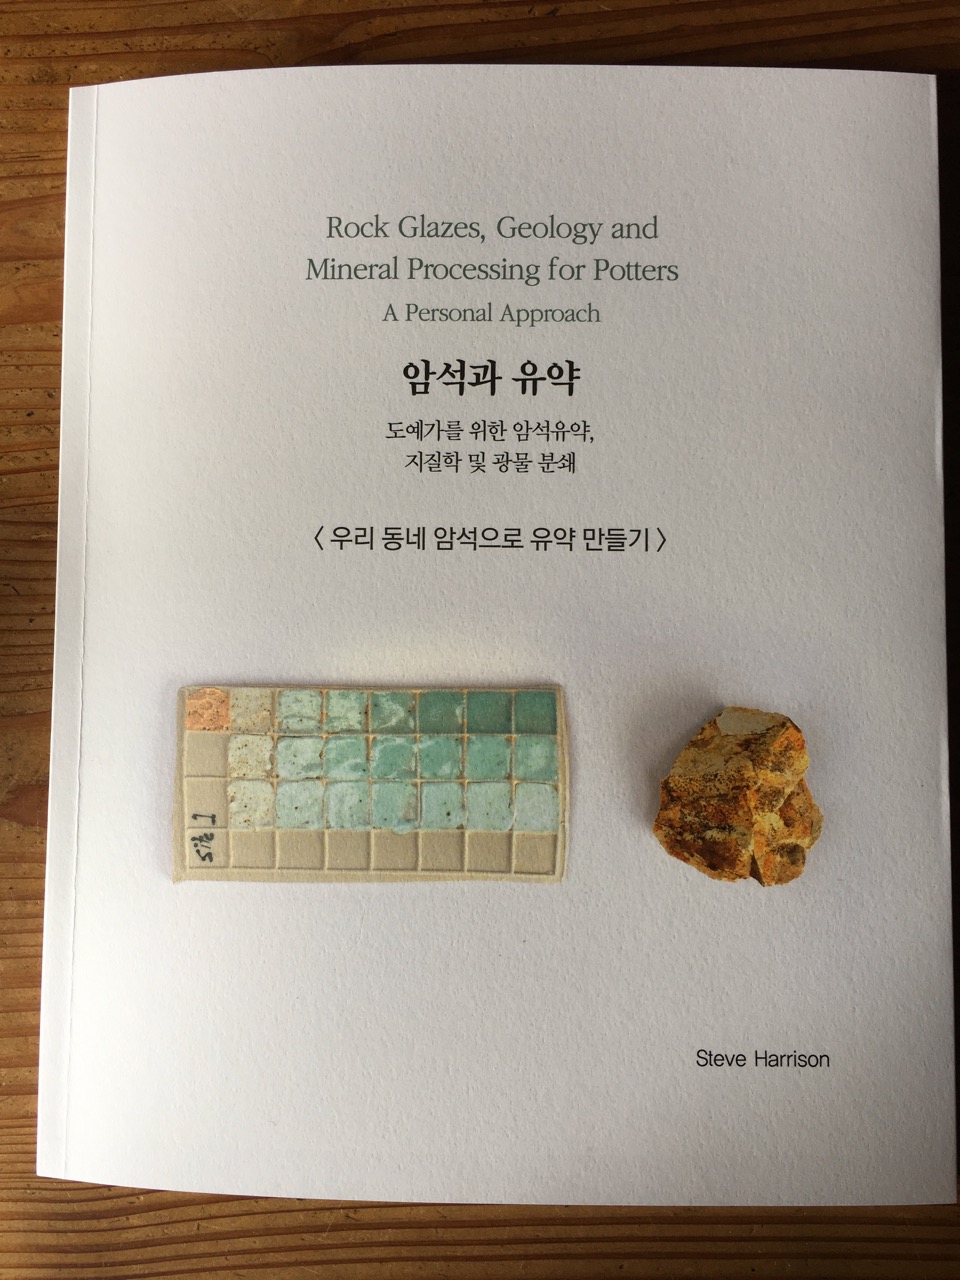
This week I received a box in the mail from Korea. It contained copies of my latest book translated into Korean.
I was such a poor student of English at school. I’m somewhat surprised that I have become a published author of multiple books in 3 languages!
Even my English teacher from High School was surprised, to the extent that when I met him 10 years after leaving school, at a reunion, he didn’t believe me when I told him.
I don’t blame him.
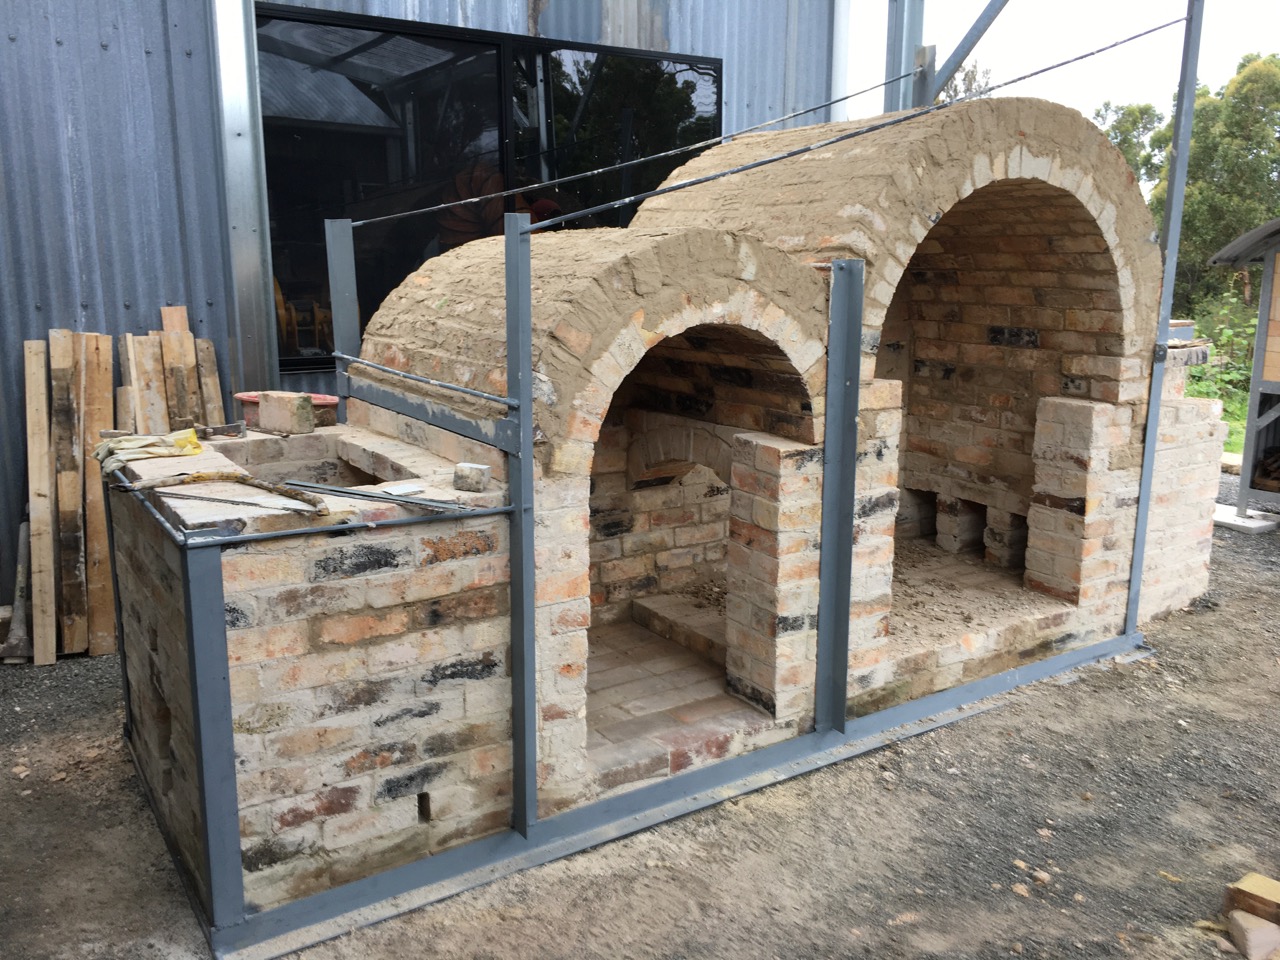
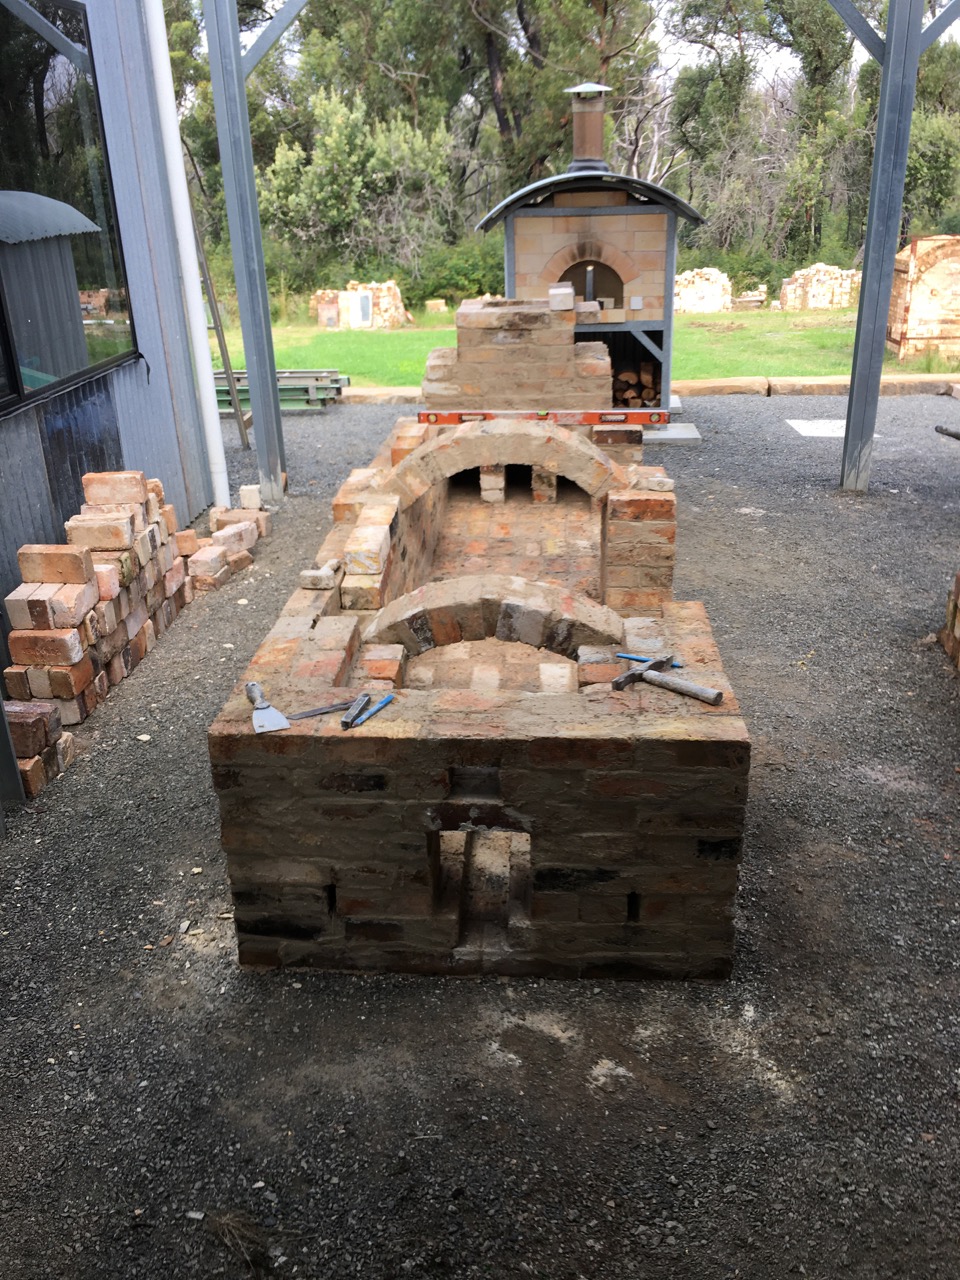
My work building our wood fired kiln continues. This last week I have finished the chamber arches with Janine’s help.
Adding their second layer of insulation bricks and welding on the steel bracing.
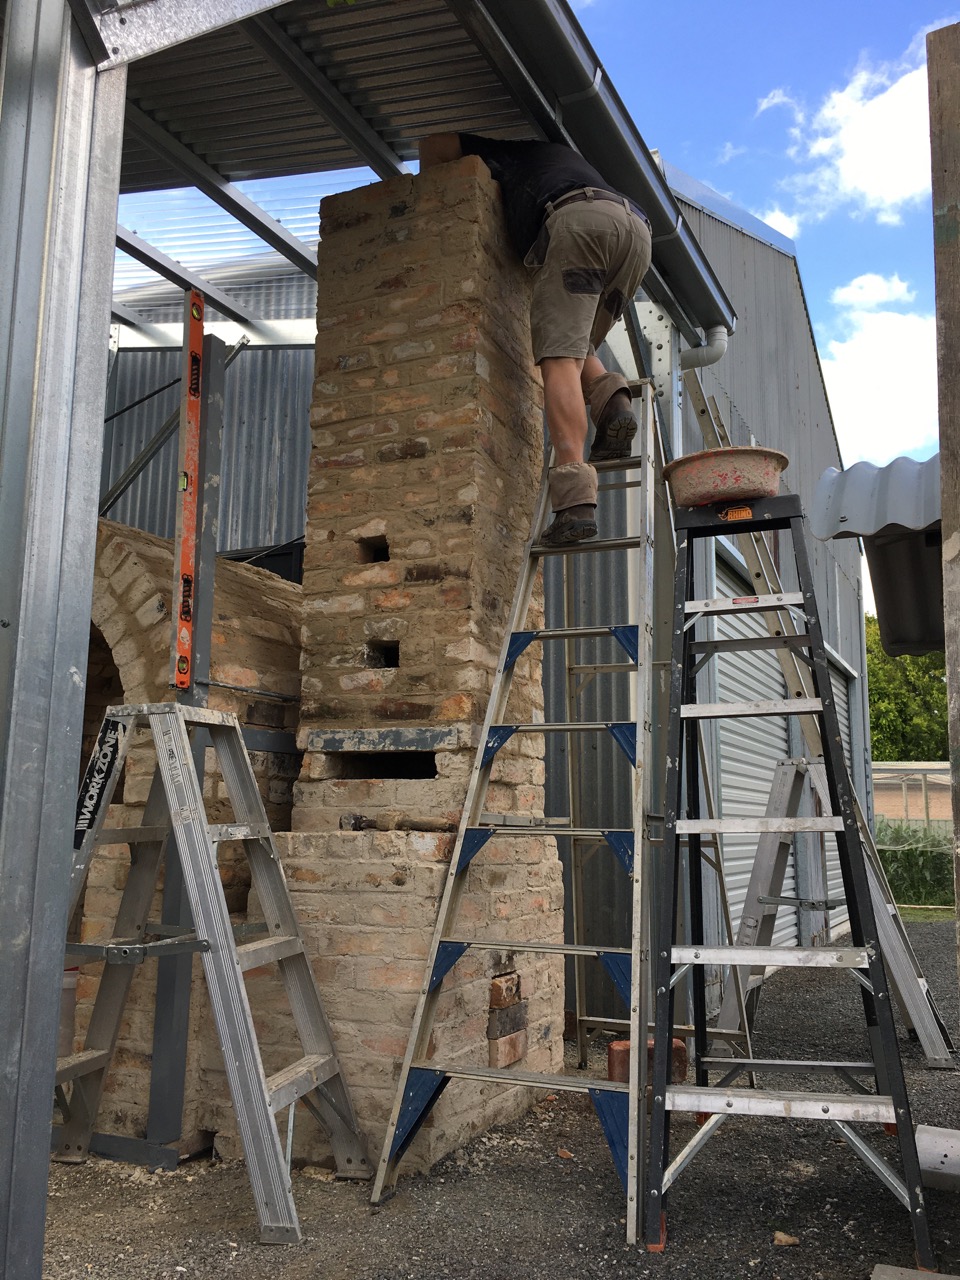
I also started work on the chimney with the help of my good friend Warren on the weekend.
The chimney is almost at the height that I can’t build anymore courses until I cut a hole in the roof to allow it to go through.
This will involve fabricating some specialised pieces of galvanised sheet metal ‘flashing’, custom fitted to the brick courses just above the tin roof to keep the rain out.
I hope to complete the chimney this week. More ladder work!
I have declared myself an honorary 59 year old for the past week to allow me to keep climbing ladders 🙂
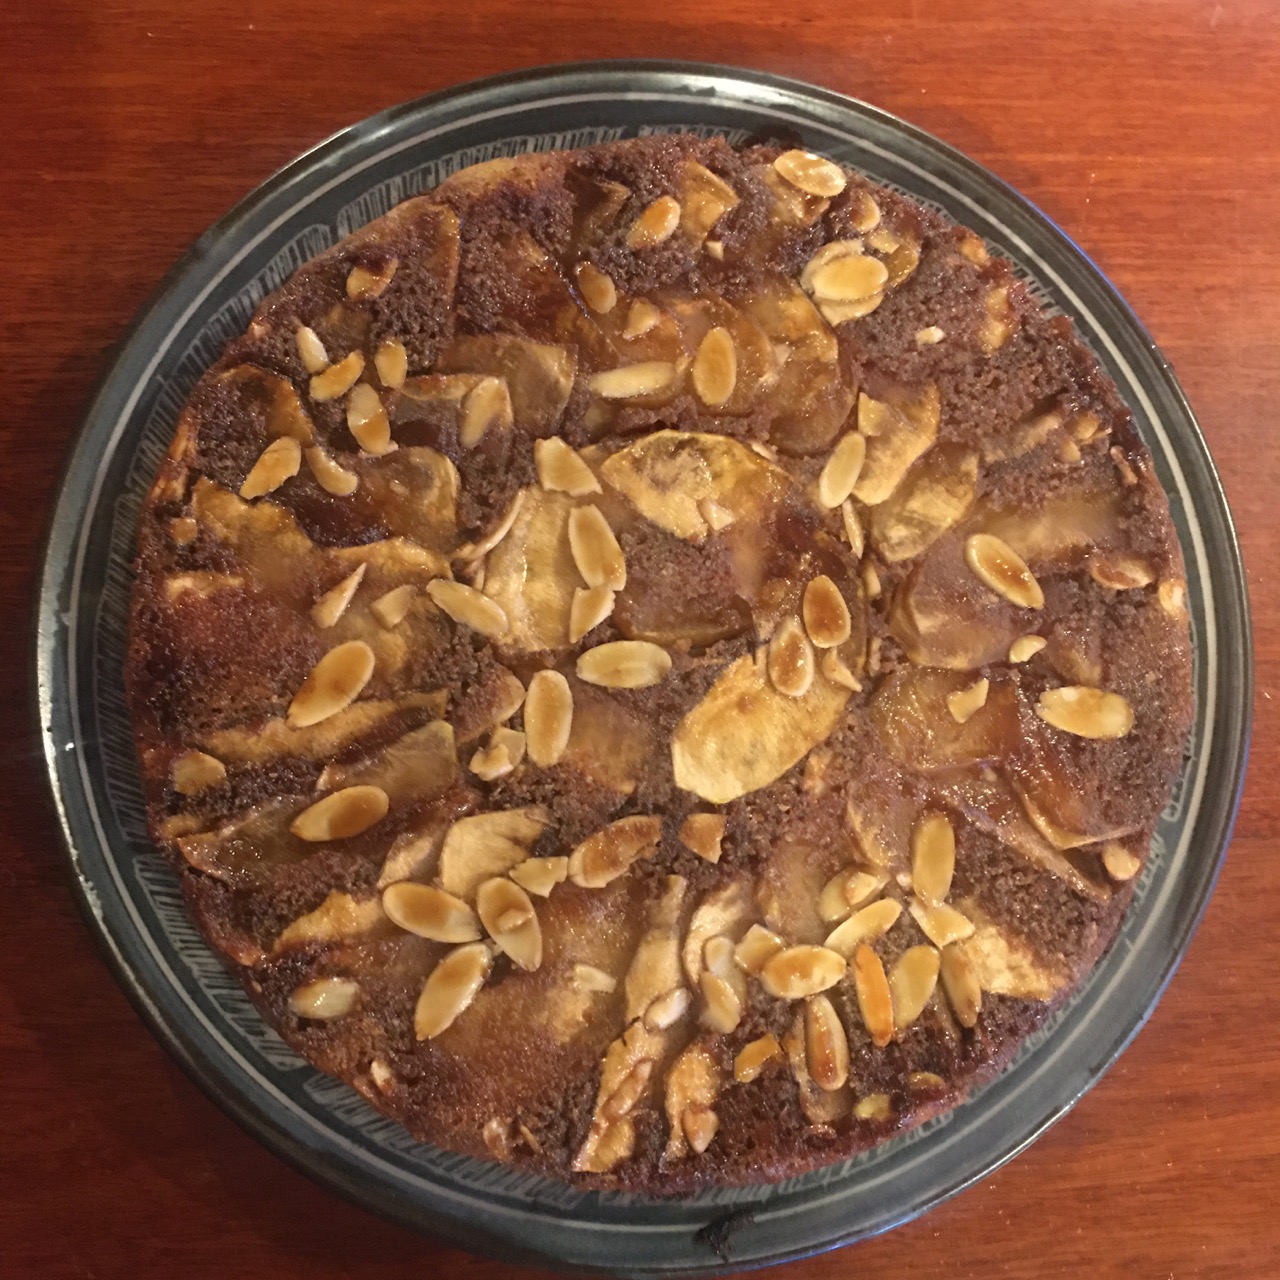
We have now picked nearly all the apples and I cooked another apple and almond flan tartin for our weekend guests.
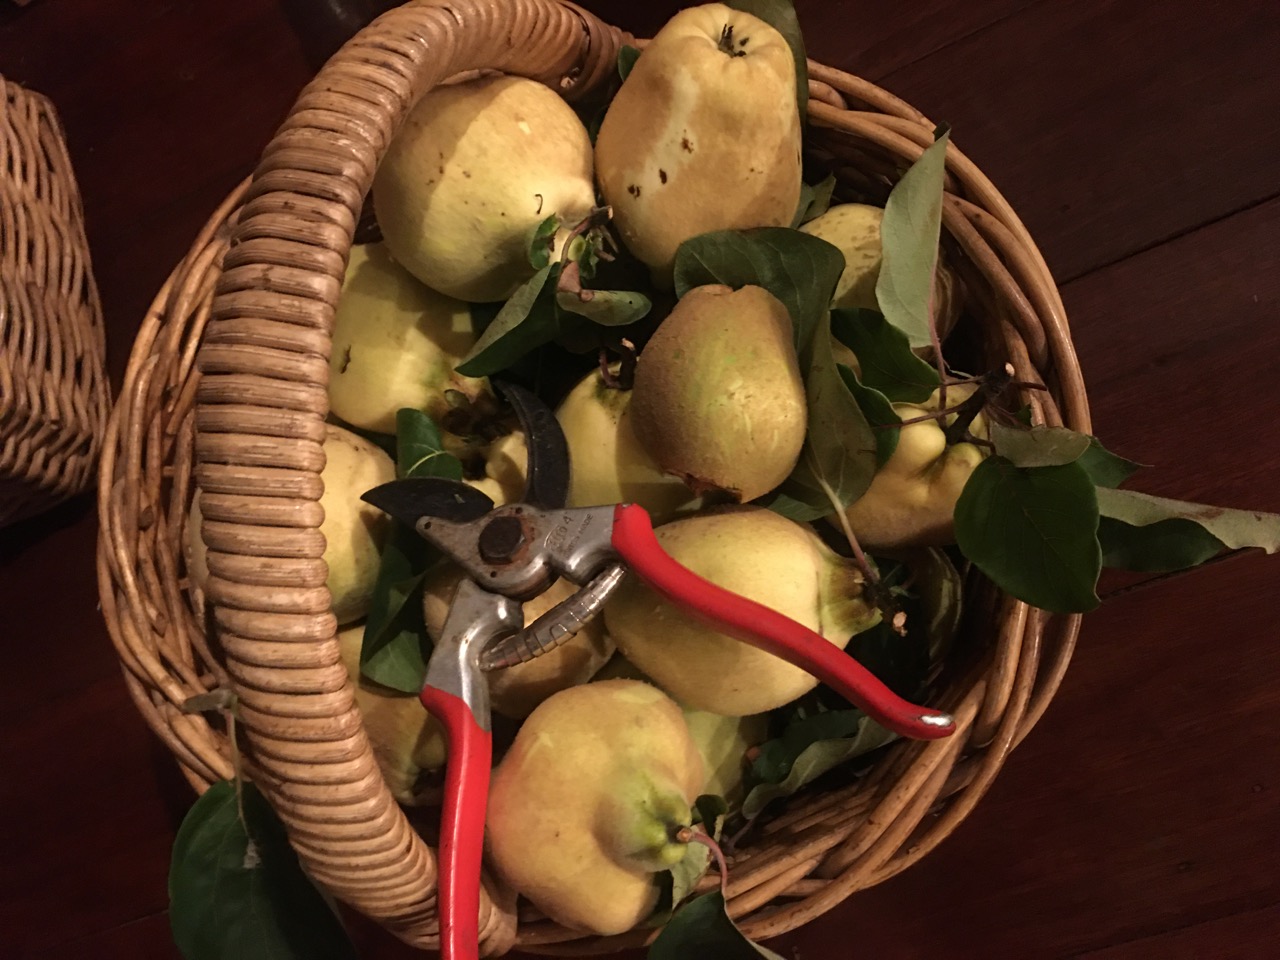
I also made the first batch of baked quinces, as the birds had decided that it was time to start eating them, dropping a lot of them onto the ground with just a few holes pecked into them.
They need to be dealt with pronto, or the damage soon spreads and they go bad quickly. I wouldn’t mind so much if they ate the whole thing, but they just peck a hole into the fruit to get to the seeds inside. If the fruit drops, they just watch it fall and start on another. At least the rabbits eat some of the fallen fruit. Quince fed rabbit sounds pretty good!
I wash the fluff off the skin, then peel and core, chop into 4 pieces for small fruit, or 8 pieces for the larger ones. I simmer them for 20 mins in a sugar syrup of 120 grams of sugar per litre of water. This syrup is less than half strength of the recipe ! Use enough water to cover the volume of fruit. Add a few cloves, star anise, a cinnamon stick, and half a small bottle of maple syrup. Once softened a little, transfer to a large baking dish and bake for 2 hours in a low oven at 160oC until nearly all the liquid has evaporated. Remove the aromatics and bottle in sterile jars while hot from the oven. I think that they are ready when they start to catch just a little on the tips and have turned a beautiful reddy/orange colour.
The fragrance is spectacular and the taste is amazing. Can be eaten just like this, or can be enhanced a little with the addition of some pouring cream, plain yoghurt or ice cream.
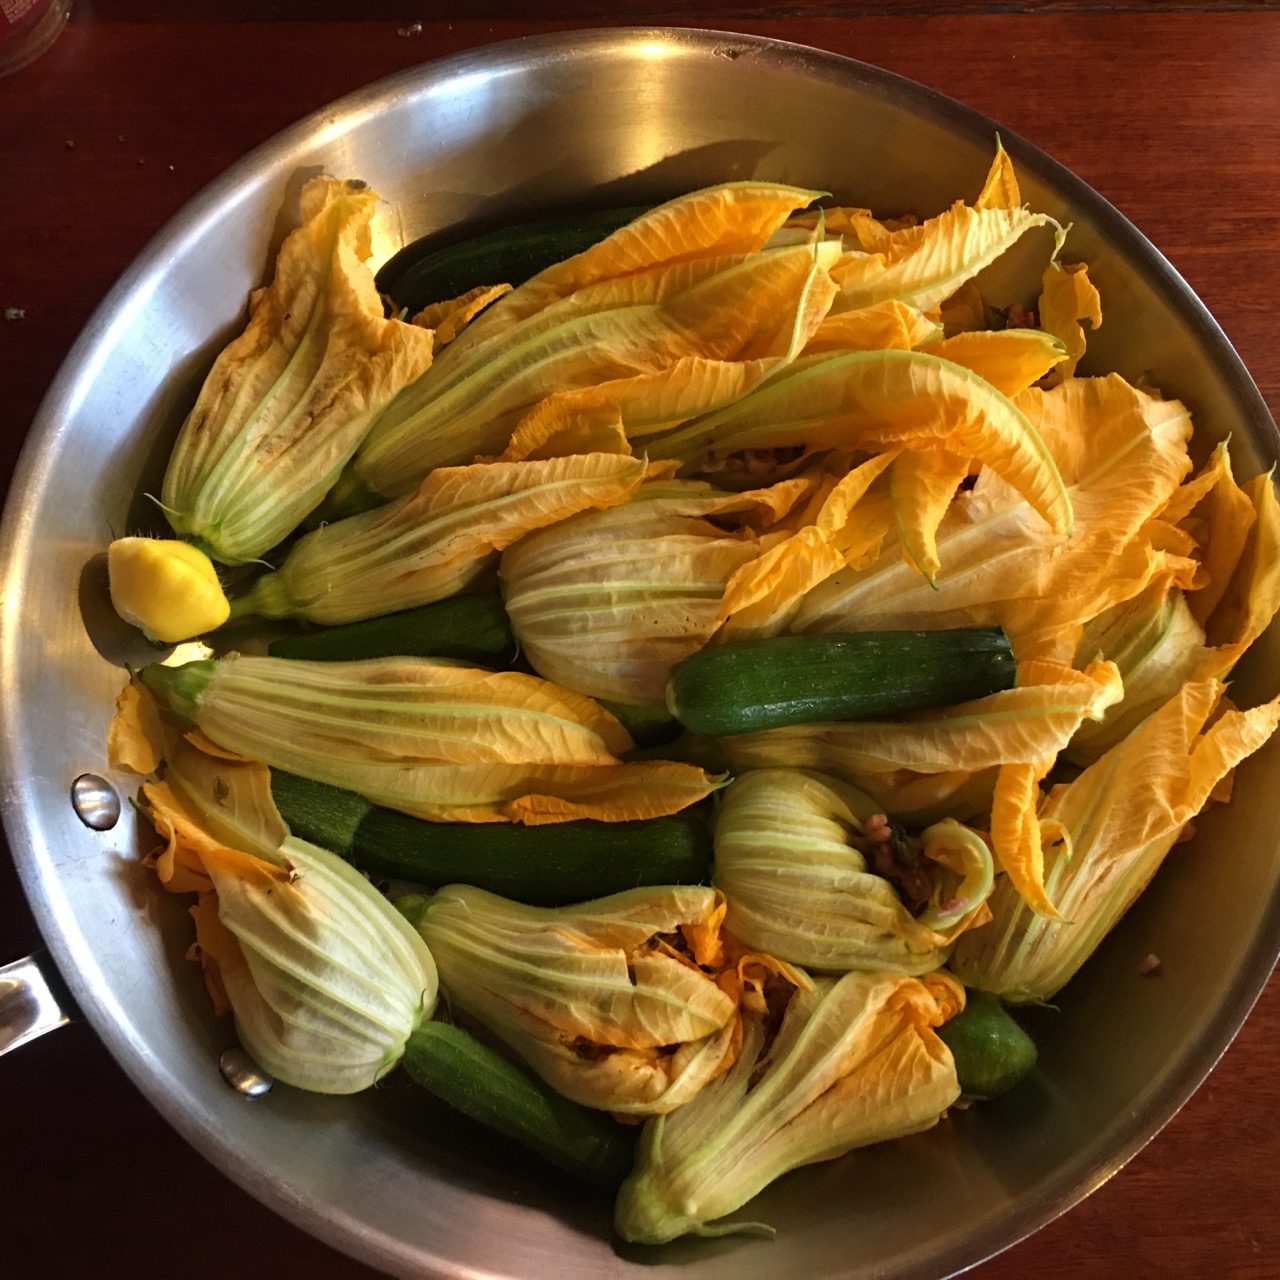
I also managed to find just enough zucchini and squash flowers, both male and female to make up the numbers, so that I could make stuffed zucchini flowers for dinner. I wasn’t expecting to find so many suitable flowers this late in the season, so wasn’t prepared with suitable quantities of cottage or other suitable cheeses. Instead I used a tub of left over risotto from the fridge. extended with some boiled lentils and a few olives. It made up the distance.
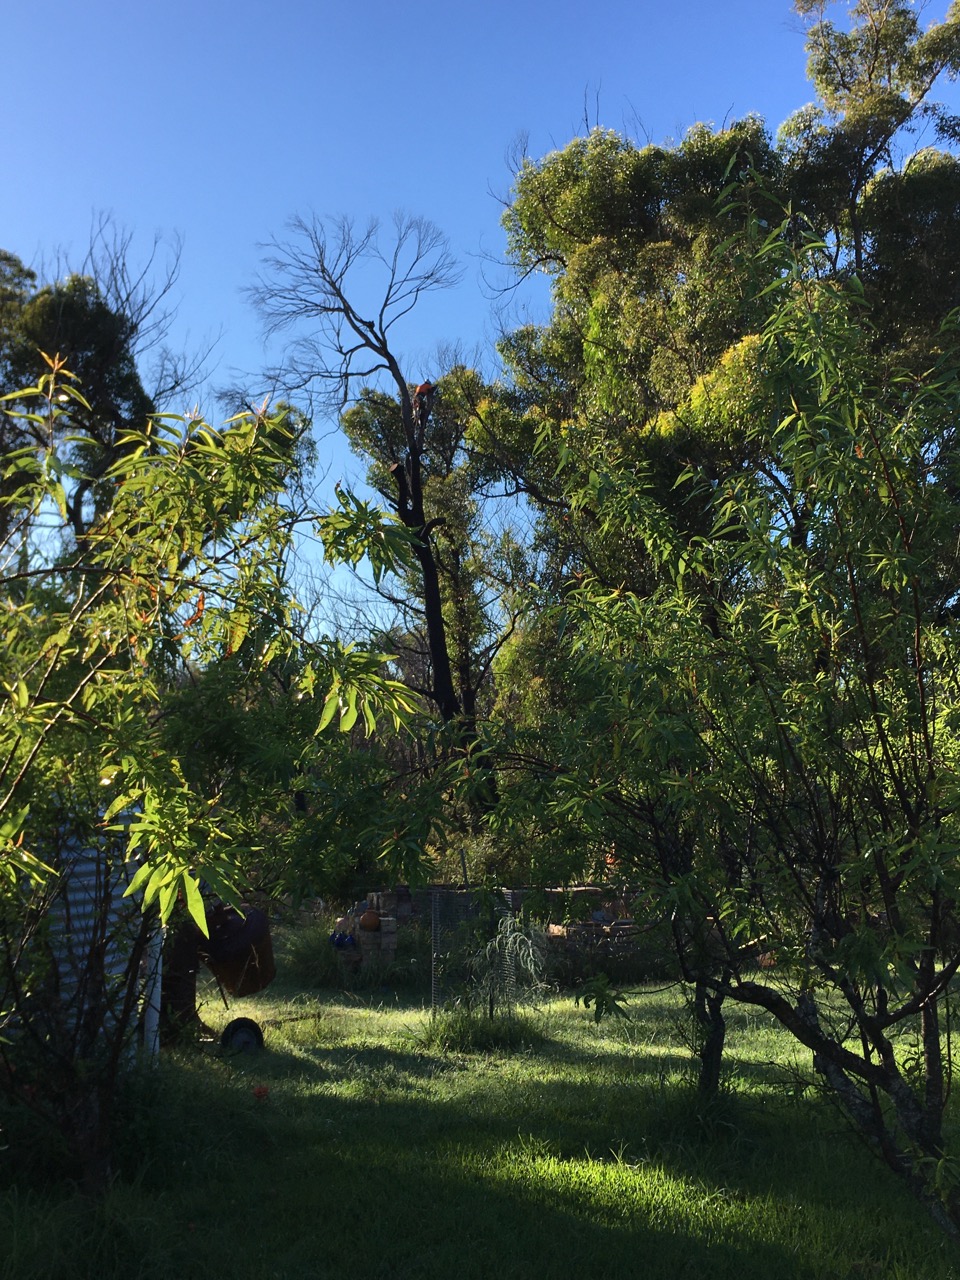
This last week also brought a little bit of excitement into our dull, plodding, Post Modern Peasant lives. The State Government Funded green waste clean-up program commenced, for all the dead and damaged trees in people yards that were created by the 2019 Black Summer catastrophic bush fires here in the Southern Highlands.
We had a team of half a dozen blokes here for two days, lopping, topping and chopping dead trees. Some were completely removed and the stumps ground out, but most were pruned back to make safe habitat trees for wild life.
They shortened and made safe 15 trees and took down 3 or 4 smaller ones in the immediate vicinity of our back yard orchards, where we work and mow.
The purpose of the exercise is to get most of the smaller dead branches down out of the canopy so that it is safe to walk around underneath them in our garden. We had already dealt with the most pressing and difficult problem trees in our front garden 2 years ago at our own expense. I wasn’t prepared to survive the fire and then be killed by a falling branch.
It’s only taken 26 months for the State Government to implement this emergency safety solution into place. I wonder how long it takes them when they take their time 🙂
We still have 3 acres, or one and a bit hectares of dead forrest that is continually dropping dead branches. We just don’t go there, and if I have to, I wear a hard hat.
It’ll be unsafe for the next couple of decades as the dead branches slowly rot and fall. But what can you do? It’ll cost many thousands of dollars to get them all pruned safely.
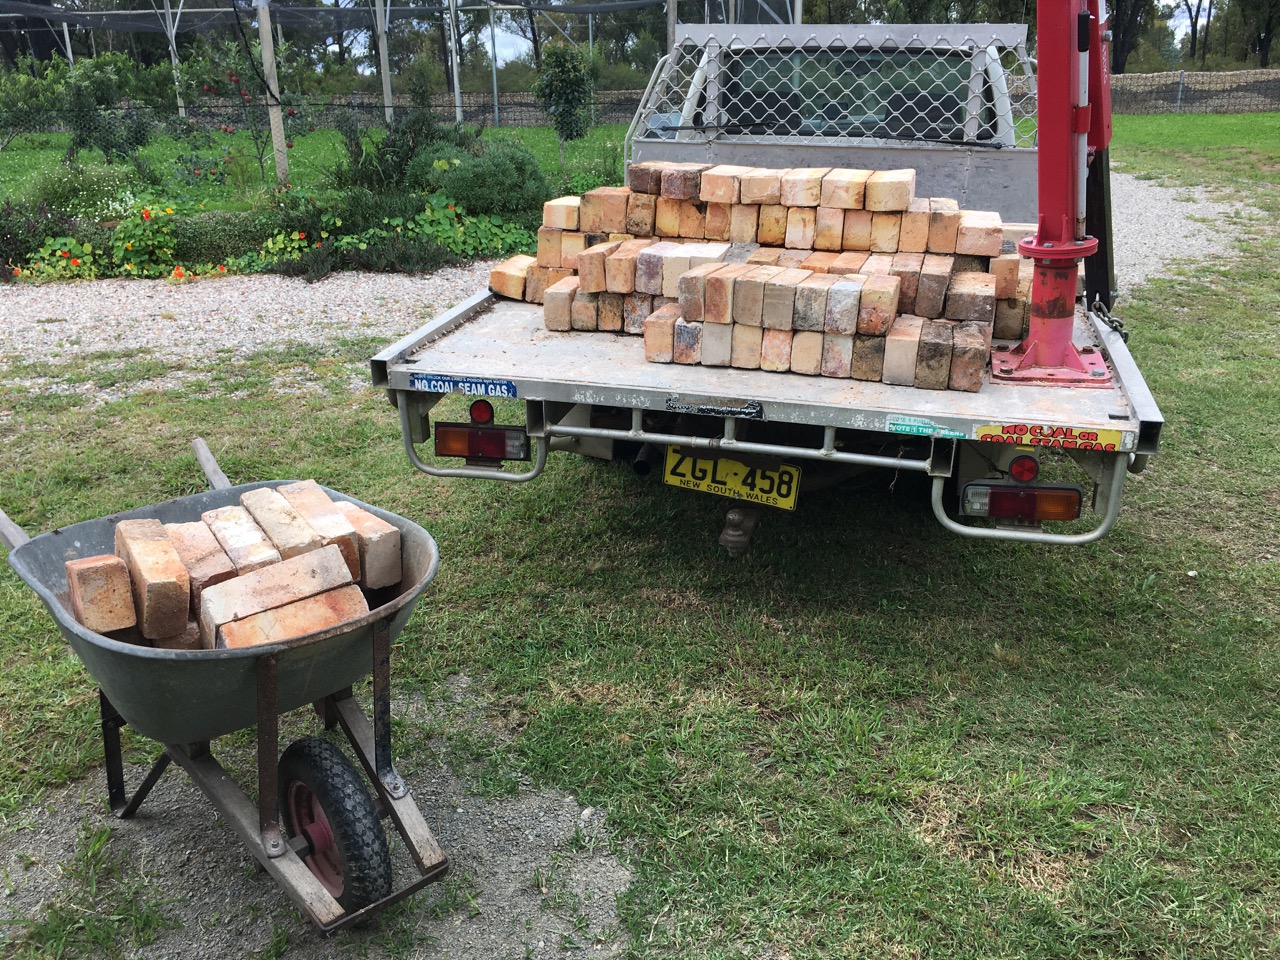
I have been working on the new wood fired pottery kiln now for the past week and a half. Each morning Janine and I start with cleaning bricks and loading them onto the truck for the trip up to the new pottery shed. From there they are wheel barrowed down the alley to the newly covered court yard kiln area.We clean and stack about 150 bricks each time. As we clean the bricks, we sort them into different types and sizes.
All my fire bricks are very old and I have been using all the same bricks over and over for the past 45 years. I was lucky enough to buy several thousand fire bricks for just $100 way back in 1974. I already had a couple of small gas fired kilns and a small wood fried kiln in my parents back yard. I didn’t live there any more, but continued to use my studio in a little garage sized shed below a cliff at my mothers home. I saw an add for fire bricks for sale in the paper. People looked in the newspaper to see adds in those days before screens. I went to see the bricks in the old ‘Mcillraiths enamelled cast iron bath tub factory in Alexandria. I think that they had merged with ‘Metters’ and were closing down and moving to a new site where they would only enamel pressed metal baths. Those were the days before plastic baths.
The fellow in charge of dismantling the factory had been the manager before closure. He needed to get rid of the four large 5 metre square and 6 metres tall enamelling kilns, as they were just about the last things in the factory to be removed. I looked at them and shook my head, thinking that ere was no way I could shift that many bricks. I had only come on the off chance that there were some small number of bricks that my students at the old East Sydney Tech College (now called the National Art School) could obtain to build their own small kilns after graduation. I told the guy in charge of disposal this, and that the job was way too big for me. He had originally wanted $1 a brick in the add, but there were 20,000 or so of them. He had had no offers and was very keen to get rid of everything, as the factory needed to be empty by the end of the month, the kilns and some old machinery were the only items left in the place.
He sweetened the deal by offering to sell the lot to me for $1,000. I said No, thinking that although that was a very good price, I just couldn’t see how I could do it. Having said no way! He then offered to dismantle all the kilns and stack them on pallets for me. I continued to say NO!, more in disbelief than anything else. He said, “you drive a hard bargain Son!” OK then, I’ll organise a semi, palletise them, load them all onto the semi here with the fork lift and deliver them to your factory.”I told him that I didn’t have a factory or a fork lift, anyway I don’t need that many bricks. He countered with OK $500! He saw me shaking my head, I couldn’t believe what was happening. He must have been extremely keen to get out of his contractual predicament. I assume that he had already made his money on the sale of all the scrap iron and useful machinery? I was still shaking my head, when he said OK! $100 delivered. I said yes!
They arrived all in one go on a huge semi-trailer truck. The truck was loaded 2 pallets wide and two pallets high. Over twenty pallets of fire bricks. It took 5 friends and me all afternoon just to unload them onto the foot path. The next day my friend Len Smith came over and we hired a brick elevator/conveyor and laid it more or less horizontally up the sloping driveway so that as Len loaded the bricks onto the conveyor at the street, I was at the other end to catch them and ran around stacking them on the ground at the top of the hill. I paved my parents driveway 3 layers deep in fire brick to get them all off the side of the road. That’s how I ended up with 20,000 fire bricks and could afford to build a 3 chamber climbing kiln in the rented property out at Dural the next year.
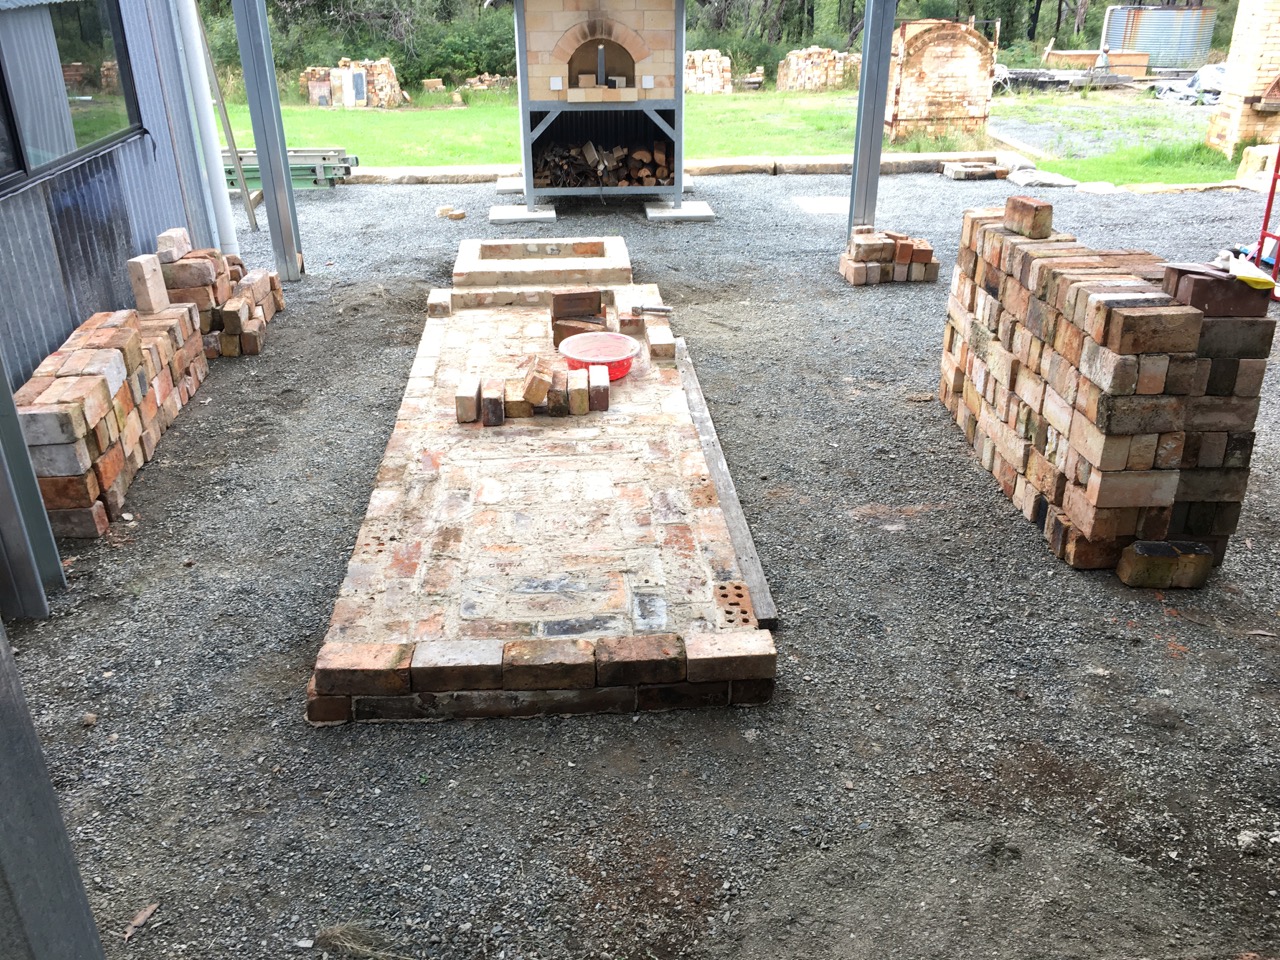
As we wheel barrow these very familiar fire bricks that I have handled so many times to the kiln site. I sort and stack them in piles around the kiln into their different uses. House bricks for the foundations, Heavy fire bricks for the fire box and floor, light weight Insulating refractory bricks for the lining of the chambers and finally plain light diatomaceous insulating bricks that are only good for low temperatures, less than 1,000oC, these are only used as the outer skin of the chamber as insulation. After lunch I mix up a wheel barrow load of clay and sand mortar, then I spend the afternoon laying those bricks. It’s a full day.
The chickens are all over the job keen to see what is going on. They are so inquisitive! They are always pecking at the gravel floor to get grit for their crop.Then they took an interest in the pile of yellow ‘fat’ sand that I’m using for the clay and sand mortar mix.Today they suddenly started to take an interest in the mortar. They decided that it was just what they needed in their diet. They have eaten so much of it over this past week, that their pooh has turned white with all the kaolin. As have their faeces, faces and beaks. They are now truely, sticky beaks.
After 5 days work, I’m now up to the level of the throat arches that divide the fire box from the first chamber, then between the 1st from 2nd chamber. It’s slow going, but my excuse is that I’m an old guy now, about to turn 70 and can’t do all that I used to when I was younger. I didn’t need that catastrophic bush fire in my life at this time, but life is what it is and you have to take it in your stride. Resilience is all about facing up to reality and keeping on going in the face of hardship and set backs. I just turn up everyday and do what I can.
We are eating sweet corn almost every day. When the cobs are so fresh and young, I just eat them raw. They are sweet and juicy.
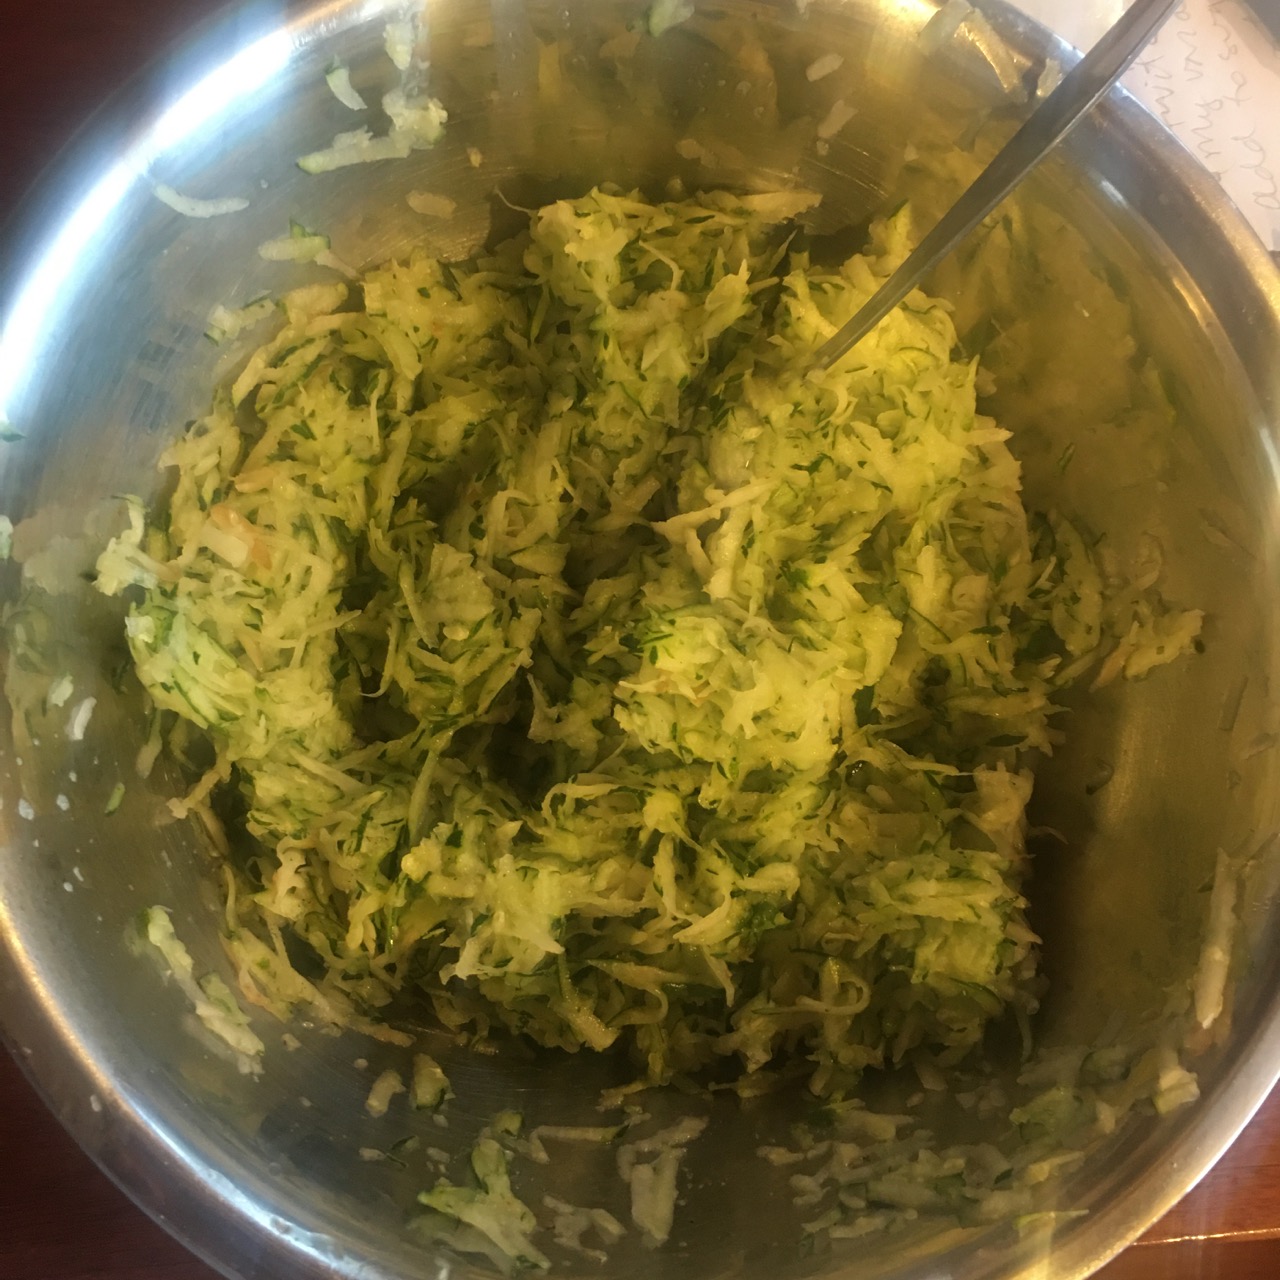
This time of year, we also have an excess of zucchinis. This week we made zucchini fritters with garden fresh tzatziki.
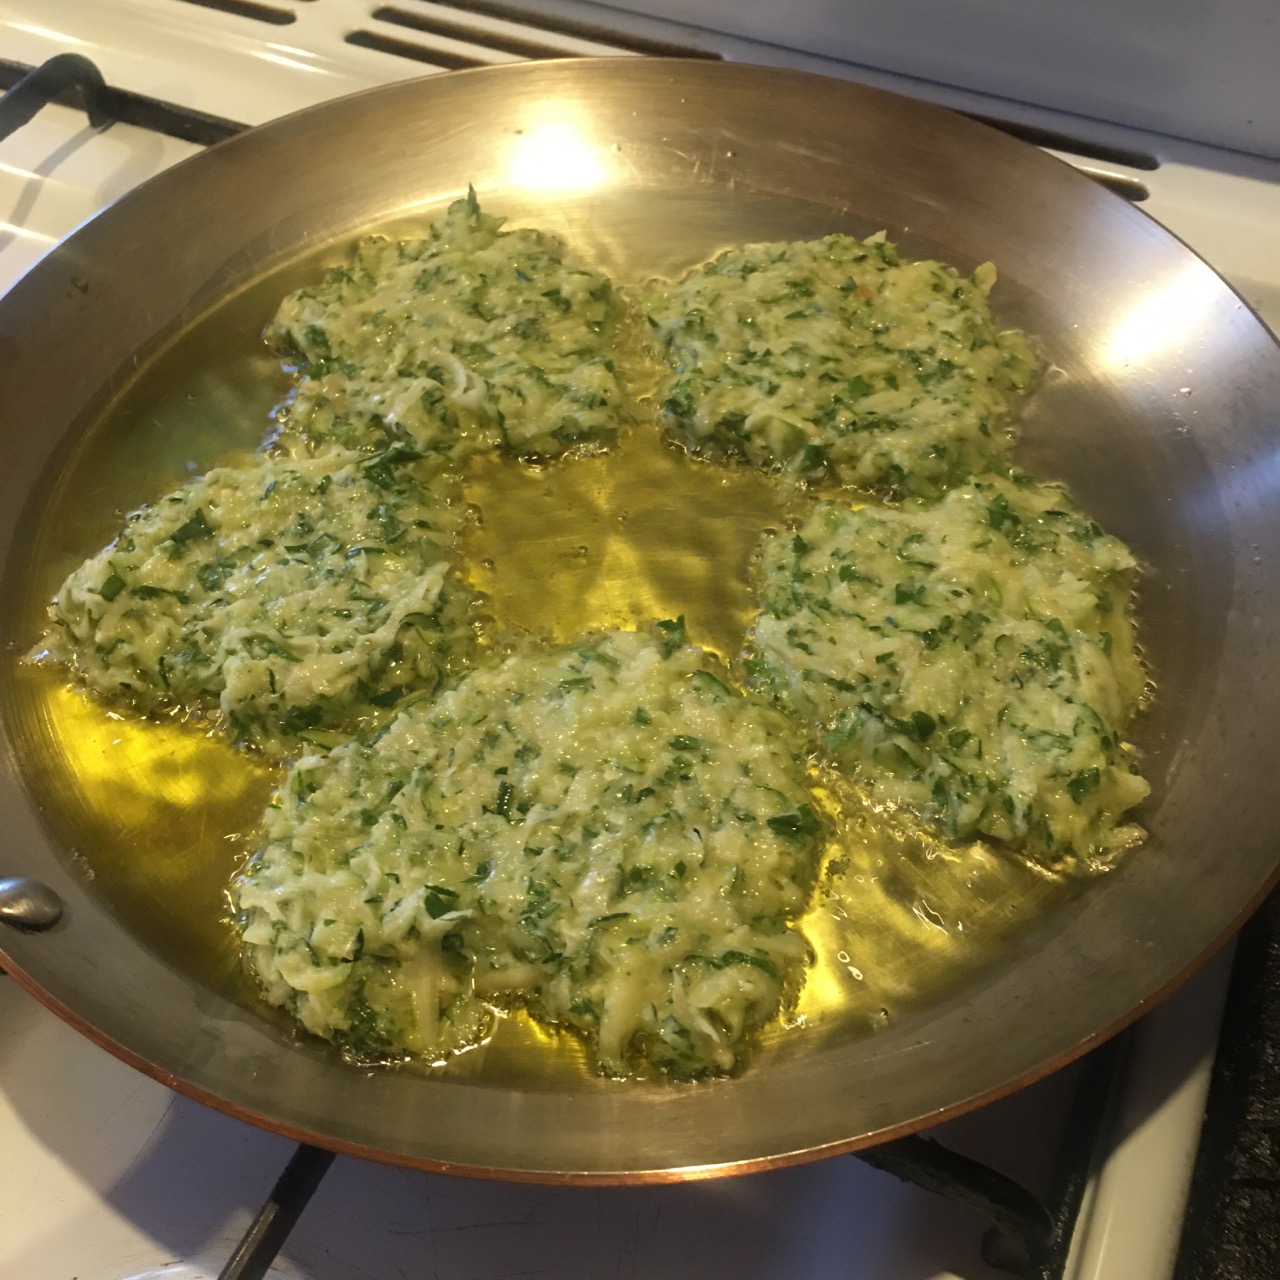
Grate two medium zucchinis and one small potato. Wring out the juice, and add one egg and a tbspn of flour. Pan fry in a little olive oil. It’s a great way to use up those pesky zucchinis that got away and are past their best for BBQing or steaming. Just as long as the seeds haven’t become too well developed. If they have, just slice them long ways and scoop out the seeds and use the outer layer of zucchini.
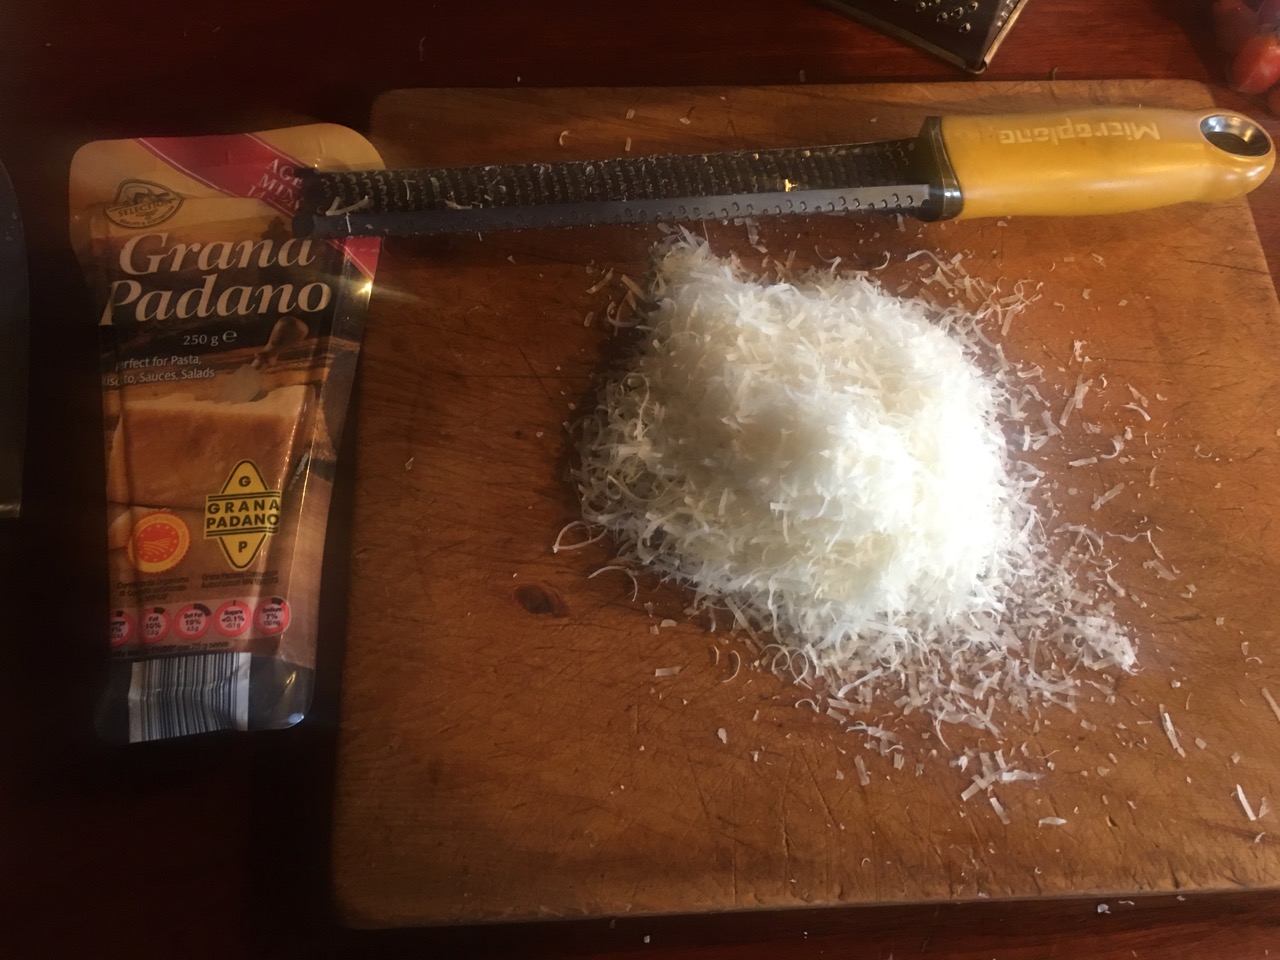
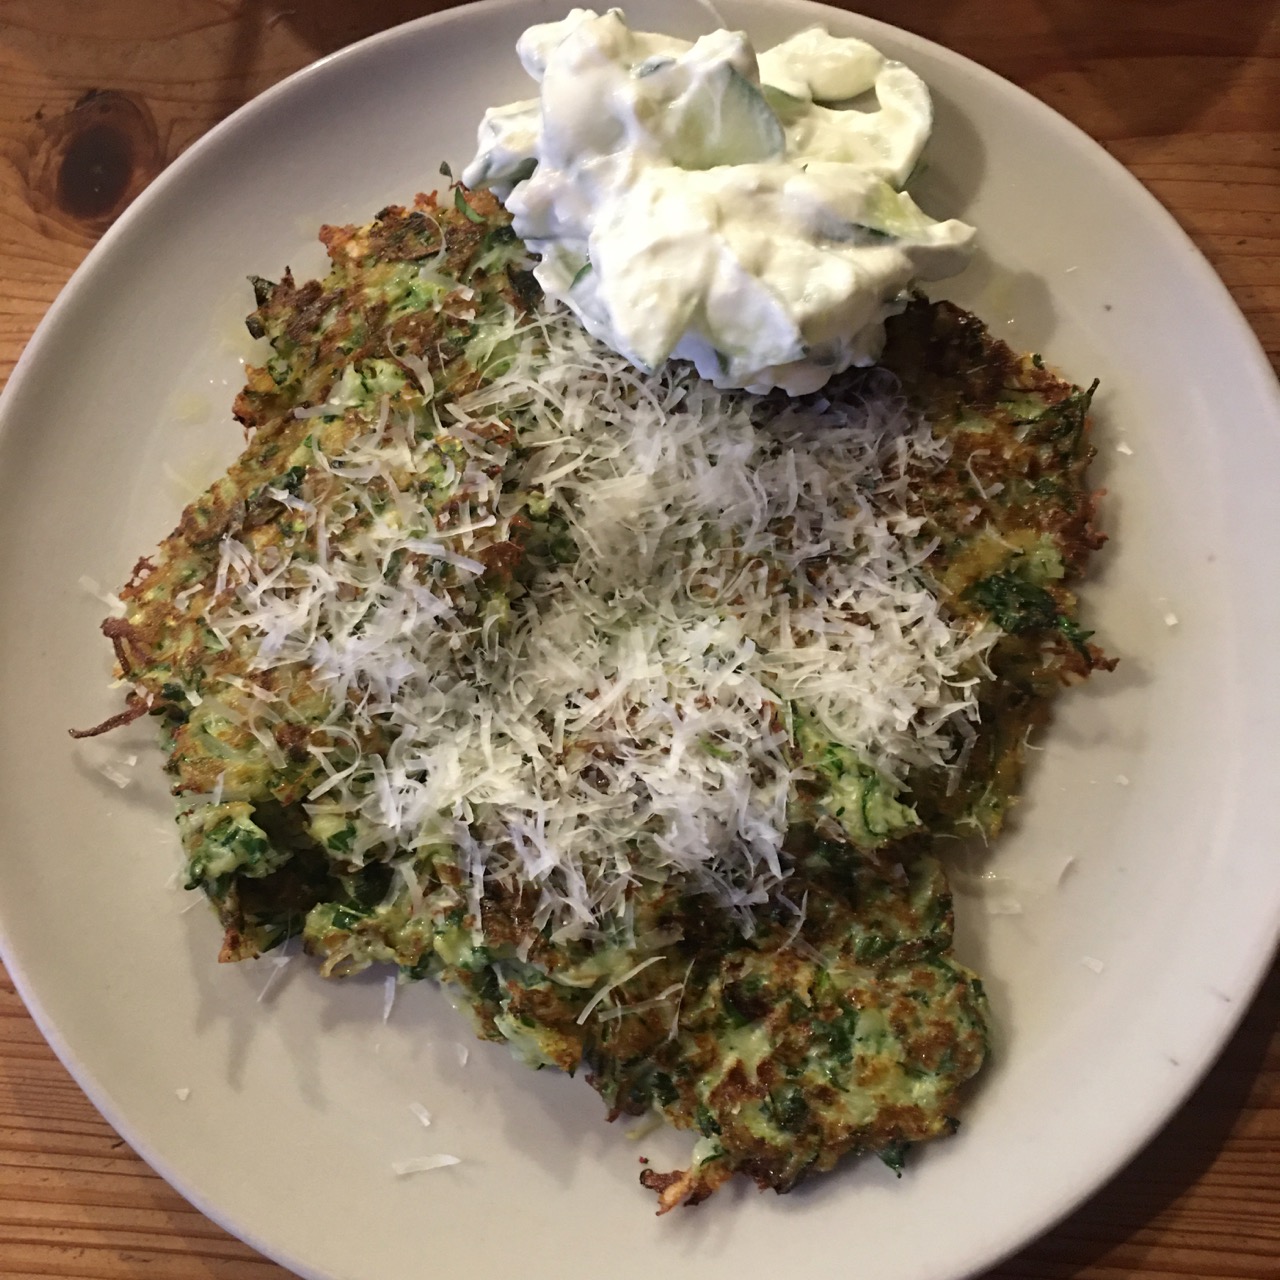
Top with a little grated parmesan and serve with garden fresh tzatziki. I slice the cucumber pretty finely, dice up the garlic and crush it to a paste with the side of a broad chefs knife along with a sprinkling of salt. This really liberates the full flavour of the garlic. Mix with thick Greek yogurt and its ready to serve in no time while the fritters are cooking.I love these kinds of immediate, garden-fresh meals. Simple, tasty, very healthy and quick, with very little cleaning up.
This is just about as close as it gets to self reliance, served on Janine’s hand made plates, straight from the garden and onto the plates within the hour. The only thing that we bought was the parmesan. It keeps well in the fridge for ages and serves as a finishing touch on many meals.
We have hit the ground running in this first week of the new year. I still have to build the wood fired kin so that I can get on with my work and research.
Before I can build the new wood fired kiln, I need to build a roof to keep the new kiln dry and weather proof.
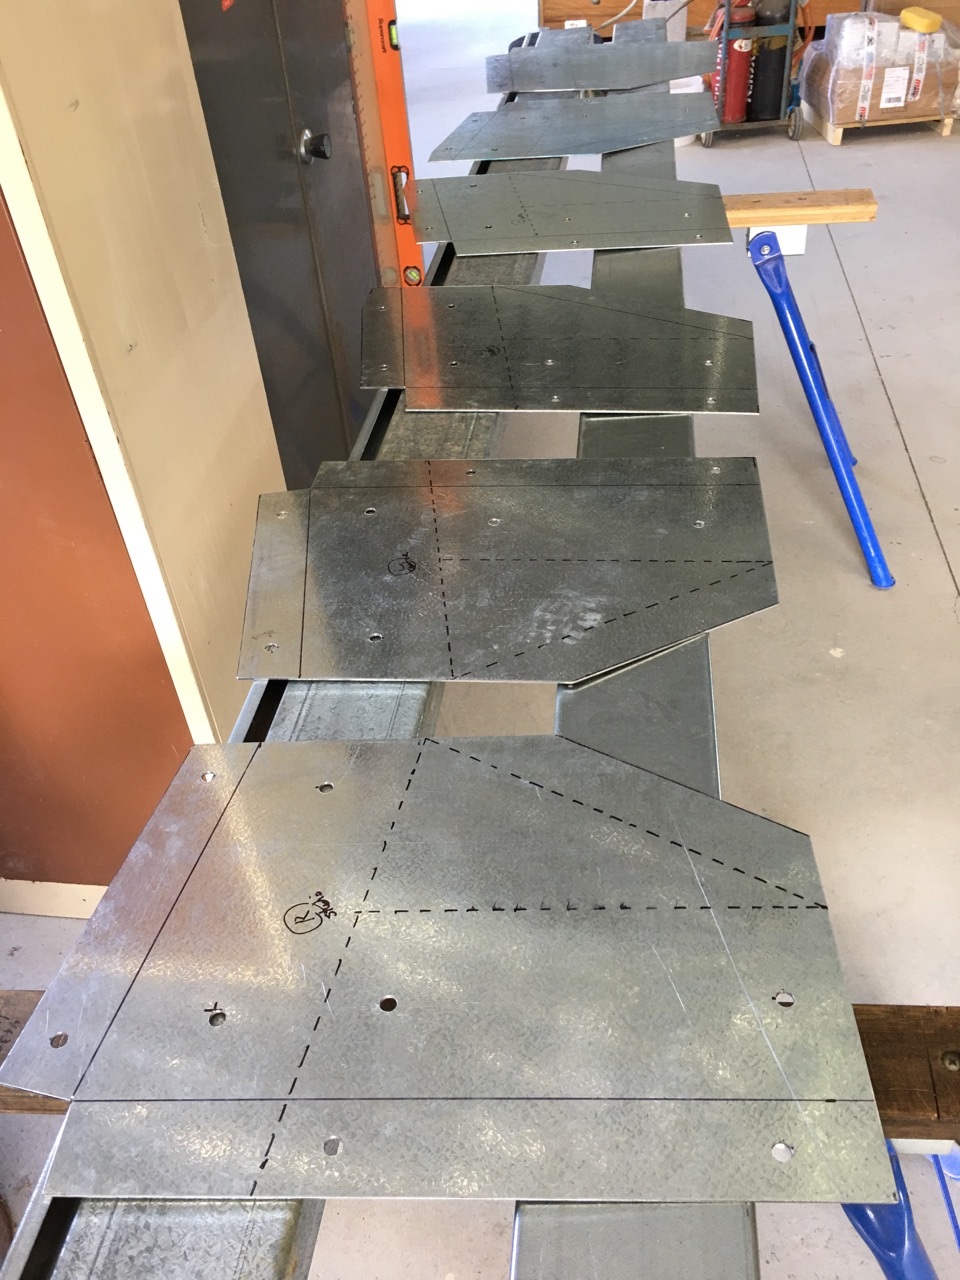
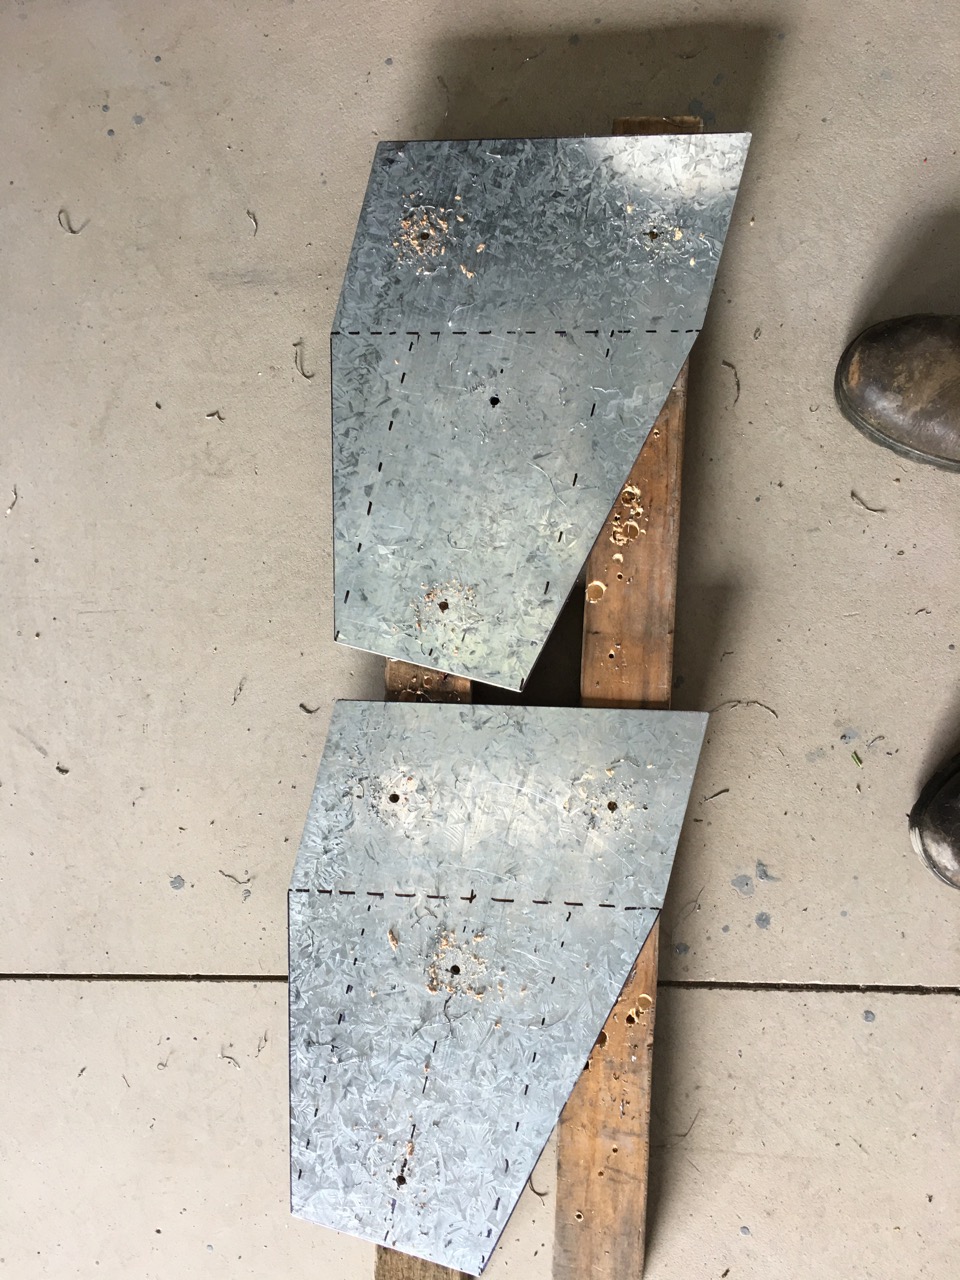
We have a beautiful court yard area that only needs a skillion roof over it. I spent the first couple of days of this week making the portal brackets that I need to join all the rolled steel purlins for the roof.
I had half a sheet of 3mm gal steel, so was able to make all my own brackets from this. Cut and folded into useful custom brackets. Then pre-drilled to take the 12 mm. high tensile gal bolts. I drilled 200 holes on Tuesday with my hand held battery drill. I spent quite some time sharpening drill bits to keep them all sharp as the day wore on.
Once the 12mm. bolts are in and tightened, it prevents the various members from parting company. Then there are 8 to 10 ‘tek’ screws to be drilled in around the bolts to stop any lateral movement or swivelling around the bolts. It’s a very quick and elegant system to secure the rolled steel purlins together with great structural stability. There are 8 bolts and 24 tek screws holding each triangular corner plate together.
By fabricating all the crucial parts myself, all I need to purchase are the long, rolled steel purlins, as these are 6 or 8 metres long, and too big for me to fold myself in my workshop. Everything else is scrounged, recycled, repurposed or home made on site. We are even using some of the hundreds of metal screws that Janine picked up around the building site after the contractors erected the original shed frame.
On Wednesday, my friend Warren turned up for a 3 day stint. We dug the footings and cast the ‘H’ section posts in concrete. I had pre-cut and stacked the posts ready to go into the ground. On Thursday, the cement had set and we were able to bolt on the cross-beams and triangulate the structure with knee braces, making it free standing and structurally stable.
Friday saw us screw on the ‘top hat’ rafters, or roofing battens, and then finally screw on the galvanised iron roofing and polycarbonate sky-light sheeting. Not too bad for a couple of amateurs in 3 days. What was remarkable was that all this was done in the pouring rain. It seems that all the negatives of working on ladders, at height, when over 69 years old, with power tools, in the rain, on slippery steel. These all seem to cancel each other out and the result is all positive. A finished, metal-framed, kiln shed roof with skylights and excellent ventilation.
I wrapped the power tools in a plastic bag to keep the rain out of the electrics. Just had the drill bit sticking out of the cut-off corner of the bag. It worked really well.
This coming week, the second week of the new year, We will be picking up and carting the paving stones back from their storage stacks post-fire and re-laying them in the courtyard in preparation for the bricklaying of the wood kiln. I really need the wood fired kiln built and fired as soon as possible, as I need to get my exhibition commitments under way.
Each week brings us closer to the completion of our new workshop. Nothing is ever finished, Nothing last for ever and nothing is perfect.
We have been busy – always busy, but we have managed to organise a few impromptu get-together parties with our neighbours, the ‘creatives’ of Balmoral Village. We have all been fire-affected in some way, some more than others, but we have survived and we are looking forward. We organised these dinners to ‘catch-up’, share news and ideas, but mostly to take some time out to celebrate each others company. We cleared out the big central room in the new pottery because it has beautiful light and plenty of space. We can fit 10 at the big glazing bench, 11 or even 12 at a pinch. It’s been very enjoyable to share time and food in this way. Although just as much work preparing and then washing up and cleaning, then setting everything back in its place, as it is building the space.
This week I booked the electric car in for its third service. It been amazing driving around these past 3 years on sunshine. It’s a plug-in hybrid, so it does have a petrol engine in there as well as the battery and electric motor. We can do all our local running around entirely on sunshine, but every now and then we go a little farther afield and we come home on petrol. When the battery is fully charged and the fuel tank is full, it has a range of over 1100 kms. However since that first fill 3 years ago, we have not filled the tank since, as it took us the best part of half a year to use the fuel up. It’s not good to store petrol for so long. It can go gummy, or ‘off’. Since then we have only put $20 in the car every 3 months or so, even that is a bit long, but it seems mean to pull into the service station and only put $5 in each month. We seem to have settled into some sort of routine of going to the petrol station quarterly.
We charge the car and our Tesla battery from our solar panels on the shed roof. We produce a maximum of 5.3 kW of electricity on the best sunny days, but much less in overcast and rainy weather. However, this size of Solar PV installation is enough to charge our car, run our house and pottery, even fire the electric kiln, AND we still have some excess to sell to the grid on an average day. These days, we earn over $1000 per year, (it used to be double that) while living, driving and firing our kiln for free. We went solar in 2007. We haven’t paid an electricity bill since. The system has well and truely paid itself off over that time. Interestingly, as more and more people connect SolarPV to the grid, the price that the utility pays us for our power has progressively gone down. Years ago, we used to get 60c or 70c kWh. Over the past 4 years the price that we get has dropped from 21 cents per kW/hr, down to 19, then 17 and now 10 cents. I can see it being 7 or even 5c next year. It’s great that more and more people are going solar. If not fully, like we have, but every little bit helps get more coal power and its pollution out of the system.We didn’t go solar to make money, but it has turned out that we have. We went solar to try and minimise our reliance on the fossil fuel economy. That has certainly worked out very well. Our power bill tells the story.
We consume less than 1 kWh per day on average over the year. We have spent our life here honing our self-reliant skills to consume everything minimally. Our 0.91kWh is about 1.5% of the ‘average’ 2 person household, yet we live in a very old house, (128 years old) not a new solar passive one, and don’t ‘want’ for anything. It can be done.
The utility charges us about $1 per day to be connected to the grid. Their ‘access’ charge. This has been steadily increasing over the years, while the feed-in tariff has been gradually dropping. At the moment we pay $1 a day to be connected to earn $3 per day. I can see a time when this balance reverses. I guess that’s when we start to think about the 2nd battery and disconnect from the grid. I’ve read that this is called the death spiral of the electricity industry, but I can’t see it happening, as it takes a lot of effort and planning to live a life of minimal consumption like we do.
All this rain has the garden growing very well. I’ve been putting in a lot of effort in the veggie patch recently. It’s looking more loved now and providing us with all our green food. The warmer weather combined with the rain has the grass growing it’s head off. Janine and I spent half a day each yesterday mowing to keep it under control. We haven’t had to mow this much for years. All the greenery is very soothing on the eyes. All in all, the COVID plague aside, it’s looking like a pretty rosy year ahead.
We have just had our first Open Studio weekend. It was good. Not too busy, just right. We had an influx on Saturday morning with half a dozen cars in the first hour. We even had a queue at the wrapping table for a short time. but after that it settled down to just one car after another until lunch time and then a long spell of quiet. In the afternoon we had several more visitors spread out more or less evenly until just after 3pm when it stopped.
We were lucky that there was a big function on at Sturt Workshops in Mittagong all day Saturday, so we picked up a few car loads of visitors that called in here on the way past, coming from Sydney and going to Sturt.
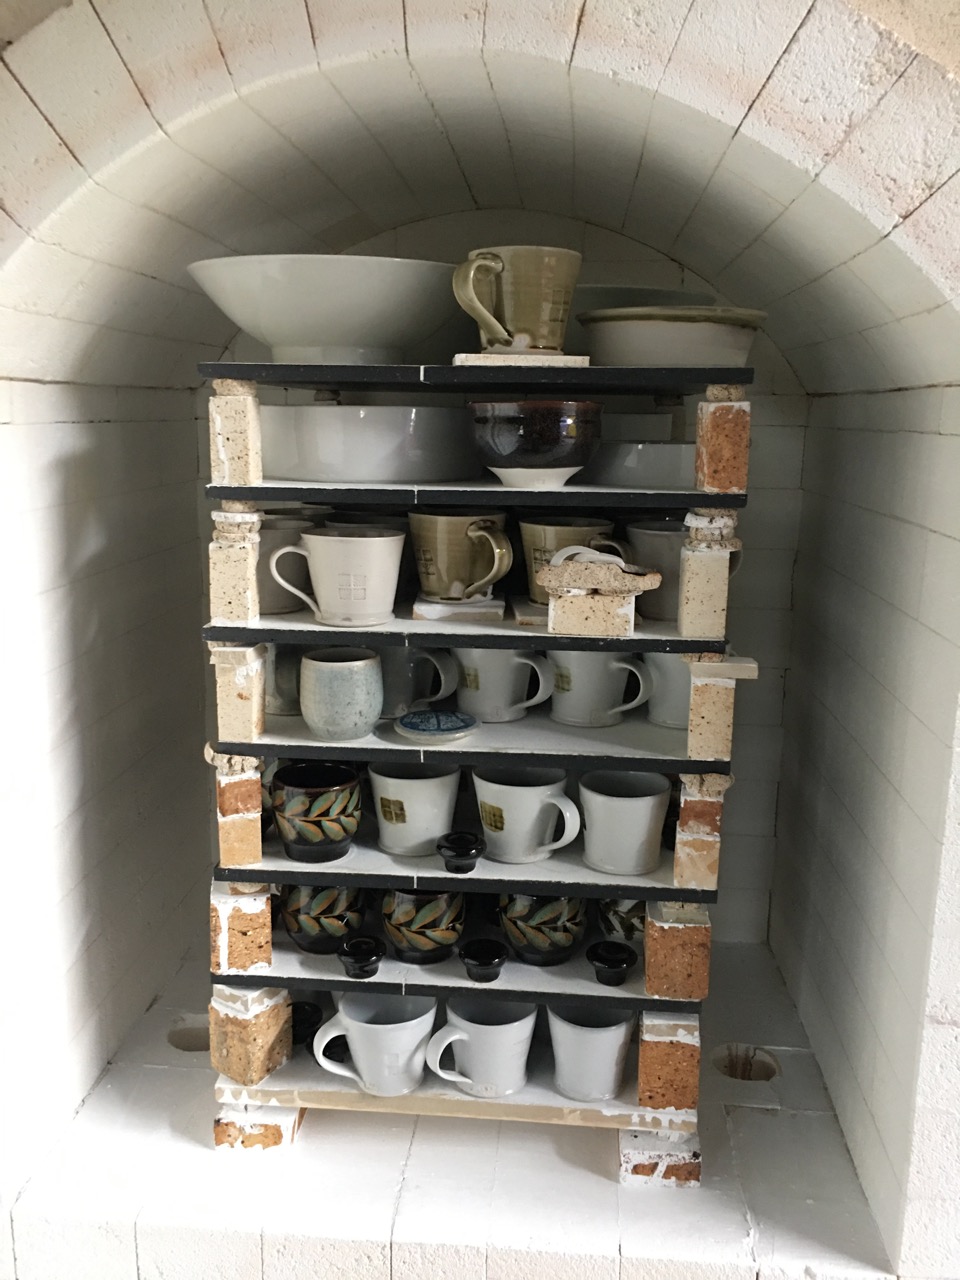
We have had only 4 stoneware glaze firings in the 3rd hand gas kiln that I bought back after 26 years out in the wild. It’s now back in captivity and working well.
Sunday was quieter, but still good. We had the same lull in the middle of the day but a much quieter afternoon. It was a great start to this 4th pottery iteration after loosing the first 3 to fires, we have been a lot more cautious about what sort of garden and just how much foliage we can accept near our house and workshop. As this new 4th pottery is almost entirely made of steel, it is a lot less flammable. Steel building can still be ruined by intense fire – they bend and collapse in intense heat. So that is why we have decided to build this new studio in the middle of our block well away from any bush. I have already plumbed the building with fire fighting sprinkler lines. Although as it is so wet they year. I haven’t got around to fitting the sprinklers yet.
I decided to spend those couple of days in the pottery making work for the sale. Everything in it’s own time.
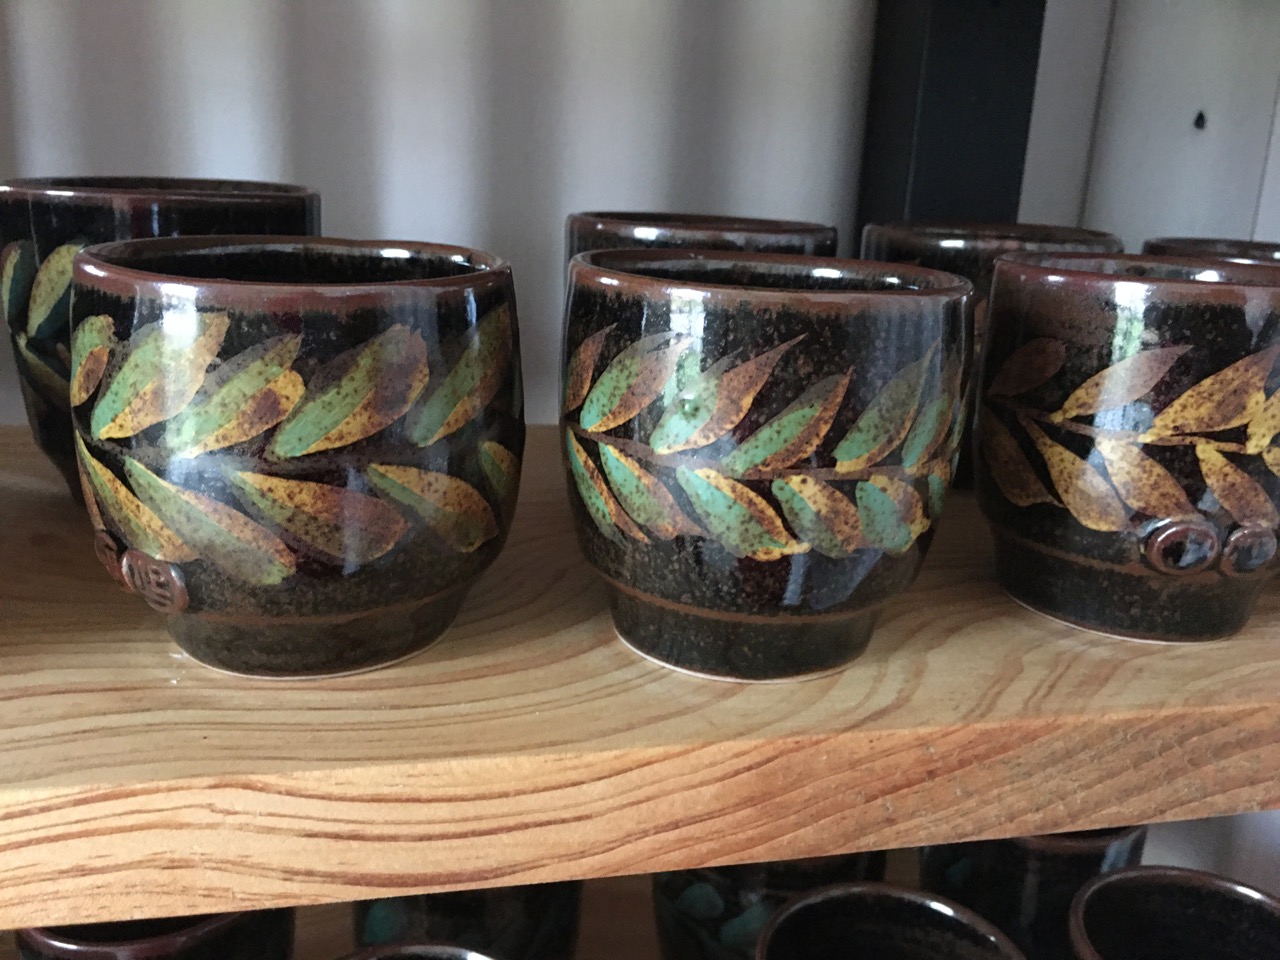
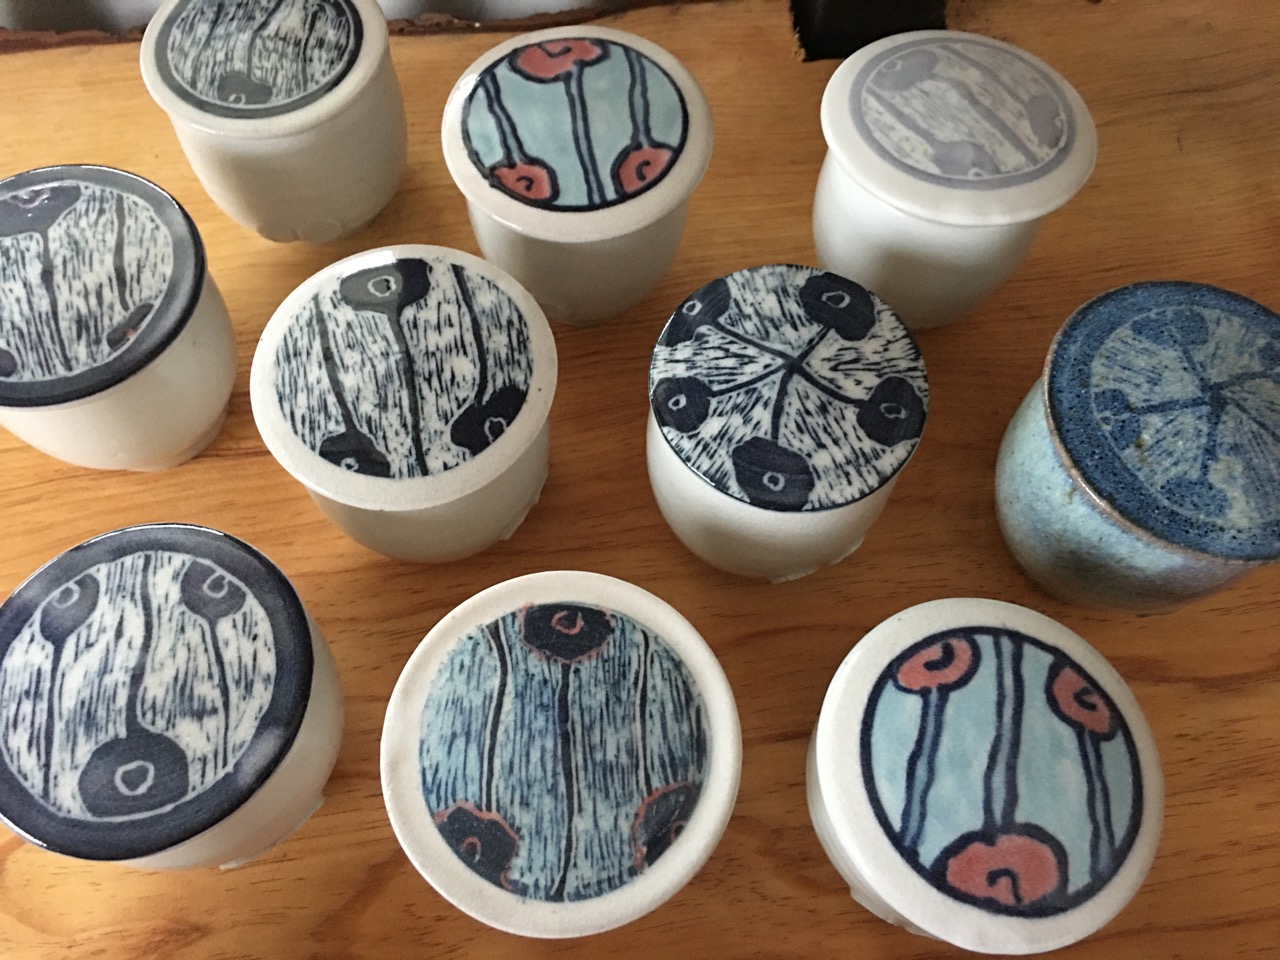
We almost sold out of Janines painted unomi beakers and inlaid lidded boxes, as well as my breakfast bowls.
So on Monday morning we were both back on the wheel making new stock for the up-coming December Open Studio weekends as we have elected to be part of the Southern Highlands ‘Pop-up’ Artists Open Studios on the first two weekends on December, – 4th and 5th, then the 11th and 12th.
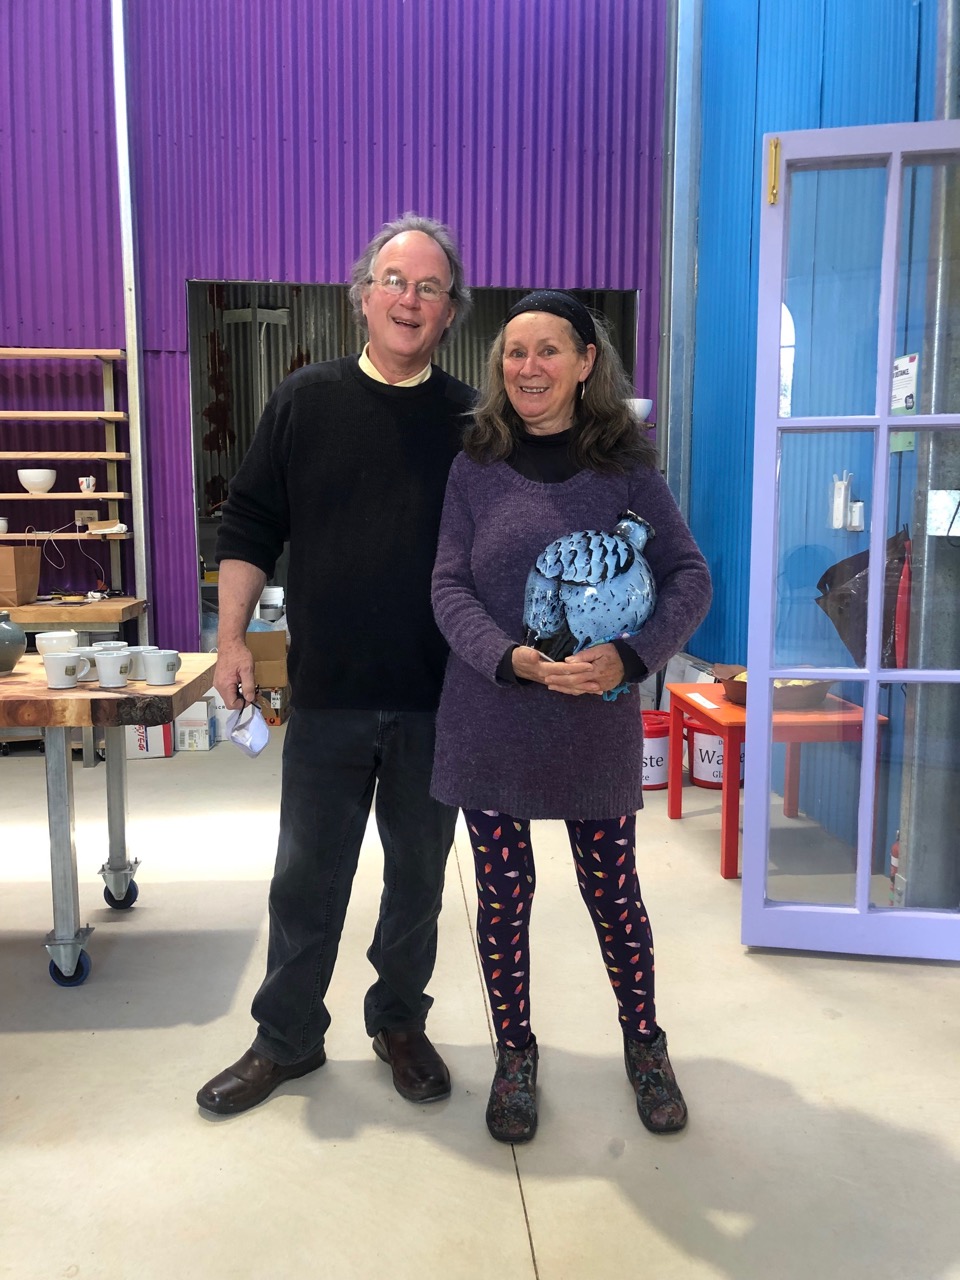
This image of us by Eva Czernis-Ryl. Thank you Eva.
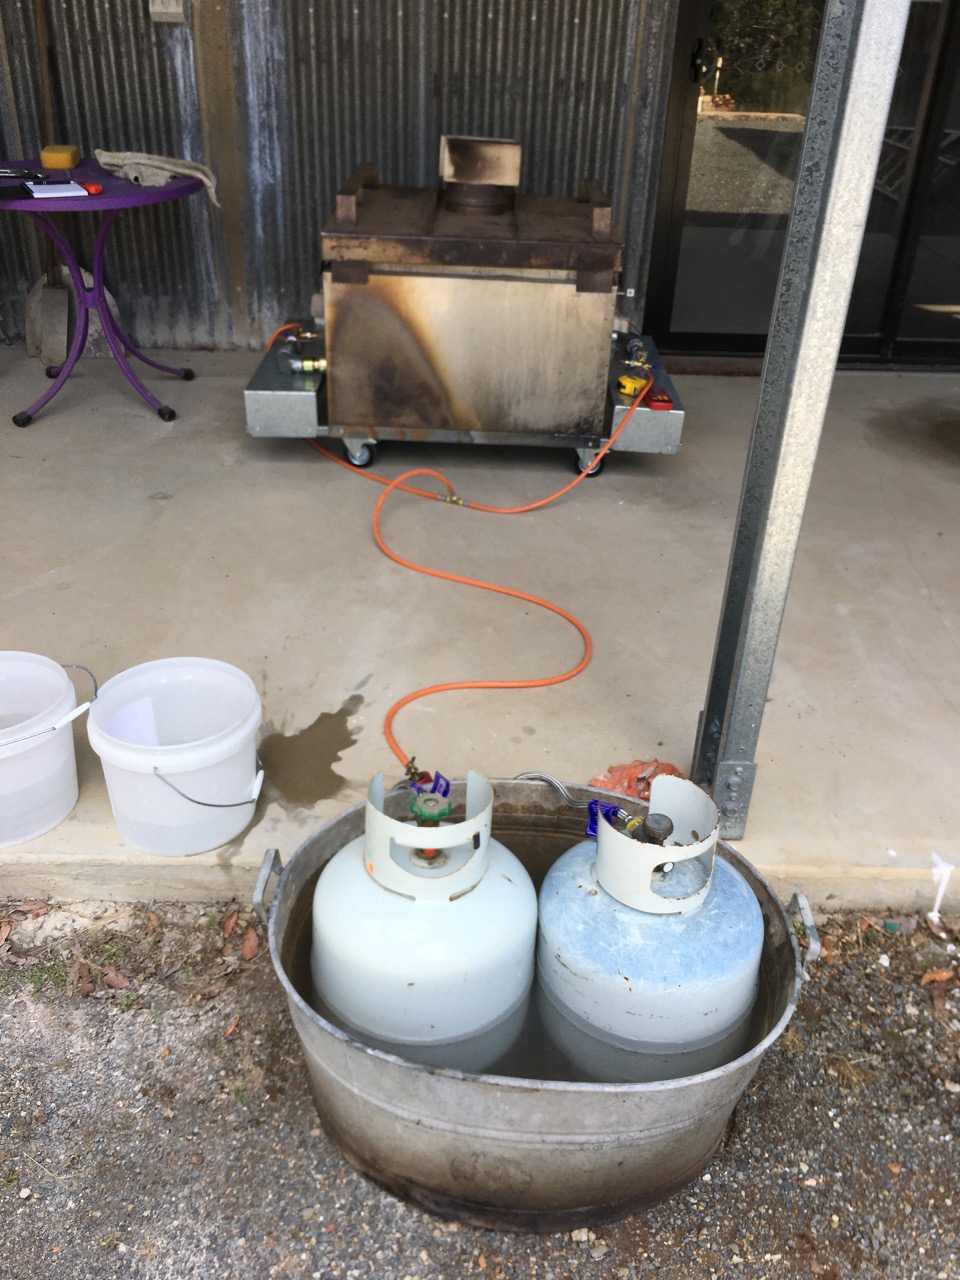
Yesterday we had all three kilns firing at once. A bisque in the little electric kiln, a stoneware reduction glaze in the big gas kiln and another stoneware reduction firing going on in the old relocatable mini wood fired kiln. I recovered it from the ashes of the fire. As it was built from a stainless steel monocoque frame with insulation brick lining, it mostly survived the fire, because it was stored out on the verandah and didn’t get too badly burnt. It just needed some cosmetic TLC on the frame and a new set of castor wheels. Lucky!
It was designed and built as a possible dual fuel kiln to be fired with either wood or LP gas from BBQ bottles. However I had never fitted it with burners and only fired it with wood previously. Now is the time to finish fitting it out with burners. I spent a day making shiny new burners and gal steel mountings. I chose to only pack and fire the bottom half of the kiln , as it is designed to be in two sections. A bottom half with the fire box opening and burner holes – which ever is chosen to be used. Then a top half composed of a removable ceramic fibre ring and lid. The ring can be removed and the lid placed on the base section to make a smaller half sized kiln. Which is what I did yesterday. As it was the first test firing of the kiln, I thought it best to go small for a first firing.
After an initial tweaking and tuning, It worked perfectly and fired to stoneware in reduction easily in 2 1/2 hrs. using less than one 9kg bottle of BBQ gas. I had 2 set up ready with a change over switch just in case, but the 2nd bottle wasn’t needed. I also set them up in a tub of water that can be warmed. In this way I can fire them to dead empty without them freezing. But none of this was necessary yesterday.
I’m a bit more confident about our local rock glazes now after 3 rounds of test firings. The hares fur/teadust tenmoku is a little more stable.
Both Janine and I have been investigating the use of colours over tenmoku.
and I have managed to stabilise the local Balmoral dirty feldspathic stone and wood ash opalescent Jun glaze.
Janine has made some slip decorated lidded boxes.
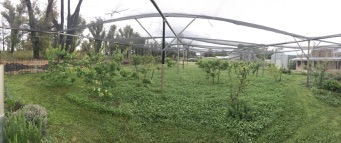
The stone fruit orchard is looking great after a wet start to the spring season and everything is green and luscious.
The almond grove is also very lush and green. All these mature almond trees were burnt and transplanted into this area that was formally a native garden. We have decided to keep the more flammable native bush at a much safer distance from the house now.
The pottery will be open this coming weekend, the 13th and 14th of November as part of the Australian Ceramics Assn. Open Studios weekend that will operate nationally. We will be open in conjunction with Megan Patey in Colo Vale. Megan makes beautiful Majolica and Smoked Arab lustre.
click on the QR code to find your local potter.
Janine and I will be also open on the first two weekends in December and the Southern Highlands Artists Pop-Up Open Studios group.
We will be open on the 4th/5th and in conjunction with Sandy Lockwood, on the 11th/12th of December.
We look forward to being able to show you around the new pottery on one of these 6 days.
We will be following the government recommended COVID19 safety protocols. So please come if you are double vaccinated and have your vaccination certificate. There is our Service NSW, QR code poster on the door for login
We have a covid-safe plan that includes keeping the space very well ventilated and limiting numbers to 4 sq.m. per person.
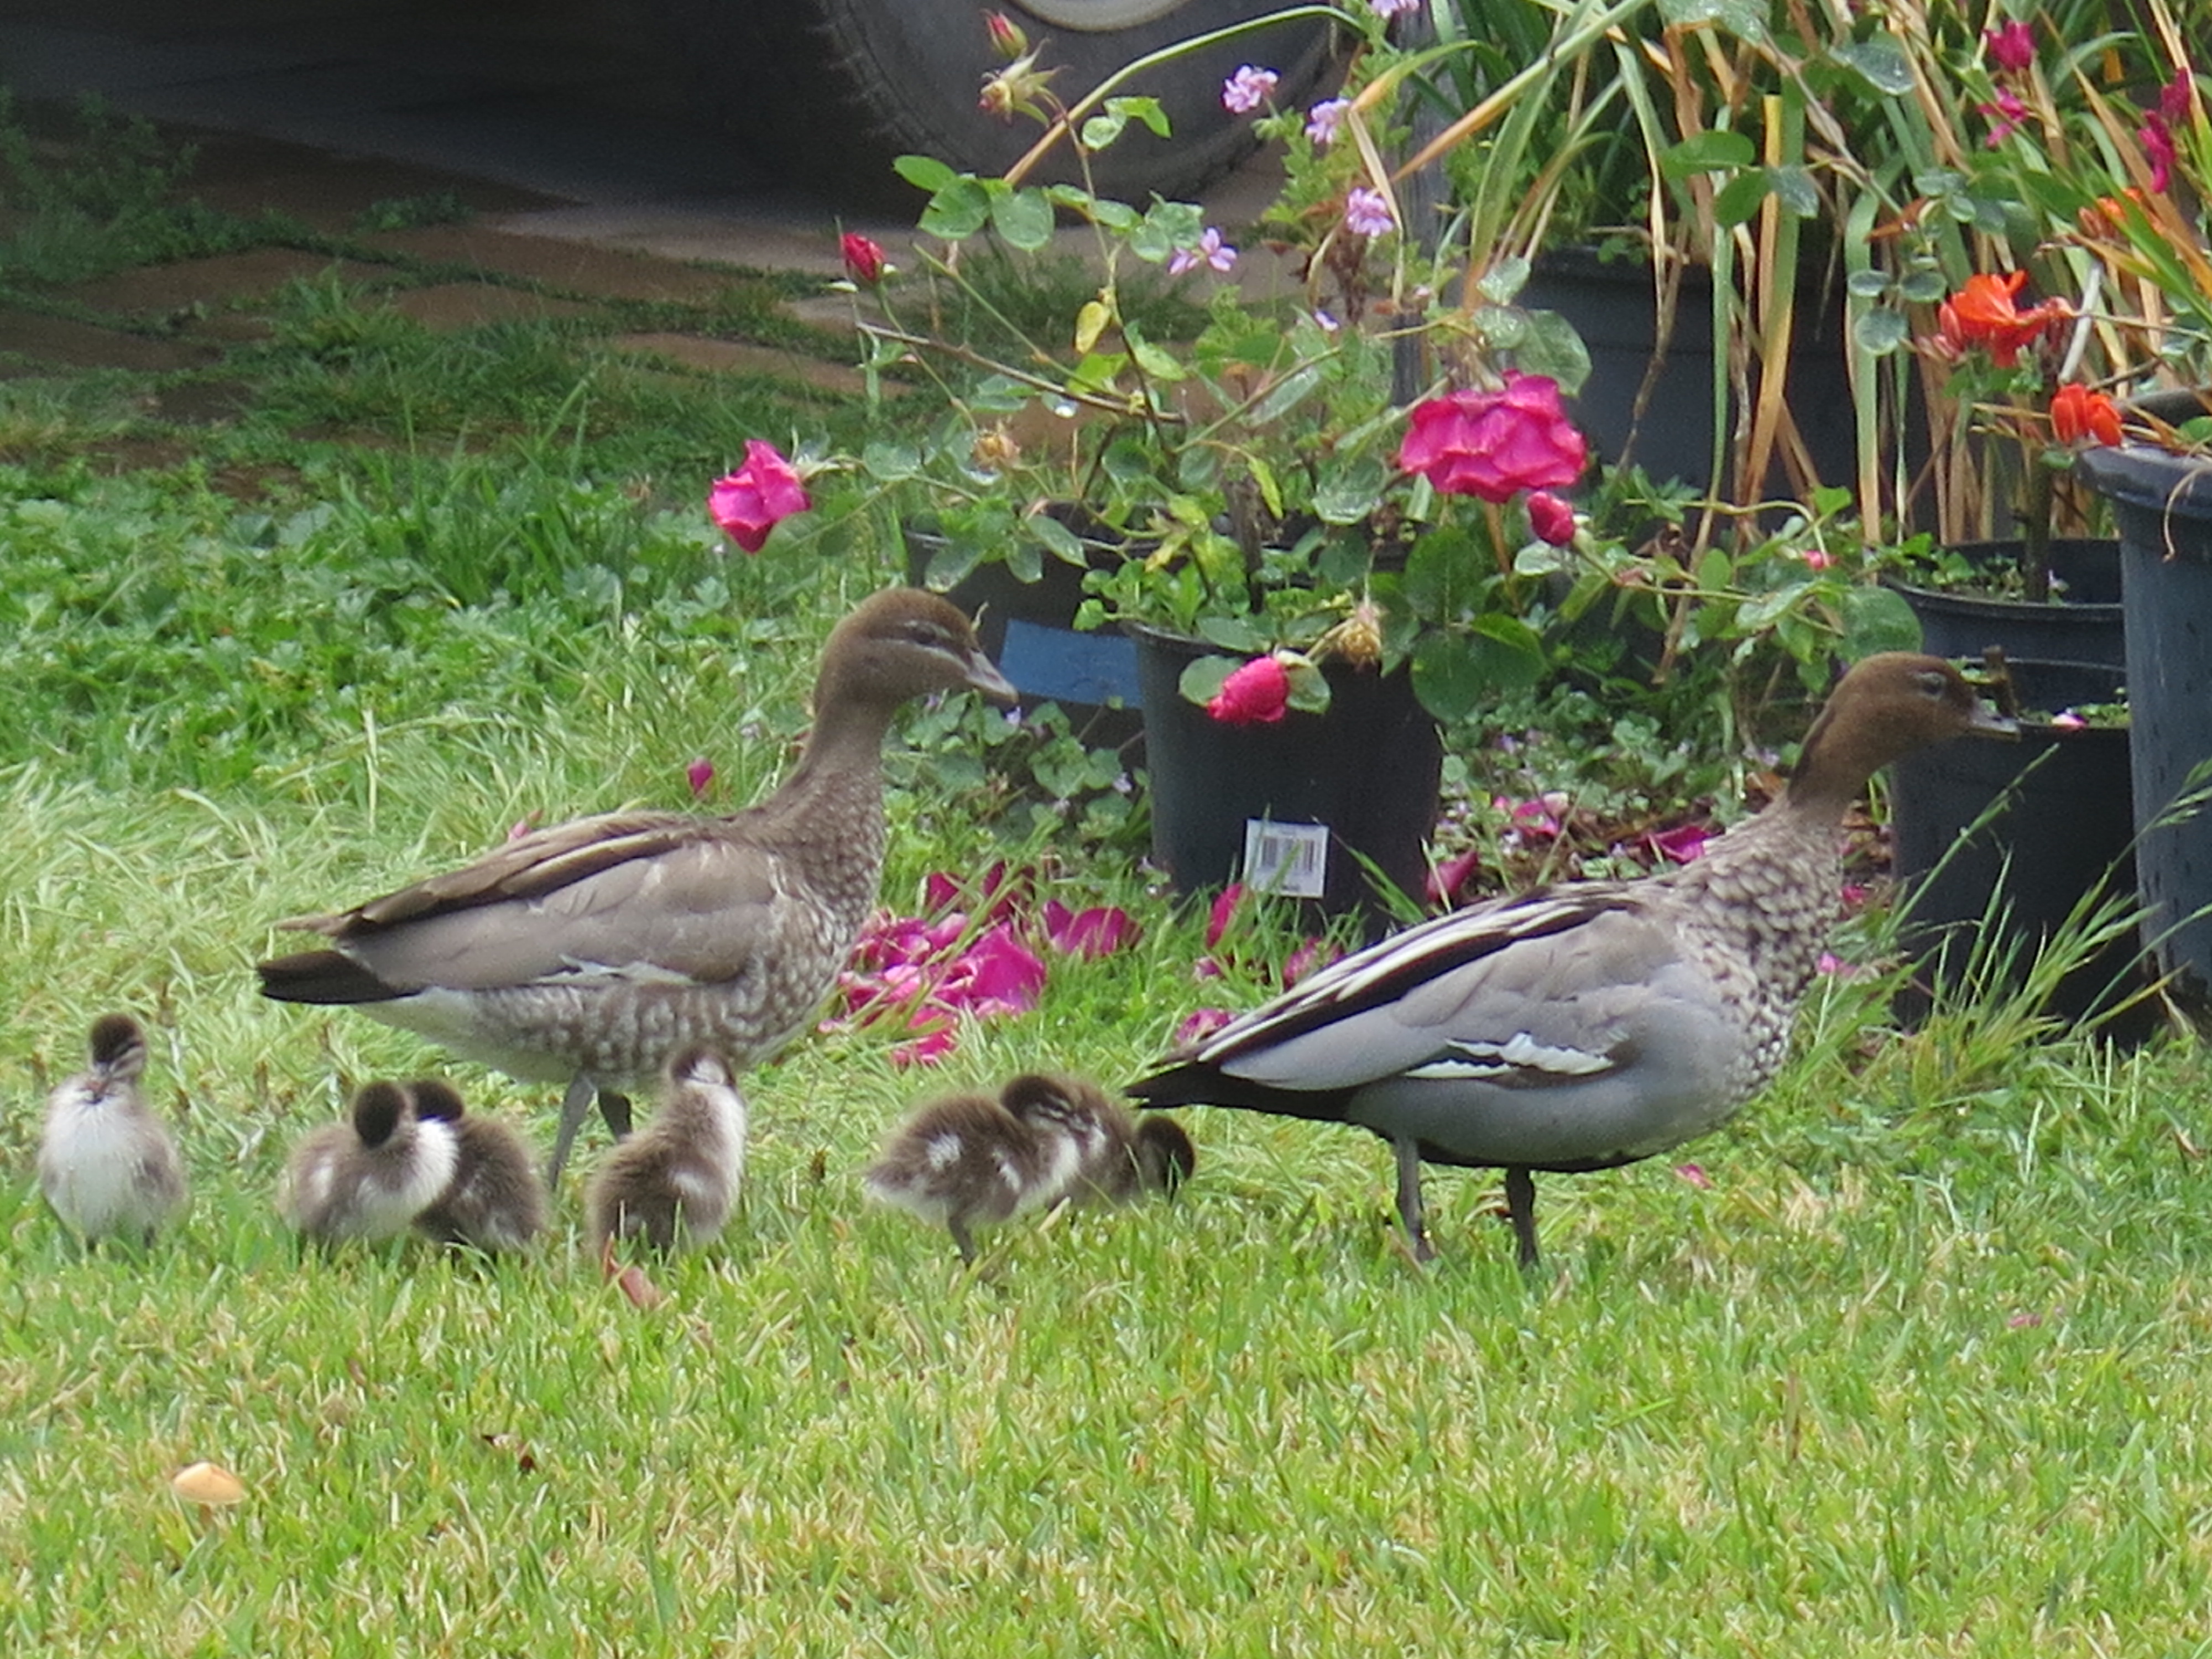
Please don’t bring dogs, as we have recently had both wood ducks and brown ducks hatching clutches of little ducklings that waddle all around the property with their parents feeding on the lush grass. These are timid wild animals and we have no control over where they wander. So please keep a respectful distance if you are walking around the garden.
Dear Friends, We will be opening our pottery on the weekend of 13th and 14th of November. We are informed that on the 1st of November, the state will be opening up to allow people from the Greater Sydney Region to travel to the regions like ours in the Southern Highlands. We have joined the Open Studio Weekend organised by the Australian Ceramics Assn. and accordingly, we will be open from 10 am to 4.00 pm on both Saturday 13th Nov. and Sunday 14th Nov. We are looking forward to seeing our friends again after such a long time in lock down.
We must remind you all that we will be observing strict Government COVID safe protocols.
Please don’t come unless you are double immunised, and have a vaccine certificate to show us.
We will need to see your vaccination certificate before you can come in and there will be a strict 4 Sq. M. rule applied. That’s 7 people max. in the gallery. Although I can’t imagine that we will get more than 7 people all day, never mind all at one time 🙂 We will have all the doors and windows open for good ventilation and to keep the CO2 levels down to around 450 ppm. As this is considered good practice to minimise the chances of infection. We won’t have a lot of work fired and for sale by that time, as we have only now just had our first stoneware reduction glaze firing full of glaze tests. I have been very busy working on the 3 local igneous rocks that I could collect within 5 km of our home here, or near the supermarket and Post Office on our once a week shopping excursion. That has limited my choices, but it’s a challenge to make the best I can out of what I have available in my immediate vicinity.
Its shaping up to look like we can make a tenmoku and tea dust glazes from the Hill Top basalt found in the next village. A green celadon from some washed felspathic gutter sand, A pale blue celadon, a yellow matt glaze, Blue/yellow mottled glaze, also made from the local ‘Living Waters’ Basalt intrusion, and a pink matt glaze made from the sericite porcelain body. As well as something resembling a pink/orange shino style of glaze made from the Balmoral dirty felspathic igneous stone. Nothing special, but a workable mix to get us started. As long as you are double vaxed, We’d love to see you here at some stage, once we are all allowed to travel inter-regionally. Even if there is only a small selection of our our work on the shelves, we welcome you to call in and see the new shed. I’ll be pleased to give you a tour of the Workshop, Pottery studio and Gallery, as well as the raw material processing facilities that we are in the midst of developing – for those so inclined.
We will probably also be open from then on, each weekend, through until Xmas, but please ring beforehand, just to make sure that we are in and open, and not out doing shopping.
Janine made up our first bucket of glaze. She mixed up a 5 kg bucket of Leach’s Cone 8 glaze. We have used this glaze all our life. It is the reliable go-to glaze for testing all our clay bodies. A basic and reliable, no frills glaze that fits right in the middle of the spectrum. A great way to compare the various different clay bodies glaze fit characteristics in our first few firings, which will be nearly all tests.
It can also be an extremely beautiful glaze, a pearly, creamy white, surface. But this is only really true if it is fired just to cone 8 only and not higher. We also ball mill the glaze batch for a little while to get all the particles well mixed. Not too long, otherwise the already finely milled felspar granules will start to break down, releasing its alkalis into solution. Felspar does not have a chemically robust structure, so care is advised when ball milling rocks for glazing. To avoid this damage, I usually ball mill my stones dry after putting them through the rock crushers. I can then store the powder for use in making clay body or glazes, weighing them out accurately dry before wetting them down. The alkali is less likely to be released during dry milling.
I’m not trained or qualified in any way to do with mineral processing, but I have worked with locally found stones for my glazes for the past 47 years. Everything that I have learnt is self taught. I built my first ball mill in 1974. The first year after I graduated and I have built a few more since then. I will probably make another one in the coming years, when time permits. I have always kept a ball mill log to track my ball mill usage. I kept a record of what was milled, for how long and how much was in the mill, wet or dry milling and the date that I milled it, as well as any recipe involved. I lost that log book and all my other glaze recipe books etc. in the fire. Just as I did in the first and 2nd fires. I had two copies of my glaze recipe books, one in each building, but they both burnt down! I can remember that my most recent milling log, kept since 1984, I had clicked up over more than 1,000 hours of milling since then. but the exact number escapes me now. Somewhere around 1050 hours? With an average milling time of 2 to 3 hours, This is about 500 uses of that last mill. Thats a lot of hours of loading, unloading and washing out.
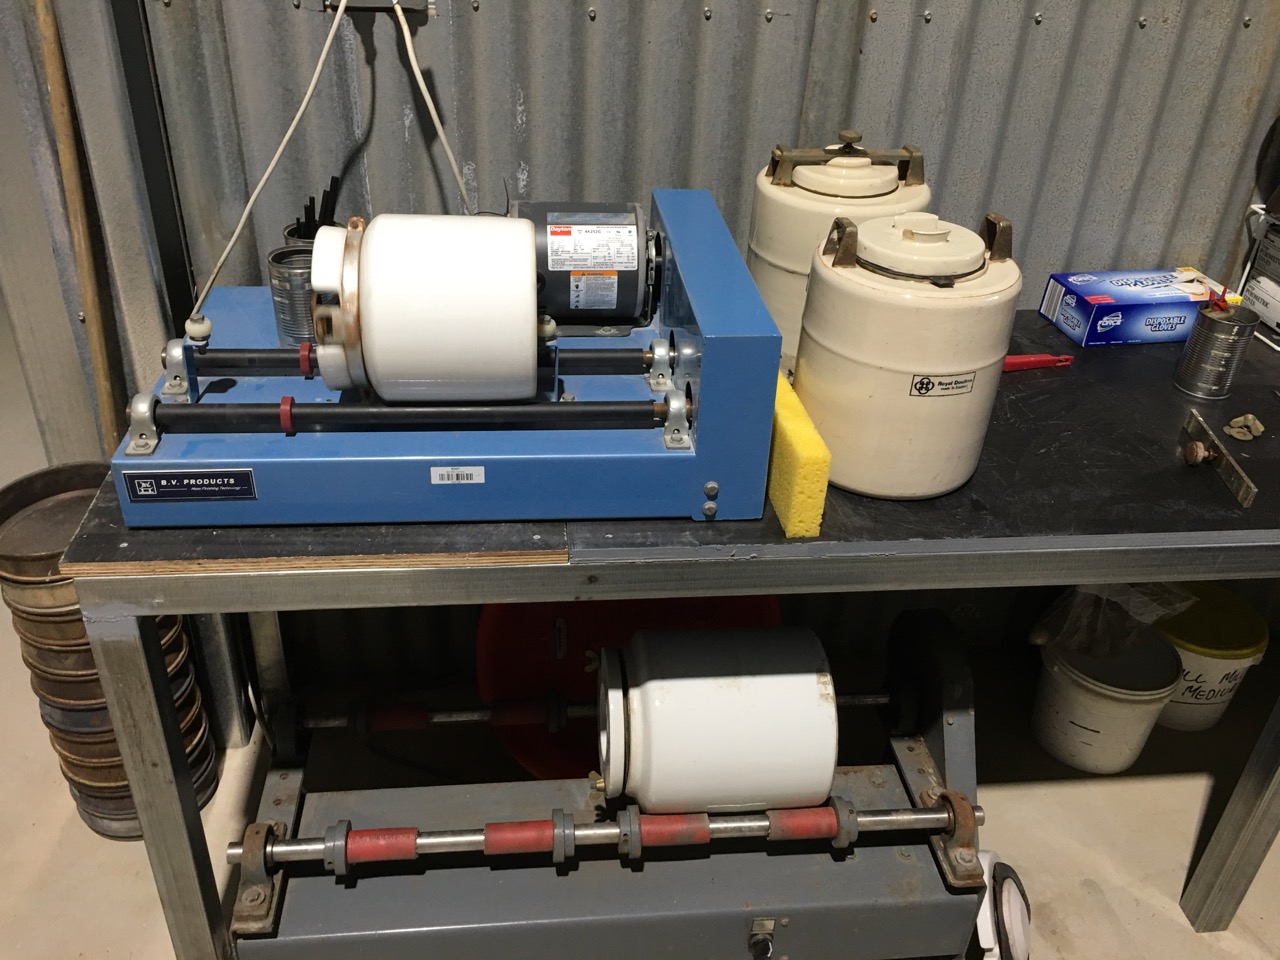
My friends have sourced some 2nd hand ball milling machines for me. Len Smith is always on the digital lookout for me for bits of equipment. He is so fantastically resourceful! He told me about a deceased estate of a potter. I turned up (before lock-down) and was lucky to buy what appears to be a locally made copy of a Shimpo ball mill roller and two 1 gallon, Chinese made porcelain jars. One was broken on the shoulder near the locking stud and the other has a brittle, seized rubber ring seal. Was able to prize the stuck lid off with a chisel. They both need some work. But I was lucky to get them. I made a new silicon rubber seal for the seized and a flat rubber washer type of seal for the other.
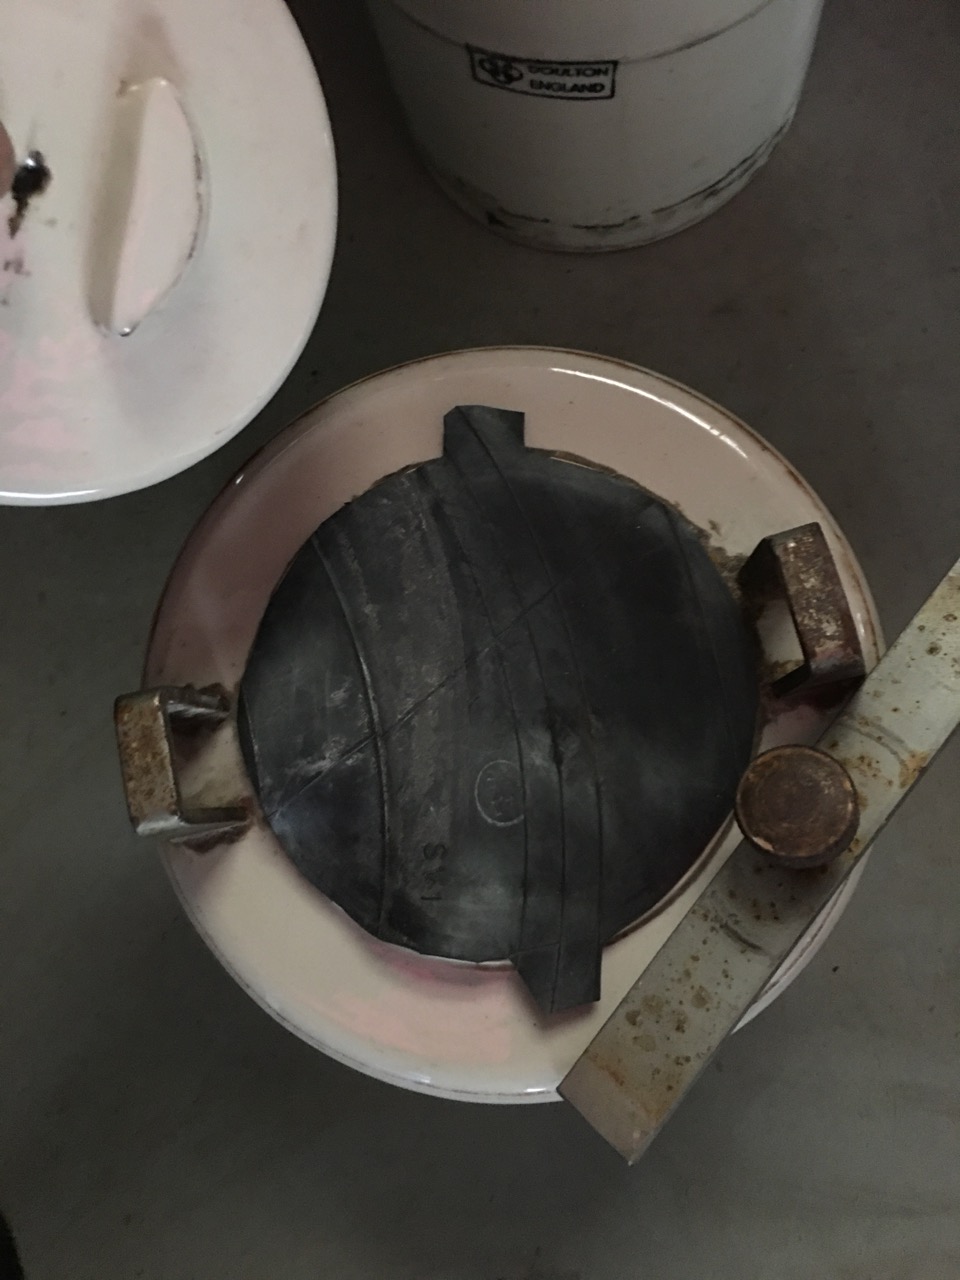
I vaselined the ground porcelain jar rim, then extruded a thick silicone rubber ring around the lid and placed it on the jar overnight to set.
This has created a new, soft and springy rubber seal that will keep it going for another 30 years.
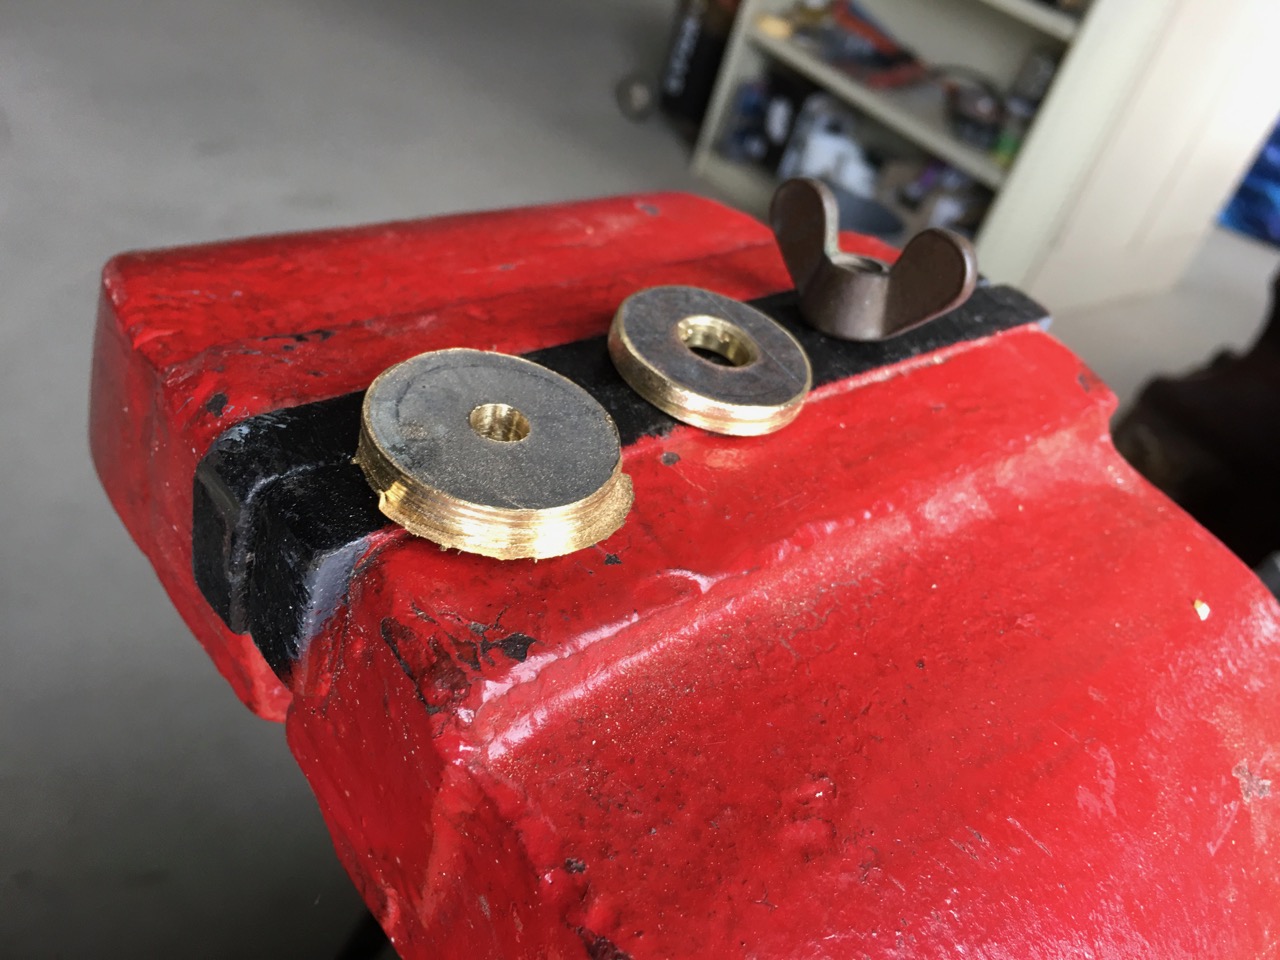
My friend Simon Bowley, just gave me his 3rd hand Shimpo mill roller and a beautiful 15 litre Chinese jar. It has the brass wing nut and brass washers missing to secure the lid. This gadget was stored in an old shed for some years, and I’m not too sure if it has ever been used very much. As it still had the paper label from the supplier (Walkers) glued to the outside of the jar. This started to wear off as soon as I used it.
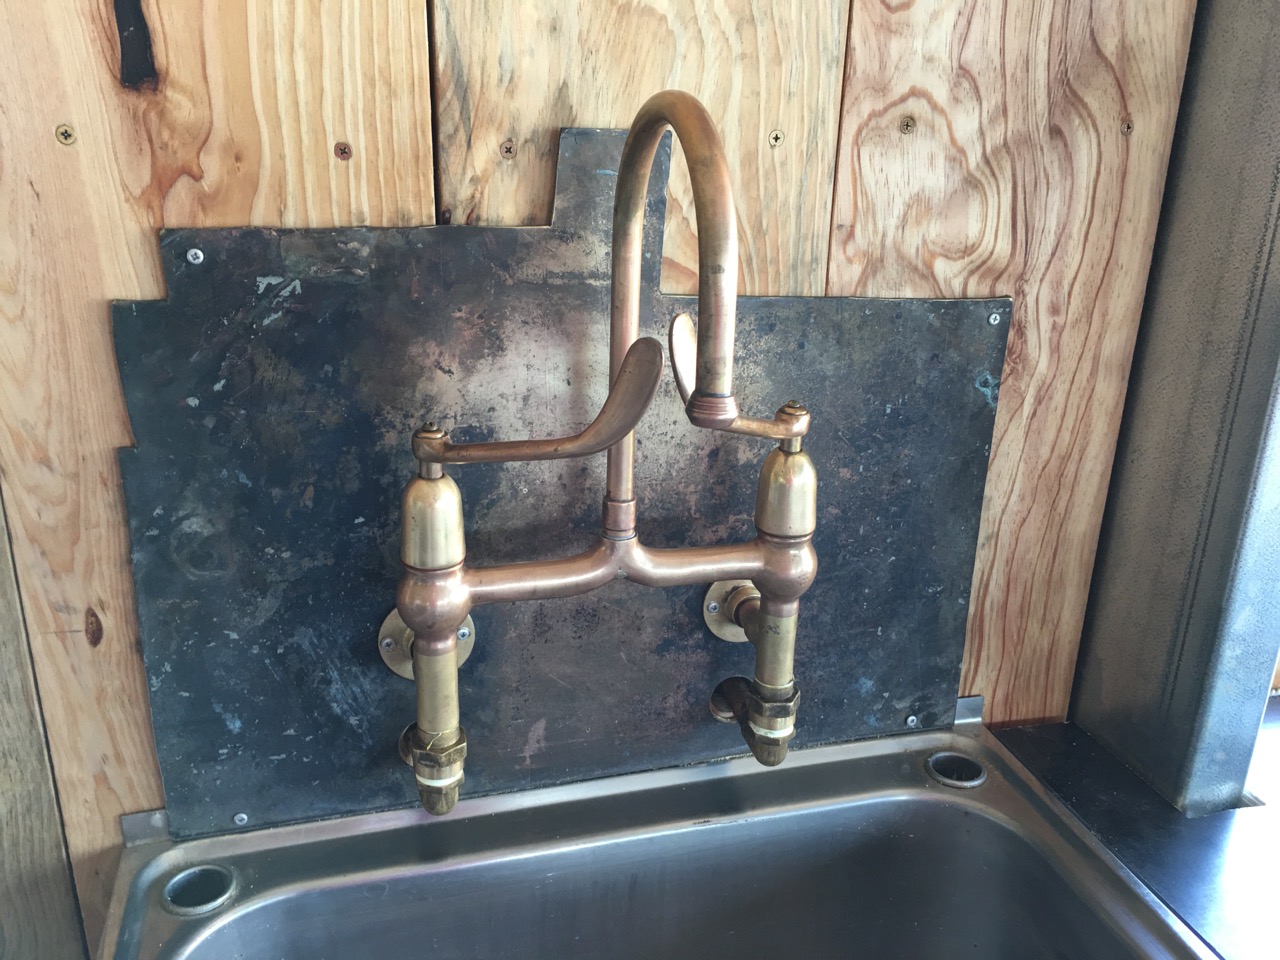
I made a couple of brass washers from the ‘hole’ pieces that I cut from the pottery sink splash-back to get the water pipes into the shed.
I hadn’t thrown them out, as I thought that they might just turn out to be useful some day. A good piece of thick brass like that, 6mm thick is too good to throw away! They came out of the hole saw pretty rough, but I was able to file them down to a smoother finish and drill out the centre hole to a clearance on 3/8″ BSW thread and they work a treat. Not many potters have the luxury of solid 6mm brass washers on their mill jar.
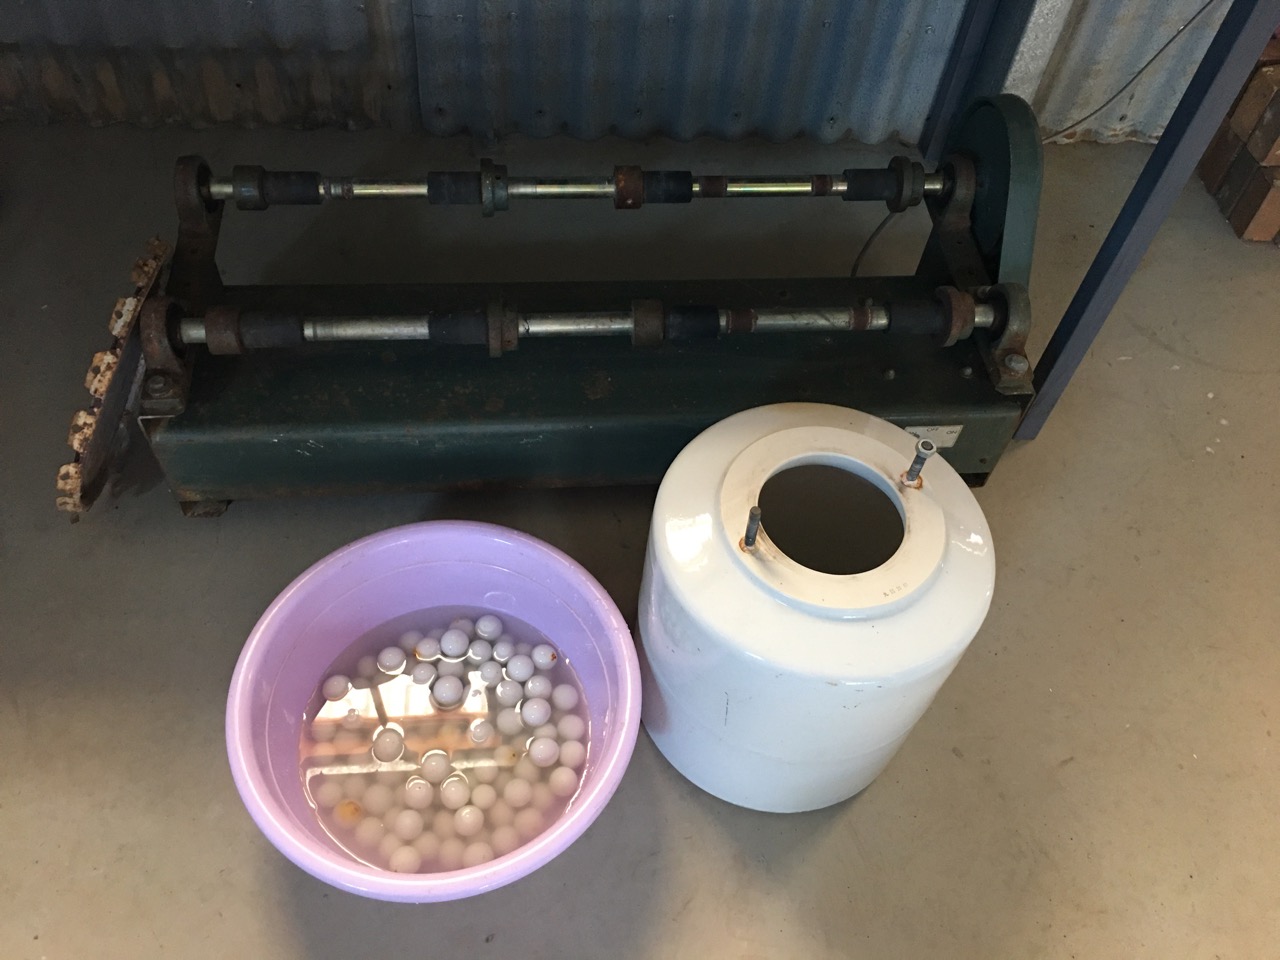
Len also located a very small ball mill unit in Melbourne that wasn’t being used and was able to be donated to me as a bush fire victim. It looked as though it had hardly ever seen the light of day. It came with 2 beautiful Daulton porcelain jars of about I gallon, or 4 litres, and a plastic bucket of small milling media to suit. The jars had some remnant brown dust in them, but looked as though they hadn’t been used very much.
When I tested the small mill roller with one of its Daulton jars loaded with balls and water to clean the mill. I found that the motor overheated and stopped after 25 mins. I can see why this machine wasn’t used very much. It doesn’t work! 30 mins is only long enough to do a bit of blunging, but a couple litres isn’t enough to achieve much. I will need to change the motor for a larger/stronger one. These Daulton jars will fit on the smaller end of Simons mill roller, so I can use them in this way.
My friend Tony Flynn gave me his shimpo potters wheel a few months ago, He also gave me a tiny 1 litre porcelain jar. This could be useful for milling pigments. I tried it on the RMIT roller the next day and it was small enough and light enough not to over heat the motor. It got too hot to touch, but didn’t trip the overload switch. so this will be a useful combination for small batches of pigment.
So now I have a 3 different jar roller mechanisms and by mixing and matching the different jars, I can use the Daulton jars on Simons roller, Tony’s jar on the small roller, Simons big jar on his roller and one of the smaller Chinese jars on the deceased estate roller.
Most of the jars needed new rubber seals. I had already been to the tyre business in Bowral and asked for a punctured inner tube from their rubbish bin, so I was prepared.
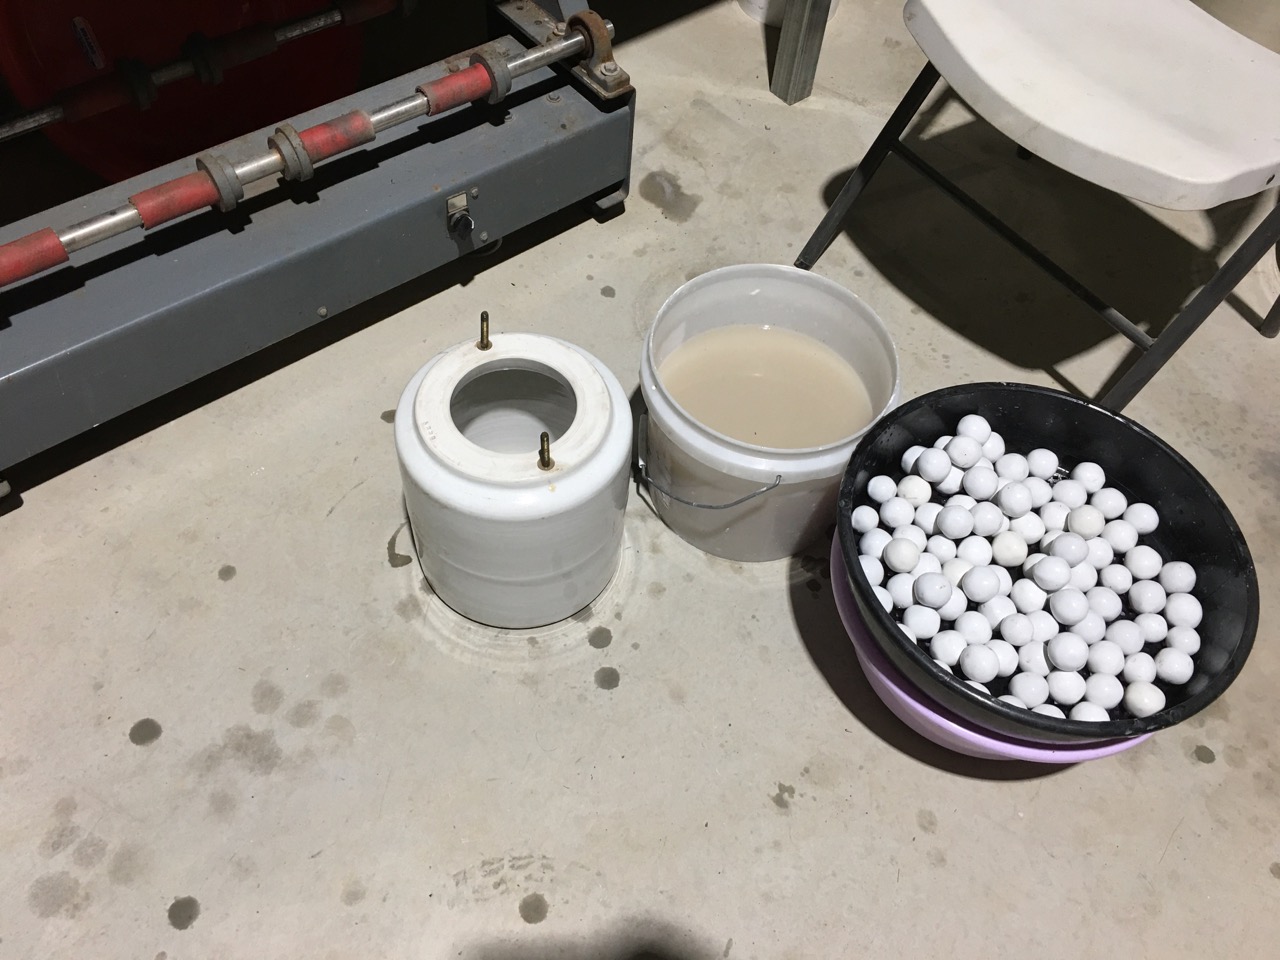
All the jars needed to be washed out and cleaned, then filling with balls and water and run for an hour or so the get the surface of the balls and mill all clean and fresh to start work. After milling like this the water turns cloudy, so the balls are rinsed in 2 buckets of fresh water, then placed in a plastic garden sieve to drain and dry out.
The volume of all these small jars added together just about equals the one bigger 25 litre jar that i used to own. The big difference is that to load all 5 seperate jars, run them on 3 different machines and then clean them is a lot of extra time and labour. But at least I can get some stones milled and local rock glazes made to get us going.
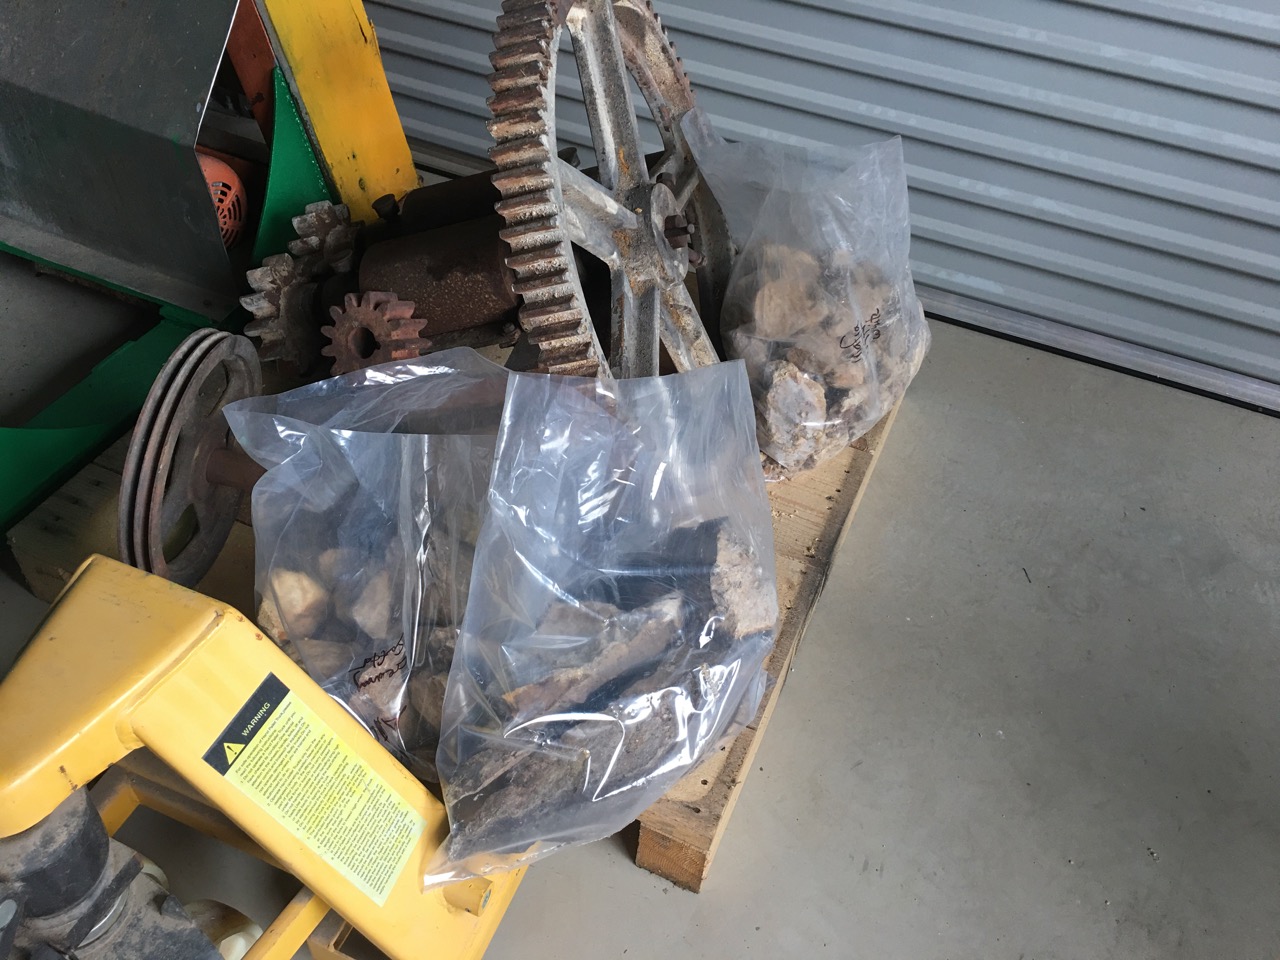
I stopped off at a few local sites on the way to the supermarket a few days ago. So I have a few bags of stones to work on. The next step will be to get the rock crushers going. The roller mill is still in pieces and needs some TLC
I have now installed the double walled, stainless steel flue on my newly acquired 2nd hand kiln that I built and sold 26 years ago and have now bought back. I was able to buy the flue system parts, even during lock down, as I still have my old account with the company that makes the parts.
I had told the company that I was closing the account back in 2019, as I had arranged to sell the kiln company to my friend Andy. I even took Andy to meet the owners of all the companies that I did business with, and introduced him as the new owner. Regrettably, the fire burnt us out just 2 weeks before the sale was to be completed. So we had nothing to sell.
I rang the company this year and told them the sad tale and asked if I could re-establish the account , but with a new name – Steve Harrison. They agreed and the parts were sent by courier, no new paper work. They trusted me. After all, we had been doing business together for close to 40 years. I have re-activated all of my former accounts now to buy parts to re-build. In every case they agreed to give me my account back with a change of name to my name with no paper work involved. They all know me well enough. Trust is a beautiful thing. I appreciate it. But after more than 40 years of trading with them, I sort of expect it. After all, my account number with one supplier is 001 . Their first customer to open an account!
The new rule will be; No step ladder work after 70! I just need to get this done.
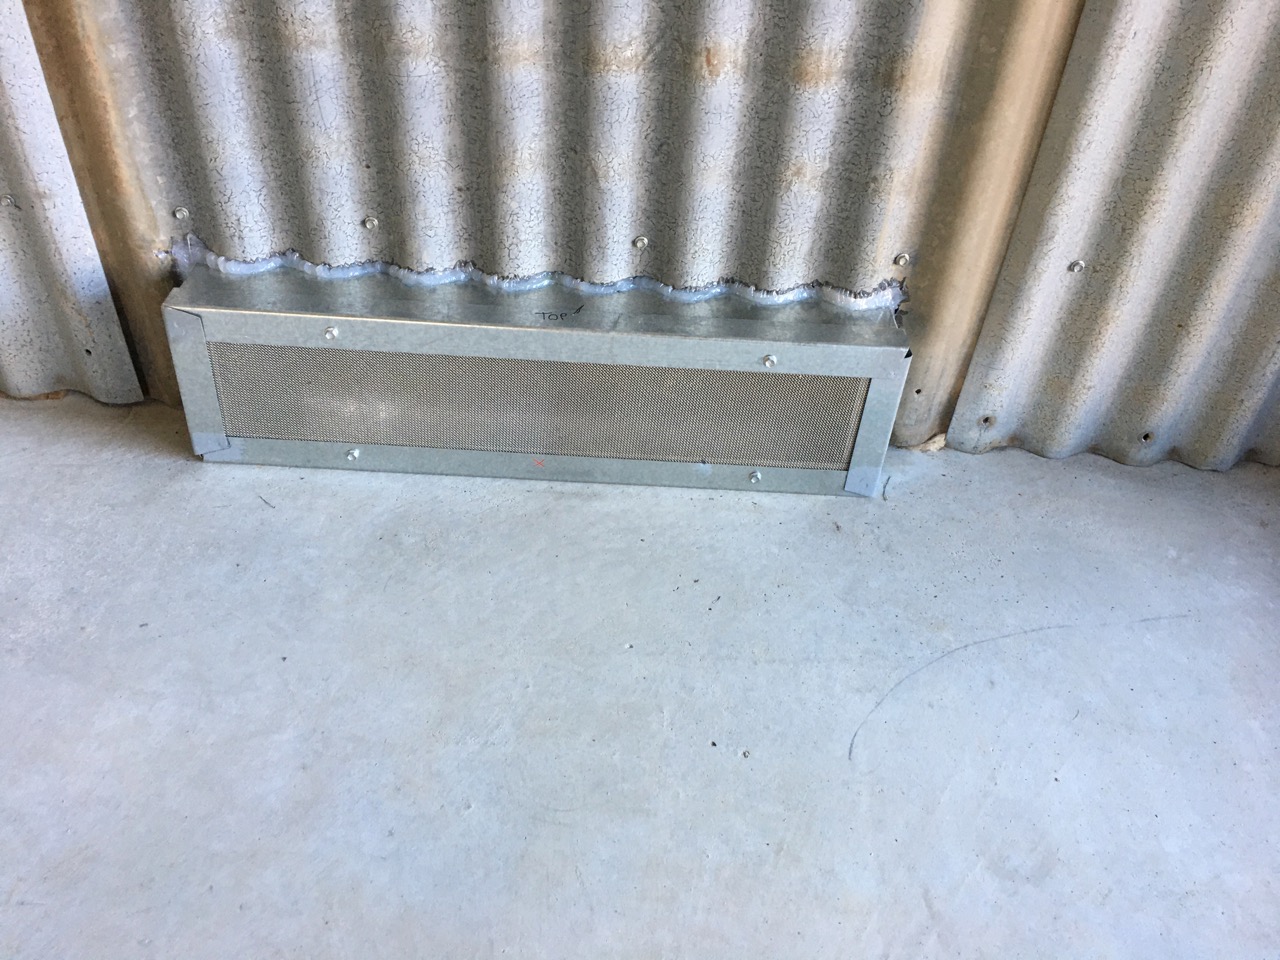
To comply with the Australian Standards for a kiln located indoors. I also had to make a couple of air vents. One at floor level and another at ceiling height to get good ventilation into the room.
The floor level vent is a wide and low format, louvered, and is screened with 16 gauge stainless steel mesh inside and out.
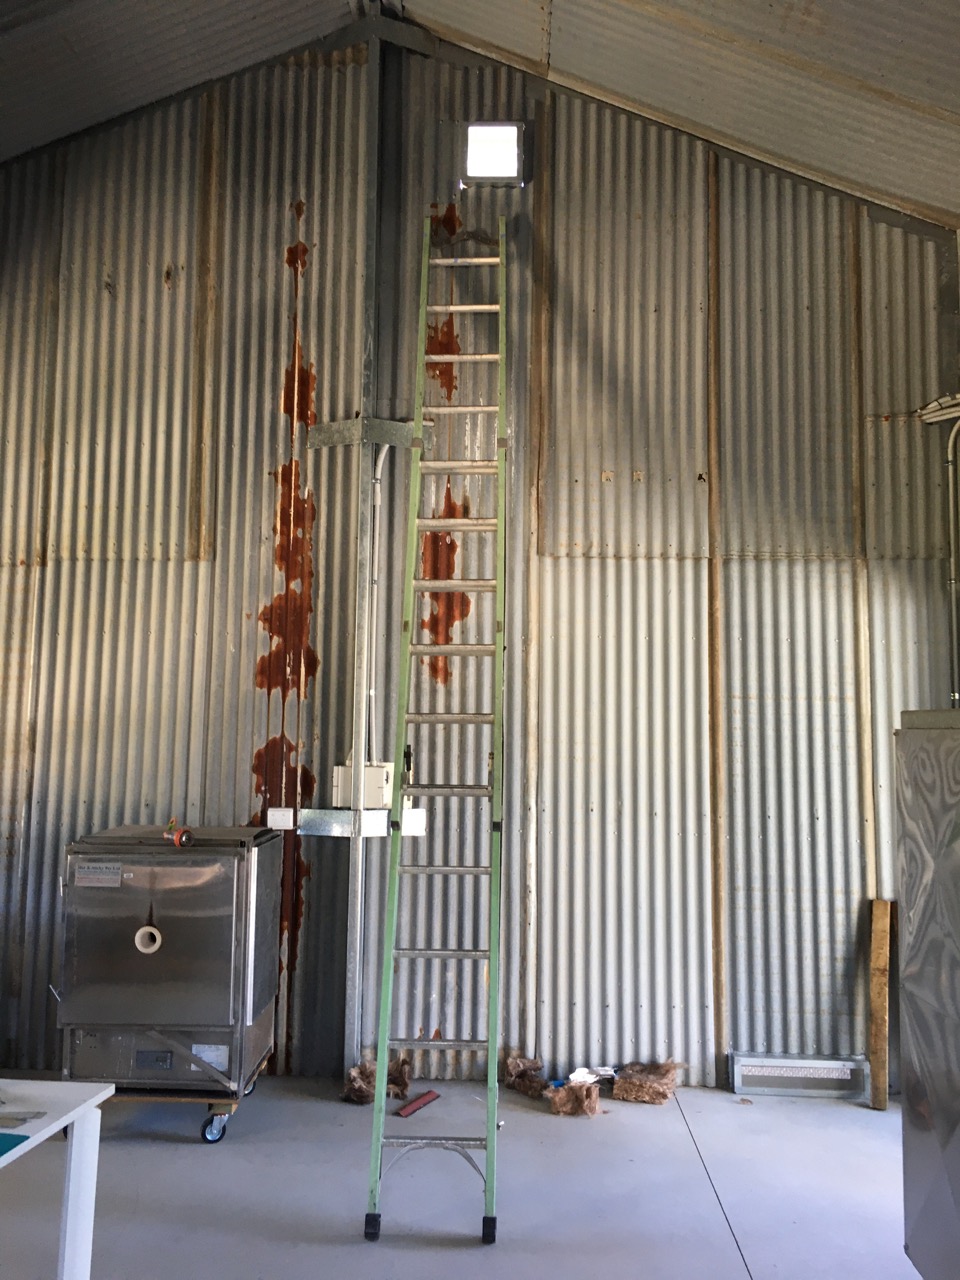
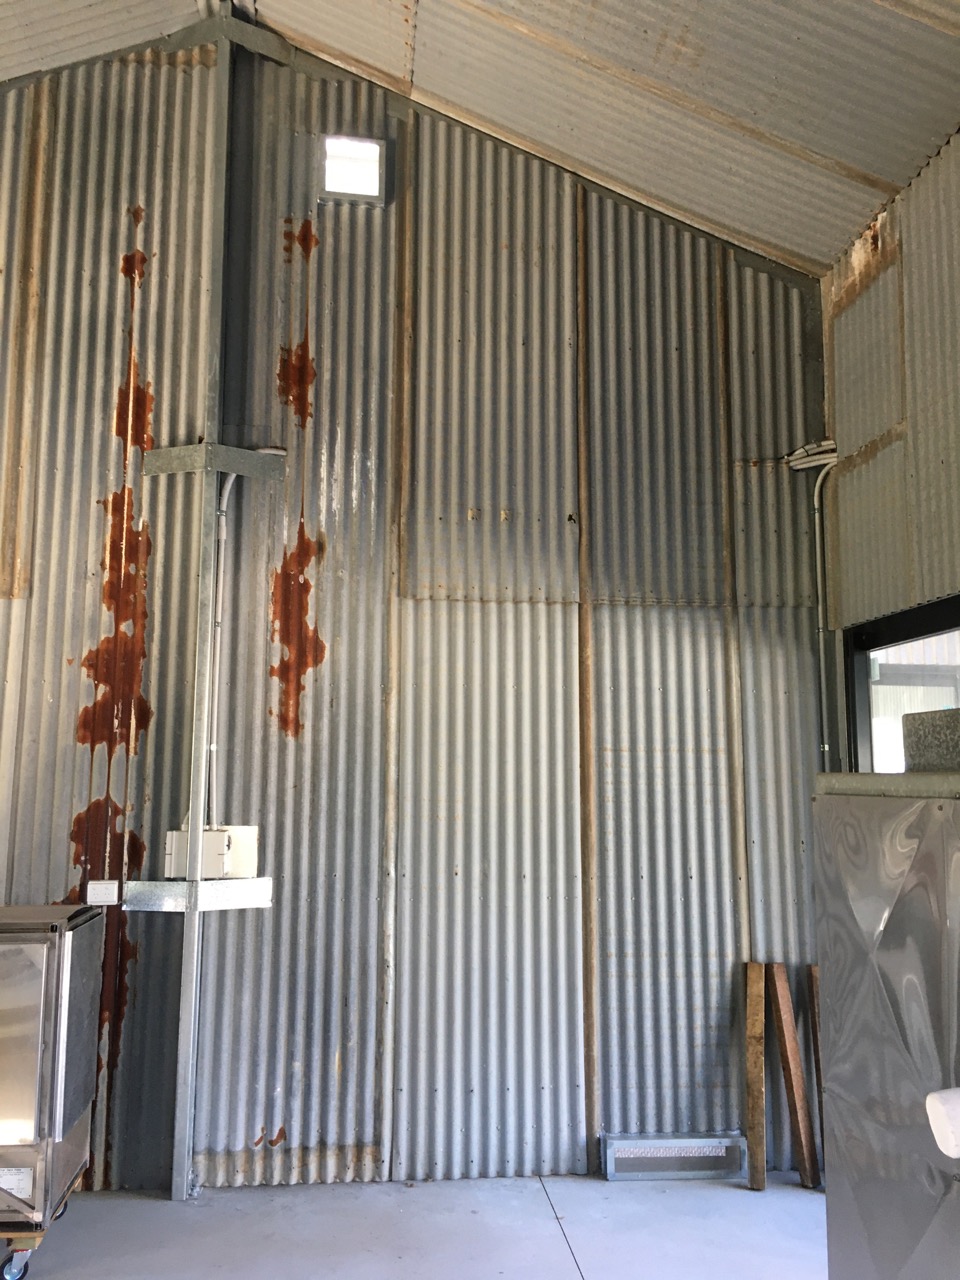
The upper level vent is of the same area, but this one is square. Louvered on the out side and meshed inside and out with the same 16 gauge stainless steel mesh.
It’s always a challenge to work on an extension ladder up at 5 metres these days, but no one else is going to do it. I was a bit concerned about installing it, and put it off for a few weeks, but due to the Lock-down, I can’t really get someone in to do it. Having left it for some time, waiting for the work fairy to turn up and do it for me. But yet another no-show. Maybe the work fairy is restricted by lock down too? So I finally got up the gumption and did it myself.
I had intended to install a large stainless steel hood over the electric kilns end of the kiln room, but due to lock down, I can’t get my hands on any stainless steel sheets, as there are no commercial stainless wholesalers within 5 kms of Balmoral Village.
Kilns fired on different fuels can’t share the same venting flue system, so LPG , Natural gas and wood, can’t co-habit, nor can you flue electric and fuel kilns together.
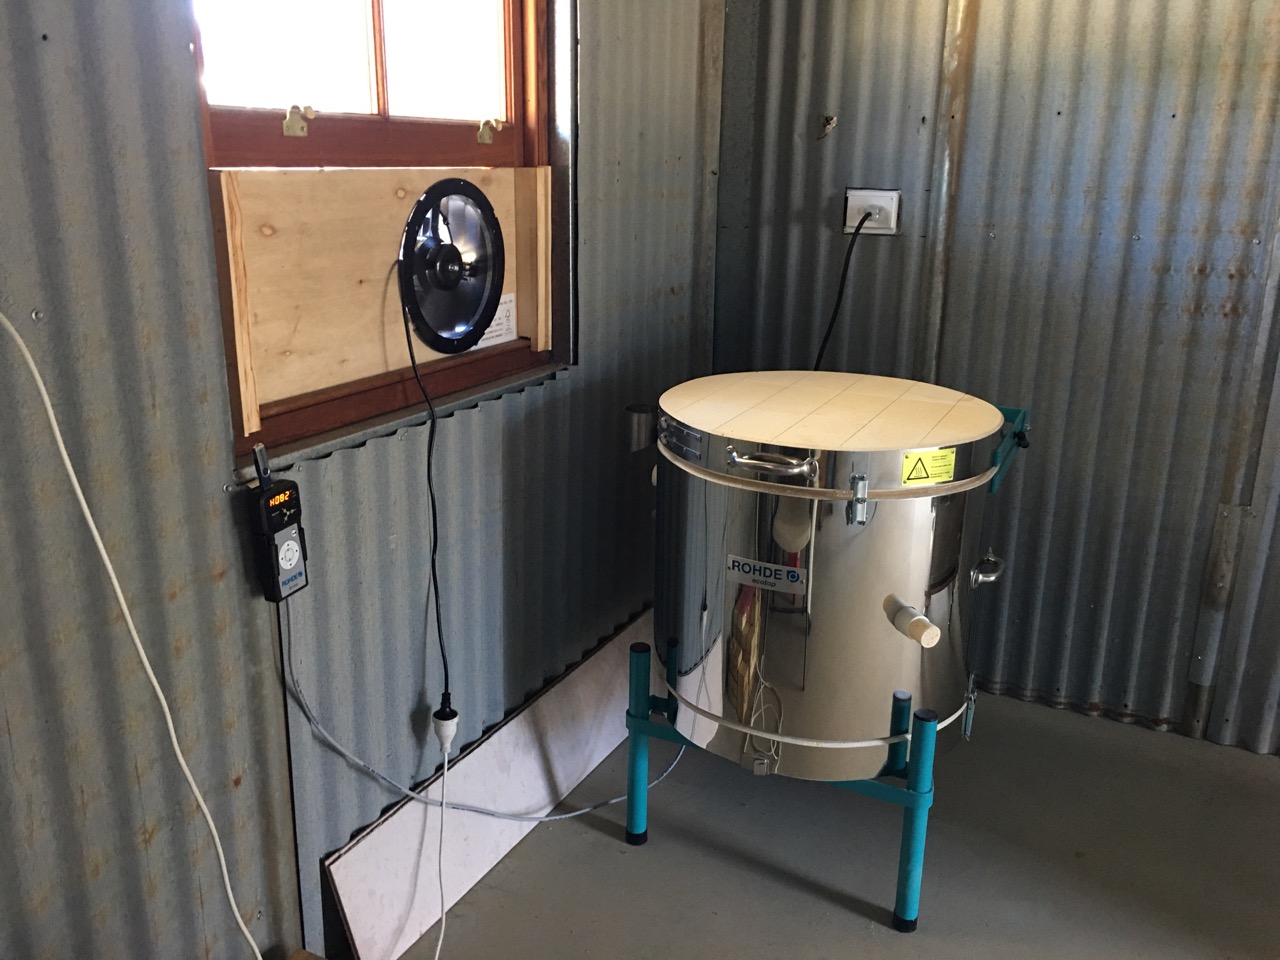
We have been gifted a small top loader electric kiln by Rohde. Thank you Rohde! The gift was organised by my friend Len Smith. Thank you Len!
As I can’t build a large flue canopy for the electric kiln at the moment. I have bodged up a temporary extraction fan in the window next to the kiln. It will do until I can build a proper one.
I made it so that it can be installed and removed easily and also used in the next window later on as a dust extractor when I’m making up glazes.
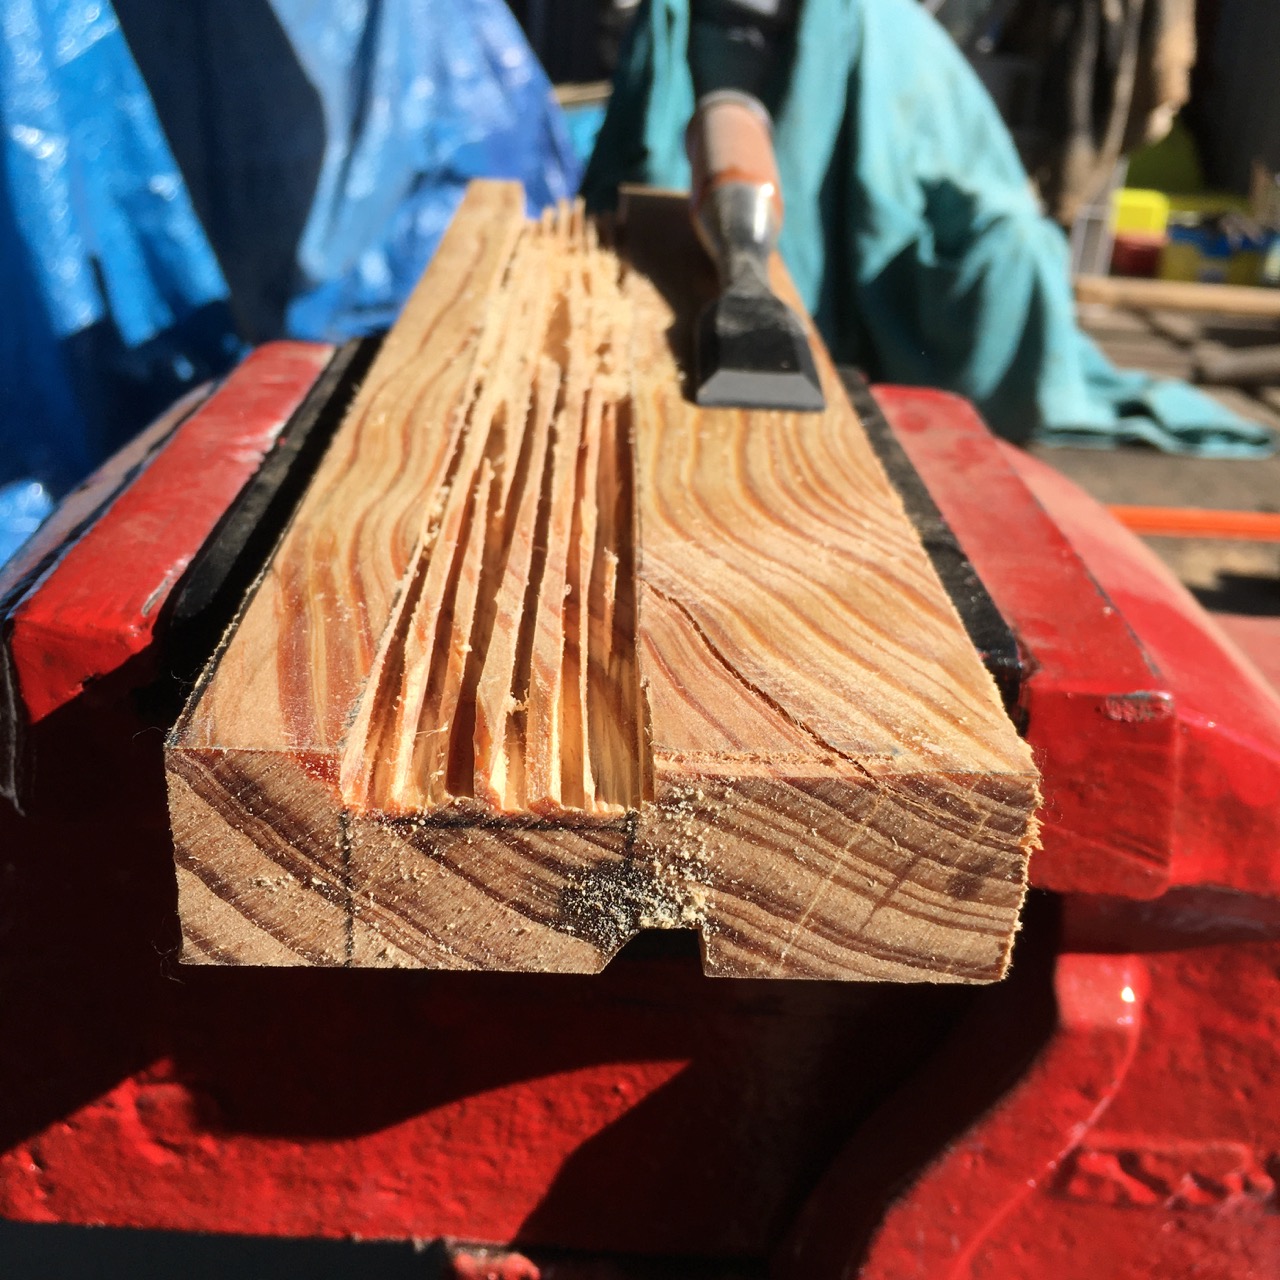
I made these two wooden blocks with rebates on both side, plus top and bottom, so that they can lock into the window frame and allow a sheet of plywood with the fan mounted in it to slide in and be held securely. While still being able to be removed easily. I even made them using wood that we grew, milled and dressed our selves.
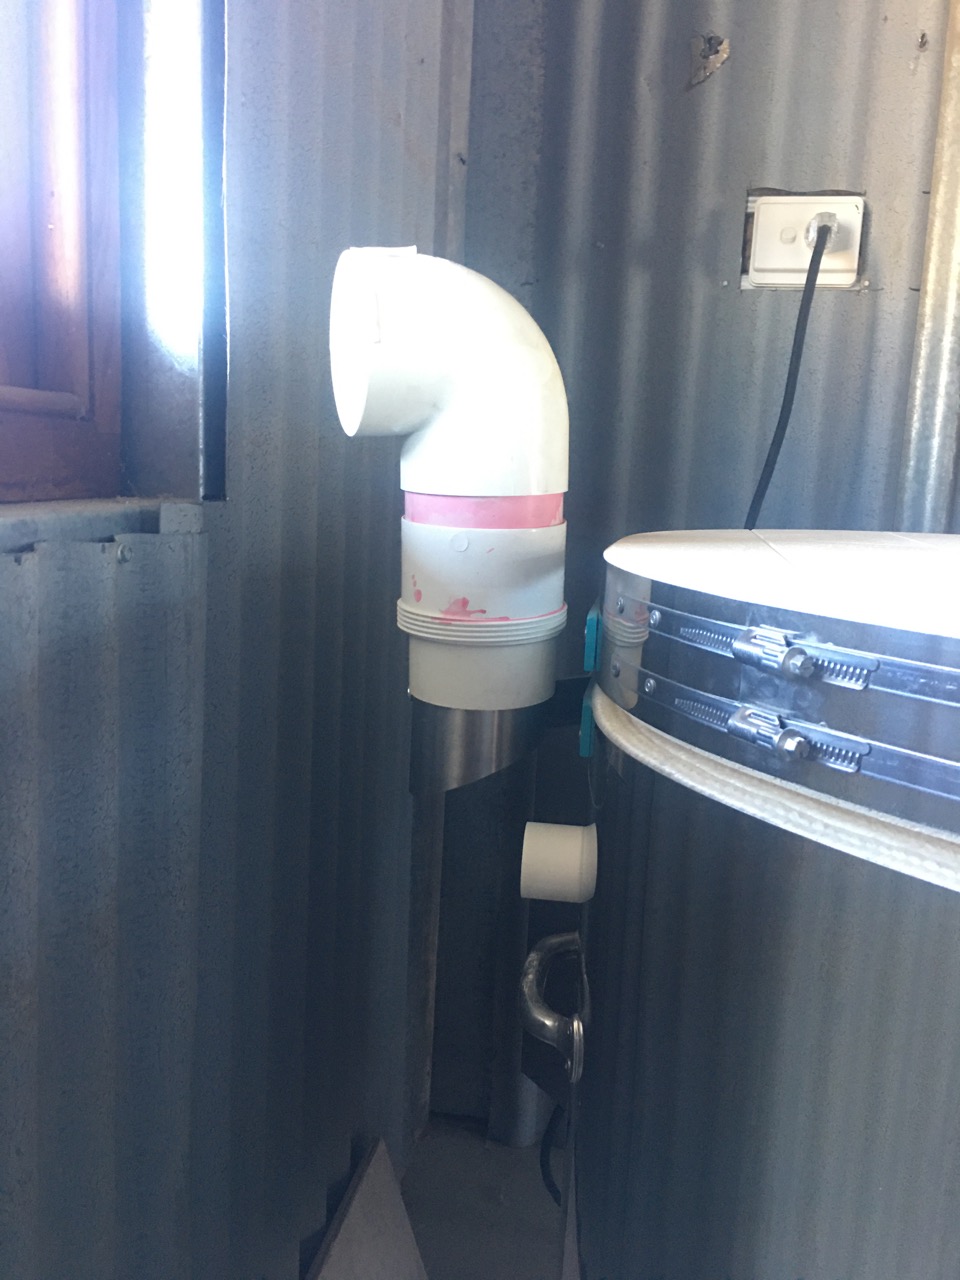
We have done one test firing to dry the kiln out and establish the protective oxide layer on the elements. The kiln has a small tube fitting that allows the fumes from the kiln to be directed out of the room through ducting. (not supplied.) I have directed the vent fumes out the window through the fan. The vent is only 25mm dia. so I have used 90 mm dia. pipe to vent it out through the fan. This allows a massive excess of cold air from the room to mix with the vent fumes to cool them. allowing the use of plastic pipe. I’d prefer to use a gal steel pipe bend, but I don’t happen to have one. Maybe later.
To finish off everything in the kiln room, we have the LP gas Plumber coming this week to certify the gas line installation. If all that goes ahead, then All we have left to do is make up some test glazes and do a test firing full of glaze and body tests. Slow but positive progress.


You must be logged in to post a comment.