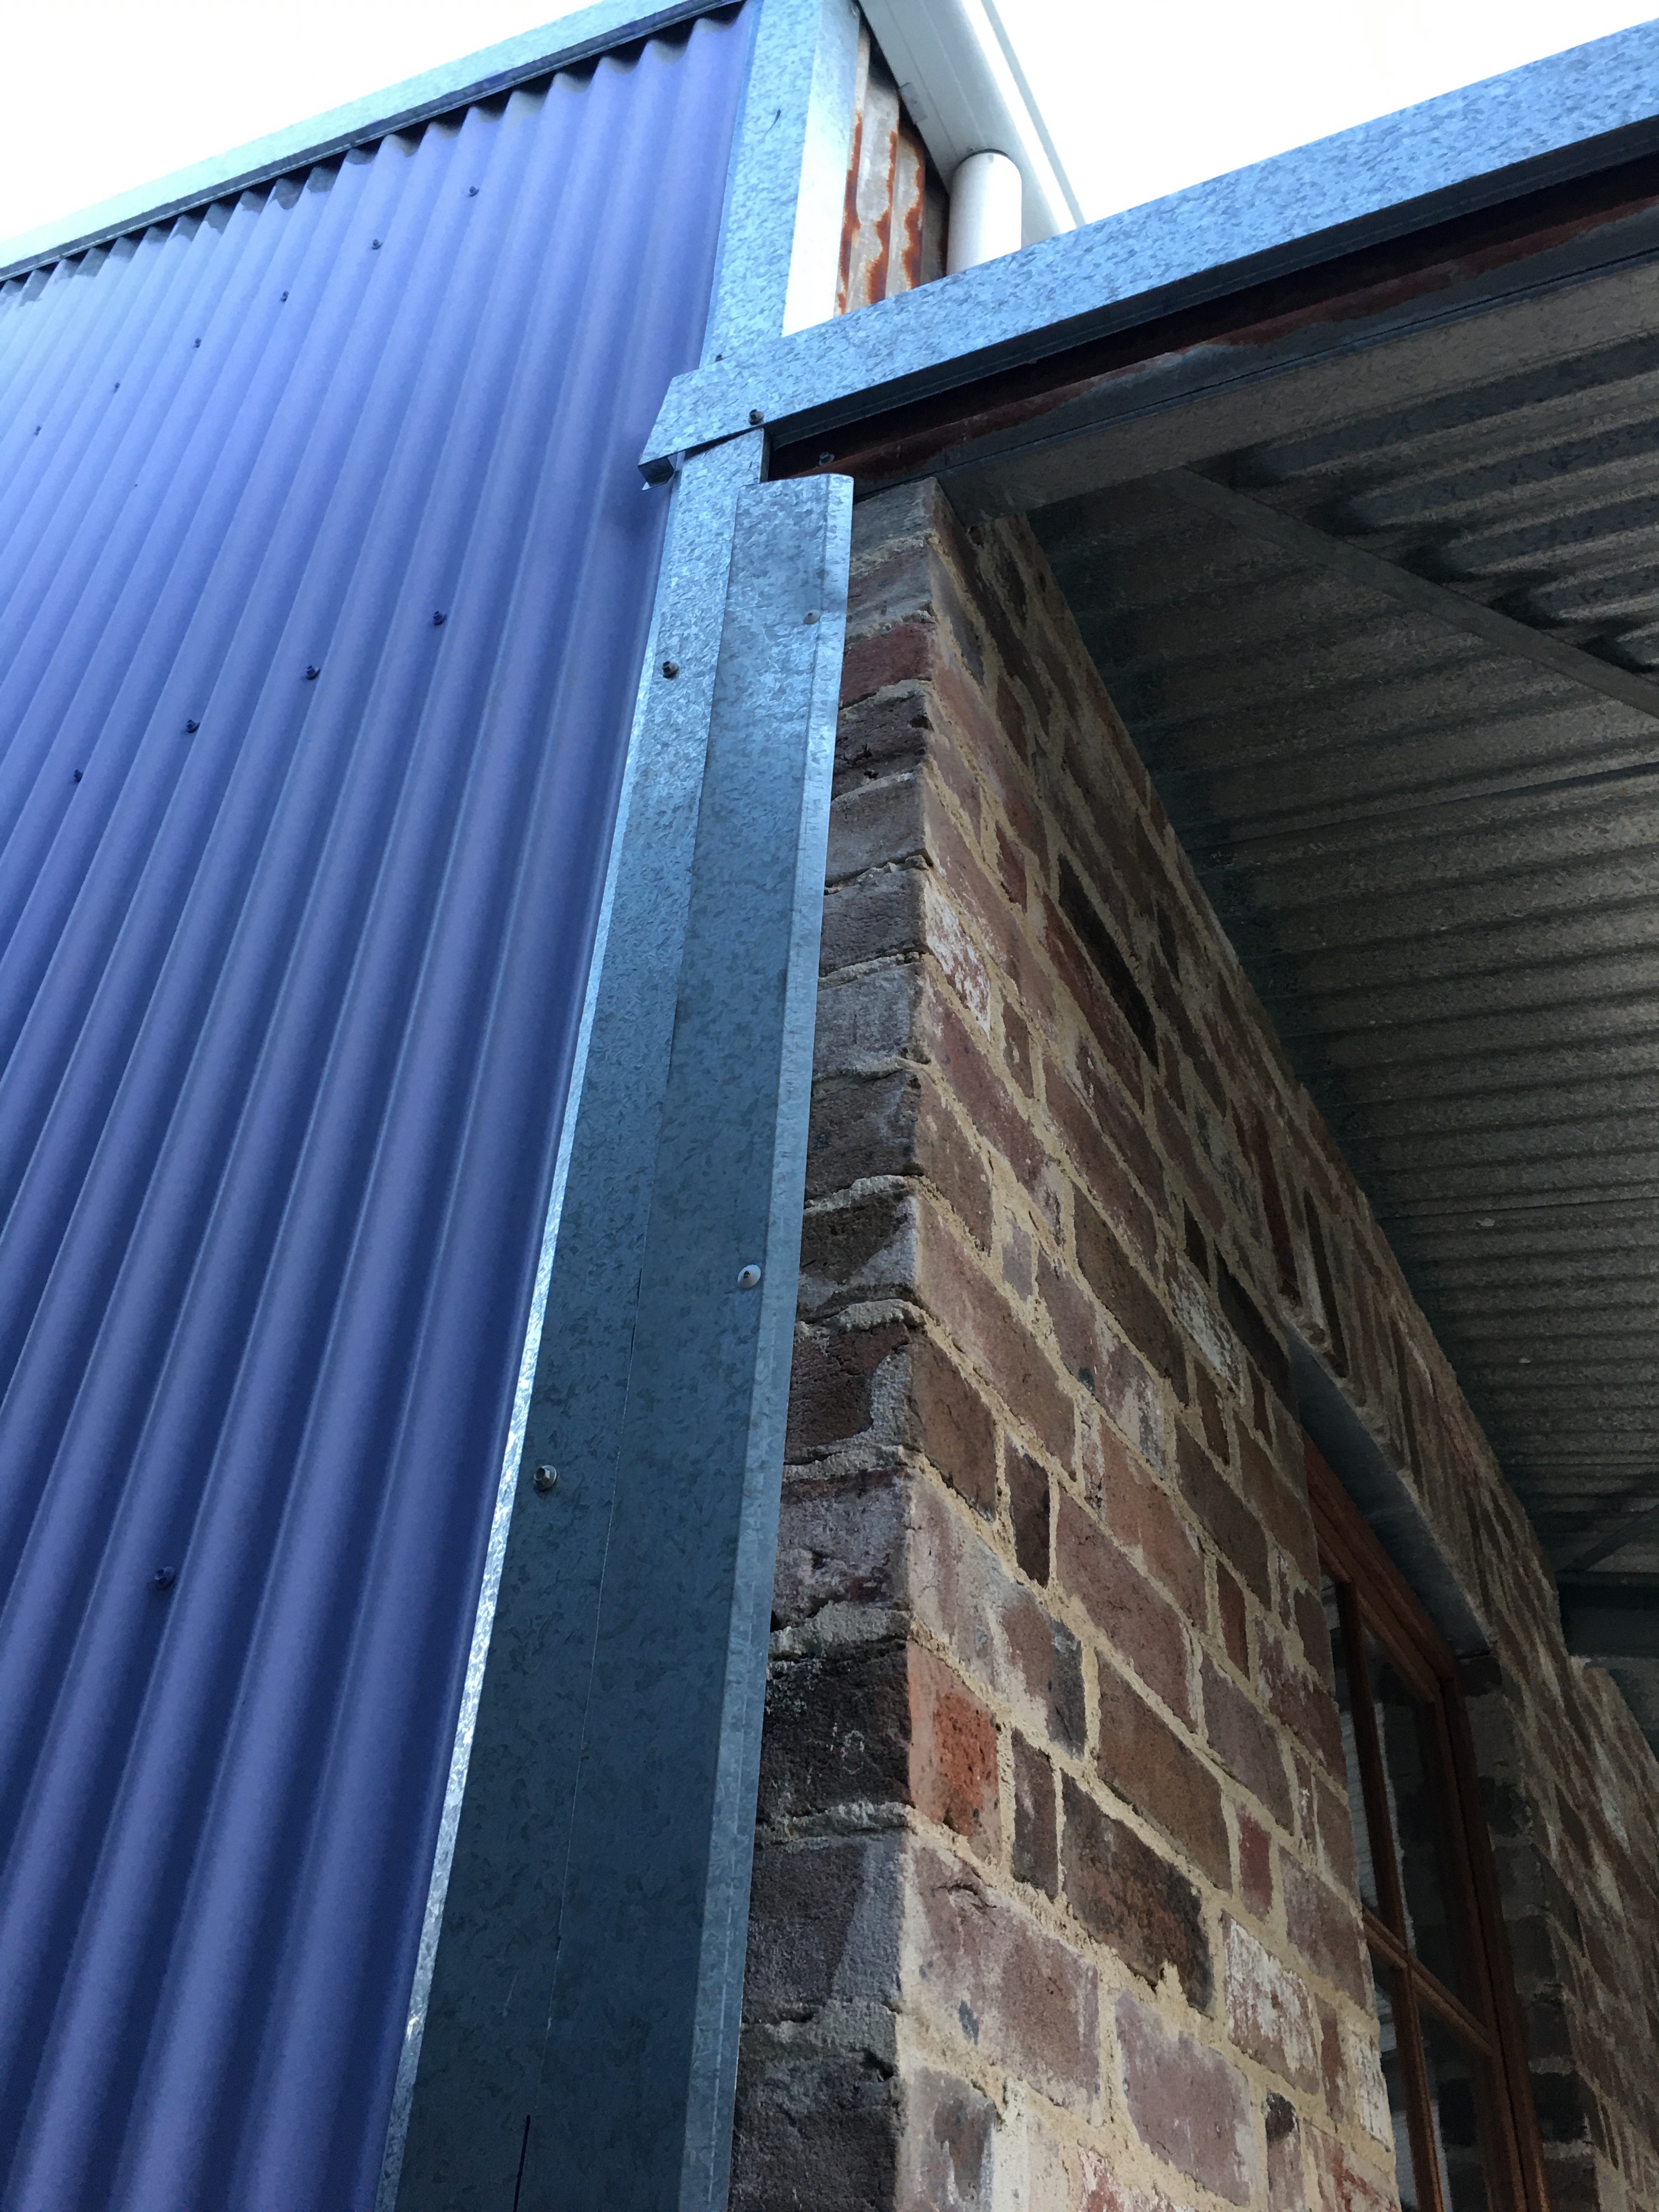
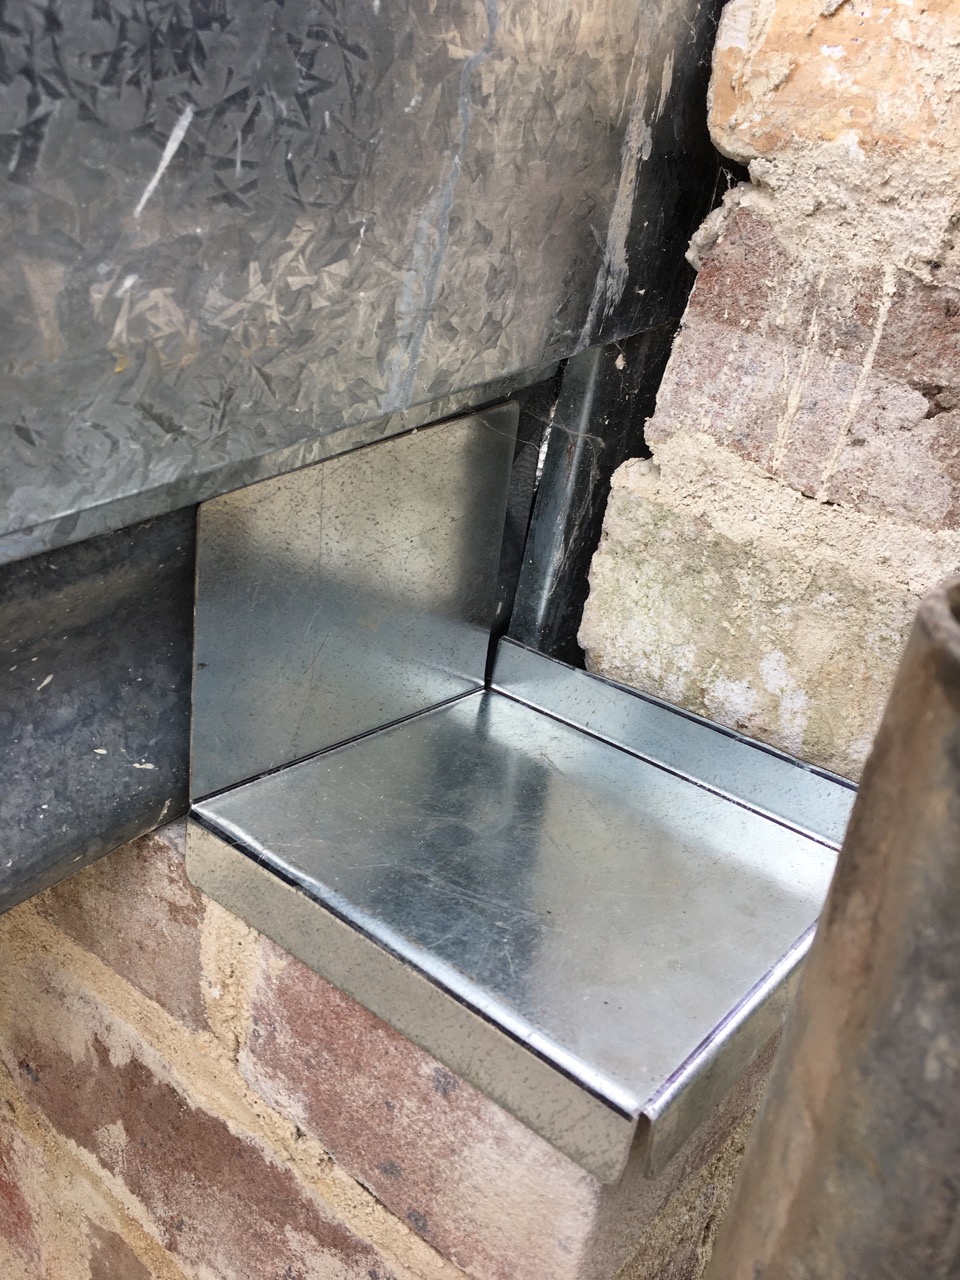
This last week I have been finishing off the roof flashing. I spent time cutting up gal steel off cuts left over from the construction phase of the project. I have pieces of corner section, ridge capping etc. I cut them into narrow strips and then folded them into the pieces that I needed for each specific place.After the brickies finished the walls, there was a gap between the steel shed and the new brick veneer wall that needed to be covered.
In one spot on the wall where the corner meets the verandah. I had to cut and fold a special section that is folded in 5 different directions.
That was a very satisfying little job. I’m pleased that it worked out well. I have no idea how much that would have cost me to get a plumber to do these jobs. But it wouldn’t be cheap.
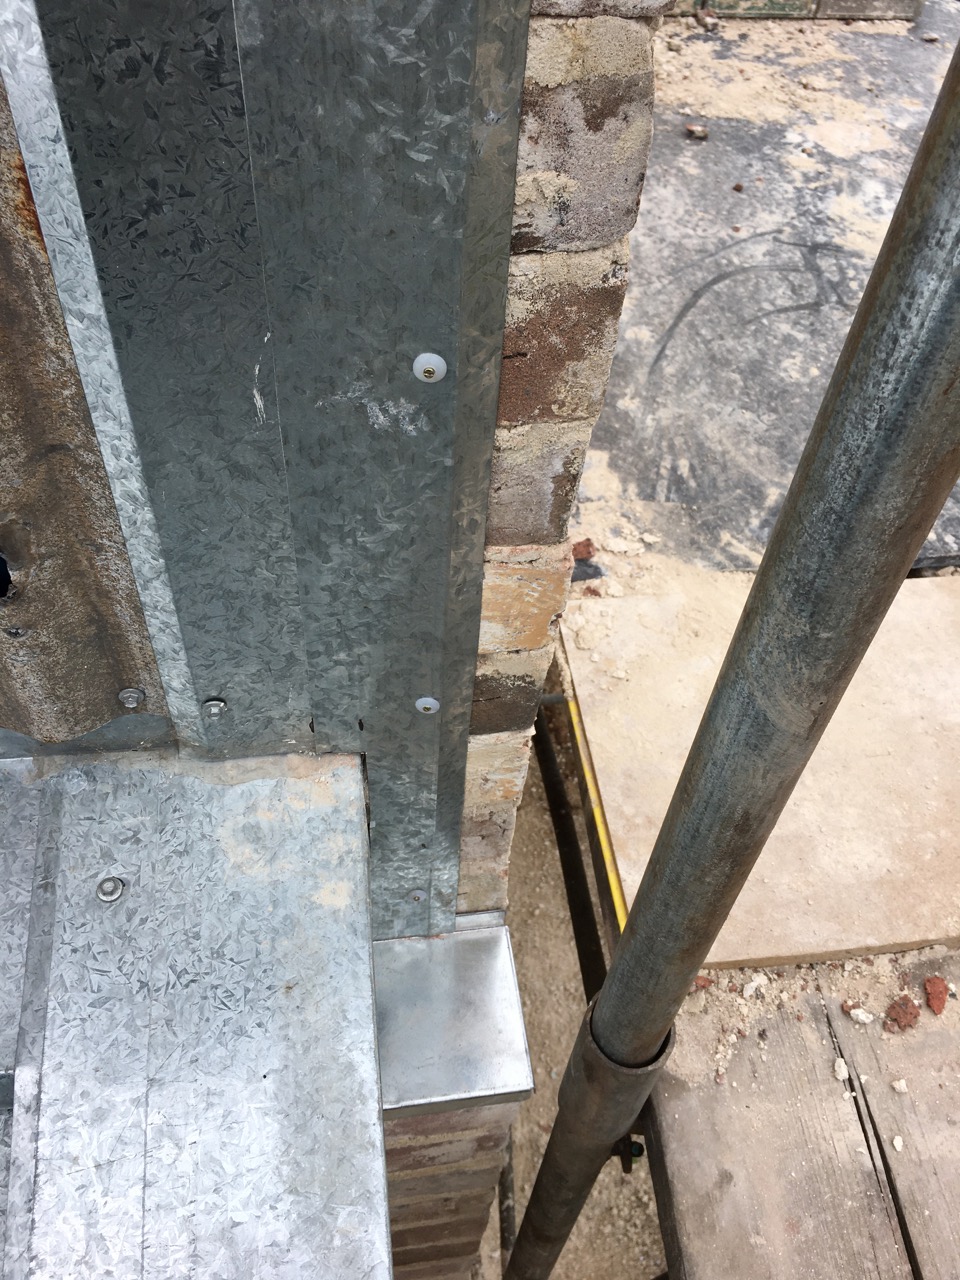
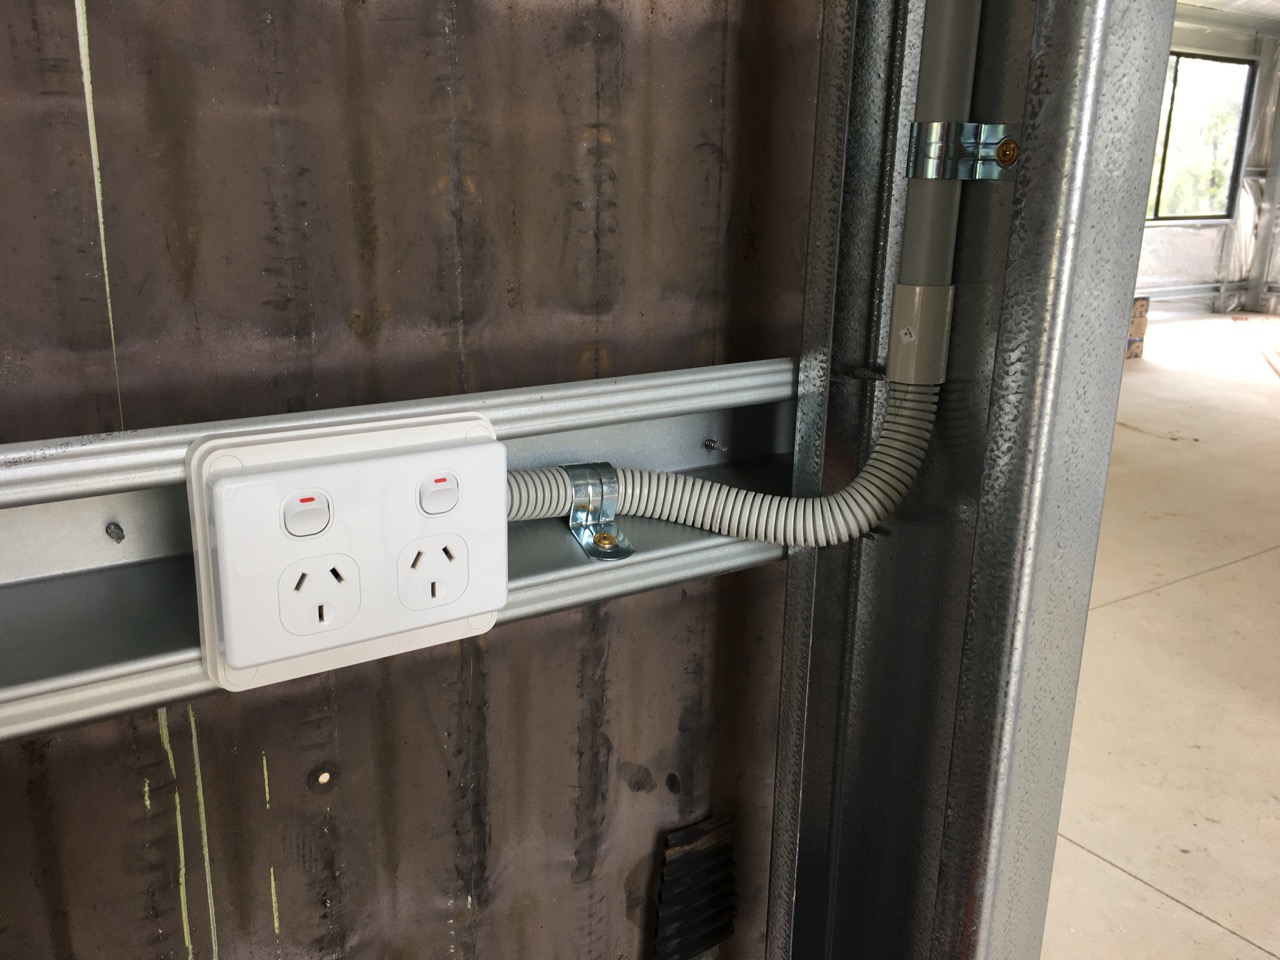
I also needed to cover the electrical conduit brnging the power into the workshop.
This conduit needed to be protected from sunlight, but also mechanical damage.
I have finally finished the capping on the roof between the new brickwork and the steel shed. All done, now back to the acid cleaning of the brickwork. I had to finish the steel capping before I could afford to pull down the scaffolding. Without the scaffolding, I wouldn’t be able to reach the central capping safely. Every job has to be done in its own specific sequence.
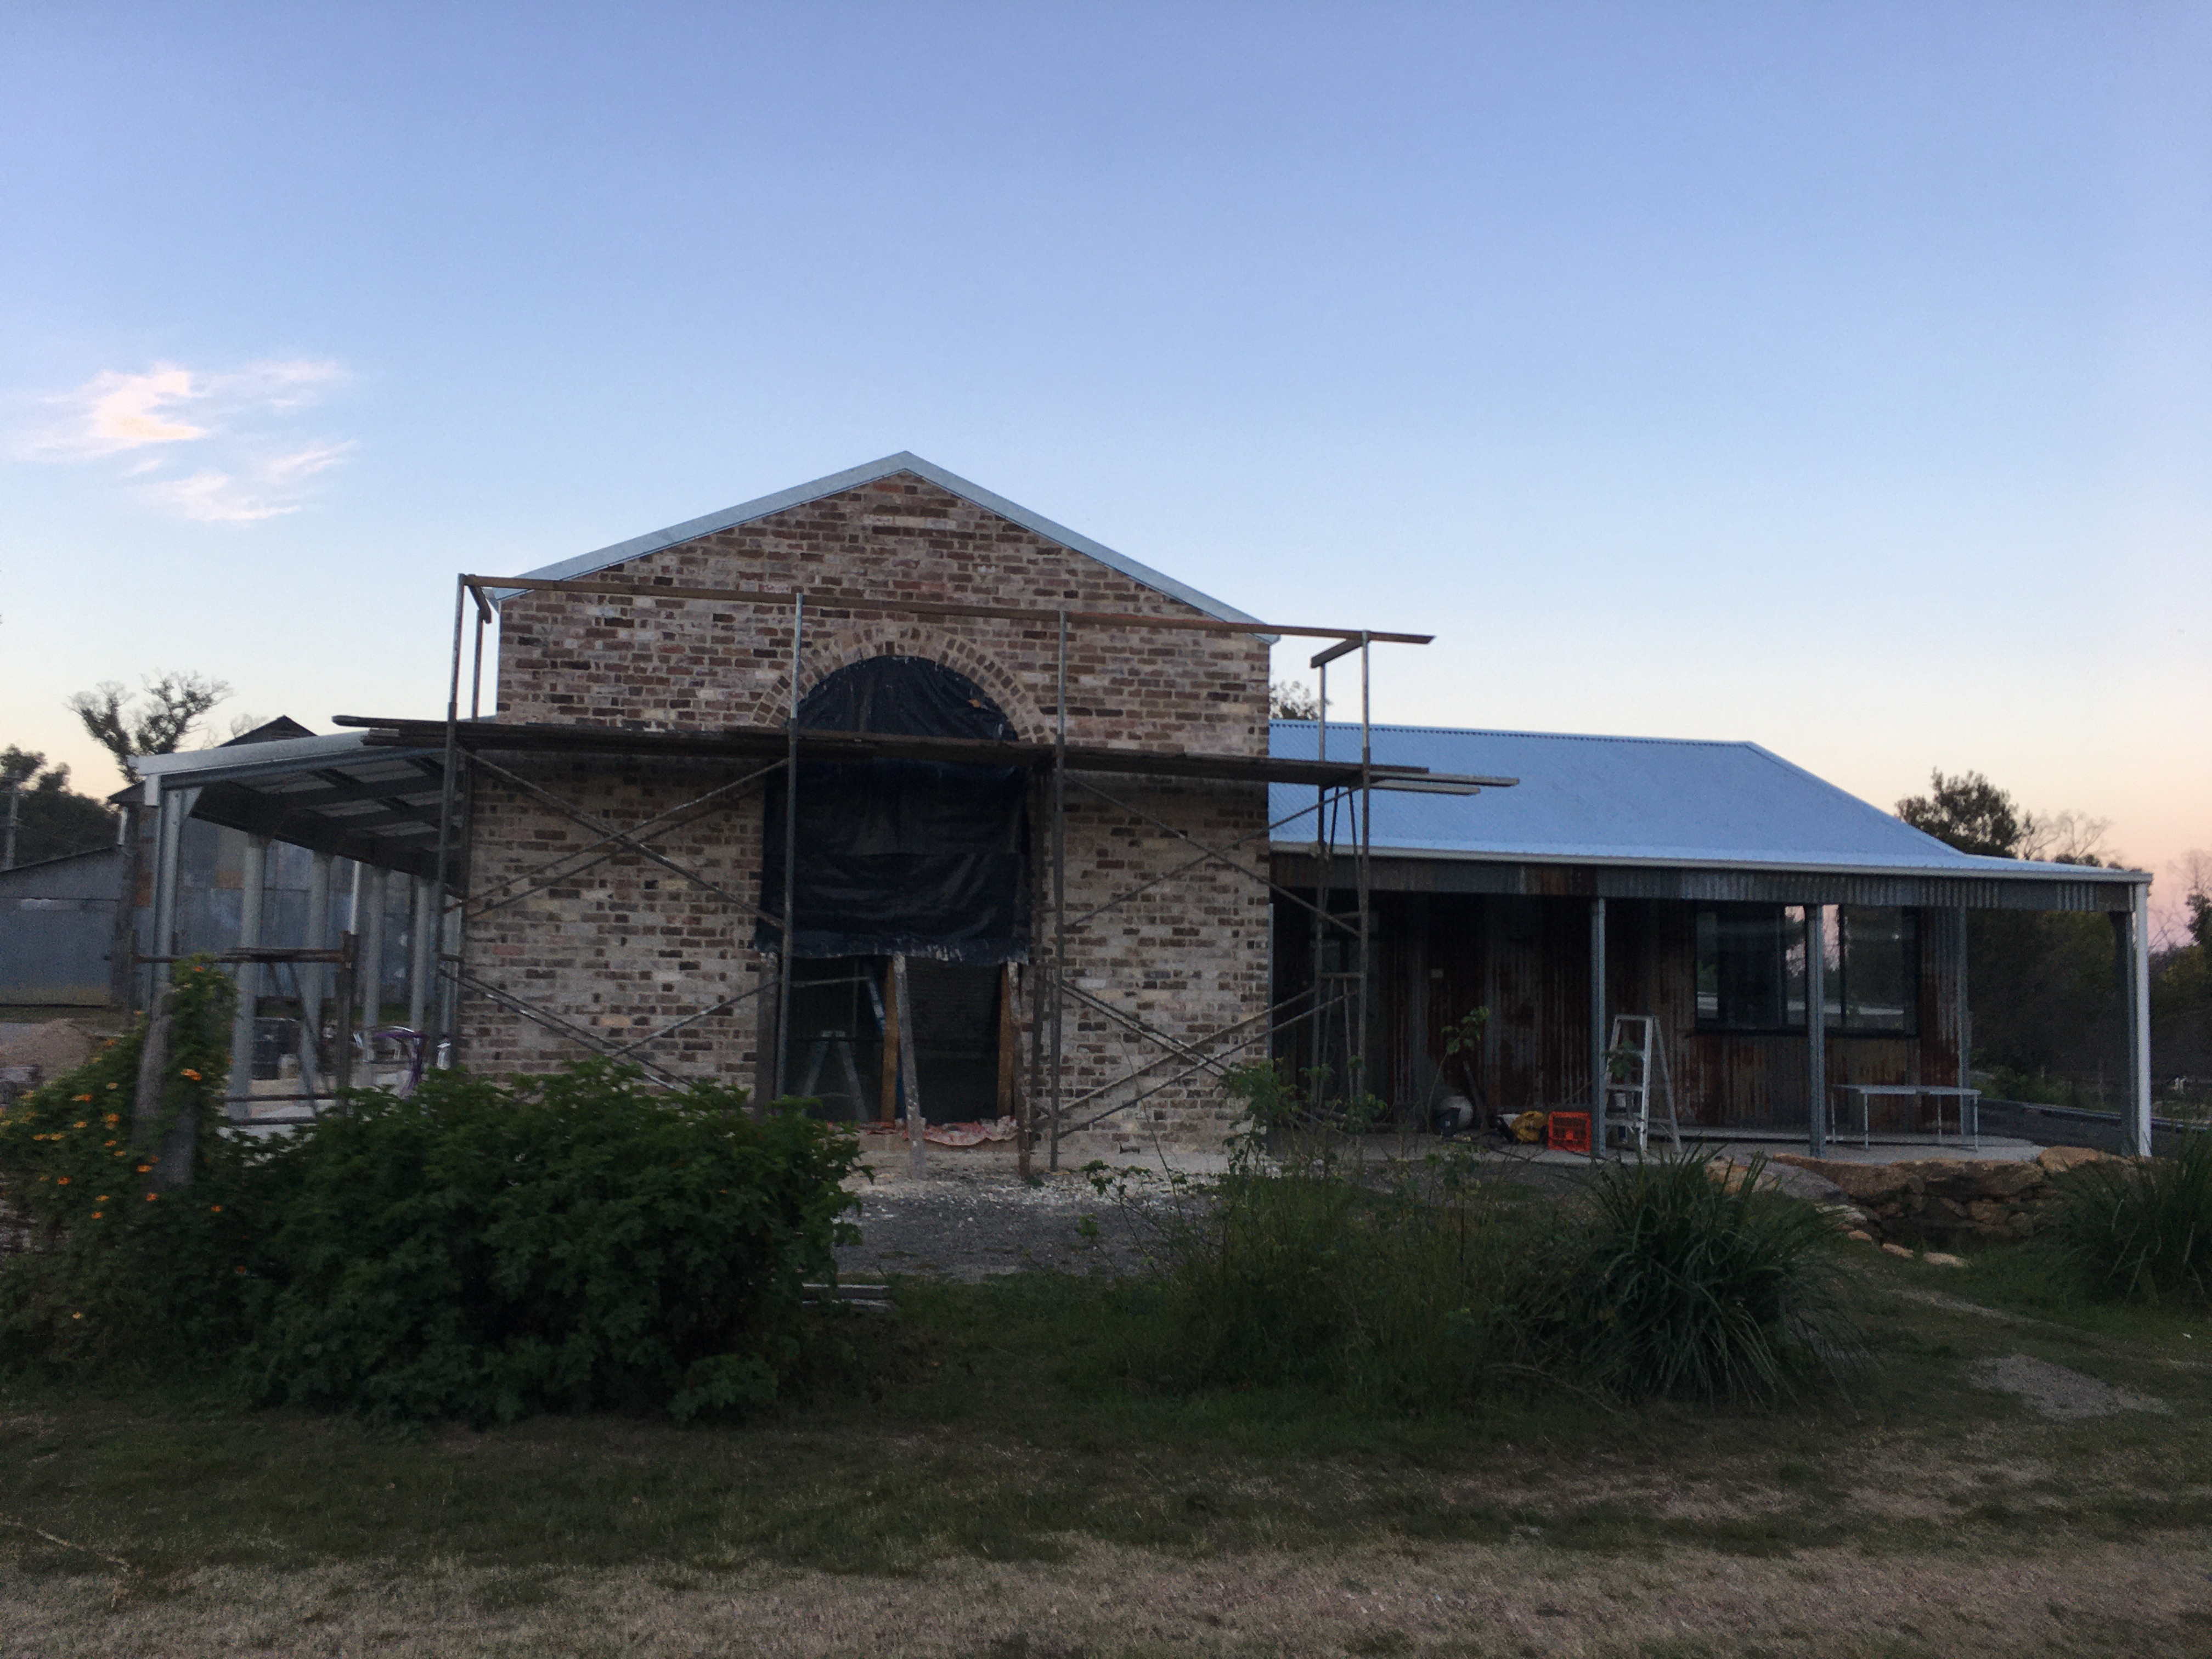
I’ll be pleased to remove the scaffold, so that I can finally see the arched wall and window in its complete form.
The brickies have finished. However, there is still a lot to do to clean it all up. I still need to scrub it all down, fettle it, then acid wash the surface and water blast it, but even at this stage it looks great to me.
I asked Bill, one of our brickies, if there was a rule about laying bricks with the frog up or the frog down, as I had noticed while securing the brick ties to the shed frame, that some of the bricks were laid either way. Bill explained to me that he was taught by the English Master Bricklayer Dave Smith from Leeds in Yorkshire to lay bricks frog down, so he lays bricks frog down unless there is a reason not to, such as the need to get a particular face out, or if the brick is warped and won’t sit flat any other way.
At this point, I should explain to those not familiar with bricks, that old fashioned sand stock or modern day dry pressed bricks have an indentation in one of the broad, flat faces. This has a few functions, but mostly to provide a ‘key’ to allow the mortar ‘grip’ the brick and lock it into the wall.
Modern extruded bricks have a lot of holes all the way through them, so don’t require a ‘frog’, the extrusions provide the texture for the cement to grip the brick. BTW, Bill told me that he refuses to work on jobs that specify extruded bricks. He said that they aren’t ‘real’ bricks, just rubbish.
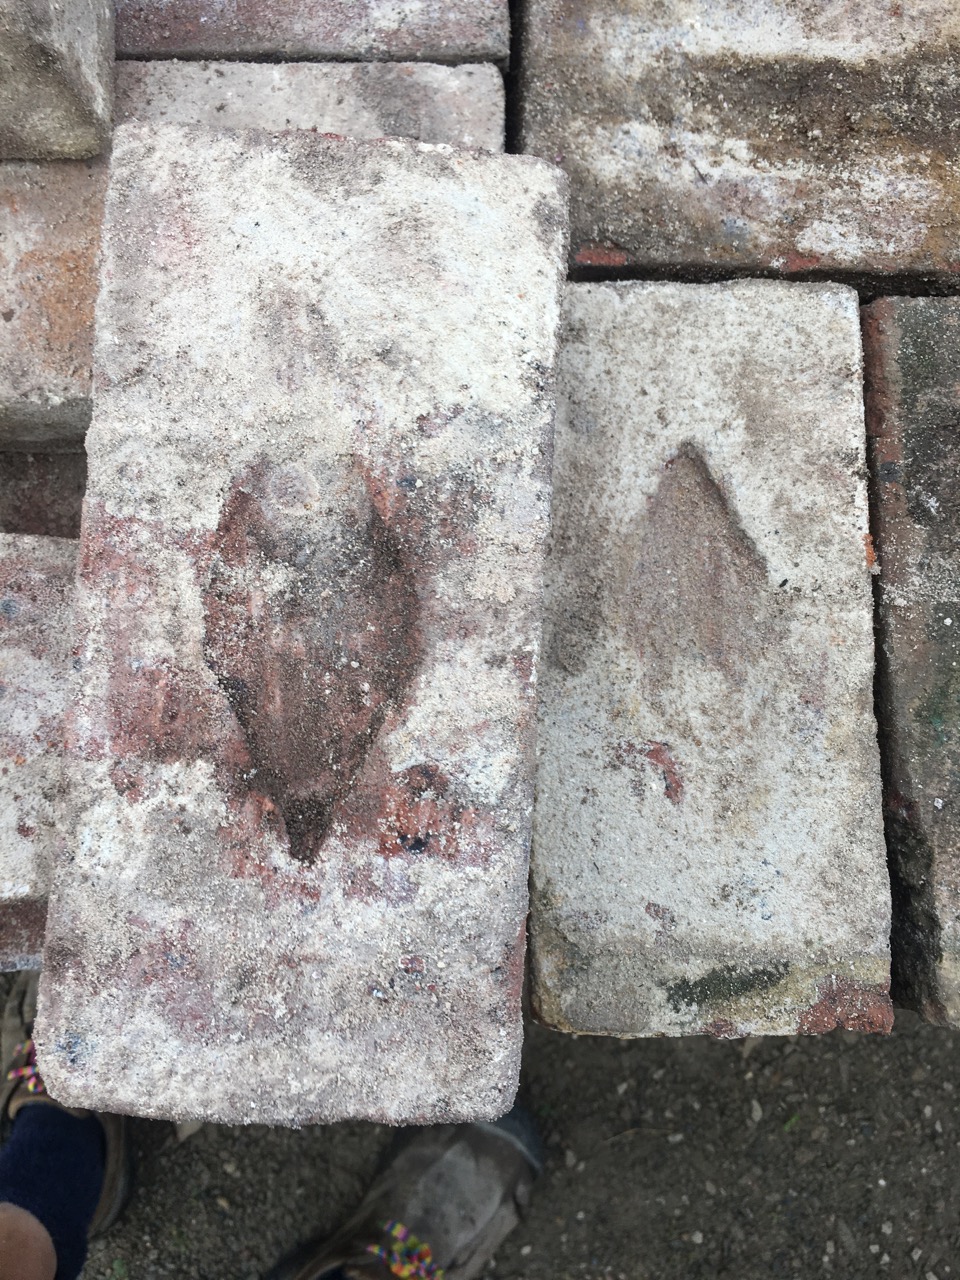
So a frog is an indentation in the brick. In old, hand made, sandstock bricks like ours, the bricks were made one at at time in wooden mould, also hand made on site and not always exactly the same as the other moulds that were being used, so there is plenty of variation in the size and shape of the bricks, but particularly in the size and shape of the ‘frog’ indentation.
We have diamonds and ovals, but mostly a huge range of rectangular shapes.
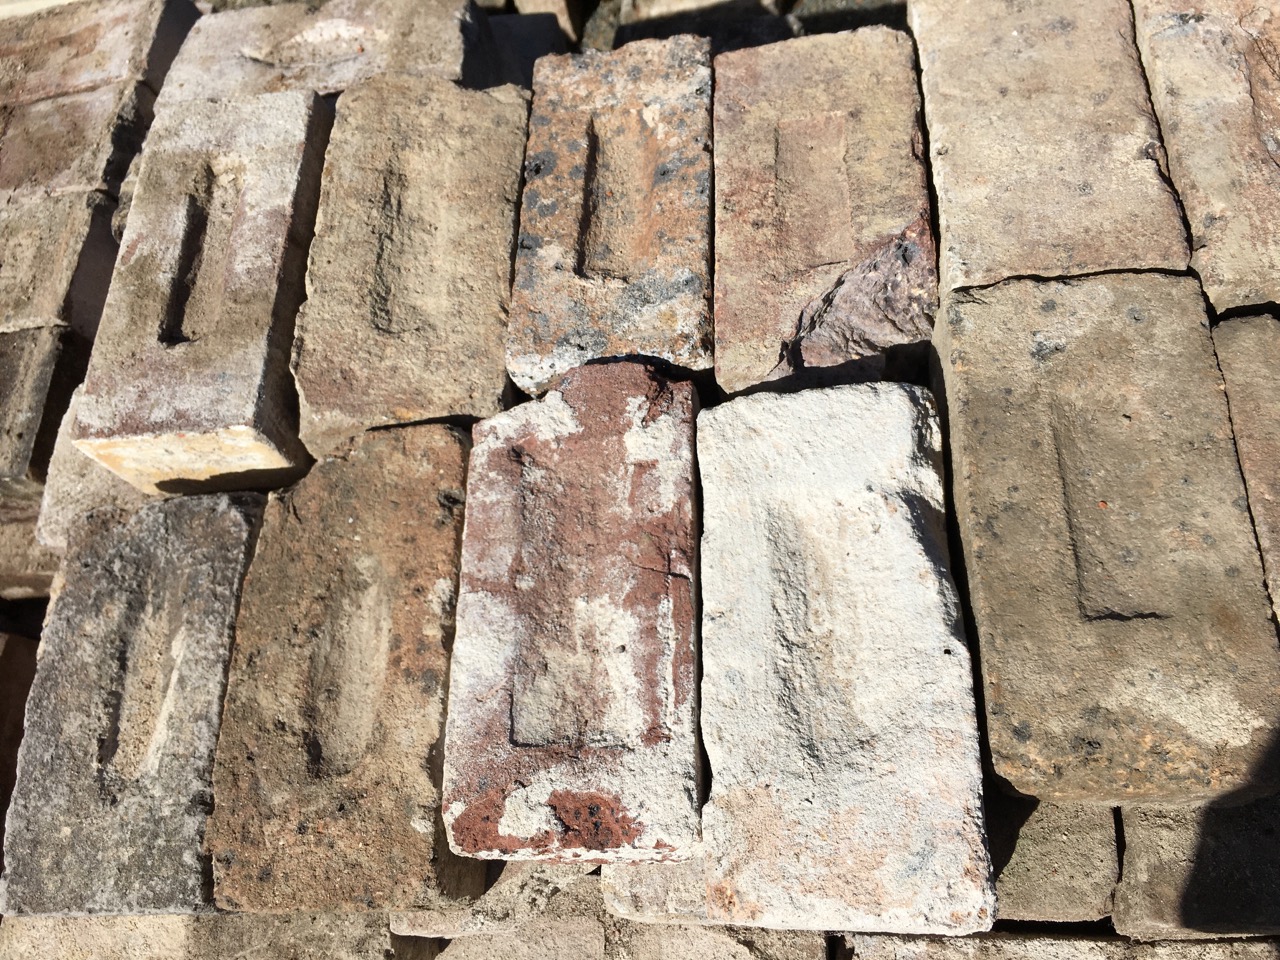
It appears that each brick maker seemed to make his own mould and chose what ever piece of wood was available at the time to add to the mould to make the ‘frog’ indentation in the brick. There is a huge variation. I have read that as each frog was different, the shape of the frog in the brick was a way of counting up the tally of each individuals daily output, as the brick makers were paid per brick produced.
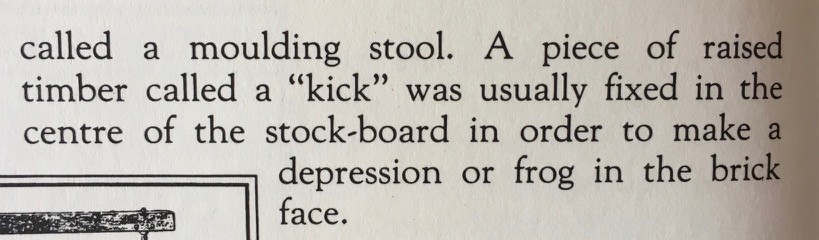
You can see above, many of the various shapes of the frog, these varied from long, narrow and deep, made by using a squarish baton of wood in the bottom of the mould or ‘Stock’, to very wide and shallow, with tapered edges. Warwick Gemmell in his book ‘And so we graft from six til six’ – Brick makers of New South Wales. states;
Having a wooden piece in the bottom of the mould also had the beneficial effect of pushing or ‘kicking’ the clay slop out to the corners of the mould. It is important to fill the corners of the mould to get a well shaped, square edged brick. Having a ‘kick’ in the bottom of the mould made this easier to achieve by kicking the soft clay out to the edges and allowed the brick maker to work faster with less ‘seconds’.
So where does the word ‘frog’ come from in brick making? The the OED vol 6. P208/6 quotes it’s first use in print in 1876. But gives no indication of it’s origin. In a book called “Des Brykes”, I read that fancy brick work in many old English stately homes was done by imported Dutch bricklayers, as the techniques of sophisticated and decorative brickwork were well advanced in Holland at that time. The Oxford Dictionary also quotes on the same page that Dutchmen were called ‘frogs’ as a term of derision in 1652.
Could it be that immigrant Dutch brick workers introduced the frog into English brick making? It just might be possible, because the ‘Kicker’ piece in the bottom of the mould is also the same word in Dutch (kikker) that means frog!
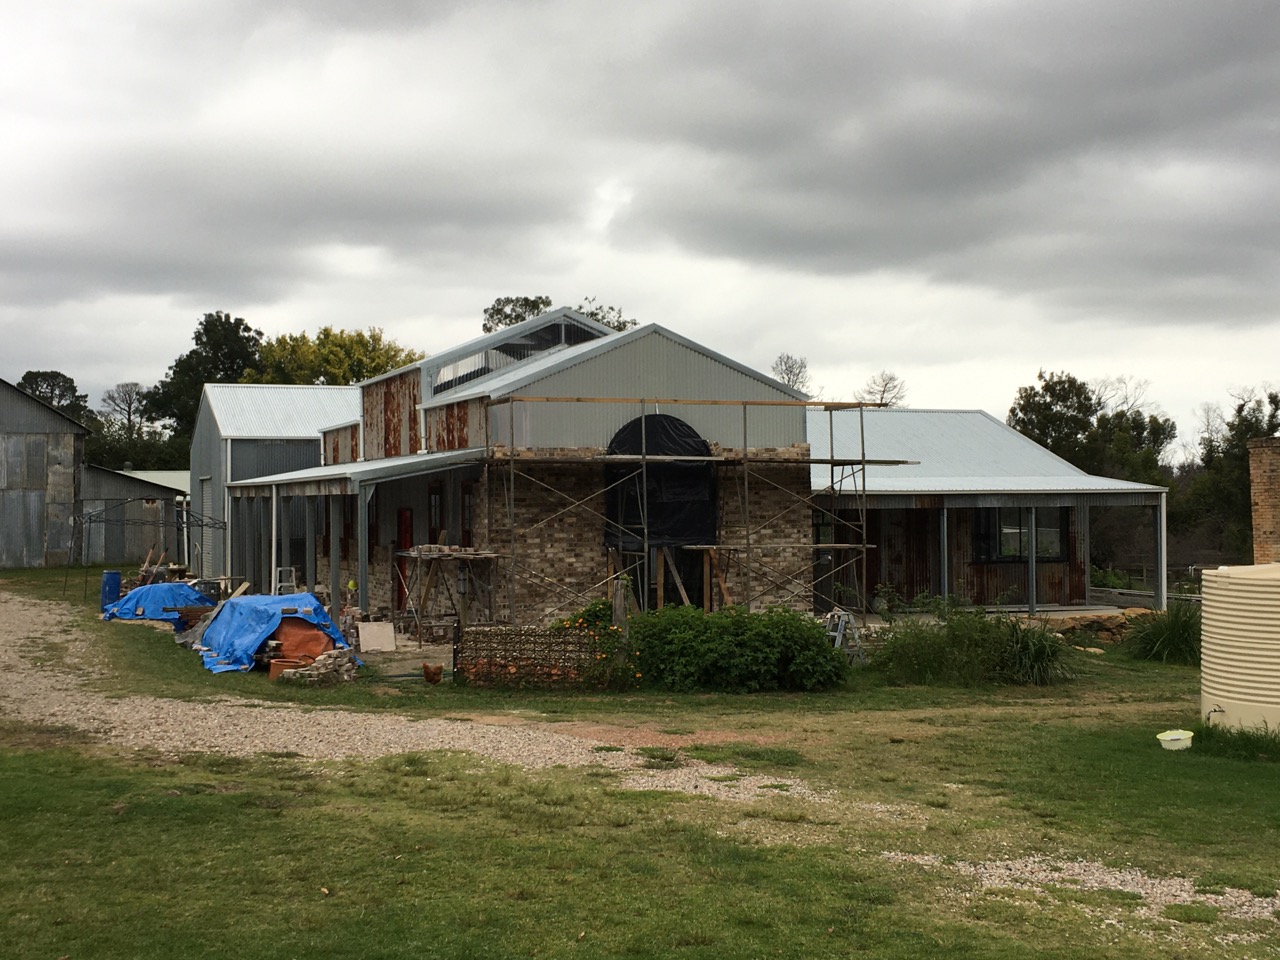
Janine and I have been particularly busy today cleaning up the brickwork left as it was by our wonderful brickies, Gordon and Bill after they finished up their 4 day week on Thursday. They got the verandah wall all done, right up to the roof. That only leaves the top of the gable wall to be completed. If anyone needs a couple of very skilled and experienced brick layers to do a great job, contact me and I’ll pass their details. They only work a 4 day week, as with them both being well over 70, they can do that. We don’t want to wear them out.
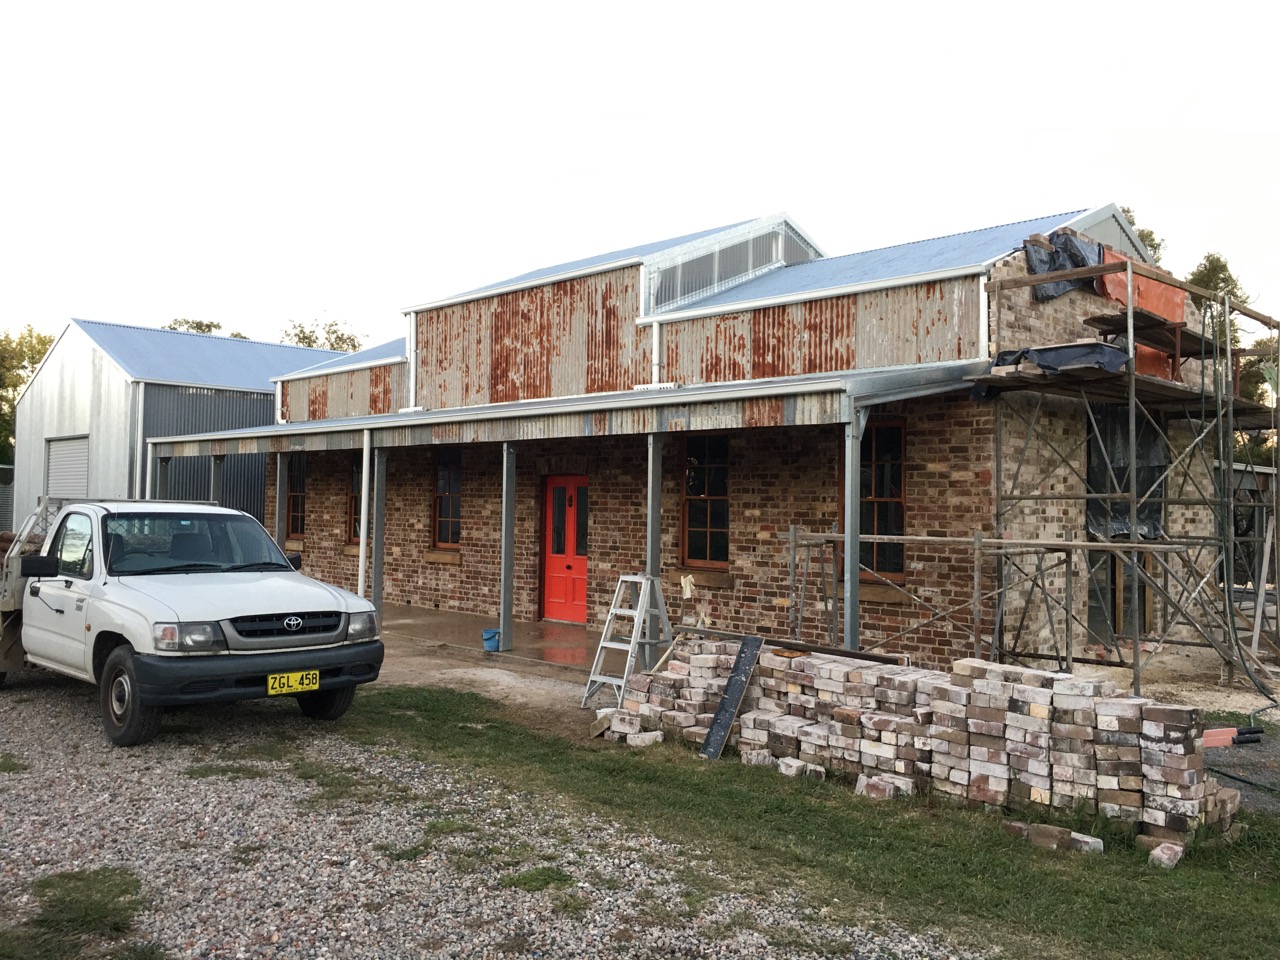
What was particularly good about their working style is the number of times that they asked me what I wanted done here or there. What was I expecting. What did I think about this problem… How should the Sussex bond variation be interpreted and implemented here? etc etc. They’re always consulting and prepared to be flexible. Although I’m very tired from being the brickies labourer to two brickies. Constantly on the go, making mortar, or cutting special shapes on the brick saw, but mostly passing mud and bricks up onto the scaffold, I’m really glad the end of the day, and particularly now that this wall section is complete. We can stand back and appreciate the final ‘look’ of the project so far. And it looks great! Better than I imagined 12 months ago when I drew up the plans and started to get quotes on this crazy idea of buying 5 different ‘off-the-plan’ kit-form farm sheds of all different sizes, heights and shapes, and then bolting tham all together, to make something a little bit different and more interesting. It’s worked!
Today is Good Friday and everything is closed for some obscure ancient pagan reason, so we are working hard at home as usual. As the brickies have finished the verandah wall, we can start to fettle it and begin to wash it down with dilute hydrochloric acid and scrubbing brushes. I’m using a 0.5 norm muriatic acid from a big hardware chain. I’m diluting it to a 10% titration just strong enough to react with the lime in the mortar to dissolve the white ‘blush’ and occasional streak of smeared excess mortar from the brick face, but not strong enough to cause any damage to our skin if spilt. We are wearing long rubber work gloves and goggles, just in case.
We spent most of the day from 9.00 am to 7.00 pm. on the cleaning of the wall. We first went over the entire wall, every brick, brick by brick, scrubbing it down with acid, then follow this up with another going over with the water blaster gadget. The wall looks better, but not quite good enough or clean enough. There were still a few smudges here and there when we came back from lunch and got a fresh look at the surface.
We decide to go over it again with the dilute acid wash and scrubbing brushes. We follow this up again with the high pressure water blaster. Our supposedly, high pressure, water blaster is just a toy, We bought it very cheaply over 20 years ago and have hardly used it, as it’s not very powerful, but it does blow off just enough of the lime gunge without damaging any of the bricks or the environment. It turns out to be just perfect for this job. I wish that I had owned it 35 years ago when I had to wash all the brick work on the old school extension. I did all of that acid scrub and water rinse off by hand from buckets carried up onto the scaffold. It’s amazing how fast a bucket of water can get emptied by hand using a sponge. I spent more time climbing up and down the scaffold, than I did washing bricks.
But that was then and this is now. We have just had a massive down pour of rain last week, so we have an excess of water in the dams, as they are still over-flowing with the seepage from the saturated soil. So water supply is no problem for us this week. I can leave the pump on for an hour while I wash everything. The electric pump runs directly off the solar panels, it’s a sunny day, so we are just using up some of our excess solar-electric power as well.
The water is over-flowing from the dam, so If I don’t use it up in this way, it just flows out of the dam and out into the already saturated soil farther down the hill and into the ‘key-line’ system of dams that we have built over our 45 years years of living here. The water flows from one dam down into the next. We have 4 dams on the property, before the water leaves us and flows down the hill and into our neighbours dam.
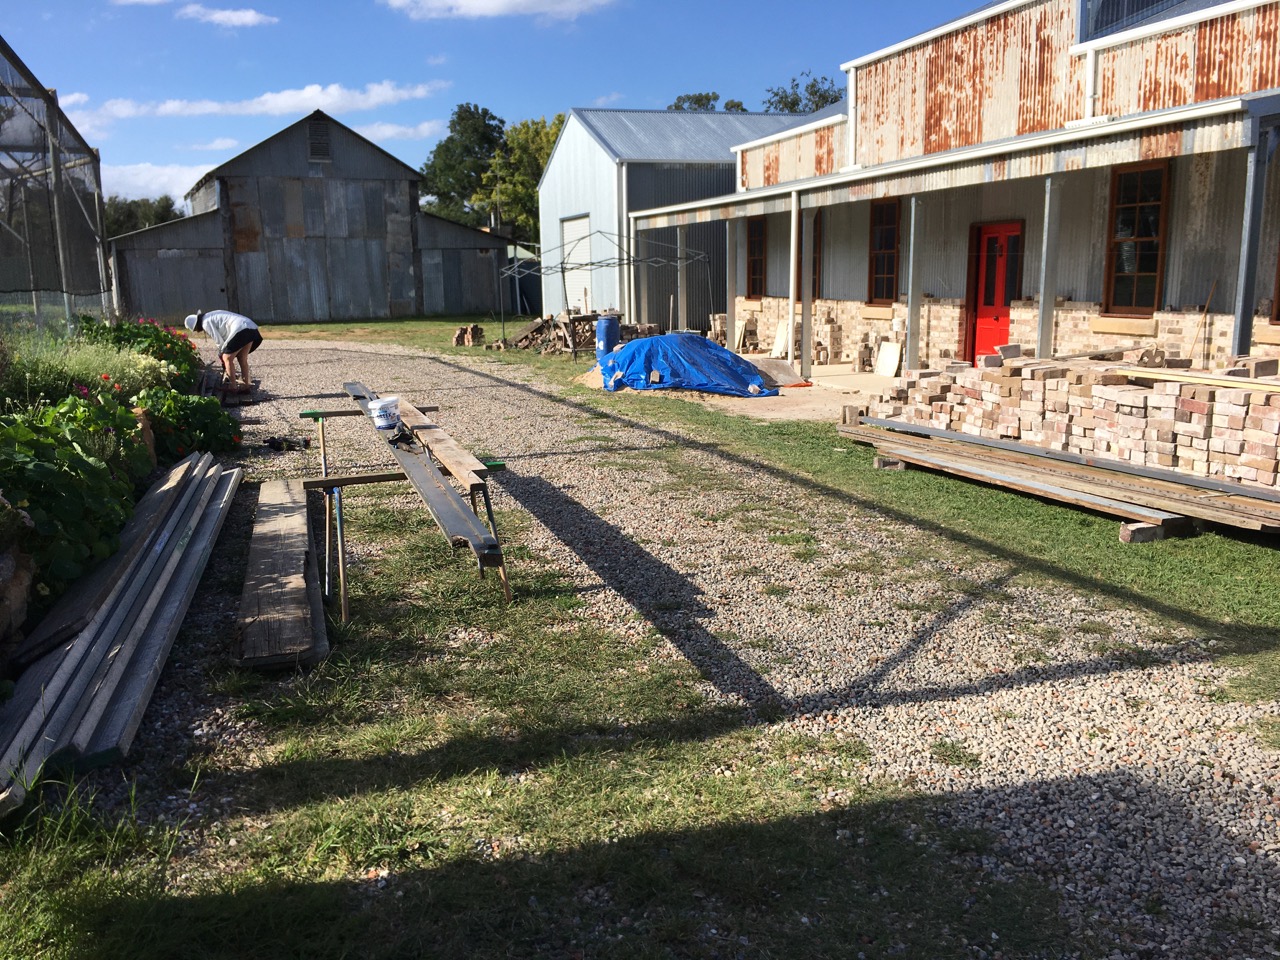
We did the second acid scrub and water blast rinse, then stood back and had a good overall look. It looked better and was worth the extra few hours of work. Once the bricks were cleaned, it was time to dismantle the scaffolding piece by piece, removing all the planks and ply sheeting and stacking them all away for re-use again later. The planks and ply will be used as bench tops and tables in the pottery in a few months time when we get to that stage. They were 2nd hand when we got them given to us, as they came from a house that was demolished in Tahmoor. We had to de-nail them before we could use them as scaffolding, they will need to be heavily cleaned to remove all the spilt lime mortar before they can be used again. I will have to wash them and scrub them to remove all the sand before I can plane the surface without damaging the planer blades.
Once all the steel scaffold frames were removed and stacked on the ute, we could remove the plastic sheeting that I had stapled onto the timber windows to keep them clean. Only then could we get to see the outcome. The wall looks great. The Sussex brick bond variation that Gordon and Bill have created for us looks perfectly matched to the Old School building. It also matches the tone and hue of the old rusted galvanised iron sheeting that I used on the wall above the verandah.
I used almost 4 litres of acid to get this wall cleaned. I can see that I’ll use another 4 litres on the gable wall next week when that wall gets finished.
I’m starting to get a bit excited now as things are beginning to come together. The rest of this long weekend will be spent in the garden as everything is growing it’s head off and has been left somewhat neglected for a while now.
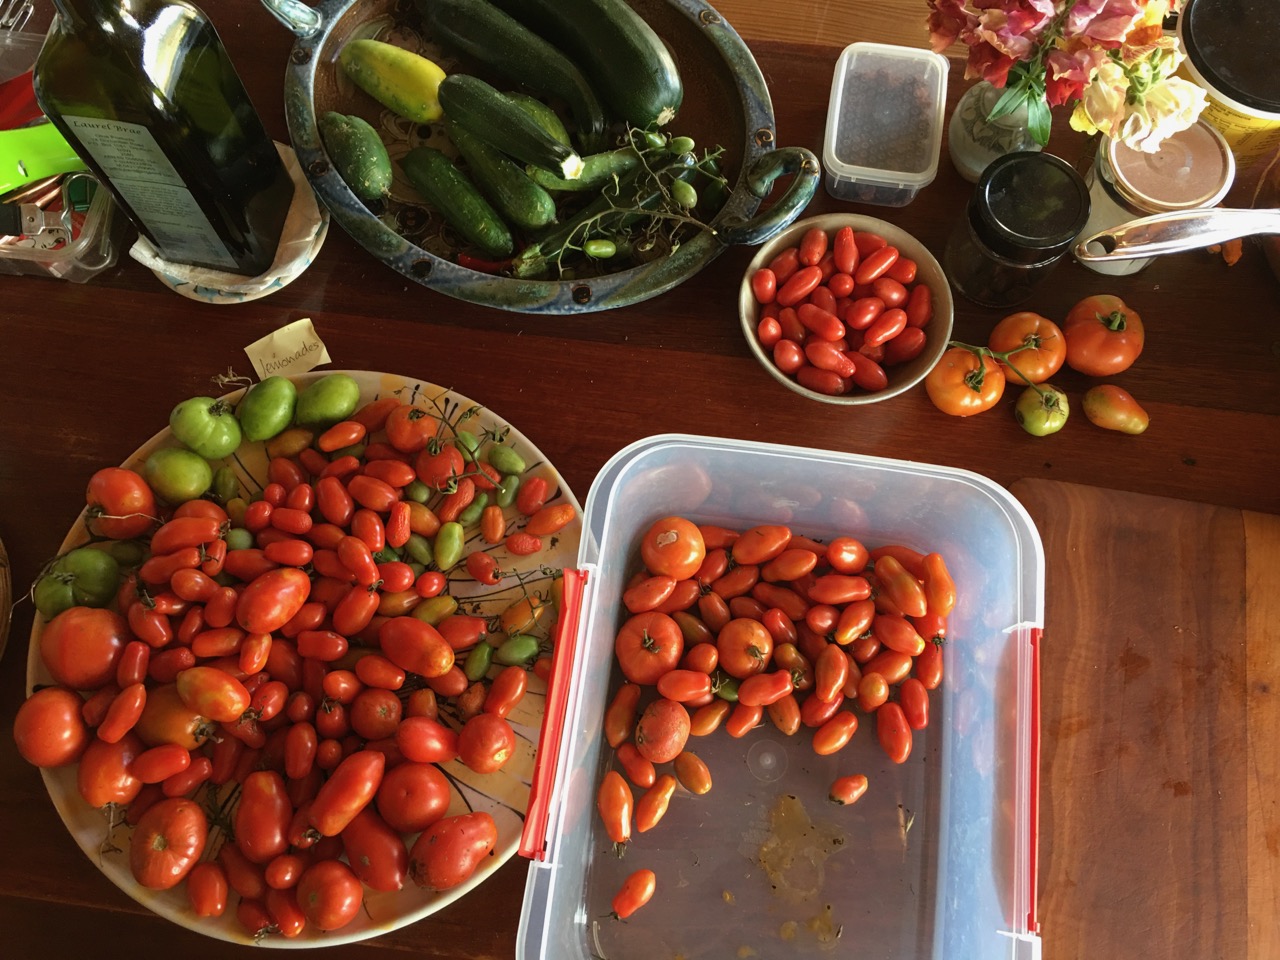
When the weekend comes around, we spend time playing catch-up. There are so many jobs that don’t get proper attention during the week, just a cursory glance. I get stuck in and pick tomatoes, Zucchinis, pumpkins, etc.
Janine has been doing all the garden harvesting during the week while I’m flat out being builders labourer to our wonderful, sensitive and highly skilled, couple of brick layers.
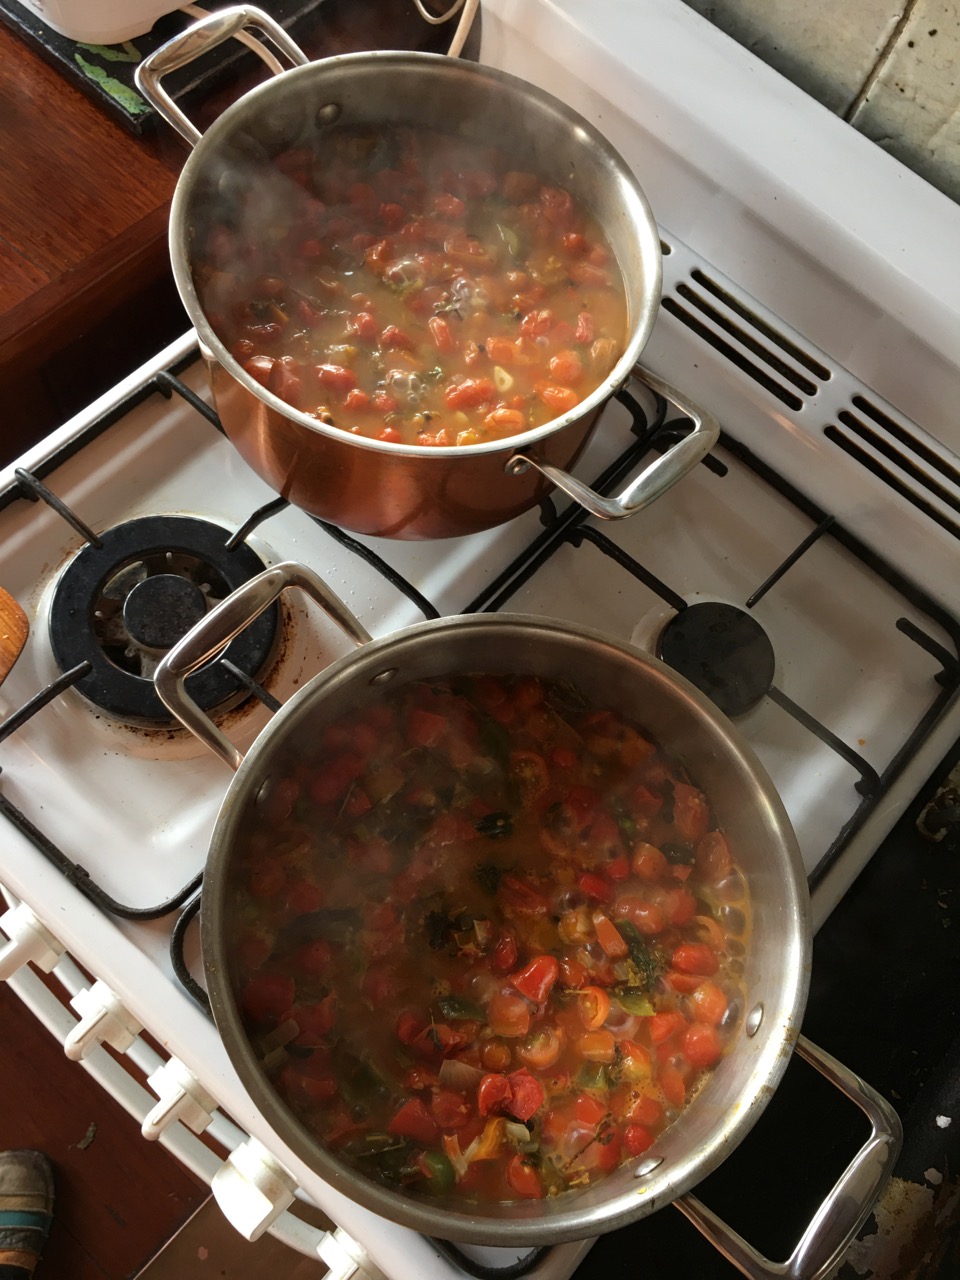
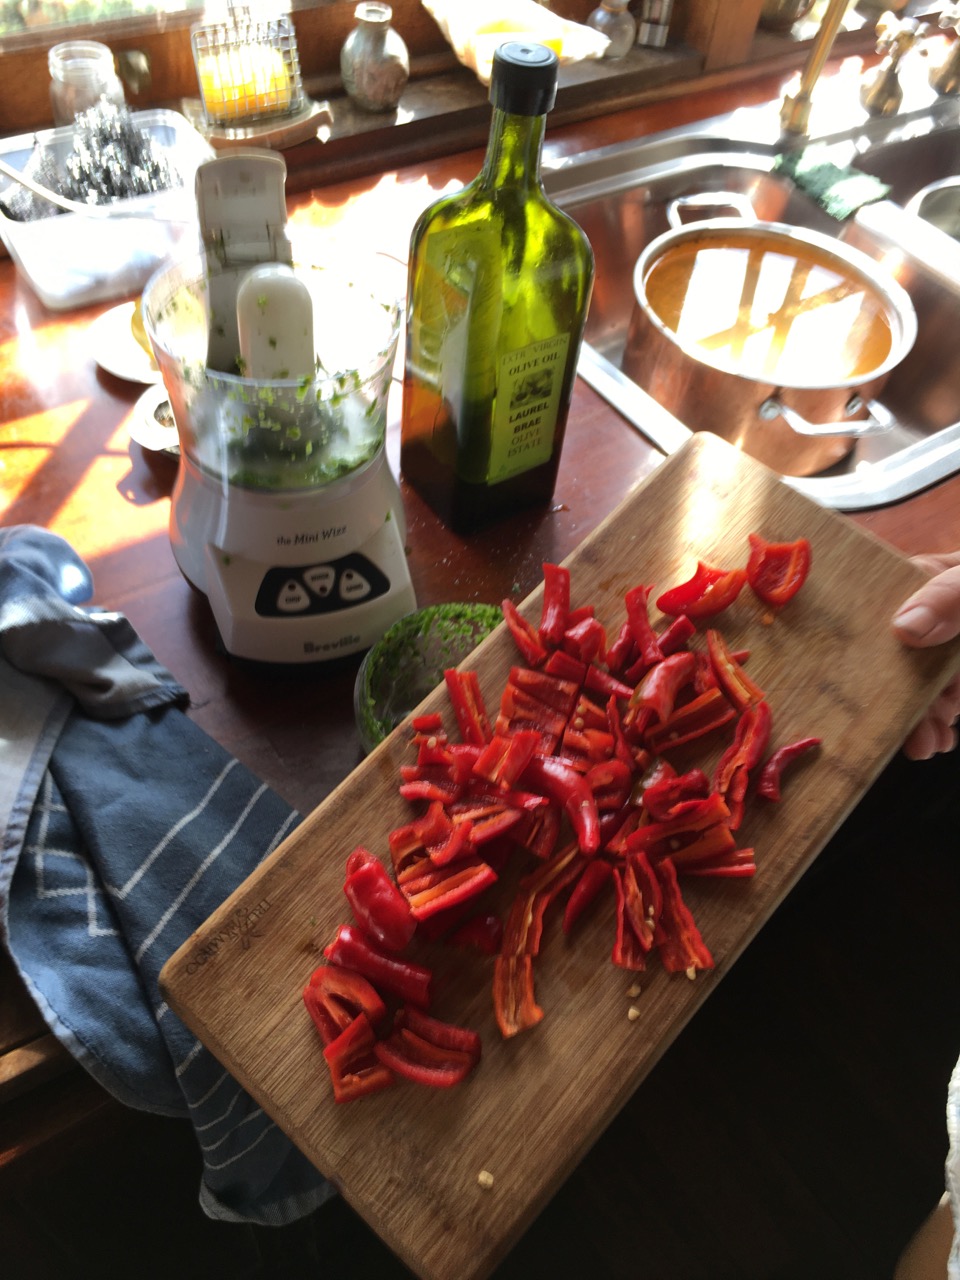
Saturday is the time for washing, sorting and chopping all the sub-prime tomatoes. The best ones are put aside for the weeks lunch time salads. All the rest are chopped up and boiled down into passata, starting with frying brown onions in good olive oil, then adding a knob of peeled and chopped garlic. This batch, I’m adding lots of capsicums and chilli, as well as the usual bay leaves, a sprig of thyme, some sage leaves, and loads of sweet basil. The sweet basil is trying to go to seed just now, so I have to continuously pay attention to pick off the flowering heads, with a couple of leaves. Back in the kitchen, I strip all the useful leaves from the somewhat woody stalks and florets. I eventually get about 3 hands full of leaves and my hands smell divine for an hour.
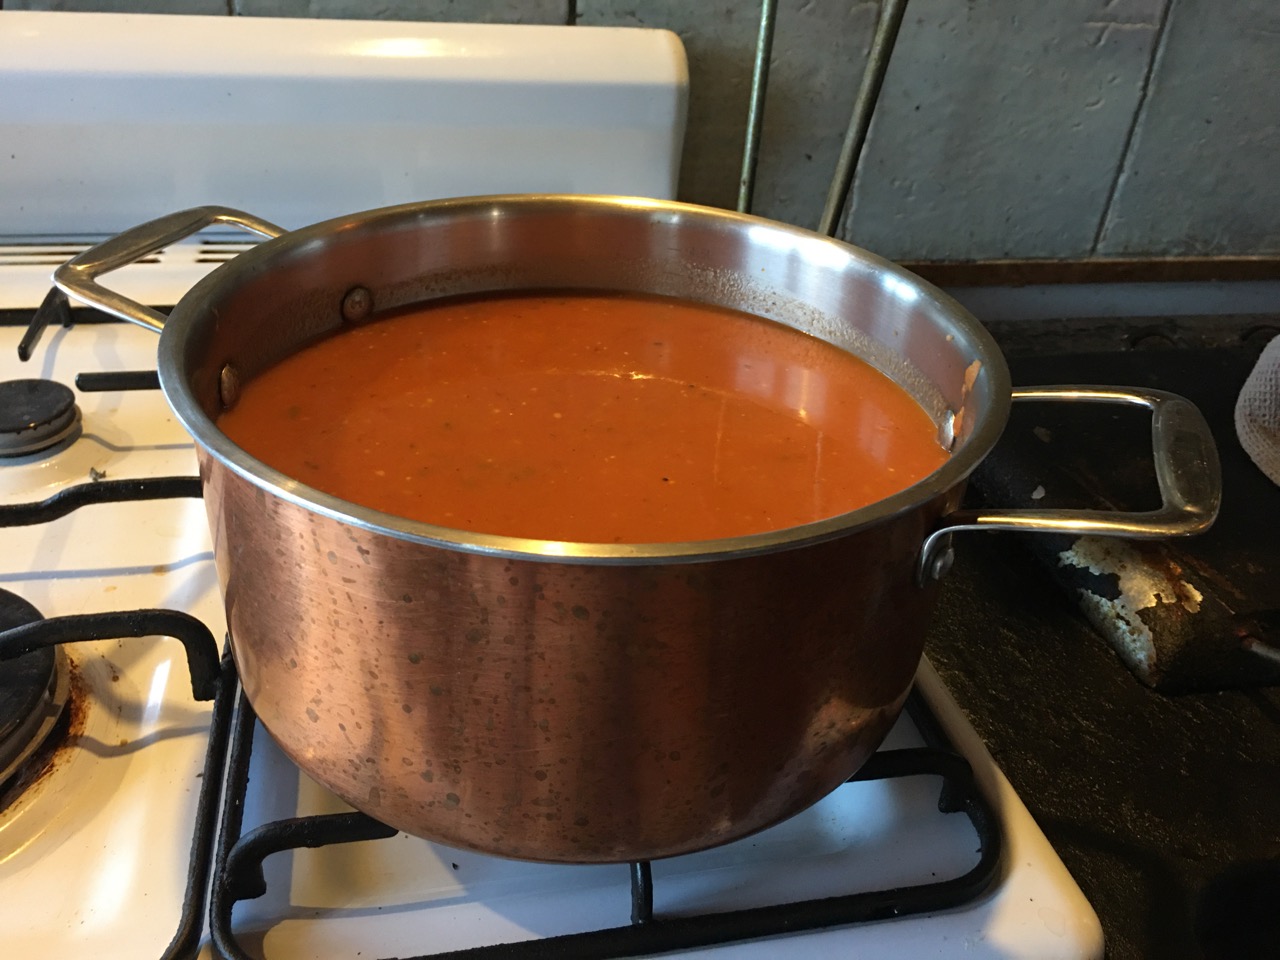
I usually bring the chopped fruit to the boil and then continue for an hour longer on a low simmer. Once the vegetables and herbs are well and truely reduced to pulp, I put the pan aside and let it cool. Later, I come back to it and pass the boiled pulp through a moulii sieve to extract most of the stalks, herbs, seeds and skins. I choose not to use the very fine screen in the moulii. I usually use the medium screen. This lets a few tomatoes seeds through, but it also passes some of the herbage. I like the rougher texture. It somehow feels more honest and real.
This time, I also add 2 teaspoons of salt to the pan, just for that little extra savoury hit. I generally avoid salt in my cooking, but tomatoes and eggs, both really comer alive with just a little of the poison. I do this because salt is in everything that you buy, and in excess, it isn’t good for you. As nearly all processed foods are loaded with the stuff. I think that it’s best to keep my consumption of self-inflicted salt as low as possible. The result of this self-imposed restriction, is that Janine and I both have blood pressure that is at the lower end of normal. 110 over 60.
The resultant puree is again brought to the boil to reduce it by about 1/3 and then bottled. My 5 litres of original chopped fruit, is reduced to 2.75 litres of tomato sugo or passata.
This stuff is magic. It’s so hard to describe a combination of aroma and taste, but trust me it is amazing. This ritual of making tomato sauce every summer is the closest that I come to having a religion.
We chopped up one of our big greenish grey, glaucous ‘Queensland Blue’ pumpkins and Janine made pumpkin soup that will last for a day or two. Even feeding our two brickies.
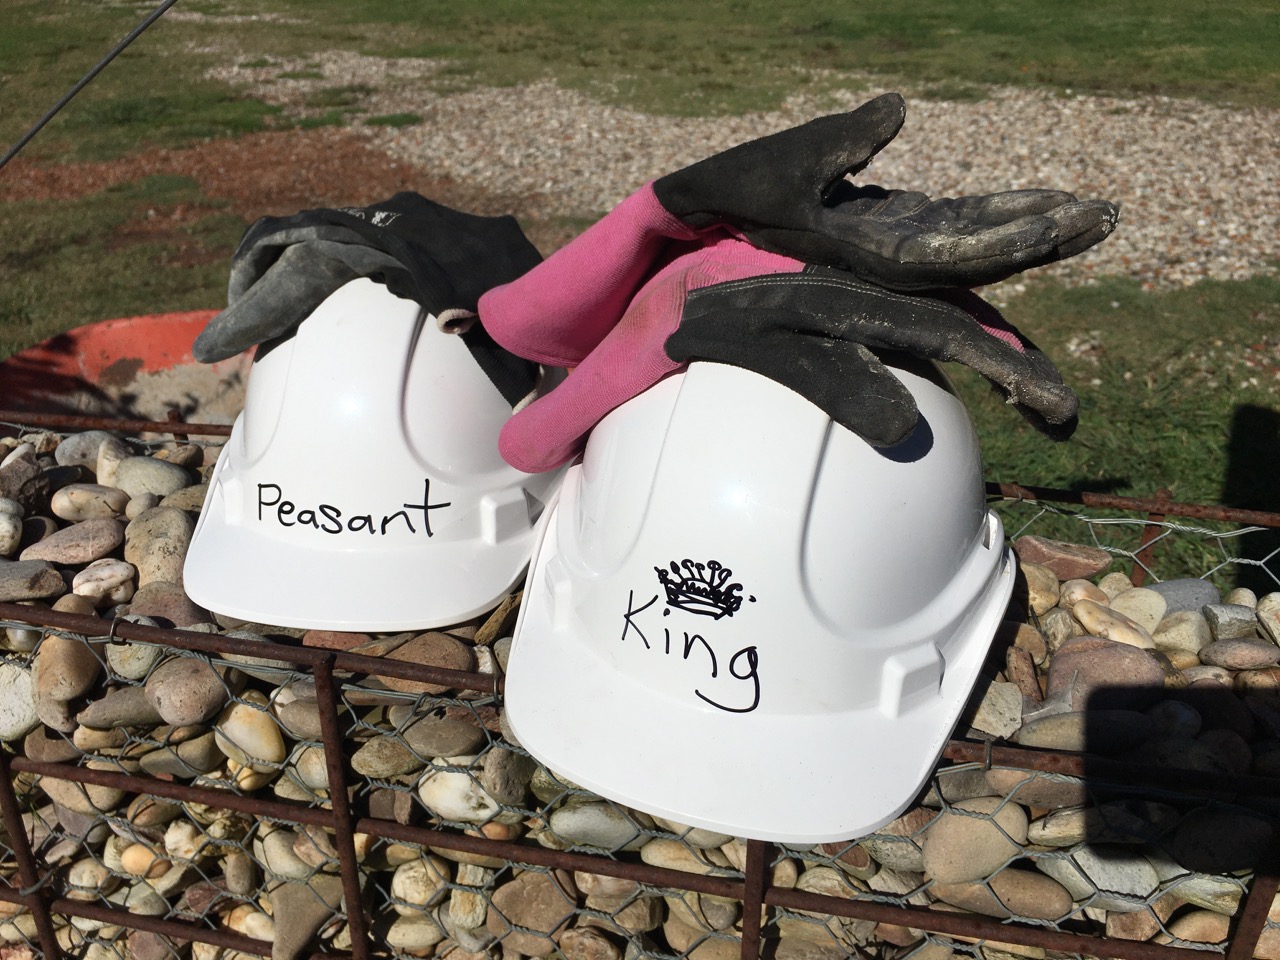
We have been supporting our brick laying brothers by mixing lime mortar, stacking bricks up onto the high scaffold, passing up queen closers and snap headers to them and generally being helpful and supportive in whatever inept way that we can, whilst staying mostly out of their way. It can be a bit dangerous working below a scaffold, with occasion objects falling down at times. The odd trowel, but mostly brick spalls.
I had to go into town and buy us two safety helmets to keep us safe. Appropriately identified as belonging to the King and Peasant.
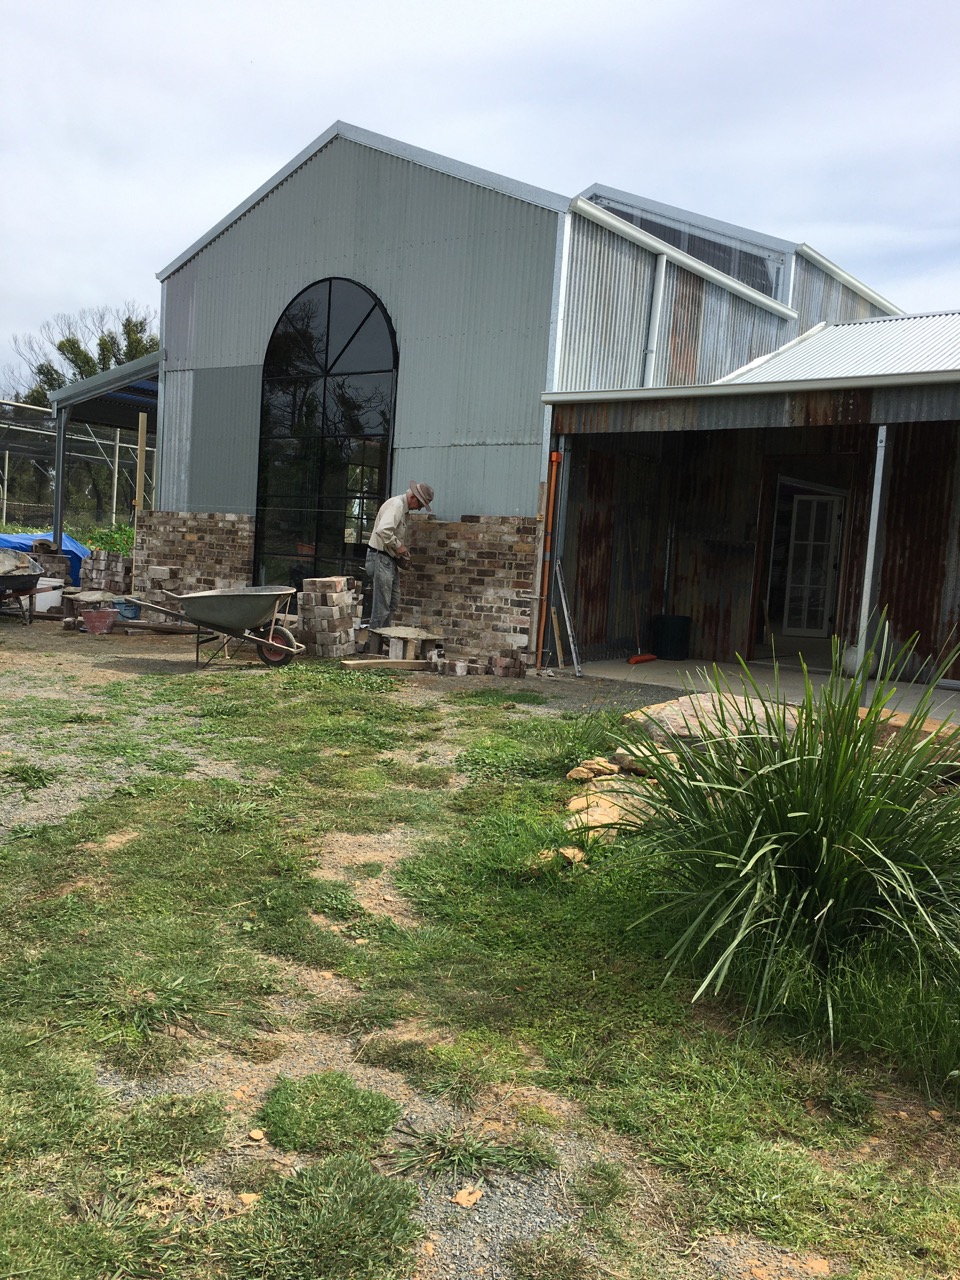
The work on the southern facade progresses this week with the home-made double story scaffold including safety rail. The arch is now completed, fitting the two keystones that close the archs. A ‘keystone’ is the last brick that fits in the arch, joining both sides of the span securely. The key stone is no more important than any other brick in the arch, every brick is equally important, it’s just the last one to be placed. Once the arch is secure, the wall is closed over the top, requiring me to cut a few special tapered ‘wedge’ bricks to bring the coursed brickwork back to level over the arch.
A well constructed arch is a beautiful thing. I built over 300 kilns over the course of my kiln building career. With the assistance of my good friend Warren, who was my right hand man for over 25 years, we prided ourselves in creating perfect arches in our brick lined pottery kilns. I know the whereabouts of some of these early kilns, and they are still working well after a very long life of untold firings over 30 years and more.
A well constructed arch is a beautiful thing!
We have spent two days on it and there is still the best part of a day to go the get the gable facade complete. It will require another small centre section of extra scaffold to allow the ridge to be reached comfortably and safely.
As the rain has started to set in, and is forecast for the remainder of the week, we finish the day by wrapping the new brickwork with its soft, freshly laid, mortar joints and covering it with black plastic to stop the rain from washing the joints out over night. If we are lucky, the rain will be very light or hold off for another day so that we can get the wall finished.
If the rain persists, we will be working under the verandah area and try to finish off the front wall around the door and windows instead.
We have spent the last week working with our heritage bricklayers. The job progresses slowly and steadily. I spent the first half of the week working on the southern high arch window end wall.
Mid week I had to build a scaffold to allow the brickies to get higher.
On Thursday I got some help from our son Geordie and my good friend Colin the builder who came over for a couple of hour to help me erect the wooden arch former so as to facilitate support the arch bricks over the arch. I built the frame, but couldn’t hold it up safely while I secured it in place without help.
The brick work proceeded up the wall pretty quickly, so Colin and I spent Friday afternoon building the scaffolding up to the second level and securing it to make it very stable, then creating a safe ty rail around the top to make it safe for the brickies while they work up there next week.
While we worked on the end wall, the brickies worked under the verandah to keep the job moving along.
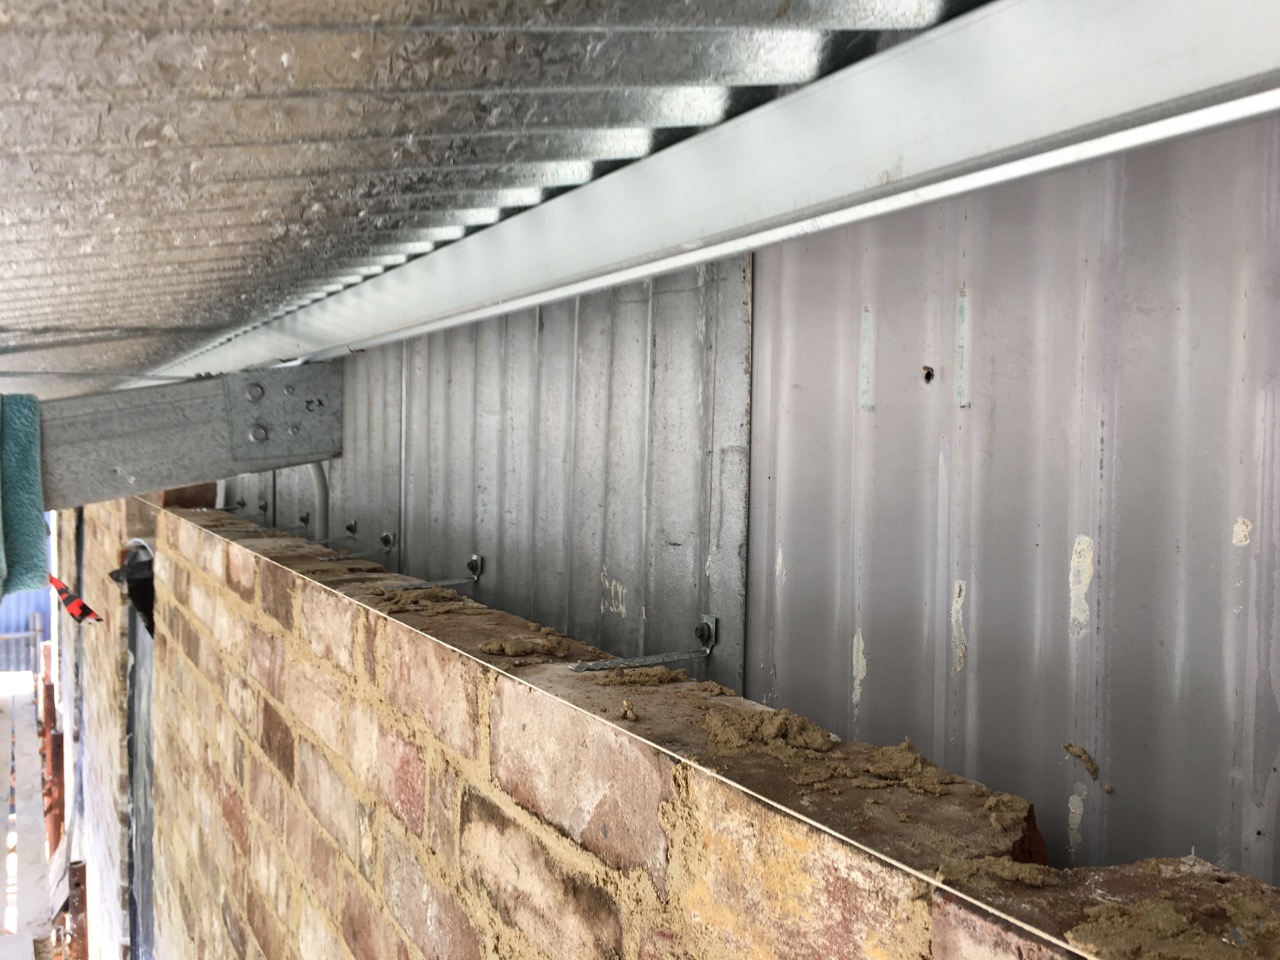
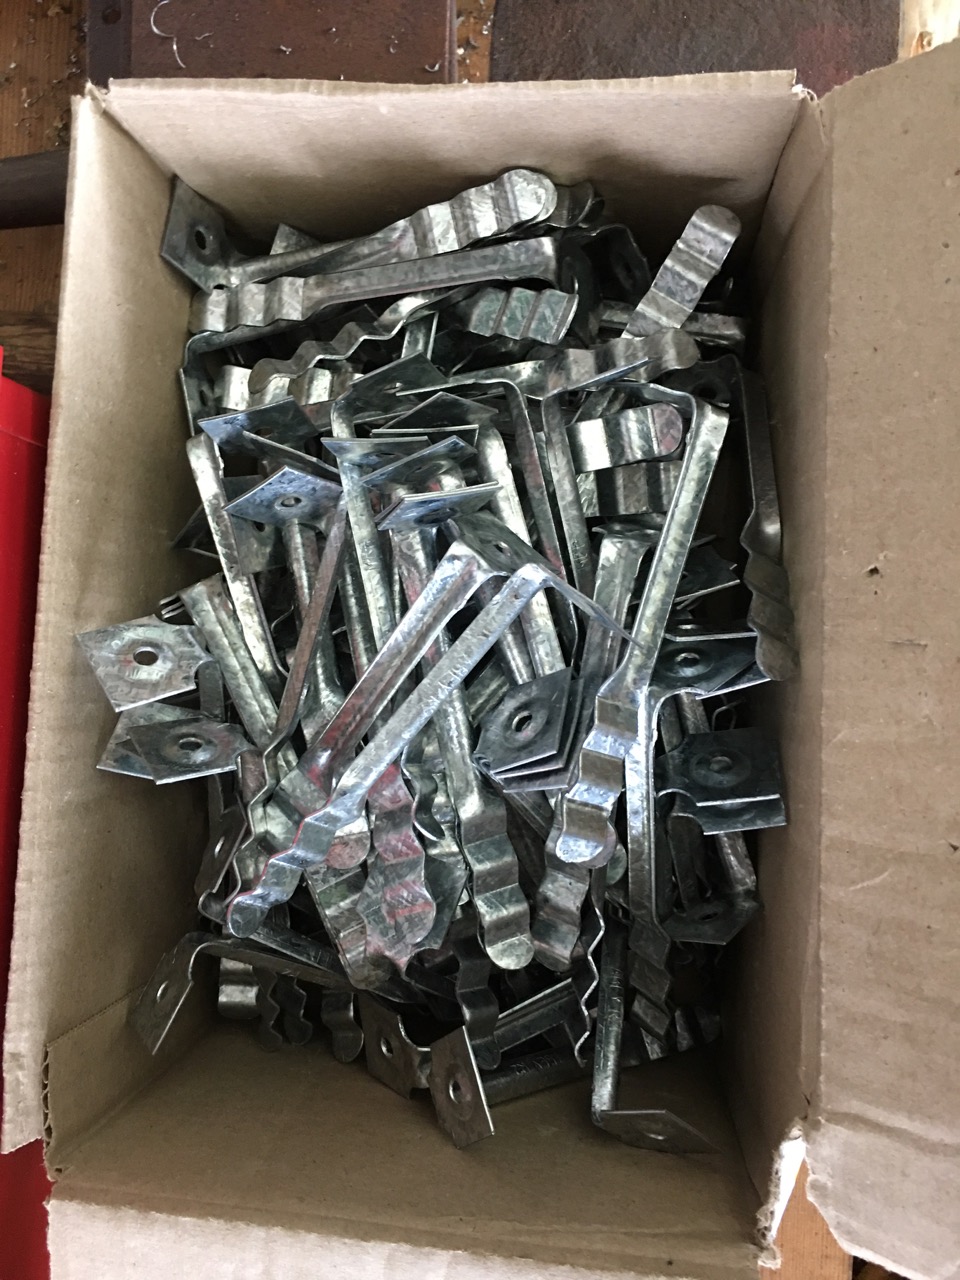
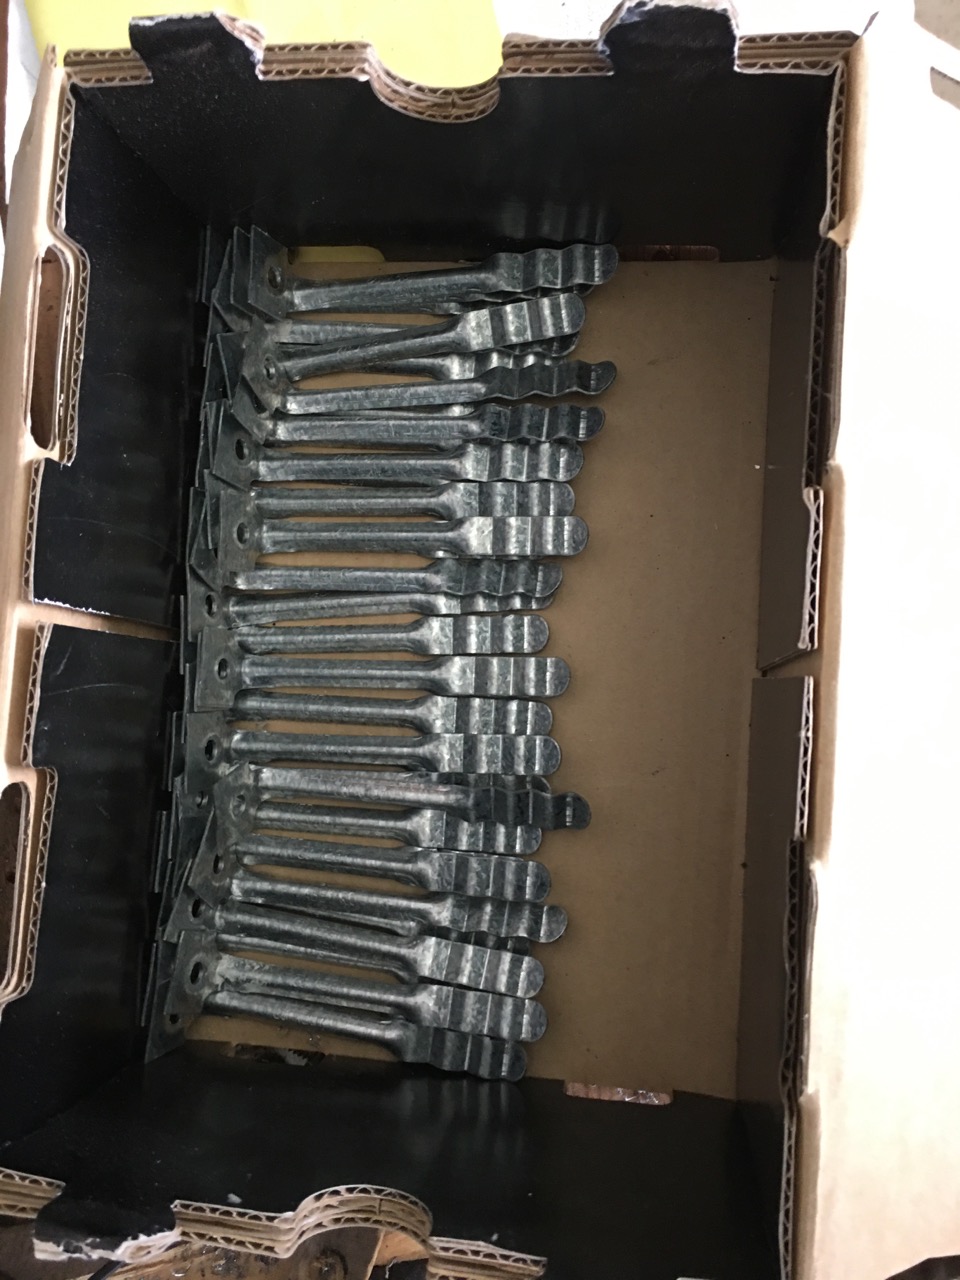
I secure the brick veneer wall to the corrugated ironed steel rail wall by using what are called ‘brick ties’. These are specially designed steel brackets that are screwed to the steel wall and are embedded into the cement mortar.
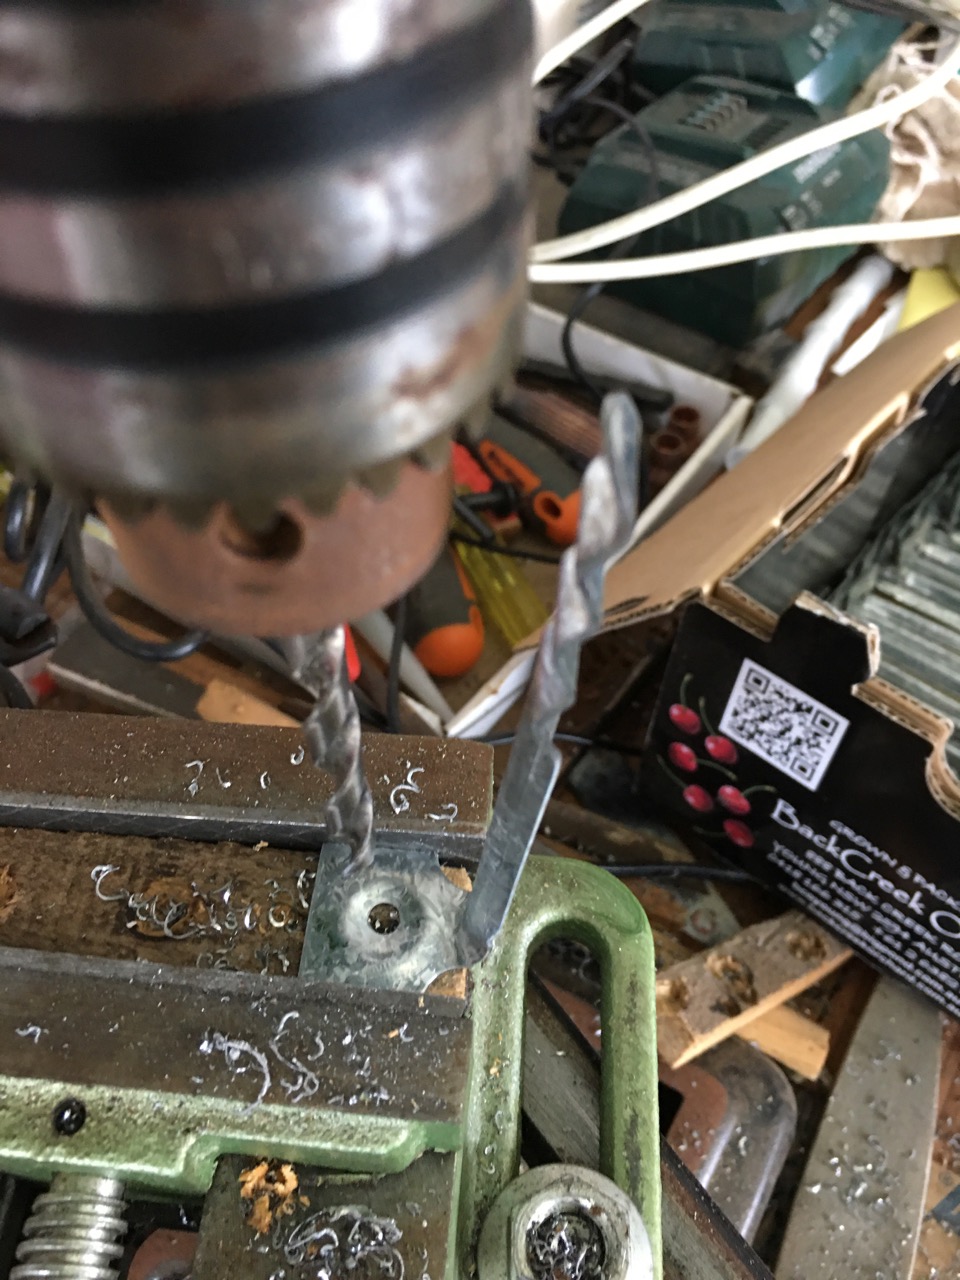
These are sold in boxes of 150 units. I am placing these ties on every 2nd brick, on every 3rd course of brick work. We are about half way through the job and we have used almost 4 boxes so far. I can see us using about 1,000 of these in total. Tragically for me, these things are made to secure the brickwork to a timber frame, so the hole in the tie to allow the nail or screw through is made too small for the big roofing screws that I’m using. So I have to spend half an hour a day drilling out the holes from 4 mm. to 6.5 mm.
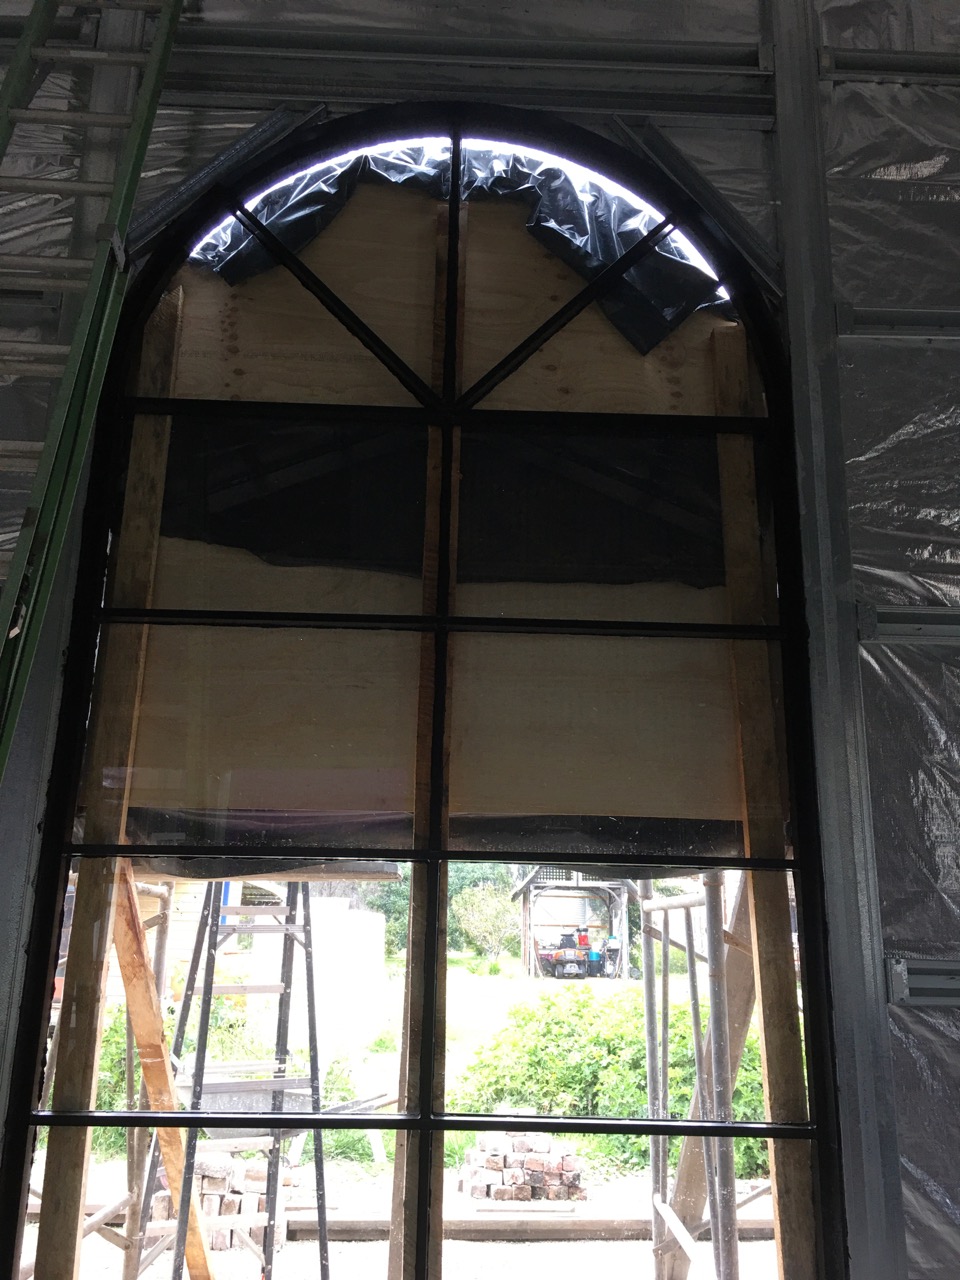
To prevent any bricks being dropped onto the glass panes, I have screwed plywood panels onto the arch formwork supports and then covered the plywood with black builders plastic to keep it from getting wet in the rain that is forecast this coming week.
It’s all very tedious and takes so much time, but is so very necessary, as replacing a broken pane would take a longer time and cost more.
In chatting to Bill, one of the bricklayers, it turns out that he was taught by a master bricklayer, Dave Smith, who came from Leeds in Yorkshire. I tell him that my father was born in Leeds. Bill likes this bit of news and spends our next few ‘smoko’ breaks telling me all about his good ‘mate’ Dave. He even rings Dave up to tell him about the job, about our ‘Sussex bond’ variations, and about our Yorkshire/Leeds connection.
It also turns out that Bills brother Gordon, our other brickie, knows a lot of our friends here in the Highlands, as Gordon lived here for a decade in the 80’s. We discuss our connections and it turns out that we must have met 35 years ago, or if not, at least been at the same ‘open house’ music concerts.
It’s a small world. We are bonded by more than just bricks and mortar. We have the Sussex bond, the Leeds bond and the Open House music bond.
We are having a weekend off from the brick wall. We need to get into the garden, as there are tomatoes and chillis that need to be picked and preserved.
There are also capsicums, cucumbers and the sweet basil is always wanting to go to seed at this time of year, so it needs a good trim, taking all the flowering tops off to encourage it to put on new leaves and shoots.
I picked a 3kg basin of small egg shaped tomatoes. I didn’t select these plants, they were given to me as an unknown variety. I wouldn’t bother with them again. Too much work for so small a return. But they will make good passata sauce.
8 litres of rough chopped tomatoes, in two boilers, gets reduced and concentrated down to just 3 litres of sauce. But its really nice and intensely flavourful sauce. You can’t buy concentrated, intense, organic home made , small batch passata like this. Or if you could. I couldn’t afford it!
The kitchen smells so good. Especially when I come back in from working outside in the fresh air. The intensity of the fragrance hits me. You don’t notice it as much when you are working in amongst it. It becomes common place. You need a break away from it to realise/recognise the true intensity. Just like so many other things in life. Home made passata is concentrated life in a jar.
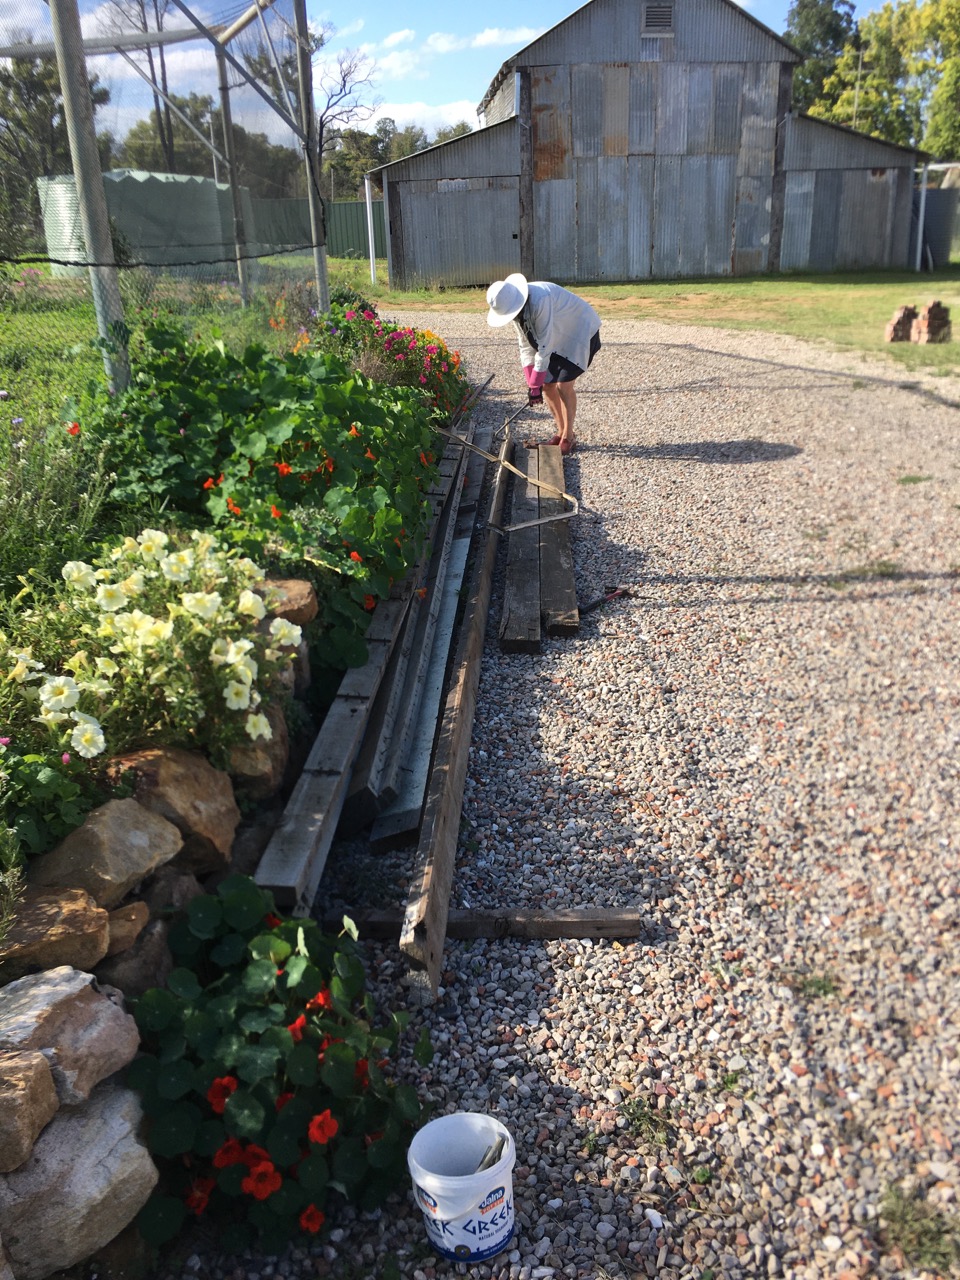
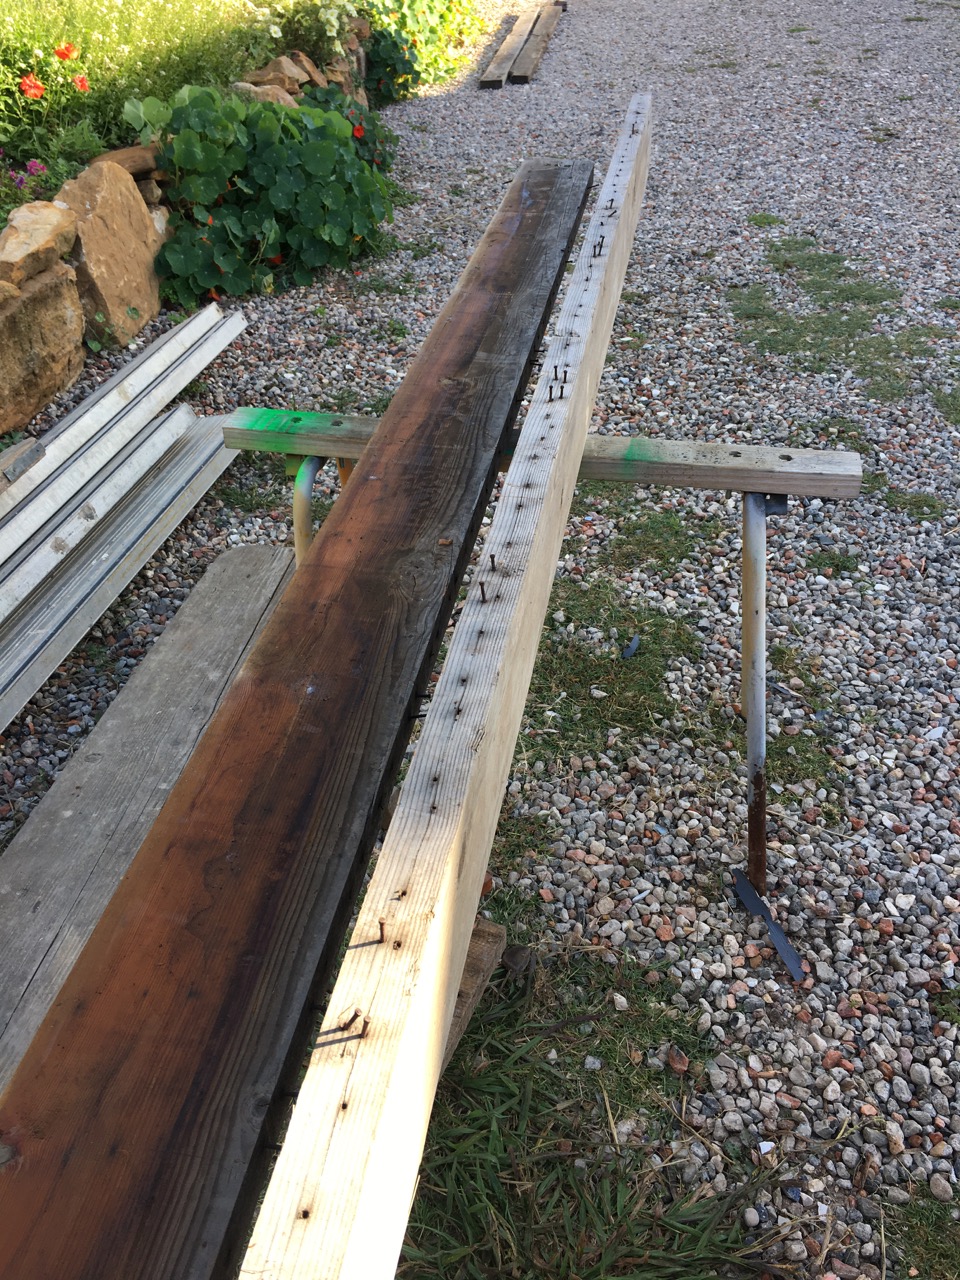
We need the weekend break to catch up on other jobs too. We have been collecting timber planks to use a scaffolding. There isn’t a single stick of timber that survived the fire here. I used to have loads of stacks of re-cycled lumber, all stacked under cover, just waiting for a time when they would become useful for some job or other. They all burnt.
We have managed to scrounge enough – I think, to do the job, but it all needs to be de-nailed.
It’s all a bit tough on our wrists, elbows and lower back, so we spread our attack over the weekend, a bit each day. It’s all done by Sunday lunch time. We are taking part in the ‘Clean-up Australia’, so need to be all done before that.
I also picked a load of spinach from the garden, so Janine made a couple of spinach and 3 cheese pies for dinner. Ricotta, feta and gorgonzola, extra yummy.
While I finished the de-nailing, Janine was inside milling up the red and green chillis into chilli paste with a little salt and olive oil. This will keep us going for a another year.
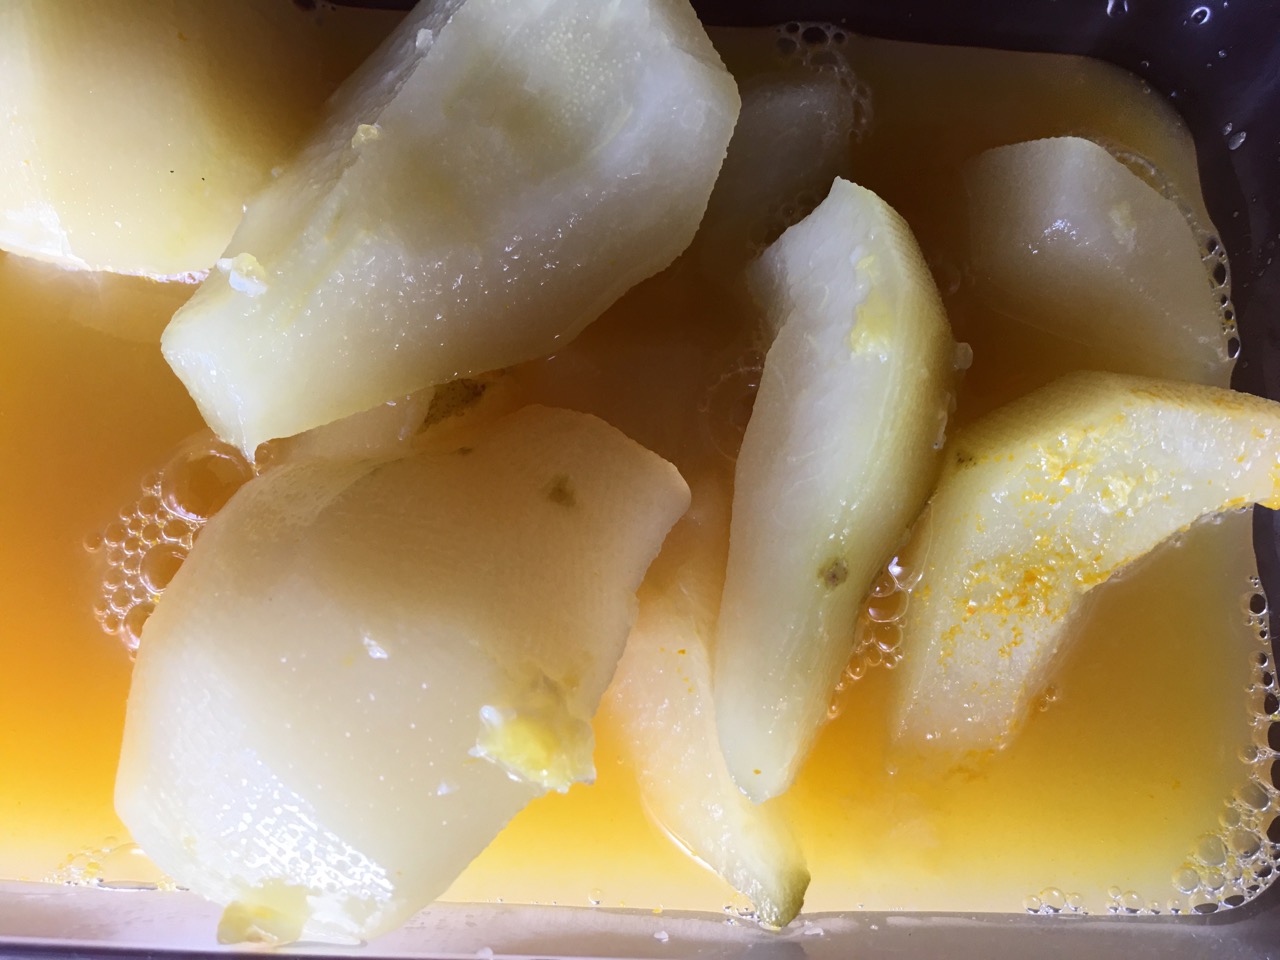
Then finally she stews up some pears for breakfasts, later in the week. This is self-reliance.
It has been a busy week, with 3 of the 5 sparkies turning up early on Monday morning. I also had my friend Ross turn up to help strip down some of my burnt bits and pieces, to see if we could salvage any of it. It was all put aside and wrapped up under a big plastic tarp to help preserve what was left of it.That kept me busy all day, running between the gaffers doing the electrics and Ross pulling gear boxes apart. Ross is a pretty impressive guy, he seems to know an awful lot about all sorts of things. He started out as a Telecom technician, but quickly moved into electronics and then heavy earth moving equipment. It was Ross who turned up just after the curfew was lifted here post fire, last December ‘19. He brought me his bob cat to borrow for a few weeks to help me in the cleaning up. That made me cry! It was invaluable to me and got me started well on my way to recovery. Being able to shift burnt trees and building materials around to clean up the huge mess gave me hope. I would look at a blackened piece of twisted metal and see trouble and difficulty. Ross would look and see possibilities. “We can straighten that, get the oxy torch”. and “I have an old 3 phase motor about that size that will fit in there” etc. “I can take that bent shaft home and straighten it in the hydraulic press on ‘V’ blocks”. I started to feel a little confident that some things are recoverable and not just scrap.
I had to split my time between the two sets of action, being best boy to the Gaffer. A gaffer is an electrician, and the Best Boy is his main assistant. I was asked to make large metal brackets for the 40mm conduits going up the outside wall. Cutting, folding and spot welding sheet metal cable covers to protect the exposed conduits towards ground level. I was busy all day. On Tuesday Ross worked at home and only two sparkies turned up. I spent the day hoisting 3 phase cables through the upper portals and ‘tophats’ to get the power around the building. That involved geting up and down the tall 3 metre step ladders all day. A good work-out. Wednesday I had my friend Len here to help me clean bricks. Janine finished all the full sized bricks on Monday with our friends Rai and Fran. I had to miss that last bit of brick cleaning, doing the last 80 bricks. Len and I started on the 1,000 broken bricks that I will use for the ‘fake’ headers and queen closers in the Sussex wall bond veneer. If I can use the broken bricks to cut up for all the small pieces needed to fill the bond pattern, then I will have enough full bricks to do the job.
As well as Len, I had one lone sparkie here, I was needed to help him pass the heavy copper cables through the wall cavity from room to room. When I wasn’t needed inside, I helped Len outside the verandah chipping the bricks. My main job in the afternoon was to fit 25mm conduit down the portals and pass the power cables down through it to where the power points will be. I had to try and stay one step ahead of Ian the sparkie, I’m saddled with the job of fitting the wiring in place in the conduits and securing it all with saddles, as Ian came behind screwing on the fittings and connecting all the wires up.
After lunch, a brickie turned up to see our job. He was recommended by a friend. Gordon is a semi-retired ‘heritage’ brick layer. Perfect!He looked at our bricks and at the job as I explained what we want. We looked at the old school classroom, then the 1980’s addition that we did. Gordon understood exactly what I was saying and offered pertinent comments as we went about the particular bond and the quality of the mortar. Do we want it pointed, raked, or struck flush? He agreed to come and do our job, and even said that he could start on Monday! We are happy about that. He even has a brother, also a brickie, who will come and help out on the 2nd week. I now need to get 4 tonnes of off-white brickie’s loam, 6 bags of lime and 12 of off-white cement to make lime-compo mortar. I also have only 3 days to cut and shape the 7 sandstone window sills. particularly the two large ones that are needed under the big arch window for the first course. No pressure!I won’t have much time to do this while I’m being the brickies labourer or donkey. Every trade has a nick-name. Sparkie, Brickie and Donkey or Hoddie, even Navvie, But there are also Carpenters as Chippies and painters are apparently called Smudgers. So starting next week, I’ll be a Navvie or Hoddie for two weeks as well as the Gaffers Best Boy!That is – if it all goes to plan. This is the 5th brickie to check out our job. We’ll see on Monday morning at 7.00 am!
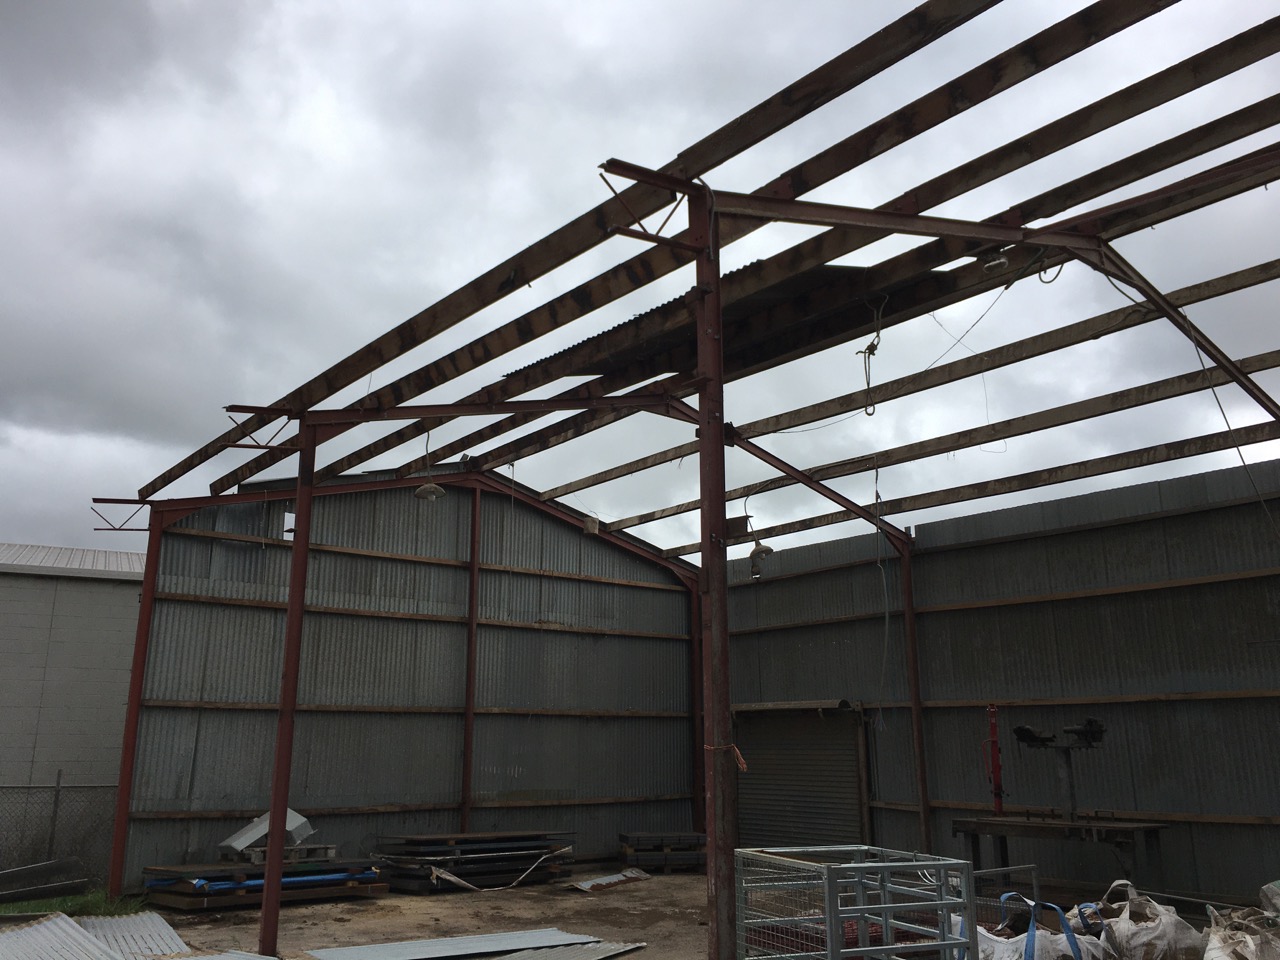
Today I spent the day demolishing the old feed Mill factory sheds in Moss Vale. I had known about the sheds needing to be demolished to make way for a new steel fabrication factory. The owner had offered me all the roofing iron for free if I took it all apart. I looked at the site a month ago, but wasn’t ready for the iron until now. The Old Feed Mill has been on that site for a very long time. I was told by one person that their father went there as a kid with his father and his father is now over 80! The original feed mill was built and run by the Hirsh family. This shed appears to be a more modern building. It doesn’t look to be 80 years old, possibly dating back to the 50’s or 60’s. The current owners, who bought the company in 1992, finally closed up in 2017. I know this because the last message was still scrawled up on the black board at the entrance.
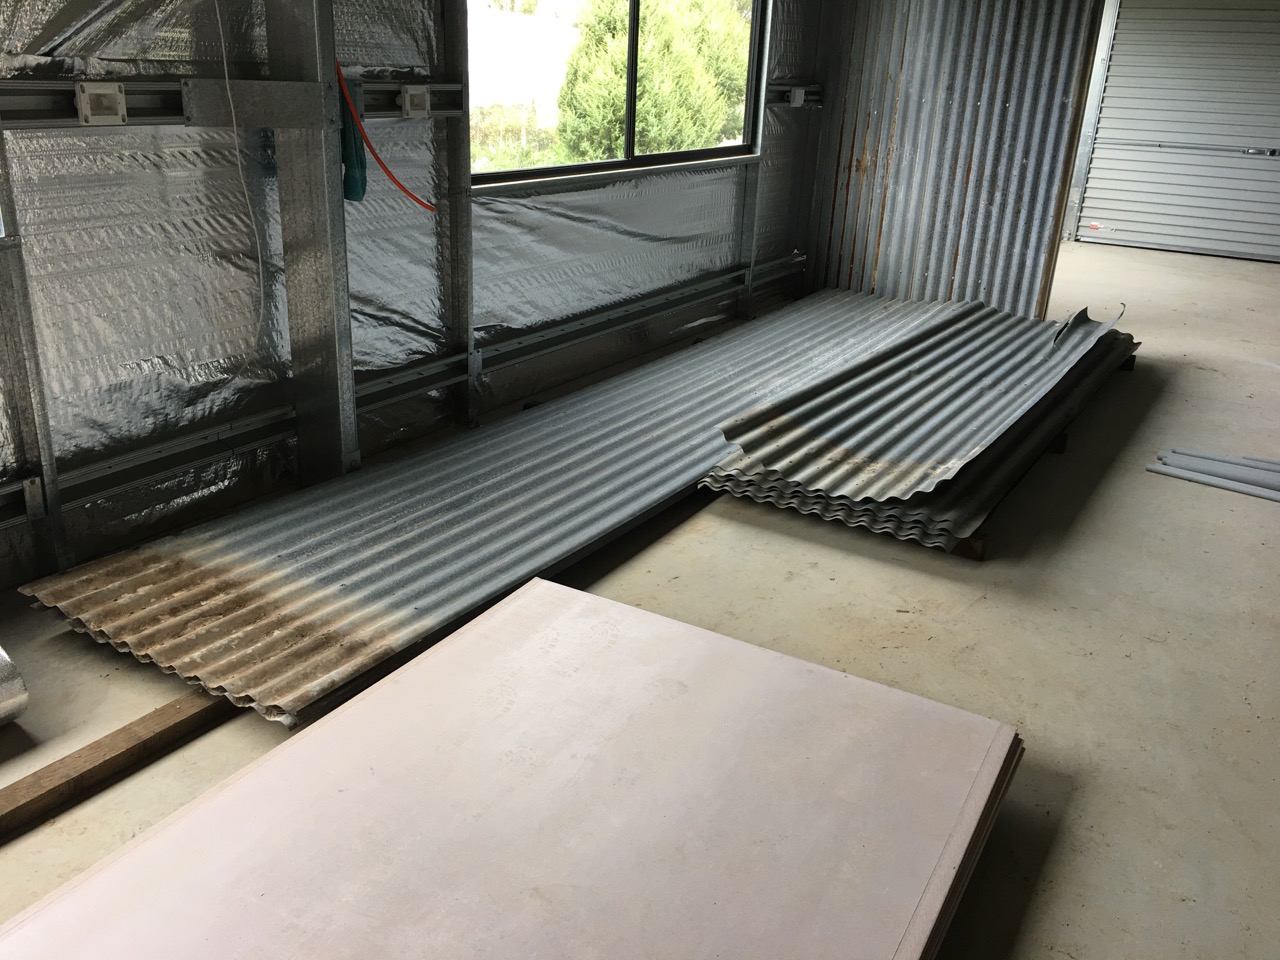
The pottery rebuild has got close to the stage of lining the sheds. The electricians have started wiring the building, but will still be another few weeks before they finish, as they are doing my job in their ‘spare’ time in between doing a huge factory installation in Mittagong. so I only get them when they have ‘spare’ days.Once the electricians have all the wiring installed in the walls, I can then start to put the insulation batts in the wall cavity and then line the buildings. The iron from the old feed mill will do nicely as a fire proof lining material. The shed will be steel framed, steel lined and steel clad, with fibreglass insulation. Not too much to burn there.I would have left it for another couple of weeks until the electrics were done, but I got a call asking me if I still wanted the metal, because if I didn’t, there are plenty of others who do. So I had to move now.
I asked my friend Andy to help me on this one, as I thought that it was just a bit too big for me alone. also, working on ladders at heights and on high roofs, it’s best to have a friend there just in case. I’m a decade past the age when I should have stopped doing this kind of work, but nobody told the bush fire that.
We started at 8.00am and hammered, ground, levered, screwed and bludgeoned our way across the two roofs prising off the old rusted nails and screws, then throwing down the liberated sheeting to the ground in a rather messy pile. It all went to plan – almost, except for the rather strong gusty winds that picked up, just after we started, we had to time the picking up and carry the loose sheets to the edge of the roof and throwing them off to coincide with lulls in the gusts. It could have ended badly if a severe gust of wind hit me with a full sheet in my hands at that height. Long sheets of iron act like a sail or even spinnaker.
We finished taking the roof off by 2.30 and then spent an hour cleaning up the mess on the ground and loading some of the iron onto the ute. We got about half of it on. 104 sheets on the ute, which was a really full load for the one tonne ute, but I made it home OK with out being booked. Andy had more sheets on his trailer. We stacked them all in a corner of the new workshop. They can wait there until the sparkies are finished.
We finished stacking the first load of 100 sheets in the shed around 5 pm. A big day for an old guy. I’ll be going back tomorrow to take the walls off and bring the 2nd half of the load back home. That’ll keep me off the streets for a while. I’ll certainly sleep well tonight. I know that I shouldn’t really be doing all this ladder work and roof work at my age, but I gave the Work Fairy a month to get it done for me, and she never showed up. Fictional and imaginary friends are just So unreliable! There is nothing much that a passionate and committed human can’t do – given time.
We have been working on the tools, brick cleaning for the past 3 weeks now. Last week, my wrists began to ache, so I stopped and had a 3 day break to let them rest. Our friends Rei and Fran called in on Monday to give us a hand and I did my share, but that night my wrists swelled up and ached, so I realise that I have reached my limit on brick cleaning. I’ll need to have a few weeks off now to let them recover. We got 2,200 bricks cleaned, so we are about 2/3 of the way through the job, an average of around 100 bricks a day. Not too bad, but obviously too much for my ageing body – at this time of great anxiety and stress.
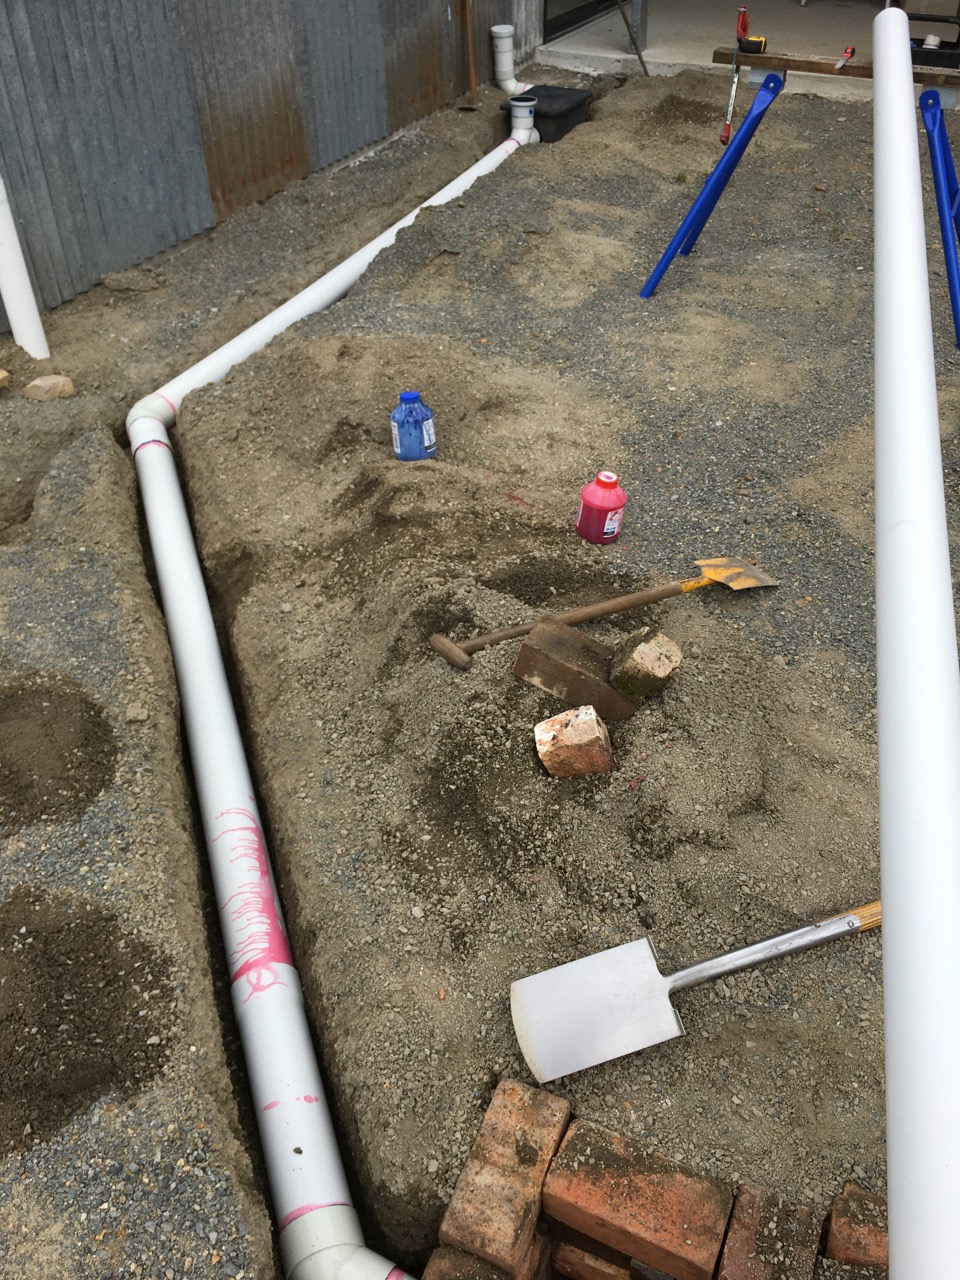
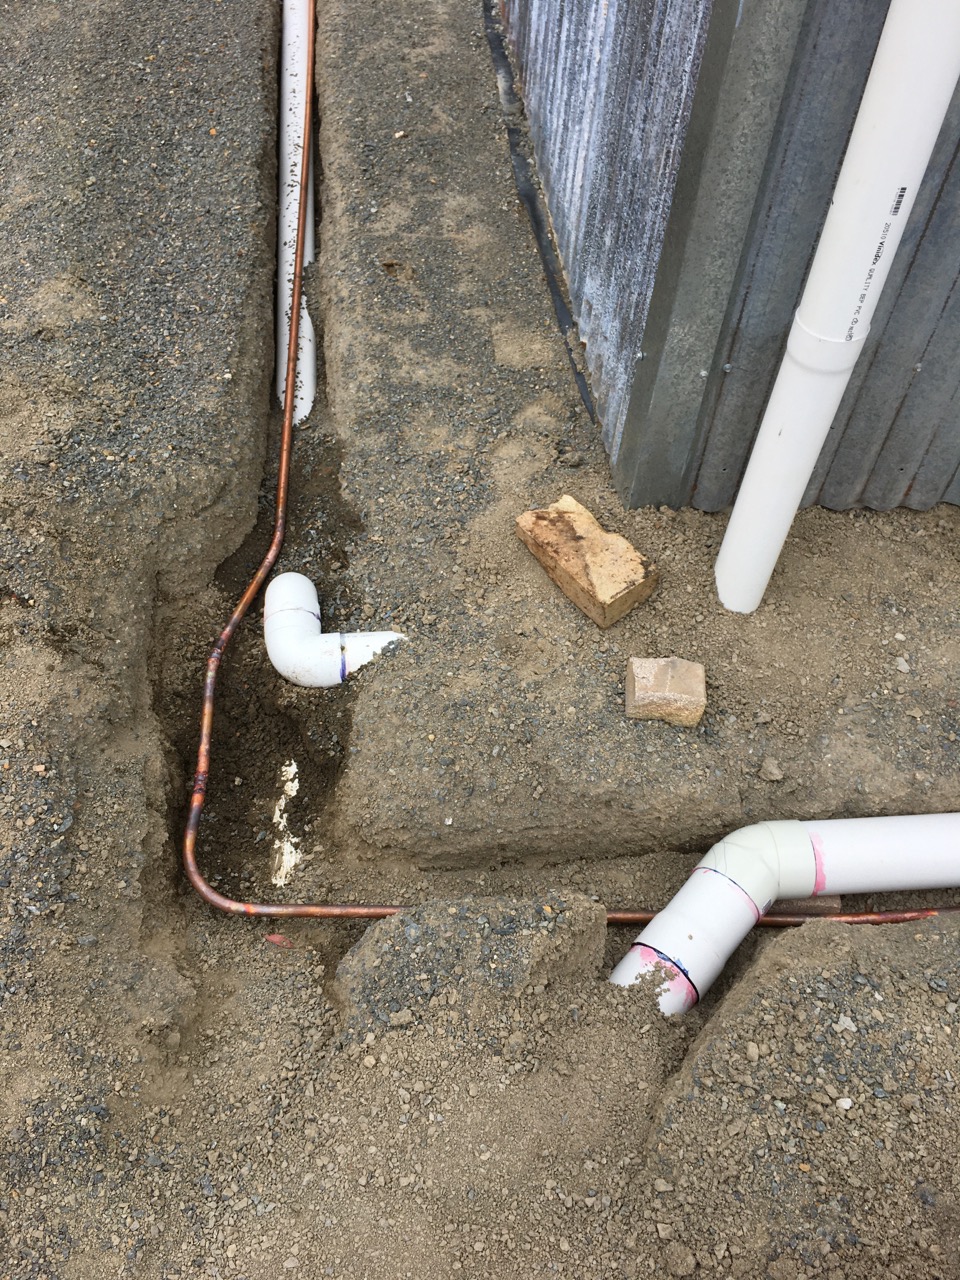
Instead of brick cleaning, I finished off the claywater/greywater drainage system, digging the trench from the pottery studio to the seepage trench by hand using a crow bar and shovel. Interestingly, this didn’t hurt my wrists the way that chipping away at lime mortar does?
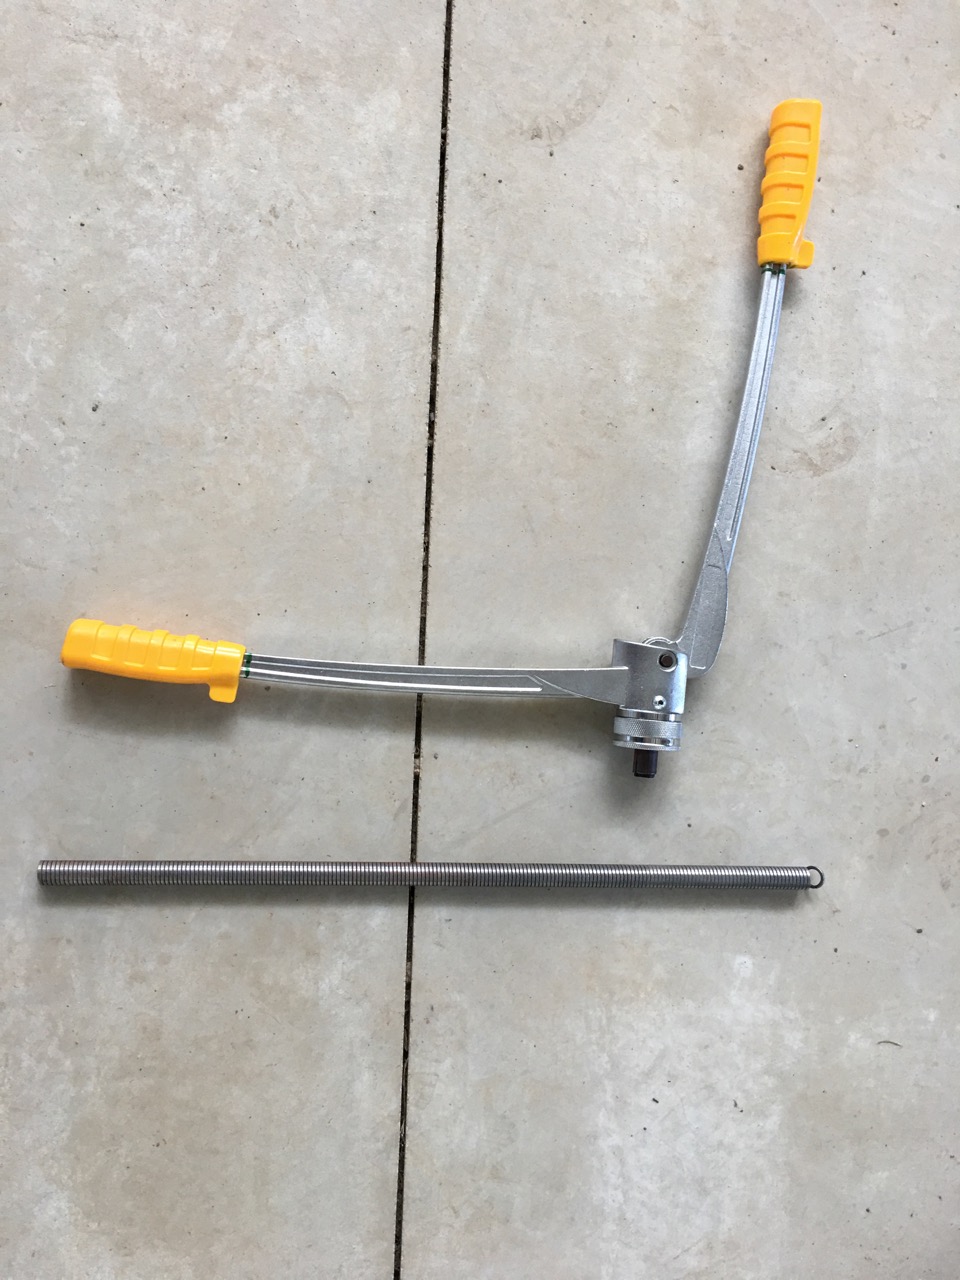
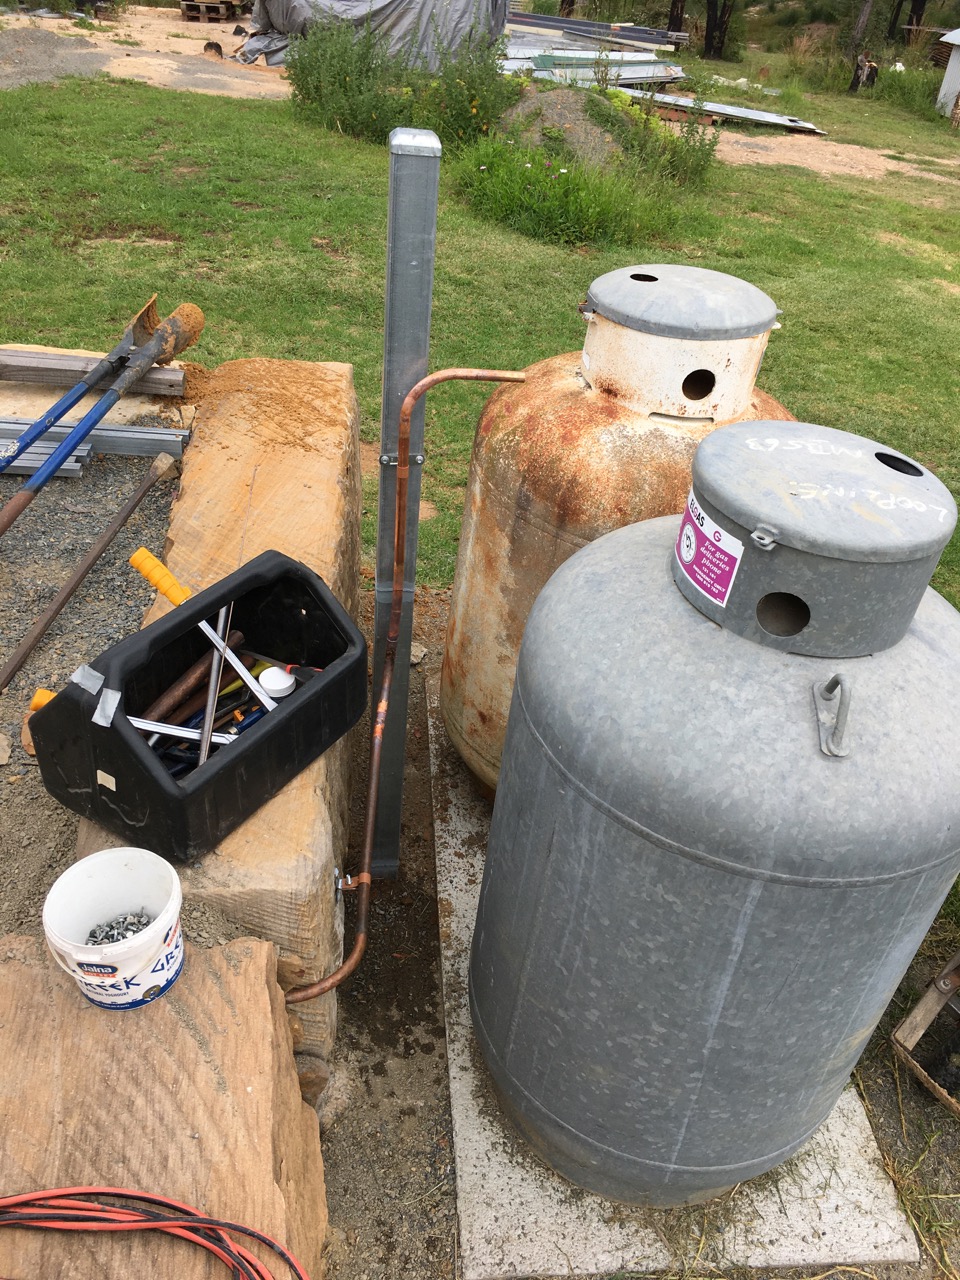
Once the sewerage line was completed, I turned my attention to the LP Gas line. We hadn’t fired our LP gas kiln for the past decade, as we were trying to minimise our use of fossil fuels. But the gas bottles still have gas in them and I’m planning to build another solar electric kiln using gas reduction at stone ware temps. There are so many services that need to be buried all around the building, I’m trying to get these done, I’ve finished the storm water and guttering, so all that remains to be dug in and buried is the fresh tank water supply to the sink. This has to come all the way around the building from the 2 big rain water tanks next to the barn. I want to get all this done so that I can finish the ground works around the building and start to clean up the site. The LP Gas line comes from the 2 big gas bottles past the studio and around into the court yard then up and over the verandah and into the kiln room. I’m really proud that I have been able to achieve this complex installation using only two tools, a coil bender and an expander.
With this minimal tool set, I have been able to make all the elbows and joiner parts necessary for the job from simple copper pipe. I’m using thick class B pipe and 5% silver solder for all the welds, as required by the Australian Standards. The only parts that I will need to buy are the 2 end threads to screw on the LP Gas connection fittings. Miraculously, my ancient 1950’s oxy set and the 2 gas bottles survived the fire because I wheeled them out side into the paddock and wrapped them in a piece of 1/2” ceramic fibre blanket. The fire raged past and over them and didn’t even melt the plastic hoses, such is the insulating value of ceramic fibre in the short term. It saved me too!
I’m not real fast, It has taken me 2 days for this job, but I don’t charge myself anything for my time. One of our past pottery students is a plumber and he has agreed to come and test my line and certify it if it passes, then connect the kiln for us. I saved myself a lot of digging by using the existing stormwater trenching for nearly all of the underground work. Another of our past students, Tony, a retired builder came and installed the glass french doors. These were donated to us by another ex-student Geoffrey and his wife Sue. They bought the doors 2nd hand and Geoffrey cleaned them back, reglazed and puttied them, then undercoated them. Only to realise that they didn’t really suit what they had in mind and found them to be excess to their requirements, so donated them to us. Tony did a wonderful job of installing them, which required moving one of the studs and me making a new steel header beam and then some new steel door jambs out of 3mm thick gal steel plate, so as to save using a wooden door jamb to save the extra space. This was the only way we could fit them in. They look great and let lots of light into the building. We are really pleased!
I also finished the back verandah with the help of my friend Warren last Sunday. I had made up all the parts to make a new ‘portal frame’ to finish the job that the builders said couldn’t be done. I used the off cuts from the 3mm thick gal steel plate that bought for the french door jambs, and cut out and folded the parts for the frame myself, using the guillotine and pan break, watched over by the always attentive chickens, Gladys and Edna.
The back verandah is now complete and weather proof. The brickie that we originally had come out ond look at the job, has now said that he can’t do it. A shame, but I have been in touch with a couple of younger guys who are interested. One says that he can start in 4 weeks, so the pressure is on to get the last 1200 bricks cleaned in 4 weeks! We’ll see what we can do. That’s 50 a day, 25 bricks each. It may be possible? 10 before breakfast, 10 before lunch, and 5 before dinner. We have a few weekend working bee’s organised, so that will take some of the load off our wrists.
Today I didn’t clean any bricks. We had an almost full day yesterday when 2 friends came and gave us a hand for most of the day. Janine and I did our ‘normal’ shift from 6.30am till 9.30, then our friends came at 11.00 am and left at almost 7.00 pm.
We did have a long lunch, but it was still a big day on the tools. So today is a designated day off from brick cleaning. Our first
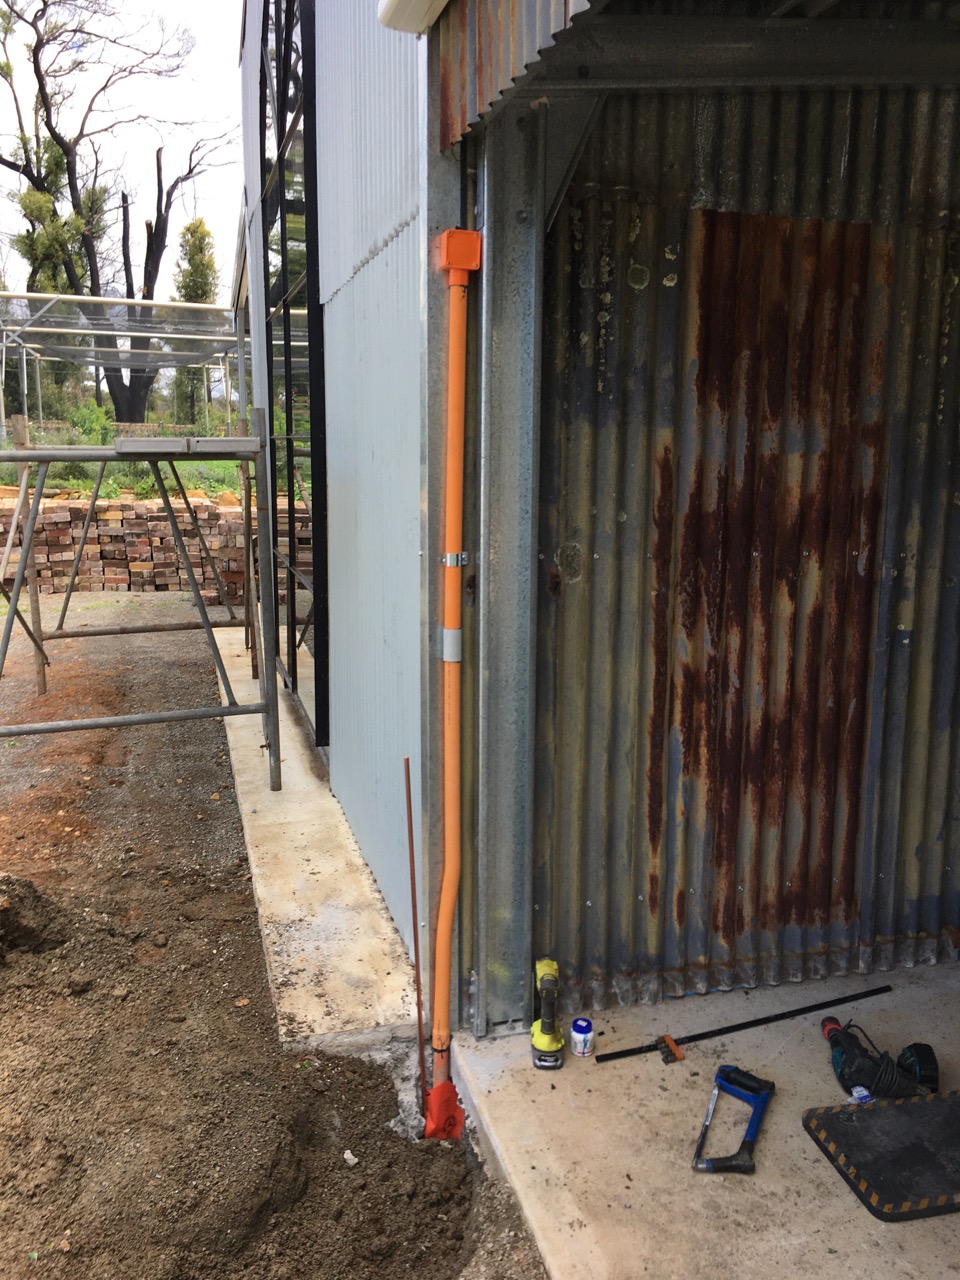
The electricians turned up, so that was good. It’s nice to see some progress. I spent the morning helping them by digging out the old pottery 3 phase cables down to 750mm. deep and exposing the horizontal run of the orange conduit. The sparkies then joined on a longer section of cable and ran it up the outside wall of the Gallery room, and then along to the new main sub-board inside.
My next job was then to fill it all back in again, after laying a sheet of orange ‘warning-electrical cables’ plastic safety strip along the trench, half way up. By doing these mindless labouring jobs myself, it saves paying the high hourly rate to the sparkies, for something so dull and time consuming and saving me some money.
I will need to make some new corner flashing out of gal steel sheet to cover this conduit and make it safe and weatherproof.
The sparkies continued on inside wiring the rest of the building.
Progress in fits and starts. I’m grateful for every little bit of it.


You must be logged in to post a comment.