My project to introduce clean, low emissions, wood fired kiln technology to Korea has gone pretty well. The third firing that I did using local hard wood was excellent. In fact, better than I had hoped for. I was actually surprised how well it went. I’m a cautious person, So I was a bit surprised, I wasn’t going to dare to change anything, just stick to my technique and decisions. It worked! So that was good!
I’m always prepared for things to go wrong when trying new things. Very few things in life ever turn out perfectly, and this last firing came close, but the was no cigar! The bottom back shelf was still a little bit under-fired. However, no-one complained!
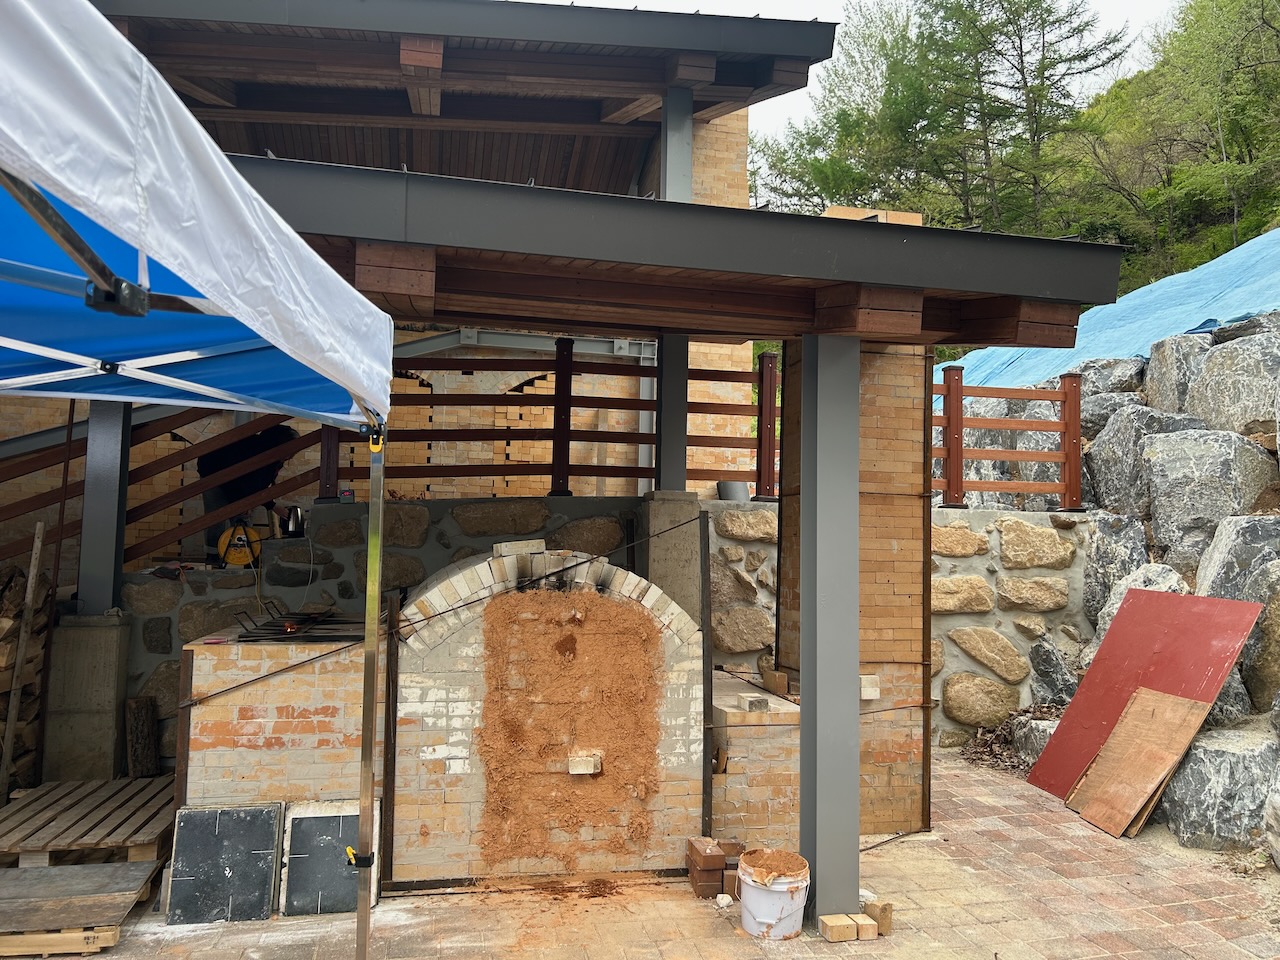
The day after the kiln was unpacked, I went down to the kiln shed early the next morning, before work, and took out the bag wall. I eliminated one complete layer off the top, and removed one full brick from the cross-section. I re-arranged the smaller number of fire bricks with bigger gaps between them, so as to allow more flame to pass straight across the bottom of the chamber and allow more heat to the bottom back shelf.
Over the three firings that I did here, I got better results each time, as I tuned the kiln settings and chose better wood, more appropriate to fire cleanly in this design of kiln.
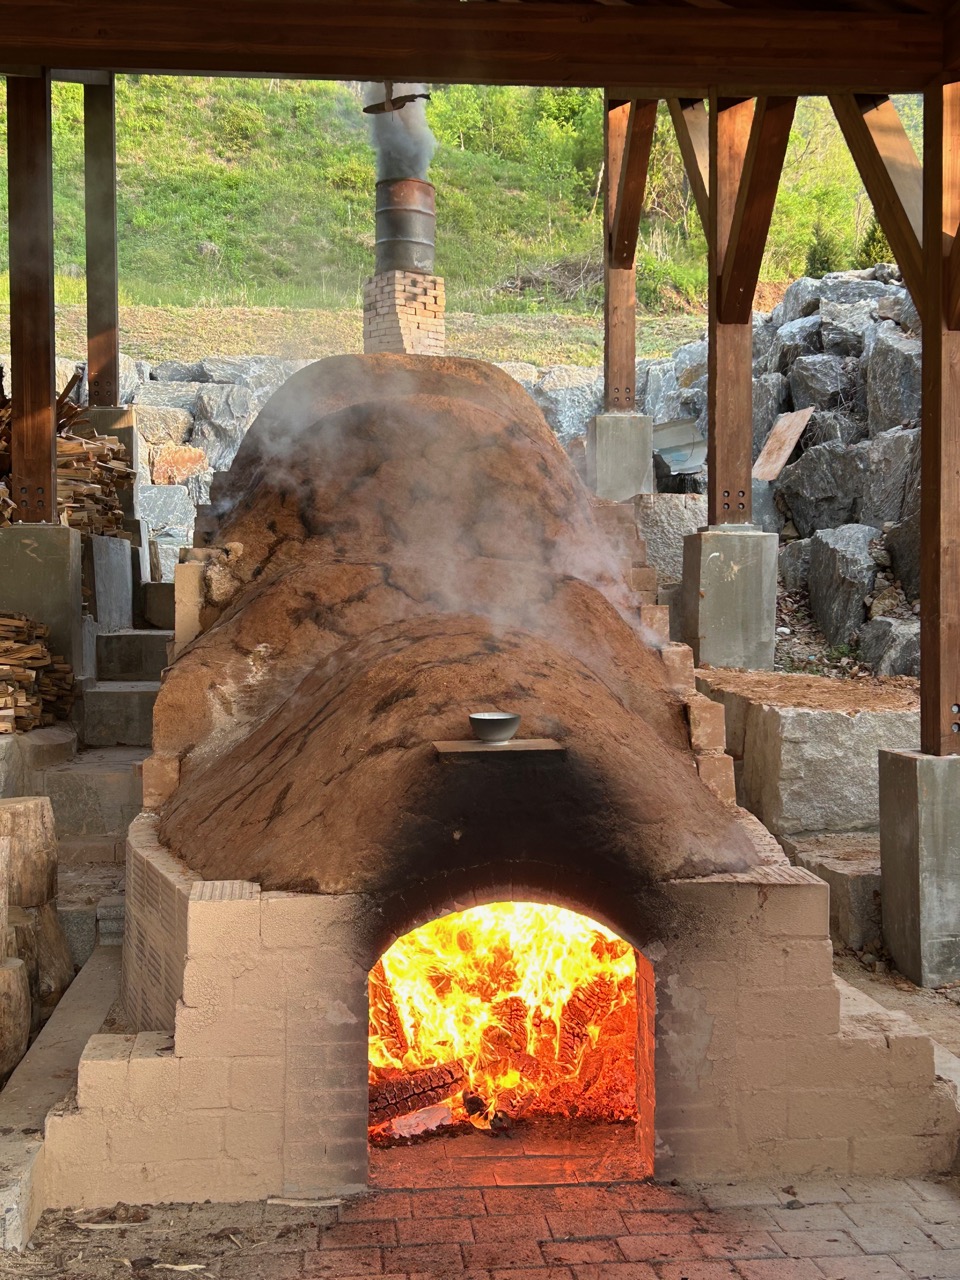
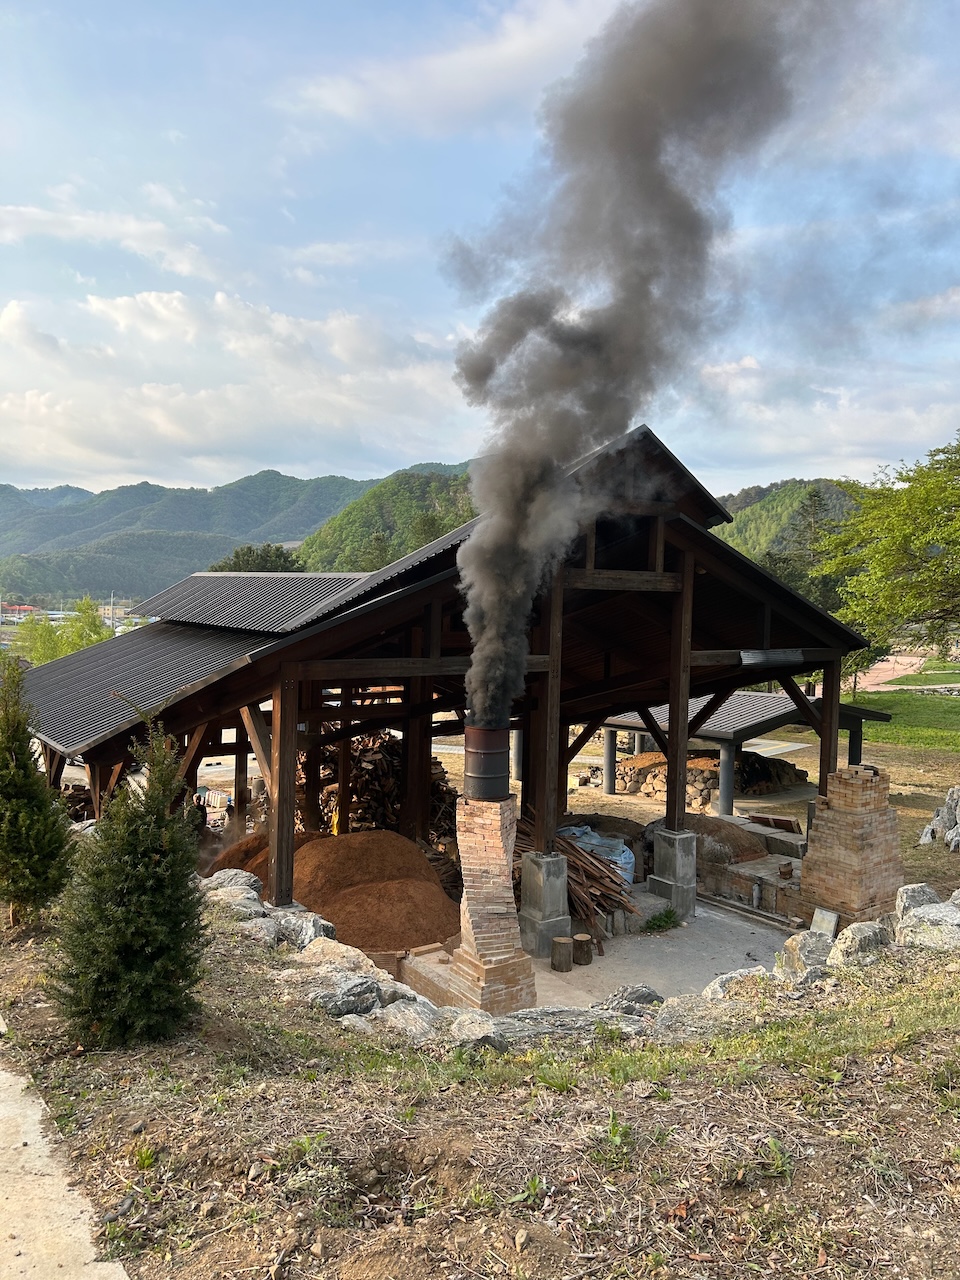
Below is an image of my kiln firing to stoneware in reduction near top temperature. There is no smoke coming from the top of the chimney.
My chimney isn’t particularly tall, but it is wide. Short and thick, does the trick! Or so I’m told!
I calculated the height and cross-section of the chimney based on theory. The total volume of the hot gasses enclosed in the chimney volume, as opposed to the same volume of cold air on the outside. Chimneys work because the cold air outside is forced in at the firebox by air pressure, and this pushes the lighter hot air up and out of the top of the chimney. It’s all about volume, not just height.
Below is the traditional kiln next to mine being fired the traditional way. Koreans are used to making loads of smoke. It just seems so natural to them. They were quietly amazed that I could fire with so little smoke and still reduce. One of the traditional kiln firing team, A National Treasure potter from his own local region, went straight home and built a copy of my kiln for himself. So I consider that a success!
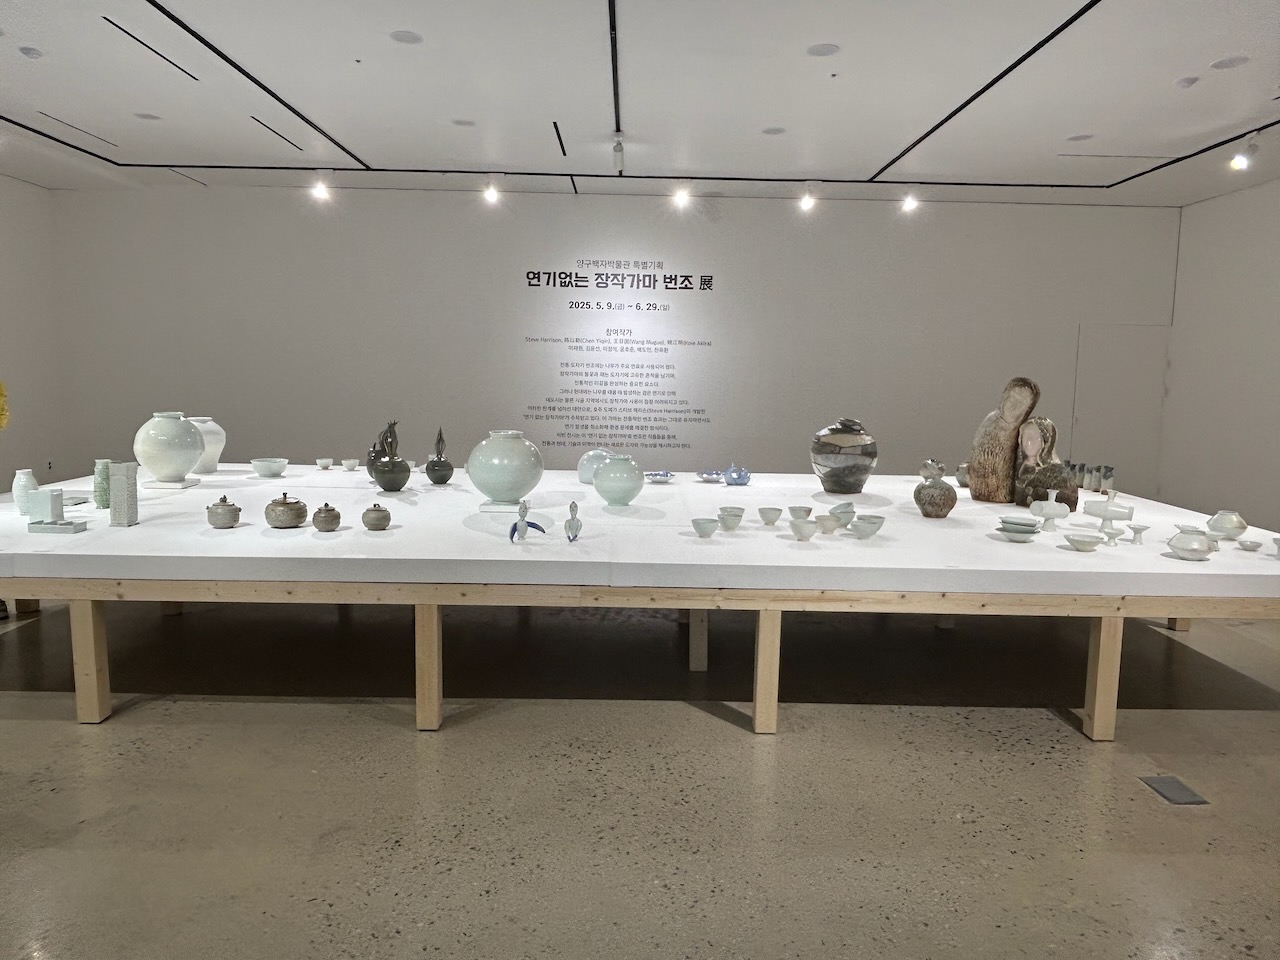
So my introduction of new ideas, with appropriately successful results, was well received. My host, Mr Jung, had organised the local TV station to make a documentary film about my visit, the firings and the subsequent exhibition of the fired works. Several international potters from France, Japan and China were invited to make work for me to fire, as well as a few local potters. After the kiln was unpacked and the work fettled, it was put on show in the Porcelain Museum. The exhibition is on until late June in the Porcelain Museum. The Museum Director released a short promotional video of the firing in time for the exhibition opening, which he posted up on-line and got over 4,000 hits the first day. So he is very happy.
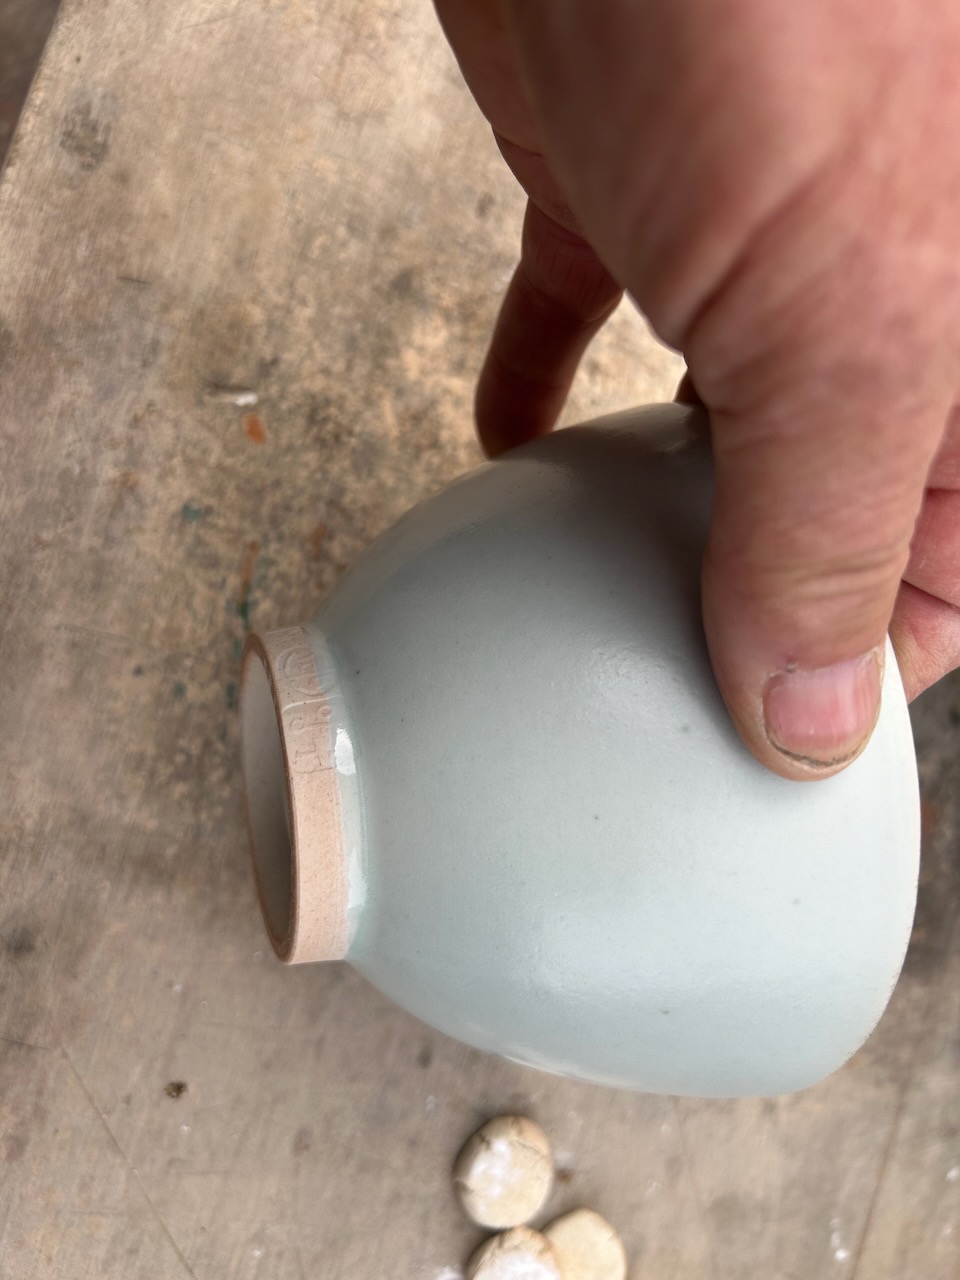
One of my bowls from the firing, with the Korean location name stamp and my name in Korean
The Staff of the Museum took me out to dinner after the event. They are all such a pleasant bunch of people, I really enjoy their company, They are great people. As I don’t have more than a simplistic grasp of ‘Airport’ Korean. All our conversations are carried out using translation software on our phones. The local Korean app is called ‘Papago”.
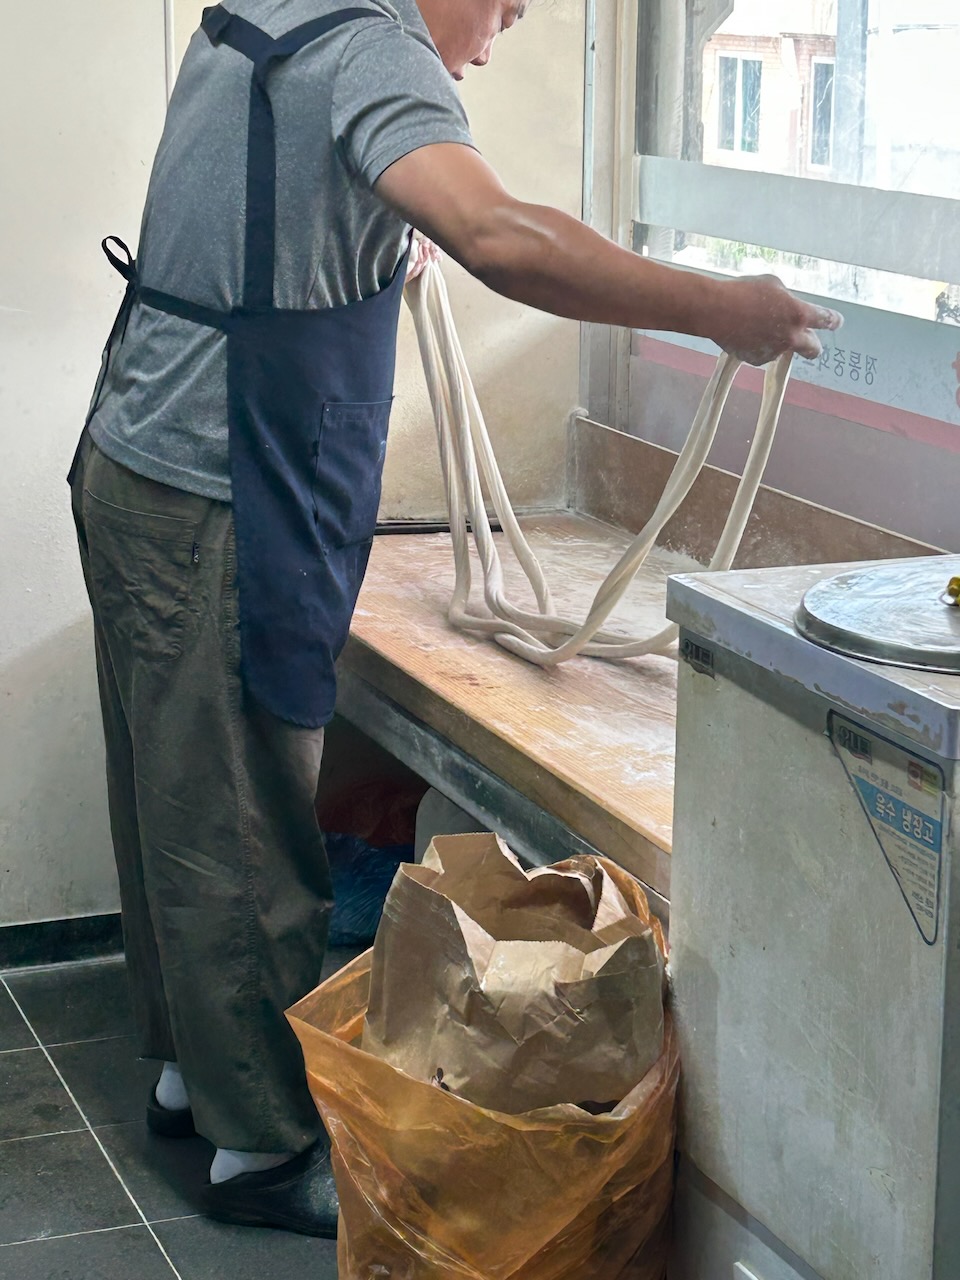
We went to a local restaurant where the chef makes his own hand made noodles. It’s worth going there just to watch him work. It’s an entertainment in itself!
Before I left, I made my usual pilgrimage up the mountain to the historic site where porcelain stone can be picked up off the ground. I collect a bag full each visit, (10kg) take it back to my room and wash it thoroughly, scrub it well, to get any dirt off the stones, then soak it in chlorine bleach over night to make sure that they are sterile, before bringing them home. It only needs to be put through the rock crusher, then the ball mill with enough water to make a slip, and then stiffened back up to a plastic state before throwing it on the wheel.
Throwing stones! Powdered porcelain stone mixed with water, nothing else!
There is nothing quite like sericite. It’s such a unique material.
After finishing my work at the Porcelain Museum, I travelled up to the northern suburbs of Seoul, to meet up with my friend Sang Hee. She took me to her mothers farm, where we spent the morning weeding some of the rows of vegetables.
And a salient reminder that you never step over a fence line here! Even though you are in the suburbs. Not everywhere has been thoroughly de-mined and checked to make it 100% safe.
My last day was spent in Seoul, getting ready to fly out the next day. I went into the tourist area and got a couple of new name stamps made, as I lost all my older name and workshop stamps in the big fire.
Another very rewarding trip in every way. I’m so lucky to be able to do this work!
Nothing is ever finished, nothing is ever perfect and nothing lasts!
I’m working in Korea in this little artists village community on the edge of a country town. There have been potters here making and mining porcelain stone for 800 years. The village is located away from the township, such that the smoke from the traditional wood fired kilns is not a concern for the township residents. It was great forethought in its time to start to locate all the wood kilns up into this side valley.
But it doesn’t stop there, this has been a long-term plan and as with all long-term plans, it is evolving and adapting with current thinking and social mores. Hence my involvement here with the constriction of my low-emissions wood kiln firing designs and techniques. I was commissioned to start this work here, back in 2019, I was all set to come, but before I could start, we had the fire, then covid intervened. So I was unavailable for some years. But I’m back here again now the the plan is back on track.
My demonstration firing was very successful. In previous firings here the only fuel available to fire the kilns with was very dry 5 year aged local pine. The standard fuel here that everybody uses. It is a statement of fact here that dry pine is the only fuel that works in a kiln!
Last year when I was travelling around, I visited a famous potter’s studio, where they fired with wood. He had built a special pine fuel drying kiln, to desiccate his very thinly split fuel. He told me that it was his special secret, and that only desiccated pine could raise the temperature of the kiln easily. Other potters struggle with ordinary wood, but he had discovered the answer. I decided not to mention that I sometime throw water over the dry pine to get a better result! He had no concerns about making smoke. That was taken as a norm. All kilns make smoke, don’t they!
In the kilns that I have built here, the 5 year seasoned pine burnt furiously and it was very difficult for me to minimise the smoke. I managed it, but wasn’t at all happy with such dry volatile fuel. I enquired about alternatives. There is hard wood available in the form of oak and acacia. But no one uses it for kiln firing as it doesn’t work!!! That was the local opinion anyway! Meaning that it doesn’t work in the traditional kiln designs, used here, using traditional techniques. I thought that it might just be ideal for my purposes, for use in the down draught firebox.
For this most recent firing I had requested that both pine and oak be available, to give me options. There is also the possibility of using local acacia wood, But I was told that this is not considered be be a useful fuel for kilns. That made me more interested in trying it out. I said that it is one of the better fuels back in Australia, but that hasn’t cut any ice here as yet – apparently.
When I arrived, the oak and pine were stacked neatly in front of the kiln. A lovely sight. I started by using just 100% oak. Initially, I found that the oak burnt black and then smouldered. Just as everyone else had found. But I was perfectly sanguine about this, because my local stringy bark timber back in Australia does the same. In fact the locals wouldn’t cut it for use in their open fire places because of this. I quickly found that a blend of 80% oak with 20% pine was a good combination to get started with, using the flashy pine to keep the oak burning. This combo worked well from 700 up to about 1000 oC, when I cut the use of the pine back to just 10%, and finally at 1100oC, I was using straight oak.
This series of combinations got the kiln firing well, while still burning quite cleanly with almost non-existent traces of smoke from the chimney. Just the occasional waft of pale grey smoke.
Problem solved. I was able to fire up to cone 9 in reduction with virtually NO smoke, while firing in reduction. This is a notable achievement here. A lot of chatter and comment, firing in a wood fired kiln with no smoke, by using the oft’ maligned local oak. Applause all round. Who’d have thought?
Maybe the local acacia might even have been better? But that is a project for another visit.
There are two ceramic university campuses that are keen to follow up on this, as they are located in cities, and there is no possibility of being able to make smoke in their location. Downdraught oak firing might just do the trick.
Word gets about it seems. During the cooling period I got news that the opening of the kiln would have to be delayed from one day to the next, then from the morning of the appointed day, to the afternoon, as the Federal Minister of Culture wanted to be there to see the results unpacked, and he could only be available in the afternoon of the 8th. So when in Rome… I delayed the opening at his masters pleasure.
I’m certain that this is no accident. Of course, I don’t know, but it smacks of ‘realpolitik’ strategising. I’d bet that the Director of the Museum has organised this as a media event to promote the Museum. Politicians fund the things that they see, are involved in, understand, AND if it looks like a successful vehicle to advantage their own career. They want to be seen associated with it.
Just a thought! Call me cynical! But…
I remember some years ago. I collected some porcelain stone from here and took them back to Australia and made a large bowl out of them. I glazed the bowl with a subtle blue celadon glaze that I made incorporating kangaroo ash. A kangaroo had died on my property, so I calcined it and retrieved the local source of phosphorous from the bones. Phosphorous is known to enhance the optical blue in certain pale iron glazes like celadon.
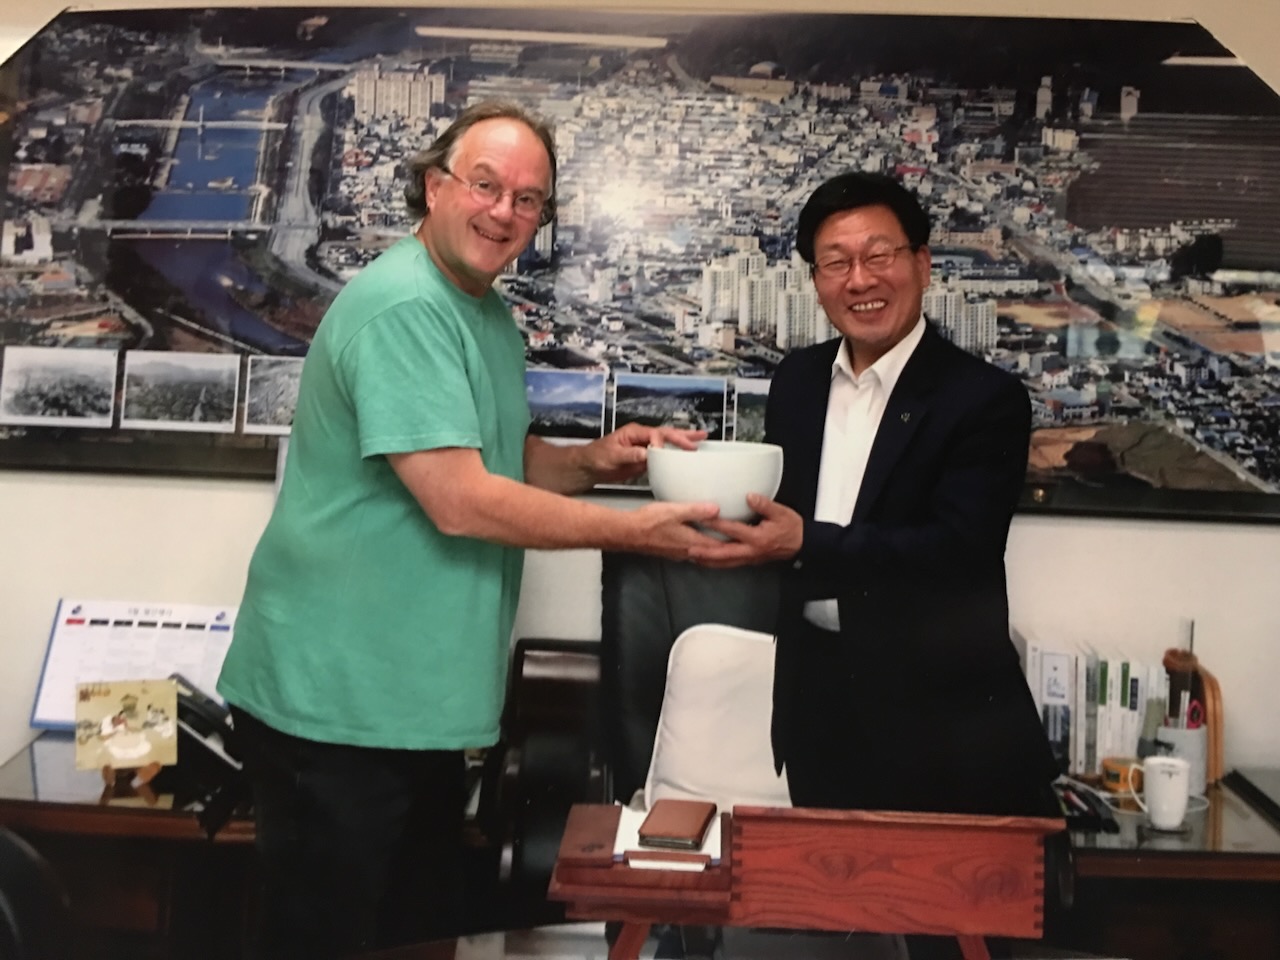
I gave it as a gift to the Museum Director along with the story. This was my own private Cultural Exchange project. His Korean stones collected from this historic site, made into a pure sericite clay body glazed with my Australian kangaroo blue glaze. He loved it. He was so taken by it that he called the Premier and made an appointment for us to meet him and make the bowl a gift to him. Thus bringing the Museum into his field of vision.
We turned up just before the appointed time for our 15 mins of fame, and were eventually ushered into the Official Office along with newspaper reporters, translators, aids and other staff. I was duly introduced to the Premier, a little bit of small talk. He had been very well briefed and made appropriate comments. Then it was down to brass tacks. I handed over the bowl and he graciously accepted it on behalf of the Korean People. He said straight away that he knew next to nothing of Ceramics, but understood the significance of the effort that had gone into such an art work and its cultural exchange significance. He thanked me again and shook my hand. There was a flurry of flash bulbs going off to record this staged event.
He asked me how I came to be researching Korean Porcelain from this remote place. I replied that Korean porcelain is unique in the history of world ceramics. I came here because of the history of the place and the pots that were made here. You can only learn so much from books. I had to come to experience it. He smiled, so you knew about Korean porcelain from back in Australia? I said yes, once I learnt about it, I had to come. The Porcelain Museum here is one of the very few places in the world where this kind of study can take place. Mr Jung, The Director, is very supportive, open and inclusive. He runs a great institution.
The Premier was reflective for a second, then said. I believe that you can build pottery kilns that fire with wood and make no smoke. This is important for the environment. Mr Jung has asked me for more funding for this kind of project. If the Museum is so famous internationally, attracting research like yours,
I will fund it!
The next day, the newspapers had the Premier on the front page announcing the success of his funding initiative for his international artistic ceramic exchange program, for the very successful, now internationally recognised, Yanggu Porcelain Museum. Every one wins. The Premier gets all the credit and is in the paper looking like a hero. The Museum Director got his funding. I enjoyed the research and achievement of making the lovely bowl. The premier mentioned before we all left, that the best place to keep such a unique bowl, would be in the porcelain museum.
Back to the present time and hence the sudden flush of offers of work to build similar such kilns from established potters and university campuses. Once it is shown to work, it gets it’s own legs. Word travels fast. These days it travels electronically with likes and re-postings. It’s very fast.
The Minister of Culture is coming for a visit to the Museum and will be at the opening of the kiln. The kiln has cooled more than enough waiting for him to arrive. I’m introduced to the minister, he asks me in Korean – if I can speak Korean. I recognise the phrase, so I’m onto it, but my recall of Korean standard reply phrases is so slow, that before I can make my clumsy reply, he already knows my answer, so swiftly continues in English. “So we will have to speak in English then!”. I nod my thanks.
We make some small talk. He’s been briefed on hisc way here about the nature of the project and asks me if it is going well and I reply yes. That’s the depth of our interaction. That was my 15 seconds of fame! The photographers elbow in and I’m shifted sideways. The minister looks quizzically at the kiln and my Jung explains something in Korean. The Museum team are then given the go-ahead to unpack the kiln.
The firing is unpacked and everyone ‘oohs’ and ‘arrhs’, the other potters here each look in and turn to me with BIG smiles and thumbs-up. Huge sigh of relief. Everyone is all smiles. The pots are mostly well fired, but I’m interested in the minutiae of the detail. I’m looking not just for colour, but for the depth of colour in the celadons. Not just a shiny surface, but a certain quality of soft melt and satiny quality there. I want to get in and see the flame path and the flashing on the exposed surfaces and kiln shelves. Where is the ash deposit and how has it melted. None of this is possible with 50 people crowding around and flash guns going off.
Its a bit like a crime scene or perhaps an archaeological dig. You don’t want a rabble of untrained people trampling all the evidence and the details. Just like an aboriginal tracker, I want to read the ephemera, the subtle traces and shadows, but that isn’t going to happen. The pots are whipped out and shown to the Minister, with total disregard of their place in the kiln and their fire face and lee side qualities.
It’s just a little bit of a shame, as I’d like to learn more than I am able to in this situation. Looks like I’m the only one who isn’t ecstatic! I am really pleased that everyone else is so happy with the result, but I know that I can do better. But I need to read the surfaces to be able to learn what I need to be better at it the next time round.
In a perfect world, I’d like to go slowly and examine each pot in detail. These pots aren’t just trophies and trinkets, they are also part of my research, or at least they were when they went in! But this has become a media event now, and that is also very important, possibly more important, because it may well result in continued or even better funding into the future. A topic far more important than one firing and a few glazed pots.
The firing is a success, no doubts. Everyone is happy. They all leave feeling uplifted and maybe just a little bit happy and warm inside to know that they have been somewhere where there is some sort of mysterious, but positive, environmental action taking place. Even though they don’t understand what it is.
Back at the Museum tomorrow, I’ll have to have a quiet look at all the work as we are setting up the show. But the exact context will be lost, however, I can fill in some of the missing info using my experience. I’m so pleased that everyone is happy, but I could have learnt more to help them with the next firing, as the kiln still needs some fine tuning.
What I could see quite clearly, was that the oak ash was very refractory. I’m guessing that it is very high in SiO2. We may need to burn a bit more pine in the mix to introduce some CaO (calcium flux) into the eutectic to get a softer surface from the ash deposit. I was burning 20% pine in the early stages without smoke. I might have to keep that up for the whole firing? As pine ash has a lot of calcium in it.
All grist for the mill in the future. I could also see that the floor at the back was still a little bit under-fired, so I was up at 5,30 this morning and went down to the kiln and took out the bag wall and rebuilt it one layer lower and with one full brick removed, to make larger gaps. I will see how this works after the next firing. I also placed one brick in the middle flue hole to force the flame out to the corners more. All little fine adjustments that I hope will make it fire more evenly.
Another option for the refractory silicious ash problem might be to place a few tiny pre-fired stoneware cups containing a spoon full of Na2CO3 (washing soda) in the front of the kiln. This will mimic a few years of charcoal built-up and decomposition at high temperatures, where sodium vapours are released from the burning embers. The soda will sublimate and slowly volatilise throughout the firing, reacting with the silicious ash as it is being laid down and help it to melt. or I hope so anyway. Everything is an experiment!
I could also use common salt to get a similar effect, but sodium chloride creates a slightly different look. I don’t want to change the look of the ceramic surface from wood fired into salt glaze pots. But anything and everything is worth a try. At least once. I first came across this light salting technique being used in La Bourne in France, back in 1974, where they had been doing it for centuries. As a naive student, I thought that it was a very clever idea that I hadn’t come across before. Many potters have used it since. In fact, it has become part of the standard repertoire.
With the influence of the Minister of Culture on the front pages and the release of the TV doco soon, there will almost certainly be more enquiries about this firing method. It is my intension to try and leave the kilns here in good condition and with useful, technically accurate kiln firing logs that the students here can use to do their own firings in the future. Hopefully we can work together ‘virtually’ via ‘Kakao’ talk or Zoom to achieve the best result possible. It could be a whole lot easier if they would just read the book, or at least the first chapter on how to fire!
All that is required now is for some young enterprising Korean potter to pick it up and run with it, develop a small business building these kilns for whoever wants one.
Maybe firing a downdraught fire box kiln with local oak will become a thing? I have shown that it is possible. It is now one other possible strategy for potters and academics in the field, to follow to be able to keep on wood firing here into a cleaner, carbon constrained, and environmentally friendlier future.
All I need to do now is to introduce them to the concept of the after-burner/scrubber to minimise PM 2.5 particulates, not just smoke. But that is a bridge too far at this time and for this visit.
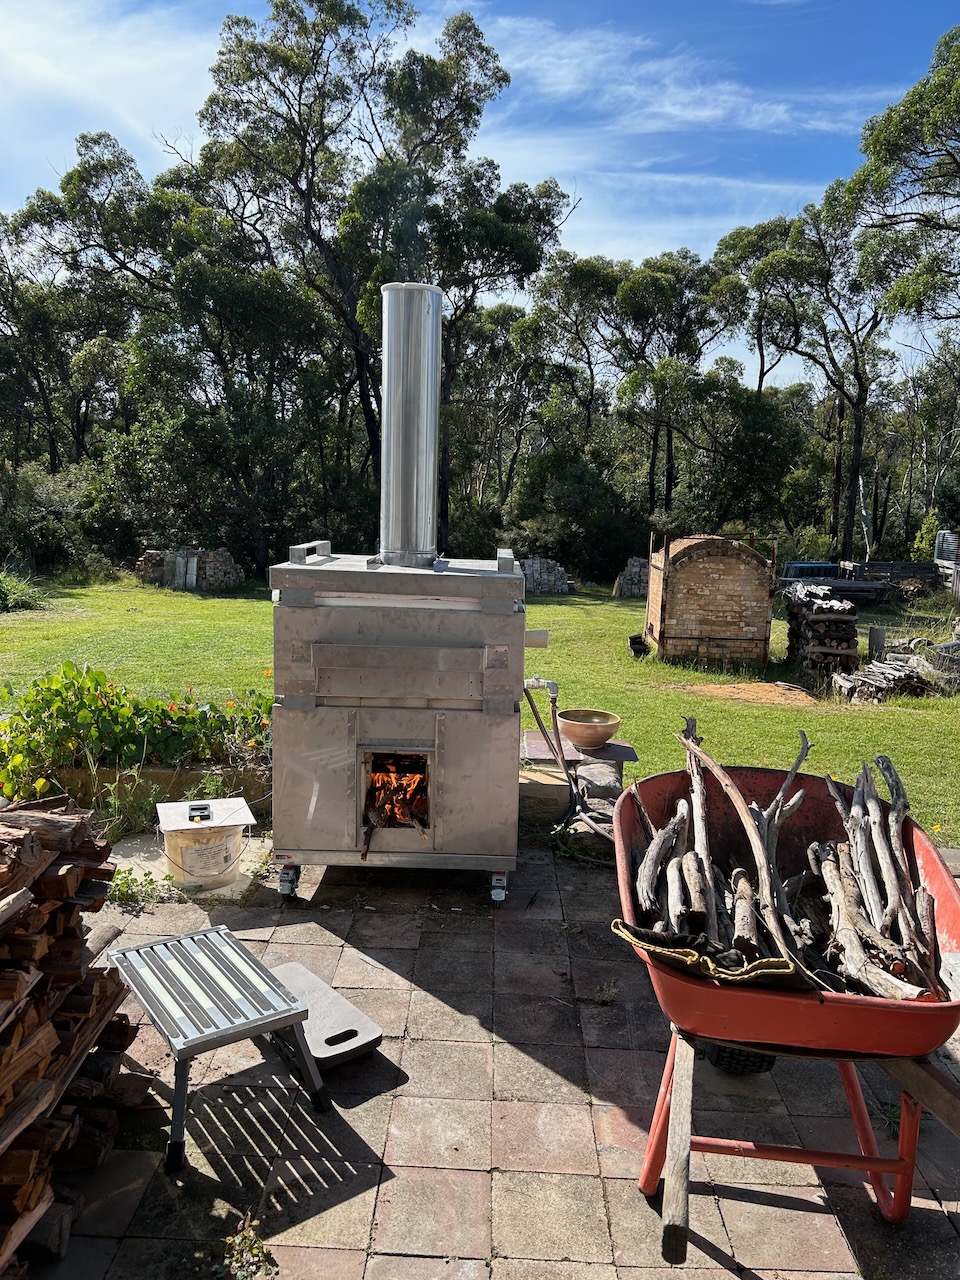
I’ve just completed the first firing in the new version of the small portable wood fired kiln that I have built for a friend.
This kiln is a little bit different from the ones that I used to build for a living before the fire.
In this case, I’m building it as a favour for an old friend. To repay an old debt. No money is changing hands.
I’m also using up a lot of old refractory bricks and fibre that I had in stock before the fire, and which subsequently got burnt, but were largely unaffected by the fire, as they are ‘refractory’ after all. They are scorched black in places and impregnated with a lot of soot and carbon, where the cardboard packaging burnt off.
I’m confident that they will be fine. This first test firing will burn off all the carbon and return them to pristine white, albeit with a little bit of flashing and wood ash decoration.
The purpose of the test firing is to make sure that the kiln will get to stoneware temperature easily, just like all the others that I used to build. In this current kiln, I have made changes that allowed me to use up a lot of the left over materials, this makes the kiln just a little bit different in dimensions, so testing is required.
I sharpened my designers pencil and had a good long think about how I could use up what I had to the best advantage, and still have much the same outcome. As the old saying goes. There is more than one way to skin a cat. Who’d want to skin a cat anyway! weird! Anyway, this kiln looks pretty much the same as all the others, superficially at least, but all the critical dimensions are kept in the same relationship, so it ought to work OK.
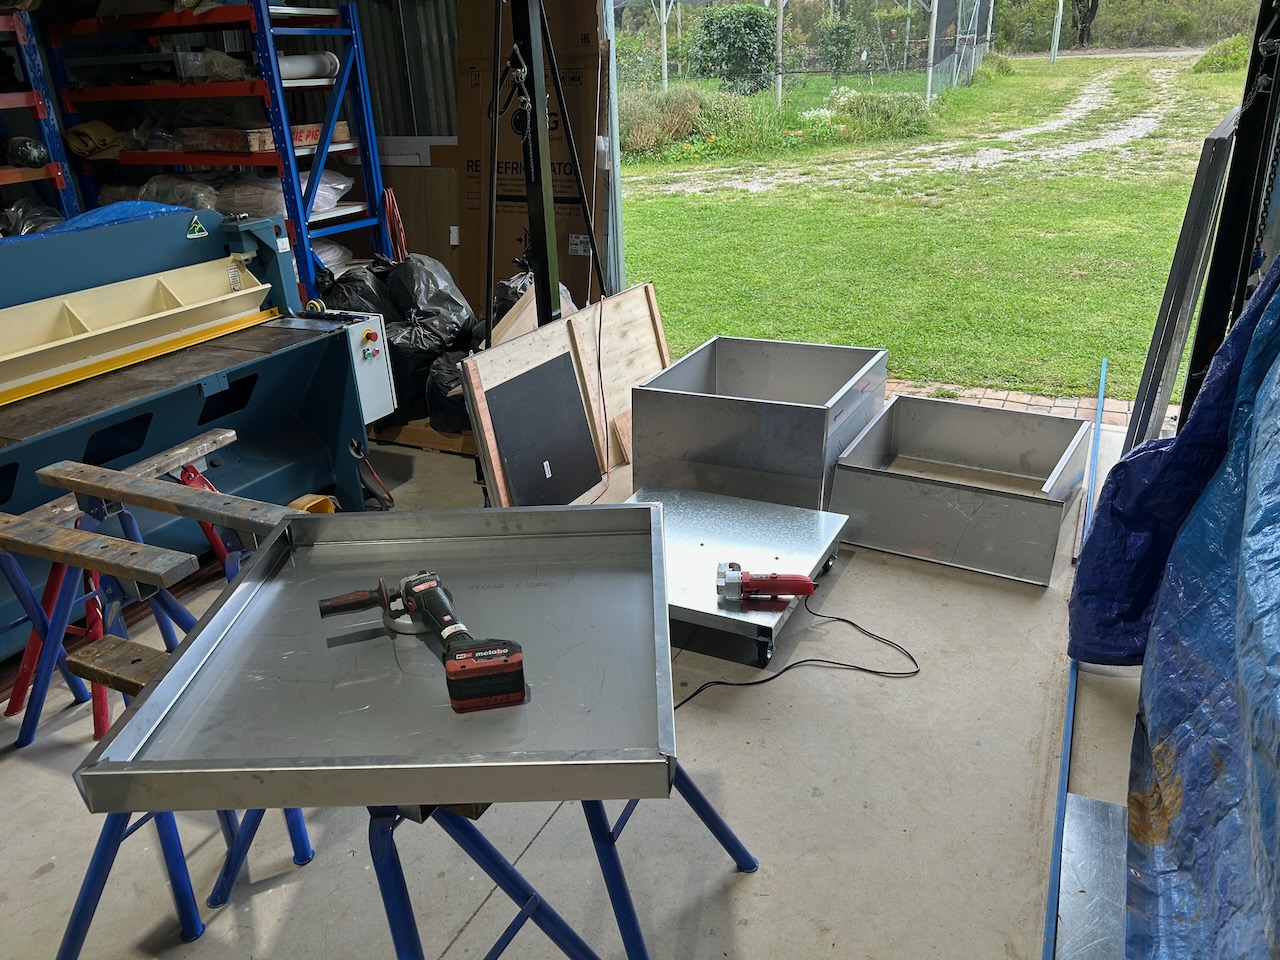
I started by redesigning how I cut the frame out from the standard 2440 x 1220 mm sheets of Stainless steel. I thought it through and started from the out side measurements of the sheets and worked back inwards. In this way, I was able to use every last millimetre of the material, with minimal leftover off-cuts. I am still using the same 450 x 450 size kiln shelf as the setting and the height is still more or less 450 mm high in the setting. Only I can see where the changes are, and I’ve done a work-around so that it doesn’t matter or affect the outcome too much. Or, at least that is what I thought, hence the need for a test firing. I’m actually a little bit pleased with myself, if I do say so myself.
I hate wasting precious material like stainless steel. Of course, I always managed to use up all the off-cuts from the previous kilns in subtle ways, right down to making throwing tools out of the smallest little pieces. So no more stainless steel throwing tools for sale or give-aways anymore.
This cunning use of everything made me re-design the handles, reinforcing angle brackets and support lugs etc that I have on the kiln. They don’t look so different, but still do their job effectively.
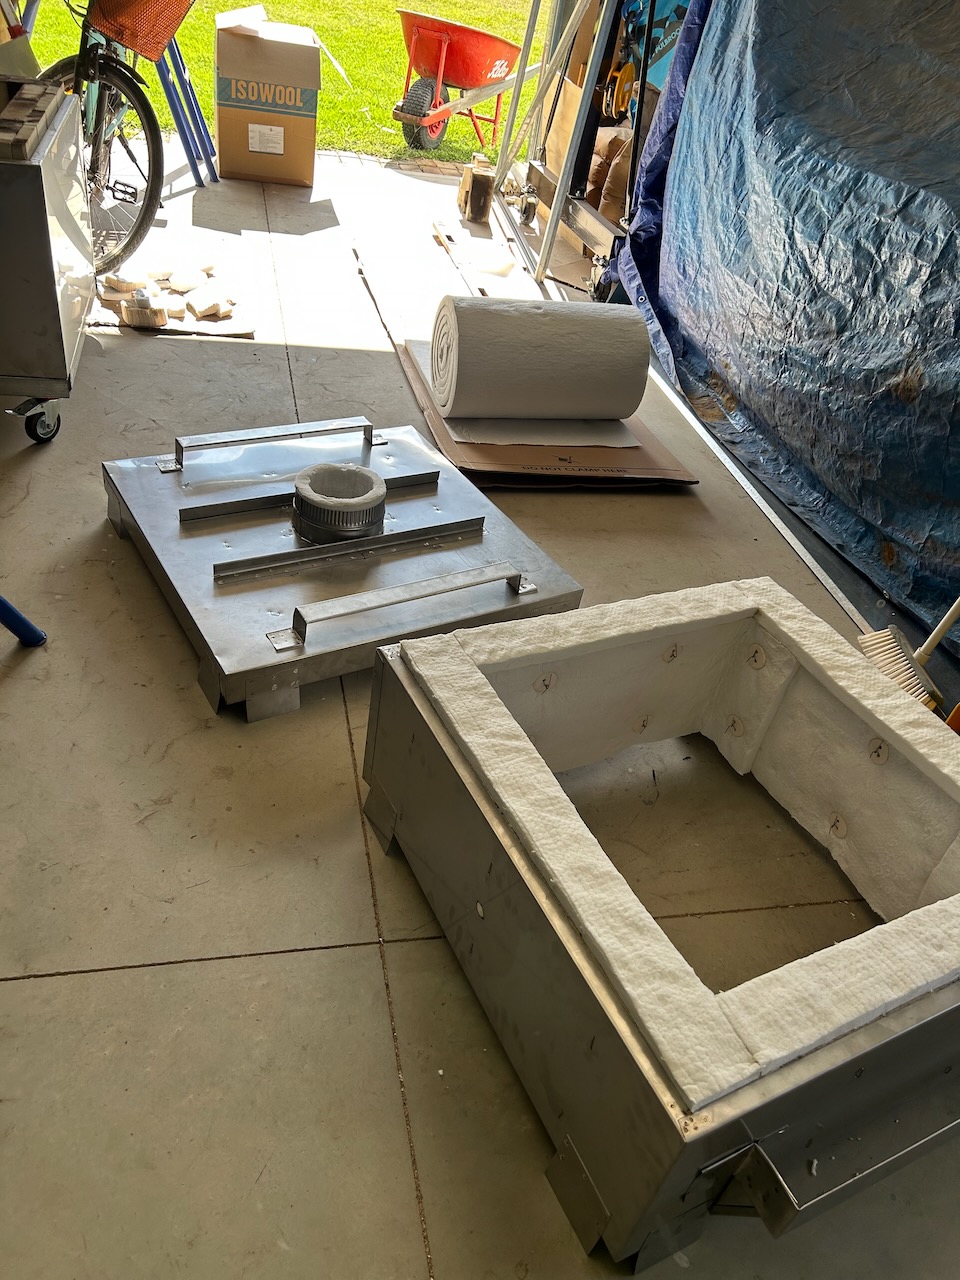
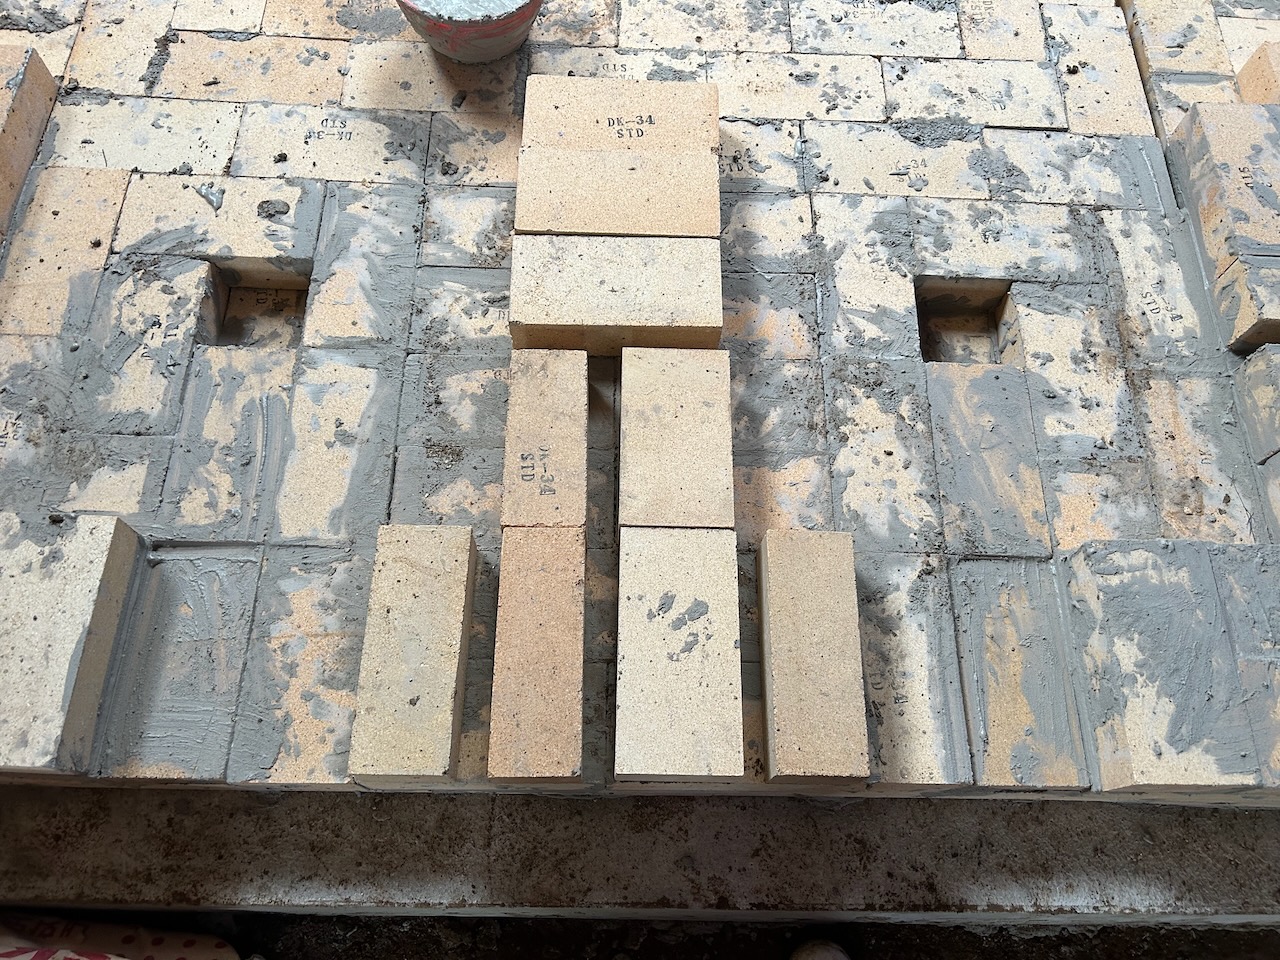
All the bricks look a bit ‘dirty’ but are brand new. These are the equivalent of RI 23 insulating refractories. Good for firing to stoneware in fast firings. They are not very suitable for long, high temperature firings, as they would shrink a bit. but not so in this fast firing kiln.
I made some more ceramic buttons to keep the fibre in place. I also made a new stainless steel grate from old burnt stainless steel rod that was in the pottery when it burnt down. It looks a bit rusty, but it would look very black and rusty after the first firing anyway.
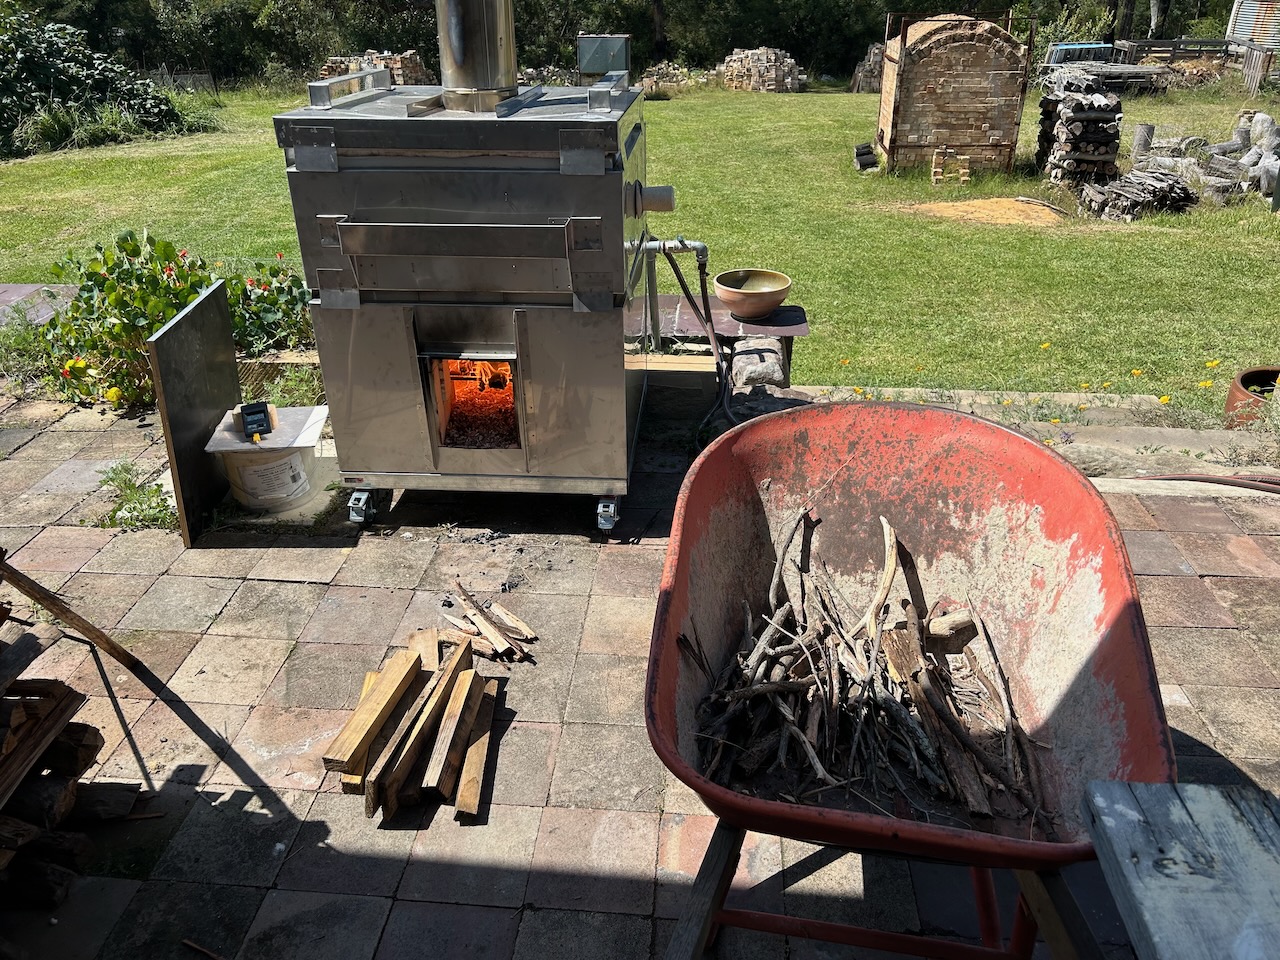
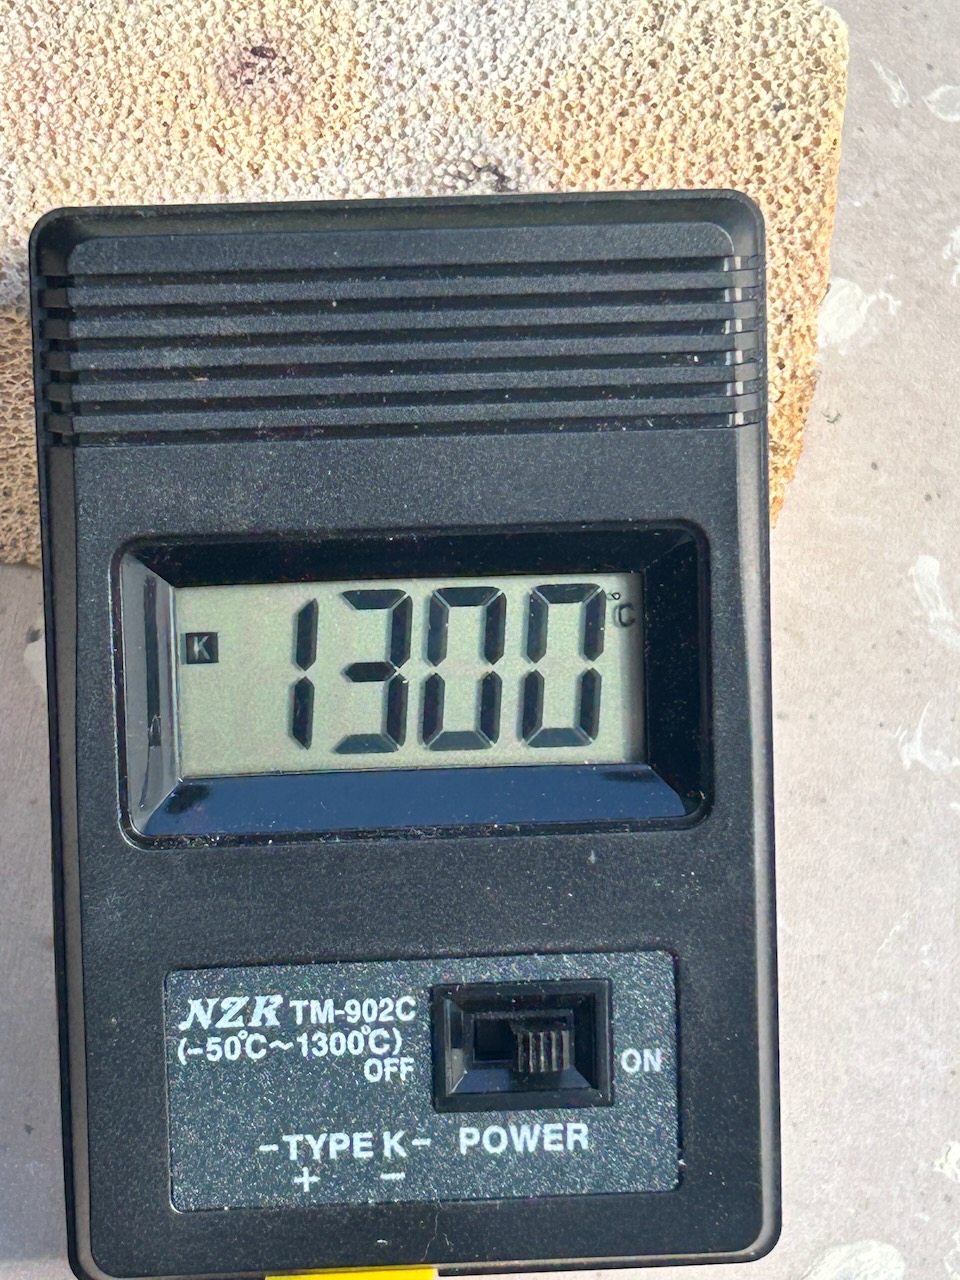
The test firing went very well. I got it up to 1300 in just over 3 hours and 15 mins. I used 2 wheel barrow loads of wood to get it up to temperature.
Just a few skerricks of wood left at the end of the firing. A lucky guess !
A nice resolution for an example of necessity being the mother of invention. This new design variation will be my new standard design.
If I ever make another one!
Good thing that I don’t have many friends 🙂
Nothing is ever finished, nothing is perfect and nothing lasts.
In the evenings after the days kiln work and dinner, we are all allowed into the Porcelain Museum pottery room, so that we can all make some pots to put in the first firing of my kiln. I don’t know whose idea this was, but it’s a very good one. Everyone has contributed to its construction, and as it’s such an unusual kiln for these parts. It’s a very good idea for everyone to get to see a pot of theirs fired in it. NO Pressure!
It turns out that there are two ‘National Treasure’ potters in our crew here. But everyone is a famous potter from their own regional district. They all come together to do these big kiln building events at special places around the country. A loose conglomerate of like minded and highly skilled artists all contributing their own particular skill set to these big projects.
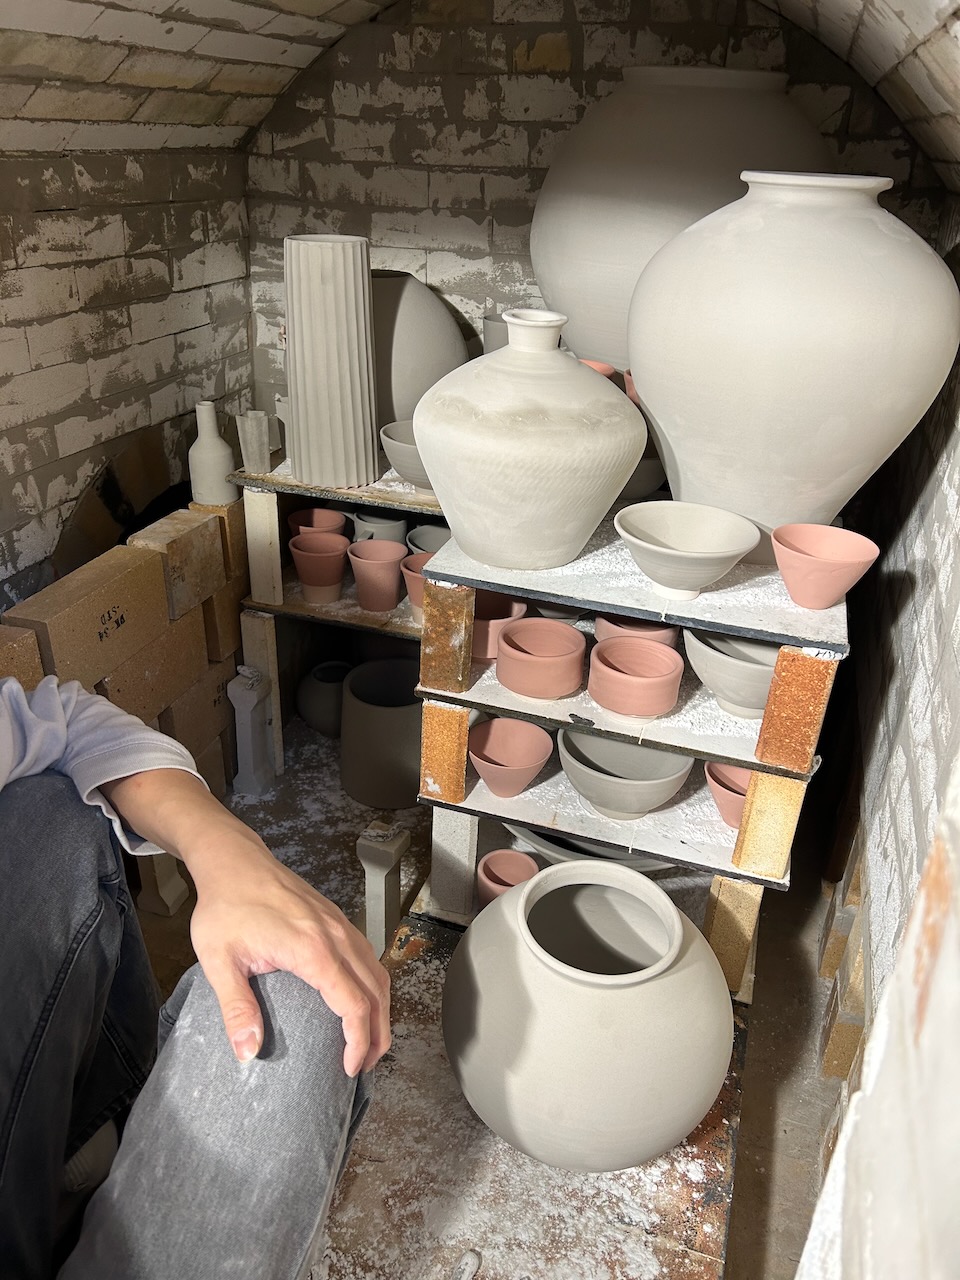
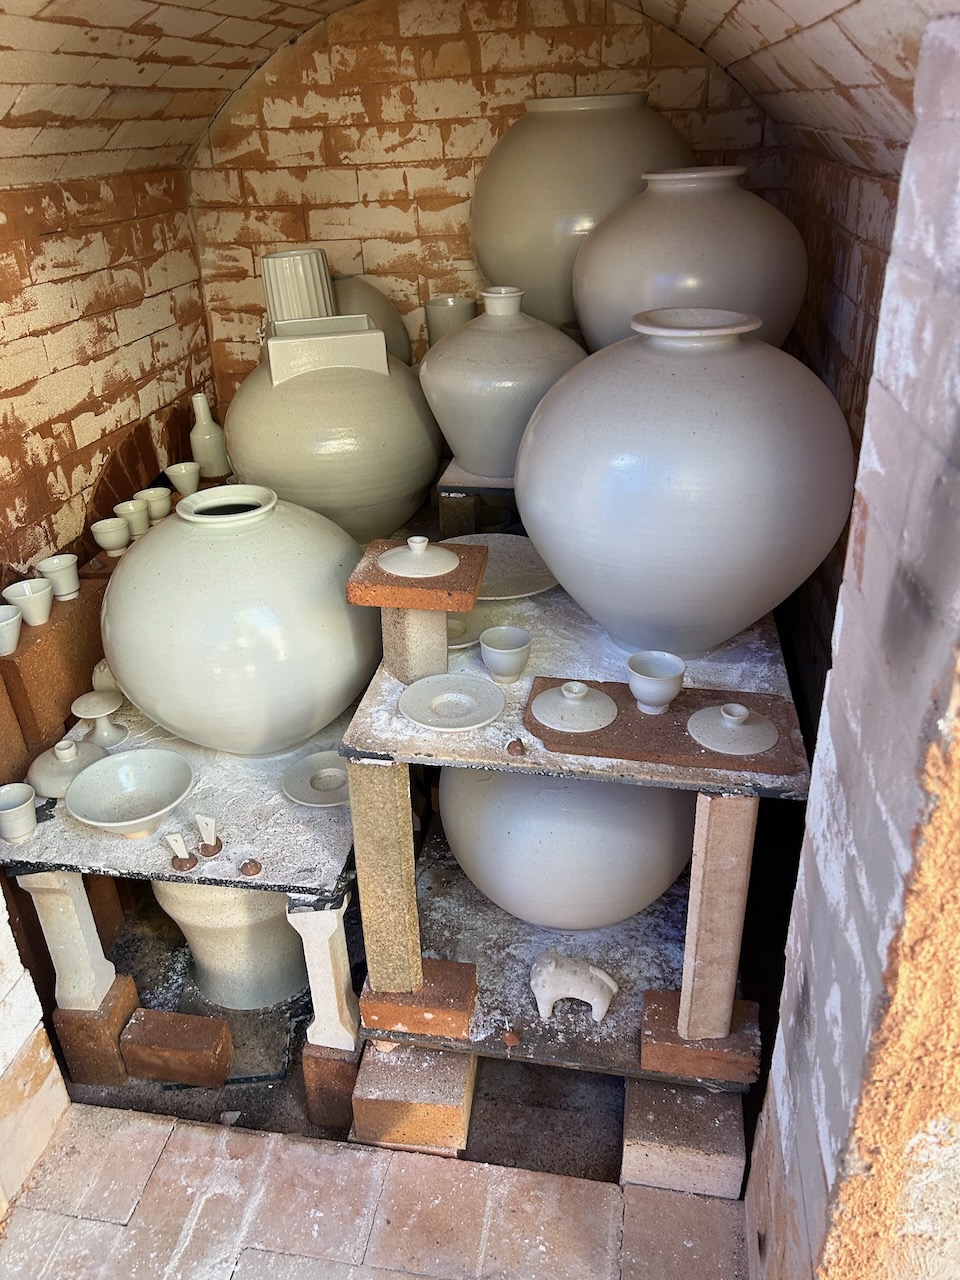
We pack the kiln with our bisque fired and glazed pots, with other contributions from the research students as well. There is only just enough pots to fill the kiln. I could have fitted more work in if there was any. But there is just enough.
Interestingly, they don’t use digital pyrometers or pyrometric cones here. Traditional firing is judged by colour, sound, smell, smoke and flame. Using years of experience with a particular type of kiln, to judge the progress of the firing. They do however use small glazed tiles as draw trials to gauge the degree of glaze melt, and something that I haven’t come across before, and that is the use of a small amount of stiff glaze paste, that is rolled between the fingers into a small length of pasta sized rod and set in some wadding. This little 3mm dia. rod of glaze will melt at top temperature and fall over, in much the same way that we use pyrometric cones as pyroscopes.
I suddenly realise that I’m really out of my depth here. I usually rely on a digital pyrometer to tell me how I’m going. Now I have to go back to basics and look and listen very closely to the fire to make my decisions. Luckily I’ve also done this before too, so I’m OK, but would prefer the reassurance of a pyrometer to confirm my decisions. Until very recently, we used ‘handheld’, battery operated, digital meters. This meant that you had to go over to where it was and switch it on, to see the LCD display the temperature. They are cheap – very cheap – $10 to $15, pretty reliable and because they are intermittent, they teach you how to look and listen to the kiln, to watch the fire and see how the wood is burning. How the flame is developing, and not just stare at the screen. Since the big fire here. We lost everything, and I bought 240 volt LED permanent temperature displays, online from China for $30, so I have recently become addicted to screen watching in my dotage. Luckily, I still retain some of my mental capacities, well learnt and polished to a finely detailed finish. So just like my stick welding skills, my firing skills are soon retrieved from the dustbin of the recesses of my mind.
In the late 1960’s, when I built my first kiln. No one owned a pyrometer. They were just so expensive. They were totally out of reach. I made a lot of mistakes along the way, but I learnt a lot. I wouldn’t recommend this learning strategy. Using an intermittent pyrometer is the better way to learn so much faster and without the losses that I incurred. My first pyrometer was an analogue, needle indicator, galvanometer. They were quite inaccurate and it taught me not to trust them. A wise decision. They are nearly always wrong. I use them to tell me if i’m going in the right direction. Up or Down. That’s it! I leave the decision as to wether the kiln is finished or not to the use of draw trials, test rings and pyrometric cones.
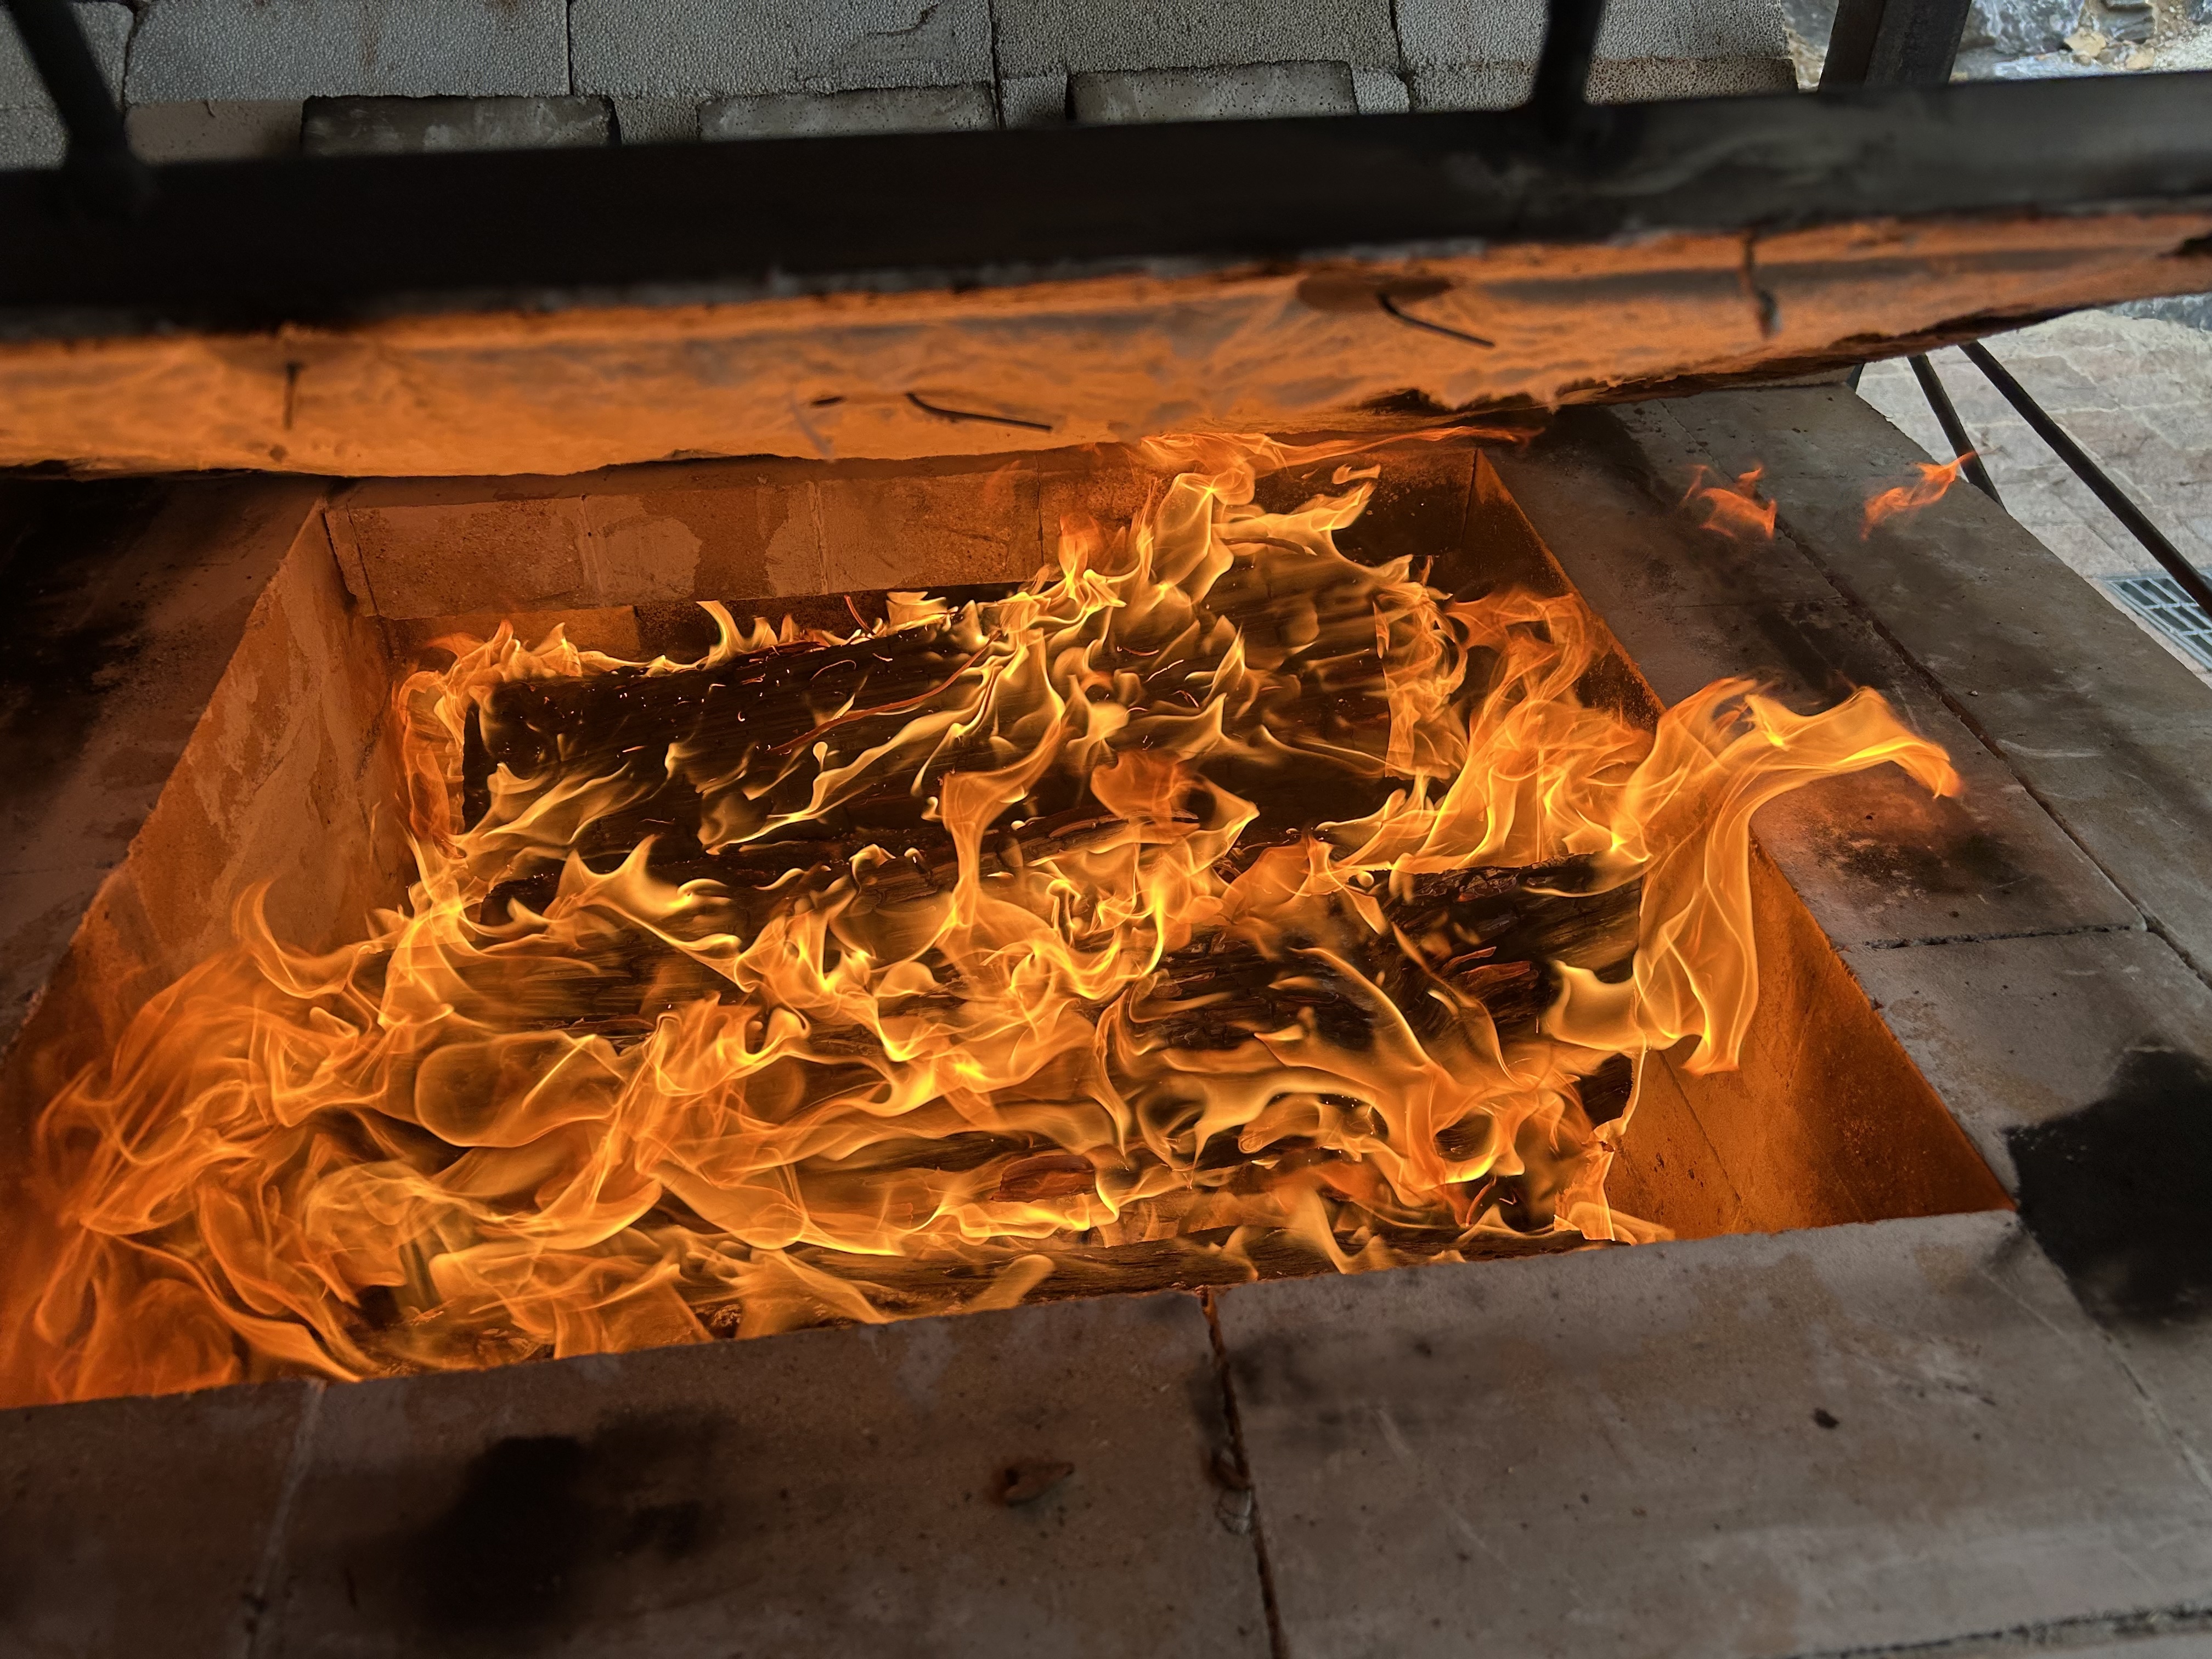
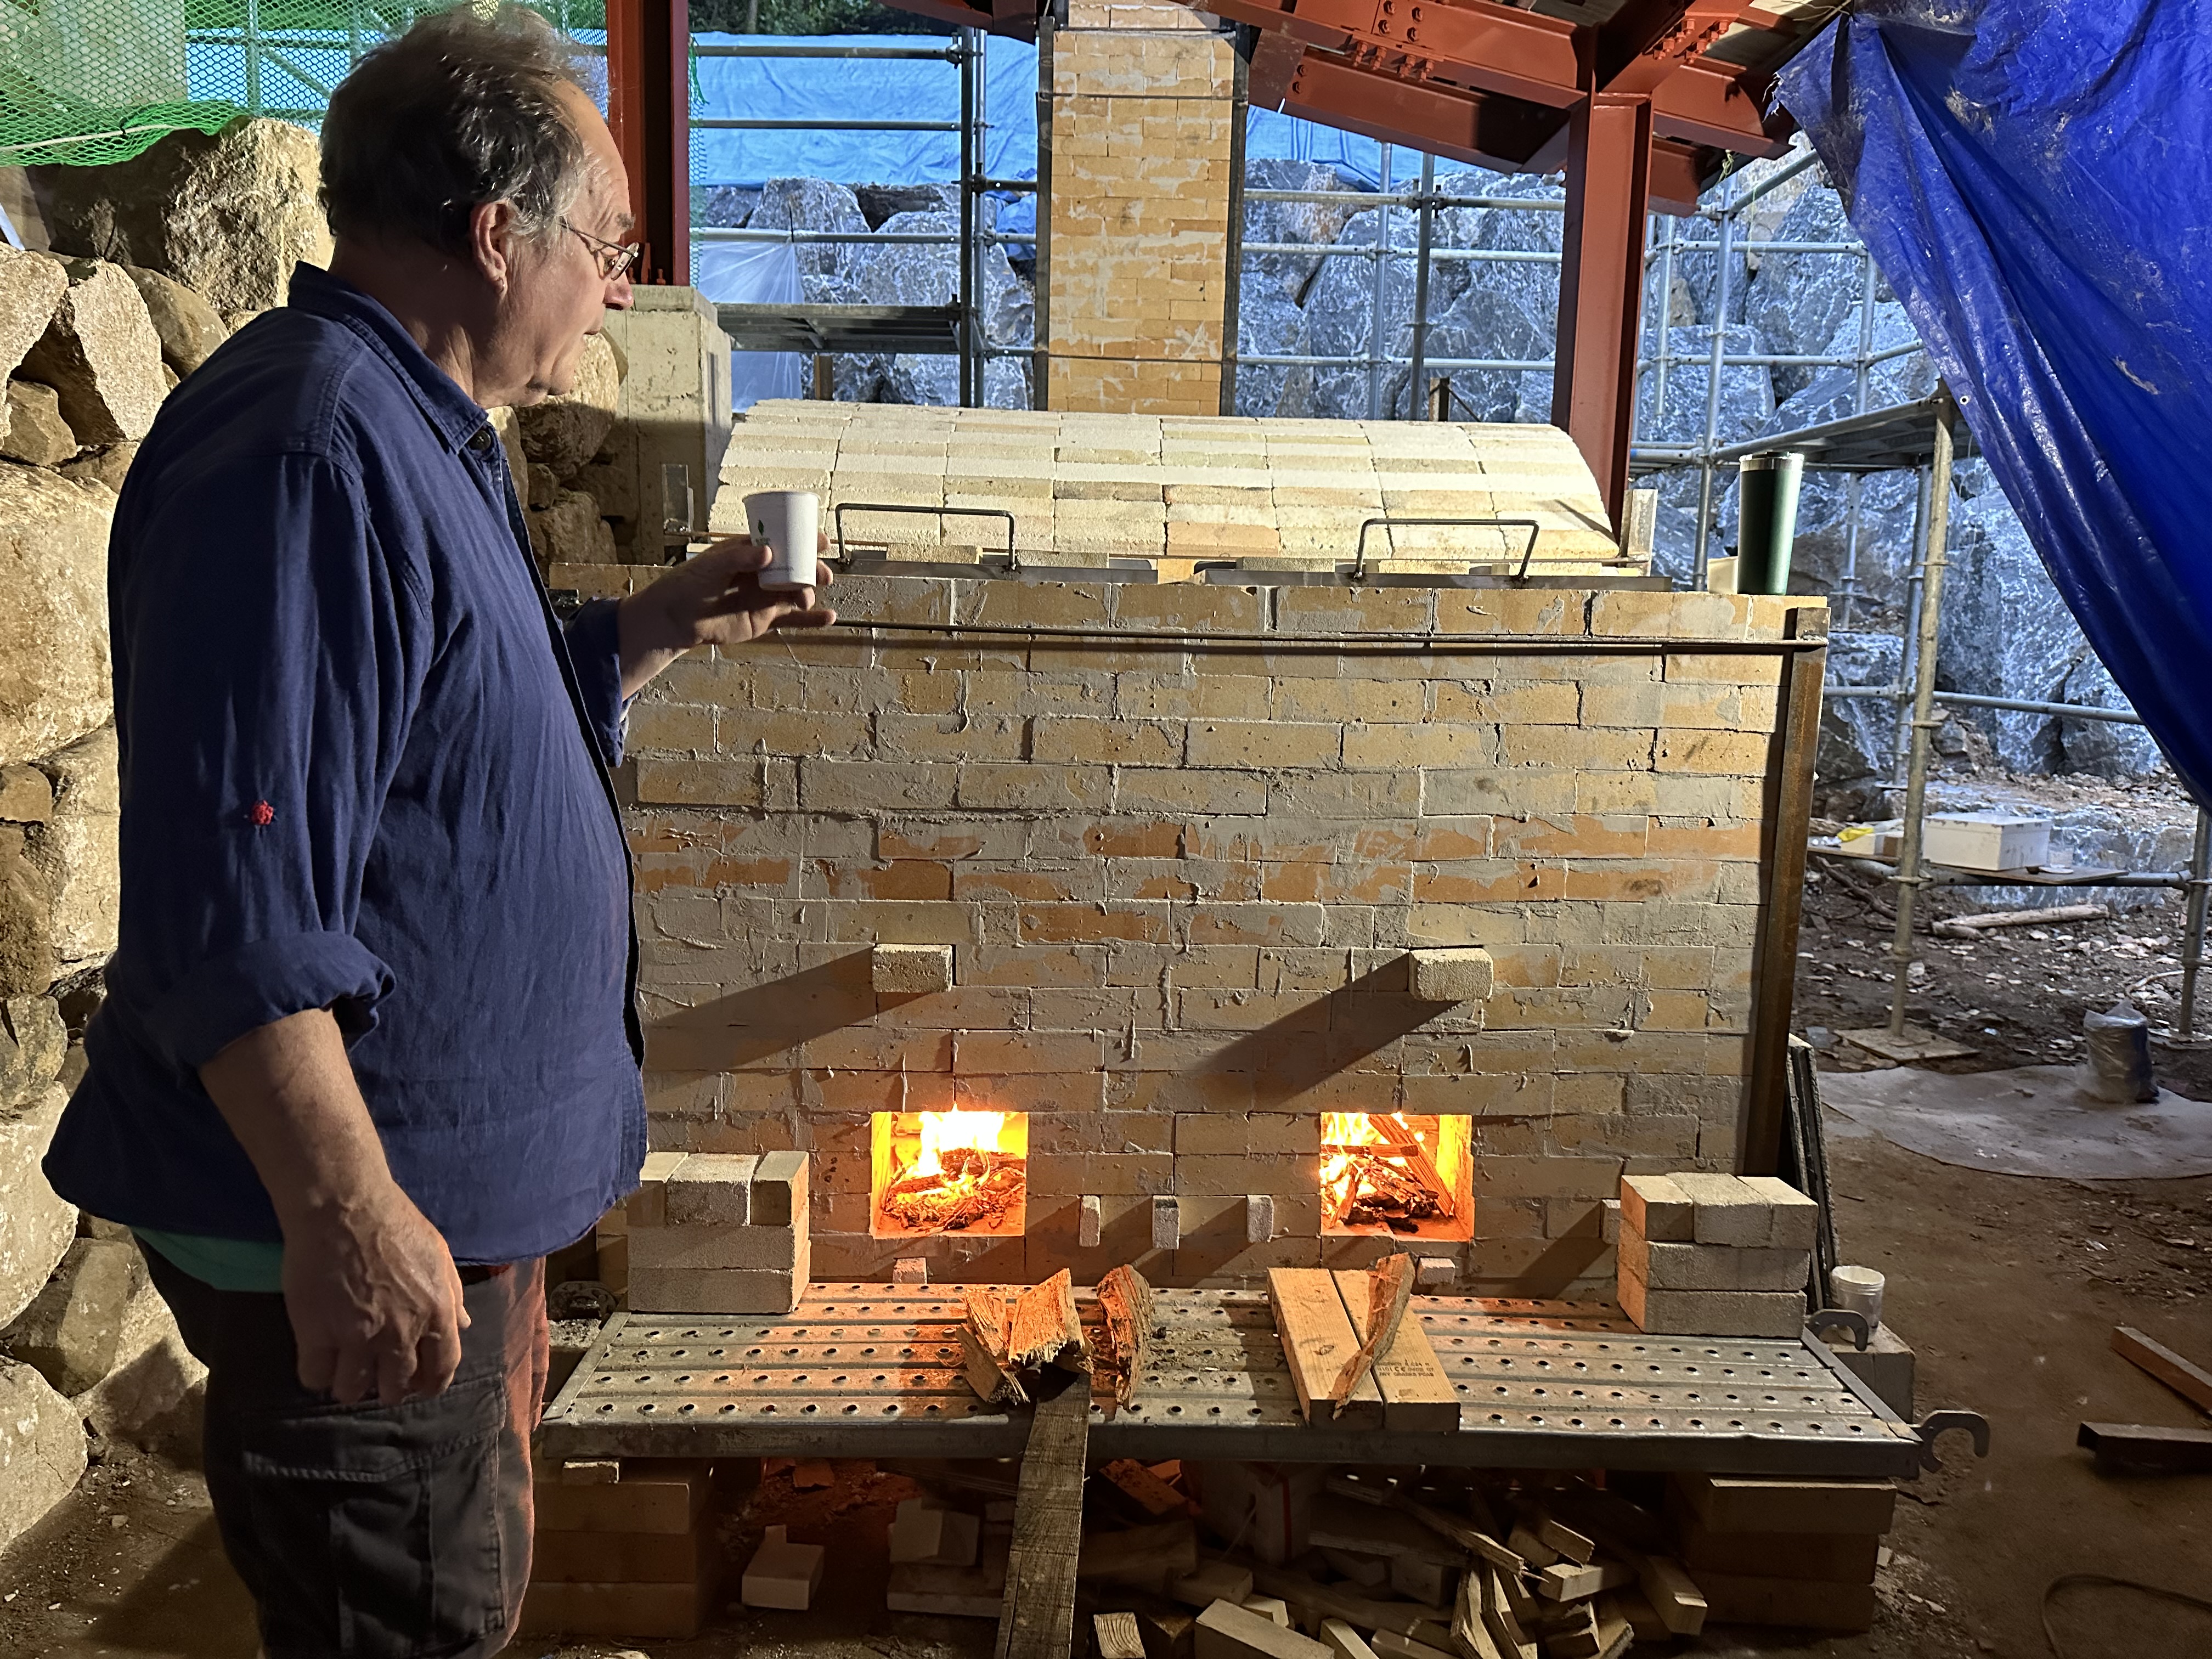
It is very important to me to fire this kiln well, not just get it to temperature, but do it in a steady, constant, reduction, so that all the usual reduced stoneware glazes that they use here will come out as they expect. BUT, most importantly, to fire the kiln with as little smoke as possible. As that is the main reason for me to be here doing this. This kiln is a demonstration of low emission wood firing.
I must admit that as the only fuel here is 5 year old very dry and seasoned pine wood, that burns very fiercely and fast, I have my work cut out to keep the kiln in reduction, but to minimise the smoke at the same time. As it turns out, I can never get to the stage of filling the hobs with progressively combusting wood, as it is designed to do. I ask if there is any hard wood available and I’m told that it can be obtained, but not at short notice. In fact hard woods like oak and acacia are cheaper than pine, so they will get some in for the next firing. But for now, I have to carefully juggle the wood level in the fireboxes. This means constant attention to detail, so this is not really a Laid Back Wood Firing at all, but a rather busy one. AND, not a smokeless wood firing, as the cover of my book in Korean translation falsely claims!
I manage it reasonably well, but each time I stoke and there is a little burst of pale grey/brown smoke from the chimney. There a howls of jeering from the kiln builders next door. However, although it is smoke, it is nowhere near the column of black smoke that issues from the traditional kilns here. Young Mi, one of the resident researches here translates for me during the firing. She tells me that the jeers are just in good humour, and that the chatter is all about how little smoke there actually is and how clean it is. I have surprised them.
Another resident confides in me that he expected to see flames come leaping up out of the fire box as soon as I lifted the lid. He is also surprised how enclosed, slow and gentle the firing process is.
These 4 images by Kim Young Mi.
I prepared 8 stacks of timber for the firing, expecting to use it all, but as it turned out, I only got to use just over half of it. In the afternoon, when I go to look in the spy hole, all the little glaze rods have melted. The firing is over in just 9 hours. Too quick! I didn’t realise how fast the temperature was rising without a pyrometer. The colour in the chamber is still looking rather yellowish, and doesn’t have that bright pale glow that I’m used to. I wonder what temperature that glaze stick actually melts at?
Note to self! Next time I come here for a firing I’ll bring my own pyrometric cones and a hand held digital pyrometer.
The firing turns out OK. The glazes are pale, grey-blue celadons and off-white, grey/white guans. As I only burnt 4 stacks of wood, possibly 250 kgs of wood, there is no obvious ash deposit, just a little dusting of ash on the glazes facing the fire.
The bottom back shelf is under-fired, but I can remedy that by firing a bit slower and also adjusting the bag wall gaps and height. I hope to be invited back to fire it a couple of times in quick succession, at some later stage, to get to tune it and get an even temperature throughout.
Meanwhile, life goes on in the rest of the village, with the rice harvest in full swing, and autumn vegetables ripening in peoples gardens. I’d love to get in there and pick some of those beautiful vegetables.
Work has been progressing on the big kiln next door. It is more or less finished, but may need some extra work on it. I’m not too sure there. It will certainly need to be pre-fired to remove all the arch shuttering that is built into each of the 5 chambers. It’s a massive kiln!
Who knows if, or when I’ll be back? What does the future hold. Watch this space
Before I leave this beautifully creative place, I make my usual pilgrimage up the mountain to the ancient site where all the sericite porcelain stone was stock-piled in ancient times. The site has been tragically decimated by a local former. I imagine to stop it being declared an historic ‘National Trust’ site of importance? The whole site was bulldozed some years ago, but remnants remain in the soil. Particularly after heavy rains, the white stones stand out from the brown soil and are easily collected. I make a point of hiking up there and seeing what is available for me to collect. I return with 10 to 15 kgs of stones in my back pack and start the process of meticulously scrubbing the stones to remove any particles of dirt. Then I rinse then several times, until the water runs clear. Finally I soak them overnight in bleach to kill anything that might be harmful to the environment in Australia when I return.
Back home, I put them through the jaw crusher and then into the ball mill and let the slurry sit and flocculate for a month or two, before stiffening and plastic ageing before use sometime next year.
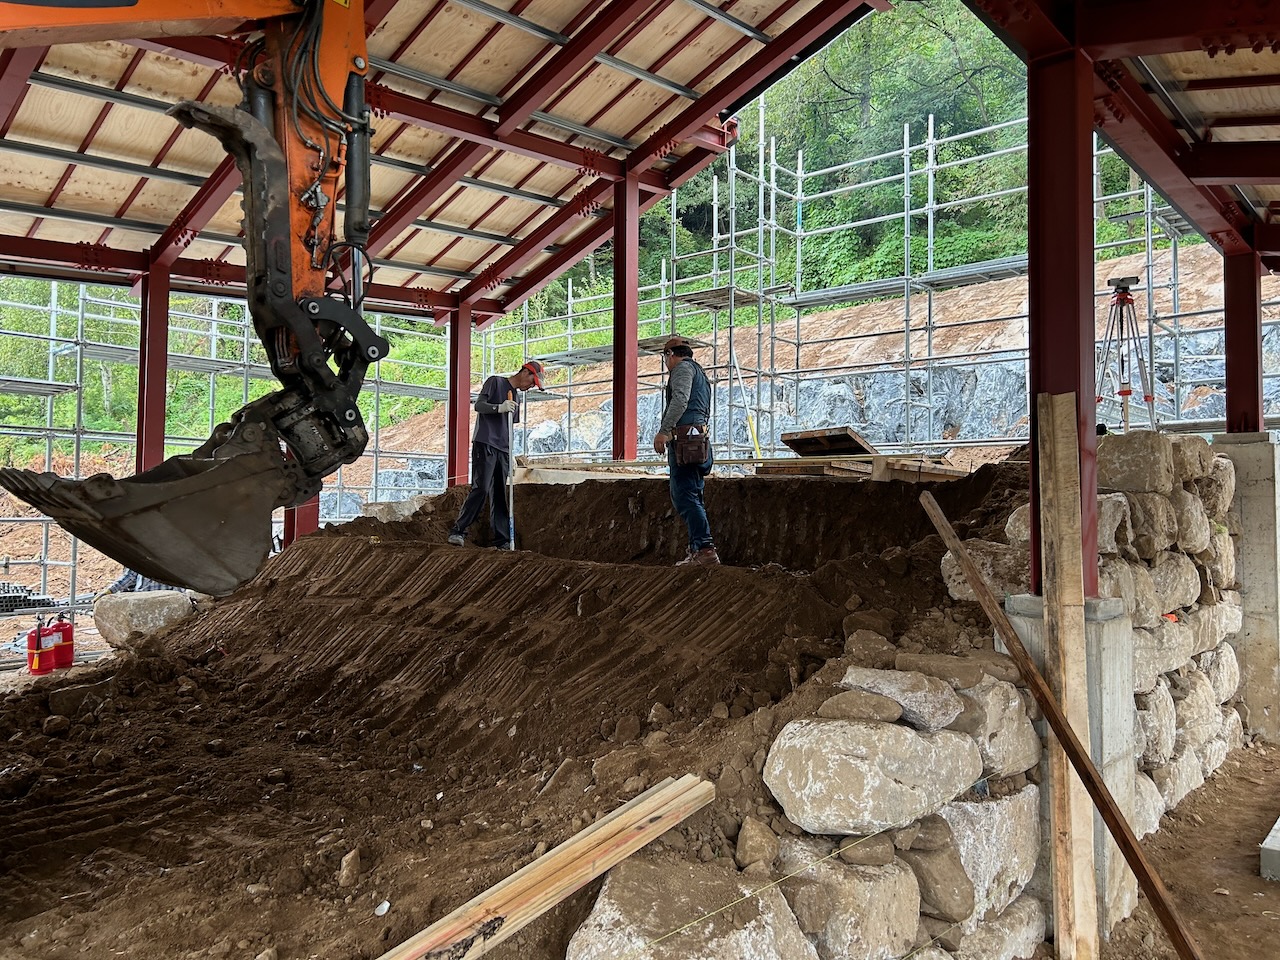
Because the kiln shed wasn’t finished on time, the team of 8 professional kiln builders that are contracted to build the massive North Korean designed 5 chamber kiln that is going in the new shed next to mine, are all sitting with nothing to do for a couple of days, as the slab for their kiln hasn’t even been cast yet. The slab for my kiln was cast the day before I arrived, but as they were still finishing the roof of the shed I wasn’t allowed on site because of the danger of falling objects. So nothing happened for the first day for any of us. We all went into the nearest big town half an hour away to buy groceries for the coming week.
There is almost nothing fresh available here in this little village. There is a junk food ‘convenience store’ that mostly sells soft-drinks, tinned coffee, beer and cigarettes, and a very small ’supermarket’ where you can drop off the first word and buy dried and canned foods that aren’t particularly super in degree or range.
No one sells fresh vegetables, and understandably so, as everyone here, with exception of the dozen museum staff and research students, is involved in farming vegetables. I suppose that they either grow what they need themselves, or swap with neighbours who do. Either way there is nothing fresh in the two tiny shops here.
In the bigger nearby town of Yanggu, there is a choice of bigger grocery shops and one real supermarket. We travel there and get a weeks supply of almost everything that we can think of, that we might need to feed ourselves for the coming week. We spend about $700 on these 3 trolleys of various food items. It even includes shoju and beer! I notice that they sell red wine in there. So return by myself while the others are loading the cars, and buy 4 bottles of red wine, mostly of cheaper origins like Chilean and South Africa There is nothing from Australia available.
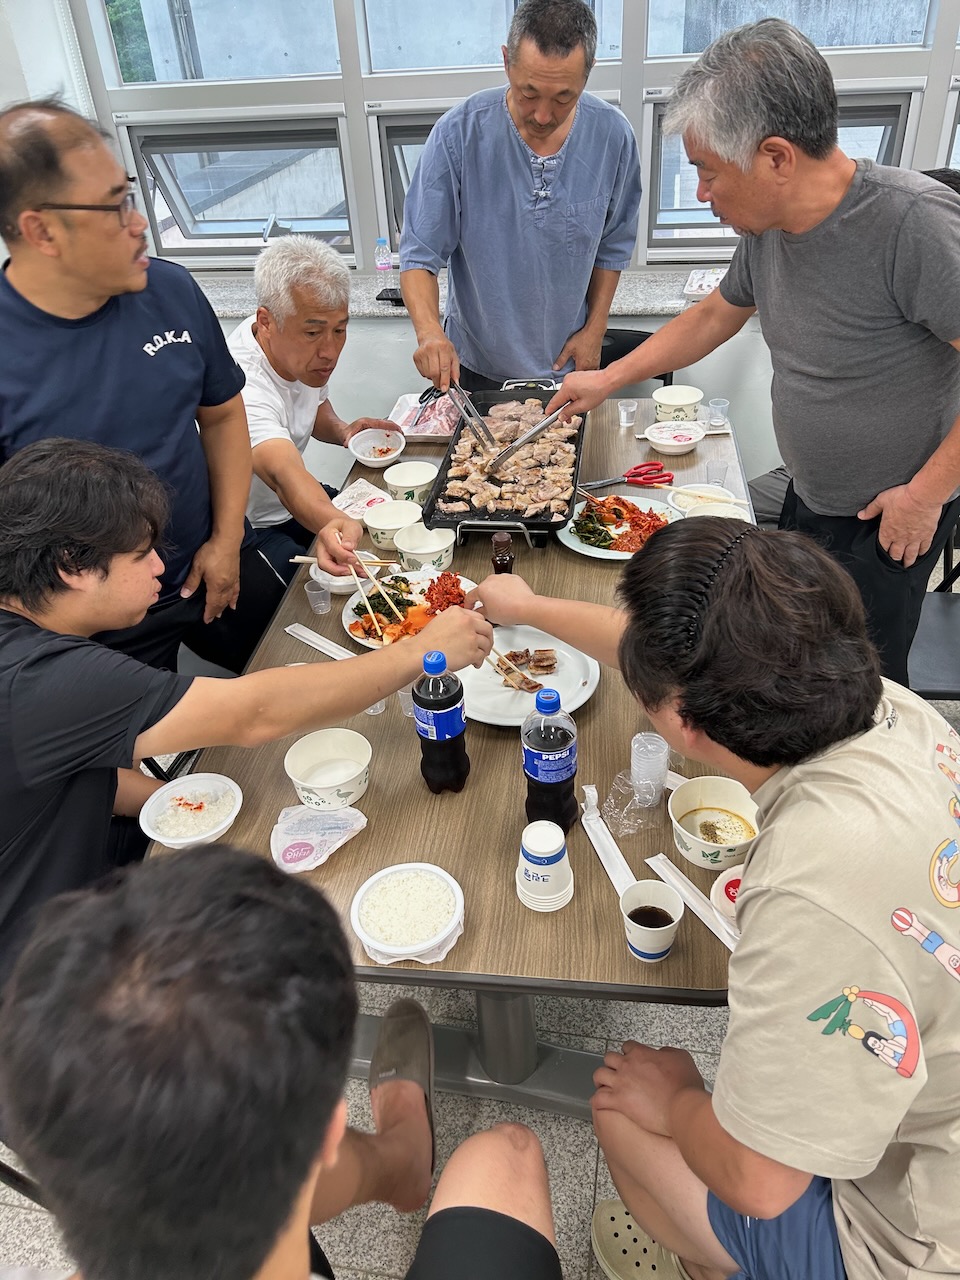
I don’t enjoy shoju at all, but quite like the fermented rice wine called makoli and the local beer, but I feel that there might be an occasion when there will be an opportunity to share some claret in the coming evenings together. It turns out that I’m spot on with this decision. The bottle doesn’t go very far when shared 9 ways!
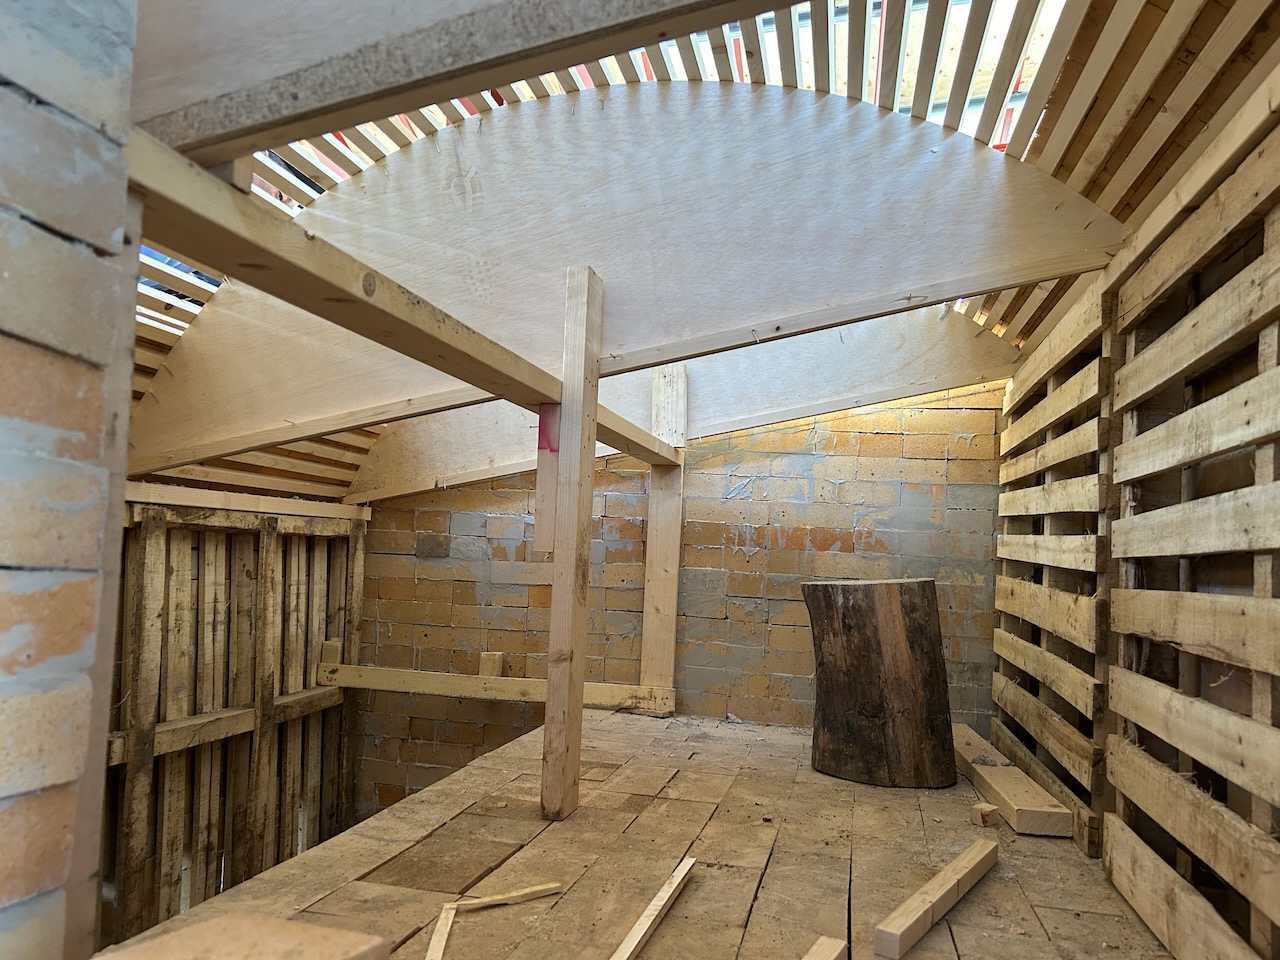
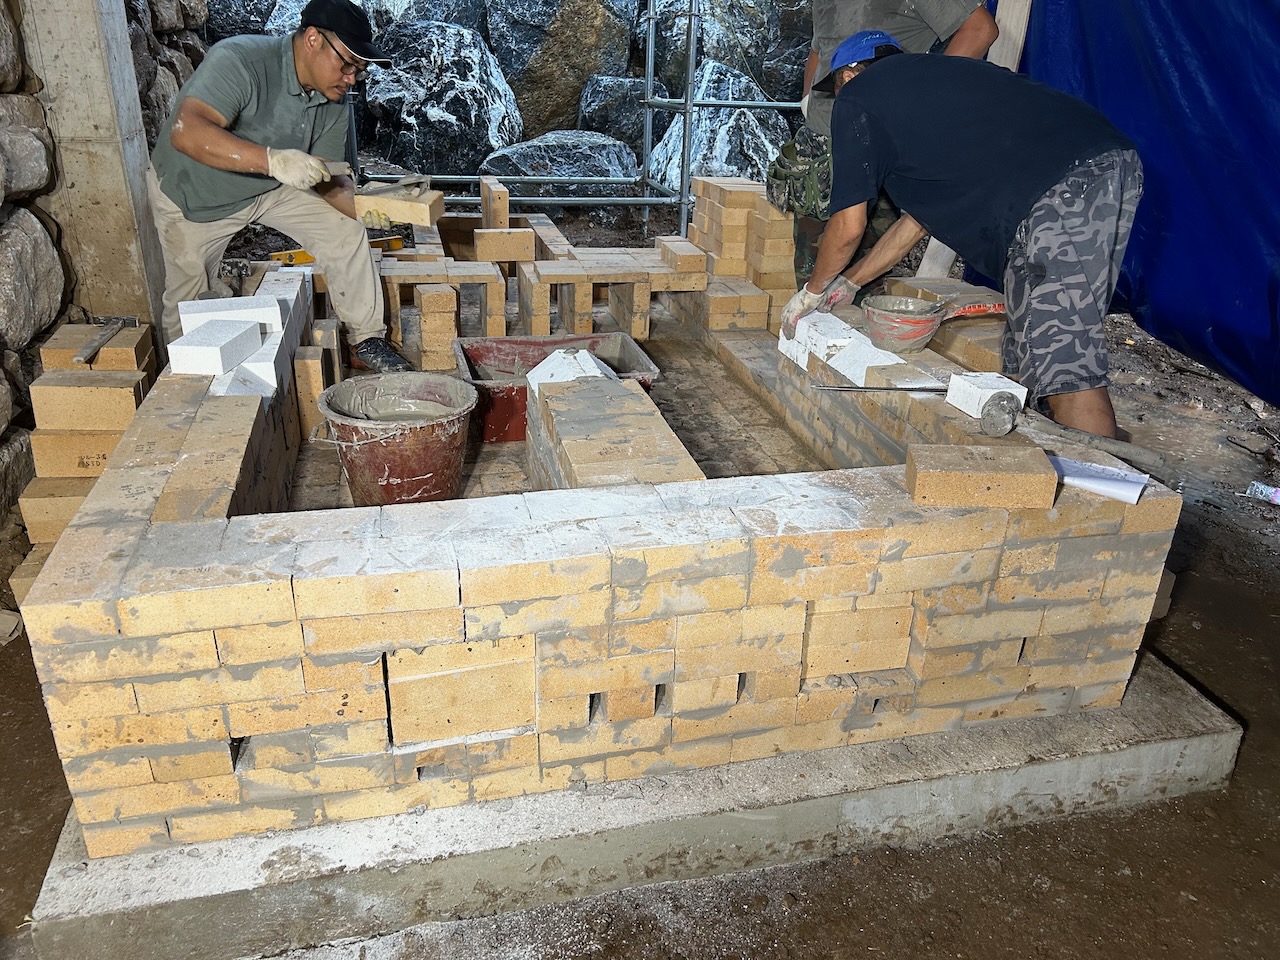
The first day of brick laying, with many helpers goes really fast and I lay out the parameters for the design and using a string line and plumb bob weight, I make sure that the chimney will be directly below the roof opening. This laying out is the slowest part of kiln building. Getting everything square and level before we start.
Many hands make light work and we lay the two floor layers in record time. I introduce these Korean professional kiln builders to ‘herring bone’ pattern floor bricklaying technique. They don’t seem to recognise what I’m doing, but using my phone and a translation app, I explain it to them as best that I can, and one of them googles/navers it and announces that it is called herring bone, and they all nod approval, discussing it in detail in Korean chatter as we work. This pattern helps to avoid any straight through cracks developing from left to right or front to back as the kiln shifts and moves as it expands and contracts during its firings.
2 days later, I notice that they have decided to use it in the base pattern of brickwork of their kiln foundations as well!
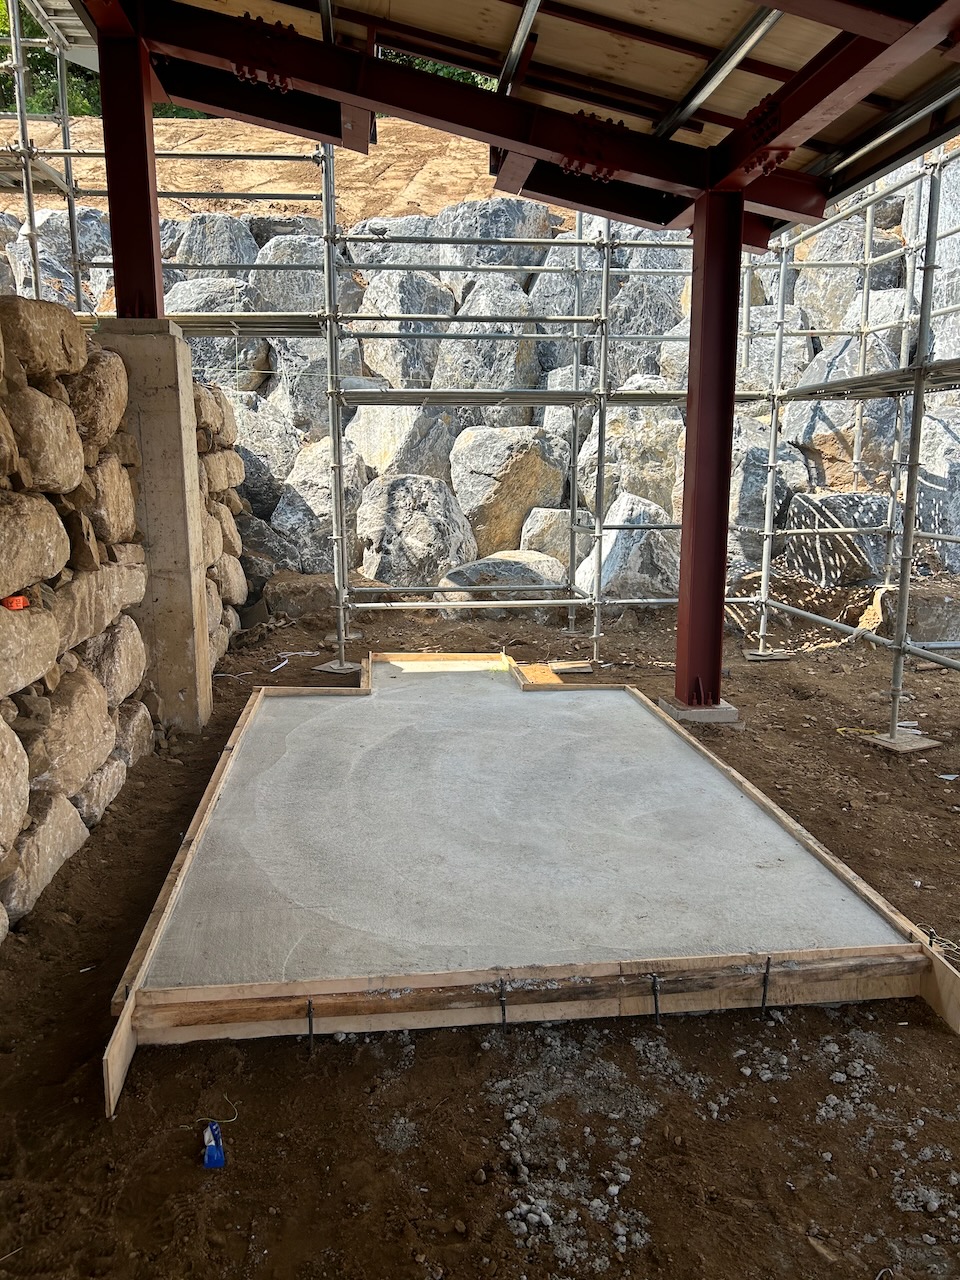
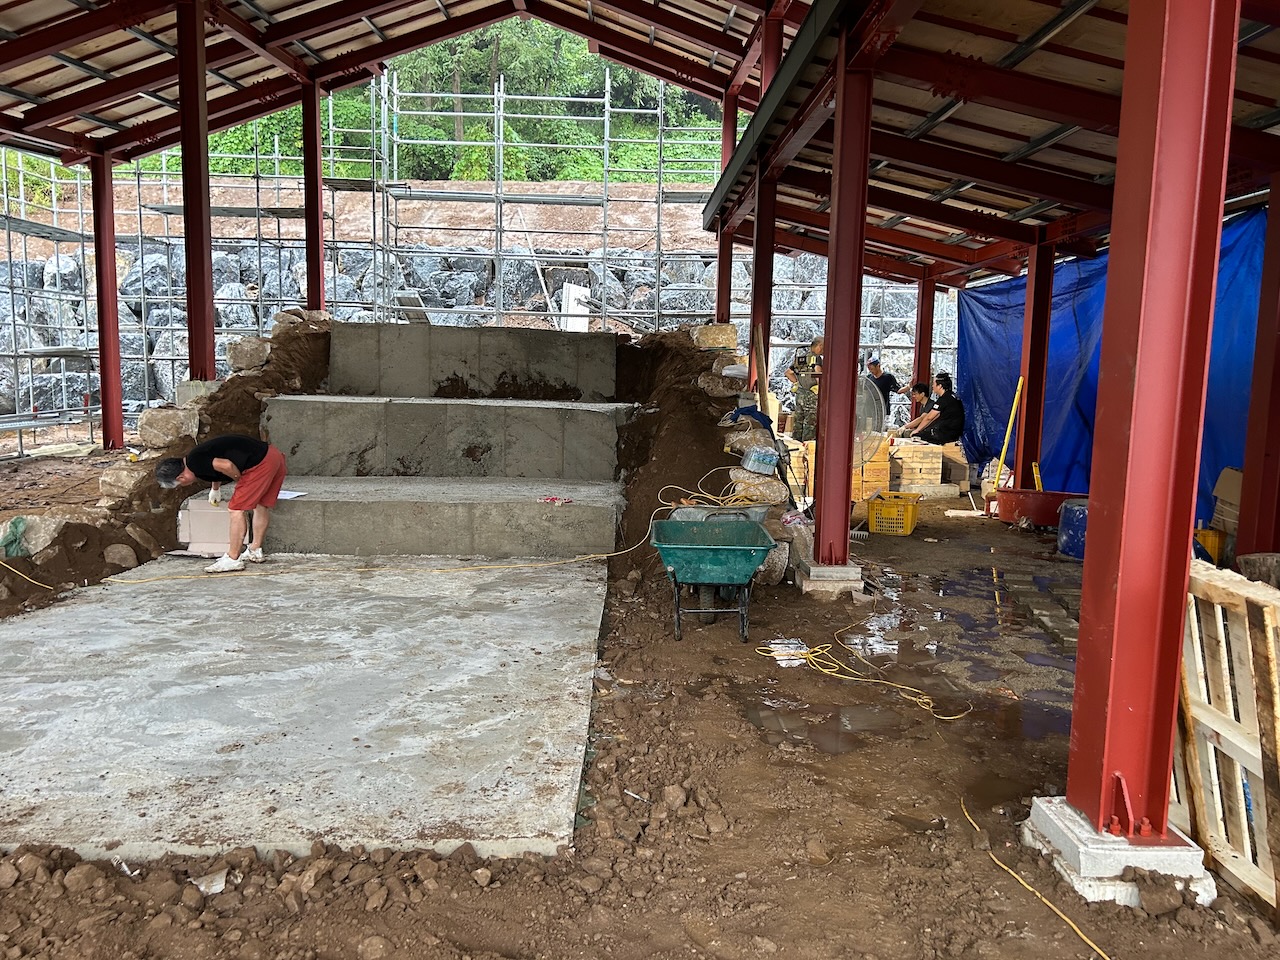
I get this unexpected extra manpower help with my brickwork, as the slab for the big kiln next door is not yet cast. In fact, the local builders are still relocating soil for the earth ramp of the man-made slope and then framing the formwork for the slab. Unbelievably, they get the freshly tamped earth roughly level and tamped down, then all framed-up with formwork and the cement cast by late in the afternoon. I’m pretty amazed by this fast work. However, I do notice that there is no steel mesh used in the slabs, and with it cast on top of freshly placed earth substrate, Will it crack in due course? I have no idea, but hope for the best. These Korean workers sure are fast. Going on this, I can only suppose that there is no steel in my slab either.
I am working flat out, as fast as I can to lay down bricks in their final positions to be laid with mortar seconds later, by one of my several helpers. They are professionals and are so quick. I’m hoping that I don’t make any mistakes working at this speed, as there is no room for any error. It gets particularly stressful when I have to lay out all the mouse holes and tertiary air inlets in under the floor and in the first layer of the walls. They need to be precisely positioned to work effectively, and I have no time to second guess if they are exactly right or not. working with four bricklayers calling for bricks keeps me thinking of four different parts of the kiln at once. Mouse holes, stoke holes, tertiary air inlets, flue holes and the door openings are all required in this first layer, and all at the same time. I’m used to working at a much slower pace and thinking everything through thoroughly. There is no time to think here at this speed. Luckily, I’ve done this before a time or two, so everything goes well.
By the end of the second day, we have the walls well and truely started and up a few courses. I have the luxury of having two of these enthusiastic helpers dedicated to using both of the diamond saws, cutting the hard fire bricks to special sizes to facilities the special openings that I need for the tertiary air inlets. These guys have never seen a kiln like this one with so many holes in it. Traditional wood kilns here are very basic in their construction, often, just straight through tunnels, or multiple chambers, one after the other with only the flue holes to think about. They keep asking me how it will all work, and I am at a loss to be able to explain the intricacies of the design to them with my limited Korean and just some charades to do the explaining. It will have to wait until dinner time, when I can get out my lap top and show them some images of finished examples. Everyone here has a phone with a translation app. I’m constantly turning round to face a phone screen to talk into, to give yet another explanation of a detail in the brick laying pattern.
I briefly have these 7 blokes on my team, and there is just one bloke stripping the form work and measuring the step dimensions and figuring out the layout for the big North Korean designed kiln next door. The cement slab is still fresh, soft and still very wet.
The next day, They are all going flat out on the big kiln, sorting out the necessary steps up the slope and making sure that the first layers will match the brick dimensions needed to align with the next step of brickwork. It’s a massive job. The kiln will have 5 chambers and a huge firebox with two arched openings at the front. They waste no time, and with 8 skilled workers the job flies up.
I am left to work on slowly on my small kiln, with occasional help from one of the bigger kiln team and someone to cart bricks and cut special shapes on the diamond saw when necessary. We work well together, and there is a lot of laughter, good natured banter and good will towards me. At the end of each work session, there are more questions about how it will work. I suspect that they think that I’m a bit mad, or at least quite quirky, expecting the fire to burn up-side-down and not roast my head off as a soon as I open the stoke-hole lid in the top of the fire box. Fire always burns upwards in their experience.
None of them has read my book on downdraught fire box kilns that The Director here of the Research centre has had translated into Korean about 5 or 6 years ago. Not a big seller apparently, among the traditional wood kiln building community?
I ask Mr Jung, The Director of the Porcelain Museum and Research Centre, to bring a copy of the book over to the kiln site, the next time that he visits, he does and it is passed around at morning tea time. A couple of the guys flip through the pages, but I don’t think that any one actually reads it in any detail. After dinner, I get out my lap top and show them images of other projects like this one to help explain what I’m try to achieve.
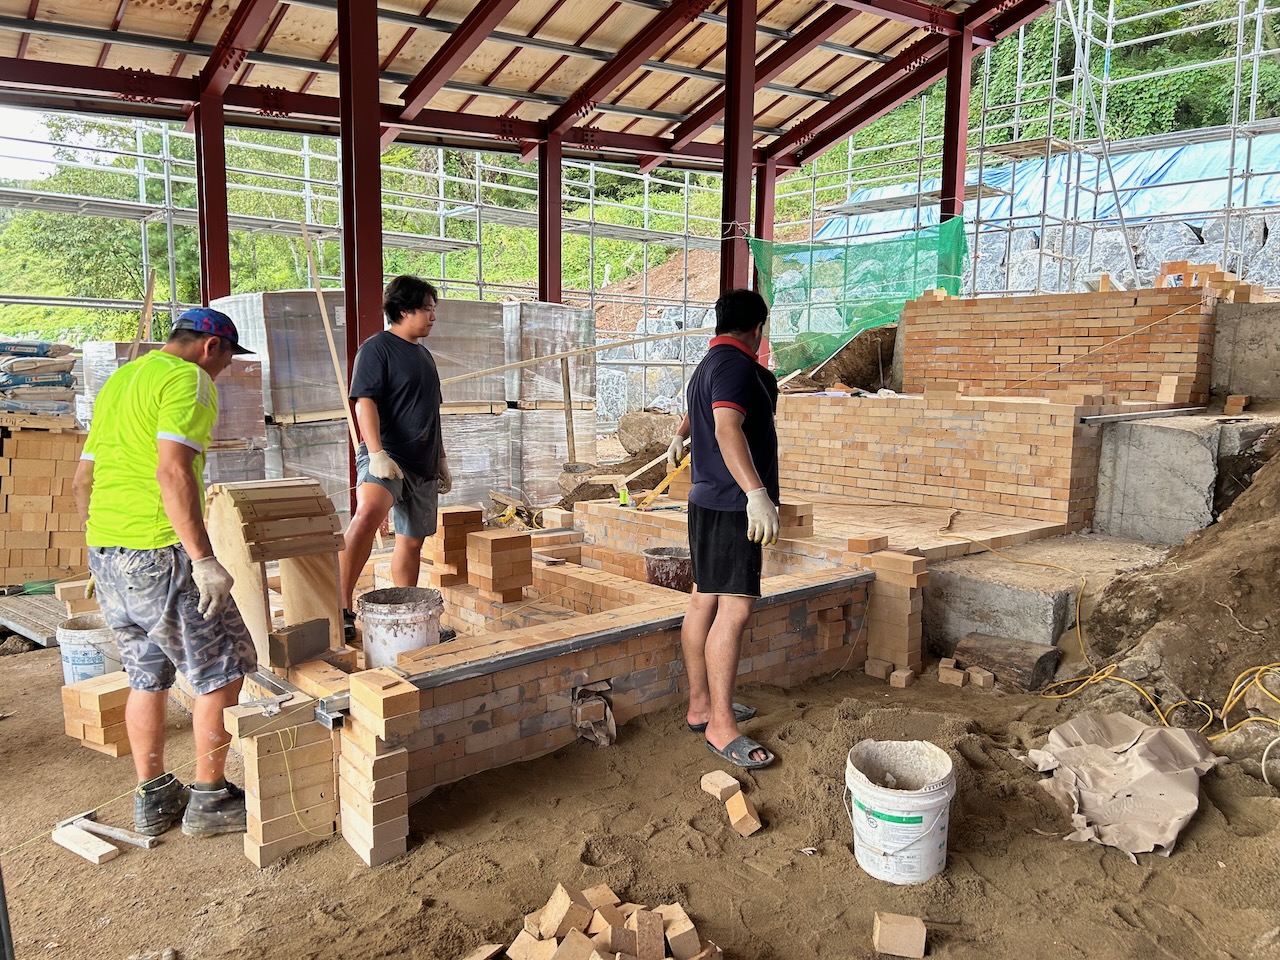
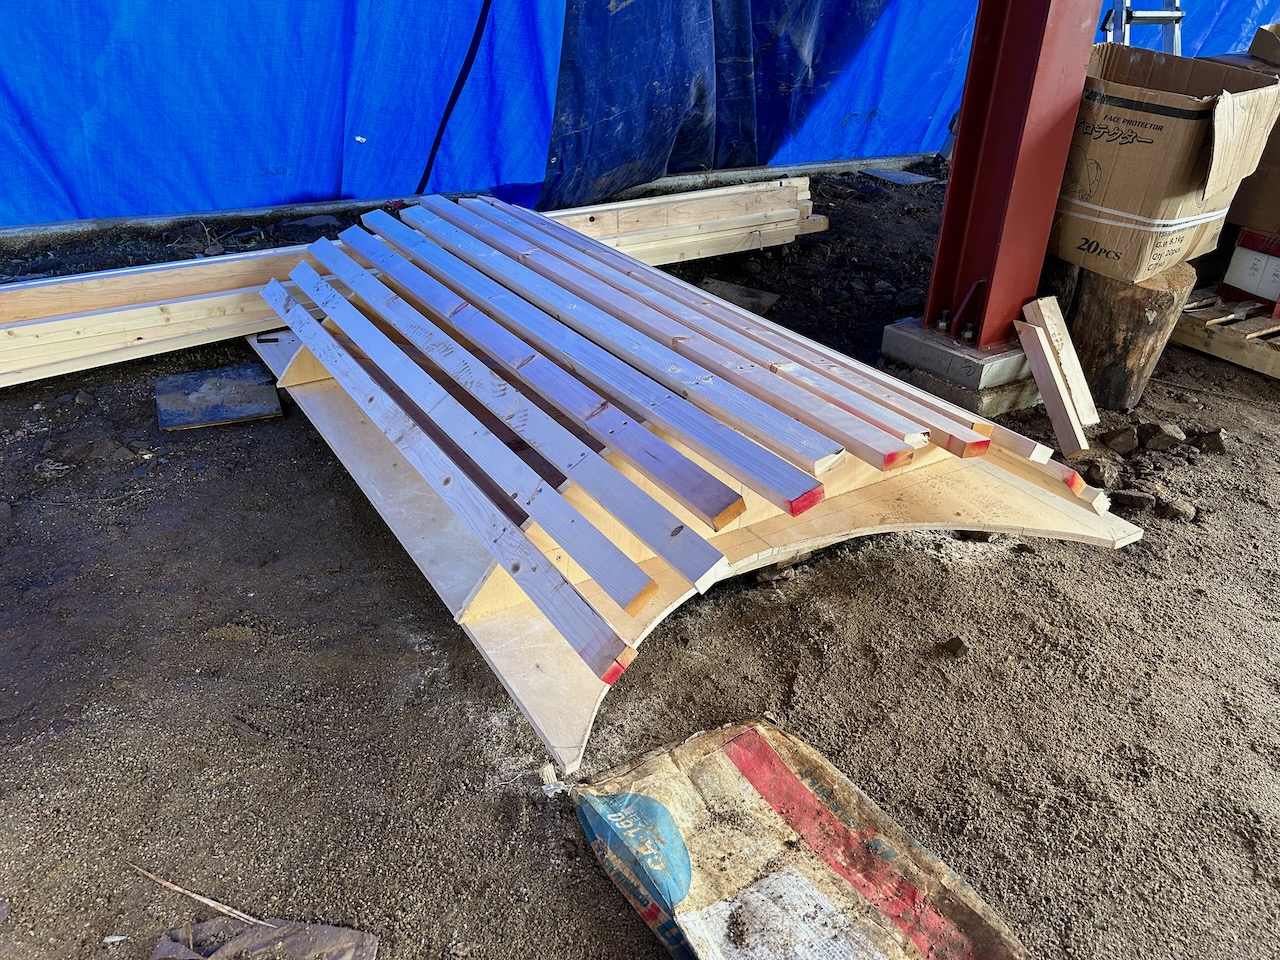
I build an arch formwork and set it in place on a stack of firebricks, using hand cut special wooden wedges that I place on top to adjust the formwork to the exact level needed, and also to allow me to pull them out and drop the wooden form work down free of the finished brick arch, to allow me to slide the formwork out of the chamber. This excites a little bit of interest in a couple of the bigger team, as they don’t appear to have ever seen this before.
I have read in older books, perhaps Leach’s Potters Book? That they just leave the form work in place in the big oriental kilns and burn it out later, before the first firing. I though that this was a bit wastefull. So I have never done this, always removing the formwork to be used again in another kiln in the future. When I tap out the wedges and drop the form work, there is a little intake of breath and a smile from Mr Kim who is assisting me at the time. He smiles broadly and taps me on the shoulder, thumbs up. He’s impressed. word spreads and my position in the social order rises slightly. At dinner, some one asks me how old I am. I tell them I’m 72, nodding all round. From this time onwards, I’m always ushered through doorways first and given the front seat in the car when we go somewhere. I’m accepted as one of them as a professional kiln builder, but I’m also the oldest member of the team. So as such I garner a little bit of extra respect as well.
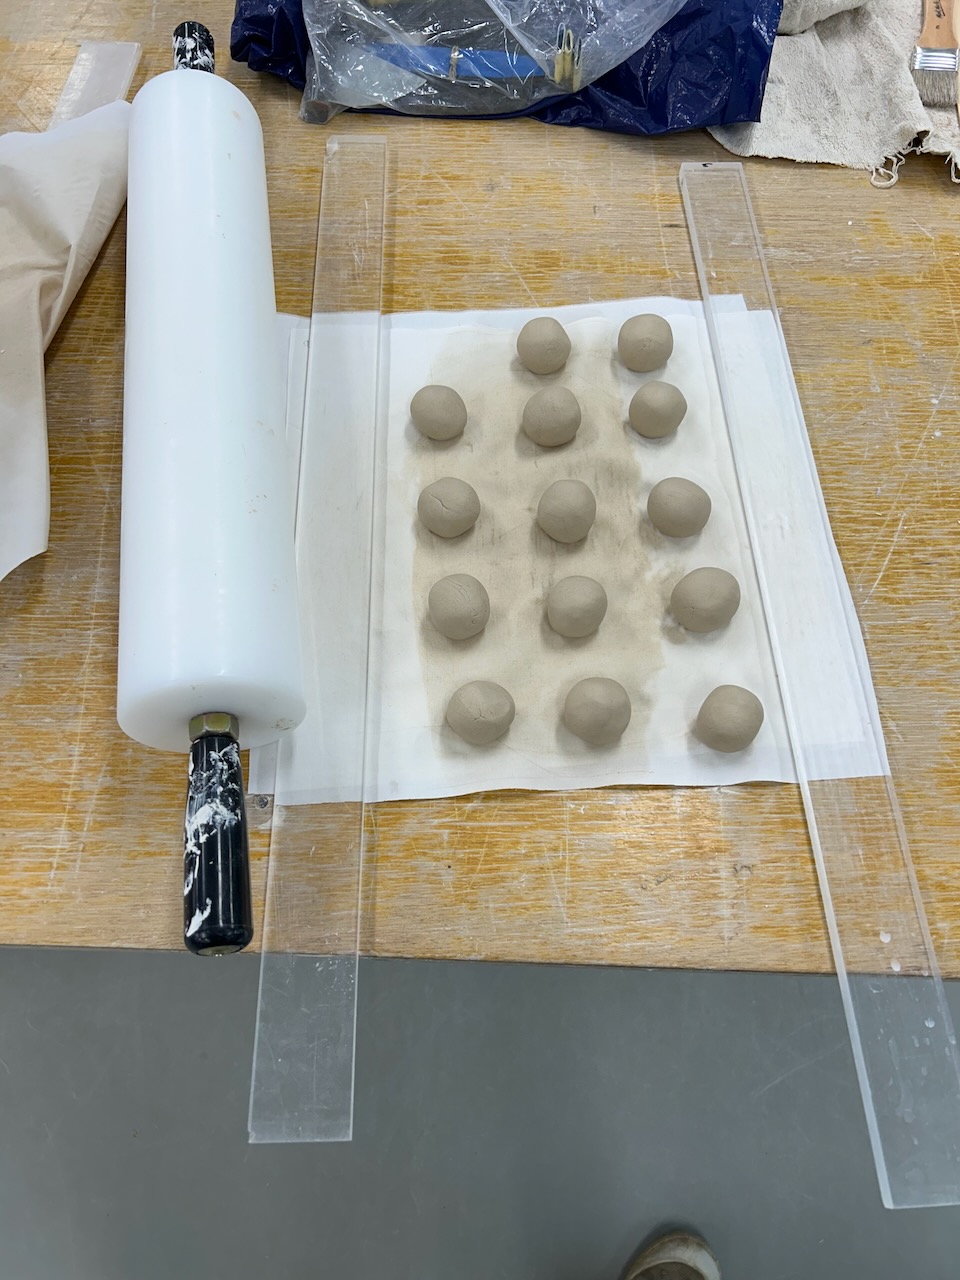
I finish the brickwork on my kiln by the end of the week and start to engage with all the multitude of little jobs that are needed to complete the kiln. I need make a load of ceramic buttons to attach the ceramic fibre insulation to the firebox lids. I also need to get a local company to cut and fold some thin stainless steel sheet to make the fire box lids.
I ask to be given a lift into the bigger nearby town of Yanggu, to buy steel angle iron and round bar to weld on the bracing. It all goes pretty smoothly, and in a couple of days the kiln is all braced in steel. Using a little portable stick welder I slowly work my way around the kiln, cutting and fitting the pieces together. I haven’t used a stick welder for 20 years. I’m a bit rusty on it, but it soon comes back to me. I’ve only used much more modern MIG and TIG welders in my kiln business for the past couple of decades. I have been spoilt by their speed and convenience, but I manage.
In some miraculous way, I manage to weld the 10mm dia. steel rod handles onto the 0.8mm. thick, or should I say thin, stainless steel sheet lids, using the little stick welder. This isn’t normally possible. The heat needed to melt the 10mm steel handle, is far too hot for the thin sheet and would normally burn a hole clean through the thin sheet. I’m aware of this, so prefabricate a small piece of angle iron backing plate that I clamp inside the lid to absorb most of this excess heat. I do burn a couple of small holes through here and there, but mostly it works well and I get the impossible done before lunch. More kudos from the pros on site.
They are treating me as an equal. It’s turning out to be a very good job.
There is a world-wide phenomenon in international popular music that has taken the world by storm in the past decade or so called K-pop. A style of popular Korean music, loosely based on traditional Korean music styles, but greatly influenced by loads of Western music styles like hip hop, R&B, rock, jazz, even gospel, reggae, electronic dance, folk, country, disco, and classical. Every body seems to know about K-pop, this Korean cultural export.
I don’t know much about K-pop and Korean popular music, I come here to study ceramics, so I thought that I’d call this blog K-pot! On my first visit to Korea, 8 years ago, I wrote a blog called ‘The Kim-chi Chronicles’ (Sept 2016), This blog is its latest incarnation.
This is my 7th visit to Korea, since I first came here in 2016. I was here only 6 months ago for a ceramics conference, where I presented a paper on low emissions wood firing. This involves using a kiln with a downdraught firebox (Bourry box) which is capable of firing with relatively little smoke. Of course there is always some smoke when burning wood, but this style of kiln design keeps it to a minimum most of the time.
In Australia, where I have done most of my research, I use hard wood, eucalyptus trees for fuel. Eucalypt hard woods are heavy and dense. They burn slowly and steadily. Perfect conditions for low smoke emissions. Here in Korea, they have a lot of different softwoods in the form of pine trees/conifers. They burn fast and furiously, so it is a challenge to minimise smoke during firings.
People here have asked me what is the secret addition that you have incorporated into the kiln? As if there is some sort of afterburner, that they can add to their own kiln to clean it up. There is no secret addition! It is a complete kiln design incorporating the virtues of the down draught firebox that burns the wood more or less in stages, so that there is no intense emission of volatiles that causes smoke in most other kilns.
So I am here again in Bangsan, in the Yanggu Porcelain Village, this time not as an artist-in-residence, as I have been in the past, but as a kiln building tradesman, a glorified refractory bricklayer. I have been tasked with the job of building a small kiln here that demonstrates that wood burning kilns can be fired with a minimum of smoke.
This project was first floated way back in 2018, when the director of the Yanggu Porcelain Museum and Research Centre, Mr Jung Do-Sub, asked me if I would be interested in such a project. The Museum had purchased the rights to publish my book, Laid Back Wood Firing, and had it translated into Korean. They have also published my other books ‘5 Stones’, and ‘Rock Glazes, Geology and Mineral Processing for potters’.
Unfortunately, The translator took someone else’s advice and renamed the book “Smokeless Wood Firing”. Which is of course not true. all wood creates some smoke when being burnt. My project is to keep the smoke to a minimum. Calling the book ‘smokeless woodfiring’ only creates false expectations, and room for criticism and disappointment.
As a result of the books’ publication, there was some interest in getting one of my kilns built at the Yanggu Research Centre as a demonstration model. Like other places in the world, There is a growing interest in cleaning up the environment, at least from the grass roots level, not from there polluting industries, who are being dragged kicking and screaming to be made to be kept to account. It is this citizen-lead interest that is putting pressure on political leaders to make some sort of gesture to seem to be doing something, while still taking large donations from the polluters to keep the status quo.
The result is a very slow transition to clean up the environment. The results can be seen here in this tiny, remote village. When we were last here before ‘Covid’, in early 2019. The streets were being dug up and gas pipe lines being installed to every home and business. Previously, most home heating and commercial cookery was being done using pressed coal briquettes. Dirty, inefficient and polluting. The immediate result is much cleaner air.
These days the smoke from the wood fired kilns looks just as polluting, now that the residents have paid to have cleaner gas installed, to eliminate their smoke, why shouldn’t the residents want cleaner air, and less smoke pollution from every source? The traditional kilns here are very smokey, producing black smoke all the way through the firing schedule, from start to finish, particularly at the end of the firing, when the extra chambers of the climbing kilns are being fired by ‘side stoking’ methods.
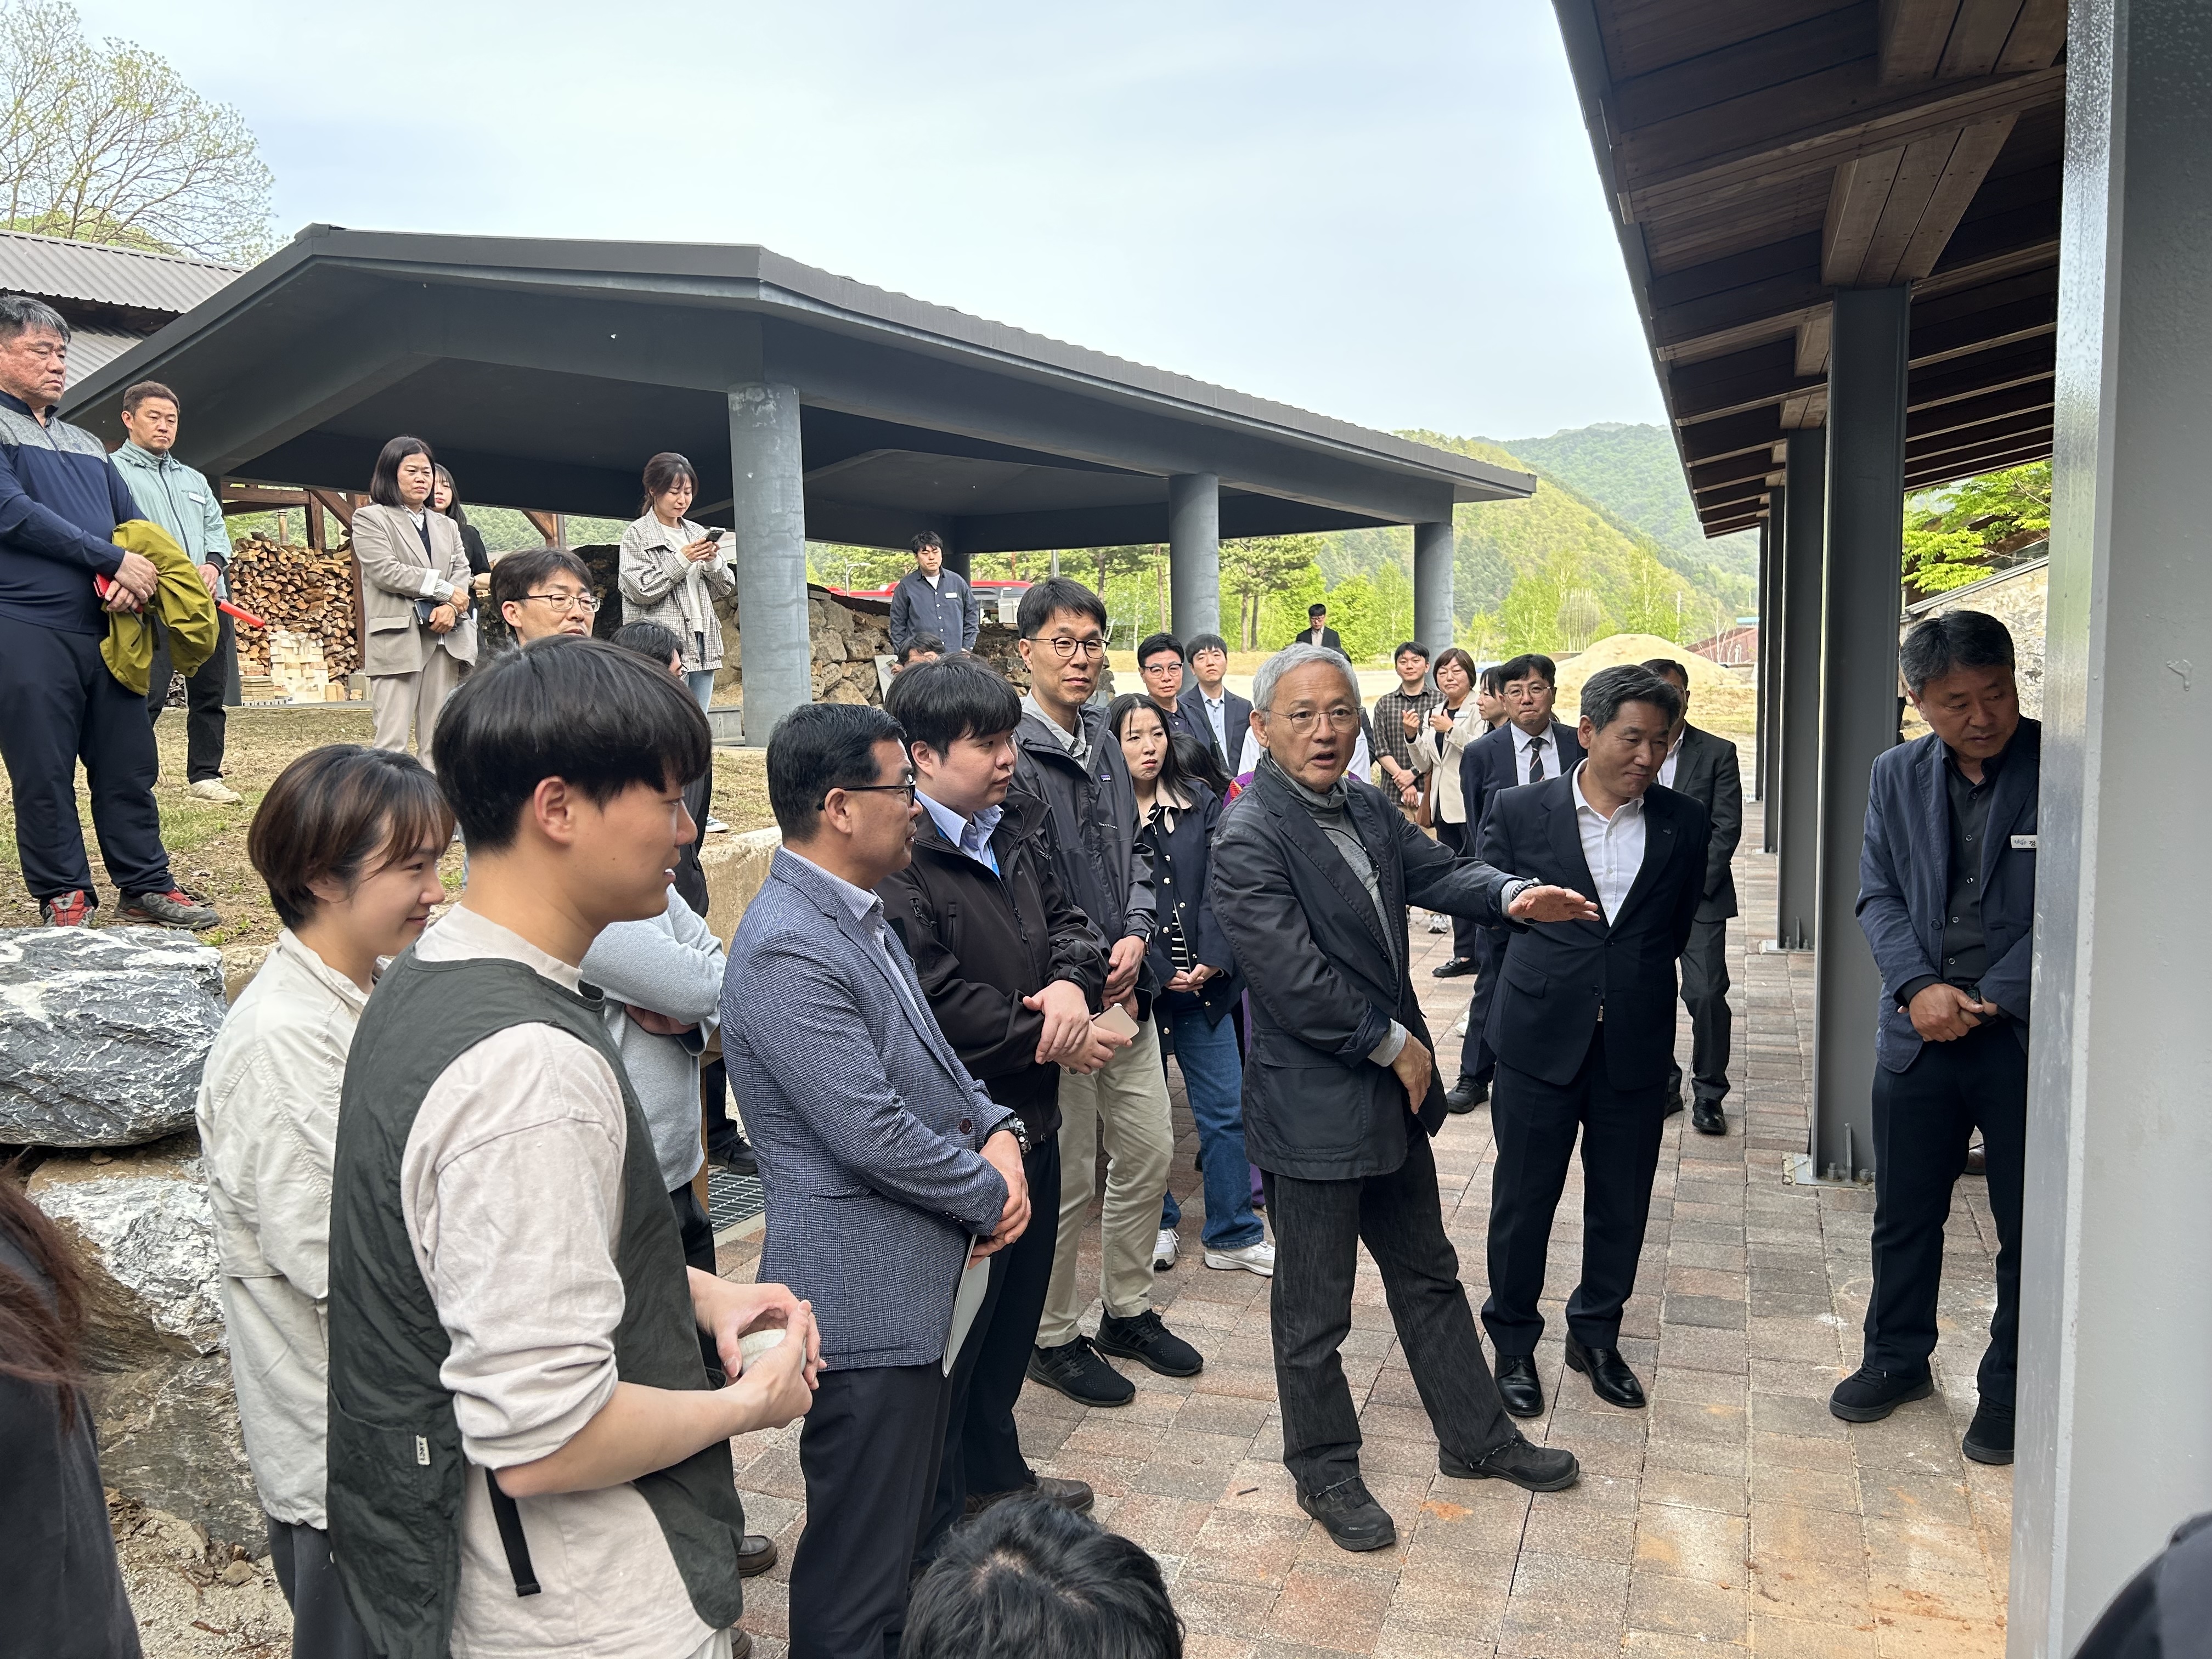
There are two climbing kilns here in the centre of the village behind the research Centre and Museum. One of them right next to an ancient kiln site, where porcelain has been made since the beginnings of porcelain making here, hundreds of years ago. With an ancient tradition of pottery making here in the village, using these old kilns going back many hundreds of years, it’s hard to suddenly say NO! Just stop doing it. So the Director of the Museum, was thinking a decade in advance of this possible occurrence.
He managed to secure access to an abandoned military base, a few kilometres out of town, up a small valley, well out of the village, where a new
Smoke from one of the traditional kilns here.
‘Porcelain Village’ is being built. When I first arrived here 8 years ago, in this new development, the buildings were still very new and my room still smelt of fresh paint, and all the facilities were still being installed in what had been the officers quarters. One of the stone barracks was being converted to a meeting room and coffee shop. The Museum director had big plans to build several different styles of kilns out here to add to the research facilities available to the students. That has since then, mostly all come to pass. However, the plan keeps changing and expanding and getting more complex. The Museum Director is a very smart guy, a good strategic thinker and politically very savvy.
The first kiln built up in the valley was a tunnel kiln. I didn’t see this kiln being built, as I have been away for 5 years because of the COVID lockdown, and then the huge catastrophic bush fires that burnt our pottery. It has taken me 5 years to recover, so that I could finally accept Mr Jung’s offer to come and build them one of my kilns.
The second kiln built here was a traditional low-firing, earthenware wood kiln, the design of which, originated in Jeju Island off the far South Coast of Korea. It is built out of basalt stones. The only available material on Jeju Island, so is limited to very low firing temperatures. A kind of tough earthenware. Hand made fire bricks stacked to dry in front of the Jeju basalt stones kiln
The third kiln built here was a traditional 5 chambered climbing kiln, built almost entirely out of hand made blocks and bricks for the walls, and hand rolled cones of local fire clay for the dome and arches.
Hand made clay cone shaped bricks set out to dry in the kiln shed.
The 5 chamber domed climbing kiln getting ready for its first firing
There are 3 independent, self contained workshop/residencies for artists and their families, and another building with 4 bedrooms and 4 studios, suitable for single student residents. Each of the studios has it’s own electric kin and pug mill. There is a huge communal clay processing and kiln firing building with 2 large gas kilns, and finally a very large conference/residence building that can sleep up to a dozen people with large multiple bathroom, toilets, and even a sauna and laundry.
As far as I can ascertain, all the residents/students here have already completed MA hons degrees from their university, and have come here to study for up to 5 years to gain their PhD in porcelain research. It appears that they get rent free access to all the facilities here and only have to pay for their gas and electricity bills. An amazing deal. Such great support for the Arts here! In exchange, they are expected to take part in communal activities like the making of the hand made fire bricks for the last kiln built here. or making the years supply of small test tiles for glaze testing.
There are plans for the local government to develop and sell off several privately owned and developed house and pottery studio sites, next to the research facilities. There may be up to 8 or 10 of these house sites. 2 of them have now been taken up, and buildings are currently underway. It will become a small porcelain village and creative community.
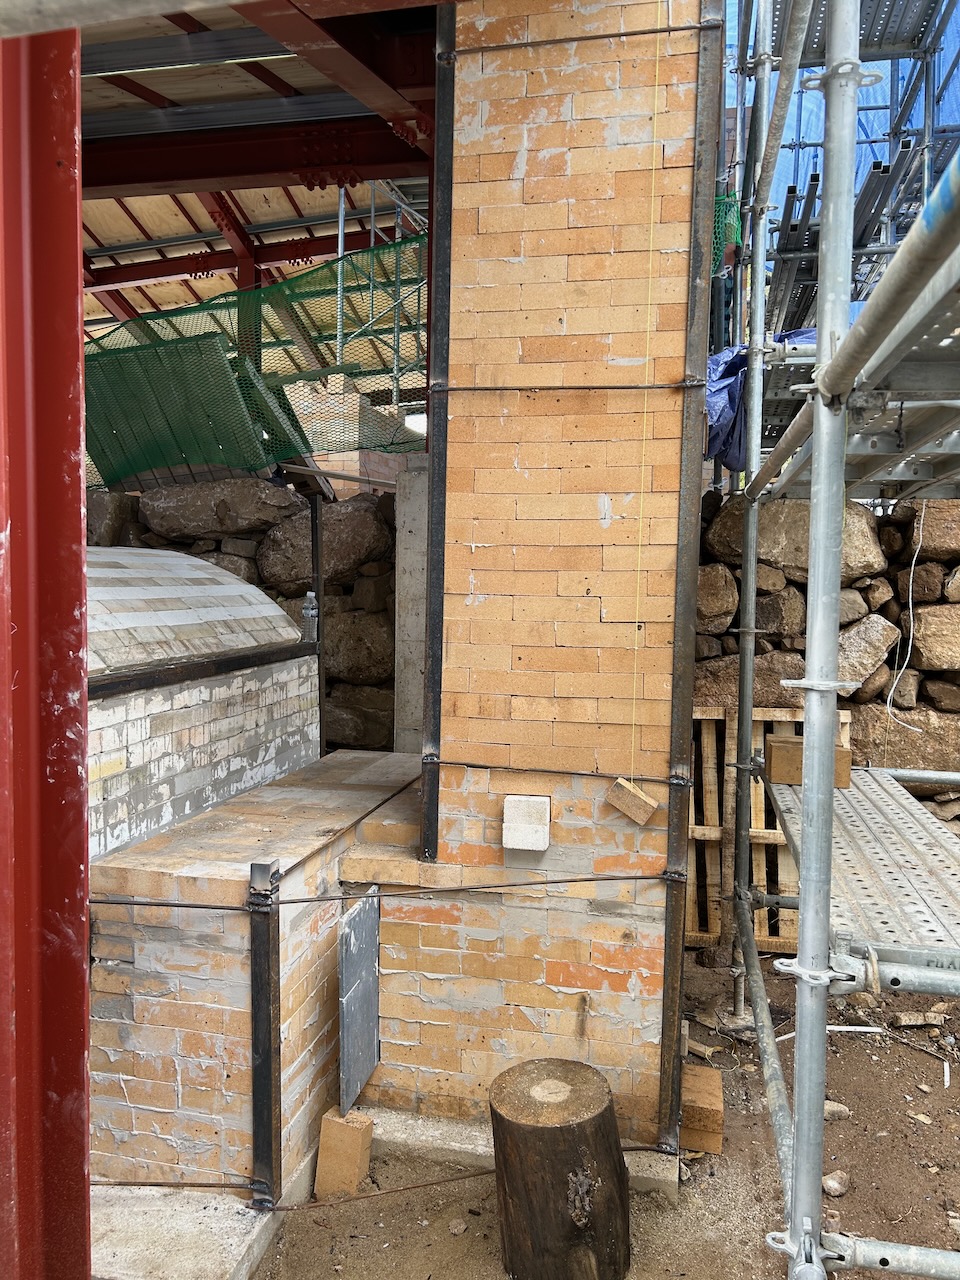
My wood fired kiln is small compared to the vast climbing kilns here. But it is actually quite a large kiln of 85 cu. ft. or 2.5 cu. m. Very large for a single potter to fill regularly in Australia. However, I expect that it will be filled by group effort here, just like all the other big kilns. Mine will be the 5th wood kiln to be built on site here. A demonstration model of what might be possible in terms of reducing smoke pollution in wood firing, while still achieving reduced stoneware wood ash effects.
I only hope that it all goes to plan, However, I am mentally prepared to accept some smoke, as all the wood here is very dry pine, that will burn intensely, so I will have my work cut out to get a good clean result. I will be severely embarrassed if it all ends up going pear shaped in the firing. So far the kiln looks good and is built to the specifications that I usually rely on when designing similar wood kilns. But knows what will happen when I fire it with very dry pine fuel. I can only guess, but I imagine that there will be some smoke.
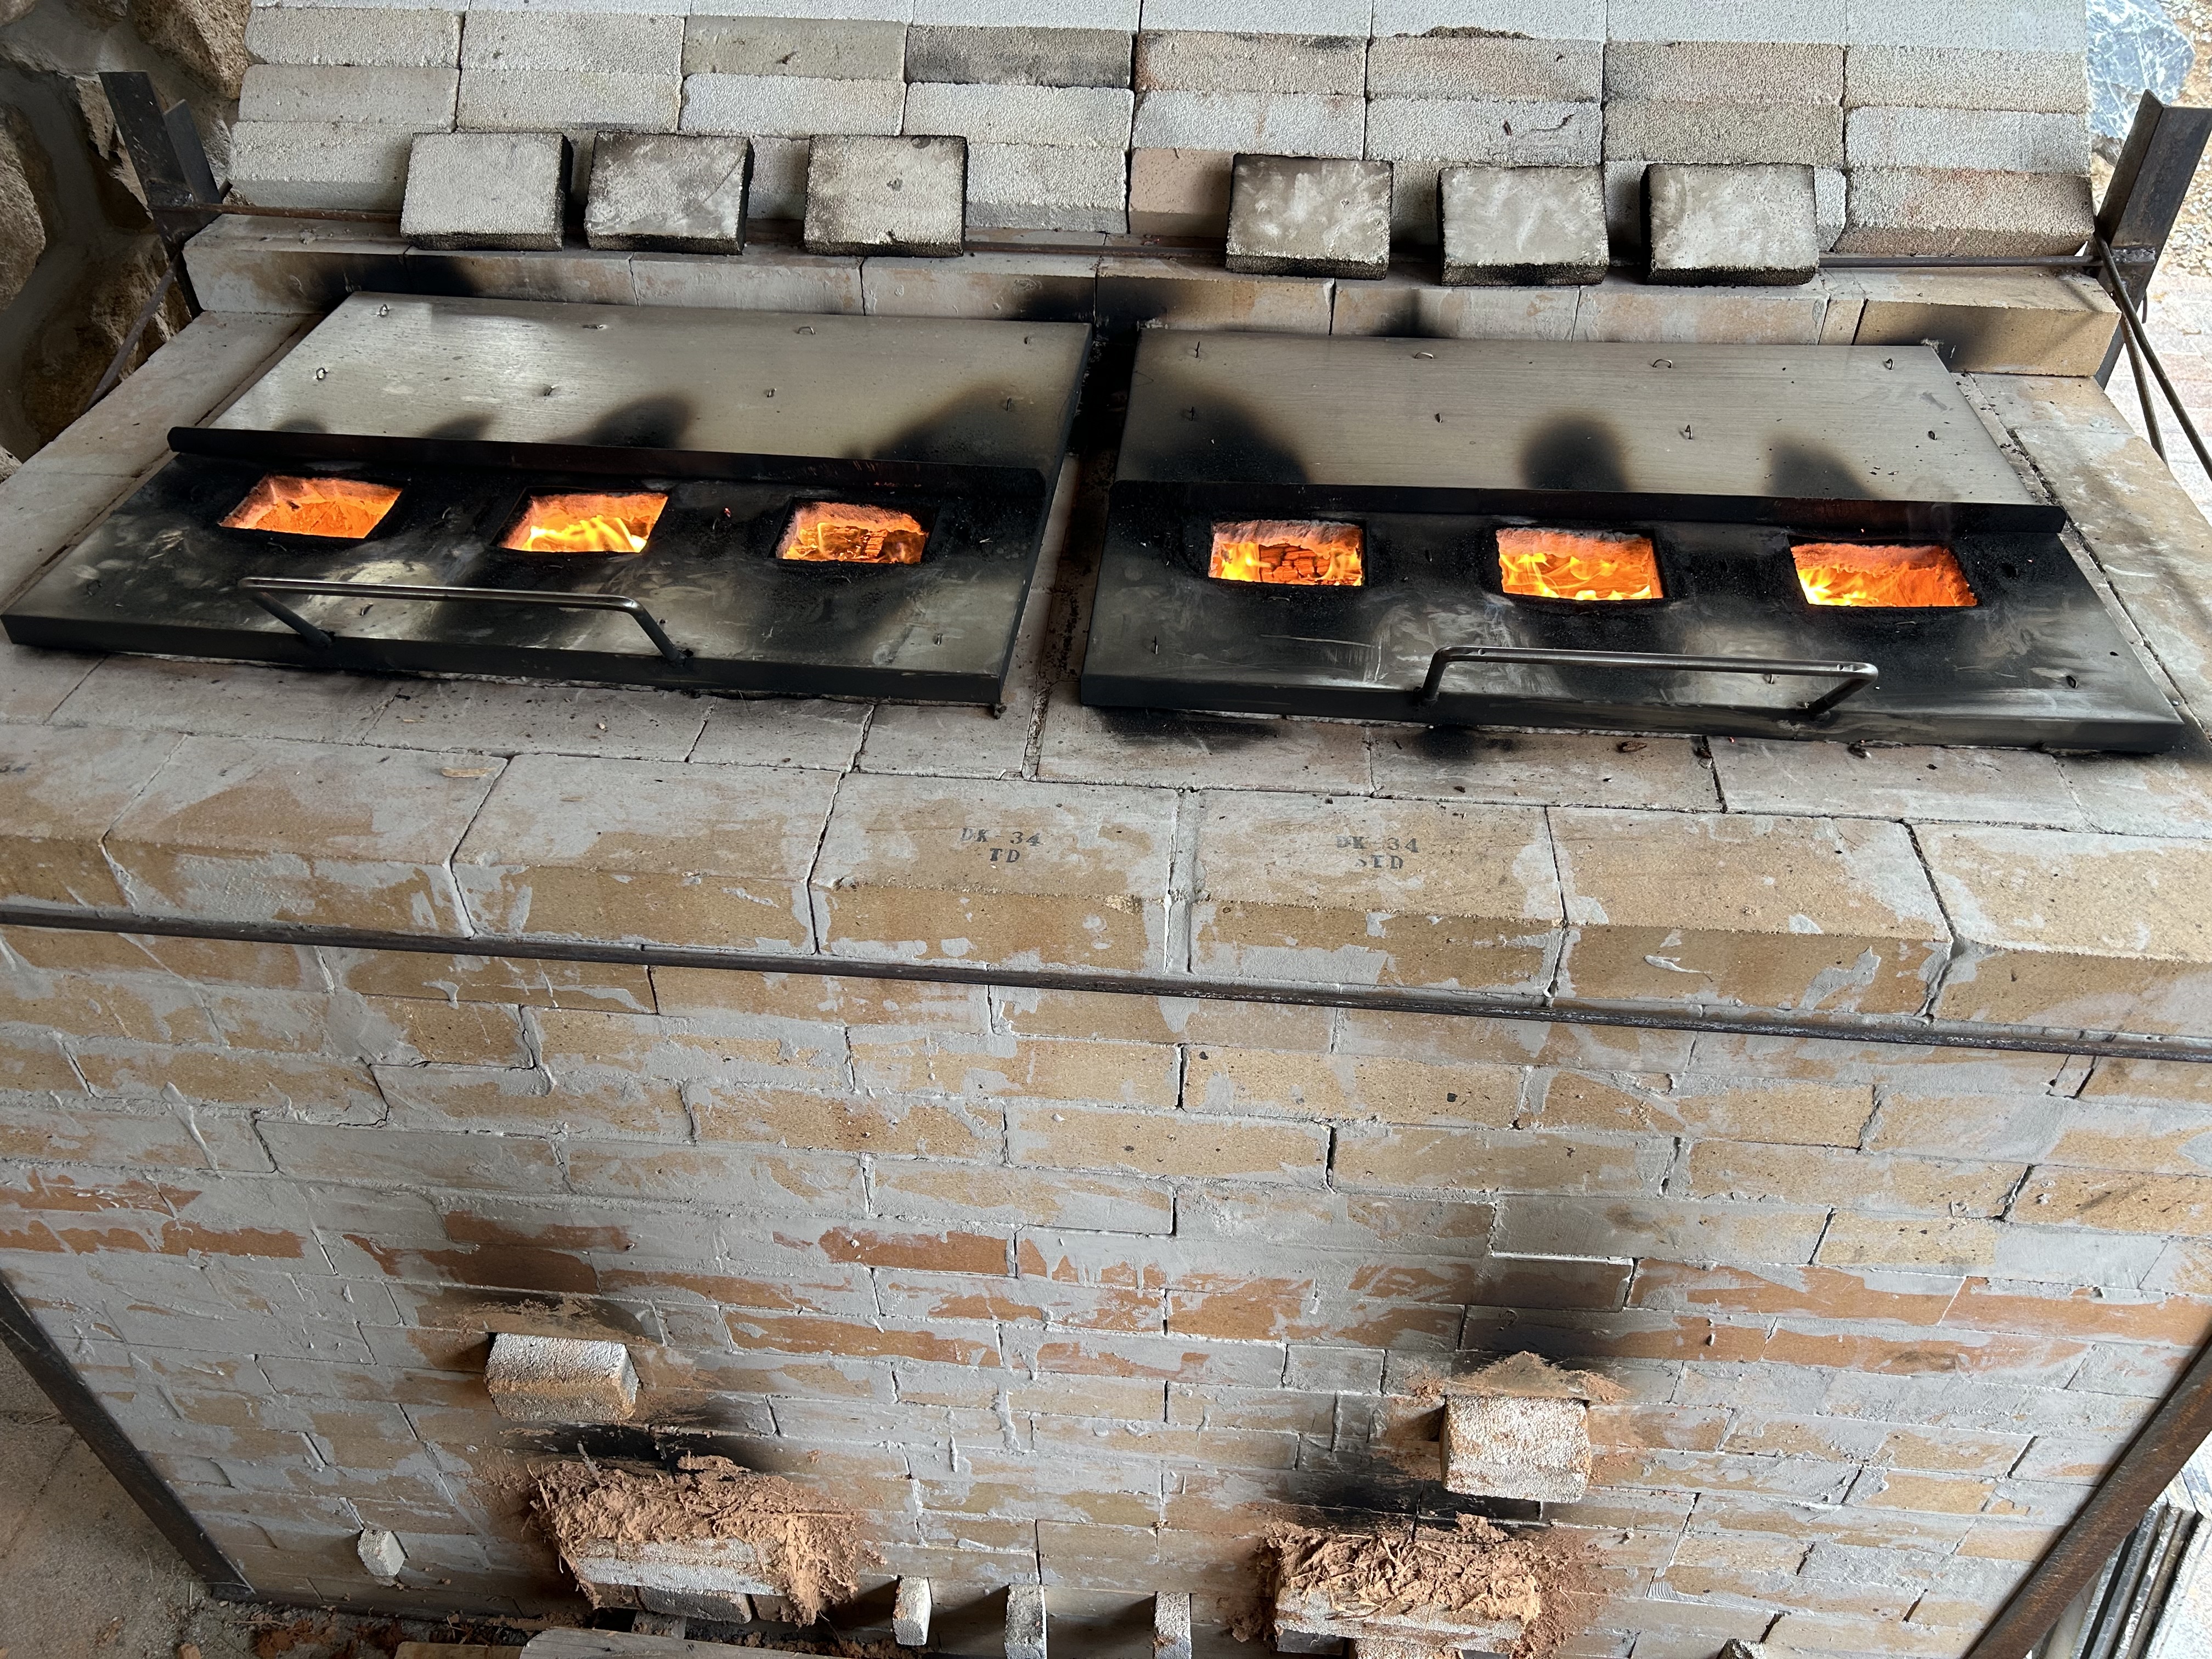
My finished kiln with 2 Bourry style downdraft fire boxes side by side. Ready for K-pot firing. I have to wait and see what my decisions were like.
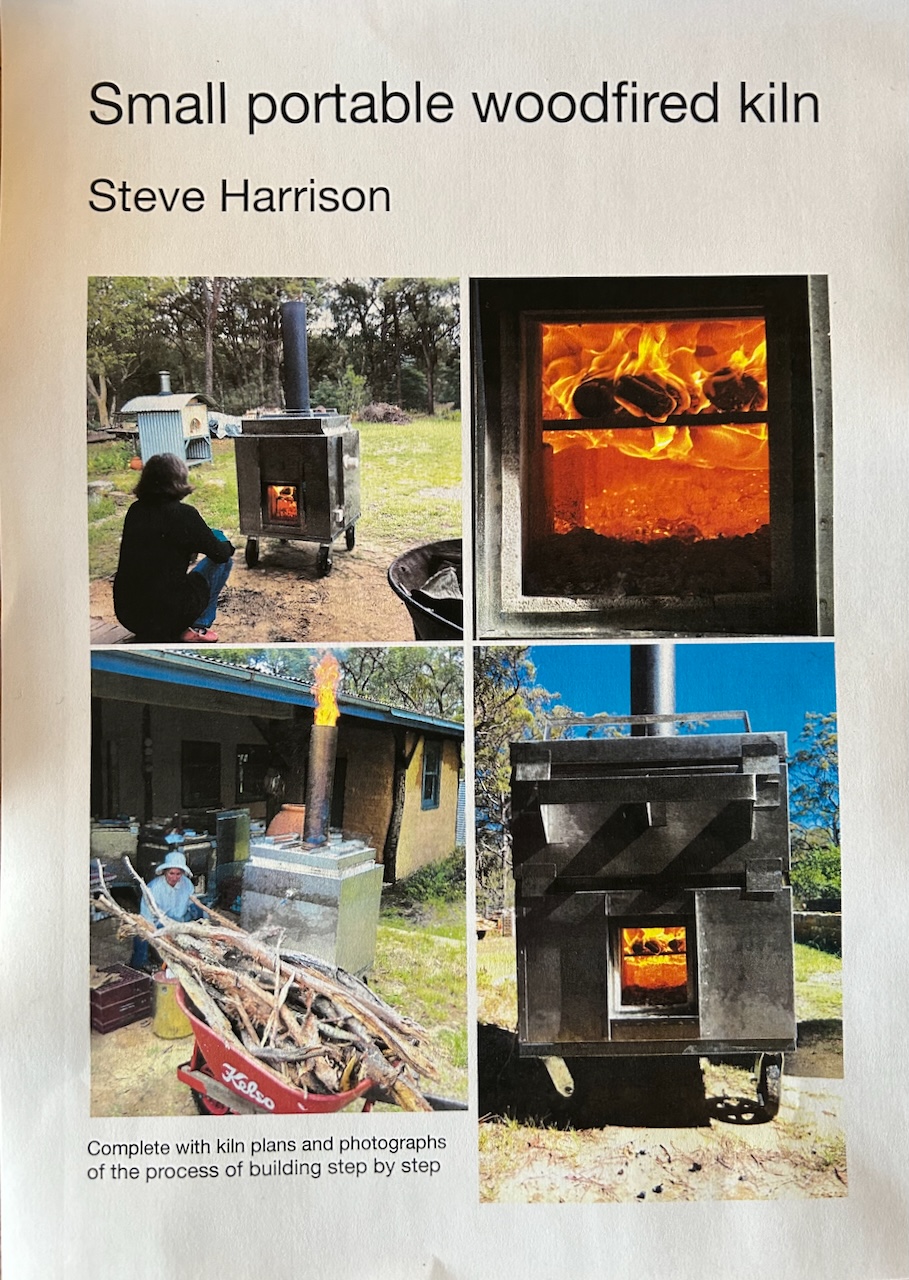
I have a new book available now on the topic of my Small Portable Woodfired Kilns.
I have been working on this book for some time. It was started before 2019.
However, I was so caught up with the clean-up and then the re-building, after the catastrophic bush fire that destroyed our place, that I was not able to get back to the book until recently.
I get at least one email every week enquiring about my blog posts on the topic of these little portable wood kilns.
They seem to have the potential to become very popular, given the number of enquiries that I get about them.
Before the fire in 2019, I used to build and sell these little beauties. I used to build 10 or 12 of them at a time, in big batches, to make it most efficient and to keep the price down.
It turned out that I had quite a bit of descriptive writing about them, mostly cobbled together from my blog posts, but, I needed to do a bit of technical drawing to draw up the details of the two final designs, including the dimensions. The plans were never properly drawn. I just kept on adapting the previous plans by hand as the ideas flowed into reality, developing kiln by kiln.
Finally, I spent some time trawling through my photo albums to extract all the step by step images that I needed to illustrate the text fully with the detail of information that a keen amateur kiln builder/hobbyist might require to understand the full process of assembly.
During the decade that I spent developing these little kilns, I started from a very basic first attempt, and slowly worked on the design, improving it and polishing it. over several years and 12 iterations. I finally ended up with two different kilns, both good, but slightly different. One smaller, and the other larger. These little gems are capable of firing to stoneware, cone 10 in just a few hours.
Our fastest firing to stoneware was 2.5 hrs, using just one wheel barrow of sticks. However, I think that the results are better at around 4 to 5 hours and 2 to 3 wheel barrows of sticks. All the details are in the book.
Janine and I are recently returned from Korea where we were invited to take part in the Mungyeong Ceramics Festival, where I delivered a paper to the ceramics conference there about low impact wood firing.
My paper concentrated on my research into small down draught fire box design, intended to minimise smoke and pollution as much as possible. I also presented my current work on afterburners and scrubbers to try to minimise particulate pollution from our kiln chimneys.
I believe that these topics will become more important over time as Global Heating and carbon in the atmosphere starts to become obvious and difficult to ignore. Even to conservatives.
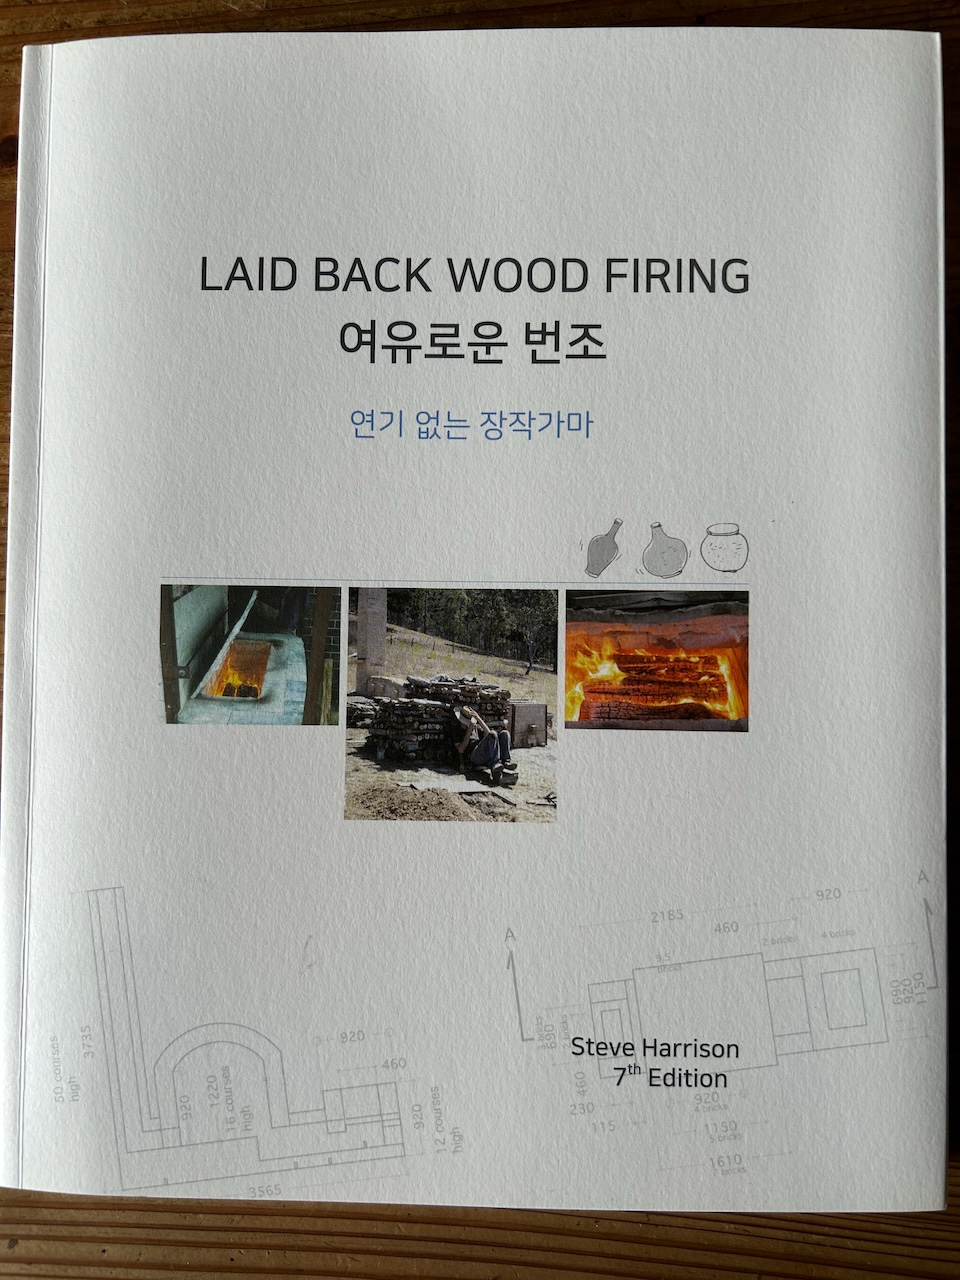
My paper was well received and I got some good interrogation during the question time afterwards. My book ‘Laid Back Wood Firing’ was translated into Korean about 5 years ago and has been available there for some time, so some people there had read it and were up to speed with the concept.
Janine and I will be returning to Korea later in the year to build one of my small Bourry Box kilns as a demonstration of how it can work. It will be built alongside several older traditional wood fired kilns. They are interested to compare the smoke from our firing and also the fired results afterward with that from the traditional kilns.
The most recently built, traditional, multi-chamber kiln was fired while we were there. It smoked all the way through the firing. I’m pretty sure that we can do better!
Its a really beautiful kiln to look at, and is constructed using the very old method of using cone shaped hand made ‘bricks’.
The cones were all made on site by the students/residents in the ceramic research centre at the Yanggu Porcelain Village.
The use of cone shapes allows for a rather nice dome shaped top or 3D arch over each of the fire box and 4 chambers.
The freshly built kiln took just 24 hours for it’s first firing – all 4 chambers to stoneware, absolutely no technology was use. No pyrometers or cones, just an experienced firing crew and home made draw trials of glazed tiles pulled at 30 minute intervals after orange heat.
This kiln was so new, it was still wet, and steam was coming out of all the cracks all the way to top temperature.
Side stoking is always a dirty business. Hard to get around that. It’s the nature of the beast.
That is why I have chosen to build a single chamber bourry box fired kiln as the demo model.
It will be a larger sized chamber, so I have designed it with 2 fireboxes side by side.
Only time will tell if it works the way I intend and if it impresses them.
When you are in Seoul and the air quality is rated as ‘fair’, but you can only see for 1 km through the smog. I makes you think about what a bad day might be like. Smoke from wood firing is not the big problem in the scheme of things.
For those people who attended the recent Zoom ‘Earth Friendly Kiln Firing’ webinar and want to learn a little bit more about what we do, here are a few links that you can follow up on this blog.
You can type in the following key words into the search box in the top right hand corner and there are posts and articles that you can read.
Small portable wood firing kiln
Slower, Smaller, Quieter. Towards A Local Terroir Based Life and Aesthetic
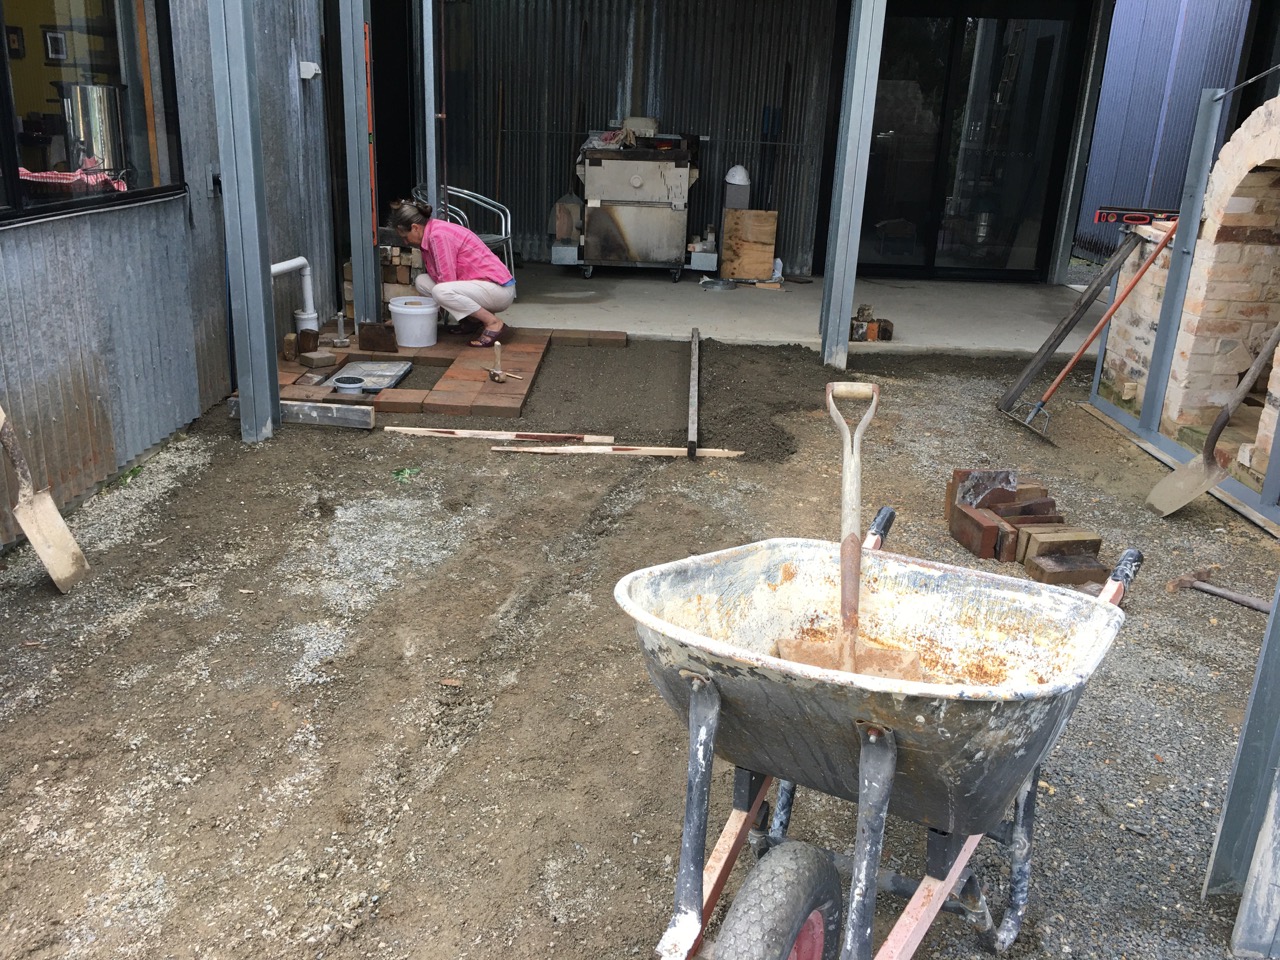
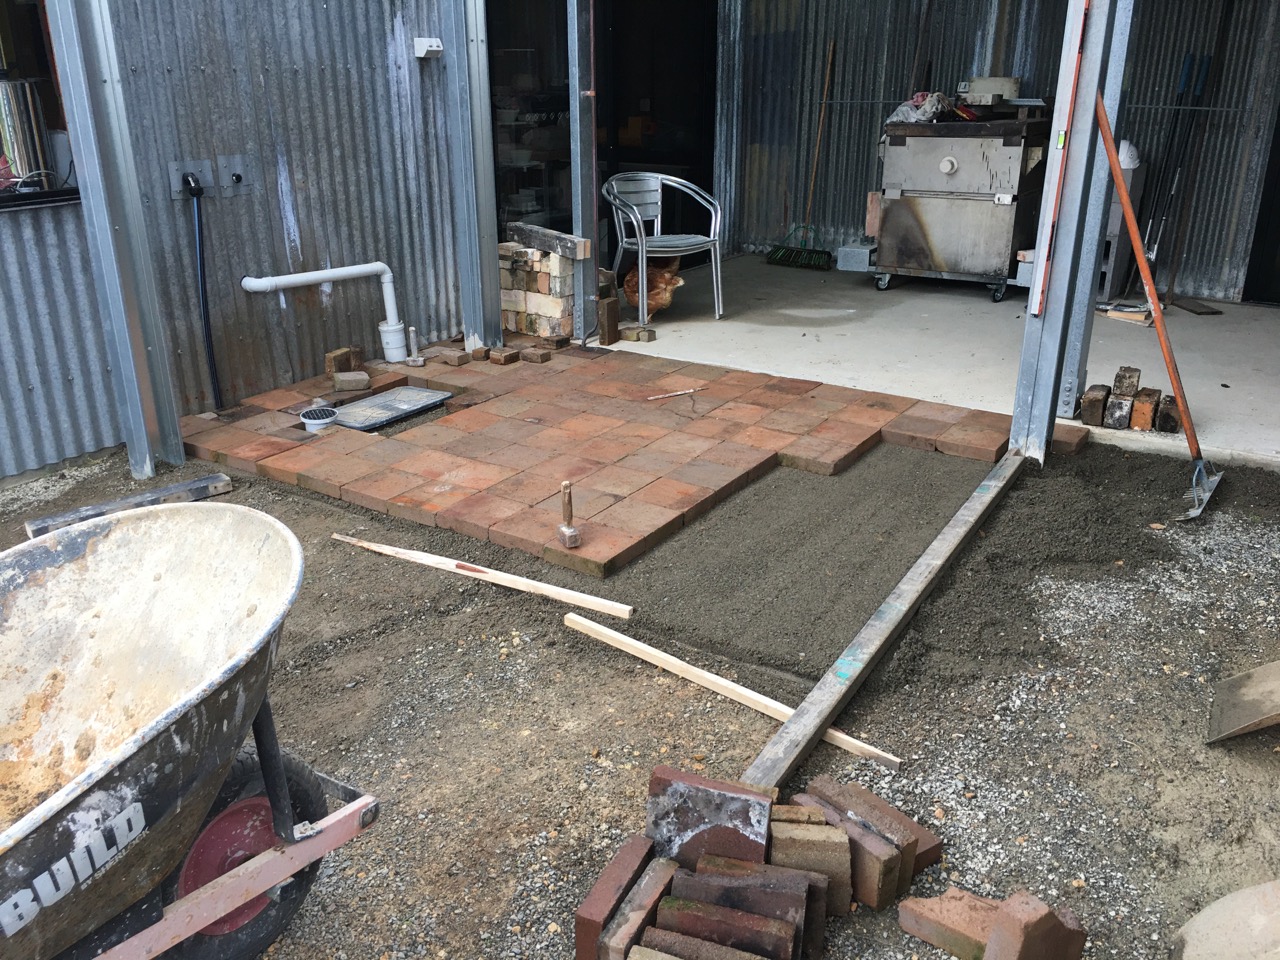
We were busy last weekend with a bunch of friends paving the court yard area around the new, almost finished, wood fired kiln.
I still need to finish laying the last of the floor bricks in the chamber, I would have finished this small job a couple of weeks ago, but when the court yard flooded with 70mm of water sloshing around in there. It wasn’t very appealing to be kneeling done and doing the bricklaying. Then all that water was sucked up into the floor bricks like a wick and they became saturated so that any new mortar wouldn’t stick in place. Finally, they have now turned green with algae. I’m sure that they will dry out – eventually!
This severe weather event, although not life or property threatening for us, like it has been for our friends and relatives up on the North Coast. It has been a good warning and trial run for what we can expect in the future as Global Heating increases unchecked. No one in government seems to be taking this seriously, so what can we expect for the future? Well my guess is more of the same, only much worse. We’ve been warned.
So this extreme weather event has been a great warning to us as to what we can expect in the future. I have learned from it and and I’m taking actions now to limit the sort of damage that very heavy rain fall can cause. To start with we have paved the kiln area with a significant fall away from the kiln and out into the open. I have also ordered some more steel batons and some more poly carbonate roofing sheets to wall in half of the courtyard directly behind the kiln. With contour drainage to take the water to the edge of the retaining wall. Although the pottery didn’t flood, it has become obvious that we need to create a dish drain around the front of the building to carry all the excess ground water away from the front of the building, because another event will eventually be worse.
This is a start
Back at the kiln, I also need to fabricate a stainless steel firebox lid and a stainless steel chimney flame tube incorporating a spark arrester. I planned to have started this job already, and 3 weeks ago, I ordered the Stainless steel sheets and some Stainless steel wire mesh for the spark arrester. The sheeting is here, but the couriers have lost the SS mesh. The supplier won’t replace it until he knows what has happened to the first order. The courier company won’t pay out to replace it until they know what has happened to it. So I’m stuck in a catch 22 situation. I can choose to wait it out until the original order is found and delivered, or buy a second sheet of stainless steel mesh and get on with it, but it’s not cheap stuff, so I’m waiting and continuing to write emails of enquiry.
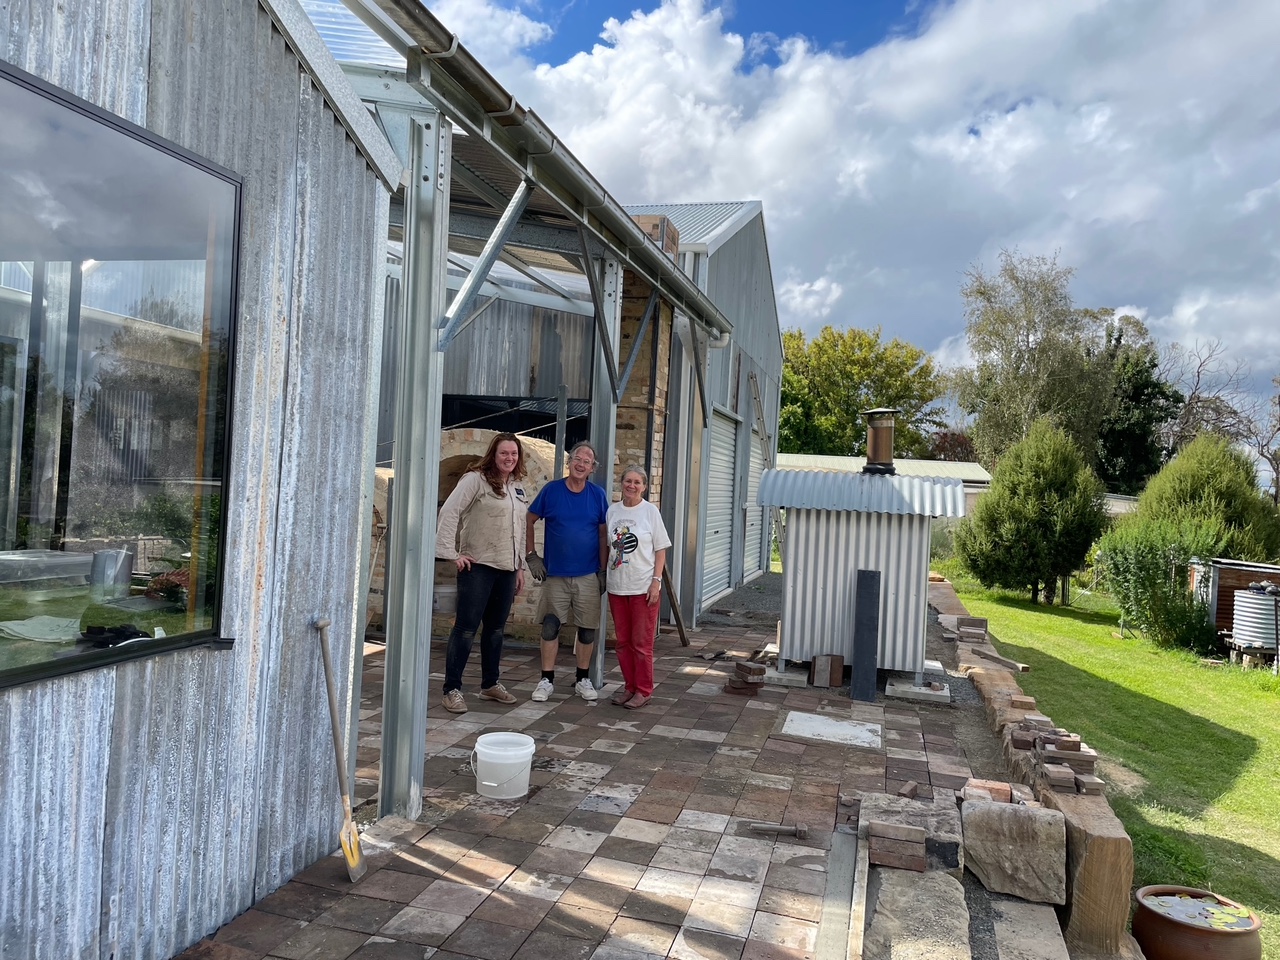
We had a great weekend with our friends laying the paving tiles. We also met two new people who volunteered and turned up all the way from Newcastle, who will surely become friends now. They were a great addition to the group. The stayed over night with us and we got to know each other over a home grown meal from the garden. I had previously made a big pot of tomato passata from the last of our tomatoes, so we had an easy meal of pasta. Dan and James are environmental campaigners and organisers, so we shared a lot in common. James took this image of Dan, Janine and me standing on the new paving.
Dan, Steve and Janine. image by James Whelan
This is all great progress and I’m really happy to see so much getting done.
Janine and I started the levelling and paving earlier in the week. As a trial run, to make sure that everything would work out the way that I planned. As we haven’t done any paving since we built the last pottery shed in 1983, I’d completely forgotten what to do and had to re-educate myself and get my skills back up to date. It’s not rocket science, but does need concentration and quite a bit of back bending work. I decided that at my delicate age, I should not do so much bending and instead get the knee pads on and work down on my knees to keep my back straighter. This worked out much better. But then getting up became a bit of an issue.
Starting the paving, getting our levels sorted out and learning how to space the pavers to allow for all the different sizes to fit together evenly.the courtyard paving complete
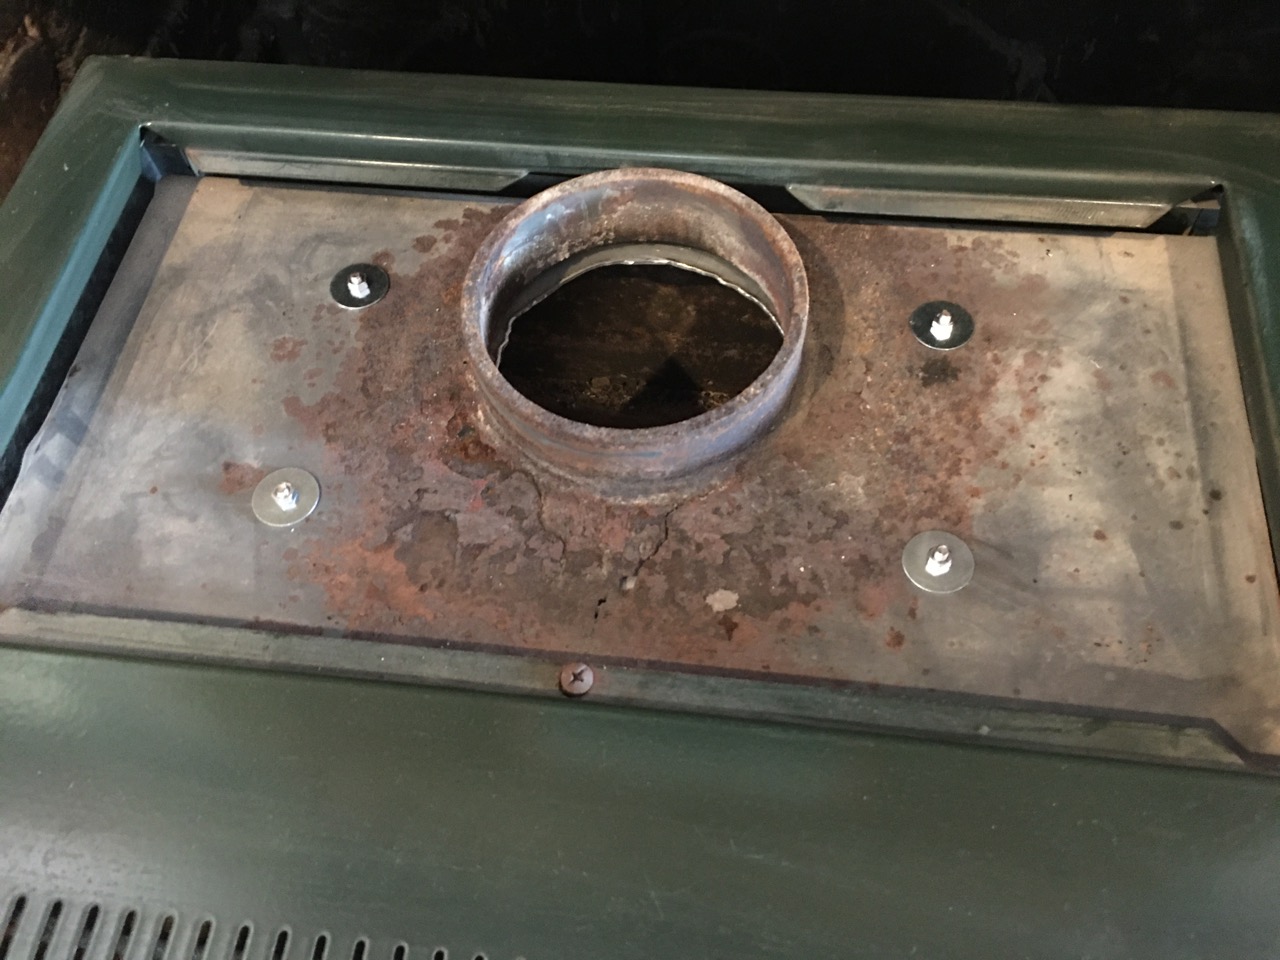
As we are in Autumn now and the weather is getting cooler and the days shorter, we have thought that we may need to light the fires in the kitchen and lounge room soon. The slow combustion heater in the lounge has started to wear through and rust out in the top fire box steel sheet. A crack started to appear at the end of last season, so I made a mental note to repair it once it cooled down, during the off-season, well that time is running out now, so it has to be dealt with as a matter of urgency. I decided to attack the problem by fabricating and new roof for the firebox out of a scrap piece of 2mm thick stainless steel sheet.
The new Stainless steel fire box roof sheet ready to installThe new firebox top bolted in place
Rather than try and weld it in place, which wouldn’t really work very well , as stainless and mild steel have different rates of expansion and contraction. I decided to bolt it in place with stainless steel bolts through over size holes and oversize washers. This should allow for the differences in expansion. The 2mm thick stainless roof should last as long as the 4 mm mild steel walls and whats left of the old top sheet. Time will tell. The stove is about 30 years old, so it has proved it’s worth. I’ll continue to work on it and preserve its life for as long as I can. We bought our slow combustion kitchen cooker over 40 years ago now and it was 2nd hand then. I’ve managed to keep it going all this time with home made adaptations and ingenious improvised repairs. I’m proud of that achievement and I’m hoping to extend it to 50 years if I can.
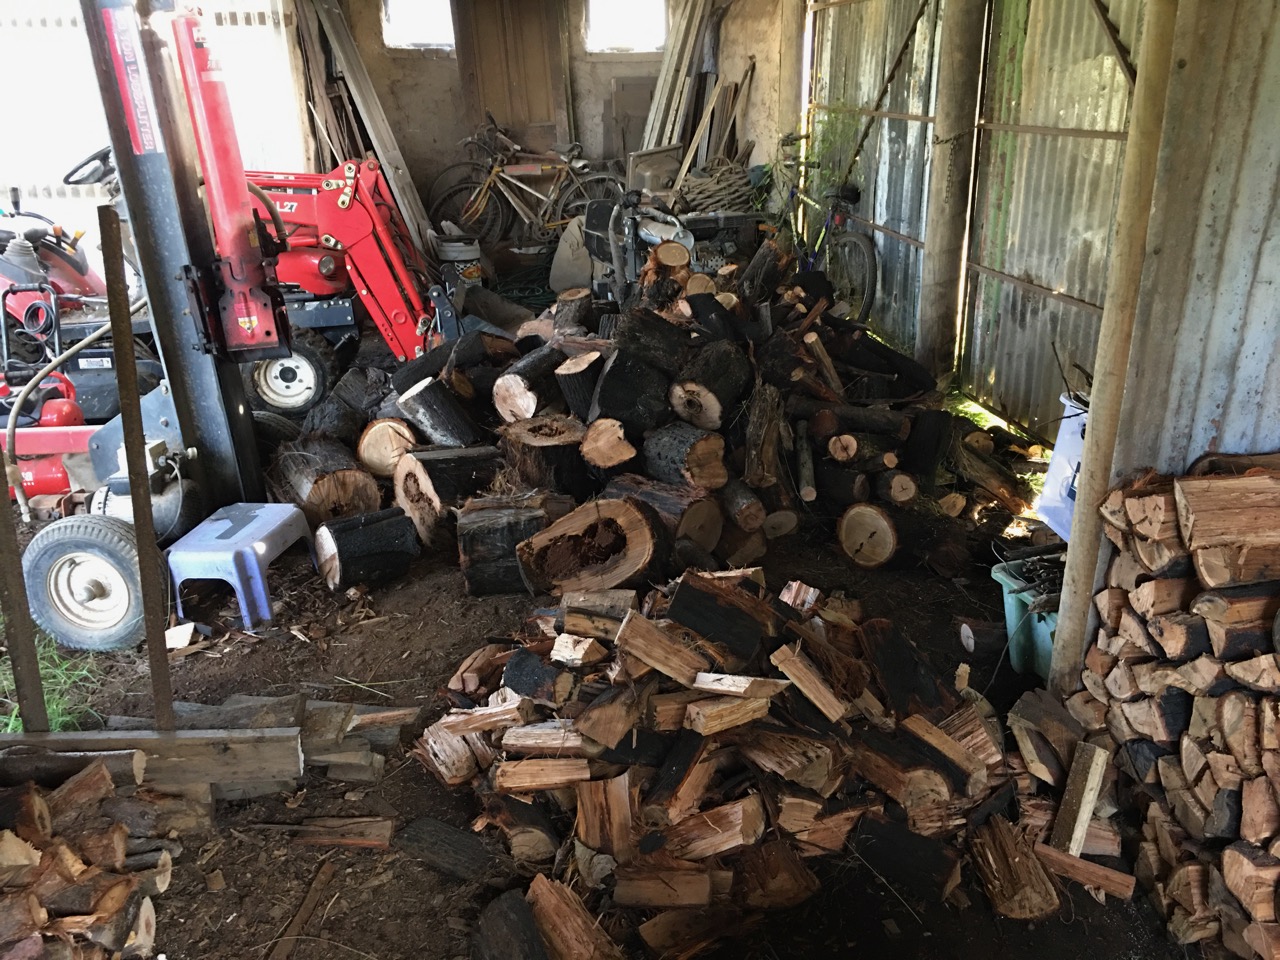
While I was at it, working on the lounge room heater. I also made a new front door frame seal. Afterwards, we went out into the paddock and spent an hour together with chainsaws cutting bushfire devastated and blackened logs. We cut them to stove lengths and stacked them in the wood shed ready for splitting. This will be about 1/4 to 1/3rd of the fire wood that we will get through the coming winter months.


You must be logged in to post a comment.