We are finally back at work in the pottery. Proper work.
There was still so much to finish off in and around the pottery. We have been trying to achieve the impossible.
To rebuild in a few years what it took us 40 years to build up over a lifetime of potting, collecting and restoring.
There is still a lot to do, but most of all the pressingly urgent stuff is complete and in place. The extraction hood over the electric kilns was the last really necessary thing.
I am currently working part time on a flame combustor, spark arrestor and scrubber for the top of the wood kiln chimney. That will be completed in the next few months in time for the cooler weather and the first wood kiln firing of the season.
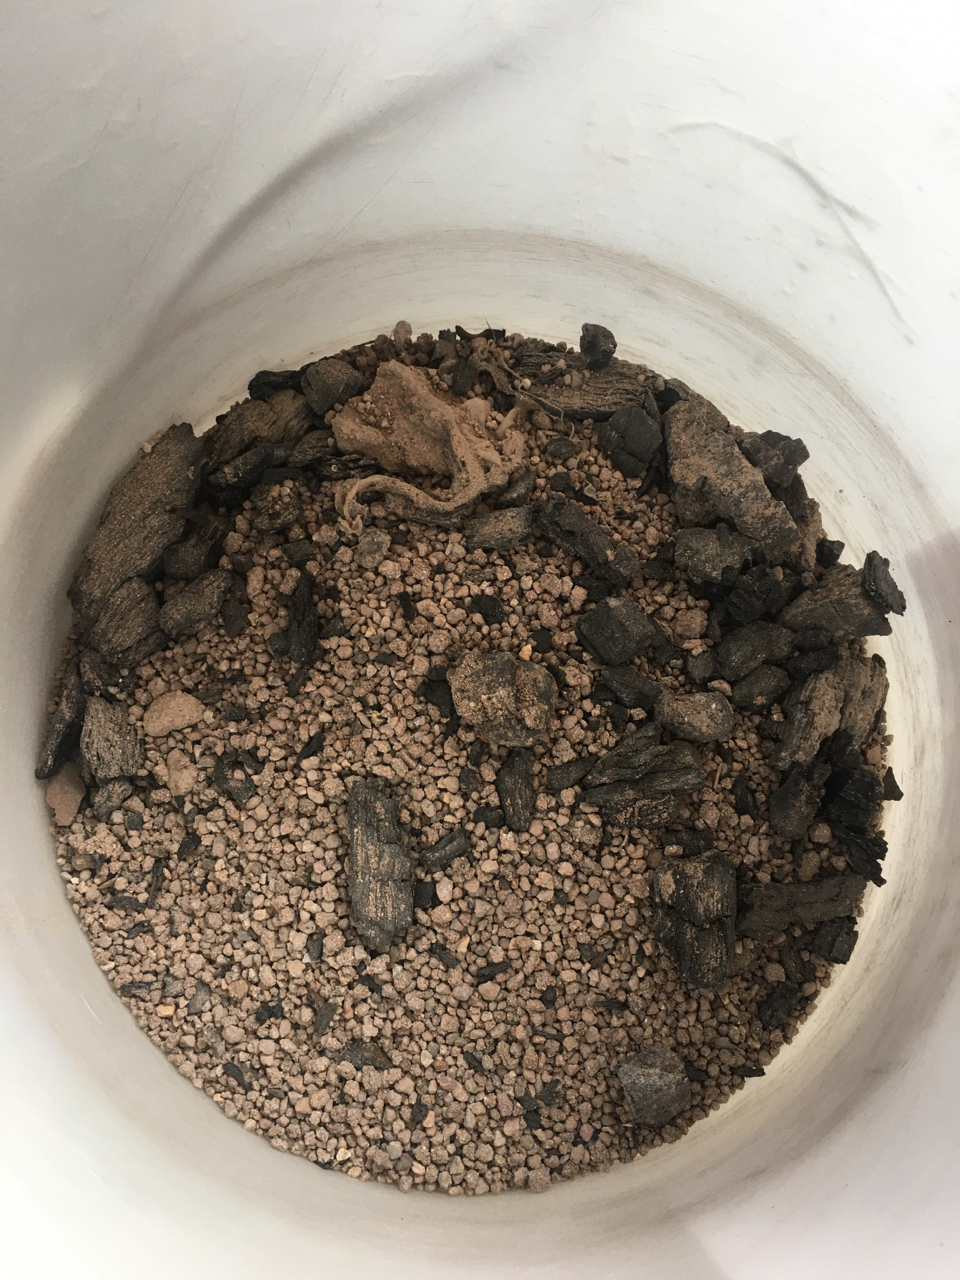
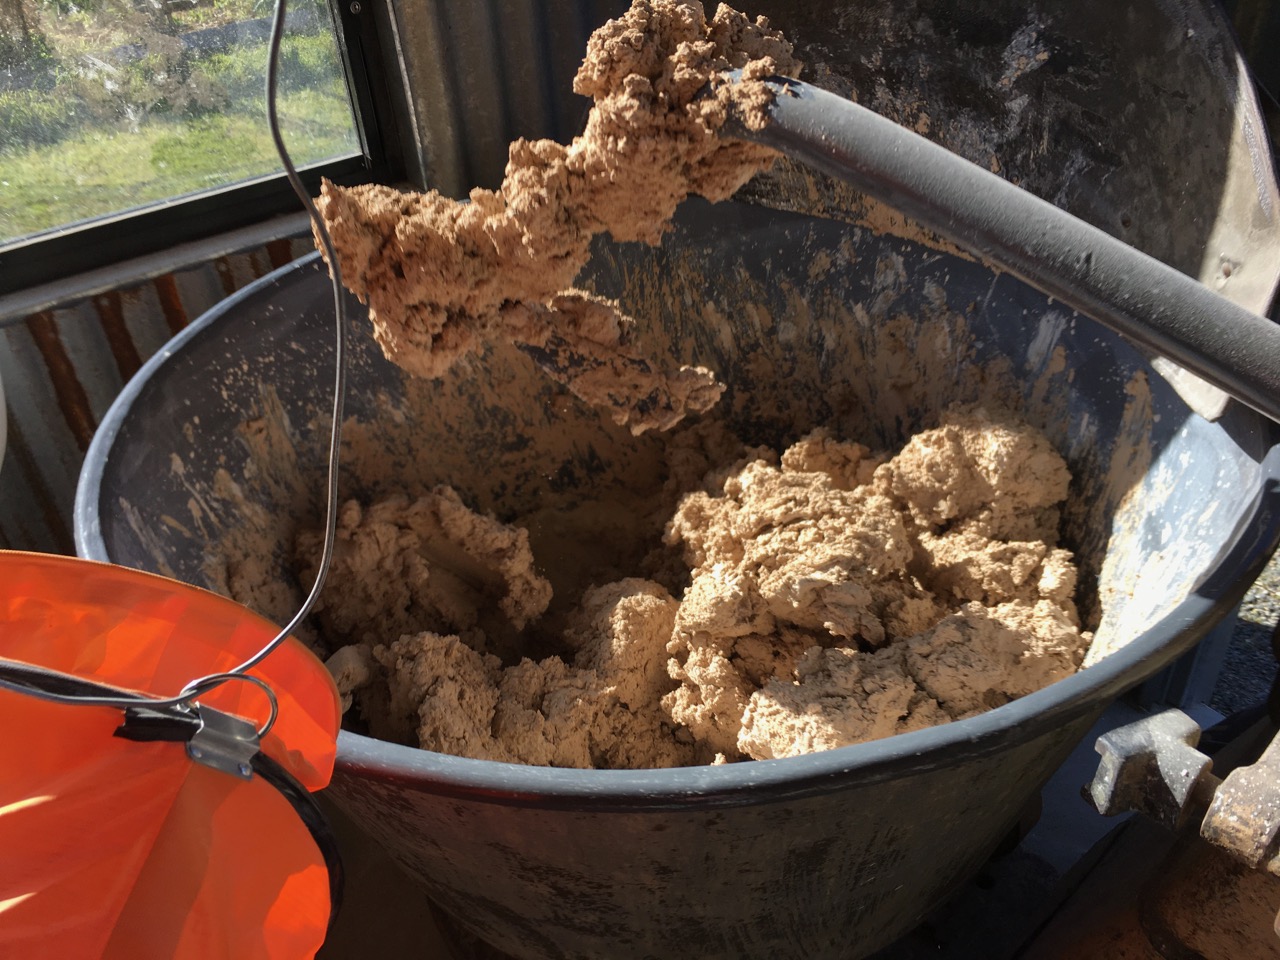
This week I made up a batch of rough stoneware body made from crushed shale. I had to spend some time crushing and sieving the shale. I have had this stuff for some time. It had come through the fire and is full of charcoal from the fire. It wasn’t too arduous, as it was only through a coarse mesh.
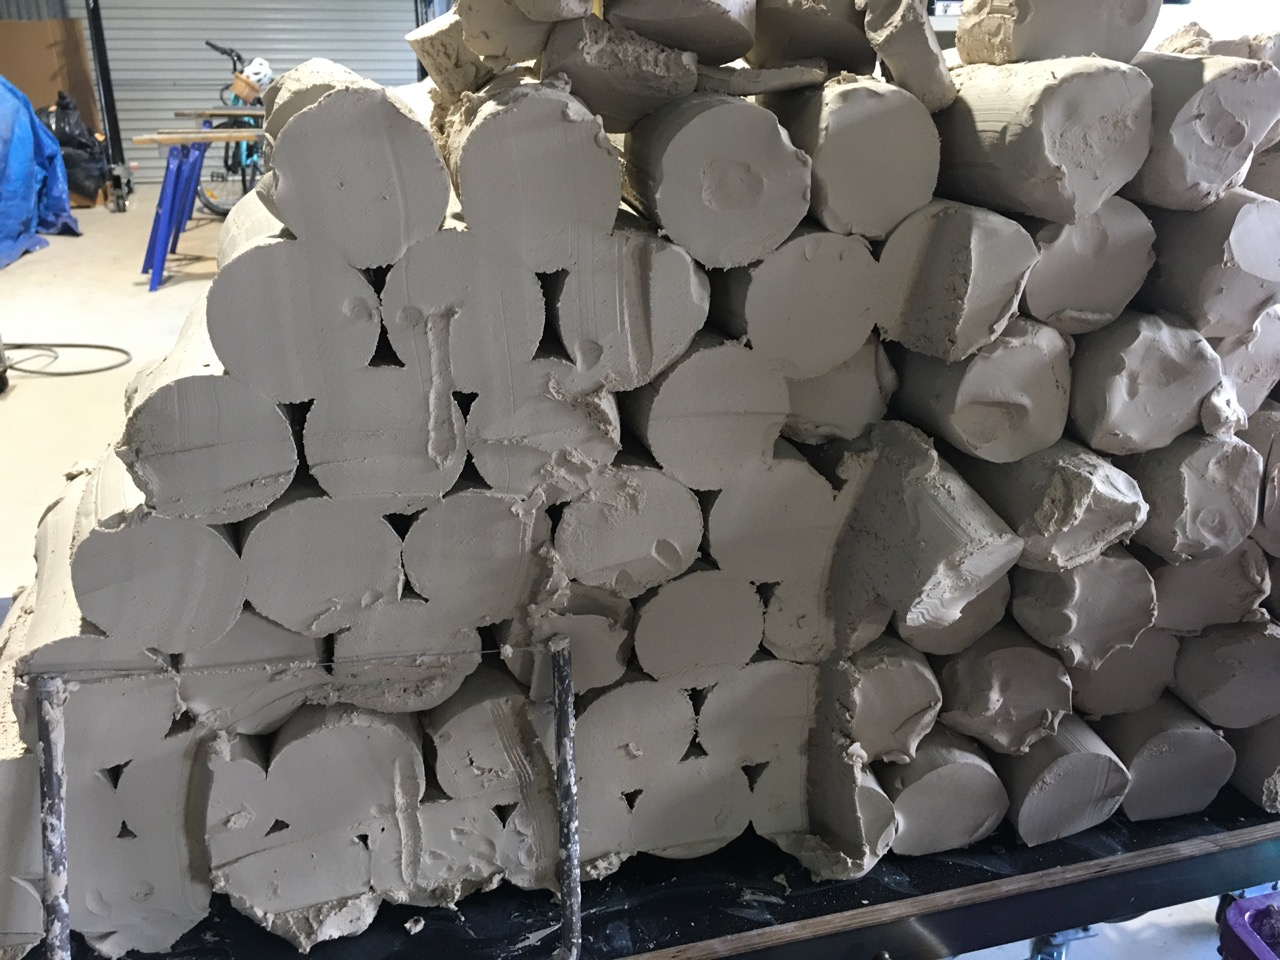
After mixing the two x 125 kg batches of body, we pugged all the clay twice. Once all through the pug and then stacked on the pug table in a pyramid stack. We then cut off all the ends of the sausages and re-pug it all another time, such that each sausage that comes out of the pug is comprised of a mix of all the previous pugs of clay. This is to ensure that there is very little variability from the first to last sausage of clay.
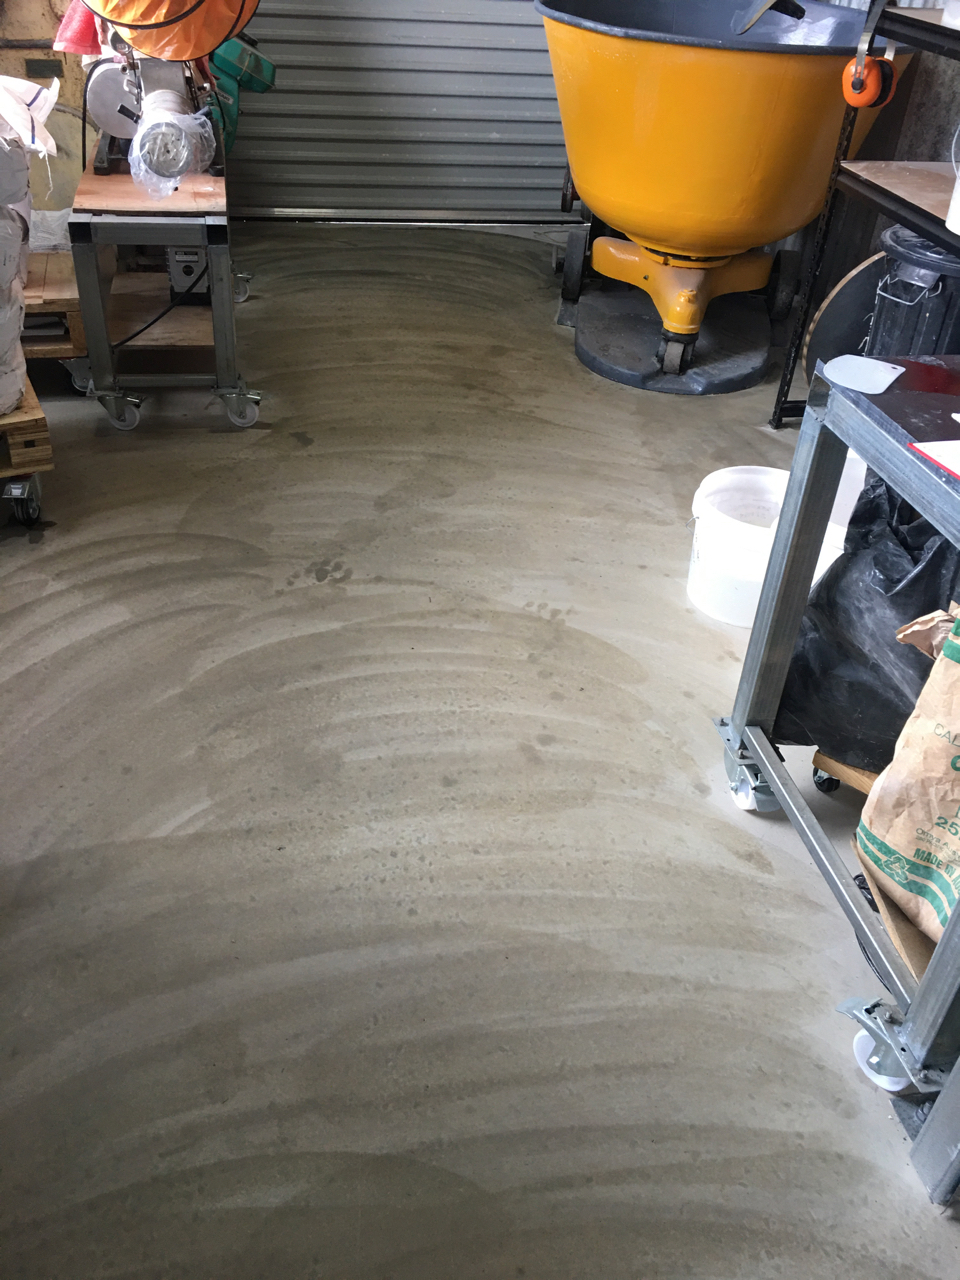
After finishing up, the pug mills and tables are all washed and wheeled out of the way and all the floors are wet scrubbed and mopped to clean off any small amount of clay that finds it way onto the floor, which it inevitably does. The floor is scrupulously clean all through. All the clay is bagged and boxed. Everything ship shape.
This is the best pottery workshop that we have ever had. Having been burnt out 3 times over our careers. I have designed and built this 4th workshop/studio with every piece of equipment on wheels to facilitate flexibility and cleanliness.
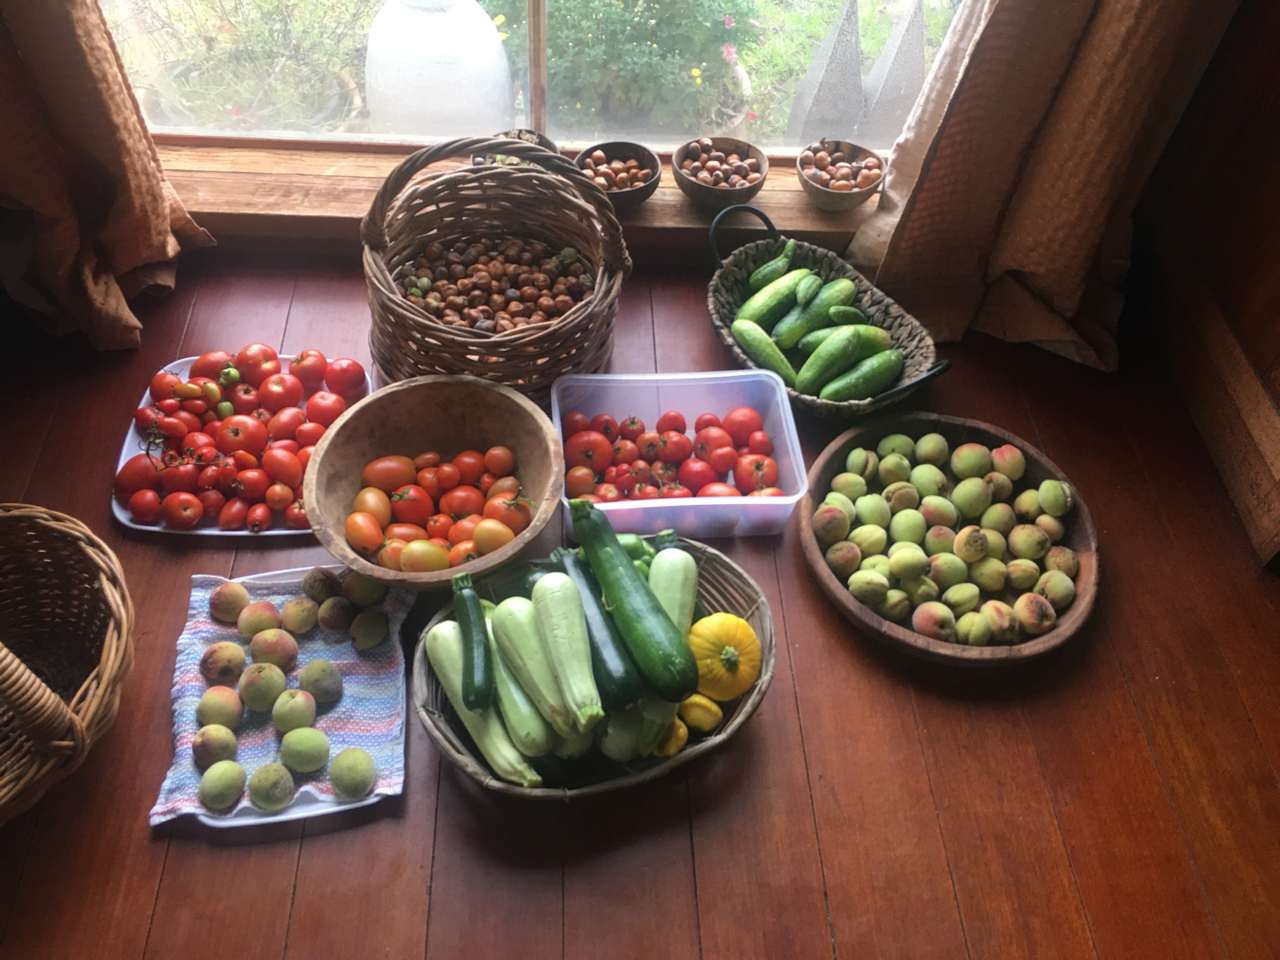
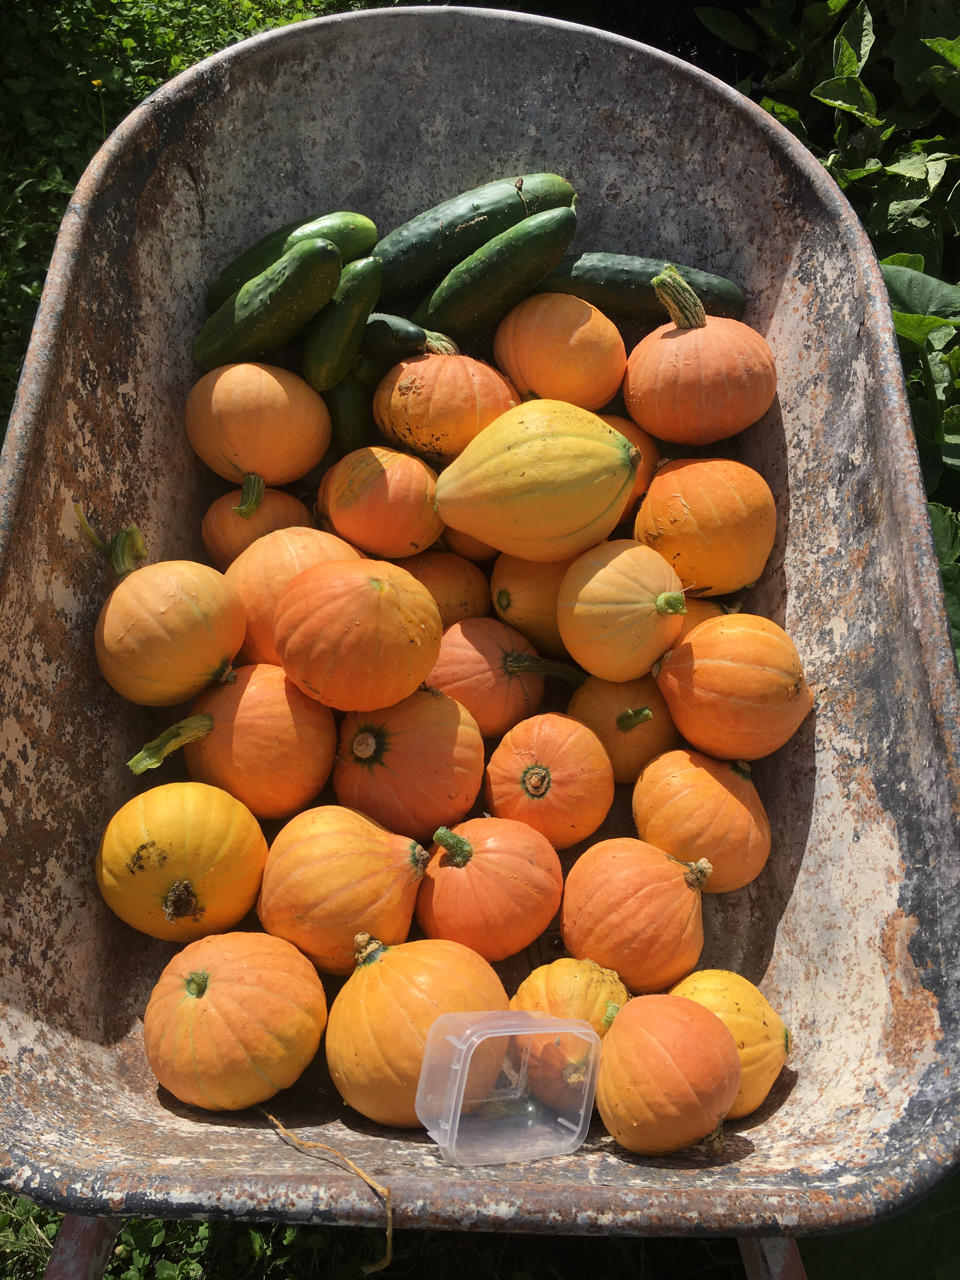
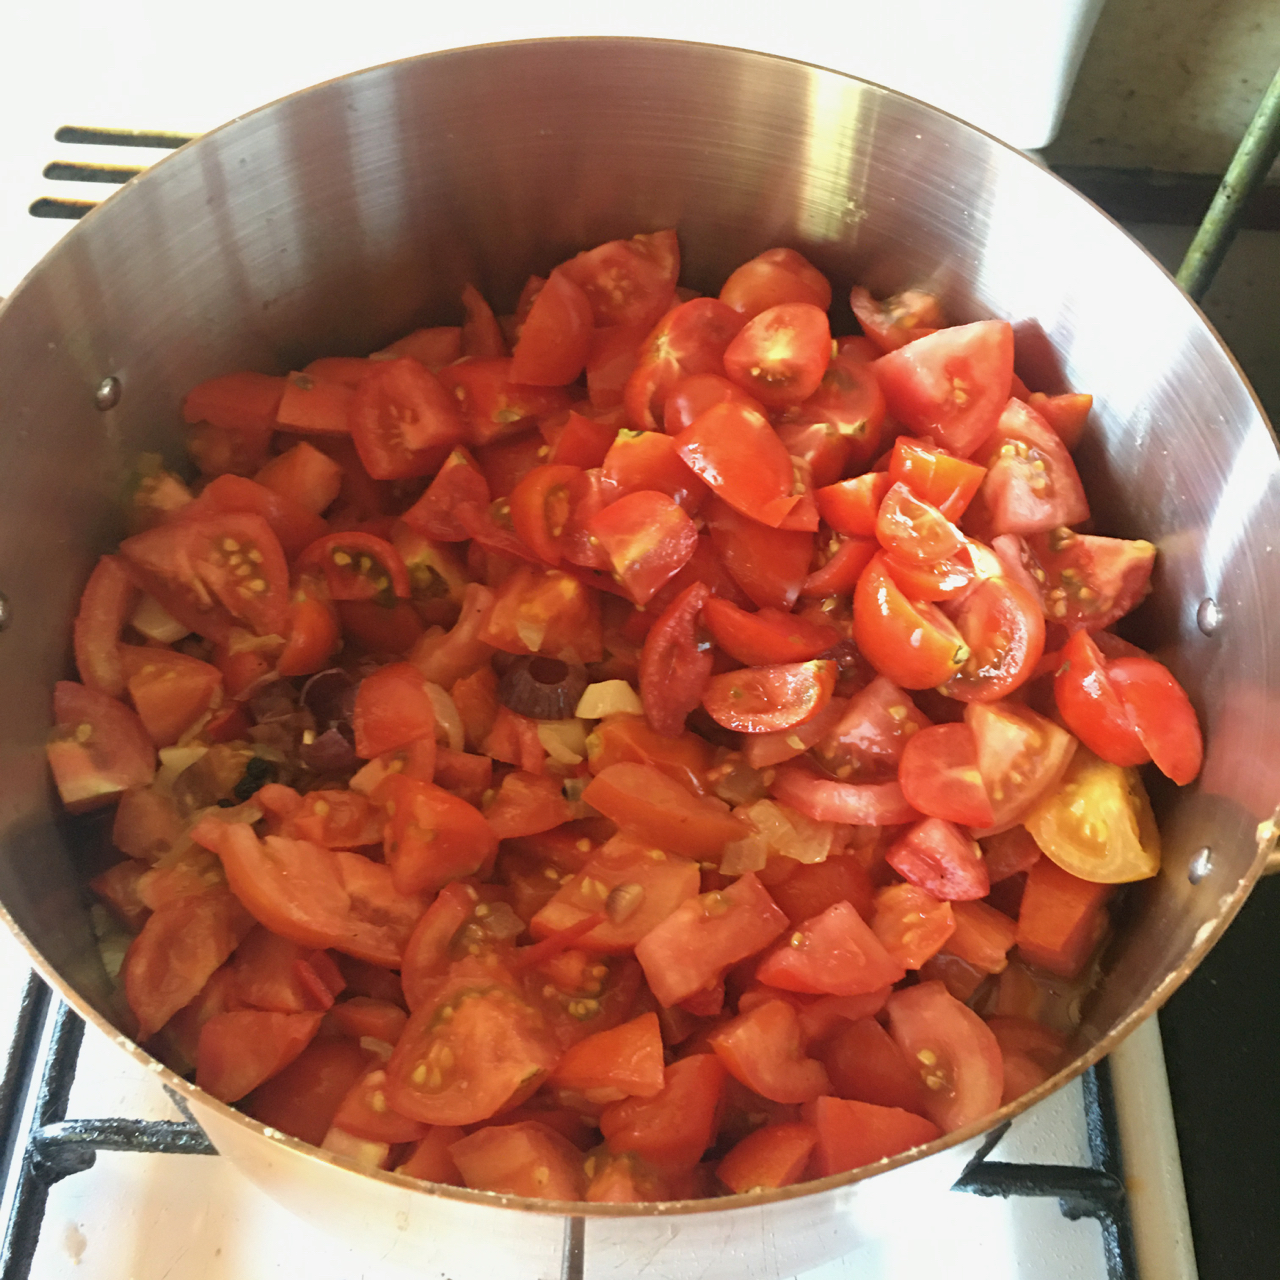
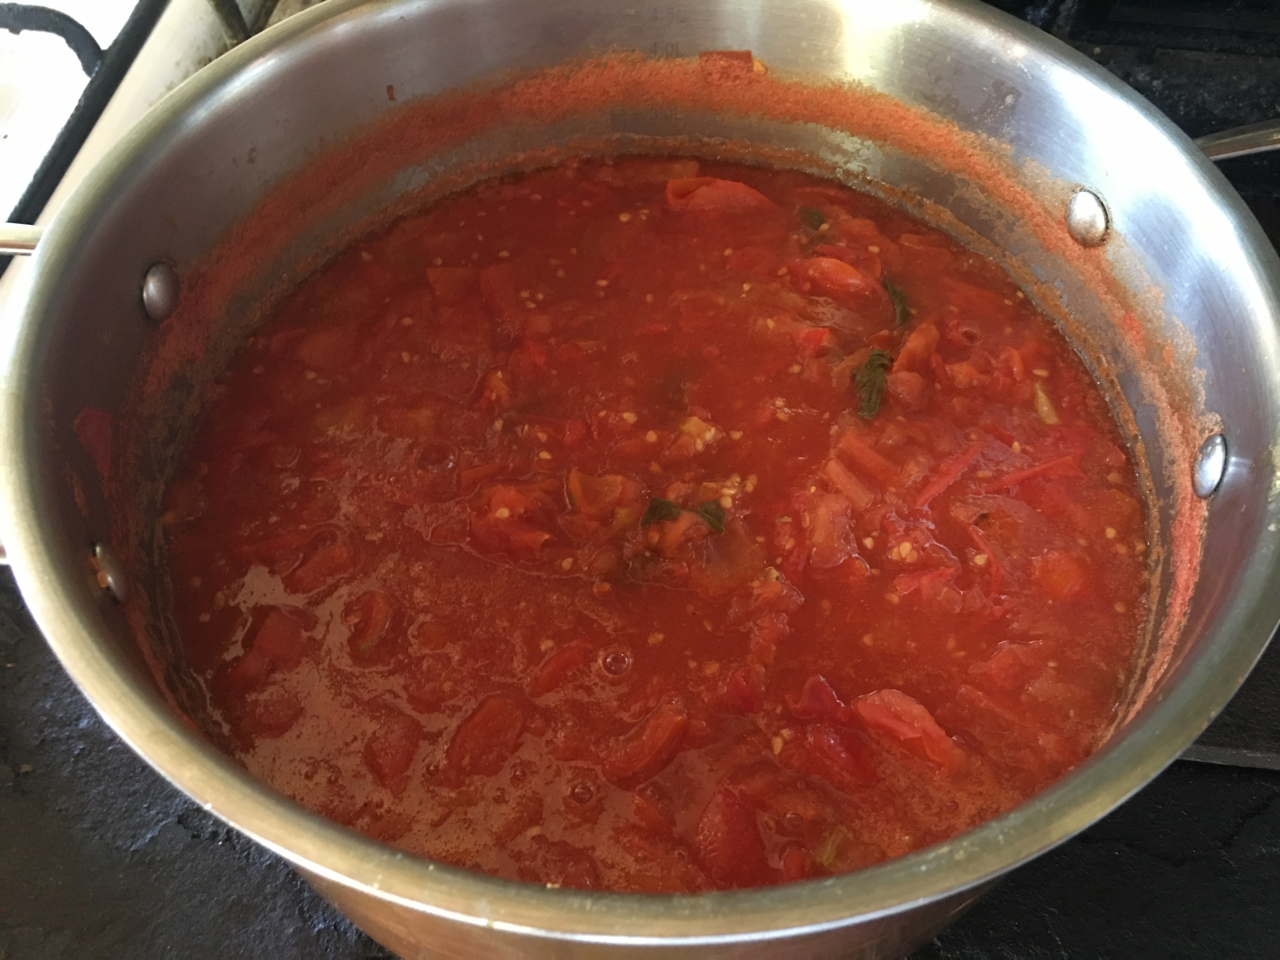
We have been picking lots of food from the garden, then cooking and preserving all the excess. We are up to our 5th batch of tomato passata.
Oven baked pumpkin is great on its own and can be used up all week in all sorts of ways from frittata to salads.
Tomatoes, basil, capsicums, chilli and pepper corns go into the passata.
We had an over ripe banana and a few eggs, so I made us a banana soufflé for desert. It worked out really well.
All part of our attempts at self-reliance. It seems to be working out OK.
Over the solstice break, I’ve been having a bit of time off.
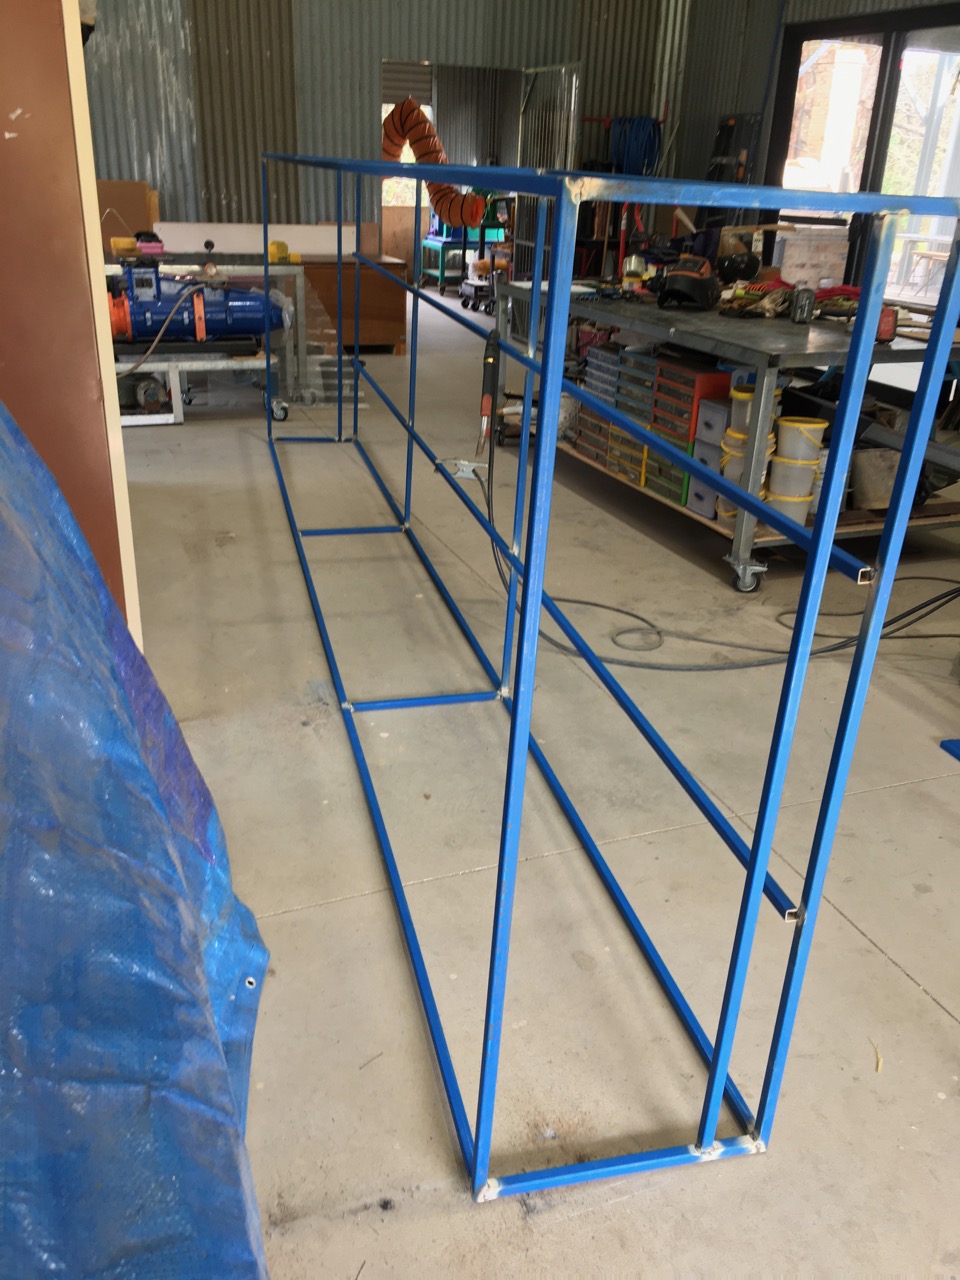
A change is as good as a holiday I’m told. So I took some time out to weld up a steel frame to make a fume extraction hood to go over all the electric kilns.
I have been ‘making-do’ with a bathroom exhaust fan set into the kiln room window, but it doesn’t catch all the fumes.
So we now have a ‘proper’ hood that covers all 3 kilns and there is room for a 4th kiln at the end, if I ever get round to building it.
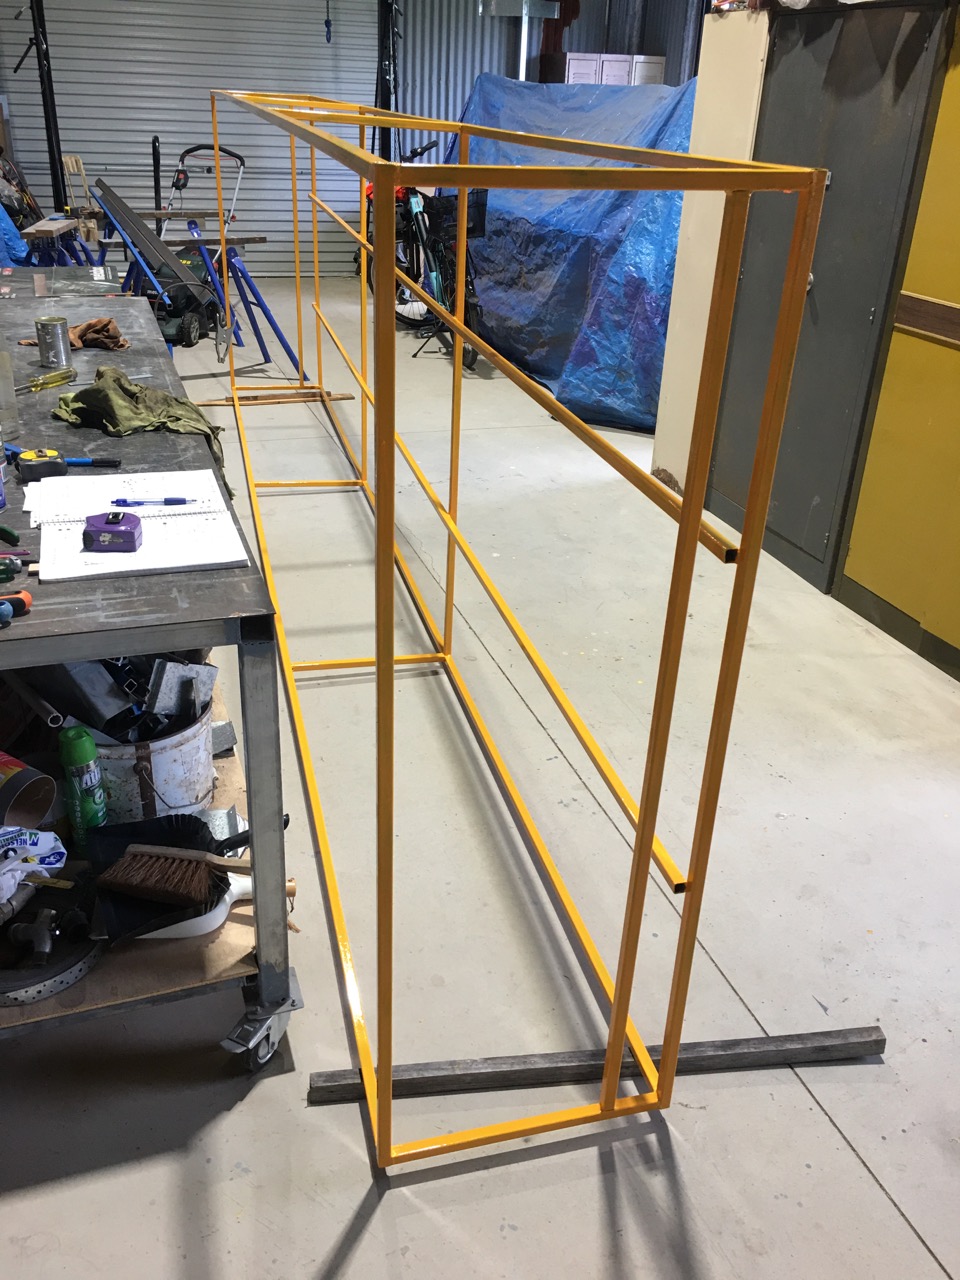
The frame is welded out of 20 x 20 RHS sq. section tube and then primed, undercoated and top coated with a strong yellow industrial grade paint. Something resembling ‘CAT’ Yellow, just to give it that heavy duty industrial look. Actually, I was thinking of the sort of colour that big factories have to paint over-head cranes, gantries and such.
It has turned out to be a massive edifice measuring 4.5 metres long by 1.5 m wide and 500 mm. high.
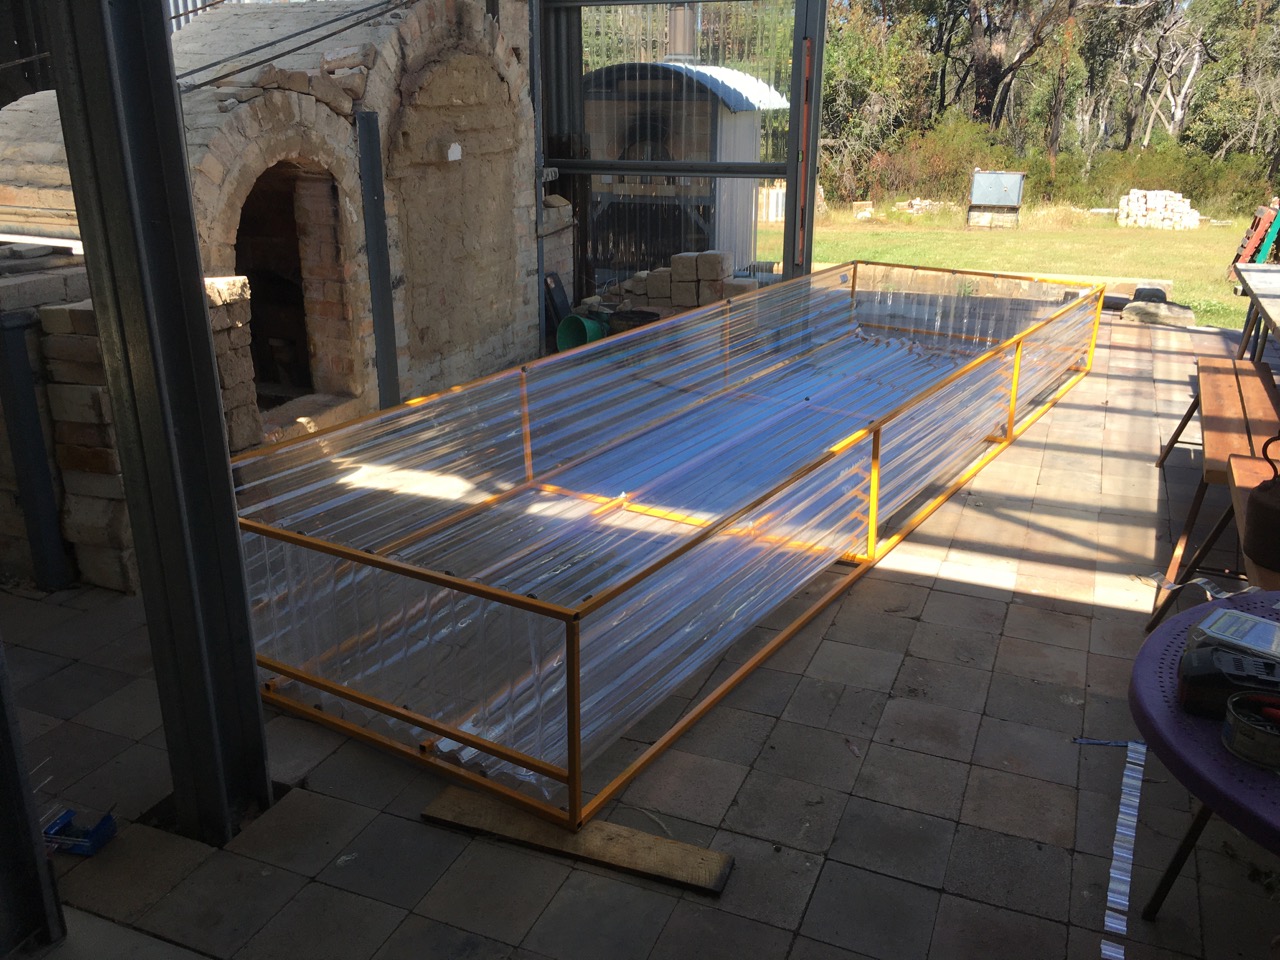
I had to build a special little trolley to manoeuvre it out of the welding area and into the court yard, where I could rotate it so as to allow me to screw in the poly carbonate lining.
I decided to use light weight RHS construction and poly carb sheeting because of the weight factor. I have to lift it up into the ceiling. But I also noticed after the fire, that poly carb doesn’t burn. It just melts, even at really high temperatures. So I thought that I’d give it a try as a fume hood lining. It wont get too hot, so shouldn’t melt. It is very light weight. It lets the light through, adding to the ambiance of the kiln room. It is cheap compared to any other sheeting. BUT most important of all, it doesn’t rust. The big killer of overhead hoods is the condensation of acid gasses and the rust that they create. This could be a solution?
Time will tell.
My son Geordie and my friend Warren came over for our Solstice lunch get-together, so before we ate, we did the install. It took all of 5 minutes, because I had every thing planned out and ready.
Now, the bathroom fan will be more effective at removing all the fumes from the kilns, and there is room for expansion.
Hopefully, a cheap and effective solution to the kiln vent fume problem.
While we had both Geordie and Warren here, I got them to help us move an exquisite old Japanese cupboard into our bedroom.
We were given this gorgeous old Japanese cupboard by my lovely friend Anne, who I have known for a very long time, getting on for 58 years in fact. Where does the time go?
Thank you Anne!
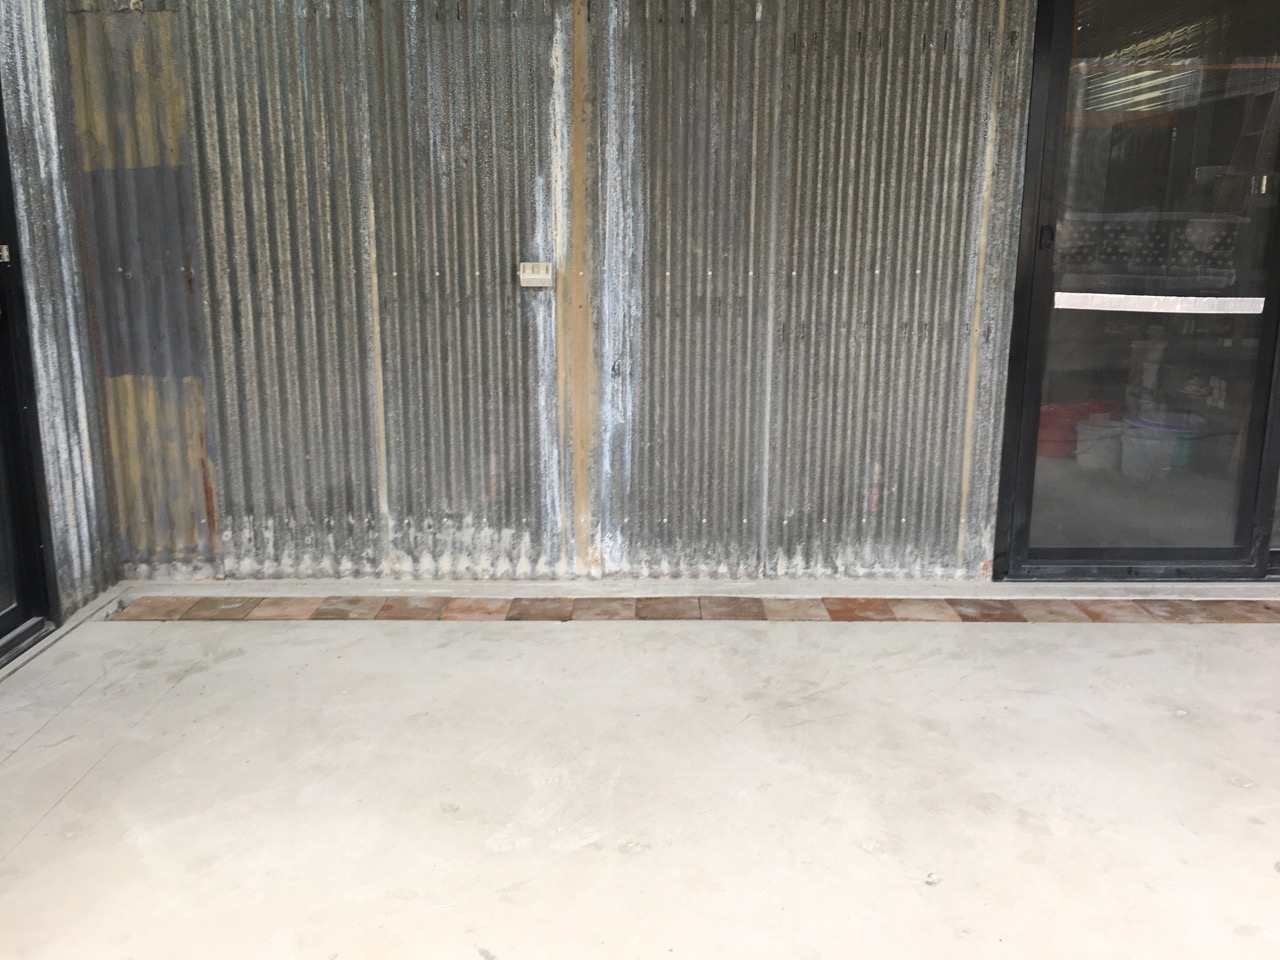
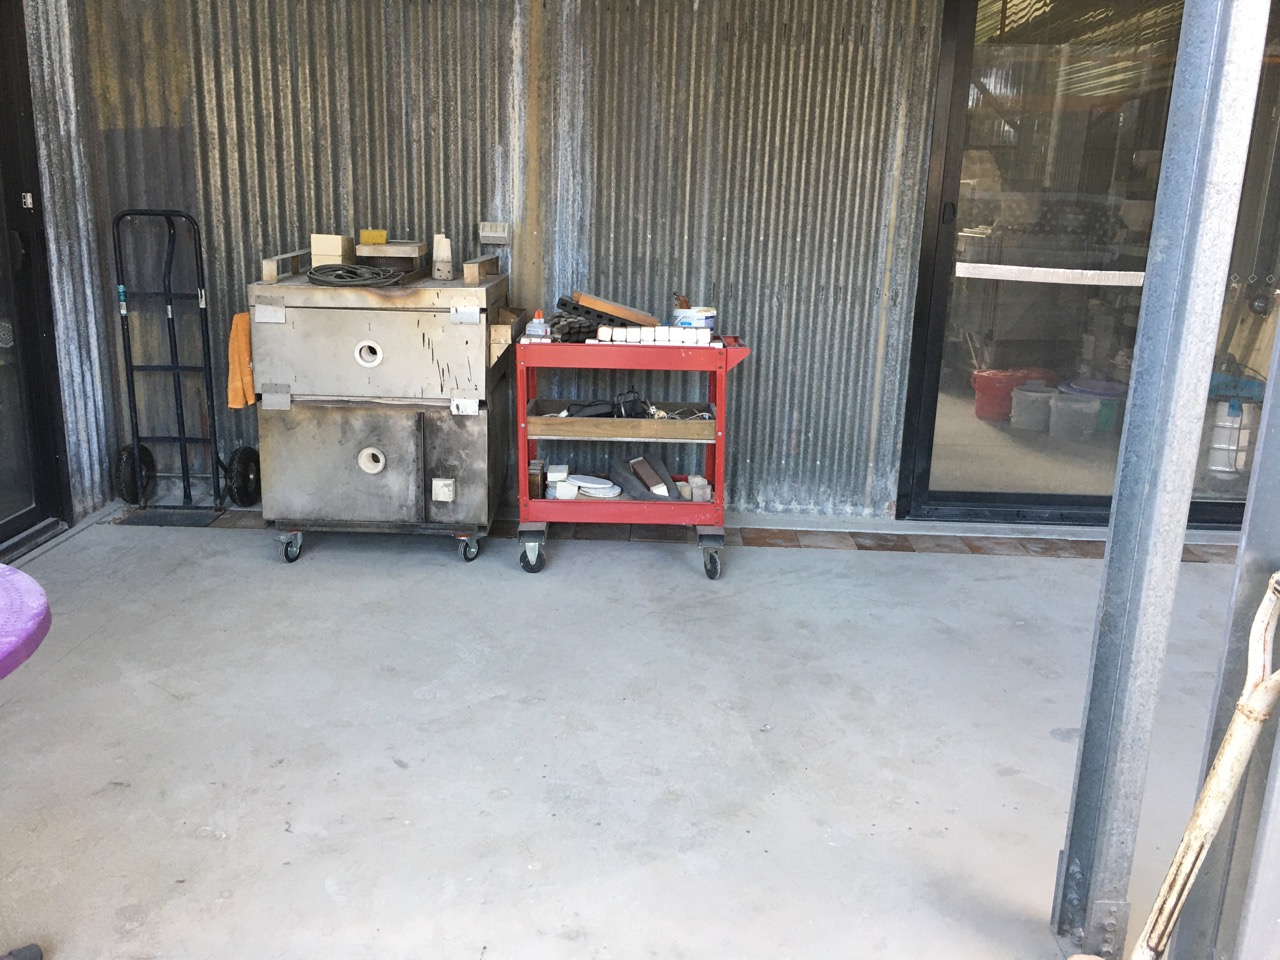
Somewhat disappointingly, we had another flood in the new pottery shed this week. Each time it happens, I look at the causes and find a solution and fix it. This time we had a brief, but severe storm of just 25 mins, but we got 25 mm of rain come down in that short time. It caused the gutters to over flow into the court yard around the kiln. However this time the rain all came it, not from the open wall leading into the courtyard, but deep in the enclosure against the kiln room wall from the gutters that couldn’t cope with the intense volume of water.
It has become apparent that the builders were pretty sloppy with their levels, such that the concrete slab is high at the edges and low in the middle of the kiln/glazing rooms. The result was that all the water flowed in under the gal iron wall and pooled in the centre of the kiln room, with some seeping into the glaze room.
There is absolutely nothing that I can do to change to the contour of the slab to stop this happening again. So my only option is the make a drain that can intercept the water before it reaches the wall and enters the building.
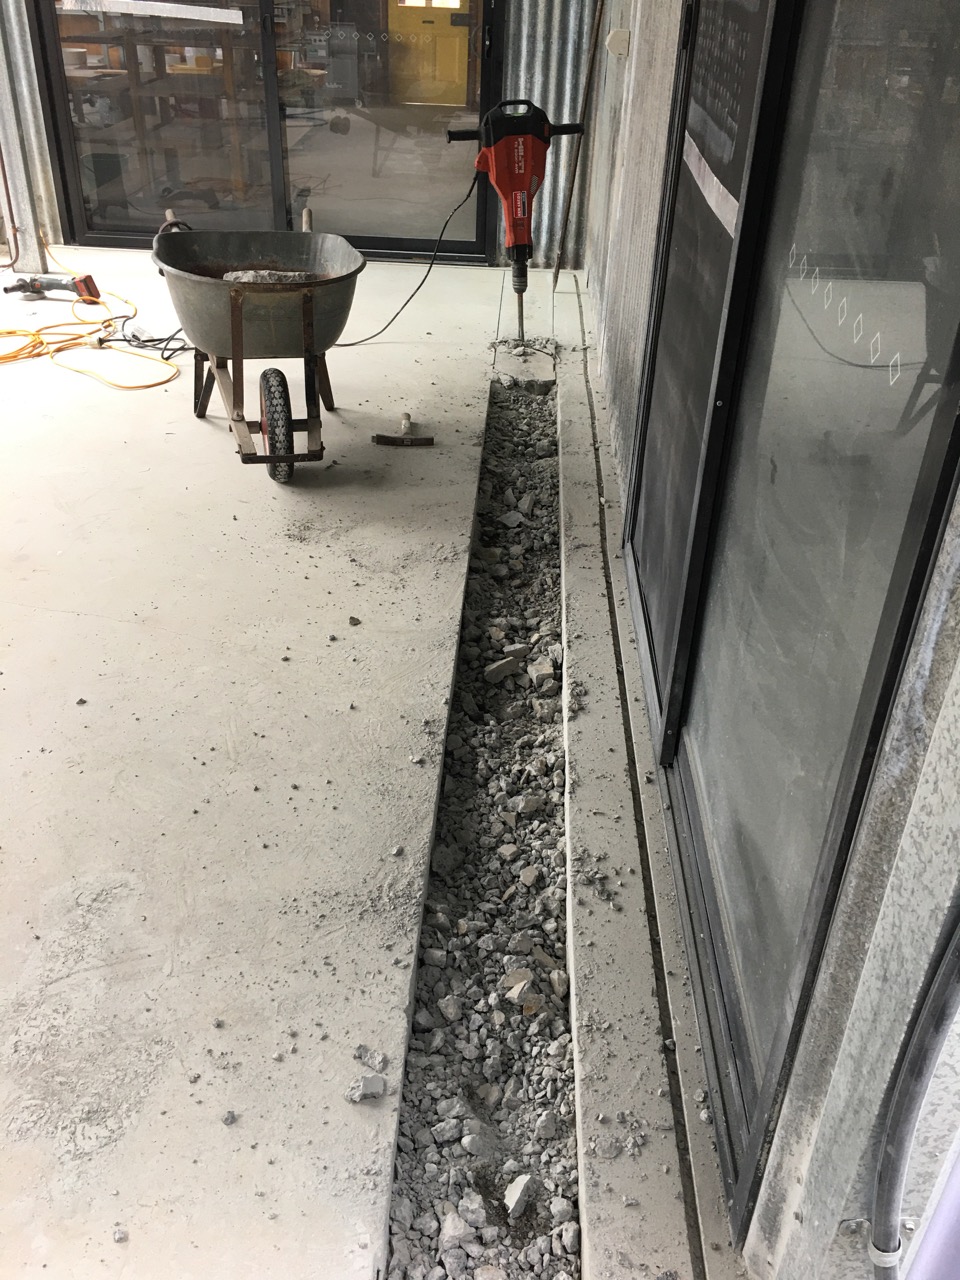
To this end, This morning I used a diamond saw blade to cut two 8 metre long slices through the 115 mm thick concrete slab down to the substrate of compacted rock dust and gravel. It was one of those nightmare jobs that nobody would ever want to do. But someone has to. Meet muggins.
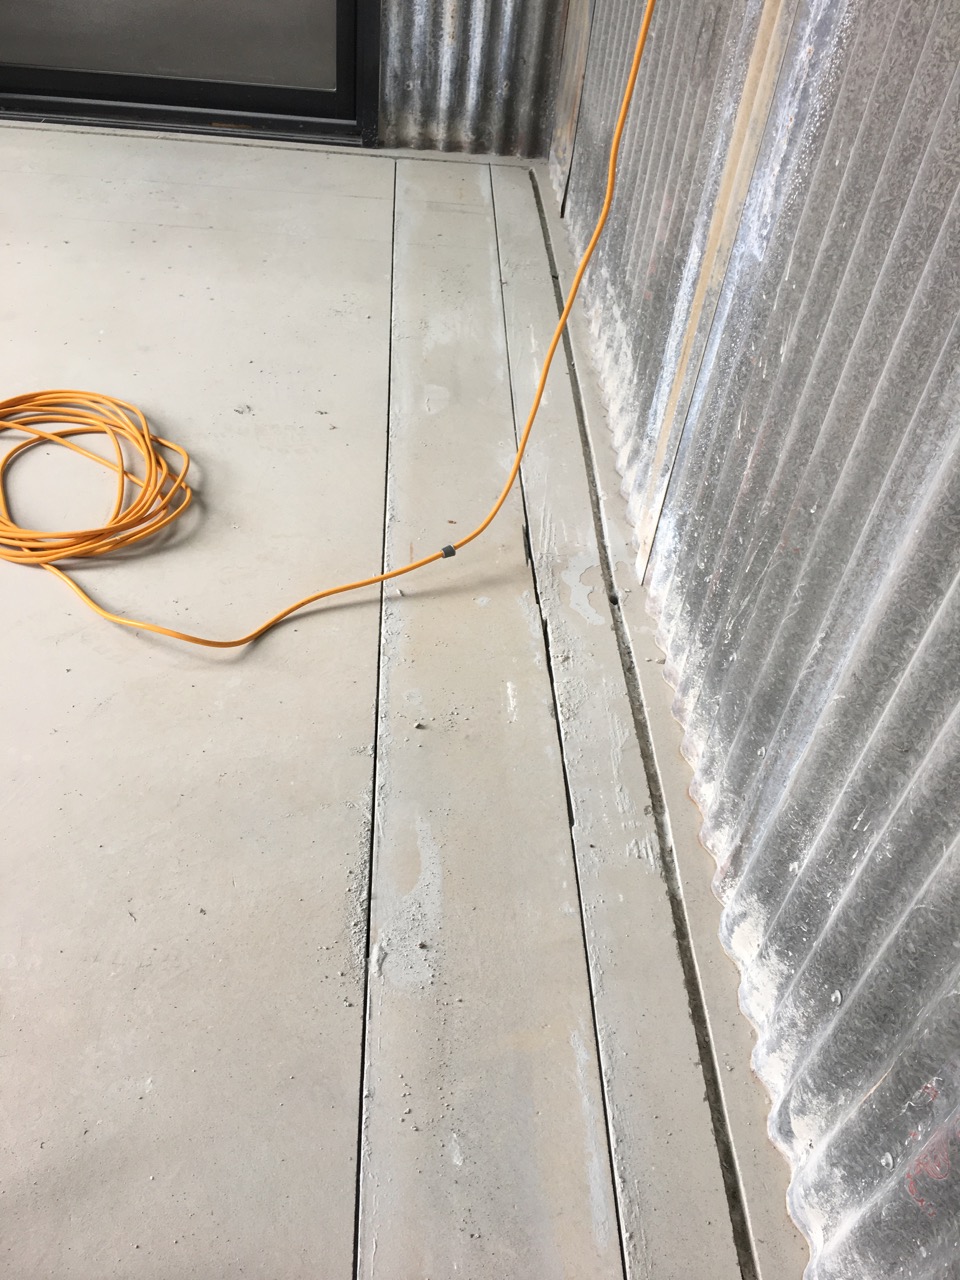
You can see in this image, where I had initially tried (unsuccessfully, as it turned out) to create a small diversion channel around the wall using a circular saw and a friction disc. This wasn’t deep enough to cope with the flood of water from this last storm. I realised that the drain needed to be substantially larger and deeper.
Then, I hired a jack hammer to break up the concrete into rubble. That was another big job.
Finally, I removed the broken ‘rio’ bars and the strip of black plastic waterproofing membrane, and then shovelled out all the larger pieces of crushed concrete and re-installed all the finer gravel.
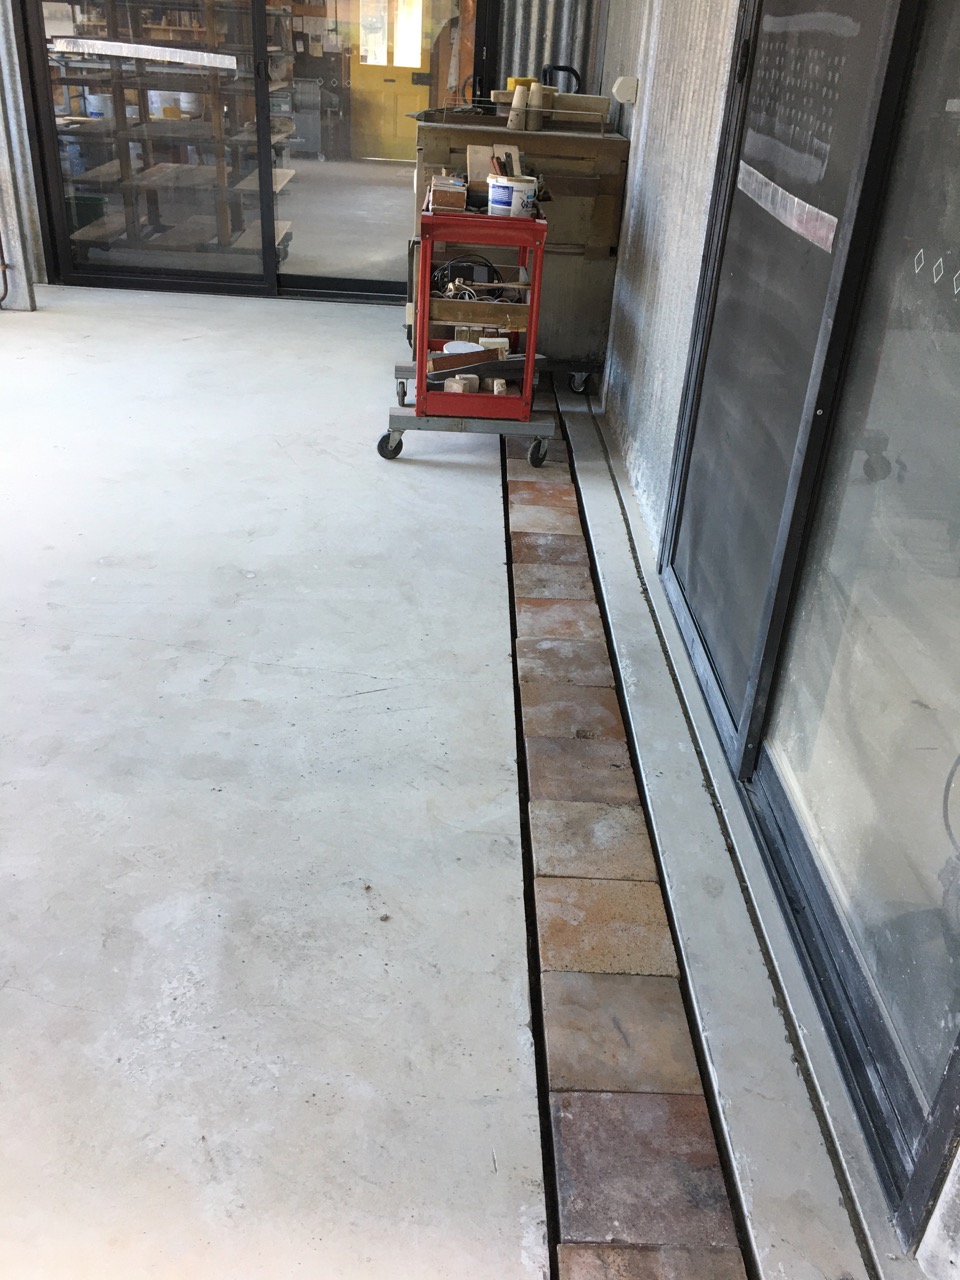
This allowed me to then lay pavers over the rubble to make an ‘agg’ drain.
With my remaining energy, I completed the job by laying a line of terracotta pavers to cover the scar, but leaving a gap all along the trench to allow any future flood water to flow down into the rubble drain and seep out along the alley way between the two sheds. Hopefully a simple and effective solution to yet another problem left by our slack and seemingly incompetent builders. ( who have now gone out of business I’m told). I have noticed that any rain that is driven into the courtyard by the storm, just sinks into the porous pavers and their gravel bed. That paved part of the kiln shed/courtyard never holds any water. It’s just a total bummer that the slack builders cast the slab with the fall in the wrong direction.
It’s been a hard day. I’m pretty worn out from the effort of jack hammering, crow-barring and wheel barrowing all the broken-up concrete out of the trench, but very happy with the out come, now that it’s done!
I’m hoping that it will work. I’m getting too old for all this strenuous high energy stuff.
Over the past week, since the first Open Studio weekend, I have managed to do a bit of catching up in the veggie garden, mostly watering and weeding.
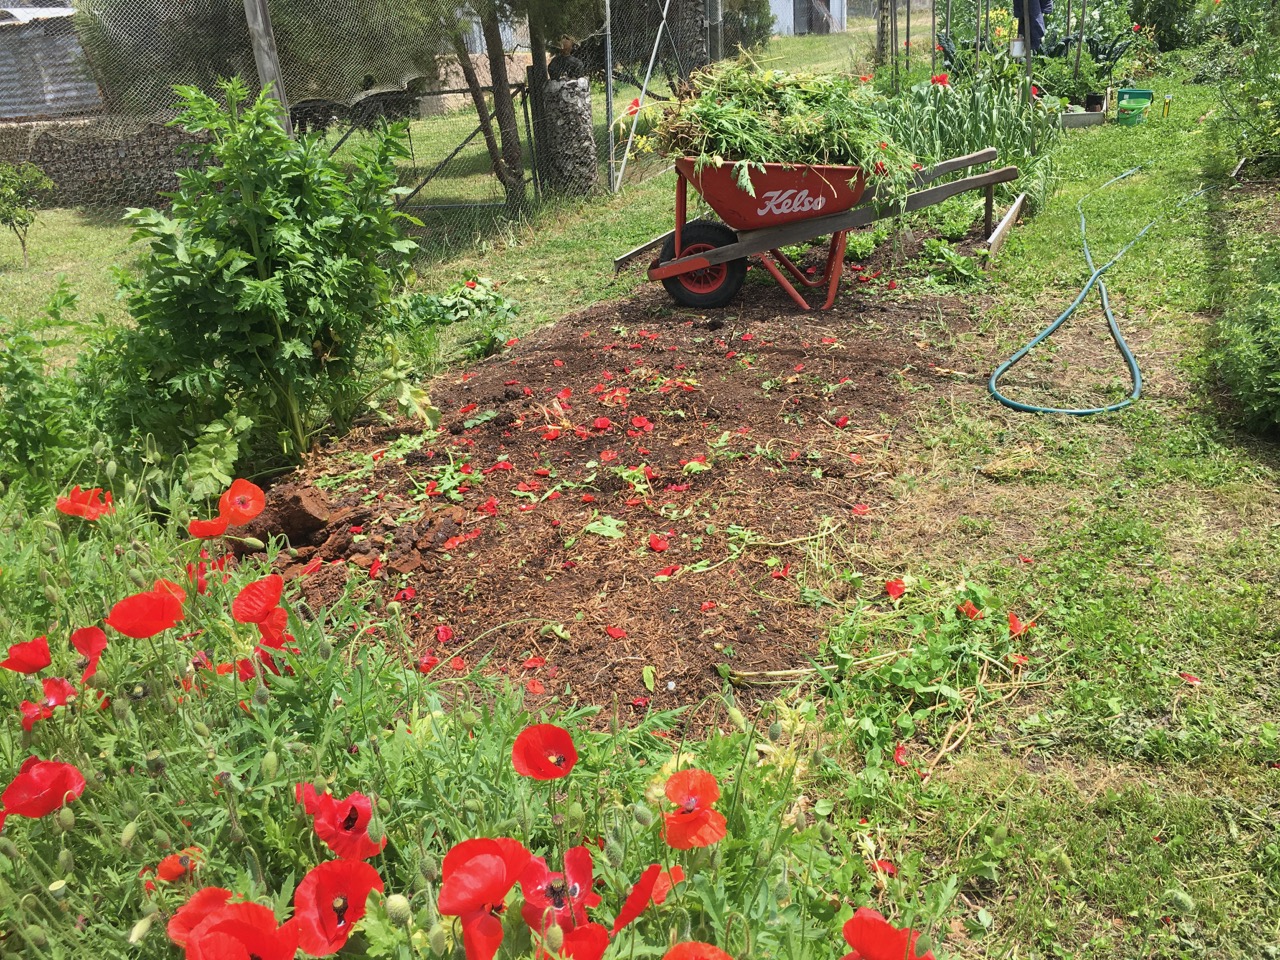
I pulled out half of the ‘Flanders’ Poppies. They are really beautiful. I love them to bits, such a great explosion of bright colour. They self sow every year and fill every space where I don’t weed them out. I need the space now to plant out more summer vegetables, so out they go. Well, half of them. I still want to keep the rest as long as possible.
The French beans are all up and doing well. I have no idea where I found the time to plant these during the hectic work load that we had up to the opening of the studio sales?
Half the poppies are gone to the compost heap to make space.
In their place there are now sweet basil, tomatoes and spinach, Further back, there are cucumbers and pumpkins.
I took a little bit of time out from gardening and weeding this week to glaze the last of the bisqued pots and get a stoneware firing done in the bigger electric kiln, fired entirely on solar energy from our new PV panels and battery. The results are good, just a few more lovely pots to refill the gaps in the gallery shelves from last weeks sales.
We are open this weekend each day from 10 till 4 – ish. on Saturday and Sunday , and also for the rest of the summer by appointment. Please ring or email first to make sure that we will be home.
We have been hard at it in the pottery preparing for the Arts Trail – Open Studios and the TACA Open Studios weekends coming up very soon. It starts next weekend. We have just managed to squeeze in one last wood kiln firing. But this will be the last for some time. Mainly because I’ve just about run out of dry glazed pots, but also, because from now on the weather will be getting too hot for safe wood firing over the summer.
This firing seemed to go very well, just 11 1/2 hours to cone 10 down, not quite so hot on the top back shelf with cone 8 over, but cone 10 just starting to bend. Probably cone 9, close enough. I changed to pack again this firing just see if I can get a better understanding of how this kiln responds to subtle changes of setting. Life is endless learning.
I got a very good control of the ember level with this firing. I’m pleased about that. We have been getting rather too much ember build-up towards the end of the firing in the last few firings, so I opted to open all the mouse holes right from the start. I can’t remember ever doing this before, but it was just right and worked well, kept everything under control. I’m a slow learner, but I get there in the end. I recon that this wood firing lark is quite good fun. I’ll probably have another go at it 🙂 We’ll see how it has turned out in a couple of days.
We have also lifted the 2nd planting of garlic. This bed of garlic was planted at the same time as the previous batch that had split into individual cloves. This variety has taken a few weeks longer to mature and has stayed as complete bulbs. This bed of garlic has delivered around 50 knobs. The last bed lifted out 45 split knobs. We still have one more double sized bed to go, maybe in a few more weeks? It may have up to 100 plants, but we’ll have to see what matures and lifts and dries successfully. Not all our garlic plants mature to a full supermarket size. We get quite a few small knobs that are a bit tedious to peel, but the flavour is still all there. We can get through up to 300 knobs of various sizes of garlic in a full year, and that isn’t always quite enough to see us through till next years harvest. This year we ran out of our own home grown organic garlic about a month ago and had to buy 4 or 5 knobs to get us through to a time when we could start to ‘snaffle’ or ‘steal’ a few very early plants from the edges of the first bed. I love fresh, wet, early, fragrant garlic. I have to have a couple of cloves sliced on my homemade rye bread, with a twist of fresh ground black pepper and a tiny sprinkle of salt. Tonight it’s just not my fingers that smell of garlic. Keep your distance!
The first lifted crop is now all dried, plaited and hung in the kitchen ready for use.
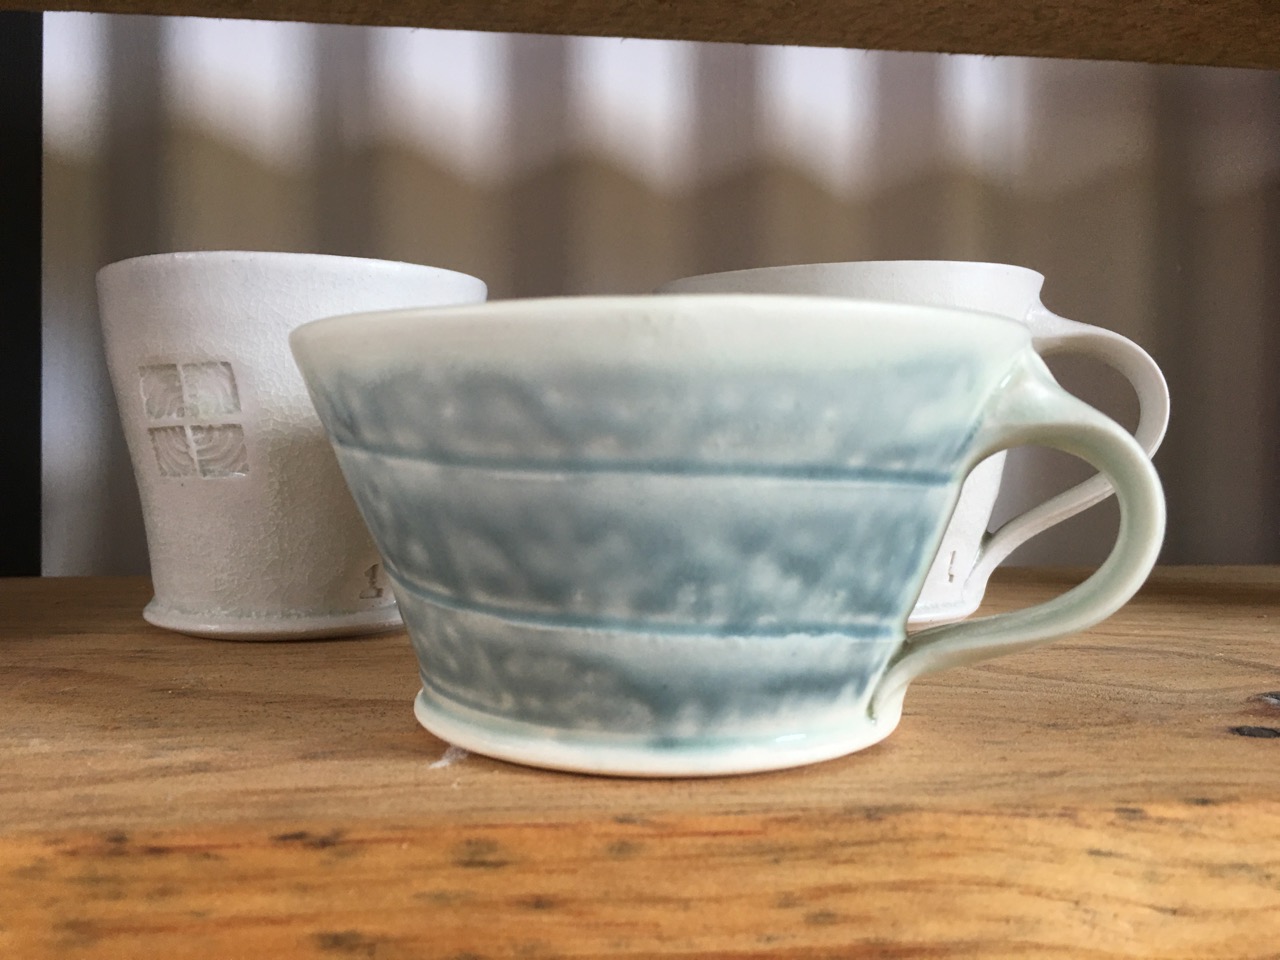
This week I have been making baking dishes in 3 different sizes and latté cups for the wood firing kiln. All this is leading up to the Australian Ceramics Assn Open Studios weekend, which also coincides with the Southern Highlands Arts Trail Open Studios weekends, so pencil in the first two weekends of November 5th, 6th and the 12th, 13th. We will be open for visitors on both days of both weekends.
If you can’t make it on any of those 4 days, just give us a call or email us and we can arrange to be open by appointment any time up until Xmas and over the summer.
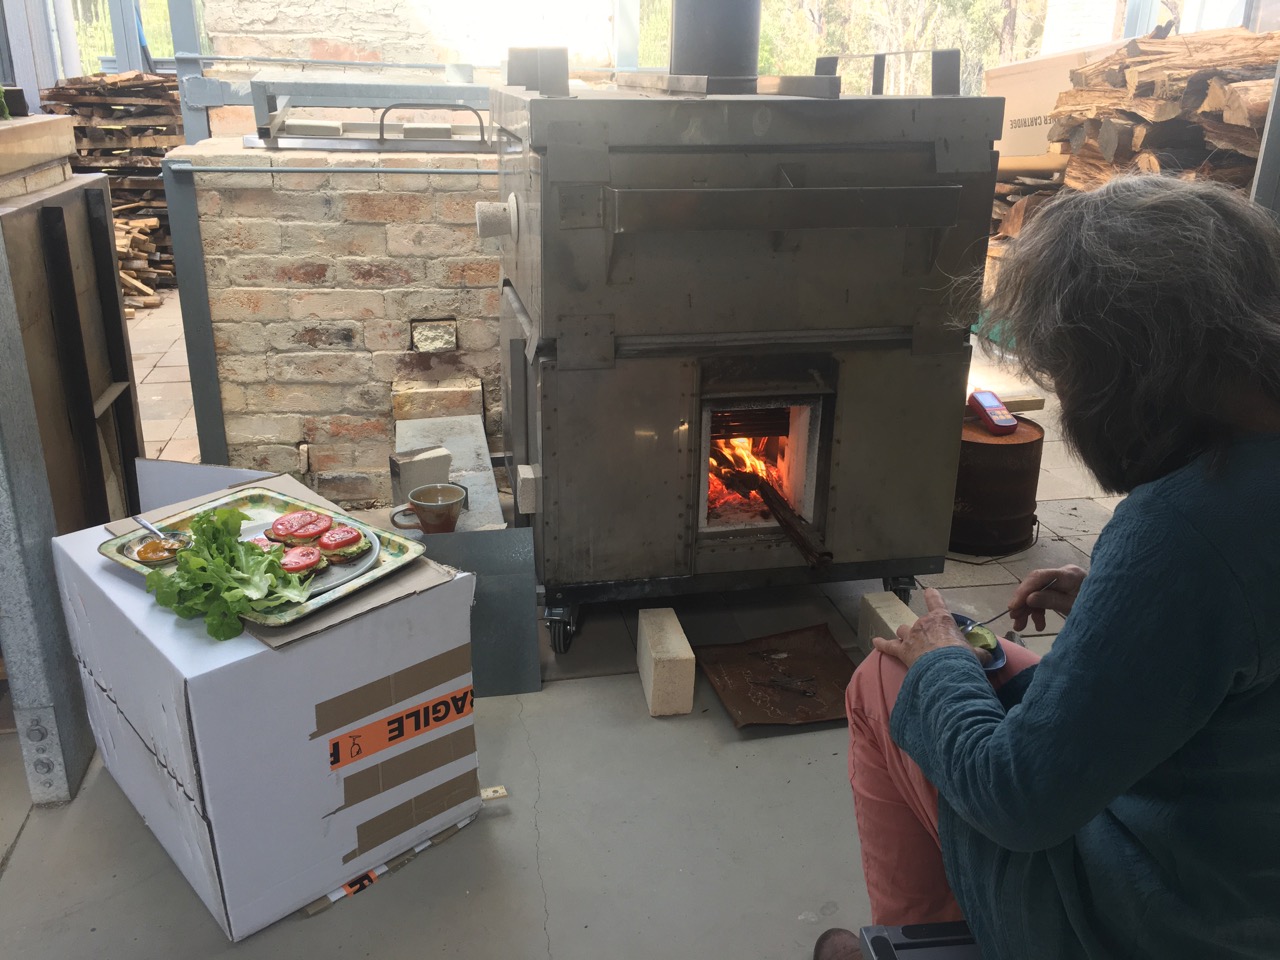
Janine packed and fired the little portable wood fired kiln with some of her work a couple of days ago. It was the first time that we have fired this portable wood kiln since the fire. This kiln was burnt in the fire, but survived only because I fabricated it out of good quality Stainless steel sheeting. Spot welded together into a monocoque frame. We had to replace a few broken anchors and fit new wheels, find the stainless steel firebox grate, then build a pyrometer system from a broken thermocouple, that I cut the end off, shortened back to clean metal and re-welded back together. This kiln has only 100mm thick walls, so a short thermocouple is ideal. It was a first experimental firing to test out new settings, kiln shelfs, T/C, glazes and timber fuel. It was only partially successful, but good for a first firing, so many ‘firsts’ in combination. We will fire it again next week to build on what we have learnt. 4 1/2 hours to stoneware in reduction, cone 9, she got a little nice flashing on the exposed clay and nice glaze melt on her ash glaze and pumice glazes. Next time we will try a slightly longer firing, maybe 5 or 5 1/2 hours?
Because she was dedicated to the kiln all day, first packing, then collecting the wood and finally firing, I made her lunch, delivered to the kiln. Home grown smashed avocado on home made rye bread toast. We already own our home, so can afford to eat such luxuries. I put sliced tomato and home made mustard pickles on some and served it with a side salad of home grown lettuce leaves. The other half of the avocado I filled with lemon juice and sprinkling of ground black pepper and served it as an entrée, with a tea spoon for scooping it out.
I got no complaints.
We have finished picking all the red cabbages, both the first large cabbage, and then the 2 or 3 heads of secondary cabbages that follow. Now the plants are going to seed, so I don’t want to waste the mini red broccoli-like flower heads. They are picked, washed, blanched in boiling water for 2 mins, then pan fried in sesame oil, with slices of garlic and ginger and served with a little freshly ground black pepper and a squeeze of lemon.
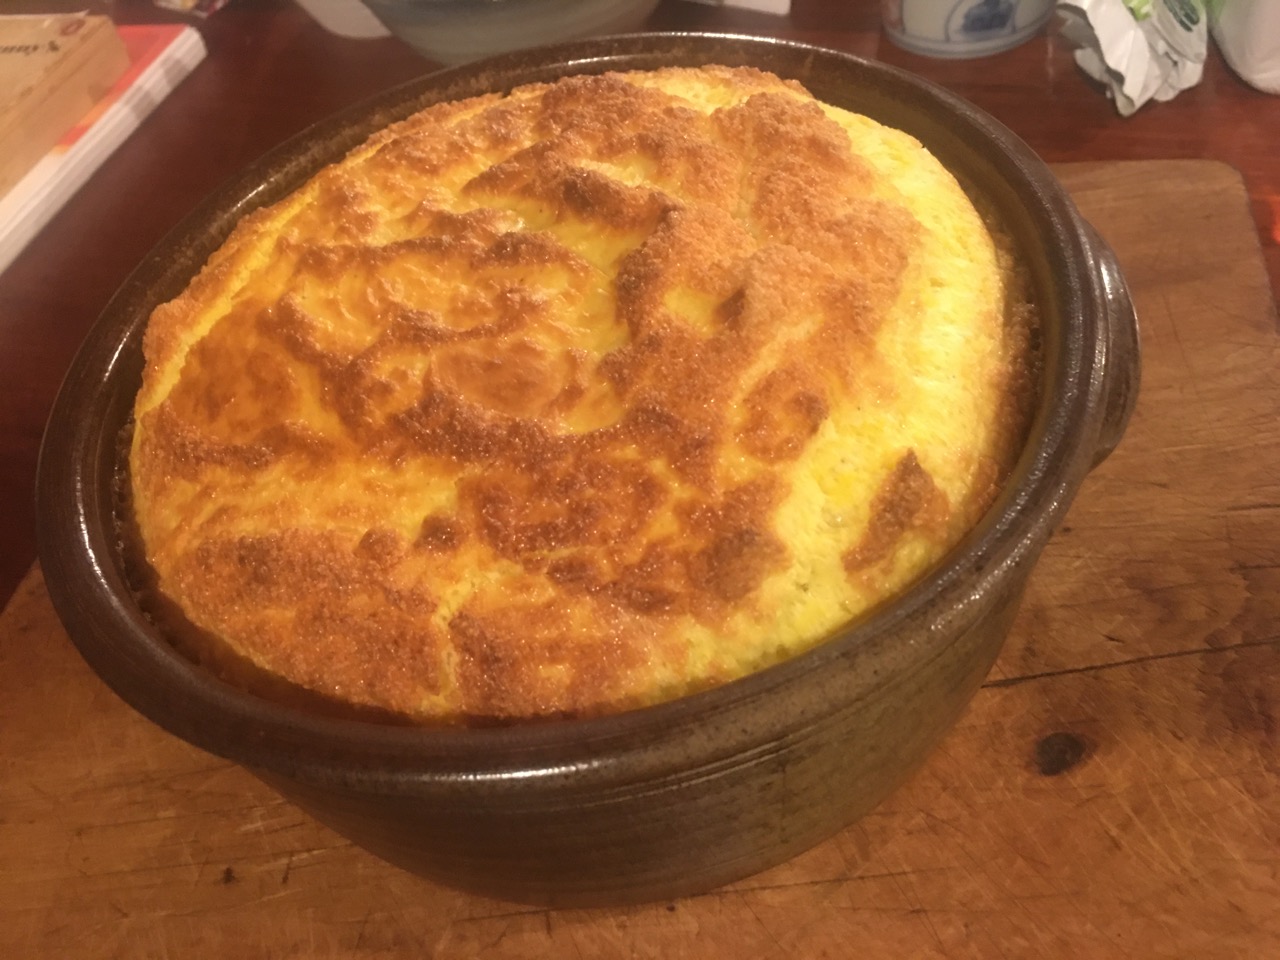
This was just a side dish to Janine’s main event – a duck egg soufflé. 6 duck eggs couldn’t be put to a better use.
Served in one of my wood fired baking dishes. A perfect combination. Thanks to our garden, eat well. We live on a low income by choice, but we enjoy a rich life due to our hard work and creative endeavours.
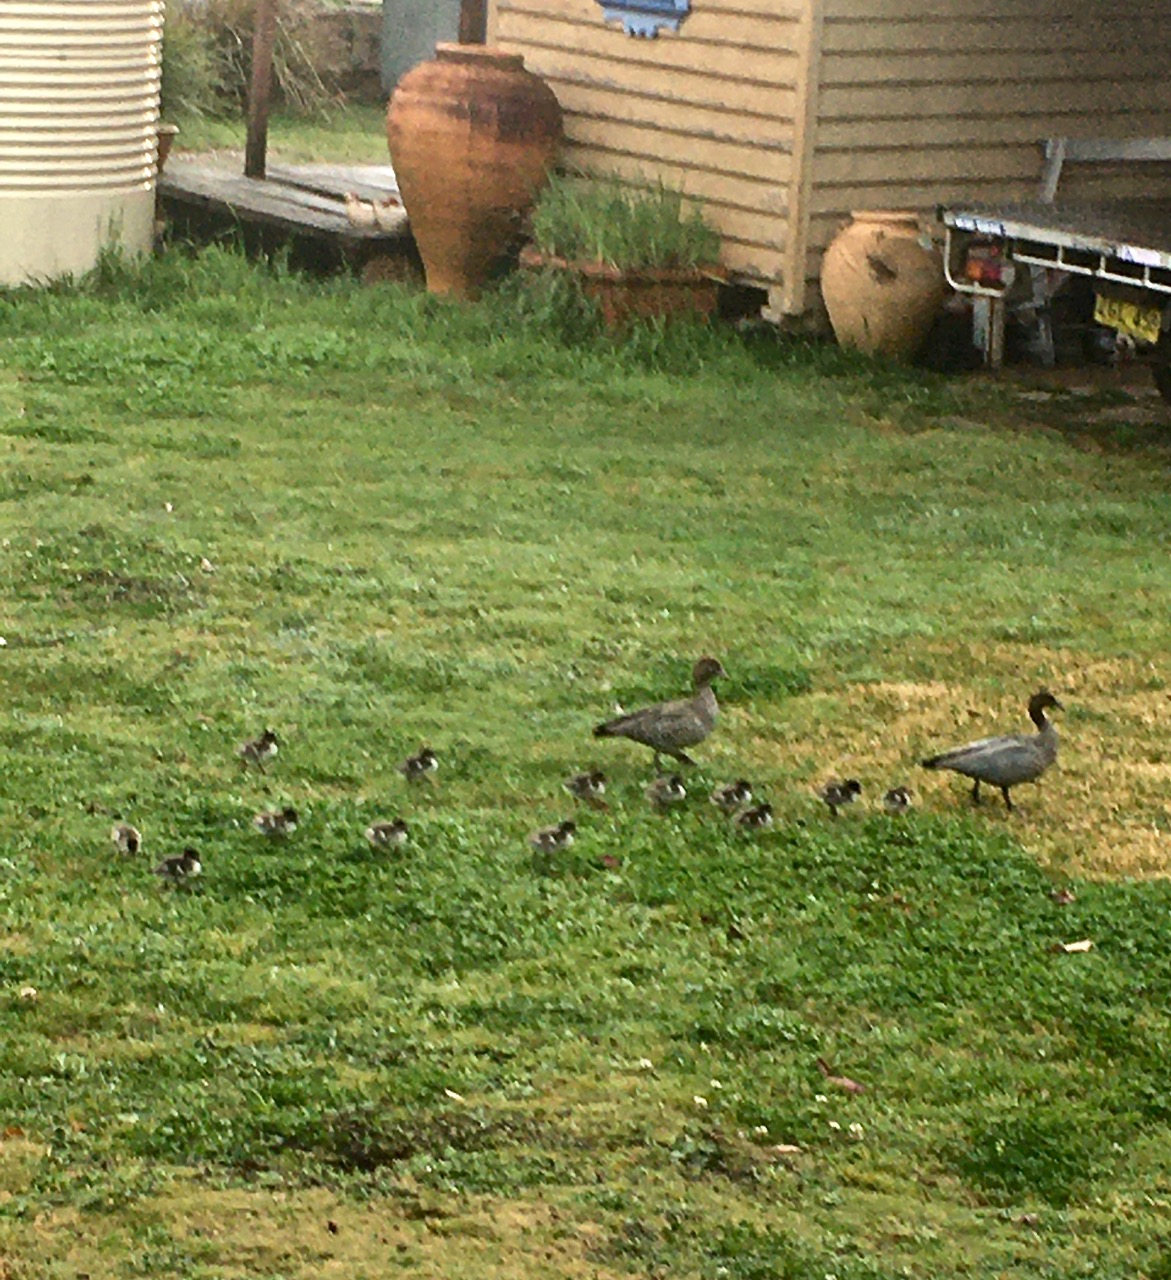
This week, we saw our first hatching of baby ducklings appear in the orchard from our resident wood ducks. We seem to have between 5 to 7 permanent residents and up to 25 itinerant blow-in opportunists. I’m always surprised how independent and resilient these tiny little fluffy things are straight out of the egg. They run frantically on their minuscule legs to keep up with their mum as she strolls along nibbling at the lush spring grass. They feed on the grass too, each time she stops to let them sit down and rest their little legs.
We seem to have 13 in this hatching.
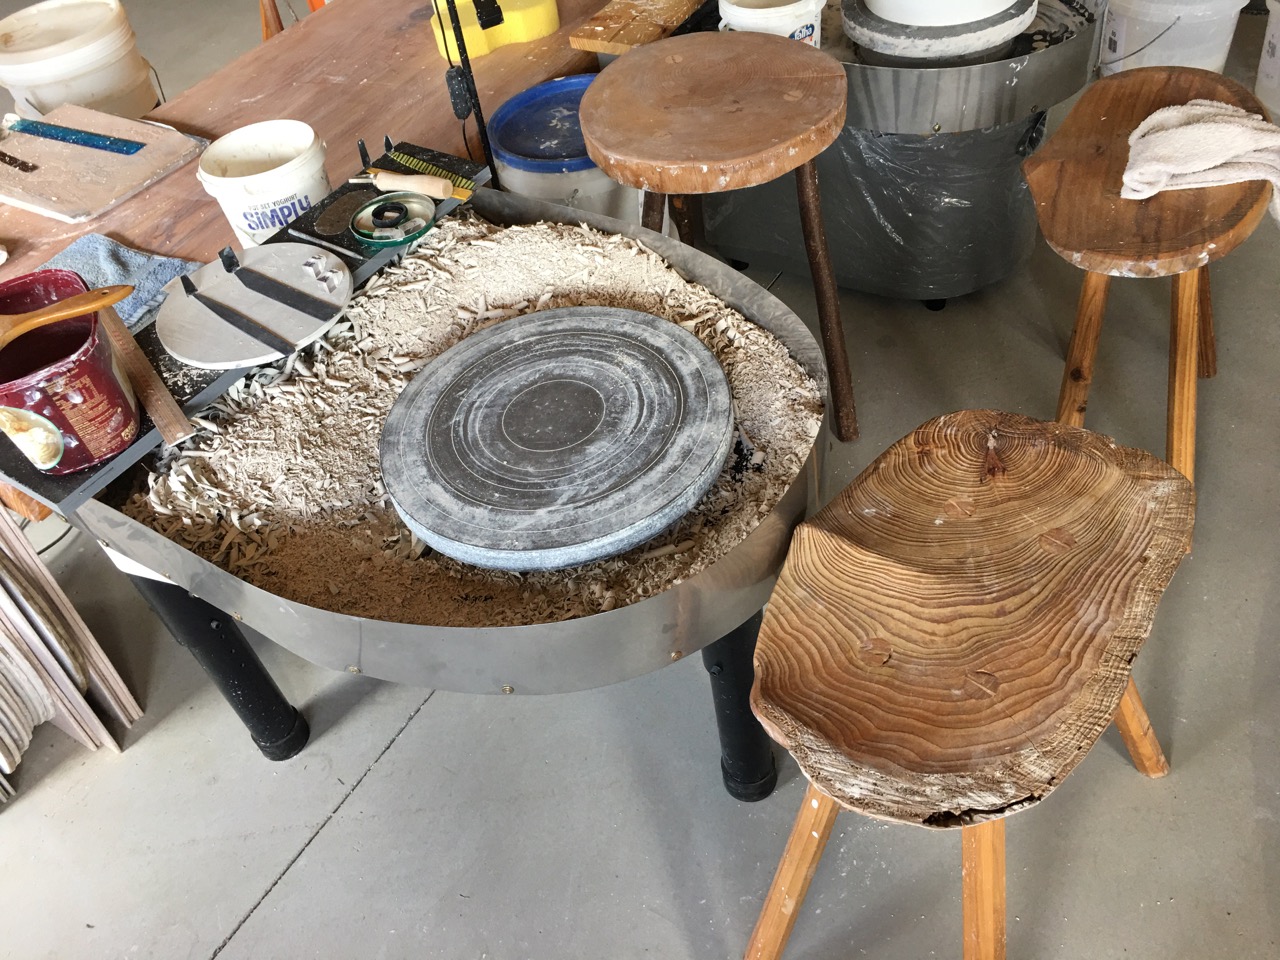
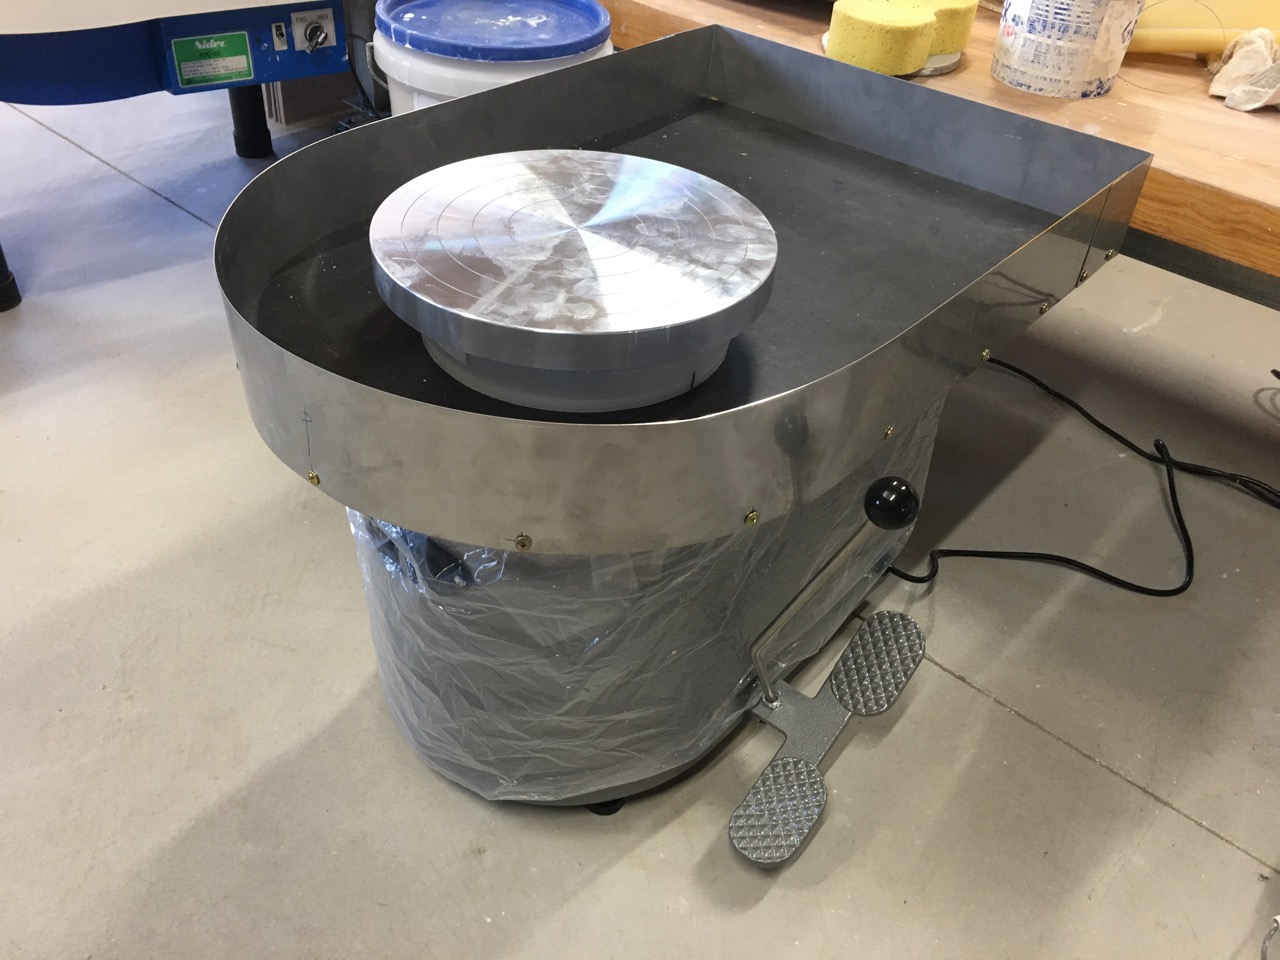
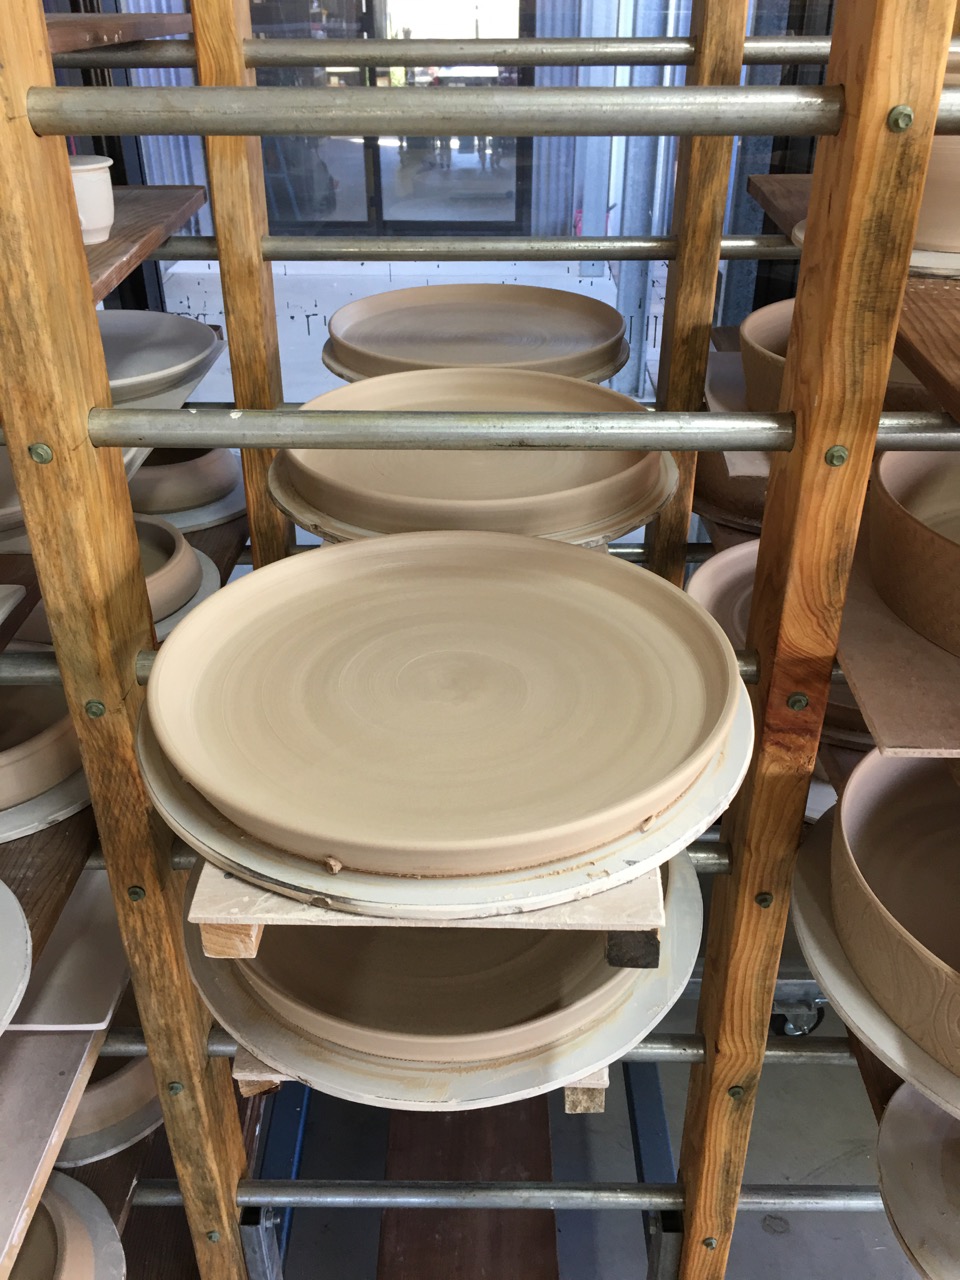
I’ve been making pots out of our own blended iron-stained stoneware body on the kick wheel for the wood kiln firing that is coming up and also making porcelain on the shimpo. I’m very happy with my new experimental large format wheel head turnings tray. I was able to turn two dozen porcelain dinner plates straight through without having to empty the turnings from the tray – and it’s still not full! In the past, I used to have to stop after every pot and take the tray apart to empty it ,so that I could go on with the next pot. The Shimpo tray is so tight that I can’t get my fingers in to lift the turnings out without taking the tray to bits and then re-assembling it. Such a pain. But that is all in the past now. These new home made custom trays are so spacious!
While I’m on the subject of potters wheel trays. I threw 40 mugs the other day and because I don’t use much, if hardly any, water when I throw. The wheel tray was still mostly dry at the end of the one hour throwing session.
You can see a damp ring, where the slight excess of throwing water has dampened the tray in a ring around the wheel head. No more than is really necessary.
I learnt to throw like this during my apprenticeship with the Japanese potter, Shiga shigeo. All Japanese potters wheels are set down into the floor, of a raised bench-like structure, and it is customary to sit cross legged, on this raised floor, in front of the wheel at floor level
I had to throw all my pots off-the-hump, on a Shimpo wheel with no tray. As I couldn’t sit cross legged, on the floor, in front of the wheel, for very long without getting cramps. I had to dangle my legs down beside the wheel, into the enclosure, to be comfortable. I didn’t want my legs to get wet, so I learnt to use virtually no excess water. I’ve become a bit lazy in my old age and let a few drop slip off the wheel head these days. As it doesn’t matter, because I have a large tray to catch everything. Old habits die hard.
The mugs are all handled and on the shelves drying out now and waiting for the next firing.
Yesterday we packed 2 bisques and a stoneware glaze, then pre-heated them for an hour. So today we are firing 3 kilns at once.
Now that my work in the group show at Sturt Gallery is up and running.
I have time to do a bit of catching-up on all the jobs that I wasn’t able to get done while I was working hard to get all the pots fired for this show.
One of the first jobs is to make a new turnings and slip tray for one of our potters wheels. The turnings tray on Shimpo wheels is slightly only just above pathetic.
They are so mean and cramped that if you do any amount of turning whatsoever, you need to stop work to take the tray to pieces and empty the turnings out, then re-assemble it to keep working!
It is so pathetically small, it is completely un-professional. I’m so surprised that they haven’t managed to come up with something more appropriate after all this time.
I’ve been using shimpo electric potters wheels since 1972. I first started with an RK-2 ring-cone wheel. The model with the sharp, pointy drive cone. Later I bought a 2nd hand RK-2 ‘super’. The model with the short, blunt, rounded cone. These were the best wheels on the market at the time. I really enjoyed using them.
After the fire I was given a couple of RK-10 metallic traction drive wheels, but these were from a school, where they were not well looked after and the small plastic trays were possibly allowed to be over-filled with clay slip water that found it’s way into the top bearing, grinding them out, such that that they sound and feel very rough and noisy.
I now have an RK-3D and RK-3E whisper wheels, but the tiny, cramped, plastic trays are still an embarrassment.
In the old pottery, I installed the RK-2 and RK-2 super shimpos in wooden enclosures, so all the turnings went straight onto the floor around the wheel, as is the Japanese accepted practice. However, in this new pottery studio, all the wheels are situated in a row either side of a central bench. This isn’t so convenient for allowing the turning to spill directly onto the floor.
So today, my first new job was to build a large, very spacious, turnings tray for the RK-3D shimpo. It has worked out very well, or so I believe. Time will tell if it is any good. If it isn’t, I’ll take it to bits and redesign it.
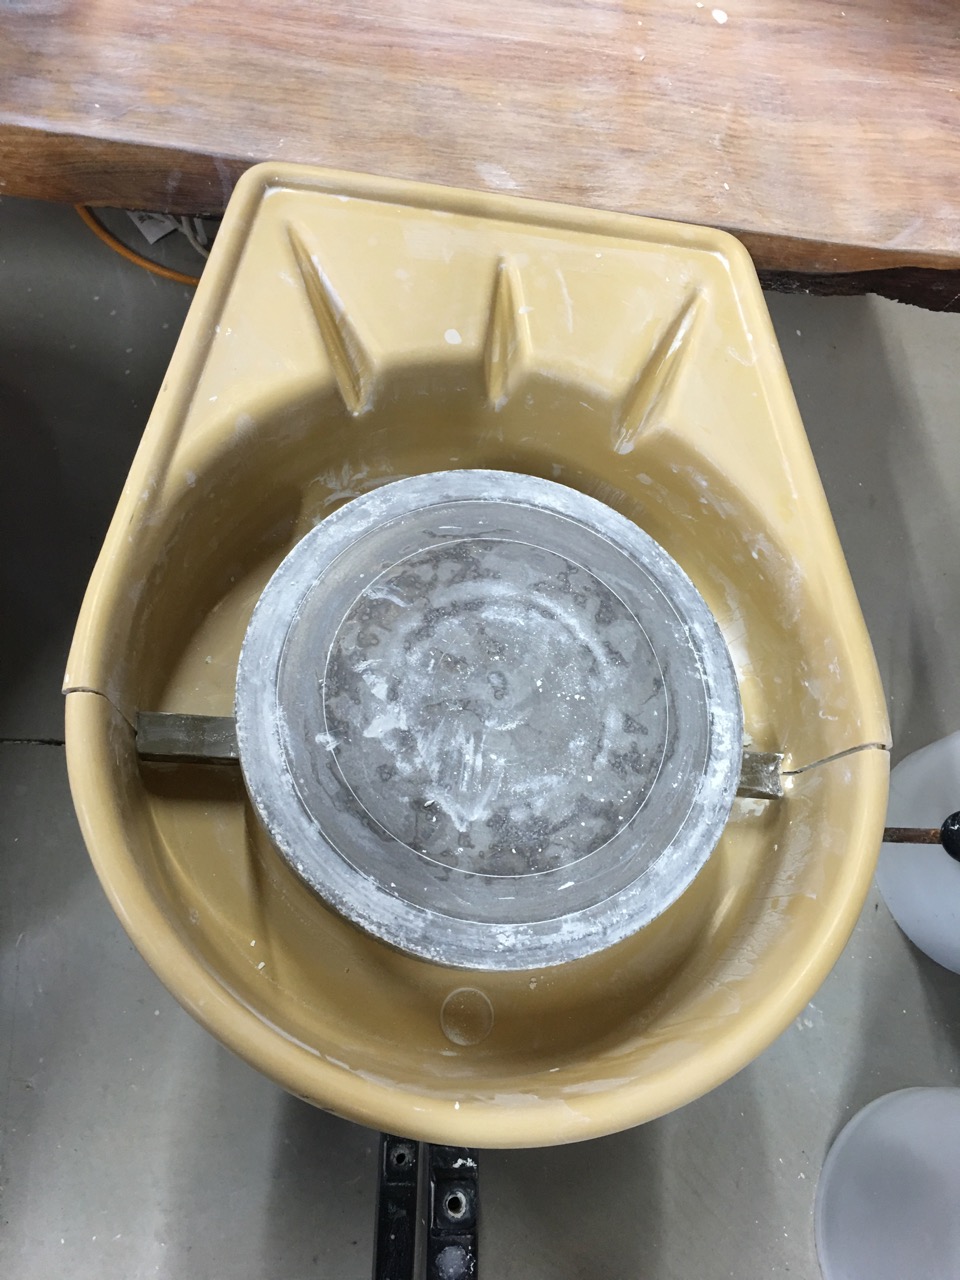
This is the miserly factory supplied plastic tray on the RK-10. It desperately needs to be 3 or 4 times larger. The space between the wheel head and the tray is so small that I can’t get my fingers in there to lift out the turnings.
Trying to do it, just seems to push some of the turnings over the inner edge of the tray onto the top of the inner bearing mount cover. When this happens, I have to take the tray apart and brush out all the turnings from the metal frame and bearing cover, then re-assemble. It’s a very slow and painful process that needs to be repeated every few minutes. When I work with sericite porcelain, I need to do a lot of turning to get the shapes just right. I really need a better designed tray.
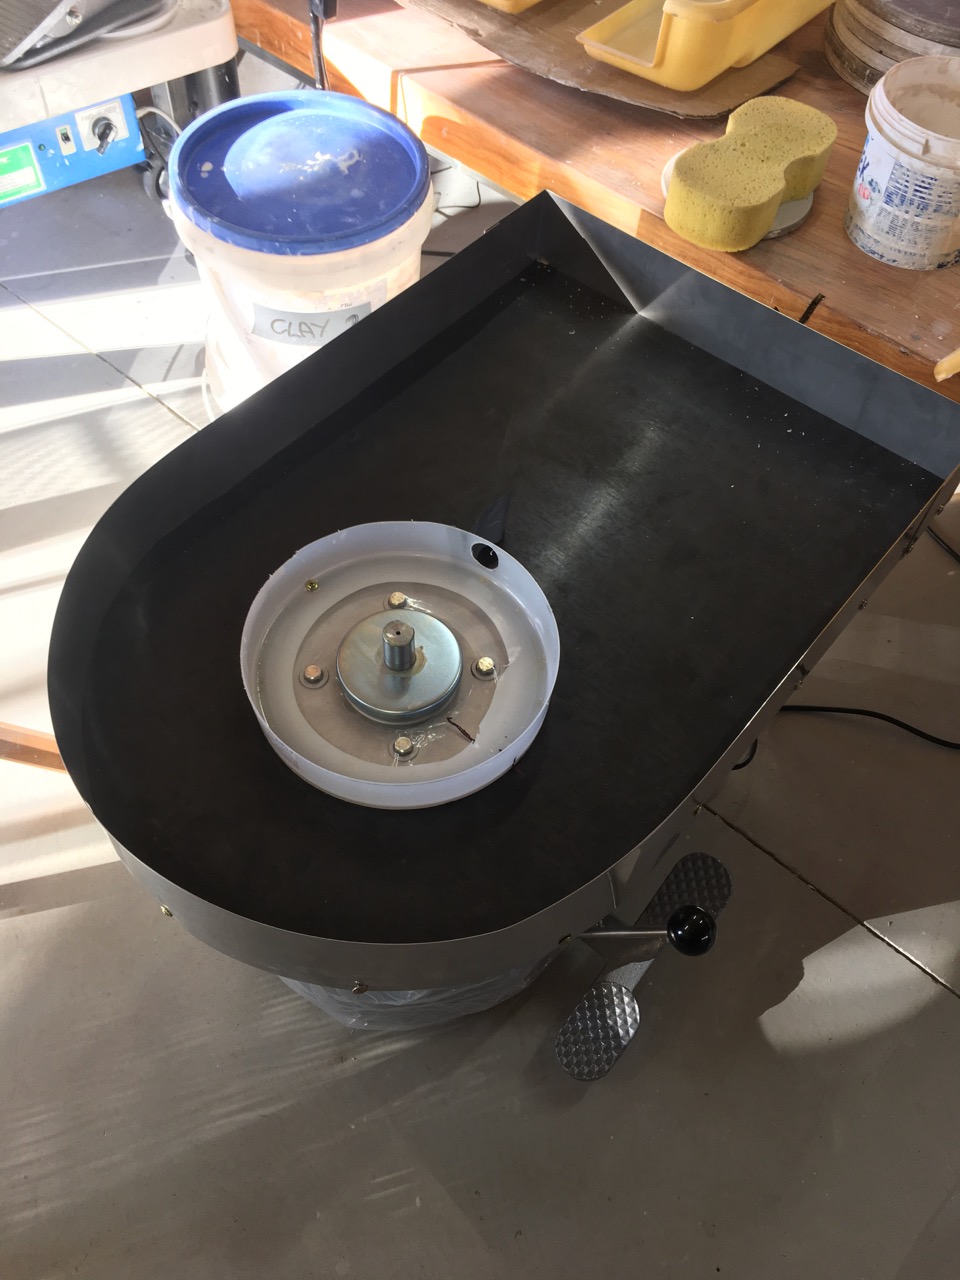
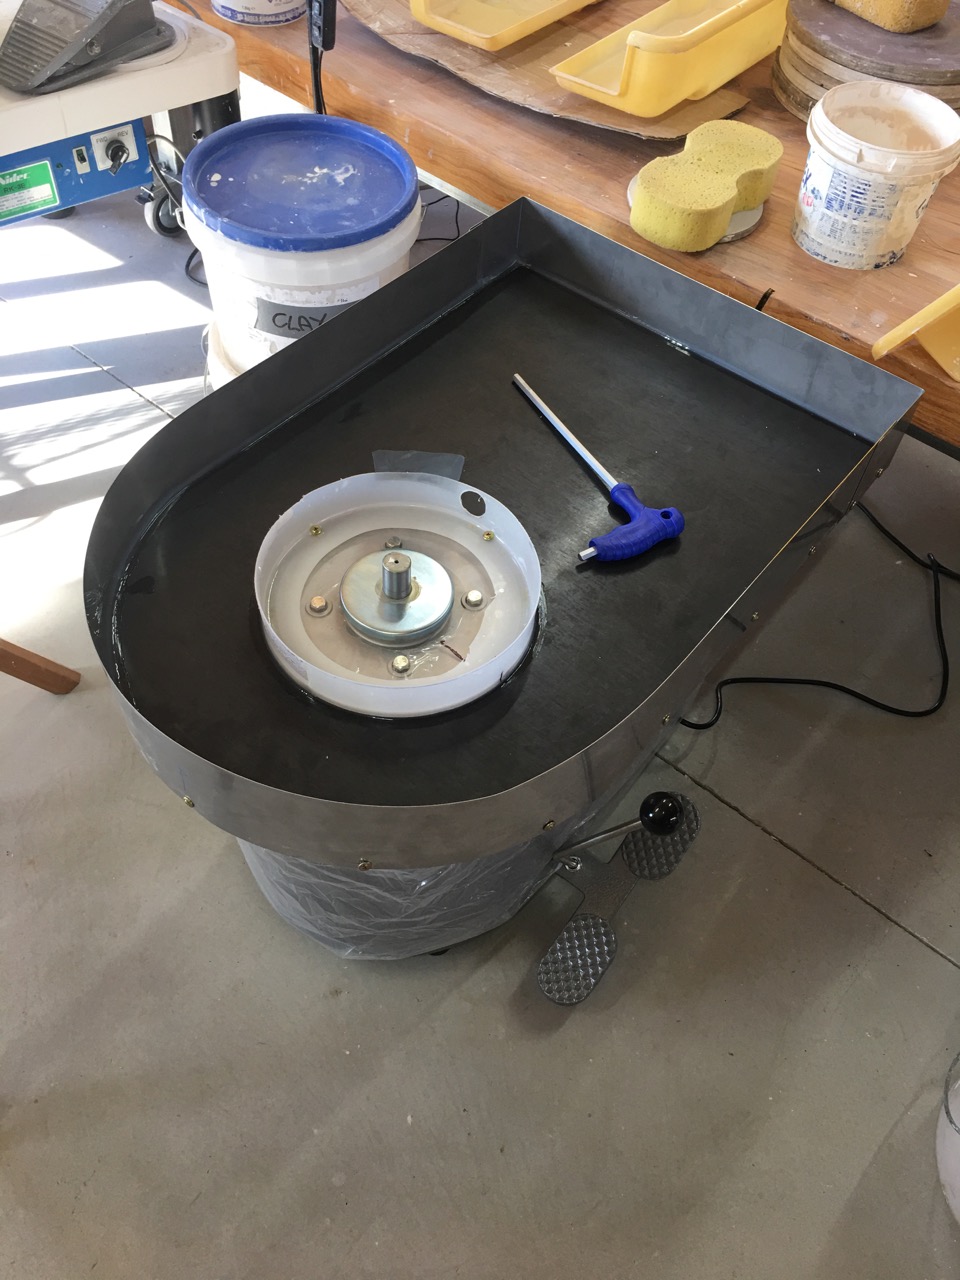
I decided to make the new tray out of water proof plywood 750mm. x 500mm. It is designed to just clip over the top of the wheel frame, using wooden cleats to jamb-fit it onto the top of the metal frame.
I cut the bottom out of a plastic bucket to make the circular wall that stops all the turnings and clay slurry ending up on the top bearing. I ‘TEK’ screwed this to the wooden base and used silicone rubber to seal all the edges and make the tray water proof.
I decided to fit it with a strip of stainless steel off-cut as a curved wall, all the way around.
This tray should be able to be cleaned out of turnings easily and quickly, without having to stop work to dis-assemble it.
There is even room at the back to get a hand broom and dust pan in there to sweep out the last of the turnings.
I’m hopeful that it will make working with sericite a whole lot easier and quicker.
Time will tell. Watch this space.
If it works well, I’ll be fitting trays like this on the other wheels.
This week we have experienced the longest night, and also the coldest day – so far.
We awoke to a fantastic white shimmering frost. All the paddocks were bright white for a couple of hours until the sun light reached them and burnt it all off. The sun rises at such a shallow angle in winter, it takes a long time for the sunlight to get higher in the sky, and then cast its bright energy onto the fields.
We have been making work for the first firing of the new wood kiln. This job was one of many put on hold while we made work for the ‘Pop-Up’ Open Studio weekend. Now that this is safely behind us, and with a little bit of liquidity to keep us afloat. We can concentrate on making the work for the wood firing.
I started last week by chopping wood and making clay. Now we are enjoying the fruits of that labour. I started with making the largest pieces, as these will take the longest time to dry, especially in mid-winter.
These big platters and dishes are 400 mm. dia. Janine has started by making some press moulded square dinner plates. These are an order that has flowed on from the Open Studio sale last Xmas.
I have also managed to get a couple of half-days in the veggie garden, so it is starting to look loved again.
The garden always looks so much better when there are a few rows of carefully weeded and tended seedlings and sprouting seeds coming up. I just made it, getting these leeks, onions and garlic in before it is too late. It is really too late for a good garlic crop, but this is the 3rd planting, so we will be OK. I also put in broad beans, peas and transplanted seedlings of Brassicas that I managed to sow 6 weeks ago. Everything is a bit ‘just-in-time’, but it will do to get us through this tough time of transition from Bushfire residue chaos into New, comfortable and productive post-fire life.
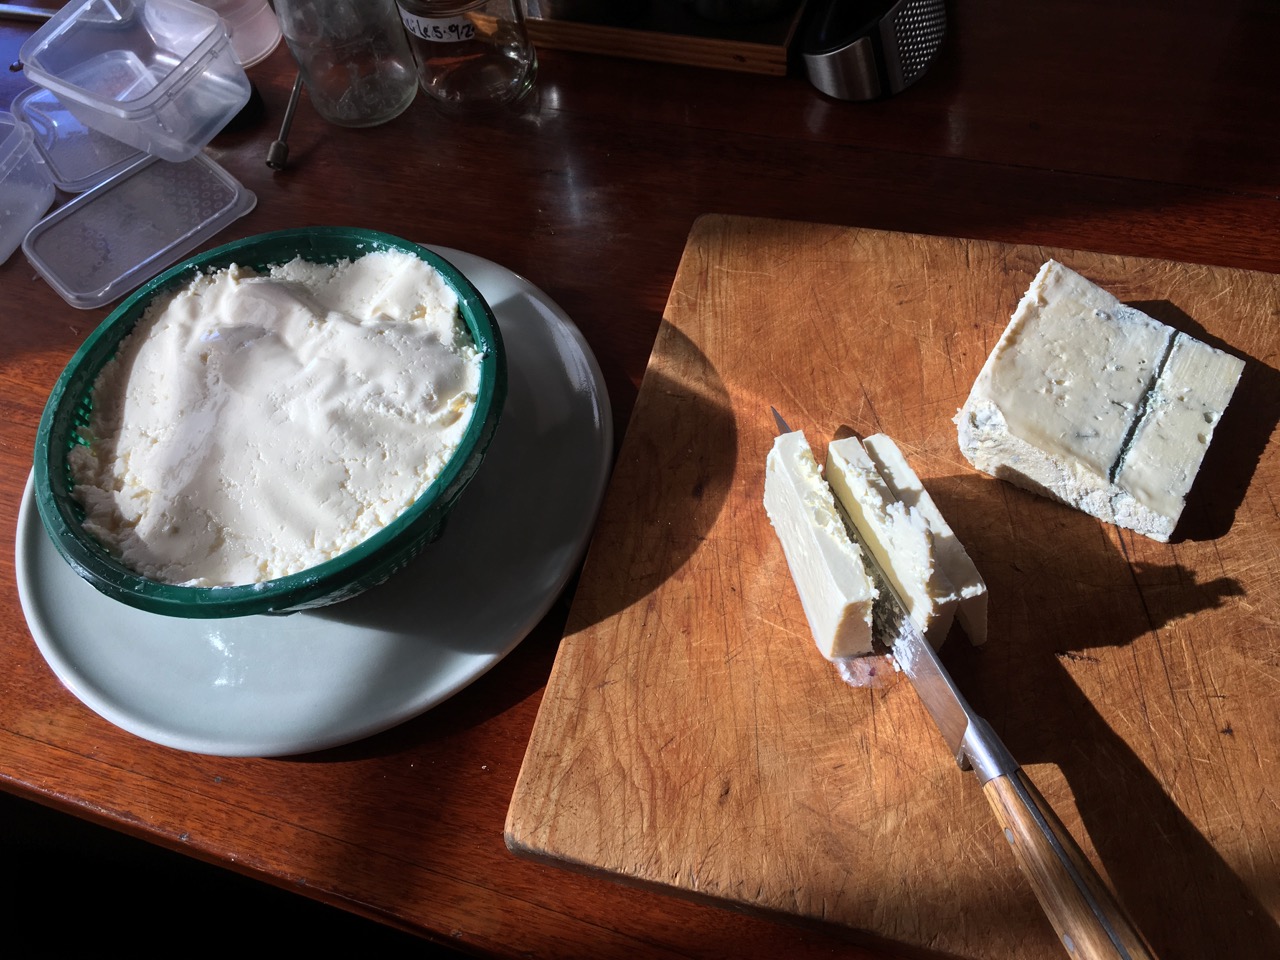
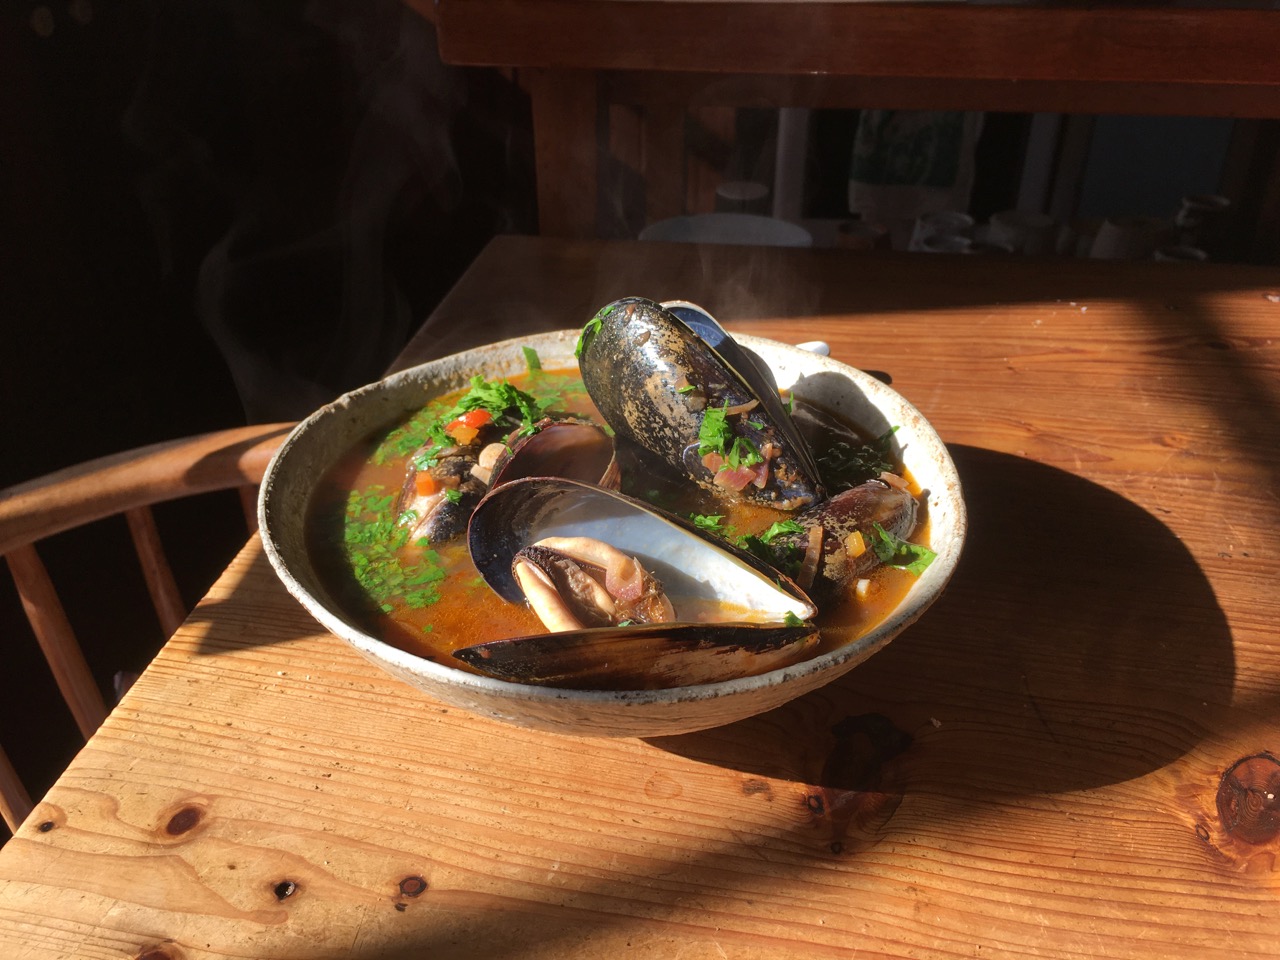
We have been enjoying a few very nice meals recently. Janine cooked 2 big spinach and cheese pies to feed all our helpers over the long weekend pot sale. But at the last minute a couple of our friends, Warren and Trudie, caught Covid and couldn’t turn up to give us a hand. Luckily our other friends Susan and Dave stayed on for an extra day to help us out. Because we had fewer people here, there was an excess of pre-cooked food, like two spinach and 3 cheeses pies, a lovely dish of mussels in rose wine and home made tomato passata, flavoured with a liberal sprinkling of chillis.
Ricotta, plus coarsely chopped Fetta for texture and the sharp spike of gorgonzola to lift the flavour profile and stop it from being too bland.
Janine and I were eating spinach and cheese pie for days. I tried reheating and serving it in a few different ways. One favourite was serving a slice with a home made tomato passata sauce bottled in the past summer, this was served with slices of chorizo, olives and capers. That was my favourite combination, combined with side of a small amount of sautéed mushrooms in garlic and olive oil.
Now that the Open Studio Long Weekend is over. I can get back to the issue/problem of the pug mills.
Success! I made two batches of clay for wood firing and processed them through the two refurbished pug mills.
They both worked just as they should. Instead of taking a whole day to pug the clay through the small 75mm pug mill, as we did a month ago.
This time, using the 100 mm vacuum pug mills we were able to get the clay pugged all through twice, to insure even mixing in record time.
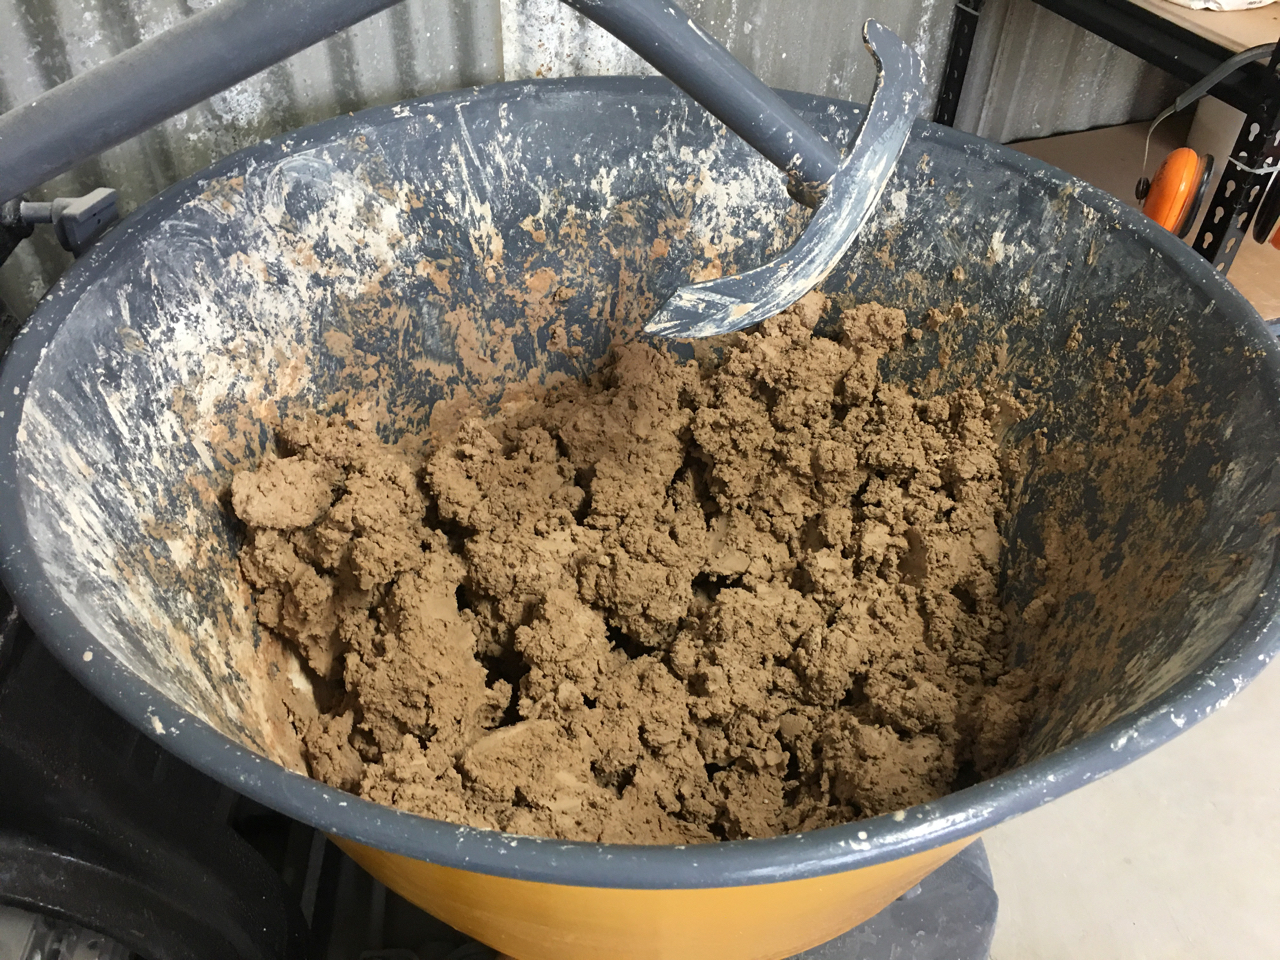
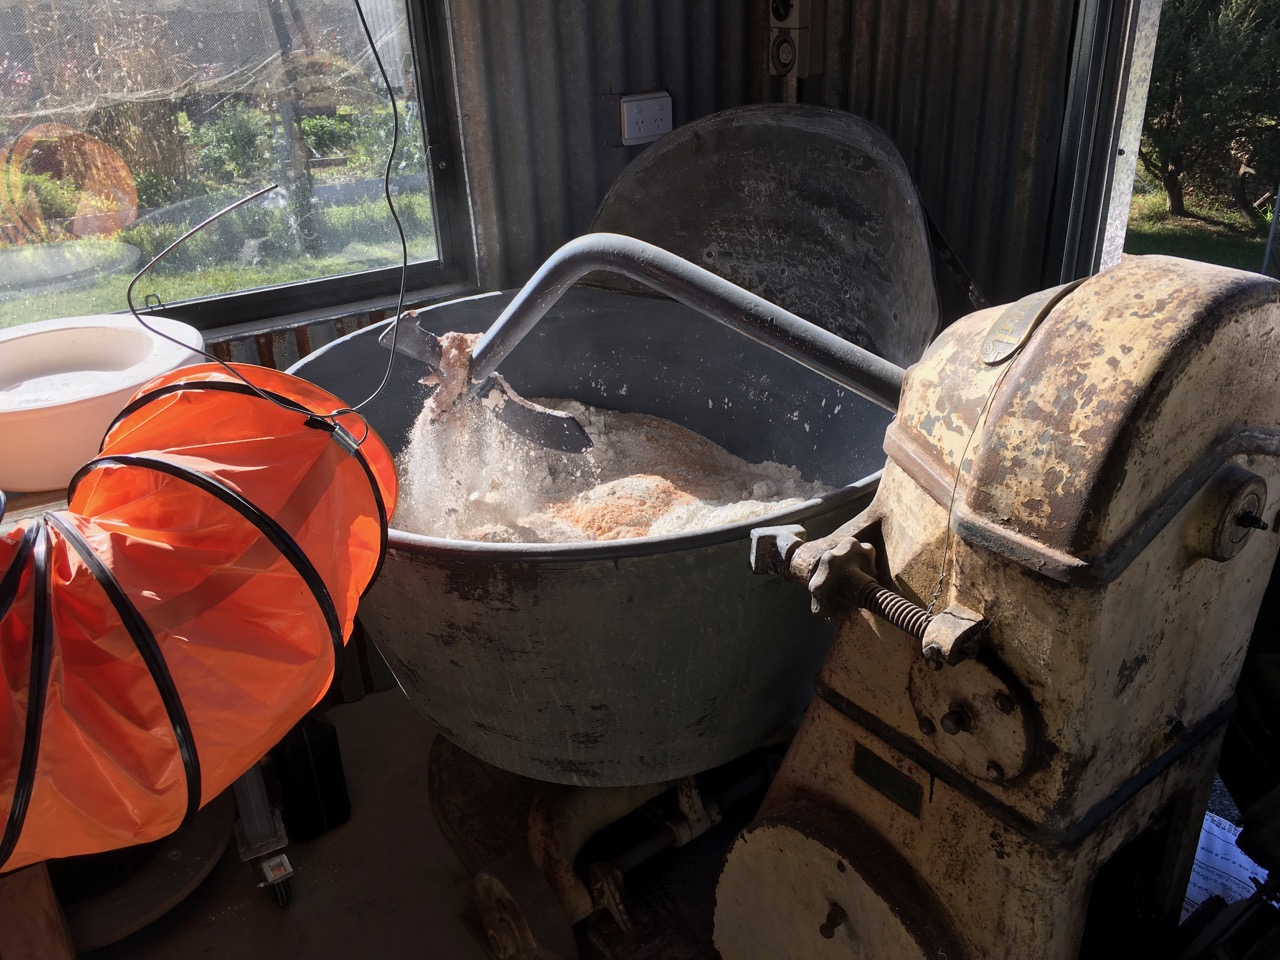
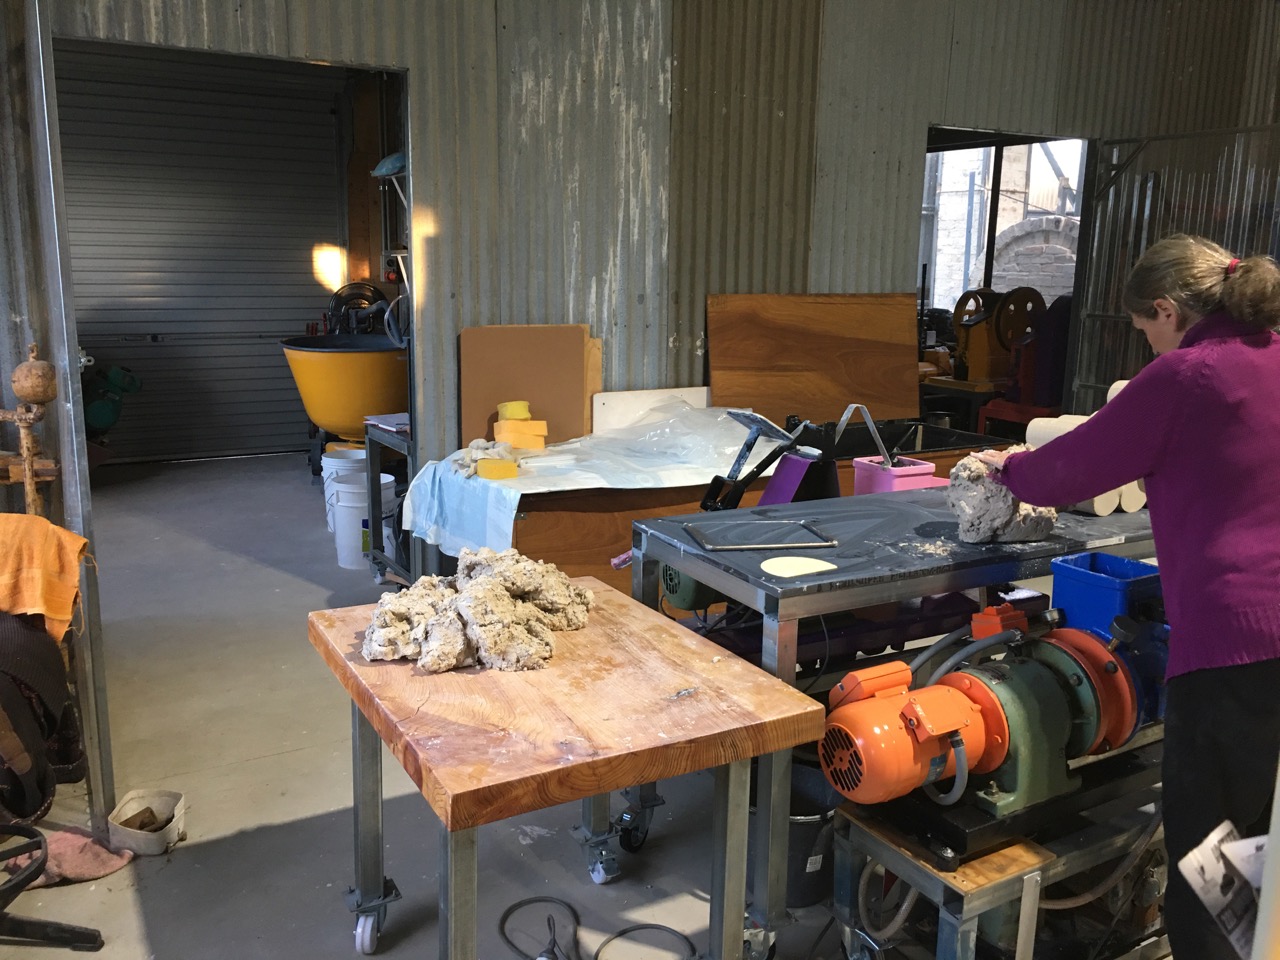
I made a batch of 140 kgs of iron stained wood fired stoneware body in the dough mixer that I bought from my long time friend John Edye after he retired.
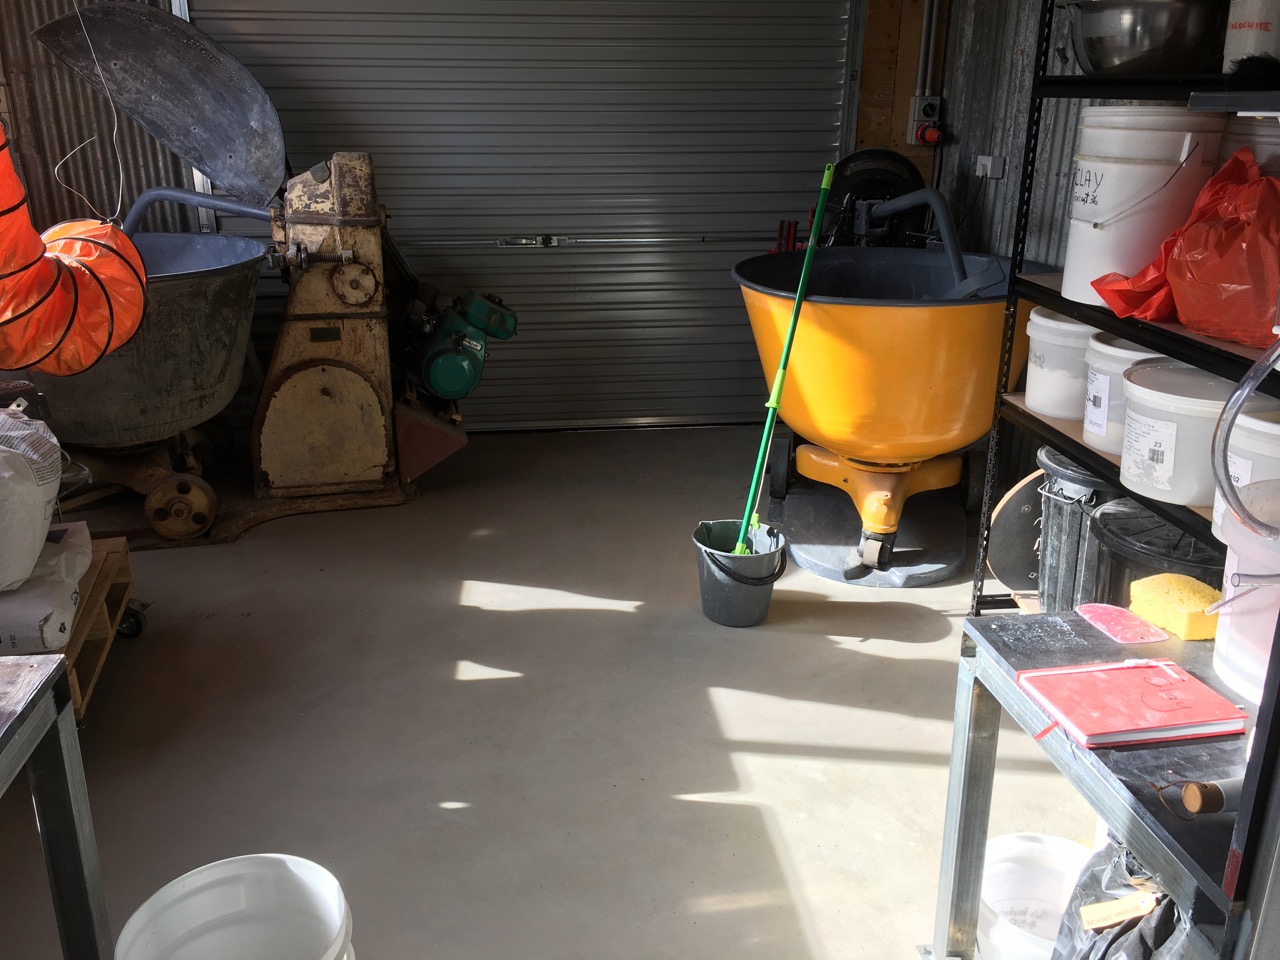
The clay mixing room is loosely sealed and has a vacuum nozzle positioned over the machine that is in current use. This removes a great percentage of the dust from the building, keeping a slight negative pressure in the mixer room and stopping any dust from migrating into the pugging room.
After the clay is removed from the dough mixer, it is placed on the clay trolley and wheeled out of the mixer room and into the pugging room, where it is pugged twice, blended, bagged and boxed.
I scrape, scrub and then sponge out the dough mixer bowl clean as soon as the clay is removed from the bowl. It is best to do it as soon as possible, while the clay is still moist.
It makes the job a whole lot easier. I take charge of mixing the new clay body batches in the vacuum sealed clay mixer room while Janine does all the pugging in the next room.
The fresh clay is then pugged through John’s 100mm. Venco pug mill that dates from the mid ’70’s. This pug mill is the first model of this size made by Geoff Hill.
It is currently disguised as a very large pretend musk stick!
We pug the clay through twice. The first time we stack all the pugs up in a pyramid fashion, then chop all the ends off the clay sausages, working our way back through the batch of clay to minimise any slight variations from batch to batch. Taking clay from the first, middle, and last pugs and blending them back through the machine.
It turns out that Geoff Hill learnt a lot in the building of this first model. And soon made changes to improve it’s design.
We bought our first 100mm. Venco about 6 months to 1 year later than John and we ended up with the second, re-designed model.
As it turned out the second model worked faster and was quieter than the first model.
I didn’t realise this at the time, but as we now have one of each of these earlier pug mill models running side by side, we can experience the differences.
When I made the second batches of clay. The wood fired porcelain clay body. Janine used the pug mill that we were given from our lovely friend Jane in Melbourne.
With its new reconditioned motor now in place, it works beautifully – now!
This is a later model pug mill. Possibly built a decade later than John’s pug. It is much quieter, runs a touch slower, but is much faster and is self feeding.
It runs a little bit slower, but pugs the clay a lot faster.
It doesn’t need a lever plunger to force the clay into the barrel. The clay is just naturally drawn into the pug barrel. This is how we experienced the use of our old original Venco pug mill from 1978.
I attribute this to the design of the blades as they are set up on the shaft. The newer model has the blades a little bit closer together, so that there are no ‘dead’ spots and is a great improvement.
After pugging both batches of clay and storing it all away in the plastic lined clay boxes. Janine puts the chooks to bed and then goes to the house to light the kitchen stove and start dinner.
I wheel the pug mills out of the way, and then wheel the clay bench and pug sausage tables both out of the way. So that I could wet mop the floor and get it scrupulously clean, before wheeling everything back in place. Ready for the next batch.
The mixer room is also mopped clean.
This practice, keeps the clay room spotlessly clean and minimises air born dust diseases.
I’m actually too old to die young now, but I still want to protect everybody else that comes here to visit.
Janine and I had a very good Open Studio Weekend Sale.
We are part of an artist collective organised by a local lady called Erin Adams, she came up with the idea of the ‘Pop-Up’ Open Studios artists collective and herded all of us cats into a cohesive group. A tremendous job of work on her part, and we are very grateful to her for her organising ability.
Over this long weekend, we had over 30 visitors each day, for the 3 days, and almost everyone bought a pot, so we were chuffed.
The weather leading up to the weekend was awful. Freezing temperatures and blowing a gale. We had power outages, with trees blown down over power lines, for 2 days beforehand.
I was starting to think that no one will turn up. Nobody would want to brave all this weather to come out here.
As it turned out. Lots of people came out to Balmoral Village to see us. Most of the ‘Open Studios’ are located in and around the towns of Mittagong and Bowral here in the Southern Highlands. It is a well recognised tourist destination for people from Sydney, and it is easy to flit around and visit all of those local studios about town, without having to spend much time driving between them. You are also in close proximity to cafes, restaurants and coffee shops.
As we are 25 km out of town, it’s a half hour drive to get out here and the same to get back again. So we appreciate the effort that the locals put in to get out here. However, what was amazing was the number of people who drove down from Sydney to come and visit us. About 2/3 of our visitors were from the greater Sydney area. So Thank You very much to all of you who made the long drive of 2+ hours or so each way.
Luckily, we had our friends Susan and Dave here for a few days to help us clean up, set up, and then help us with selling and wrapping for the first couple of days. It made the job go so much easier. Thank you Susan and Dave!
I had made a batch of Tea Pots for the sale and sold most of them. I like making tea pots, they are an interesting challenge. You need to make all the different parts in the correct proportions to fit together in a unified design, but they also need to perform their function properly once fired.
The shelves are greatly depleted now. I love making pots, so its great to have space to make more things.
In the past couple of weeks, I developed a new high calcium porcelain glaze that has a lovely ‘streaking’ quality. I works well with a thin, soft pigment wash.
The pigment highlights the texture of the glaze. It also feels very soft and buttery to the touch.
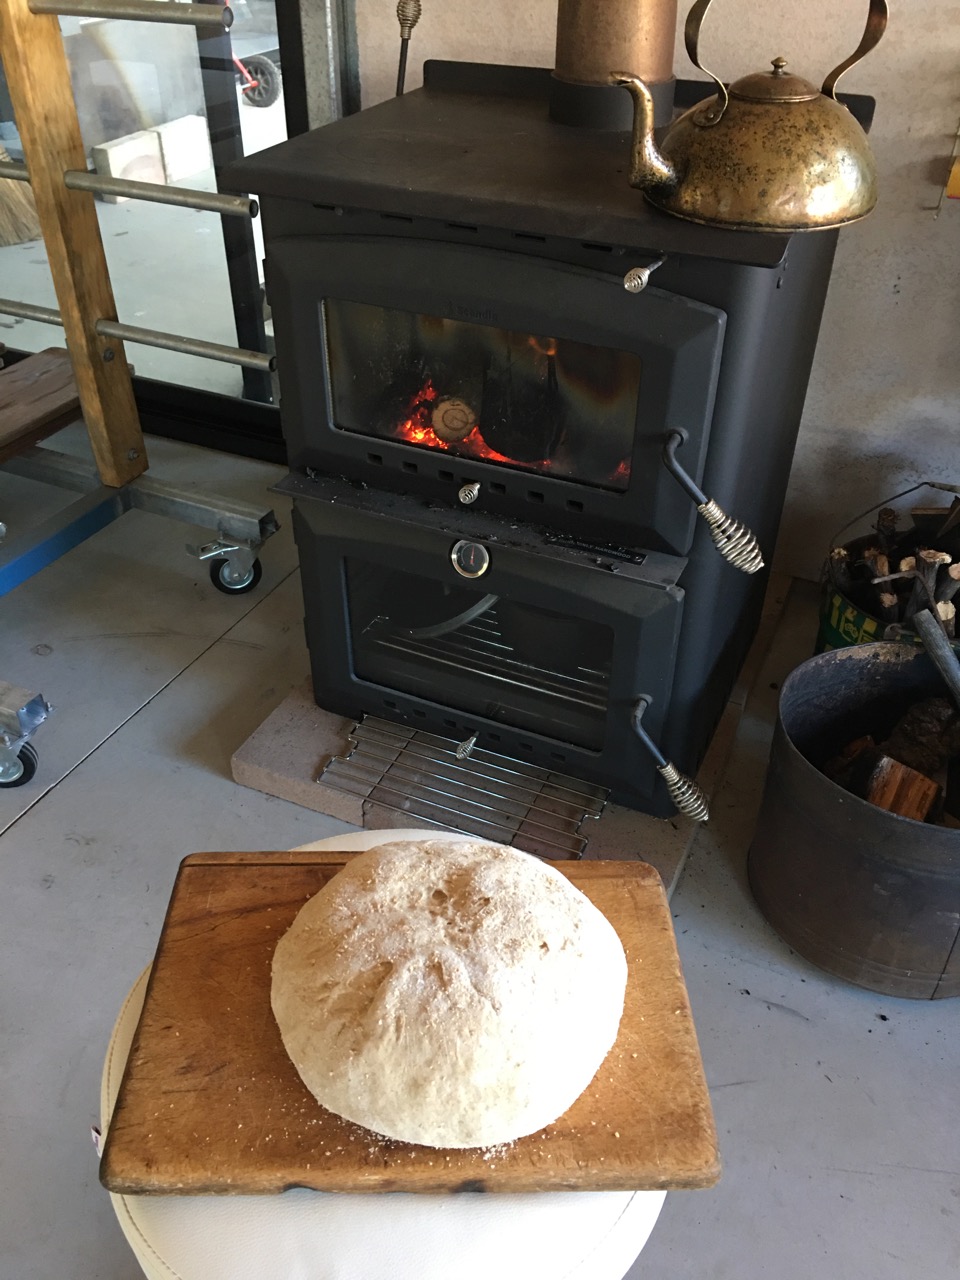
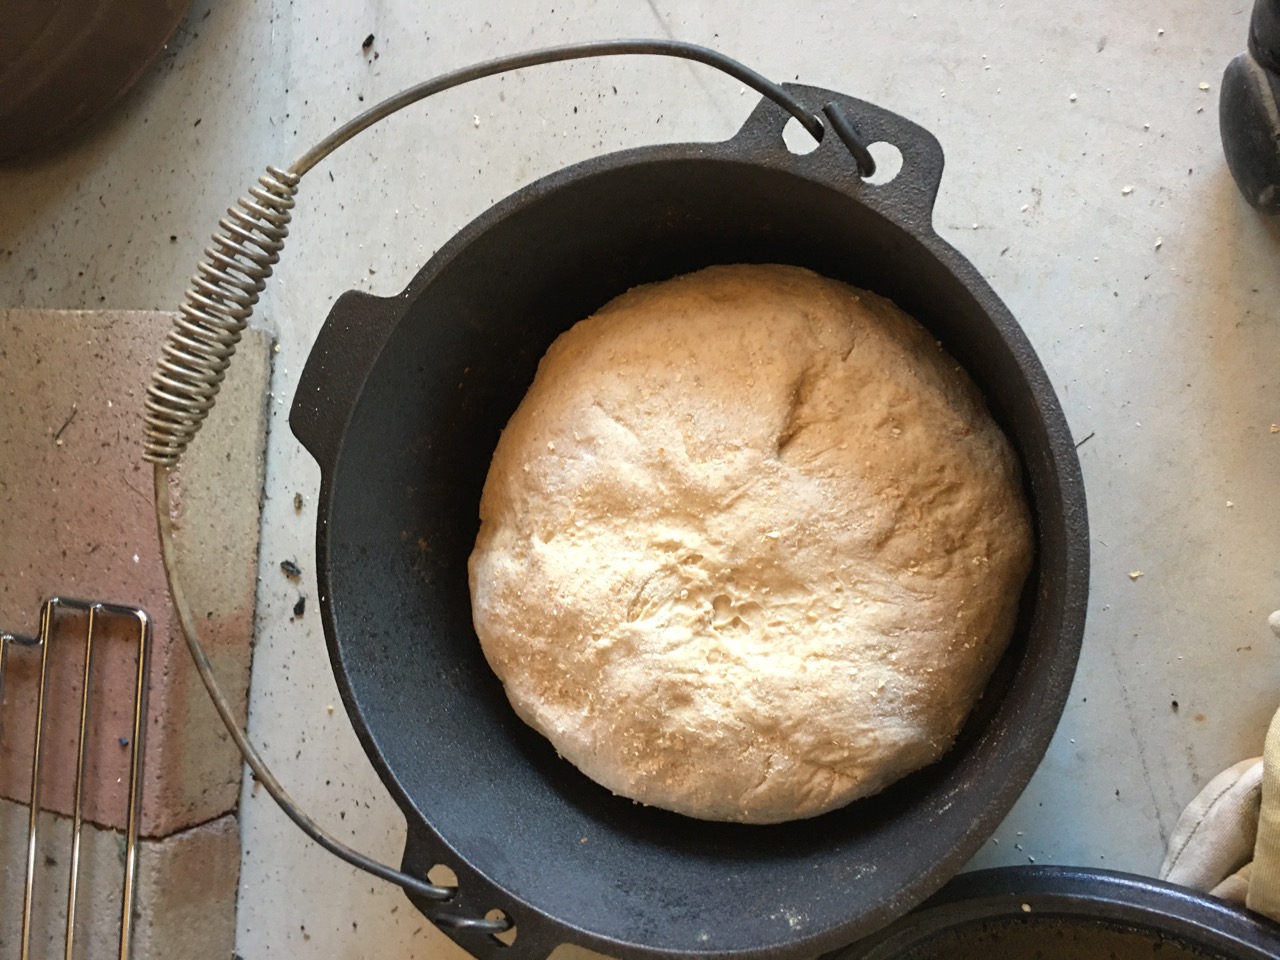
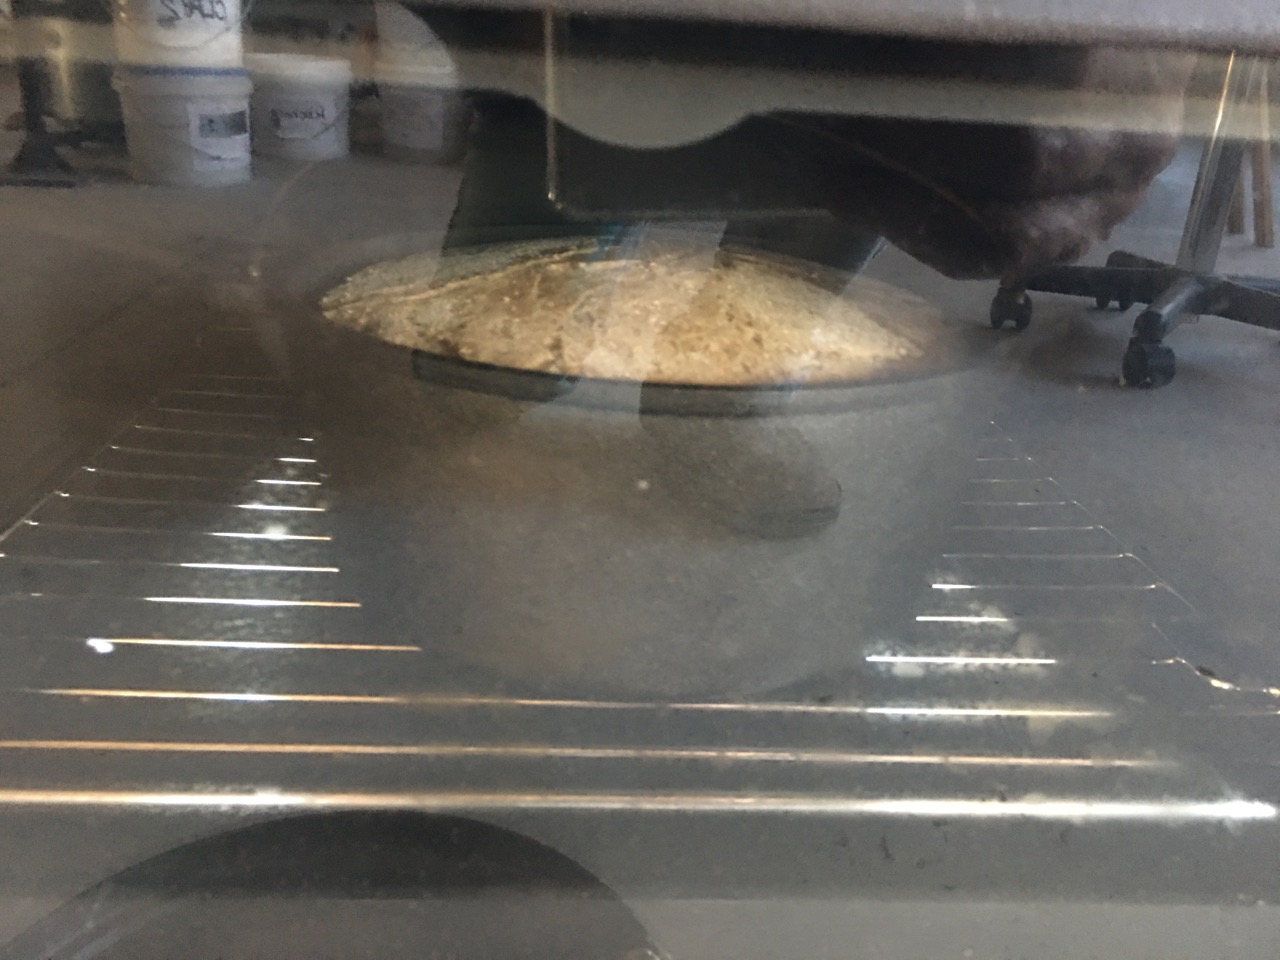
In the days leading up to the Open Studio, I baked a loaf of bread in the pottery wood fired oven and although it took longer than it would have in the house oven, it turned out very well. This new oven has its own personality and will take a few goes to get used to.
I prepared the dough in the house as usual, and then put it in a cast iron pot in the pottery oven.
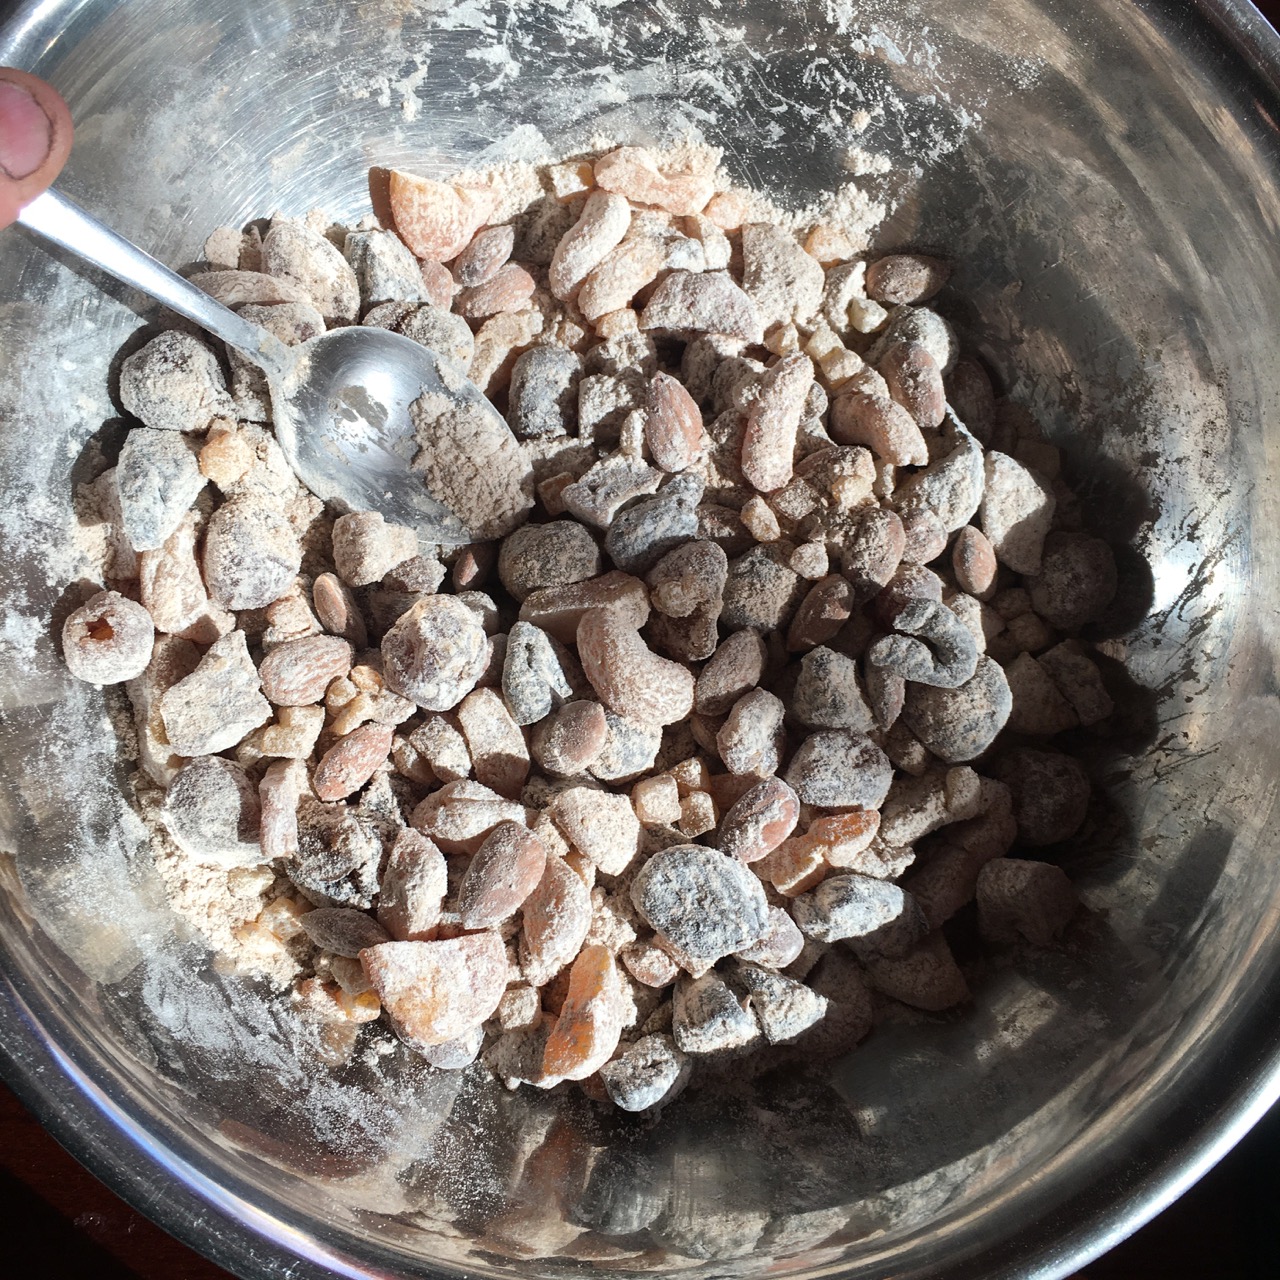
I also made a couple of panforte cakes for the open weekend, to share with visitors. Panforte translates from the Italian as ‘strong bread’. It is a small, solid, flat loaf of sweet bread, filled with dried fruits and held together with some honey and flavoured with a few spices like cinnamon and cloves. The recipe was listed here in an earlier blog. Search ‘panforte’ on the home page search box.
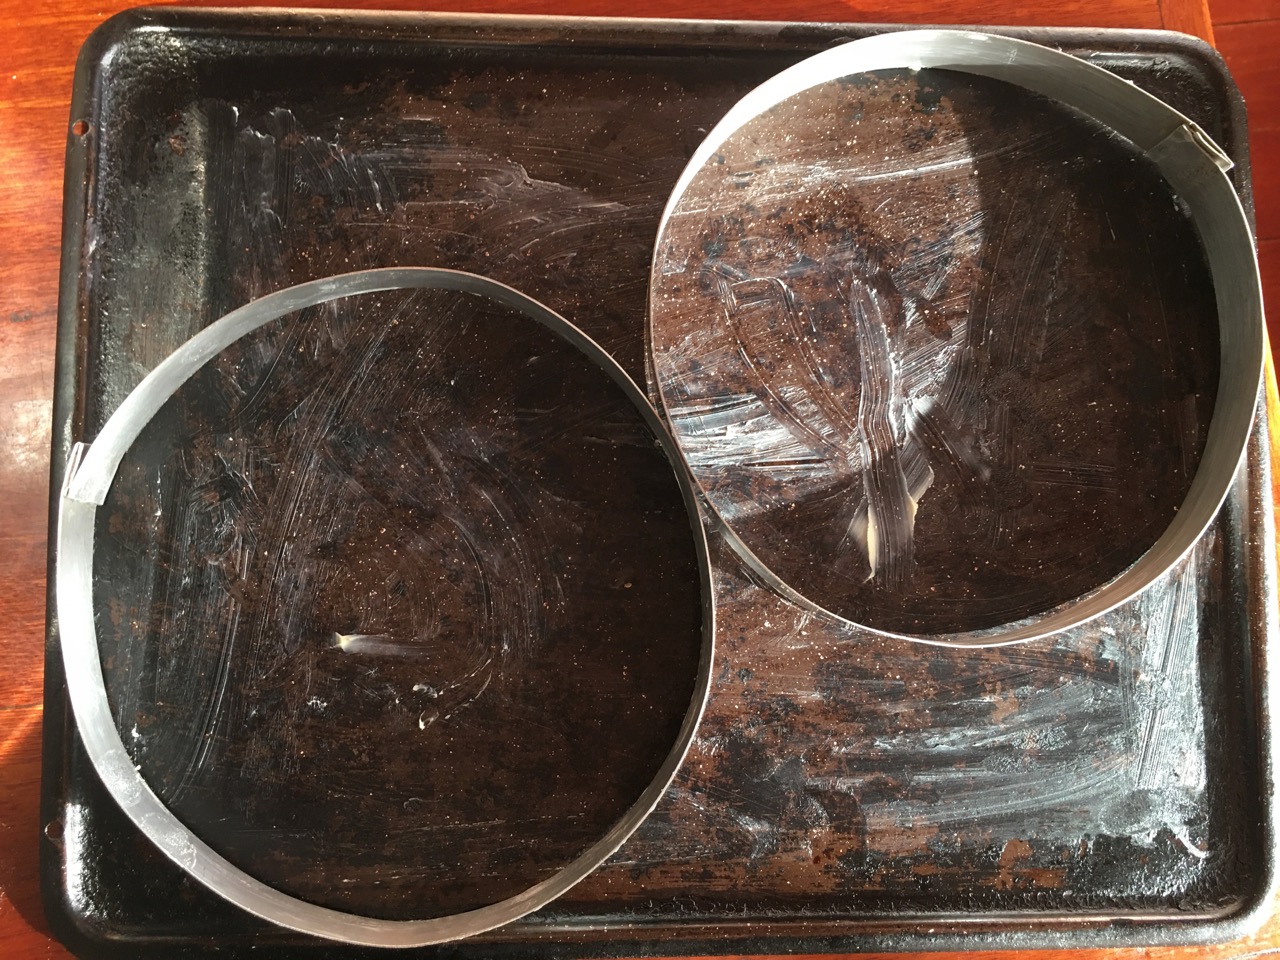
The dried fruits are measured out and mixed with the flour, before adding the honey water and spooned into my homemade stainless panforte rings on a buttered baking tray.
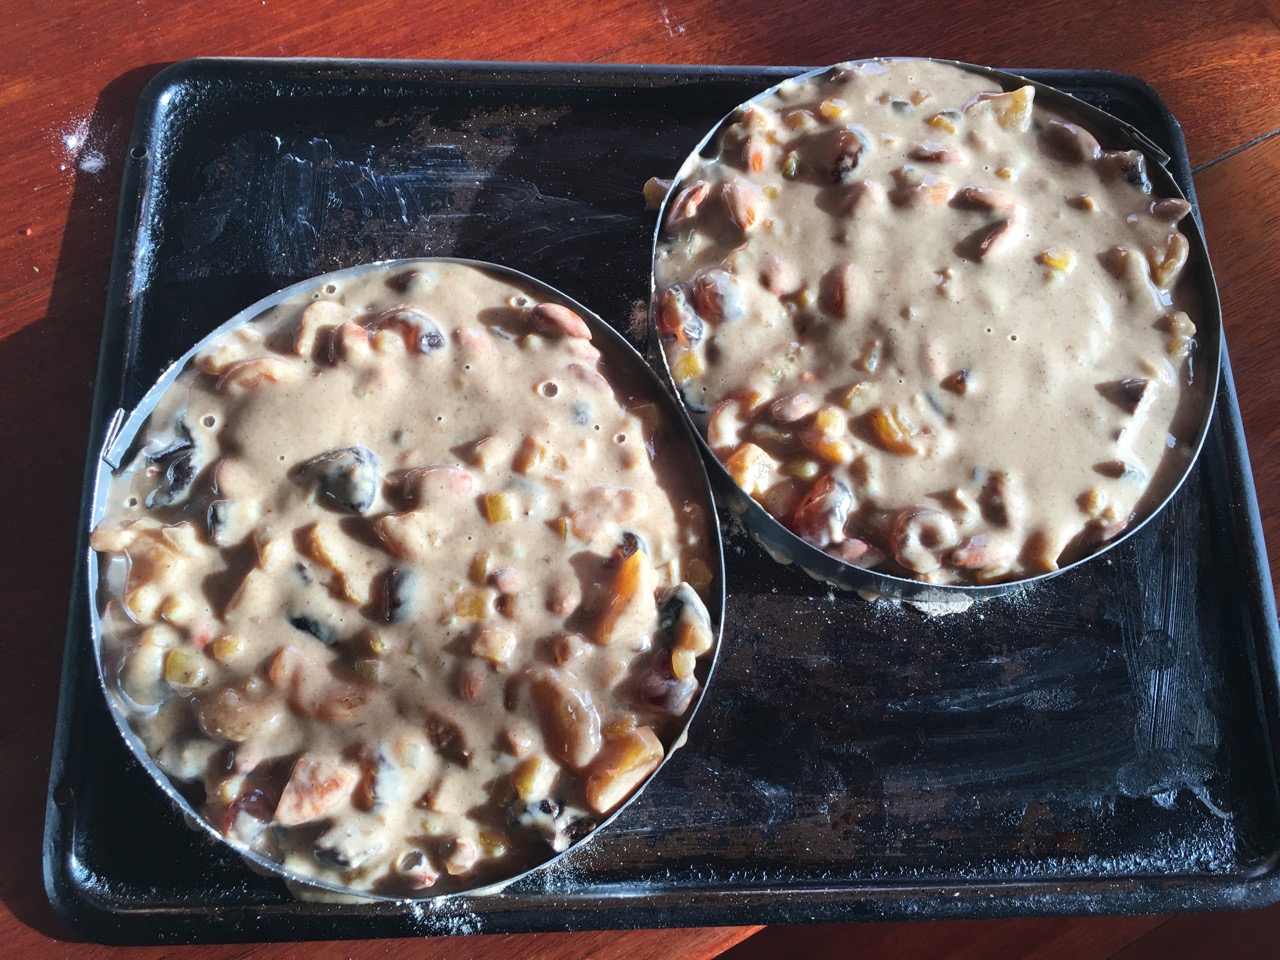
Spoon the mixture into the rings and press it down to fill them well, then bake at 180oC for 40/45 mins.
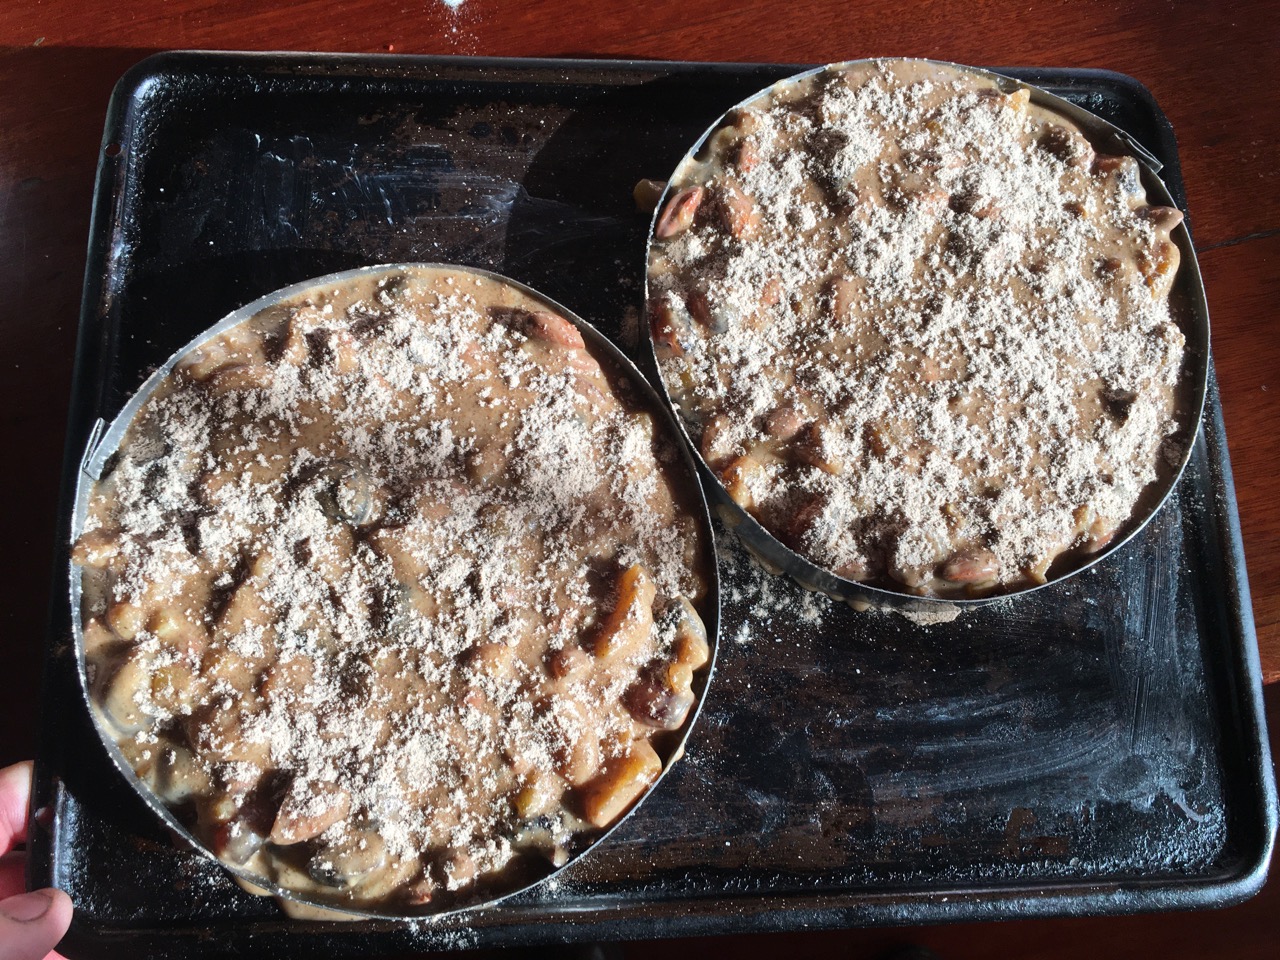
When the cakes come out of the oven, I sprinkle on a mixture of castor sugar, cinnamon and flour as a decoration. Served in thin slices, they go very well with tea or coffee.
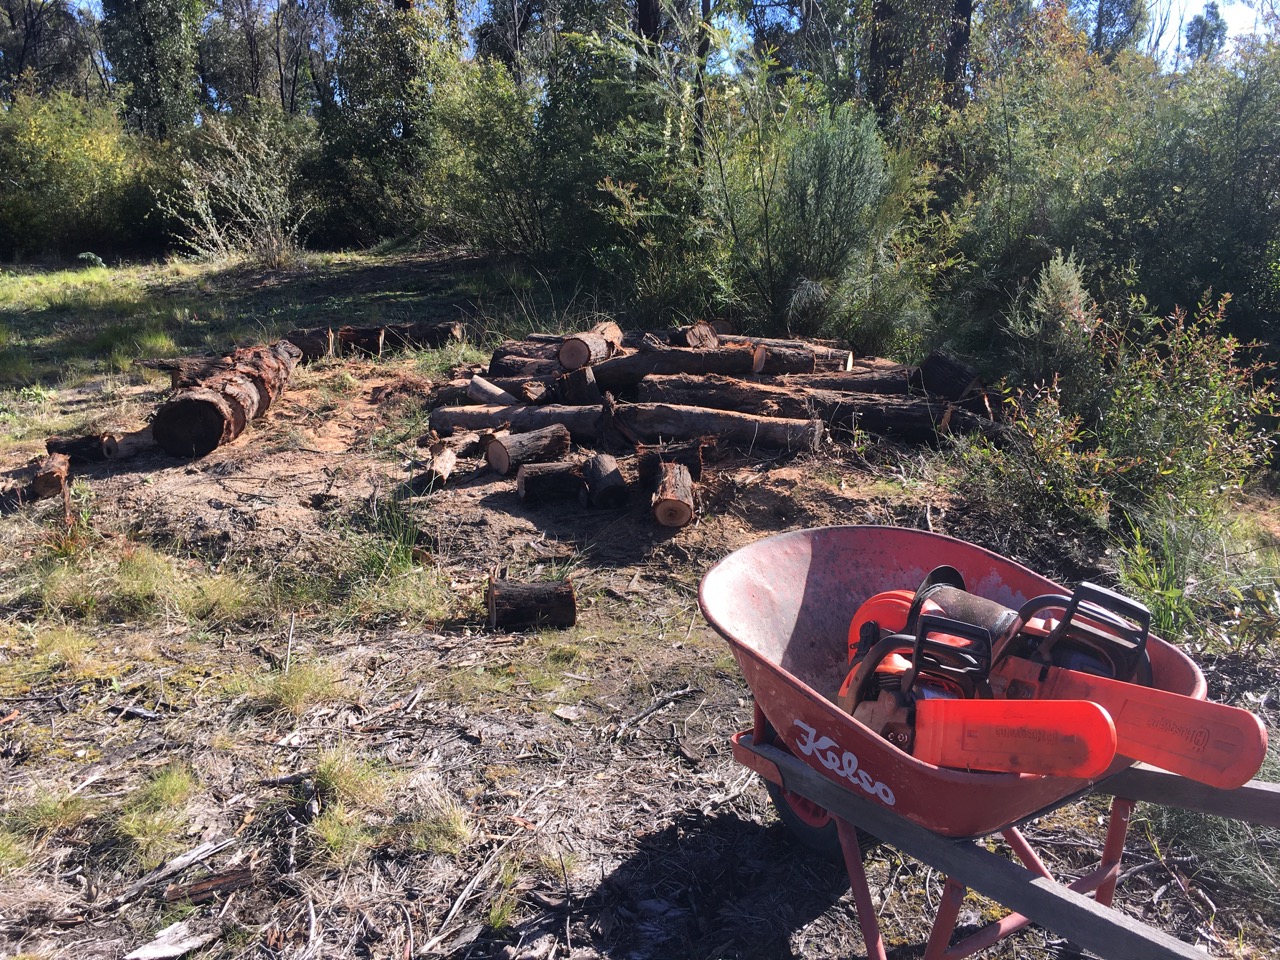
Now that the Sale is over, it’s back to work. Our first job is to chain saw logs to refill the wood shed with fuel.
We have been so busy potting to get everything ready, we burnt a lot of wood in the house and studio stoves, to keep us warm during this very cold start to winter. We burnt so much wood, that we started to run low in the wood shed.
So today was wood chopping day. Out with the chain saws, the wheel barrow and the mini tractor.
We have no shortage of dead trees after the fire, but they need to be chain-sawn into short lengths and then carted to the wood shed where they are split and stacked, ready for use.
A good days work and ready for the next job. This is self reliance. Nothing lasts, nothing is perfect and nothing is ever finished.


You must be logged in to post a comment.