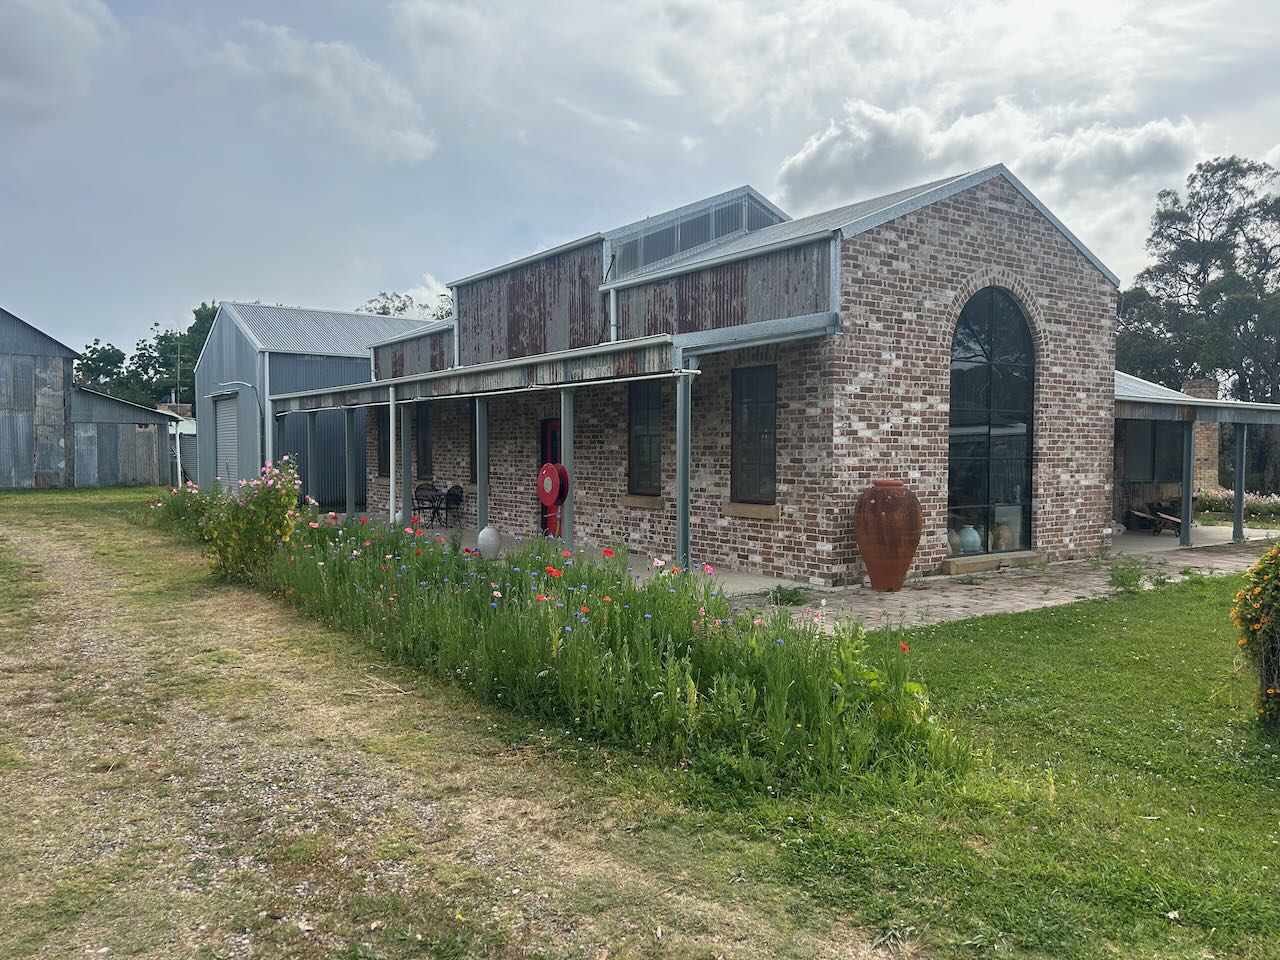
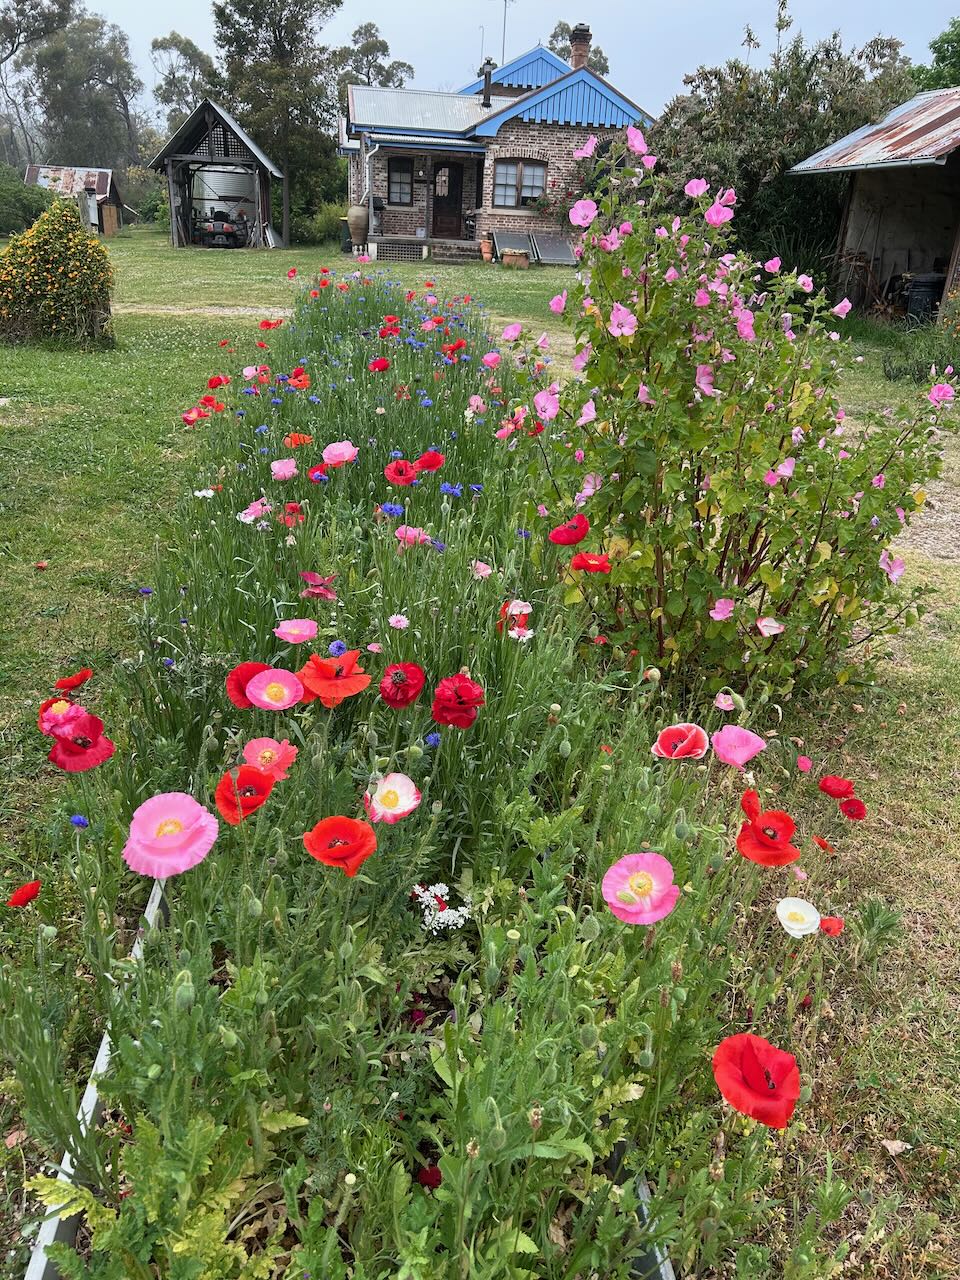
The pottery and its garden are looking great just now and for the next few weeks. All the spring flowers are coming out, just in time for the Open Studio weekends.
We are firing both electric kilns every day for the past week. We are getting all of the final glaze firings done. Working like a well oiled machine. We have been so lucky, that the sun has been shining bright every day – until today. It’s overcast with just a few spots of drizzly rain now and then. Just enough to stop me wanting to go out and do some gardening. I have two more firings on. One stoneware and one gold lustre firing. It’s all coming together.
We have managed to do all our firings on sunshine up until this afternoon, when it had turned quite overcast. Not only have we managed to glaze everything with our own electricity, but I have been careful to manage it so that I have kept both electric cars fully charged, at the same time and still been able to sell just a little of our occasional excess back to the grid to cover our daily access charges. It’s important to me to live a green, low carbon, passive, low energy, non polluting, life of minimal consumption, and we are doing it. We are managing it pretty well. But this afternoon, I will be withdrawing some expensive ‘green’ sustainable energy from the grid, for the last 3 hours of these current firings.
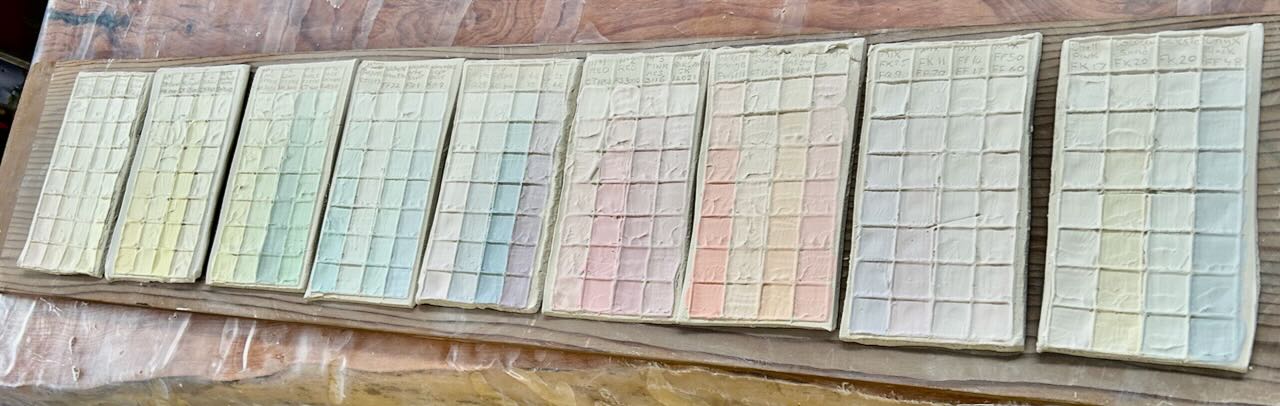
I have been experimenting with some new coloured pastel slips that I developed before we went to WA for the conference. See my previous post; More rain and tasting cider, Posted on
I weighed out almost 300 different pastel tones of stoneware slips.
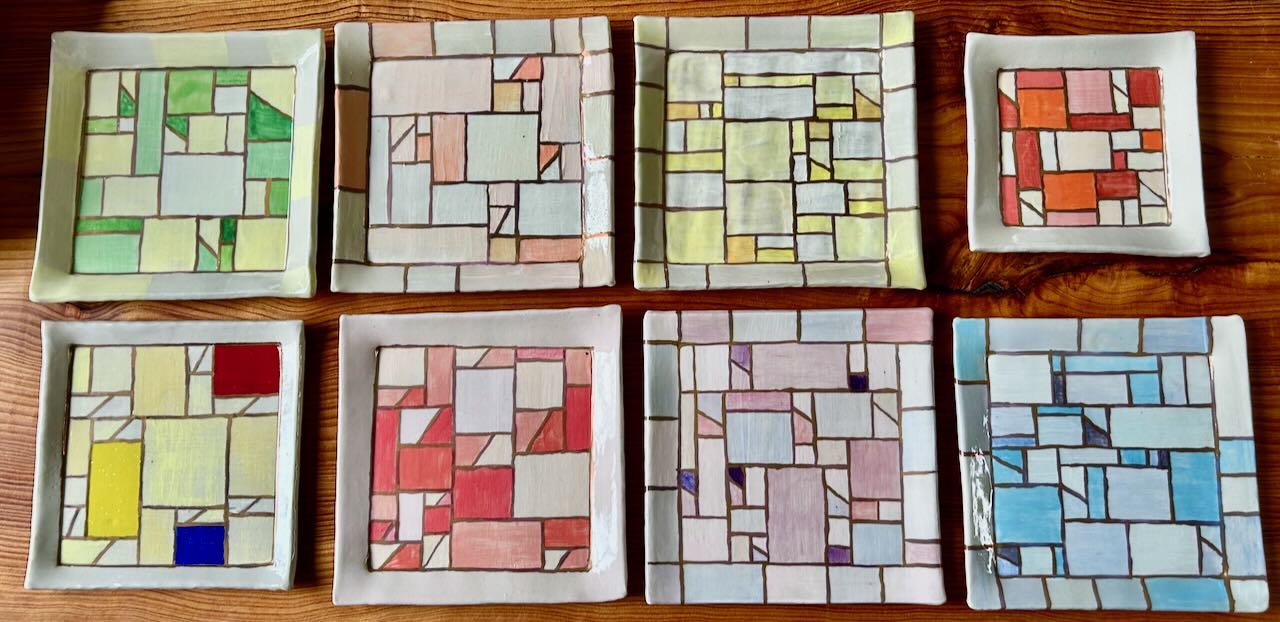
Using these colours, I tried making some new square plates, with a Korean inspired ‘Bojagi’ traditional fabric design. I’m very pleased with them, for a first attempt. I quite like the one were I ‘channel’ Piet Mondrian. Mondrianic bojagi!
I have also been making some more Korean inspired ‘Moon Jars’, but with an Australian twist. No photos yet, that are still in the kilns.
Please call in to see us on the next two weekends 1st/2nd and the 8th/9th of November. We will have tea or coffee and even cake for the first in and best fed.
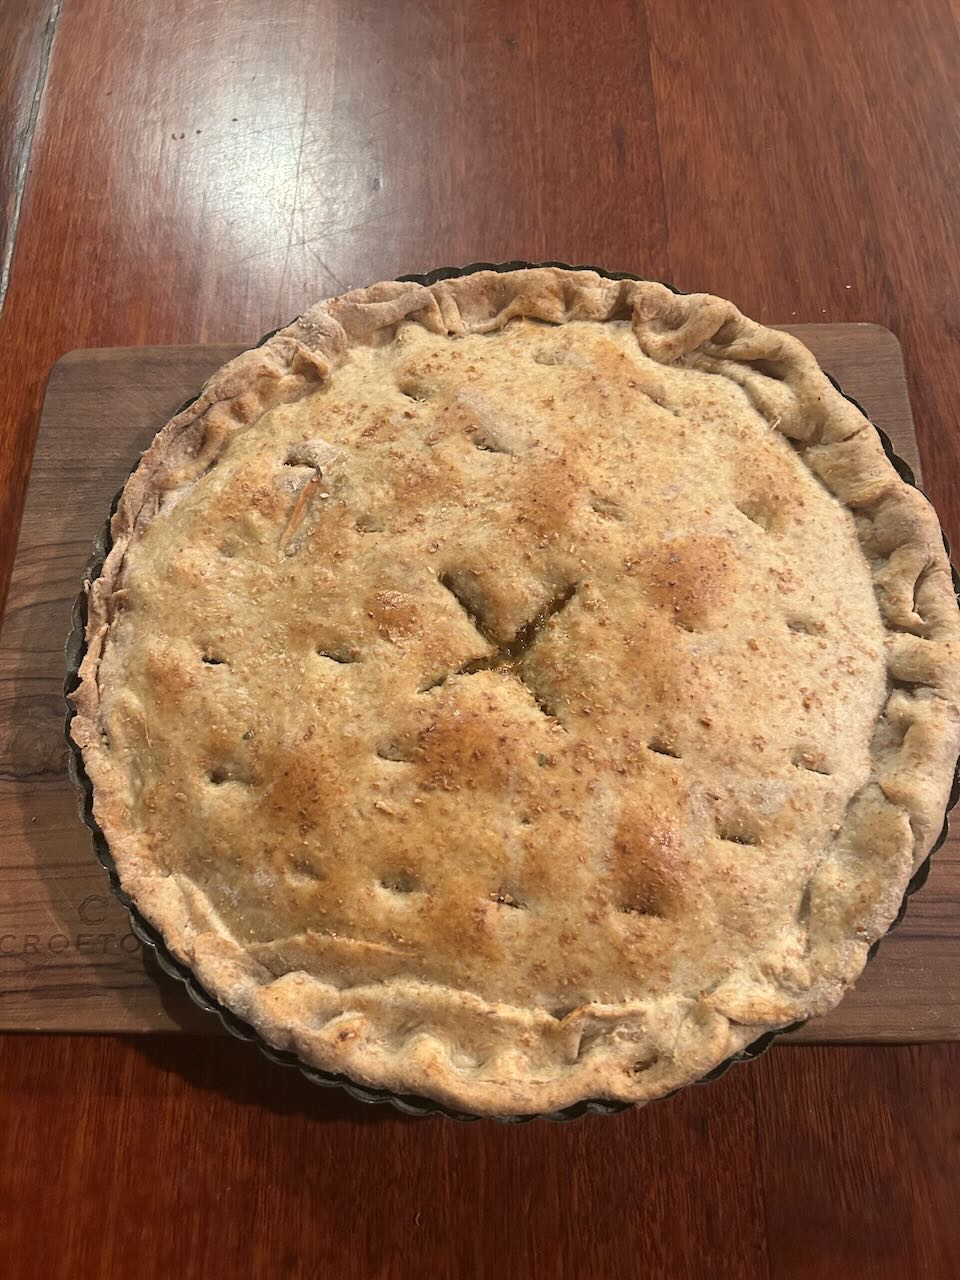
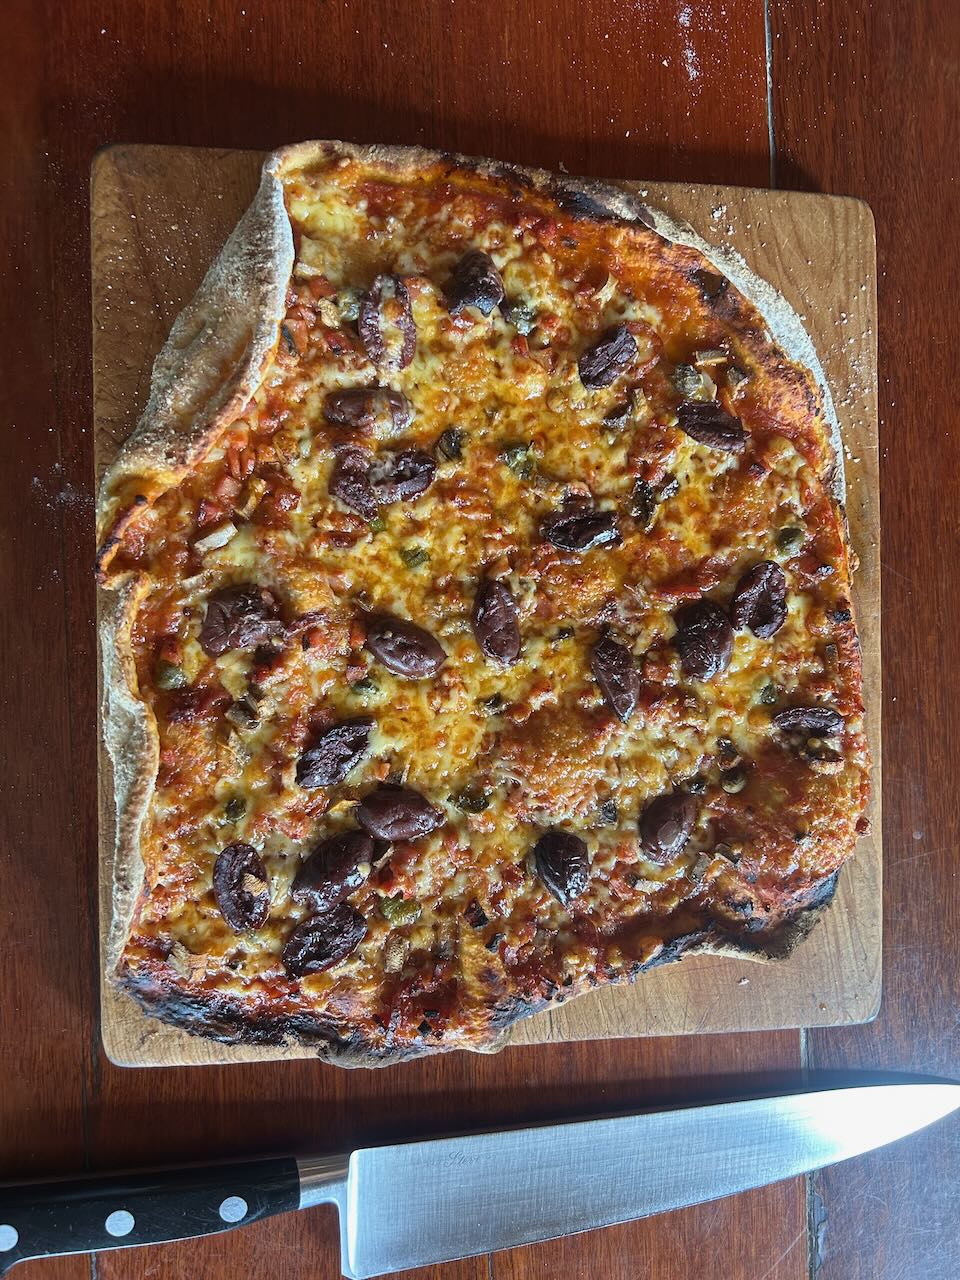
In the kitchen, I’ve been harvesting lots of leaks, and making chicken and leak pie. I’ve got quite quick at knocking up small batches of wholemeal pastry for pie crusts and pizza bases.
We may be very busy in the pottery, but there is always time to raid the garden for food for dinner and to cook up something wholesome and delicious for dinner.
July means that it’s time to get to work in the orchards. There is pruning to do. I usually wait until most of the trees loose their leaves before pruning as a rule, but with such a range of trees in this family orchard of mixed fruits, there are some that have lost their leaves a month ago and others that are still in leaf.
In a perfect world, I’d treat each tree as an individual and consider its best needs, one by one.
But this is reality, and I have a lot to do everyday through the seasons. Winter is also wood kiln firing season. I want to fire my wood kiln at least once each month to get through all the pots that I’ve been making since my return from the work that I did in Korea. So the orchard pruning/spraying/fertilising is all compressed into one day, as needs must. I have my friend Andy coming tomorrow to help me do some of the last outstanding jobs to finish off the pottery shed. It needs flashing installed over the windows. Something the shed builders didn’t bother to do. Slack arses! So I’m finally getting around to it 5 years later.
I choose a day at the beginning of July and get stuck in to the orchard jobs. Every tree gets pruned for shape and strength, removing any dead wood, crossed branches and water-shoots, I also open up the centre to let light and air in and allow good ventilation. I prune to an outward pointing bud, and hope for the best. I’m not so interested in maximising the crop of fruit. In fact we have more than enough fruit set each season, as we give a lot away.
Yesterday during pruning, I noticed that I was pruning off branches from an apple tree with full vigorous growth of leaves still on, and then followed by a peach that was so advanced in its dormancy, that it had bud swell. I really need to give the trees a good saturating spray with lime sulphur before bud burst to suppress mildew, fungus and leaf-curl on the various trees. Lime sulphur spray stinks of rotten egg gas smell, and is best kept off your skin and clothes, so I wear a face shield, hat, rain coat and gloves, just in case.
One of the apples gets white powdery mildew, a couple of the peaches get leaf curl. It’s a mixed bag. After lime sulphur spray, I go around and spread composted chicken manure for its nitrogen, dolomite powder for its mixed, subtle calcium/magnesium content, and some wood ashes for the potassium that encourages healthy fruiting.
The chickens have the stone-fruit orchard all to them selves everyday to roam and scratch around in. Always finding something interesting to chase and squabble over. They are forever dropping their pooh and enriching the soil as they go about scratching, so a little extra lime every now and then to sweeten the soil is a good plan.
In a few weeks time, I’ll also start the first of the Bordeaux sprays, to suppress the leaf curl fungus, through into spring. Peaches and nectarines are particularly vulnerable to this fungus. Bordeaux spray (copper sulphate mixed with lime) helps to control this. Both Bordeaux and Lime sulphur are registered organic sprays.So I can feel safe using them on our food. However, I like to use the minimum amount, as copper can build up in the soil over time.
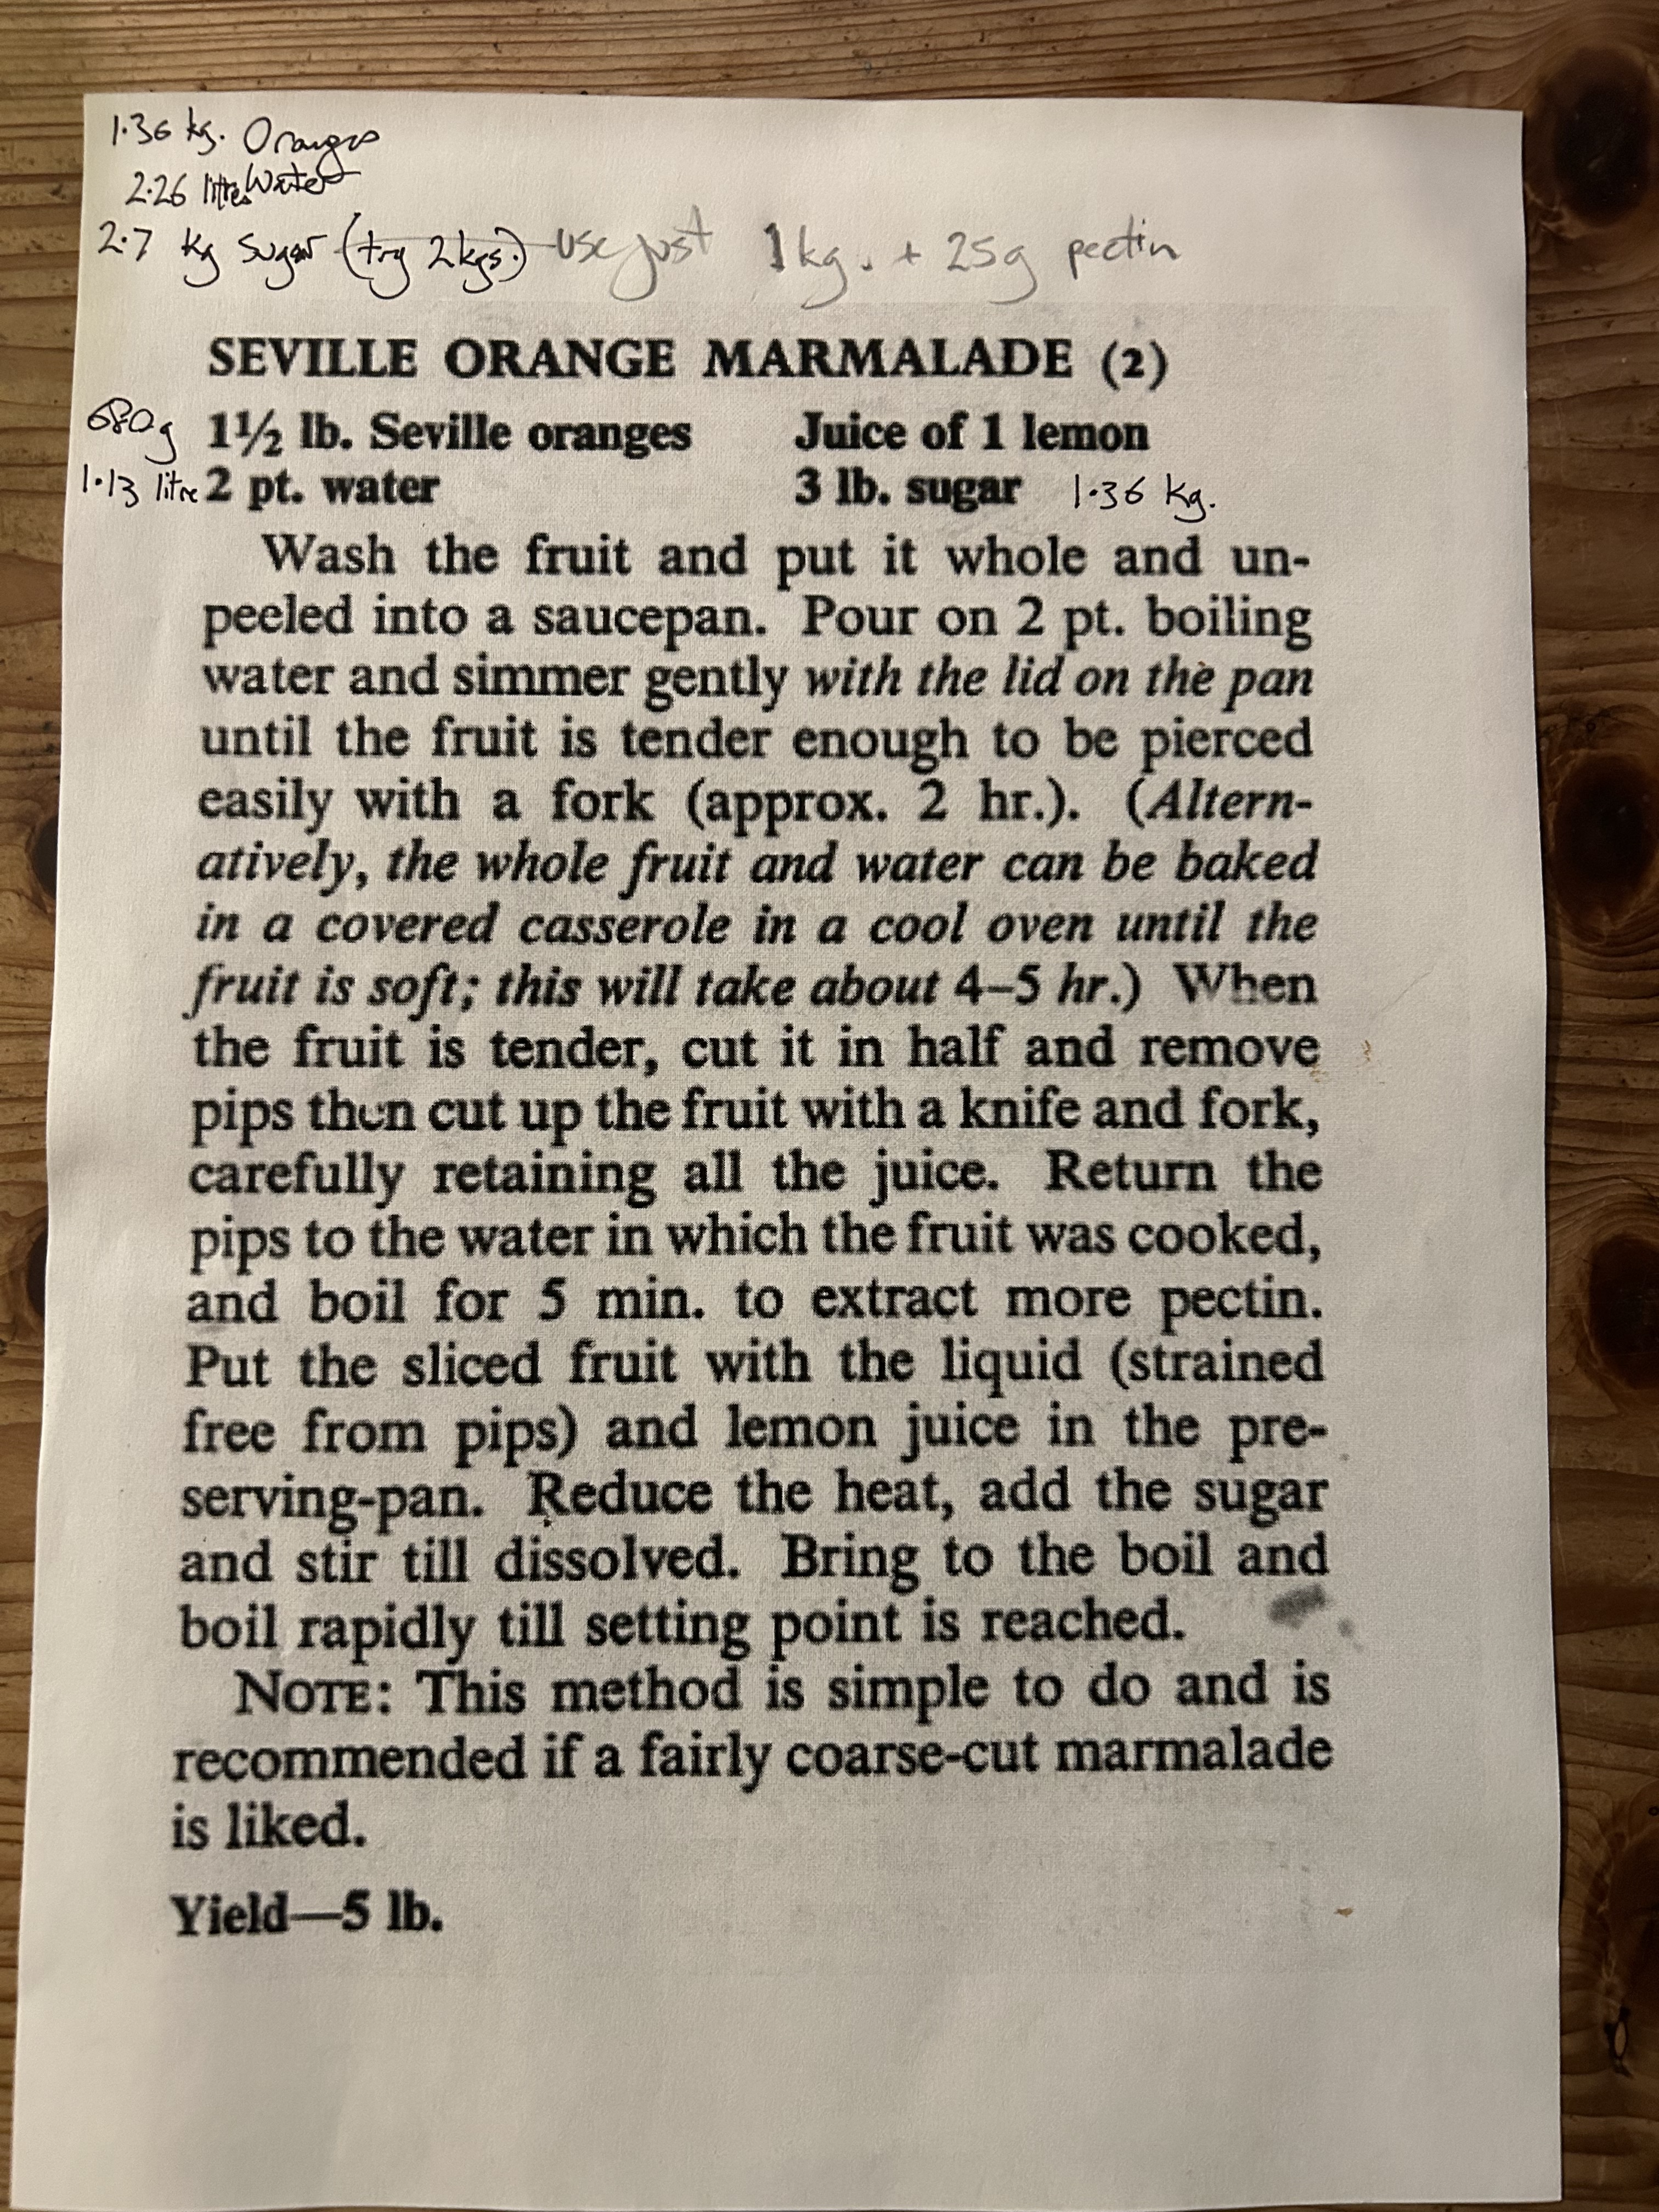
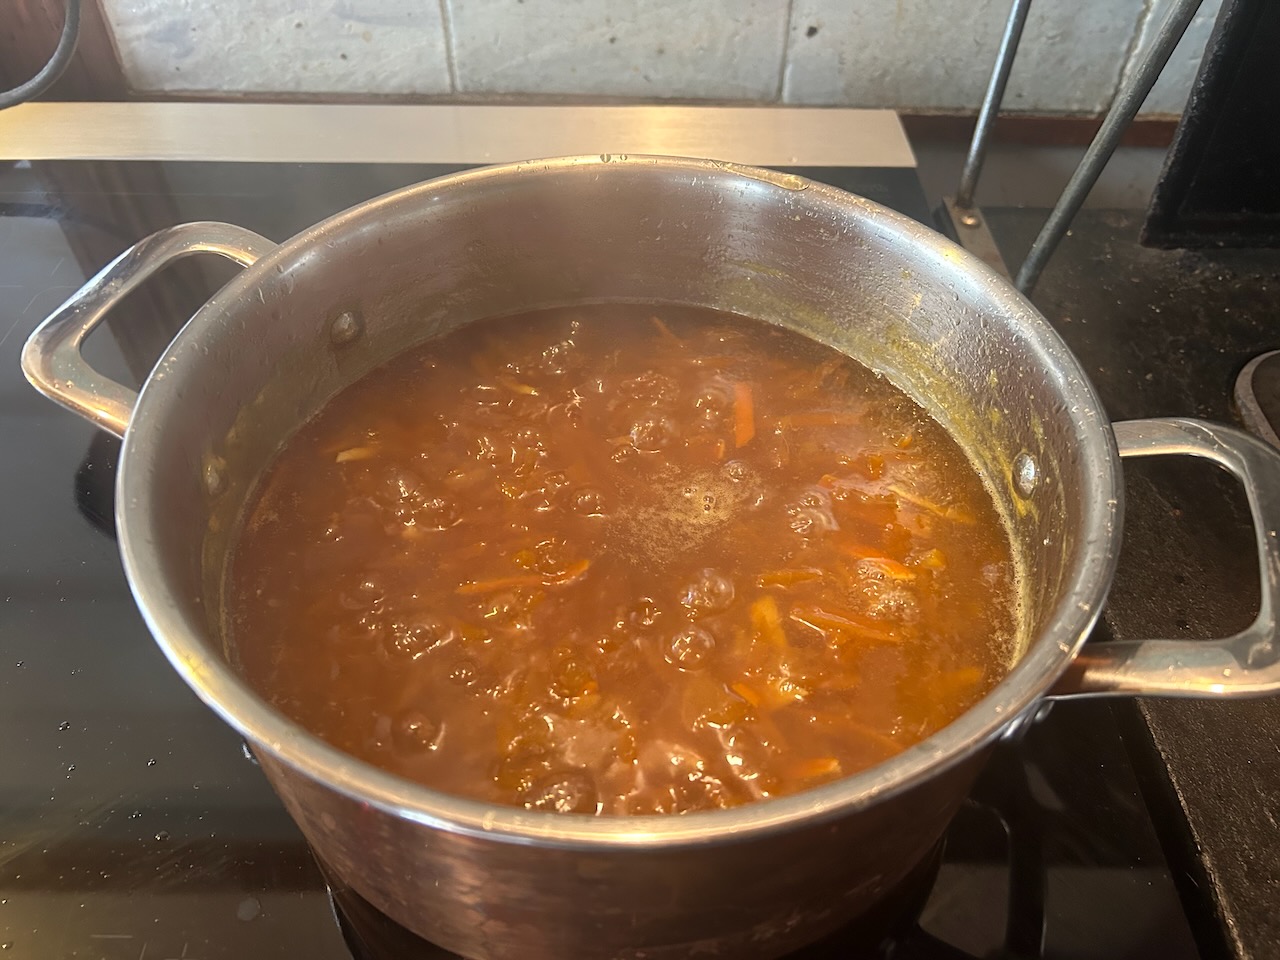
Out of the garden and into the kitchen. Winter is also peak season for citrus fruits. We have been making batches of marmalade since the season started back at the beginning of June. This week I have been trying out an old recipe that I got out of Mrs Beaton’s cook book. I have the paperback facsimile edition from the mid seventies. I was encouraged to try it out by my friend Bill who makes lovely marmalade. I occasionally post him a box of Seville oranges and he later returns a jar of his latest batch of marmalade. A good arrangement.
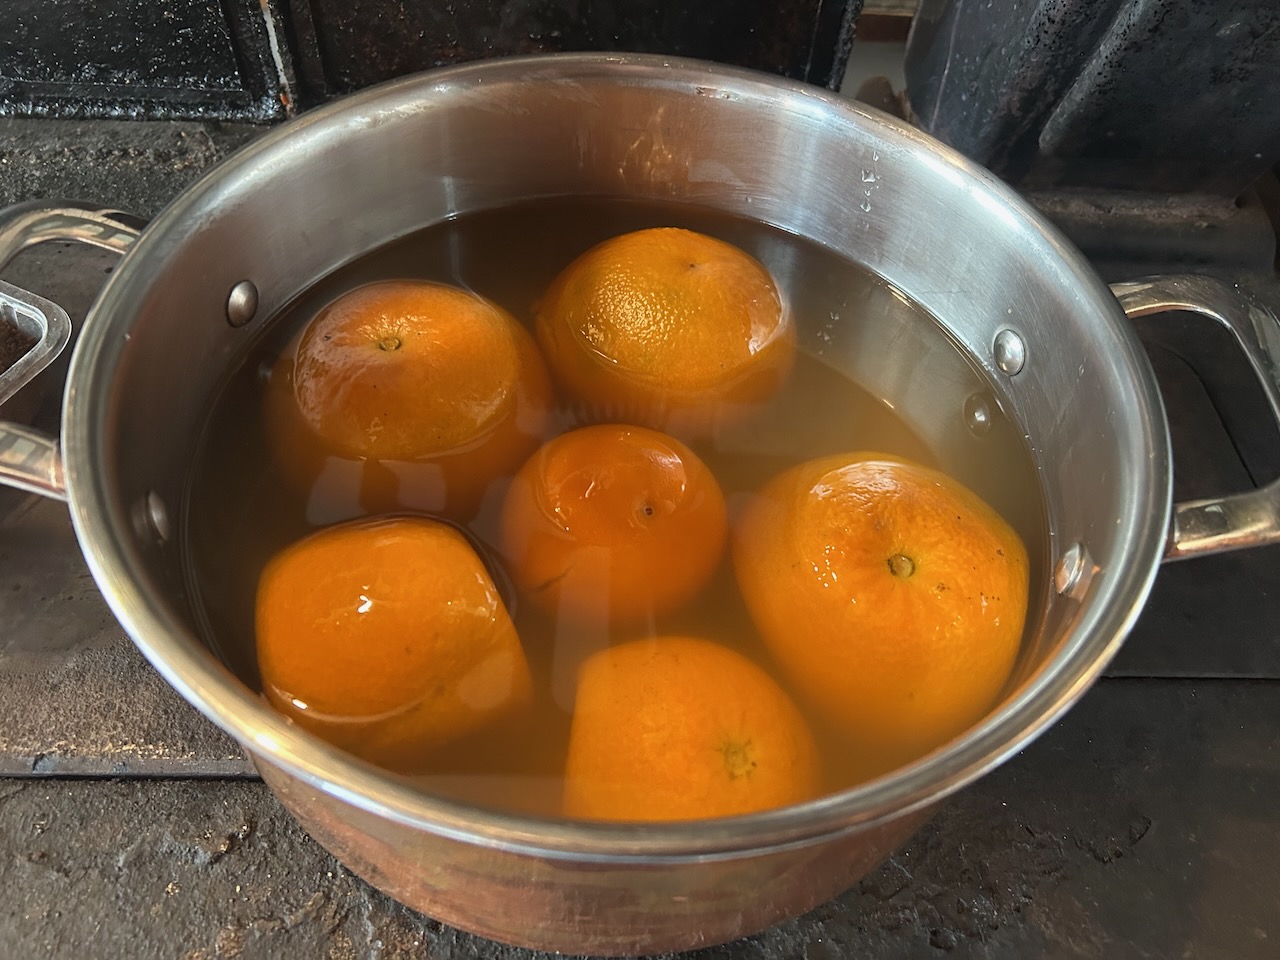
This year I’m giving one of Mrs Beaton’s recipes a try. There are a few in the book. This is No.2 as recommended by Bill. I doubled the quantities, to make it worthwhile spending the time on it. However. I couldn’t bring myself to use 3 lbs (2.7kgs) of sugar. So I reduced it to 1 kg and added 25 grams of pectin to make up for the reduced sugar. After converting it to metic and doubling all the quantities, it still tastes great!
It’s a good recipe and in this slightly altered form, with much less sugar. I still find it very sweet. I’m glad that I didn’t bother trying it in the original. I wouldn’t have enjoyed eating it at all. Boiling the whole fruit for 2 hrs and letting it sit overnight to cool gives it a very old fashioned sour flavour from the peel that we don’t get by just boiling the peel and juice for a short time.
This recipe gave me 3.5 litres of marmalade = 6 medium sized jars. Worth the effort. We had visitors while I was cooking it up. They all walked into the kitchen and each remarked on how wonderful the smell was as they entered. We were able to give them a large box of mixed citrus to take with them.
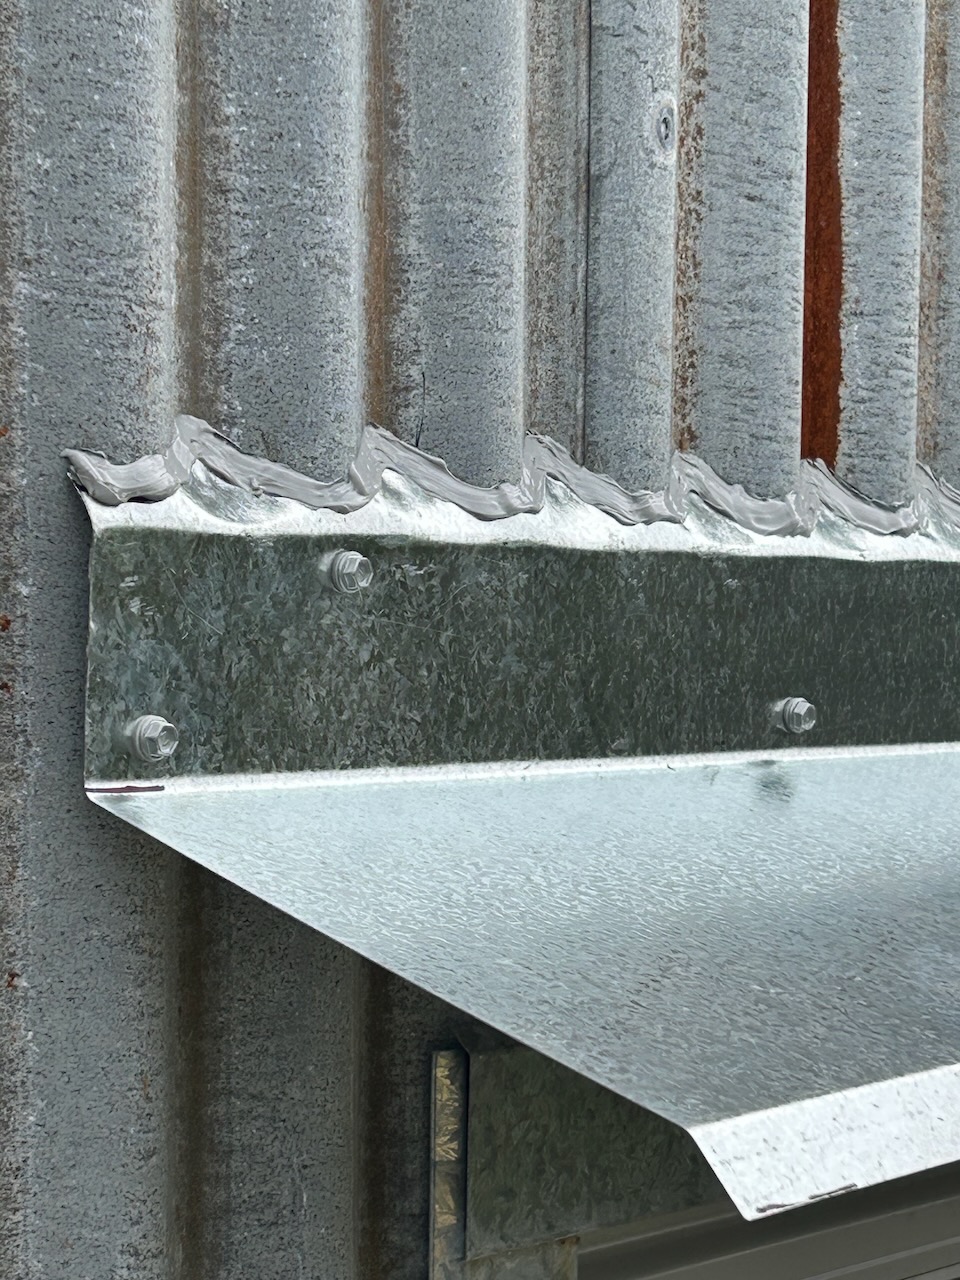
Out of the kitchen and onto more pressing practical matters, I made my own new flashing for the pottery shed windows from two sheets of 2440 x 1220 x 0.9mm sheets of galvanised steel, that I cut and folded on the guillotine and pan break, custom fitted for my windows. The lengths of flashing have to be marked and then cut out to perfectly fit into the curves of the corrugated iron sheeting on the walls. In a perfect world. The shed builders should have fitted flashing above the windows before they installed the outer wall sheeting. But they didn’t bother to do anything at all, so the window seals around the edges leaked. But not any more.
Andy and I marked out, hand cut and fitted the curves exactly to match the variations in the mixed 2nd hand gal sheets. A slow, but rewarding job. We couldn’t use a template, as almost every sheet is different across the wall. Until I collected all this mixed corrugated iron roofing fro mall around Sydney and the Highlands. I didn’t realise how many different profiles of corrugated iron there were. I just thought that it was all the same. But every company has their own individual variation of the profile.
We spend a day going around the building and fitting the new flashing above all the openings. We can’t take off all the cladding to do it properly. As it should have been done. So we add the flashing onto the wall sheeting and cut it into the profile and seal it with silicon. It’s quicker, but still takes us all day to do 5 double windows and 3 garage sized roller doors.
Bit by bit I’m getting the shed finished. It’s only taken 6 years to get this job finally complete.
All the flashings acting as mini-awnings above every opening.
Nothing is ever finished, nothing is perfect and nothing lasts.
The first Open Studio Weekend is over. One more to go!
We had a very slow day on the Saturday, as it was raining hard on both sides of us in Picton and Bowral. So visitors were reluctant to leave home, and few and far between. We had just a few brave people venture out. One visitor from Picton had gone to an Open Garden event, but it was so miserable in the pouring rain, that she gave up and decided to come and visit us for some indoor, dry and warm, entertainment.
The Sunday Open Studio was much better, quiet in the morning, but it picked up after lunch and we were almost busy dealing with a steady flow of visitors in the afternoon. We hope for better weather and more visitors next weekend. However, if it is going to rain, I’d prefer it to pour down, flood the gutters and stream down into the dam.
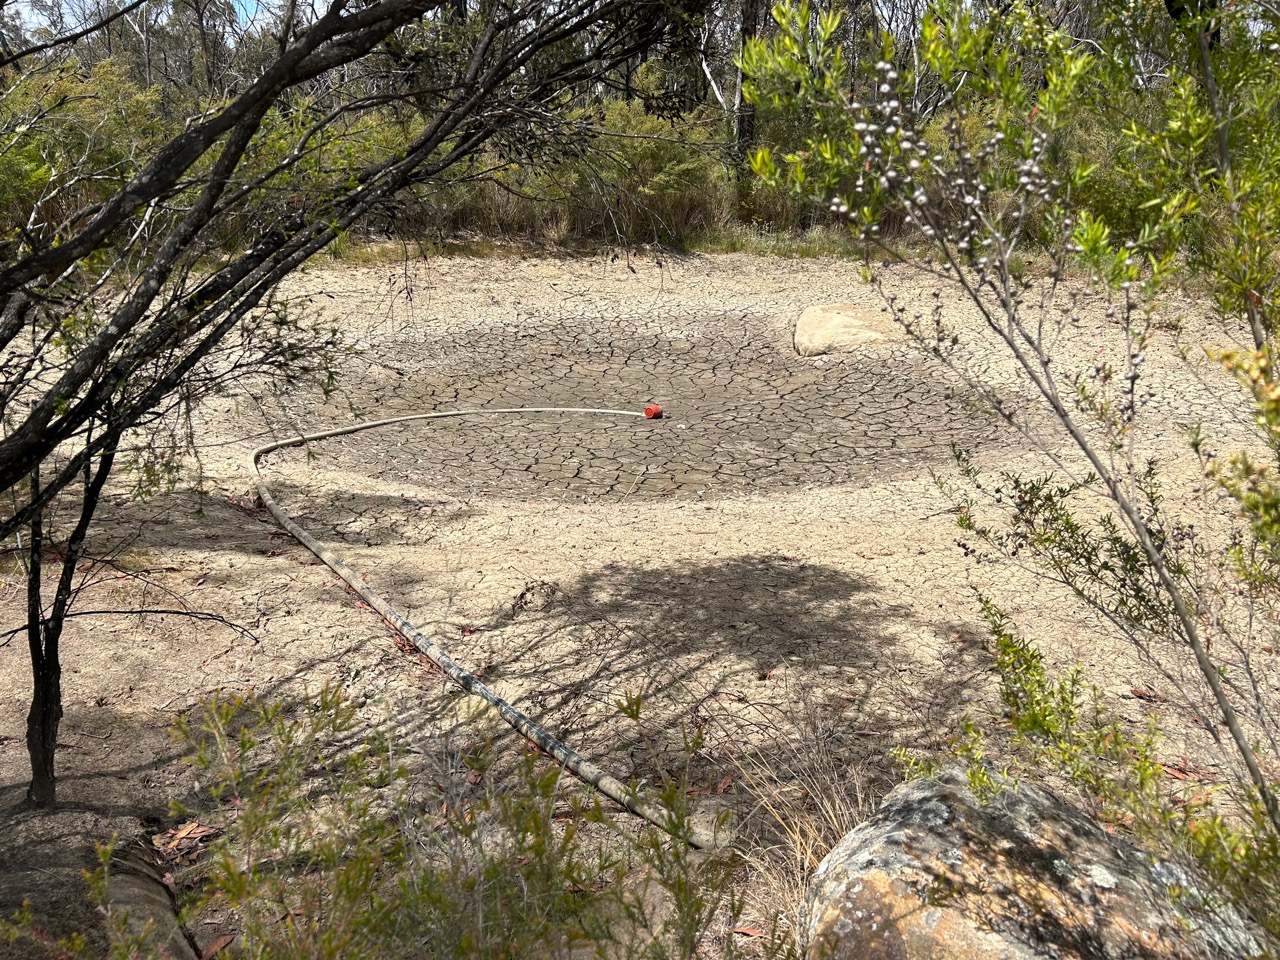
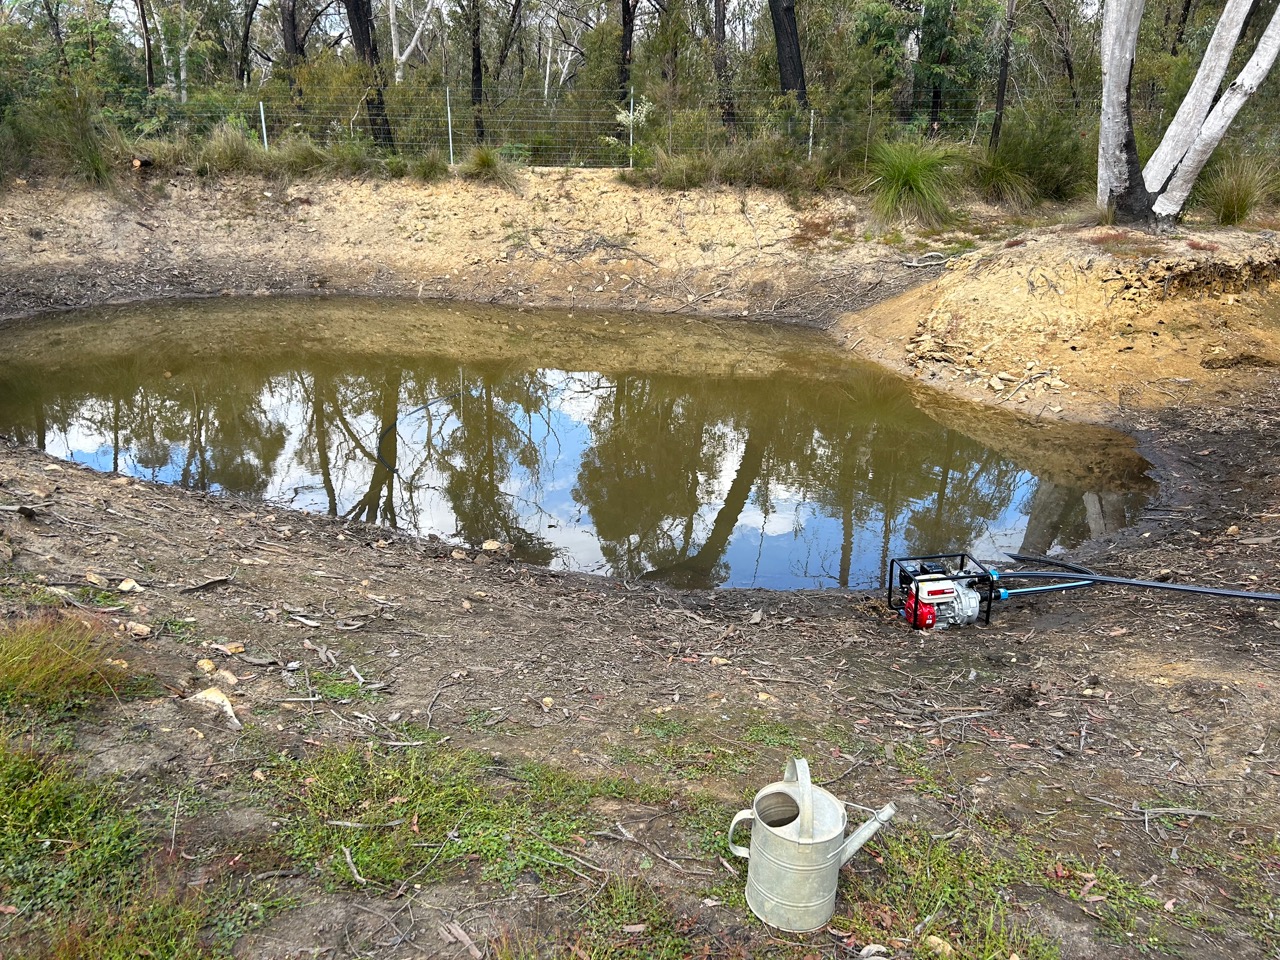
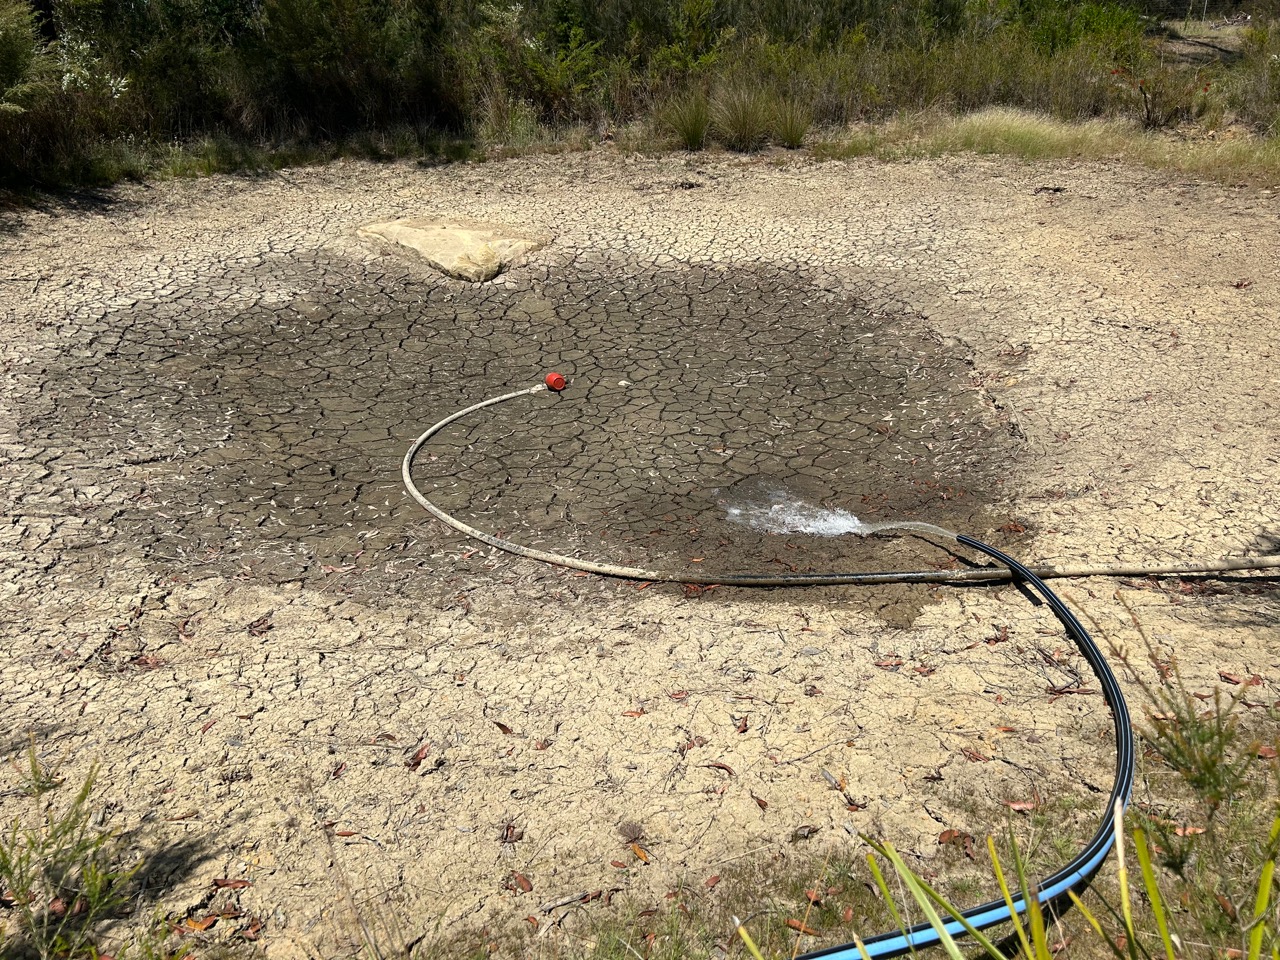
Of course, as usual, it didn’t rain here at all, just a few light passing showers throughout the day. Our top dam, the one closest to the house, that rely on for irrigation and fire fighting water is bone dry. The foot valve for the pump is sitting high and dry on top of the caked and cracked mud. This dam still had a very small amount of water in it when we left for our time away in New Caledonia and then Brisbane. However, we got a call from our lovely neighbour one day to tell us that she had tried to water the garden for us, but no water was coming out of the hose. I knew knew why. I expected it to run out and dry up at any moment. but there was nothing that I could do at a distance.
Starting on the Monday morning, with the news of so many houses burnt down in the north of the state in the terrible bush fire there. I wasted no time in preparing ourselves for the next bushfire – whenever it happens. Maybe sooner than later? With the bushfire season now upon us in earnest. I was straight into action working on all those jobs that I had put off during the recent three wet years.
We have 4 dams, built in a key-line system. I moved the high pressure, petrol driven, fire fighting pump, down into the bottom dam, which is nearly empty, but still has some water in it, right at the bottom. I built a jerry-rig, improvised system of poly pipe lines to convey the water from this little bottom dam, up to the larger, middle dam. A day of running the pump moved most of the water up the hill to the next dam. I left just 300 mm of water in the bottom of that dam for the yabbies, to keep them safe over summer. If it does dry out completely, they will bury them selves in the mud.
From the bottom dam, up to the middle dam. This larger middle dam also has next to nothing in it, just 300mm deep in the middle, but every drop counts in summer. Especially when a bush fire is in the offing.
Neither the bottom dam or the middle dam, has a functioning pump on them at the moment, so moving all the available water up to the top dam, where I have both petrol and electric pumps installed gives me access to whatever water is left to us over the hot dry summer for fire fighting. Also, concentrating all our water in one place minimises the losses from evaporation.
Once the bottom dam was more or less empty. I carried the petrol pump up and into the middle dam, re-arranged all my Heath Robinson, improvised piping and began pumping from the middle up to the top dam. I’ve been on my very own personal, localised, ‘Snowy Hydo 2′ project here for two days now and all the water hasn’t been relocated yet. It’s a slow job, moving thousands of litres of water, up hill through a 40mm dia pipe. I hope to finish it off tomorrow.
From the middle dam up to the top dam.
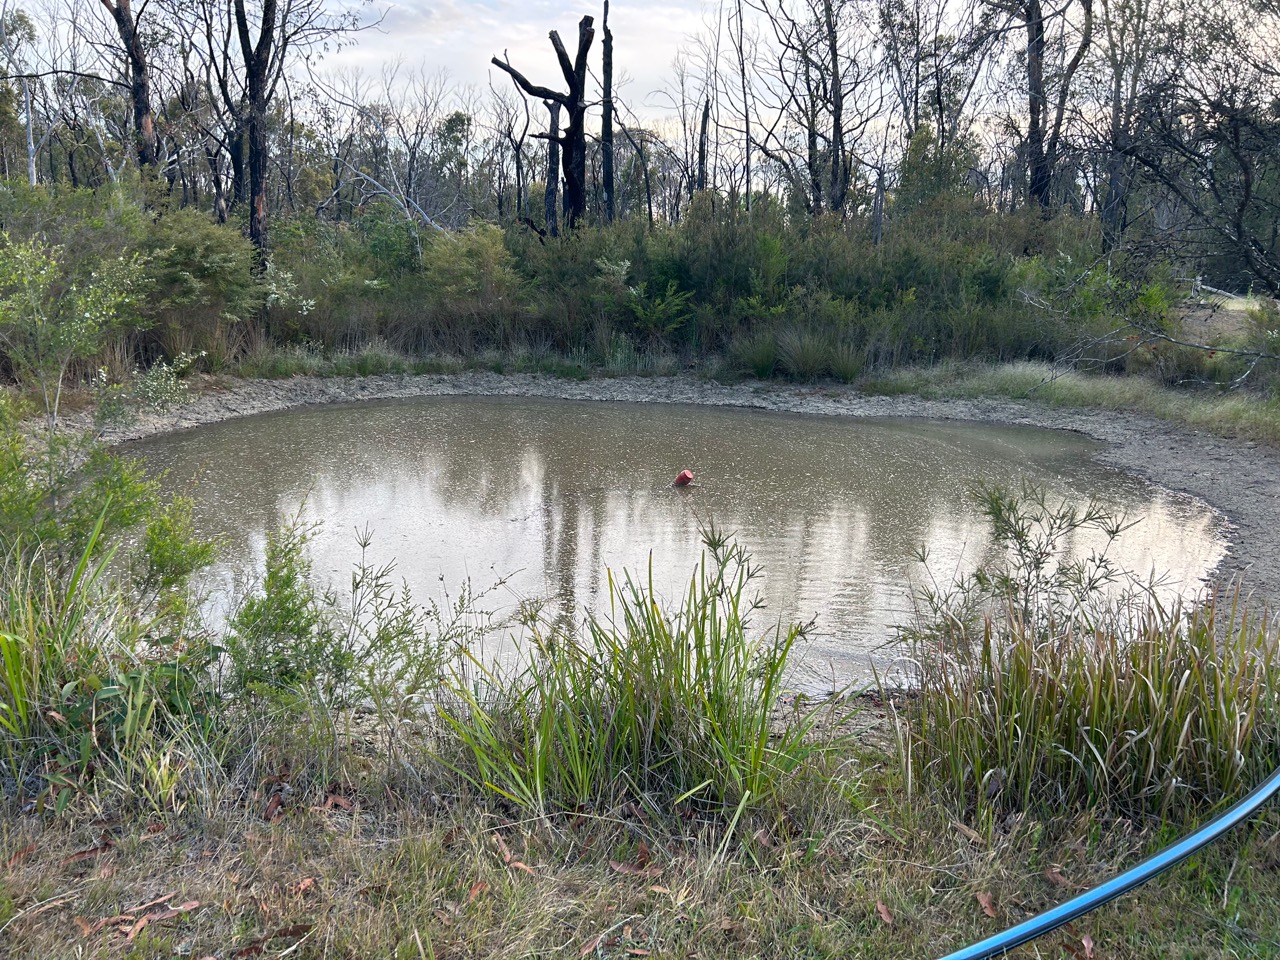
The little top dam is now half full with all the accumulated water from the other dams, it will keep us safe into January. Then?
While all this was going on. I was also working on the new fire fighting sprinkler system along the verandah and roof of the new pottery building, and also rebuilding the burnt out sprinkler system on the barn. It worked perfectly during the fire, and saved the barn for burning, but when the power failed and the electric pump stopped, the plastic pipe system melted. I will be installing a petrol driven, high pressure, fire fighting pump in this system when I’ve finished pumping all the dam water uphill.
The roof and wall sprinklers all rebuilt and up and running again now.
Nothing is perfect. Nothing is ever finished, and nothing lasts.
However, I feel safer knowing that I have water in the system available to use to fight the next fire,
and a reasonably functional system in place that I hope will be able to cope with whatever nature throws at us
I make sure that I use the fire pumps often over the summer months to irrigate the garden and orchards.
In this way, I always know that the pumps are in reliable working order, then if one of them gives some trouble with the irrigation, I can step in and fix it well before there is any emergency, when there is no time for fixing things. Everything must work perfectly and immediately.
Since the last fire 4 years ago, I have installed 45,000 litres of tanks in front of the Barn, dedicated to the fire pump for the pottery and barn system. I have also installed 30,000 litres of new water storage tanks on the old Railway Station and car port with its own fire pump.
We are much better prepared now than we were 4 years ago. This is self reliance!
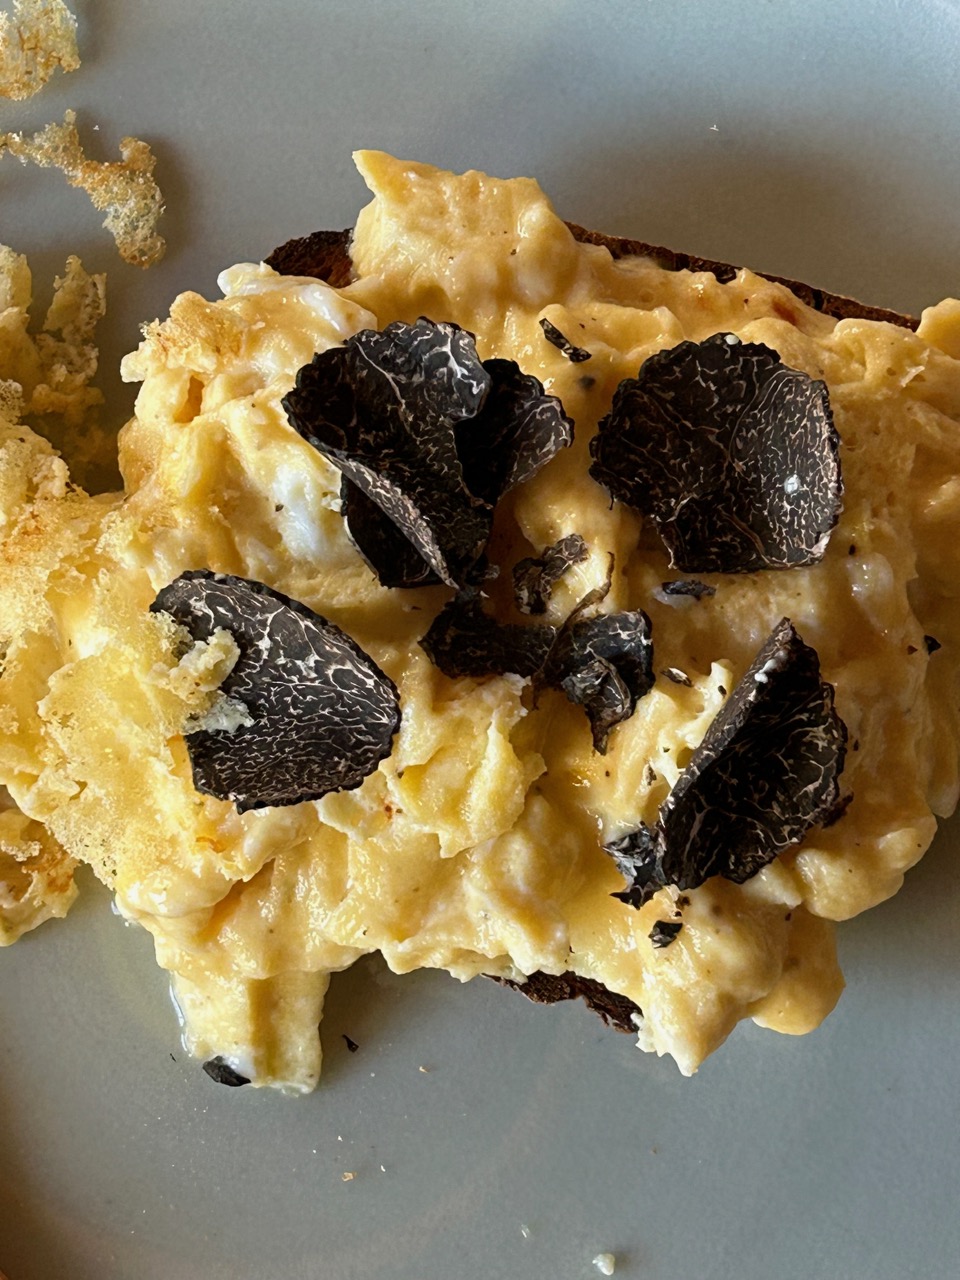
Today we finished off the last truffle of the season. It was romantic, mysterious, fragrant, exotic and delectable. It really elevates the humble scrambled egg into something special without taking anything away, just adding loads of romance and aroma. The warmth of the freshly cooked eggs releases so many aromatic oils and esters from the tiny black fungus. It fills my nostrils as I bend over doing the shaving. It’s a good thing that we only get to eat these delicious little morsels in the winter months, otherwise we may become somewhat blasé about it all. As it is, they are still a very special seasonal treat, If somewhat expensive. We can only afford to live this decadent gourmet lifestyle on our frugal budget because we have a son in the industry.
We are also probably making our last batch of marmalade too, as we have picked most of the Seville oranges now and eaten nearly all of the other citrus fruit. Although this is the beginning of spring, it is also the end of winter in another way, so it’s the end of the winter crops like citrus. We try and live with the seasons, so that’s it for the big citrus splurge in our diet.
It is one of the blessings of living in the Southern Highlands, that we have 4 distinct seasons. For instance, this morning we had another frost. This might possibly be our last really cold morning, but you never know with the climate emergency developing as it is, anything could happen.
I peel off the thin yellow layer of the skin without taking too much of the pith. I want the pith off! With my pile of curly peels, I end up with what can only be called ‘bitter and twisted’ .
Janine removes the pith and cuts up the juicy centre to add to the pan. The first pan is on for 30 mins. before we get the 2nd pan on the stove and the difference in colour is dramatic, it gets richer and deeper as it cooks. We try to use as little sugar as possible, while not making it too bitter and acidic, we also need enough sugar to make it ’set’. It takes about an hour of steady simmer to get it to thicken sufficiently. It’s worth all the effort, it tastes delicious, with just the right consistency. Seville oranges aren’t all that nice on their own. They are OK, but they really come into their own when it comes to making marmalade.
The stone fruit orchard is growing up well. This is its 3rd year and the trees are starting to look a lot more settled and established, with thicker trunks. I have been pruning them into open vase shapes where possible, but some of them have a very narrow vertical habit. They are all grafted onto ‘dwarf’ rootstocks, so they are keeping to a compact size. Most of them are now about 1.5 to 1.8 metres high, with an expected total height of 2.5 metres eventually. But I am well aware that plants can’t read their own labels! So there are bound to be variations.
We had a really great 1st Weekend workshop in the new pottery. It worked very well. The new studio is a great space to teach in. The light is good and the layout works ergonomically for 10 people, 8 students and 2 teachers. After everyone left I got stuck in and started making more pots for myself. The Open Studios, Arts Trail is coming up at the end of the year, so I need to get back to work making pots for that. I started back at it by making 30 straight sided mugs.
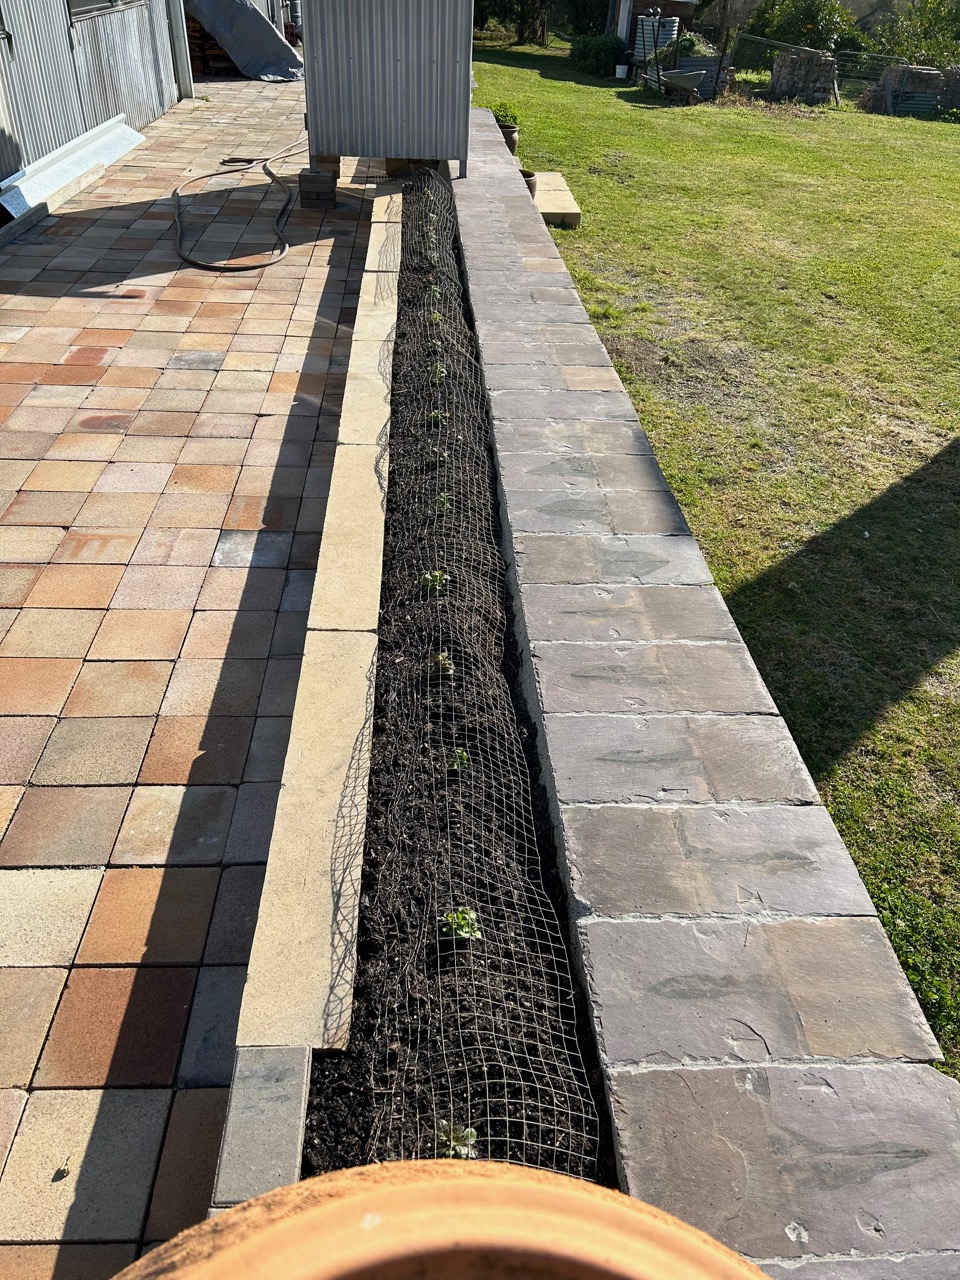
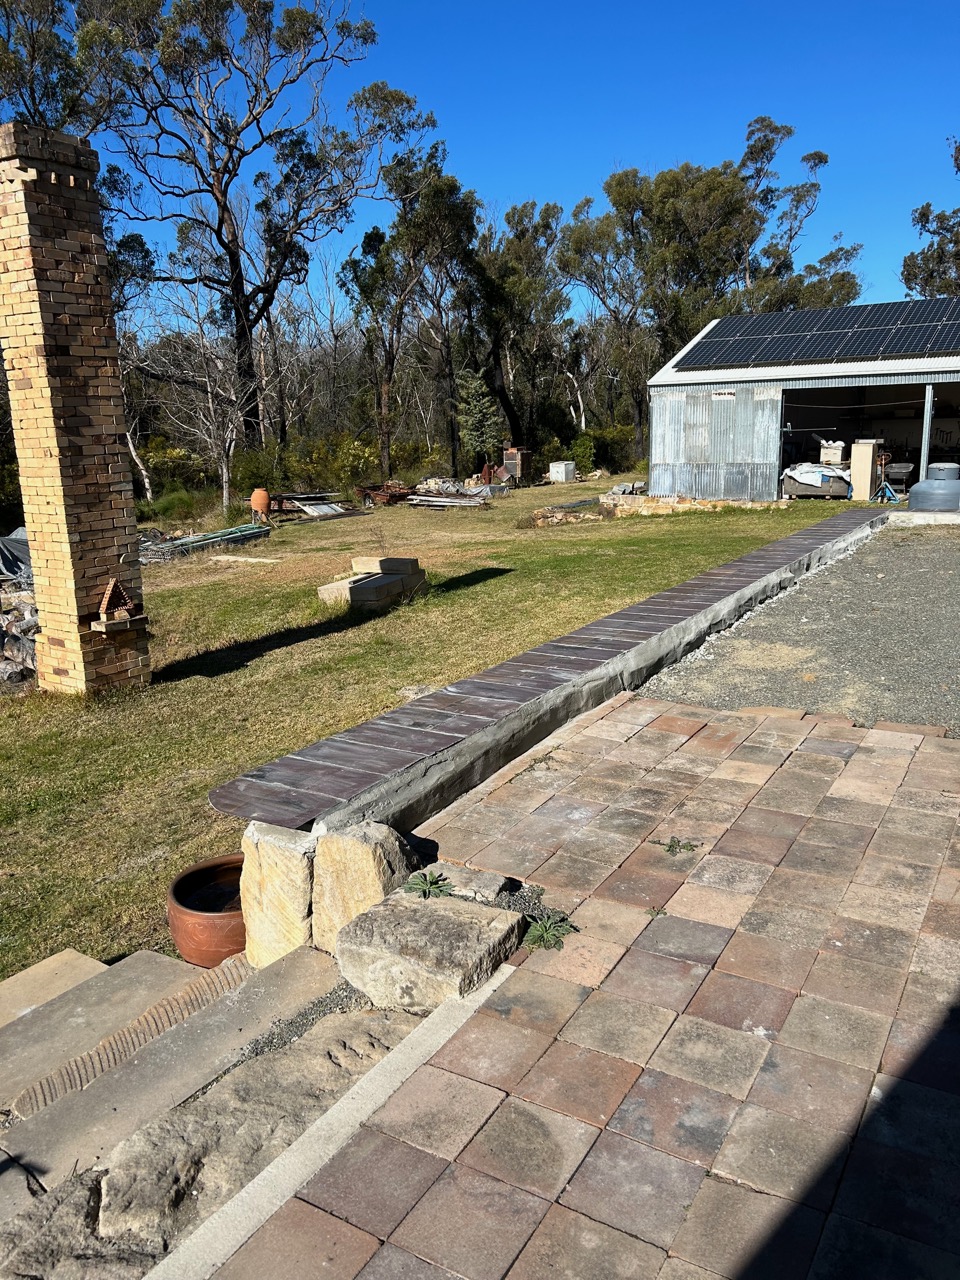
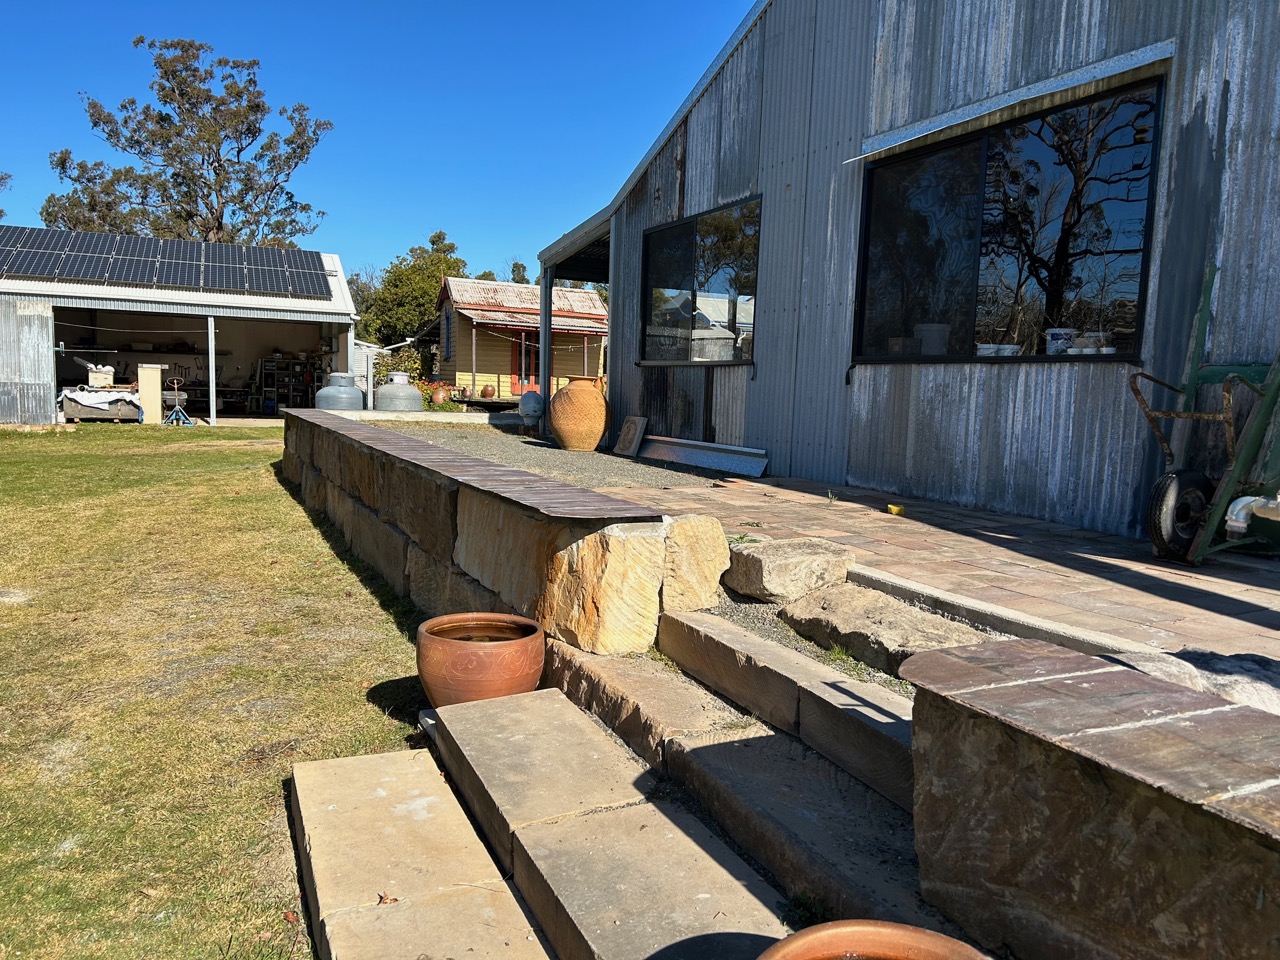
I spent a few days since the recent weekend workshop, in the afternoons, in my spare time, splitting and dressing sandstone blocks, to make some garden bed edging along the recently finished slate capping on the big sandstone retaining wall around the new pottery. It’s just another one of those jobs that has been in the offing and waiting for the ‘right’ time. I chose this ‘right’ time from what is left of my other time! Once the little wall was in place I shoveled in a load of top soil and planted seeds and a few seedlings to make the edging look a bit more settled and finished. I sprinkled in a packet of English Cottage Garden seed mix for good measure and 30 caper seeds, one every 600mm. Capers need an elevated, well drained, sun baked, dry, harsh environment to thrive. They take 2 years to establish, then persist for many more as long as they are cut back and pruned hard in the winter to stimulate good growth in the spring and summer, as flowers and fruit are produced on the new years growth. The elevated and exposed wall seemed like a pretty good place to try them out. I have read in a few books that they thrive on top of stone walls in the Med’s dry summers. I have no expectations, but if something comes of it, I’ll be pleased. If not, then I’ll chalk it down to another one of life’s enriching experiences. The stones look nice anyway, regardless of whether the plants grow or not!
After the soil was shoveled into the new beds, Edna the chicken, who had been helping me all day, came along and decided to help me some more by scratching a lot of it out again. I had to make some impromptu wire covers to protect the small seedlings from being excavated!
I’m happy with the result. 3 days work and $50 bucks goes a long way. I’m hoping that it will look greener in time for the November Arts Trail, Open Studios event.
We have just completed the first weekend workshop in the new pottery.
We invited the potters and ex-students who had helped us clean up the mess from the catastrophic fire that cleaned us out in November 2019. We only have 8 potters wheels in the new throwing room, so our numbers were limited to the first 8 potters to get in touch with us.
Regrettably, we had to turn a few lovely people away. However, there will be other workshops coming along in the pipeline. I’ll be announcing them here on the blog as they become reality and when we have set firm dates. This first workshop was a ‘freebie’ as our thank you to those volunteers.
To help us out on this first workshop we invited or friend and collaborator Warren Hogden to join us. We started off with throwing mugs, cups and beakers.
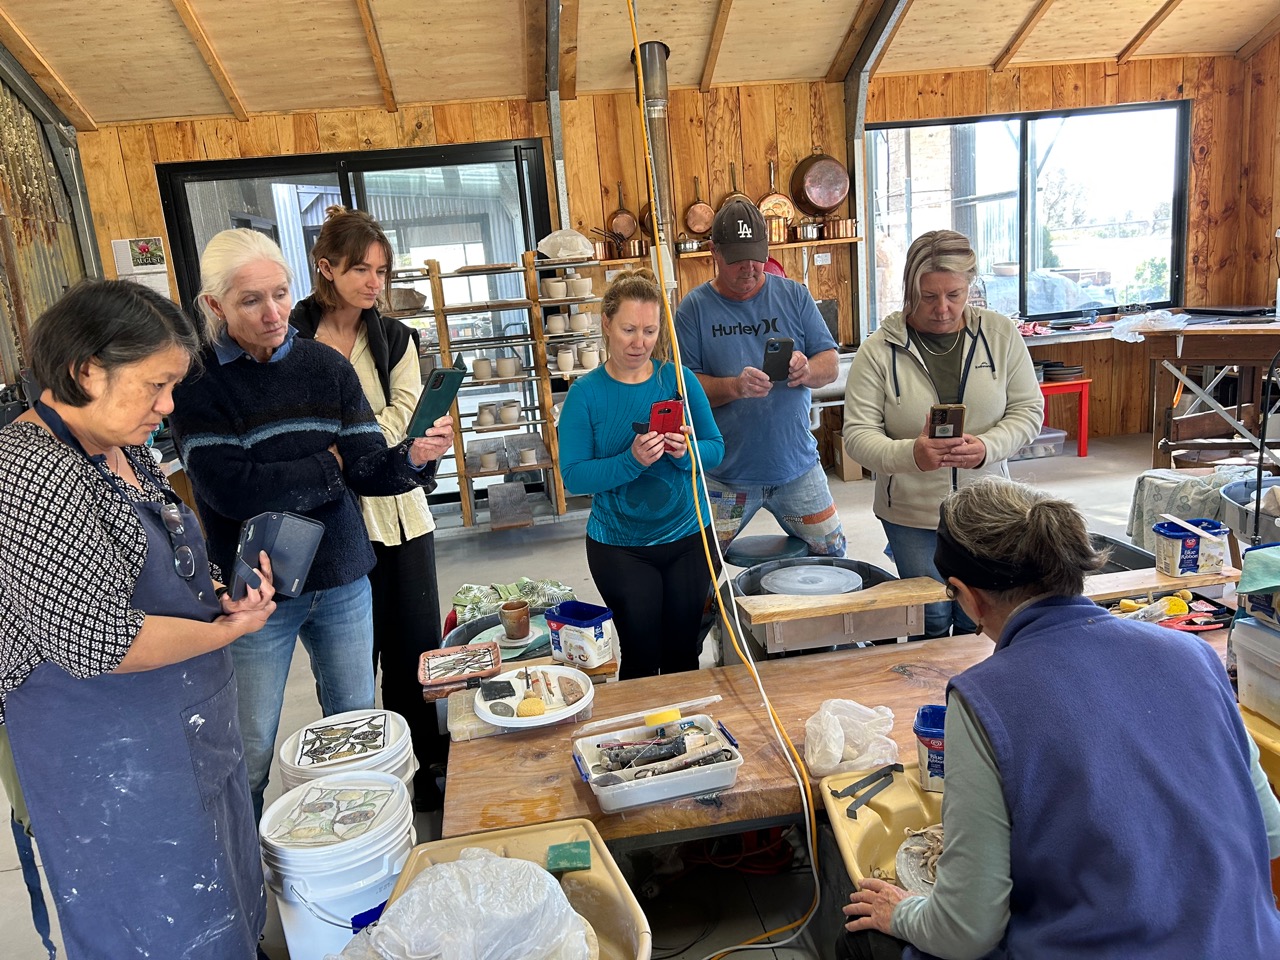
The pottery was buzzing, with every one being busy. Janine, Warren and I all gave a demo of our throwing techniques, so everyone got 3 different approaches demonstrated, so that they could choose something to concentrate on for the day.
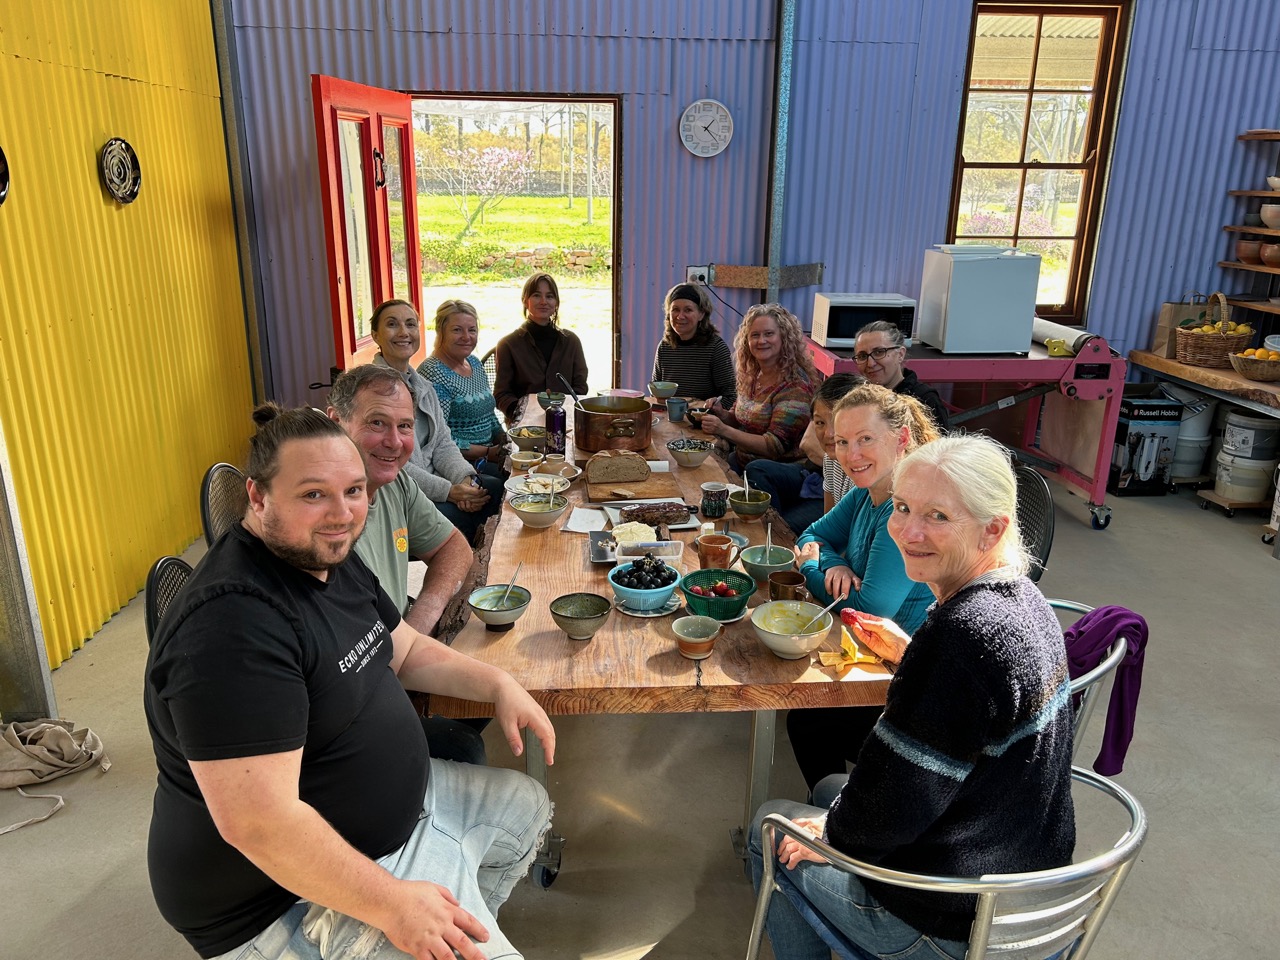
Each lunch time, we asked our son Geordie, who is a ‘hatted’ chef, to come in and cook lunch for us – a very special treat.
We set up the hand-building room as our lunch room, I made a table out of a very large slab of wood from one of our trees that was killed by the fire. And rather than waste it. I couldn’t bear to see it bull-dozed, chopped up and burnt, so I hired a portable sawmill for 3 days and we milled the trees into all the planks and slabs that we needed to build the new pottery.
This solid table is one big slab of timber that can seat 12. We use this room for functions, dinner parties and openings. Our house is small, so if we need to sit more than 6 guests, we move out into the pottery where we can seat 12 to 14 at a pinch. It’s a large bright, well lit room with loads of practical, flexible space, so it has become an extension to our house in some ways.
On the 2nd day we all demonstrated turning our pots, then making and applying handles. We kept everyone busy all day for both days.
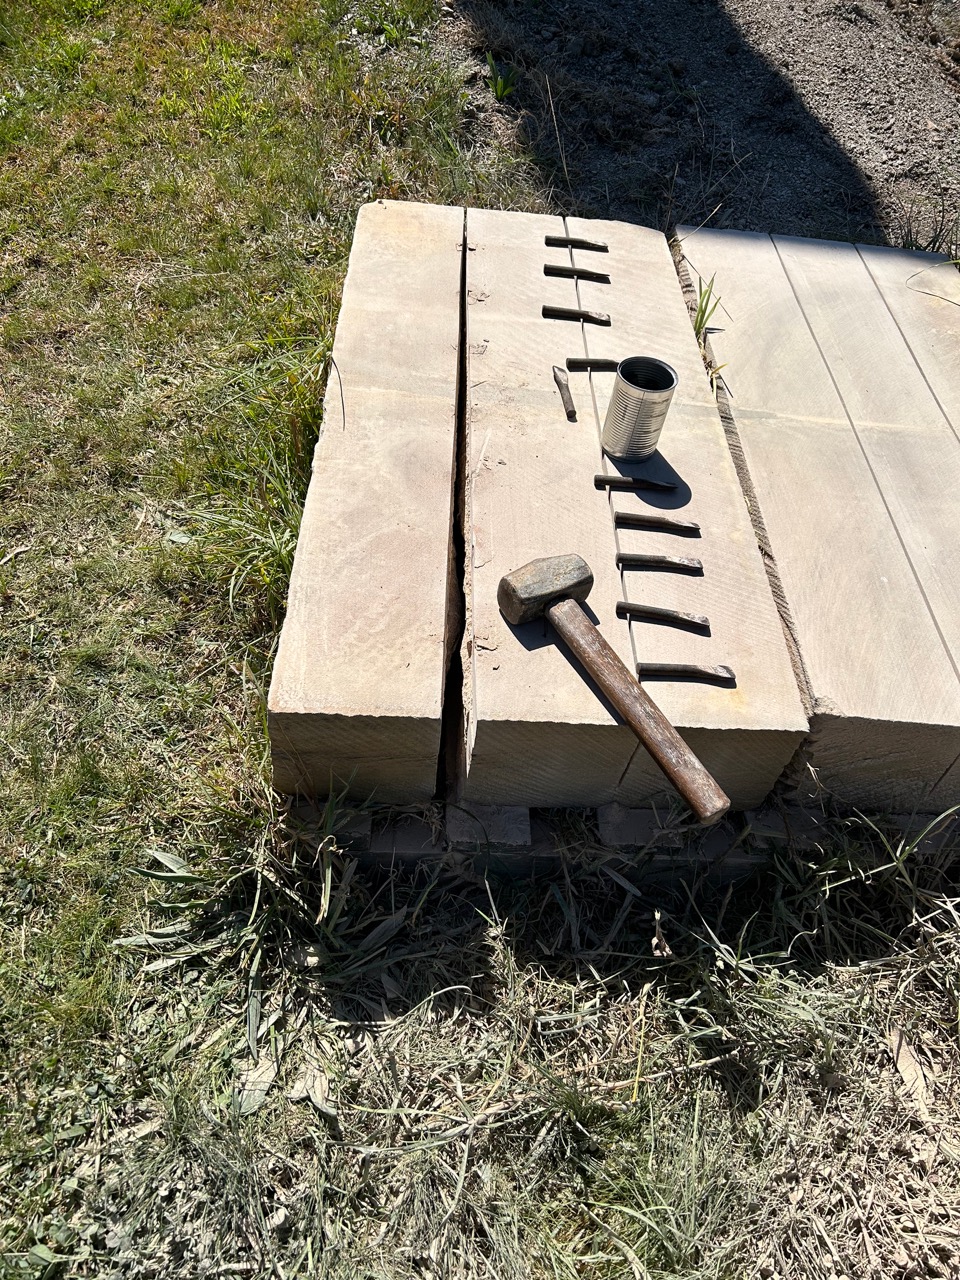
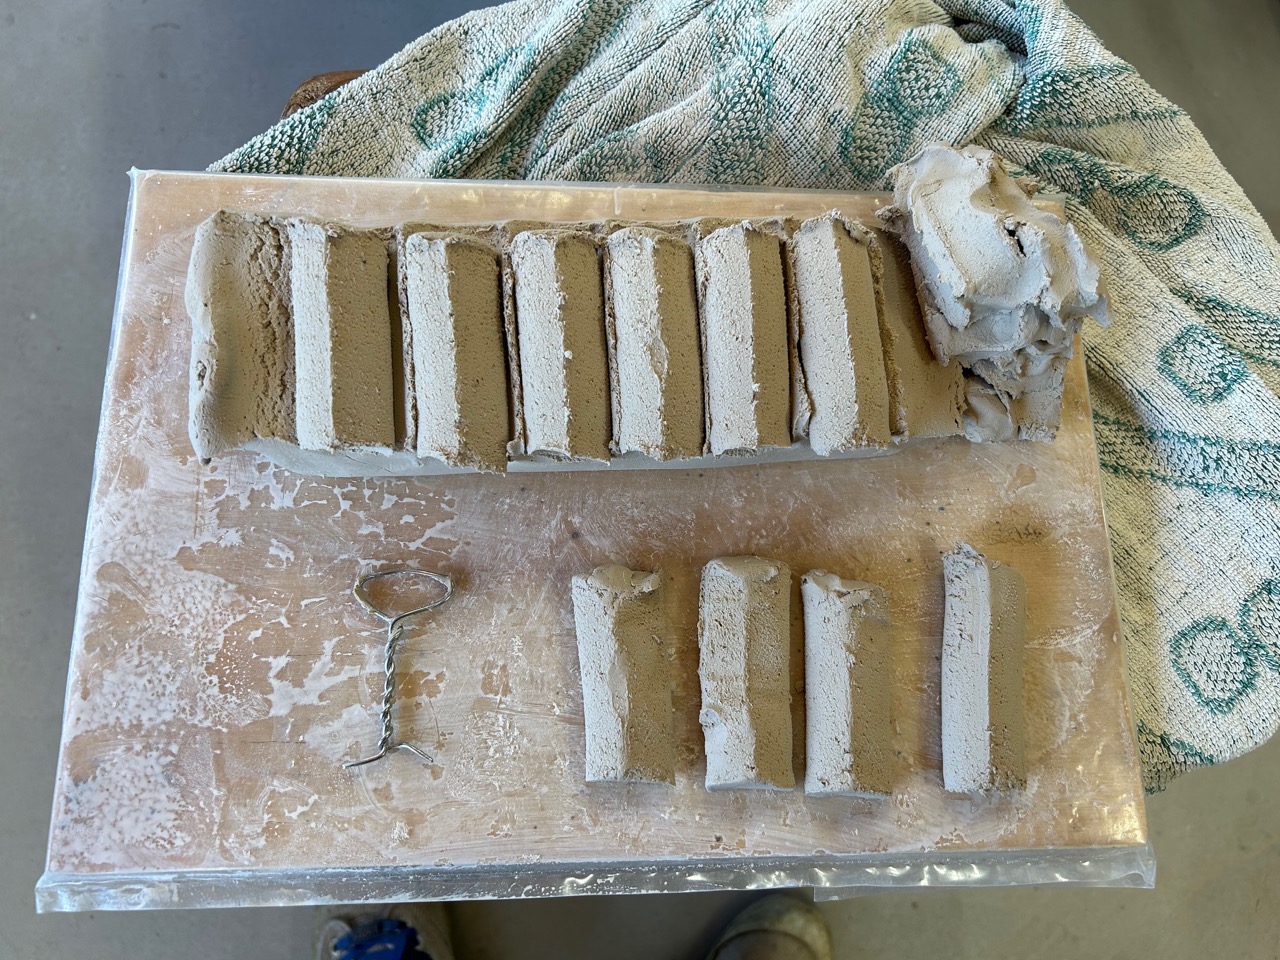
I demonstrated pulling handles from simple hand rolled coils, as well as my somewhat crude, but easily made, twisted-wire handle ‘blank’ extruder.
These ‘blank’ billets of proto-handles are applied to the pot and then ‘pulled’ in the traditional way to make an elegant, smooth, curved handle.
Janine demonstrated turning the base of her pots on a leather-hard clay ‘chuck’.
I couldn’t help by notice how things have changed over the years. These days everything is videoed on mobile phone for later reference.
Warren demonstrated the use of a ‘caulking’ gun to extrude the basic handle shape. He also demo’d the use of a plaster mould to press mound handles.
Everyone appeared to enjoy them selves. It was certainly an intensively productive 2 days.
We farewelled everyone with a very tiny taste of Geordie’s latest venture as the head distiller at ‘Renegade gin’ in Mittagong.
We had a bottle of his Australian Native Plum Gin. I served it in very petite antique Japanese porcelain sake cups. I didn’t want any one to get booked on the way home, so just 1 or 2 mls. It’s really delicious stuff. So intense, fruity and concentrated, just superb!
As soon as the Pop-Up long weekend Open Studio sale was over, we got busy tackling the next big urgent job.
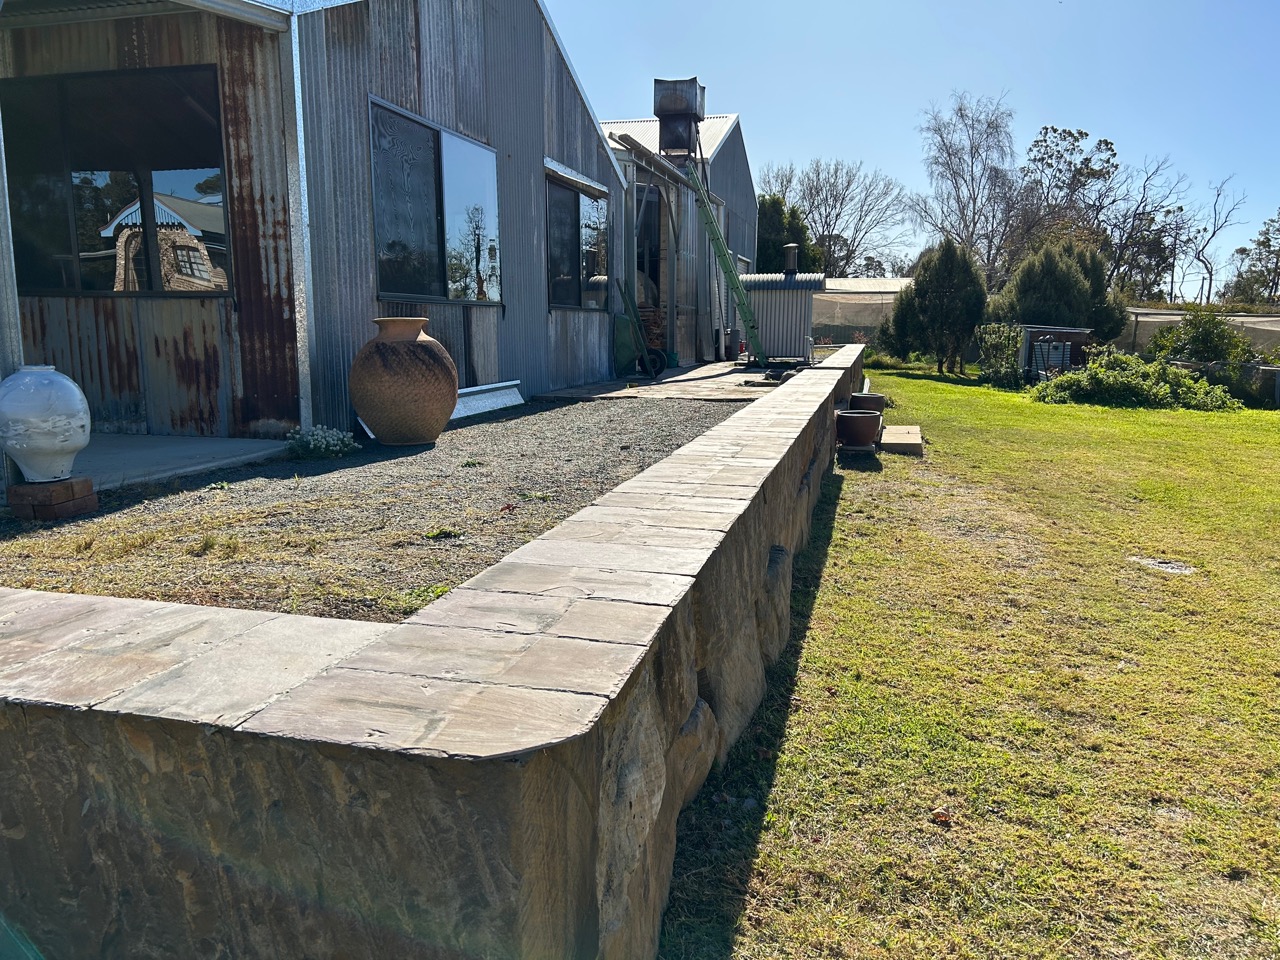
That job is dealing with the cracking and spalling of the big sandstone blocks that we used to make the retaining wall behind the pottery.
I knew when I bought them that they were rejects. I naively thought that they were cheap because they were split in an irregular way and not square, but tapered. That didn’t worry me, as I could arrange them so that they had a reasonably flat and square face outwards. I could hide the unevenness in behind the grave back-fill.
However, as it has transpired, the real problem with them, and the reason for them being very cheap, is that they are not hard sandstone, but rather soft and sugary.
Bummer!
Over the past 3 years that they have been sitting there year in, year out, through the rain storms and winter frosts, they have begun to spall. Water soaks in to the porous stone and when the frosts come and the ice expands, bits of the face split off. Recently we noticed that the blocks were beginning to split down the centre, not just the face and edges. This is serious stuff. If not dealt with immediately, the stones will start to loose their stability.
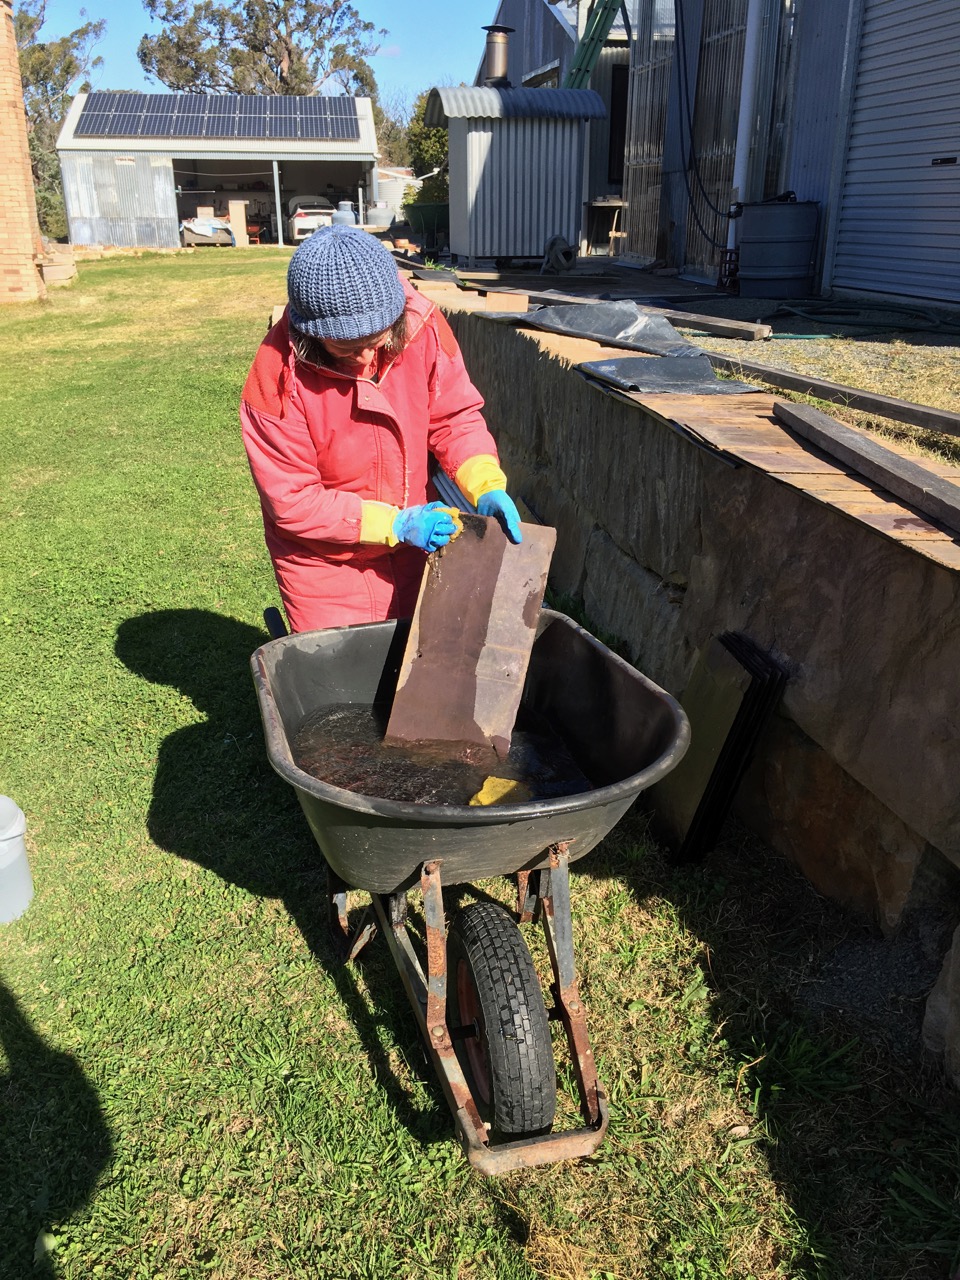
I decided that the best approach would be to cap the stones with some sort of waterproofing system. We had a load of old roofing slates stacked away under the railway station. They came off the roof of my brothers house before it was demolished many years ago. We always intended to use them as floor tiles, but never did. So we have plenty of these old weathered slates. We needed to get them out from under the floor and give them a good scrape and clean, then a good scrub and a wash to get all the grunge of history off them, so that we could get the cement to stick securely.
We spent 2 half days fettling and washing the slates. A cold, wet job for the first of winter after a cracking good frost.
I took the truck down to the sand and gravel yard each day to pick up half a tonne of sand and 7 bags of cement each day for the 3 days that it took us to get the job done. We employed a young, local guy to give us a hand, as we are getting too old for this kind of heavy work on our own these days.
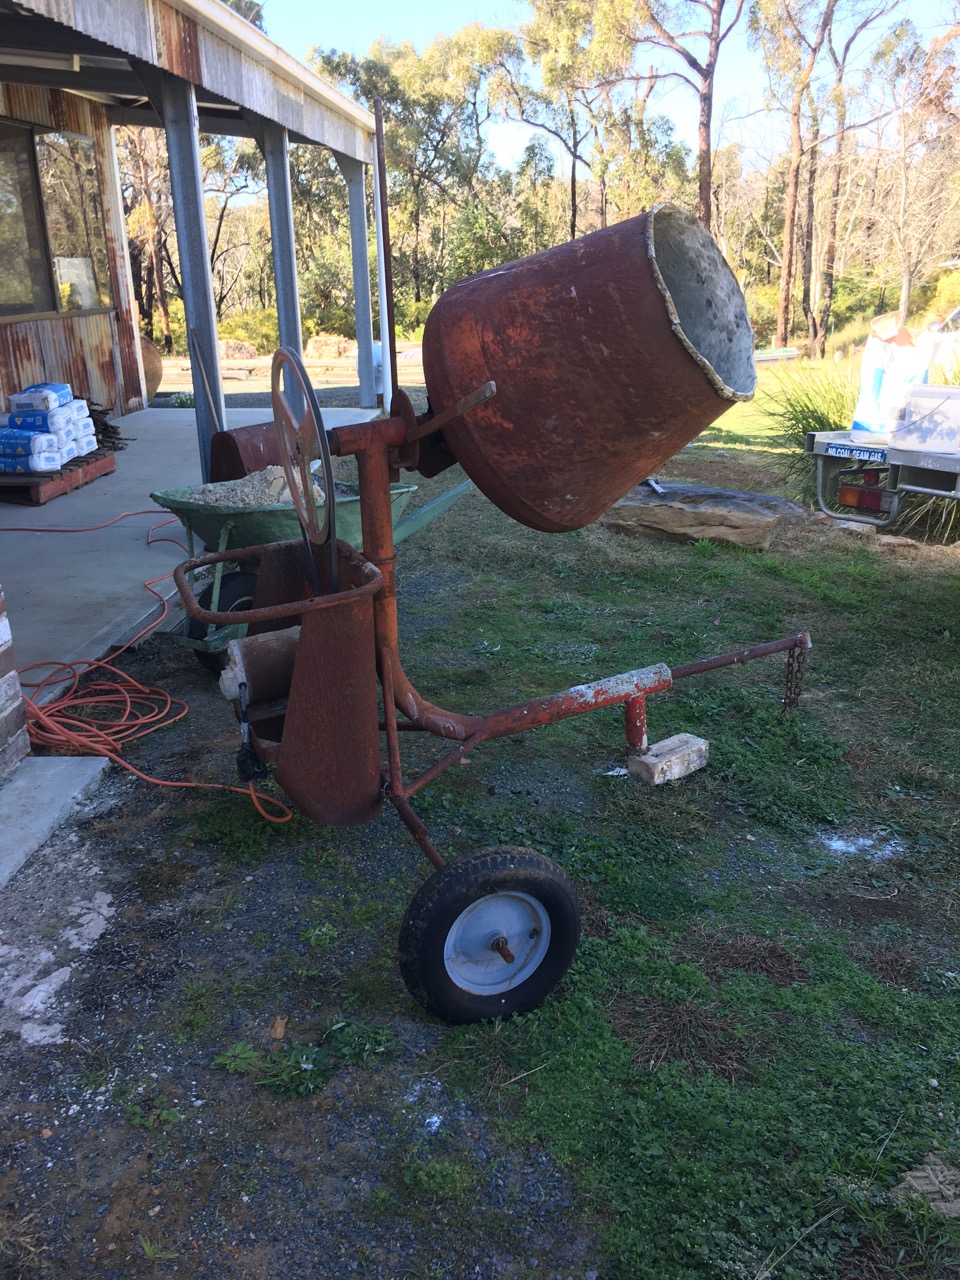
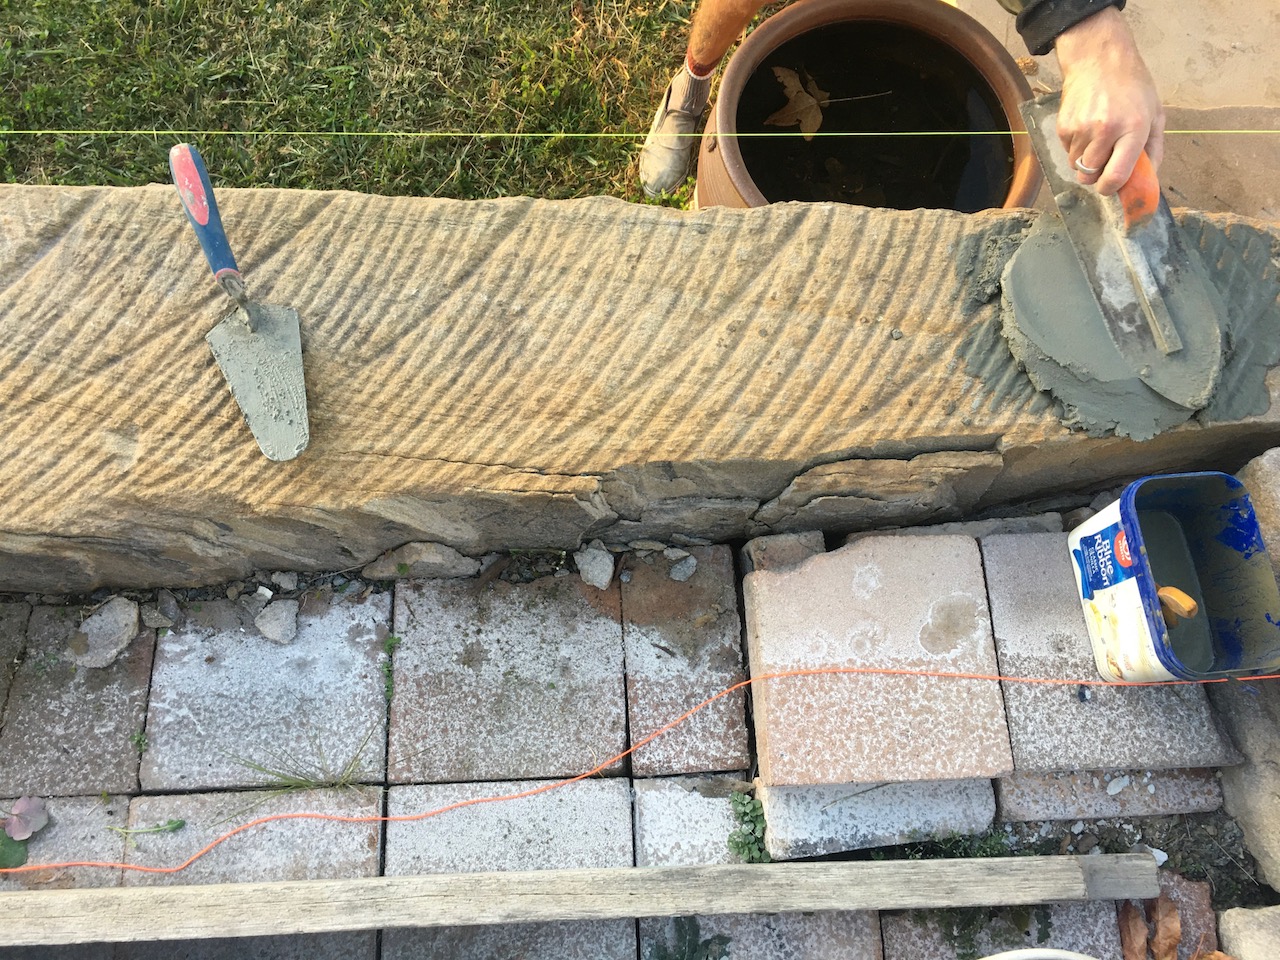
Using our very old ‘wabi-sabi’ Steam-Punk cement mixer that we bought 2nd hand for $50, 35 years ago. We mixed 14 loads a day and got through 1 1/2 tonnes of sand and 20 bags of cement to render a 70mm thick bed of mortar over the stones to get a continuous straight level, thick enough to be water proof and strong enough to cap the stones and support the slate capping.
Time will tell if this has worked well enough to deter any further spalling. I did notice that there was enough embedded heat energy in the stones, such that after the frost melted in the morning, the slates were very soon dry, except where the edge extends over the stonewall to create a clear drip line. The extended slate stayed wet, frozen and cold.
We still have a lot of paving to do, but everything in its own time. This job was an absolute priority now that winter is here and the frosts are back.
We are finally back at work in the pottery. Proper work.
There was still so much to finish off in and around the pottery. We have been trying to achieve the impossible.
To rebuild in a few years what it took us 40 years to build up over a lifetime of potting, collecting and restoring.
There is still a lot to do, but most of all the pressingly urgent stuff is complete and in place. The extraction hood over the electric kilns was the last really necessary thing.
I am currently working part time on a flame combustor, spark arrestor and scrubber for the top of the wood kiln chimney. That will be completed in the next few months in time for the cooler weather and the first wood kiln firing of the season.
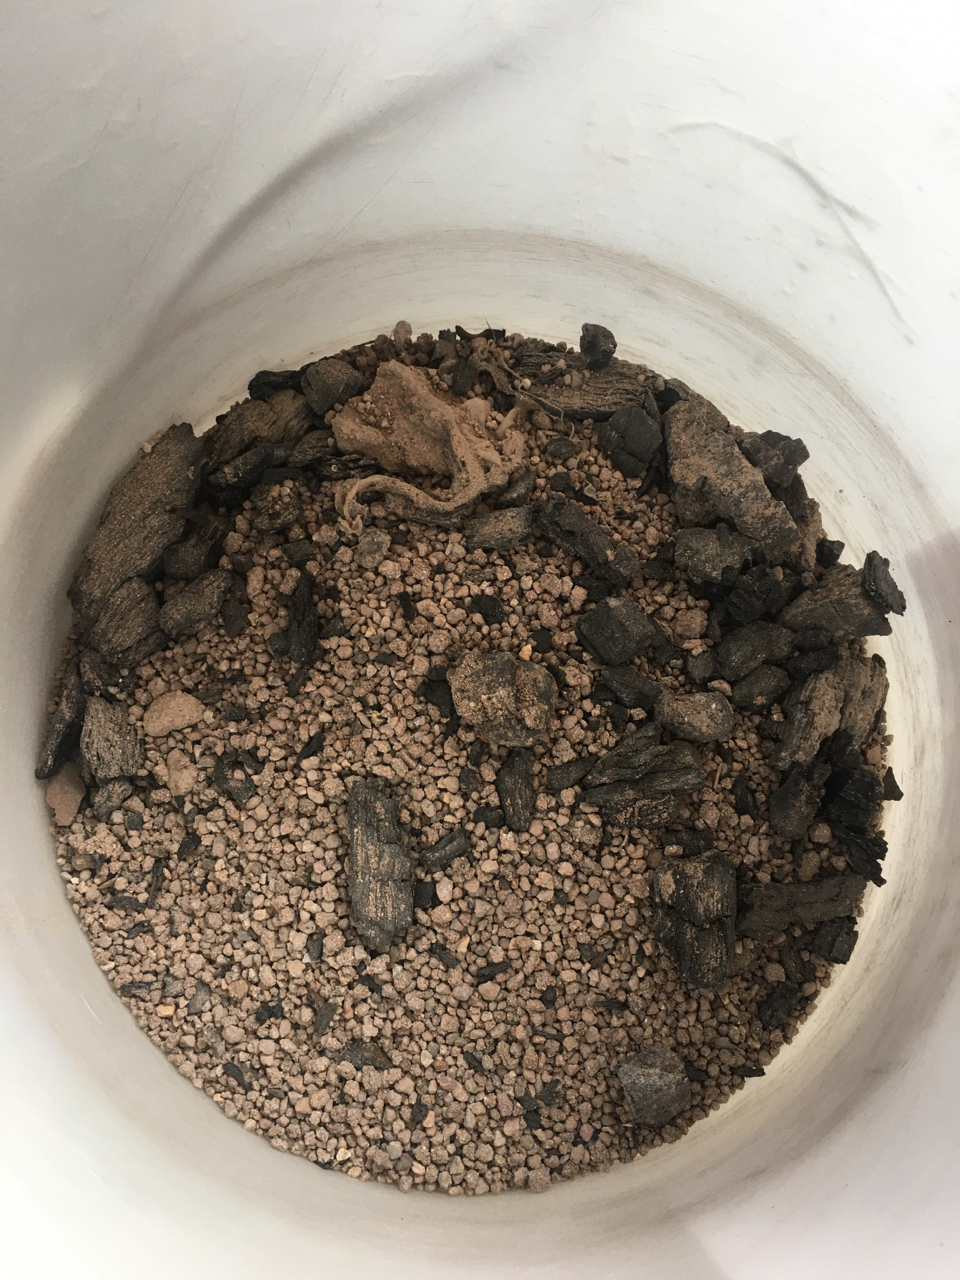
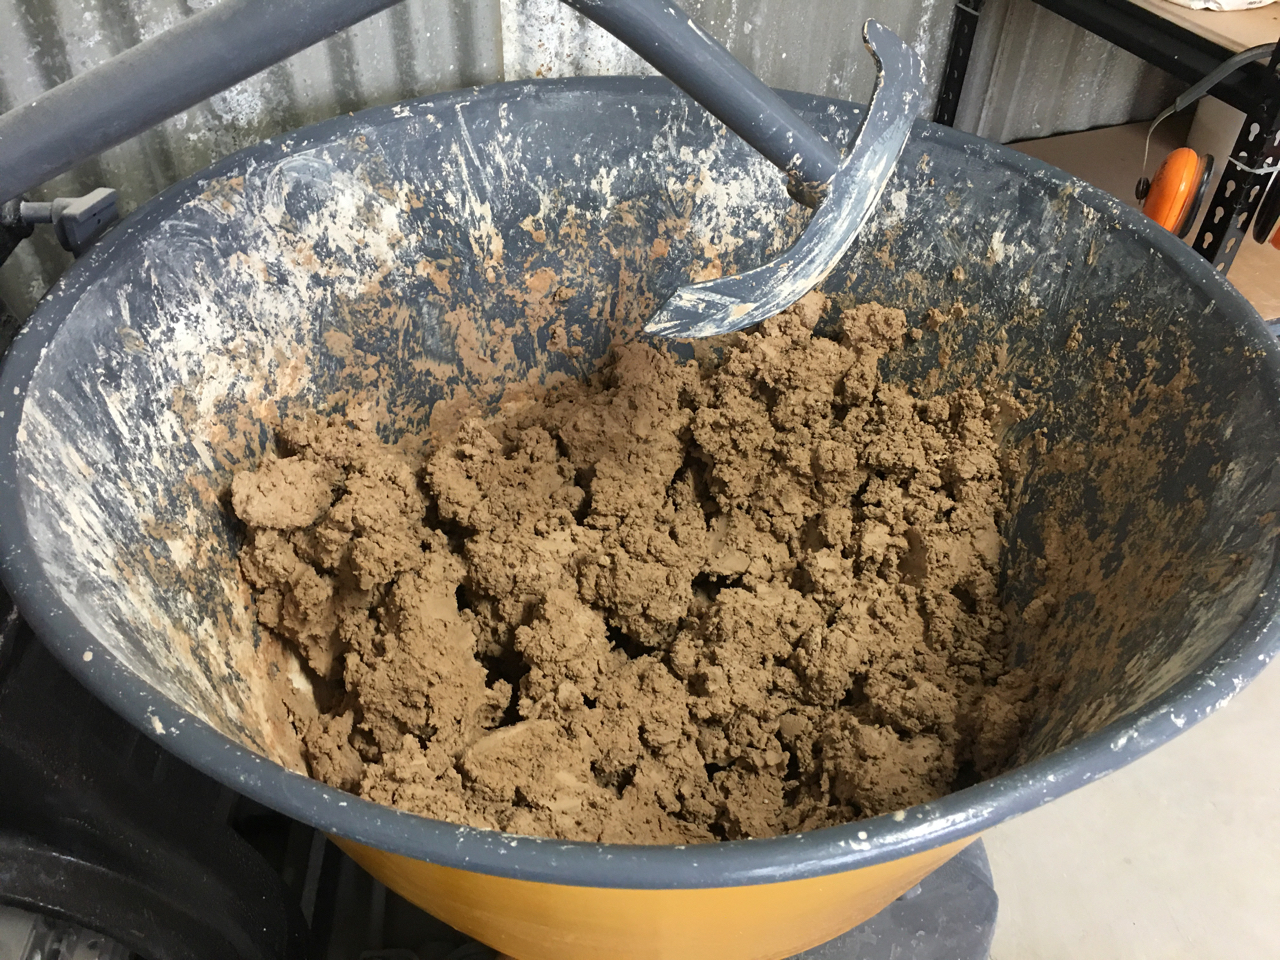
This week I made up a batch of rough stoneware body made from crushed shale. I had to spend some time crushing and sieving the shale. I have had this stuff for some time. It had come through the fire and is full of charcoal from the fire. It wasn’t too arduous, as it was only through a coarse mesh.
After mixing the two x 125 kg batches of body, we pugged all the clay twice. Once all through the pug and then stacked on the pug table in a pyramid stack. We then cut off all the ends of the sausages and re-pug it all another time, such that each sausage that comes out of the pug is comprised of a mix of all the previous pugs of clay. This is to ensure that there is very little variability from the first to last sausage of clay.
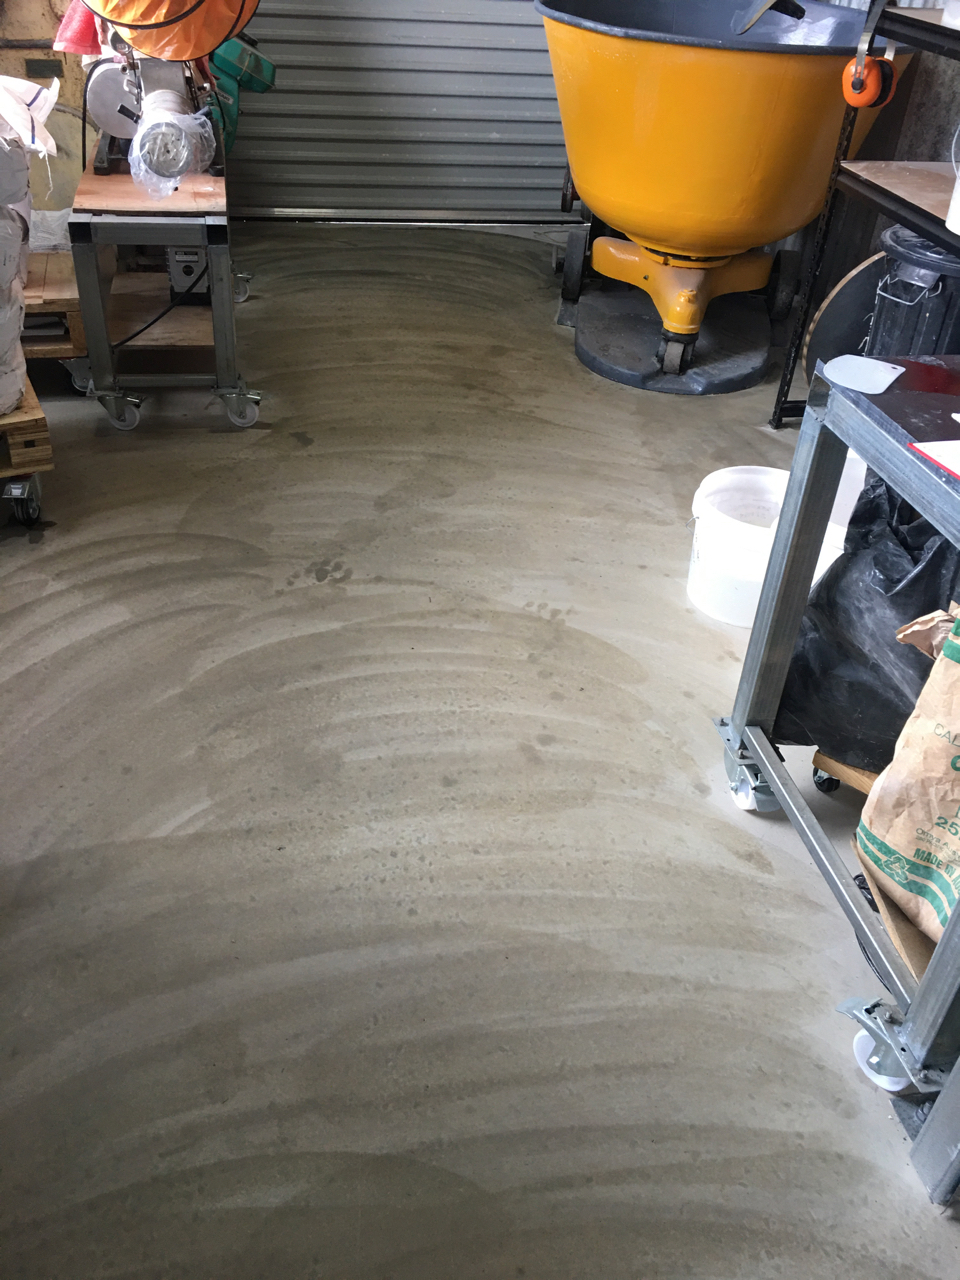
After finishing up, the pug mills and tables are all washed and wheeled out of the way and all the floors are wet scrubbed and mopped to clean off any small amount of clay that finds it way onto the floor, which it inevitably does. The floor is scrupulously clean all through. All the clay is bagged and boxed. Everything ship shape.
This is the best pottery workshop that we have ever had. Having been burnt out 3 times over our careers. I have designed and built this 4th workshop/studio with every piece of equipment on wheels to facilitate flexibility and cleanliness.
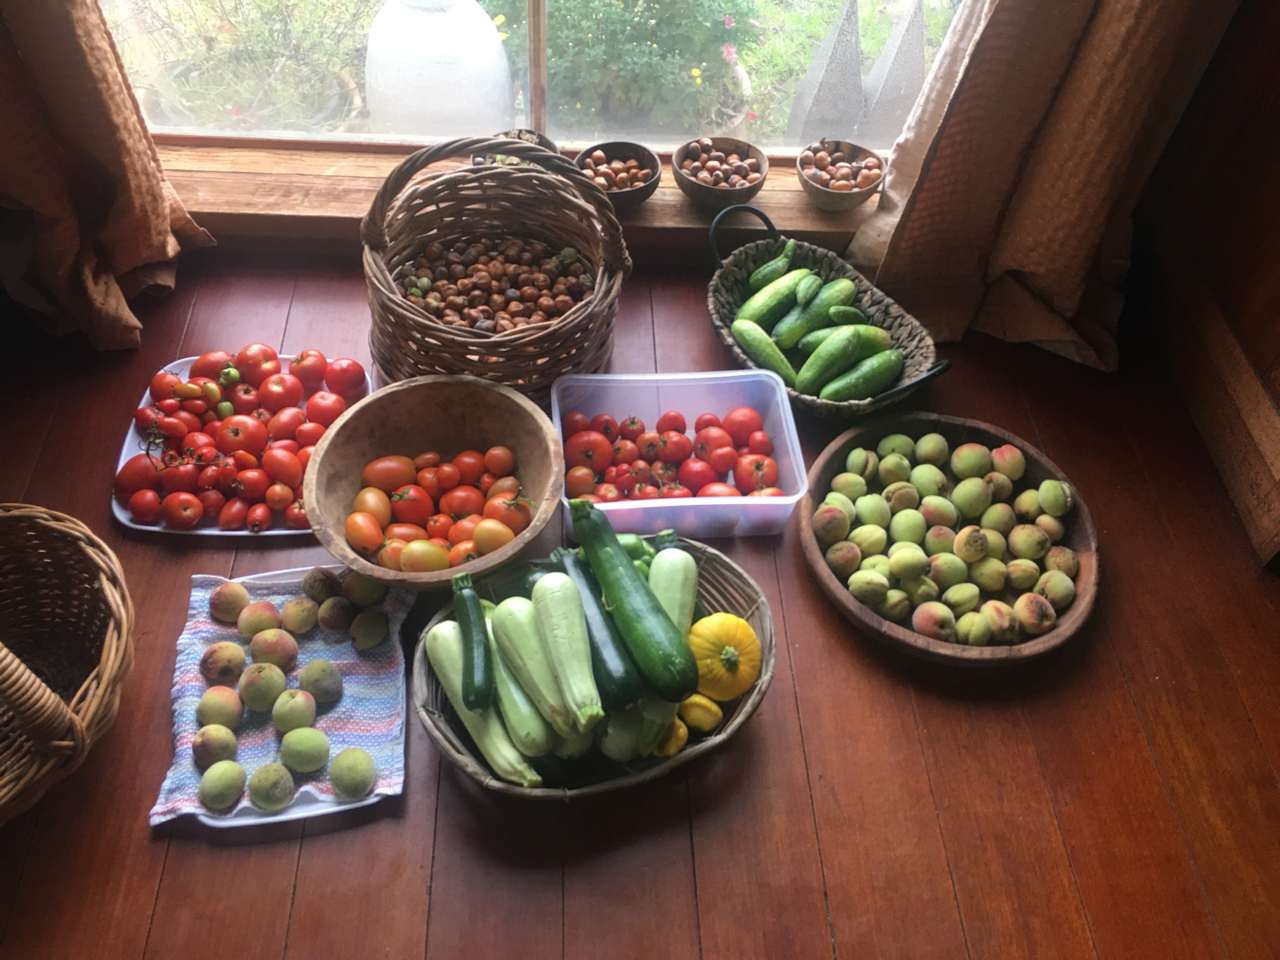
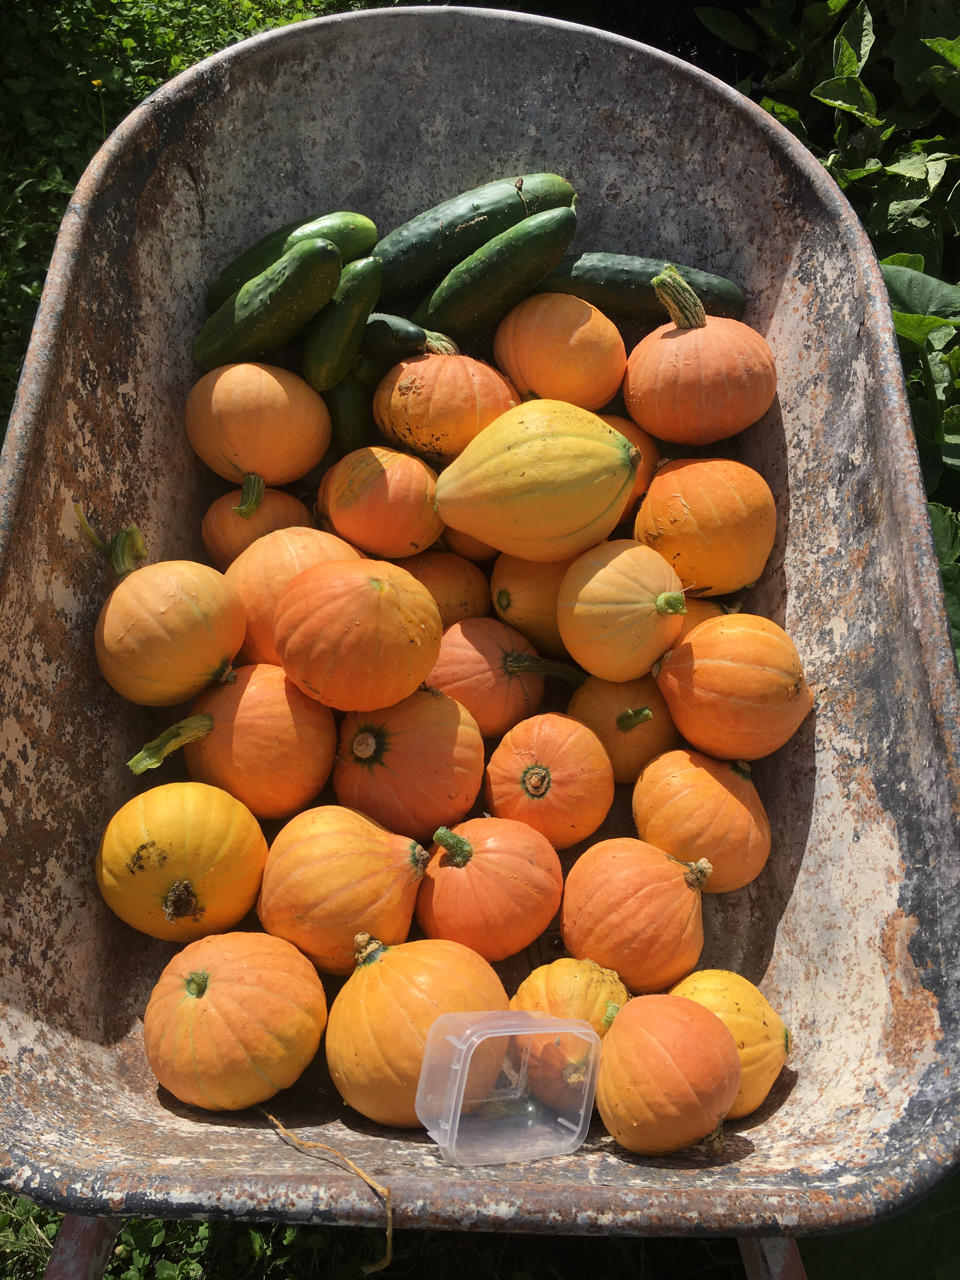
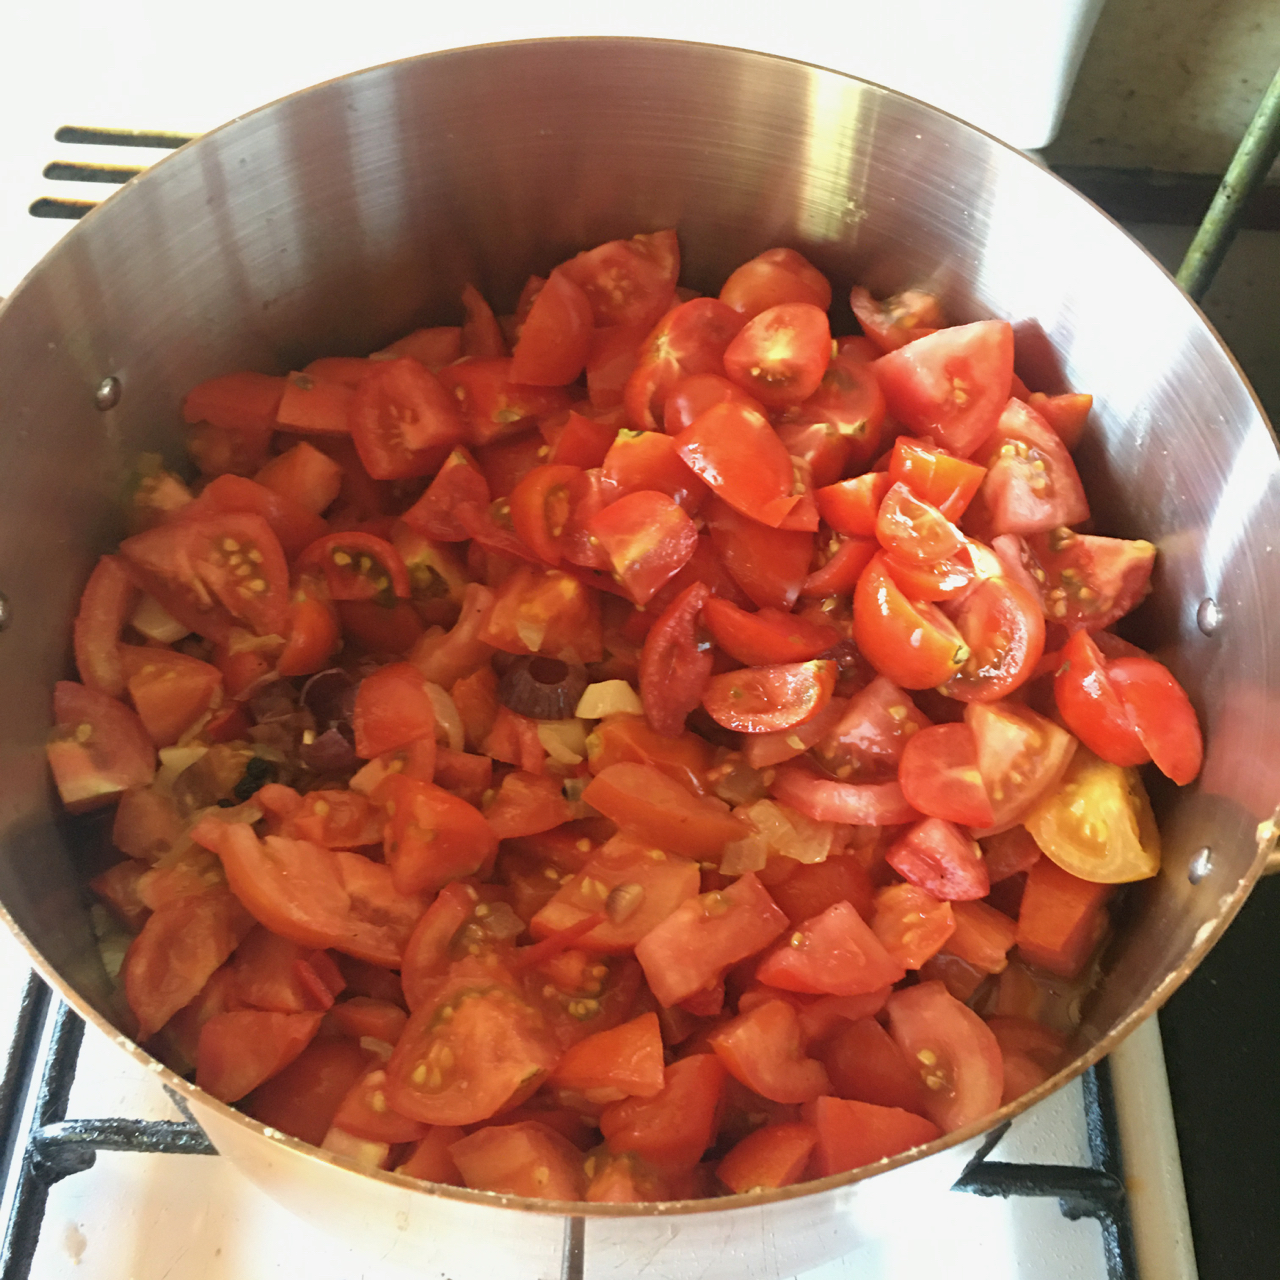
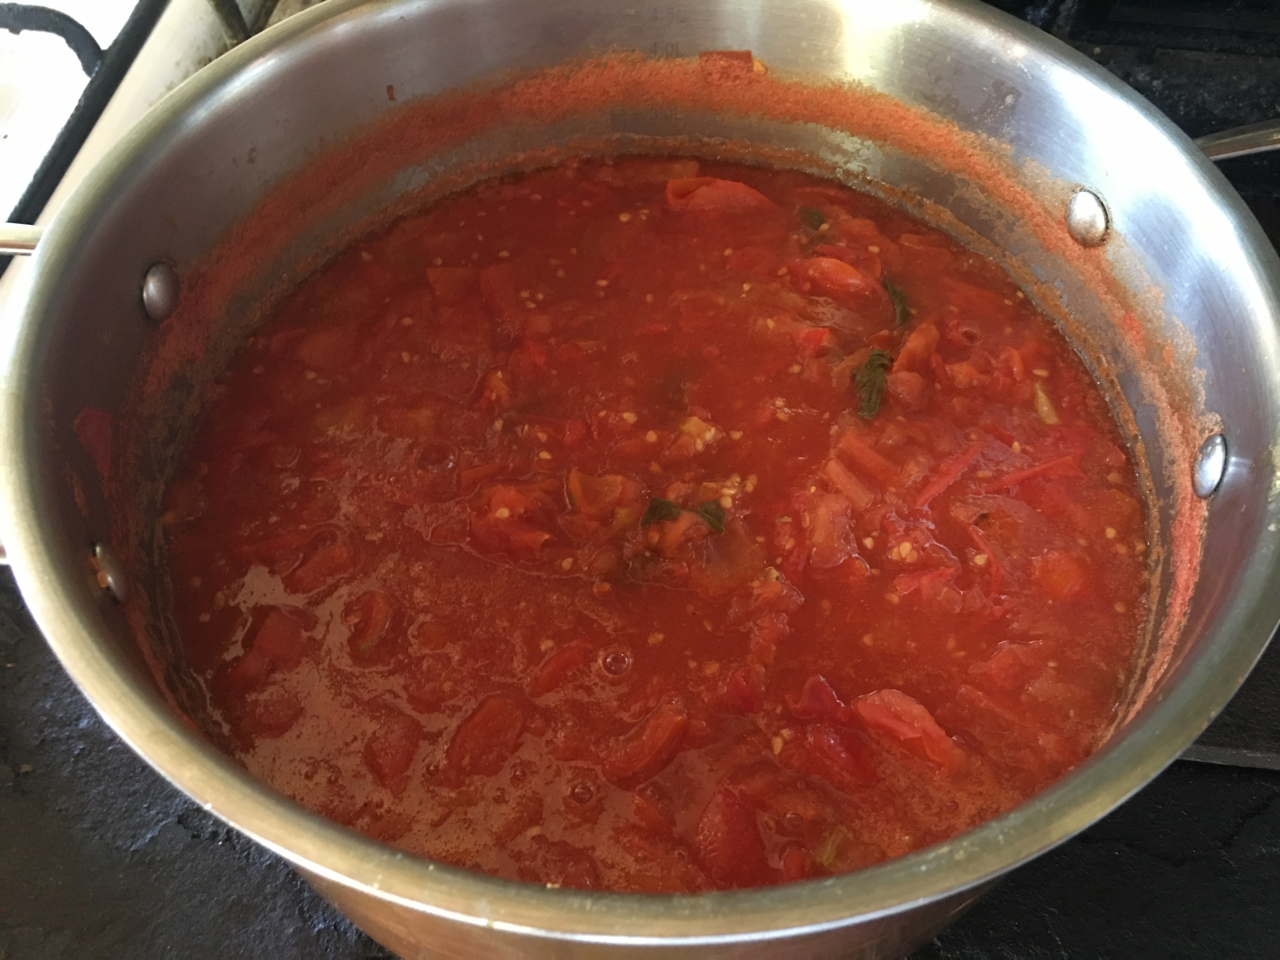
We have been picking lots of food from the garden, then cooking and preserving all the excess. We are up to our 5th batch of tomato passata.
Oven baked pumpkin is great on its own and can be used up all week in all sorts of ways from frittata to salads.
Tomatoes, basil, capsicums, chilli and pepper corns go into the passata.
We had an over ripe banana and a few eggs, so I made us a banana soufflé for desert. It worked out really well.
All part of our attempts at self-reliance. It seems to be working out OK.
Because I only go to the petrol station once every 3 or 4 months to put a small amount of petrol in the plug-in electric hybrid car. I always forget where the switch is, to open the petrol cap cover.
In our old petrol powered car, I used to go the garage and get petrol almost every week, so I knew where the lever was. It was on the floor next to the drivers seat.
Now, because this car is so different — all electric everything. I have to remember to look for the special button to do the job.
Previously, I was only putting $20 in to last 3 months, but with the recent outbreak of war in Ukraine, the petrol company has been forced into ‘Putin’ the price up.
I put $30 in this time. I’ll see how long it lasts. This is only the 3rd time I’ve been to the petrol station this year. It remains a quaint and unusual event for me.
This electric car is beautiful to drive. So silent, but with heaps of torque. All you hear is some faint tyre noise, depending on the road surface. On the newer, smooth road surfaces, it is silent.
I’m pleased to be able to drive home and plug it in to the solar panels for a re-charge. If the sun isn’t shining, we still plug it in, and charge it off our Tesla battery. In this way we can use yesterdays stored-up sunshine.
I’m very pleased to say that even during winter, with shorter days and a lot of rain so far this year, we are still over 95% self powered. We can run our house, charge our car, plus run the pottery and even fire the small electric kiln on our 6 kW of solar PV.
So far this year, we have paid just $75 for electricity from the grid, and this was our first power bill in 16 years since we installed the first 3 kW of PV panels. This bill was largely due to the fact that the feed-in tariff has been reduced to just 7 cents per kW/hr this year, while the cost of green electricity has increased. The feed-in tariff won’t be going up any time soon, if ever. So we have to cut our cloth accordingly. Up until recently, we were getting 20 cents per kW/hr for our electricity, and getting the best part of $1,000 per year in rebates.
However, because I have been doing a lot of regular firings in our electric kiln, we have therefore used a lot more electricity than we normally would. This is becauseI have been working on my Show at the Sturt Gallery. It has taken a lot of research and testing to get this new body of work completed. I haven’t made pots like this before. I haven’t decorated my work with brushwork like this before, I haven’t used most of these clay bodies before and I haven’t fired this wood kiln before. Almost everything is new and therefore un-tried. It was a lot of work to get it all together in time, involving a massive amount of glaze and body testing and test firings. Hence the large power bill. So this is why it is so rewarding to realise that we were able to cover over 95% of it with our own self-generated power.
All this testing also has another more important purpose. I need to make the specially commissioned work as my part of The Willoughby Bequest for The PowerHouse Museum. My original idea all went up in the flames, so I have had to find a new approach, and this new work is my way into that place.
The show at Sturt gallery has been well received. It’s been open for a week now and they have sold 17 out of the 23 pieces. So that is a very good result and I’m very happy with that. I’m very happy with the work and I think that it stands up well. It expresses both my angst and trauma, but also the terrible beauty and energy of intense fire.
We have passed the shortest day, but the weather is still getting colder, as it does. There always seems to be a bit of a lag from the shortest day to the depth of winter. The reverse is also true for the longest day and the hottest weather. So it is now time to do the winter pruning of all the grape vines and deciduous fruit trees.
This was always such a big job in the past with all our stone fruit trees being over 40 years old. They had grown quite massive. Now, post fire, and all new dwarf fruit trees planted in the new orchard, it will not be such a big job, as the trees are still quite small and should remain that way. No more ladder work for pruning.
The first, earliest, peach tree has suddenly broken into flower. This is a strong reminder that I need to get on with it, stop lazing around, and get all that pruning done.
All this cold weather, frosty nights and chilly mornings has inclined me to make a few curries. They are a good comfort food, warming and filling, without being too bad for you. Veggie curries are great, I have been trying to use mostly what we have growing in the garden, which at this time of year must include broccoli, cabbage and even a few Brussel sprouts. I even managed to used most of our own spices.
This Asian influenced meal had the last 9 small tomatoes from the garden, our garlic, chilli, lime leaves, curry leaves, coriander and the last two small capsicums. All from the garden. I had bought a few pieces of fresh ginger, galangal and turmeric from the green grocer because we cant grow these plants in our garden here, even in summer. We had 3 curries over the week. Each one was slightly different, from Thai to Indian. Curry seems to be more warming than other meals.
Maybe it’s all that chilli?
On Sunday I was up before dawn and drove up to the North side of Sydney, a few hours drive away. Up to Oxford Falls. A place where I used to live. I grew up and went to school there. I used to live at number 41 Oxford Falls Road. This time I went to the far opposite end of that long road to collect some old and rusted galvanised iron roofing so that I can rebuild my wood fired kiln’s wood shed and finally create a new and hopefully permanent home for the rebuilt big hydraulic wood splitter.
It was a really lovely sky at dawn with the horizon turning from grey to pink for those precious few minutes.
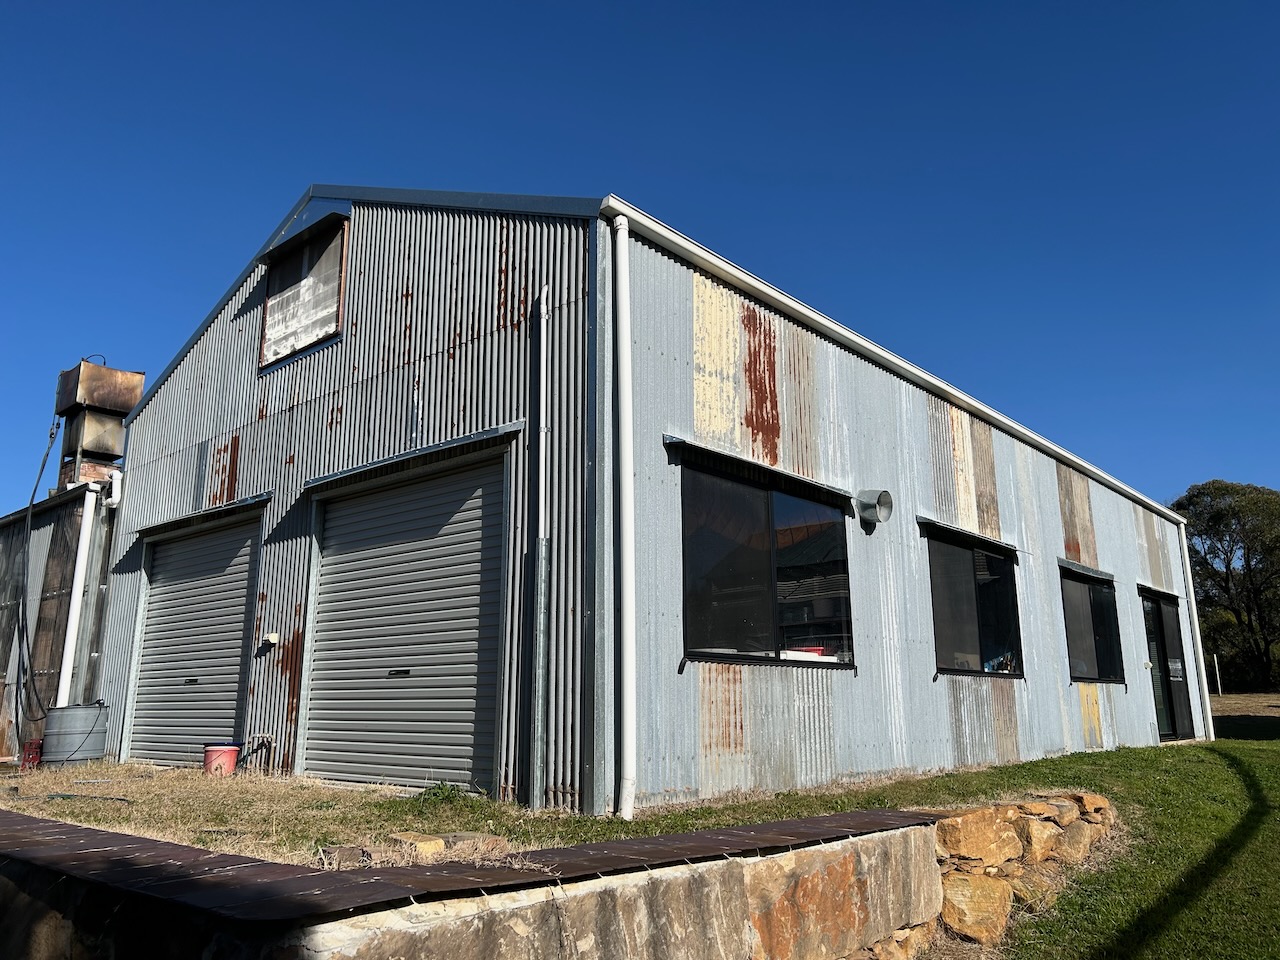
I had been given a tin roof off an old chicken farm shed. I was told about it a couple of years ago, when we were casting about looking for old re-cycled roofing iron to use as cladding on our new pottery shed. I wanted to use all old, grey, weathered and slightly rusty re-cycled gal sheeting on this new building to make it look more in keeping with all the other old buildings on our site. Our home is the Old School building from 1893 and we also have the old railway station built in 1881. I managed to save both of these buildings from the fire. We wanted to keep the heritage look and feel of the place and a brand new shiny corrugated iron pottery shed would stand out like dogs balls, I managed to find just enough old, weathered roofing to complete the job while I was still waiting for the roof to be taken off the Chicken shed in Oxford Falls.
That roof was finally replaced this year. Too late for me to use in the new pottery, but just in time for me to use to re-build the dedicated wood shed for all the large billets of timber that are required to be split, stacked and dried for use in the wood fired kiln. I’m quite fond of the old heritage buildings and their ‘settled-into-the-environment’ look, so it is appropriate for me to build the new wood shed out of old and slightly rusted stuff.
When I drove into Oxford Falls Road, the road I grew up on, but where I left to find my own way in life in 1972. I found some old memories flooding back. I remembered that we used to walk down the road a few miles to get to the creek at the bottom of the hill and go yabbying. A yabby is a fresh water crayfish. This time, instead of turning to go up the hill to where my parents old house was. I turned the opposite way and crossed over the ford just above the falls and went West.
I hadn’t been here since I was in my teens and used to drive the family truck down here with my grand father, to collect chicken manure from his friends egg farm. My Granddad was a very committed organic gardener, health food devotee, and a strict vegetarian. He brought my mother up that way, and she me. In fact, my grand parents lived behind our house. The two houses back to back, on different streets but with a common back yard joining them. This back yard was huge, as land sizes were very generous in those post (WW II), war days. That shared back yard was dedicated in the most part to a huge vegetable garden and a few fruit trees. And, of course two massive compost heaps.
It was a regular chore to go with granddad and shovel chicken manure from the deep litter floor of the chook sheds when there was a change over of birds and the various sheds were empty for a short while. We had to take it in turns either holding the bag open or digging the manure and wood shaving mixture into the hessian bags, then lugging them out and up onto the truck. I shared this job with my older brother for a few years until he eventually left home and I was old enough the get my drivers licence and took over the driving. Old man Rigby, who owned the farm and my granddad were great friends. They were about the same age and shared the same interest in ‘health foods’, as they were called back then. Old Mr Rigby baked his own bread. As did my grand mother and she taught my mum. She then taught me. I still make most of our bread, as well as grow my own organic vegetables. Family traditions are passed down in this way. Give me the boy till he is 7!
Well, you can image my surprise, when I turned into the driveway of the site to collect the old roofing iron to find that it all seemed strangely familiar. I recognised the old shed with the hand split stone walls. It all came flooding back. I’ve been here before. Almost everything is different now, but the old shed is the same, just more dilapidated, but I remember that Old Mr Rigby lived in there. The first room served as his kitchen and his office, it’s now the pottery studio. The remaining bigger part of the old shed was his machinery shed. It’s now got one of my wood fired kiln designs in there. Who could possibly imagine that !
I remember sitting in that room waiting while Mr Rigby and my Grand Father chatted on about compost and other organic gardening stuff. I was bored. I wanted to get going, so that I could go to the beach. I didn’t take sufficient interest in their healthy organic gardening and wholemeal bread baking chat. My Granddad was probably thinking…
We are in our own very small and insignificant flood recovery mode
Now that the rain has eased. I can get out and start to repair the leaks that have become apparent in the pottery.
The tin shed builders were pretty basic, almost sub-prime. We have had so many leaks in this building.
The builders chose to use metal sheeting screws without any rubber seals. This must have saved them $10 bucks! So all the walls leaked in the first rain months ago.
I had to go around the whole building and seal all the screws. I had a few options. Firstly I could go around and take out every screw and replace it with the correct type 17 climaseal screws.
Or, I could go around and take out every one of the 3,000 screws, add a small rubber ‘O’ ring washer, then replace the screw. In the end I took the quicker and cheaper option of going around and siliconing the head of every screw. This turned out to be quicker and cheaper. But it still took me days to go around and seal every one to water proof it.
During this prolonged rain event we’ve had a lot of rain compared to our normal. At one point we had over 300mm in 2 days. I know that this is nothing compared to what other places have had to deal with, but it is more than our annual rain fall during the drought years. It became apparent that a couple of the windows were not installed correctly, so that water was leaking in around them. The builders must have been very sloppy with the flashing.
Rather than take the shed to bits to find and seal the problem. I decided to put an awning over the problem windows to keep the rain from getting in behind them.
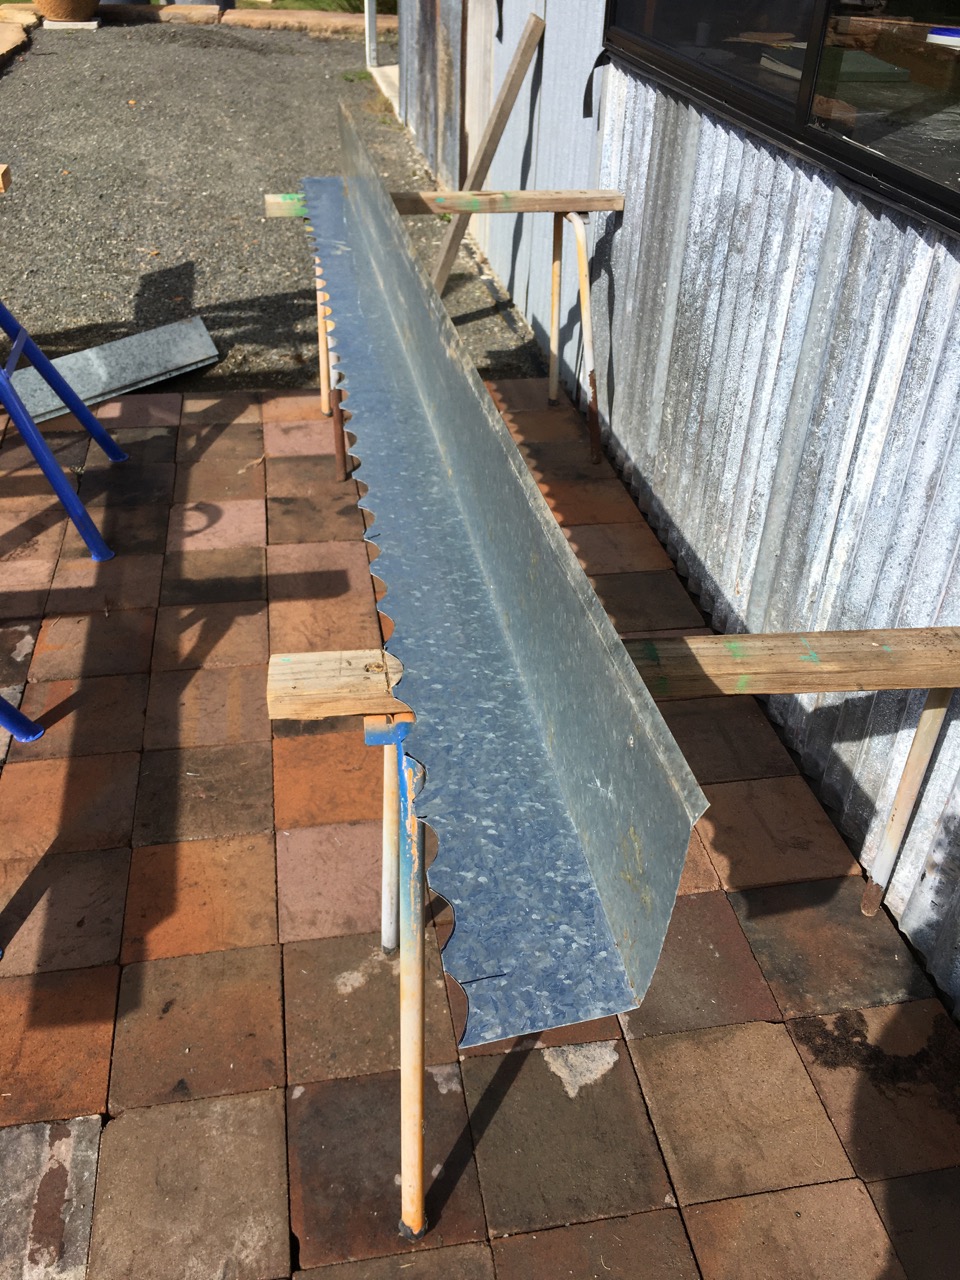
I had to custom cut and fold some fancy flashing to fit the corrugations and keep the water out.
I cut them by hand using old fashioned ‘curved’ tin snips. Once screwed to the wall above the window and sealed with silicon, they look pretty neat. I’m hoping that this will solve the issue?
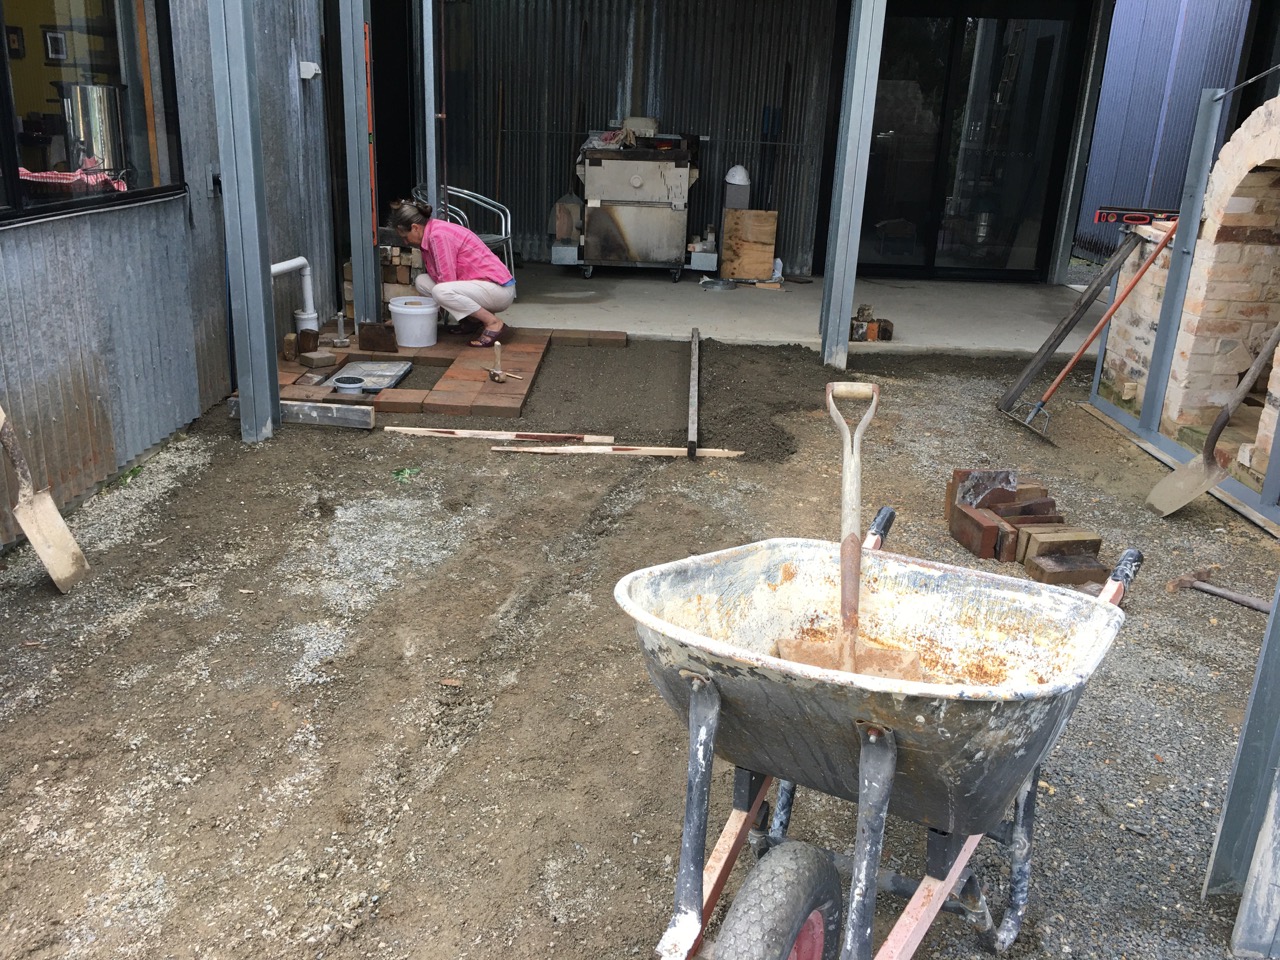
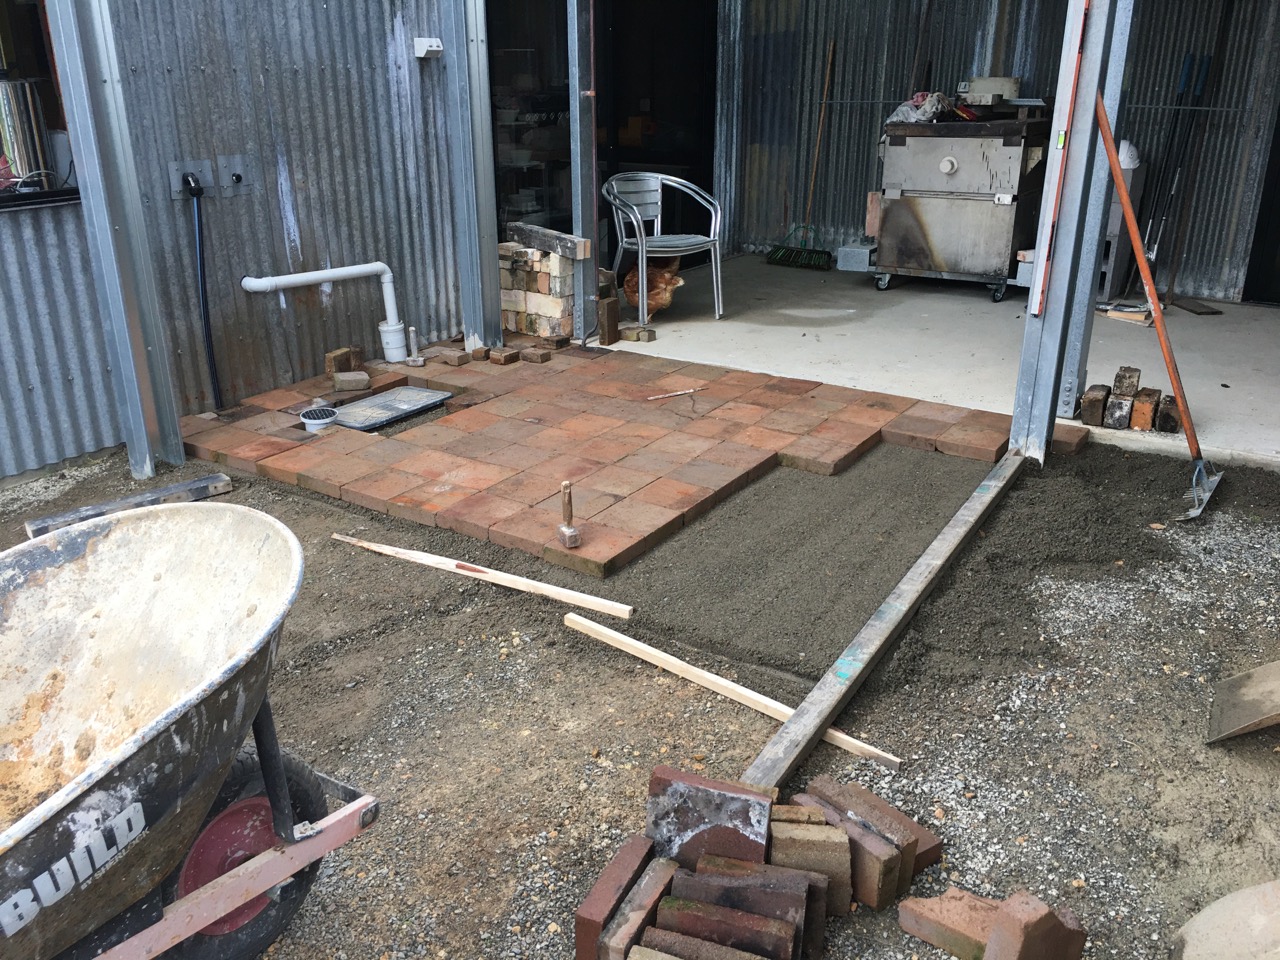
We were busy last weekend with a bunch of friends paving the court yard area around the new, almost finished, wood fired kiln.
I still need to finish laying the last of the floor bricks in the chamber, I would have finished this small job a couple of weeks ago, but when the court yard flooded with 70mm of water sloshing around in there. It wasn’t very appealing to be kneeling done and doing the bricklaying. Then all that water was sucked up into the floor bricks like a wick and they became saturated so that any new mortar wouldn’t stick in place. Finally, they have now turned green with algae. I’m sure that they will dry out – eventually!
This severe weather event, although not life or property threatening for us, like it has been for our friends and relatives up on the North Coast. It has been a good warning and trial run for what we can expect in the future as Global Heating increases unchecked. No one in government seems to be taking this seriously, so what can we expect for the future? Well my guess is more of the same, only much worse. We’ve been warned.
So this extreme weather event has been a great warning to us as to what we can expect in the future. I have learned from it and and I’m taking actions now to limit the sort of damage that very heavy rain fall can cause. To start with we have paved the kiln area with a significant fall away from the kiln and out into the open. I have also ordered some more steel batons and some more poly carbonate roofing sheets to wall in half of the courtyard directly behind the kiln. With contour drainage to take the water to the edge of the retaining wall. Although the pottery didn’t flood, it has become obvious that we need to create a dish drain around the front of the building to carry all the excess ground water away from the front of the building, because another event will eventually be worse.
This is a start
Back at the kiln, I also need to fabricate a stainless steel firebox lid and a stainless steel chimney flame tube incorporating a spark arrester. I planned to have started this job already, and 3 weeks ago, I ordered the Stainless steel sheets and some Stainless steel wire mesh for the spark arrester. The sheeting is here, but the couriers have lost the SS mesh. The supplier won’t replace it until he knows what has happened to the first order. The courier company won’t pay out to replace it until they know what has happened to it. So I’m stuck in a catch 22 situation. I can choose to wait it out until the original order is found and delivered, or buy a second sheet of stainless steel mesh and get on with it, but it’s not cheap stuff, so I’m waiting and continuing to write emails of enquiry.
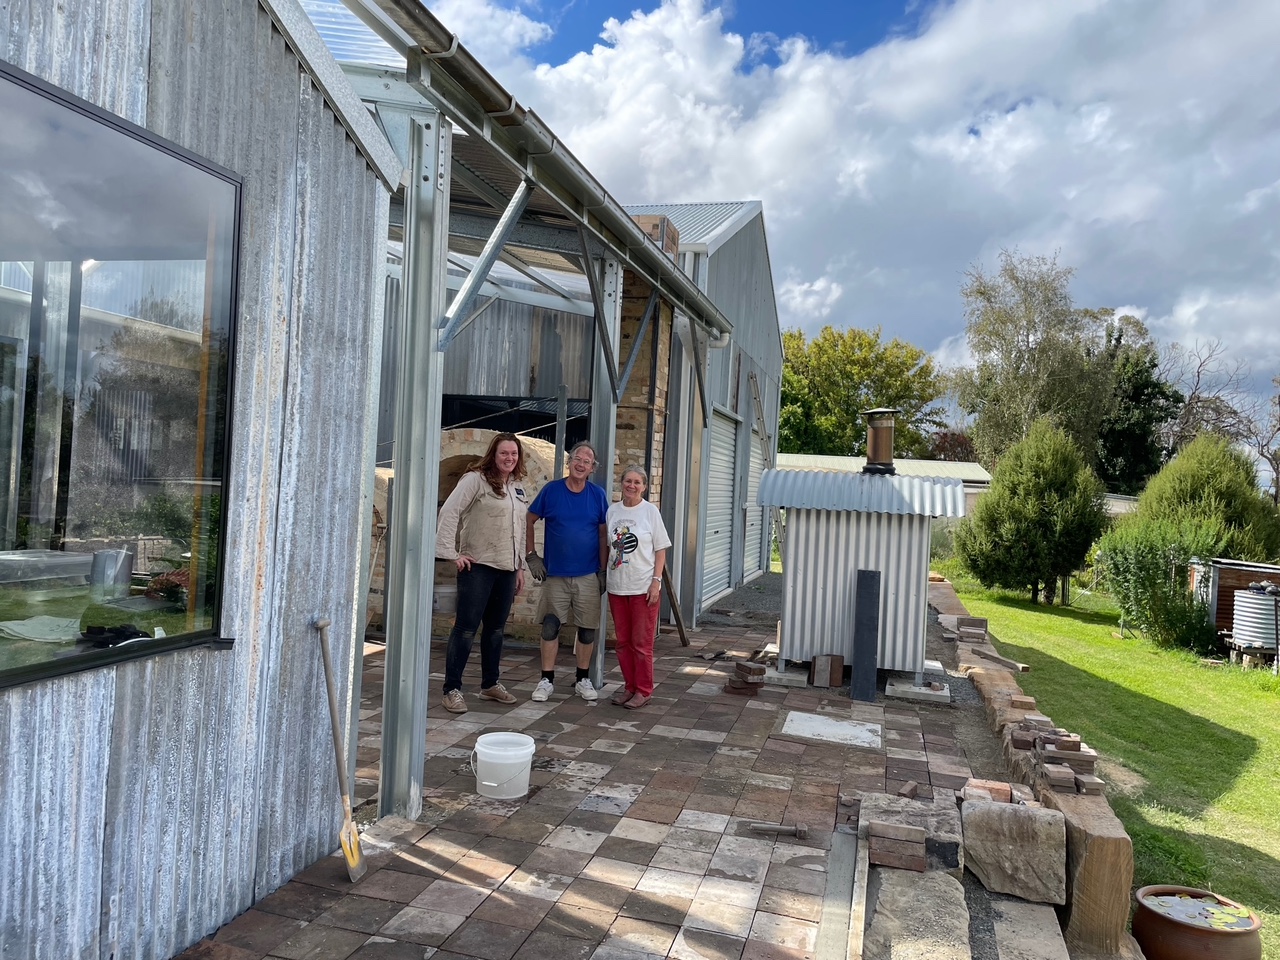
We had a great weekend with our friends laying the paving tiles. We also met two new people who volunteered and turned up all the way from Newcastle, who will surely become friends now. They were a great addition to the group. The stayed over night with us and we got to know each other over a home grown meal from the garden. I had previously made a big pot of tomato passata from the last of our tomatoes, so we had an easy meal of pasta. Dan and James are environmental campaigners and organisers, so we shared a lot in common. James took this image of Dan, Janine and me standing on the new paving.
Dan, Steve and Janine. image by James Whelan
This is all great progress and I’m really happy to see so much getting done.
Janine and I started the levelling and paving earlier in the week. As a trial run, to make sure that everything would work out the way that I planned. As we haven’t done any paving since we built the last pottery shed in 1983, I’d completely forgotten what to do and had to re-educate myself and get my skills back up to date. It’s not rocket science, but does need concentration and quite a bit of back bending work. I decided that at my delicate age, I should not do so much bending and instead get the knee pads on and work down on my knees to keep my back straighter. This worked out much better. But then getting up became a bit of an issue.
Starting the paving, getting our levels sorted out and learning how to space the pavers to allow for all the different sizes to fit together evenly.the courtyard paving complete
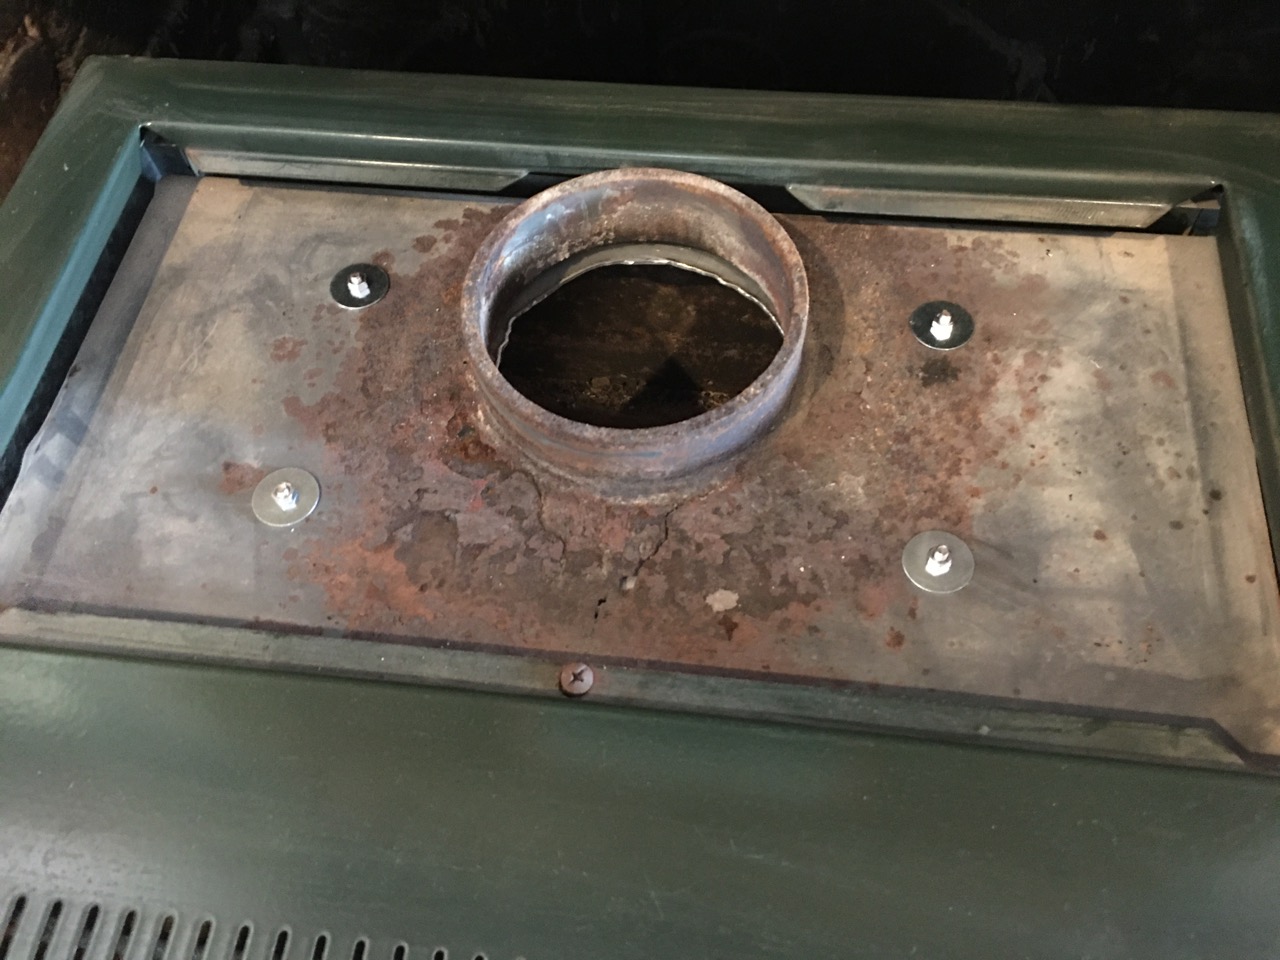
As we are in Autumn now and the weather is getting cooler and the days shorter, we have thought that we may need to light the fires in the kitchen and lounge room soon. The slow combustion heater in the lounge has started to wear through and rust out in the top fire box steel sheet. A crack started to appear at the end of last season, so I made a mental note to repair it once it cooled down, during the off-season, well that time is running out now, so it has to be dealt with as a matter of urgency. I decided to attack the problem by fabricating and new roof for the firebox out of a scrap piece of 2mm thick stainless steel sheet.
The new Stainless steel fire box roof sheet ready to installThe new firebox top bolted in place
Rather than try and weld it in place, which wouldn’t really work very well , as stainless and mild steel have different rates of expansion and contraction. I decided to bolt it in place with stainless steel bolts through over size holes and oversize washers. This should allow for the differences in expansion. The 2mm thick stainless roof should last as long as the 4 mm mild steel walls and whats left of the old top sheet. Time will tell. The stove is about 30 years old, so it has proved it’s worth. I’ll continue to work on it and preserve its life for as long as I can. We bought our slow combustion kitchen cooker over 40 years ago now and it was 2nd hand then. I’ve managed to keep it going all this time with home made adaptations and ingenious improvised repairs. I’m proud of that achievement and I’m hoping to extend it to 50 years if I can.
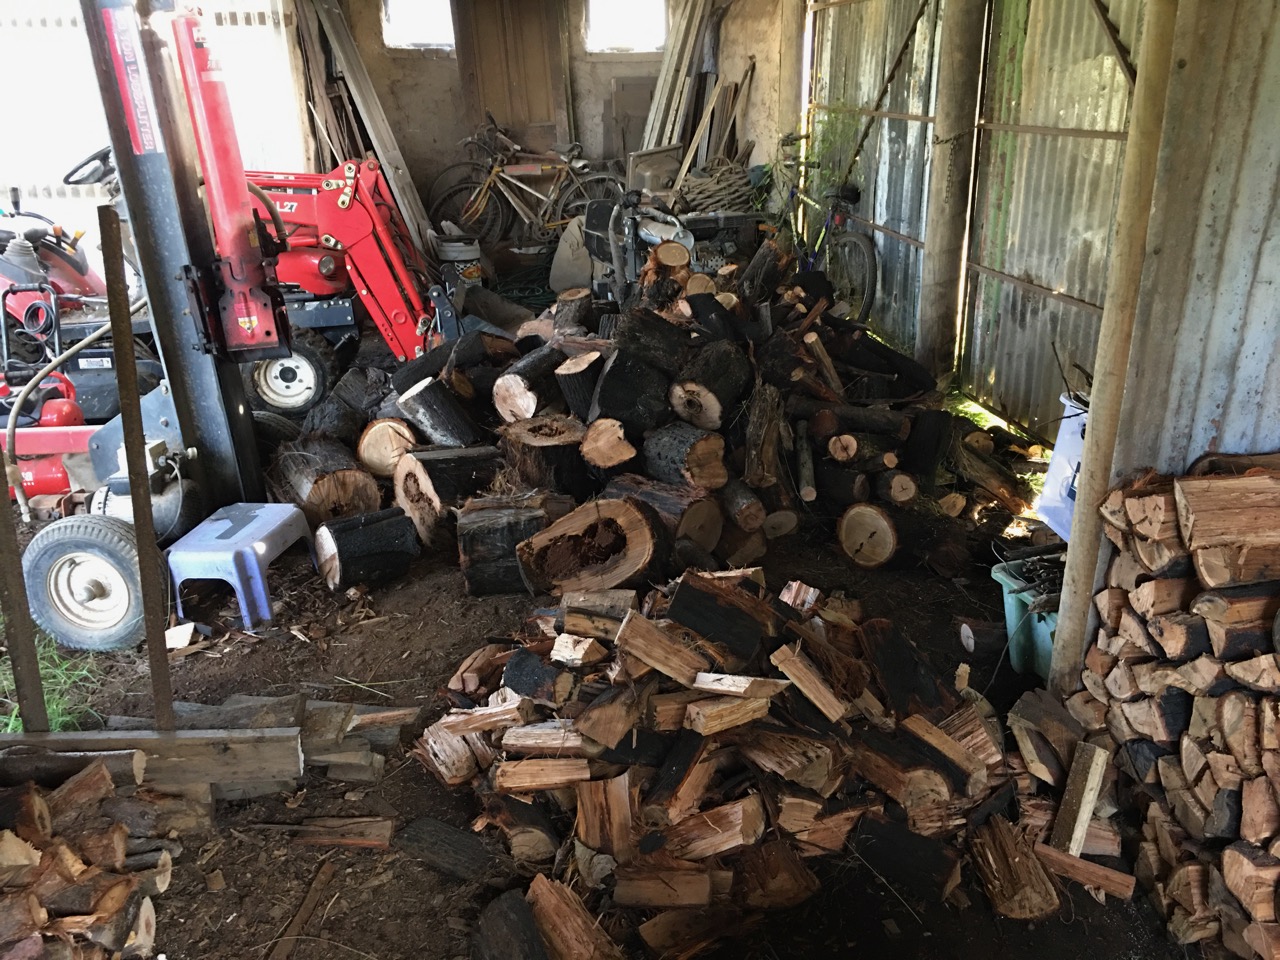
While I was at it, working on the lounge room heater. I also made a new front door frame seal. Afterwards, we went out into the paddock and spent an hour together with chainsaws cutting bushfire devastated and blackened logs. We cut them to stove lengths and stacked them in the wood shed ready for splitting. This will be about 1/4 to 1/3rd of the fire wood that we will get through the coming winter months.


You must be logged in to post a comment.