Platform Heal

We bought the old Balmoral Village Railway Station building to save it from demolition back in the 70’s. The local ‘Loopline’ train line had been closed to passenger trains and all passenger services were replaced by a bus service. The line was still open to the odd freight train, or it was used as an alternate line to the main line if there was a derailment on the main line, which actually happened in 1978.

For a whole day and night we got all the Sydney to Melbourne train traffic off the main line diverted along our old loopline tracks. We got to see the Sydney to Melbourne Inter-capital Daylight Express and the Southern Aurora rumbling along past our house at 20 kms hr. on our old, little used, light gauge tracks.

We live on this old and now closed line. It was originally the main line south for about 50 years. It came through here in about 1864 and was replaced by the new main line in about 1916. The old line through here is now just a ‘loop’ off the new line.

The original line was difficult for some of the older steam engines, as the gradient was very steep. Digging cuttings through the hard rock of these steep hills was time-consuming and expensive. There is an extremely deep cutting just up the road from here. I was told that it was the deepest railway cutting in the Southern Hemisphere when it was built. This cutting allows the line up through a difficult part of the terrain to the next village that was originally called ‘Big Hill’.

Our village was, at the time, a place to keep and maintain an extra steam engine. When the Sydney train arrived here. The spare locomotive was hitched on to the train and used to pull the carriages up this steepest part of the line. Even so, it was a very slow and difficult job to get the train up the big hill.

There is an old story, and I can’t vouch for its truth, about a bush ranger stepping up onto the very slow-moving train at the front and robbing everyone on the train as he walked down through the carriages, and then hopping off again, not too far from where he got on!

There were originally 7 stations along this part of the original train line, now the ‘loop’. We live right in the centre of the loopline. As we are half way between the two ends of the loop. It was decided that a School would be built at the half way point to service all the children of the track ‘fettlers’ and engine maintenance men that were stationed here.

The school was opened in 1893 and operated full-time until the line was relocated to the new route in 1919 and the population started to decline, as the railway men and their families slowly moved away. The school then operated as a part-time school for a few more years, and then closed. It reopened during the Second World War as a part time school, sharing a teacher between here and the now named village of Hill Top, higher up the line. The school closed permanently at the end of the war. The station remained open until the line was closed to passenger traffic.

Once the line was closed to passenger traffic and the bus service instigated. It was decided to tender all the stations along the line for demolition. The first station to be offered up to tender for demolition was Hill Top station, next door. We heard on the grape-vine, that the only bidder just wanted the tin off the roof to build a chook shed, so only offered $2, won the bid, took the iron off and burnt the building down to comply with the clause that stated “remove to ground level”.

When the Balmoral Village station came up for tender next, we were keen to see it preserved and not destroyed, so we bid the ridiculous price of $250 to make sure that we would win and could preserve it. $250 was about half the cost of the wood to build a new one. We won of course. No-one in their right mind would pay that much for what amounted to a little old wooden shed.  A very old wooden shed indeed. It is thought to have been installed in 1864 or there-abouts, when the line opened. Making it the oldest building in the village. We thought it worth saving.

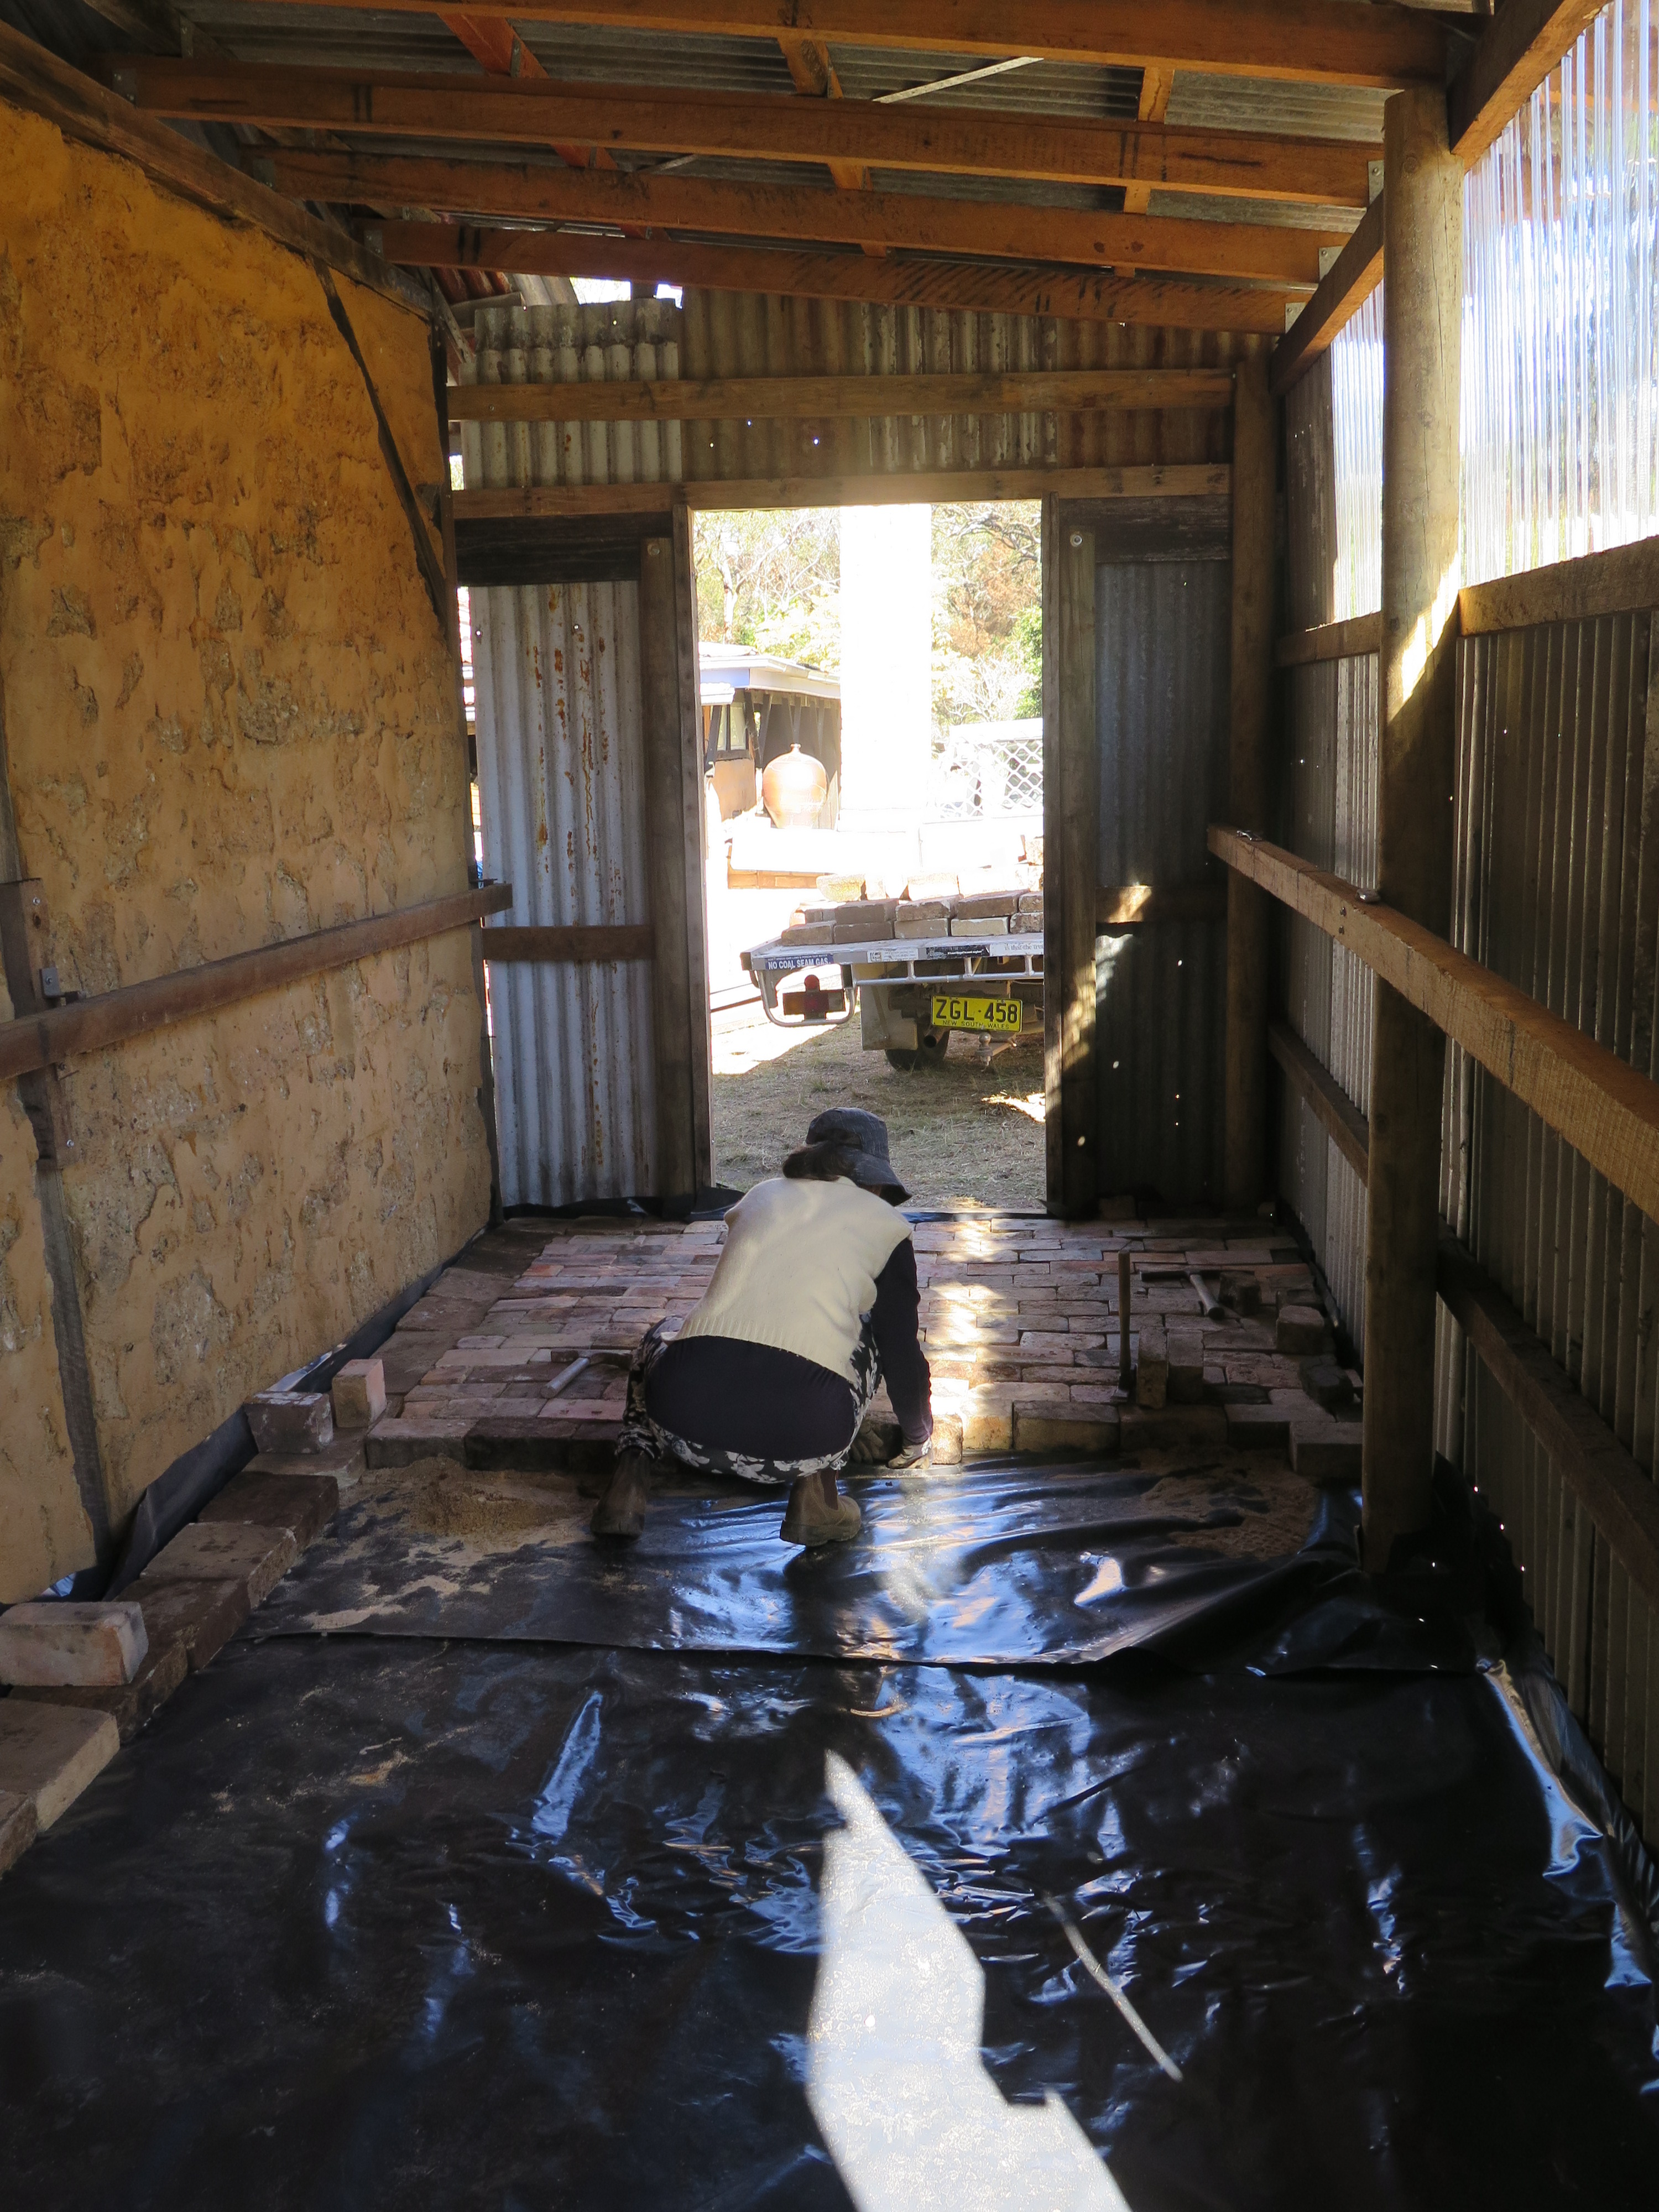
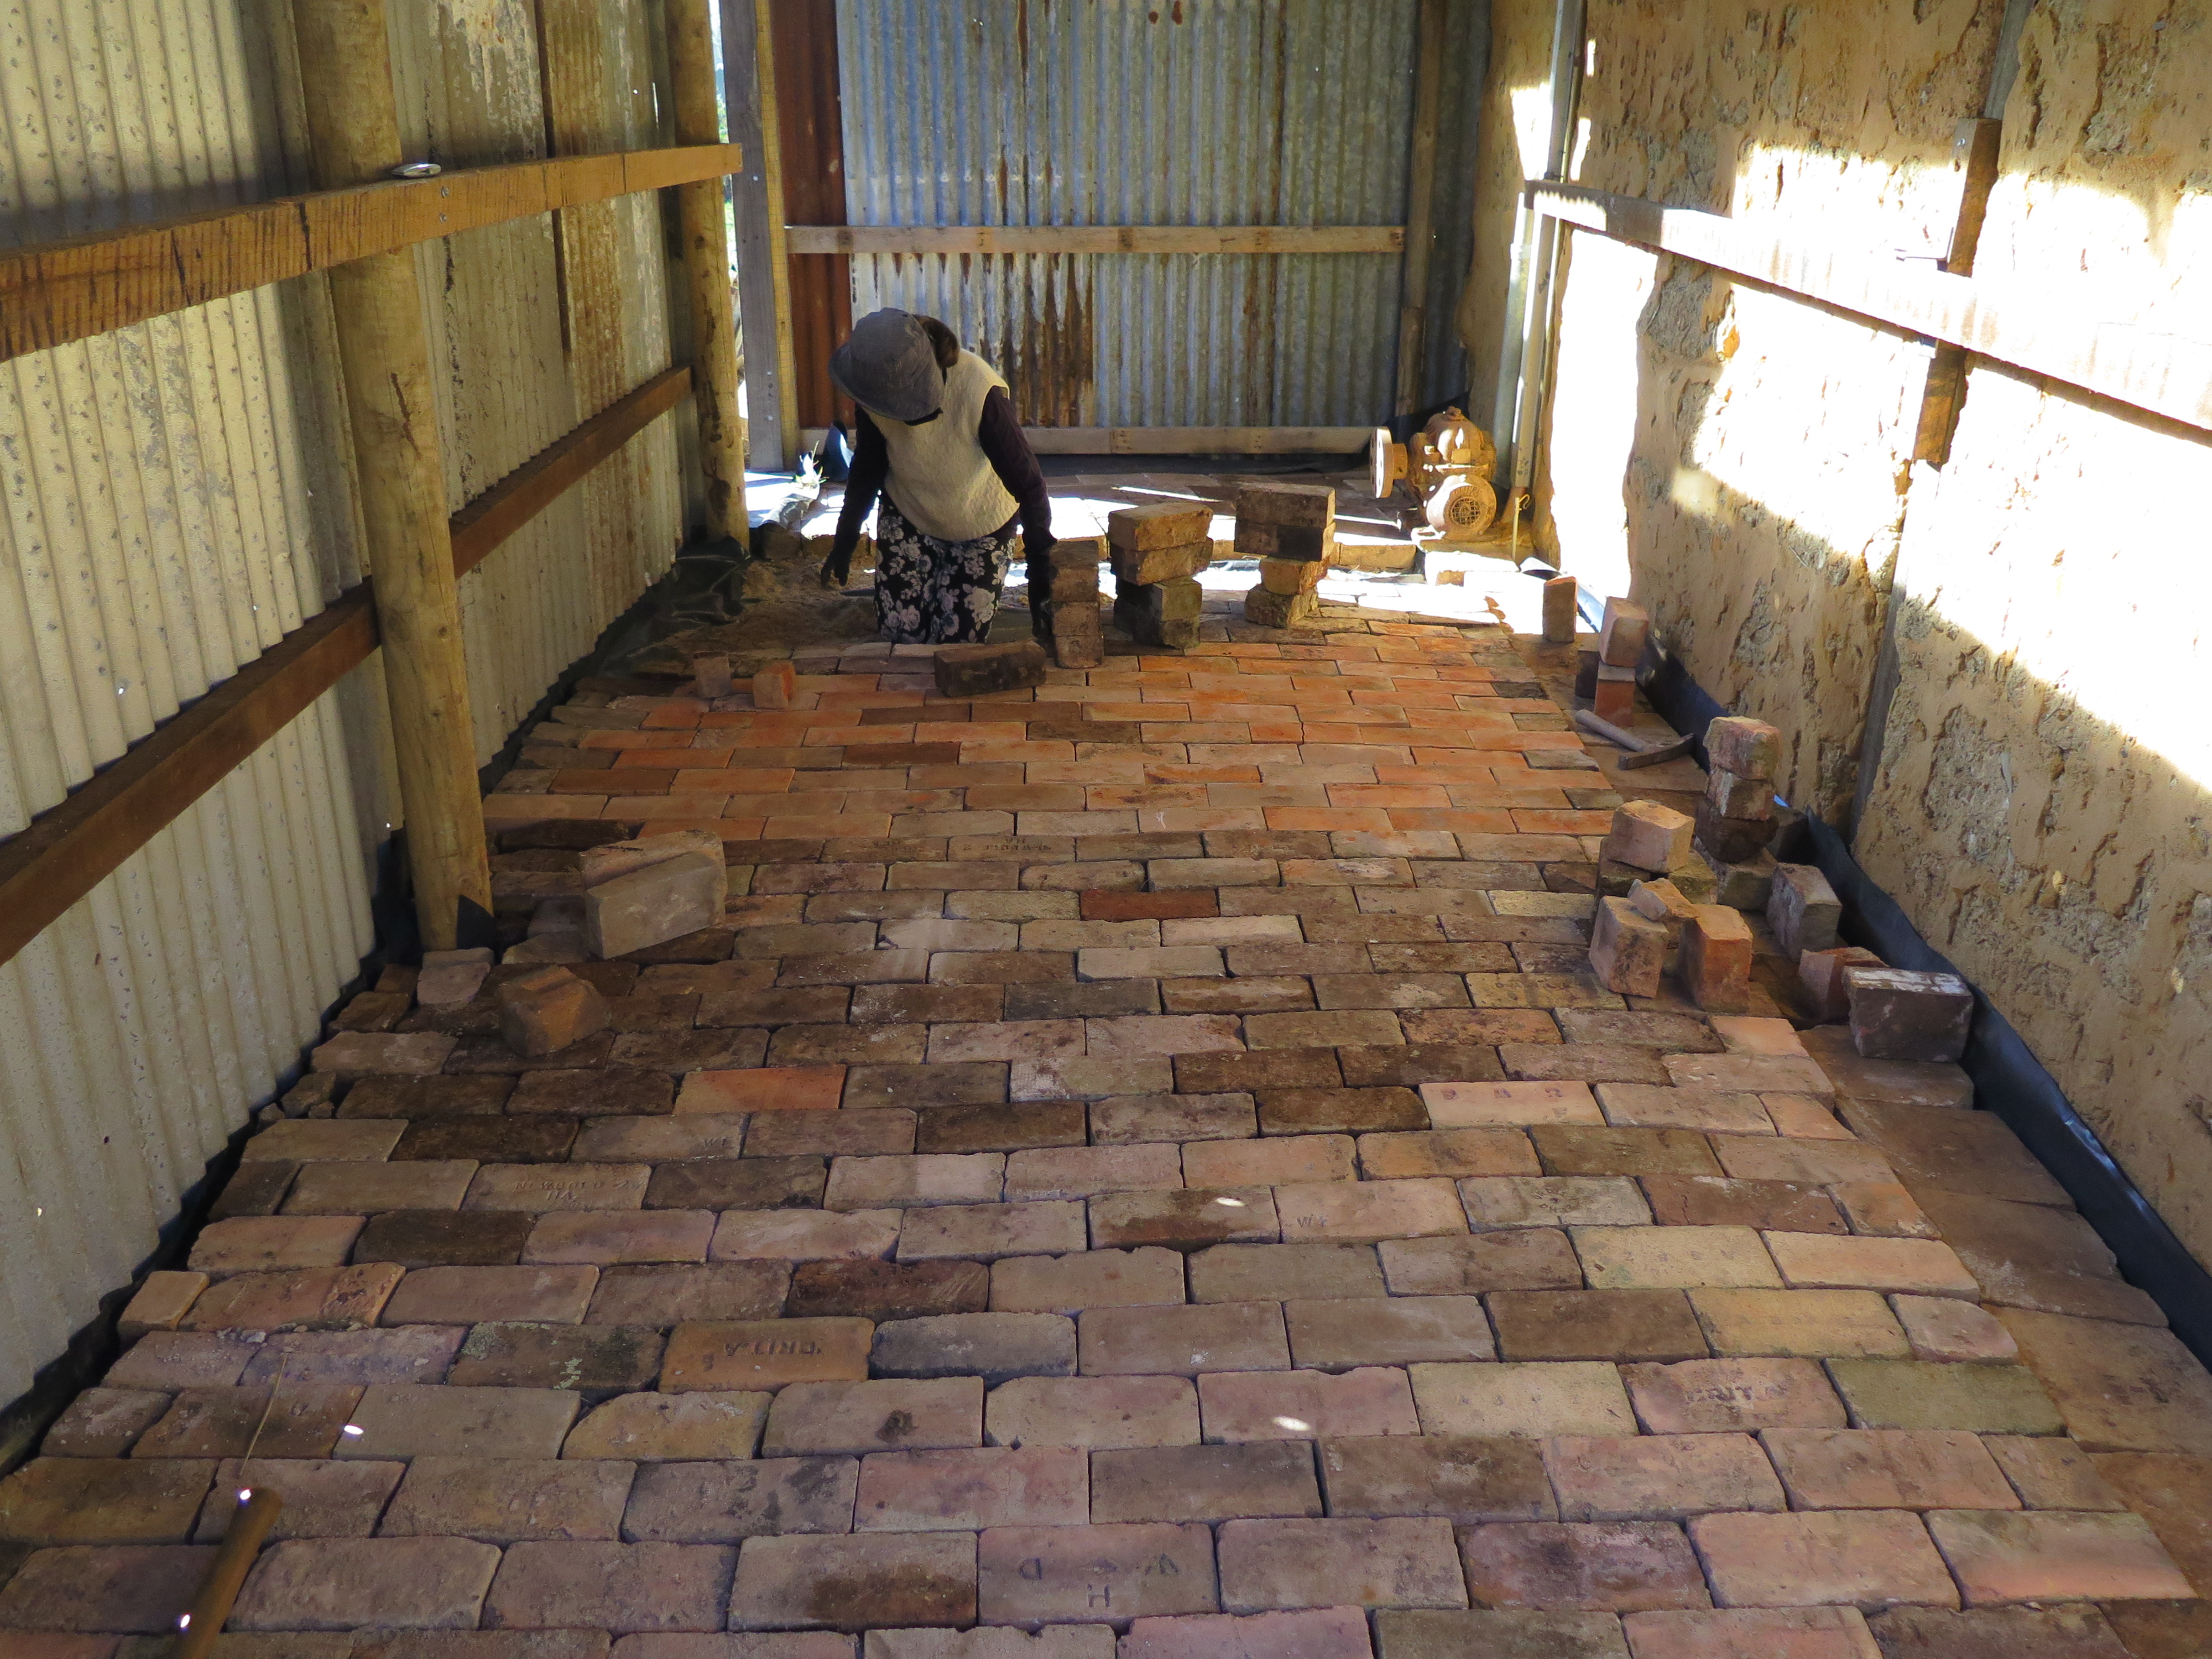
We measured it up and built footings to suit, then hired a crane and low-loader. We picked it up and drove it home to the school in one piece. Then lifted it into place. It was the biggest job that I have ever attempted and it all went like clockwork. It turned out to be the least troublesome thing that I have done. However, I did spend a lot of time planning, preparing and choreographing it.

Once we realised that we now owned all (both) of the public buildings in the village and there is no water works to buy. We could put a motel on Pall Mall and charge all passers-by to pay $200 dollars to pass ‘GO’!

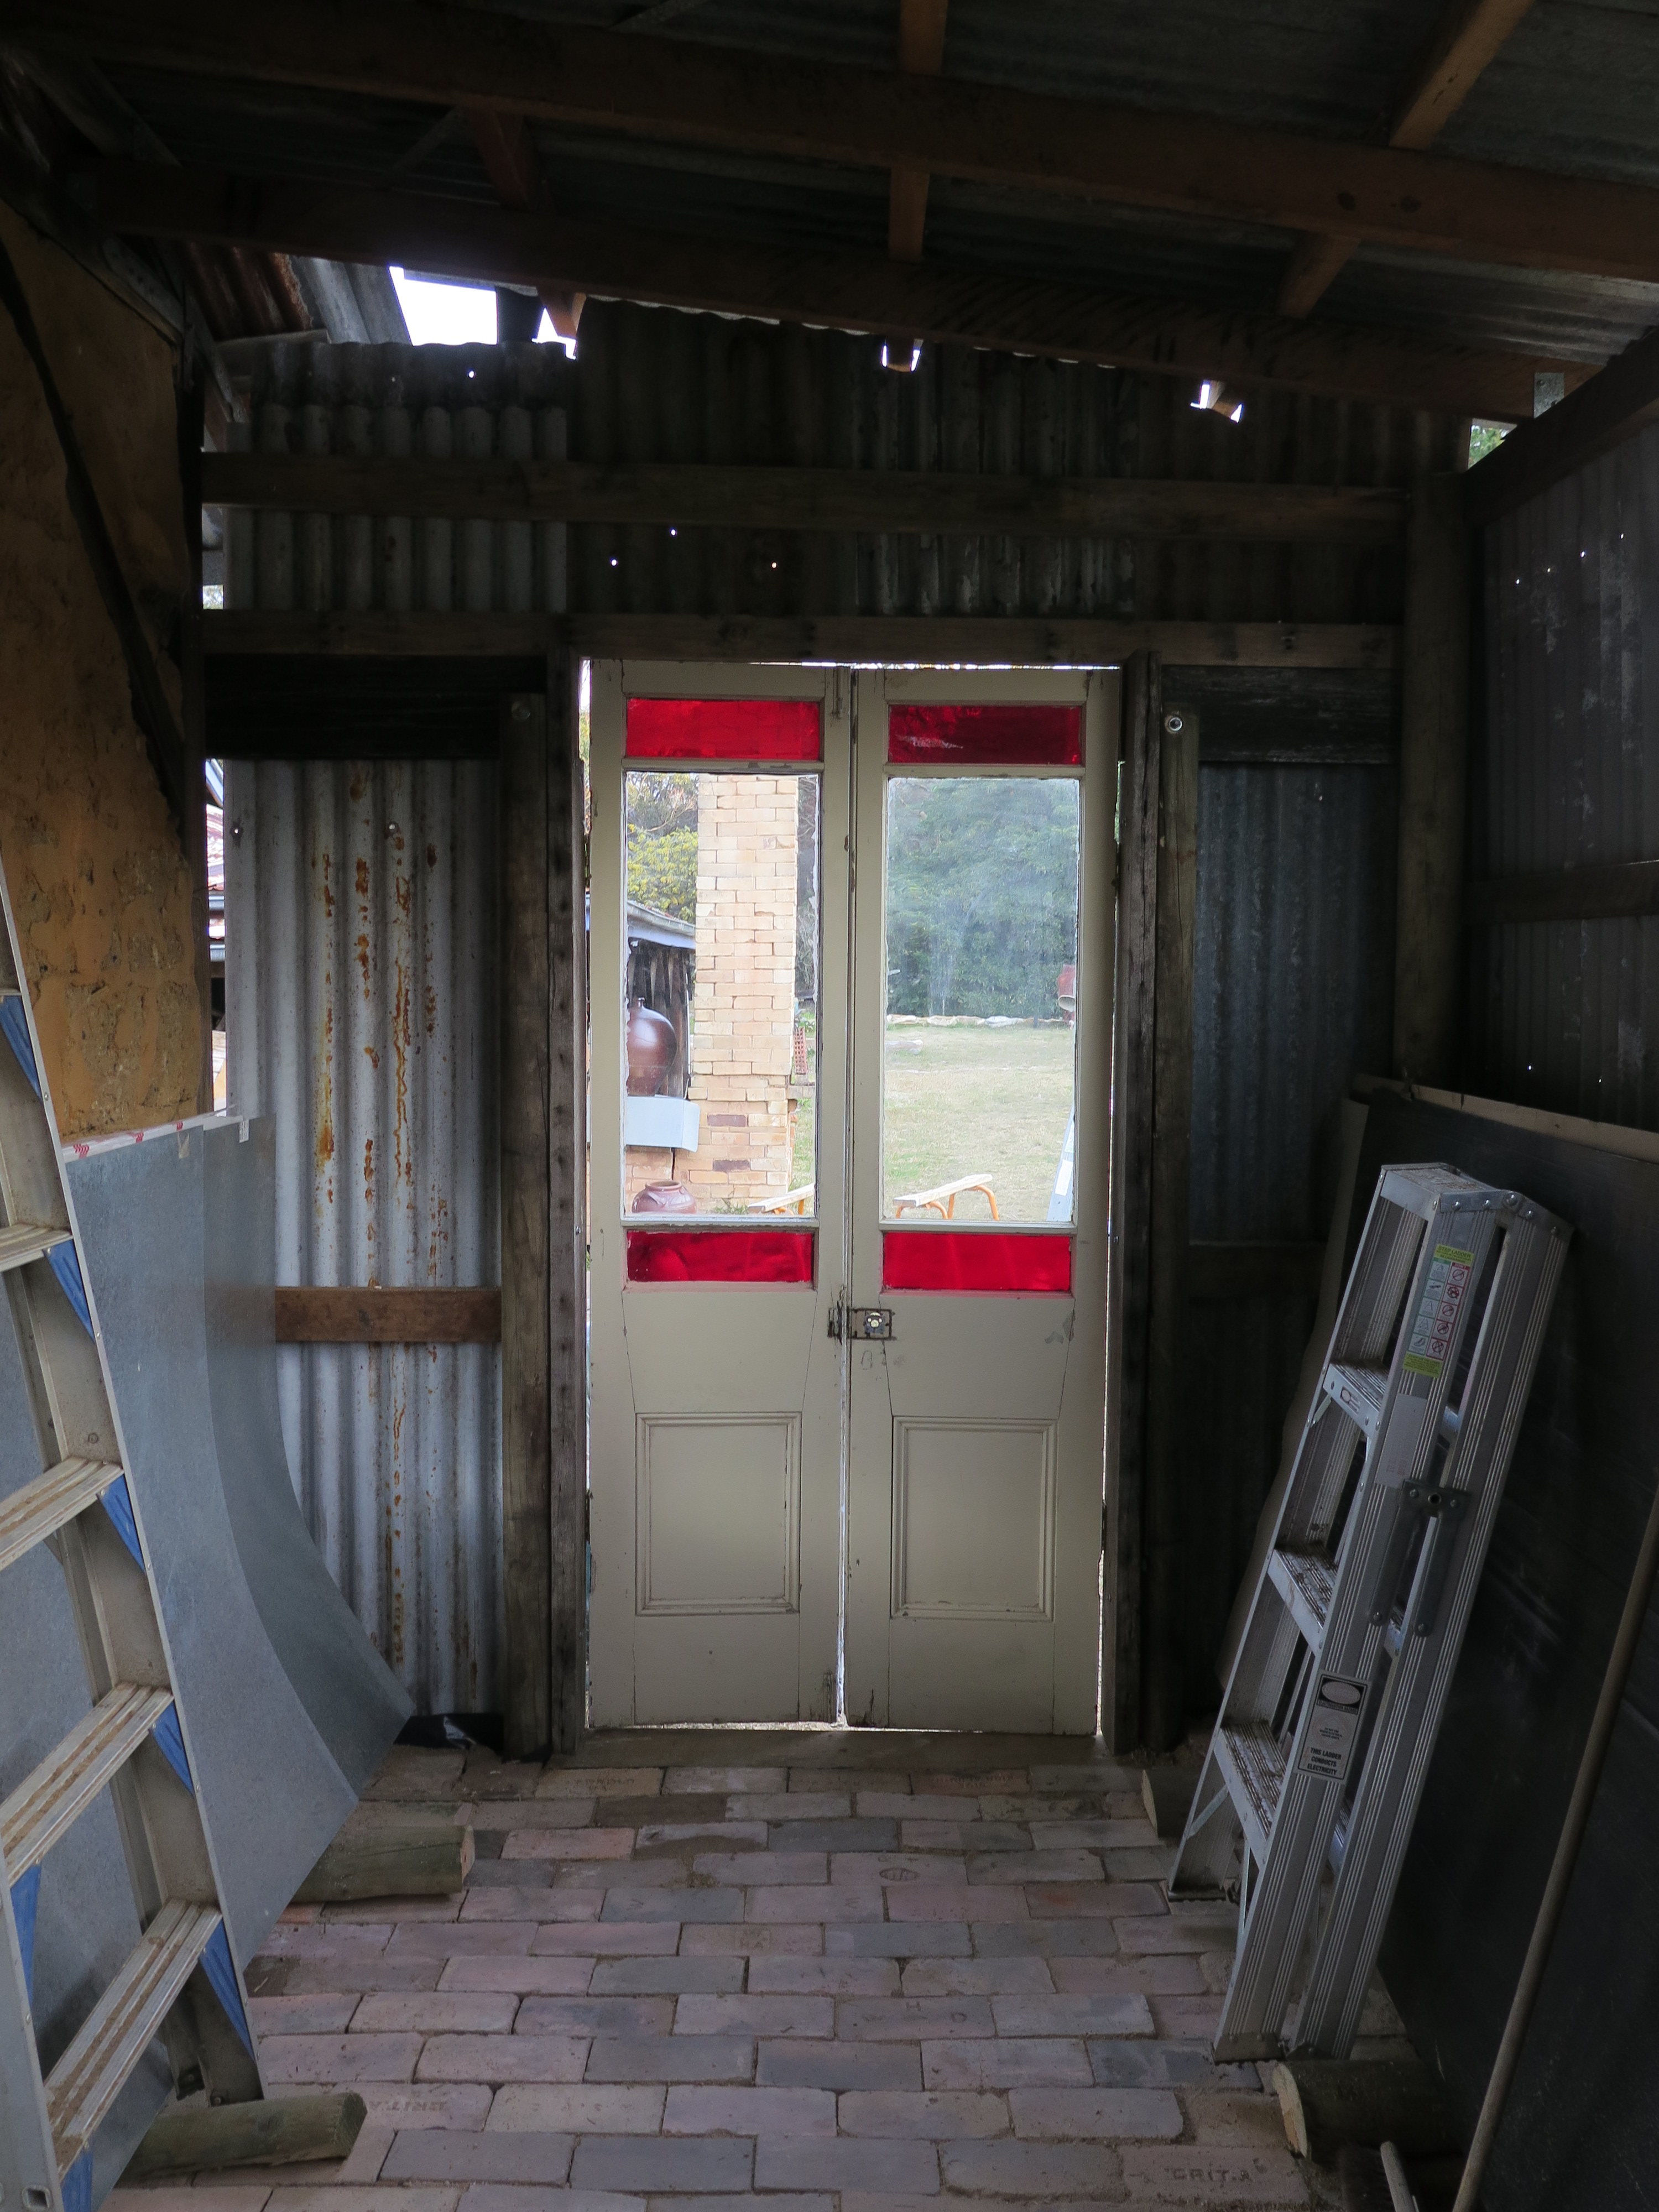
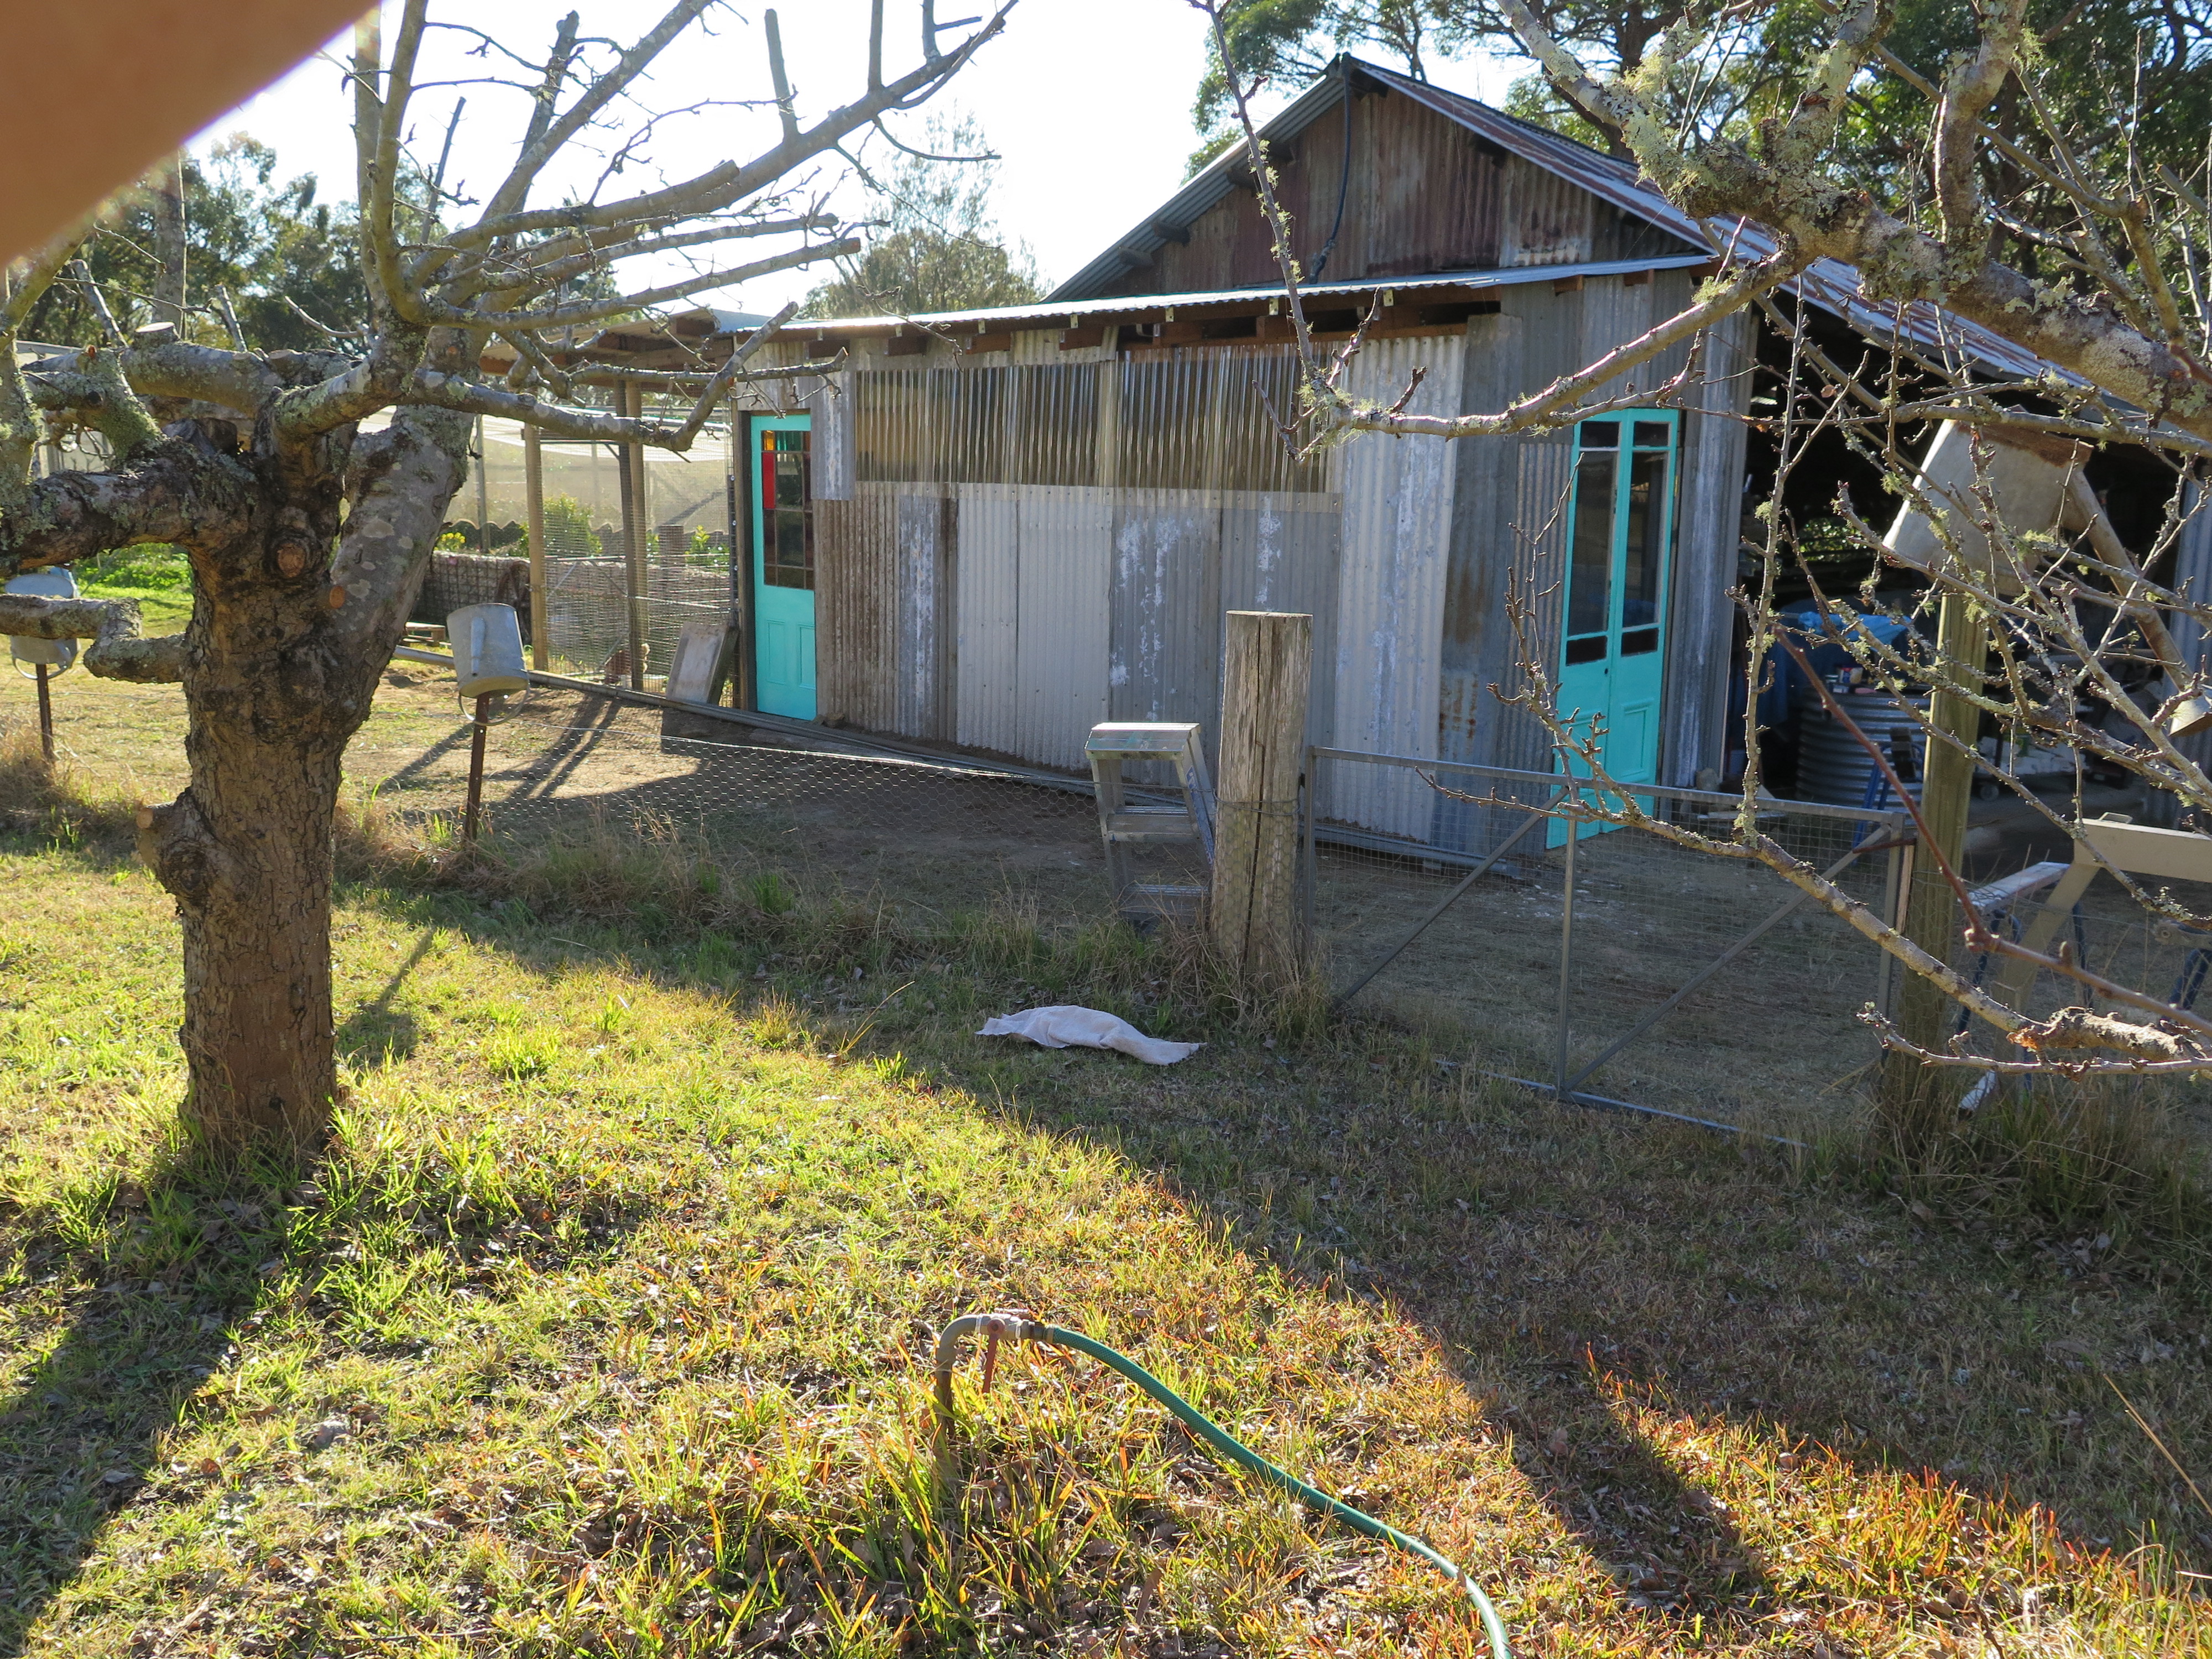
Instead, we decided to sand blast off all the old flaky paint when we sand blasted the old School classroom. We had hired all the equipment for the weekend and had some spare time and ‘shot’ left on the Sunday evening, so we cleaned it back. I bought undercoat and we made some top coat our selves. We bought a one gallon tin of pale yellow oil based gloss top coat, then added an equal amount of turps mixed with mica and talc dust 200# that we had in the pottery for making our glazes. This gave us 2 gallons of paint. This rock dust saturated oil paint is still as good as new today. No drying out or flaking off. The stone particles guarantee that there will be no UV penetration. The little weatherboard waiting room is still in good shape. Well the paint job is anyway.

Interestingly, we noticed that after we cleaned and painted the waiting room. The train line fettlers that passed along the line each few days, saw the station building in its new location and new clothes and waved to us and we waved back. They saw that we thought that the building had some historical merit and was worth saving and restoring.

After that no more stations were offered for demolition. All the others have now been restored and painted creamy yellow! Personal activism does work sometimes.

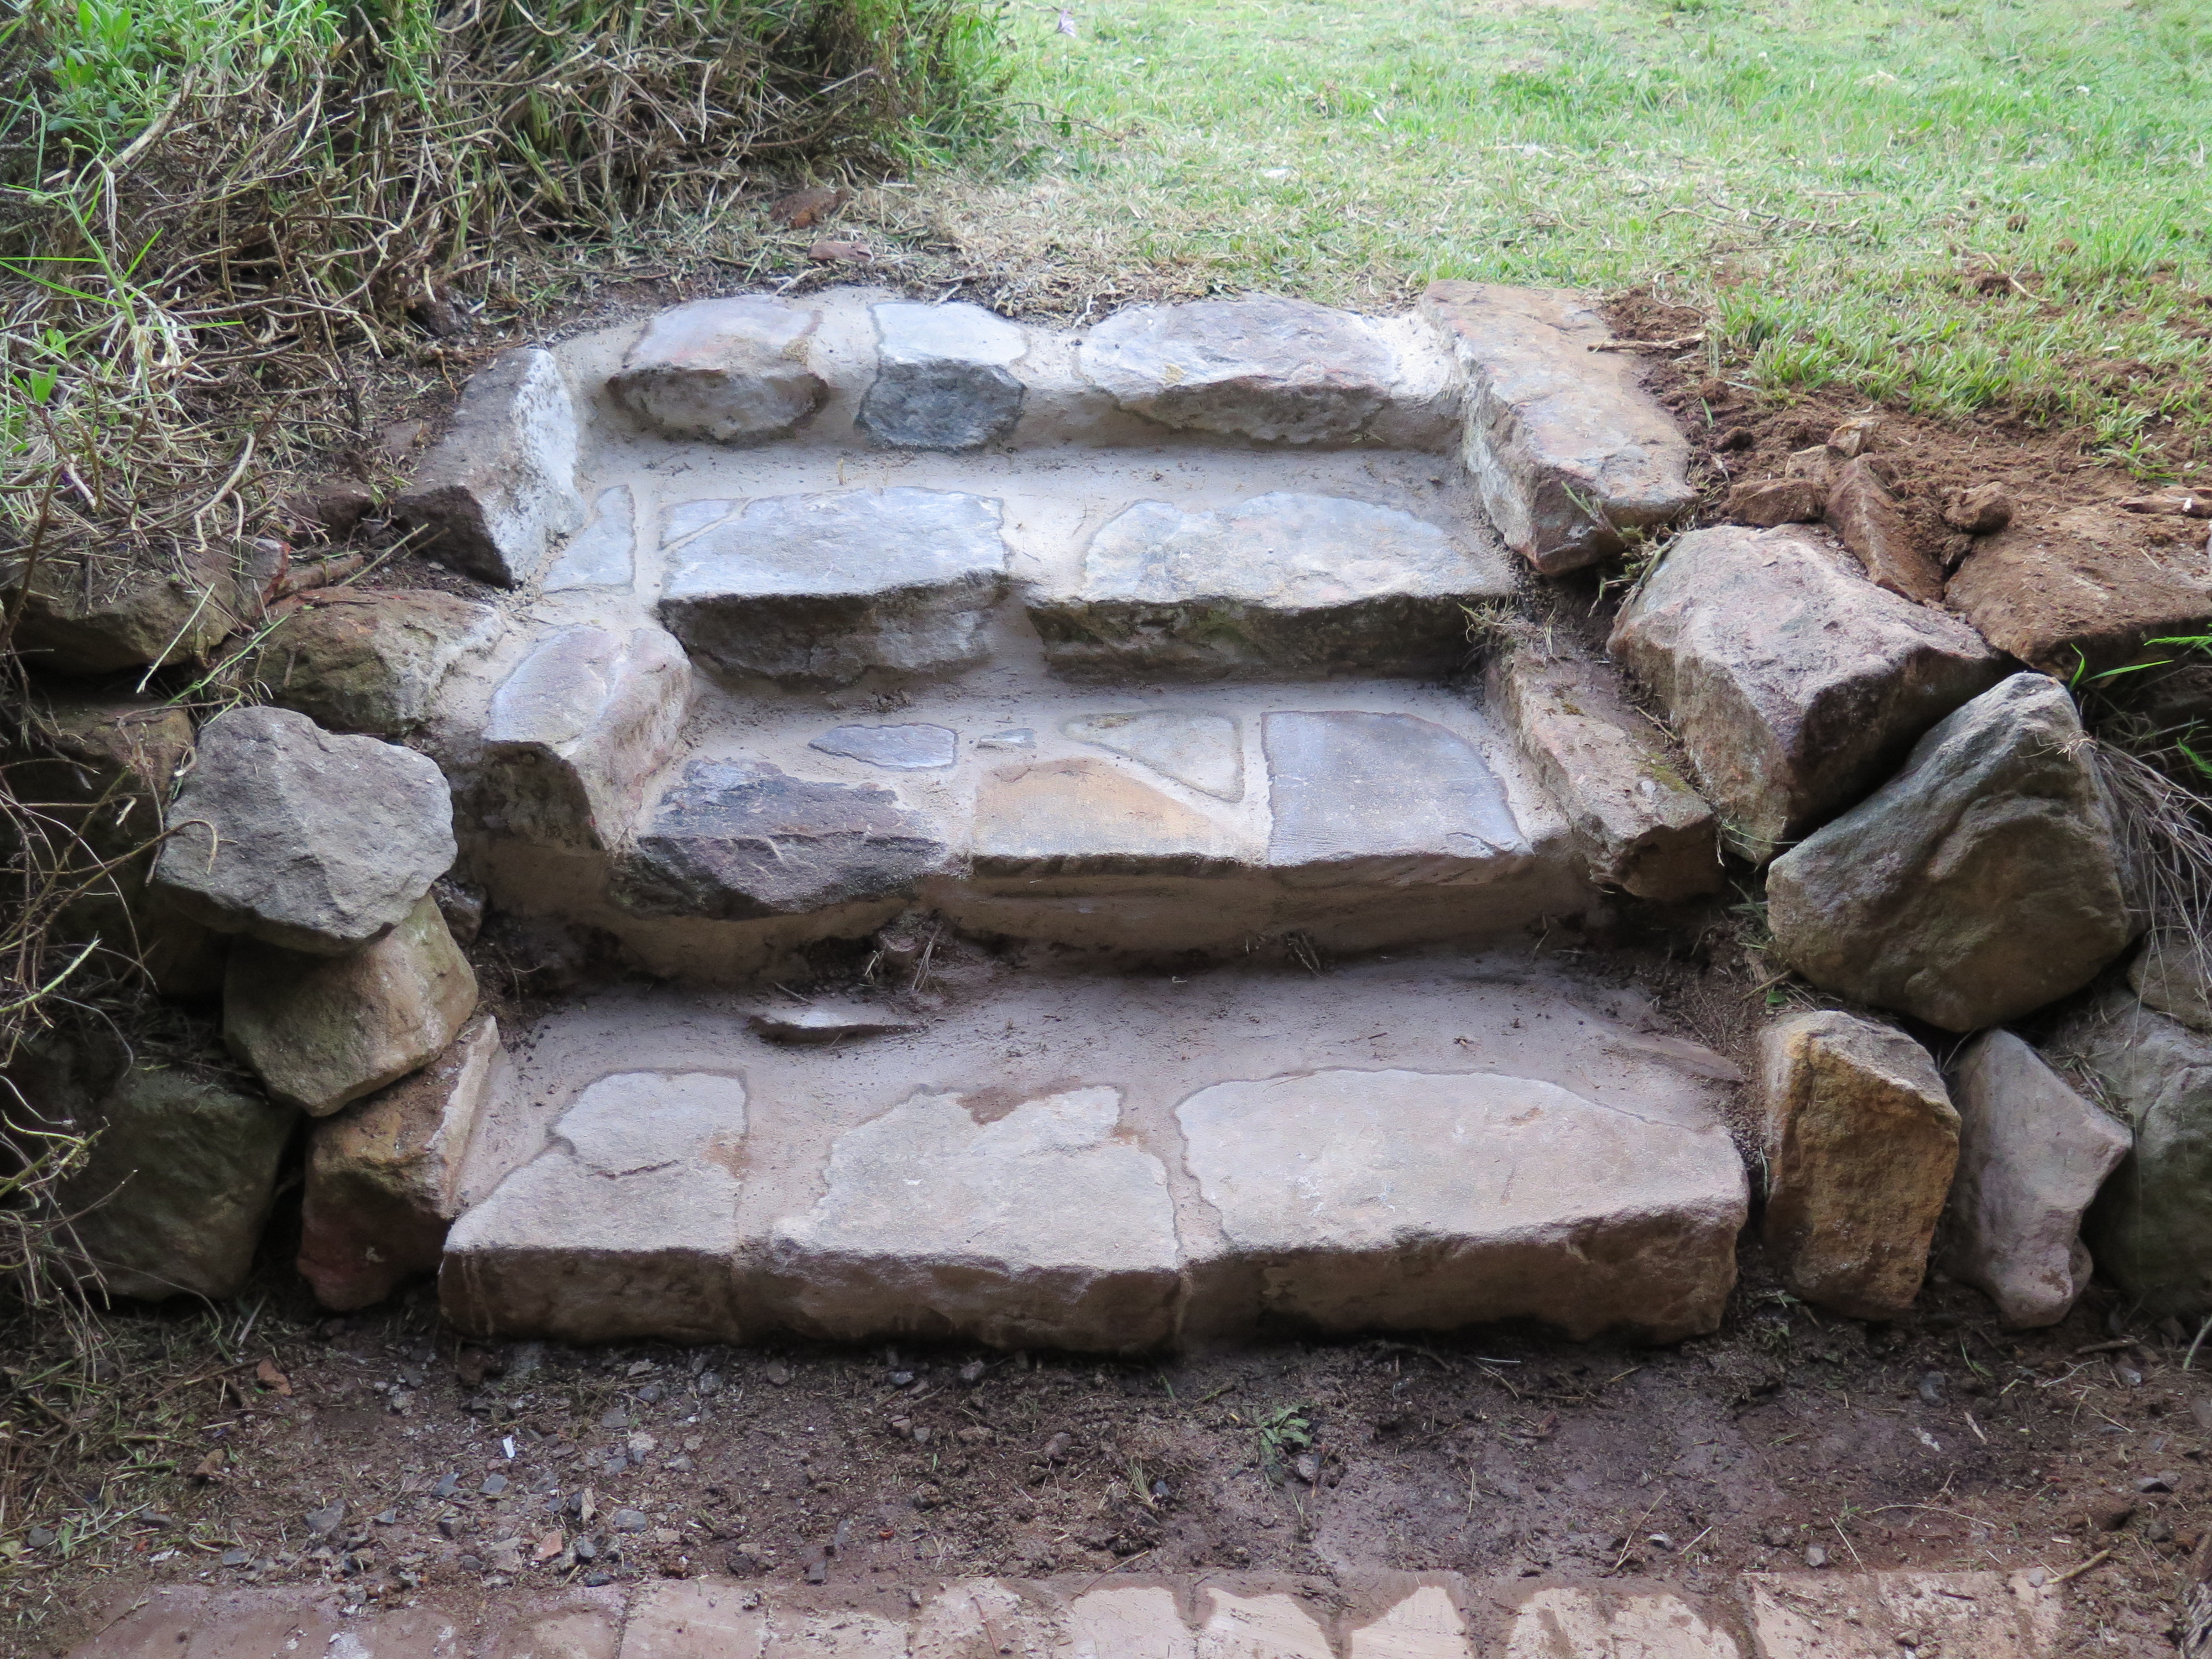
Well that was 40 years ago, and the poor old wooden sleepers on the platform have been weathering away. I have no idea how old they are. Not 153 years I shouldn’t think. I’m sure that they are not original. Perhaps they were replaced in the 60’s when there was a derailment at the station when a goods carriage came off the line and ploughed into the end of the station destroying the Ticket Office building. Perhaps the original sleepers on the platform were replaced when the platform was repaired?

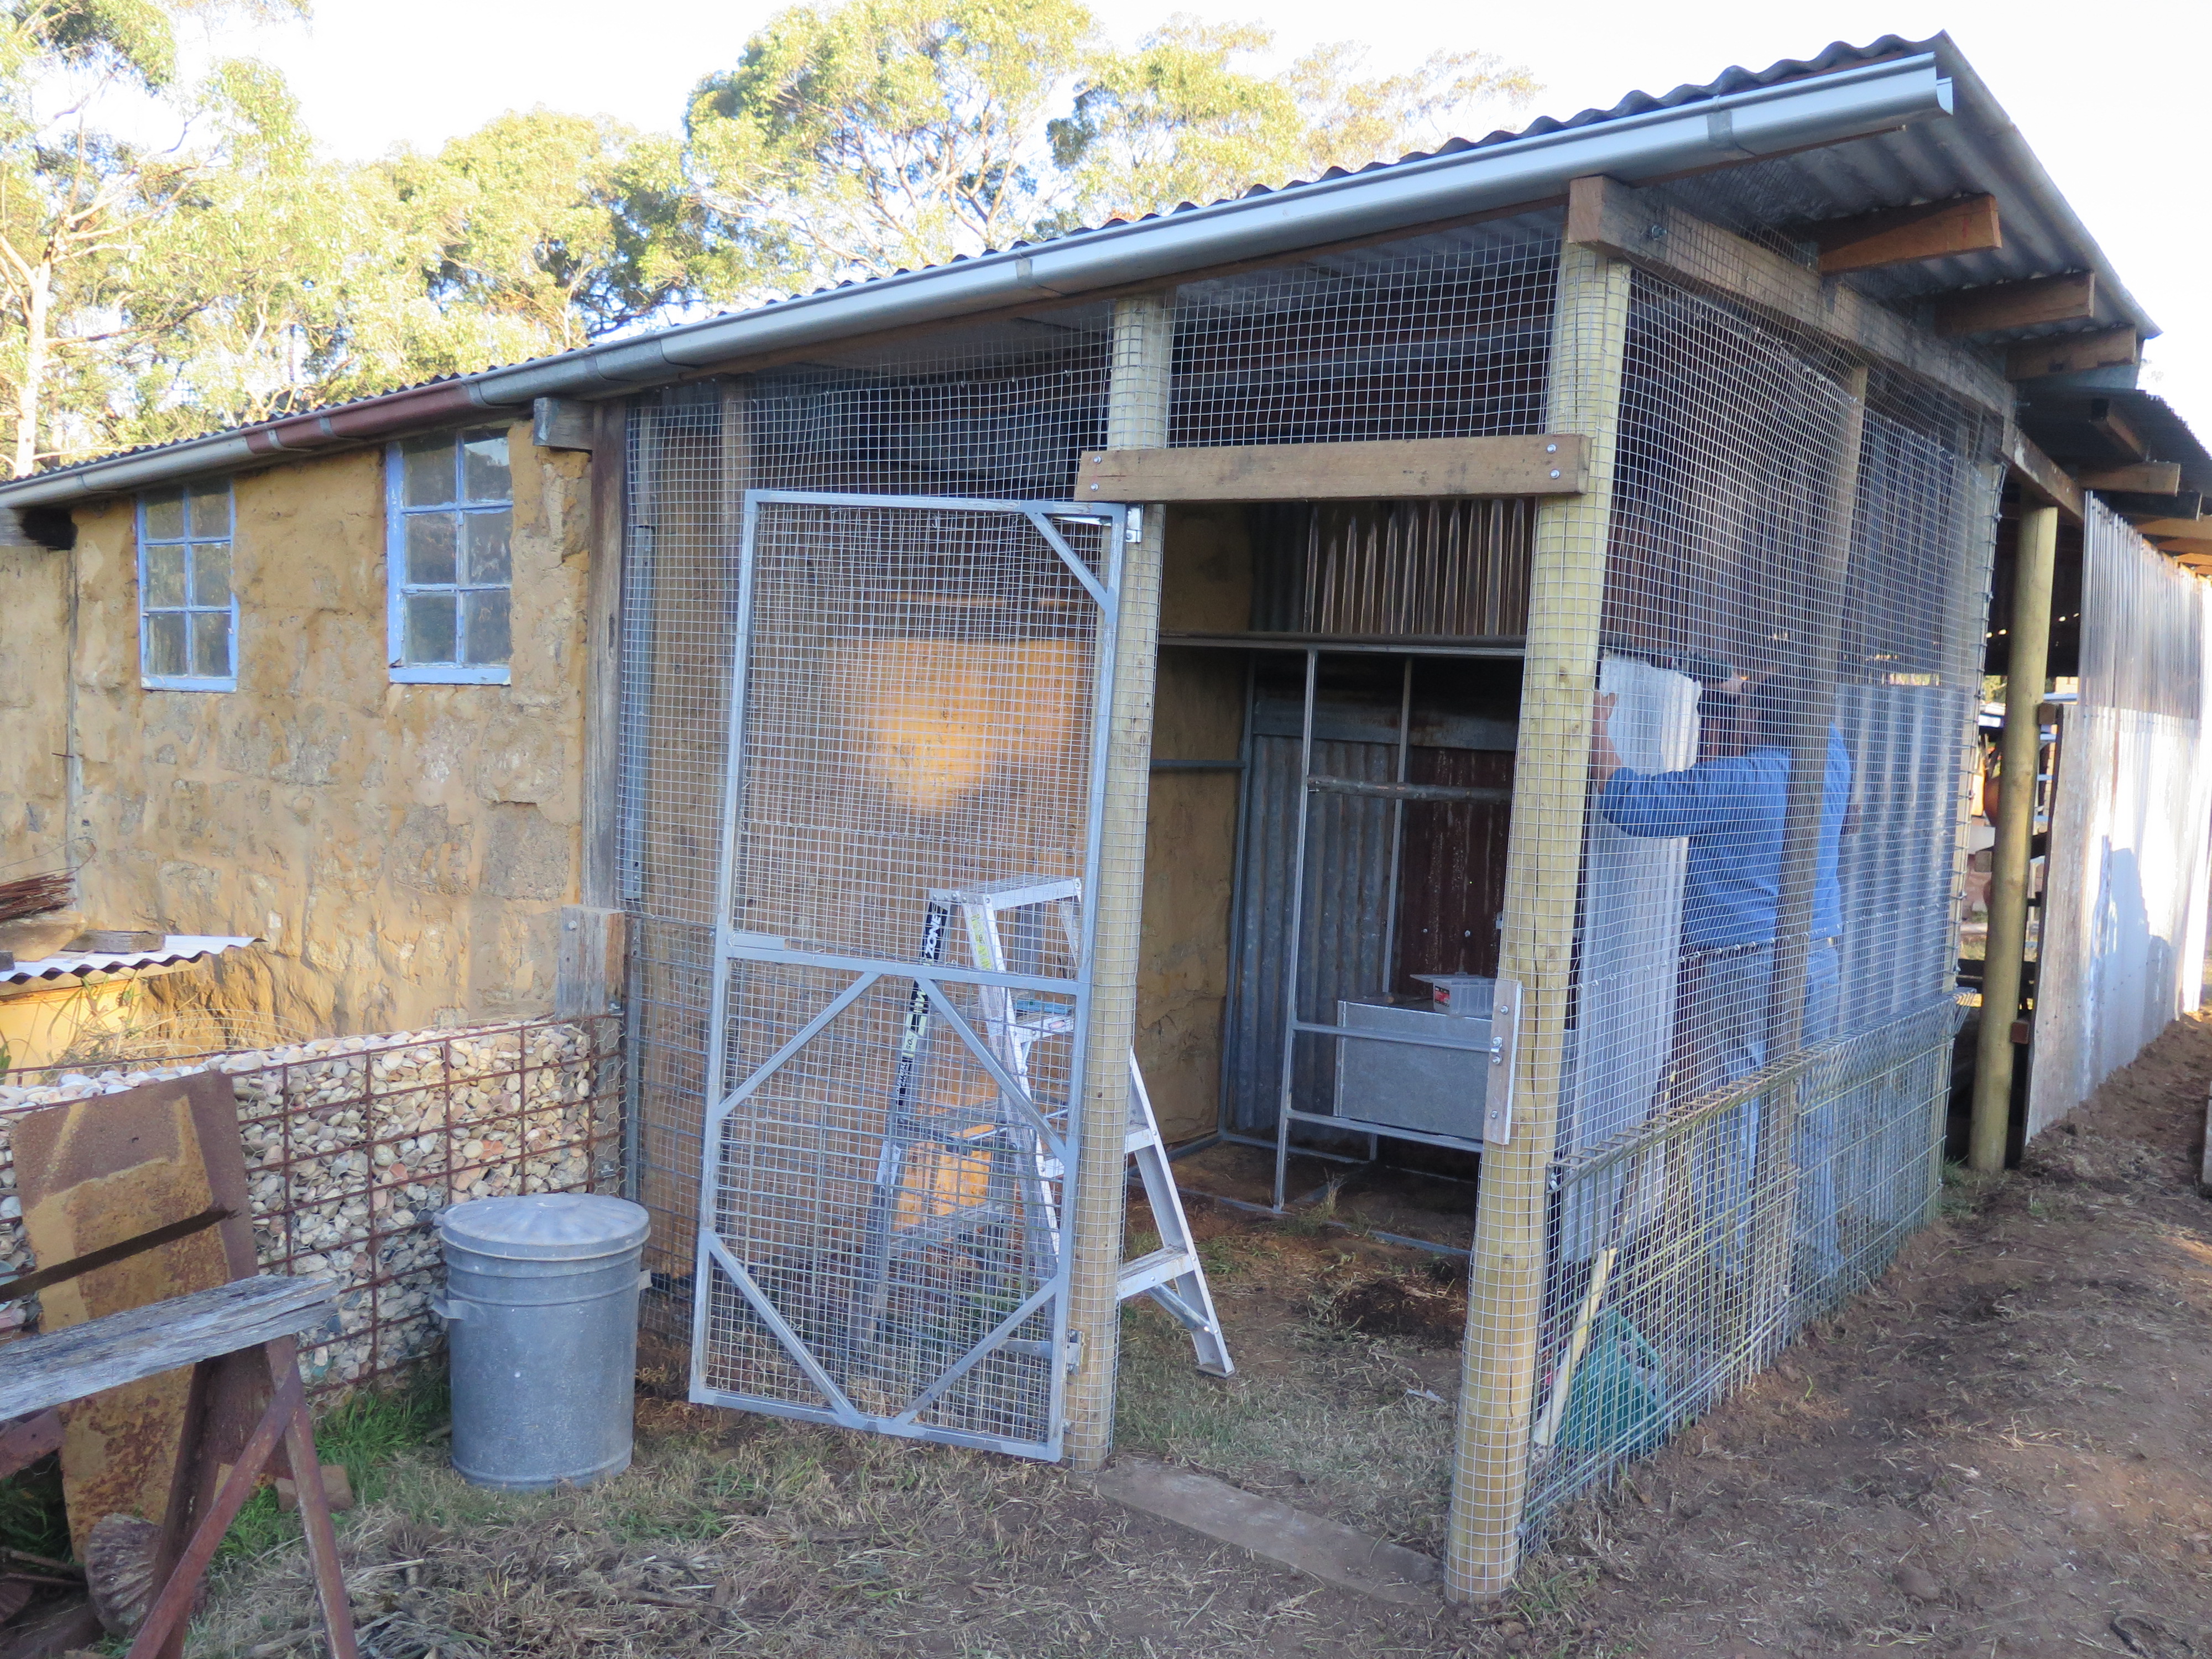
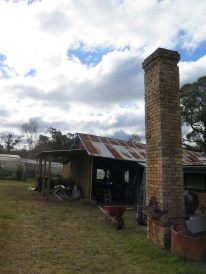
They are sill in good shape where they are under cover of the verandah, but the exposed ends are rotting away. We have our wet weather clothes line under the verandah and Janine has stopped using it because she feels that it is too unsafe.

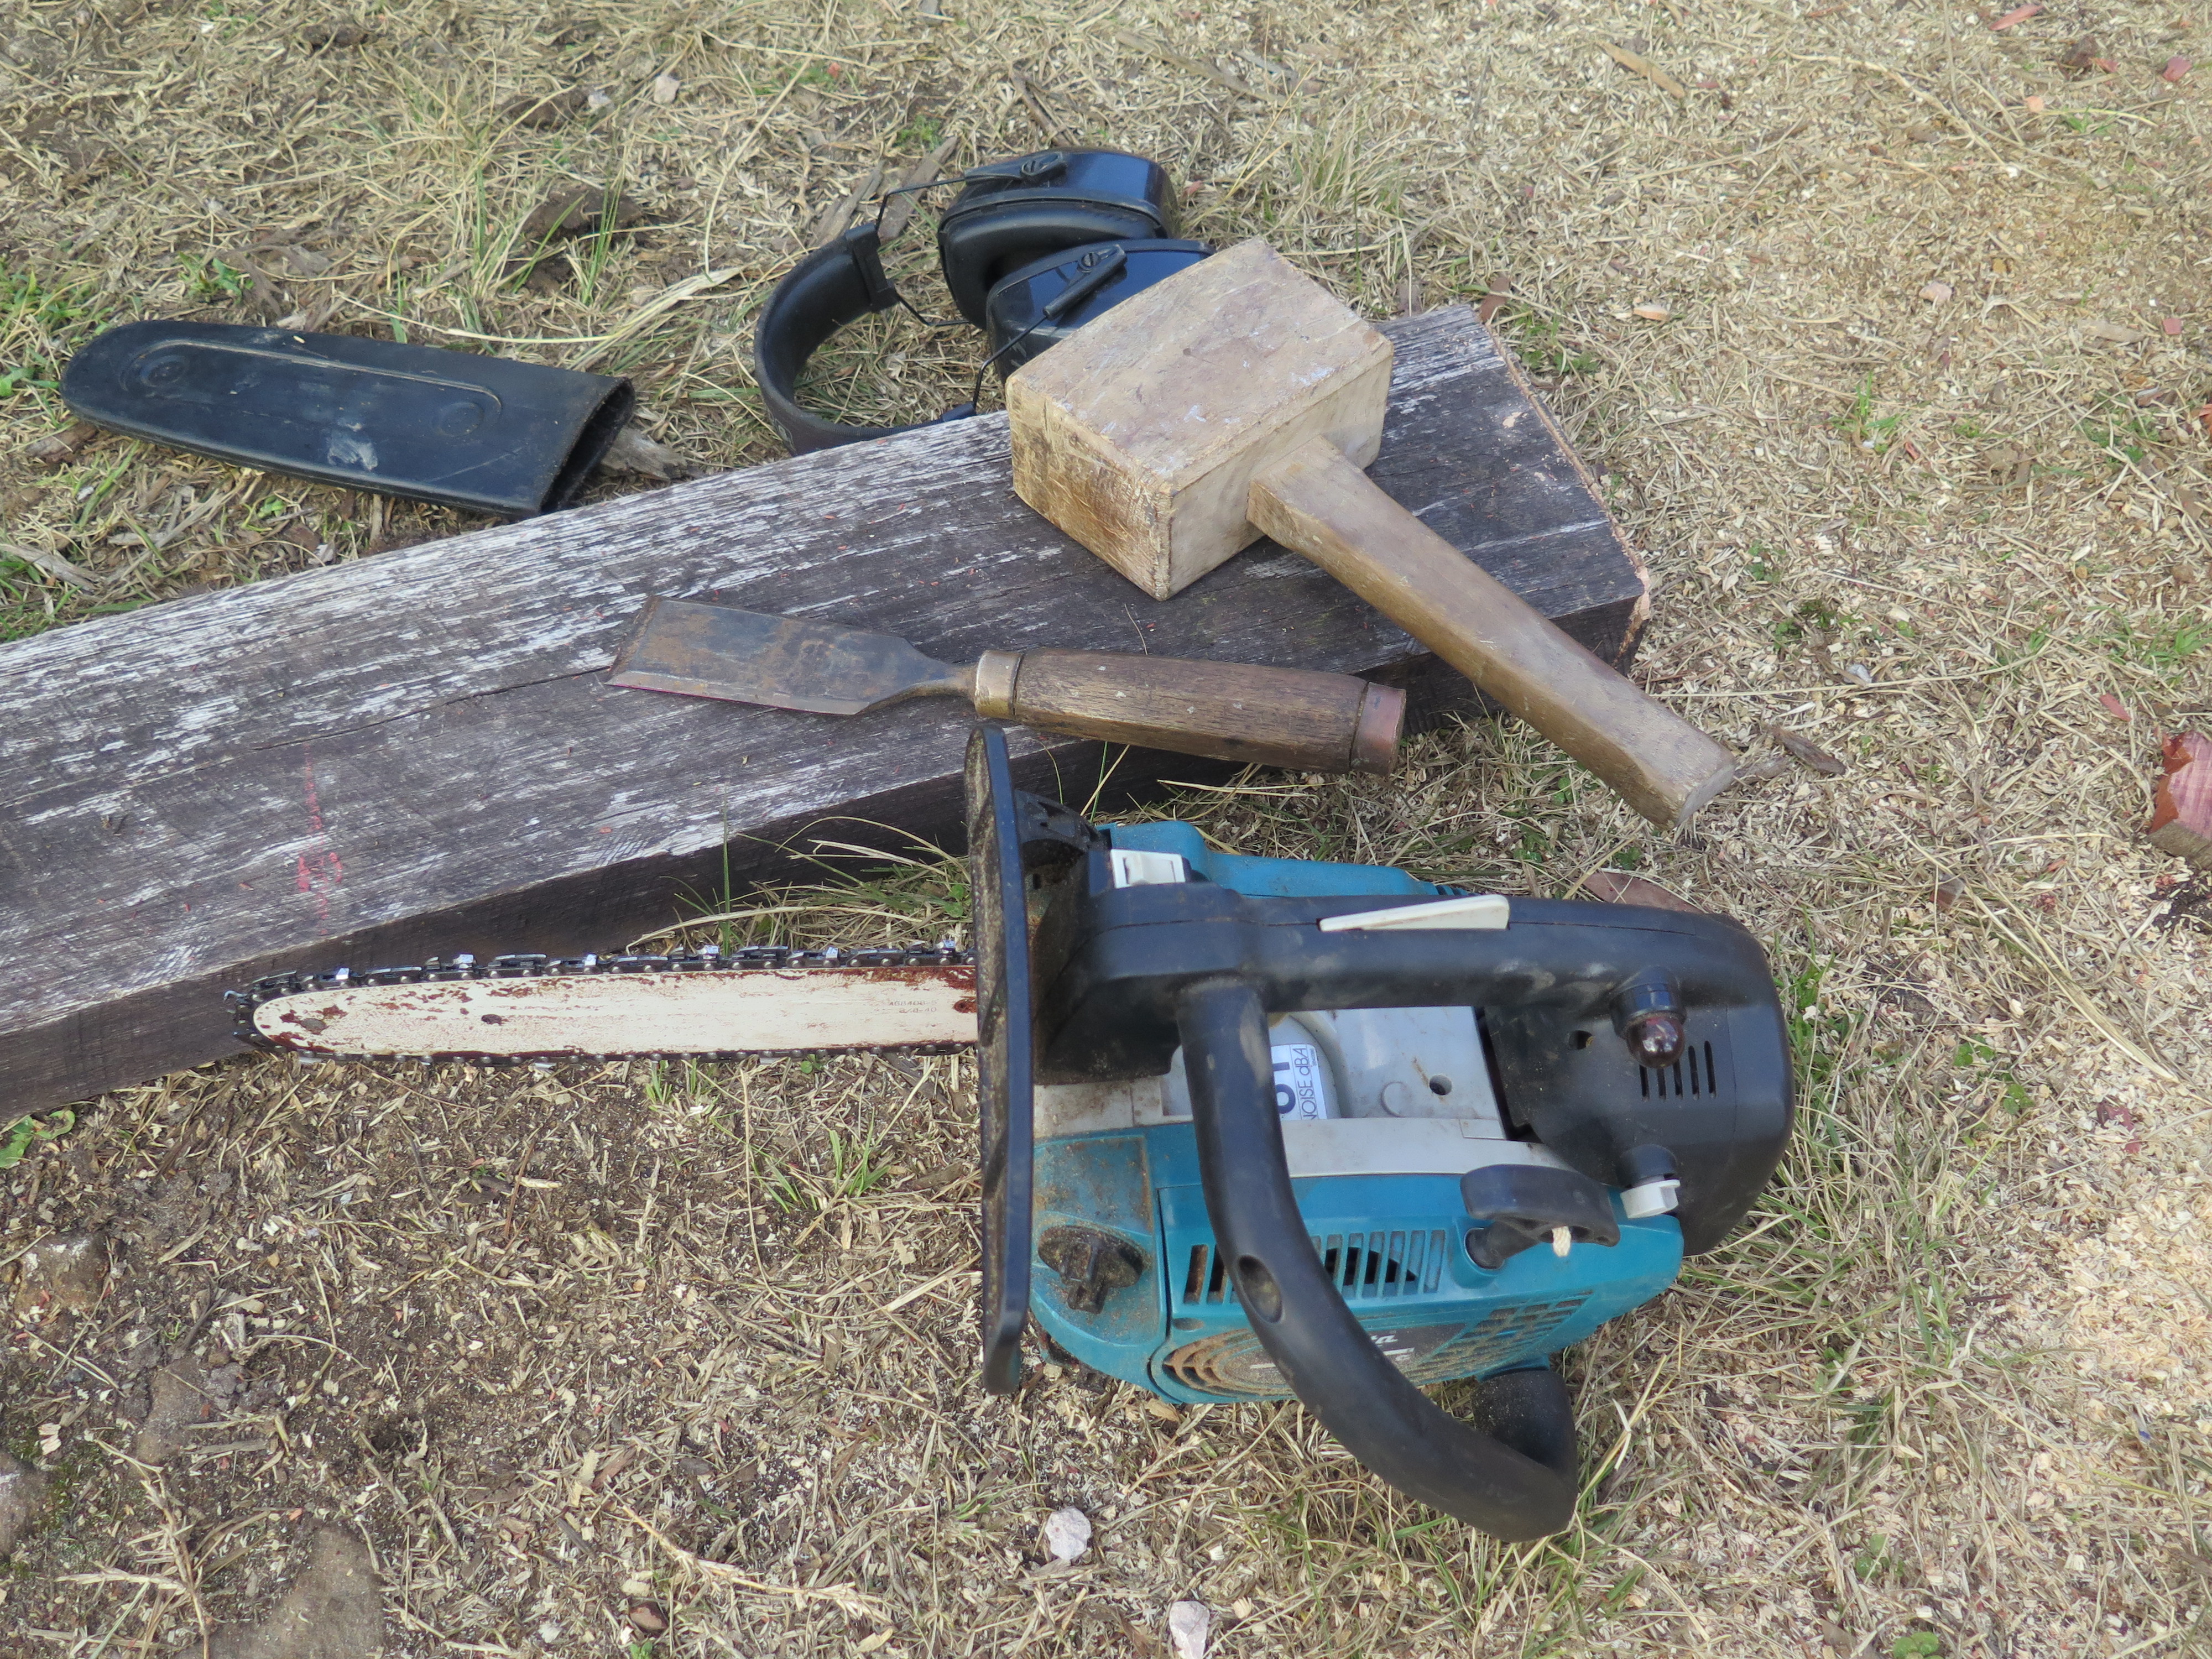
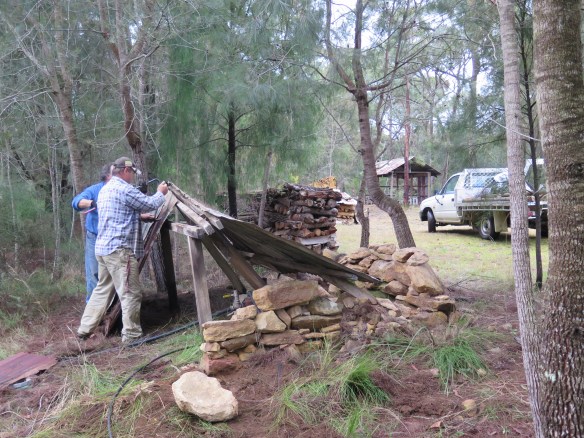
I take a day ‘off’ and go down to the timber yard and buy new ‘treated’ sleepers. I slowly remove each of the old sleepers a few at a time, and replace them with the new ones. It all goes pretty much to plane and is finished by the end of the day. However, I still have to put up the new guttering.

Everything goes to plan, except that I drop one of the old heavy hardwood sleepers on my recently damaged and recovering finger, which splits it open again.

No good turn ever goes un punished. I’ve healed the platform, I now have to wait for my hand to re-heal.

img_4508 img_4506

img_4510 img_4509

How Many Potters Does it Take to Change a Light Bulb?

How many potters does it take to change a light bulb?

The answer is, only one. But it takes about one hour and lots of frustration. Actually it just took me over 2 hrs, because I couldn’t believe that such a simple job could be designed to be made to be so difficult and monumentally stupid by a car designer, so I spent an hour on the internet looking up what other people had done to solve the problem.

The problem is that the low beam head light bulb on our car wore out after ten years of use. I have no problem with this. It’s the first thing to have worn out on the car. A Mitsubishi Colt hatchback. It’s been a really good, reliable, fuel efficient, little car. Changing it should be simple. The light bulb can just be twisted and pulled out and unplugged. A new one plugged in and twisted back into the socket, BUT and its a BIG BUT. You can’t reach the back of the head light with your hand. It’s been designed to be located into such a cramped space, that access to the back of the light is not possible from the open bonnet.

The owners manual makes light of this. Just rotate the steering wheel in the opposite direction to make space in the wheel well, remove the liner and replace the bulb as shown in the illustration. It sounds so easy – just do it. The only problem is that it isn’t. It isn’t easy at all! When you get down to it, it is a lot more involved. So I read it up on the web. And yes, it is a lot more involved. Very much more.

One mechanic wrote that it is much quicker and easier to remove the entire front of the car. Front bumper and other fittings , then take out the entire headlight enclosure. It is so simple to swap the bulb once you have the entire fitting in your hands! He claimed that it only took him 1 hr! I doubt that, unless you do it all the time and are used to it.

I decided to follow the manual instructions, and go in the back way, through the wheel arch. Using the added advice from the web chat line and the 15 minute video of high lights on You Tube. I like watching highlights! It’s my favourite way to take in the Boxing day cricket test match too!

So, this is what you have to do. You have to jack the car up on one side, as it is too low and cramped to get in there if you don’t. Good advice from the web. Remove the front tire. remove the wheel arch liner, or at least most of it – about 3/4. This involves snapping off he plastic rivets that hold it in. These all need to be replaced, but the manual doesn’t tell you that. I’m a careful sort of guy and take my time with these things, but I could only manage to salvage one of the plastic gadgets for reuse. It doesn’t help that you have to lay on your back, in a very uncomfortable position, in a restricted space, with all the years of accumulated dirt and sand dropping in your eyes while you work.

Next, you peel back the liner and twist it out-of-the-way. Finally you get to see the back of the head light fitting, but you can only manage to fit one hand up there in the narrow gap.

You simply have to release a wire clip, by twisting lowering and pulling. Simple on the kitchen table, using two hands. But not so easy in the dark, up in the small cramped space allocated. I say in the dark, because when you insert your hand up there, it blocks out almost all of your vision, so the operation has to be done by Braille. Oh! And the other thing that I forgot to mention, is that you are not allowed to touch the light globe with your hands! You must always hold it by the mounting socket only, or it will explode!

I finally get the old unit released so that the fitting can hang down on its connecting wires, to where I can get two hands onto it. I have to wear plastic gloves at this point, to avoid touching the bulb. I swap it over, but it won’t go back in to where it just came out of. It sort of goes in but the wire clip won’t go back into place to secure it. I manage to tear holes in 3 rubber gloves trying to manage this. I decide that there must be a left and right, or up and down option for plugging the bulb into the socket, but it is too dark to see if there is and the wires aren’t long enough to bring it into view. I just take it all apart and try again in reverse. Non of this is mentioned in the manual or on the webinar.

This does work however, I swap my thin sensitive rubber gloves that I can feel through, for a pair of thicker, plastic, work gloves that are clumsy but more robust, and by now I know what I ought to be feeling/sensing through the gloves. The bulb goes in, the mounting eventually goes back in, and the clip finally gets secured. I replace the wheel arch liner with the one remaining good plastic rivet. I can’t drive anywhere in the car like this. So then I hop in my truck and drive down to Mittagong to get a packet of new plastic clips/rivets, but they only come in blister packs off 3! So I have to buy a dozen in 4 boxes. All unnecessary land fill.

I replace everything as it should be, refit the tyre and lower the car back down. It costs as much for the plastic rivets as it does for the bulb. But most of all, I have just wasted 2 hours of my life that I will never get back, and had to drive 100 kms! Someone once told me that the garage charged an embarrassing amount to replace a blown bulb. Based on this experience I can understand why.

Maybe next time, I’ll try dismantling the front of the car and go in that way? At least I’ll be standing upright! There is bound to be a next time, as the car is now 10 years old and the other side bulbs will be getting old too. At least I’ll know what to expect. I’ll buy all the plastic clips as well along with the bulbs. I console my self with the knowledge that I’ve just saved myself a few hundred dollars. This car has never been to a garage to be worked on. I’ve managed to keep it all tidy and well serviced for all these years. It’s all just a tiny part of being self-reliant and living frugally.

img_4282 img_4283

Something boro, Something blue

I have started to get stuck into the pile of shirts and jeans that need repairing. I have managed to wear out several pieces of clothing in recent weeks, all work wear items, worn through in the regions of highest wear.

The most critical was my welding shirt, which has worn very well for many years, possibly 5 or 6 years. It had become a bit threadbare and almost transparent at the front. To the point that I got a radiation burn on my tummy after spending a day welding up all the seams on the recent kiln. I didn’t realise at the time of it happening, that I’d torn a hole through it. I had a ‘T’ shirt on as well but it wasn’t enought, as you don’t feel radiation, but in the evening, when I showered, I got a nasty shock.
So my first job is to add some dense dark fabric to the front of my shirt. I also have a few pairs of jeans that have worn through in the front thighs and knees, but also suspiciously in the crotch? I’m guessing that this is from sitting on the Leach-style potters kick wheel wooden saddle? I’m hoping so, as I can’t think of any other reason.
These are some sort of stretchy jean fabric, so I steal the off-cuts from the bottom of the legs of Janine’s new turquoise stretch jeans, that she had to shorten, so as to get the same weight and stretch of the materials matched. The colours work OK too. Perhaps not in public? I’d feel a bit like one of those Japanese monkeys!
img_4017 img_4019
I have quite a collection of used, 2nd hand, Japanese indigo fabrics. I buy these off-cuts and old recycled pieces of clothing whenever I go to Japan. They are still plentiful and reasonably cheap in the markets. I really like them. indigo dyed fabric is so long-lasting because of the preserving effect of the indigo. I also just happen to love the colour. There was a time, when I was younger, when I couldn’t feel really comfortable in the colour blue, I preferred orange, then my favourite colour morphed into yellow, eventually into green, and finally I’m OK with blue and mauve, or even a bit of purple. I guess that this leads me to thinking that I’ll end up wearing red. Perhaps I’ll go full circle and wear yellow again? Or will I finally end up liking white? I doubt that. I lead a very busy life. I just can’t wear white. It gets dirty so quickly.
What ever the reason, I’m very happy to wear Japanese indigo fabric as patches on my clothes. The Japanese even have a specific word for this, and it’s called ‘boro’. The repair or mending of worn clothing with patches to prolong their life. It was always seen as something shameful in the past, when it was a sign of poverty, but these days, I’m starting to see Japanese patchwork clothing everywhere. It’s finally trendy. I don’t do it because it’s trendy. I’ve been patching my clothes ever since I learnt to sew. My mother taught me to sew on my own buttons, take up my the legs of my new jeans and hem them. So it wasn’t such a big step to add a patch or two as needed.
Next, I work on my worn out shorts that need a new front to one leg.
 img_3949 img_3950
then the jeans.
img_4021 img_4023
An earlier pair from the time when I was transitioning out of orange through yellow into green.
This activity fits in well with my philosophy of self-reliance and not throwing anything out until it is really worn out. For me this is not any statement of fashion, as fashion is just not on my radar at all. It’s a political statement. Not consuming stuff that you don’t really need and making things last, it’s cutting against all the advertising and market pressures. Over consuming is polluting the world with toxic landfill and adding to global warming. So much of what we are encouraged to buy is just not necessary. So I’ve decided to minimise my spending and as a result, I’ve found that I have more money left over for the things that I really want and need, when I really need them.
img_4452 img_4453
I spend my evenings these days sitting comfortably and listening to music or listening to the idiot box with half an eye to the screen, while I pin-up and stitch my patches. Some of these clothes that I’m working on go back 15 years and they are still going, and I believe becoming more interesting as they display their work life and history. I’m applying new patches over worn-out older ones. The layers just keep building. It’s an interesting topography of work, wear and repair. A 3D sculpture or installation that gently illustrates environmental activism as some sort of artwork.
img_4034  img_4035
I’m pretty sure that it’s not art, It’s not quite ‘boro’, it’s possibly interesting, maybe it’s beautiful? Maybe not?. Otherwise it’s certainly ‘creative’ and a nice piece of re-cycling, re-purposing and life-cycle extending handiwork. After-all, it’s just work-wear.
If nothing else, it’s a very rewarding evenings entertainment.
Best wishes
Steve

A Potters Floor

It just occurred to me as we swept some sand into the cracks in our new/old shed floor, that is made up of a mix of fire bricks and house bricks, that this is very much a potters floor and very appropriate. As I look down at the bricks and admire the patina of age and use, with all the varying hues and textures, I start to see the brand names of the various manufacturers.

Here in front of me under my feet is a brief history of refractory brick making in Sydney in the post war period. It doesn’t escape my attention that everyone of these companies that made these firebricks all around the Sydney region are all now gone and defunct. Everything is made in China now. In fact, I believe that I am probably the last refractory fire brick maker left in the greater Sydney area, if not all of New South Wales. I can’t think of any others, and we only make fire bricks for our selves, for use in our own kilns.

All of the old brick makers were bought out by the big multinationals and closed down. The sites were sold off for re-development and all the new stock of bricks were then imported. We don’t manufacture anything here anymore. We only operate warehouses for foreign multinationals to distribute imported product.

As the last Australian refractory brickmaker, perhaps I can look forward to being bought out by a big corporation? This might provide the superannuation that  I don’t otherwise have ?)

IMG_4184 IMG_4183 IMG_4202

IMG_4194 IMG_4195

 IMG_4187 IMG_4199 IMG_4189 IMG_4190

IMG_4191 IMG_4192

IMG_4195 IMG_4201 IMG_4186

Some of the above bricks are; Newbold General Refractories, Dive (Matraville), Illawarra fire brick Company, Waterloo Fire Brick Company, Woodall Duckhams, Vulcan, Bulli, Darley, Grit’A’, Ordish and Booths Medium Refractories.

This is in no way an extensive list, it is just the ones that came out of that small kiln that we dismantled, and the ones where the logo was laid upwards, so that I could photograph them.

We have lost so much in the past 4 decades.

The Accidental New/old Shed

e

I am preparing for a new research exploration project, but while I plan and organise, we decide to take a week off from the pottery to catch up on a few outstanding jobs. The weather has been beautiful all this week. The best winter days are like this with frosty nights followed by sunny days with no wind. Glorious days for working out side. We breakfast on marmalade and toast with coffee, and then the Lovely spends couple of days burning off all the orchard fruit-tree prunings to make ash for glazes, while I start working on the new shed.

IMG_4148 IMG_4209

We decided to build an addition to the kiln shed to create some extra storage space, while at the same time it allows me to create some space for a new chicken coop. We raised chickens and ducks here for 25 years, but we had a rather traumatic event with a pack of local village dogs that killed almost all of our birds in one savage attack. The old chook shed was somewhat degraded over time and the wire somewhat rusted and frail. It offered no real protection from the frenzied pack of dogs. I decided that I wouldn’t get anymore chickens until I built a stronger, steel-reinforced chook run.

IMG_4157 IMG_4218

The time has come now and it is done. 25mm. square, welded wire mesh with 6mm dia steel weld mesh dug down into the ground 300 mm. We now have 3 brown chooks at point of lay and are looking forward to our own fresh organic eggs again. The chicken run is quite small, but we only want 3 hens. One or two chickens would be enough for us, but I’m told that a trio is a better number for their own comfort and companionship. Once they are settled in we will let them free range all day, just as we did in the past. Only locking them up at night to protect them from foxes. Chickens are very resourceful at finding their own living out in the orchards and paddocks. Only the vegetable garden is locked up and out of bounds to them. They can be very destructive in a garden, digging up seedlings and excavating large dust bath holes in the soft, moist composted soil.

The other two thirds of the shed is a storage space for all the stainless steel sheets and other kiln building paraphernalia that I have to keep in stock, plus a small space for garden tools and the wheel barrow. We decide to pave the floor with bricks. This wasn’t in the original plan, but it seems the right thing to do to make the shed floor moisture proof and flat, so that I can wheel my brick cutting bench in and out easily.

IMG_4177 IMG_4179

IMG_4181 IMG_4205

We dismantle a couple of old, early wood fired kilns that have been in the garden for over thirty five years and are no longer used. The used bricks have a lovely patina of use and age about them. We lay them over a sand and black builders-plastic membrane substrate to keep the shed dry. 500 bricks later, it all comes together rather well. A good days work to dismantle, clean, stack, transport and lay all these bricks in one day.

This shed is built from nearly all recycled materials. I only had to buy a few sticks of hardwood for the rafters, nearly all the green poles were recycled from vineyard trellises and the iron sheeting for the walls and roof were all given to us when friends re-roofed their house. To complete the build, Janine suggests that we use some french doors and a solid timber single door that a friend found on the side of the road at council clean-up day and delivered here to us thinking that we might be the kind of people that could find a use for them, and we have. We get stuck into it and don’t seem to be able to stop until it is really formally finished. We hadn’t planned for such a proper shed. It started out as just a lean-to roof to keep the rain off the mud brick wall and an excuse to re-build the chook shed.

5 days later we have a beautiful dry, flat, level and secure, well-lit shed. It’s a thrill and a novelty to be able to let an idea go for a walk and have it end up so beautifully. Just using what recycled ‘rubbish’ we have collected here from what others have thrown out. It is almost too good for just storage. I didn’t intend to do this project, this week. I have a lot of other things that I have to do, but here it is and I’m really pleased with how it has turned out.

IMG_4210 IMG_4214 IMG_4212

We put a bit of effort into restoring the old doors. I need to replace a broken sheet of glass in one french door, which Janine organises and putties into place beautifully. There is one broken sheet of gold-red glass in the single door. We don’t even bother to get a quote on that. It will be too expensive to justify for a shed door, so I cut a small piece of perspex and we paint it with red poster colour – you can hardly tell. Once the doors are cleaned and painted, we end the week with a new/second-hand, recycled shed built for just a few hundred dollars and using a modern combination of old and new tools – because I can.

IMG_4216 IMG_4219 IMG_4172

We dine on steamed kale from the garden with our own home dried tomatoes and mushrooms, all softened with a little ricotta and some diced feta for texture.

IMG_4136 IMG_4139

IMG_4138

All suitably self-reliant for a hard-working couple of amateur builders.

The Solstice Approaches

Here we are almost at the solstice. It’s dark until late in the morning and dark early in the evening. A few months ago, I booked one of my best friends, Warren, to come and help me do a lot of work. Now, the appointed weekend is here and it is pissing down. We can’t change the dates, we are both fully committed in other work for months ahead. We have to do it now – in this weather! We had the flood last week and have almost finished clearing up from that heavy rain and now it is raining again, almost constant drizzle to annoy us while we work.

Warren has come to help me build a wood shed for the kiln wood. We have a small shed for the house wood for the kitchen stove and heater, but the kiln wood is so much bigger and there is a lot of it when we do the weekend workshops. So, we have needed another woodshed for some years now. Last year was terrible for us. So stressful, as it always seemed to rain the week before the firing and we spent the year trying to work with wet wood. Sometimes I could store the wood in the kiln shed/factory. But if I was building a kiln in there at the time as well, there just wasn’t room for both. So, the wood was out in the rain. We tried tarping it, but there was loads of condensation under the tarp in the prolonged wet weather and sometimes it would blow off in the really heavy storms.

IMG_3874 IMG_3886

So, we’re building a dedicated shed to store the long lengths of bourry box hob wood. At least that is the plan. The rain comes down in waves, so its jackets on for a while and then we start to steam inside them as we work hard, digging holes and ramming in the poles, lifting beams and climbing ladders, so then it’s jackets off until the rain comes back again. We are cold and damp by the end of the weekend, all our clothes are saturated with either sweat or rain. We finish off the shed by screwing the wall sheets on the outside, while the rain trickles off the new roof down our necks. We just happen to be working directly below the drip line. Who designed this thing?

IMG_3888  IMG_3913

To make it worse, by the end of the weekend, with us two tramping about in the rain, all the ground is mushed up into a slippery slide quagmire. We find it hard to keep our balance towards the end. We finally finish in the dark, using the LED focussed torch beam on the battery drills to find the correct places for the last few screws.

IMG_3915

It’s lovely to be able to strip off and have a steaming hot shower heated with our own firewood and the wood fired kitchen stove. We change into a clean set of dry clothes. It’s such a luxury, I’m so lucky to live here. I’m suddenly thinking of Syrian refugees transmigrating across Europe from one country to another. displaced by war and nobody wants them. They have no hot showers or warm house. I really am so lucky to be here.  The Lovely has got the fires going and the house is toasty and warm. We enjoy an amazing bowl of Janine’s warming ossobuco and a glass of red wine. We are all ready for an early bed.

IMG_3892

The next day it’s the pump house on the dam bank. It has been there keeping the rain off the old electric pump for 40 years now. I built it out of scrap everything on a zero budget in 1976 when we first arrived here with few prospects and no money, with a double mortgage to support. I built that first shed out of scrounged material. It was rough as guts, just designed to last a short while until I could get around to building a ‘proper’ one. It’s finally falling over and the posts have rotted off at ground level and the dry stone wall is slowly pushing it over with the unbalanced weight of the moving stones. We demolish it in a few minutes and find that the eucalupt hard wood timbers from above ground, are still in excellent condition, even though they were salvaged 2nd hand 40 years ago. So is the roofing iron for that matter. It was worn out and rusty, and dumped at the local tip back in 1976, where there was no supervision at the dump. I saw it there abandoned, all bent and rusty looking. It went onto the roof the next week and has been there ever since. It’s still all bent and buggered, but no more rusty than it was and is still OK for re-use.

IMG_3896

I check out what we have to work with and everything is in good nik, except the hard wood poles in the ground that have rotted off, broken and are falling over. I get 4 poles that  have been re-cycled from grape-vine trellises. We remake the old shed just as it was, but just a bit higher, using the taller poles. I need to put walls on this little shed, to keep the  rain off the electric pump, but that can wait. I put a plastic tarp over it for now. It may end up lasting another 40 years? Temporary things have a habit of doing that around here.

We discover through necessity, that it is OK to use electric power tools in the rain if you put them inside a plastic bag, with just the chuck sticking out. It works really well.

IMG_3903 IMG_3901

The next job is the  verandah on the kiln shed to store the kiln wood when I have both a planned firing weekend and a new kiln job on the go in the kiln shed. There isn’t really room for both very comfortably. So we add an extension to the shed very quickly in just one day using what we have. A lot of 2nd hand timber and roofing iron. The common denominator for all the sheds is new poles in the ground. This time around I’m using ‘green treated’ poles to deter the white ants and the damp soil rot. Almost everything else is recycled. I have even found a bucket of pre-loved roofing screws, that I have salvaged from somewhere. It was so long ago, that I can’t even remember collecting, sorting and cleaning them. But there they are in my salvaged screws and bolts section of the shed, just waiting  to be called on for a second life.

IMG_3916

I have no idea how much it would cost to pay to have all this work done. Obviously, quite a lot. Even the cost of materials would be excessive, never mind the labour cost. I’ve made all my own galvanised steel plate ‘triple-grip’ hardware fasteners. I have all the machines in the kiln factory sitting waiting to be used. We knock out a few hundred of these home-made brackets and then get to work framing the sheds. Everything is held together with roofing ‘TEK’ screws and these steel brackets. It makes for a very quick and seriously strong series of joints.

All of the 100mm. x 75mm. (4×3″) hardwood timber used in the roof trusses was salvaged from the old pottery tank stand. It stood out in the weather for over 30 years with a 13,500 litre (3,000 gallon) galvanised water tank on it, until the tank rusted out. Now it has been de-nailed and cleaned up and has found a new lease of life as roof trusses. I’m amazed how good the local hardwood from Mr. Blatch’s Mittagong saw mill was. It just doesn’t rot. I’ve bought hardwood since, obtained from down the coast, that only lasted 4 years out in the weather, before it rotted. It was largely sap wood. Very disappointing. I re-cycle all the large size 2.4m. x 1.2 m. (8′ x 4′) pallets that the stainless steel sheeting used in the kiln factory comes on. I use this wood for all the knee braces inside. It’s a very valuable resource, and much too good to burn.

IMG_3917

We clad each of these three sheds with recycled galvanised iron that we have been given or scrounged over the years. I never turn down a pile of old roofing iron if it is offered. You never know when you might need it. Today we do need it and we manage to work our way through half of our reserve stack. It’s a great feeling to make very good use of someone else’s cast-offs. Giving them a new useful life, forestalling waste and avoiding earning a lot of extra money to buy these otherwise very expensive building products. I’m so pleased to be able to live this thrifty life of re-imagined waste.

Recycled wood, recycled roofing iron, recycled bolts and screws. It’s a triumph of frugality and re-purposing. I’m very proud of it all. These new old sheds have some of that hard to describe special quality of wabi/sabi. The old, lonely, quiet, rusty, well used, weathered quality of use and nostalgia.

A shiny new, zincalume clad, metal framed, mecano-set-style, farm shed, just wouldn’t do here. It wouldn’t fit in. I love the patina of age of these re-cycled building materials and constructing my sheds so that they have this special ‘weathered’ quality is important to me. They look just right in this setting that we are creating here.

I’m tired now. Actually, I’m a bit wabi/sabi myself – I’m old, well-used, rusted out and weathered, but otherwise very pleased.

Now for a big sleep.

After the flood

The rain has eased off and we can go out and check the damage. We have had 350 mm. of rain in 36 hours. the rain gauge was over-flowing one morning, so we don’t know how much we lost. That has never happened before. We have emptied 350 mm out of it, so perhaps there was another 50 mm that we missed measuring? That’s about 14″ in the old imperial measure. It was certainly a very heavy and prolonged rain storm.

IMG_3819

We go out to survey the damage. Not too much thankfully. Just a  few small trees blown over or snapped off. We sprang a few more previously undiagnosed leaks in our 123 year old tin roof, but I can fix those. I always do, I’m used to it. There is a lot of maintenance in owning a hundred+ year old house. I just don’t know where the leaks are going to be in advance. I have to wait for the big storms to be able to find them. So, we sat through the evening with buckets on the floor, dripping and ‘plonking’ away.

Out side everything is still seeping, teeming, running, gushing. Everywhere you look, the ground is so saturated and oozing water. All 4 of our dams are full and overflowing. As I walk around, I make a mental note of all the jobs that will need doing. The kiln shed is a tragic mess. The water has forced itself up and out of the floor in one corner where the shed is cut back into the hill. The new spring has flowed straight through the middle of the  building, washing away all the small items that were left on the floor and making a trail of patterned tidal sand ridges and depressions like you see in the sand beds of creeks.Now a day or two later, everything is starting to turn green with a mossy/lichen sort of growth. The kiln shed has an earth floor with ceramic paving. It’ll take months of dry warm weather to evaporate all this water from the floor. That is once the earth has stopped seeping.

IMG_3821

I walk down along the old lane it has been swept, or rinsed, clean of loose brush and other light materials. All swept away. The water from our big dam higher up overflows down along here. It looks really peaceful and beautiful here now after the event. The grass and undergrowth has all been swept over and ‘combed’ by the torrent. there is still a steady stream of water 100 mm. deep flowing down along here. It’s hard to believe that this was once the main East/West artery for the village. It’s particularly beautiful, right here, right now. I’m brought back from the moment into another reality. My feet are wet from standing in the water and it’s cold. I chose to wear sandals for this walk, as I knew that it would be too wet down here for shoes.

All the dams are brimming full and over-flowing. It’s a very nice sight and it only ever happens like this once every decade. We are so lucky to have put in all this ground work and infrastructure over the past 40+ years. If everything all goes to some sort of plan, like it has in the past, we will have water now for at least another year and possibly two.

The dams don’t stay full for long as seepage and evaporation steadily take their toll. That is why we have paid extra money to have all the top soil from the dam sites kept and then returned to the tops of the dam banks instead of the usual practice of burying it under the wall. The top soil allows the native bush to re-seed into the bank and grow up into a sort of wind break, as it is the wind passing over the water surface that causes evaporation. If you can slow down the air movement, evaporation is reduced. This seem to have worked well for us over the years. Our dams are all now enclosed in native bush and not sticking out like scars on the landscape. We are so lucky and I am grateful.

IMG_3836


Home Again

We haven’t been home long and we are able to get most of our meals from the garden. We start with a very fresh and crisp green garden salad. IMG_3713

We find that there are a few ripe avocados still on the tree, so we pick one and add it to the salad. It’s a special bonus. We wouldn’t have any left at all due to the birds and possums if it weren’t for Janine getting out there and bagging the last of the fruit before we left.

I manage to find some time to get out into the garden and pull out all the spent corn stalks and dead tomatoes vines. I have a few goes at it over a couple of days and eventually make a bit of a difference. I lime the soil with dolomite. A natural mixture of calcium carbonate and magnesium carbonate in about a 50/50 ratio. It sweetens the soil and negates some of the natural buildup of acidity through our use of a wide range of organic composts. We make compost from everything that we have on our place here, including pine needles and gum leaves. Everything that is organic and can rot is composted down to a black/brown peaty compost and used as mulch somewhere on the block. Pine needles and gum leaves tend to be acid, so are good for strawberries and blue berries, but bad for other plants that like a more neutral or alkaline pH.

IMG_3781  IMG_3784

We also add a layer of composted chicken manure on top of the freshly exposed, weeded soil, then cover it all with more compost. I try not to dig unless I have to. The worms seem to do that for us, If left to their own devices.

IMG_3783  IMG_3782

I pick a cabbage and make our first home made okonomiyaki at home here after our return. The cabbage is a whopper. It has grown well while we have been away. I only use a 1/4 for 4 pancakes. I add in some other vegetables that we have including a grated carrot and a finely sliced red capsicum;. These wouldn’t usually be included in such a dish in Japan, but we aren’t in Japan anymore. We are home and this is what we have. And after all, okonomiyaki actually translates as something like ‘add what you like’. So I do!

IMG_3789  IMG_3788 IMG_3787

IMG_3791 IMG_3793

The washing machine decides that it will only do one more wash and then burns out. It stops mid-wash and goes no-more. We have to drain out the water from the unit before we can open the door of the front loader. This machine has done well. Over twenty four years of continuous service. I can thoroughly recommend the ASCO ASEA brand for a quality, reliable, long lasting product. All you have to do is find a brand new and unused model from 20 years ago and you’ll have a good quality machine. God only knows what the current products are like in terms of long lasting quality. Anyway, I’m very pleased with our choice from two and a half decades ago. There is a lot of embodied energy in a thing like this and it really needs to have a long life to justify its existence, otherwise it just becomes more of the same old land fill junk that the big companies want us to cycle through endlessly at great expanse to the planet. Built in obsolescence is a crime against society. So good on you ASCO, for still stocking spare parts for this old model.

I knew that the water pump in the washing machine was wearing out for some time and I ordered a new one a few months ago. It took a couple of months to get here, as it had to come from Sweden. The new pump arrived just before we left on our travels, so we were lucky that it didn’t fail while we were away and cause Annabelle, our house-sitter, any problems. The local agent doesn’t carry spares for 24 year old products. I can understand. I’m pleased to get one at all after all this time.

I set to work to replace it, but like all these jobs, it turns out to be a bigger, longer, more complex job than I imagined. Firstly, the new pump isn’t complete, I have to take some parts off the old one to make it fit. Second, the old parts are quite well settled into place after 24 years in wet, humid conditions and take quite a bit of un-doing. I am forced to retreat from the laundry and go down to the workshop to get my hands on some serious tools. The Swiss army knife isn’t going to cut it on this job on its own.

IMG_3761 IMG_3765

I manage to get all the parts swapped over including the fan on the pump motor. I’m amazed that this isn’t included. It’s only a simple plastic part worth just a few cents. it has the be prised off the old shaft and it’s a tight press-fit on the new one. I had to pay $250 for this little pump. I’m amazed that they can’t supply a mounting plate and plastic fan for that money!

IMG_3768

The electrical cable is just long enough for the factory technician to fit the pump, while it is up-side-down in the factory, in good light and with the correct tools, and plenty of practice. When I’m working down in a dark corner, on my back, in a confined space, holding a torch in one hand, a pair of pliers in the other and then with my other 2 free hands I am able to manipulate the electrical clips in the correct order, otherwise the last one won’t fit!!!!! I question the logic of this thriftiness. This all has to be accomplished in just 100 x 300 mm. of access space. I’m finding it quite difficult to get both my arms in there at the same time, never mind to be able to see what I’m doing and work accurately.

The last minor annoyance is that the rubber hoses are all crimped on with single-use metal clamps that need to be broken to get them off. Luckily, I keep a lot of different sizes of adjustable hose clamps in stock here for other uses. Fortunately I have 50mm, 35mm and 25mm dia clamps in my tool box. Eventually it’s all done. The only real joy that I can take from this is that I didn’t have to pay a technician another $250 to come out here and do it for me and most importantly, I have forestalled waste by keeping this old appliance going for another few years. So this is self reliance.

While I’m in maintenance mode, I set about rebuilding a Venco potters wheel destined for an aid project in Cambodia. It arrived here completely disassembled and in a few different cardboard boxes of loose parts. it has a reconditioned motor and all new grommets as well as a new rubber drive wheel. Everything reconditioned for a long life ahead.

It takes me an hour or two just to figure out the order in which I must do the job to get it all to work out. I have one false start and then it goes smoothly. If I had taken it apart myself. I would have remembered the sequence, but as it has all been completely disassembled by someone else, I have no memories to call on. I have to work it out using only logic.

IMG_3770 IMG_3779

It goes and it works OK, so I am happy with that. This old wheel will now have a new life ahead if it in Cambodia in a village pottery workshop for many years to come. More waste forestalled.


Time For Some Fun


Last week I attended my friend Alan Parkes funeral. Alan was a good mentor, a stonemason and sculptor. He taught me how to cut and dress stone, so that I could create all the sandstone features for my home, when I built it way back in the early seventies. I still have those stone masons tools that I forged all those years ago. I have Allano’s pitching tool, that he gave to me, I am forever grateful for his kindness and support. All the other tools I have forged myself.
I have been slowly building stone retaining walls for the new pottery workshop Pavillion building. It’s been a slow process, because I have had to dig nearly all the stones out of the ground myself over the years that we have been living and gardening here. When even I make a new garden bed or make a new orchard area, I have to dig some enormous sandstone floaters out of the ground. I pile them up down at the bottom of our land, until the time is right for some more stone work.
That time is now. It’s time to have some fun and in memory of Alano I get out my skutch, point and bucket of gads. I originally made myself 10 gads, back in the seventies, but when I get my bucket of stone working tools out from the workshop, I find that I only have 5 left,  I’ve lost one at a time over the intervening period, so now I only have a bare minimum of them left. The first thing that I do is make another set of 10 more. That should see me out for another 40 years of quarrying and masonry work! Just like the last lot.
IMG_1258IMG_1261
IMG_1264IMG_1265
I set about breaking up the big floater that I cut in half a while ago, so that I could put the citrus grove fence right through the middle of that space. The rock just happened to be smack-bang in the way, so I cut it in half and cut up the piece that was now in the way and used it to make the lower part of the stone retaining wall that I plan to finish off this weekend. Using just my small 4 lb hammer and a dozen gads, I cut it up into 4 large blocks and another half-dozen, smaller blocks. They are really enormous lumps of stone and I need to use the tractor to move them to the site. The largest is about 200 kilos. It’s longer than the 1200 mm bucket on my tractor. I have to secure it with heavy snigging chains, to make sure that it doesn’t fall out of the bucket during the bumpy ride over to the building site on the other side of the kiln shed and pottery.
It is amazing what one man can achieve with just a 2kg hammer, a dozen small gads – and a few hours!
IMG_1298  IMG_1299
IMG_1303IMG_1304
Using crow bars, levers, rollers, the tractor and the help of my good friend and faithful retainer, Warren, we build the retaining wall. In two days, we cut and lay 20 metres of stone wall and two sets of stone stairs. It’s great fun and ever so rewarding. We get so much done working together and we manage to laugh a lot while we are at it, even though the work is physically very demanding. The Lovely Janine is here too, supporting, passing, carrying, sorting stones, getting gravel and lime in the ute, raking up, finishing the details and finally sparging and cleaning our messy lime mortar work in the afternoons, once the mortar has started to set a little. The weekend goes so fast. It’s been really tiring but also energizing to be so productive in a free and creative way. We don’t really know what we are doing, but we enjoy doing it all the same. It all goes so well. Mostly because I spent the last two days before-hand splitting up the stones and cutting and dressing those blocks, then carting then onto the site in preparation. The largest stone is 450 mm high x 300 mm deep and 1500mm. long. It takes a bit of maneuvering to get it into place, but it can’t resist the hydraulics of the tractor and two crow bars.
IMG_1311 IMG_1312 IMG_1307 IMG_1308
IMG_1314 IMG_1310 IMG_1313
Even though I have used, the tractor, chain blocks, crow bars. levers, wedges and rollers and a mate to help me. My back is still telling me that I have done too much. But if I don’t do too much, then I don’t get enough done.
We finish the job and are all cleaned up, well before dark. The Lovely had picked the 2nd picking of the early pink cherries. Yum! We need to be vigilant, as the birds soon realise that they are ripening and will clean out the lot if we don’t net them. But netting will have to wait for another day. Today we are being masons, not orchardists! The Gorgeous One manages to find time during the days hectic work, to bag a good deal of the crop, so as to allow it to ripen in its own good time and mature, before the pesky birds get them all.
IMG_1318
As it is getting dark, we come inside for hot showers, a change of clothes and a well earned beer. For dinner we have a simple light meal of cubed silken tofu with todays fresh picked, early season garlic, some finely diced spring onion fresh from the garden, finely diced fresh ginger and a drizzle of light soy sauce. This has to be one of my favourite light meals.
IMG_1317
I am someone who benefitted greatly from the generosity and good will of Allano Parkes. He left his mark on me, and inadvertently on this small piece of land of ours. I am really quite taken by the concept of self-reliance. So being taught to be able to dig up stones and turn them into a visually pleasing and environmentally sensitive, carbon-neatral, building material is a real thrill. Apart from the occasional use of the tractor to do the heavy lifting, there were no power tools used on this job. All the cutting was done using the small 2kg hammer and gads, while all the fine dressing was done using the bitch-pick and pups as well as the skutch hammer. We ache all over from the exertion and the use of muscles that don’t get used like this very often, but when we take the time to stand back and admire our achievement at the end of the day, they are all good aches!
fond regards from the part-time mason and his masonette

Nothing is Ever Finished

We have just finished another firing with a group of enthusiastic potters. The weather is glorious and warm in the sun, with no wind, so a good night for a frost. The firing went very well, even a little bit quick, so we will wait to see what the results are next week.

IMG_0794IMG_0791 IMG_0792IMG_0790 IMG_0793IMG_0798

The night before the firing and just after I had written that Nothing lasts, nothing is ever finished and nothing is perfect. The heat shield on the door of the wood fired kitchen stove fell off at the end of dinner. The bolts holding it on had rusted away. I was stuck for just one second with a 2kg piece of red hot steel plate coming free and having to deal with it unexpectedly. Trying to stop it landing on the wooden floor of the kitchen. Fortunately, I installed a piece of thick copper sheet onto the floor in front of the stove, just in case any red hot embers might cascade out of the fire box on some occasion. This has hardly ever happened, but does occasionally. I’m glad that I saved up and did it when I did, thirty years ago, because I probably couldn’t afford to buy such a sheet of copper now. The copper looks great, has lasted well and on this occasion, might just have saved the house from burning down. I man-handle the glowing lump of red hot metal outside and into the ash bucket using the ember shovel.

IMG_0771IMG_0772

IMG_0777

IMG_0778In the morning, before everyone arrives for the next workshop. I’m up early and down in the workshop drilling out the corroded screws and re-tapping the threads to suit the stainless steel bolts that I keep in stock for kiln building purposes. It takes me about 45 mins to clean it up, dissemble it and then figure out what I should do to cobble it all back together again. The old bolt holes are well corroded and packed with swollen, rusted bolty remains. I find that it is next to impossible to reconstruct it as it was, without moving up from 3/8 whitworth  to 10 mm. metric bolts, which I don’t have in stock. I decide to drill right through and use a longer, but thinner bolt. this works well and should last another 20 years. Probably longer than the remaining life of the rest of the stove. I get the door back on the stove just as the first of our guests arrive.

IMG_0781

Small progress, problem solved for the time being. It isn’t perfect, it won’t last, it isn’t finished.

Next!

Fond regards from the imperfect Steve the stove bodger