
I have been given an old electric kiln that is 44 years old. The frame is still in OK condition, but the ceramic fibre lining has collapsed, it is all cracked, shrunken, and falling to bits. The fibre in the roof and back wall has sagged, broken up and half of it has fallen in. Most of the element rods are also cracked and broken. It looks like it has had a hell of a life. I was told that it was once in use in a school, but I don’t know where it was originally from or it’s history before that. But it ended up being last used to slump glass. We were given the kiln when it finally became unworkable and the glass artist, (a relative of Janine), retired. And, I believe, spent its last years laying on it’s back and used as a top loader.
I’ve been given lots of things that don’t work in my time here, especially since the fire. I’m used to it. People say. “Steve, your handy. I’ve got this thing that doesn’t go, but I’m sure that you will be able to fix it. You can have it!” And occasionally, I can actually fix it! I surprise myself sometimes!
Most things only need a different way of thinking to get around the huge problem of built in obsolescence. To find the creative alternative. It doesn’t have to look like new or be perfect. It just needs to work. Our pottery is full of old gear that I have rebuilt like this. In fact, there are less than half-a-dozen items that were bought ‘off the shelf’, as it were, brand new. We just don’t buy new stuff very often. Even my recently purchased ‘new’ electric car, was actually a used car, but new to me.
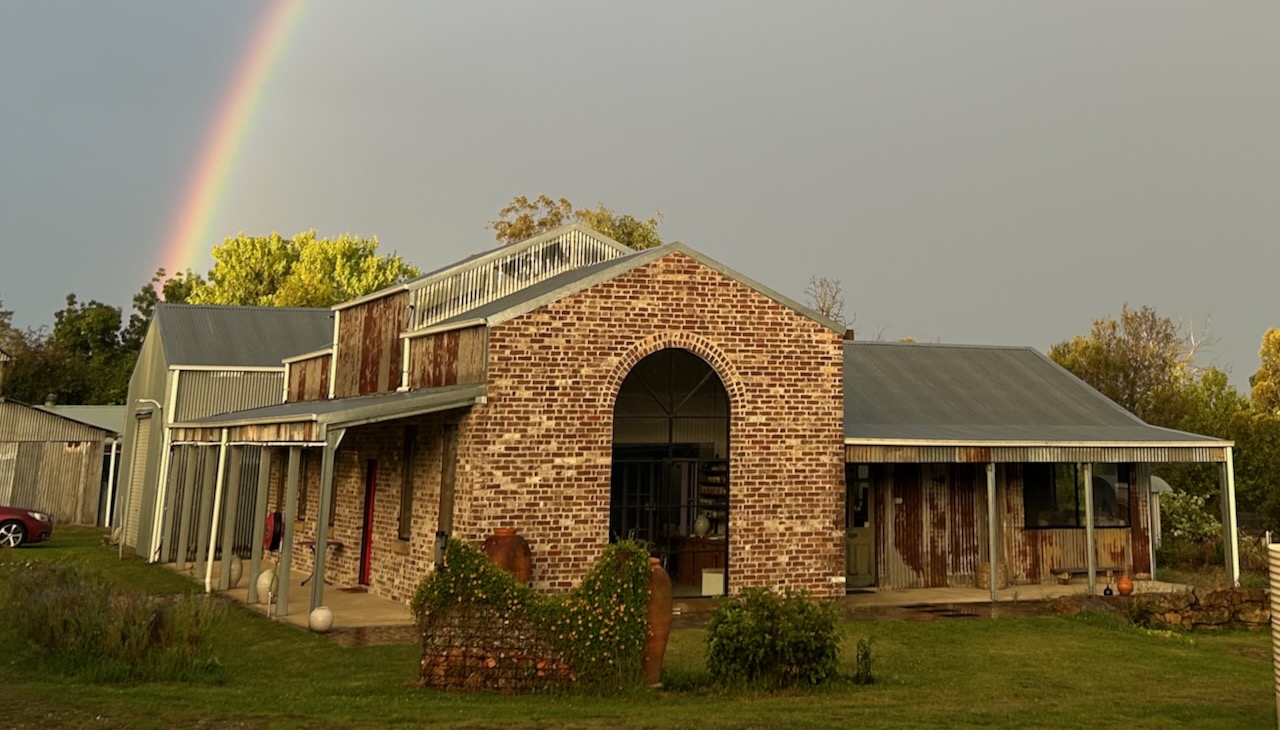
That is how we survived financially all these years, we rarely buy anything new. Only 2nd hand stuff, that no one else wants, or is less desirable. Second hand car, second hand house, second hand tools and equipment, we were always being offered stuff cheaply, or free, because it needed repair or just didn’t go anymore. However, If nothing turned up, I just built things from up scratch, using recycled material, or re-purposed from another job. The first two pottery studios that we built here, were made from re-cycled and scrounged materials, mostly wood. Tragically, they both burnt in fires. So no more building with wood for us. It is only this last studio that we built using a metal frame, but we spent a year scrounging sufficient old recycled corrugated iron to both clad it and line it, inside and out. Along with 2nd hand fittings and doors.
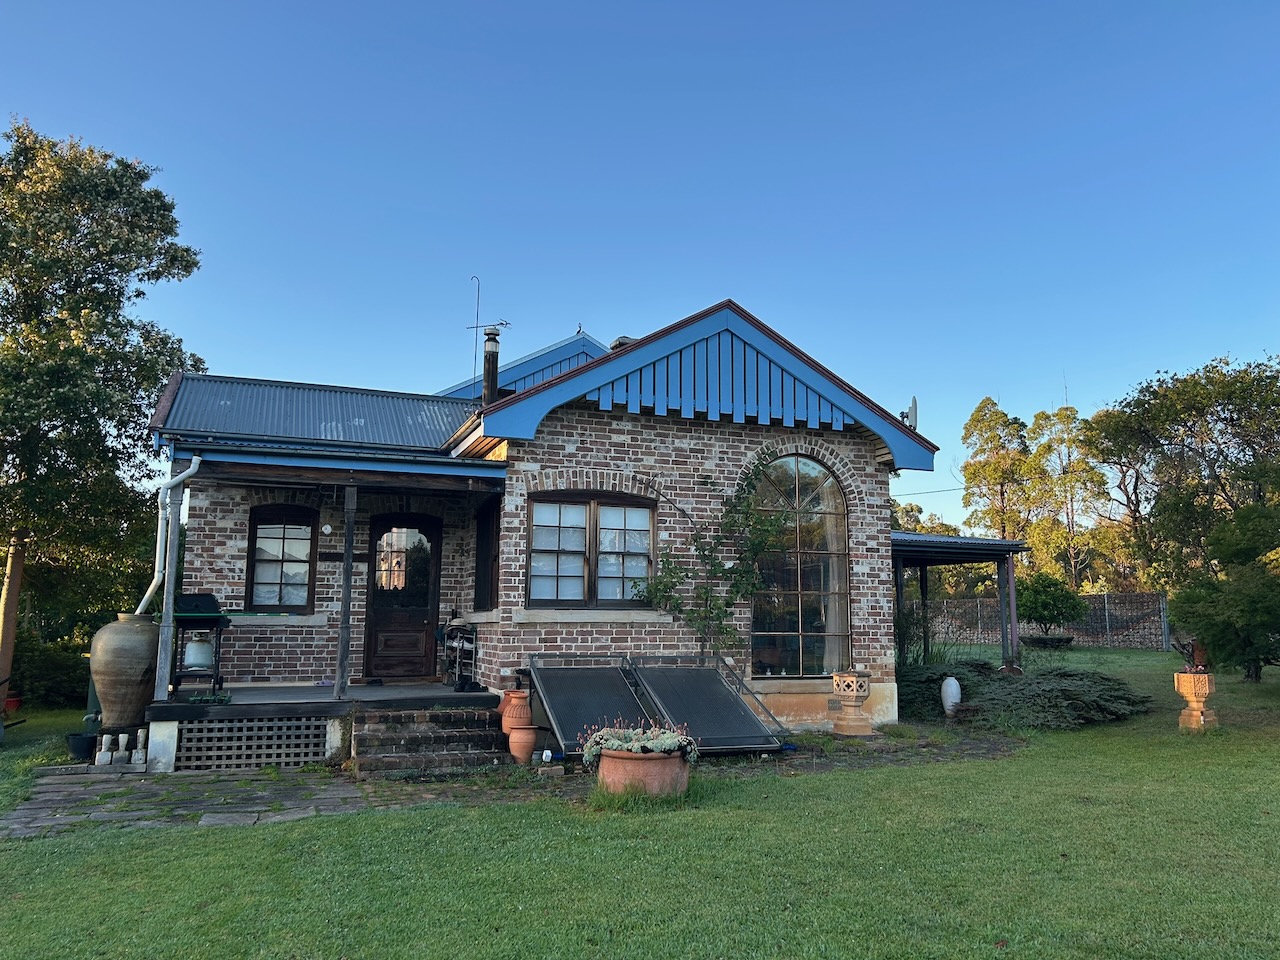
I decided to include a big arched window for the South wall of the new pottery facing the house. I wanted it to reflect the arch window that I made for the house back in the 80’s. No chance of finding something like that on the side of the road, so I welded one up out of marine grade aluminium for just a few hundred dollars. It actually turned out OK. I’ve never done that before. And can’t see myself ever needing to do it again. I never seem to get any good at anything much, as I only ever seem to do these jobs once, or maybe twice, but a couple of decades apart, just after I’ve forgotten how to do it.
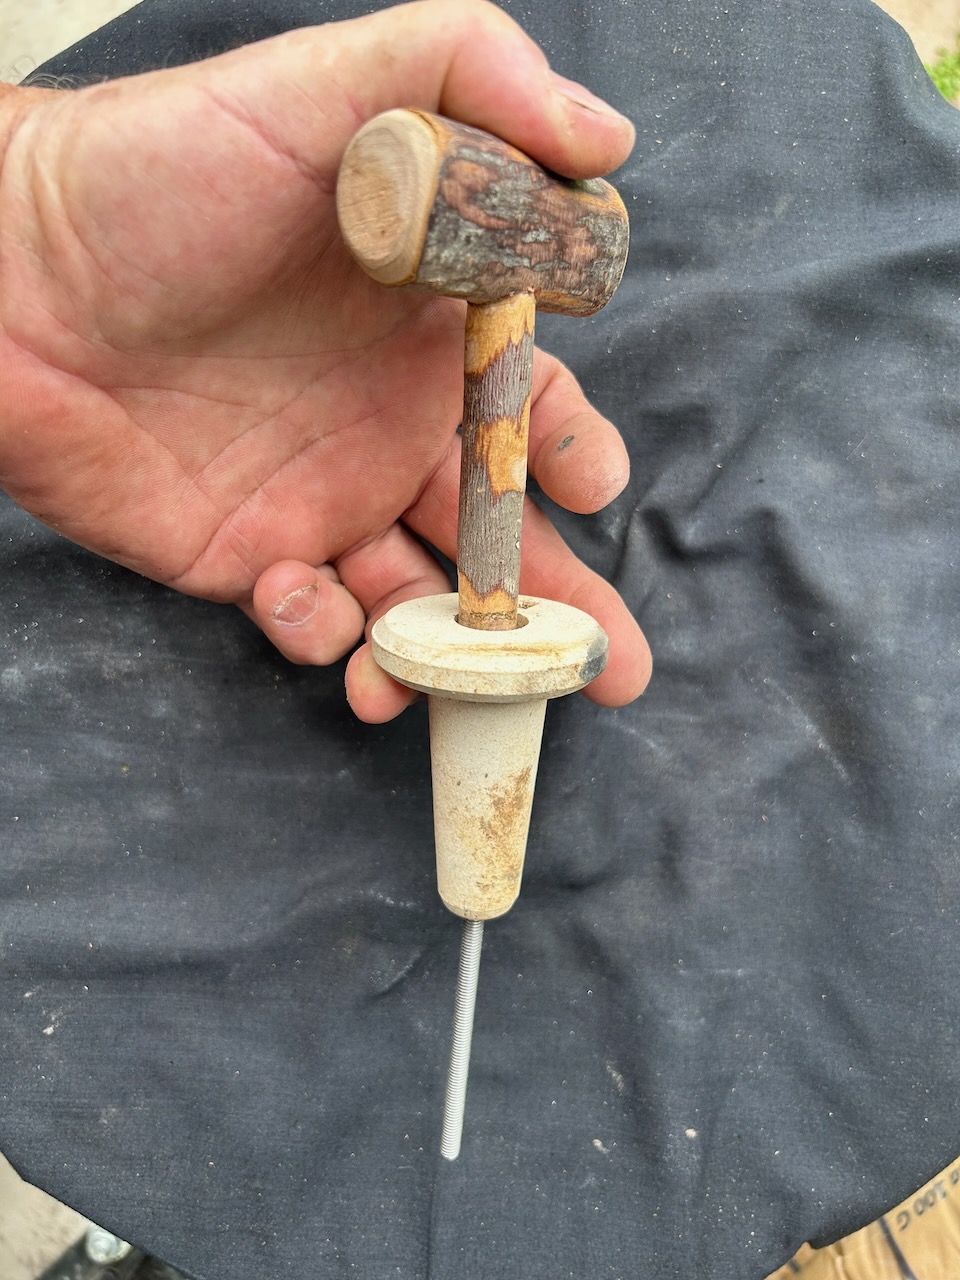
The first thing that I did to get this old freebie kiln on the mend, was to make some new element mounting rods. As far as I’m aware, no one makes these ceramic kiln rods anymore in Australia. They are not hard to make, just time consuming. But I guess that you do need to know what you are doing. And in this case I just happen to know just enough to to it. That is to say, that I have had a go at home made kiln furniture/home made refractories about 50 years ago.
I needed to get these rods made early, as the only kiln that I now own that can fit in 650mm long ceramic element rods, is the big wood fired kiln. I can only fire the wood kiln in the cooler months, avoiding summer for obvious reasons. So I needed these rods made back in March, last year, so as to be dried out and ready to fire in May/June. As I was planning to do the rebuild of the electric kiln over this last summer break. I got a lot done, but it has taken me a long time. Principally because I don’t really like doing kiln work. I’m over it!
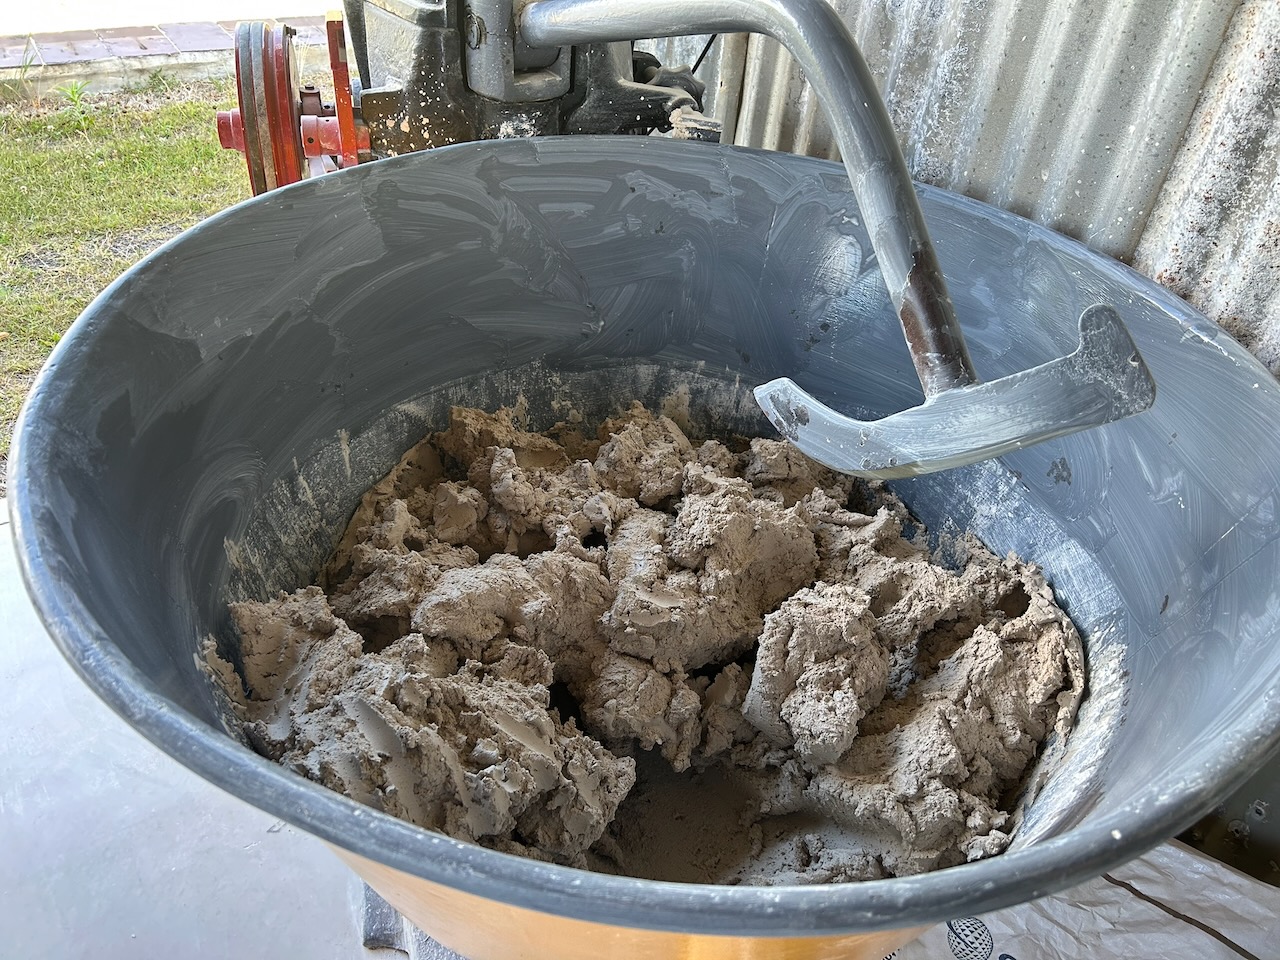
I mixed up a small batch of 10kgs of refractory clay body suitable for use as element rods. I used some old refractory ‘Puggoon’ kaolin, along with 3 sizes of high alumina grog. For years, I used to make all our wadding for the big wood fired kiln out of ‘Puggoon’ high alumina kaolin from Gulgong. I still have one big jute sack of it left in the barn. This special High Alumina wadding (HA) that I made up, after firing to stoneware, wasn’t just rubbish to be thrown out, but instead, I had created very useful, high value, HA grog. Converting what would normally be any one else’s waste product into a valuable asset worth over $6,000 per tonne.
I can also crush a very good quality HA fire brick down to dust in the rock crusher to make excellent grog.
This is not just re-use, re-cycle, but rather up-scale and value-add as well! Over a year, it’s amazing how much wadding/grog you can accumulate. A very long time ago, way back in the 70’s. Janine and I managed to buy 12,000 mixed fire bricks for a few hundred dollars, from a metal bath tub enameling factory that was being de-commissioned. This meant that we were able to build a very large 3 chamber wood fired climbing kiln. The biggest problem we faced at that time was that kiln shelves were so incredibly expensive. Without kiln shelves we couldn’t fire the kiln, so I taught myself how to make our own kiln shelves and props. Most of which, I still have! I developed a reliable recipe using crude ‘Puggoon’ HA Kaolin 50%, mixed with our own home made HA grog 50%. Our own crushed wadding and fire brick grog gave us a range of sizes straight from the crusher, coarse, medium and fine, It proved to be a good blend of sized aggregate. I learnt this technique when Janine and I worked with Harry and May Davis in New Zealand way back in the early 70’s.
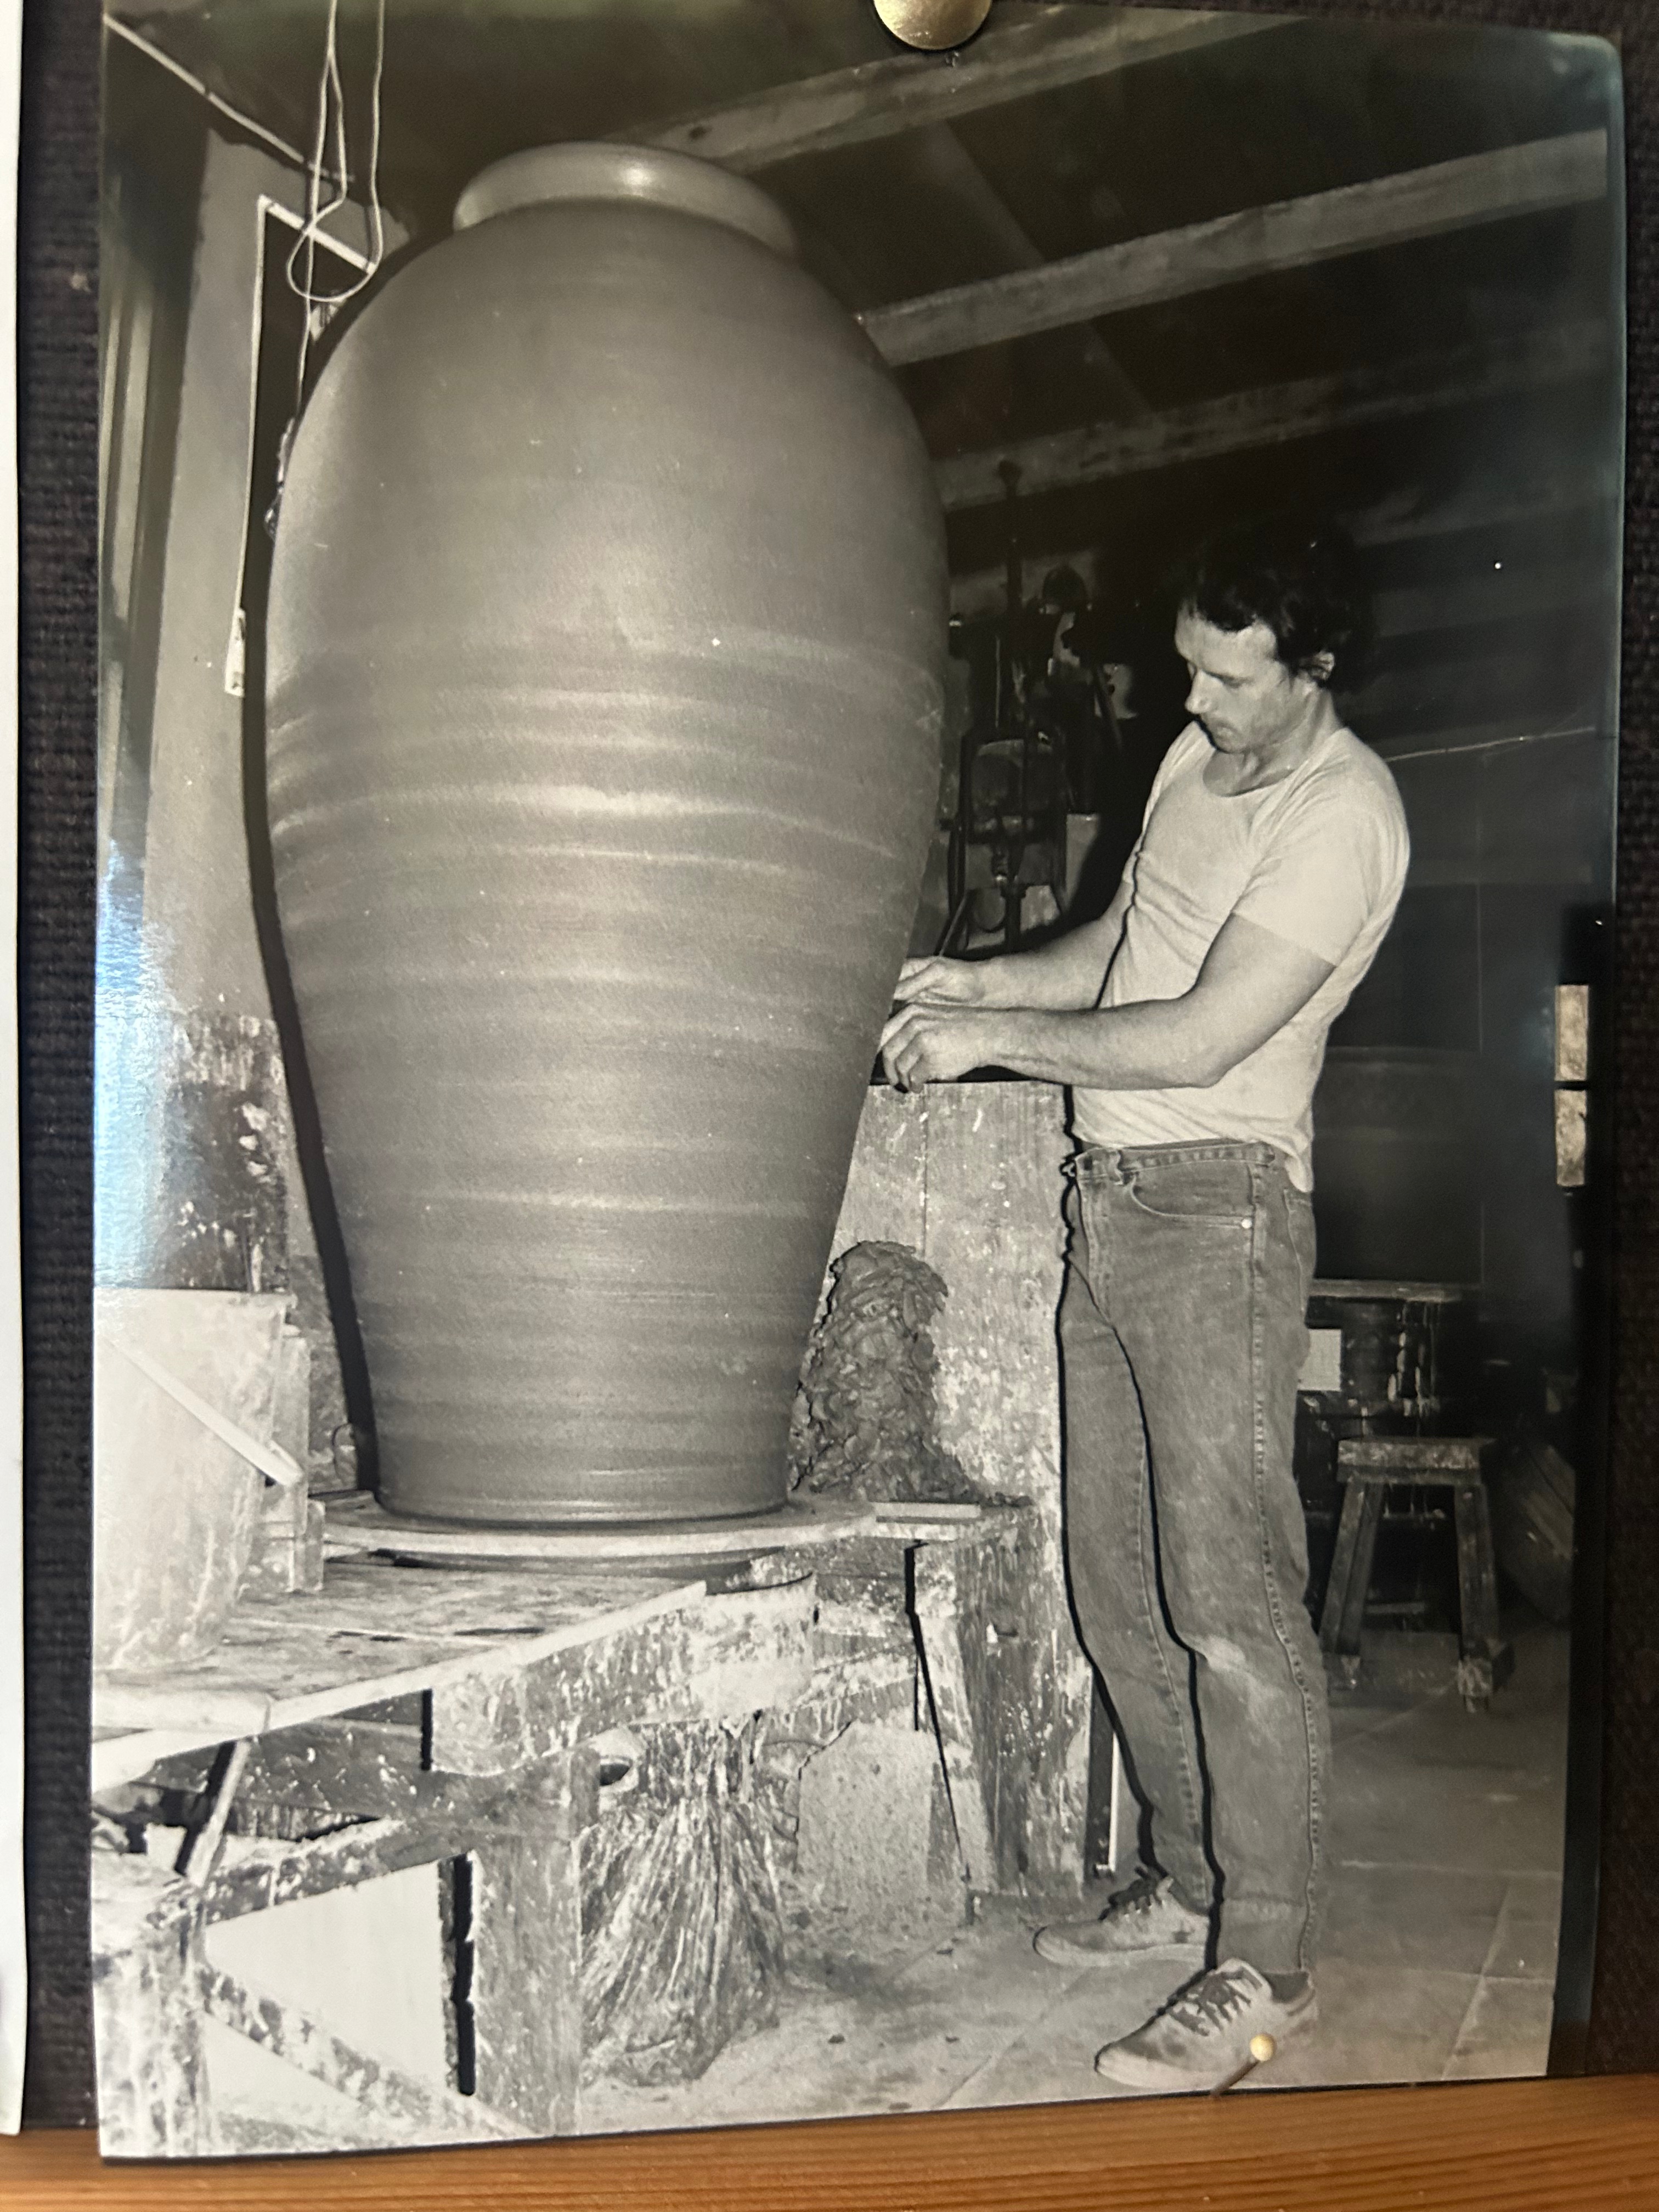
My recipes and pictures of me making the kiln shelves and props were all illustrated in the book ‘Handbook for Australian Potters’ published in the early 80’s. Pages, 206 to 212. Below, I’m shown in my youth, in these images, taken by Janine, of me making kiln shelves, fearlessly declaring my independence and learning to be self-reliant. I’m a lot older and fatter now, but nothing else has changed. I’m still enthusiastically practicing self reliance!
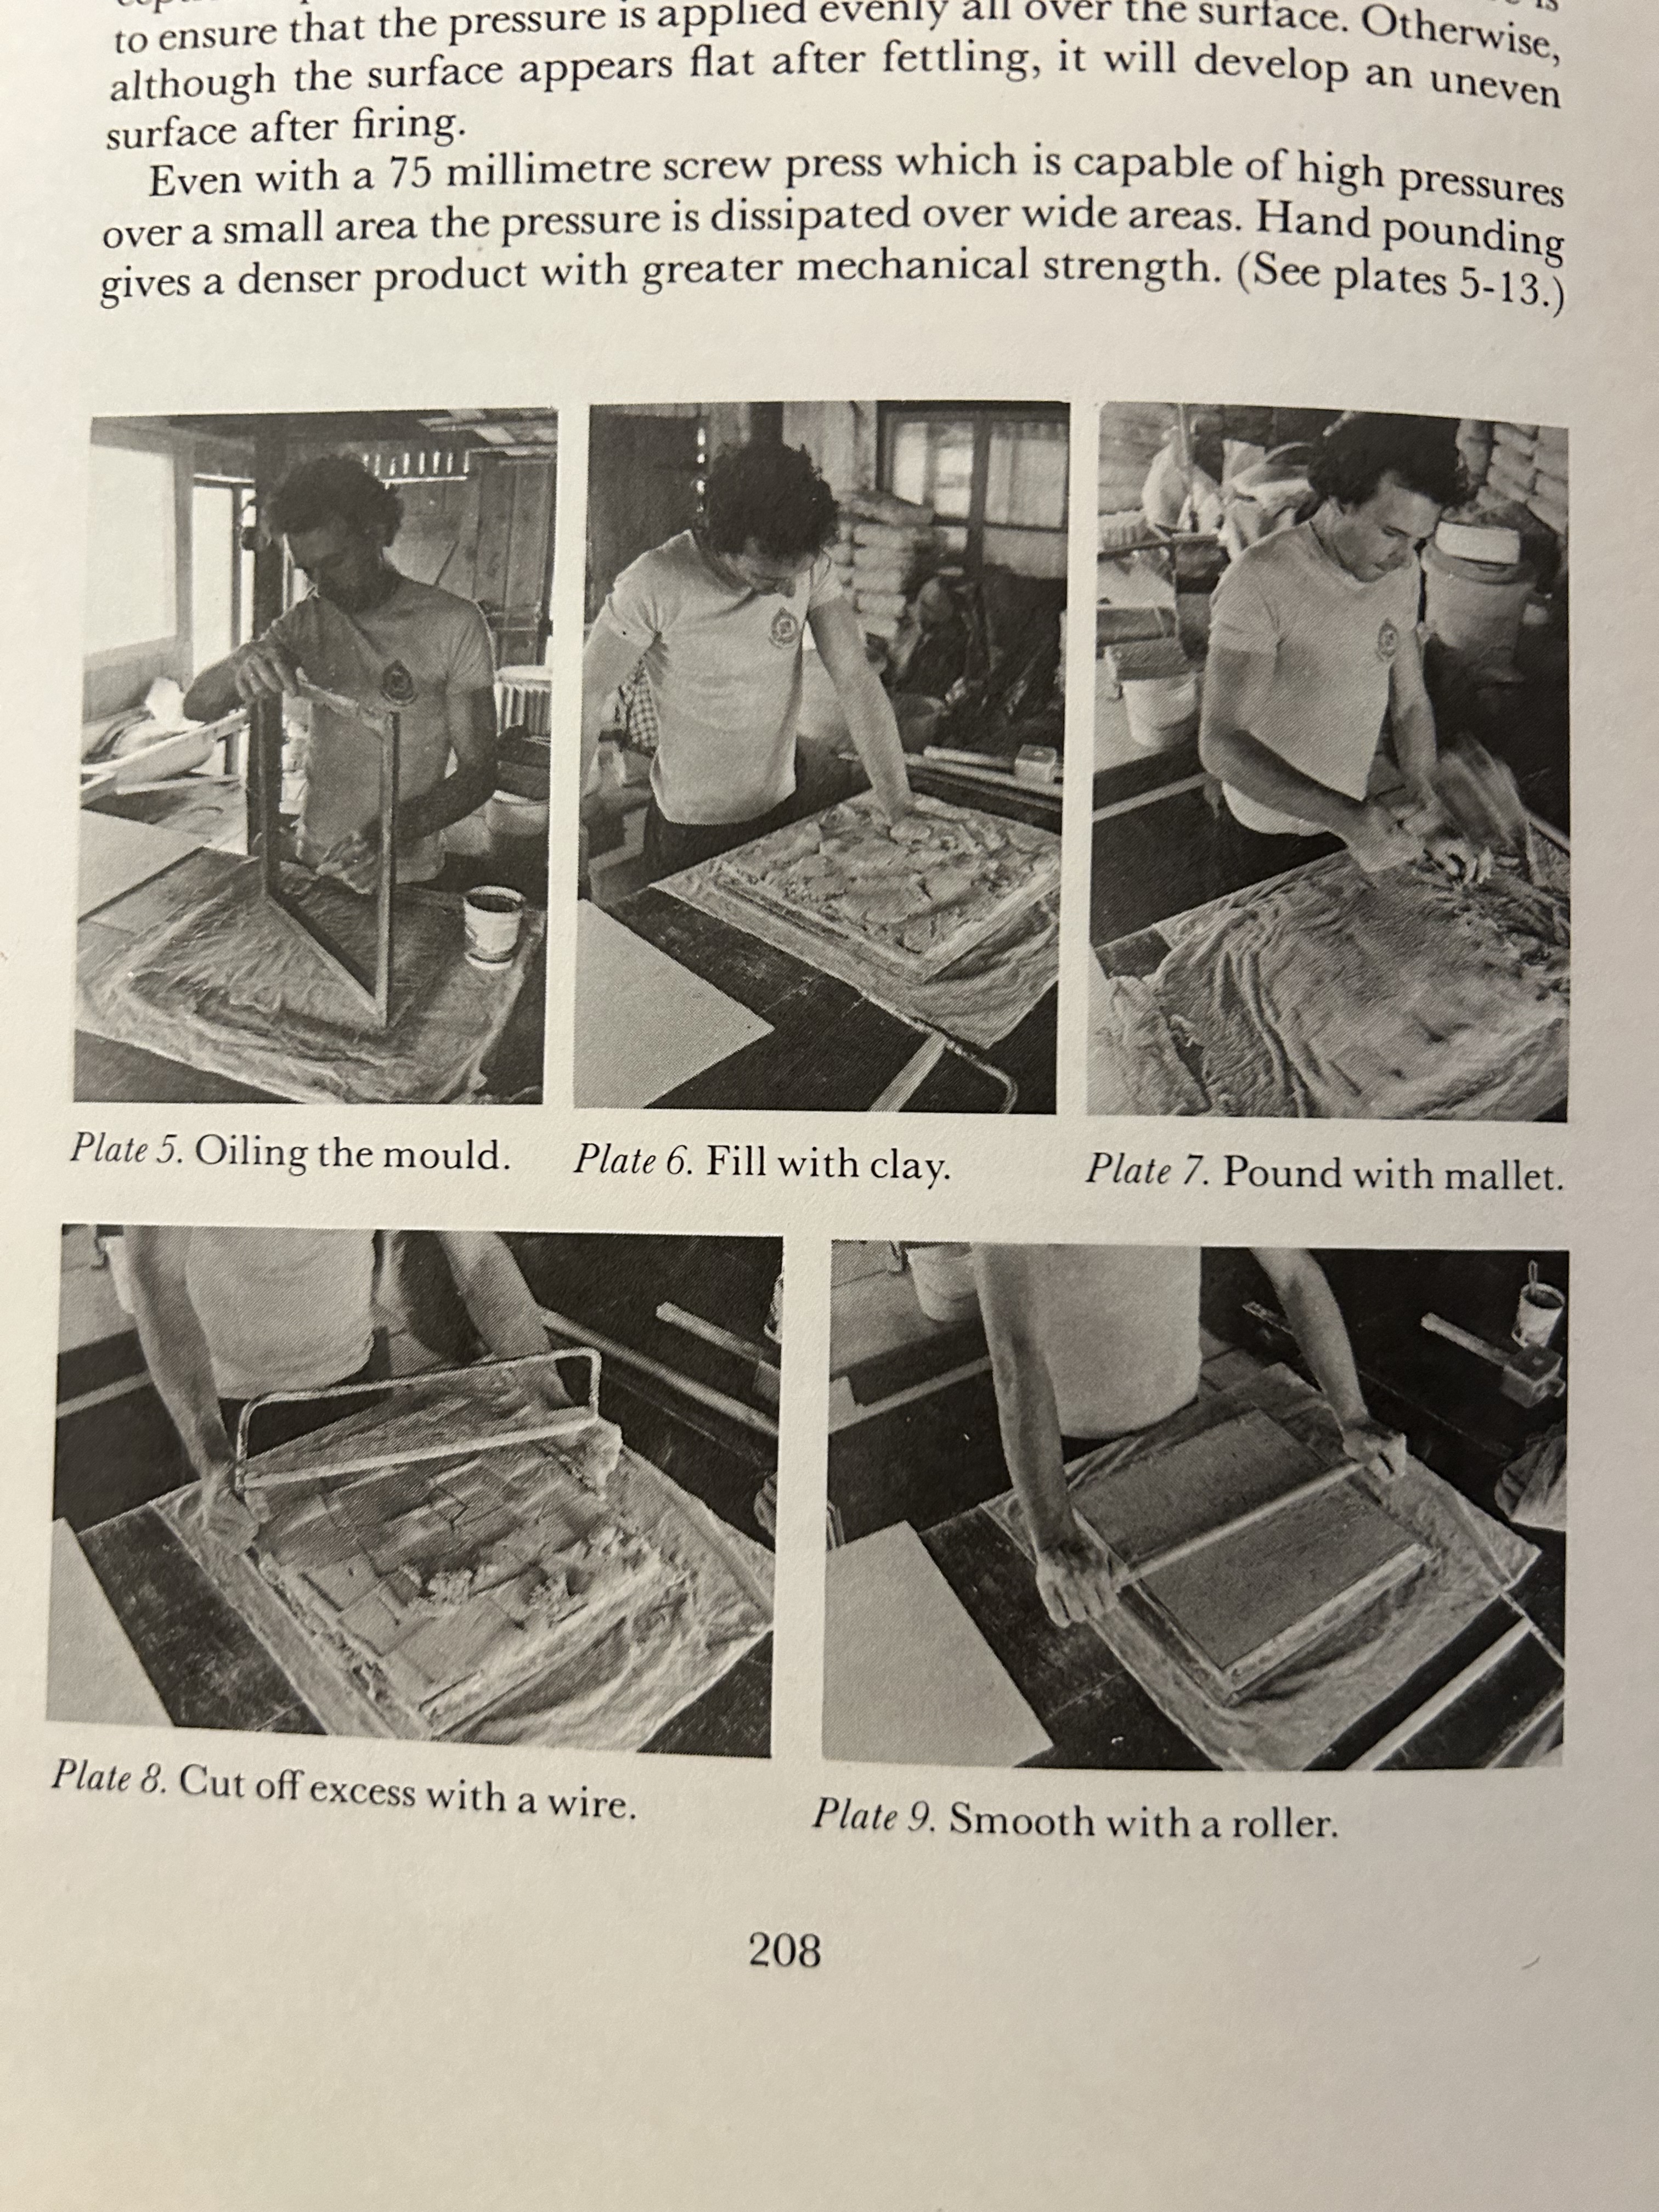
These home-made kiln shelves weren’t very good. But they worked, and were good enough to get us going and in business, because we certainly didn’t have the money to buy enough of them to fill such a big kiln. So I taught myself how to make refractories way back then out of necessity. Now I’m financially secure enough to afford to buy element rods, but as a Nation, we don’t make anything in Australia anymore. Such items may be available from China? But I know how to make my own, So I do.
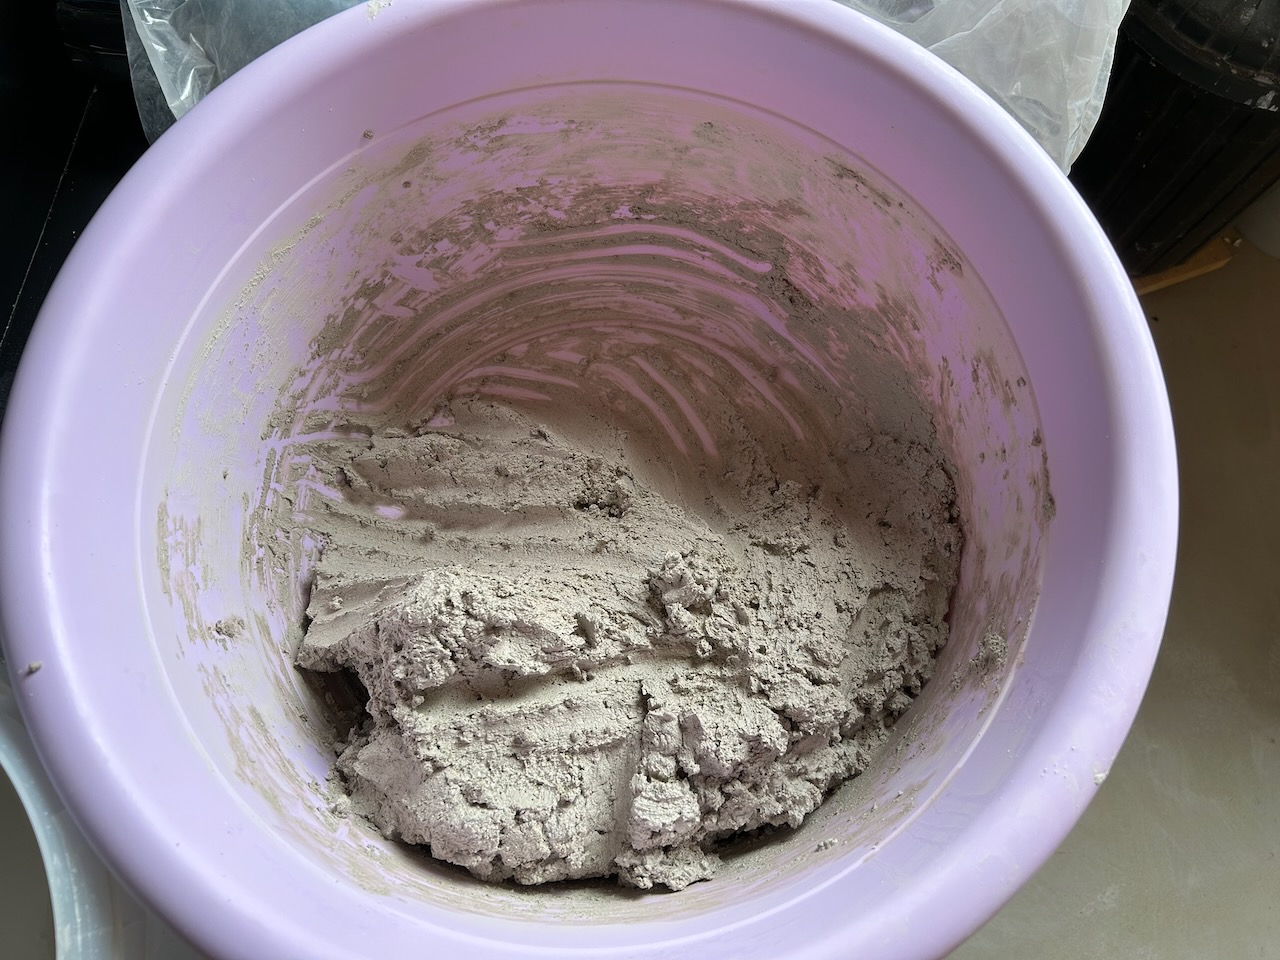
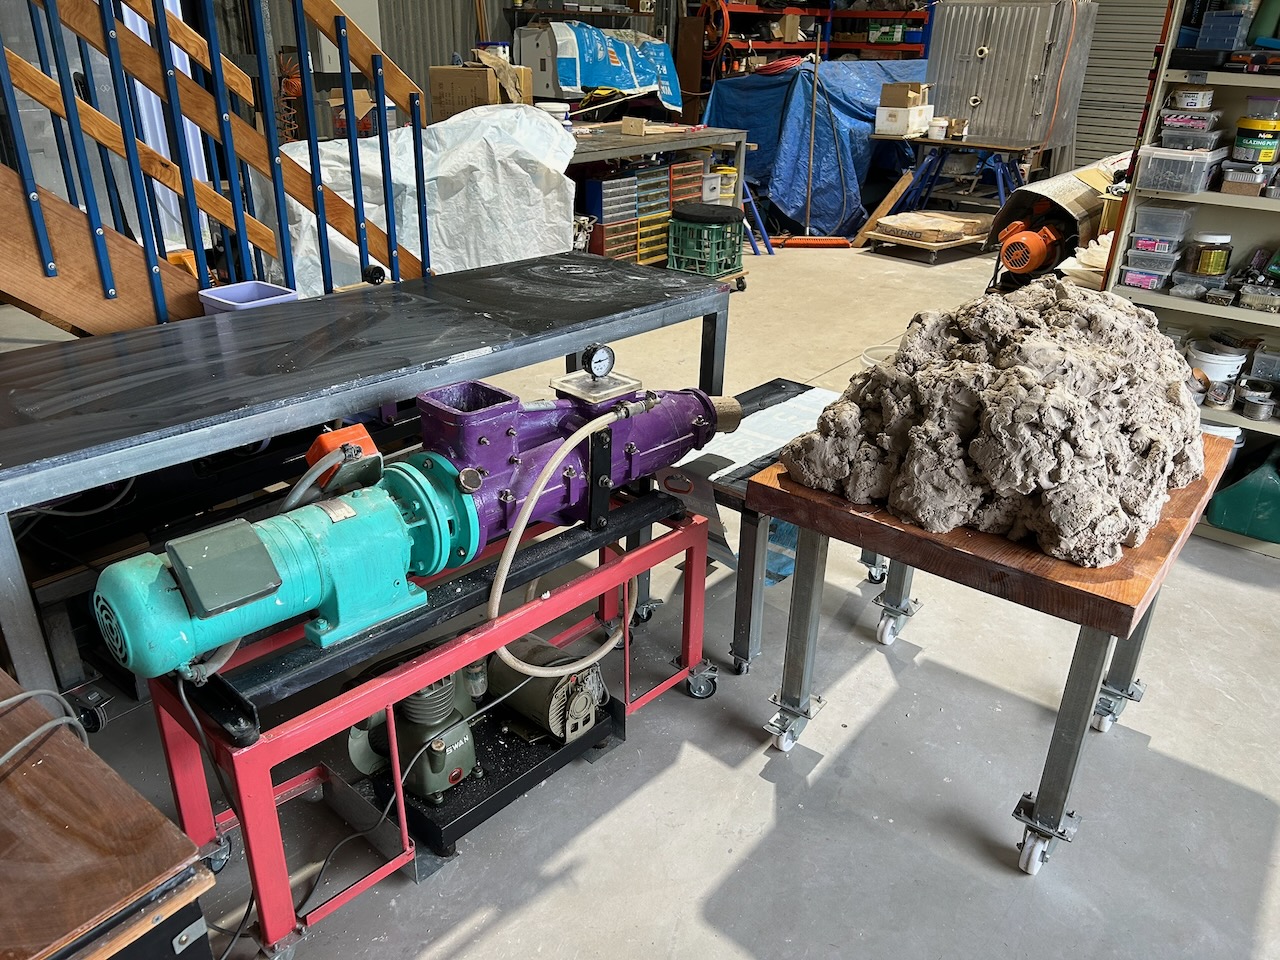
The refractory clay and grog mixture is so non-plastic and short, that it doesn’t hold together much at all. The clay is naturally short, crumbly and non-plastic, and when mixed 50/50% with fine grog it is, not too surprisingly, totally short, crumbly, floppy and useless. A bit like working with sand castles. I can’t extrude the rods vertically, they just snap off under their own weight. I have to extrude them down an inclined stainless steel ‘V’ shaped ramp, lubricated with a little used engine oil brushed on to it to ‘lube’ the process. The clay has to be pushed down the ramp to keep it compressed and avoid hair line cracks. If it can slide easily, it will distort, stretch, weaken and break. The thick engine oil, allows the clay to slide, but is sufficiently viscous to stop it from sliding easily. I use the thin stainless steel ‘V’ angle slide to carry the soft rods to the drying table.
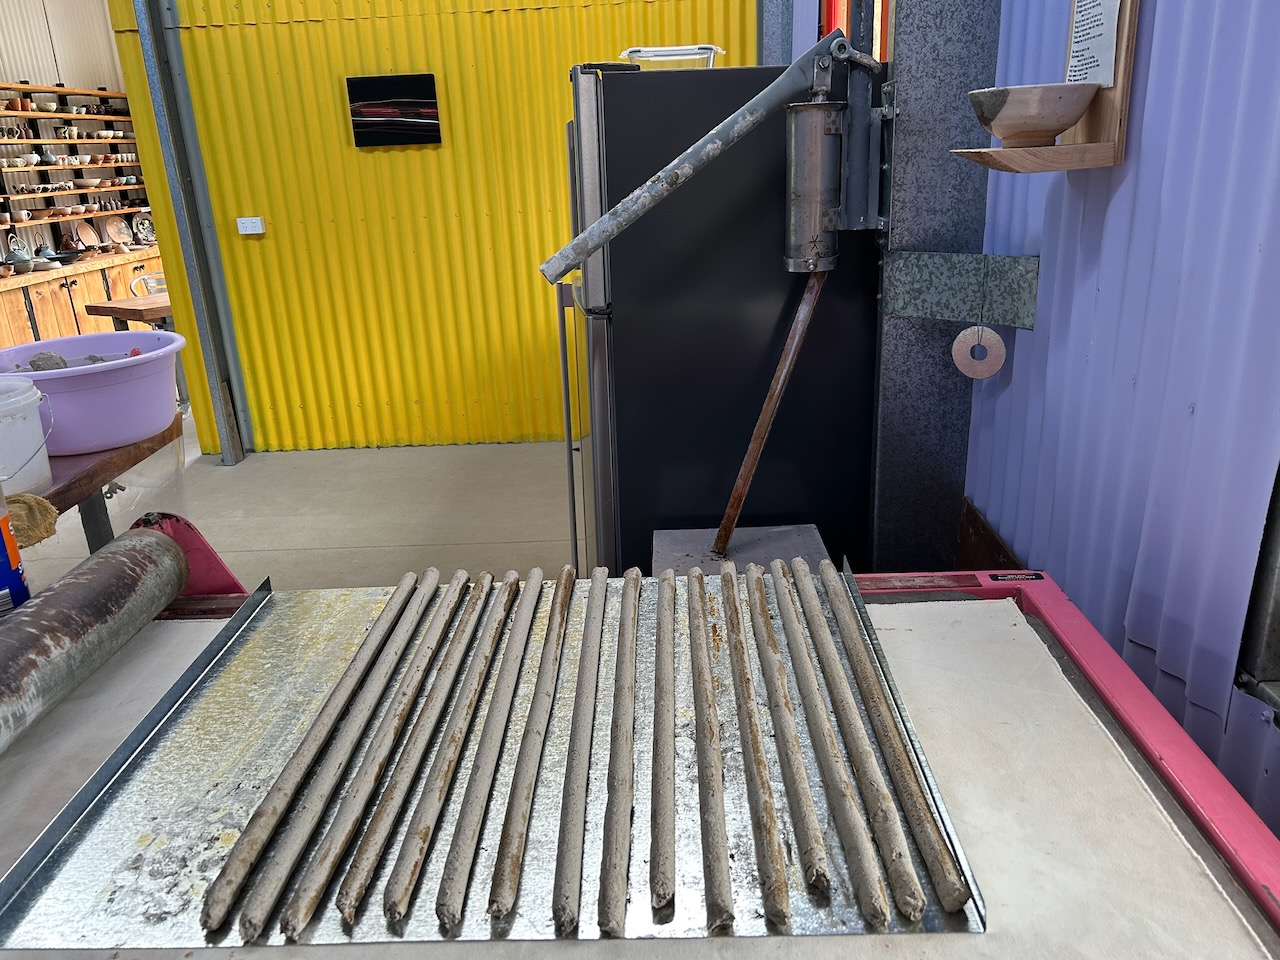
Once dry, the rods have to be carefully carried and placed in the kiln very gently. The clay body is so ‘short’ that they snap so easily. It has NO dry strength. NONE! I broke a couple packing them, even taking care. Once fired to stoneware, they are more resilient. The final strength is achieved when they are used in the kiln. Each firing to stoneware, helps to develop the matrix of primary mullite crystals in the body that gives it high temperature strength and thermal shock resistance.
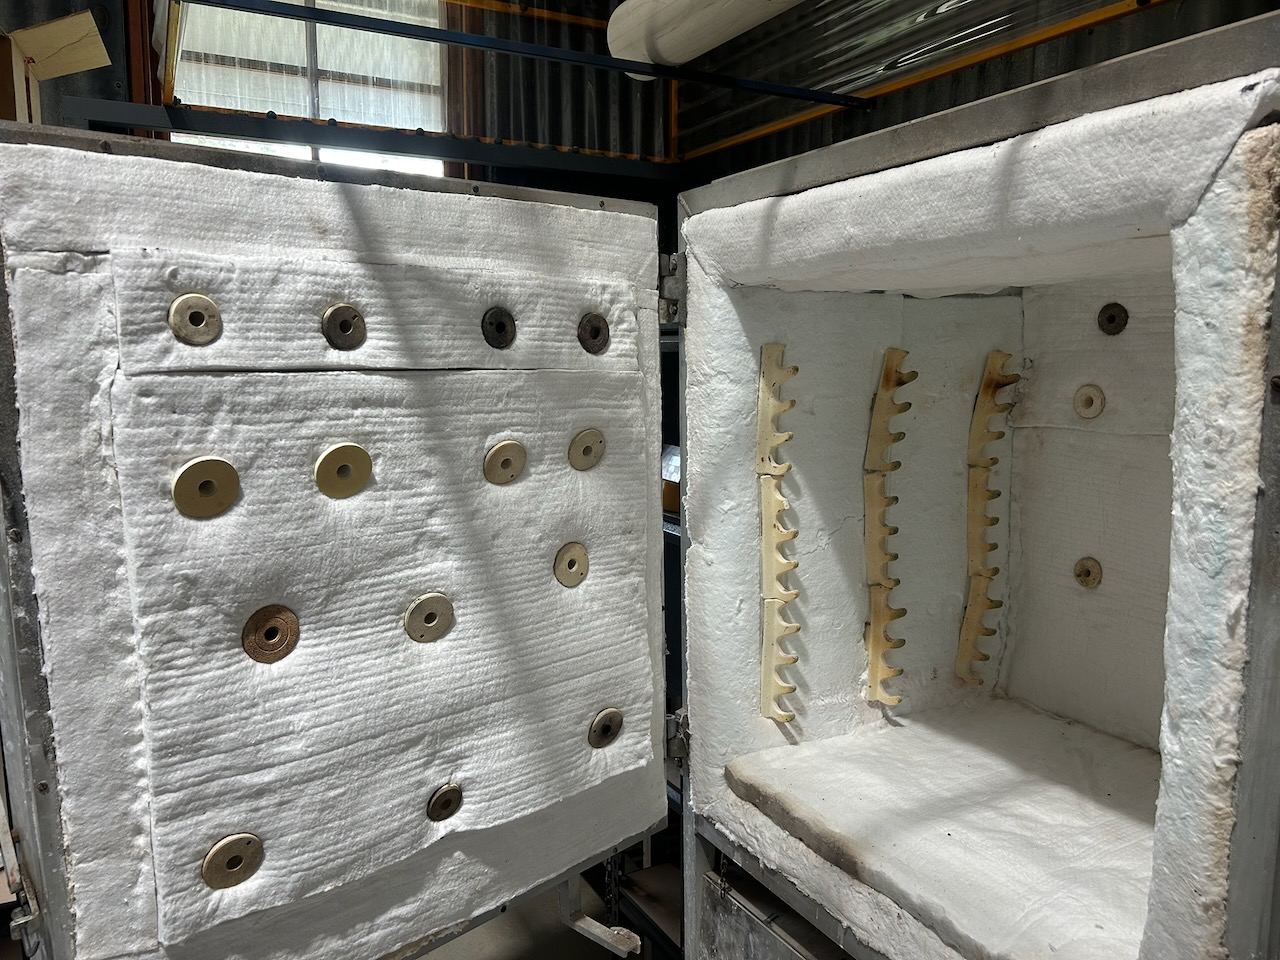
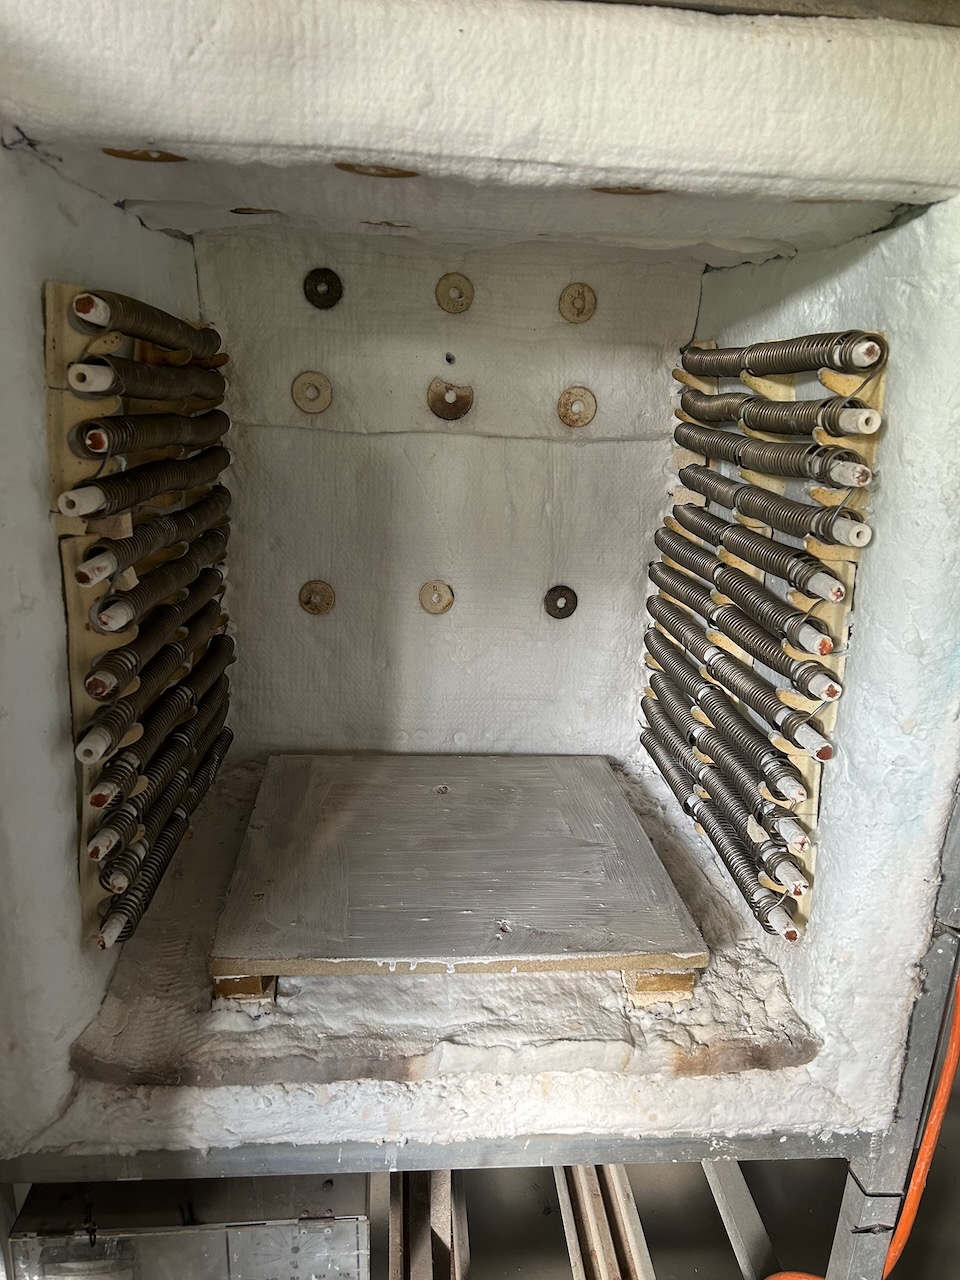
Now, with the element rods in stock, I recovered 2 rolls of ceramic fibre that went through the fire, (completely unaffected, but just a bit blackened, and now without their cardboard boxes), a box of 2nd hand refractory insulating bricks, slightly burnt, blackened and box-less, and a box of recycled and charred ceramic anchors, that also survived the fire. I only needed to buy some new stainless steel bolts to hold the anchors in place.
The largest expense in rebuilding an old kiln like this is my labour, so I’m saving a lot of money there. The other big expense is the cost of the bulk Kanthal wire, so that I can wind up a new set of electrical heating elements on the lathe. I have done all the calculations and decided to design the new elements to use the best grade Kanthal A1 resistance wire, and run the whole thing at very low ’watts per sq. millimetre’ rating. This requires using more of the most expensive wire, but gives a set of elements that will last a very long time and make the kiln more or less maintenance free. The wholesale cost to me to purchase the bulk wire is close to $900! Before spending time to wind them on the lathe and form them into hairpin element units.
I once had a phone call from a kiln maintenance guy who’s job was to go around the Schools, Colleges and Art Schools servicing pottery kilns. He told me that he had been doing this job for over a decade and had seen my kilns sitting there in the various kiln rooms, and he had never been asked to look at them. Constantly working on other kilns in those facilities. Apparently, my kilns had never needed any servicing.
It’s pretty unheard of for a pottery kiln like that to go for 10 years, fired 2 or 3 times a week, and not need any elements replacing or other work. He asked me directly, “What are you doing?” “How come they last so long?” I was pleased to hear that he was so impressed. I told him that I simply used the best material available and plenty of it, and did the best good job that I could. I don’t want to be going out doing maintenance. I want the things to last forever. There was one brand of kiln that had the reputation for having a certain degree of built in obsolescence. Those were his bread and butter, he told me. He loved the fact that they were rubbish,
I built around 300 kilns in my time over the 50 years. When I started my kiln building business decades ago, and rang the ‘Kanthal’ wire distributor, to order their best quality A1 high temperature wire. I often got the message that they would have to order it in, “as no one uses that wire in Australia very much, so we don’t carry very much in stock!” I’d have to wait up to 2 months for the next shipment. It opened my eyes to the fact that other kilns being made here at that time, didn’t have the best grade of wire in their elements, possibly ensuring a certain degree of ongoing maintenance calls into the future?
I don’t actually like doing kiln work. I did it out of necessity. It was one of the ways that we found to earn the extra money that we needed to pay off the mortgage. Making pots was so much more fun, but financially unreliable. However, although I didn’t enjoy the kiln work. I found ways to make it more mentally challenging, by always looking to do things a different, or better way. I developed all my own designs. Got both a gas license and an electrical license to keep it all legal. Taught myself how to weld both stainless steel and aluminium, using a sophisticated solid state, AC/DC, pulse, TIG welder, and do all the sheet metal, as well as the electronics and learnt CAD design software. There was always something challenging to learn to keep it ‘alive’ and interesting. So although it wasn’t my first choice, it was better than all the other alternatives. Like packing the shelves at the supermarket, being a delivery driver, or becoming a full time ceramics teacher. I was happy to just go into town one day a week to teach my special subjects at the Art School. I really enjoyed that. But it was only one day a week. I could cope with the driving once a week. I couldn’t see myself doing it every day. It was a 2 to 3 hour trip each way. A waste of my life if I was to do it full time. I couldn’t bear the thought!
So we found half a dozen creative ways to cobble together a risky, uneven, slightly stressful, but fully committed and involved creative life. It turned out that we ‘got away with it’! We managed to get through life without ever having to get a ‘real’ job! I was never on the dole either! Completely independent. Most of the other potters that we knew had a partner who had a full time job to smooth out the economics. But we were one of only a few couples, who survived working together with no one earning a safe ’salary’. We were both fully involved in this erratic, ceramic based, artistic engagement with self reliance and creative mini-capitalism. It taxed our inner resources both physically and intellectually, but was ultimately very rewarding in exact proportion to the effort that we put into it! I’ve never been motivated by the desire for money in itself. It’s necessary for a basic level of comfort, but after that it consumes people. Someone once told me that money is like manure. It has a great fertilizing effect when spread evenly, but stinks when it’s piled up in great heaps!
So all this life experience has now come in handy in the refurbishment of this ‘free’ kiln that was destined for the tip. Is anything ever really free?
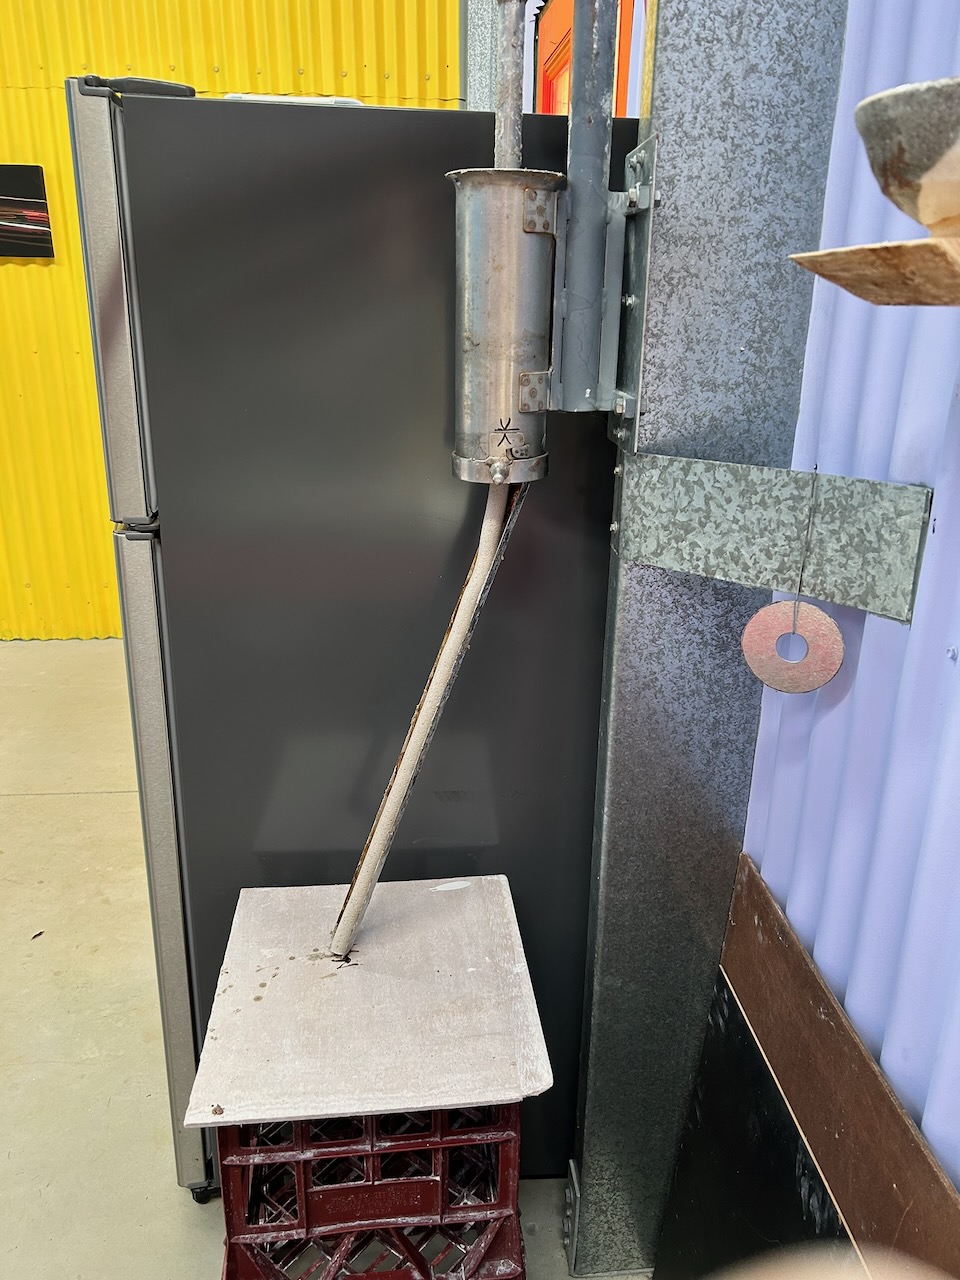
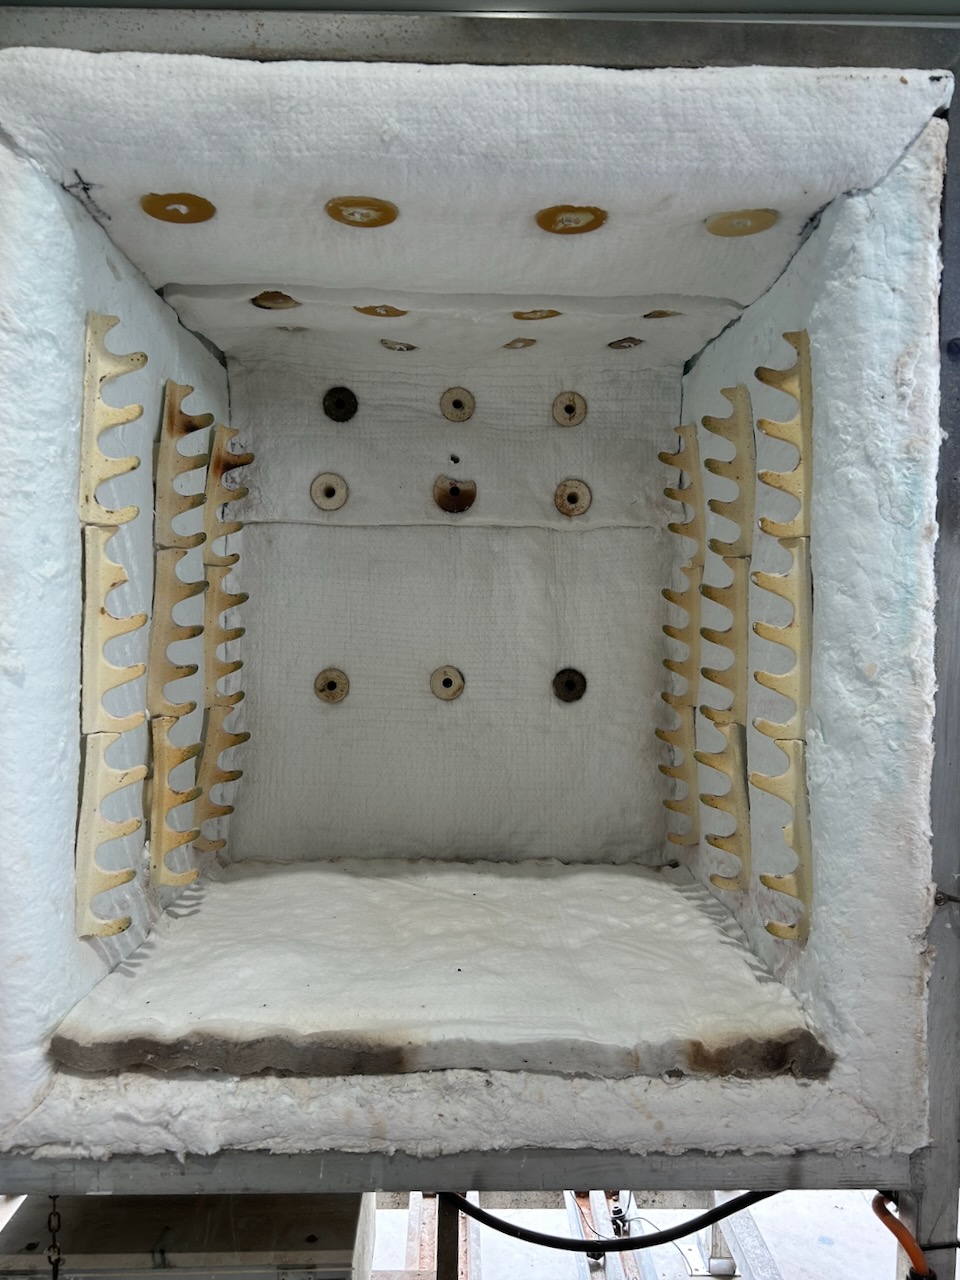
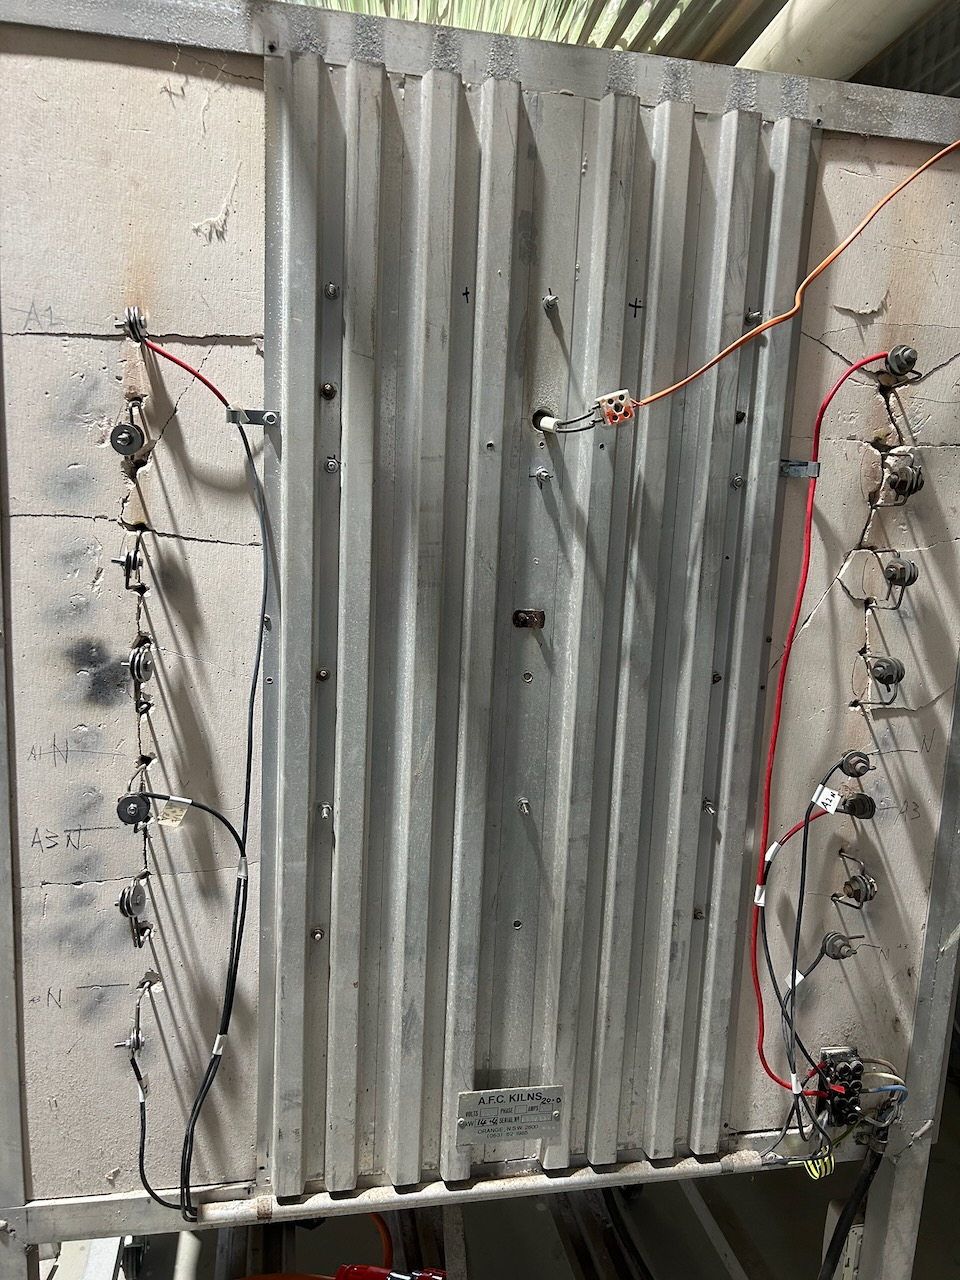
I laid the kiln over onto it’s back, so that I could take out the broken and collapsing roof fibre and replace it, without the whole brittle ceramic fibre roof collapsing down on me. I only replaced the hot face and the 1st of the damaged back-up layers of fibre. However, I changed the overall layout of the ceramic anchors to triple the number. It was the lack of sufficient anchors that lead to the roof sagging and collapsing. Next, I stood the kiln up and added another hot face layer of 1400oC ceramic fibre on top of the shattered and spalling existing back wall. Best not to muck around with old fibre where possible, so I just covered it with a new layer. I also added double the number of ceramic anchors to support it. Plus, the extra 25mm of hot face fibre that I added will make the wall more thermally efficient.
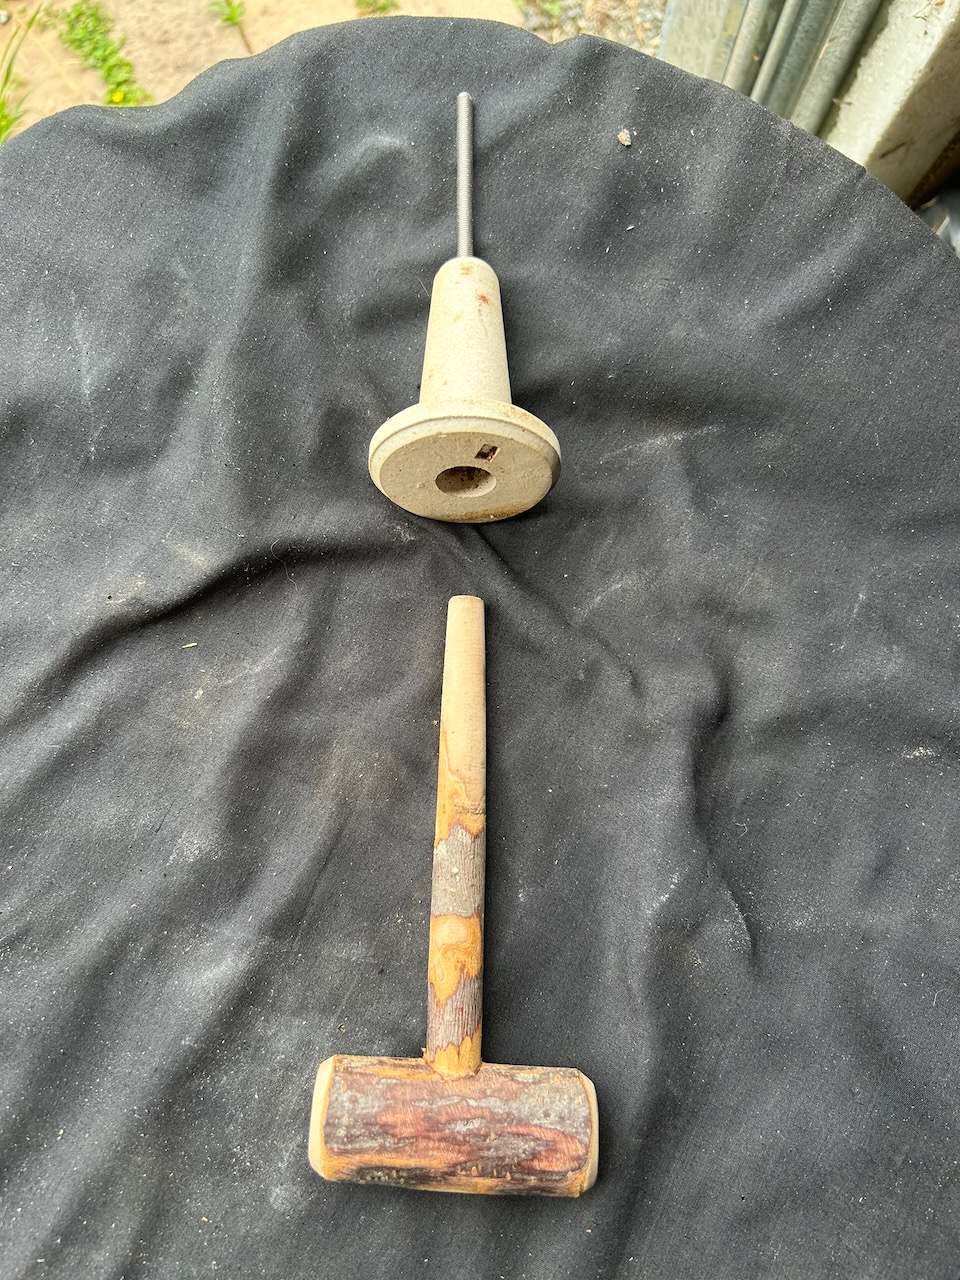
I made a set of tools to do the fibre work. I made a special little plunger out of fruit tree pruning wood, to hold the stainless steel bolts in place while being installed. Its a gorgeous little home made improvisation to make a fiddly job a lot easier. I took the trouble to make a tapered mortise joint to hold it together. Sweet! No one knows it exists, just me. I know how beautiful such an unimportant tool like this can be. I enjoy the fact that it exists, that’s enough.
I added another layer of fibre to the floor, but didn’t touch the side walls, as they are intact, and well supported by the element rod support brackets. They will last for a while yet. 3 of the element rod support hooks are broken off. As these where custom made, and are no longer available, rather than go back to basics and make a new set from scratch. I will make 3 small support blocks to hold the rods in-situ in those spots.
I was lucky that we found a few old re-cycled ceramic anchors in the ashes and rubble after the fire. Janine and our friend Trudie hunted around for them at some point when I was fully occupied doing something else during the chaos. She knew that they had a value and might come in handy in the future. Now 6 years later, they have. Thank you Janine and Trudie ! Some are chipped and have a bit broken from the rim, but still perfectly functional, if used with care.
I have wound the new heating elements on my old lathe. I bought it 4th hand. It was at one time in use at the naval shipyards in Sydney harbour – a very long time ago. It was actually made in Melbourne by McPhersons, most probably in the 50’s or 60’s? So it’s as old as me!. That’s old! But very solid and reliable. (it, – not me!)

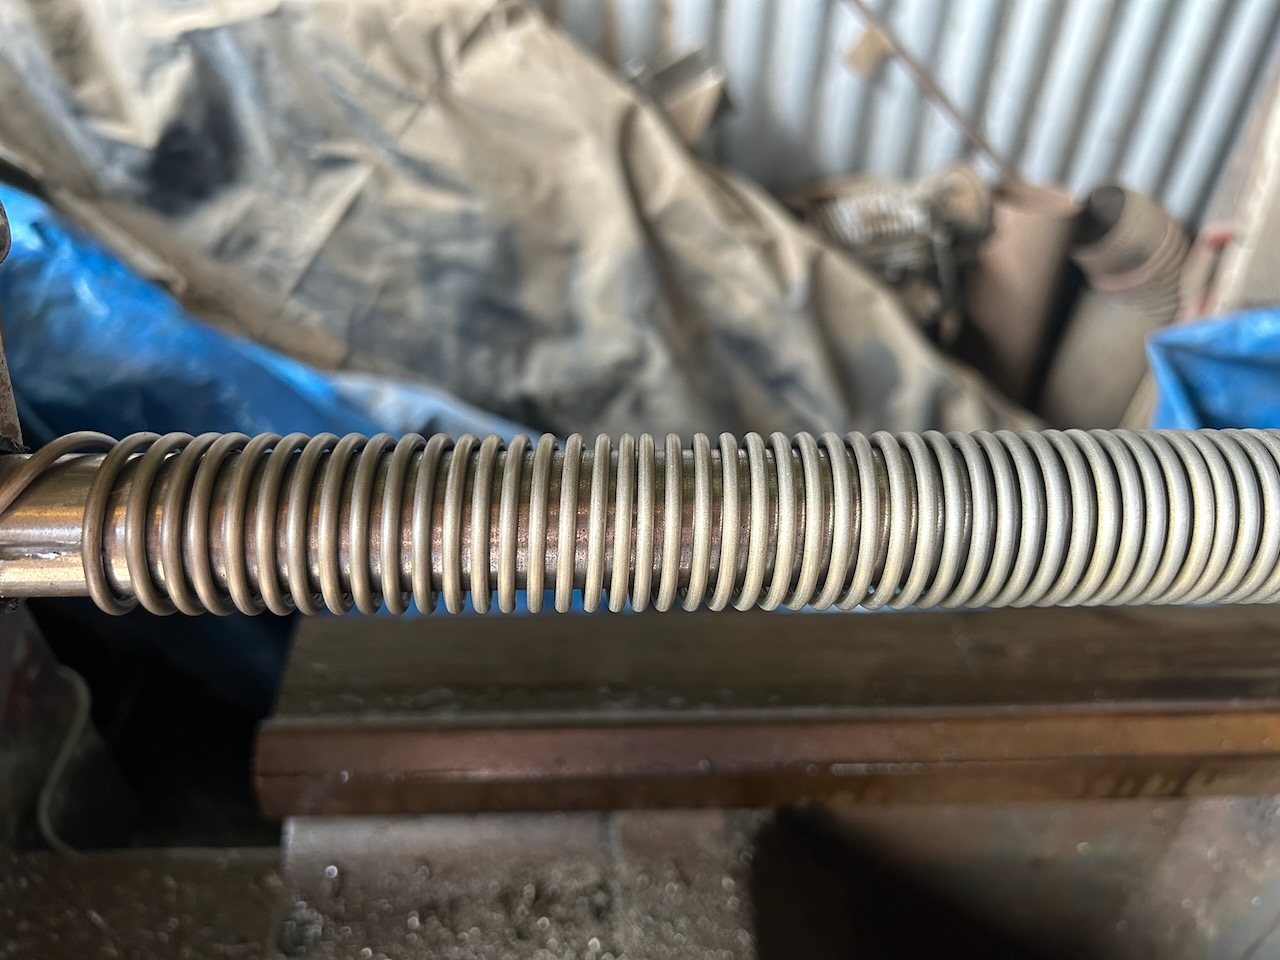
The next job was to renew the door seal, to create a secure tight fit during firing to protect the metal around the door frame. Once that is done I will use the oxy torch to form the heating element coils into ‘hair-pins’, I get them red hot , so that they become pliable, then I can bend them over and double them up into ‘hair-pins’. I can then fit them into the kiln on the ceramic rods, with both terminal ends sticking out the back of the kiln where they can be linked up to make full circuits.
New door lining and door seal installed
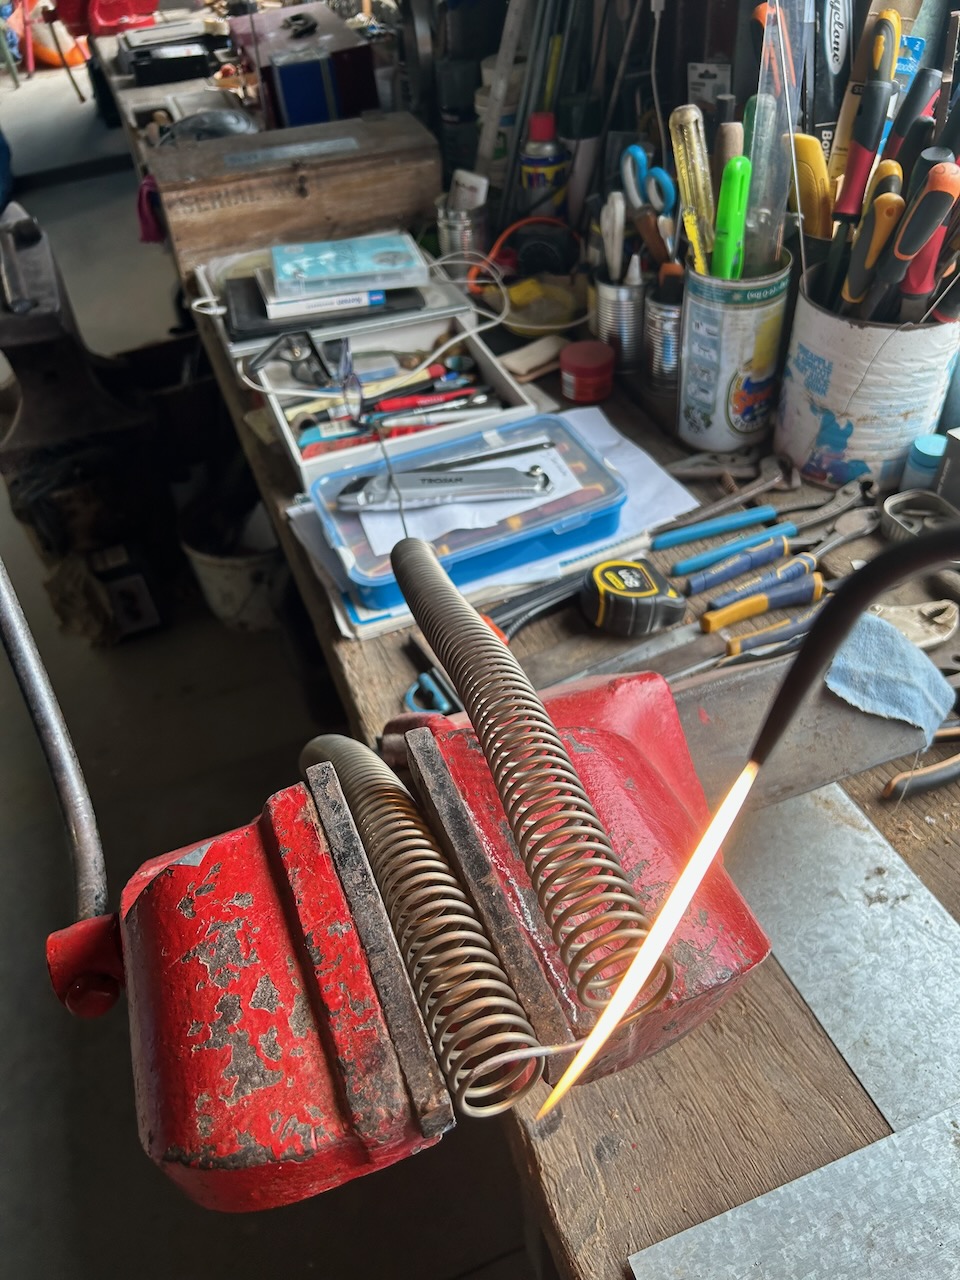
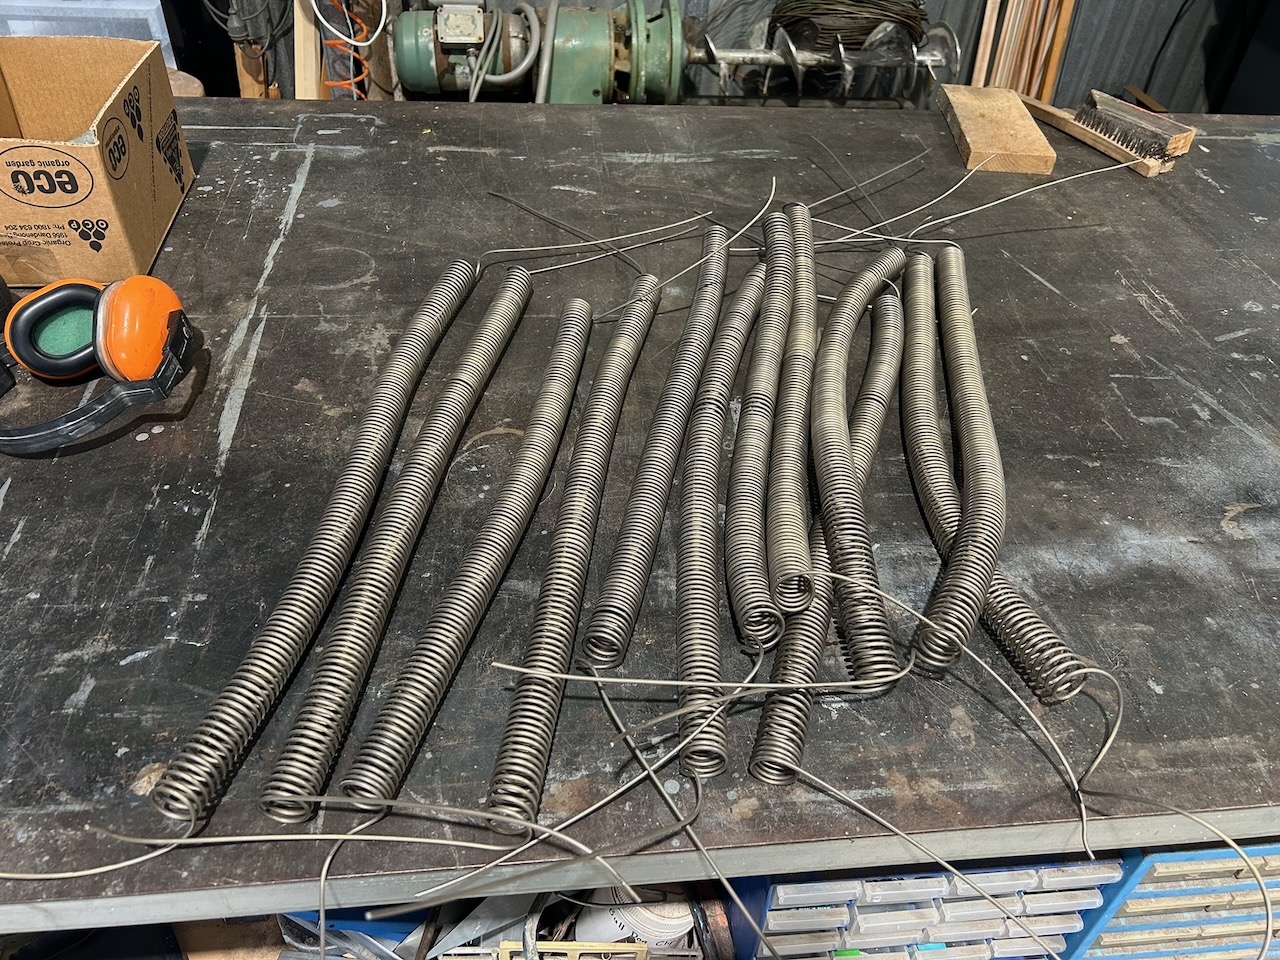
Forming the ‘hair-pin’ heating elements from the straight coils.
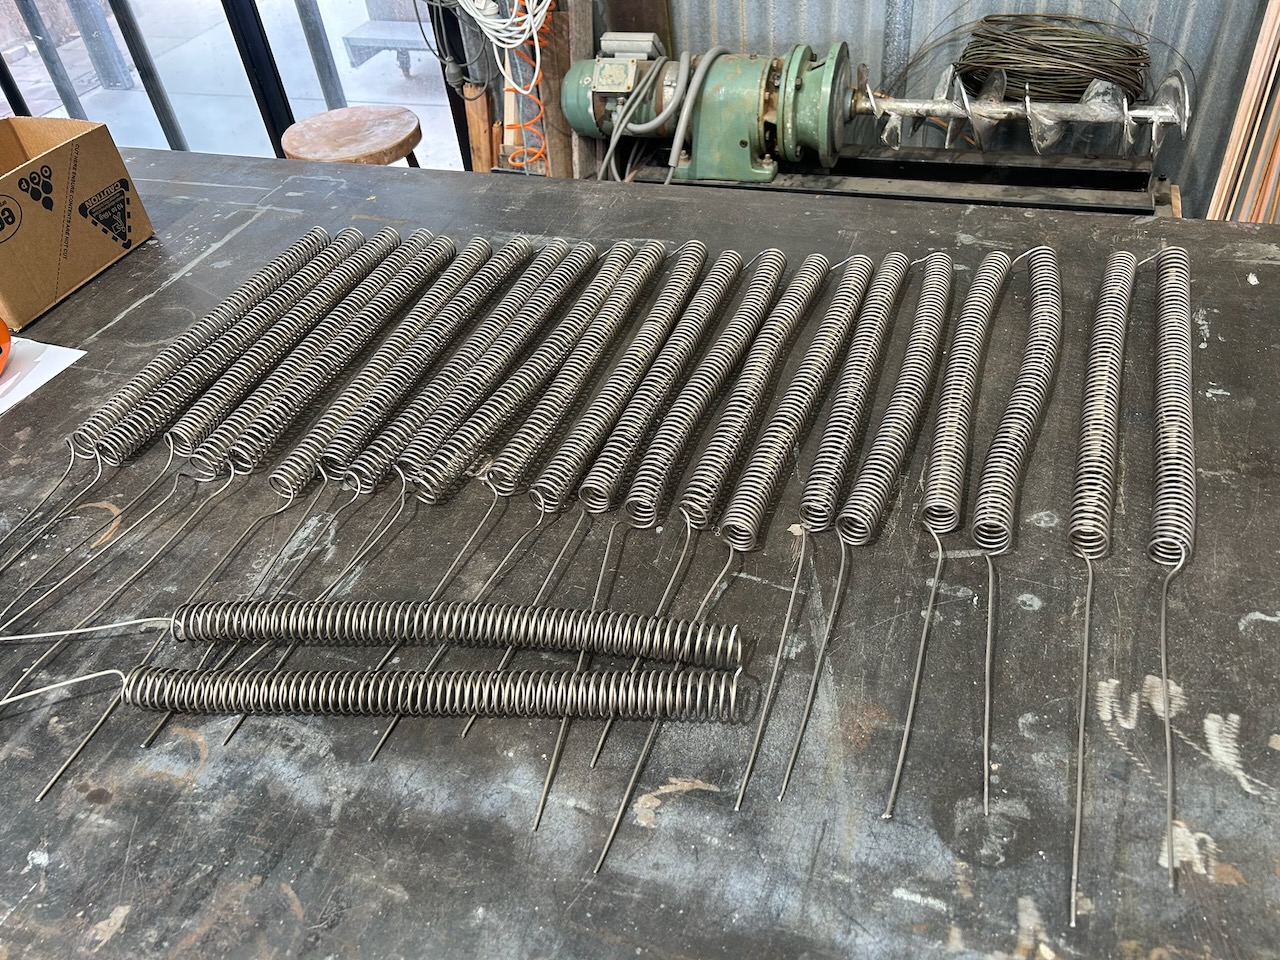
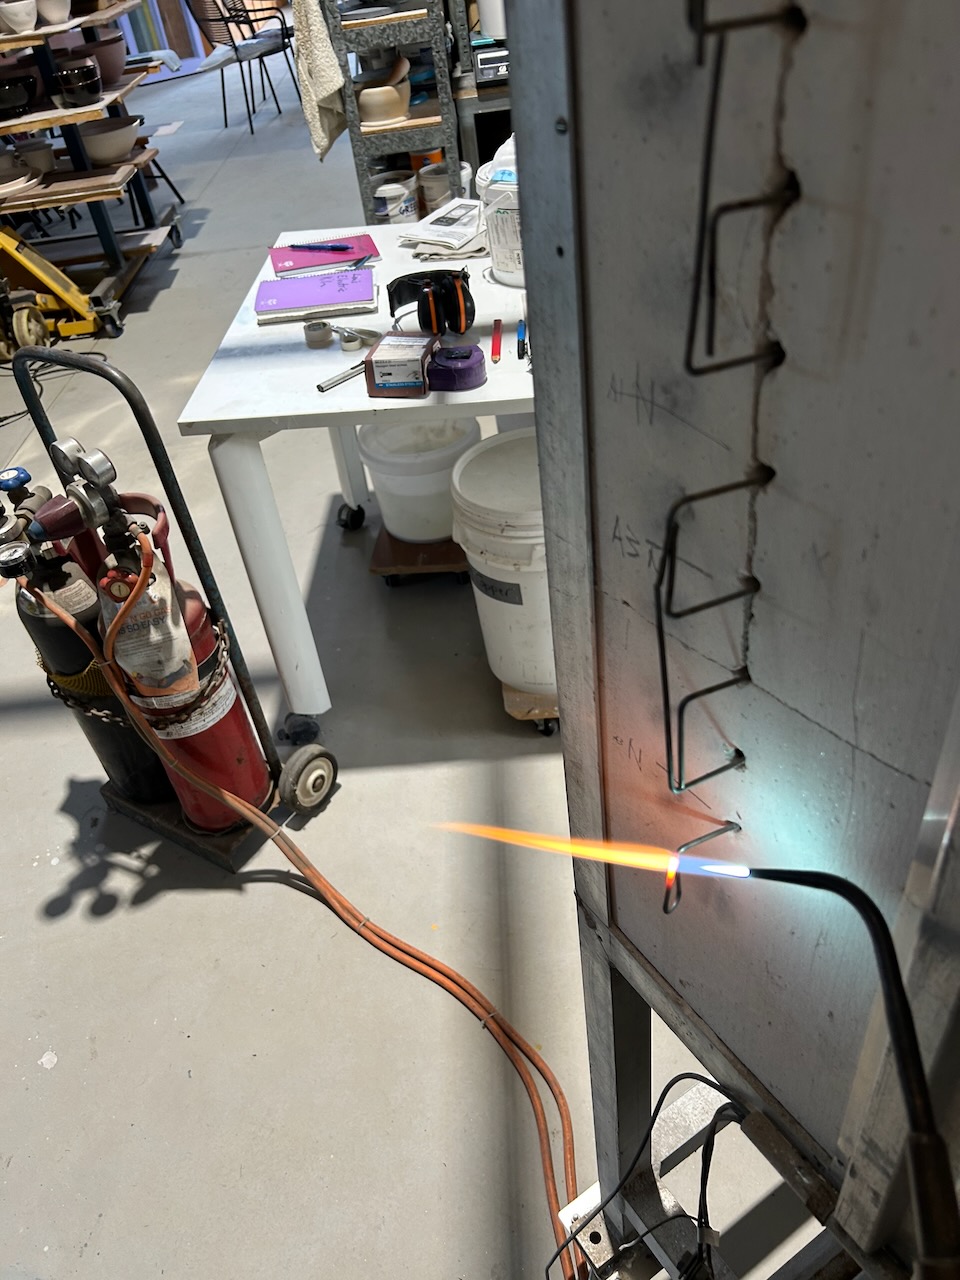
Heating and bending the rear element ‘tails’ into paired ‘loops’, so that I can link them together to make heating circuits of pre-calculated ampage and resistance to give precise heating of the kiln.
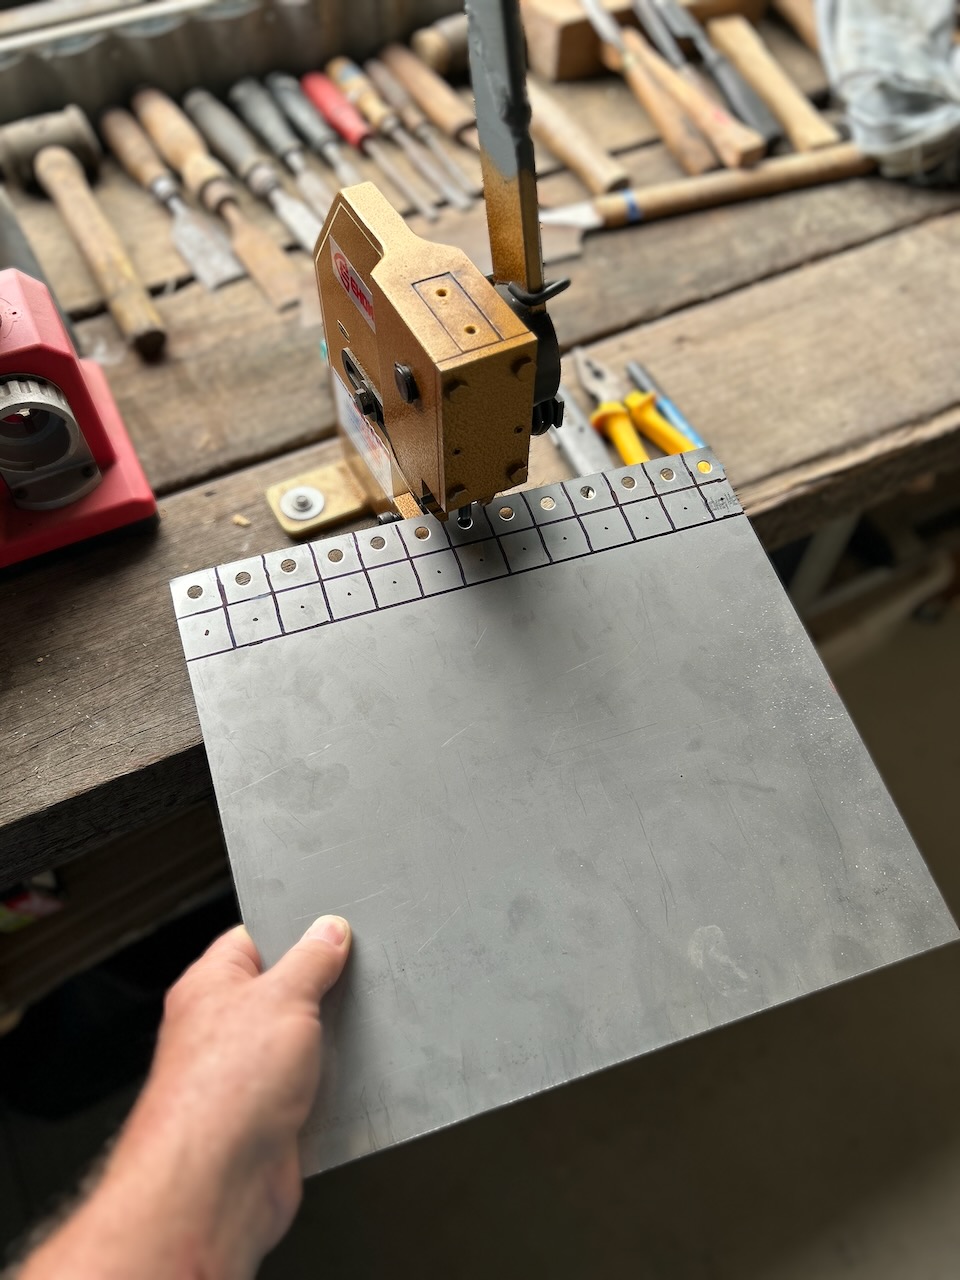
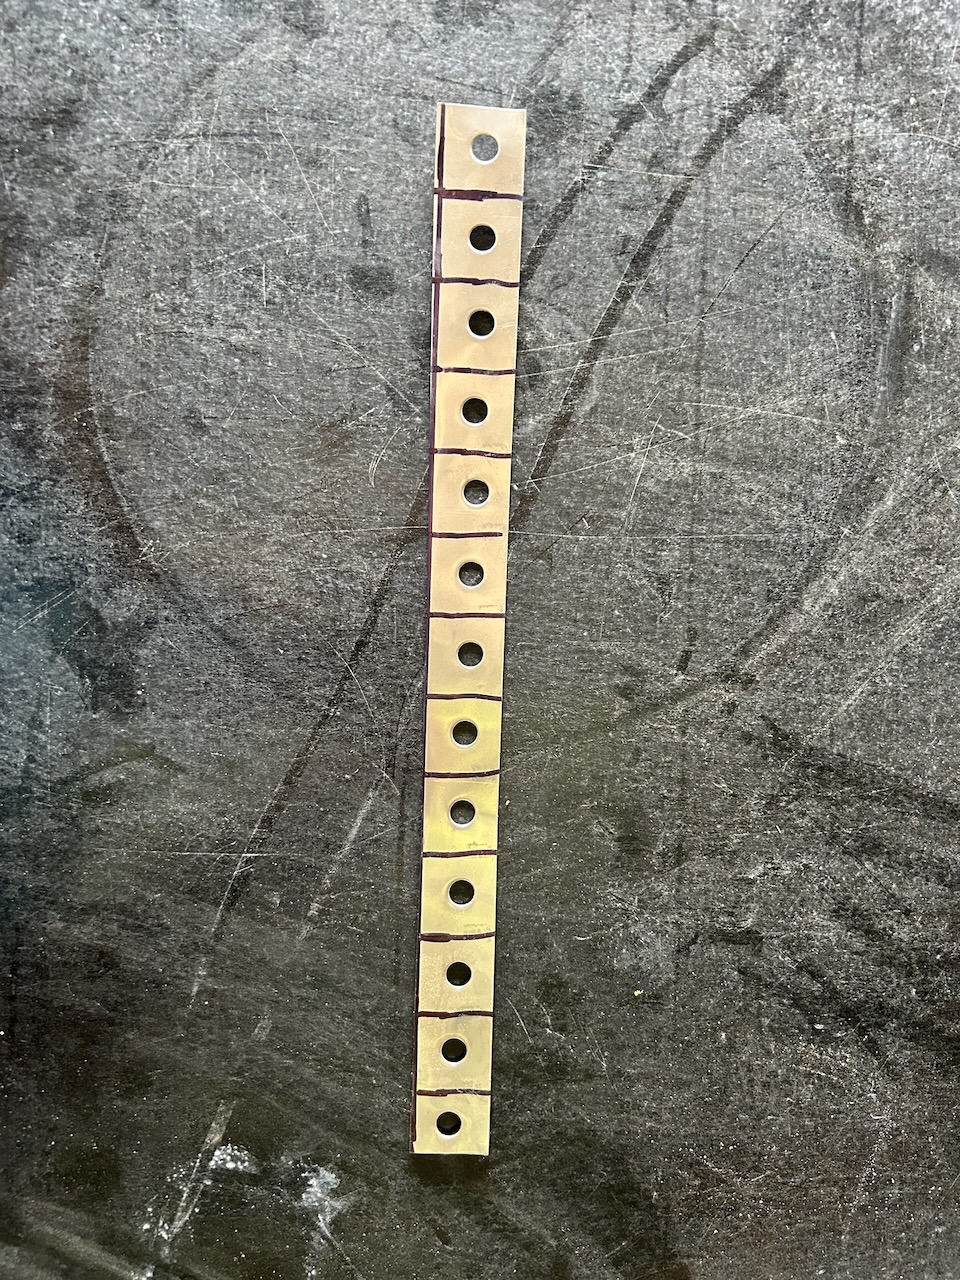
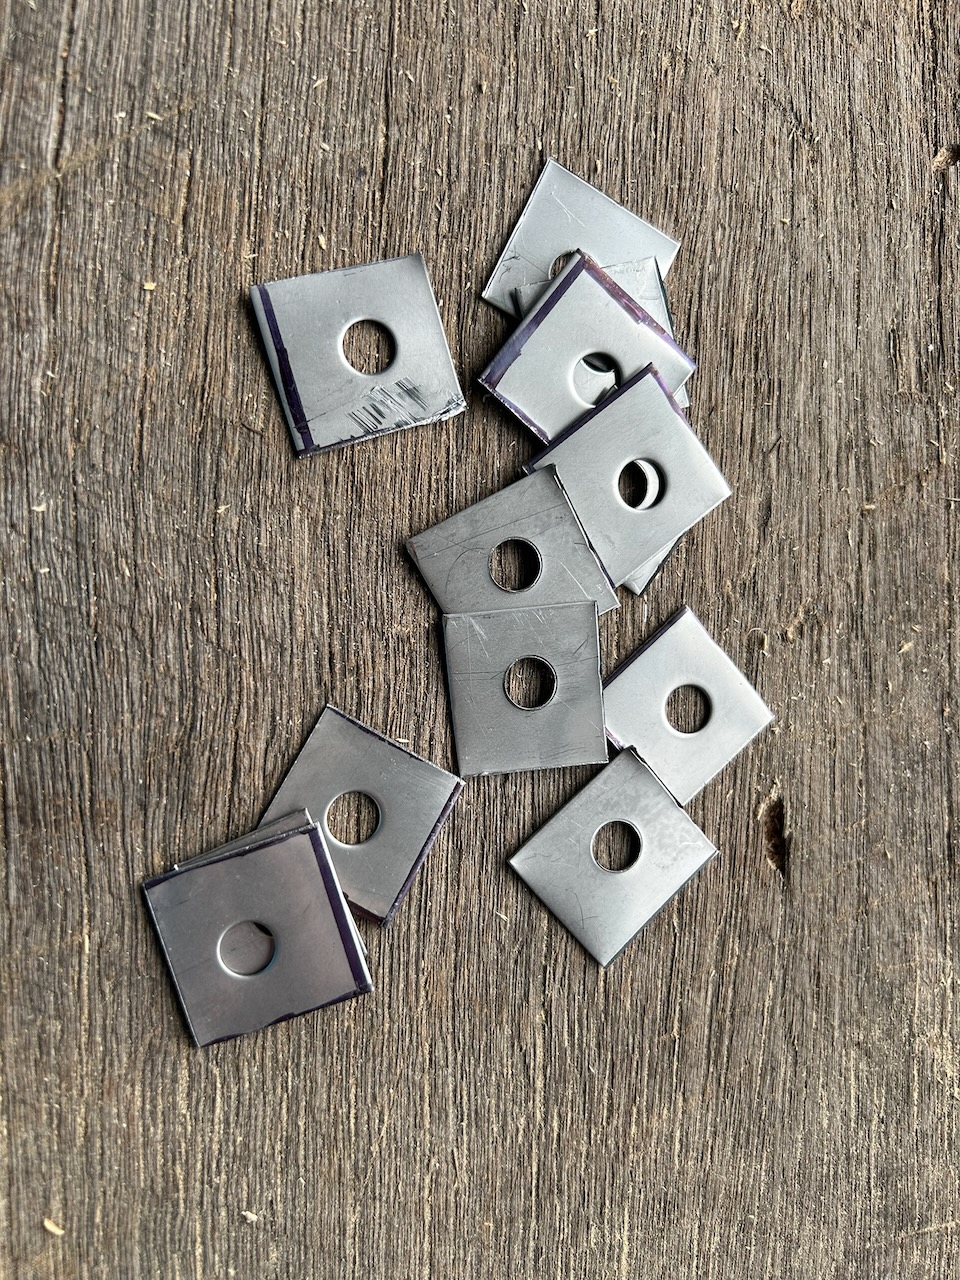
I have all the stainless bolts that I need, but I realised that I didn’t have enough of the correct stainless steel washers to do the connections. So I made some! As you do!
I’ve cobbled together this refurbished electric kiln for a little bit over $1100 for parts only. It is a bit less than 400 litres with a packing space of 320 litres, or 12 cu. ft. in the old units. I’ve upped the power from 16 to 20 amps x 3 phase, and used the very best quality Kanthal A1 element wire.
I have seen new kilns of this size for sale online for over $20,000. Quite a saving. This is how we survive, by the generosity of others, to whom I am eternally grateful, plus some good luck and a lot of scrounging.
I consider myself so lucky to be given this ‘free’ kiln. I have had to dig deep into my past skills and recover them from memory. I haven’t made kiln elements since before the fire, maybe 8 years ago, when I retired from building electric kilns. I am very lucky that my ancient old lathe survived the fire! Lucky, because it was in the old barn that burnt in the fire. Fortunately, because I stayed to defend, I was there and able to put most of the fire out, and control it to some extent, so that only half of the barn burnt. I said lucky, because the lathe could have been in the other half. What I lost was a lot of dried ceramic materials in paper ply bags.
I can’t remember the last time that I made kiln elements. But it’s all coming back to me, bit by bit, as I think about what the next step is. Luckily, I haven’t made any drastic mistakes!
My last job was to link up the element tails at the back of the kiln with stainless steel bolts and washers to complete the circuits. That done, I was able to pug it in and give it a run. My ‘tong’ tester revealed that I made a very slight error in my calcs, as the ampage on each circuit turns out to be 21 amps rather than the 20 that I had calculated. No problem. The kiln will be 4% more powerful.
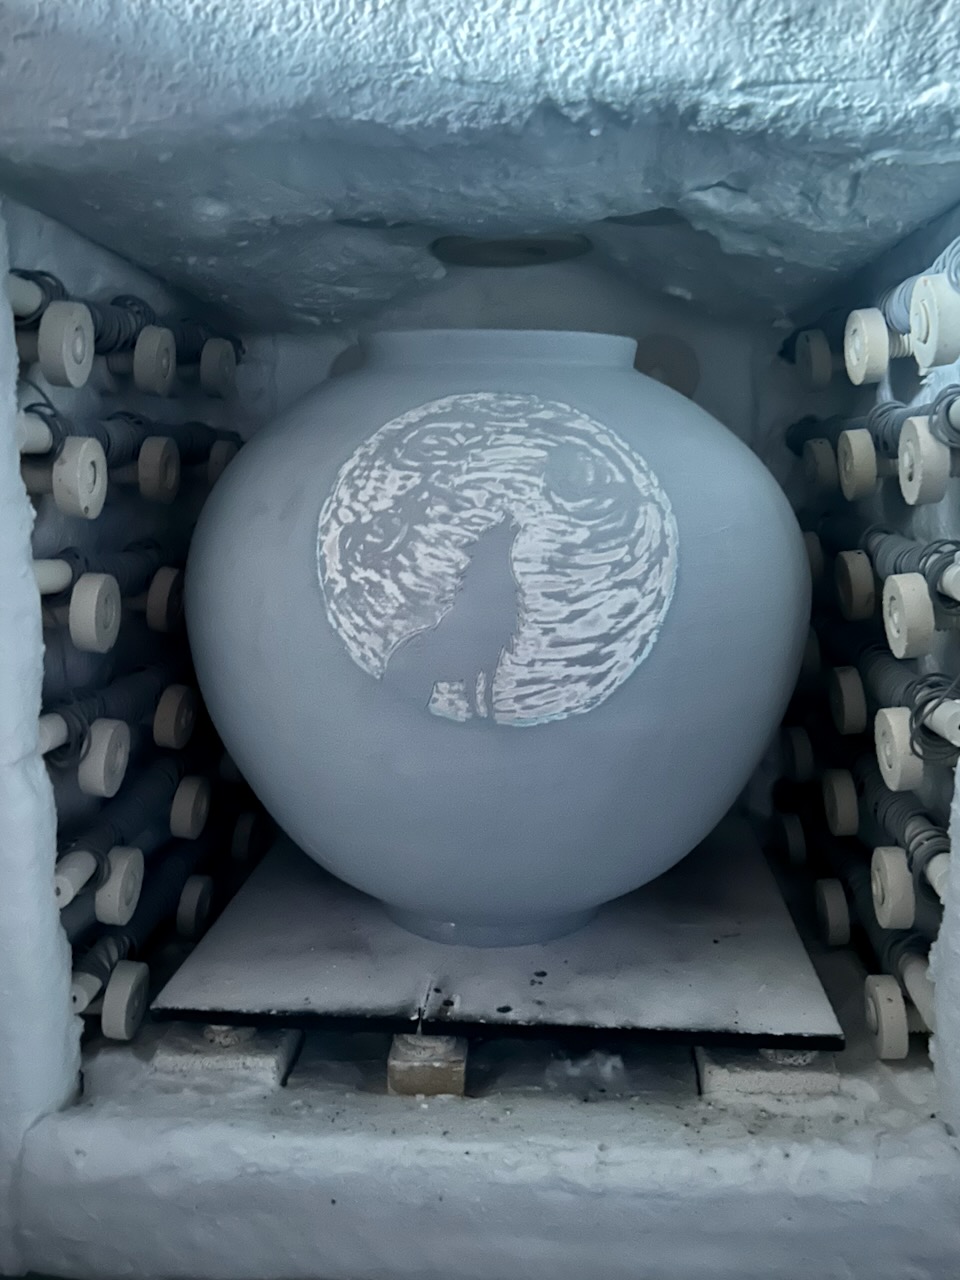
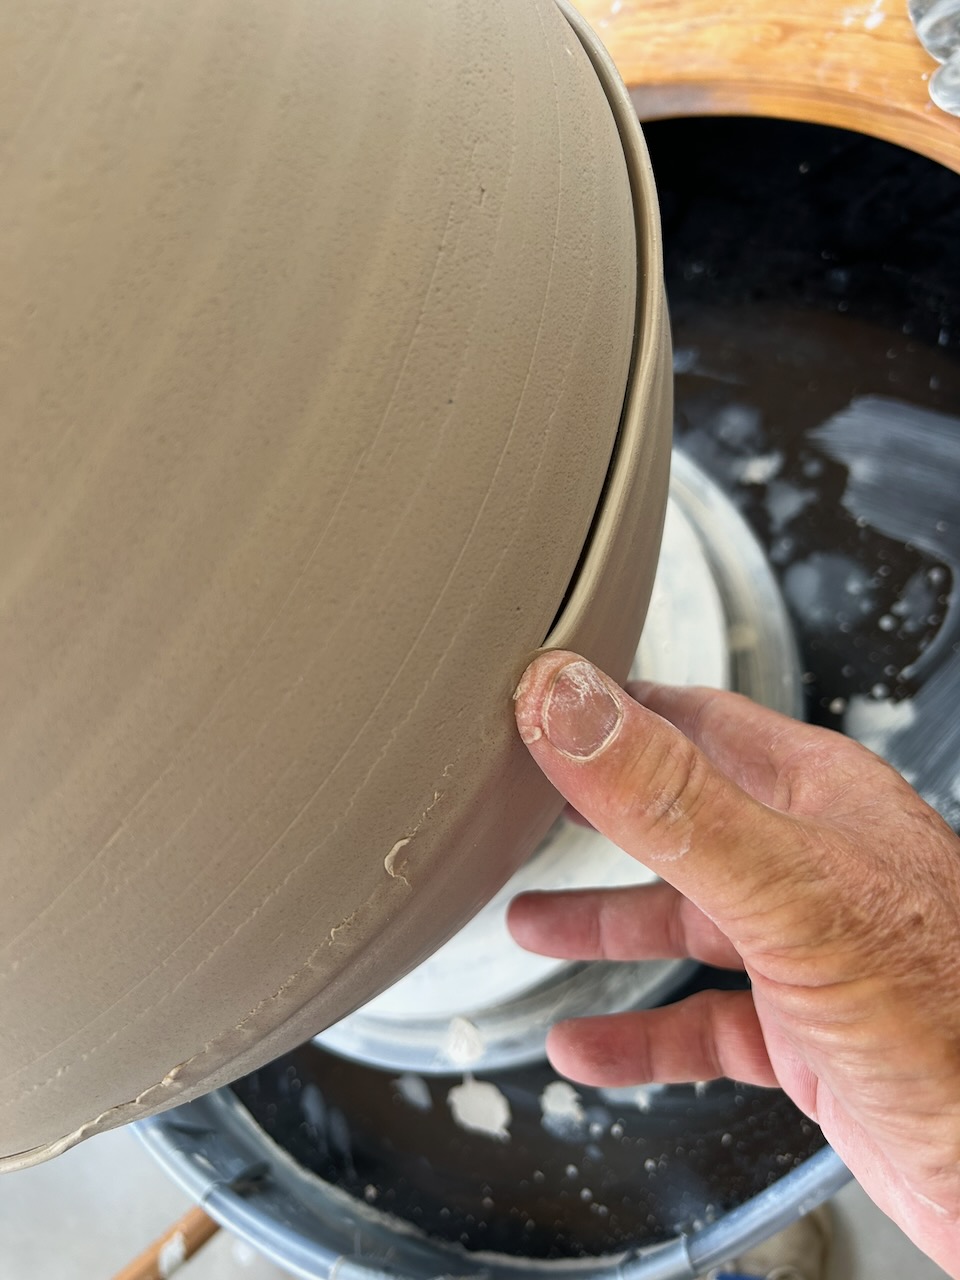
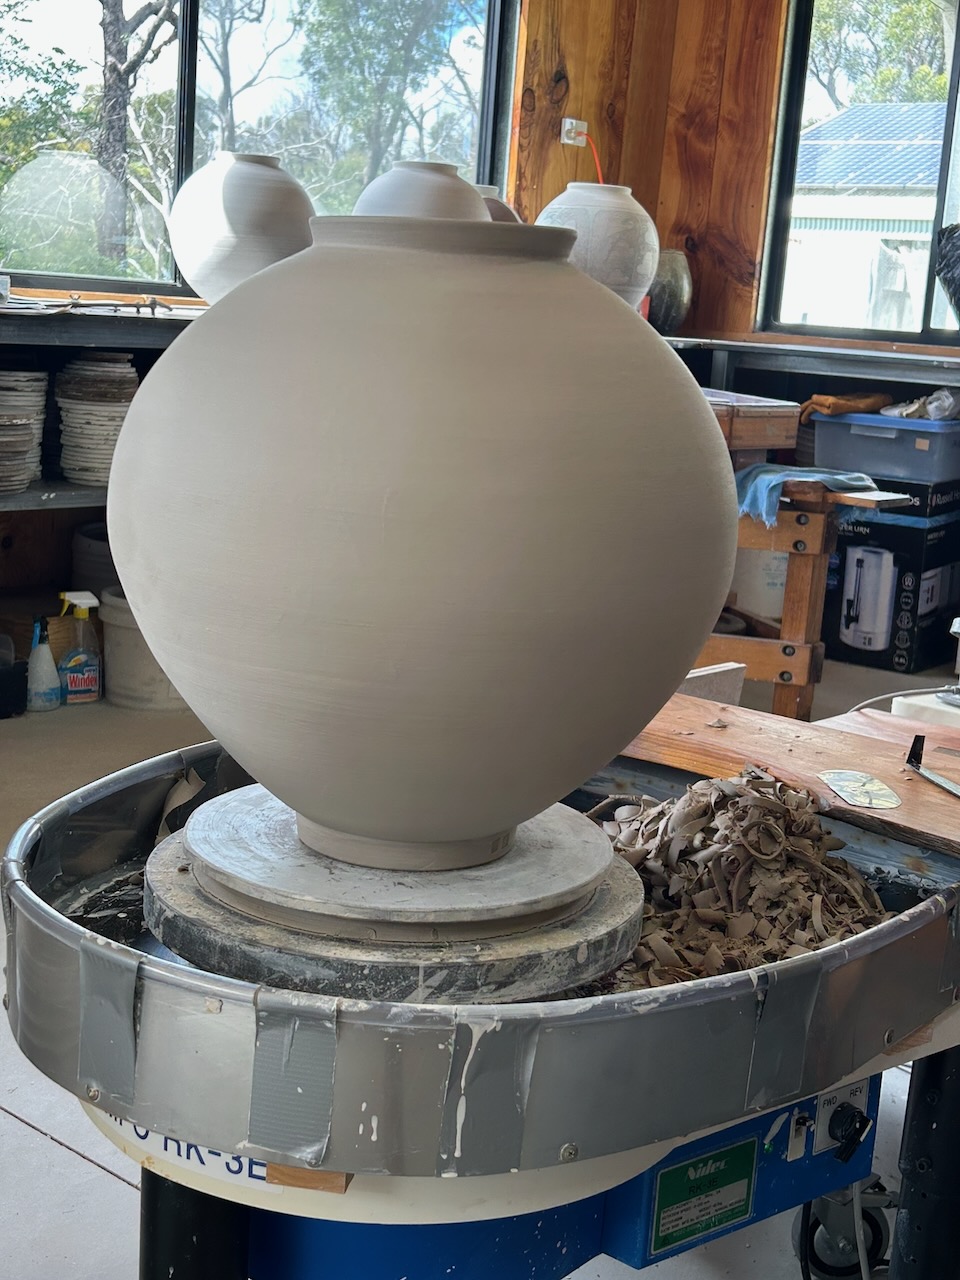
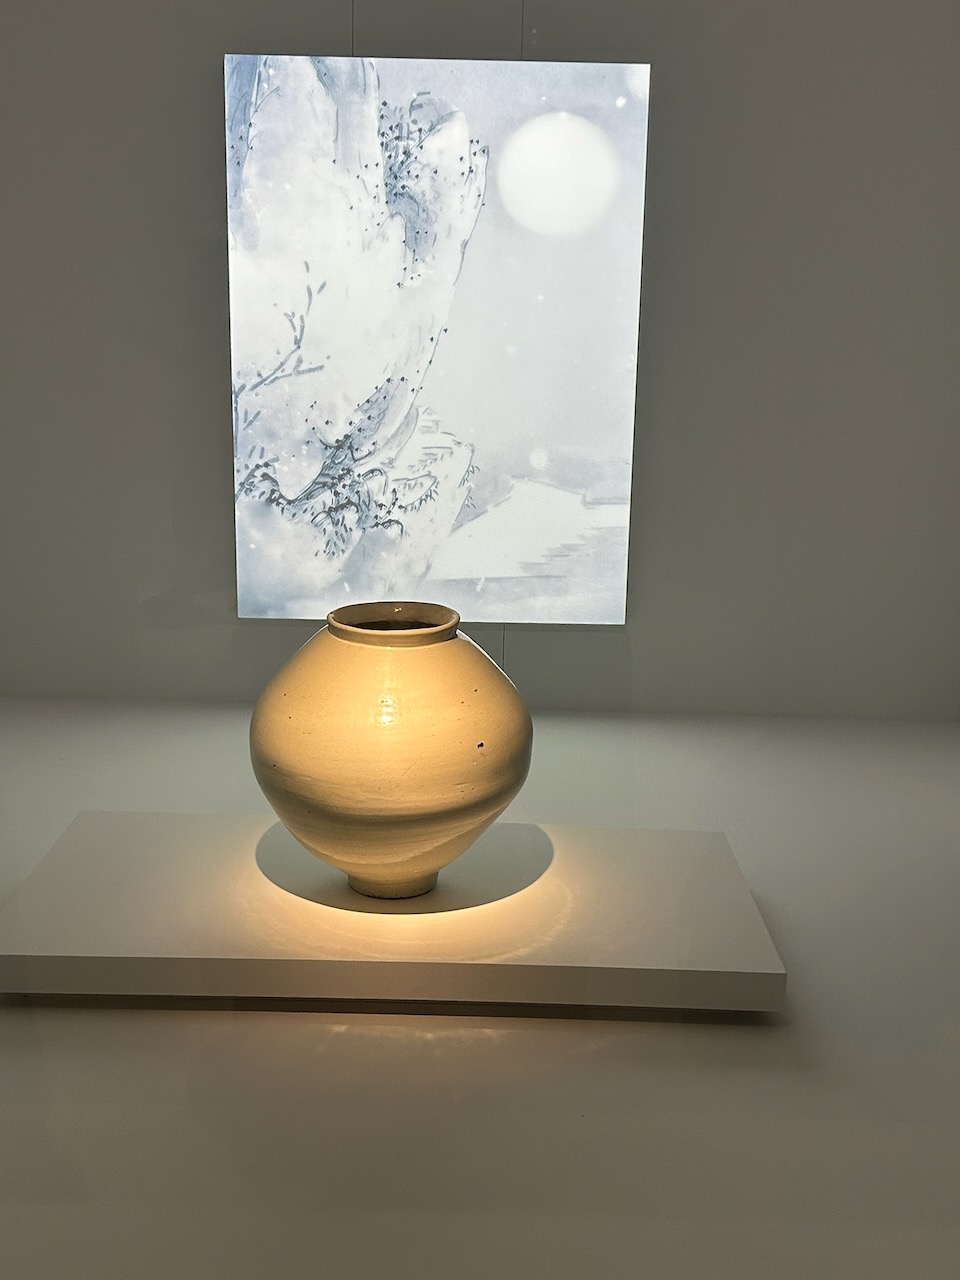
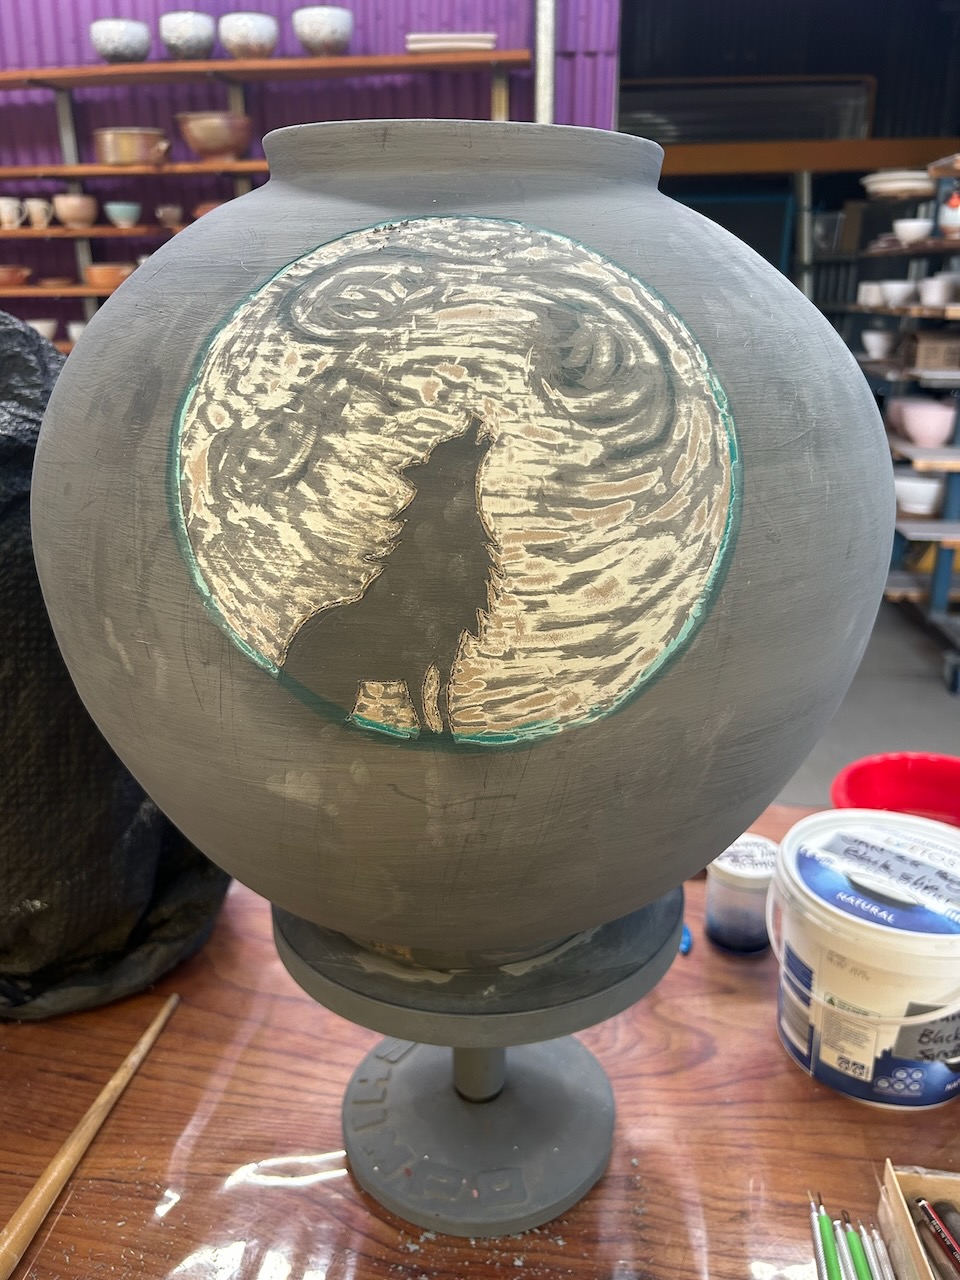
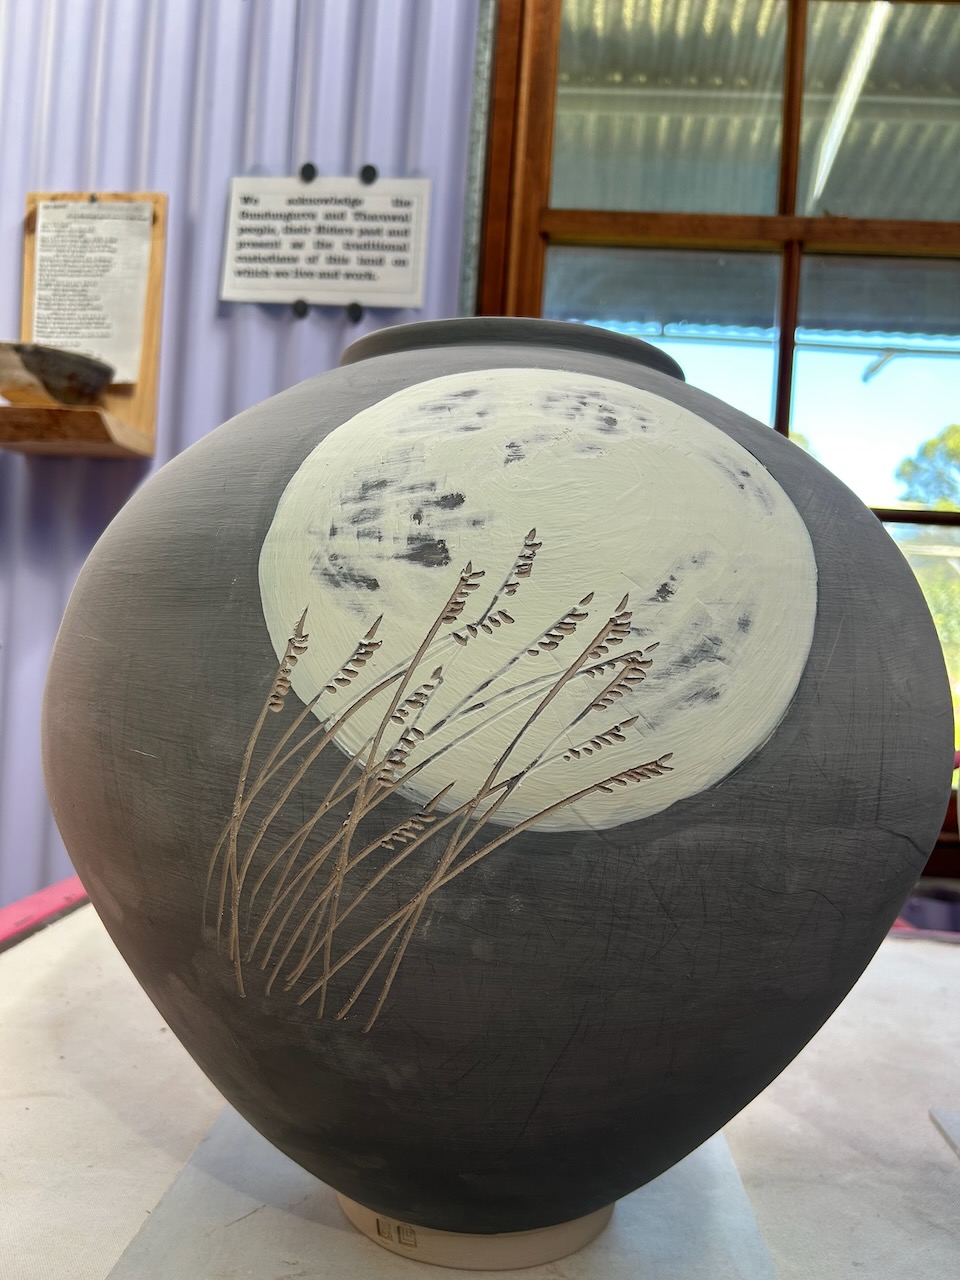
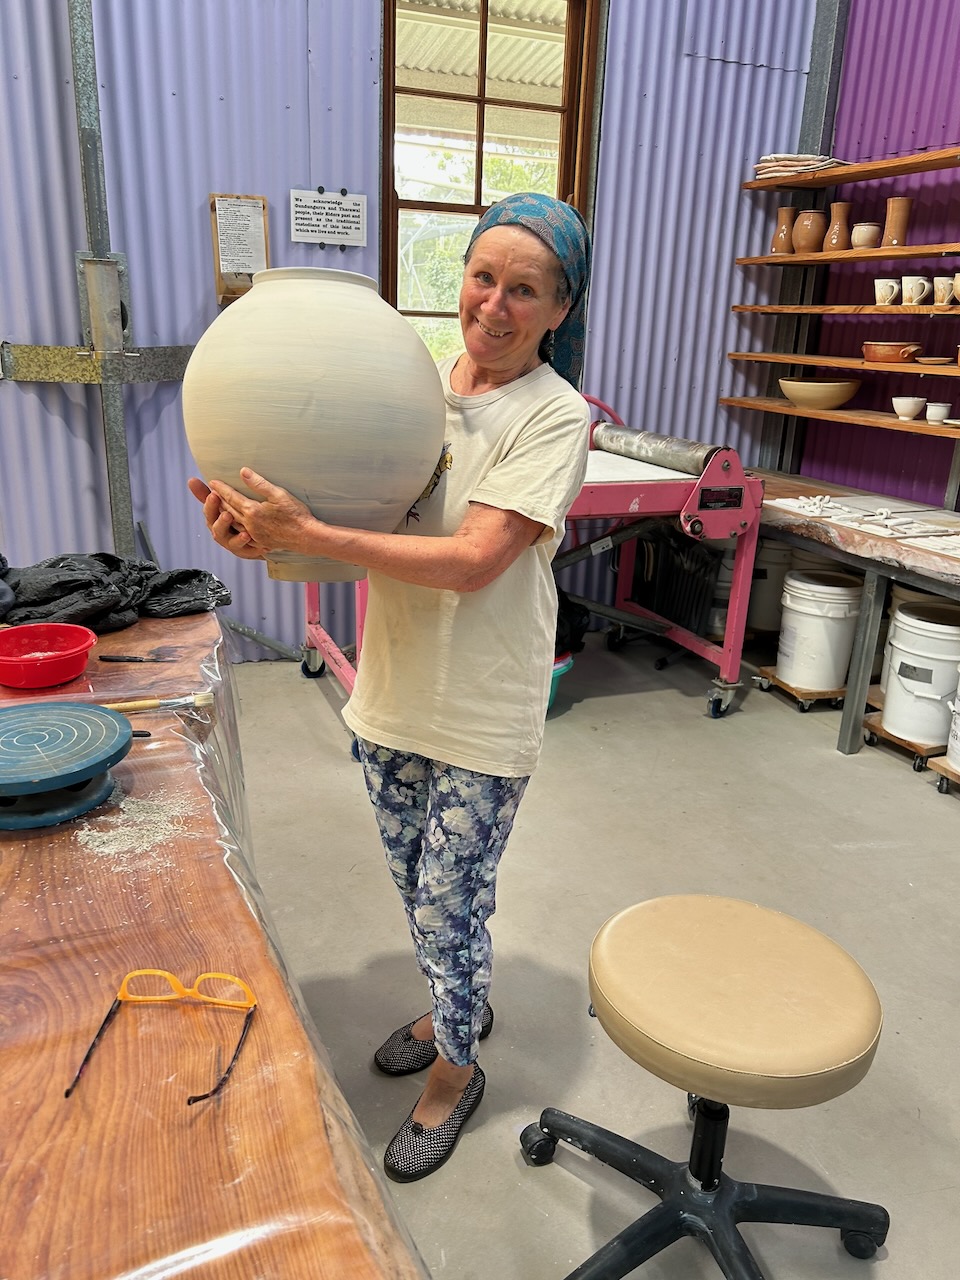
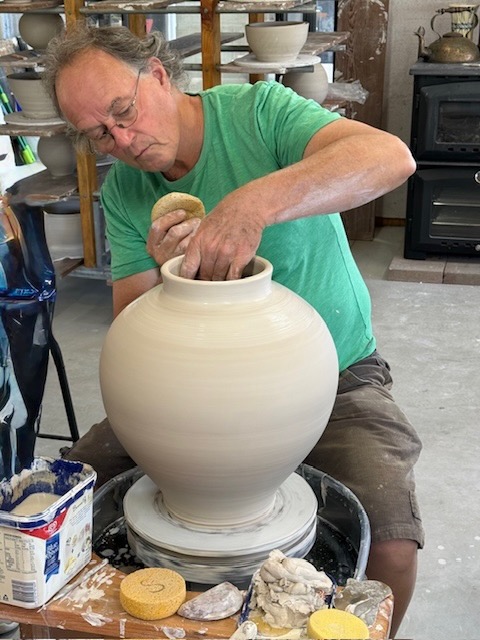
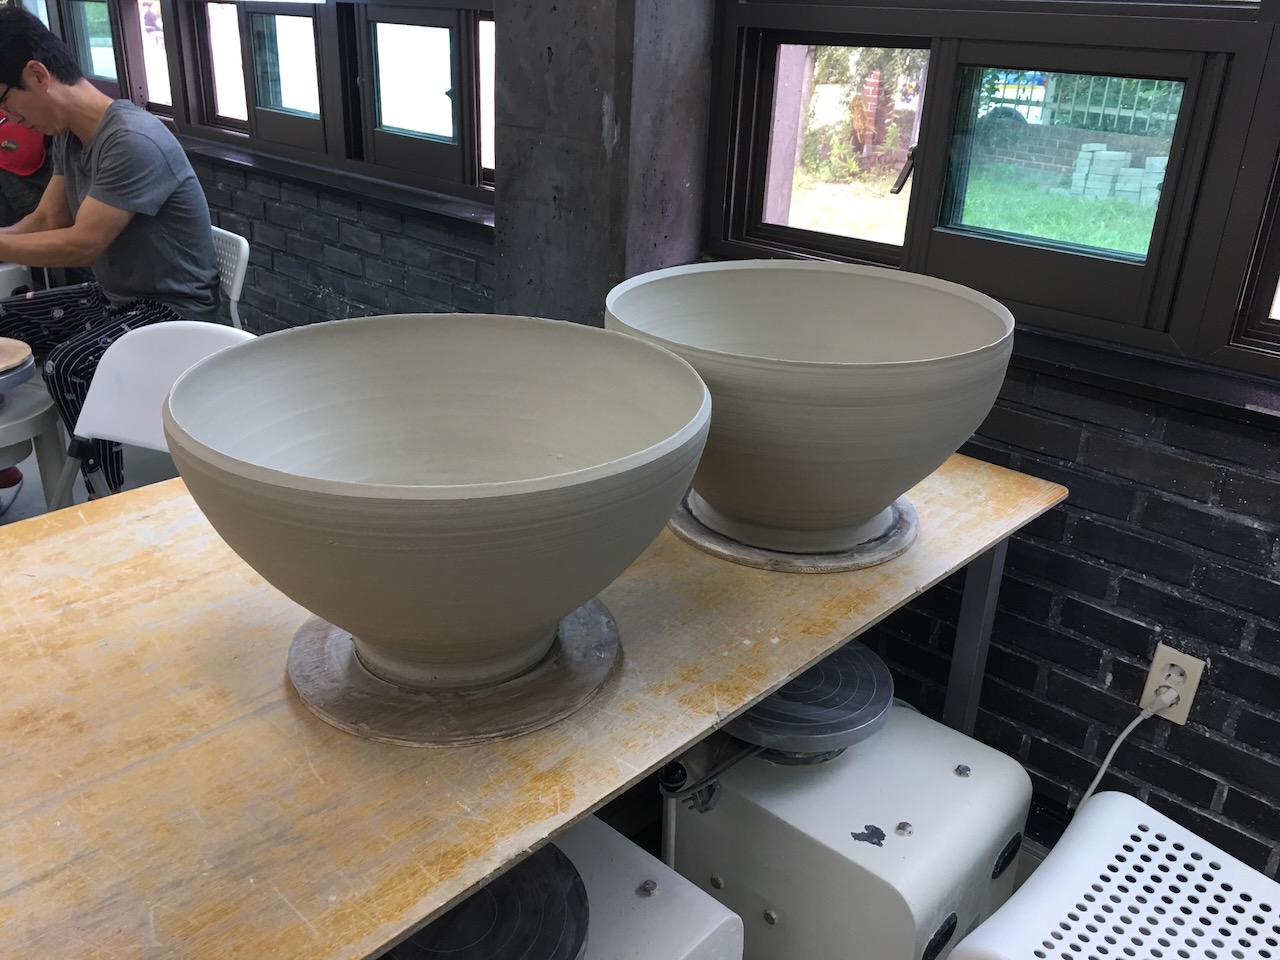
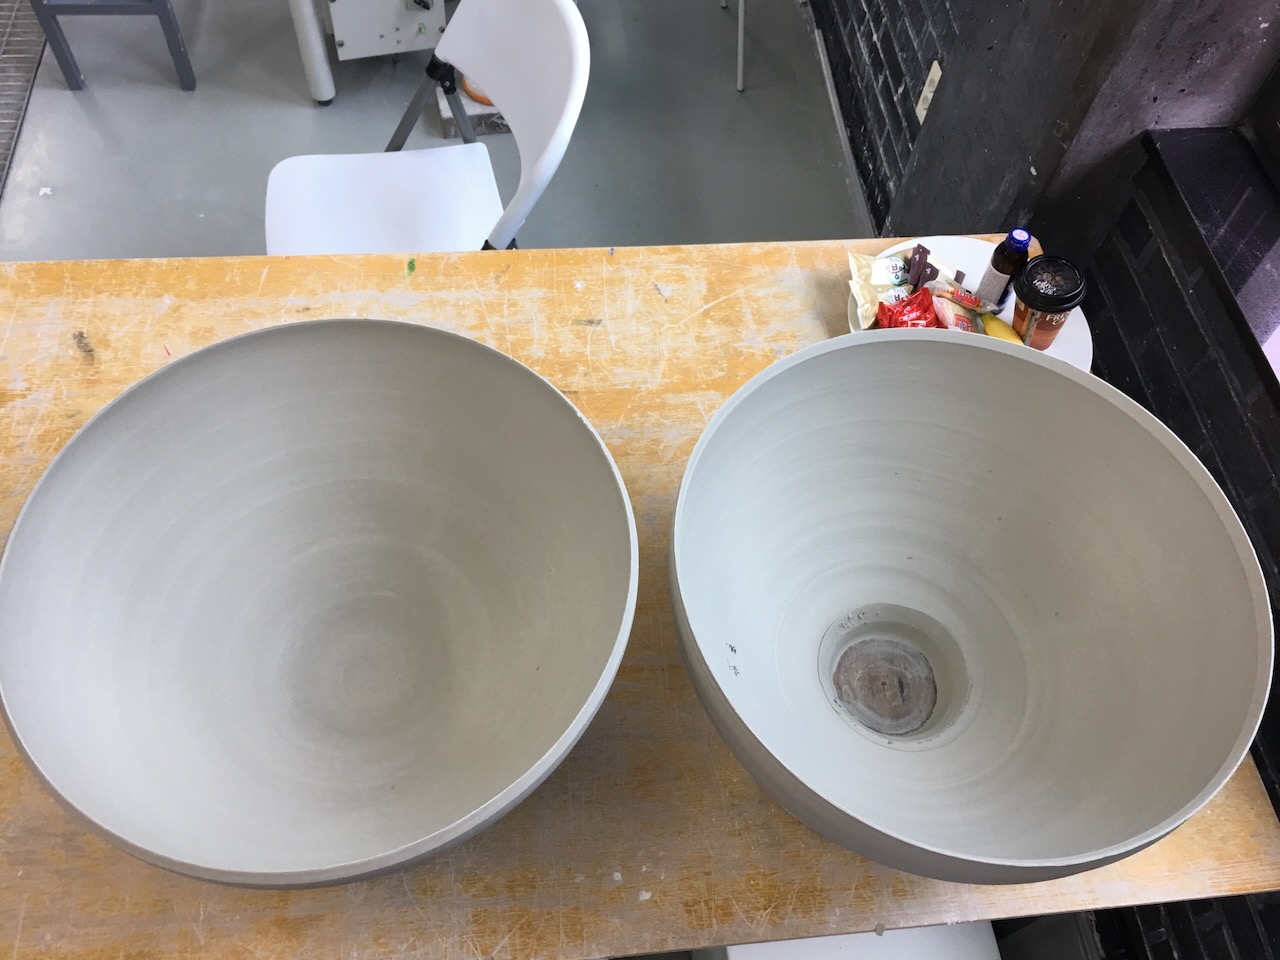
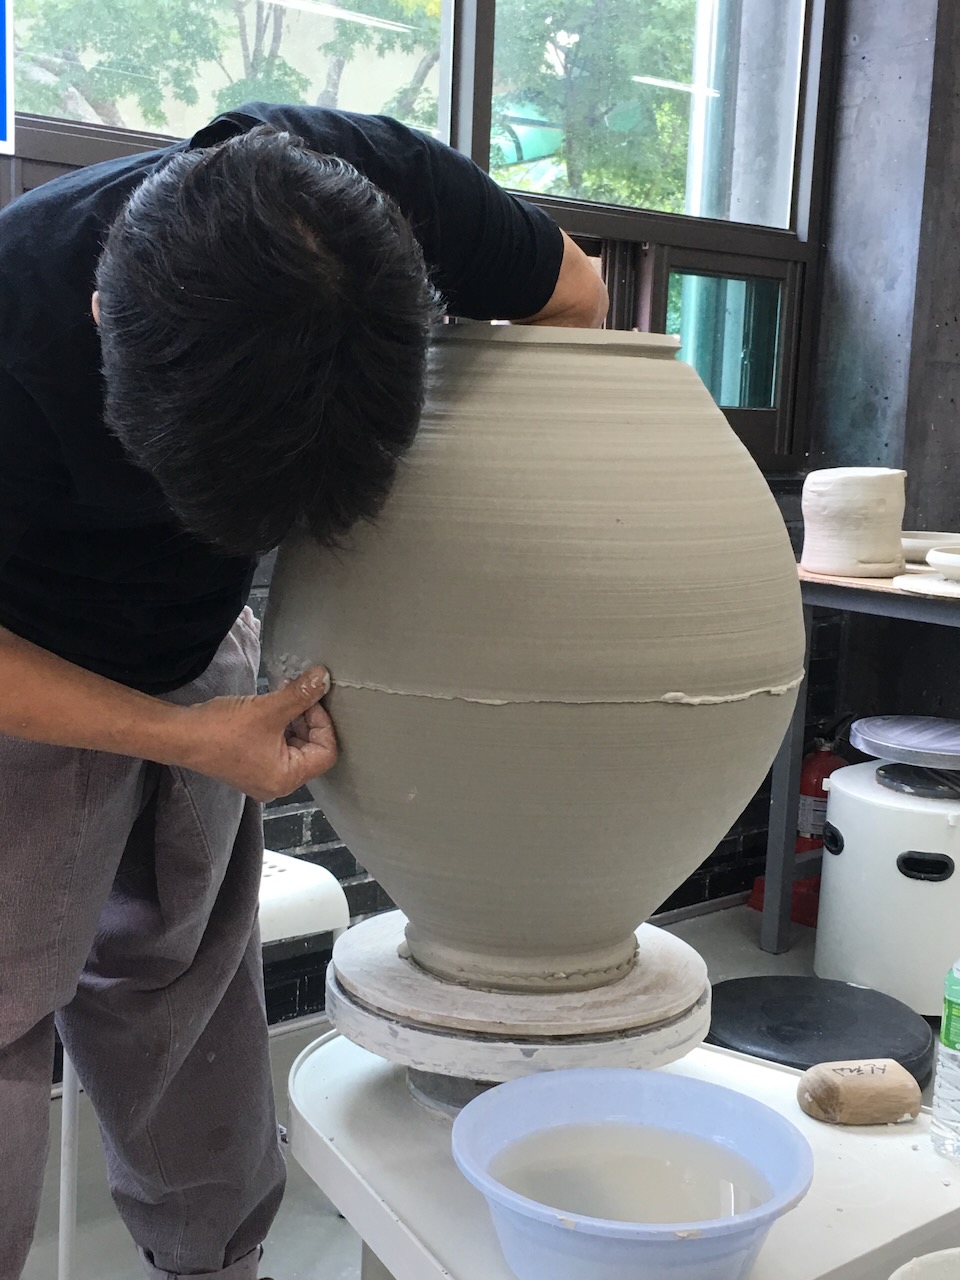
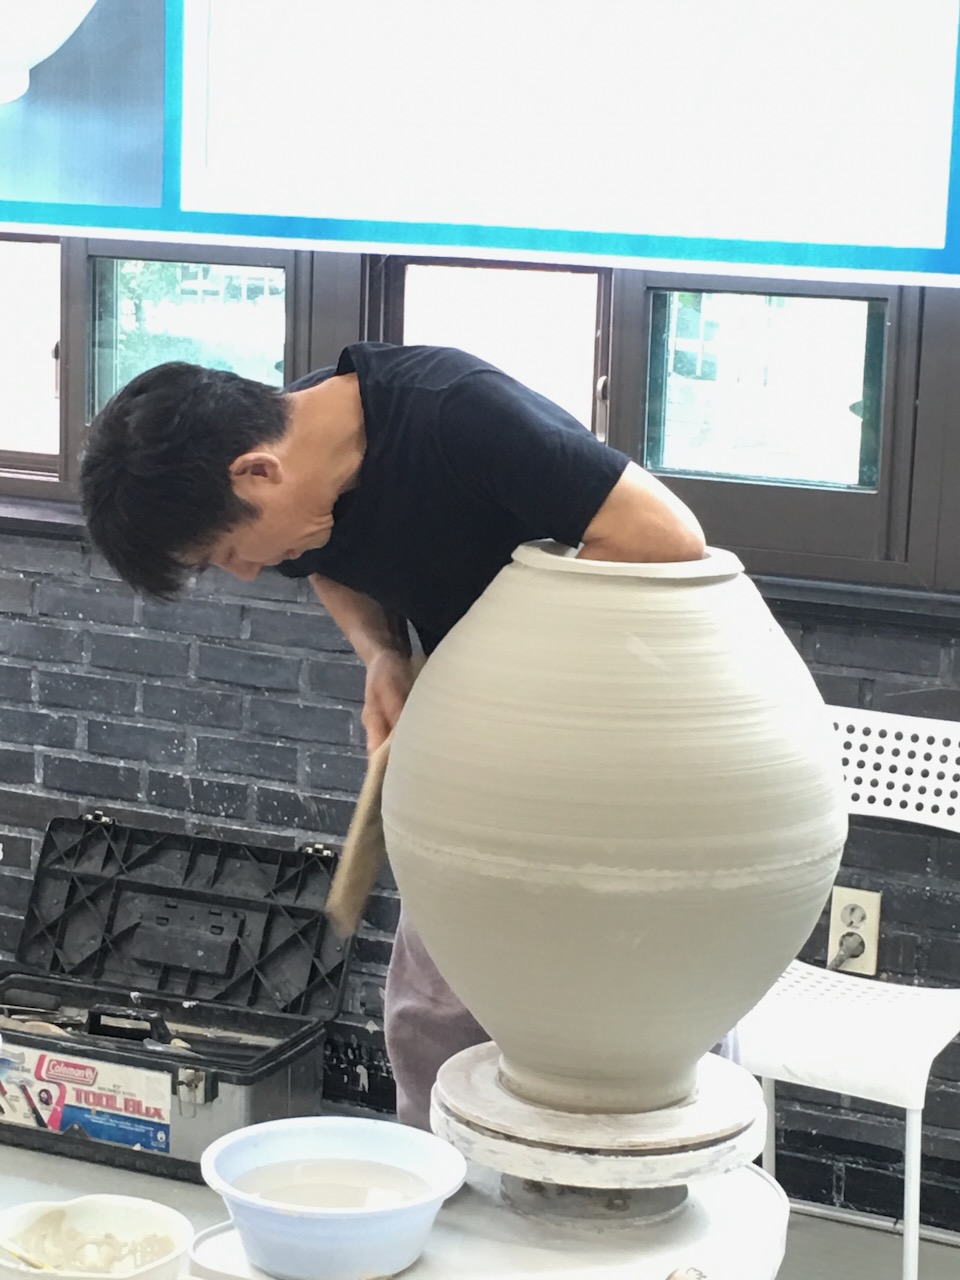
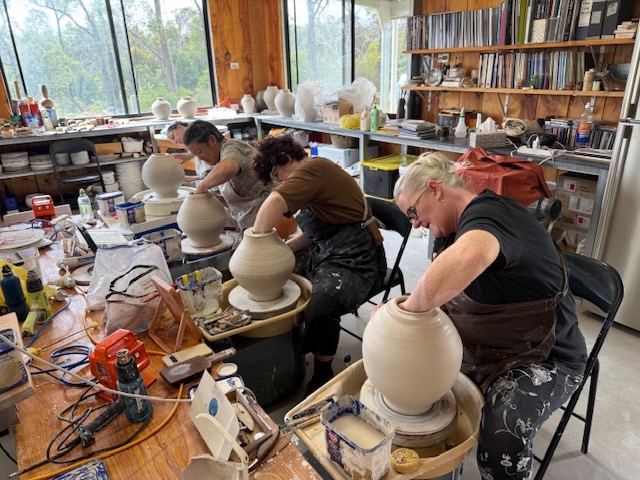
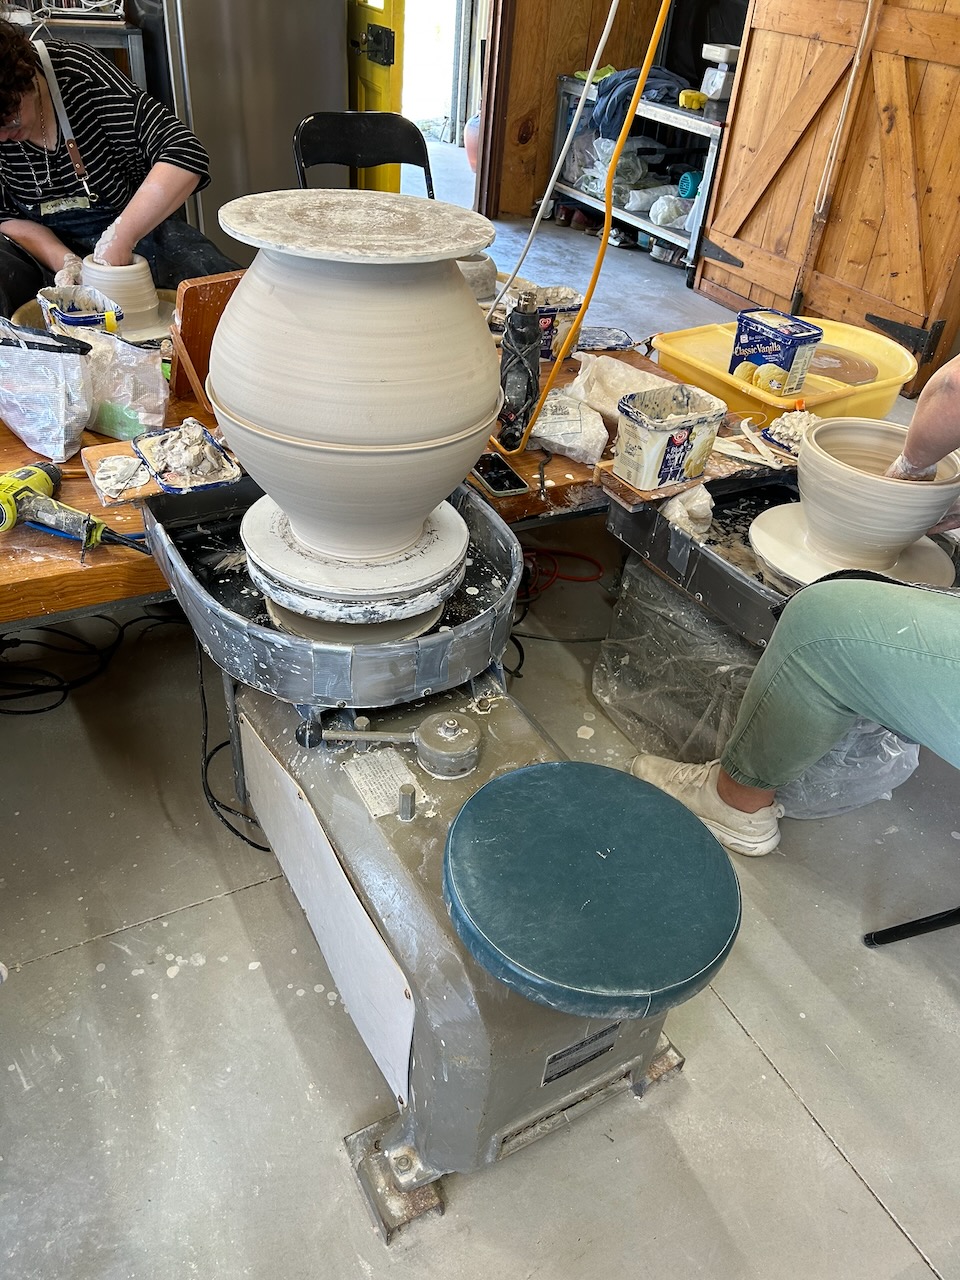
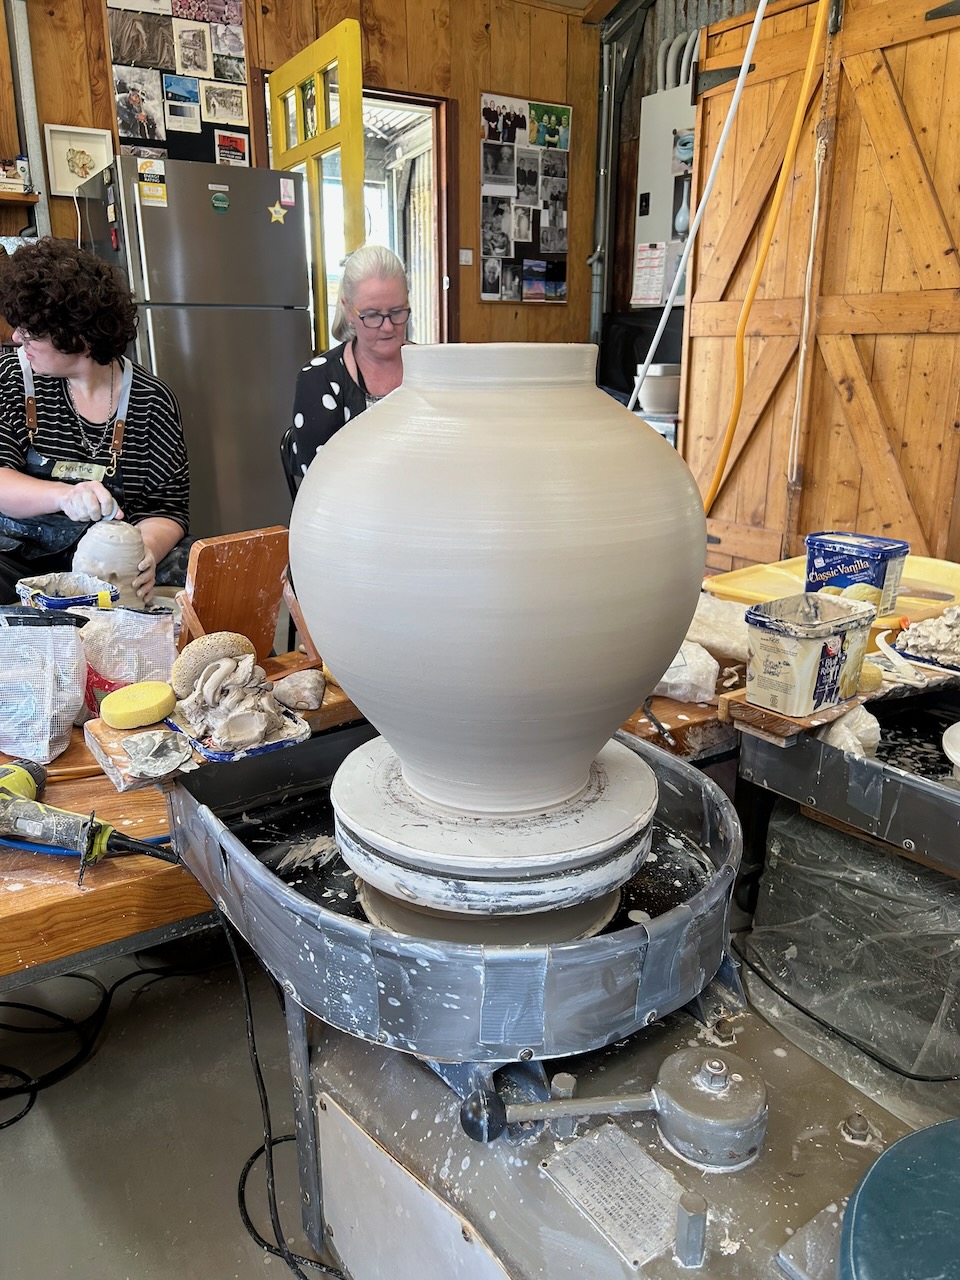
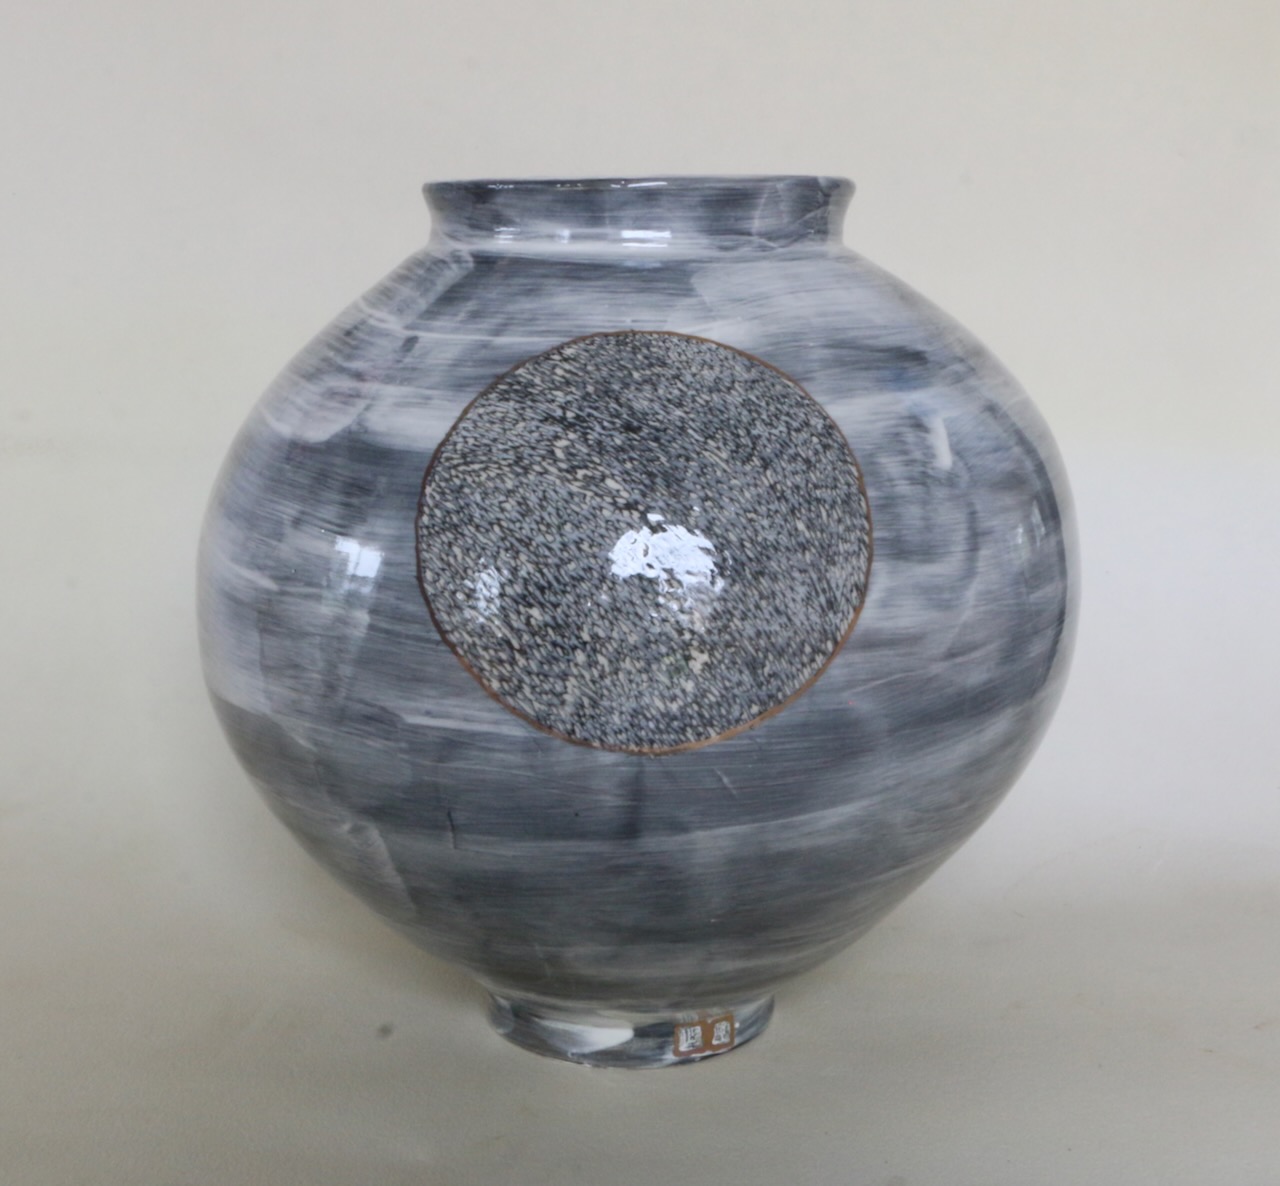
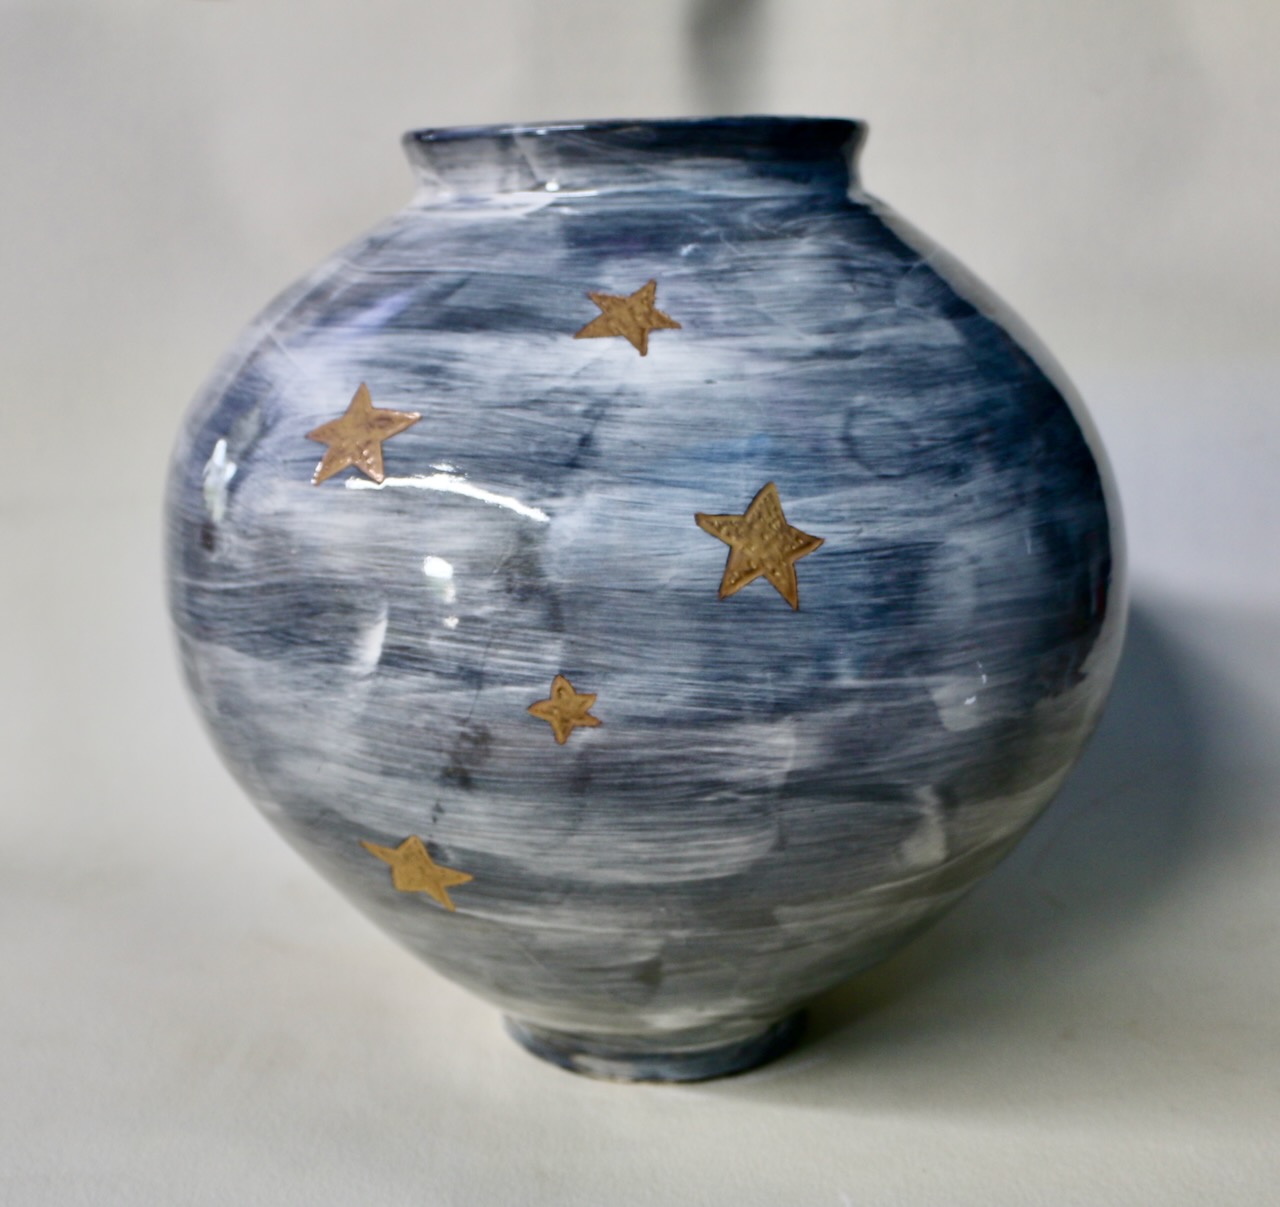
This kiln isn’t beautiful. It just has to work! And as of now it does. Time will tell. I have had this ruin for a couple of years now. I didn’t do anything with it for the first year and a half, as I didn’t really need it. However, Now that I’m keen to make big, round, fat, pots inspired by Moon Jars. I need a larger kiln. This kiln has a 600 x 600 floor, and 750mm high. So plenty of scope to make a larger, fat, round jars.
I’ve out grown the small 450mm x 450mm. cubed electric kiln that Len Smith gave me to help me get re-started. I have been using it for the past few years and it works just OK, but is worn out and struggles to get to cone 8. I have purchased new element wire for that kiln, but I haven’t got round to making the new elements yet. I had to re-wire the old lathe after the fire burnt out the barn, so I’m working on lots of projects all at once. But now that I have the lathe back in working order. I can proceed on to the next job, which is Lens old kiln.
Nothing is ever finished, nothing lasts and nothing is perfect.
Nothing is affordable, nothing stays new, and nothing does exactly what you were promised that it would in the add!


You must be logged in to post a comment.