On The Tools – brick cleaning, day 6

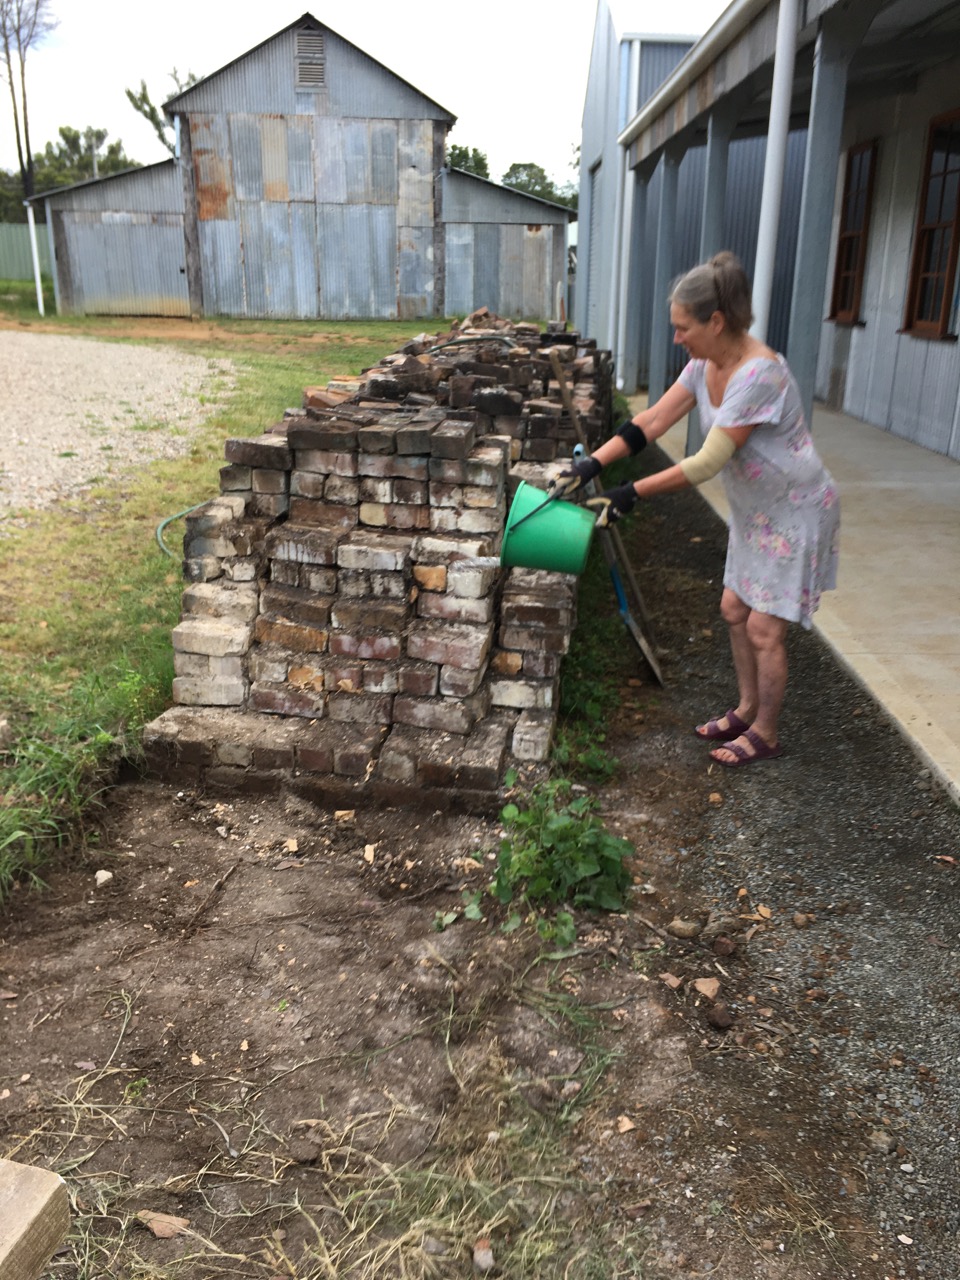
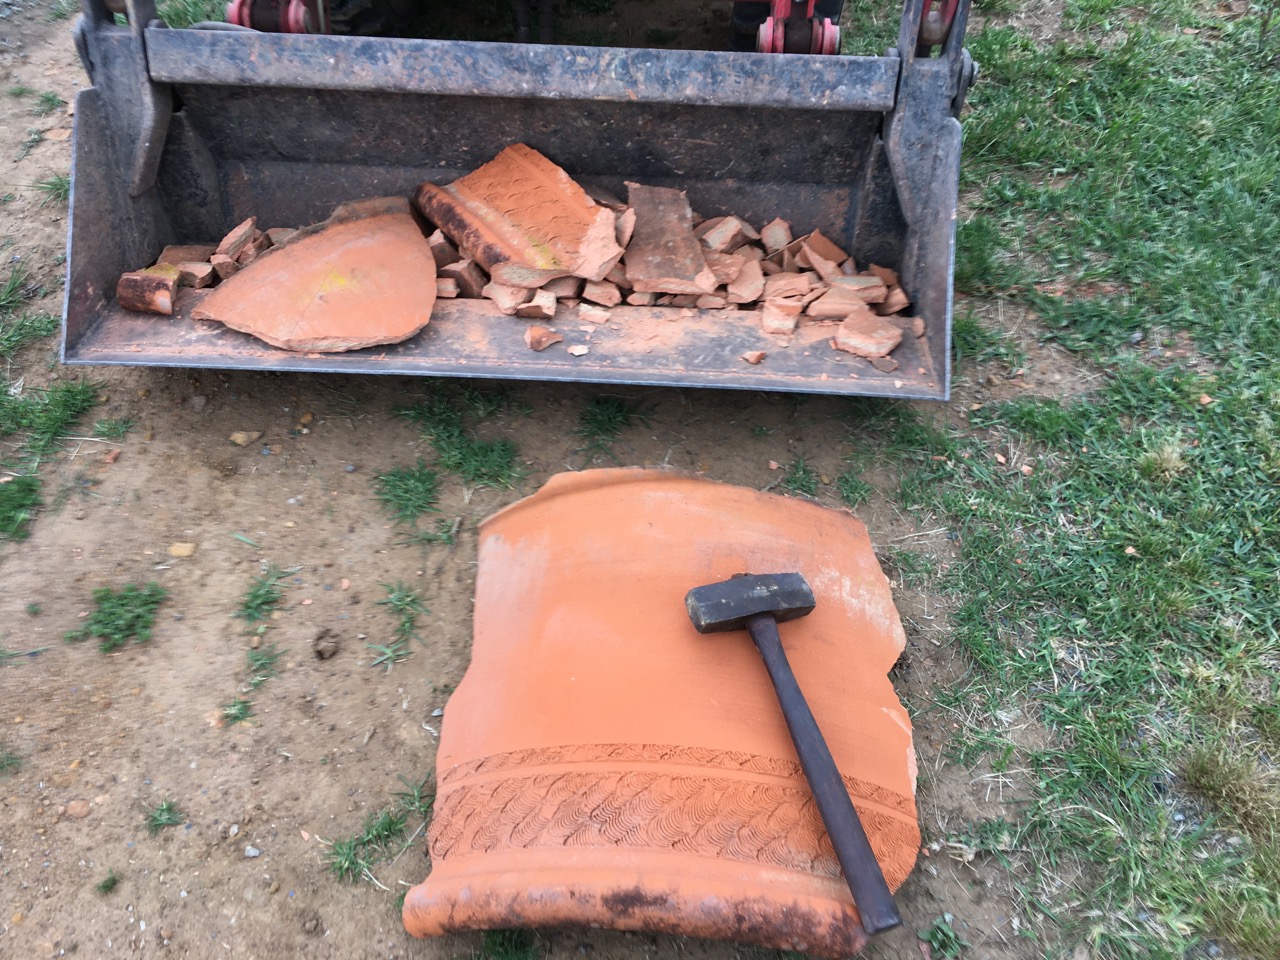
The weather has turned cooler now with a southerly change coming through yesterday. We were out there cleaning bricks again today and we managed to put in 3 hours from 6.30 to 9.30 simply because it is not too hot. We got over 150 bricks done, plus a number of broken bricks, shorter ones, skinny ones, plus the usual halves and quarters.

We have now cleaned up to around 1,000 bricks in all categories. I have separate piles for 1/4’s, 1/2’s, 3/4’s. Then other piles for bricks that were cut to special tapered shape for use over the window arches. There is a whole category of smaller bricks that we excavated from the footings of the old Mittagong Railway Station. These make up about 10% of the total. I stack them separately, because 33 years ago when we were building our extensions onto the Old School building here in Balmoral, The brick layers would often call out for me to find a taper brick, or a small brick, to fit a particular spot in the bond.

The long original pile of bricks that used to continue all along our drive way, is now significantly shorter. We keep moving the bench up to the pile and then, the next day, the pile has receded back further again, as we clean the bricks and stack them at the other end of the driveway. This stack advances, as the old stack recedes.

You can see where we started on the brick pile on the far right of this picture after the red wheel barrow, there is a patch of green grass surrounded by a ring of white lime mortar. This was where the bench was when we started. When I start again, later today, we will move the bench again up closer to the brick pile.

The cleaned brick pile is looking very healthy.

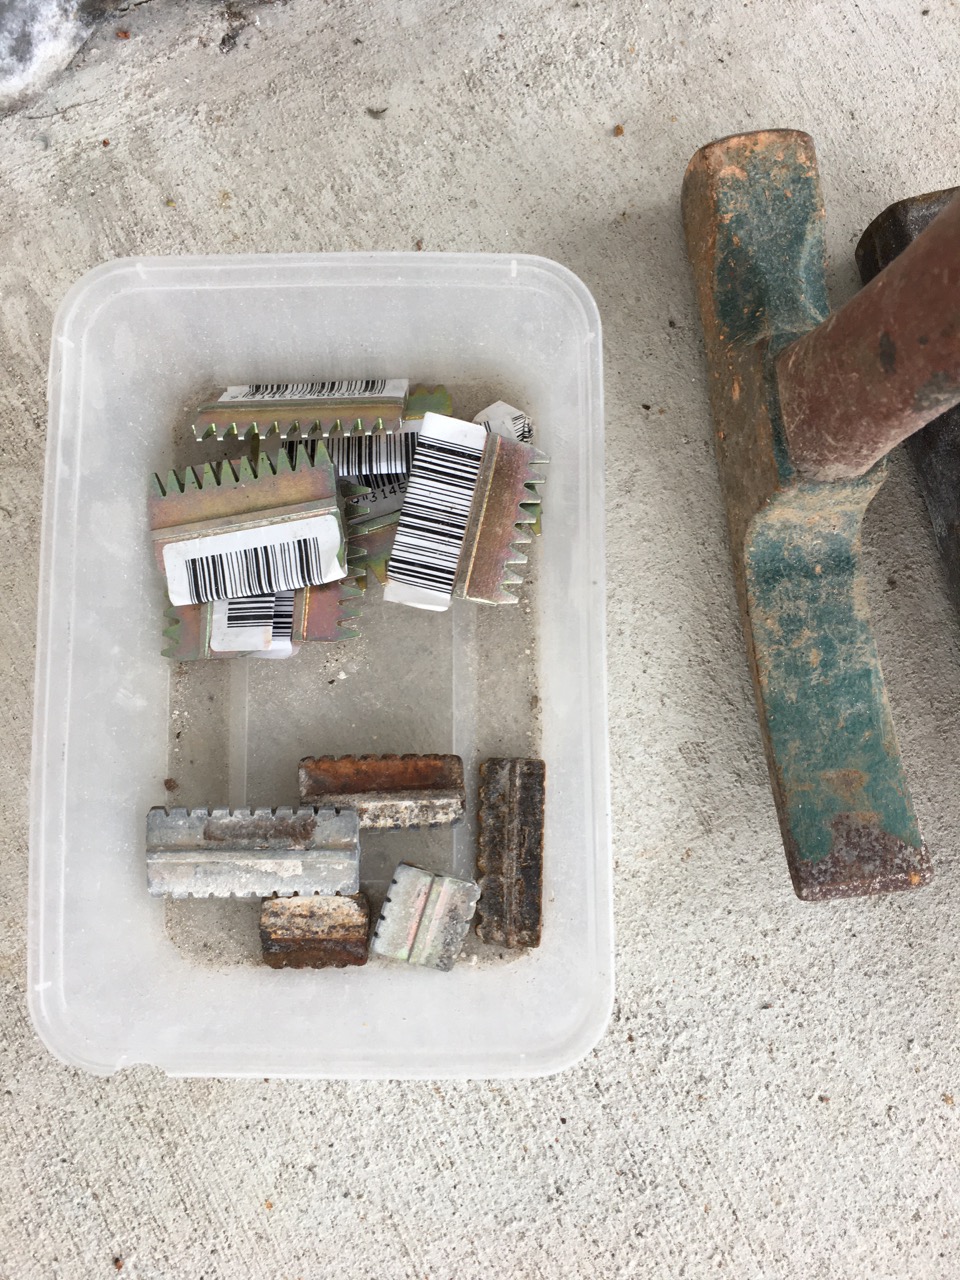
We are so far ahead of my hoped for estimate of 100 bricks a day for 33 days. Getting close to 1000 bricks in 6 days. We are wearing our way through the stock of Scutch combs.

It’s a small but significant measure of our progress.

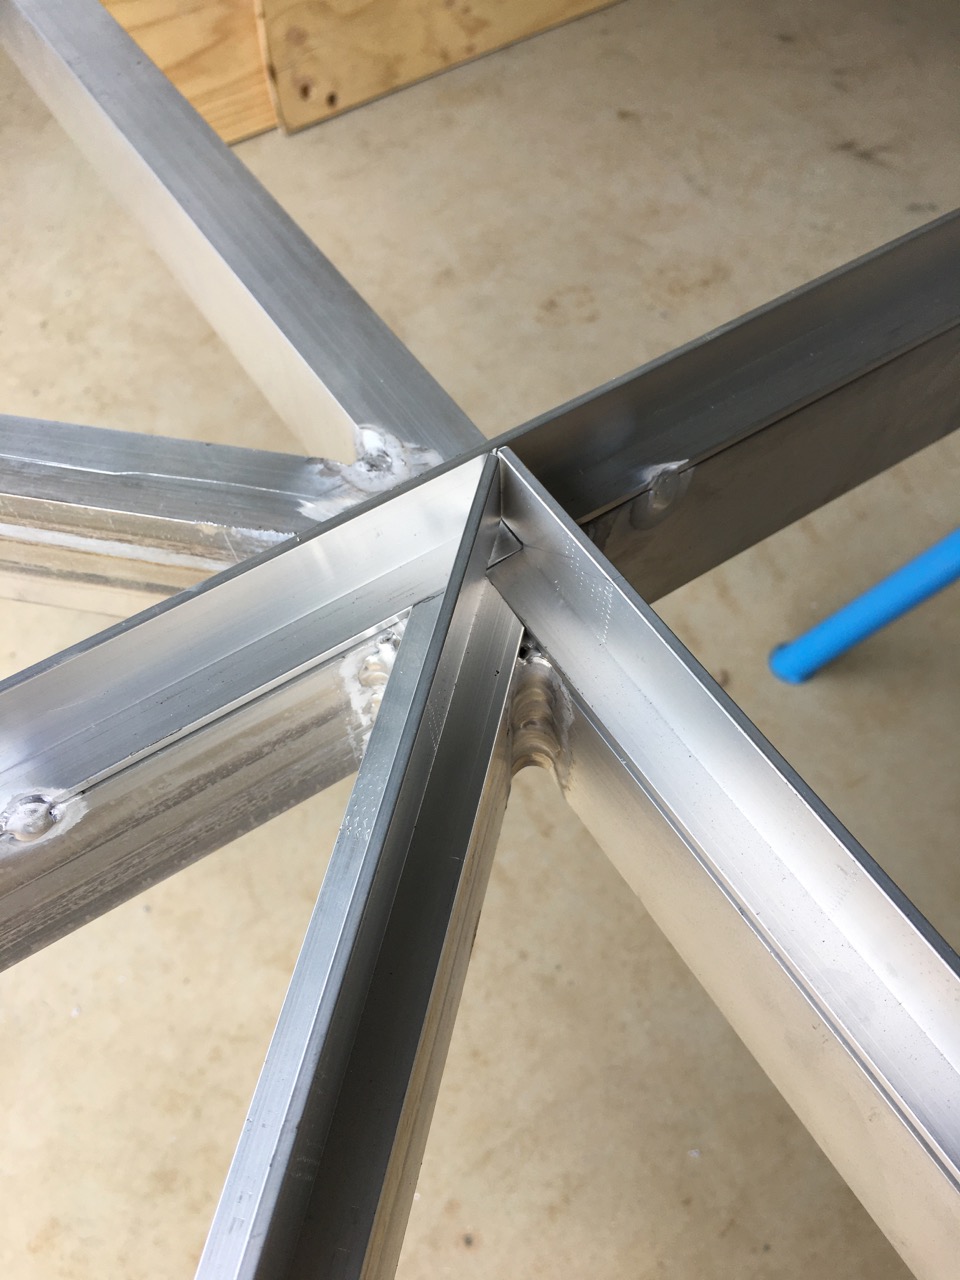
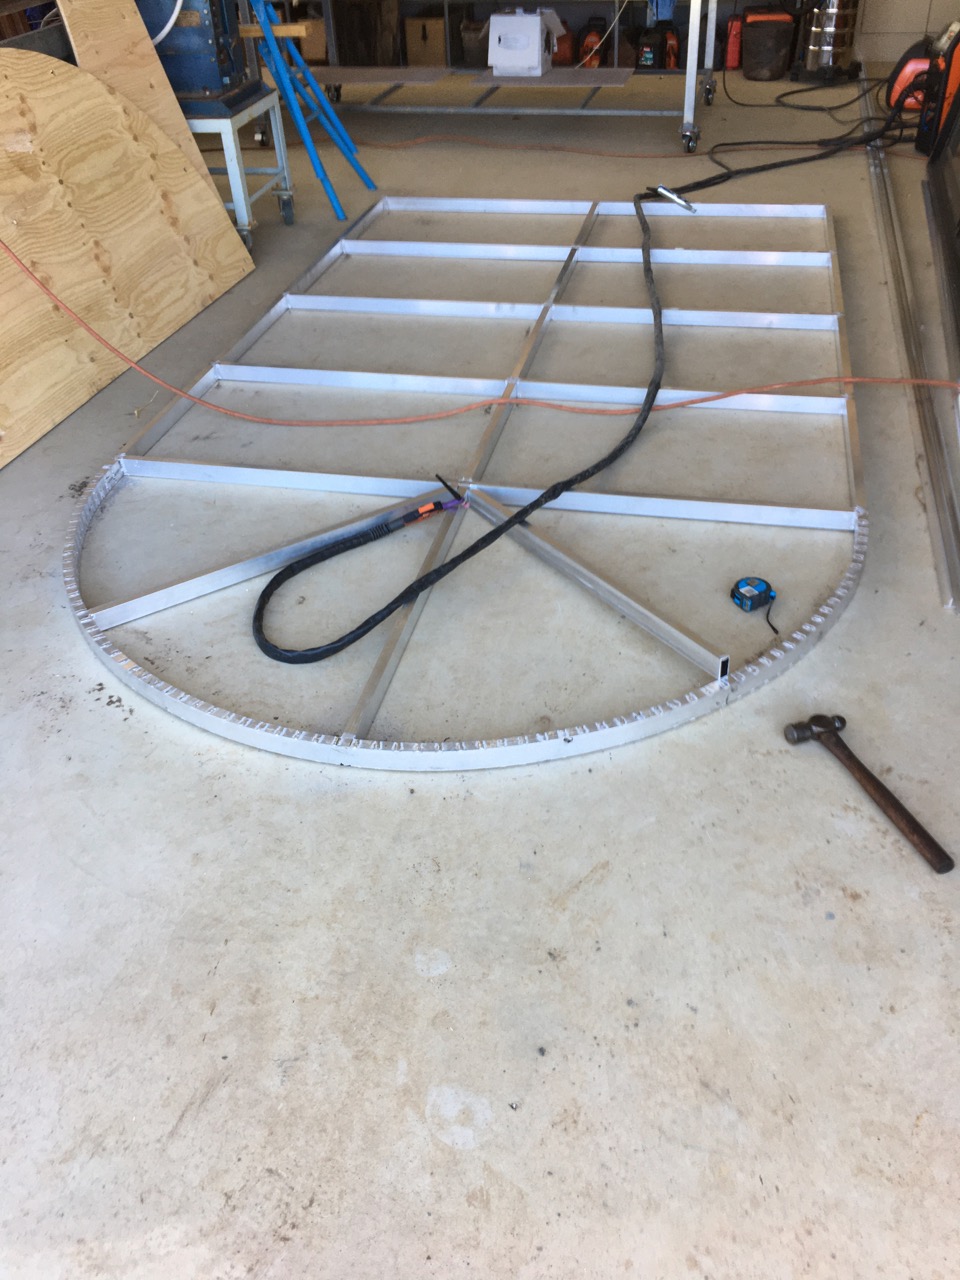
The other big achievement of yesterday, was the completion of the big arched window. I had the glass delivered just before Xmas, when the glass shop closed for Xmas break. Unfortunately, I had miss-measures one sheet, very slightly over size. It was one of the triangular sheets at the very top. I thought about trying to cut the curved arch end back by 10mm., but decided against it. The glass shop didn’t open again till yesterday, having had 6 weeks off. So I rushed down to Mittagong and got them to cut 1cm. off the curve for me and then brought it home and fitted it.

The window is now complete. An intermittent job that has taken me 11 weeks, but 6 of them waiting for the glass. I’m quite pleased with it, and in particular the fact that I could do it all myself for about $1,000. A massive saving on the cost of having one made. I’m lucky that I have all the skills necessary to be able to do this detailed work for myself. There is a local factory that makes custom made steel framed windows for architects. I was told that the window would be in the region of $20 to 25,000 to have specially commissioned.

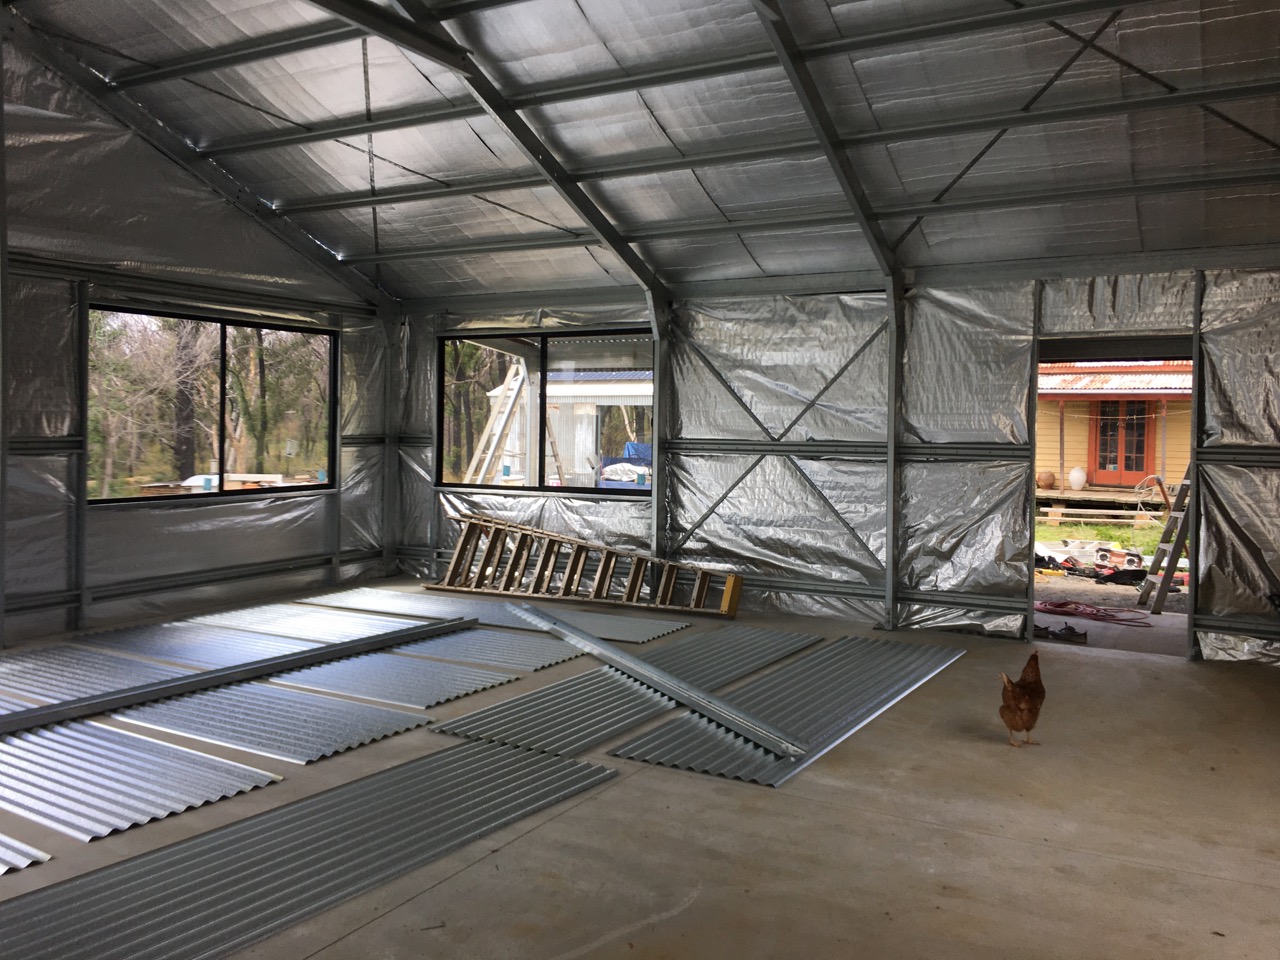
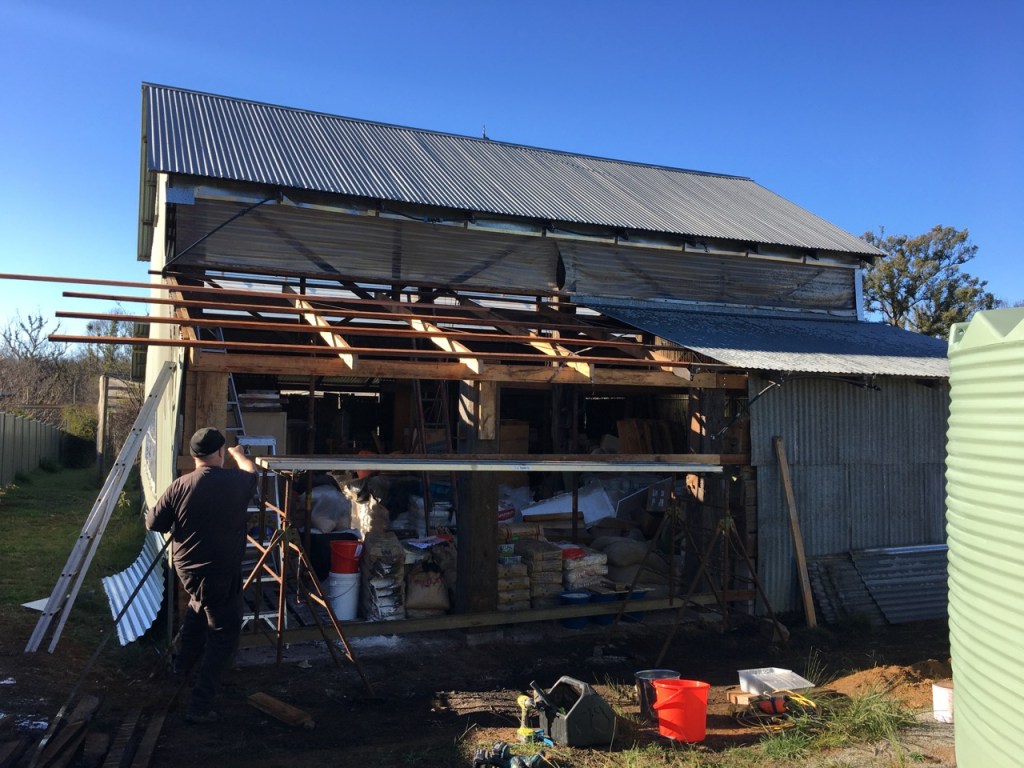
I can finally take the scaffolding down now.

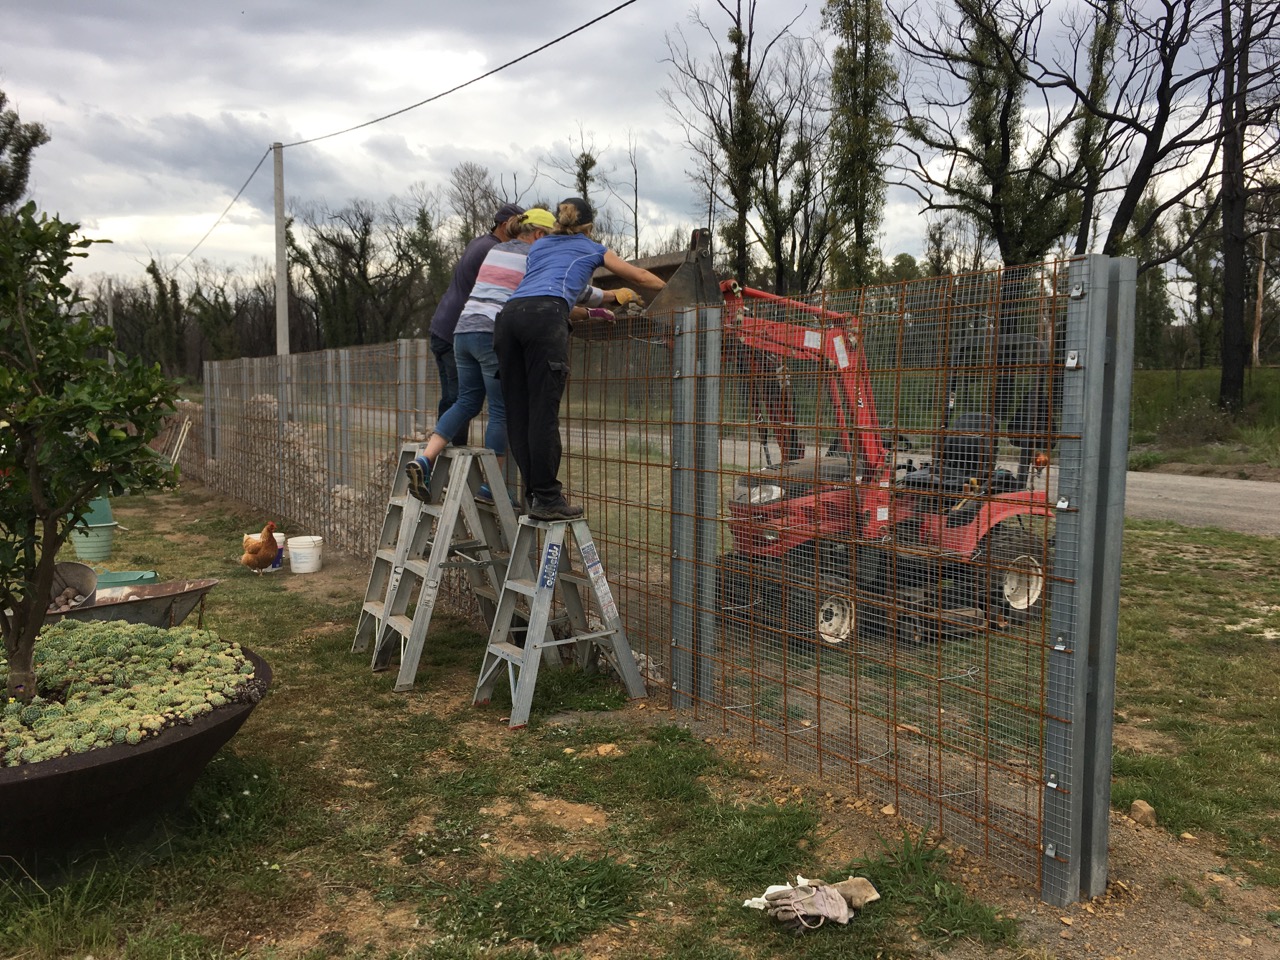
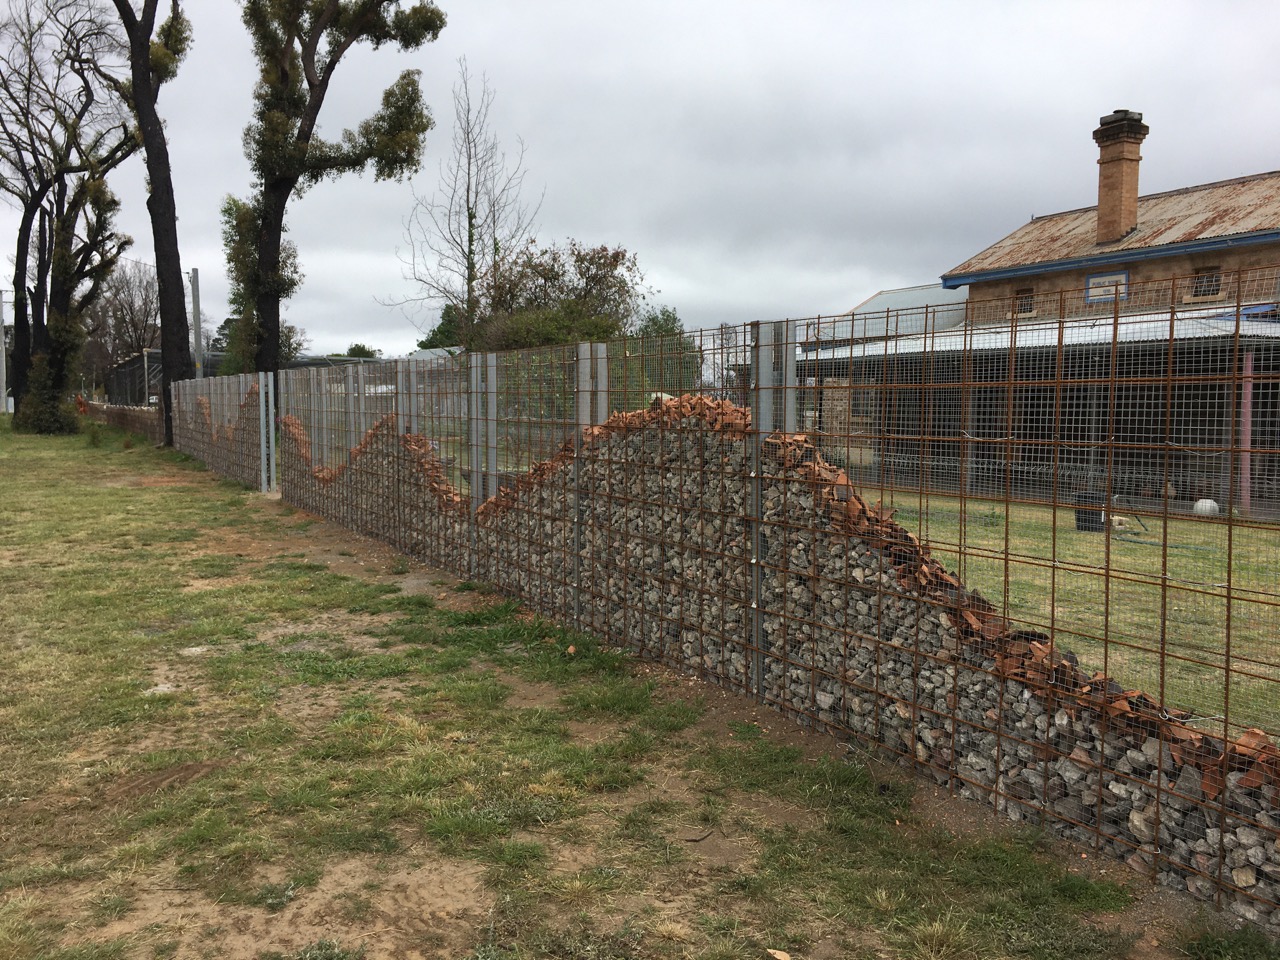
I’m really looking forward to seeing this wall bricked up!

On the Tools – Day 4

We work for a couple of hours every morning from 6 or 6.30 until 8 or 8.30, depending on when we wake up.

We do at least 100 bricks before breakfast. Our brick cleaning tally stands at 600 bricks now. I was thinking at the beginning of this little project that I had over 3,000 bricks to get done. I’m an ageing old man, maybe 100 per day would get them all done in a month. Achievable, without doing myself an injury. So, all in all, I think that we are doing pretty well.

There is a gap between the bench and the brick pile now. That’s progress made tangible.

We were joined this morning, very early on by half a dozen wood ducks, they came wandering past grazing on the grass and made their way up to the front of our land where I planted a patch of clover.

Janine wets the bricks down with some water every now and then to suppress the dust.

Yesterday, I started the day with a new set of scutch combs in the hammers and by the evening they were reduced to being pretty blunt, so I reversed them to get another day out of the the other edge.

Slowly but surely, we will get it all done. The 42 oC temperatures haven’t helped, but we are in for a cool damp change tomorrow, so I might be swapping my home-made Legionaires style, adapted sun hat for a rain coat. At least it will keep the dust down and be so much cooler.

I improvised it by fixing part of an old T shirt to my straw hat with some of Geordie’s old nappy safety pins. Needs will, as needs must.

Clay water/grey water

On Wednesday afternoon, my neighbour Mitch called in with his excavator after he had finished work on another job.I had asked him to come when he could just a couple of days earlier.
We needed a seepage trench for the pottery sink to be dug 10 metres long and at least 600mm wide and 600 mm. deep. This will be for clay water/grey water seepage.I felt that as the weather is getting hotter and I’m wearing down. I copped out and got the trench dug. But it is money well spent.  Mitch dug the trench in just 10 minutes. It would have taken me all day – and then some.  3.5 cu.m. of crushed stone gravel is about 7 tonnes of material.

Yesterday I was in town, as I had a favour to repay and then I was off to Moss Vale to the plumbing supplies to buy all the parts for the seepage trench. 
Today, with everything in stock, we lined the seepage trench and built the stop ends/access/inspection ports, then filled 5 of the 7 tonnes back in again. A big day in the hot sun. We still have a couple of tonnes left over to deal with. 


I’m so glad to see the end of that job. It was over 30 oC here today while we did all this digging. After we finished all the earth works, we watered the garden and I picked all the days garden produce.


I picked tomatos, zuchinnis, capsicum, cucumbers, chillis and artichokes. This will be dinner. Janine cooked a vegetable risotto for dinner, while I made a big 5 litre stock pot full of tomato passata. We had our risotto with a small piece of fish, fresh off the south coast fish truck yesterday.

It’s a good life if you don’t weaken!

First Peaches of the Summer

We are only 10 days into summer and we already have both our first tomatoes and now our first peaches. We’ve been picking zucchinis and cucumbers for weeks already. Nothing quite like the flavours, tastes and aromas of the summer garden. Although this all sounds idyllic, it’s possible because of the worlds unabated consumption of carbon based energy. With global heating racing away, unabated like it is and coupled with an embarrassing total lack of political will here in Australia. We also have to accept the changing weather patterns associated with all this heat, like catastrophic bush fires and massive storms. From someone who has lived through a catastrophic fire event. I can clearly say that I’d rather not have to experience it again and the early tomatoes are not worth it.

Back in the garden, the pumpkins that I planted on the 12th of September are now 3 months old and taking over the bottom of the garden.

From this to…
to this!
They are setting a nice crop.

Strangely, we are just harvesting our citrus crop now almost half a year out of seasonal sync. We should be picking them in the winter. Everything has been dislocated by the extreme weather and the catastrophic fire event. All the citrus got burnt, some very badly, such that we lost half of the trees facing the pottery as it burnt. The citrus grove was planted next to, and on the north side of the pottery, using the building to protect the trees from the worst of the winter’s southerly winds. Sheilded in this way and facing the north winter sun, they were in a bit of a sun trap and it suited them very well. We had good crops.

After the fire we watered them well for the first few weeks, whenever we could find the time during the clean-up. Sometimes this meant in the dark before dinner at 9.00pm. The result was that they all re-shot leaves, some only on half the tree that wasn’t so badly burnt. They went on to flower again as if it was a new year, but totally out of sync. We got the strange out of season crop and they then flowered again out of sync, such that we are now harvesting again in summer and not winter.

The entire right hand side of this tree was so badly burnt that it has remained completely dead and needs pruning off. I’m hoping that the tree will eventually put out new shoots on the right hand side and balance itself up.

Apart from the strangeness of it all. They are probably suffering from PTCD. Post Traumatic Citrus Disorder! Also, when the fruit is ready, it isn’t the usual colour. For instance, the tangelos are pale yellow like lemons instead of bright orange. While the lemonades are green like limes instead of yellow. Strange times. I assume that they will slowly revert to the normal seasonal flowering and fruiting regime over time?

All the peach trees were burnt in the stone fruit orchard, but just before the fire. I had lifted two of the smaller trees that were doing very badly in the draught, as I couldn’t keep enough water up to them. I put one of them into a big plastic tub that was hanging around and the other into a large synthetic plastic fibre plant bag that someone had given us. I placed them in the veggie garden where I could water them better, just to see if they would survive. They had recovered well and are now ready to plant out again, but because they had flowered and set fruit, we thought it better to let the fruit ripen and plant them out next winter when they will be dormant.

The out come is that we have a dozen small peaches ripening. Amazing!

The out come is that we have a dozen small peaches ripening. Amazing! And so unexpected. Janine also picked the first apricot off one of the newly planted stone fruit orchard trees. Where the trees were doing well and growing strongly, I left one piece of fruit on each tree that I thought could cope with a ripening fruit and still grow well. That applied to one apricot, one almond and two apple trees. I just couldn’t resist the temptation of seeing and tasting the new fruit varieties.

The pottery shed is slowly progressing. Today the builders are putting the roof on the pottery studio. That is really good to see. It was ready to roof yesterday, but it was windy and slightly foggy and damp, making it too slippery and too difficult to roll out the silver roofing insulation in the wind. Today is calm and overcast but not wet, so it’s all go on the roof. I can hardly wait to get inside and see how the light is in there. We now have two roofs on. the kiln room and the creative studio.

I spent a long time working out how to get the best light, at the lowest cost, but not interfering with the structural strength, allowing for enough metal strap ‘X’ bracing, covered with corrugated sheeting to provide sufficient structural wind resistance strength. I’m no engineer, but the shed company’s computer program allowed me to input different options, increasing the glass area until the ‘Computer says No!’

Edna the Chook, came in to check out the new studio too.

I then worked backwards from there, to find the biggest size of standard ‘off-the-shelf’ cheap aluminium windows that would fit the space. No use in paying double to get a custom window made that is only 100mm larger. So I back-tracked down to the best available size. We ended up with 4 windows that are 2.4m. x 1.2m. (8 feet x 4 feet) plus a sliding glass door that is 2.4m x 2.4m.

It will end up darker inside when it is lined and not so oppressively metallic and shiny.

The New Pottery Arch Window

I’ve spent the last few weeks working on an arch window for the new pottery workshop. I want to make a window that reflects the existing window in the house opposite to the new pottery. I have a plan to brick up the external west and south walls of the new pottery building, those that face the street and the house. We have a lot of leftover sand stock bricks from when we built the house. We put in a large arched window in the north face of the new kitchen. It worked well and I’m very happy with it. I built that window out of western red cedar. I taught my self to steam wood so that I could bend the sections to make the arch window. I want to reflect this architectural conceit in the new pottery. My idea is to have the 2 windows facing each other.

There is a slight problem with the original idea and that is that a cedar wood window might be quite flammable. I want to try and build this new pottery with a fire resistance rating ‘BAL40’. 50 being the highest possible rating. One way to do this is to make the window frame out of metal. I decided to give it a go using aluminium, as most of the other windows in the pottery will be black aluminium framed. One of the benefits of aluminium is that it can be obtained in extruded forms like hollow sections, ‘T’ sections and angles. It is also very light and not too expensive compared to ‘merbau’ timber. I was able to buy a series of sections that I could weld together to make a complex frame that could be both light and strong – and fire resistant!

The other important issue is that aluminium is tricky to weld, but fortunately I taught myself to weld it years ago when I was building electric potters kilns, as marine aluminium is one of the longest lasting kiln frame materials for electric kilns. So the welding problem was not a problem. The difficult part in welding a big window of this size, 4 metres by 2 metres, is that aluminium expands and contracts a lot with heat, so it can very quickly warp our of shape. I usually clamp aluminium down onto my steel welding bench to keep it straight. However, in this case, the window is bigger than my bench, more than twice as big, so I had to weld it on the floor. This meant that I couldn’t clamp it down. So I have had to weld it intermittently with long gaps to allow the window to cool dawn so that it would remain flat and straight. This is why it has taken me so long, with just two welding sessions each day.

I made a wooden former to shape the arch

In order to bend the hollow section, I needed to make some cuts in the metal so that I could bend it round in an arc. I worked out that the difference between the inner and outer circumferences of a two metre arc was about 80mm. So I made 80 equally spaced cuts into the frame with a hacksaw, these were about 1mm across. It ought to have worked, but it didn’t. It wasn’t enough, the bend was too difficult to make by hand. I decided that I needed to make another cut with a thin blade angle grinder of about 1.5 mm wide. I made this cut just about 6 mm deep. The combination of the two allowed me to bend the arc easily by hand. I then clamped it to a plywood form, so that it would stay put while it expanded and contracted during welding. I welded the cuts back together. The whole section is now just as strong as it was before it was cut.

There are rolling machines that do this sort of thing easily, but I don’t know of any here in the Highlands. Besides, I am happy to do all the work myself in my own way, finding my own solutions. Using what I know and using what i have at hand. This is self reliance.

I tacked the arc onto the square section and it started to look like a window. Once the box sections were assembled, I needed to add the ‘T’ sections on top and an angle section around the edges. These are essentially the glazing bars. The rectangular hollow section is just a supporting frame to resist the wind pressure. These ‘T’ sections needed a little bit of fine cutting and filing to get to fit nicely, but it worked out OK. Clamping everything all the time is essential to keep it all flat and straight during welding.

Its taken many hours of thinking, measuring, cutting, fitting, clamping, tacking, cooling and then welding to get to this stage.

So far I have used over 50 metres of filler rod in all the tacks and box section welds. It’s a slow business, I’m hoping that it will work. each of these little butt-end rods was once a metre long.

In this image, the structure is complete, but it’s not a window yet, however, I started to think that it just might work. There is still a way to go at this stage. I still have to fit the architrave around it and then a fixing fin, but it’s almost there.

The builders finally turned up months late. We paid our deposit on the first of July, straight after the Council passed our DA. They told us that it would take 5 weeks for the kit to be delivered, There was some sort of stuff-up and the kit eventually took 12 weeks to be delivered. That was 2 months ago on the 23rd of September.

The builders have eventually arrived.

On the positive side. All the waiting around gave us the time to work on the yard and the clean-up, the orchard and the garden.

So the beginnings of a frame have appeared. Certainly enough to fit my big arch window in the end wall.

With any luck, we might be at lock-up stage before Xmas?

Summer approaches, hot days of fruit and fenestration

It’s not quite a week since I wrote that we picked the first youngberries of the season. Now, 6 days later we are in full harvest mode. This morning we picked 4 kilos of berries, we also picked 250 grams of blue berries and half a dozen strawberries.

Up until today we have been keeping up with the harvest. Eating them as we go in morning fruit salad. Then Janine made a sorbet/icecream sort of thing with just fruit and fresh cream, whipped up by hand intermittently every hour or so through the day as she took the batch out of the freezer as it stiffened. It made a pretty delicious dessert after dinner.

We have been up since early to do the watering and picking before the heat of the day set in. We are expecting 30oC today, so will spend the middle part of the day inside and out of the sun.

I also picked half a dozen hours old zucchinis with their flowers still attached. I will stuff these with cottage cheese and olives for lunch. This is our simple seasonal cuisine.

My inside work will be trying to finish off the big 4 metre x 2 metre arched window for the gallery space in the new pottery building. I’ve been plodding away on it for a couple of weeks now. It’s slow work as TIG welding aluminium creates a lot of heat in the metal frame, and aluminium expands and contracts a lot, which can lead to warping. Usually I would clamp a smaller job down onto a heavy steel-plate bench. but this window is so large, its bigger than my welding bench. so I have to be patient and allow it to cool down and shrink back to size between welding sessions. Hence the slow progress.

So far, I’ve been lucky, and it hasn’t warped much and is still within 1mm of square. That’s pretty good for my low level of skill.

4 Weldings and a Funeral

Janine and I finished the wall and had a dozen visitors, Mark and Judith, who lost their house in the fire, Elizabeth, who lost her house in the fire, Jules, who lost her shed in the fire, Len whose house was damaged in the fire and lent me his generator in the week after the fire, Kevin who ran the recovery centre post-fire, The cars kept coming and stopping, complementing us on the wall, even the little trail bike rider who usually screams past in a cloud of annoying dust, slowed, stopped, did a bit of circle work in front of us , yelled out “nice wall”! and roared off in another cloud of choking dust.

I’ve started work on the big new arched window for the new pottery. It’s meant to reflect the big window in the house opposite. We’ll see how successful it is when I’m done. This window will be entirely made of welded metal so that it will be more fire resistant.

Finally, Vale our lovely chook, the last of The Spice Girls, the hen Formerly Know As Hillary, FKA Ginger and many other non-de-plumes, teller of great tales and the inspiration of many adventure stories has passed away. She had been going blind over the past month. She couldn’t perch any more, as she couldn’t see the rail, she wasn’t eating much, even a treat like snails, that she loved, she just didn’t know I was holding them out for her. I had to hold them in my hand and gently bump them up against her beak, then she would peck blindly at my palm to try and hit them, mostly pecking my fingers. On Saturday she fell off the verandah when I called her, as she couldn’t see the stairs and missed her footing.

Yesterday, she was very slow to come out of her house. I talked to her quietly encouraging her, she followed my voice, bumping into things that she would normally walk around, finally settling into the corner of my workshop. Her happy place, where she usually went to preen in the afternoon. She just sat on the floor with eyes closed. I fed her some bacon fat trimmings, her second favourite thing in the world and then sent her off play with her other sister chooks with the youth in Asia.

Eating Seasonally and other incidental things

We are now half way through spring, and have been harvesting broad beans for a couple of weeks now. We start with the early little beans eaten raw to savour that unique broaden flavour that we haven’t tasted for 11 months. Broad beans have a short season, but that makes them all the more special. We pick the small immature bean pods and cook them whole, then as they mature, we pick the larger pods and shell them for the beans inside. They are really delicious at every stage.

We use broad beans in many ways, but they best in my opinion just lightly fried very quickly in olive oil, so that they are just warmed through and sprinkled with dried sweet basil and some cracked pepper. I take them off the heat as soon as the outer shell starts to split open.

I served them with a few fish cakes that Janine made.

We also made a broad bean risotto with Mushrooms, garlic and chilli.

I add the broad beans late in the cooking so that they don’t over cook.

We had a visit from some old friends for lunch. People who hadn’t been here since before the fire, so I cooked a small batch of Flatolli for them. Flatolli is my lazy flat version of Italian Canolli, without the deep-fried pastry tubes, hard boiled in lard. The filling is the same however. Ricotta and/or mascarpone filled with dried fruits soaked in liqueur.

I pre-baked the little pastry sections with beans to weigh them down, then filled them with a creamy desert filling. Easy! And very yummy.

I also attempted to make a pear, ricotta and almond flan or tart. I pre-simmered the quartered pear sections in a sugar syrup with a cinnamon stick, then placed the finely sliced poached sections on the almond/ricotta filling. This turned out very well indeed.

No one complained!

I’m trying to find ways to be useful and creative while we wait for our eternally slow builders to turn up. After we finalise our plans in June, paid our deposit on the first of August, we originally thought that we would have the building up to ‘lock-up’ stage by the end of September. Three months for a tin shed didn’t seem too unrealistic. But now we learn that the builders are saying end of November, from our current experience with them, we will most likely get to lock-up by mid December or even Xmas.I certainly hope that it is done in this calendar year!It’s a challenge to stay positive. 
In the meantime Janine and I are working on the gabian wall. I hope to finish that job by the weekend. We had a small group of our ex pottery students – who have become good friends, turn up to help finish the tall metal framework in front of the house and start to fill the gabian enclosure with crushed, recycled, concrete building material.

Janine loading crushed concrete lumps from the tractor bucket in the metal mesh frame.


In a small personal sacrifice, I smashed up the last of our broken terracotta garden pots. It’s somehow comforting to get to find a positive and creative use for all these â€˜dead’ terracotta planters. I couldn’t just trash them. So this down-sizeing to rubble, but up-scaleing to art is a suitable solution. Turning this disaster into something positive is a constant challenge. The final terracotta pot to go into the wall was a large cylindrical pot that was a â€˜second’ grade reject from the Parliament House project in Canberra that I worked on with Cam Williams back in 1986. This pot was the very first piece made for the parliament and was fired here in Balmoral in our old kiln to test the body, slip and firing technique that we planned to use to do the rest of the job. As 250 pots were commissioned in total, we needed to rent a factory space and set up a very big kiln to get the job done on time. This first pot was the big test. It sat next to the old wood kiln chimney for the past 34 years, As it was broken into several pieces, it no longer had any real value, other than sentimental. It did however represent one year of my creative life. I thought that it was best up-cycled into the last bit of our new wall. Now, I will always know where it is. 


We still have two other examples of these big cylindrical pots in our garden, just 2nds with minor cracks that happened during the 2 year project. One is still intact, but the other was smashed by the tree loppers when they were clearing up the mess here in our yard straight after the fire. One of the workers drove into it with the bobcat loader.Janine and I re-constructed it with wire strapping just to preserve it until I have the time to do a full kintsugi repair.  It will take a lot of gold!


We also have 1 of the 5 massive, extra-large pots made for the New Parliament House Building out in our garden. There were only 4 of these 1.5 dia x 1.5 metre high monsters ordered for the project. The first one that we fired got a hair line crack, so we had to make another one. I got to keep the ‘spare’ one in the garden.

This large pot has been sitting here in the garden for the past 33 years and has grown a very lovely green, grey, black, patina. I’m so lucky that it didn’t shatter in the fire, as all the garden around it was reduced to ashes.


From black to green, from down to up, from negative to positive, from rubble to art. Nothing lasts, nothing is ever finished, nothing is perfect. I’m grateful to be still alive to be able to re-build a creative and beautiful environment. 

Creative, interesting and cheap

We have been continuing to work on our ceramic wall along the front of our property. We have 120 metres of frontage to the street. It’s my intention to replace the old fence with something that is more fire proof for when the next fire comes, sometime in the next decade? The original fence was the old style post and lintel, but being timber and being 127 years old, there were only 3 substancial morticed posts left in the ground when we arrived here in 1976. We know from these relics that it was a 3 rail fence. The very last post burnt in this last fire and smouldered all the way down into the ground leaving a perfectly round hole where it once stood.
This new fence is designed to be as fire resistant as possible, hence the steel posts welded in pairs to seperate the front hot face from the back cooler side, to stop the metal bending over in the heat. I have also filled each post with sand and rammed it solid to give the post a solid thermal mass, so that it wont heat up to deformation temperature in the short time that a fire front passes. I looked at all the ruined fences around here, post fire, and timber completely disapears, it’s also very expensive. Cliplok metal fence systems just buckle and collapse and arn’t cheap. Full masonary walls are OK, but are the most expensive in both labour and material. There is also the drawback that a masonary wall needs an engineered footing of reinfored concrete and steel, all more expense.
I have been trying to think of very cheap/cost effective solutions to all our rebuilding problems/opportunities, solutions that we can live with aesthetically and also aford. As well as this, everything has to be as fire resistant as is possible. I decided on my poor man’s imitation gabian wall idea, as it met all my requirements of cost and fire resistance. I also need everything that we do to be as beautiful, or at least as interesting as possible. To this end, I decided to fill the gabian sections with re-cycled building agregate in a moving wave pattern, as this is the cheapest ceramic fill available and this makes up about 50% of the wall. We also used 30% of black ballast rock for contrast, as this is also relatively cheap at $70 per tonne. The black wave runs as a countrepoint to the grey concrete wave. We crushed up some old terra cotta to make a colour change and a bit of detail. This is about 5% of the wall and is free, but took some time as we smashed it all up by hand with hammers, as all my rock crushers were burnt in the fire. The terra cotta is placed in ‘lenses’ in some parts of the wall, to hint at a sedimentary reference in the landscape here at the edge of the Sydney sandstone basin. To finish off the wall, we bought a small amout of round, water-worn pebbles to fill up the last 10 to 15% of the wall volume, to cap off the wall. These pebbles are the most expensive part of the wall at $90 a tonne, but we limited our use of these to just a few tonnes to minimise the cost. These pale pebbles accomodate the sweeping wave of energy in the wall pattern and bring it back to equilibrium and tranquility. The dark energy sweeps and undulates through the stoney medium, it represents my dark times, it’s always there, but rarely breaks the surface, the steady, even, bright whiteness nearly alway prevails over the dakness.


We have now completed all the 1200mm high wall sections, about 90 metres, at a cost of $1200 for the fill, this was possible because the steel yard where I have bought all my steel for the past 40 years, donated $2000 of credit into our account to help us in our re-building.  We now have 90 metres of interesting and fire resistant fence. The real cost is in the labour that we, and a lot of friends, have put in to make it happen. One very good thing about building such a fence as this is that we can turn up and do a bit when ever we have a day ‘off’, and time to spare. The last 30 metre section of the wall will be built 1800mm high in front of the house to give us extra protection from the ground fire in the next fire event. 
We have also planted a lilli-pilli hedge all the way along the wall to give somewhere for the little birds to live. Lillipillis are reasonably fire tollerant. They don’t add to the spread of flme. They have small leathery leaves that tend to just shrivel instead of burning. We hope that they will act as an ember filter in the next fire event, as well as acting as a safe bird habitat in the mean time.


Other than that, we have been continuing to burn off the piles of burn trees, twisted branches and clayey root balls that are left over from the 16 truck loads of fire debris that we dumped  on our spare block next door. This is where we used to stack all our fire wood, well away from the house. We very good strategy as it turned out, as all 50 tonnes of wood that we had stock piled ready for the kiln and house use in the coming years was all destroyed in the fire. Not one stick of wood was left on our land after the fire had pased through. As we cleaned up after the fire, we cut any straight sections of tree trunks into kiln sized lengths and stacked them. All the twisted, forked and nasty bits have been burnt in 10 tonne piles over the winter. Each pile left a few ugly root balls that didn’t burn, so the last time we had the excavator here, we had Ross collect all these remnant bits together and make a new, last pile. We needed to get this burnt before the spring and the new fire restrictions period begin. We lit it last week and it burnt for 3 days. We now have only two ugly clay and stone packed root balls that didn’t burn. I may be able to knock them about with the tractor to shake off some of the soil and rocks to get them seperated, so that they can be burnt at some later date. It has been a mamoth task to get all these piles burnt and cleared away over the winter, while also getting the orchard built and planted before bud burst. We have run to a tight schedule.


Everything is starting to come together now. We have a delivery date from the steel rolling company for delivery of our steel shed frames on the 19th of September, so just 3 weeks left for us to finish all the fences and garden. before the building work commences. I have worn through 4 pairs of heavy leather gloves, two pairs of light gardening gloves, ruined one straw hat and worn though 3 pairs of jeans, patched the knees and worn through those patches and re-patched them from thigh to knee, ready for the next onslaught of hard work. I hate to throw out anything that still has life left in it. I like to get at least 5 years of hard wear out of a pair of jeans before thay are relagated to kiln factory rags. I am very grateful to be able to live this life of frugal creativity.Nothing is ever finished, nothing is perfect and nothing lasts.

Solstice to Solstice

It is half a year now since the fire on the 21st December, right on the solstice. We have been in clean-up mode ever since. All the black from around the house is now cleaned up and dead with. Be that cutting up into suitable lengths for fire wood for later, or piling up and burning in bonfires. We have almost finished the burn piles. We started with 16 big tip truck loads of stumps, twisted branches and blackened gnarly undergrowth, all too difficult to deal with in my damaged and exhausted PSD state.

The house is now clear and no longer dangerous to walk around, as we were always wary of falling dead and burnt branches. We haven’t even thought about dealing with the burnt bush further from the house. It will have to wait. I have a couple of years work ahead of me just around the house here. We just won’t go there without a hard hat.

So now it is the solstice again. The winter solstice this time and we have passed from high summer through into deepest winter. Something to look forward to is that the days will now start to get longer, although the coldest days (and nights) are yet to come. A full six months has passed, half a year, I have been working hard every day, but not much seems to have been achieved. We still don’t have a pottery. I guessed, with no real evidence or insight, only the past two bush fire events that burned our previous potteries down, that it would take at least a year to rebuild. That was based solely on past experience. but I was a lot younger then and had so much more energy. Now i’m so much older, I can’t keep up the pace I want to achieve. I’m smart enough to know when to knock off. No more working with torches or under lights. At least not very often!

These last few weeks we have insulated the new car port walls with earth wool insulation and then lined the walls with fibre cement sheeting (fibro). I installed it back to front with the textured side out and left it untouched with it’s slightly pink mottled face as the finished surface. It looks OK. I have been trying to make this brand spanking shiney new industrial shed look somehow slightly softened and more comfortable in these rustic surroundings. I think that it’s working. I’m trying to do it without spending very much money either. That’s a challenge.

The wall cavity has been stuffed with 100mm of recycled beer bottles as brown fibreglass.

Since lining the carport I have been working with my friend Colin the environmental builder. We have dismantled the burnt-out north western corner of the barn and rebuilt it with my new square peg post and another recycled one that Col had in his yard.

We removed the roof and walls and replace all the timbers with new ones that we milled from one of the old stringy bark eucalypt trees when we hired the portable saw mill a few months back. It’s a very rewarding feeling to be able to rebuild this old barn using timber grown here on-site and personally milled and adzed into shape. I really like the concept of embedding something of the old native plant garden into the new shed. it’s all good quality hard wood, so theoretically it should last a hundred years. as long as we can keep the next fires at bay.

We removed the two burnt out posts, then placed the new adzed post in position. I lifted it with the little crane that I have on my truck and raised it up to about 45 degrees, then pulled the post up into place using my chain block.

I will reinstate the 4 water sprinklers on the western walls once the building is finished next week. I only need to install the guttering and replace the polycarbonate. Then I’m done. This old barn now has it’s own 2 new water tanks and will have it’s own high pressure fire pump to run the sprinklers. I decided to reuse all the old burnt corrugated galvanised iron wall sheets. They look suitably rustic and appropriate. The new gal roof sheets look a bit too shiney just now, but as they are old fashioned galvanised zinc coated, they will age to a dull grey, non-reflective surface, just like the old sheets that are next to them.

The half dozen burnt roofing sheets will be re-used on the new pottery workshop walls where it won’t matter if they have a little damage, as they won’t need to be totally waterproof.

On Friday, we got our DA approval for our plans for the new pottery building from the Council – with 9 pages of conditions attached! It seems like a lot of fiddle and extra work, but I’m pleased that we have approval to get going with the new building. This is a big step in the right direction. And after only 6 months! I had a few discussions with the inspector who kept asking for more detail. I eventually had to redraw the plans and colour them in, with a colour code ‘key’, to show all the different materials that I intended to use.

Everyone that I have had to deal with at the council has been incredibly helpful and supportive. We are so lucky!

The trees are just starting to make new shoots since the rain, but half of the rees are dead and will need to be taken down for safety – sometime in the future.