More rain and tasting cider

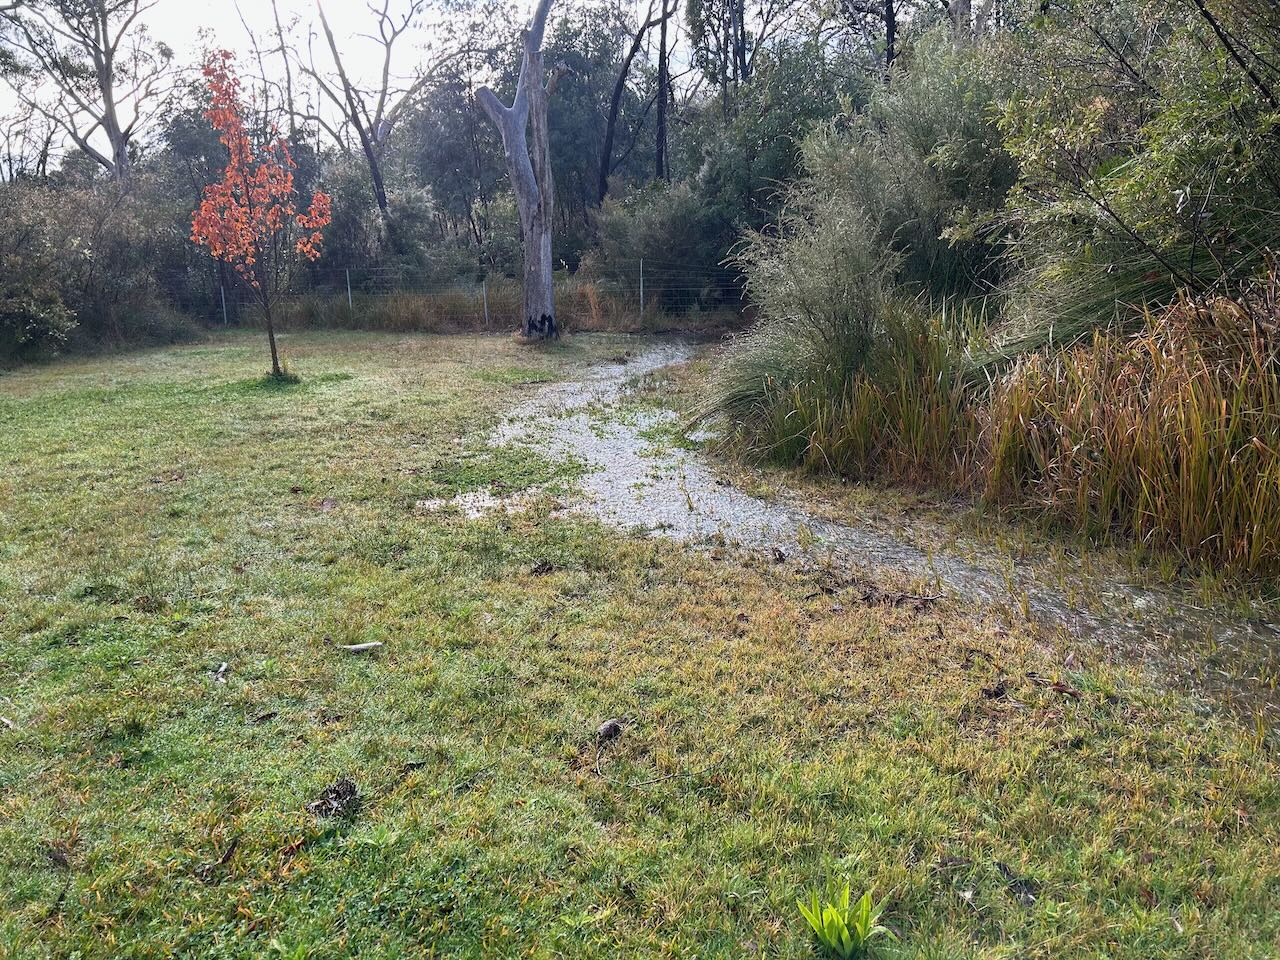
It’s been raining again quite heavily. We now have 4 different little streams flowing across our land, where the dams overflow, and the front lawn is under 25mm of water, like a slow moving shallow lake gently flowing across our kitchen vista.

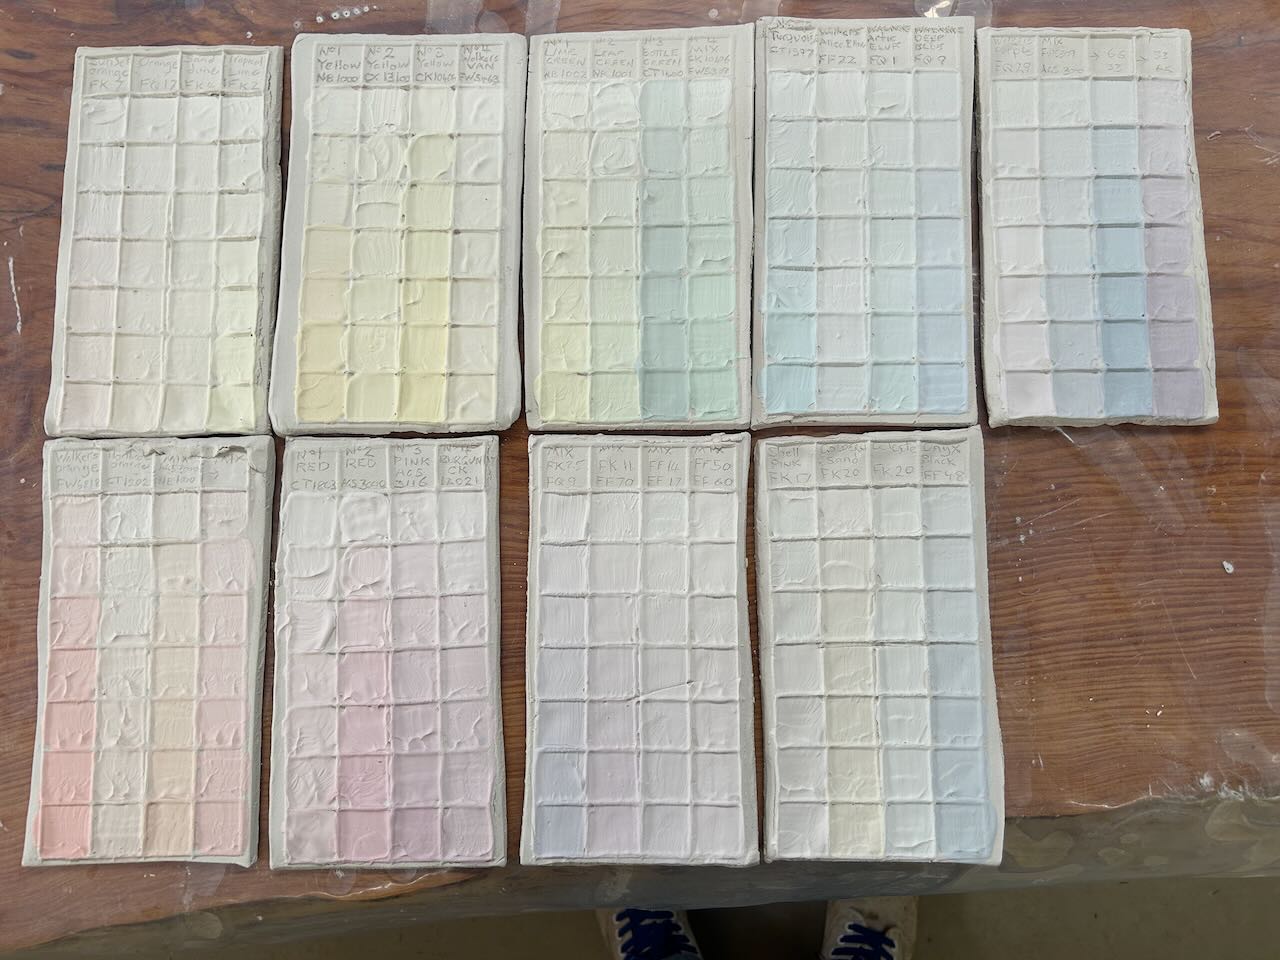
We had 65mm of rain at one point. I thought about what to do for a while and came to the conclusion that it was probably best if I decided to do all those glaze tests that I had been meaning to do for a while. I certainly didn’t want to do any outside work. So I spent a day rolling out slabs and pressing out grid-tiles from my standard plaster grid-tile mould. This ensures that all my test tiles are the same size and shape, so that I can compare them at any time with tests made years before if needed. Tragically, I lost 3,000 glaze tests in the fire, so I’m starting again.

Weighing out glaze tests can be quite boring, especially when it goes on for days. However, it keeps me gainfully employed in the warm and dry pottery studio. I put on a CD while I work. It takes more than the length of a CD to fill one test tile with the infinitesimally small gradations of ingredients in the logical progression of the recipe. Each tile is 8 x 4 squares = 32 weighings and recordings.That’s 288 tests made in this sitting. Enough!

When I was doing my PhD, I did every test in triplicate, so that I could fine them in oxidation, then reduction and also in the wood fired kiln. As each kiln gives its own variation to the test. Having done that very thorough exploration, I’m over it and these days I only make the one series of tests, and fire them  in the kiln that I think will deliver what I’m looking for.

It fills 10 pages of my glaze note book this time around. I have to keep detailed records of what I do and why I’m thinking that it might be a good idea. Sometimes, it takes so long to get the firings done at the temperature that I’m imaging will be best and in the atmosphere that I want, and in the kiln that will give me those ideal conditions, so that If I don’t write everything down in detail, then I can forget what I was thinking and why I went to all the trouble. Hopefully, it will help me to understand both the results and more about myself in a few weeks time, when they are all fired, and I can decode the results! 

Each tiles takes about one hour to complete. After two days of this, I’m pleased to do the last one – for the time being

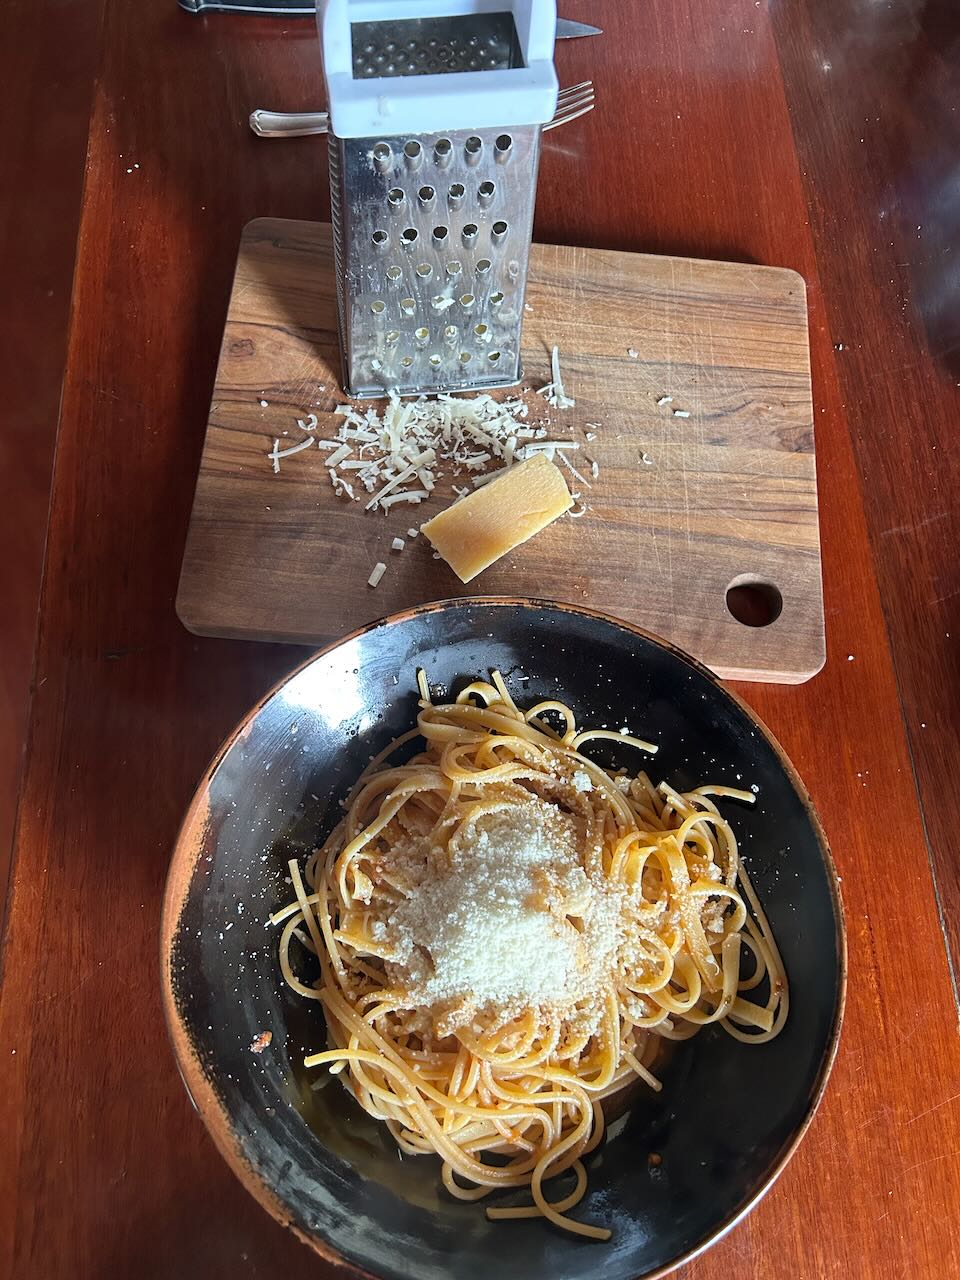
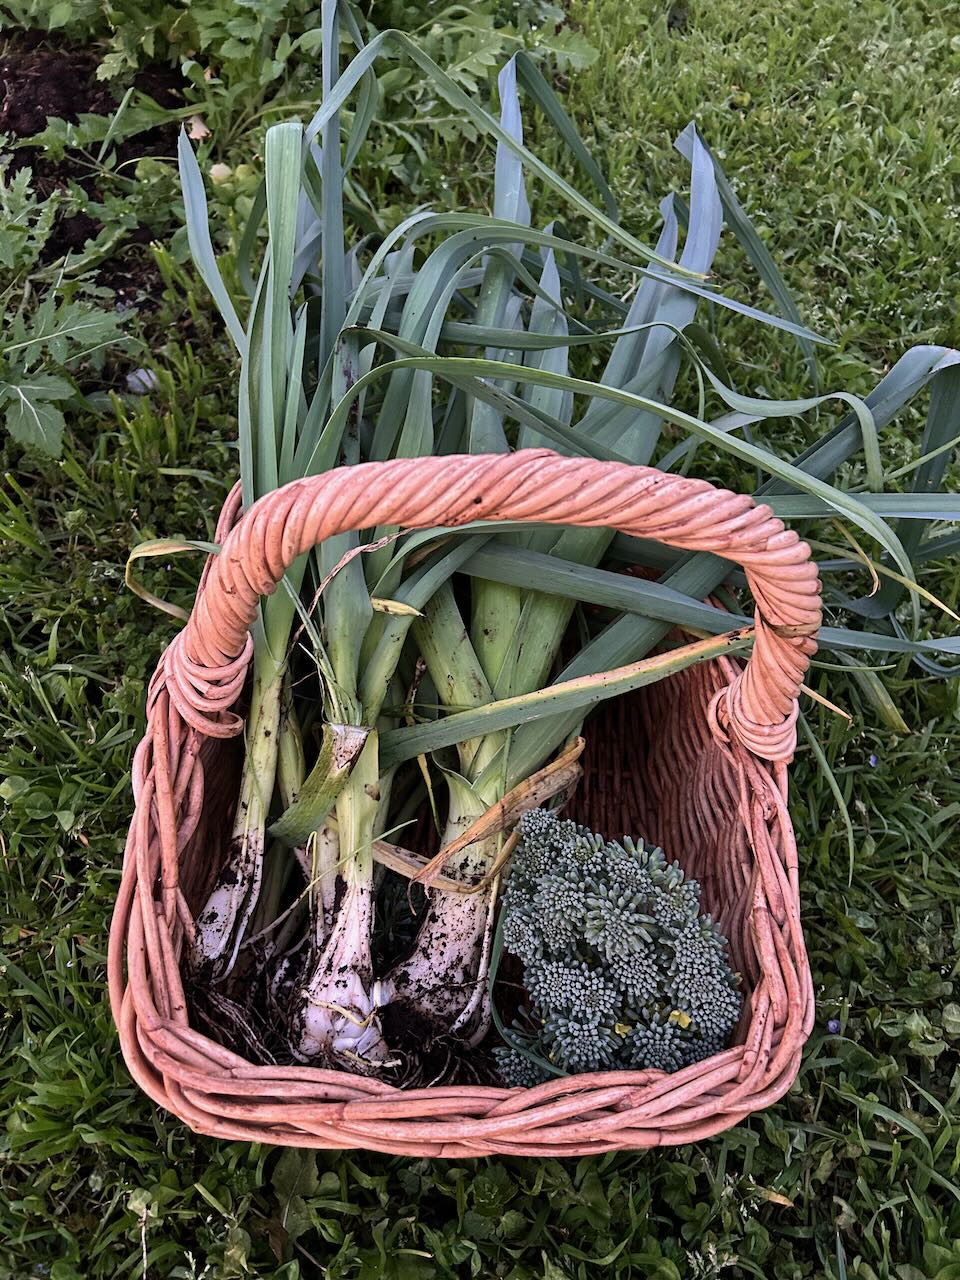
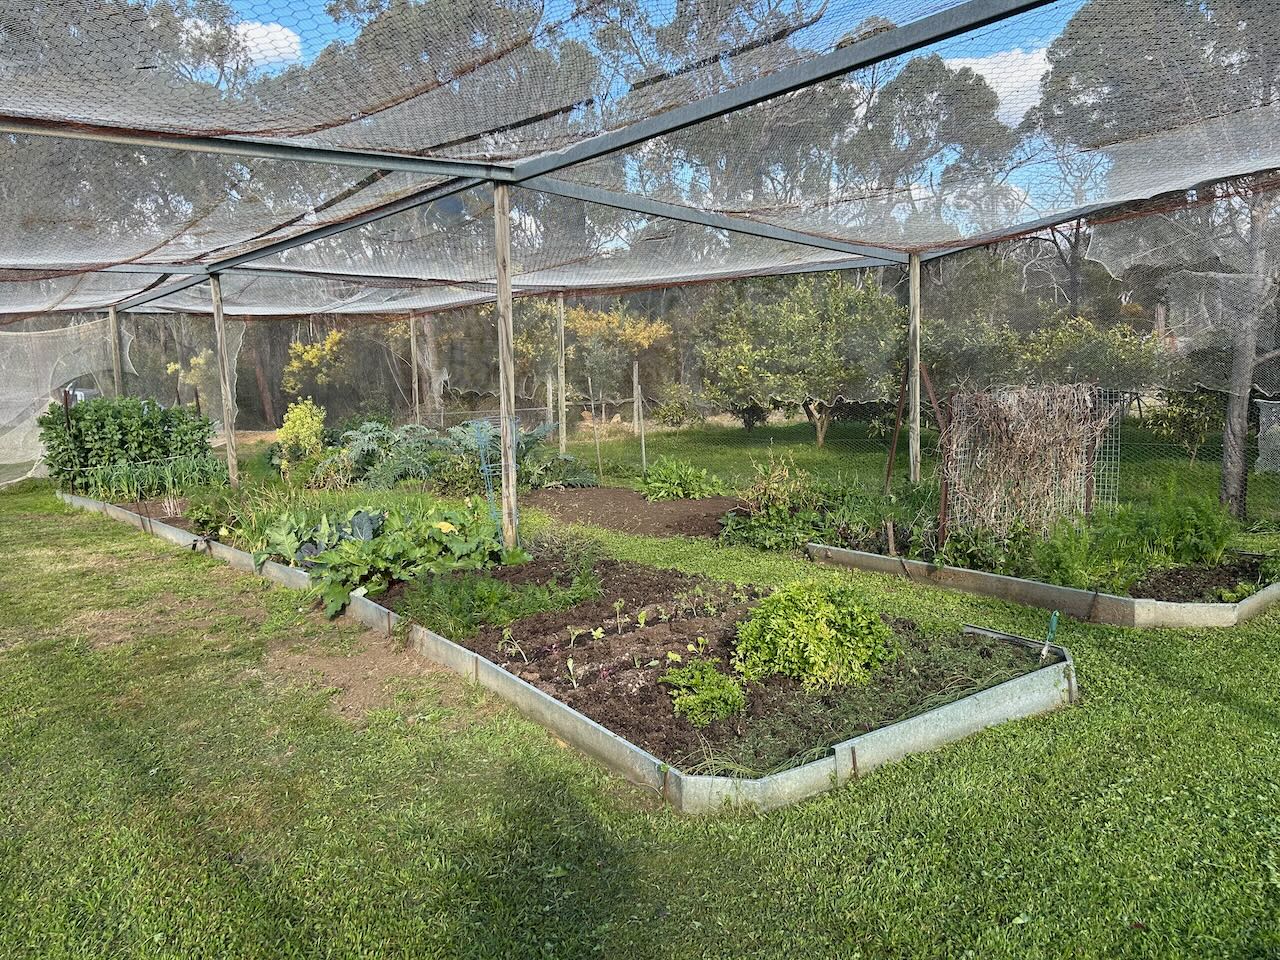
When there comes a break in the rain, I get out and pick vegetables for dinner. This time is leaks, broccoli, Brussel sprouts and carrots. I’m planning baked veggies with a mustard infused béchamel source for dinner. I make a quick and warming lunch of pasta. I tried to steal the spaghetti from the supermarket, but the female security guard saw me and I couldn’t get pasta!

🙂

We decided to try is years cider with dinner. We made this batch of cider back on the 11th of February and bottled it on the 11th of April. So now it has had 4 months to settle down. It will be good to see how it has turned out.

See my blog post; ‘Autumns rewards,  Posted on 11/04/2025 

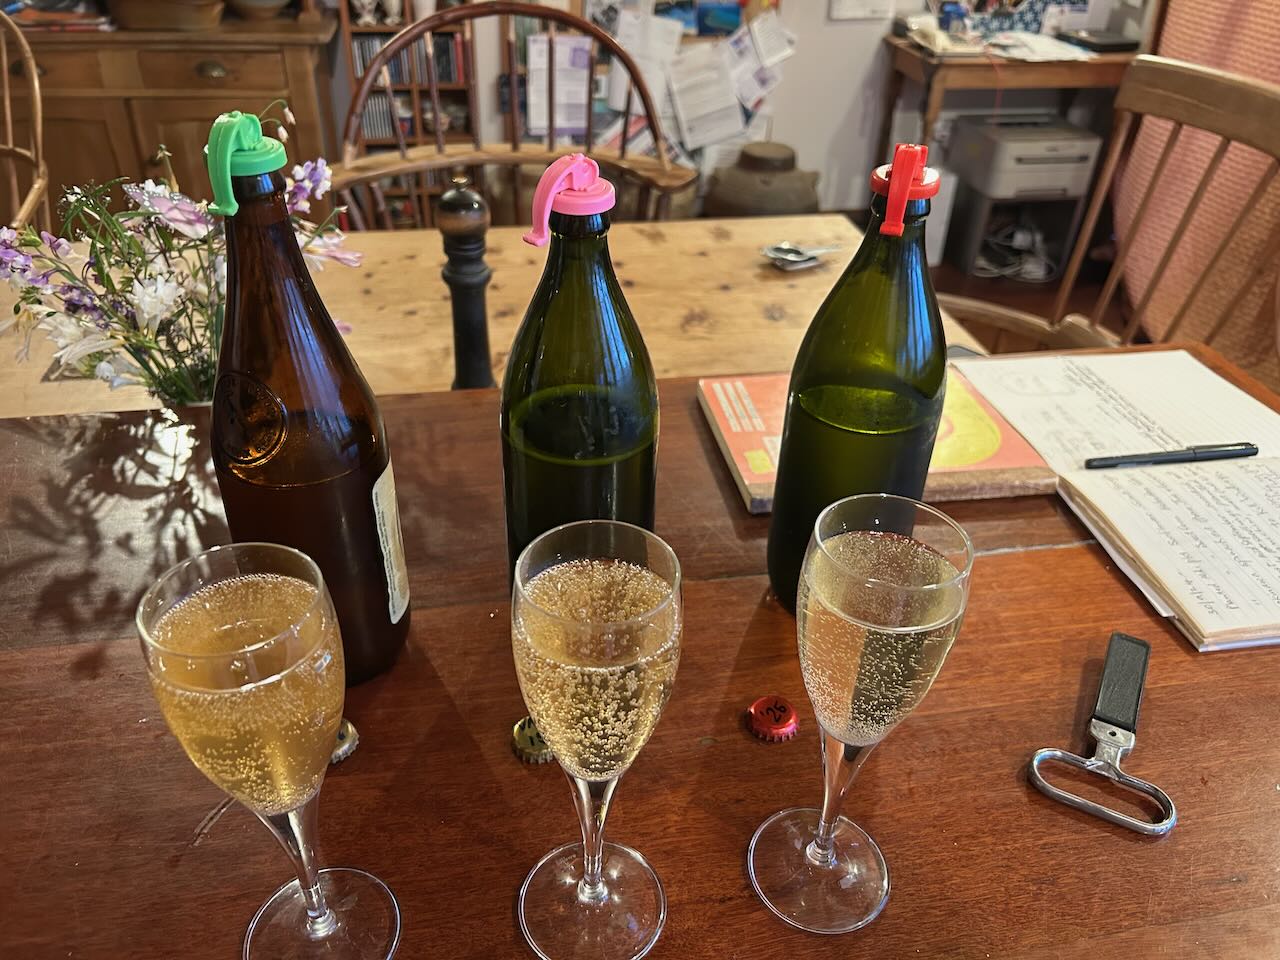
Janine thought that we should do a vertical tasting of the last 3 vintages. What a good idea! 

As we still have a few bottles of the 2012 vintage. This was the last vintage from the aged 40 year old apple trees in the previous orchard. From 2012 onwards there was a severe drought, so intense that we didn’t get to harvest any apples from 2012 through until the fire in 2019. So no cider was made. In 2015, our friend Val had a good crop of apples on her trees in ‘Lagan’, 2 hours drive, south of here, so she drove up a couple of washing baskets full of her apples. We were able to make a small batch of cider from those apples. We re-planted a new orchard in 2020 with different varieties of apples.

We opened 3 bottles to see and compare the difference. The older 2012 vintage was still very lively with good spritz, but a darker colour from its age, more akin to a beer in colour. It has a medium nose of sultry notes and a good firm cider flavour, just as we are used to. Completely dry on the finish. The 2015 from Val’s apples is medium in colour and flavour, and similar to above.

The 2025 is very pale with floral notes, a delicate palette and a dry finish, however, not very effervescent, because, as it is the first vintage from all the new apple trees in the new orchard, all planted since the fire, and this being the first year that we had a decent crop. I made the decision to cut the amount of sugar added at bottling, to ensure that there wasn’t too much pressure in the bottles. I don’t want to experience any exploding bottles. 

We make a completely ’natural’ cider here from our organic orchard apples. Nothing added at all except yeast. I have always used Moet and Chandon champagne yeast, as it has alway worked well for us. Back in the 70’s, you couldn’t buy cider yeast here in Australia, so i chose champagne yeast, as it is closest to what we wanted to make – a sparkling cider. These days I can buy any number of cider yeasts form the brewers supplies shop, but I stick with what works. 

I always leave the cider in the fermenter for 2 months to make sure that it has completely fermented out all the available sugars and is ‘dry’. Over the past 4 decades, I learnt to add one spoonful of white sugar to each bottle at bottling. This is the standard champagne bottling technique. This is to allow it to re-ferment, just enough to make a sparkling cider. Because these are all new trees and therefore an unknown fruit. I played it safe, and only added half a spoonful of sugar at this first bottling. So this batch has only a gentle spritz, but this is better than too much. 

After this test run, next year I’ll be brave enough to add the full amount of sugar.

I’ve never been brave enough to go with the wild ferment of naturally present yeasts that are on the skins of the fruit. When we had a small vineyard of 100 cabernet and 30 shiraz vines. I tried making one vintage of a macerated, whole bunch ferment. The wild yeast that was dominant on the skins at that time was very vigorous and resulted in a rather unpleasant distasteful wine. I didn’t like it at all and threw the whole lot out. So I lost a whole vintage. it’s nothing to do with money. It’s all about the investment of time and effort, and the expectation that there will be something interesting and delicious at the end, even if the amount is very small. For instance, we only make 30 to 36 bottle of cider each year, just enough to fill one fermenter. It’s enough.

Nothing is perfect, nothing is ever finished and nothing lasts. Good cider doesn’t.

A sense that Spring isn’t far off

As I gaze out from the kitchen window across to the newly mown orchard with the chickens wandering about scratching and pecking, I can’t help but be overcome, albeit very briefly, with a warm glowing sense of achievement and happiness. What a beautiful sight. It’s a sunny day and everything is looking good. 

It’s still sometimes hard to believe that all this is ours. I’ve somehow forgotten the 5 years of stress, anxiety, blood, stitches and pain. I’m very pleased that it is all over – more or less!  There is the beautiful new pottery shed in all its fire resistant glory, with its sandstock brick facade, re-cycled iron cladding, and fire-fighting spray system on the wall facing West, all newly risen from the ashes like a Phoenix, (yet again) and in the distance, the repaired and partially re-built functional barn. It has all come together now. We are almost finished with the rebuilding work. There will always be more to do, but the list all fits on one page now. In recent memory, it was so long that I didn’t even want to think about it. I was just plodding along day by day, completely focussed, dealing with the most pressing emergency repair/replace/removal jobs.

Isn’t it amazing how a little bit of balmy weather and some flowers can lift your spirits. This past weekend was glorious. We have just come out from 2 weeks of wet and drizzly weather with intermittent torrential down pours. Which filled all the dams, and we are warned of another week of rain coming in the forecasts. Winter is coming to an end and I can sense it in the colour of the grass brightening, greening and starting to regrow. Hence the recent mowing of the orchards. I spent the weekend in the vegetable garden, which was looking somewhat neglected and dowdy. But the sudden appearance of bright sunshine and warm weather made me want to get out there and get stuck into some serious weeding, strimming and composting. Lunch was a bowl of nourishingly warm miso soup and a bowl of silken tofu, served with diced ginger root, garlic, green onion and dressed with a little soy sauce.

I managed to fill 5 or 7  wheelbarrow loads of pulled weeds on Saturday, such a lot of bending and time spent down on my knees trowling, forking and winkling out the more stubborn woody weeds. Although I ached afterwards from the effort, it was so rewarding that I was straight back into it again on Sunday. After mulching the freshly weeded beds, I planted out seeds and some seedlings. Lettuce, rocket, beetroot, fennel, chard, spinach and celery. All things that are cold tolerant and wont mind if the coming cold spell reaches down to zero overnight. The seeds will still germinate in the coming warm weather. 

I won’t be planting out tomatoes for another few weeks, maybe this time next month? and even then I may have to cover them with some clear plastic as a sort of temporary closh for the first few weeks. I do this each spring as a way of getting an early tomato before Xmas. Last year I did the planting and then left for my work in Korea. So I wasn’t home to cover them when the cold snap came and frosted them off. Janine, who had stayed home, dutifully went out to the nursery/garden centre and bought some more punnets to get things going again.

Tomato seeds can be planted into punnets or trays, in a warm sheltered spot in late June or July, or even now, so that they are big enough to replant in mid to late September. Speaking of tomatoes reminds me to mention that although I had written about picking the last of the tomatoes last month. I showed a picture of 3 green tomatoes and a few red ones, well, the red ones tasted great and those 3 green ones did eventually ripen in the kitchen and we cooked them up with our morning eggs for breakfast last week. BUT, Amazingly, while weeding, I found a stray, self-sown, tomato plant that had survived under a dense cover of fennel. So we now have the last ripe tomato picked in Mid August. That has to be a record for us!

The first asparagus spears have started to appear, so our cooked breakfasts will start to take on more variety. We also have a few bright red Flanders poppies starting to flower. There are a multitude of wild, self-sown, poppy plants all through the garden beds. I planted them once, way back in the 70’s, because I like them so much. They are so bright and cheerful. I’m not so keen on the big blousy doubles. I just love the intensity of the single red.

Janine has decided that she doesn’t want the youngberry canes growing where they are anymore. They’ve been there since the 70’s, and have gone a bit feral in recent years. So I have started the process of digging them out and transplanting them over into the vegetable garden, where they will be under permanent netting. Where they are now requires us to build a plastic polypipe hoop structures over them each summer and drape netting over that to keep the birds out. It should be easier to maintain them in there. There was also an issue of rogue seeds falling and germinating in among the cane patch, some of these germinated and grew up into spiky/prickly versions of their former selves. So a total clean out is in order. I’m being very careful to only select the ‘bald’ canes for transplanting. I have chosen to place them right at the end of the bed for easy access and continuing maintenance. I will create a second cane patch at the end of the parallel bed when I get the time. Maybe next week? During the cold days I will be spending more time indoors in the pottery preparing for the next wood firing.

Today the weather has turned cold. The wind has a bitter finger-chilling edge to it.  Suddenly, I have no further interest in getting out there and finishing off the weeding. There is still so much to do out there, but I’m very content with what I got done over that glorious weekend of still, warm sunshine. Promise of the warmer weather to come. Roll on spring.

Pug mills and working with soft clay

Warning! This post might be very boring! 

Don’t read on unless you want to learn something about clay.

Janine and I have been teaching weekend workshops these last couple of weeks, and all of the preparation that goes into that to make sure that everything runs smoothly keeps us very busy. The whole exercise takes us 5 weeks in total. However, there is still time for other fun things like the garden, chickens and cooking

Over the week in between the two weekend workshops, I re-cycled all the clay from failed and re-cycled practice pieces that had made their way into the clay room to be stiffened up in the plaster basins. I have 5 large plaster tubs sitting in the direct light of the North facing window, this keeps them dry and ready for use, most of the time. Plaster saturates quite quickly if thin slip is poured into them, but they cope very well with soft plastic slumped pots that just need stiffening up. 20 mins on each side on a dry plaster batt, is all they need and it’s well and truely ready to wedge up and use again.

At the end of the workshop, I get everyone to collect all the trimmings, turnings, scraped-off batt bases and thick slurry from their throwing water tub, and pour it all into a tall 20 litre bucket. 8 potters can fill it up pretty quickly. I let it sit and soak for a day or two, to make sure everything is equally softened, I like to get it to a thick and creamy consistency, not unlike Greek yoghurt – with some lumps.

I then transfer it all onto the plaster drying tubs. It takes 3 days to get stiff enough to lift it out and stand it up. This allows more air to circulate around the soft, barely plastic clay, so as to dry it out faster. The plaster basins then need a few days in the sun to dry out again. When we do back to back weekend workshops, the plaster does get saturated and ‘tired’! However, it always recovers with a few days of sunshine.

Once stiff enough, I put it back through the pug mill, extrude it and bag it ready for re-use. It’s easy mindless work. However, I say that in the full knowledge that it is only so if you already know exactly what you are doing and have done a lot of it before. There are so many little signs and issues that you need to know and be aware of to understand about pug mills and recycling clay. The joys and sorrows of owning a pug mill!

The clay can’t be either too soft or too hard, or the mechanism of the pug mill won’t work. A pug mill is in essence, a long tube with an Archimedes spiral inside. This spiral blade pushes the clay through the barrel. Some parts of the spiral at the beginning are removed to make the spiral into a series of spiralled chopping blades. This chops up the clay, mixing both hard and soft parts evenly, then the later, complete spiral section of the auger pushes and compresses the clay out the other end. Some of the better pug mills have a screen or screens half way along the barrel so that the clay is pushed through the mesh and comes out the other side as clay spaghetti. This exposes any trapped air bubbles which are then sucked out of the pug mill barrel by a vacuum pump, before the clay is recompressed and continues along the barrel.

There can’t be any little bone dry edges that have dried out too far. They are rock hard and dry and will clog up the vacuum screens. I have to constantly check when running my fingers through the thick slurry, that there are no small tools, profiles, kidney shapes, or chamois strips left behind by my students. Any of these will grind the exercise to a rapid halt. Requiring the pug mill to be stripped down, dismantled, cleaned, the offending ‘rubbish’ removed, then checked and rebuilt. It’s the best part of a full days job to to a thorough clean out. If it’s only a chamois, sometimes, I can get away with just removing the blocked vacuum screens, cleaning them only and reassembling.  This is still a good hour or so.

In the picture above, the orange vertical plate on the side of the blue pug mill barrel, half way along the barrel is where the vacuum screens are located and can be removed for cleaning. The white lid on top of the barrel is where the vacuum chamber sucks out the air. The vacuum pump is located in a box slung underneath the pug mill trolley, which is on castors for easy manoeuvring. 

So far, I’ve been very diligent in checking all the recycled clay pretty thoroughly, so I haven’t had any ‘accidental’ issues in the last few years. I did discover, quite early on that the new pottery shed, with its north orientated, solar passive design, does get a lot of direct sunlight in onto the clay processing area in mid winter. I’ve learn’t from hard experience that direct sunlight like this can cause the pug mill barrel to heat up and sweat moisture out of the clay on one side, which then condenses and trickles down to the bottom of the barrel. The end result is dry hard clay in one part and slurry in another. The dry, very stiff nuggets of hard clay get forced onto the fine mesh of the vacuum screens and clog it up. The rheological nature of the thin wet slurry in the other part of the barrel doesn’t have the cohesive strength to force the hard clay through. A complete strip down is required. This is a lesson that I learnt the hard way.

Rheology is a very interesting subject in itself. Clay can be either too soft or too hard to stick together and be ‘worked’ or shaped successfully. There are limits called ‘Atterberg’ limits that have been determined, which predict the upper and lower limits of water content in clay. If too wet, it just sloshes around and won’t hold a shape, when too dry, it is just crumbly granules. We need the ‘Goldie Locks’ range for our clays to ‘work’ successfully. For pressure extruding the range is somewhere between 17% and 60%,. That’s such a huge range. See graph. For pugging, it needs to be in a narrower range of 20% to 30%. depending on the inherent plasticity and texture of the clay body. For throwing clay on the potters wheel, it is often closer to 20 to 22%. I have found in practice over the decades that my wrists have their own personal Atterberg limit of around 25% water content or even a little bit softer rather than stiffer. 

Some people say that you should work to your strengths. I think the opposite, I work to my weakest point, and as that is my ancient wrists. I have adjusted my clay body recipes over time to include more very fine plastic particles, slightly more course non-plastics and more fine sand. This combination allows me to make softer clay mixtures that are still easy to pug and easy to throw on the wheel when very soft.  I am limited by what is still available on the market here. So many materials that we used to be able to get have been removed from the market, as the Australian companies that own clay mines were purchased by multinational players who shut them down to force us to buy their imported products.

Luckily, I was trained in the 60’s and 70’s when clay technology was still taught in Art School. I even went on to teach it myself for a few decades. So, I can develop and test my own clay body recipes. A skill soon to be completely lost, as us oldies retire and die out. I can still obtain Australian mined and milled ceramic materials from NSW, Vic and Qld, but the options are constantly diminishing. When I have been shown commercial plastic clay bodies over the years, I have always found them to be far too stiff for my wrists to feel comfortable with. Possibly because of a lifetime of damage due to hard work with my arms, wrists and hands?

So dry lumps of clay on the pug mill screens stops everything in it’s tracks, until the screens are removed and cleaned, and this can be a big job, depending on the maker and model of the pug mill. We are lucky here in Australia to have the ‘Venco’ company, who under the direction and vision of Geoff Hill, manufactured pottery equipment here since the 70’s. His version of  ‘Harry Davis’s, genius design’ of vacuum pug mill was an excellent piece of machinery. The smaller, cheaper, models require that the entire machine be diss-assembled to get to the singular screen. However, the larger, and more expensive models are designed so that the screens are accessible from the outside of the barrel and can be accessed directly for cleaning.

So now I have learnt to keep my pug mills covered with silver insulation foil when not in use, and this has solved the condensation problem. There is always something new to learn, even after 50 years!

Once pugged and bagged, It’s not the end. Good clay that has been well made needs to be nurtured a little. Clay is alive, in the sense that it contains live microbes, or should if you want it to develop the best possible plasticity. We live in the bush here in Balmoral Village. There are few Government services. There is no Town Water Supply available. So we have to collect rain water in dams and water tanks. Water stored in the ground has more bacteria live organisms than Chlorinated and sterilised city water. My clean rain water will allow the naturally present bacteria and other organisms to grow and develop in the clay. This might sound shocking, but it is just natural. Clay ‘ages’ as the organic action develops between the clay mineral particles. The water is drawn closer to the surface of the fragments and the air is slowly excluded and passed to the surface by capillary attraction. In this slow gentle way, clay develops its full plasticity. It is very noticeable after say 3 months. But a year is better! Of course, no-one in their right mind would make clay and then not use it for 3 months! Would they??? Yes muggins does. I have stored and aged porcelain bodies up to 15 years.

There is a distinct difference in the clay after a period of ageing. Clay body made with chlorinated water inhibits the natural growth and ageing, so does not develop the same plasticity.

In the old pottery, there were a lot of eucalypts growing around the building, and consequently there were a lot of gum leaves in the rain water. These made the water a little acid with their tannin. It turns out that tannic water is just about the very best additive that you can put into clay to improve its plasticity. Our gum leaf infused tannic rain water was a pale, transparent grey/brown colour. Some fancy companies that manufacture commercial Porcelain bodies, buy in, at great expense, a product called ’Totannin’, that does much the same thing. Our clay really responds to any time left wrapped in plastic bags, sometimes double bagged, for long term storage. Then stored in a cool dark place and not touched for as long as you can bear it.

Each Friday evening, before the workshops, I bake a loaf of bread and a tart. This time, its beetroot and French goats cheese over a bed of slow cooked onion jam. This has always proved to be a very popular lunch contribution at the workshops. Every one brings something to share for lunch. There is always just a bit more than we need. Everyone eats well and the selection is broad, varied and delicious.

We spent the first day on the wheel, throwing all the forms that we will work with on the following day. I demonstrate each step in the process on each day. 

Teaching a throwing school in winter is always just a little bit of a challenge. The pots don’t want to dry out over night to stiffen up to the point where they can be turned, trimmed, manipulated and handled with ease.. I get the pots to dry faster, by stoking up the slow combustion stove to the max, and keep it going well into the night, to ensure that the pots evaporate off enough of their moisture to be workable. It’s a juggling act, but I manage to muddle through, and at the end of the weekend, everybody gets to take home their finished works.

In the orchard, the early peaches and nectarines are flowering. There is only 3 more weeks to spring, and lots of plants are starting to come back to life, buds are swelling and even the lawn is starting to grown again. This last part isn’t so thrilling though, as this means a few hours of lawn mowing several times a week.

Spring blossom always offers up so much positive energy, the a promise of warmer weather and a bountiful harvest to come.

Nothing is ever finished, Nothing is ever perfect and nothing lasts.

Enjoy the moment.

Wood fired Australian Moon Jars

I fired my wood fired kiln a week or so ago. It was a very good firing. I’m quite pleased with the results. Of course there were a few 2nds, as there always are, however, on balance. I got a lot of very nice pieces out of the kiln. The clay bodies worked very well and I achieved a lovely red/orange flashing colour on the clay.

So that was very nice to see , and I look forward to developing those clay bodies into the future, as they are exactly what I like about wood fired pots, unglazed outside and fire-flashed. All the domestic pots in this firing were raw glazed. ie. glazed when they were still wet or damp from the potters wheel, and then dried out and fired without a bisque firing. A raw glazed firing starts off very slow and gentle, just like a bisque firing, because it is. Then it ends like a stoneware glaze firing. It saves a lot of energy and work in packing, and unpacking, the kiln twice.

However, only certain glazes can be adapted to work as raw glazes. The recipe needs to contain about 20% of clay or thereabouts. This is required to allow the glaze to shrink onto the pot as it itself shrinks as it dries out. Otherwise the glaze will flake off. There is a particular quality of high clay glazes. They contain a lot of alumina. This means that some glaze chemistries, that require high silica content cannot be made very easily. The are a few work-arounds like adding bentonite instead of kaolin, but there are limits to far you can take this successfully. I’m working on it.

Some of the most interesting pots in the firing were my Australian versions of Korean influenced ‘Moon Jars’. The moon jar is a significant cultural object in Korea. They have been made for centuries for the Royal Family, and more recently are quite sought after in contemporary Korean middle class homes.

Interestingly, the porcelain clay for these ancient cultural masterpieces was mined in a very small village in the central north of what is now South Korea. This is the very same village where I have been going to study and carry out some of my research for the past decade in Korea. I’m honored to have a few of my porcelain pieces on show in the Porcelain Museum on site there. It’s such an inspiring place and the single stone, weathered sericite, porcelain clay is amazing.

Having worked there on a number of occasions now. I can’t help but be inspired by these magnificent objects. I can’t bring myself to make copies of them, it wouldn’t fitting for me, sitting here in Australia, as an Australian, appropriating their finest cultural heritage. And what’s more, probably doing it badly.

But I can’t resist the temptation to have a go at a big round jar influenced by the Korean moon jars. so I made my own Australian version. This series of homages are not made from porcelain, nor are they spherical and white – glowing like the full moon. I have made mine as a different kind of ‘moon’ jar. I threw them in white stoneware, coated them in black slip, and then again in white slip, so that I could do some sgraffito carving through the surface. A technique that I have become fond of in recent years.

During the long, high temperature, wood kiln firing, the combination of ash and the slip coatings combined to turn the surface a lovely green/grey/black/white/brown/orange, depending on where they were placed in the two different chambers for each of the firings. They bear no resemblance to the big, fat, round, glowing, white Korean porcelain full moon jars. These are definitely my own interpretation. They couldn’t possibly be confused as culturally appropriated local copies!

Full Moon jar

Moon shine vine. Decoration by Janine King.

Phases of the moon Jar

Phases of the Moon Jar II

Clouds over the moon

Phases of the moon III

Moon Flower jar

Man on the moon jar.

A very different ‘riff’ on the subject of the Moon Jar

Weekend Throwing Workshop

We have just completed another weekend workshop. This time on the topic of throwing. Moving on from rock glazes to wheel work. 

I advertised one weekend and filled the next weekend as well. We also have a waiting list for a third weekend, which, if we fill it will need to be at the end of this month on the 23rd/24th, as all other weekends are fully booked.

These images taken by Janine king

We have 12 potters wheels in the pottery now. 3 kick wheels, that no-one except Janine and I know how to use. They are quite simply the best way to make beautiful sensitive pots, in a slow gentle mindful way. But no one seems interested to learn about them. However, we have had 2 students over the past series of workshops that have had a go on them. AND, I believe enjoyed it! They made some beautiful pots on them.

We also have 9 Japanese shimpo electric wheels. Electric wheels are what everybody is used to using. When I did my apprenticeship with a Japanese potter. I had to learn to use the Japanese ‘shimpo’ style wheel. I’d never seen one before. I had to get used to sitting cross-legged on the workshop floor, with the wheel sunken below floor level. It was a difficult thing to learn as a 20 year old who wasn’t used to sitting and working cross-legged. However, I did develop an appreciation of the compact nature of the shimpo wheel design and the quality of the engineering. 

We have one from every series of the shimpo wheels that they have produced, from the 1960’s through to the 2020’s. (RK 1, 2, and 3). One of the older shimpos is a bit worse for wear and difficult to use, so that is my demonstration wheel. That leaves 8 good ones for student use. So we can enrol 8 students in each throwing workshop.

This series of workshops is based on the topic of kitchen wares, baking dishes, mixing bowls and mortars and pestles, etc.

I demonstrated making both round and rectangular baking dishes, by cutting out sections and hand-building the pot back together again in the new ‘squared-off’ shape. The simplest method is to cut a single ‘leaf’ shaped hole in the centre of the dish. I call this the ‘melanoma’ cut. As it’s the cut of choice for skin cancer surgeons when removing melanomas. This is simple, neat and easy, but it creates the greatest stress in the bottom of the dish. This method has given me the most grief with cracking during drying. But it does give you a very elegant, long narrow dish, excellent for baking a whole fish! 

A more successful method, from my experience, is to make two cuts, one on either side of the pot and push the sides in to fill the void. The ‘amphora’, or balanced cut. This creates a lot less stress in the body of the dish, and is therefore less prone to cracking and is more successful. The most successful and least stressful, is simply to squeeze to pot together between two blocks of wood, and then smooth out and flatten to rumpled base inside. All good techniques, worth practising.

Although we start with regular round pots. They must be re-shaped into ovals while still damp and soft enough to rework. Oval and rectangular baking dishes can’t be turned in any normal way on the wheel once they are shaped, so I’ve learnt to trim the foot by hand using a ’sur-form’ blade, readily available from hardware shops. It’s careful use, followed by a light soft spongeing creates a nice, smooth, serviceable finished edge with undercut.

At the end of the day/weekend, all the shelves are groaning under the weight of over 120 kgs of freshly thrown and turned kitchen wares. There are only 3 bags of clay left on the pallet at the end of the second day. Everybody really got stuck in and made the most of the creative, learning and experimental environment. I encourage everyone to push their skill levels and not to feel too precious about any pot. Stay detached emotionally from your work. Feel free to just squash it up if it isn’t going well and make another one. A better one! It’s a much better way to learn. We all have to learn to practice detachment. It’s a learnable skill. Have many goes at the technique, until you get it right. Don’t feel precious, just squash it up and start again, practice makes perfect. And of course, it is of no cost o the student, as I’ll be the one to stiffen up all the slops and failed attempts. Stiffening the slurry of rejects and turnings on plaster batts during the week, re-pugging and re-bagging ready for another life.

I also demonstrated making mixing bowls and mortars and pestles. I like to ‘pull’ a spout into the wall of these pots. It’s very practical, but really enlivens the form and gives them great character.

Everybody is encouraged to bring something to share for lunch each day. We have quite a sumptuous feast, sitting at the big table in the re-arranged gallery room. Good wholesome food, good conversation and great atmosphere. Lunch is concluded, when our resident barista ‘Len’ makes everyone a coffee. Then it’s back to work.

I ask every one to help clean up their mess at the end of each day, and they do a pretty good job, but there is always more clayey smears all over the floor afterwards. The more you look, the more you find. So when it is all over, I give the floor a final spongy mopping over again, cleaning the water bucket regularly to get as much of the clay dust up off the floor as possible. It’s worth the extra effort, as otherwise, clay dust gets everywhere, and is very fine, so we have to take care with all of our OH&S efforts to keep a clean environment for the benefit of the next group of students – and ourselves.

The weather forecast for this last weekend was pretty poor. 35 mm of rain on Sat and 15mm. on Sunday. We got it all and more! With 63 mm in total over the 2 days. One person even got bogged when leaving on Sunday afternoon. I had to dig out the mud from behind the wheels from the hollows that they had sunk in, and shovel in coarse gravel, so as to get sufficient traction to reverse out of the boggy saturated soil, next to the driveway. An intense way to end a great weekend of learning and sharing. Thank you to everyone who came and made it special.

I appreciate being in the presence your positive creative energy.

Nothing is perfect, nothing is ever finished and nothing lasts. Enjoy the moment.