Rock Glaze Workshop

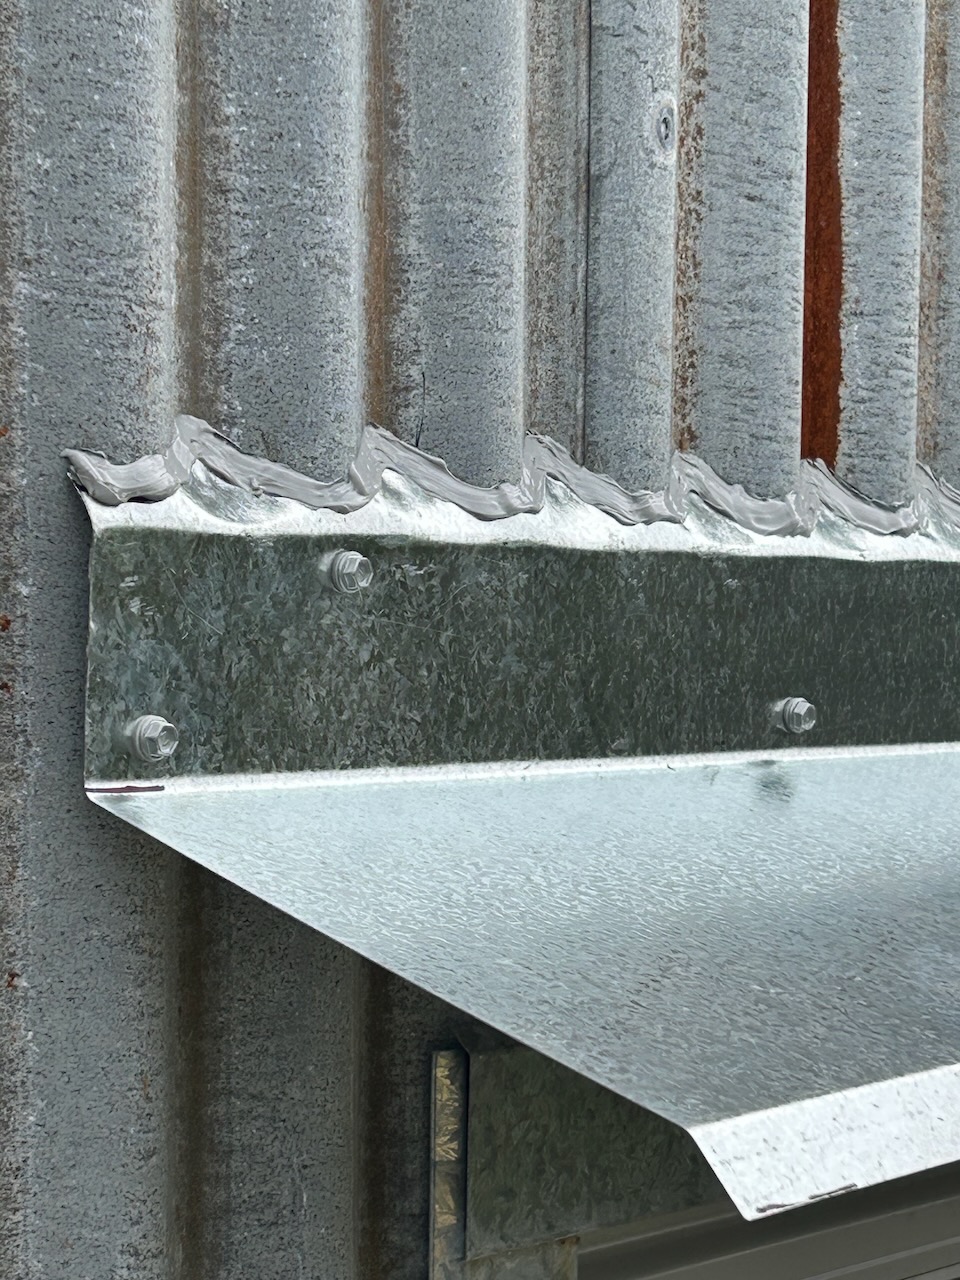
Last week I was busy making clay for the fast approaching, up-coming weekend workshops. I made half a tonne of special clay body with a bit of extra grit, adding some more ‘tooth’ to the usual reliable body that I make up for us. 

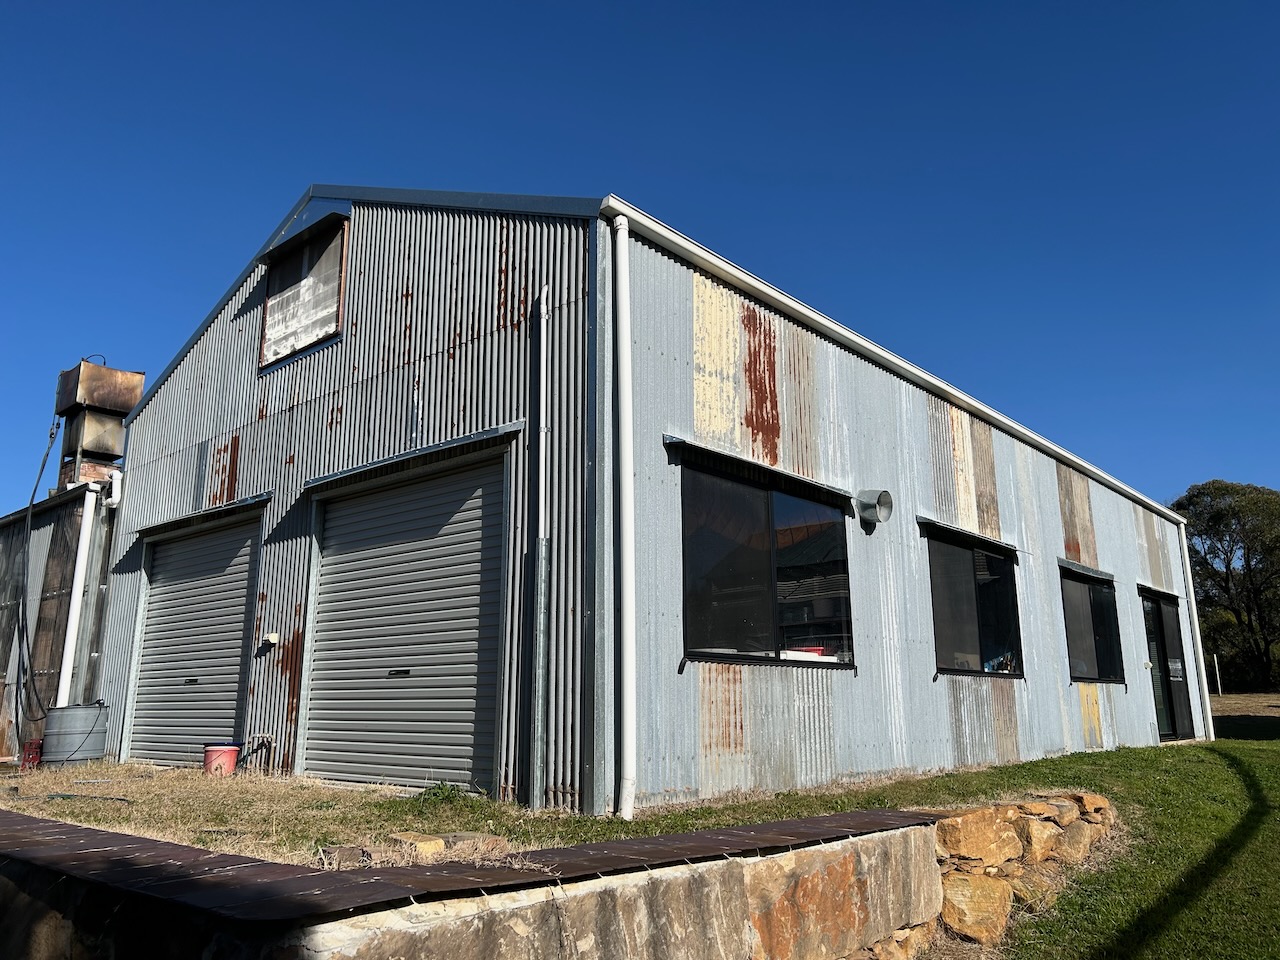
It took me two days. I can make up a quarter of a tonne of clay each day from scratch, pug it twice to ensure even mixing, then re-pugged through the Venco Vacuum pug mill and finally bagged and stacked. Along with sorting materials, weighing out, mixing, pugging and finally cleaning up, I have to have a day off in-between to catch up and to avoid over-doing it. Suddenly a week has gone by, but now it’s all done and ready for the next couple of workshops. We are pretty self reliant in the pottery here. Using our own electricity, our own rain water, using all the machinery and equipment that I have either made, re-purposed or re-built after the fire. I’m fairly proud of this minor achievement of self-sufficiency. 

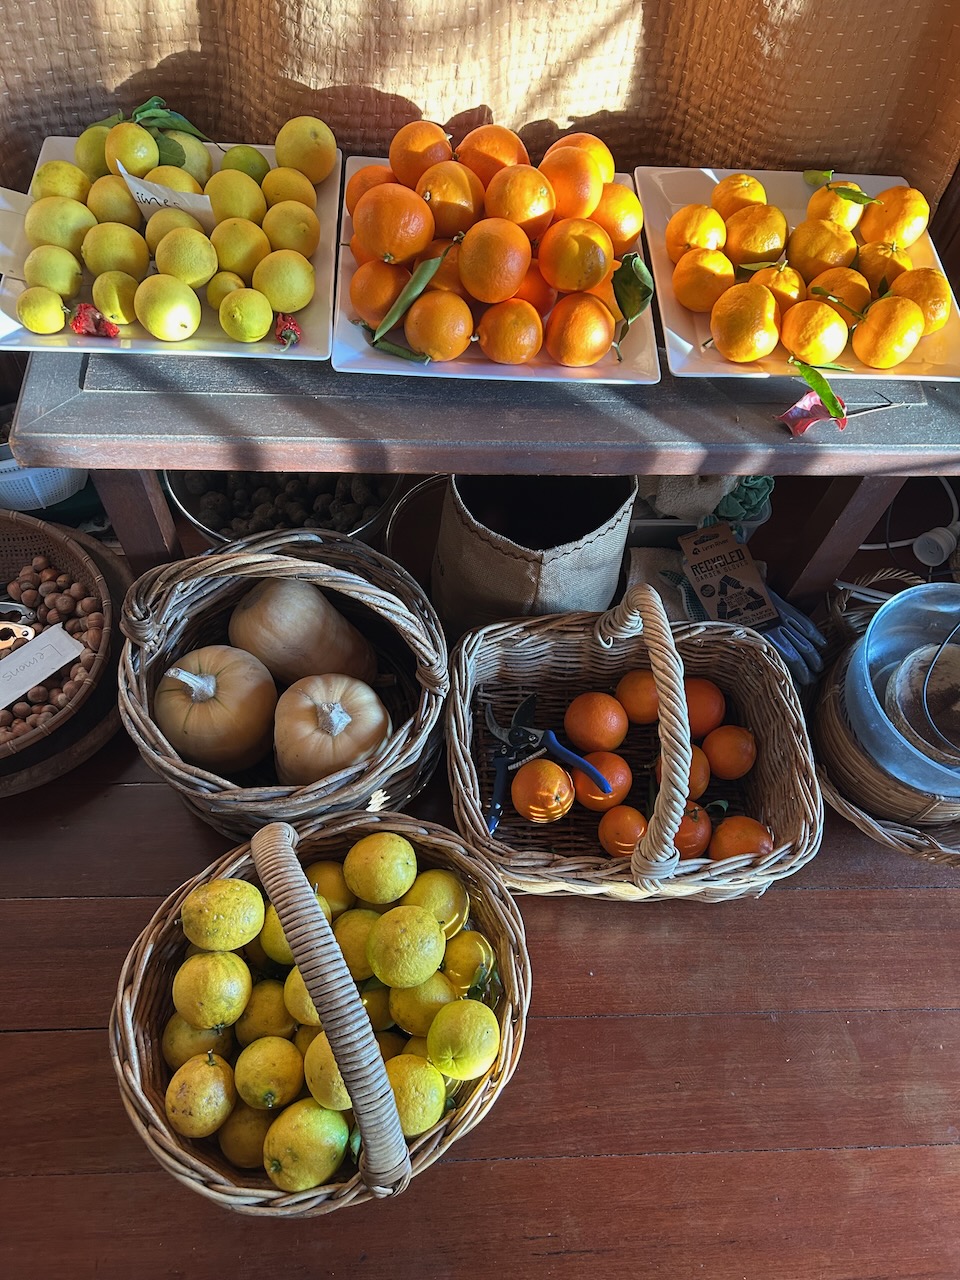
This week we have been very busy with all sorts of little jobs. We ate the last of our late season tomatoes. Surely this must be the last of the late crop. I’m not expecting the last 3 green toms to ripen very well, so these half dozen little self sown gems will probably be it. And very nice too. We cant expect to see another ripe tomato here until just before Xmas if all goes well with the spring planting for next summer’s crop. This must be some sort of record for us, eating home grown red ripe tomatoes for the garden in the last week of July.

What we are getting a lot of from the garden are cauliflowers, broccoli and Brussels sprouts, all the usual winter fare. last night I harvested the first pick of parsnips for our baked veggie dinner. Cauliflowers, broccoli, Brussels sprouts, parsnips, potato, pumpkin and onion, baked in the oven and then dressed in a cheesy béchamel source. A lovely, warming, winters dinner.

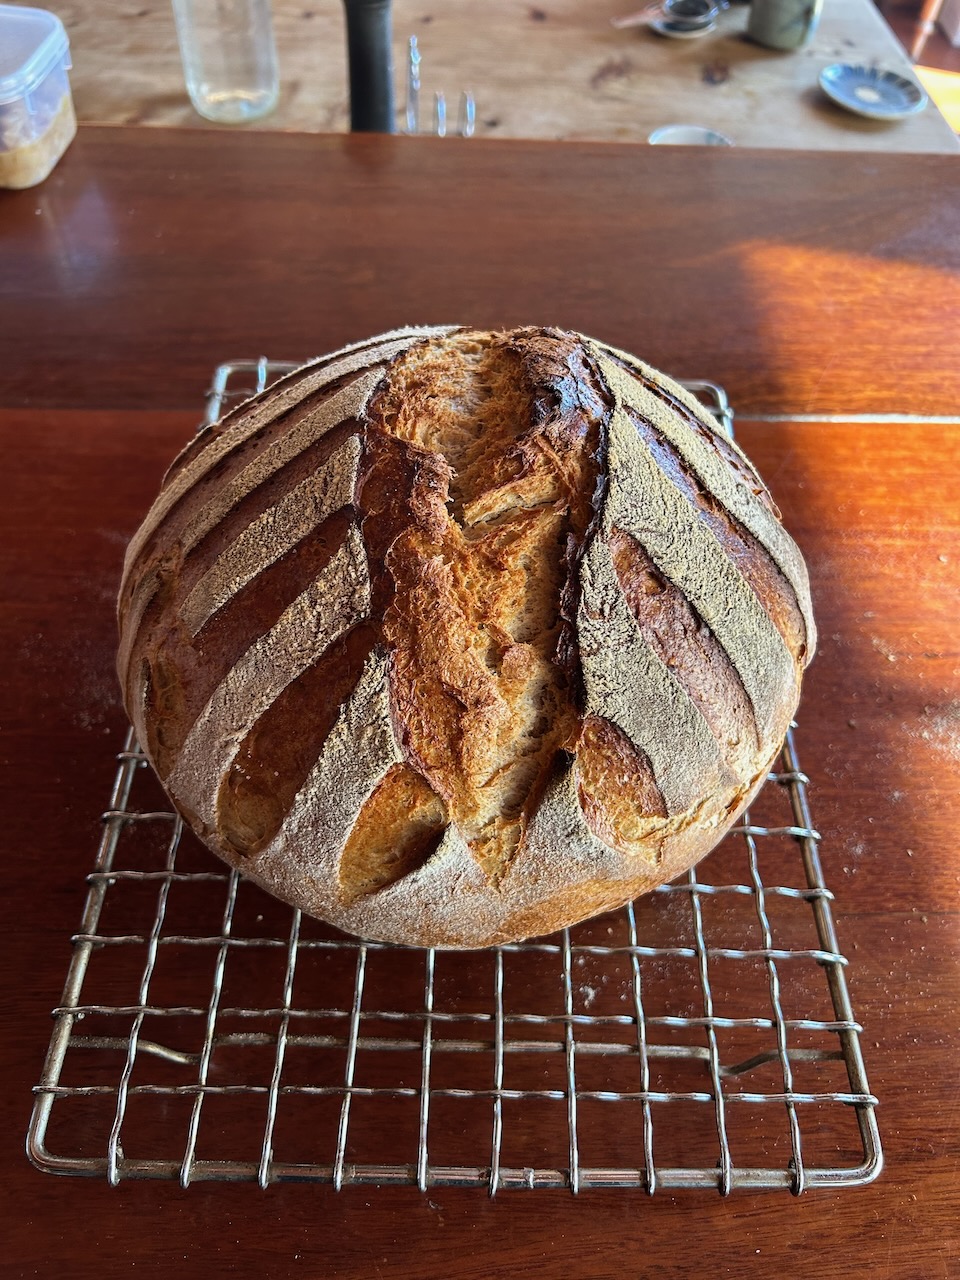
This weeks loaf of rye bread was the usual beauty. All crusty and solid dense rye inside. I use 50% of wheat flour as well so as the get it to rise, as there is very little gluten in rye flour, but it has fantastic flavour. I’m using locally grown and milled organic stone ground flours from the wheat belt of NSW. All grown, harvested and milled on site on the family farm.

This week we also hosted a weekend workshop, but held mid-week, Tuesday to Thursday for a student from FNQ. I had offered a glaze workshop last year, but only got 3 replies, and only one who paid. so it was cancelled. Not enough to make it worthwhile to run it. One potter enquired as to when the next one would be offered. I told her that it wouldn’t. Then she asked how much it would cost for me to do a private one-on-one workshop. She applied for a grant, was successful and so she was here this week. A year later than originally offered.  

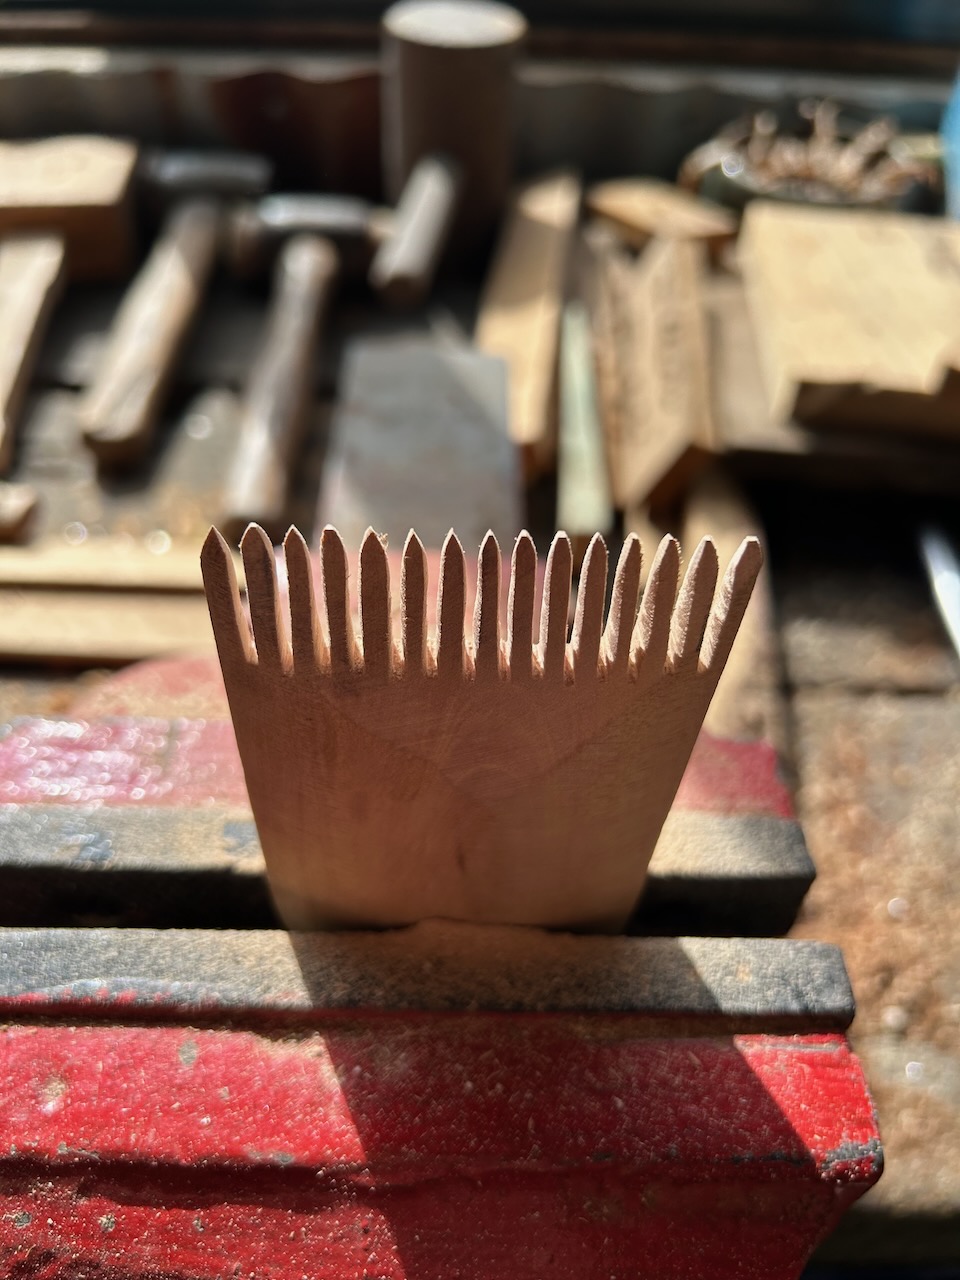
I spent Tuesday morning waiting for her to arrive from Queensland sieving wood ashes from the various fires, stoves, burn piles and kiln fireboxes, ready for use in our testing. I still had a little time, before she arrived, so decided to make a wooden pottery tool. At the last throwing workshop, my good friend Len Smith left behind a wooden comb that turned up in the throwing water. I really liked it and had got used to using it. It’s very comfortable in the hand and very useful. I really like it and was sad to have to give it back when Len next visited for the recent wood firing a week or so back. I decided to make one for myself, so I set to it and in half an hour I had one made. Not as good as Len’s, but I think that it is workable. and most importantly, it’s home made onsite from scrap wood. Not as good as the bought one perhaps, but individual, personal and much more meaningful. It still needs a little bit more sanding and finishing, then some vegetable oil, and it’s ready to go.

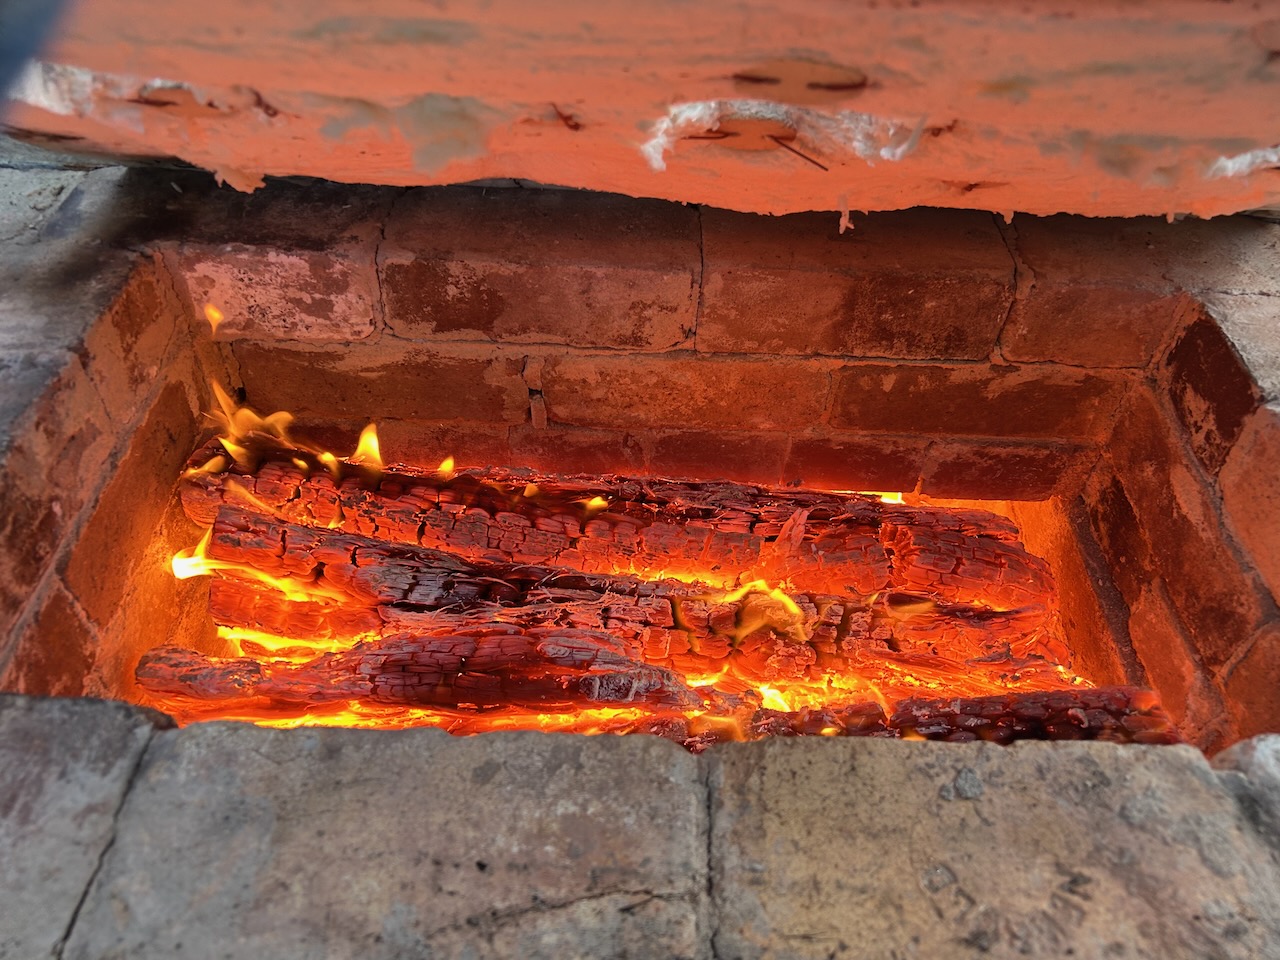
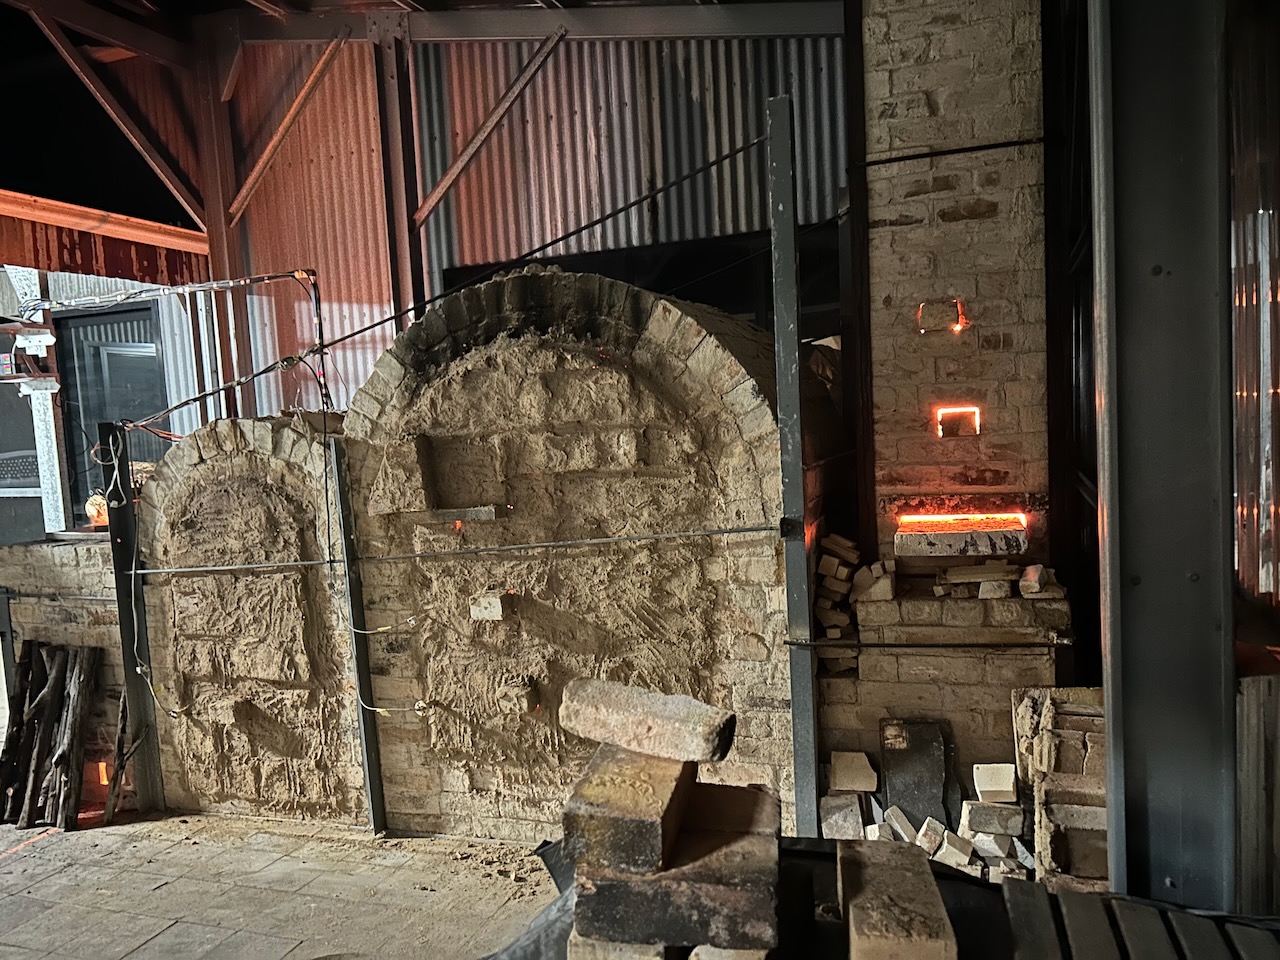
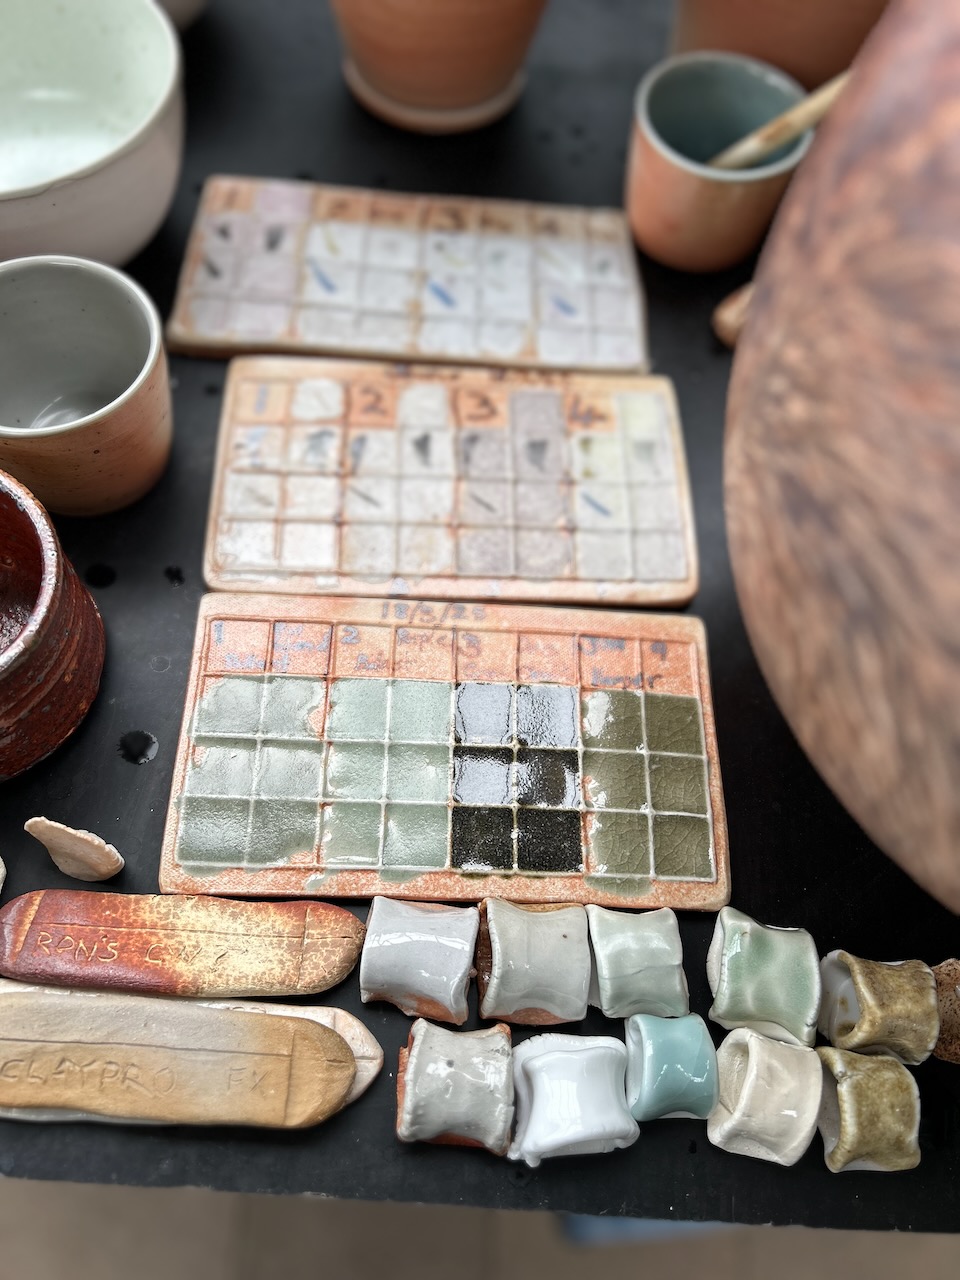
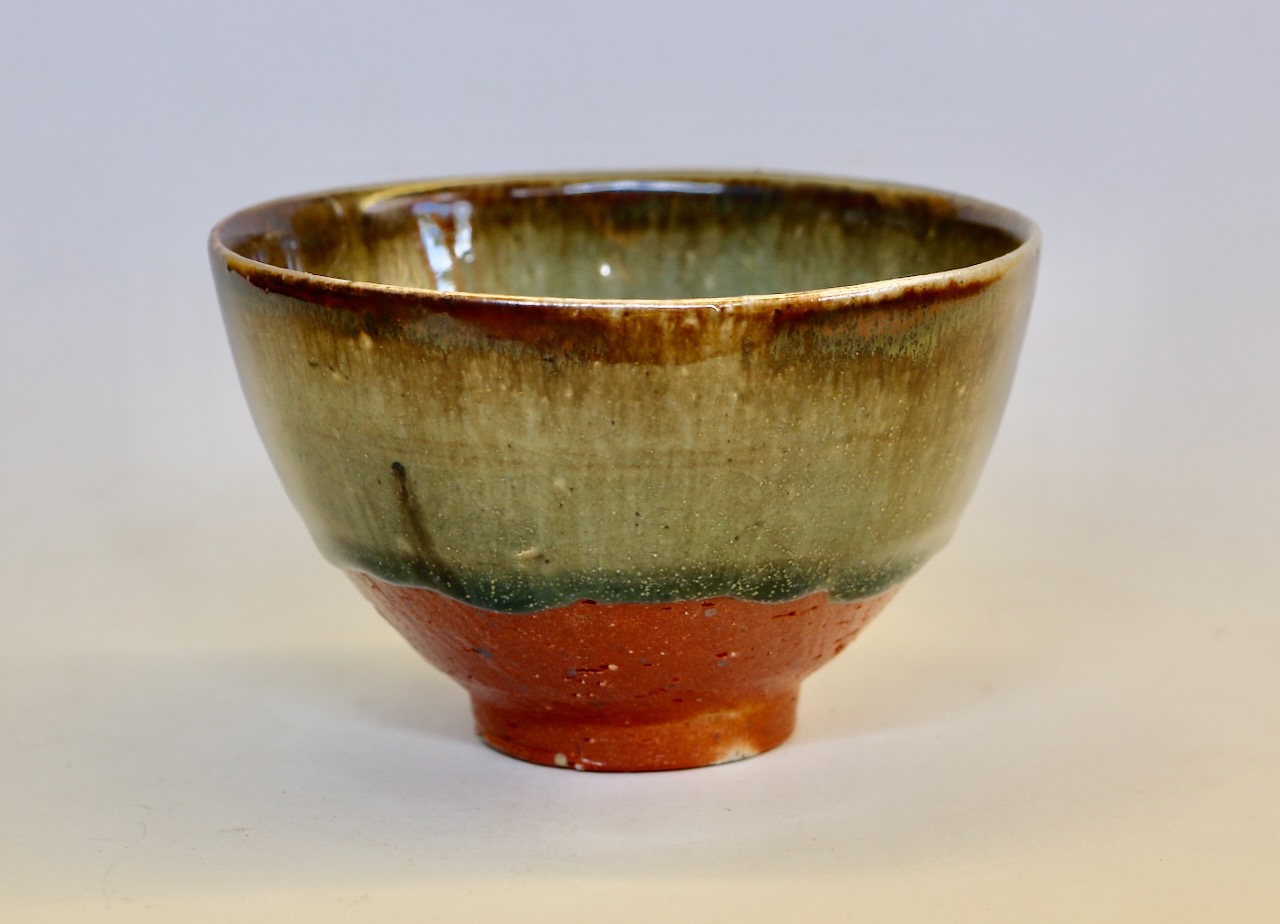
When my student arrived from the airport, we had lunch and spent the afternoon doing a geology tour of the Southern Highlands, collecting samples and talking geology, analysis and geological maps on the short drives in-between sites. Day two was spent crushing and milling our samples in the morning and then making glaze tests in the afternoon. We finished the weighing out in the late afternoon, having completed 13 test tiles, half for oxidation and half destined for reduction firing. We packed both the electric kiln and small gas kiln with our test tiles before dinner. The solar electric kiln was fired over night used the days stored sunlight energy from our battery, while we fired the small portable gas kiln during the evening into the night, a 3 hour reduction firing from 6 till 9.00PM.

Day three morning was spent unpacking the kilns, debriefing on the results, and then a theory class on glaze technology, choice of materials, Segar Formula and loads of other relevant related glaze topics. We finished on que at lunch time, in time for her return to the airport for her flight home. A fully packed, midweek-weekend, intensive crash course in geology, rock glazes and using collected ‘wild’ local materials. Ashes, gravels, arkose, clays and rocks, all alchemically metamorphosed from road side dirt into shiny glazes. 

Winter Wood Kiln Firing

It is quiet, eerily quiet. 

The only noise that I can hear is the sound of the ice under my feet crunching as I walk down to the pottery. It is 5.00 am and pitch black this wintery morning. No stars, so there must be a lot of cloud? It’s too early even for the birds to be stirring and beginning to make their first tentative calls.

I love these early starts. The air is very cold and crisp. My noise hurts in the minus degrees air. fortunately there is no wind, so I’m lucky. It could be colder. 

I’m fumbling trying to light a match wearing gloves, but I do it, and the little kindling fire slowly spreads and comes to life. There is a strong draught in the firebox because I had the kiln lit and firing yesterday evening through into the night, preheating all the raw glazed pots, I have to be careful not to heat the kiln too fast, as the raw pots may still have a small amount of water in them that can easily turn to steam, expand and blow the pot up. This would be a disaster, not because I might loose a single pot, but because the explosion would spread shrapnel like fragments and even larger chunks of rubble through out the kiln chamber and bits would land in almost every open bowl-like form. I’d need to stop and unpack the whole kiln and start again.

By staying up last night keeping a small kindling fire going, I had the kiln up to just above 100 degrees centigrade, sufficient to dry all the pots out thoroughly. I preheat into the dark, leave it to sit and sweat while I have dinner and then I’m back down here to keep the fire alive for a few more hours. This gentle start to the firing is very important and can’t be rushed. I’m used to sitting in the dark, all my wood kiln firings start and end in the dark.

The firing goes well, everything is prepared in advance, all the different sizes of wood, from kindling through floor wood onto hob logs, it’s all cut and stacked next to the kiln. I have my tea making gear ready. Thick, warm, long, leather gauntlet gloves, initially to keep my hands warm, but later to stop them getting too warm or even burnt while stoking. A few hours later, Janine and Len arrive, I’m just about ready to go to hobs with the stoking and shortly afterwards to start reduction. Janine cooks breakfast for us, we have bacon and eggs, then toast and marmalade with coffee. A great start to a good firing. I love my home made marmalade!

I stoke the fire box, keeping it full  to the top, and this generates a consistent level of reduction. I initially use some thinner sticks of 75mm up to 100 mm. diameter, stoking every 15 mins, but as the kiln get hotter, I soon move on to the heavier thicker logs of 100 to 150 mm diameter, and eventually up to 200mm diameter. these burn consistently over a longer period, so I only have to stoke every 30 to 45 mins. The biggest and thickest logs can burn for up to 1 hour, keeping a steady reduction atmosphere and a gentle temperature rise. This is kept steady and even for the following 10 hours, while maintaining a pretty clean chimney. Something that I’m proud of. Minimising any smoke and using my afterburner and scrubber on top of the chimney to minimise any PM 2.5 particulates escaping to the environment. 

I have spent the past few years experimenting in new ways to pack and fire this kiln. There are so many variables, but a steady reduction atmosphere is a necessary constant for good clay and glaze colour. I fire for about 14 or so hours. I finish up around 8 pm, but need to hang around for another hour for the burning down process, before closing the damper in the chimney. I will leave the scrubber running for another hour while I go up to the house for a glass of wine to celebrate and a bit of chat. Later, I return to the pottery to check on everything, switch off the scrubber pump and all the lights and lock up. I have to leave the scrubber water pump running for an extra hour or so, to make sure that it doesn’t over heat from the hot air coming up the chimney during cooling. I don’t want to melt the delicate brass spray nozzle. 

A while ago, I made enquiries about getting a stainless steel version of the same fitting, but the guy wanted $250 for it. Extortion! It’s better to replace the brass one every few years at just $10.

Wood firing is such an old fashioned occupation. I love it, not because of its long history, or its hands on haptic rewards, or because it is a way of avoiding the use of fossil fuels, nor its DIY economical kiln structure investment of 2nd hand fire bricks, making it economical, but in essence, it’s simply because of the quality of the pots that I can make by doing it. It is all of the above of course, all rolled into one experience, but it’s the beautiful ash enhanced surface on the pots that keeps me doing all the extra work involved in their creation. 

However, having said that, I’m also really engaged with minimising my carbon foot print, so burning wood that I have grown myself, from my own forest is an achievement. I’m so privileged, not many people can claim that. Wood is a form of stored carbon extracted from the air, which when burnt, returns to the air. A beautiful, virtuous circle. It almost entirely eliminates fossil fuels. However, although I use a solar-electric chain saw to cut up the smaller logs and I split the timber using a solar-electric splitter that I re-built myself from a burnt out petrol model, (re-use, re-cycle, re-purpose.) which runs off our solar PV electricity. I still have a big petrol powered chain saw and I cart the logs on my old 21 year old petrol powered ute, but this is extremely minimal fossil fuel use for a kiln firing. Maybe one day there will be an electric ute? Nothing is perfect, so I’m happy with where I am at the moment. I have attempted to do all this so far on a low budget working in the arts.

Winter is the season for wood firing and also for spending the long evenings cooking in the kitchen. We light the wood fired kitchen stove each evening in the winter, which heats the room, but also heats our hot water from the ‘wet-back’ boiler in behind the firebox, while I am cooking our dinner. Winter is also citrus season. So marmalade making is on the agenda.

Making marmalade is such an old fashioned thing to do. It’s sort of a grandma’s thing really, young people don’t seem to know much about it. but I love the stuff, so I have taught myself to make it reasonably well. Every batch is slightly different as I experiment, trying to learn whatever there is to be learnt. My methods are also different from Janine’s, so we have various jars of different marmalades. I like testing out all the various marmalade making techniques. It’s a real learning curve. Exactly the same as when I’m wood firing. Everything is a bit of an experiment.

I can’t really bring myself to want to do exactly the same thing every time. I love to experiment, trying different ways of packing the kiln, different shelf layouts, experiment with different clay bodies, decorating techniques, choice of timbers and wadding. Everything makes a difference. Before the 2019 fires, the last kiln that I had, was there for 15 years, altered a coupe of times, but in continuous use. I got to know it well, I was able to get some really nice pots out of it. This new kiln is a learning experience. I haven’t had a kiln exactly like this before, so I’m only just getting to know it now after 5 or 6 years.

Packing and firing is a little bit stressful. There is a months work at stake, as the wood kiln is so much bigger than the electric kilns, and all the little changes that I decide to make will have unknown consequences. Hopefully they will lead to something better, but not always. I just have to decide to take the plunge. Wood firing to me is akin to pruning the orchard. That might sound strange, but it has similarities. I’ve been doing both for 50 years and still don’t know exactly what I’m doing with either. There are so many variables that I don’t understand fully, but there is no point in procrastinating. I just make the decision and go for it. 

With pruning, each tree is different. I’ve done it before, but was it right?. I have to get over 60 trees pruned. I don’t have unlimited time, so I have to make decisions, and fast. I decide and then do it. I open the centre to let light in, take off any dead wood, remove all the water shoots and crossed branches, reduce top growth by 2/3 to keep the tree manageable and prune to an outward facing bud. That’s it! It’s simple! But which bud, and at what height, how much to take from the centre, which of the two crossed branches to remove and which to keep? I’m never sure. But I choose and do it. 

The same with packing the kiln. I can think about it for a long time, but still not know if it is the best option or not. So I’ve learnt to just do it and accept the consequences. Occasionally I unpack a bit and re-do it, but not often. I do take photographs as I pack though, so that I will be able to remember what it was that I did, 3 days later, after I unpack and study the results. If it doesn’t turn out how I imagined or hoped, no worries, it was a learning experience. Hopefully there are enough good ones to make it feel like it was all worth it.

Sometimes the pots turn out not at all like I was expecting, so I’m not too thrilled. However, it is a case of not seeing what I was expecting to see. After cleaning, fettling and grinding their bases, I get a better look at them and start to see their good points. They are often quite good, just not what I was anticipating. I end up well pleased with the fresh surface quality and I learn something new. So it’s all good.

Metric Marmalade

July means that it’s time to get to work in the orchards. There is pruning to do. I usually wait until most of the trees loose their leaves before pruning as a rule, but with such a range of trees in this family orchard of mixed fruits, there are some that have lost their leaves a month ago and others that are still in leaf. 

In a perfect world, I’d treat each tree as an individual and consider its best needs, one by one. 

But this is reality, and I have a lot to do everyday through the seasons. Winter is also wood kiln firing season. I want to fire my wood kiln at least once each month to get through all the pots that I’ve been making since my return from the work that I did in Korea. So the orchard pruning/spraying/fertilising is all compressed into one day, as needs must. I have my friend Andy coming tomorrow to help me do some of the last outstanding jobs to finish off the pottery shed. It needs flashing installed over the windows. Something the shed builders didn’t bother to do. Slack arses! So I’m finally getting around to it 5 years later.

I choose a day at the beginning of July and get stuck in to the orchard jobs. Every tree gets pruned for shape and strength, removing any dead wood, crossed branches and water-shoots, I also open up the centre to let light and air in and allow good ventilation. I prune to an outward pointing bud, and hope for the best. I’m not so interested in maximising the crop of fruit. In fact we have more than enough fruit set each season, as we give a lot away. 

Yesterday during pruning, I noticed that I was pruning off branches from an apple tree with full vigorous growth of leaves still on, and then followed by a peach that was so advanced in its dormancy, that it had bud swell. I really need to give the trees a good saturating spray with lime sulphur before bud burst to suppress mildew, fungus and leaf-curl on the various trees. Lime sulphur spray stinks of rotten egg gas smell, and is best kept off your skin and clothes, so I wear a face shield, hat, rain coat and gloves, just in case.

One of the apples gets white powdery mildew, a couple of the peaches get leaf curl. It’s a mixed bag. After lime sulphur spray, I go around and spread composted chicken manure for its nitrogen, dolomite powder for its mixed, subtle calcium/magnesium content, and some wood ashes for the potassium that encourages healthy fruiting. 

The chickens have the stone-fruit orchard all to them selves everyday to roam and scratch around in. Always finding something interesting to chase and squabble over. They are forever dropping their pooh and enriching the soil as they go about scratching, so a little extra lime every now and then to sweeten the soil is a good plan.

In a few weeks time, I’ll also start the first of the Bordeaux sprays, to suppress the leaf curl fungus, through into spring. Peaches and nectarines are particularly vulnerable to this fungus. Bordeaux spray (copper sulphate mixed with lime) helps to control this. Both Bordeaux and Lime sulphur are registered organic sprays.So I can feel safe using them on our food. However, I like to use the minimum amount, as copper can build up in the soil over time.

Out of the garden and into the kitchen. Winter is also peak season for citrus fruits. We have been making batches of marmalade since the season started back at the beginning of June. This week I have been trying out an old recipe that I got out of Mrs Beaton’s cook book. I have the paperback facsimile edition from the mid seventies. I was encouraged to try it out by my friend Bill who makes lovely marmalade. I occasionally post him a box of Seville oranges and he later returns a jar of his latest batch of marmalade. A good arrangement. 

This year I’m giving one of Mrs Beaton’s recipes a try. There are a few in the book. This is No.2 as recommended by Bill. I doubled the quantities, to make it worthwhile spending the time on it. However. I couldn’t bring myself to use 3 lbs (2.7kgs) of sugar. So I reduced it to 1 kg and added 25 grams of pectin to make up for the reduced sugar. After converting it to metic and doubling all the quantities, it still tastes great!

It’s a good recipe and in this slightly altered form, with much less sugar. I still find it very sweet. I’m glad that I didn’t bother trying it in the original. I wouldn’t have enjoyed eating it at all. Boiling the whole fruit for 2 hrs and letting it sit overnight to cool gives it a very old fashioned sour flavour from the peel that we don’t get by just boiling the peel and juice for a short time.

This recipe gave me 3.5 litres of marmalade = 6 medium sized jars. Worth the effort. We had visitors while I was cooking it up. They all walked into the kitchen and each remarked on how wonderful the smell was as they entered. We were able to give them a large box of mixed citrus to take with them.

Out of the kitchen and onto more pressing practical matters, I made my own new flashing for the pottery shed windows from two sheets of  2440 x 1220 x 0.9mm sheets of galvanised steel, that I cut and folded on the guillotine and pan break, custom fitted for my windows. The lengths of flashing have to be marked and then cut out to perfectly fit into the curves of the corrugated iron sheeting on the walls. In a perfect world. The shed builders should have fitted flashing above the windows before they installed the outer wall sheeting. But they didn’t bother to do anything at all, so the window seals around the edges leaked. But not any more.

Andy and I marked out, hand cut and fitted the curves exactly to match the variations in the mixed 2nd hand gal sheets. A slow, but rewarding job. We couldn’t use a template, as almost every sheet is different across the wall. Until I collected all this mixed corrugated iron roofing fro mall around Sydney and the Highlands. I didn’t realise how many different profiles of corrugated iron there were. I just thought that it was all the same. But every company has their own individual variation of the profile.

We spend a day going around the building and fitting the new flashing above all the openings. We can’t take off all the cladding to do it properly. As it should have been done. So we add the flashing onto the wall sheeting and cut it into the profile and seal it with silicon. It’s quicker, but still takes us all day to do 5 double windows and 3 garage sized roller doors.

Bit by bit I’m getting the shed finished. It’s only taken 6 years to get this job finally complete.

All the flashings acting as mini-awnings above every opening.

Nothing is ever finished, nothing is perfect and nothing lasts.

Winter is here and wood kiln firing

The winter is well and truely here now. We have passed the solstice. We are getting cracking frosts that turn the paddocks silver/white. Janine harvested the last of the almost red, struggling, self sown, tomatoes just in time before the first of the really heavy frosts reduced the plants to crisp brown stalks. The shrivelled plants and their remaining unripened green tomatoes will be composted – eventually, when the weather warms up a little. The mid-winter garden looks a little bit forlorn, but it is still feeding us really well.

We are continuing to pick the citrus fruits. The later crop of Seville oranges are just starting now, so some serious marmalade making will be taking place in the evenings from now on.

I’ve done the first wood kiln firing since returning from my work in Korea. It worked perfectly, and the results were good, although I’m always hoping for something a little bit better, however, I’m happy with the best pots and there is always a string of new test bodies and glazes developing from my local rocks. The samples are encouraging.

I start the firing in the very early morning, so early that there is no noise at all. At 3.30am it is pitch black and really quiet. No traffic noises from the main road. Every body is in bed. It’s a great time to start that tiny little kindling fire, nurture it and watch it slowly grow and develop into something with a life of its own. The little kindling fire is quite an intense time, you can’t walk away for any reason. You have to turn up prepared to sit and pay attention. I don’t leave to make some breakfast and a cup of tea until I start to stoke the bigger blocks of hard wood. Then there is some time to boil the kettle and make some toast. 

By morning, I’ve progressed to the hobs and my firing friends have turned up, so Janine makes us all a proper hot breakfast, cooked on the pottery wood stove. A special treat of our own chickens eggs and some nitrate-free bacon, followed by coffee, our own marmalade on my home made rye bread toast.

I have put a second water spray in my chimney top scrubber and the coarser droplets can be seen wafting out from the top of the scrubber, illuminated in the morning light. They fall like light rain bringing down PM2.5 carbon particles with them. The rest are collected inside the scrubber gutter and drained down into the soil in the back garden.

After unpacking the kiln, the first thing is the house-keeping, cleaning out the firebox and chamber floor, washing the bricks and kiln shelves with alumina, then finally fettling the work. I can see that the sgraffito work is quite different in the wood kiln. The ash and higher temperatures completely change the look of the work compared to the similar pieces fired with solar electricity in the electric kiln.

As heavy rain is forecast for the next week, I wanted to get a load of kiln fuel, in and under cover, ready for the next firing. I spent a few days winching over and cutting down some of our standing dead trees in the far paddock. They were killed in the 2019 catastrophic bush fires that cleaned us out. There is a lot of re-growth now and the understory is coming back up. I’m not sure about these long-dead, burnt trees. Just how stable they are, or if they are partially rotten inside. Dead wood like this can be unpredictable – therefore dangerous. So I’m taking no chances. I wrap a load-chain around the trunk up as far as I can reach, or if they are very tall, I use a ladder to get the connection point up as high as I can. Felling trees is dangerous, so to make it safer, I climb ladders – which is equally dangerous after you turn 50? or 60? or 70? Climbing ladders to make it safer seems a bit of a contradiction, but who said life was straightforward and easy.

Once the chain is (un)safely connected. I remove the ladder and pay out the chain over to where I have a steel wire winch connected to a substantial tree trunk. I cut out a wedge from the chosen tree in the direction that I expect it to fall, then go to the winch and apply a bit of tension, quite a bit, until I see the tree bend over slightly in the desired direction. Lastly, I put a cut in the back of the trunk, stand aside and watch as it falls over to where it is being pulled by the directional cutting and the pull of the winch.

I has worked perfectly every time so far, except once. When the tree was so rotten inside that the weight of a large side branch took it across in an unexpected direction to one side. As I’m standing well back and a little to one side as it goes. I feel that I’m relatively safe. I have been so far, even when the tree goes off sideways in it’s own way.

With smaller saplings, I just attach the wire rope/load chain to the tractor and pull them over.

The wood is all cut, split and stacked ready for the next firing. My hardwood seems to be getting harder as I get softer? It’s a big effort these days to restock the kiln hob wood pile. 

After it’s all done. I’m blessed with a perfect red sunset. Some shepherd somewhere will be delighted.