
This last few weeks has seen us making pots, but also getting into some serious repairs and maintenance.
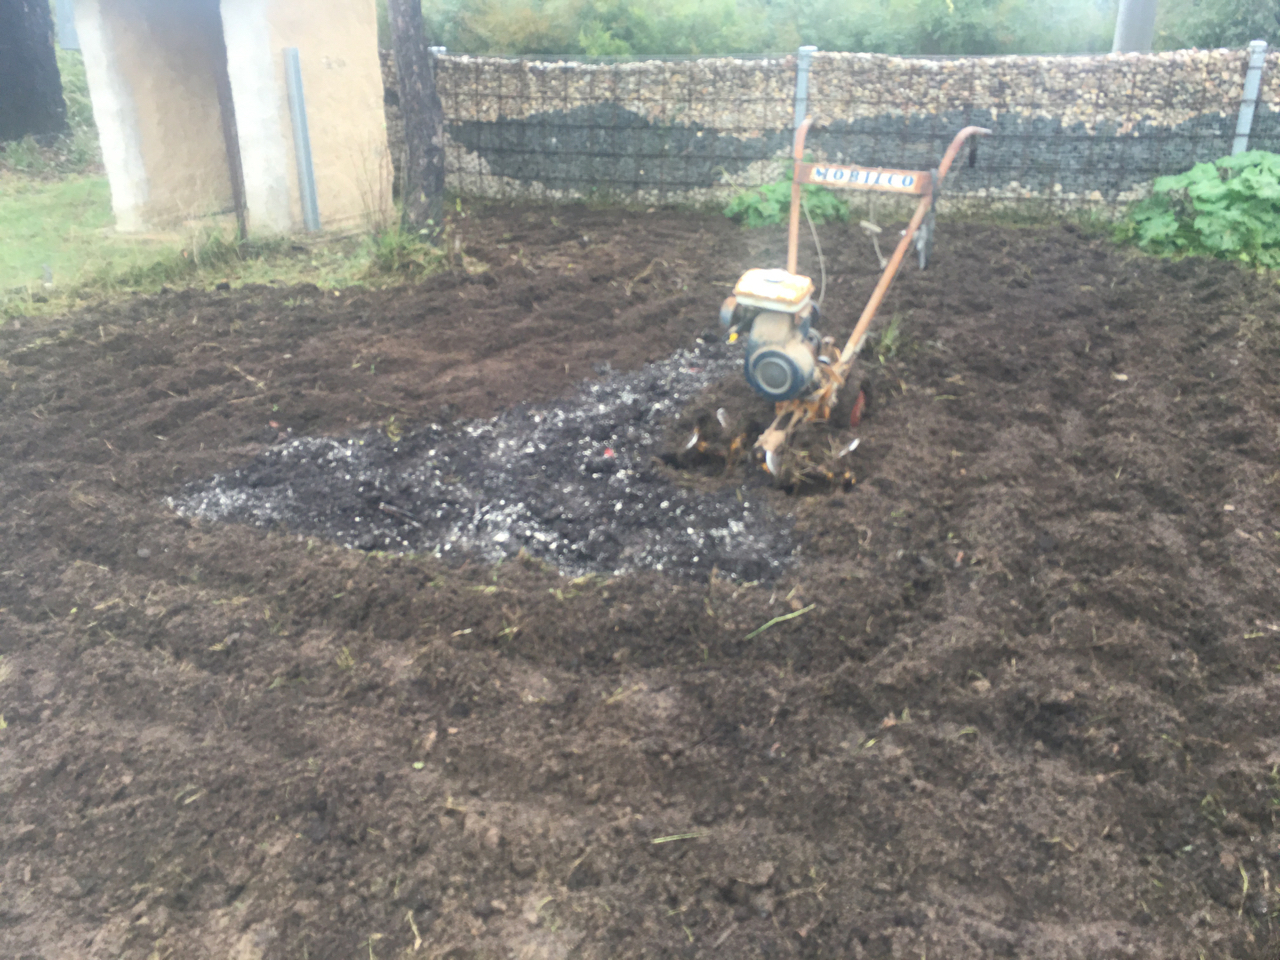
I was outside digging over the ‘cottage garden’ preparing the soil for sowing seeds of a spring/summer flower garden show of colour. I know that now is the time to plant out seeds for spring in this flower garden, as in the veggie garden, where we go almost everyday to harvest food for dinner, do a little bit of weeding and plant out successive sowings of vegetable seeds. I see that the red ‘Flanders’ poppies are germinating in the freshly dug soil where I have recently planted garlic cloves. Poppies decide when the time is right to germinate, but they will only germinate in freshly turned soil. So now is the time to dig over the cottage garden site.
I whipper snipped all the old foliage into mulch, raked it all up and onto the compost, or used it as mulch in other places in the yard.
I took what I thought was the easy alternative of using the cultivator. Not so! I only got 1/4 of the way round and the fuel line blocked up. This machine is a little beauty. I bought it 45 years ago, second hand for $50. It has just gone and gone and gone on working. I only use it a few times a year, but it is so much quicker and easier than hand digging with a garden fork if there is a lot to do. I tweaked the old rubber fuel line and it just snapped clean off in my hand, trailing petrol straight down onto the soil until the small petrol tank was emptied. I walked to the shed and got a pair of pliers to remove the stub end of the fuel line. It was very brittle as its quite old. I have replaced the fuel line a couple of times over the 45 years that I have owned it. The remaining length of line is too short to re-join for a temporary fix, so its another long walk to get some more fresh fuel line from the maintenance shed. With repairs completed, another walk to the fuel shed to get some more petrol and I’m back in business, just a half hour later.
I love this old cultivator. It’s just like me. Out of date and long past its use-by date, but it just seems to be able to keep on going, and going. So solid, reliable and old fashioned. Not very complicated. A good worker. I’m happy to spend time maintaining it to keep it working. It’s a pleasure to be able to own and use such a lovely old Australian made, solid machine that works so simply and so well.
I completed what I set out to do with no more interruptions. Luckily, I had all the parts that I needed on hand, so the job was started and finished on the same day. It’s not always so.
We borrowed Sandy Lockwood’s small pug mill over Xmas and January, as she wasn’t using it over the break and was happy to lend it to us. My wrists weren’t up to wedging another quarter tonne of clay again, so It worked out very well for us both, because after we had finished pugging the new batch of clay and also working through all our stored up re-cycled and bagged turnings and throwing slip. I pulled the pug mill to bits and cleaned it right out. I even saw that the chassis was getting a bit rusted in places, so I cleaned it back, rust converted it and painted it black again. Good as new when we returned it. This pug mill has never been in such good condition since it was built.
That batch of clay is now all used up, so we need to be getting on with getting another pug mill working.


In the old pottery, before the fire, we had two 4” or 100mm dia. Venco vacuum pug mills. One for white clay and one for dark clay. I also had a 3” or a 75mm dia. stainless steel pug mill just for porcelain clay and finally we had a very small 2” or 50mm dia. stainless steel pug for small batches of test bodies and recycling of turnings. That was such a good position to be in. Luxury really. It took me over 40 years to get to that position.
At the beginning of the year, we were given a pug mill from our friend Toni Warburton. It hadn’t been used for a long time. Perhaps 20 or more years? It had been stored in her back shed for time out of mind and was full of dried out clay. That’s not such a problem. What was a problem, was that it had never been taken apart. so all the bolts holding the 2 halves of the pug mill barrel together were rusted and swollen up in their sockets. They couldn’t be removed or even rotated. I could have snapped off the heads trying to get them loose, but then the shattered off ends would have made them very difficult to drill out accurately. So I decided to just drill them all out straight from scratch. A very long and difficult job.


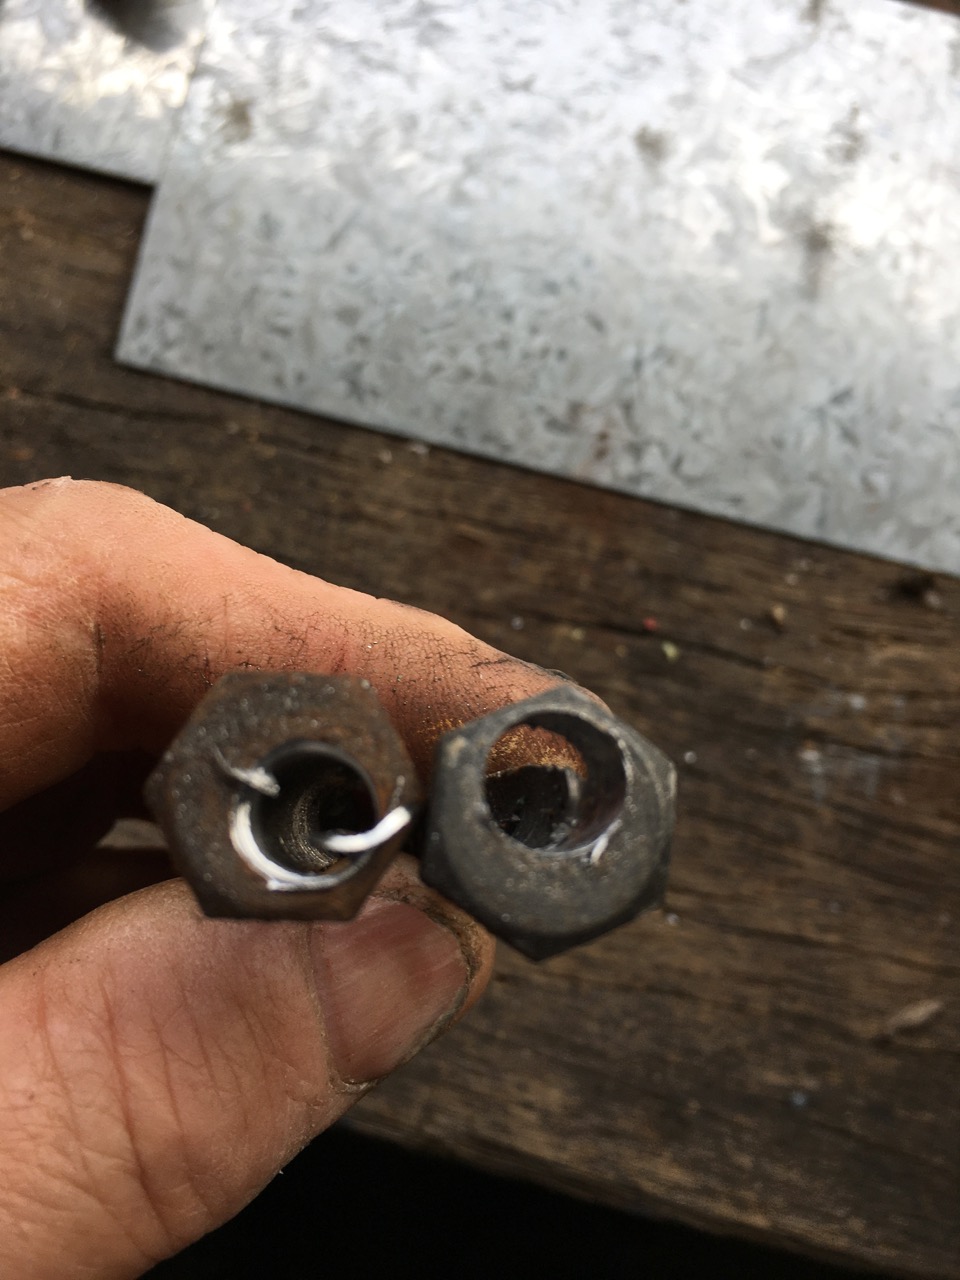
Drilling out all 8 of the bolts took some time. They were all 90mm long, so I started off with a 3mm pilot hole, then increasing from 5 to 7, and then 9mm drill bits, until the bolt was completely hollowed out and could be removed.

I was wondering if I would get away with it, but I didn’t snap off any drill bits, especially the first 3mm drill bit. That would have certainly put an end to it.
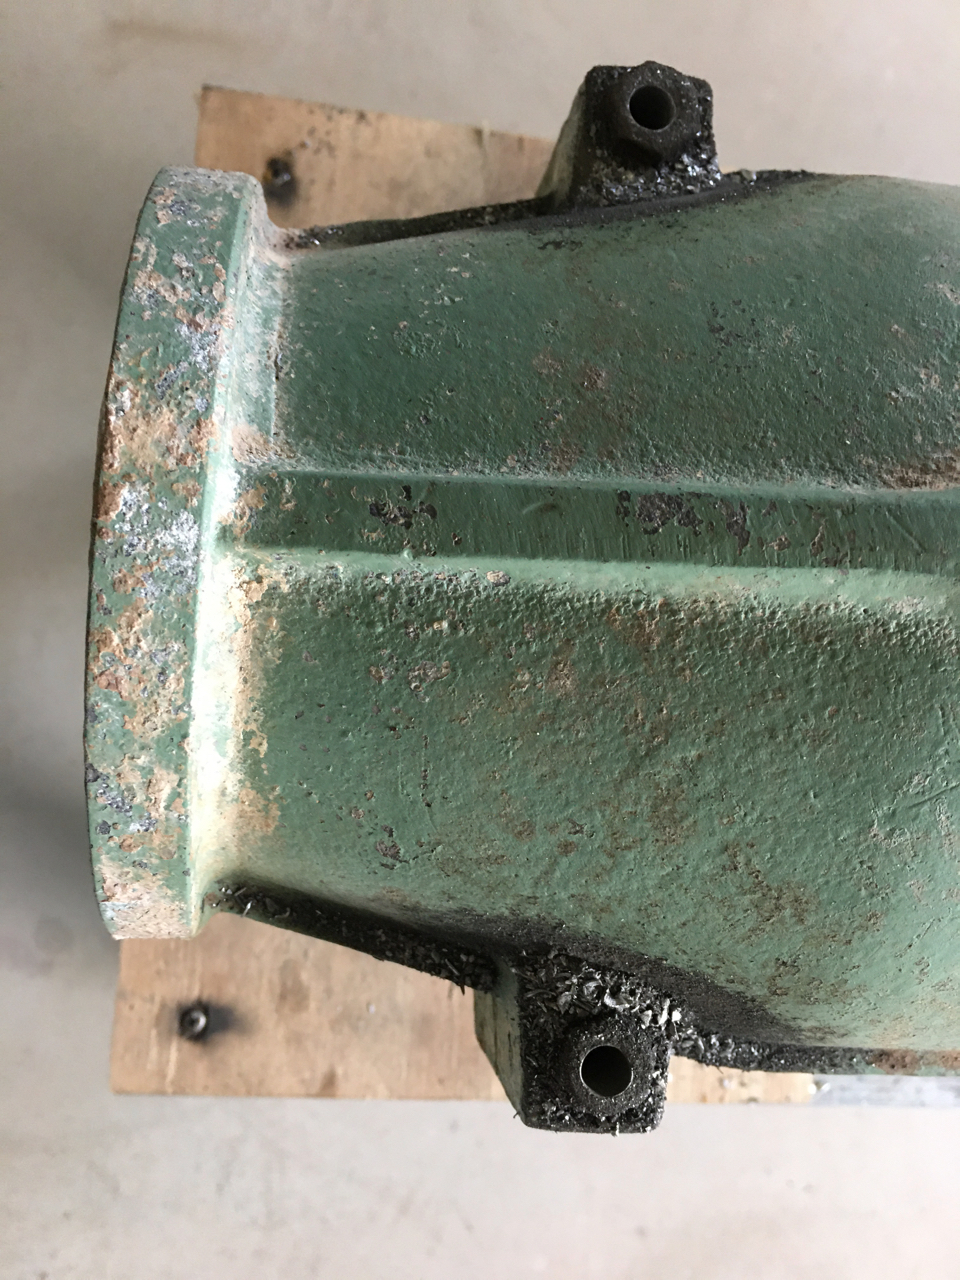
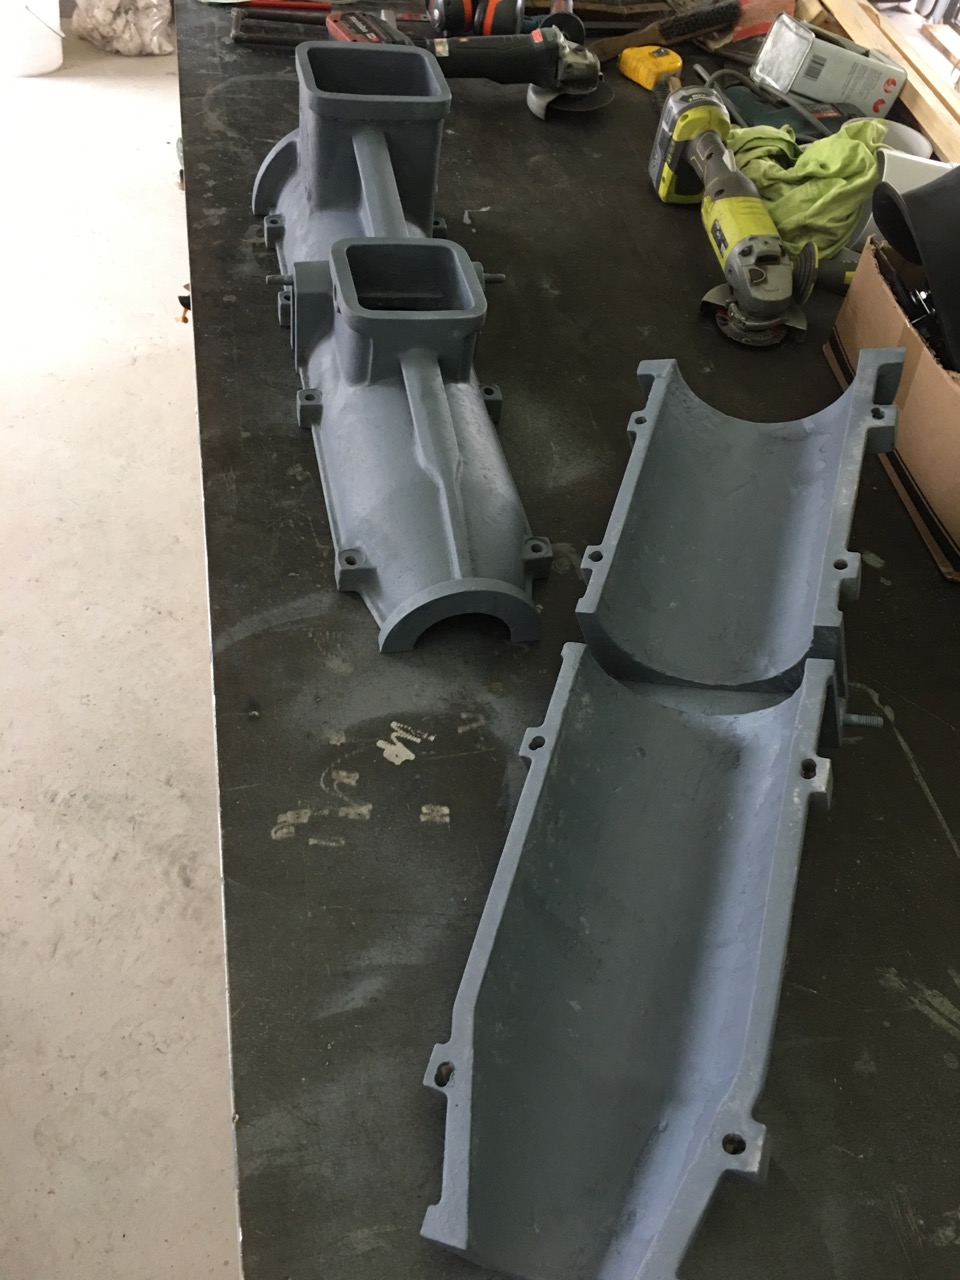
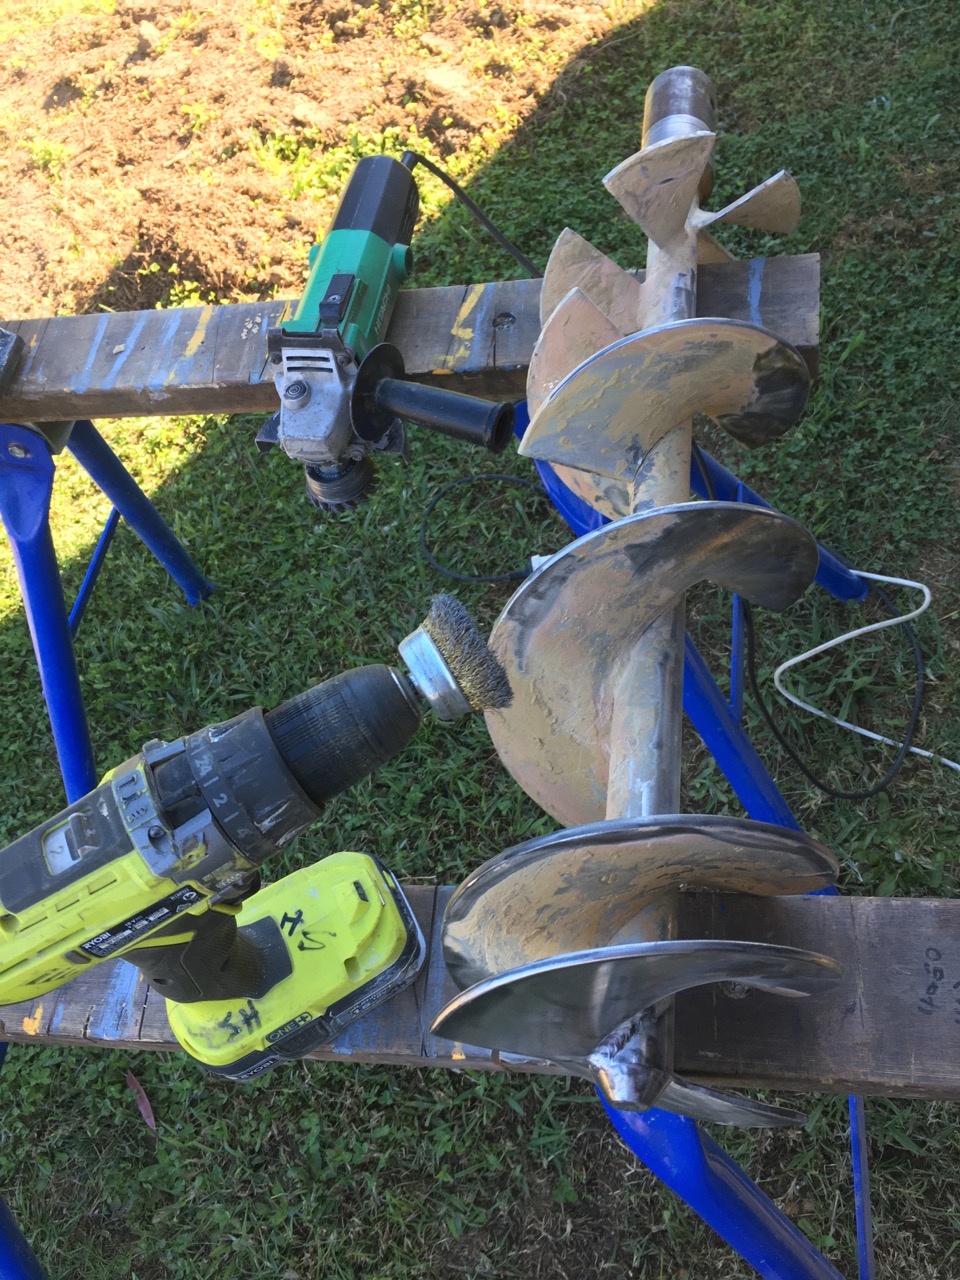
Once I got the barrel apart, I could clean out the dry clay and start to clean it up. The pug mill had previously been used to prepare dark iron bearing terracotta clay. However, I want to use it for white stoneware, so It had to be cleaned out very well. scrupulously well. I made a thorough job of it, starting out with a paint scraper and generally progressing from hand held wire brush, through to a circular wire brush in an electric drill and finishing off with an angle grinder for the most stubborn bits.

I set about removing every trace of terracotta from both the barrel castings and the stainless steel blades and shaft. They cleaned up pretty well. I ground the barrel back to bare metal and gave it a good coat of etch primer to seal it. This wont last in the places of heaviest wear, like in front of the shredding screens and in the reduction cone of the barrel, but elsewhere it will help minimise the ‘salt’ corrosion caused by the alkalis in the clay reacting with the bare aluminium metal under very wet and humid conditions. The barrel is cast out of marine aluminium, but eventually it still corrodes. In the last pottery, I replaced the oldest barrel that I had on my oldest ’70’s ‘Venco’ pug mill in 1984. It was starting to get corrosion patches breaking through the barrel after 35 years! I kept sealing them with ‘LockTite’ ‘wick-in’ each time I took it to bits and serviced it. The Locktite seeps into the crevices and then ‘gels’ to seal off the void. Very cleaver. If this barrel lasts that long, it wont be my problem! Someone else will have to deal with it.
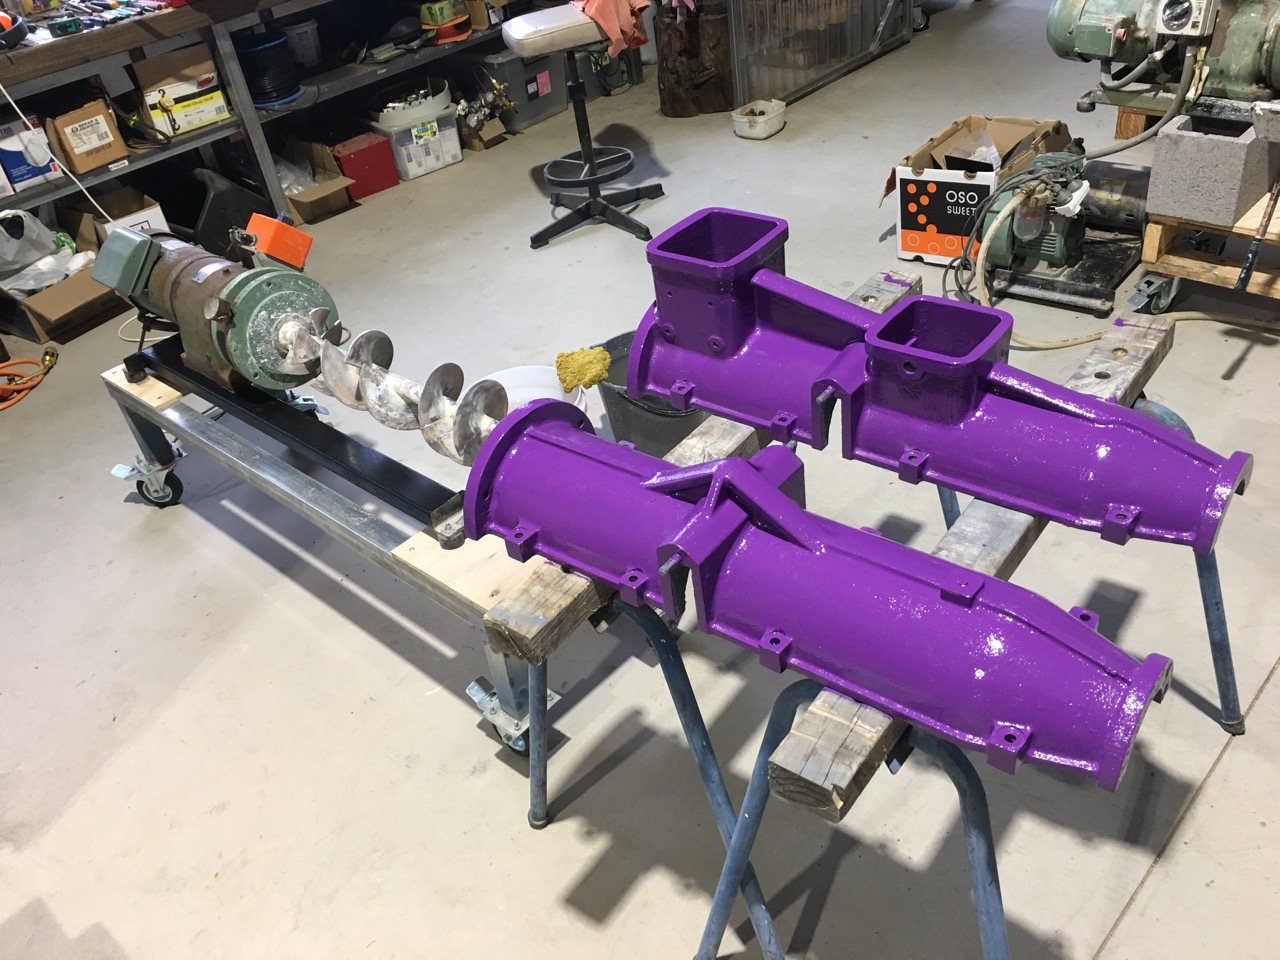
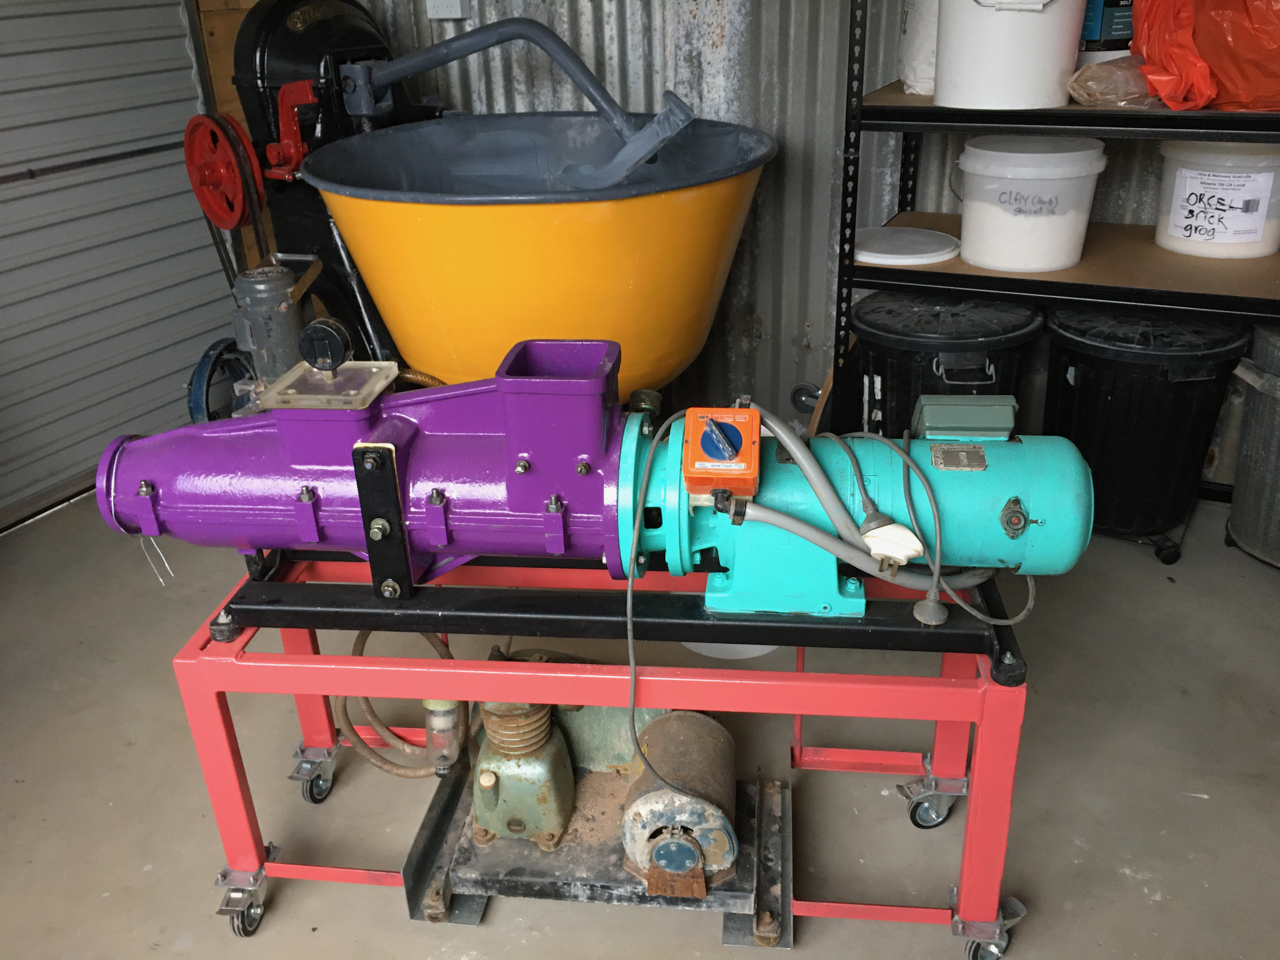
Toni had christened this pub mill ‘Pugsly’, so that is its name now and forever. However, I gave Pugsly a bit of a spruce-up and a new coat of paint.
Bright and cheerful and ready for work. I mounted the vac pump underneath to keep them both close coupled and easy to move around on the one solid castor unit.
This will be our old, but new, porcelain pug mill.
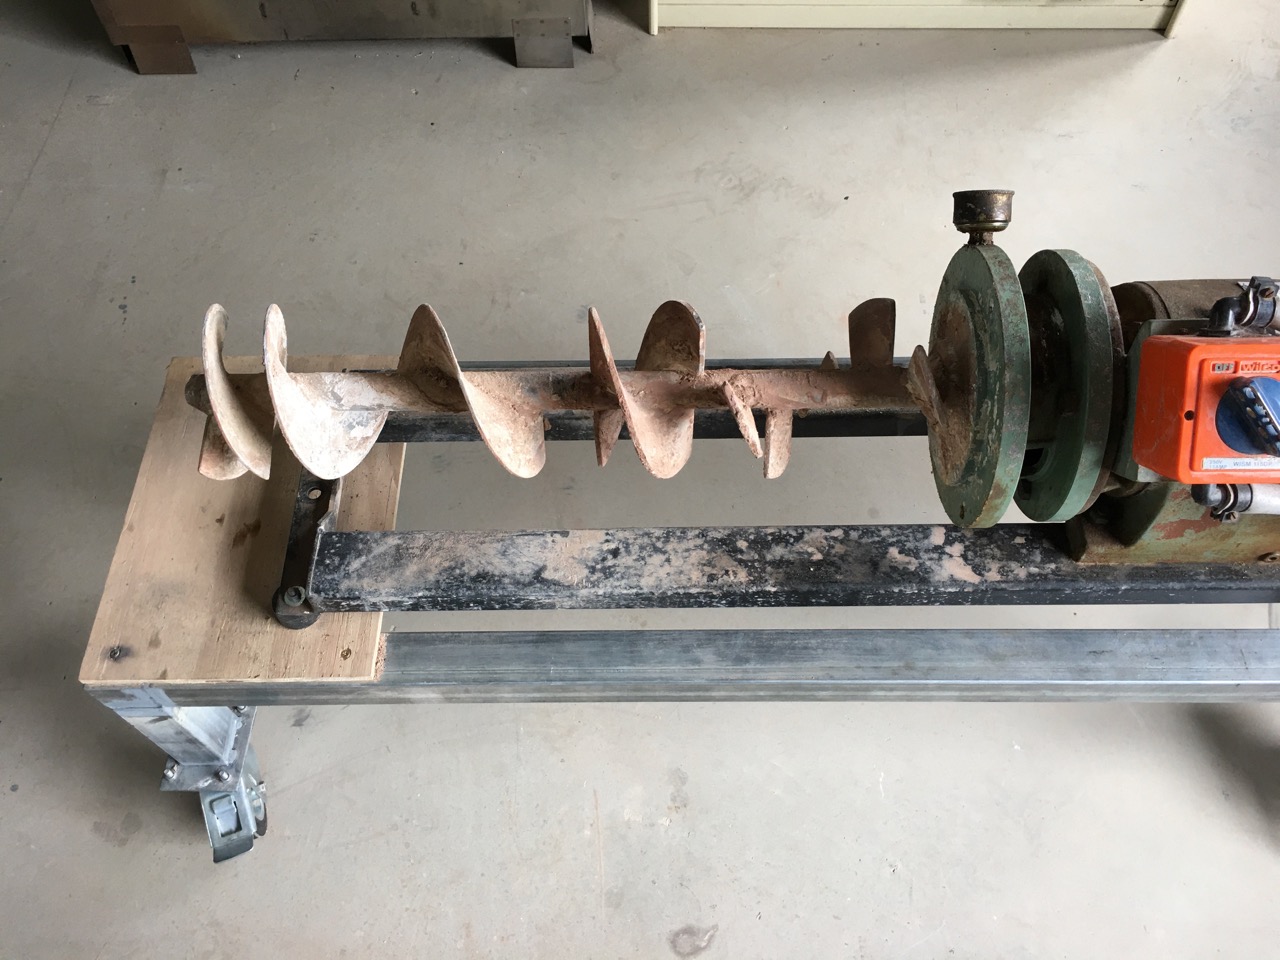
Last year our good friend Jane Sawyer offered us her old Venco pug. She had bought it 2nd hand in the 90’s. She offered it to us as she wasn’t using it anymore. She has another one at ’SlowClay’. This pugmill had stopped working at some stage and was surplus to her needs. We had tried to get it trucked up to Sydney, but no taxi truck company wanted to take on the job of delivering it to the trucking depot for transfer to Sydney. The only quotes I could get were approaching upwards of $1,000. Way too much! So at the start of April. Janine and I made a lightning trip down to Melbourne to collect it. We drove down in the ute, as it has a crane on the back, built for lifting such heavy gear as this. We had 3 days with Jane and took a day of rest to walk into and around Melbourne. The 10 hour drive each way was a bit boring. We changed drivers every 2 hours. It has been a very long time since I drove to Melbourne. The road is all dual carriage way now and a very comfortable drive. The truck is not particularly fuel efficient, so the 20 hour drive cost us $300 in petrol. 1/3 the cost of getting it trucked. But at least we now have it! The best part was that we got to spend a few days with Jane. And, It arrived home safely without being damaged in transit!

This image by Jane Sawyer.
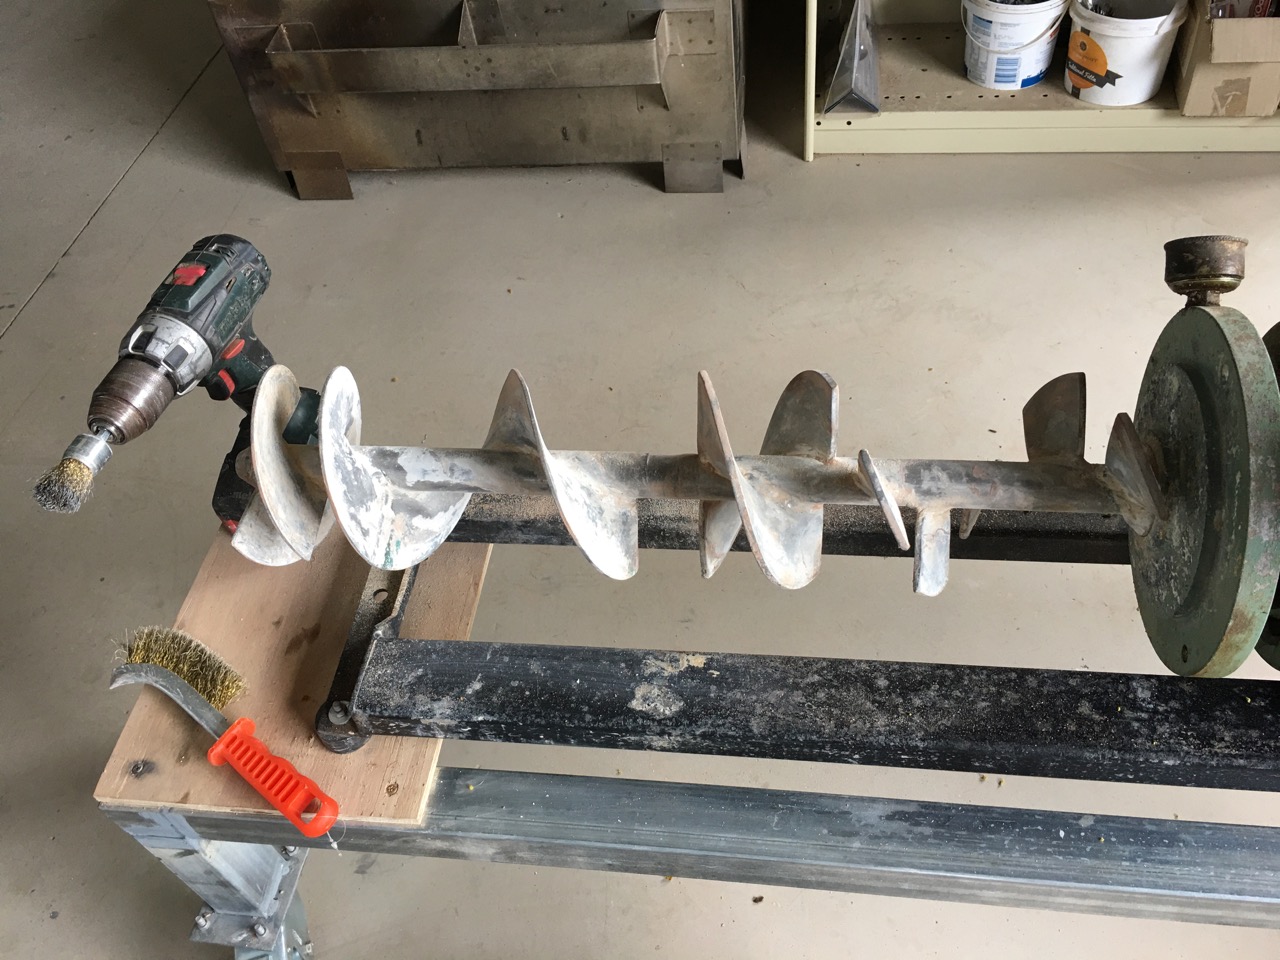
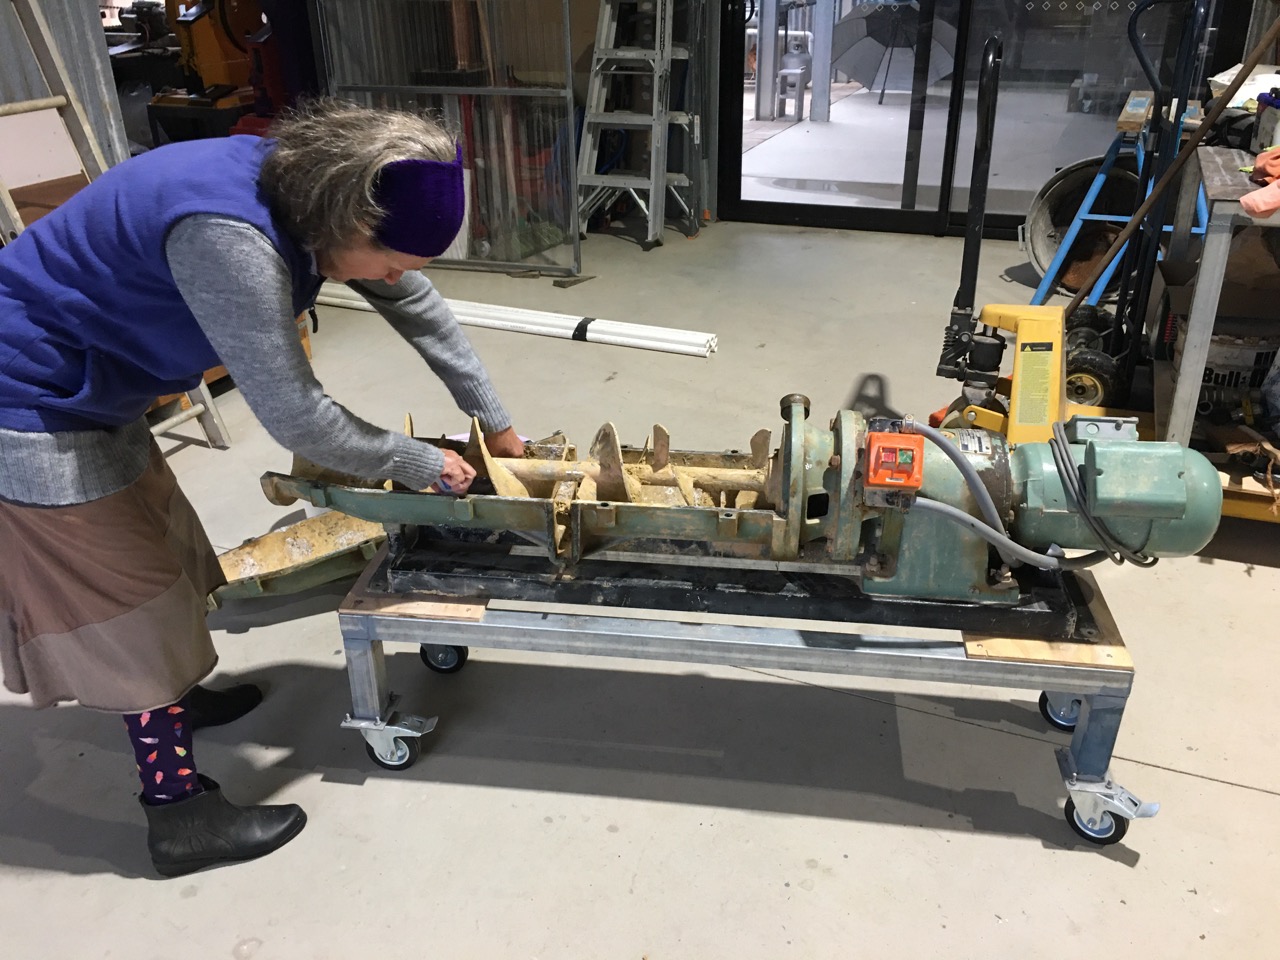
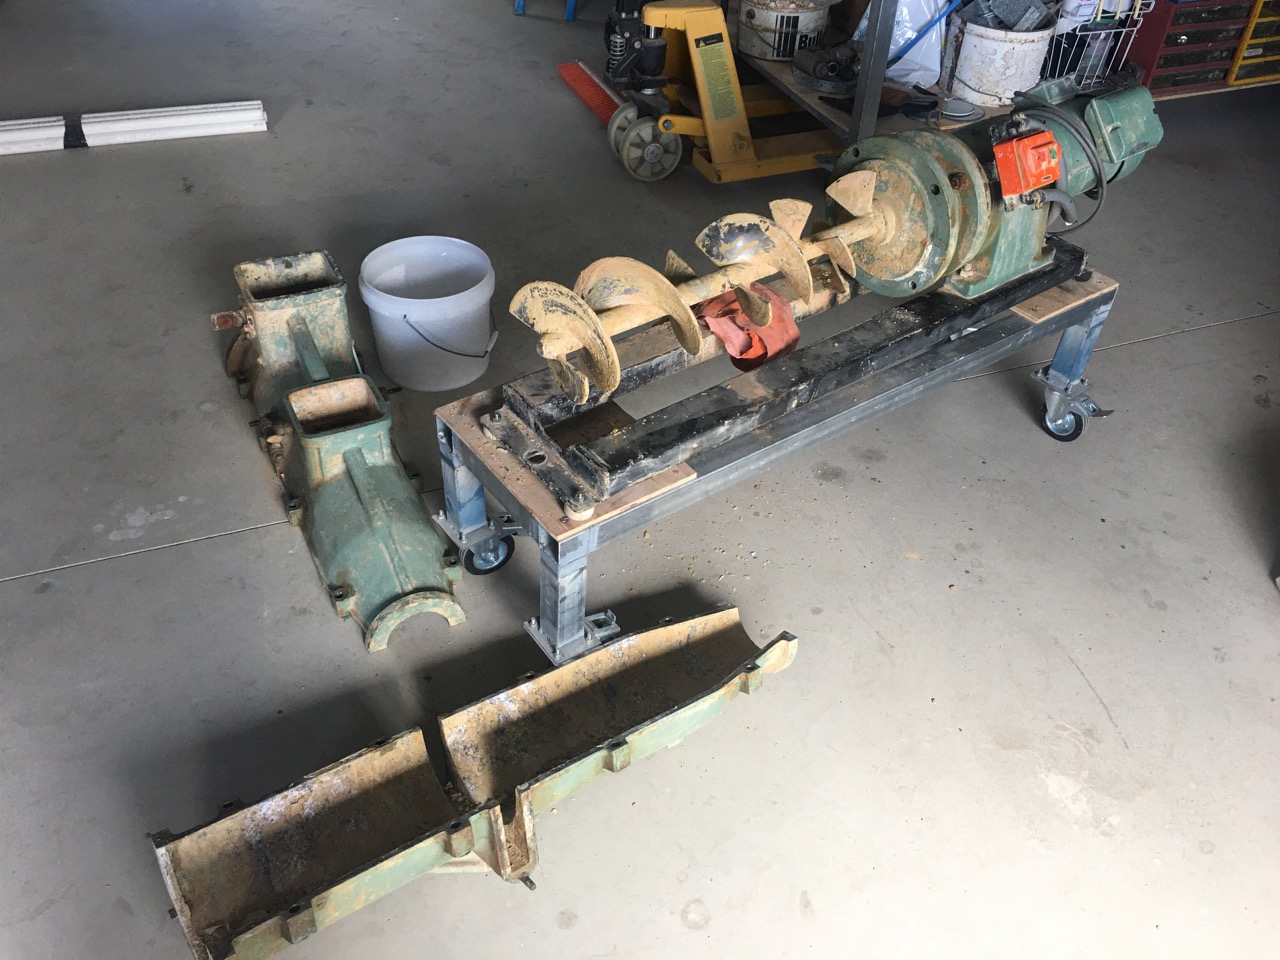
Once home I started to get the pug mill to bits to clean it out. It had also been used for terracotta, so a lot of cleaning was needed. The motor still made a noise when switched on, but instantly went into overload, shut down and stopped humming. It appeared that either the gear box was broken, jammed or a bearing was seized. The only way to find out was to strip it all down to basics. This was easier said than done.
The bottom half of the barrel had seized bolts. I snapped off one of them trying to get it loose, so decided to drill out the other. Once the barrel was off, I tried to remove the collar connecting the gearbox to the barrel. This is where the problem lay. Once I got the bolts out the collar and shaft could only rotate together when I switched on the motor. I eventually got the shaft away from the gearbox, but the collar was very firmly jammed onto the shaft.
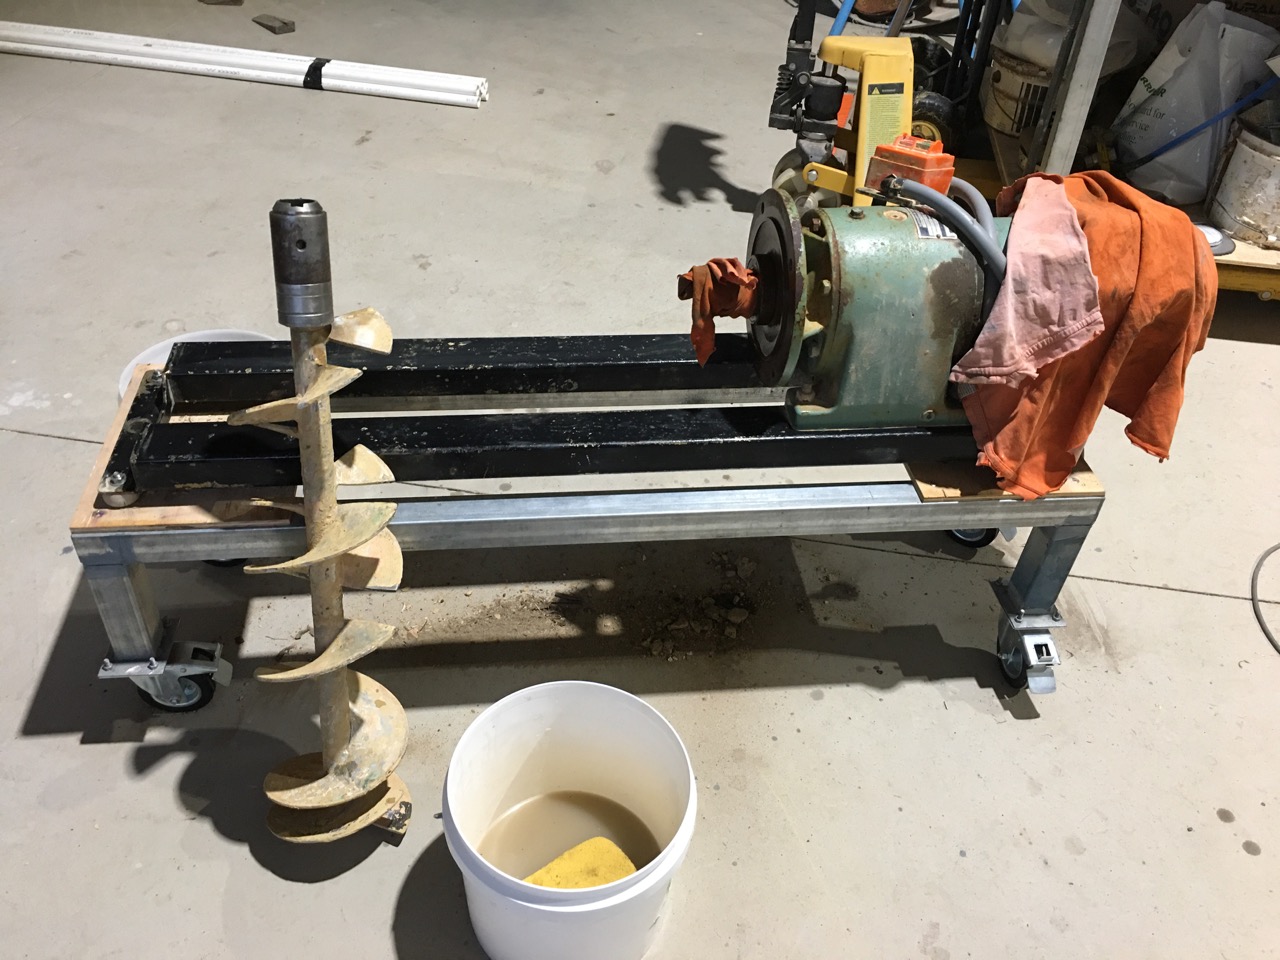
I spent a week heating, quenching, oiling, and tapping, several times a day. Whenever I went past. I eventually put the collar in the vice and hit the shaft with a sledge hammer. Gently at first, using a hardwood block to cushion the blow. Nothing happened, so I hit it harder, still nothing. Then I hit it really hard and split the wooden block! But there was possibly a little bit of movement – but only possibly. Was I imagining it? Another hard wood block, and another blow from the sledge hammer saw it definitely move 1 mm.! I dosed it quite liberally with RP7 and left it over night. Several days and 3 hard wood blocks later, the shaft was free.
I discovered that the grease cap on the collar was blocked, so the collar was badly corroded and had swollen up and jammed onto the shaft. The lubricating tube was so badly blocked I couldn’t clear it out. I decided that it was easier to drill out a new greasing tube through the collar to be able to lubricate the shaft into the future.


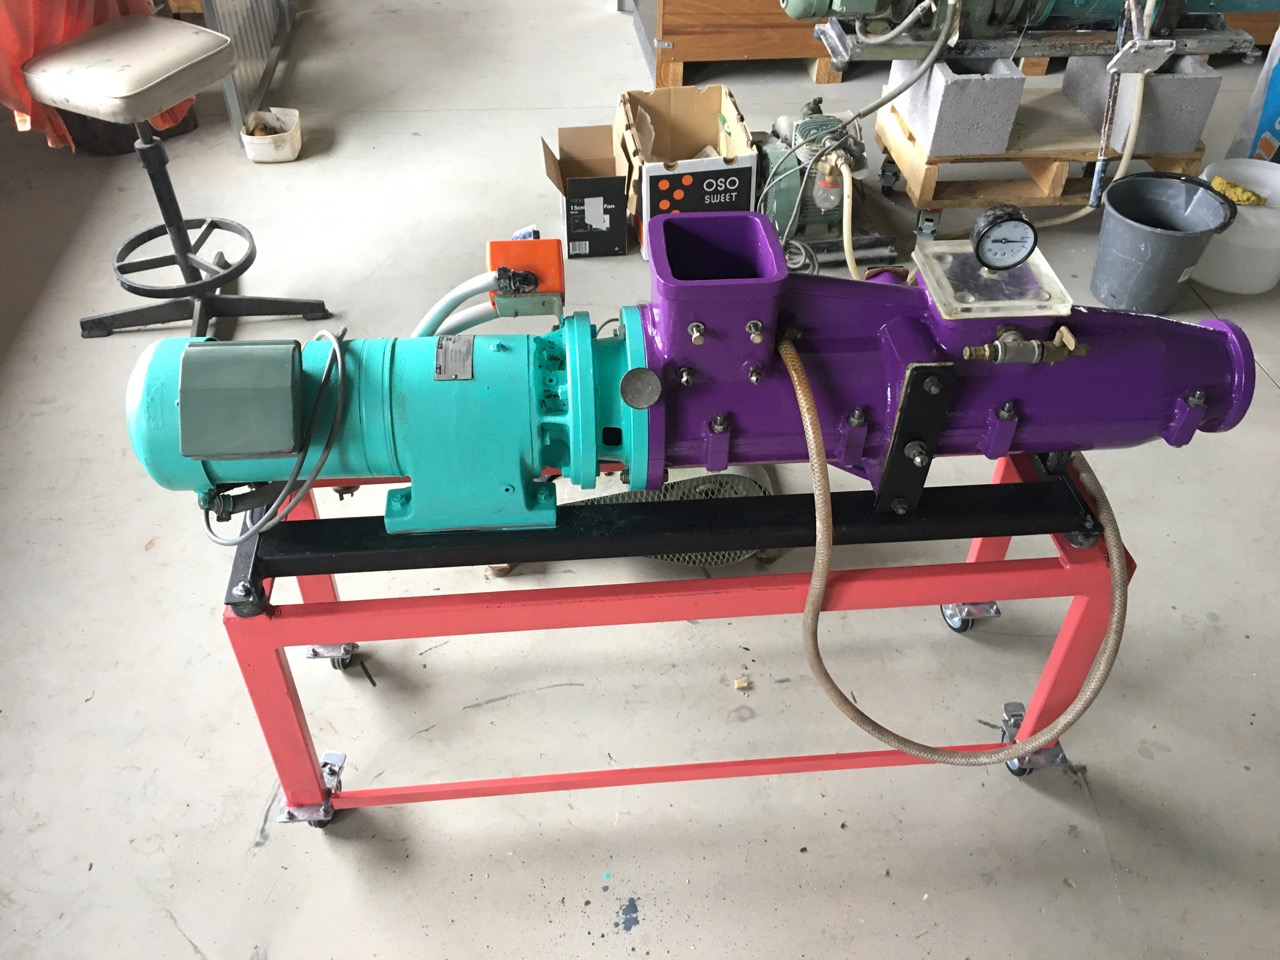
I welded up a new steel pug mill table/trolley on castors, so that I can move the very heavy pug mill around in the future. I made an under carriage to carry the vacuum pump together with the pug, so that I don’t have to move the vacuum pump separately. This will be our new/old white stoneware pug mill. I’m still waiting to get my hands on another 4” Venco vacuum pug mill for the buff/brown stoneware wood fire clay body. It’ll happen. I just need to be patient.
Bit by bit, slowly, slowly. We are getting everything back to where we were before the fire.
There is a huge sense of satisfaction in being able to take other peoples unused and non-functional pieces of equipment and bring them back into productive use for very little money, by more or less only using my own labour, ingenuity and time. I’ve never done this kind of thing before, so it’s all new to me. I’m just making it up as I go along. There isn’t anything in life that teaches you how to disassemble a pugmill with a seized shaft. I’m lucky. It all worked out well.
It’s an honour and a privilege to own and use these personal links and connections to my friends. There is so much embedded energy in these machines, it’s important to keep them going and avoid waste. it is a delight to see them working properly and being productive again.
We are so lucky to have such Generous, helpful and supportive friends.
Nothing is perfect, nothing is ever finished and nothing lasts.

You must be logged in to post a comment.