
25 or 30 years ago. I can’t remember exactly. I built a new wood fired kiln in the then new, kiln shed. Now half a lifetime later the chimney has had 4 different kilns attached to it and currently has two. One on either side. I don’t want to waste all that potential energy in a good chimney, two kilns using it seems hardly enough!
It takes a lot of bricks and a lot of effort to build a chimney, especially as you get farther from the ground. It involves a lot of climbing up ladders with buckets of mortar and loads of bricks. On that occasion, I had two good friends to help me. Bernd Weise and Jim Black. With such great help, we were able to get it built it in one day. One person making mortar and cleaning there 2nd hand fire bricks, another passing bricks and mortar up and me doing the brick laying.
We eventually reached the roof and had to cut a hole in the corrugated iron for the chimney to pass through. I then had to move up onto the roof, and continue the brick laying bending down from the 30 degree pitched iron roof. Thirty degrees as it turns out, is just about the critical pitch angle where you automatically slide off the roof if the corrugated iron is new and shiny. Fortunately for me, I had used 100 year old and slightly rusty, 3rd hand, iron for my roof that I had been given for free, to just get rid of it, and take it away.
A bargain! But all the sheets were rusted through where they had been overlapped. I just cut off the rusted section, shortened them and cut others in half to make the new roof. 30 years on it’s still working well, but does have a few more newer holes that I continue to silicon up every few years.
What hasn’t lasted so well is the clay mortar that I used to lay the bricks. I usually use a small amount of cement in the mortar mix for the last few courses. But for some reason, I didn’t do that on this chimney, probably because I didn’t have any at the time. So todays job was to take the top 4 courses off the chimney and re-lay them to make them secure again, as the rain had washed out all the mortar over the years.
I also needed to re-make the flashing to keep the water from getting into the shed down the sides of the chimney. The old flashing was made very hastily, from old used and already rusted, galvanised iron. It matched the roofing sheets! Consequently, it had rusted out in places too and also needed to be replaced.
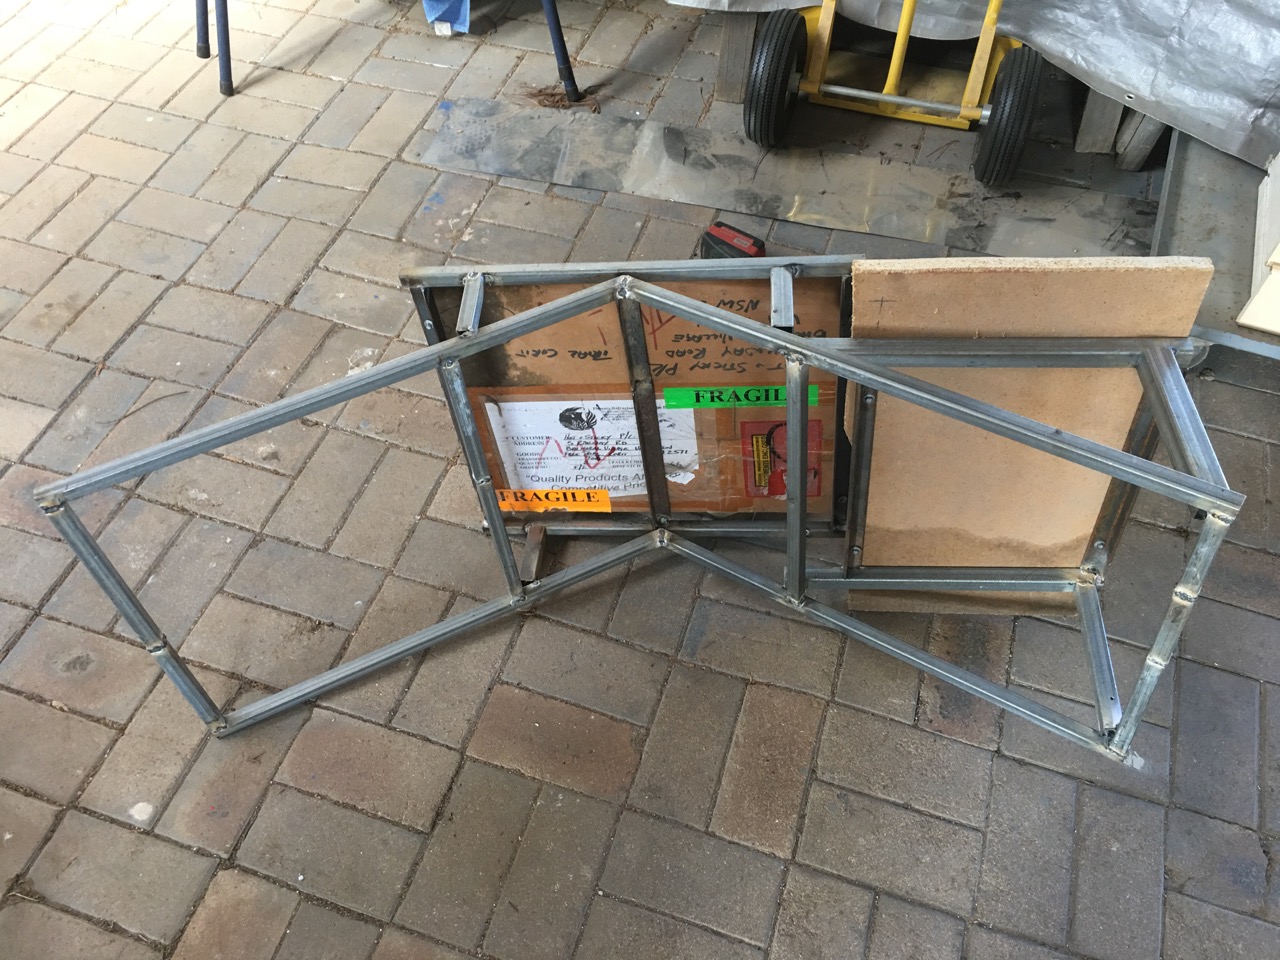
All I have to do in get up there and do it! Easy when you say it fast. As i’m now more than twice as old as I was then and approaching 70. I though that I had better work out a way of doing safely on my own this time. I started by making a table that would sit on top of the ridge capping and roof ridge, so that I could stack all the bricks on-site to save me clambering up and down the roof with just two bricks at a time.
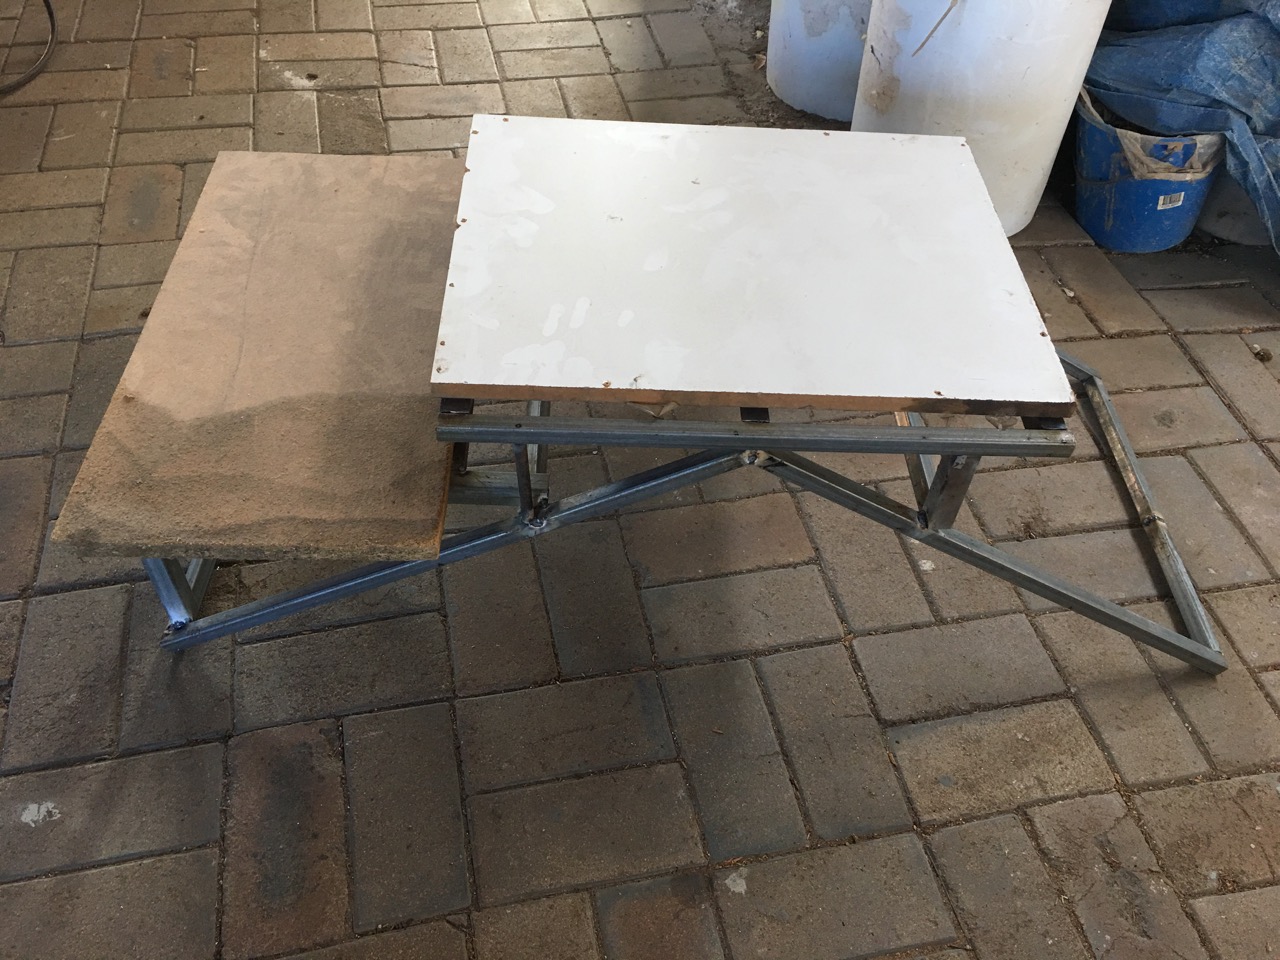
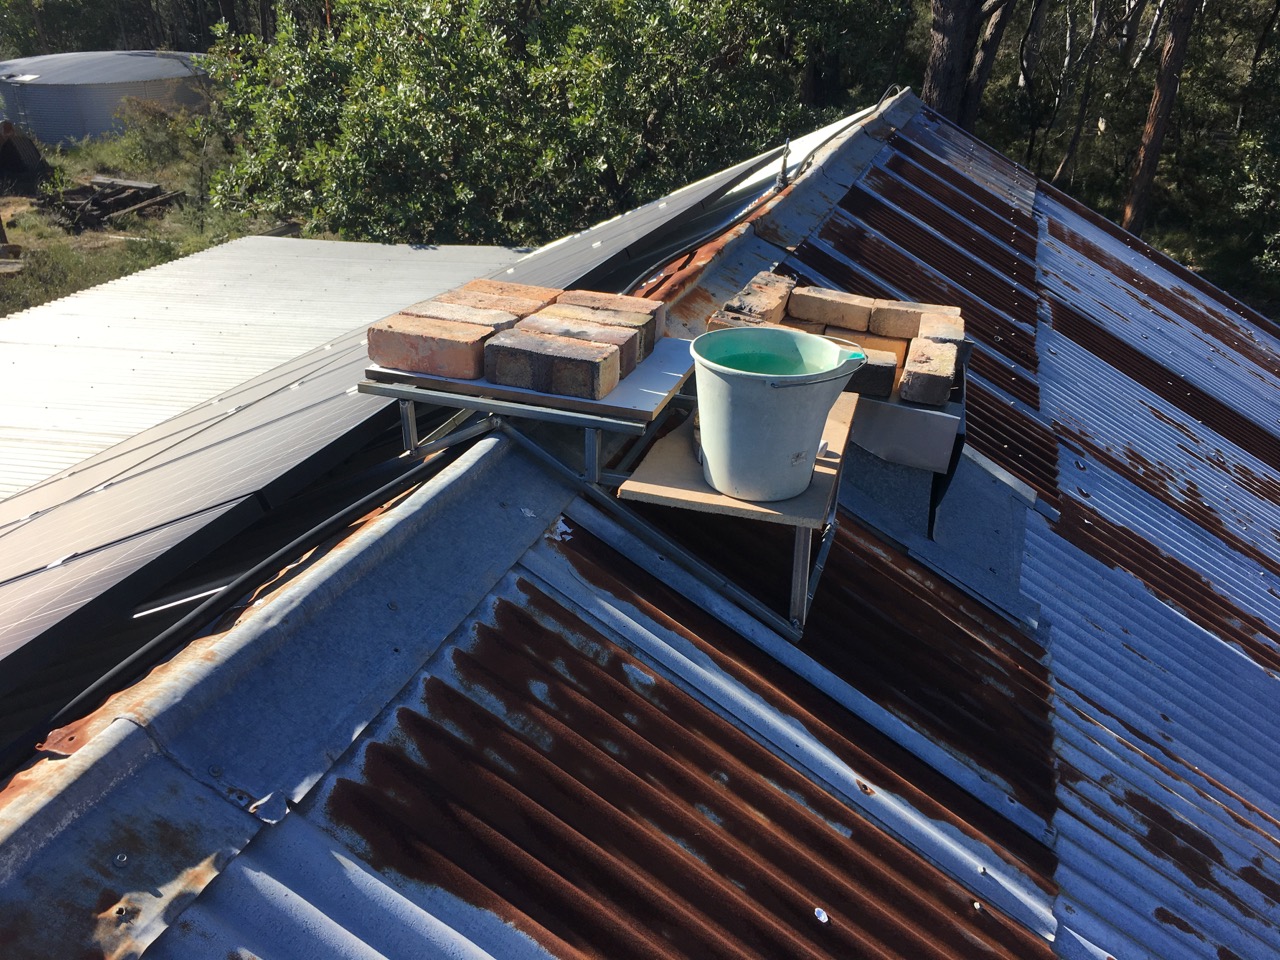

With the new roof top table made the day before, the un-bricking was done in no time. There was also a side table for buckets of mortar and the necessary tools. So convenient. Just a couple of trips up the roof and I was ready. The bricks soon re-laid up to the point that I needed to make the new flashing. This time I was able to use stainless steel off cuts for the job. This time it should out last me. If it lasts another 30 years it certainly will. I don’t fancy getting up here and flashing in such an exposed place in the future!

I finished off the last couple of courses above the flashing with a cement enhanced mix of water proof mortar. That should do it. I rather like the view from up here as well. You can see so much more from the elevated position. Maybe I should leave the new roof top table up here and we can have small intimate soiree up here in the future?


You must be logged in to post a comment.