
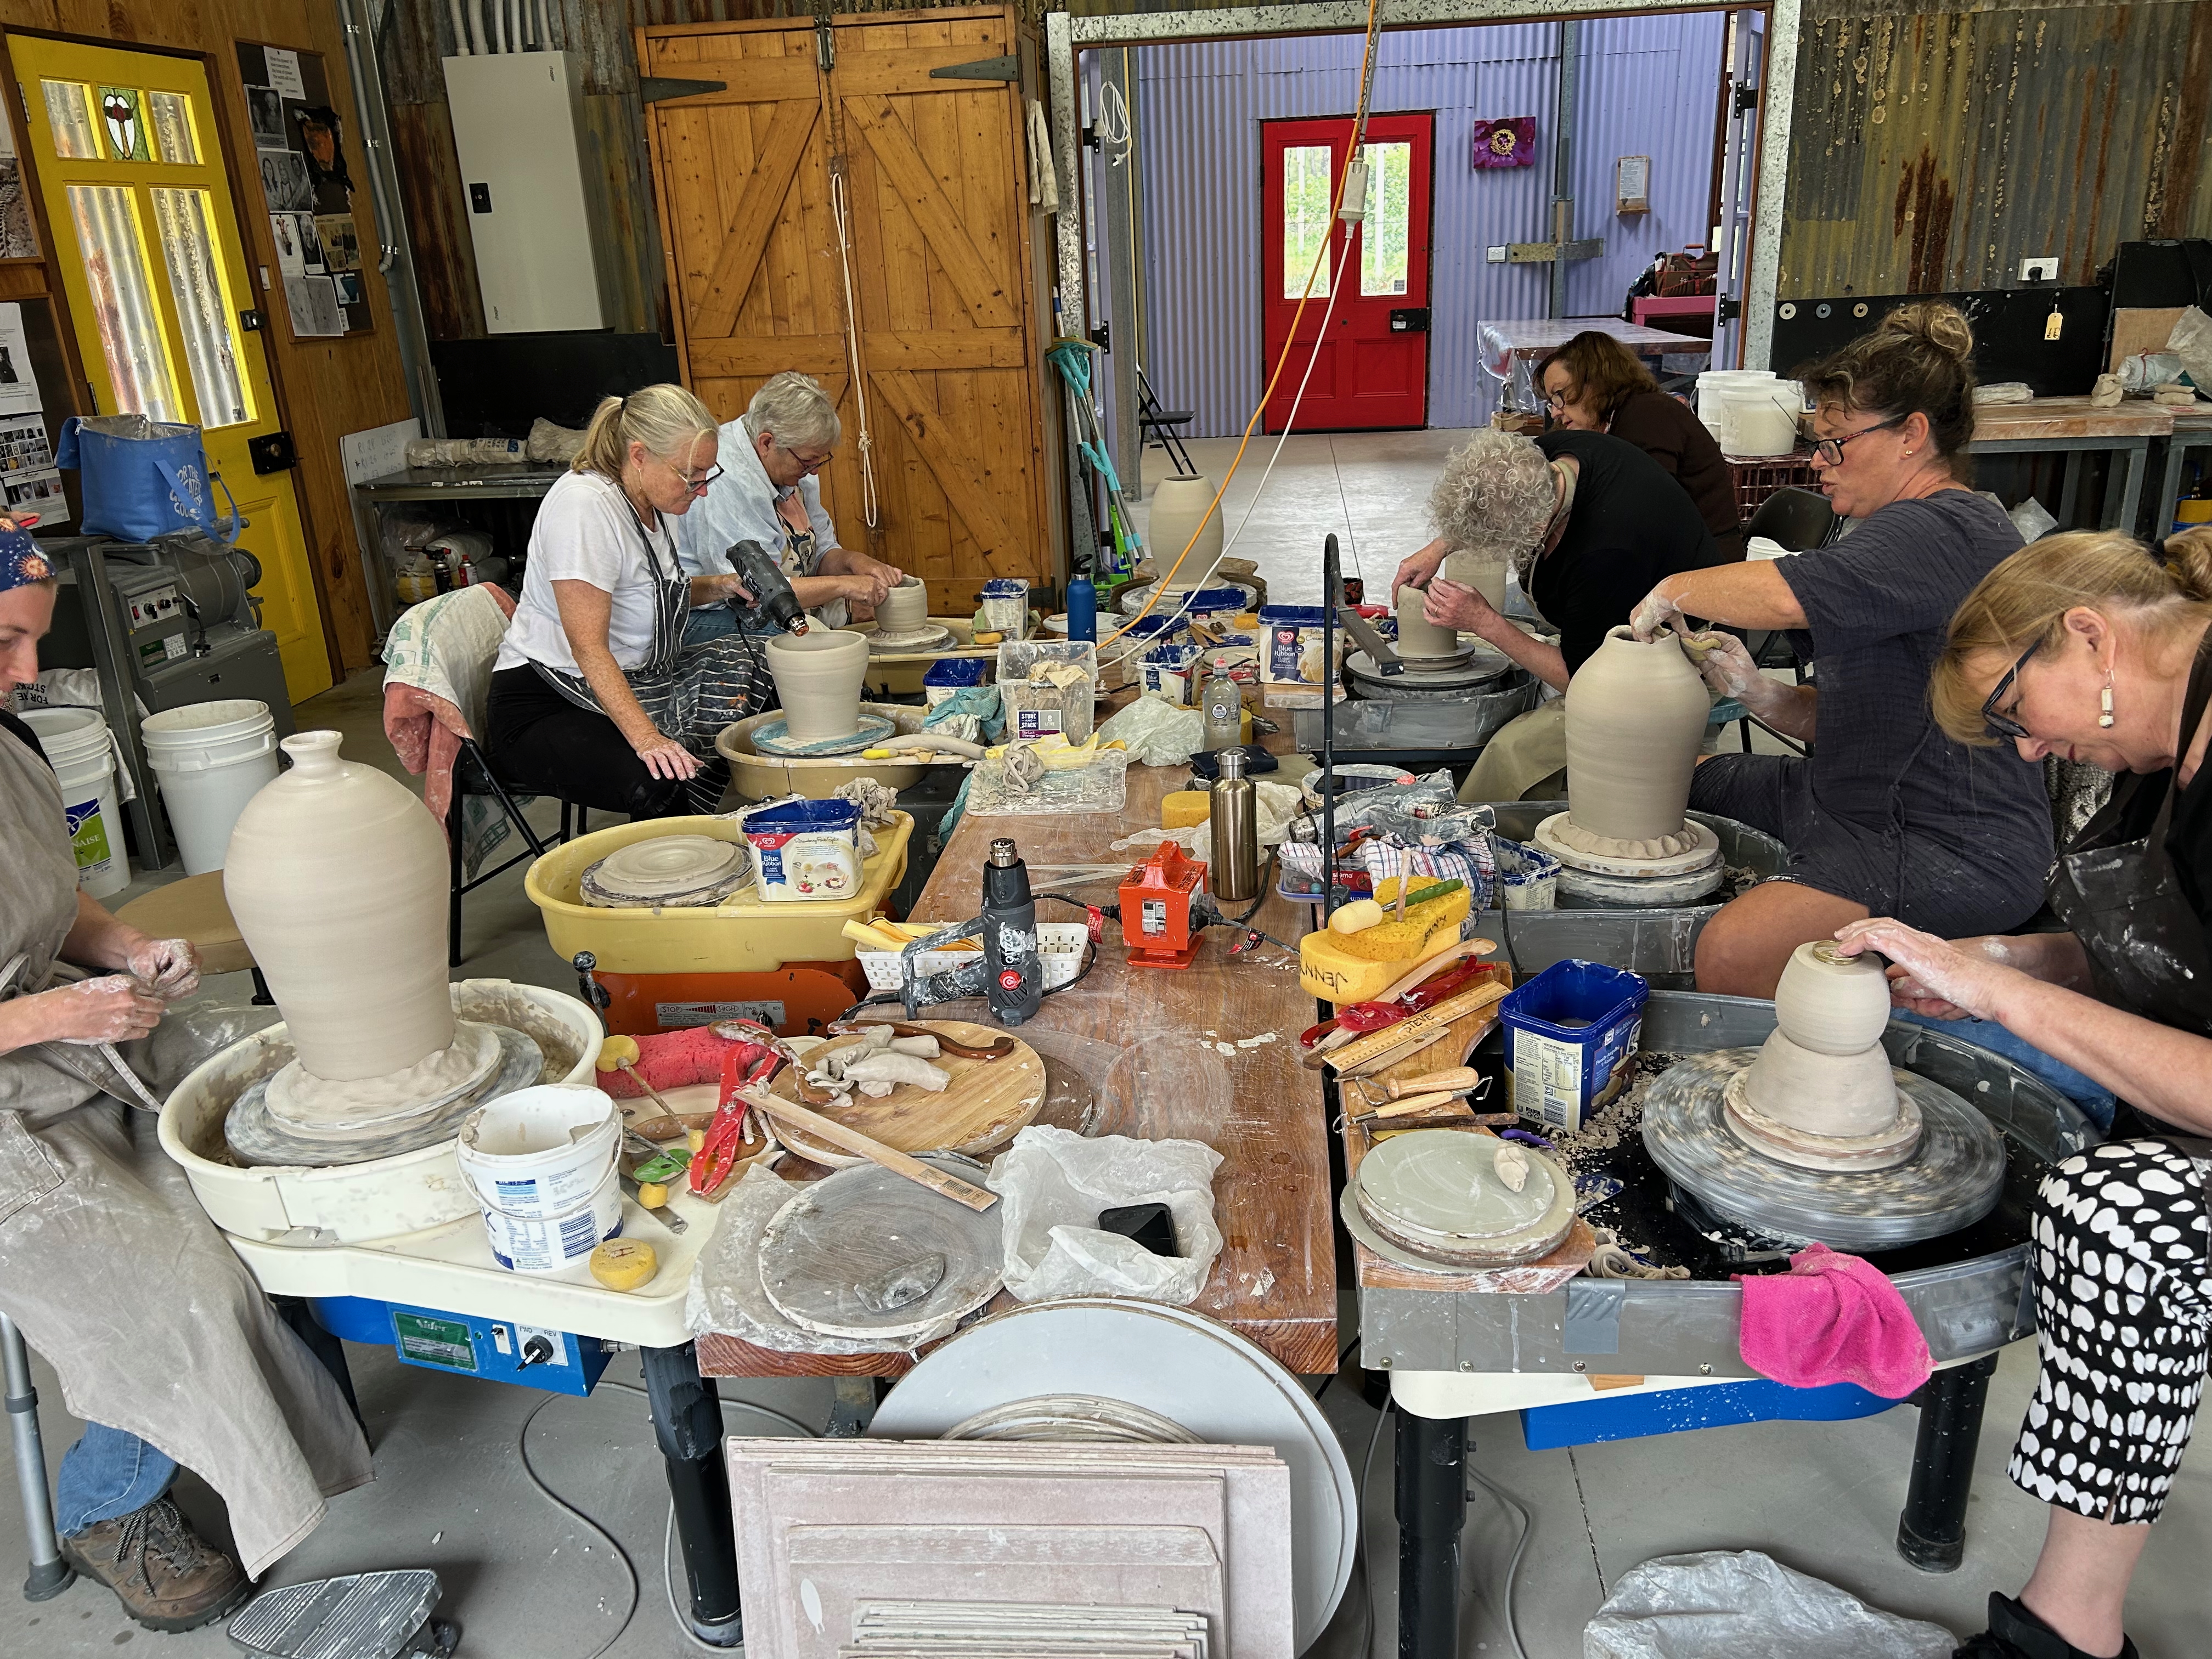
We have been very busy with our summer schools since the beginning of January. I originally advertised one Summer School to teach the making of larger forms on the potters wheel by ‘top-hatting’ and ‘coil-&-throw’ techniques. We got such a massive response to my add that we could program 4 summer schools of 3 days each, and lined them up with a few days in-between. Two in January and two more in February. We only have 8 potters wheels in our workshop, and we got over 30 replies so I had to run 4 schools and space them out.
Top-hatting is a technique of placing one thrown form on top of another to make a larger pot than you might otherwise be able to throw in one piece. It can involve the stacking of multiple forms to gain extra height. Coil and Throw technique involves throwing a substantial base for the pot and then adding a coil of clay to the top and throwing that coil up to become the wall of the pot, extending the height. This technique can be repeated several times to make a taller pot.
We got such a massive response to my add that we could program 4 summer schools of 3 days each, and lined them up with a few days in-between. 2 in January and 2 more in February. As we only have 8 potters wheels in our workshop, and we got over 30 replies, that meant staging 4 consecutive schools.

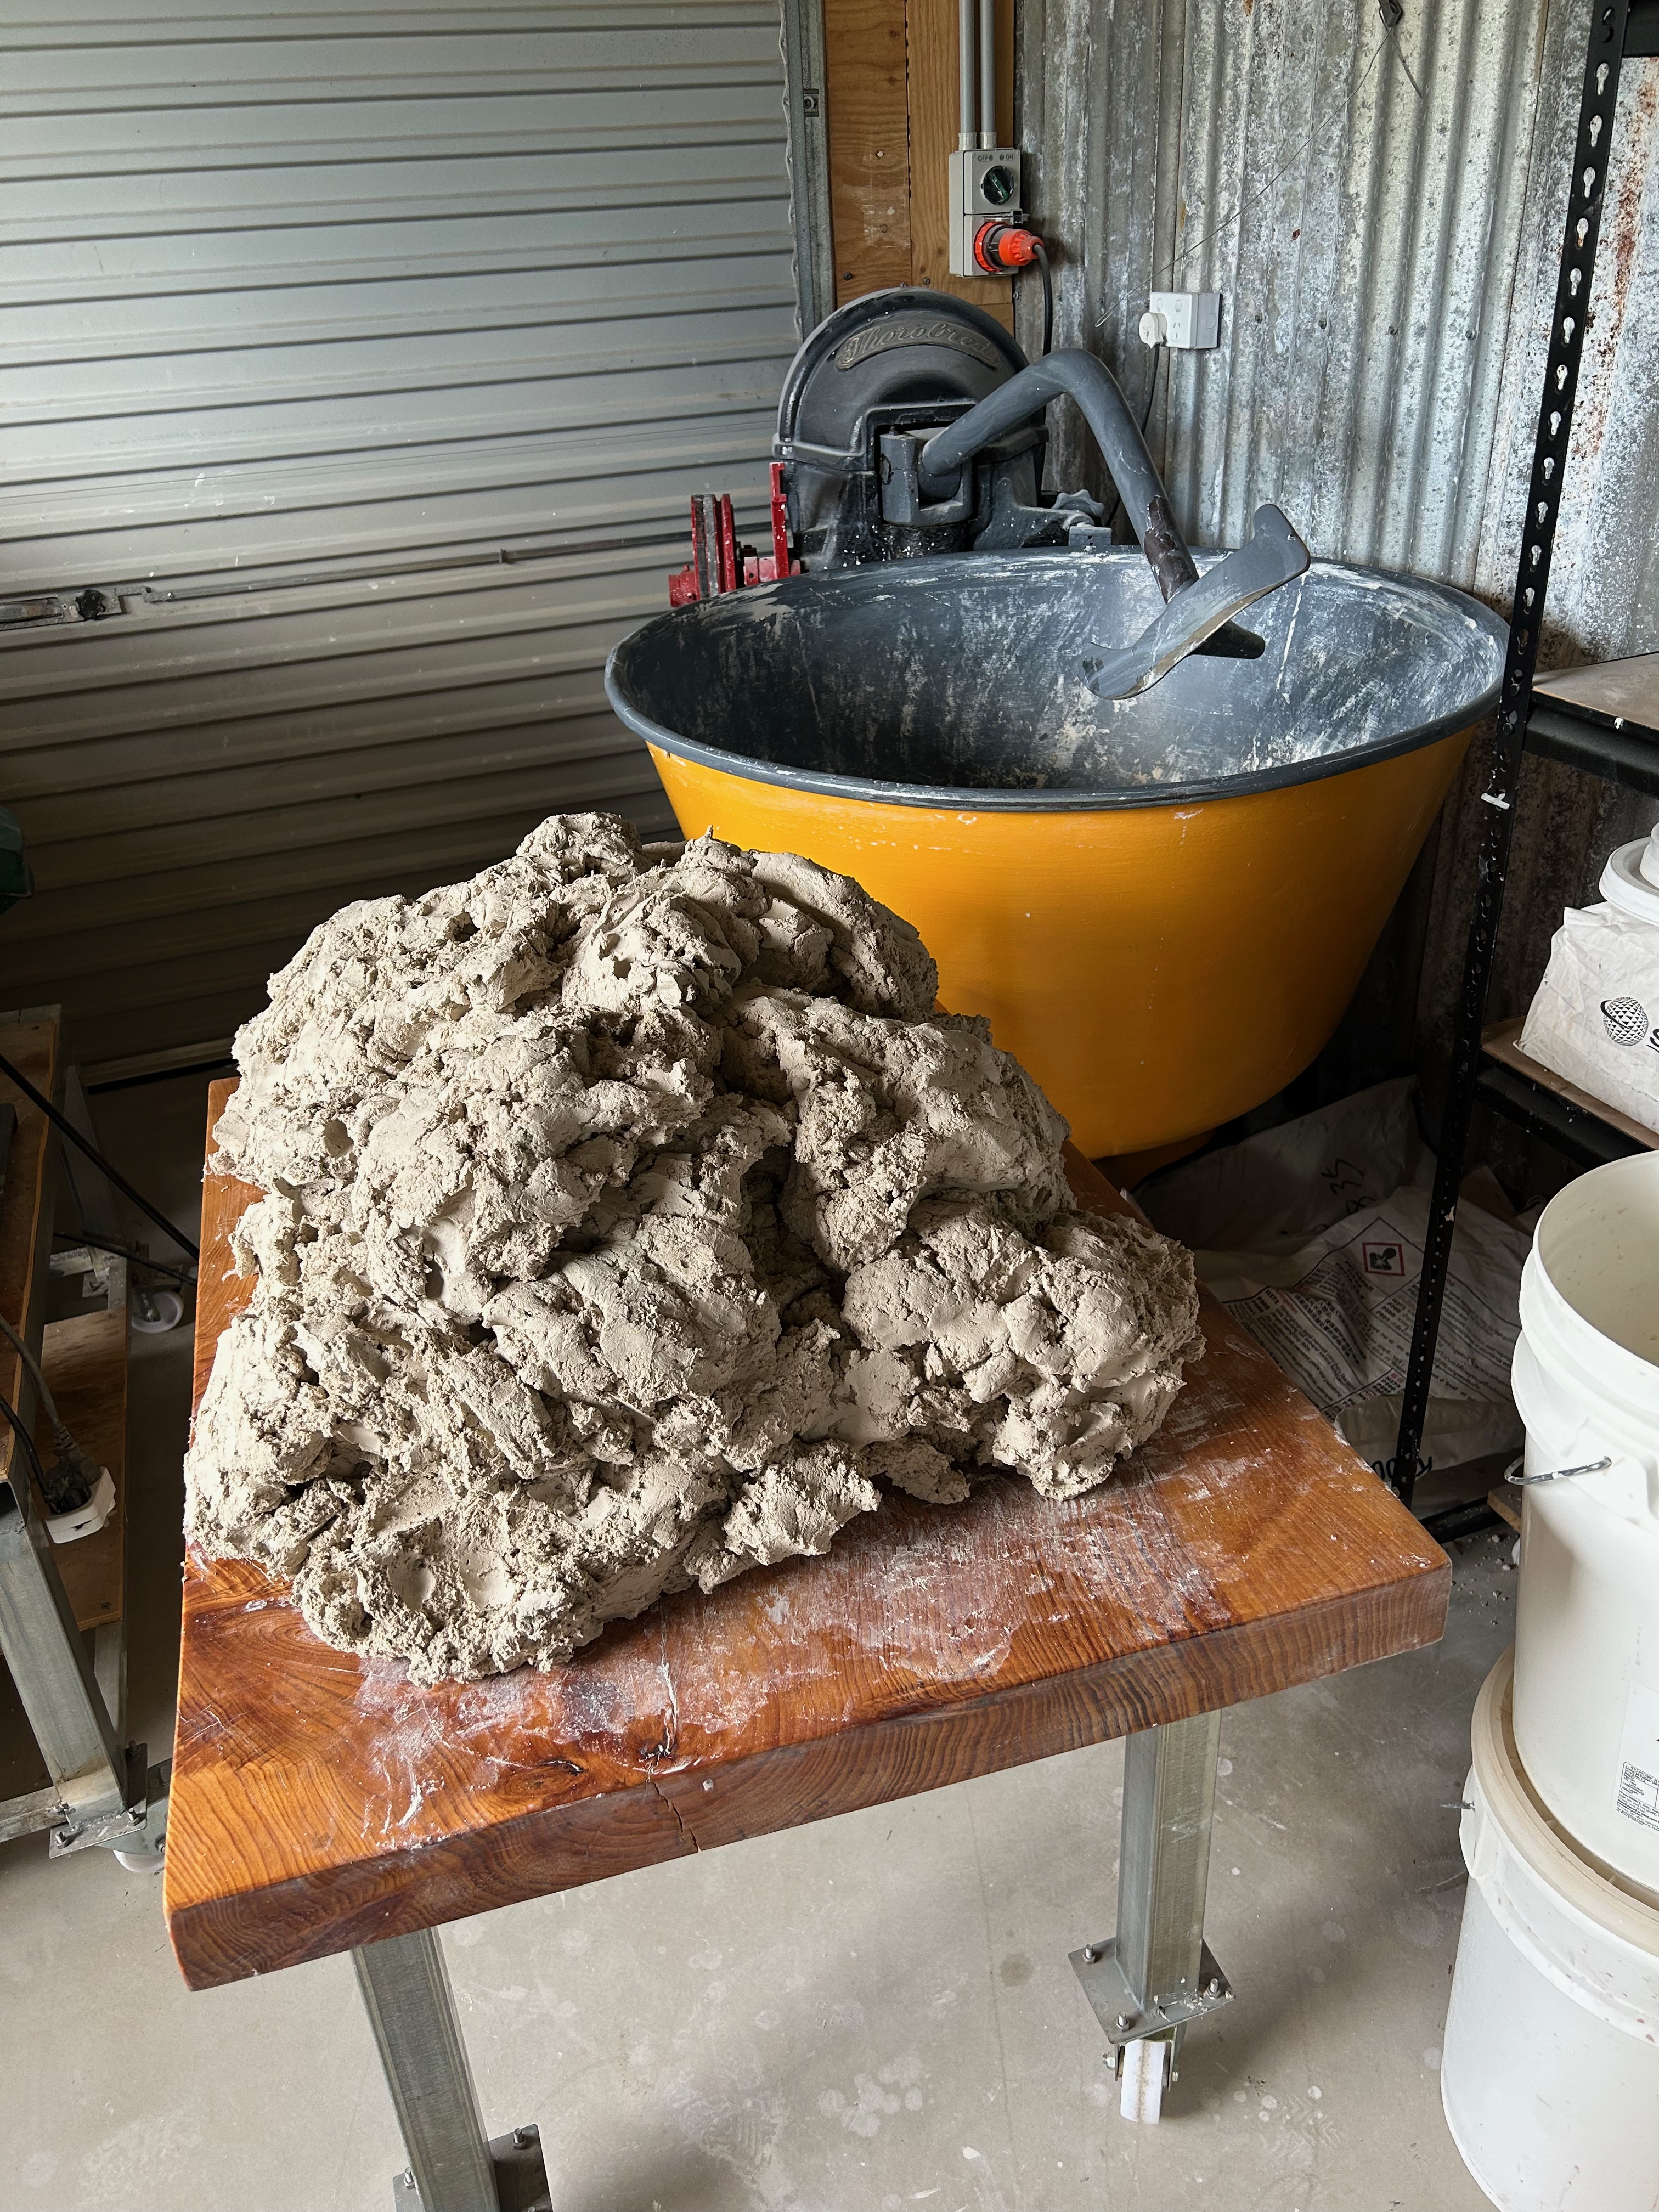
I made up some clay specially designed for big pot throwing by joining techniques, slightly softer than usual and with added ‘tooth’ and ‘grit’ for structure and good drying and firing of the larger forms. I originally made 400kgs of clay, thinking that it would be sufficient for the 4 workshops, but I was way out in my estimations. The first two workshops used up nearly all of my stash, so I was back in the clay making shed the next day to make up another 400kgs for the next two in February. I like the clay to get a little age on it to improve its work-ability, 3 months would be good, 3 years even better, but needs as needs must. One month in this case will have to be enough.
Clay develops its plasticity by the intimate mixing of water molecules in-between the infinitesimally small clay particles. The best way to achieve this is to make a ‘slip’. A very watery mixture of clay and water, to get the water into, and in-between the clay crystals, which in their purest form are flat and hexagonal shapes. It takes a very long time for the water to penetrate the ‘pack of cards’ structure of the clay particles and individually flake off the crystals one at a time to get that intimate mixing of clay and water that is required to appreciate the very best potential of any particular clay.
I don’t have that luxury of time in this instance, so I am using powdered clay material that I bought in, in 25kg paper bags. I’m using a mixture of all Australian clays from Victoria, NSW and Qld. to get a good blend of the required properties that I need. It’s getting very difficult to buy Australian raw minerals and clays these days, as the multi-national mineral companies have bought up most of the clay mines and shut them down, forcing us to buy their imported products from overseas. We are not short of clay here, but we have been locked out of access to our own resources. Welcome to the future!
I mix the various minerals together in an old recycled bakery dough mixer. I have owned this machine for over 40 years. It has gone through 2 fires and been rebuilt each time. Luckily, it is very well made, mostly of cast iron frame, but the fabricated steel sheet bowl was very badly split and warped after the last fire and needed a lot of work to re build it, and get it back into action. see my blog post from 4/6/21 “Our Old Twice Burnt Dough Mixer Proves to be a ‘Phoenix’ mixer”. I use a blend of recycled clay slip and the new powders to get the best outcome that I can from this compromise of speed, quality and efficiency.
I use a few tricks of the trade to get the best possible result out of my available materials. I use water from the dam and rain water from the old pottery shed water tank that is full of gum leaves that creates a very useful tannic acid water that is ideal for making clay. It is a transparent pale grey and has a very low pH so that when mixed with white kaolin, it attaches to the clay particles and flocculates the clay mass, which settles tightly in the bucket leaving only crystal clear water on top. It is also ‘live’ as it has all sorts of microscopic organic matter and bacteria in there, which helps age the clay. City water that is full of chlorine is pretty much sterile and kills off any live matter that may help the clay mature and become more plastic and workable.
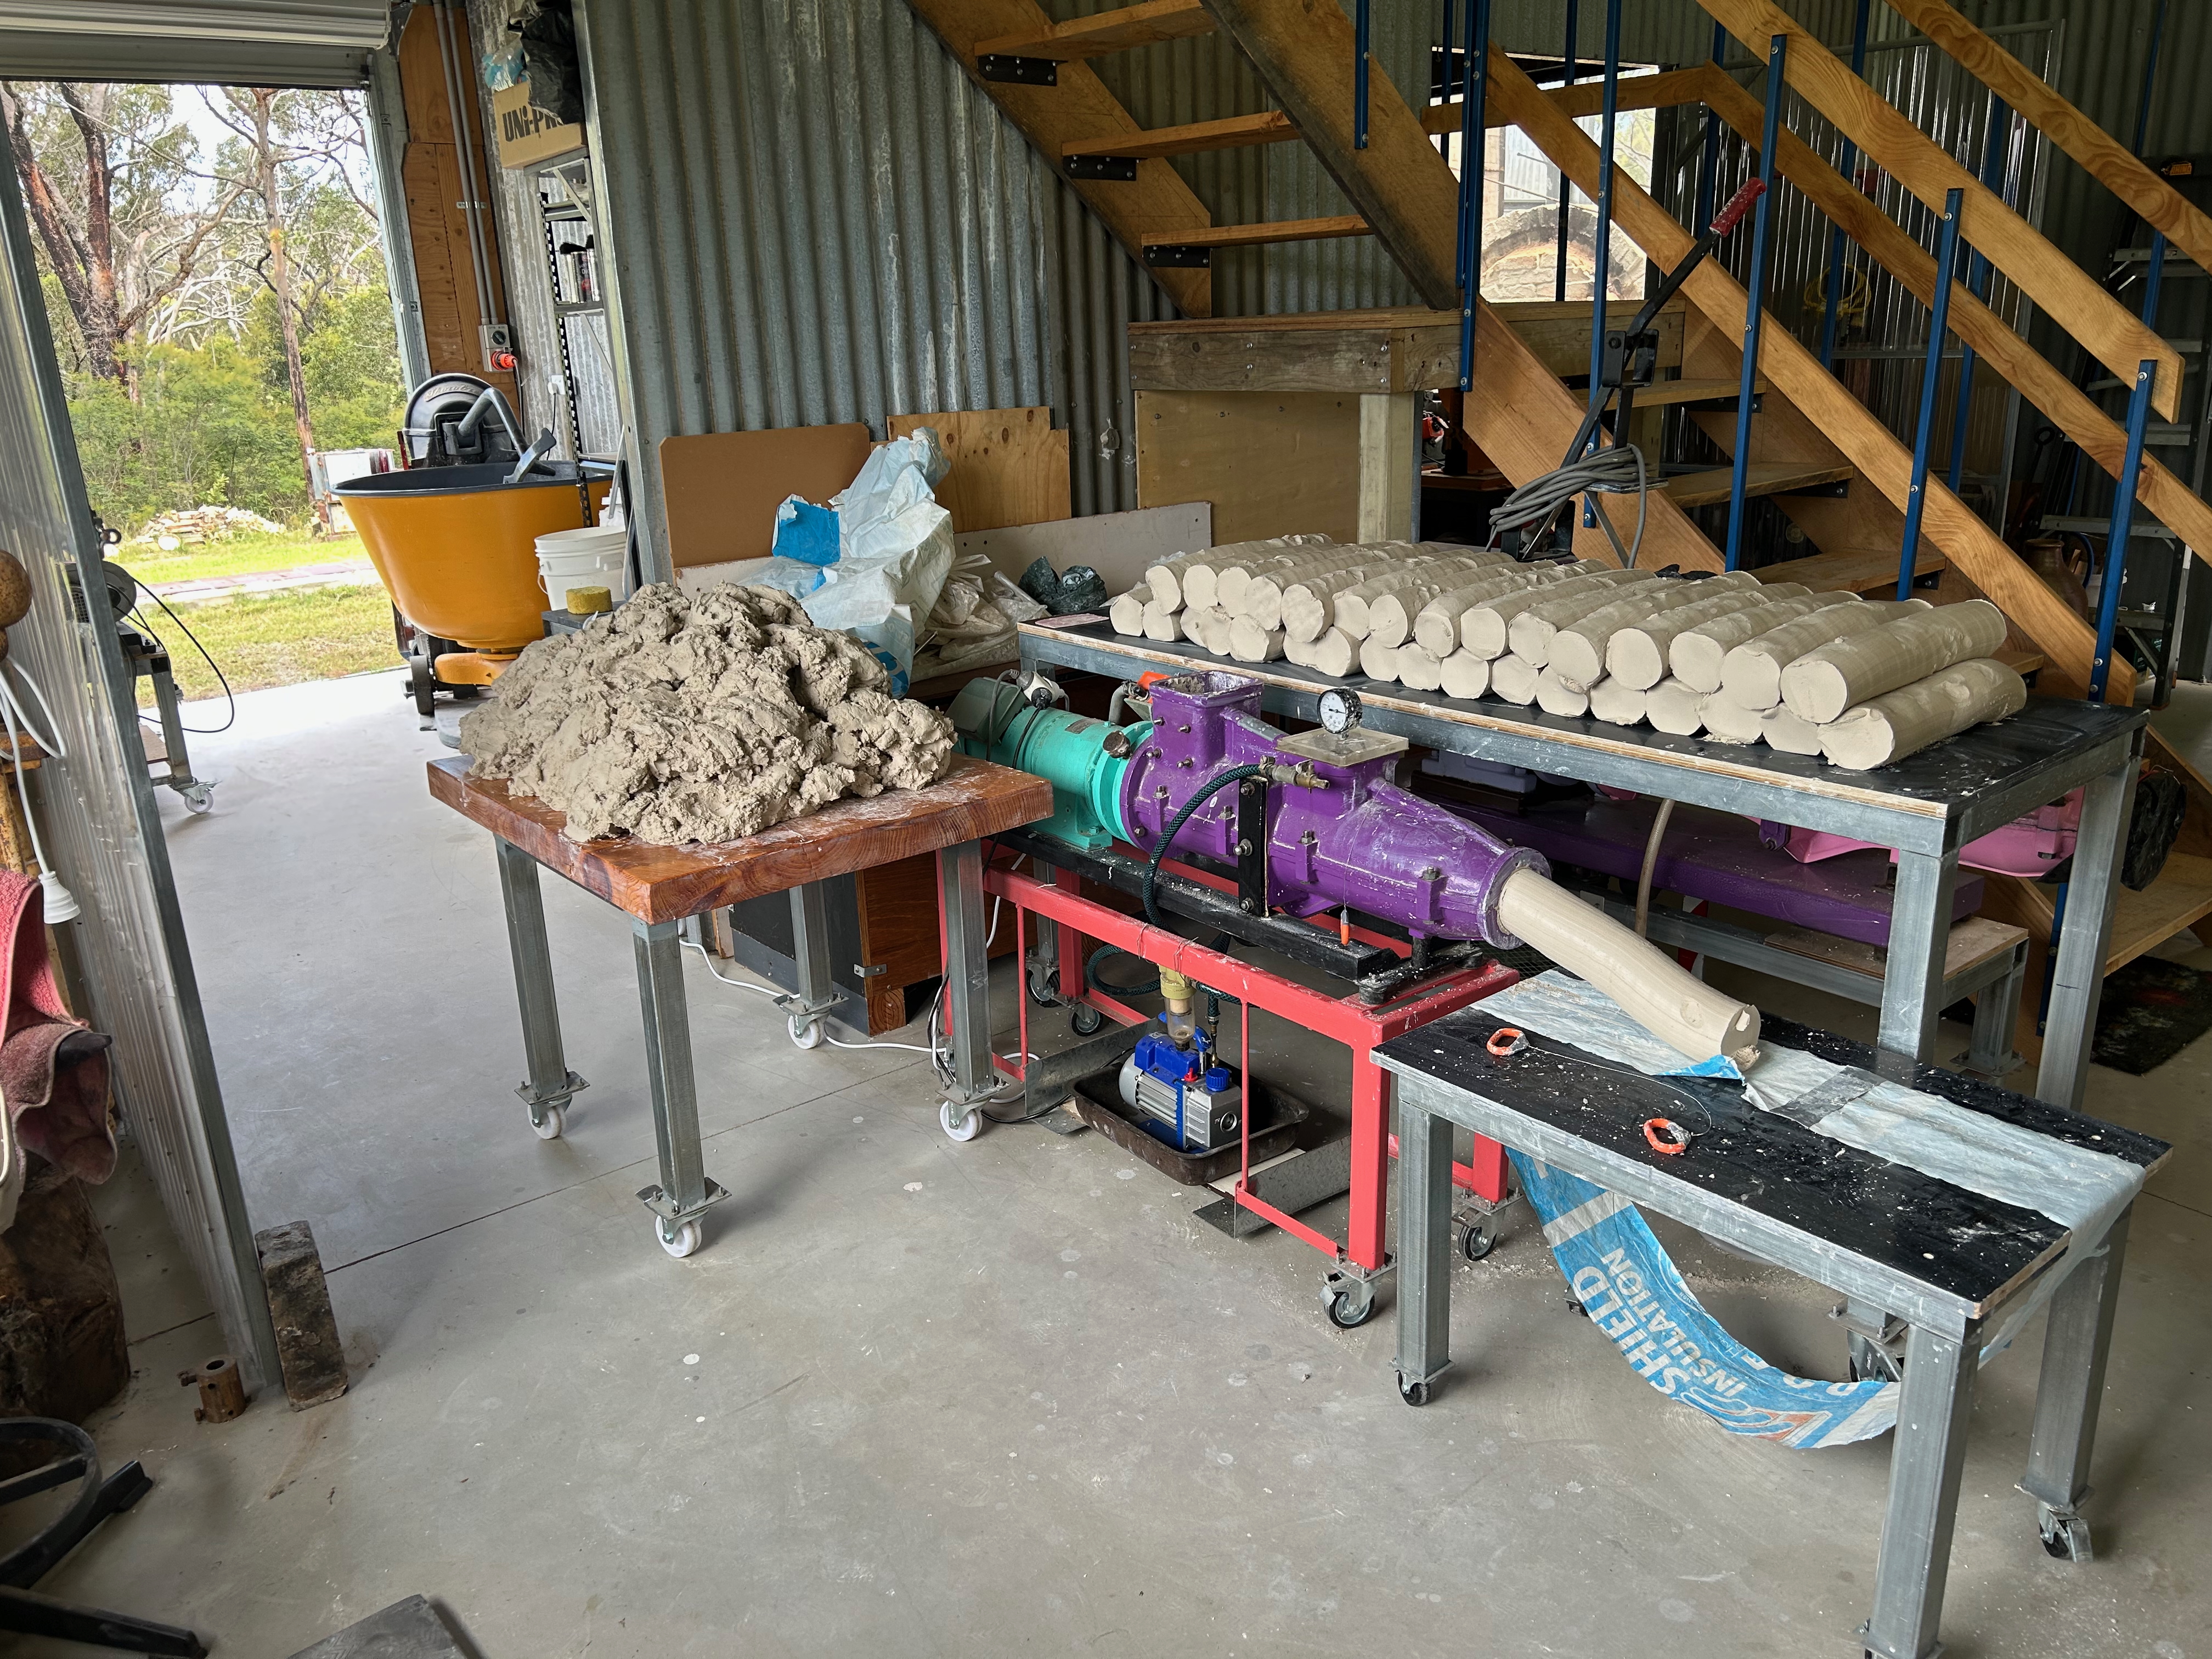
I have a ‘snorkel’ fitted to a fan in the wall that sucks all the fine dust out of the clay mixer room to keep me safe while I’m working in there, but I also wear protective gear as well. Afterwards, once the clay is all wetted, ‘plastic’ and ‘pugged’ into sausages. I cut all the ends off the stacked pugs and re-pug it all again to make sure that there is a consistent mix of all the 3 different batches of clay represented in each bag of finished clay body.
It is bagged and stacked to ‘age’ and the floor is wet mopped twice to collect all the clay dust off the floor and make the work space clean and safe again.


In the garden, we are picking the last of the blueberries, the first of the egg plants, and we are mid season for zucchinis. The tomatoes are coming on quite strong now and we have started to make our first batches of tomato passata for the summer. Every meal from now on will be some sort of variation of ratatouille in all its various forms. What else can we do when the garden is full to bursting with tomatoes, aubergines, zucchinis and basil? We try and give away as much as we can, but everyone in the village has an excess of tomatoes and zucchinis at this time of year.

Our breakfasts and deserts are mostly of fruit these days. November brings on the berries, December is the month of cherries and apricots, January for plums and peaches, February is all about apples and March for the last of the pears.


You must be logged in to post a comment.