
In the evenings after the days kiln work and dinner, we are all allowed into the Porcelain Museum pottery room, so that we can all make some pots to put in the first firing of my kiln. I don’t know whose idea this was, but it’s a very good one. Everyone has contributed to its construction, and as it’s such an unusual kiln for these parts. It’s a very good idea for everyone to get to see a pot of theirs fired in it. NO Pressure!
It turns out that there are two ‘National Treasure’ potters in our crew here. But everyone is a famous potter from their own regional district. They all come together to do these big kiln building events at special places around the country. A loose conglomerate of like minded and highly skilled artists all contributing their own particular skill set to these big projects.


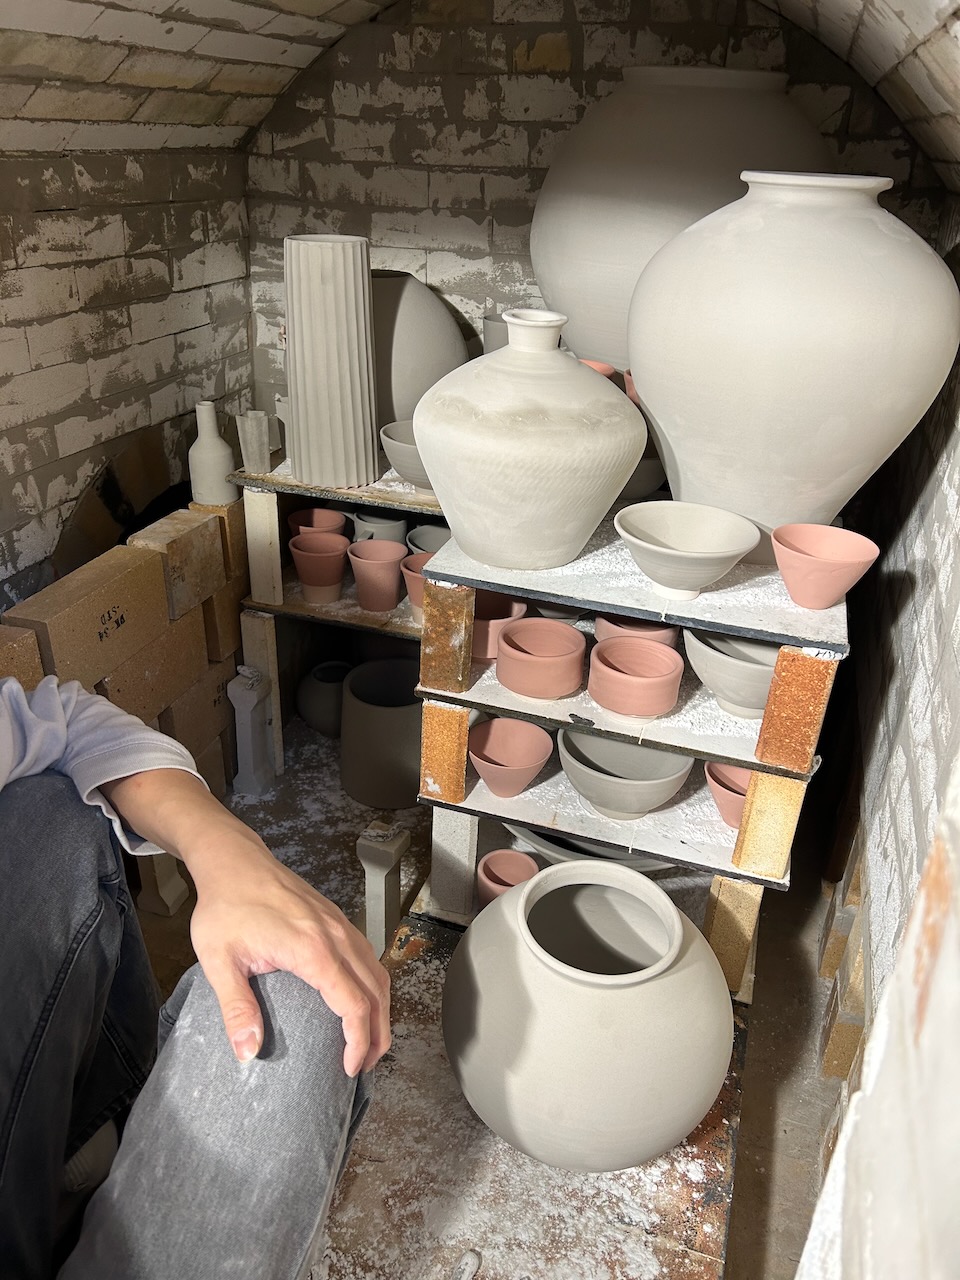
We pack the kiln with our bisque fired and glazed pots, with other contributions from the research students as well. There is only just enough pots to fill the kiln. I could have fitted more work in if there was any. But there is just enough.

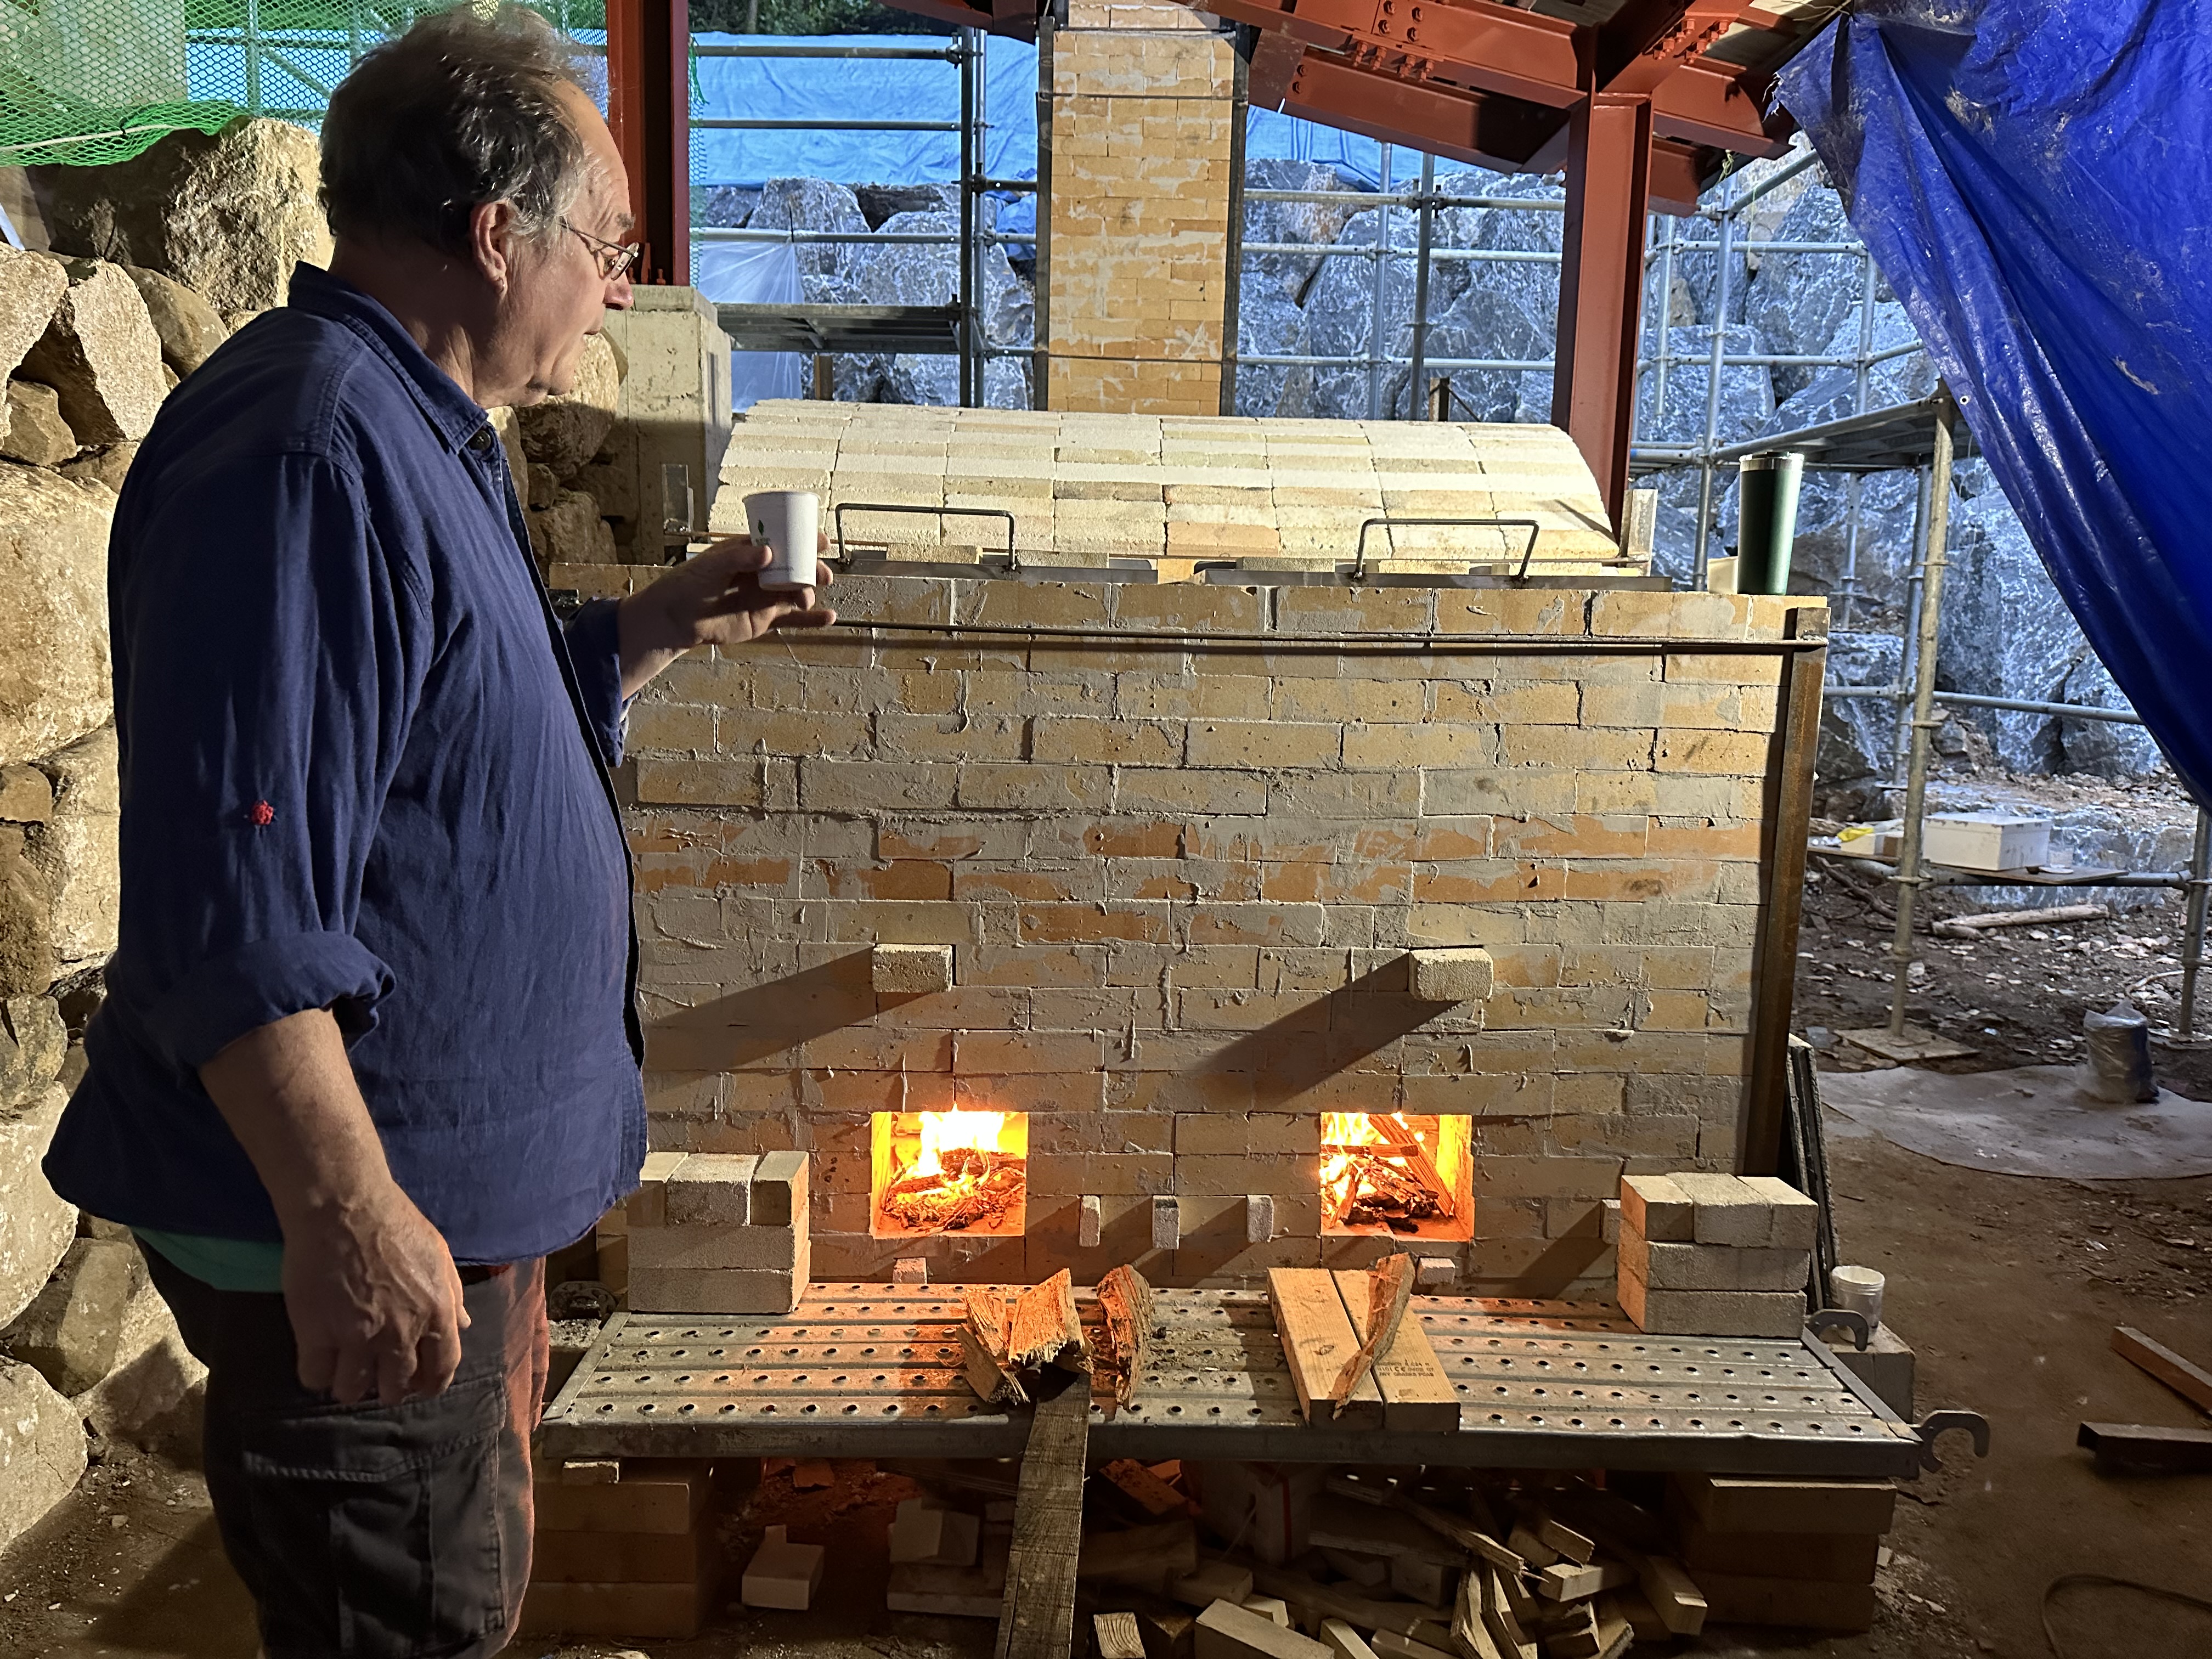
Interestingly, they don’t use digital pyrometers or pyrometric cones here. Traditional firing is judged by colour, sound, smell, smoke and flame. Using years of experience with a particular type of kiln, to judge the progress of the firing. They do however use small glazed tiles as draw trials to gauge the degree of glaze melt, and something that I haven’t come across before, and that is the use of a small amount of stiff glaze paste, that is rolled between the fingers into a small length of pasta sized rod and set in some wadding. This little 3mm dia. rod of glaze will melt at top temperature and fall over, in much the same way that we use pyrometric cones as pyroscopes.
I suddenly realise that I’m really out of my depth here. I usually rely on a digital pyrometer to tell me how I’m going. Now I have to go back to basics and look and listen very closely to the fire to make my decisions. Luckily I’ve also done this before too, so I’m OK, but would prefer the reassurance of a pyrometer to confirm my decisions. Until very recently, we used ‘handheld’, battery operated, digital meters. This meant that you had to go over to where it was and switch it on, to see the LCD display the temperature. They are cheap – very cheap – $10 to $15, pretty reliable and because they are intermittent, they teach you how to look and listen to the kiln, to watch the fire and see how the wood is burning. How the flame is developing, and not just stare at the screen. Since the big fire here. We lost everything, and I bought 240 volt LED permanent temperature displays, online from China for $30, so I have recently become addicted to screen watching in my dotage. Luckily, I still retain some of my mental capacities, well learnt and polished to a finely detailed finish. So just like my stick welding skills, my firing skills are soon retrieved from the dustbin of the recesses of my mind.
In the late 1960’s, when I built my first kiln. No one owned a pyrometer. They were just so expensive. They were totally out of reach. I made a lot of mistakes along the way, but I learnt a lot. I wouldn’t recommend this learning strategy. Using an intermittent pyrometer is the better way to learn so much faster and without the losses that I incurred. My first pyrometer was an analogue, needle indicator, galvanometer. They were quite inaccurate and it taught me not to trust them. A wise decision. They are nearly always wrong. I use them to tell me if i’m going in the right direction. Up or Down. That’s it! I leave the decision as to wether the kiln is finished or not to the use of draw trials, test rings and pyrometric cones.
It is very important to me to fire this kiln well, not just get it to temperature, but do it in a steady, constant, reduction, so that all the usual reduced stoneware glazes that they use here will come out as they expect. BUT, most importantly, to fire the kiln with as little smoke as possible. As that is the main reason for me to be here doing this. This kiln is a demonstration of low emission wood firing.
I must admit that as the only fuel here is 5 year old very dry and seasoned pine wood, that burns very fiercely and fast, I have my work cut out to keep the kiln in reduction, but to minimise the smoke at the same time. As it turns out, I can never get to the stage of filling the hobs with progressively combusting wood, as it is designed to do. I ask if there is any hard wood available and I’m told that it can be obtained, but not at short notice. In fact hard woods like oak and acacia are cheaper than pine, so they will get some in for the next firing. But for now, I have to carefully juggle the wood level in the fireboxes. This means constant attention to detail, so this is not really a Laid Back Wood Firing at all, but a rather busy one. AND, not a smokeless wood firing, as the cover of my book in Korean translation falsely claims!
I manage it reasonably well, but each time I stoke and there is a little burst of pale grey/brown smoke from the chimney. There a howls of jeering from the kiln builders next door. However, although it is smoke, it is nowhere near the column of black smoke that issues from the traditional kilns here. Young Mi, one of the resident researches here translates for me during the firing. She tells me that the jeers are just in good humour, and that the chatter is all about how little smoke there actually is and how clean it is. I have surprised them.
Another resident confides in me that he expected to see flames come leaping up out of the fire box as soon as I lifted the lid. He is also surprised how enclosed, slow and gentle the firing process is.


These 4 images by Kim Young Mi.
I prepared 8 stacks of timber for the firing, expecting to use it all, but as it turned out, I only got to use just over half of it. In the afternoon, when I go to look in the spy hole, all the little glaze rods have melted. The firing is over in just 9 hours. Too quick! I didn’t realise how fast the temperature was rising without a pyrometer. The colour in the chamber is still looking rather yellowish, and doesn’t have that bright pale glow that I’m used to. I wonder what temperature that glaze stick actually melts at?
Note to self! Next time I come here for a firing I’ll bring my own pyrometric cones and a hand held digital pyrometer.
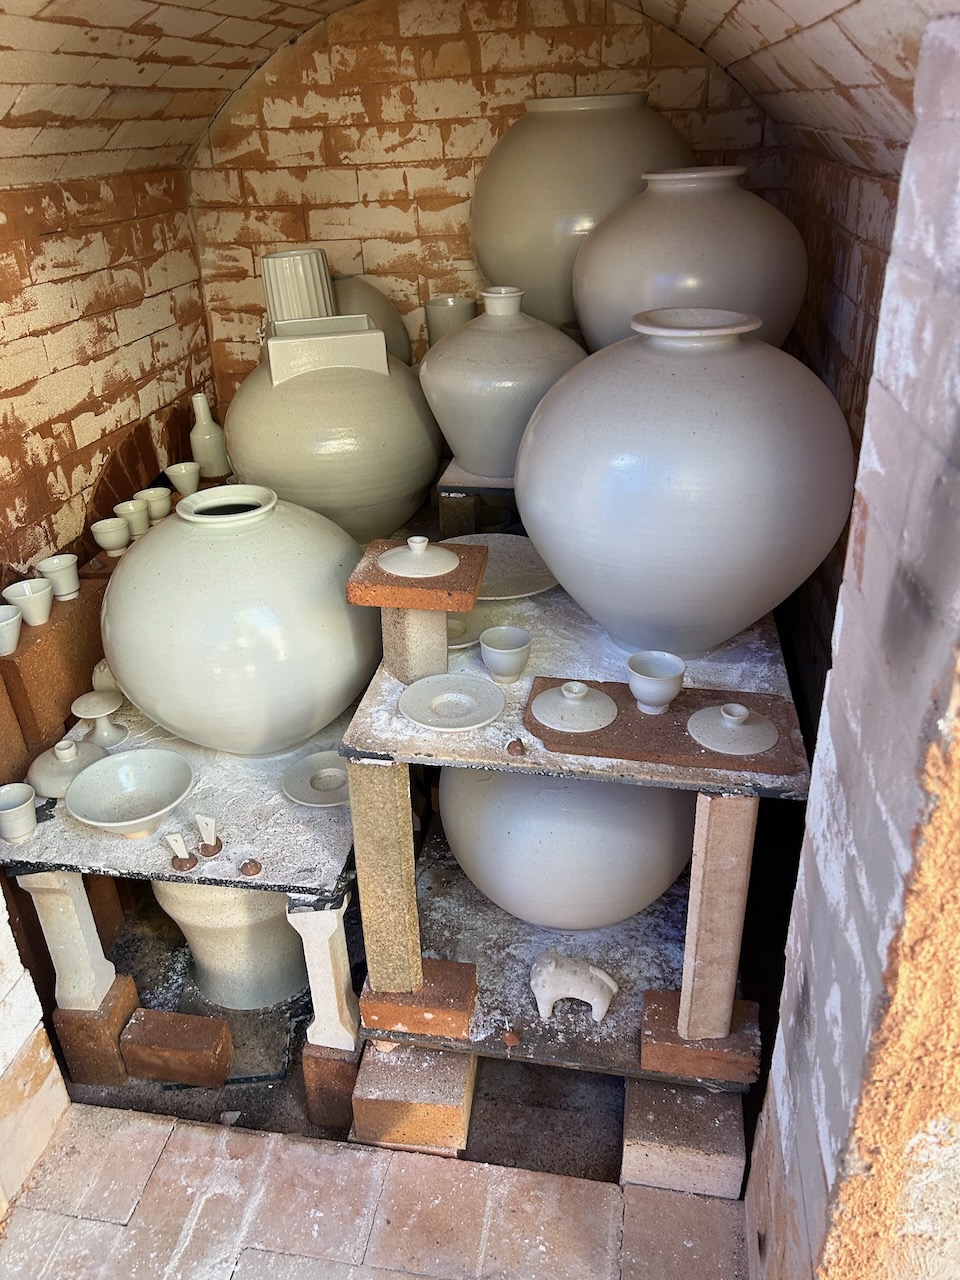
The firing turns out OK. The glazes are pale, grey-blue celadons and off-white, grey/white guans. As I only burnt 4 stacks of wood, possibly 250 kgs of wood, there is no obvious ash deposit, just a little dusting of ash on the glazes facing the fire.
The bottom back shelf is under-fired, but I can remedy that by firing a bit slower and also adjusting the bag wall gaps and height. I hope to be invited back to fire it a couple of times in quick succession, at some later stage, to get to tune it and get an even temperature throughout.
Meanwhile, life goes on in the rest of the village, with the rice harvest in full swing, and autumn vegetables ripening in peoples gardens. I’d love to get in there and pick some of those beautiful vegetables.

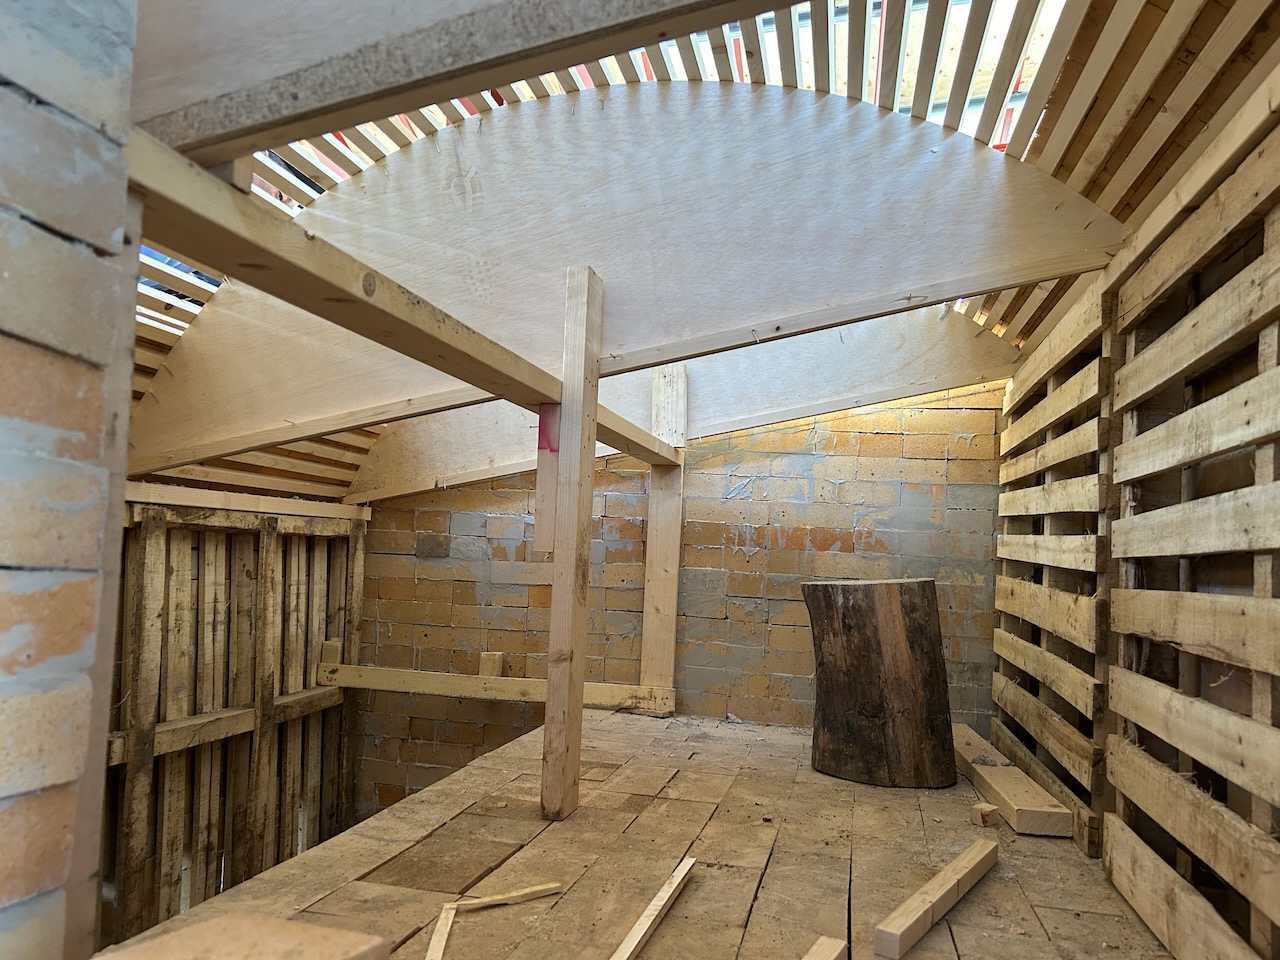
Work has been progressing on the big kiln next door. It is more or less finished, but may need some extra work on it. I’m not too sure there. It will certainly need to be pre-fired to remove all the arch shuttering that is built into each of the 5 chambers. It’s a massive kiln!

Who knows if, or when I’ll be back? What does the future hold. Watch this space
Before I leave this beautifully creative place, I make my usual pilgrimage up the mountain to the ancient site where all the sericite porcelain stone was stock-piled in ancient times. The site has been tragically decimated by a local former. I imagine to stop it being declared an historic ‘National Trust’ site of importance? The whole site was bulldozed some years ago, but remnants remain in the soil. Particularly after heavy rains, the white stones stand out from the brown soil and are easily collected. I make a point of hiking up there and seeing what is available for me to collect. I return with 10 to 15 kgs of stones in my back pack and start the process of meticulously scrubbing the stones to remove any particles of dirt. Then I rinse then several times, until the water runs clear. Finally I soak them overnight in bleach to kill anything that might be harmful to the environment in Australia when I return.

Back home, I put them through the jaw crusher and then into the ball mill and let the slurry sit and flocculate for a month or two, before stiffening and plastic ageing before use sometime next year.

You must be logged in to post a comment.